A Yeasty Fix

It’s common to hear stories from people about how they started a yeast starter but forgot about it and had to throw it away.

Another common comment is about how finicky people assume starters are.

Yes, there are some things to keep in mind and understand about yeast when keeping a starter. However it doesn’t have to difficult to keep a starter. And yeast is much healthier than most people assume. You have to remember that yeast is found in the air around us. It lives on our skin and is an invisible friend. It was created to survive in the same world that we live in.

One of the common misconceptions that I find people perpetuates in starting and feeding yeast is that you have to have a wet starter. Ever since I posted about keeping a drier starter, more and more people are talking about how they now keep a dry starter. And before I posted on my blog, I talked about this in community pages. In one thread a microbiologist agreed that it made more sense to keep a drier starter of yeast.

The benefit of keeping a drier yeast is that you do not have hooch (a liquid layer on top of your starter) by week’s end.

I firmly believe that hooch is an indication that your environment for your starter is out of balance. Excess water created a home for bacteria and mold to grow and ultimately lead to a situation where you have to throw your starter out. Once mold forms, there’s nothing you can do to resuscitate your yeast. That is the one kiss of death to starter.

And mold loves water.

If you keep your water levels in check, you don’t have to do anything else to prevent mold.

How can I state that with surety?

Let’s just say that the Christmas season was so busy that I forgot about my yeast for an entire month! Perhaps over a month… I last used my starter for Thanksgiving and forgot about it until after the New Year.

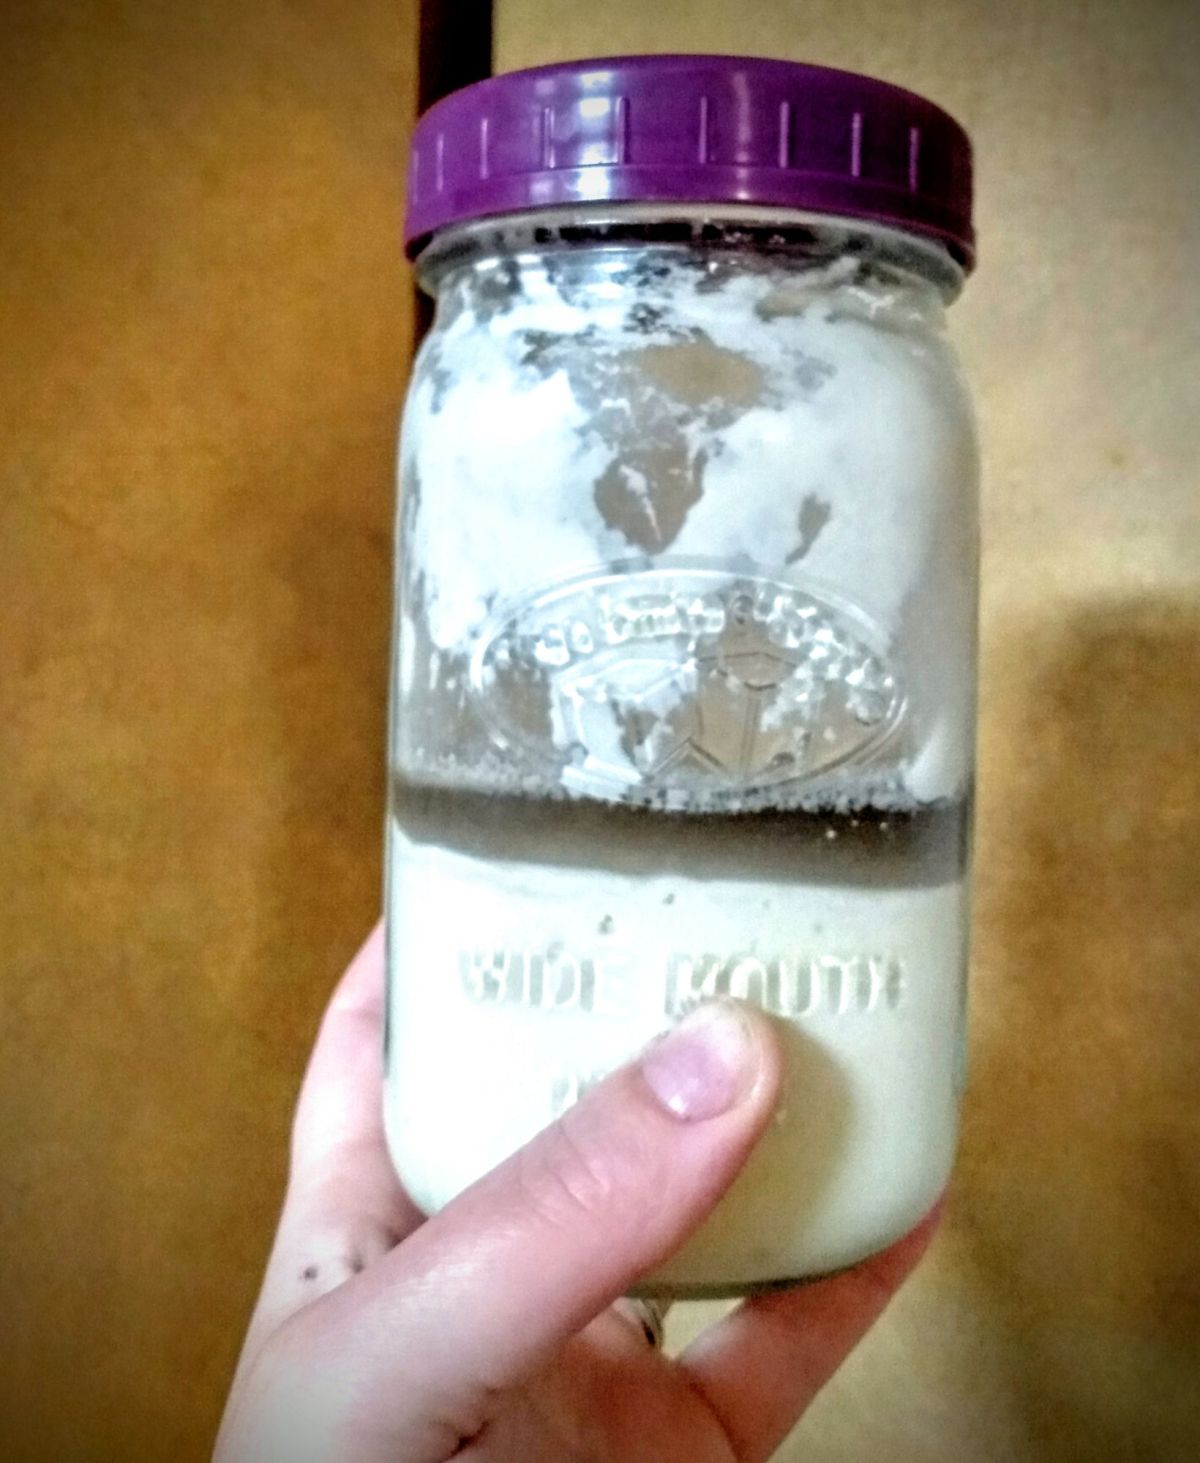
My Neglected Starter

If you pulled this out of your fridge what would your reaction be?

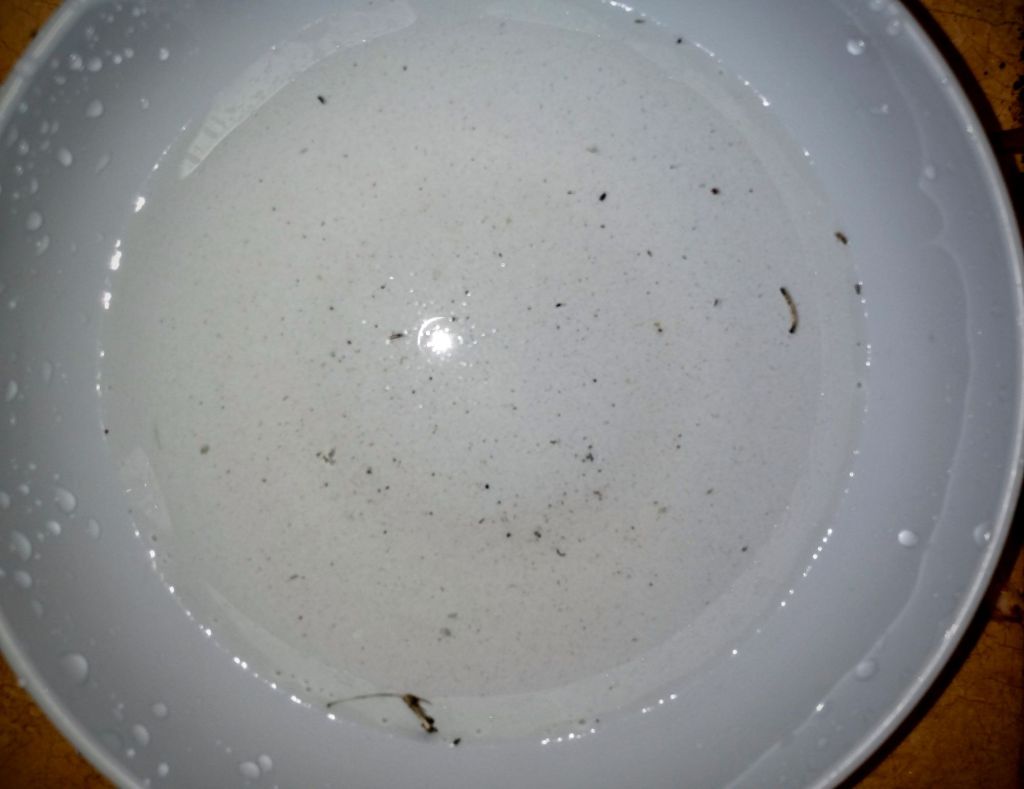
This “black” layer is hooch that is showing that my starter is sick and anemic.

Usually I remember my yeast when I haven’t used it for two weeks. It has this layer of hooch on it, but it’s clear. This is the worst that I’ve been a bad yeast mom. BUT I did not kill it.

My initial thought was, “well it’s a good thing I have a freezer yeast back up.” (There will be a future post on this. Now that I have four years invested in this starter, I want to make sure that I have a back up starter that I can fall back on Incase I really blow it and lose my main mother.)

The first thing I did was remove the lid, look for mold and sniff test my starter.

With no mold, I knew I could recover this yeast. And the sniff test confirmed that I hadn’t killed off my yeast. It still had a sour dough tang scent with no additional scent (which would be an indication of a colony of something different from my yeast). My starter smelt weak/anemic. And that’s because it was.

Advertisements

Recovery

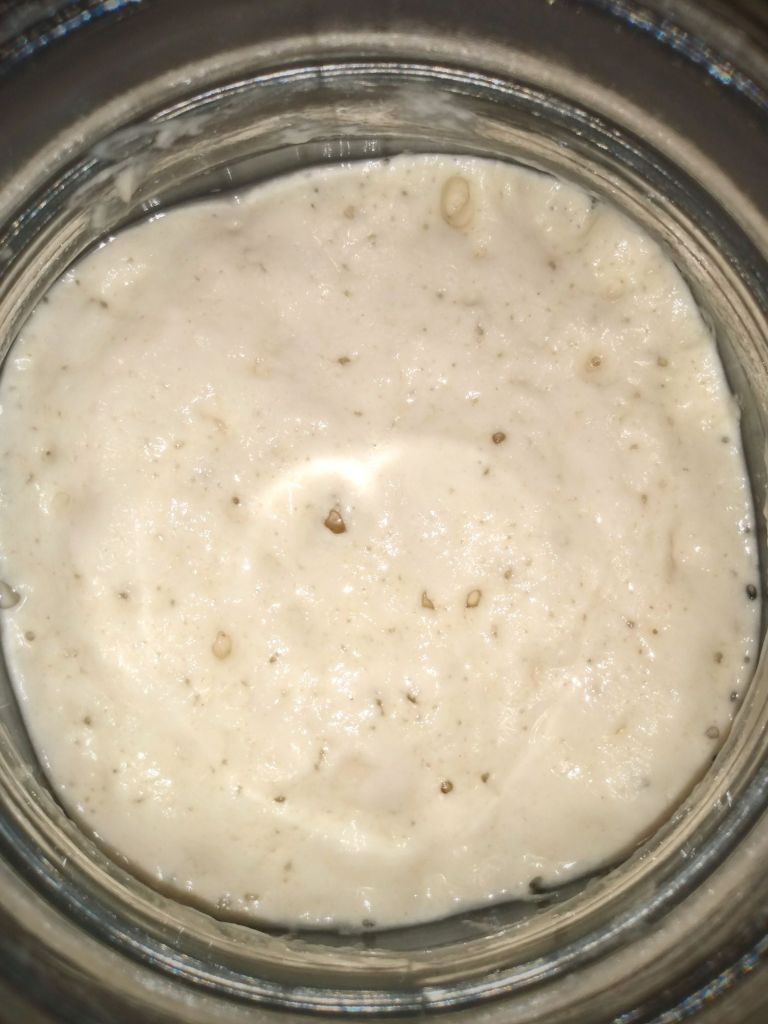
The hooch is guaranteed to be where additional growth, competing with my yeast, is living. So first things first, I poured off all the hooch.

As you can see here, there was still some discoloration with the presence of left over hooch.

When I fix neglected starter I always start with a fresh/clean mason jar. I do this because everything about healthy and unhealthy starter is microscopic. I want to minimize the transfer of anything but the yeast I’m rescuing.

Since I don’t want to transfer this tainted hooch, I take a spoon and scoop out this liquid and the top layer of starter.

It’s important to remove the top layer because it was in contact with the pooled hooch. It will be the part of the starter that has the higher counts of any of the foreign colonies (if any is present).

If you want to be extra careful about to continuing contamination, you’ll want to make sure and use a clean spoon with each scoop.

Advertisements

I didn’t take a picture after the first scoop, but this is after a couple of scoops. As you can see in this above picture, there is a distinct color difference between that sickly top layer and this more beige color.

This color difference is a good indication of what needs to be removed and what can be salvaged.

The white layer was watery, pasty, and had every indication of “do not keep me”. The beige layer beneath had a cake batter like texture and looked “healthier” even if this rich color is darker than the color of my normal starter.

Nature is good with communicating information by using layers. So I follow what my yeast tells be and grew confidence that I could absolutely save this starter without having to get the yeast out of my deep freezer and hope I could make that work.

Now that I had the information I needed, I finished scooping out all the left over hooch and the white layer.

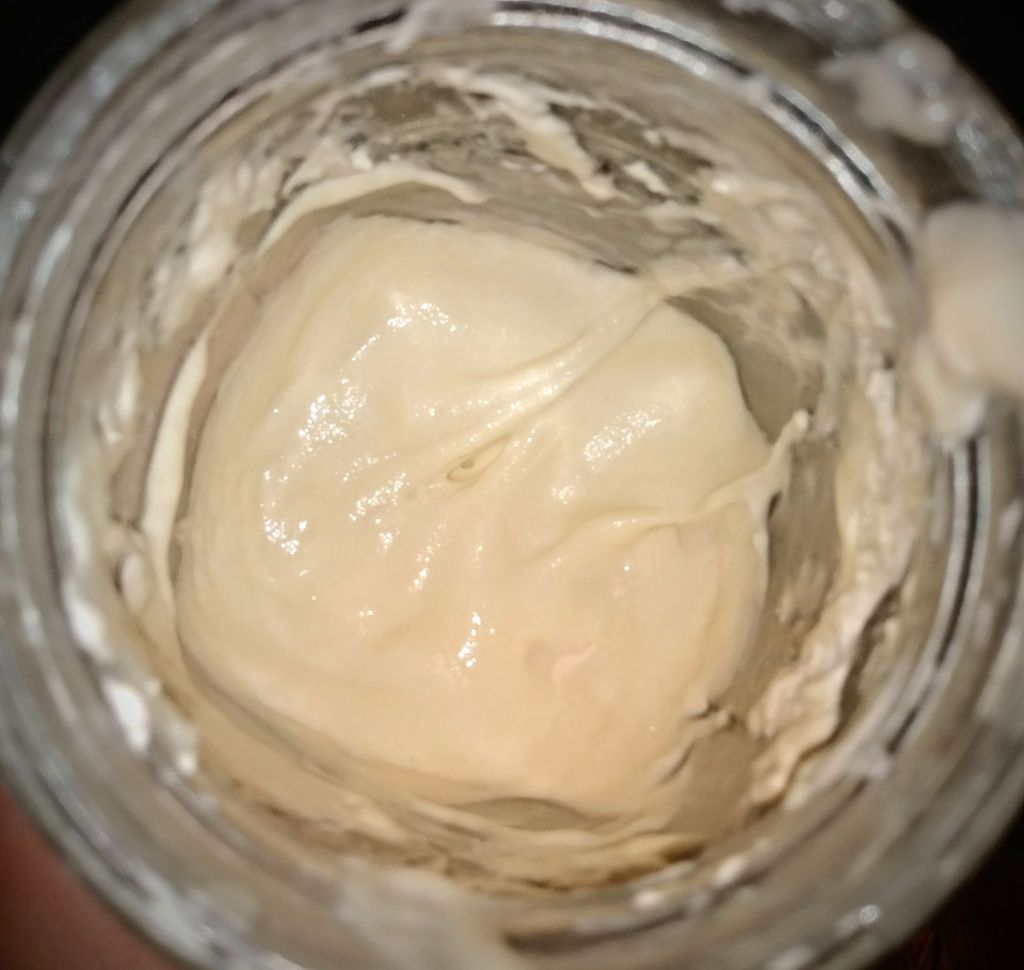
With everything removed, I grabbed my clean jar and started scooping out starter from this jar and depositing it in the new jar.

Because I wanted to minimize anything that might be deeper in the jar, I only scooped out starter from the center. I was careful not to get starter from the sides of the jar or from the bottom.

The top left is the old jar. The bottom right is my new jar transfer.

Normally I try to transfer as much starter as I can scrape out of the jar. This is an instance where that was not going to happen. Again, my goal here was to stay away from any potential starter that was exposed to the hooch.

The good news is that even if all you have to transfer is a couple of soup spoons worth of starter, that’s enough to recolonize a starter.

The amount of starter that I estimate I put in the clean jar was maybe 1/4 Cup. (I’m not as confident about guessing how many grams as this is the unit of measurement that I didn’t grow up using. However because I use the metric system for bread making, 50-75 grams is definitely more than enough to restart your starter for the ability of having enough yeast in your colony for bread making in a day or two.) Even the tiniest amount of transfer starter is enough to get you going again. Just know that until you build your colony up, your raise time is going to be slow and weak. You do have yeast, it will just take time to build your numbers back up.

Advertisements

Next I added salt into the yeast that I just transferred. As you can see above, I used about a teaspoon worth.

In Meet Frankenstein I talked about the gluten free starter I made and how I had to bring that one back to health. That starter had a different issue that I was resuscitating it back from, but the treatment is still the same… salt. The reason why salt is your first aid for wild yeast starter is because the salt creates an environment that decreases the growth of everything that is competing with your yeast colony. And at the same time salt does not affect the growth of your yeast.

At a previous time I had used 2-3 teaspoons of salt for a starter that was healthier than this one. My starter bounced back quickly. It made my first batch of bread excessively salty. (So make sure that your first bread after a treatment cut back on the salt.) Even still there was no negative effect of the salt on my starter. So don’t feel like you can be too heavy handed. I still wouldn’t put in an absence amount. First you just don’t need it. Second, if you treat all your kitchen resources as valuable (whether they become scarce or just because it frees up a few cents to put elsewhere in your budget) you just use what you need to use to get the job down.

Now can you use too little???

I haven’t yet experimented on how little you can get by to bring your yeast back into health. Here’s what I would look for though if I suddenly ran out of salt and only had a pinch to put in. If my yeast became discolored, hooch formed again, if the hooch is not clear, there is an off scent to your starter… add more salt.

Once the salt is in the jar, give the starter a good stir. This gets the salt where you want it working. If you feed your starter first, the salt is going to be diluted.

When I first started on my journey with a starter I noticed that I don’t stir as thoroughly as I thought I did. Originally I ended up with starter kept on the bottom of my jar and hydrated flour on the top of my jar. That’s another story for another day. But that’s how I came to understand that just because you have a consistency that you think is right, it doesn’t mean that you thoroughly stir and blended everything.

So that is why when I treat with salt, I treat my starter first. Then I feed it.

After the salt treatment I start my feeding process. Water first!

I changed the way that I feed my starter. I now start my feeding with water because this dilutes yeast and ensures that it’s fully incorporated throughout the fed starter. There is no second guessing if I’ve stirred enough to completely incorporate the yeast into the flour. The colony is spread out entirely through all of the water. So when I stir in the flour, everything that is wet has yeast.

Advertisements

As you can see here, there is no doubt that my starter and water are fully incorporated. And it just takes a couple stirs, less than my eggs take when I scramble them.

Bread Recipe That Hasn’t Failed Me is the post where I share my bread recipe that I always use. And since I know how much starter that I need to make two loaves of bread, I know exactly how much to feed my starter. I use 300g so when I pour the water, I aim for 150g. And that means that I also start off with 150g of flour. Once I have that measurement in my mason jar I stir it and check my consistency. Depending on the humidity levels in my house, I tend to always add about 15-20g more flour. This gives me a thick brownie batter consistency. When I keep my starter with this thicker consistency I never have hooch (unless I neglect it for longer than 2 weeks–and that error is on me).

And as you can see with the picture on above right, I stir my flour in just enough to incorporate it into the yeast water. The flour is the food for the yeast, so as long as the yeast water is connected and mixed in with the flour the yeast will find its food and go to town.

As a little side note, I make bread one to two times a week. By the time I get to my yeast, these flour lumps are no longer there. The flour continues to hydrate during the rise time.

I keep my yeast in a quart jar. After a feeding, my starter fills around half the jar. I don’t keep a rubber band around my jar because I know that my yeast is ready when it reaches the top of my jar.

As you see here, my yeast still needed to rise a bit more. But the time in my day was running out and needed to make my bread dough, so I cut my time short.

TIP: My mom hack for making bread with no time to do it during the day is that I make my dough after dinner (right before I start to relax for the night), put it in my bread molds, and let it proof in my oven over night. When I wake up in the morning I turn on my oven (without touching my bread and deflating my rise) and let it cook. By the time lunch comes around, my bread is cooled and ready to slice.

Normally, when I leave my starter out on my counter to double, it takes anywhere from 1-3 hours depending on how cool my house is. When I took the above picture (directly before making a batch of bread) 9 hours have passed and it really could have used another hour our two.

My starter took this long to grow even that much was because the yeast was weak from being neglected. This didn’t concern me. I would have been concerned if there was no rise at all. But obviously I have yeast in there and they were doing their job.

I took a picture of the top of the jar, with the only thing I did was remove the lid, so you could see that there was no hooch. There was no discoloration. This picture tells you nothing as far as smell. But it was predominantly the sour yeasty smell. BUT there was also a flour smell to it. You will notice this flour note when you first feed your starter because you have unprocessed flour in the jar. The fact that the yeast had grown and ate the flour, the smell of flour tells me that the yeast is still weak and the flour hasn’t been all eaten up. This doesn’t raise any red flags. It just tells me that I should expect my proofing to take longer than if my yeast is healthy and happy.

Advertisements

What to Expect After Treating Your Yeast

As I mentioned above, the first thing you should expect is that your yeast is going to take longer to double. I mentioned that my yeast, in my home, normally takes 1-3 hours to double. If I feed my yeast and immediately store it in my fridge, it will double in about 3 days.

Because of how long it took my yeast to double after this treatment, had I put it in my fridge after feeding, it probably would have taken a 5-7 days to double. My guess is about 5 days because that’s how long it took when I treated my starter before after 2 weeks of neglect.

The point to this is that you should expect your yeast to double over a much longer time. There’s nothing wrong with your yeast. It just takes it a hot minute to start eating and doubling its colony population.

Once your yeast has come to a usable stage, the next thing that you should expect is that the flavor is going to be off. If your starter has a sour smell and flavor to it, this first doubling time is going to make it milder

almost no sour flavor

The mild flavor isn’t going to be an issue. What will be an issue is the fact that you will be able to taste the salt that you used to treat your starter.

If you choose to use your starter as usual, and keep true to your recipe, you will most definitely taste that your bread is more salty.

The time that I aggressively salted my starter and used my bread recipe as usual, the bread was inedible for sandwiches. I had to use the bread differently–namely as grilled sandwiches and as bread cubes or crumbs for a recipe.

INSTEAD go ahead and alter your bread recipe up front.

With the bread recipe that I use, I now immediately halve my salt portion of the recipe. So instead of using 22g of salt I use 11g. By doing this there was no change in the saltiness of the bread. It tasted normal.

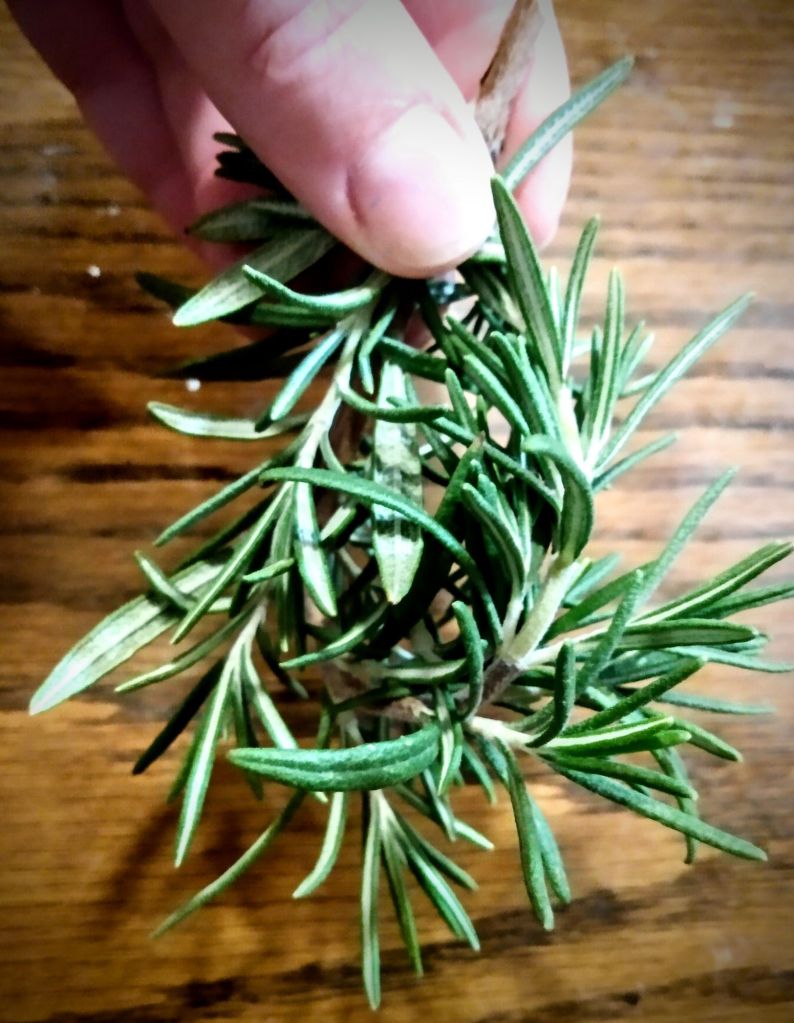
I know that most people don’t taste this difference that I do, but using treated starter in a bread recipe (even when you cut back on the salt portion of your recipe) tastes exactly like the dry active yeast that you buy in the store. I’ve always had this problem with the flavor of bread from conventional dry active yeast. I always had to add herbs to get a bread that tasted good (garlic, onion, oregano, rosemary, etc.).

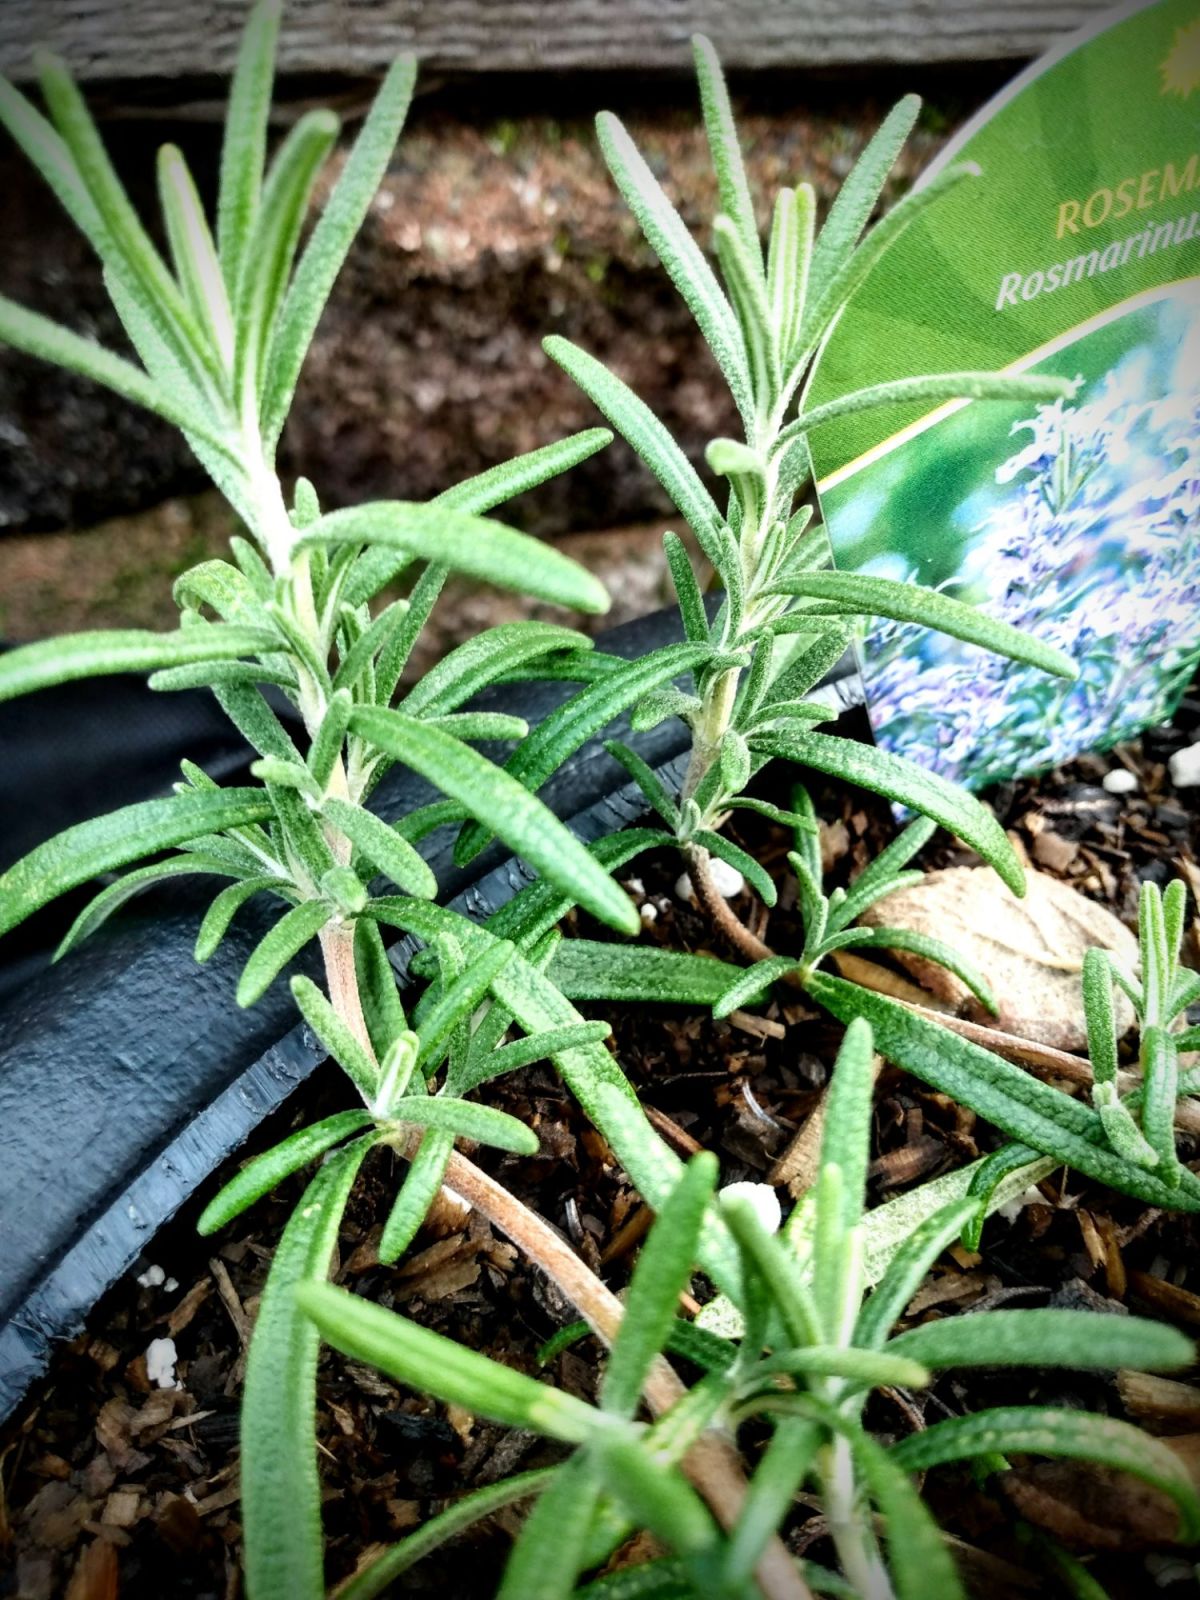
In the same manner, with the bread that I made with this recovery from a month long neglect I had to add ground herbs. So in addition to the dry ingredients that are in the bread recipe, I added:

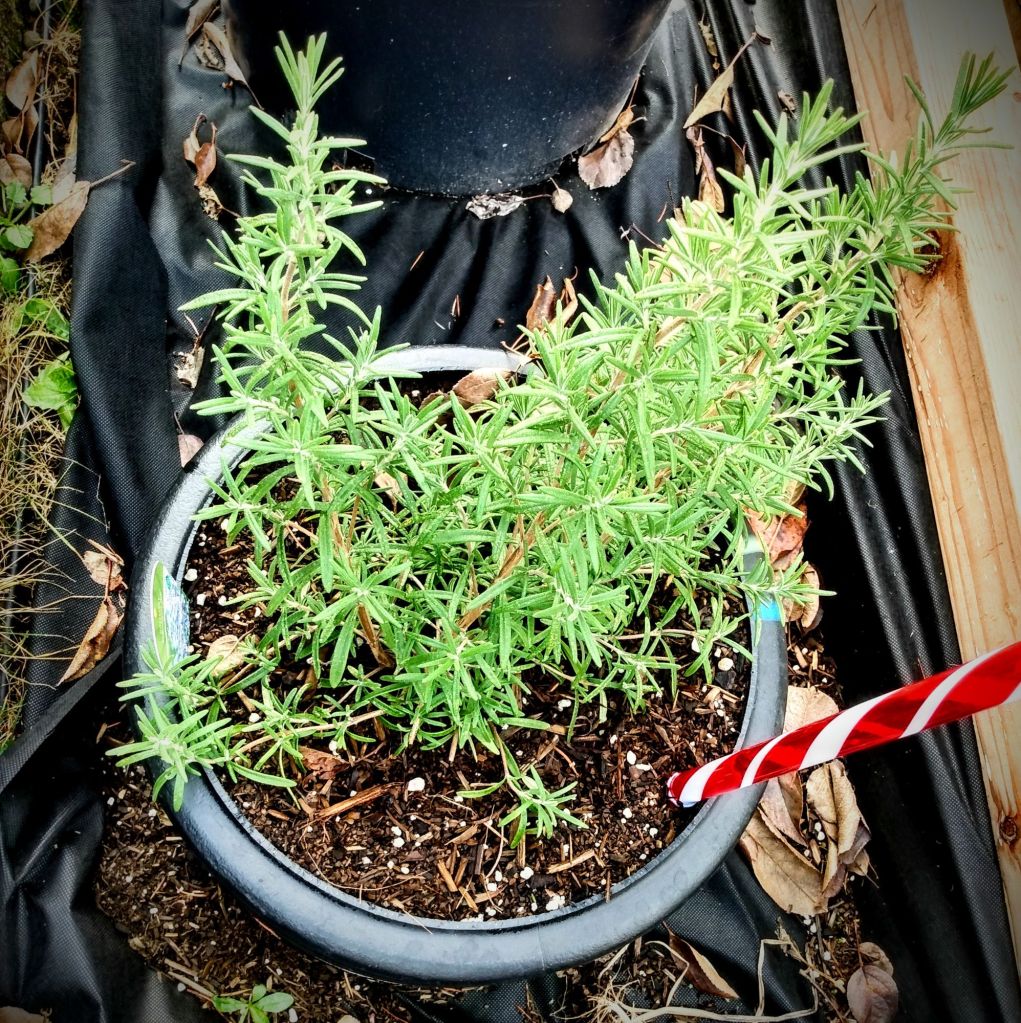
(Herbs were from my garden this year and dehydrated for winter use)

  • 1 tsp ground oregano
  • 1 tsp ground rosemary

And for the salt portion of the recipe I used garlic salt instead of standard salt.

I mention this because I want to inspire you to use other ingredients with your bread making, especially when you’re compensating for weak/recovering starter. These herbs do nothing to change the function of your bread rising. But it absolutely makes your bread more enjoyable.


Do you have any questions about the starter that you’ve been keeping? Comment below.


Links to previous bread and yeast related posts:

Valuable Resources

If you have limited resources or want to know how to make a no discard starter, this post will get you started.

Bread Recipe that Hasn’t Failed Me

I share with you my favorite bread recipe as well as how to make pull apart rolls.

Meet Frankenstein

If you’re looking for how to make a gluten free starter, here is how I made a starter from potatoes. I also share with you how I overcame my first major obstacle with creating a starter.

Leave a comment

Processing…
Success! You're on the list.
Advertisements
Advertisements
Advertisements
Advertisements

Baby Spiders

I love my outdoor plants. And often I’m asked, “Is there anything you don’t grow?” For me, the struggle is real when it comes to indoor plants. I pick up in the language of outdoor plants. I think I get confused when it comes to the dialect of indoor plants. “What are you telling me?!”

It was this past year when I was gifted me a clipping and an indoor propagation unit that I decided to give indoor plants another whirl.

Back in August I was thinking of winter months, being shut in with no fresh air. So I picked out a few end of season clearance plants that are known for being air purifiers in the home.

One that I bought was a Spider Plant (Chlorophytum Comosum Vittatum).

This is a great plant for those who struggle to keep indoor plants alive. We were gifted with a spider plant back when I was an event decorator and my hours were horrible. That plant lived for about two months of forgotten watering before it finally gave up on me.

I picked a spider plant this time around because of how hearty this plant is and it deals with neglect better than other types of indoor plants. Plus, with my homeschoolers who love commandeering my indoor plants and calling them theirs, this is a great one for young kids to learn about plant care with. My kids love over watering and this one loved their over attention

In fact, after the fourth or fifth time I had to empty my overflow bowl from a standing puddle, I noticed that this spider plant had started producing baby plants. The day after the first baby showed up, a second formed. And about a week later two more popped up.

I wasn’t counting on this plant living our home so we’ll to put off four babies almost right away. But since I’m now part of a bartering group, I figured that nurturing these babies over winter will give me four plants to barter with come spring. Or seeing how the boys have taken these baby plants over, I’ll let them take them to an event to barter with. (It’s a life skill that they’re starting to become comfortable with.)

Advertisements

How To Propagate the Babies

The first thing you’ll notice growing from your mother plant, when a baby is going to be produced, is a long rigid stem. Have you seen a rigid stem of an orchid? The baby spider stem reminds me a lot of an orchid stem. On this end of the stem, you will see a miniature spider plant start to sprout its leaves.

At this point many people say that you’re supposed to bend that stem over toward a new pit, set the baby in that soil, and stake it down until its root system grows. Then you can cut the stalk.

The reason for not cutting the stem first is because it acts like an umbilical cord and gives the baby spider plant nutrients while it grows its root system.

That way makes sense and I’ve seen it done as a child. But I didn’t go that route with propagation this time. I tried to wait and let the stalks grow so that they were long enough to lean over into a new pot. None of these stems grew longer than 9 inches.

Instead I went with the Water Propagation Method.

Here you can see the root growth from the Water Propagation Method that I started 4-6 weeks ago. I cut the stem of the baby spider plant a few inches long and then place them in these water propagation tubes.

The trick with this method is keeping the water level up to the base of the leaf cluster. As you can see from the pictures, this is where you see the root growth coming from. By keeping the water level high, it ensures that the emerging roots have contact with water at all times.

From there I simply place the stand in a window so the plants get sunlight. And then I wait for the roots to grow.

Here you see the far right and far left plants are the babies that I rooted several weeks ago and I’m ready to put them in soil. The center two babies are the ones that I just cut from the mother plant and are now ready to start the rooting process. I wanted to show you these side by side so that you can see the stems (which on my plant are a pale yellow) in comparison to the new roots (which are white).

With these newly rooted baby spider plants, I put some potting soil in a clay pot. I hollowed out the center of the soil, where I want the plant to sit in the soil. (I create the hole for the roots because they are tender and I don’t want to damage these young roots. After a few months, when I’m ready to repot, I’m not as concerned with the roots because they’ve had a chance to establish themselves in the soil. For now they are going to go through a little shock because they are changing from water to soil environment. Their function is going to change in this new medium.

While holding up the leaves of this baby plant I fill in the hole (with the roots held in place below surface level) with more potting soil. Once the hole is filled, I gently pat the soil down to give the plant a little stability. Not much is needed because these roots are around 2 inches long (some a bit longer).

And here are how my new baby spider plants look in their new 4″ terra cotta pots. I gave them a bit of a watering and then set them back in the window.

Other than the time it took to allow the roots to grow, the setting up of this propagation took less than five minutes. And potting the rooted baby spider plants took another 5 minutes. This is something that doesn’t require much of your time, if you have limited time to care for indoor plants. And with spider plants, I water mine once a week. It’s been about 4 months since I first brought the mother plant home, so on my to do list is to give them a good fertilizing on their next watering.

Advertisements

Word of Warning for Propagation Equipment

This water propagation set up was gifted to me from a friend who hated it. It was my “transportation” unit for taking home a clipping of another plant for my drive home. After working with this stand for a year now, I fully understand why she didn’t like it. And yes, I am still that type of person that still uses it even when I hate it myself.

I look at it as a personal challenge to make it work!

If you’re looking to water propagate plant cuttings, let me walk you through this set up so you can have a little walking knowledge for choosing the set up that you end up purchasing or getting from a buy nothing group, or any other opportunity.

The reason why this stand is such a fail is because of the holes that the tubes slide into. In the above left picture you can see that the center of gravity of the holes are way off. They needed to be set back into the center of this board.

You can probably guess that when these tubes are filled to the top with water, they become front heavy and tip forward spilling water and cuttings everywhere.

In fact, in just this short period of time that I took to take all the photos for this post, the filled tubes fell forward not once… but twice!

To make matters even more entertaining, my husband decided to watch the process and freaked out with each of the dumpings. Water spread not just all over the table but also the floor. And that leads to the picture where I put the pot in front of the filled tubes. As much as I enjoy a good challenge, I really didn’t want to clean up a third water mess.

Advertisements

And that leads me to the solution of how I make this failed unit work for me.

When I have a new set of clippings to add to the tubes, I set the rack down in the window with the tube side facing the glass. When the rack leans forward, under the weight of the water, it leans into the window and holds itself up.

There are two other options that I have to fix this unit once these baby spiders are ready to be potted.

  1. I’m going to check to see if I have a drill bit that’s the right size so I can make the hold deeper into the wood so the tubes sit more center in the unit.
  2. If that doesn’t work, I’m going to take some thin crafting dowels and put legs in the front corners.
  3. And in case I need a third option… I’ll drill a hole in the back corners that’s big enough for a long screw that I can add enough nuts to create the correct counter balance to keep the unit upright even under all the water weight.

No matter what the situation, a solution can be found!

Advertisements

Final Task before Putting All the Plants Away

This mother plant has been so amazing to me that I just needed to take a couple of extra minutes and tend to her so that she can keep being a happy plant for me. I trimmed away some of her discolored and battered leaves and cut the remainder of the baby stems down to their base.

Why the trimming?

The stems were no longer supporting baby plants, so they no longer needed the energy being directed to them. The leaves were damaged and there’s no need for plant energy to go to them to see to the trauma. The overall health of the plant is very good and with plenty of healthy leaves, trimming away what I did would not affect the photosynthesis of the plant. But the trimming returns that amount of energy back to the mother plant to go elsewhere: whether new leaf growth, existing overall grown, it’s cellular immune health, or even gearing up for a push of new baby plant growth.

This mother plant is now ready for the next phase of whatever cycle she is on to now. And with the next watering combined with fertilizer, she’ll have all the nutrients she needs to move forward.


Here are some propagation units that I’m eyeballing for my next adventure in rooting plants.

I have not had a chance to see or use these units, but I wanted to share with you what other ones I’m looking that you can have an idea of what is out there.

This post contains affiliate links to products. We may receive a commissions on products purchased through these links, but at no extra cost to you. These items listed here are from Amazon but may be purchased at local markets.

3 Test Tube Glass Planter Terrarium Flower Vase with Wooden Holder

Plant Propogation Tubes, 2 Tiered Wall Hanging Plant Terrarium

Leave a comment

Processing…
Success! You're on the list.
Advertisements
Advertisements
Advertisements
Advertisements

Rosemary The New Christmas Scent

There’s something about the scent of fresh rosemary. I’m not talking about the dried needles that you find in the herb aisle. Those over priced dried herbs have nothing on the fresh branches you can harvest from the bush.

If you haven’t handled fresh rosemary, I encourage your to get you hands on some.

The first thing I noticed was that there was the classic rosemary scent, but there’s also a spruce/pine under note that surprised me.

For many years we’ve sported an artificial tree. That started because there was a season where my husband and I were going through a financially rough. I had an artificial tree that I used in the past for a Christmas tree decorating competition. But we took over into using that tree for our family in order to free up money that would otherwise be spent on a fresh tree. As much as we prefer fresh trees, it’s just made more sense to use the one time fresh tree money and put it toward a fake tree and reallocate that money each year toward some other area in our budget. (This by no means negates how the trees are made and that they just don’t disappear–but this is a whole other conversation for another day.)

I mention this not to enter the tree debate, but to highlight the point that when I first smelt fresh rosemary, it completely brought back all the childhood memories of having fresh Christmas trees in the house. And once I found this out, I’ve started taking some rosemary inside during Christmas time just for that scent during this time of year. And also because of the amazing health benefits that rosemary has for our bodies, especially during known cold and flu season.

Advertisements

Growing Rosemary

The first picture that I started with was taken last year when I attempted to root some rosemary sprigs for some free rosemary plants. I wasn’t successful with those sprigs. But as I look back at this picture I see that 4 of the 5 sprigs are wood growth instead of green growth. And just like lavender, there’s a difference in cloning these plants depending on if you’re using new/green growth or wood/brown growth. Once I’m successful in propagation of rosemary, I’ll make a new post on how to do it and eliminate the guesswork.

Until then…

The rosemary on the left is a spraling variety. The plant on the right is an upright bush.

I found two plants at a local produce stand, at an amazing price, over the summer. One rosemary plant is more than enough for a family, with enough left over to share with friends, neighbors, and whoever else you can give it to. If you’ve seen the memes about zucchini season, warning people to lock their car doors before neighbors deposit excess zucchini in your vehicle, then you have an idea of how prolific that rosemary can be. I bought two plants because I’m a sucker for variety (thus the reason why I got a sprawling and an upright bush varieties). But rosemary is one of my favorite ingredients that I love putting into hair and skincare products and soaps that I’ve been making.

As you can see above, I’m in the process of making a new flower/garden bed. It wasn’t ready as all when I got the rosemary so I improvised. And I’m sharing this unfinished project because I want you to know that you don’t have to be finished with a build before you can get a plant “in the ground” and start establishing itself. I’ll come back to this in the future, when I have the build completed.

In the mean time… note that I used cylinder pipes and filled it with soil. When I planted these rosemary, the root ball literally fit in my hand, so the 12″ cylinder, that stand about 10″ tall were more than enough to set up these starts. There’s more than enough room for the root structure to grow over the winter. And in the spring, which I plan on having this bed finished, I can remove these pipes once the soil has been laid. In the mean time I need to lay some woodchips down to help insulate these plants before we get our expected snow in about a month or so. We live in a temperate area, so I’m not concerned about killing off the root system. I would be more concerned if we lived in an area with subzero winter weather.

One thing that I love about rosemary is that it is a drought resistant plant, as it is originally from the Mediterranean area. Once rosemary is established, it’s a plant that all you have to do is keep an eye on it to make sure that is free from pest and disease. One valuable resource for that information can be found here at Farmer’s Almanac. But this plant will be here for you for many years.

Advertisements

Health Benefits

This is absolutely one herb that you want to keep ready in your kitchen for not just maintaining your health, but also for food medicine.

Food medicine is alternative pharmaceuticals. If you are trying to reduce the amounts of chemical medicine (because of side effects or other complications), medicine from herbs and other foods are great for giving your body the building blocks it needs to maintain your health or boost your immune system to do the work it was designed to do.

Some of the benefits of rosemary are:

  • Contains antioxidants
  • Boosts mental alertness
  • Active studies on combating Alzheimers
  • Stimulate hair growth
  • Antimicrobial properties
  • Relieve indegestion
  • Promote metabolic health
  • Anti-Inflamatory
  • Studies in protecting against brain damage of stroke victims
  • Studies in slowing the spread of cancer cells
  • Relieve muscle and joint pain related to arthritis
  • Insect repelent
  • Increase circulation
  • Boost immune system
  • and so much more!

It was not so long ago that the pharmaceutical industry was created. Before then, families would treat themselves with food and herbs. This is not to say that pharmaceuticals don’t have their place. But what we are not told is that drug companies cannot patent plants, found in nature. So there is a huge industry in modifying plants. If a plant can be modified so that it cannot be grown in nature, then that plant can be patented and then be purchased at a premium price. The same goes with pharmaseudicals. They started out with plants found in nature and then the natural compounds are extracted and manipulated until they are at a point where they cannot be found naturally. These compounds can then be patented and sold at a premium price. These compounds are manipulated to be “fast acting”. So when you see “fast acting” on packaging on over the counter drugs, it is in comparison to natural compounds.

Advertisements

There is a large conversation that can be had on this subject. I bring it up because most people are not aware that the natural compounds are available in common plants and are just as effective if not more effective than some drugs because the natural compounds are not subject to being ineffective (drug resistance) by our immune system, as our body starts to recognize that these “medicines” are not natural/found in nature. So our bodies are not able to break the compounds down and fuel our immune systems to combat the situation we’re dealing with.

Again, this is not to negate or berate necesary pharmaceuticals. I just want to draw awareness of where drugs actually start from and why they might not be effective or stop being effective. And if this happens, it’s not the end all that causes you to stop having hope of being treated for whatever it is that you’re facing. So please do your own research and have conversations with your healthcare provider. There are always scientific studies on natural plants, like rosemary, and big health issues. It’s just that they aren’t publicized in commercials and the media because these natural plants are not and cannot be patented. So there’s not as much money that can be made from treatments from natural plants in comparison to what can be made off of patented medicines.

Identifying Rosemary

This past week I was at a party where the table decor was pine branches and rosemary sprigs were used on one of the appetizers. One of my friends happened to have one of the pine branches shed it’s needles on her plate and she couldn’t identify the rosemary to the pine needles.

If you remember what I mentioned above, about how rosemary smells like Christmas to me, smelling a pine and rosemary needle side by side may not help you decide which needle you want to eat. So I pointed out this one unique identification feature to my friend.

The underside of rosemary leaves have a white stripe down the middle.

In this case the misidentification of a pine or rosemary needle is not going to be a life threatening moment. Pine is known to have Vitamin C. In fact, during the spring I look for the new growth tips (bright yellow/green) of pine and spruce trees. The amount of Vitamin C found in this tips put citrus fruits to shame. So depending on what health needs you have, making tea from the tips of new growth pine and spruce trees, will give you far more vitamin C than eating citrus fruit or taking Vitamin C supplements/chewable.

With that little tid bit of information aside, another feature that you might want to know is the difference between the new growth of rosemary and the woody part.

With new plants, like what I have, it’s a little harder to differentiate between the two parts in comparison to an older plant. But as you see above, the new growth is white and the woody portion is a reddish brown. With a young plant like this, the woody part of the stem is still flexible. But in an older plant, the woody portion is very rigid like a tree branch.

The higher concentration of nutrients, and valuable compounds, are going to be found in these new growth portions of the branch. This is where the plant is sending all of its energy to. So if you’re looking to use your rosemary as a food medicine, this is the part of the plant that you are going to want to harvest and use.

That doesn’t mean that the rest of the leaves, lower on the branch are not useful. They still have the rosemary flavor that you want when you’re cooking with rosemary. They just don’t have as much of the active compounds that are found in the new growth region of the plant.

Advertisements

Useful Preparation of Rosemary

There are two ways that I preserve rosemary the most; dehydrating and infusing in oil.

For dehydration I’ve tried two different ways. I’ve left the leaves on the branch and dehydrated the branch with the leaves. And I’ve also removed the leaves. Dehydration time is the same either way, in my experience. But it’s easier to remove the rosemary from the dehydrator on the branch then collecting the individual leaves. So I’ve just left them on the branch and then when processing is down, I run my fingers down the limb, over a bowl, and quickly strip off the leaves. From there I save some leaves as is, which promotes the longevity of the healing compounds. Then I take some and grind it up into a powder in my herb grinder. In powder form, the compounds start to break down and become weaker around 6 months. So I only grind what I’m going to use in the near future. Otherwise I leave the leaves whole, where they retain their compound integrity for a year, upwards of two years (depending on who you talk to).

But I don’t use rosemary just for when I make my meals. I use them in the lotions and soaps that I make. In fact, the shampoo bar that I make for my hair has increased my hair health so much so that I cannot remember when my hair was this thick and healthy. It’s more healthy then even when I was pregnant with my children (which are one of the things that most pregnant women notice is that their hair health is improved). I use the leaves in the soap, but more importantly I use rosemary infused oil.

I use rosemary infused oil for everything; food and skin/health care products. So I use rosemary oil more than every other preparation. But one thing to note is that if you have more rosemary than you can process (either drying or infusing) rosemary freezes beautifully. Just leave the leaves on the branch, bag it and put it in your freezer. It will stay fresh and will not break down or wilt when you’re ready to use it.

Advertisements

Making Infused Oil

The first thing that you want to do after you cut the rosemary you will use is to rinse the branches off. Even though my plants are only a couple months old and I grow them organically, you can see below how much came off of my branches and they looked clean. All of this debris would have compromised my infusion and caused problems that are common when you read about mold and other issues people have when infusing herbs in oil.

Another problem that people have when infusing is that they put wet herbs into oil. Please remember that oil and water do not mix. What happens with water is that it becomes the medium for mold to grow (which is usually jump started by the debris that’s not washed off).

The three components that cause organic materials to break down and spoil are water, heat, and light. These three things are what feed and promote bacterial and mold growth. So whether you’re preserving food or making infusions, you want to keep these things in mind.

After rinsing off the rosemary, I air dry off the water.

There is a whole other conversation around whether to use fresh or dried herbs for making an infusion. I won’t go into that conversation here, but for delicate leaves I dehydrate them first. Plants like rosemary and lavender I go ahead and infuse fresh because of these are drought resistant plants, have thicker branches and leaves that are designed to not release the water that they have stored up inside of them. That’s not to say that I haven’t had mold grown on an infusion with these hardier plants. The times that I have, it was when the branches were above oil level (access to oxygen) and I didn’t remove the branches 6 months after the infusion was supposed to end. (It took that long for a mold colony to grow where I noticed it.)

There are also two different type of infusion you can do: stovetop or solar. Both use heat as the extraction method of the plant compounds into the oil (which I use olive oil. This is a great universal oil for cooking and soap making.)

For stovetop (or crock pot/slow cooker) the important thing to remember is to keep the temperature on your lowest setting and let it process for a few hours. I don’t do this method, but if I did I would let it run for 6-8 hours.

I prefer using the solar method because I love how it looks. And more importantly I describe myself as a busy mom. Nothing is better, in my opinion, than to spend less than 15 minutes setting something up and letting it do it’s thing over a longer period of time that absolutely does not involve me.

So after my rinsed rosemary is dried, I put the sprigs (stems and leaves) into a jar. Tightly fitting in the plant material is great because it prevents parts from floating to the top, keeping everything fully submerged when you add the oil.

On the subject of oil, not all oils are made alike. And this is another one of those points that people have failed infusions. They chose inferior oils. When you pick your oil, keep in mind what material you are using. Olive oil, grape seed oil, and a few others come from plants that are not known to be modified and with less processing. Vegetable and Canola oils are both produced from crops that are known for being genetically modified and are heavily processed (an indication that their natural plant compounds have been changed and have less natural benefits). But when you also look into the history of their origin, you will realize that they were never created for human consumption. Canola oil was formulated for World War engine lubricant. After the war, the oil was then marketed as a cooking ingredient in order to make a return on investment and because it’s cheap to produce. (For a short history of Canola, and some comparisons to other oils, can be found in the article Rapeseed to Canola: Rags to Riches by R. Keith Downey.)

For today, I used smaller mason jars. And to keep most of the rosemary stems submerged for this solar infusion, I coiled the stems into a ring shape and placed them in the bottom of the jars.

Next I poured my olive oil to the top of the jars. Then I capped them with a lid and ring. (I prefer lids and rings because you can tighten the lids tight enough so that when you shake the jars, there won’t be a leaking of the oil.)

For the next 6-8 weeks I will shake the jars and make sure the rosemary stays submersed in the oil. During the summer, I leave them in a window sill. During winter, I put the jars on my south facing windows during the day and then move them to a warm space during the dark hours. Sunlight is what causes the heat that opens up the leaves to extract the compounds and oils from the leaves.

Solar infusion takes longer than a stove top or slow cooker method because the heat temperatures do not go as high or stay sustained like a controlled heat. But the one thing that I haven’t been able to find is an article that talks about the effect that the sun has on the oil compounds themselves. (For example we know that the sun has a bleaching effect on laundry. So what else is the sun capable of doing when using it a part of the oil infusion process?)

At the end of the infusion process, no matter which method you choose, you will want to strain out the rosemary. Store it in a clean glass jar and lid. And then keep it in a cool dark place.

As with all herbs, medicinal compounds start to break down 6-12 months. This doesn’t mean that they are empty of any good. It means that they lose their effectiveness. The flavor can still be there. So as long as rosemary (and other herbs) is properly stored, they are good to be used.

Leave a comment

Processing…
Success! You're on the list.
Advertisements
Advertisements
Advertisements
Advertisements

Crayon vs. Mom

(I’m going to pepper the pictures of results through this post. So this time the pictures are not directly linked to what I’m sharing with you in that immediate space.)

Nothing causes disruption in a family more than sitting down to the laundry and finding that someone went through the wash that shouldn’t have.

This past week, my disruption was a caused when a blue crayon high jacked a tumble in my drier!

My whole load of laundry was affected. And what made me cry the most was a sweater that was gifted to me and this was its first washing.

Did I mention it was a large load of laundry?

Cotton napkins: the tags were removed so if I remember right these napkins are 100% cotton. Later on I’ll talk more about why this may be important.

Fortunately my husband was brilliant and immediately started a quick search to see if there was a possible remedy… even a small chance of not having to throw out so many clothes to the scrap bin.

He never did tell me what he found out. But two days later (when enough time had passed), I ran my own search. The videos I found were either from other housewives (and one preschool teacher) who used items they found in their homes or ken using chemicals that may or may not eat your clothes if you used it (maybe a slight exaggeration but not far off).

The teacher used a toothbrush. And I wasn’t going to go through with a toothbrush on 50+ pieces of clothes and linens. And with the options remaining… you guessed it! I chose the house wife remedies.

The ingredients that were used by all videos were vinegar and Dawn dish soap. Half also added washing soda.

This is one of my kids’ shirts. This is a blend of cotton and polyester. The tag is worn out so I can’t give the percentages.

Advertisements

Why Dawn Dish Soap?

If you think about what makes up a crayon, you find that it’s in the wax/fat or oil based. Dawn is known for being aggressive with breaking down oils and fats.

Will any dish soap work?

Absolutely not! There are a lot of cheap dish soaps out there that doesn’t break down fats and oils. If you’ve ever used cheap dish soap where you have to scrub an oily dish with the soap and absolutely no water to dilute it, you know what I’m talking about.

However, for my experiment, I used Kirkland (store brand) dish soap that is marketed as having four times the grease fighting power. This is something that Dawn is always advertising in their marketing. So I have reason to believe that this is Dawn just relabeled as the Costco store brand. Even if I’m wrong, it’s this degreasing action that I’m going for because wax is oil based, whether natural or synthetic.

Out of the three ingredients the dawn dish soap is, initially, the one ingredient that I wouldn’t skimp on. My hypothesis is that this is the ingredient that is the make or break item for this science experiment to work.

Here is another one of the kids’ shirts. This athletic shirt is also a poly blend with less cotton content than the previous shirt.

What about Washing Soda and Vinegar?

These two ingredients I’m not picky on brand and I use them interchangeable. So by all means if you have an opinion, please drop it below in the comments.

I am a homeschooling mom, but here is where my scientific knowledge is going to be lacking. We haven’t gotten to the lessons yet to understand why bicarbonates or vinegars do what they do in the laundry.

But for generations vinegar has been used when washing clothes to freshen them up (in the days before fabric softeners or laundry crystals) and give your laundry a little fluff. And that’s not even mentioning that vinegar is amazing for giving your washing machine a good little wash to break down laundry build up in the wash barrel.

This sweater I wanted to include to show what happens with a woven texture.

I suspect that vinegar is a key component in this laundry remedy because it loosens and opens the fibers up from compression. So the vinegar works in concert with the dish soap by getting in there a opening up the space for the soap to get all around the crayon wax and break it up.

In my experience there’s been no noticeable difference between a 5% acidity vinegar and the vinegar I make from apple scraps or orange when it comes to how it behaves in my laundry. Of course there is the difference of scent that comes from the apples or the oranges. But other than that, both types of vinegar (commercial vs. home ferment) behave the same.

I’m not sure how the videos with only Dawn dish soap and vinegar works supposedly as well as the videos that use dish soap, vinegar, and washing soda. The reason for this is because I know that there is a chemical reaction that happens between the vinegar and washing soda. But I’ll come back to this point when I get down to what I found when I played with the measurements of these two ingredients. The combination of the vinegar and washing soda DID have direct correlation to how much of the crayon got removed from my laundry.

These athletic pants are a poly blend that includes rayon.

Advertisements

First Things First

Before you can go back and rewash everything, the first thing that has to happen is checking to make sure that your drier is clean from residual wax.

The drier pictures I wanted to keep with this section of text.

As you can see from the pictures that I took of my drier barrel, my load was so large that the clothes kept the barrel from being covered in the crayon wax. I did have one spot next to my lint trap.

So on the one hand, this is what you want your drier to look like. And on the other hand, here is what you’re looking for. I didn’t have to go through the hassle of running my drier empty to warm the barrel up and then wipe out the crayon wax. If I did have to I favored the video where people wiped the hot drier barrel with a drier sheet. I don’t use drier sheets with my laundry, so if I had to clean out my drier this time I would have warmed up my drier barrel and then use a rag sprayed so that it became damp with vinegar.

When you’ve verified that your drier is clean, you can then move forward with treating your clothes.

This is a pajama shirt is another example of a cotton poly blend.

What’s the Recipe?

That is the real question because no one tells you the measurements of what they use for their results. They eye ball it and tell you to be generous with the ingredients.

I’m telling you that there is a difference with the amount you use and the results you will see!

Without knowing the measurements that they used, you cannot truly recreate the results that they got. So I followed the eyeballing method that I saw in all the videos. BUT I also measured what it was that I was putting in.

Full disclosure, my washing machine has a larger barrel than the standard machine. So depending on the size of your washing machine you may need to adjust the amount of ingredients that you use when this issue happens to you.

This is a 100% cotton wash cloth with a waffle weave pattern.

I split my ruined load in half to run two different batches.

For the first run of treatment (which you see the before and after two picture sets above and below) I used the following:

  • 1 Cup Washing Soda
  • 1 Cup Vinegar
  • 3/4 Cup Dish Soap

Before I put the clothes back into the washing machine I started running the water into my machine. It’s important to make sure that you run the water as hot as your machine will allow. The heat is what softens the wax and makes it easier for the cleaning agents work. I also put my machine on the setting that allowed for a deep clean (where the clothes can soak for a few minutes). With the water running, here is the order that I did everything else:

  1. Add the clothes
  2. Pour the washing soda evenly across the top of the load
  3. Pour the vinegar directly over the washing soda (you will see the washing soda start to foam)
  4. Pour the dish soap as evenly as you can on the top of everything
  5. Close the lid and let the machine run its wash cycle

This washcloth is a blend with a nap weave.

All of the pictures that you have seen above have been the worst of the worst of what got hit by the melted crayon. Everything else came out of the treatment with the wax removed.

Below this point you’ll see what the second run, with a modified measurement of ingredients. Please note that I did not run these clothes through the drier unless I was happy that they were free from was (or as you will soon see that I gave up and just accepted the fact that I wasn’t going to get the wax out).

For the second run of treatment I put in the second half of the laundry for its first laundry/treatment run PLUS the articles from the previous attempt that I wasn’t happy with. This second test, in the end, was run with a 3/4 load instead of a 1/2 load that I previously ran.

The second run of this athletic shirt removed minimal amounts of crayon wax that was left on after the first run. I resolved that I wasn’t going to be able to get any more out.

I followed the same procedure above.

Here is the change of ingredient measurements.

  • 2 Cups Washing Soda
  • 2 Cups Vinegar
  • 3/4 Cups Dish Soap
Advertisements

The Results

From the second load, there was nothing that I needed to rewash a second time (like I had to do with the first treatment load). And you see the results of the first treatment load that went through the second treatment.

I hope there’s not a second time where a crayon goes through my laundry. But let’s be honest. I still have young kids so there’s still a chance.

There was an improvement on this t-shirt. However I was unable to get everything out. But my kids have worse stains from pens and paint that this was livable.

Should I need to deal with crayon damage, this is the recipe that I’m going to use and why.

  • 2 Cups Washing Soda
  • 2 Cups Vinegar
  • 1/2 Cup Dish Soap

For treating the crayon damage, the washing soda and vinegar proved to be the combined more active ingredient over the dish soap. The increased dish soap amount made the clothes crispy in clothing feel when I pulled everything out of the washing machine. This is classic for when you’ve used too much soap/detergent on your clothes.

More does not necessarily mean better. And in this instance, my initial thoughts, expectations, and hypothesis were wrong.

I was most happy that this sweater had all the crayon wax removed. After all, this was the gift that I spoke about at the beginning of the post.

With the dish soap, even with the first load the fragrance was so strong that even a half cup was either already too much or at the top end of how much I should have used for the size of my washing machine. And if you’ve ever washed dishes by hand, you are aware of how little of a good soap that you need to use in your sink. I’m going to say that the same is true with using it as a treatment for your clothes in a washing machine.

Advertisements

Does the fiber content of your clothes make a difference???

I literally had no idea that I was even going to be answering this question when I set out to fix my laundry. But I did notice a difference.

What I found extremely noteworthy is that crayon wax does not want to let go of natural fibers!

The athletic pants was the most synthetic of the clothes that were most damaged by the crayon. And even with the first treatment, it pretty much came out. The cotton shirts did not want to release all of the wax. And one item I didn’t document (because I didn’t catch them until after I was done and folding all the laundry after being dried) was my bamboo socks. The socks were 100% bamboo and did not let go of any of the wax that it got from blue crayon.

I don’t have the answer for different fiber content of your affected clothes. But I did want to mention that this one fact will play in how easy or difficult it is get crayon wax out of your clothes. Synthetic fibers appear to let the wax go the easiest. Natural fibers appear to need more aggressive modes of getting the wax out, if you’re looking to fully remove it.

Advertisements

Other Options

There are other options out there that people say work for removing crayon wax from your clothes. They seem to mostly comprise of using chemicals to remove them. I’ve seen people use industrial strength degreasing cleansers (primarily used on clothes usually being cleaned from automotive oils stains) and acetone nail polish.

For me, I’m not willing to test these ones out on my clothes because I don’t want to accidentally burn a chemical hole in my clothes. And I’ve been in the process of trying to remove any chemicals from my clothes and skincare products because our world is inundated with chemicals that bombard our skin and health.

I know that not everyone shares this sentiment. So I wanted to put out the other options out there for those who do not have those issues with using those products and want to try to fully remove crayon wax. Or maybe you do share the same sentiment, but a beloved heirloom table cloth or baby clothes got damaged by crayon. Sometimes there are just instances where the personal risk is justified over your everyday choices.

What are you go to remedies for damages done in the laundry?

Paint, pen, grease, wax, etc.

Leave a comment

Processing…
Success! You're on the list.
Advertisements
Advertisements
Advertisements
Advertisements

Fill Up On The Fillings

The holidays are all coming up. And this can bring many feelings to different feelings. When adulting, the hardest part of the holidays are when finances are tight.

To help lighten the mood and bring a little cheer with the gift of flowers.

I’m going to show a simple and easy to make arrangement that you can personalize any way you want because it’s a blank slate. The beauty of it is that I reused some items and others were given to me. I had no out of pocket expenses to share this post with you.

So let’s start with the materials.

Vase

What inspired this post was the vase that my mom had sent me some flowers in.

Fall is my season. I love pumpkin everything. In fact I grow and purchase pumpkins to have all my pumpkin goodness that I can preserve for the rest of the year. And yes, I make pumpkin scones year round because their deliciousness transcends what is in season.

Unfortunately I can’t send you a picture of what the floral arrangement was that my mom sent. Mostly because I want to keep the blank slate in your mind and spark your creativity.

What I like about this white pumpkin is that if you remove all the floral it is literally a cookie jar. So feel free to use this idea any time of year and use cookie jars, old tea pots, water pitchers, even a shoe box (hello baby shower with baby shoe boxes!) Literally, use what you have on hand that brings you inspiration.

If you’re using a cookie jar or anything else with a lid, let me show you the parts of this vase and how it works.

This lid stand/holder is very specific for floral. I’m sure with today’s online offerings, you could find these. But you’re going to have to know what your lid size is and go from there. I have one other cookie jar, but the lid is smaller and this stand/holder definitely will not fit in it.

However I do have two options off the top of my head that I could use from items I have in my house.

I have porcelain dolls from my childhood, and this stand/holder immediately reminded me of the doll stands I have that go around my dolls’ waist. The tension part is too small to fill the lid like in this pumpkin vase, but with two or three I could position them in the smaller lid to make the tension and platform to raise the lid.

Another option is making one from a thick gauge wire. If your local store has a DIY floral department or aisle, you will find wire thick enough to hold its shape and hold the weight of a lid. If you want to price comparison shop, go to an automotive shop or aisle. You’ll often find that you will get a better price in that department, but also walk out with a larger quantity of wire.

Once you have the wire, you can make your own custom holder/stand by leaving several inches of one leg sticking out as you then go in and create a loop of wire inside the lip of your cookie jar lid. I would make a few loops inside that lid to ensure that when you move and manipulate the legs that you don’t shrink your loop and allow your lid to fall. Once you’re confident in you loop, bring out a second leg and then use wire cutters to cut the wire. You can always add more than two legs if you feel like you need to add more stability.

Advertisements

Inner Stability

For lid placement, you will need something to anchor the stand into.

I’m choosing to reuse the oasis that came with the flowers my mom sent me. This is an amazing product because it not only allows you to place flowers like a pin in a pin cushion. It also allow absorbs and holds water, keeping your flowers in water much longer than free standing in just a vase of water.

If you want to use silk flowers that you have on hand, feel free to use a Styrofoam ball or block. (I don’t recommend styrofoam for fresh flowers because the plastic will kill your flowers and won’t allow them to be properly hydrated.

Once you’ve decided what you’re using as a structure (of if you’re even using a structure), you may find that you need to piece bits together to keep them from falling into your cookie jar and becoming lost. Flower stems are enough to keep bits together. However if you need everything to be in place before you get started on your flowers, know that toothpicks or a couple inches of wire are your best friend.

As you can see here, a single toothpick is all that was needed to hold up a water logged piece of oasis.

This is a beneficial trick if you only have a small sliver of oasis that doesn’t touch the bottom of your vase. Or even if you find that your oasis fell apart on you. Or maybe some oasis you salvaged was a different size than the vase you are working with. You can certainly make your oasis fit the vessel you choose to use.

TIP: Please note that placing a toothpick or wire in a 90° angle is going to cause frustration. The weight of wet oasis and flowers are going to collapse. So instead, angle the toothpick at a 45° angle. That way when gravity starts to work against you, the toothpick will hold its place. This will be further reinforced by the flowers that you soon add.

Advertisements

Flowers

The Flowers that I was gifted after an event I attended was baby’s breath and eucalyptus. Often we look at these as just fillers to make an arrangement look larger than the more desired stems.

I wanted to use these fillers specifically because they are often overlooked for being used as flowers on their own. Maybe you have a lot of fillers left over from other arrangements that you made. Or maybe your budget is tight and these are the only flowers that are in your price range.

There are so many other fillers that you can find in your grocery store. So please keep your eyes open. And not all stores offer the same offerings. The grocery stores don’t supply very many filling options. However, stores like Trader Joe’s offer the best selection of filler flowers in my area. And their prices are quite affordable.

TIP: If your local store doesn’t offer many choices for filler flowers take a look at what is available for discounted flowers. They’re the ones that have the more delicate flowers that are wilted. These discounted bouquets are often cheaper than just fillers flowers, but the fillers used in these bouquets still have a long life to them. There are a huge number of flowers that will last weeks without even having water available to them. So know that even all that you can afford is a heavily discounted, on its last leg bouquet, if there’s a decent amount of fillers included, you can make a decent arrangement even if you have to throw out the wilted roses, lilies, and other delicate petal flowers.

Advertisements

Arranging

When looking at using long stems of filler, like eucalyptus, you will be happier in how these stems lie when you hold them up and see which direction they are naturally bending. (See the right picture below.) If you want the stem to cascade down, angle the bend down and also put it in the oasis by entering from the bottom and putting the stem upward. This can be seen in the picture on the left.

See the difference between placing firm eucalyptus stems. Using the left picture (above) the stems you see in the bottom right corner are the stems that I angled from the bottom of the oasis and pushed upward. The one stem that is in the upper left corner is the one that I pushed from the top and downward. But this stem I also used a second trick. Even with the curve of this stem, it had the tendency to stand upright. So I curved the stem in a C shape and kind of hooked the stem in the oasis. Then I put the pumpkin lid over this stem to weigh it down. Even with this trick, the stem never gave a cascading down effect like you see with the bottom right corner stems.

How you place the stems is everything about how it stands up or lays down.

The baby’s breath is much easier to shape the way that you want. For this cookie jar I used about four stems of baby’s breath and snipped them down into smaller branches. And with an arrangement like this, there’s no need for long pieces. All you need are the “scrap” pieces or bits that are the size of your hand or smaller.

If you “scrap” pieces or the bits that you cut down are too small, it just means that you need more of them to fill larger spaces.

One work around for filling empty spaces quicker is to take larger pieces like this. In the below picture on the left is a stem that is about the length of my elbow to my wrist. It could have been trimmed down into four smaller stems, but I wanted to fill a large hole with just this one piece.

To close up the gap spacing between these branches, slide your fingers up the main stem, gathering all the stems up the main stem. That gathering bunches all the stems up to achieve what you see in the right picture. You will have to hold you stem in this position until you push it into the oasis. At that point, the foam holds bunching in place.

Before you place your first gathered stem, I want to draw your attention to a stem feature that has the potential of causing you some up front frustration.

The weakest part of the baby’s breath stem is the joint where all the branches merge. The times that stems snap, when placing them in oasis, is when I try to push these joints in without giving them assistance.

If you have an arrow tip like you see above, it’s easiest if you just snip that off. It causes resistance, when pushed in the oasis, that you don’t need, because those stem numbs have no flowers.

Look further up on the stem and you see what it looks like when you have attached flowering stems. When I don’t need the height from the stem, I snip it right there at the base of where all the stems merge. Then I slide my fingers down to make more of an arrow point instead of a tear drop. That fat end of the tear drop is difficult to push into oasis. However, if you make a sharper point, or a smaller surface area to push in, the stem slides right into the oasis.

If there are any other merges in the stem, it’s easiest if you pinch it smaller to get it to go into the foam. Depending on how large of a cluster you have, there may be a few of these joints that you have to manipulate into the foam.

Advertisements

Final Adjustments

Once you’ve filled in all your empty space, there’s a few decisions to make.

  • Do you add more of one filler or the other?
  • Was there too much and some needs to be removed?
  • Does placement need to be adjusted?
  • Is something missing?

I looked at the final arrangement here and went through these same questions. All the holes I filled with baby’s breath as that’s what I chose to be primary flower out of these two fillers.

The thought crossed my mind to add more eucalyptus. But I opted with the creative decision of having less leaves on my pumpkin “vines”. So that meant instead of removing branches of eucalyptus I chose to weave the branches through the clusters of baby’s breath.

As far as “am I missing anything?” that is the question that is always there when you have a blank canvas for an arrangement.

Right now this is how my pumpkin sits in my living room. But it also allows me to keep this long lasting arrangement in season through the rest of the year. For Thanksgiving, I could add fall leaves or any other fall accent pieces. For December all the fall accent pieces can be pulled out of the oasis and winter pieces added. For example, I would put in snowflakes or mini presents. In fact, I’m eye balling some mini glitter snowflakes while writing this. The question is if I want to keep with the white color and add silver glitter snowflakes. Or do I want to add a splash of color and put in gold snowflakes?

But that’s the beauty of making a simple arrangement like this. I can dress it up and change it.

In fact, I could keep this up for the New Year and put in foil clusters that look like fireworks.

For now I’m just going to have to contain myself and not entertain my kids. It’s so easy to grab their small stuffies and other toys and use them as props to make little scenes. We don’t do Elf on the Self in our house, but just like there’s millions of Pinterest posts on Elf on the Shelf ideas, there’s just as many possibilities for arrangements like this. It doesn’t matter if you have a pumpkin cookie jar like vase (like I used here) or a teapot or coffee cup. No matter what you are using as a unique vase, you have just as many options to accessorize and decorate without limits.

How would you dress up a pumpkin arrangement like this?


Leave a comment

Processing…
Success! You're on the list.
Advertisements
Advertisements
Advertisements
Advertisements