Reverse That Frame

While getting ready for an upcoming Maker’s Market, I’m reminded of a time I was in a crafting group. A couple of times a year the group would do a special session of crafting binges. One of the first things I made with this group was a reverse canvas. It’s one of the simplest crafting transformations that is so satisfying.

If you haven’t heard of a reverse canvas, or have yet to make one yourself, grab a framed canvas, screw driver or staple remover, paint, exacto knife, and stapler or staple gun. This is all you need to make your own reverse canvas.

At any of your craft stores, or even dollar store, you can find two types of canvases: frames canvas and canvas flat. The flat looks like canvas that has been glued to a piece of cardboard. (You can make this in a similar fashion as you’ll see with this reverse canvas.) A canvas frame is the one where you see the canvas stretched over a wooden frame.
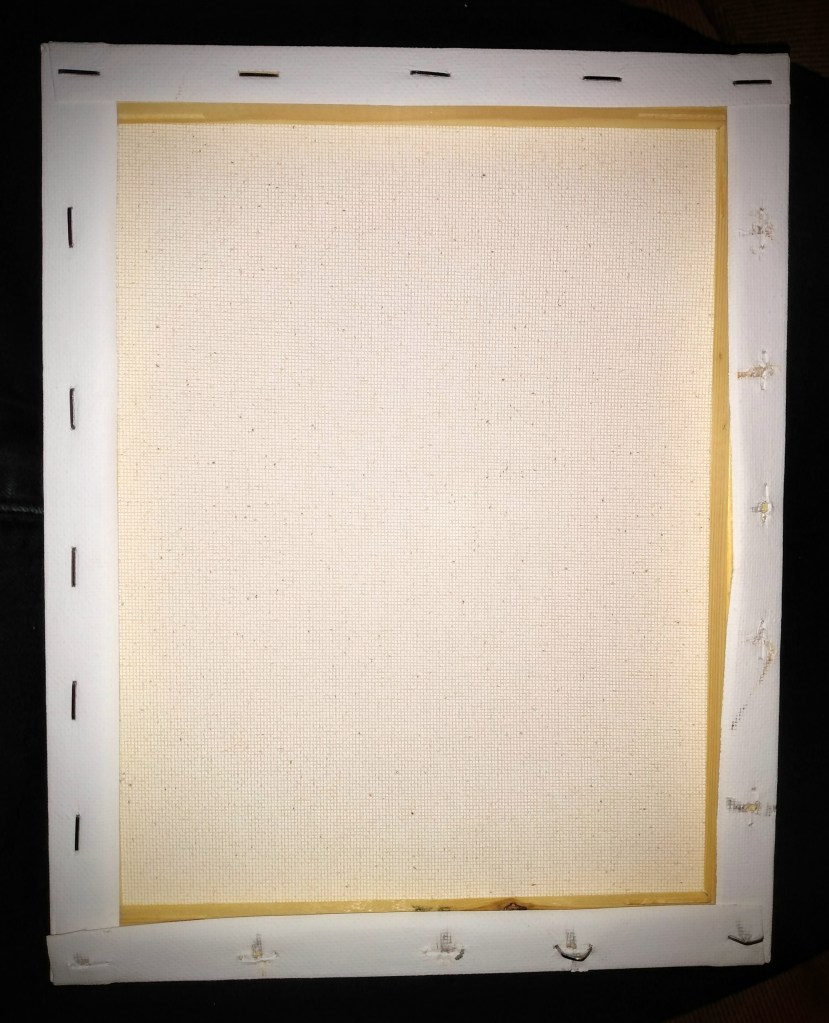
First, you want to flip your canvas frame over and remove the staples from the back. I’ve had some frames where this was easy. And there have been a few frames where I had to work to get those staples off. If you find that the staples don’t want to release from the wood, grab a piece of needle nose pliers. This will give you enough leverage where you can wiggle the staples out.

Don’t worry if your prying scars this side of the frame. With all the holes and splintering, this side of the frame will remain the backside that no one will see.

I’ve heard many crafters recommend using the exacto knife and cutting the canvas free from the frame by cutting on the side of the staple between the staple and the outside edge of the frame. If you don’t want to spend the time removing the staples, this is the method that you will love. The down side of this option is that the finished back of your reverse canvas is not going to be smooth as it could be But as I mentioned before, no one is going to see the back of the frame once it’s on the wall.

The rest of this walk through is under the assumption that you remove the staples. There are also other ways of reapplying the canvas, such as using hot glue, but I’m going to show you how to stretch the canvas. This is going to give you the best quality and make it look less DIY and more professional in finish.

Paint to Dress It Up

Of course you have the option to paint your frame and canvas at any point in time. My timing of choice is to paint the frame and canvas once they are separated from each other.

As you can see here, for one of my Market products, when you paint them separately, you are free to personalize and customize your project anyway that you want.

If you want to spray paint, you can. You can use glitter or other crafting medium. When the pieces are separated, you will never have the accidental over spray or find the need to tape off to protect one element while you’re working with the other. And if you want to try your hand at free hand painting one element, you can work absolute certainty of the work that you’re doing.

Once canvas and frame are dry, you are ready to put your canvas back on your frame.

TIP: If you wanted a pattern on the canvas (like I did above), make sure you take a look at your frame on top of your canvas. Make sure your lines, design, landscape or portrait are lined up like you want them in the frame. You may find that what you painted on the canvas doesn’t line up inside the frame like it did when you were just looking at the canvas.

Advertisements

It’s Time to Stretch

If you pre-lined up your canvas and frame (as described in the tip above), you will need to hold on to both pieces and carefully flip it over. Make sure that the canvas doesn’t slip. If it does, you may need to reposition it.

If you have a solid canvas, or one that doesn’t need positioned, start of by putting your frame front side down on your table or work surface. The staple holes side should be up. Next, place your canvas down with paint side down.

Find the center of the long side of your frame and staple your canvas to that spot.

Next, find the center of the other side of your frame and pull the canvas tight to that spot. You may need to use both hands. This will give you control in how tight you will make the canvas in the end. Once you feel the tension, staple the canvas, tight, to the center of that frame arm.

Find the center of the short end of your frame. Pull the canvas tight to that point. You should notice that you can pull it more than you did with the first pull you made. Staple it in place.

Find the center of the last side of the frame and pull the canvas tight. At this point, I start pulling the canvas to the outside edge of the frame and using the frame edge as leverage to keep the canvas tight as you staple.

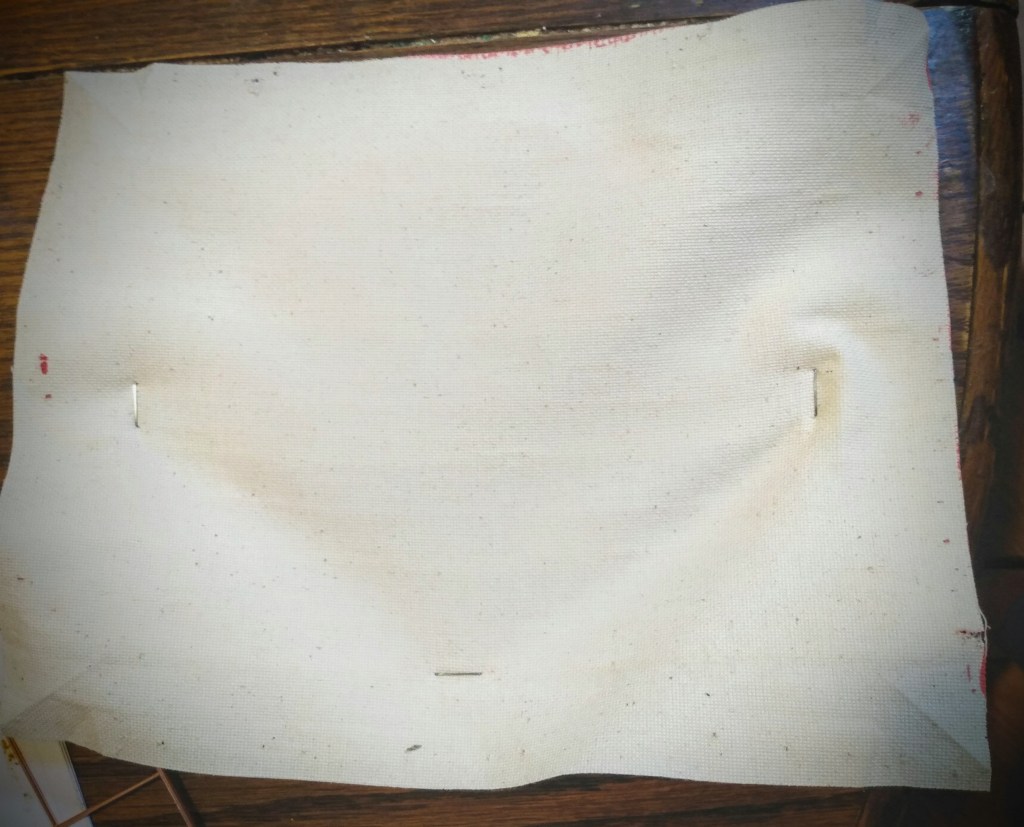
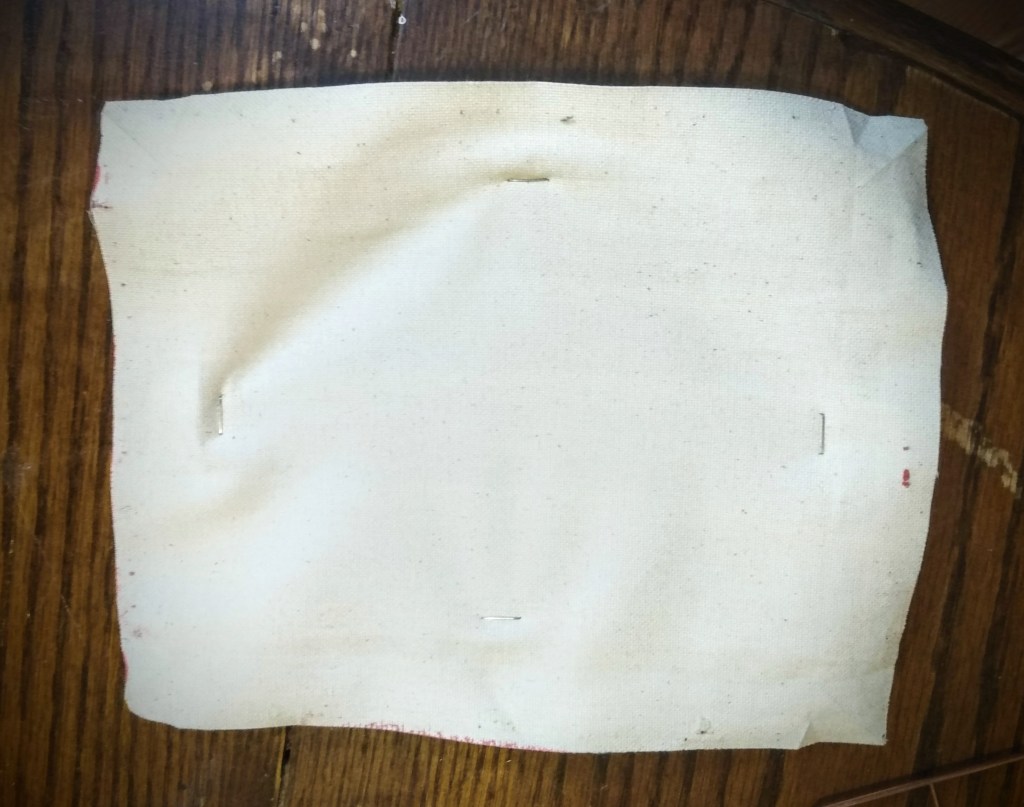
As you look at these pictures you are going to really see the warping in the canvas just from these initial 4 staples. This is normal and in no way reflects the final product. In fact, the more that I pull the canvas, the more tension that I add. I find that if I gradually add more tension as I go the least likely I am of ripping my canvas from pulling too hard.

After these initial staples are in place, the next step is to aim your stapler about 2 inches to the side of center staple. Pull and stretch the canvas toward the nearest corner, in a diagonal pull. The original pulls were in an up/down directional pull. But after you place the first 4 staples, you want to pull diagonally to prevent bubble like ripples from forming around already set staples.

Another benefit to diagonal pulls is that this is how I get my canvas to keep tight like the skin stretched on top of a bongo.

Another truck to keeping a tight canvas is that as you start pulling diagonally, you want to alternate directions that you’re pulling in.

For example, if your frame (after the 4 initial staples) is orientated in front of you with the long frame size on the top and the short on the sides, keep your frame in this orientation. Start with a staple 2 inches to the right of the staple on you top long side. Then drop to the bottom long side and pull the canvas to the bottom left corner with adding a staple 2 inches to the left of the the bottom long frame side center staple. Then for the short frame side on your right hand side, pull the canvas toward that right bottom corner and place your staple 2 inches below the center staple. Finally move to the left hand side short frame side, pull the canvas toward the upper corner , and place the staple 2 inches above the center staple.

Advertisements

With these four staples in place, we’re now going to staple on the other side of the center staple to balance out the tension that we’re putting in the canvas.

The last pull was toward the upper left corner (on the short side). So now we’re going to go to the bottom right corner (on the long side). Pull to the lower right corner and staple to the right of the bottom center staple. Next, pull to the upper left corner and staple to the left of the upper center staple. Then pull to the upper right corner and staple above the right center staple. Finally pull to the lower left corner and staple bellow the left center staple.

At this point the canvas has an even pull and it’s a good time to check the front to see if any adjustments need to be made. If there is no design to the canvas you can keep stretching and stapling in opposite directions until the canvas is fully attached to the frame.

If you have a design, now is a great time to check to make sure that you are stretching with enough balanced tension that the design is still straight.

Is the design pulling or warping toward a short/long side of the frame? Then you pull the canvas tighter in the opposite direction. This will take pulling toward the two corners opposite of where it was gravitating toward.

If the design is gravitating toward a corner, you want to pull tightest on the opposite corner to bring the design back to its original orientation.

Once you’ve made the corrections that needed to be made (keep checking back to the front after each set of 4 staples to keep an eye on what you need to do), continue with the stretching and stapling until the canvas is reattached to the frame.

Time for a Trim
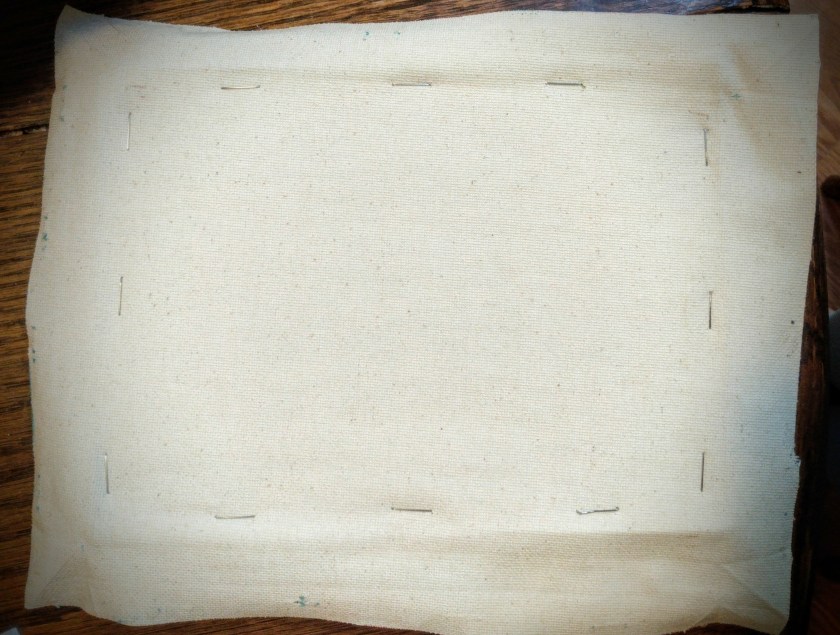
As you see here, all of the original funkiness from the 4 original staples has worked itself out. The center is smooth and tight. On the outside edges of the canvas you can still see bunches and creases of where I pulled tight against the frame (using it as leverage to pull the canvas tighter). None of this matters because we will trim off the excess canvas.

Flip the canvas over so you can see the front face. Grab your exacto knife. You are going to cut into the canvas at about a 45° angle behind the frame. This will cut enough of the canvas back so that you won’t see the edges from the front of the frame. The benefit of the exacto knife is that you can run the flat edge of the knife against the edge of the frame and cut a straight line.

It is possible to cut away the excess canvas with a pair of scissors. You will want to pay a little extra attention to where you are cutting. You will want to get the scissors in there so that you are cutting behind the frame. But at the same time you want to make sure that you aren’t cutting too close to or between the staples. Just like any taunt fabric, canvas will rip along the grain. This is particularly true when you have the tension that we built in with stretching the canvas.

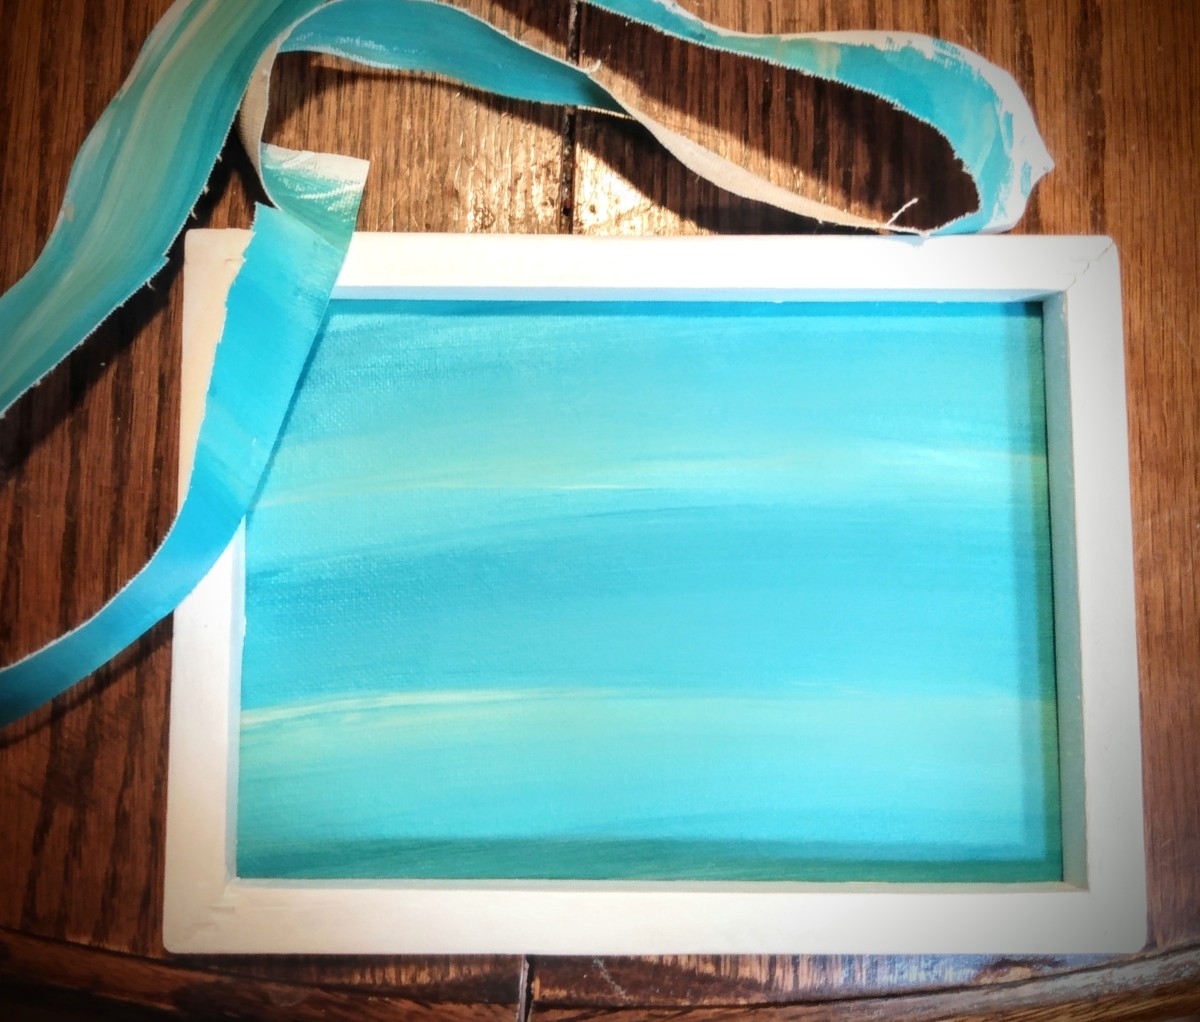
And now you see the final product with the excess canvas cut away!

This particular canvas is ready for the next step in the product that I’m making, which is a 3D wall art.

But you can consider this as a crafting blank that you can add anything to it. You can stencil paint a design on it. Maybe you want to mod podge a photograph or note from a loved one. Or there could be a decal that you want to attach to this canvas. You could also have an early childhood stick figure drawing from your child or grand child that you want to frame in a unique way. This may be what you’re looking for.
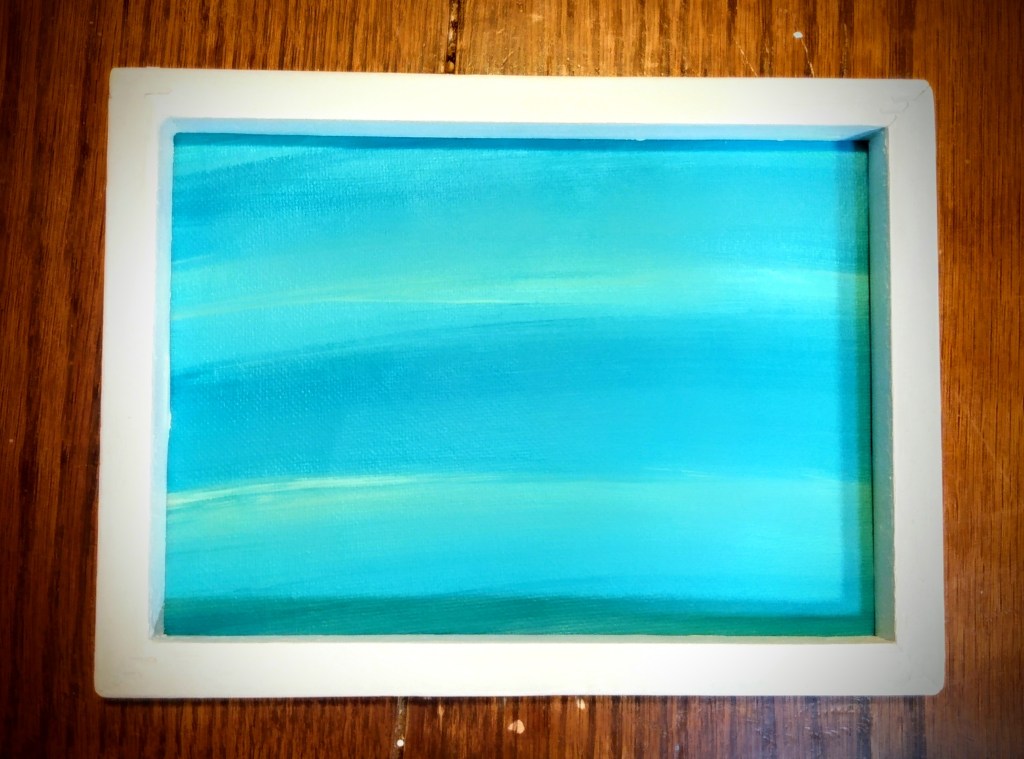
There are so many different things that you can do with a reverse frame. You are only limited by your imagination.

One last thing I want to mention, before you add your favorite decorations to this canvas, think about how you want to hang this reverse canvas. The frame can stand by itself on a counter or table top as long as what you add is very light. Otherwise, like in my case of 3D art, you will want to add a mode of hanging.

Some options for hanging your art are:

  • drill a couple of holes into the back of the frame where finishing nails can hold up your frame on a wall
  • staple a long bit of ribbon to the two top corners of your frame
  • nail a portrait anchor on the back

You’re not limited to these ideas. But they are a few of the most common ones.

How do you use reverse frames?


Leave a comment

Processing…
Success! You're on the list.
Advertisements
Advertisements
Advertisements
Advertisements

New Life to Wicker

There’s something about those moments in life when money is tight and you
try to do a lot on a dime that’s worth one cent. Here’s one of those
transformations from yard furniture that my husband brought home years ago.

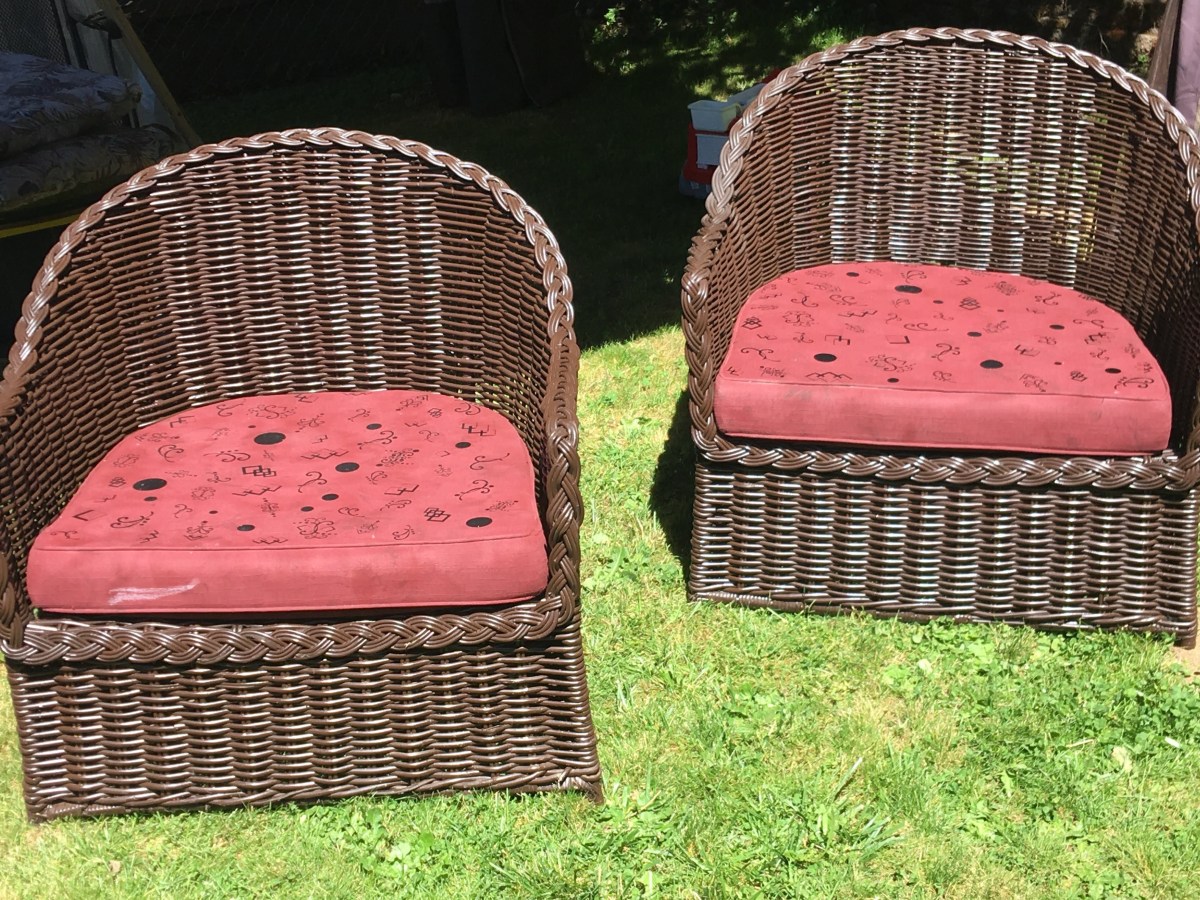
I don’t remember exactly where my husband found these two wicker chairs. It
was from a stage in our marriage where he would regularly hit garage and estate sales. If memory serves me well, these were a yard sale find.

The price was right, even if the quality wasn’t there.

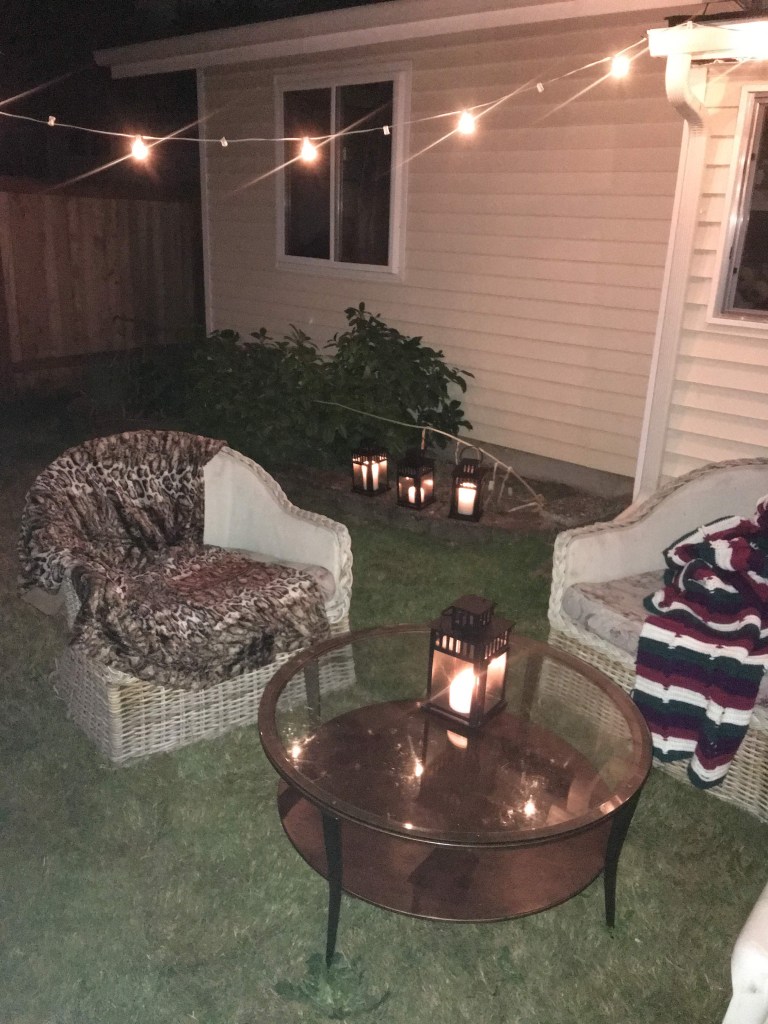
In the above picture I invited a few friends over for a yard party and needed the seating. So even though the fabric siding of the chairs were ripping out and had be hot glue gunned back to the wicker from the people who previously owned them, I hid these flaws by throwing blankets over them.

Close inspection will tell you that the falling apart wasn’t just on the side fabric. The wicker was unweaving on the bottom. The seat cushions were not only out of date by a couple of decades, but also starting to have holes.

We contemplated just throwing these chairs out.

The budget wasn’t there to replace them. And it was hard to toss them when they have always been our favorite seats to sit in during the summer and we have a nostalgic thing for wicker.

We just love them.

So I bought paint and made them over.

Prepping the Chairs

The first thing I had to do was rip all the fabric off and remove the staples with needle nose pliers. There’s no real trick to this, just a whole lot of patience.

The hot glue was easy to remove from the wicker and didn’t have any cosmetic damage. Once I saw this, I had no problem with this being the solution to the issue of the stripping that was unraveling on the bottom of the chairs.

Even though I thought I was going to have to buy new wicker stripping to replace what I thought was lost, I didn’t have to buy any. All that I needed to do was wrap the stripping back around the bottom frame and periodically drop a dot of hot glue to the frame as I re-wrapped the stripping.

I highly recommend using glue to hold anything you’re wrapping in place. There will always be a moment (or a dozen) where stripping will slip from your grip. And a small dot is all you need to keep from the whole section from unraveling and making you redo your work.

And if you’re afraid that you’ll use too much glue, make sure that you’re gluing on the “inside” of the chair. No one will see glue seepage when the chair is on the ground, so even the bottom edge of the chair is also a great place to secure the stripping.

Due to the age of the chairs, there were a few nails that had worked their way out. This made one chair in particular have the seat framing fall down under the rib that it was nailed to. That’s not a problem, because you just remove the nail, put the seat back on the rib and nail it back into place.

Fortunately, I had some extra finishing nails that were in my tool box.

While I was already repairing I decided to do some preventative work. To add additional support to the seat I nailed a few extra nails through the rib into the seat.

A Touch of Paint

There are a few different options that are out there for painting outdoor furniture. I didn’t want to deal with a primer or cleaning up brushes. So I opted for a spray paint with primer.

The one thing that I will say about wicker is that it takes more paint than you think if you want to get in all the nooks and crannies for a even coat. And for my own sanity, I did paint from different angles. One time through I painted the chairs from the upright position. For the second coat I flipped the chairs upside down.

If I do a wicker project again in the future, I will definitely paint in both directions again. There’s something about spray paint. It’s good about getting in tight places, but it really does need the extra help by changing paint directions.

These two chairs took 6 cans of spray paint. If you’re looking to do your own furniture spray painting project, this should give you a decent enough estimation on how much paint you should purchase for your project.

What about the Cushions?

There were two options that I had. At first I was leaning toward making a slip cover because that would be the easiest and quickest option. The only problem was that at the time that I was doing this project, outdoor fabric was more expensive then what I was willing to pay (starting at $15 a yard and I would have bought 4 yards).

My second option was fabric spray paint.

No one that I knew had ever worked with this type of spray paint, so I had no idea on what to expect. The only knowledge I had was watching a fashion designing competition. There was one contestant who used fabric spray to create a certain effect.

I’m sure fabric spray paint is perfect for a fabric that is a solid color.

Print on the other hand….

My pictures here don’t really show you the original print very well. But it’s a slate blue base with flowers (peach to dark rose color) and brown swirling flourishes.

I had chosen brick red fabric paint because it complimented the chocolate brown paint I picked for the wicker. And I thought that it would have great coverage since it’s a darker color.

Yeah, no.

I originally bought one can of fabric paint thinking that it would be more than enough. However, in reality I was only able to paint the top of each of the cushions because of the color disparity of the blue and brown in the original print. The short story is that it took nearly three cans of fabric paint to cover both sides of each of the cushions.

Another problem is that I left the covers on the foam form.

I chalk this fact to being the worst mistake I made for this project. The foam no doubt soaked up the paint, creating less coverage on the front of the fabric. And at the point that I did this project, my kids were babies and I had mommy fog brain. So now I would have removed the cover, but it just didn’t cross my mind then.

The good news is that the second layer of paint was thicker in coverage than the first. So if you wanted to get a solid color off of an old print, I’m absolutely positive that it is obtainable with 3 or 4 coverages. Just know that if you paint over a print, you’re going to have a phantom print showing through.

I wasn’t too opposed to the phantom print because it sparked a creative idea that I absolutely loved. Art Deco!

While Art Deco is more noted for being angular, the beauty of art is that
you take a style as your base and tweak it to fit what you see in your head. So
I took the squares and sprays seen in 1920’s architecture and added circles and
chandelier elements that matched the opulence of the time.

Truth be told, I had to work in the circles into the design to cover the
largest hole (which you see above).

Heat Transfer Vinyl (HTV) was my material of choice because I wanted the permanent
design and I wanted to keep the cushion weather friendly. It never fails that
our outdoor furniture gets caught in a summer rain a time or two each year.

Once the design was weeded, I cut the elements out and pieced them together
on the cushions in relation to the phantom swirls.

Now this HTV “print” that I made isn’t exactly everyone’s esthetic. I did want to share it with you because I wanted to show you how you can save furniture from being thrown out. Also, you have your own option for making your own design with materials that you have on hand in your home. And to encourage you to play with colors and designs that just are not on the market.

The one thing that I LOVED about this project was that I took chairs that I was constantly making excuses for, to my guests, and turned them into something that we’re happy to have in our yard for the next several years.


Do you have old lawn furniture that you can give new life to?

Comment below! Let me know what you did to rejuvenate a piece of furniture that you almost evicted.

Words That Last

I’m coming up on the end of my first season coaching basketball and I couldn’t let this moment pass without sharing some of what I’ve learned. And also share the thoughts that I wished I could have talked with my dad about.

Before I can share what I’ve learned I have to go further back. (And we get there, I’m sharing the photos of the craft that I made for my basketball boys. Directions to make this, or an alternate, are below.)

My dad was my first coach, my most favorite one. But he didn’t become a good coach on his own. He learned from one of the best, Coach Carter. He wasn’t one of the really blessed to play directly under the amazing wisdom of Coach Carter, but he was able to attend some of the basketball clinics that Coach put on for other young men. There were only select memories that my dad shared with me from his youth, but this season of his life he was very proud to pass on.

Even without the stories, I would have seen the fingerprint of Coach Carter on my dad. It wasn’t just playing Basketball in its purest form. More importantly, Coach Carter taught my dad how to value even the weakest and overlooked player on the team. For Coach Carter and my dad, there were no bench warmers. If you were on the team, you had a role to play on the court.

The most profound thing about this way of thinking is to watch over the years about how this shaped young men’s lives.

Once I went into Junior High (Middle School by today’s terminology) my dad was no longer my coach. He tried, but there were no openings. But he was able to get position as a boy’s team coach. Fortunately for me, the boys and girls teams played in different seasons. So even though I didn’t get to play on my dad’s teams, I gave up my free time to help my dad run his practices. Yes there were looks when I tried to help out boys my age during practice. That meant I ended up being a silent assistant.

While I did feel the sting of rejection about not having my knowledge accepted because I was a girl, I pivoted away from that and just learned more from my dad. I kept going to practices. I kept chasing balls and running drills. I wasn’t going to be shut out from something that was a part of me.

It took two seasons before I got to see the difference that a coaching style can make on the health of a team. The varsity coach was good, but he never had with his boys what my dad had with his junior varsity boys. On the varsity team the weakest player saw the least amount of playing time. Often times, those players were unsatisfied and felt rejected even by their own team member because they were the weakest link.

That wasn’t the case with my dad’s team. I watched the more skilled players still groan at the weakest links. But my dad refused to give up on them. He knew that he could make them better. And he did. The whole team had to work as a team, there was no exception. He gave more one on one attention to the weaker players. It was an investment. And it paid off.

There was one young man who wanted to quit the team because he knew he was the weakest link. But dad refused to give him an out. He helped him through his head space and built him up, until he could find self value. And once that young man found his self value, the team also valued him. To be fair, the team saw the potential in him before he saw it in himself.

What made that happen?

A coach who refused to give up on one of his boys. He kept calling out all the positive. Dad could see it deep down in him. After a little time, the rest of the team saw the skills deep down in him as well. They rallied behind him, encouraged, and cheered him on. With all this encouragement from his coach and team mates, the young man saw in himself what others saw in him. And he had a breakthrough that I hope has had lifelong results.

Advertisements

There was one other memory, of my dad’s coaching, that has stuck with me all these years.

One of my dad’s strong players transferred to a new school and he earned a place on the varsity team! We were so excited for him. And even though he didn’t have to do it, daddy rallied the whole team together and we all went to watch this young man play in a varsity game. It meant the world to him. His basketball family was in the audience cheering him on.

The problem was that the coach had a different philosophy in coaching. I won’t go into the details of that game. But afterward, we rallied behind our family and dad spoke one more time into his life. I don’t remember the words that dad said. But I do remember watching a young man buried under the weight of shame and disappointment. When dad was finished he was able to once again smile and hold his head up.

This was my Coach.

This is the type of coach that I want to be.

Back in January I welcomed my first team, 1st and 2nd grade boys.

From my own teaching experience I know that kids always perform better when you aim for the moon and allow them the space to pick up as much skill as they can on their own. For one, there’s always at least one kid who has higher skills than the rest of the team/group. If they’re not challenged, they can cause problems or they give up. The kids with the least skill sometimes feel overwhelmed by everything presented to them, but they don’t know that they can’t learn any of this. With the right teacher, a kid can learn anything because the adult believe that they can.

My first day of coaching, I didn’t know what I wanted to teach because my knowledge is strategizing at the middle school and high school level. So I opted out with teaching basketball terms and positions. None of these things were on the list or rules for this age group. But I didn’t want to coach at this age group. I didn’t want to dummy down this beautiful sport. I wanted the boys to be challenged and love the game that I grew up loving.

What was interesting was watching the parents during that first practice. Normally parents sit on the sidelines and talk or get caught up on work or personal items on their phone. Instead, I had the parent’s attention as well. Afterward, my husband told me that the parents were commenting that they were exciting because their kids were going to actually learn something this year.

This season I exposed them to using both hands, layups, screening, positions and a few other things. The point was never to get them to be proficient. I knew they wouldn’t. My whole goal was to get them to train their bodies in what it feels like to do certain skills. And in several years time, when it’s time for them to join a team that they have to try out for, and it matters, the skills that will be demanded of them at that point will already have a seed planted in them now. I took this year to set them up for success for another coach in the future.

Advertisements

But what I didn’t think I would have to encounter this early is the whole issue of the boys already picking out who were the skilled players and who should be treated as bench warmers. As a Parks and Rec team, everyone is supposed to have the same amount of play time–which is how I think it should be anyway. But the boys took it in their own hands, during games, to pass to the strong players only.

And this was where I wish my dad were still here to tell me how he got his team to be unified as a team. This isn’t something that all coaches know how to navigate and do it well. But my dad did. My only clues are what I have in my memories, but it doesn’t share light on his thoughts or capitalize on what he tried that went wrong.

If anyone is wondering about the answer to this issue, so far my best results have come from just the simple foundation of having a relationship with the boys. The fact that they feel valued makes it easier for them to see the team weaknesses (we own it all together instead of singling someone out) and problem solve. And giving them the options to problem solve gives them ownership of the team.

I’m sad that I’m losing a few boys next year. But I’m excited to look forward to having the boys request to be on my team again next year.

There’s no guarantee that I’ll get them back next year. All that I have is this moment in time.

So as a parting gift, I’m passing on a tradition from my parents.

Whenever dad coached out teams, my mom always crafted something that everyone got to take home. (I grew up in a generation where trophies were given to celebrate a few players. And only everyone took a trophy home when the team had a winning season.) One year mom made a felt pennant with the team name on it. (I still have it in a memory box.)

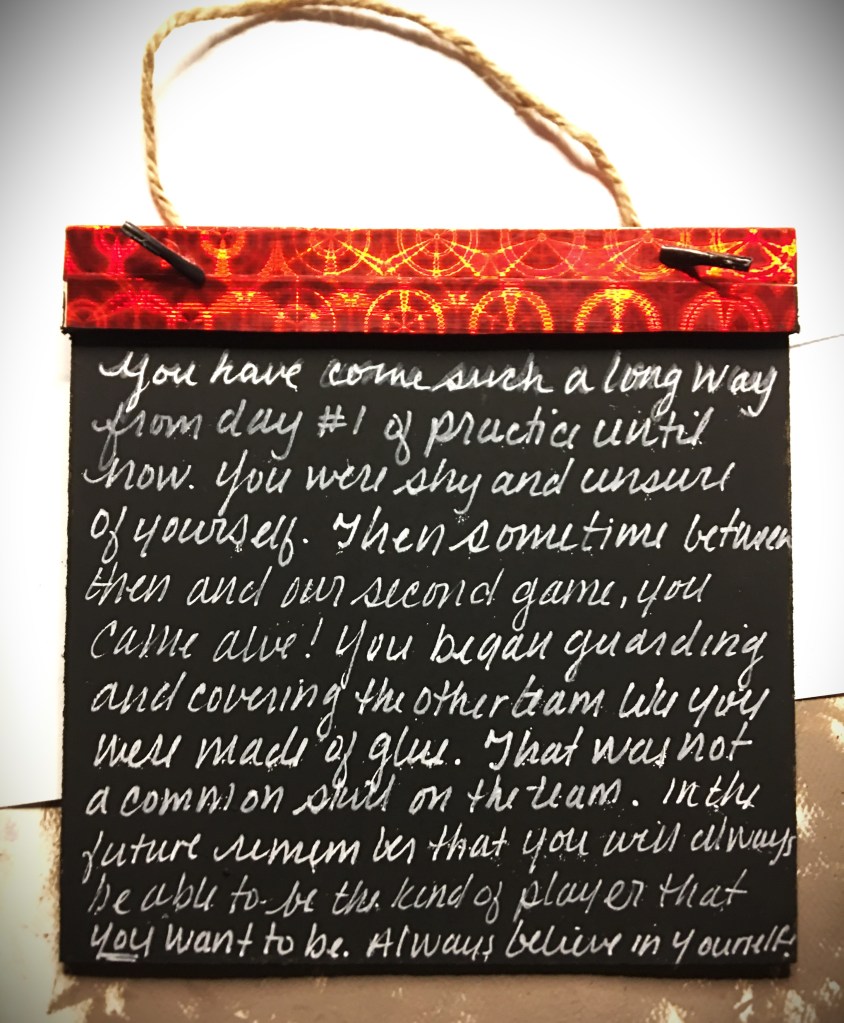
For my boys, I made stickers through the season, marking new skills that the boys learned. On the front of the chalkboard wall hang, the boys can keep their stickers like boy scouts badges. On the back I’m leaving a final message for the boys that they can look back on and see that they have had a coach in their corner. My goal is that no matter who coaches the boys in the future, they continually have a voice in their head cheering them on.

The perfect thing about this project is that it isn’t something that is just sports related. I know some teachers who give their students and end of the year present. Also, as a parting word to their students as they move on past their class room.

If this is something you would like to make for a child in your life, here is what I did.

What you Need:

  • 6″ x 6″ Square Chalk Board (I found these ones at the Dollar Store)
  • Decorative Duct Tape (I found this holographic red at the Dollar Store in the Automotive aisle)
  • Black Chalk Paint
  • Permanent Vinyl
  • White Acrylic Paint Pen
  • Transfer Tape
  • Scissors
  • Paintbrush
  1. Paint the sides and back of the chalk board black (or any other color of choice).
  2. Apply the Decorative Duct Tape. The width of the tape covers the front, top, and top half of the back boarder. You can apply another strip of tape that I did or paint all the way up the back of the board.
  3. On the front of the chalk board place your decorative elements. (In this instance, I did the team name and season year.)
  4. On the back you can write your encouraging message. ( I also added the boy’s name so that they knew it was a message specific for them and not shared with the rest of the team.)

There are so many ways to make alternates of this.

  • You can mod podge on photographs on the front or back.
  • Have young children make a mother’s day painting.
  • Attach miniature clothes pins.
  • Attach metal strip on the top, bottom, or side to make a partial magnetic feature

If you are privledged to have children under your influence so that you can pour life into them, I hope that you are inspired by this project. A gift with modest materials can be transformed to be uplifting for years to come!


If you are a basket ball coach and are looking for stickers that you can make and pass on to your players, check out these designs!

Processing…
Success! You're on the list.

Leave a comment

Bless This Garden

This year I’m working in concert with others in a garden. (I am so excited for this!) If you’re as busy as I am, you can imagine how quickly things slip through the cracks.

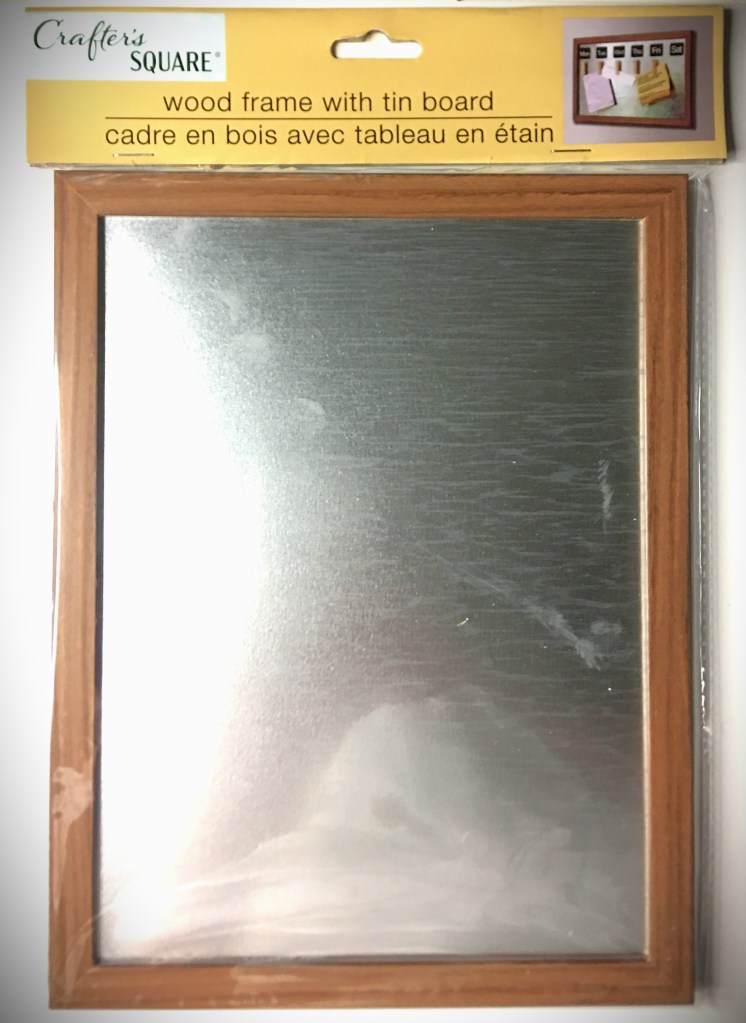
After hitting my local dollar store, I found some pieces that are going to make an inexpensive tool that doubles as home decor, all the while keeping tabs on what’s been done.

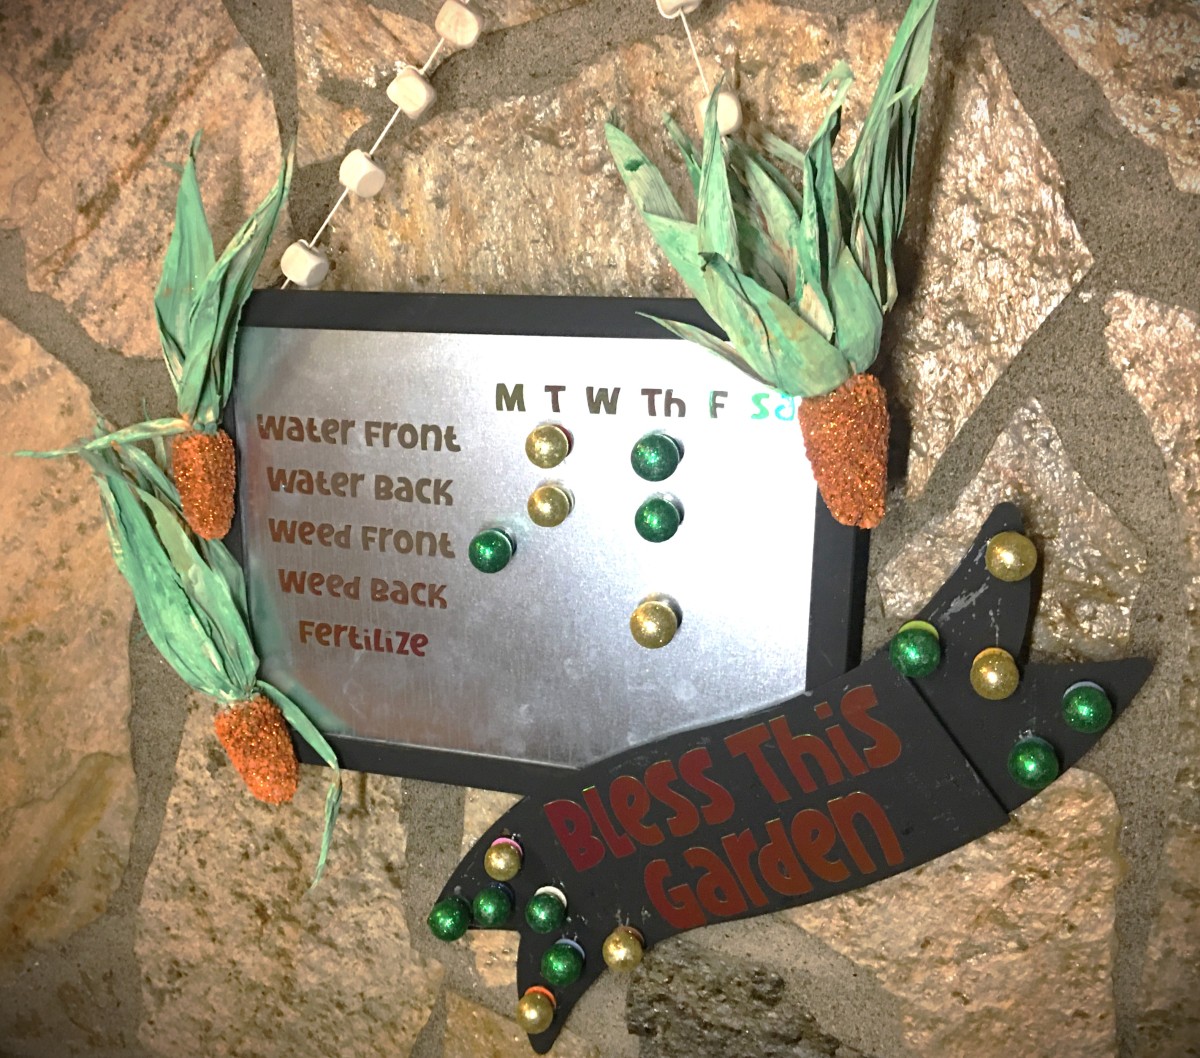
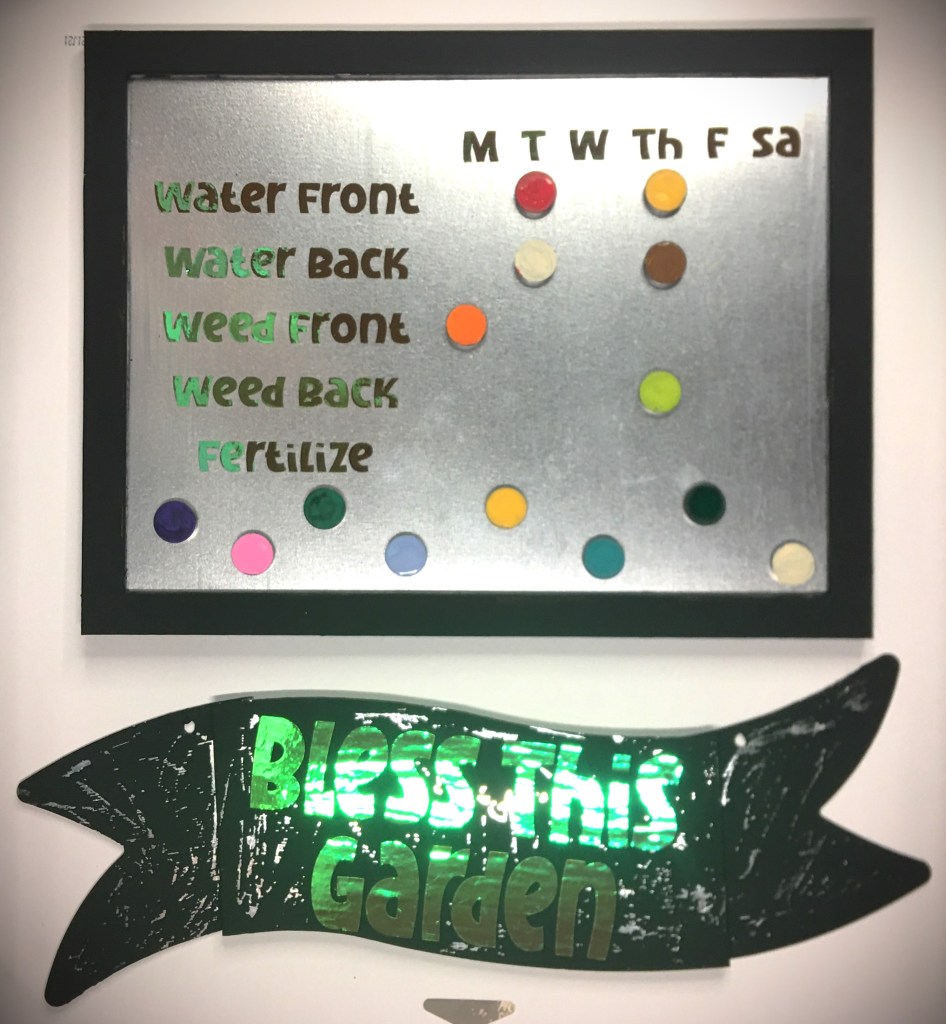
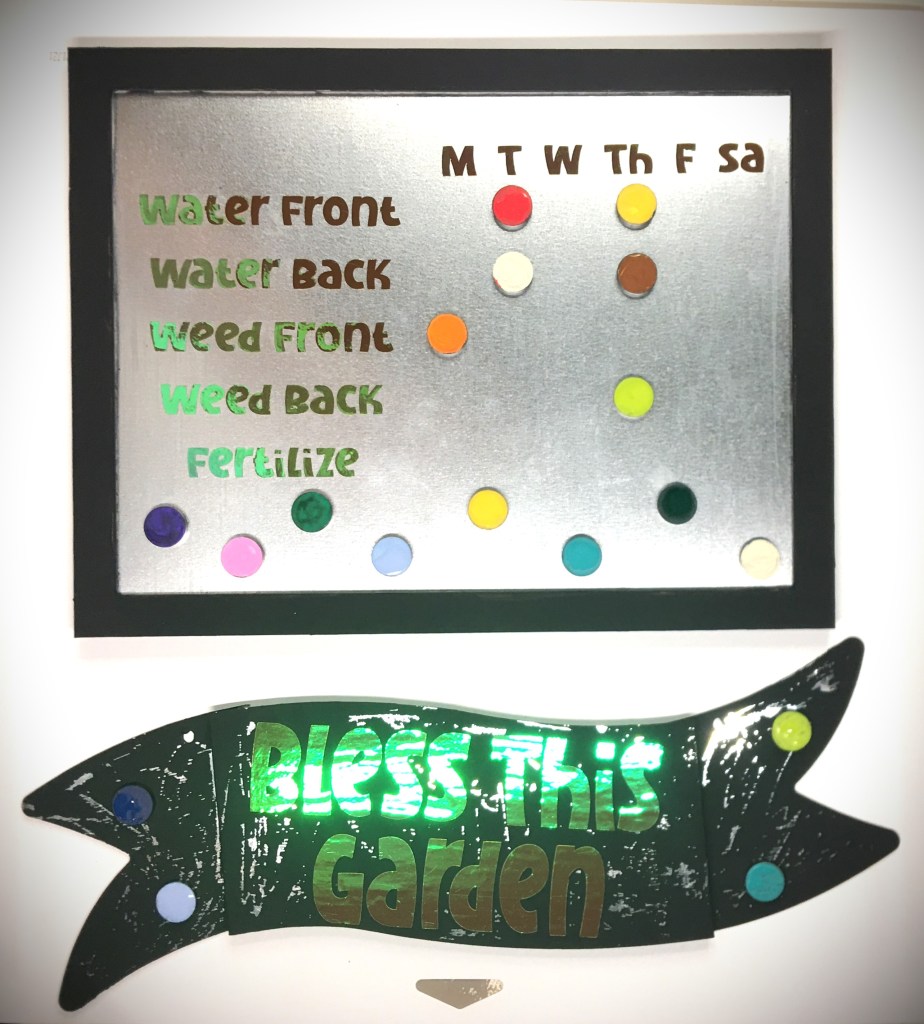
With these I decided to make a magnetic board where anyone tending the garden can quickly mark what they did.

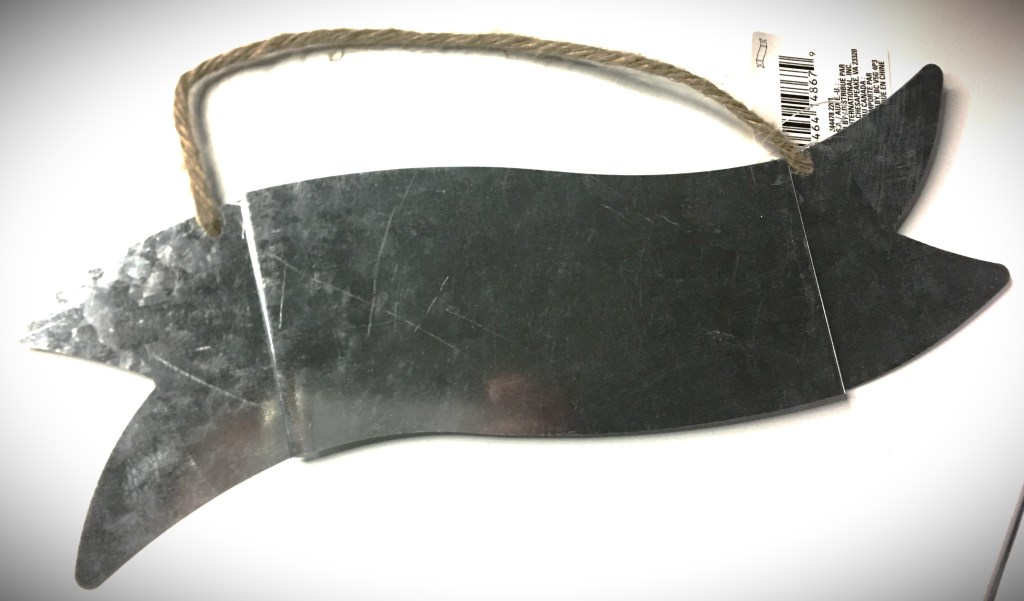
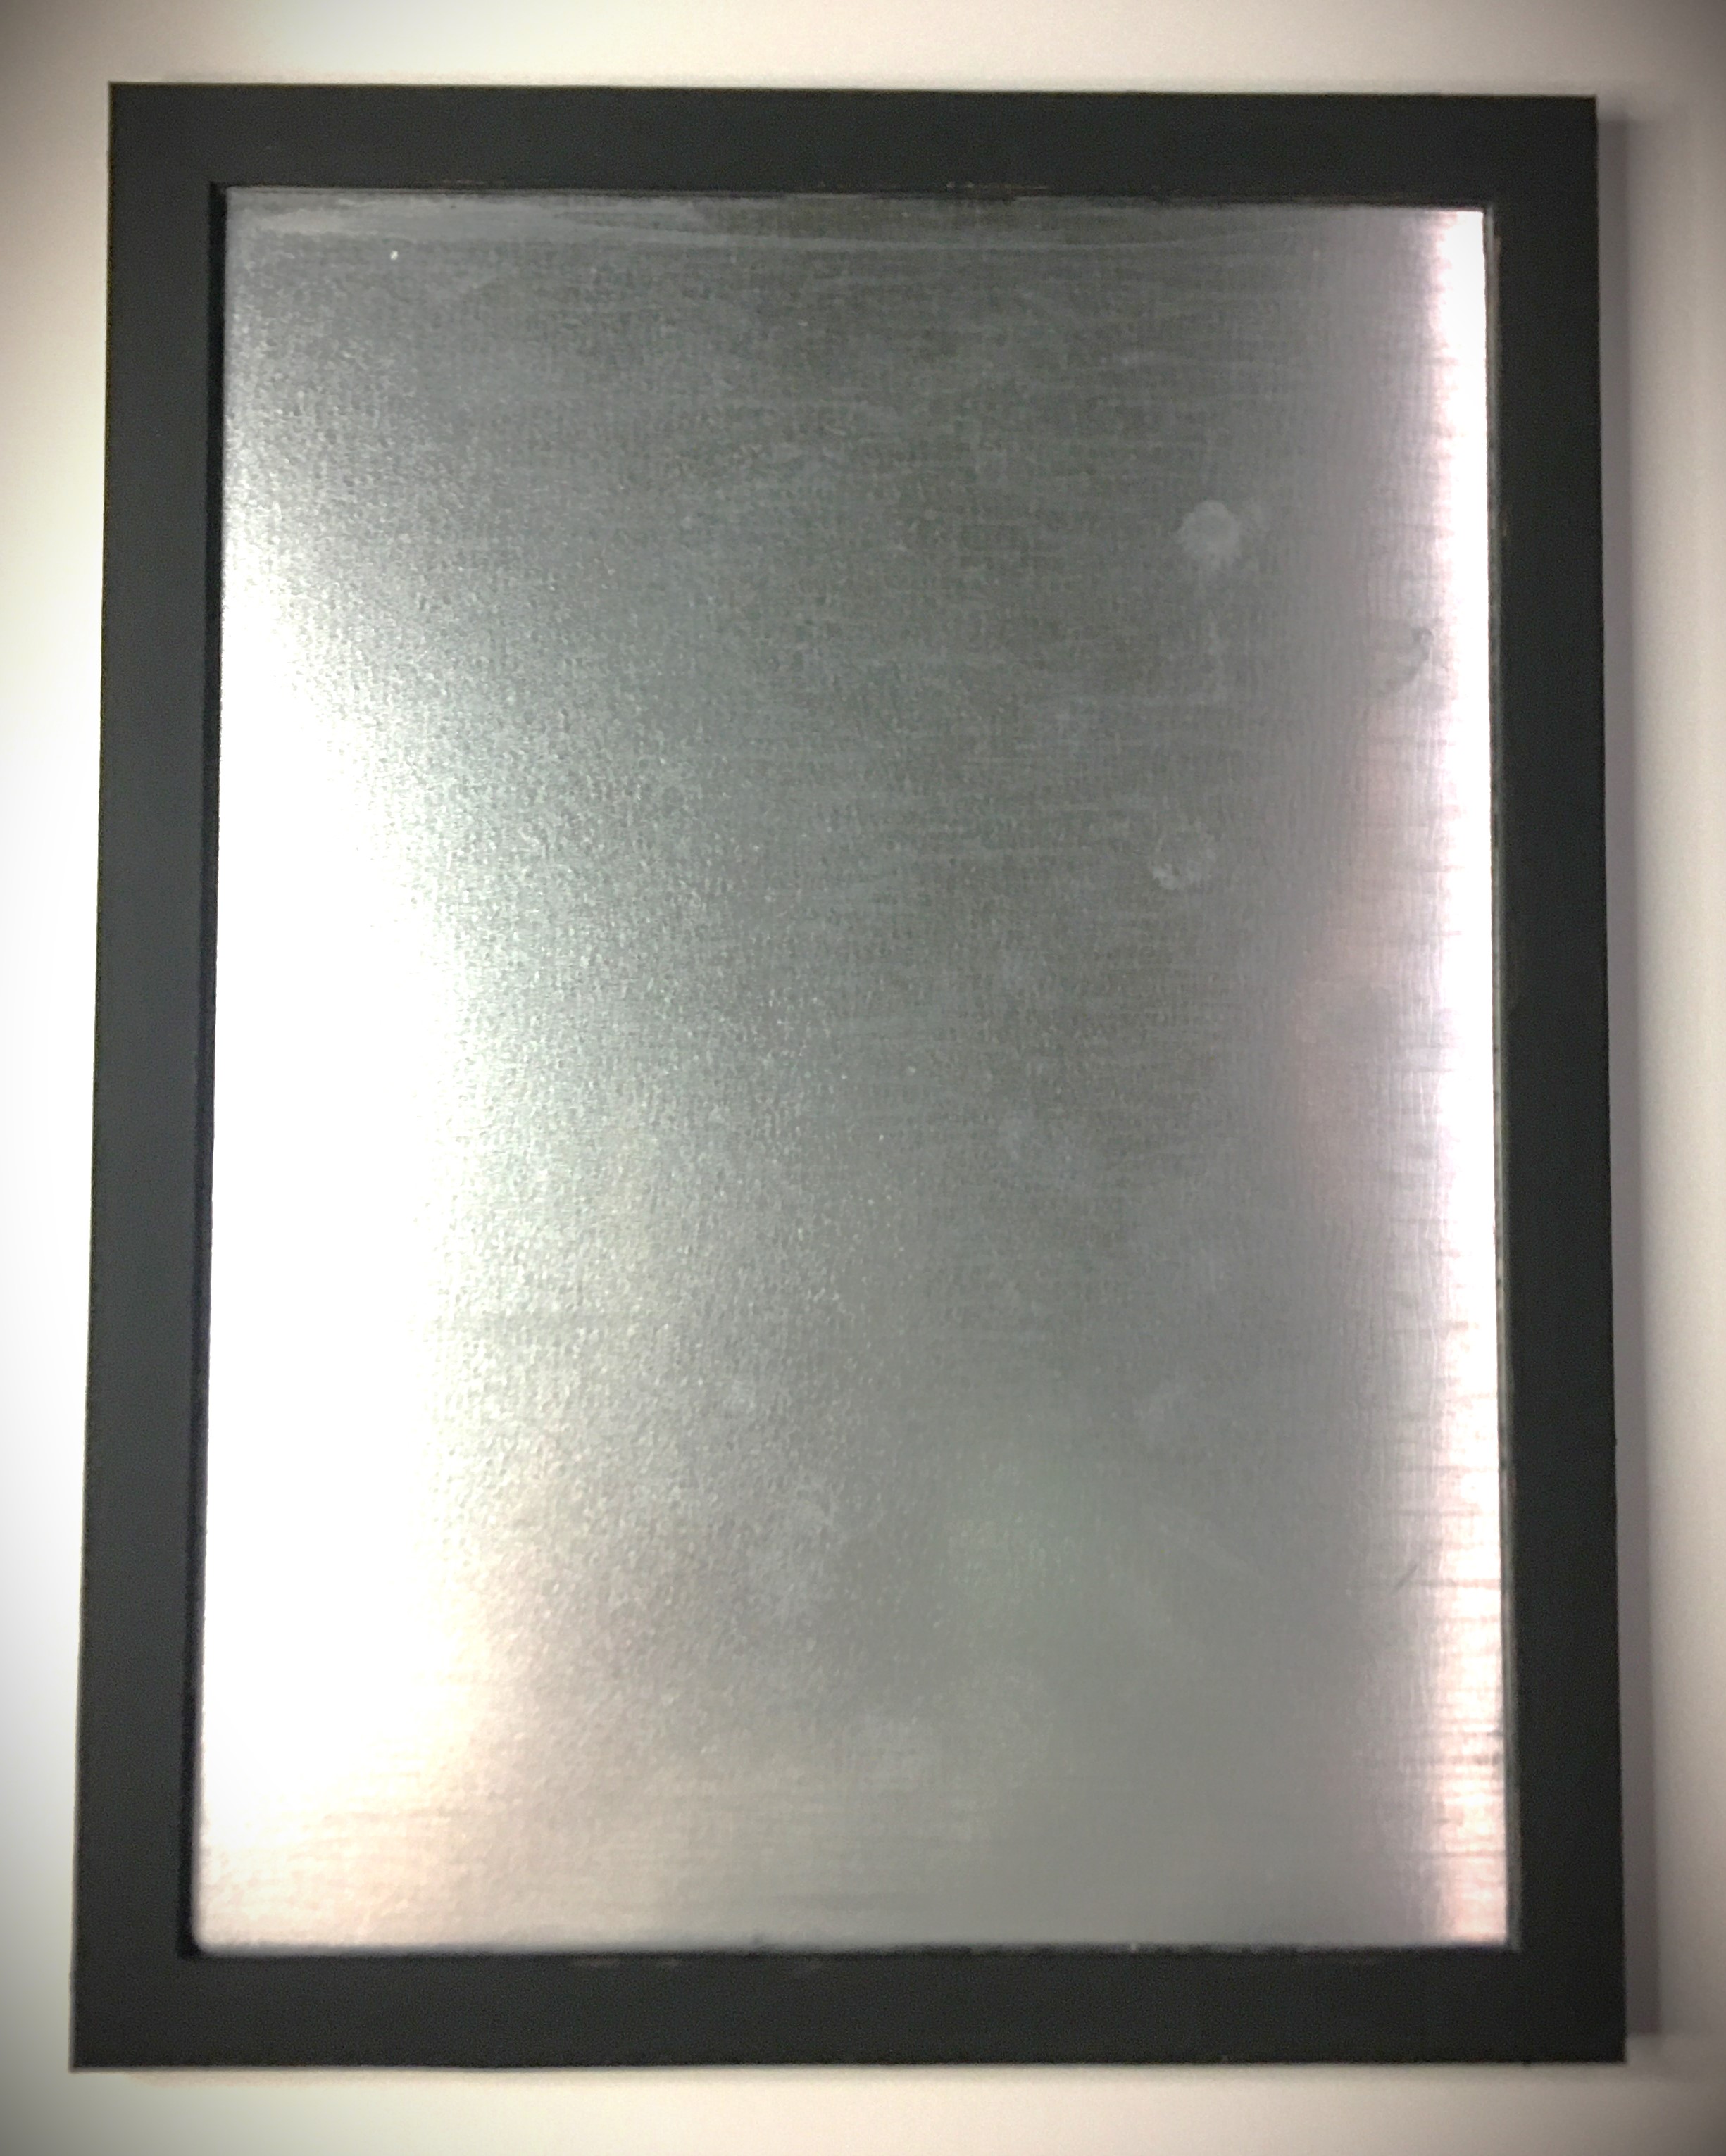
I know the galvanized finish tends to overtake everything. So with the galvanized frame and banner, everything gets lost real quick. Not to mention that the frame was a really bad fake wood. To dress all this up a bit and minimize the galvanized look, I painted the frame and banner black.

I forgot to take a picture of the banner painted in flat black chalk paint (the same paint as the frame). It looked too minimalistic for my taste, so I took the transfer tape (which I used to apply the vinyl text) and put it straight onto the paint. Some places lifted the paint quite easily. But to get the distressed look, I scratched the tape

The magnets needed a little something extra. There are so many things that could be done. I have children and they’re helping with this garden and they’ll also be marking what we do when we work, so I went into kid zone and painted the magnets with acrylic paint and did all the colors.

If you want to keep minimalistic, pick your favorite color.

Love things that sparkle, glue on gem stones or use glitter.

What about texture? Glue on fuzzy pom poms, baby pine cones, large seeds or nuts… literally whatever catches your imagination. Maybe you have a farm and want to use small farm yard figures and animals. (I wish I had these in my craft room!!!)

Something that is great about using the galvanized banner is that the extra magnets can be kept on the banner so you can add stickers, personalization, more tasks, or a note section in the blank space on the bottom.

And then while typing I decided to go a different direction.

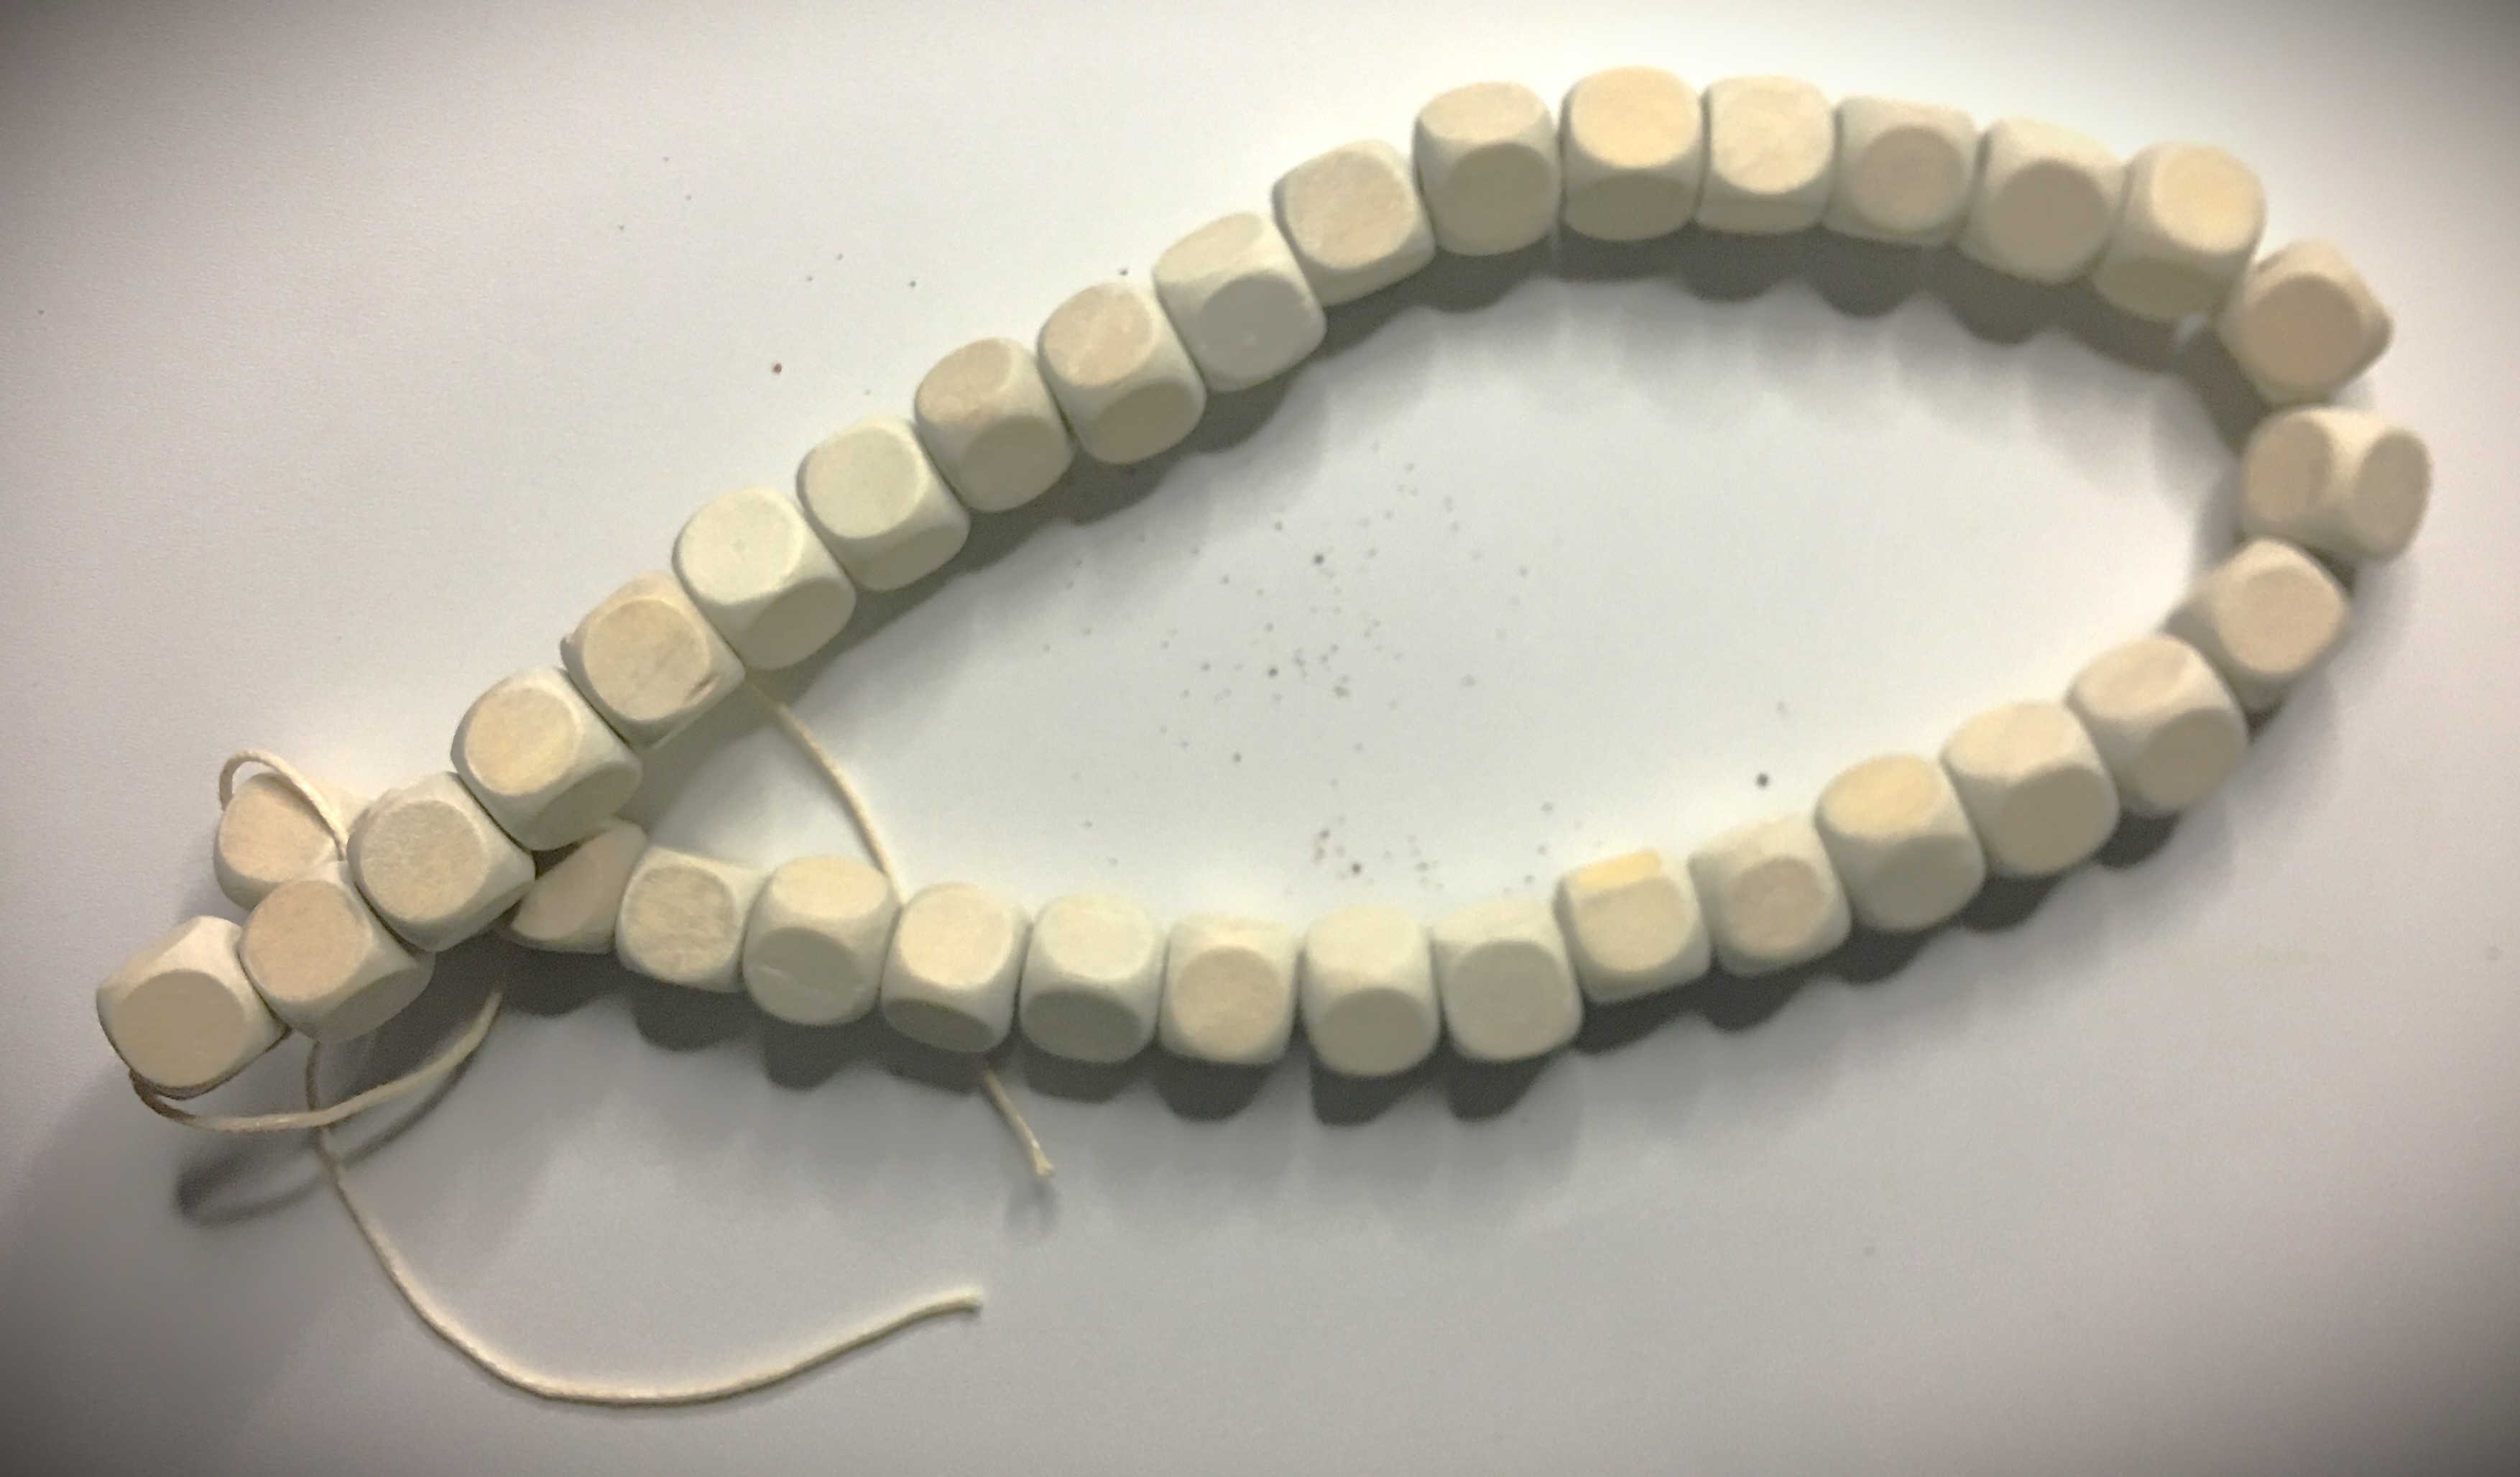
I pulled these out! Last year I made carrots out of my corn cobs. And I brought out the wooden beads from my drawer (which I also got from my local dollar store).

With the beads I removed them all from the string they came on and noted how they tied off the end bead to keep them all on the string. This “knot” that they used was how I spaced the beads further apart on the string.

Once I made those changes, the colorful “polka dots” needed to change. The gold and green glitter styrofoam balls simplified the overwhelming colors.

Even with the new modifications hanging, I’m not satisfied with the final color scheme. And sometimes that happens when you’re creating. You start building from the image you see in your head and make a change here or there and an earlier idea you loved just doesn’t work anymore.

The black isn’t working anymore. I loved the idea to begin with because it was a nice basic color that goes with where I was going to hang this. But it’s just not working anymore.

Advertisements

First thing first, I need to lighten up the banner. So I’ll be distressing it heavily so that the majority of the galvanized metal will show through. With the addition of the carrots, which obviously take the spotlight, I can bring out a lot more of that metal and the metal is not going to overtake and make everything else hide.

But before I do that, I need to decide what I’m going to do with the frame and that’s going to take a few days of looking at it to see where I want to go. At the moment, I’m leaning toward the idea of painting on white striped and creating a plaid hand painted design on it. If I go that route, I might keep the banner predominately black still and incorporate that same design element into parts of the banner.

Stay tuned to see what I finally decide!

Advertisements

And I’m going to leave you here in this moment just because sometimes the right thing is to take a step away from a project and let it tumble around in your brain. You don’t always have to have the answer right away. And you don’t always have to have things done in an hour.

Perhaps it’s convenient to have an idea presented to you in a finished state.

But I’m going to leave you here with your own thoughts. Because I know someone has that inner voice screaming, “You need to ____!”

Go ahead and leave that comment below.

Or better yet, use that idea to make your own magnetic board for your daily tasks, your children’s chore board, a classroom helper sign, your regular “Honey Do” list, or that board that I didn’t mention but you just got the idea for.

And when you’re finished, send me a picture so that I can see what you came up with.

Happy Crafting!


Want to have the cut file for Bless This Garden, click here.

Processing…
Success! You're on the list.

Leave a comment

Advertisements

Desk Tree

This year is an interesting year to go into for Christmas. For some families, they are facing a tight budget and want to still have some wow while still meeting other necessities. Other families have taken the last few years to simplify their homes with a minimalistic look. And yet there are other people you will gift this year who are limited by space, be it home or office.

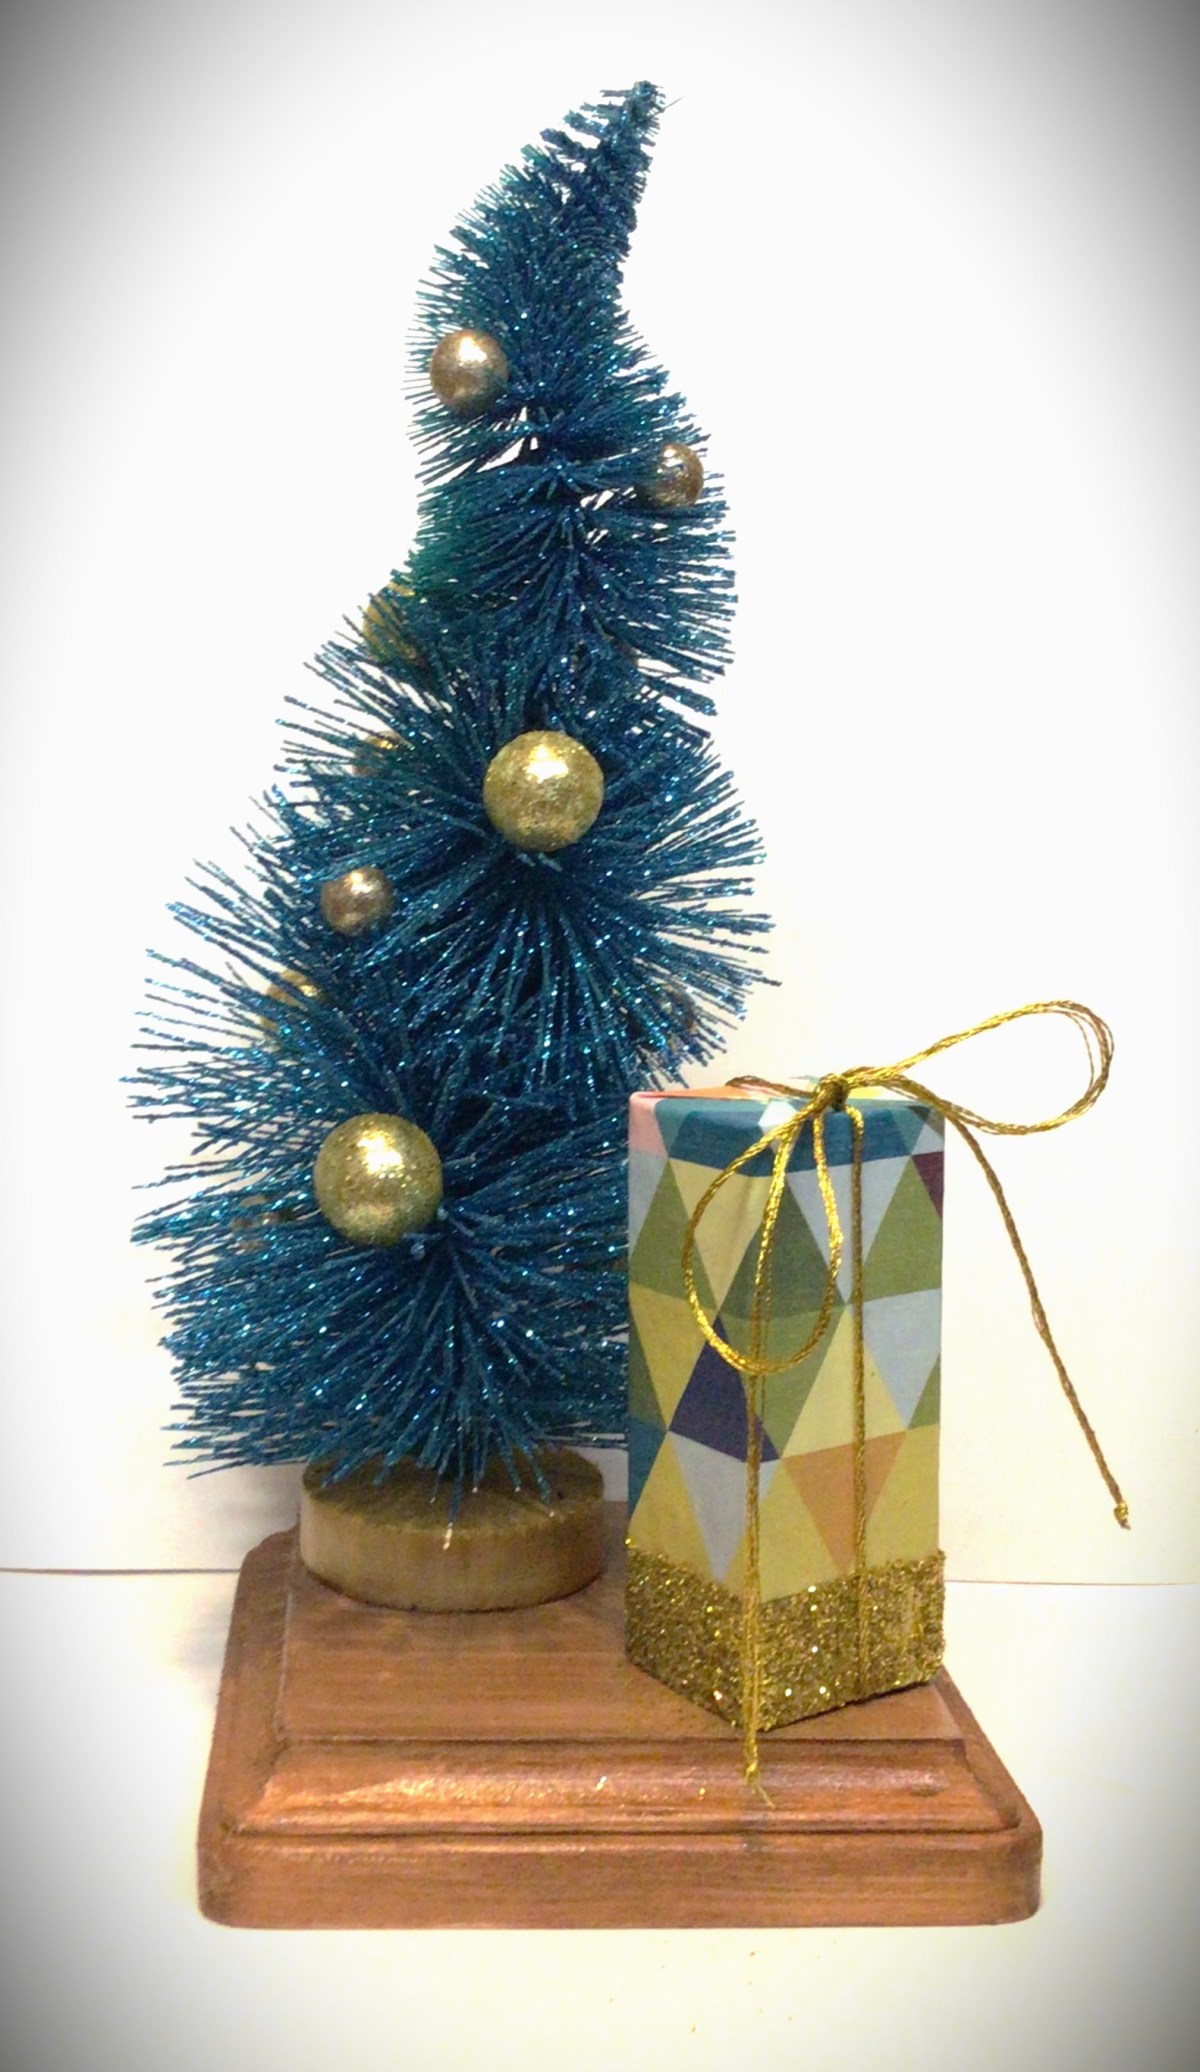
The first gift I want to present to you this year is the Desk Tree.

The beauty of the Desk Tree is that it is minimalistic in design and fits into small spaces at the same time. Not only that, but it is a blank canvas for other ideas that you already have in place for someone on your list. But I’ll come back to all these possibilities in a few moments. As well as the announcement of a special treat!

Let’s Make a Desk Tree

The fundamental components are the base, tree, and present. Everything else is completely customizable and based off of what you can find in your local shops or what you already have in your craft room. This time the only thing I purchased recently was the tree.

Other supplies I had on hand:

  • acrylic paint
  • paintbrushes
  • wood glue
  • Mod Podge
  • hot glue gun
  • clamps
  • craft paper
  • glitter
  • gold embroidery floss
  • styrofoam balls (different sizes)

Prep All Wood Pieces

I didn’t choose to sand the wood, because I wanted to keep rough surfaces for the wood glue to adhere to well. In fact, where I glued two pieces of wood together I roughed it up by scratching into the wood with a wood carving blade.

Option: you can paint the base before or after you glue on your tree. For the example in this set of photos, I glued the tree on first and worked around it. For the other copies I made, I painted the base first and glued on the tree afterward. The disadvantage of adding the tree first is that you have to have a steady hand as you paint around the tree. The disadvantage of adding the tree after the base is completely finished is that you run the risk of scratching the “floor finish” if you rough up the spot where you will add the tree.

Paint the Base

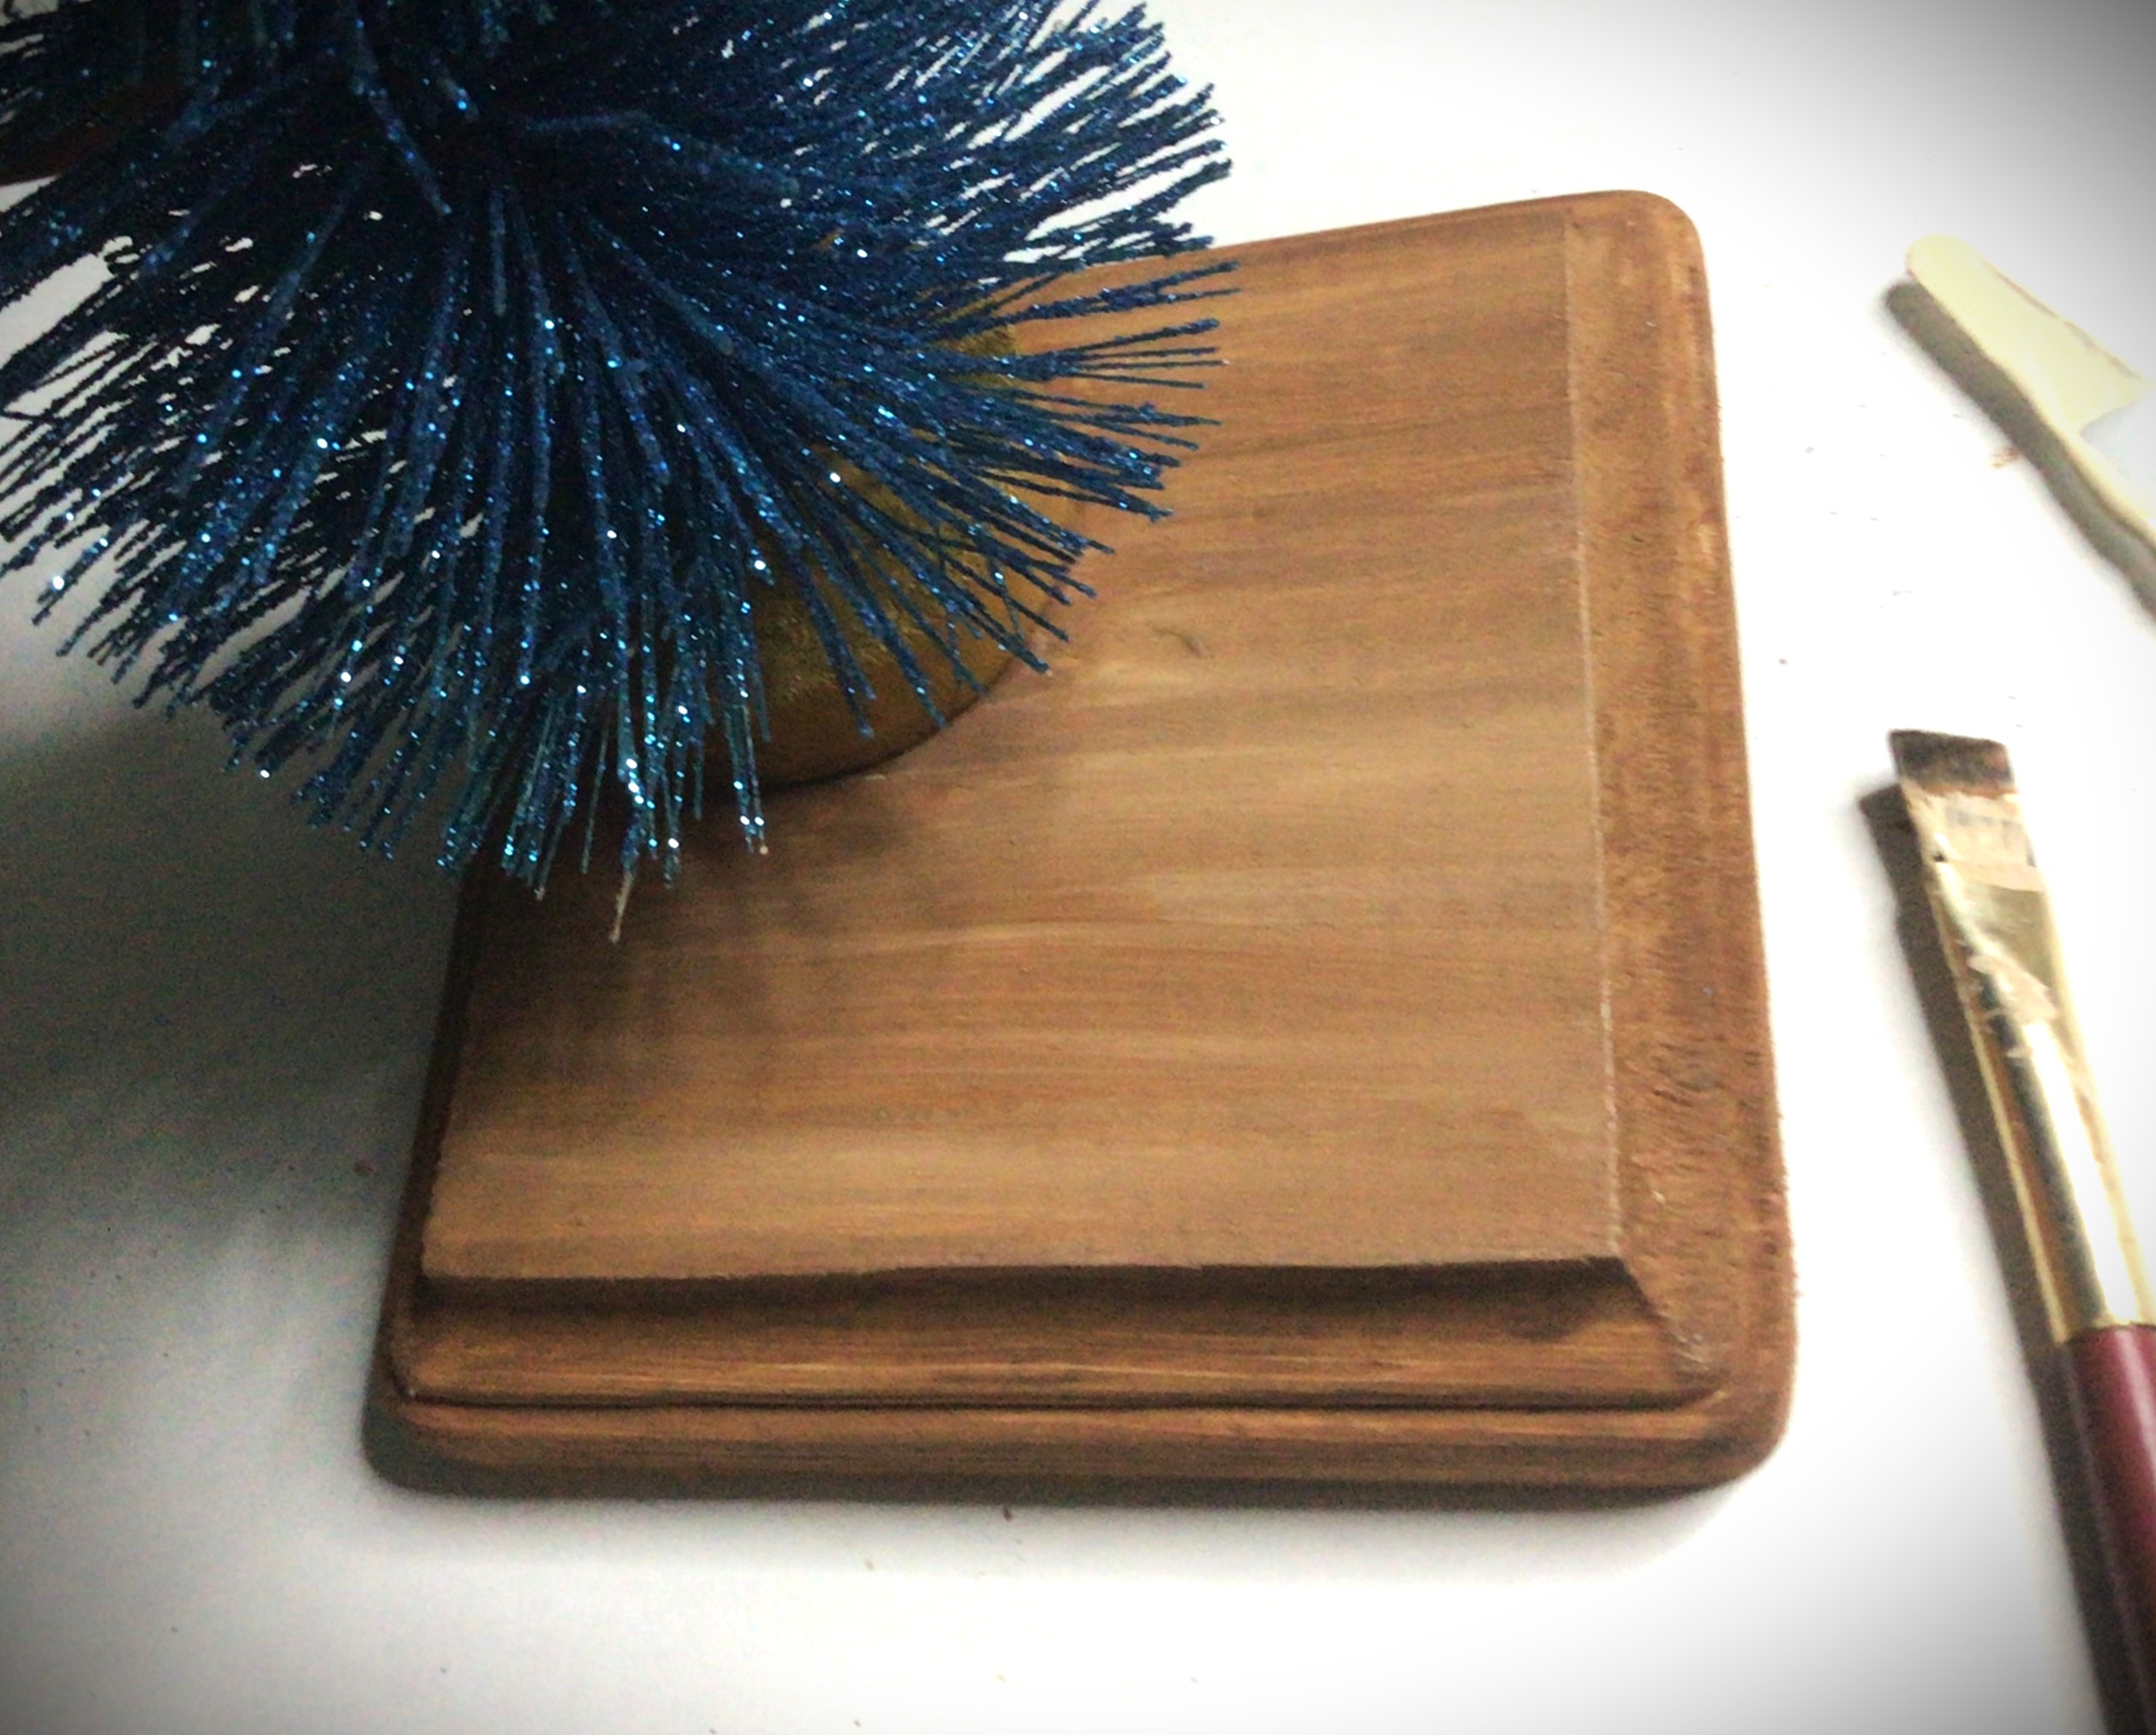
I could have painted the tree base before gluing it on. But let’s be honest, I didn’t think about it until later. So just know that it is easier to paint the tree base before you glue it, but entirely possible to paint it while on the base. Just remember to paint the tree base before you paint the floor. Because I chose to go with gold accent to my teal tree, the gold tree base paint doesn’t ruin or effect the floor at all since it blends in with brown. This is another good reason to paint the tree base first. If your paint brush slips, it’s not going to throw off your paint job. And as you can see here, in the first picture, I cleaned the gold off my brush by just painting it on the “floor” going with the grain of the wood.

When you paint the “floor”, paint in the direction of the wood. This allows you to use thin coats of paint (making it a faster dry time) and if the wood grains show through, it adds to your paint job instead of competing with it.

Picture 2 I took to show you that you have the option of leaving any decorative edges of your wood different if your creativity is taking you in a different direction.

Picture 3 shows you the direction that I went, changing the color of the pine to more of a mahogany wood color.

Option: Perhaps you don’t want to paint the base to another wood color finish, but have a wood stain in your garage. Go ahead and use the stain!

Stylize Your Tree Set

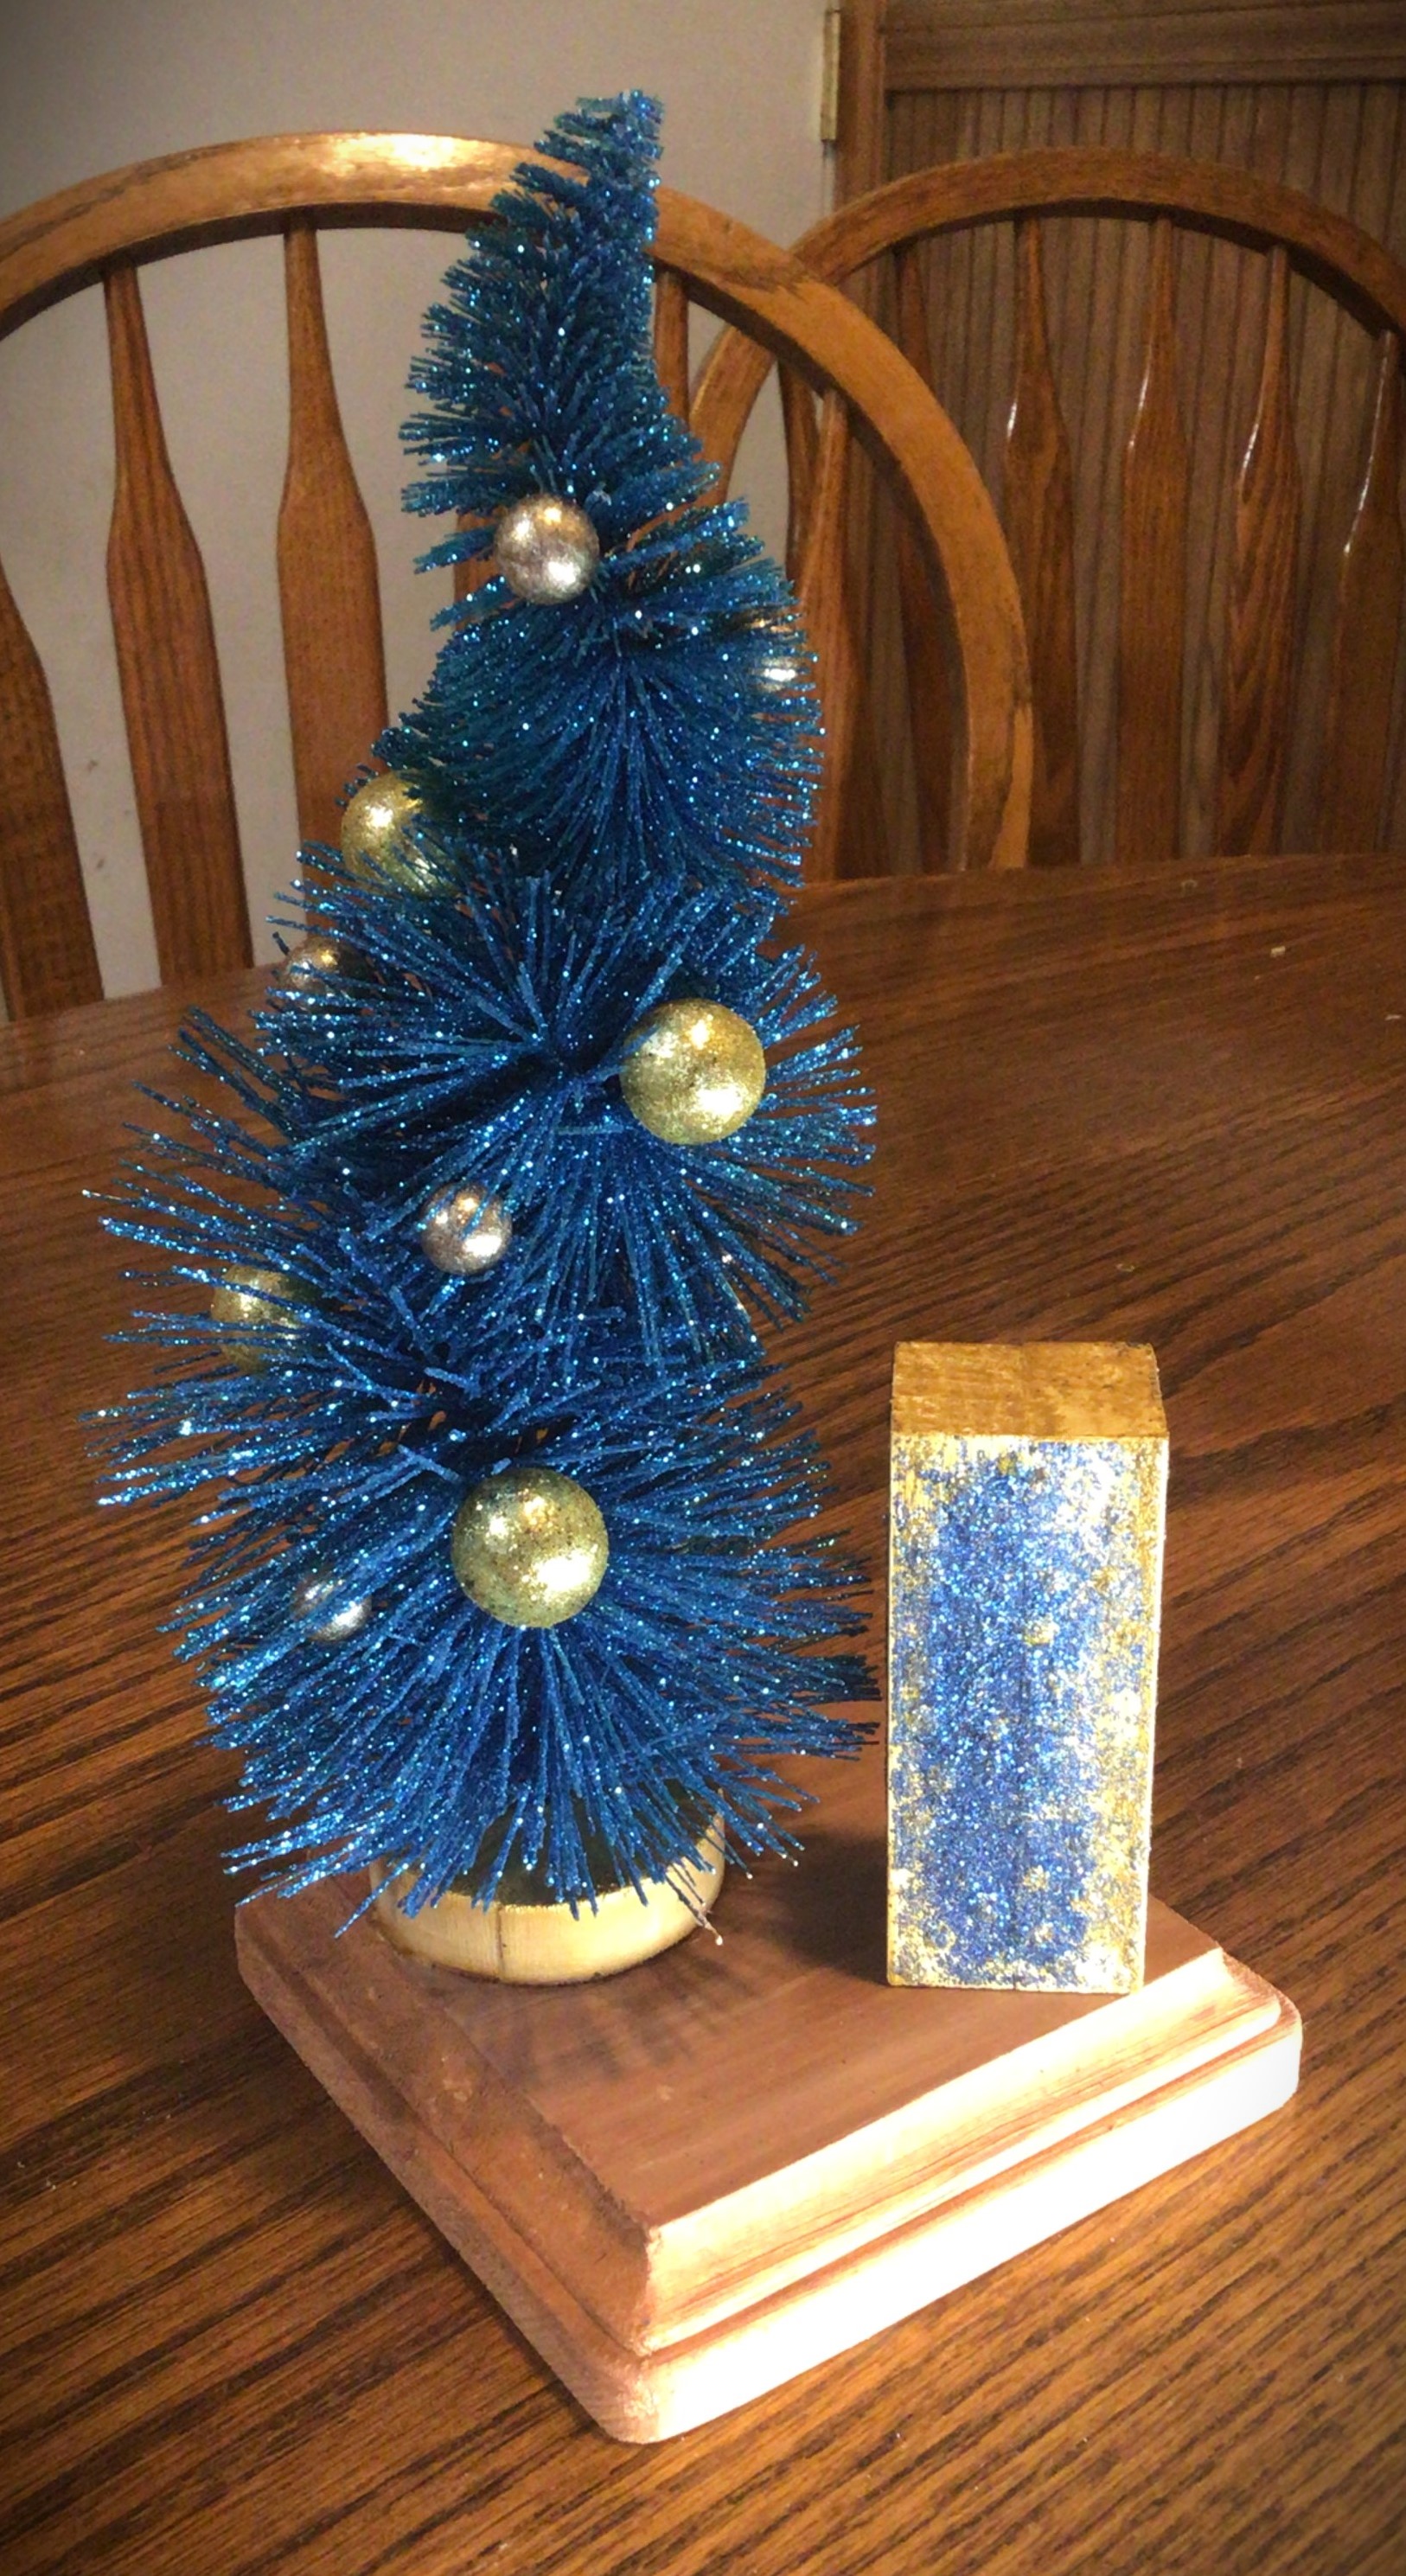
Sometimes you have to pause and put things together to see what direction you want to go with. Originally I had planned on painting my “present” and then add dots of glitter to make my own “wrapping paper”. Let’s just say that my polka dots looked like my preschooler made them. It wasn’t the vibe I was going for so I present to you my second option, glitter “wrapping paper”. For a different project, I might choose this option, but it wasn’t working for me either.

While I was staring at the teal tree with the “ornaments” that I put on it I asked myself what it was that attracted me to this tree. And the answer was the playful was that geometry was used. And then it hit me! I had geometric crafting paper.

As you can see here, the geometric triangles brought symmetry to a very asymmetric and quirky tree. And the crafting paper just made my job of wrapping this “present” so much easier.

Wrap the Present

This is simpler than actually wrapping your Christmas presents because you get to use glue!

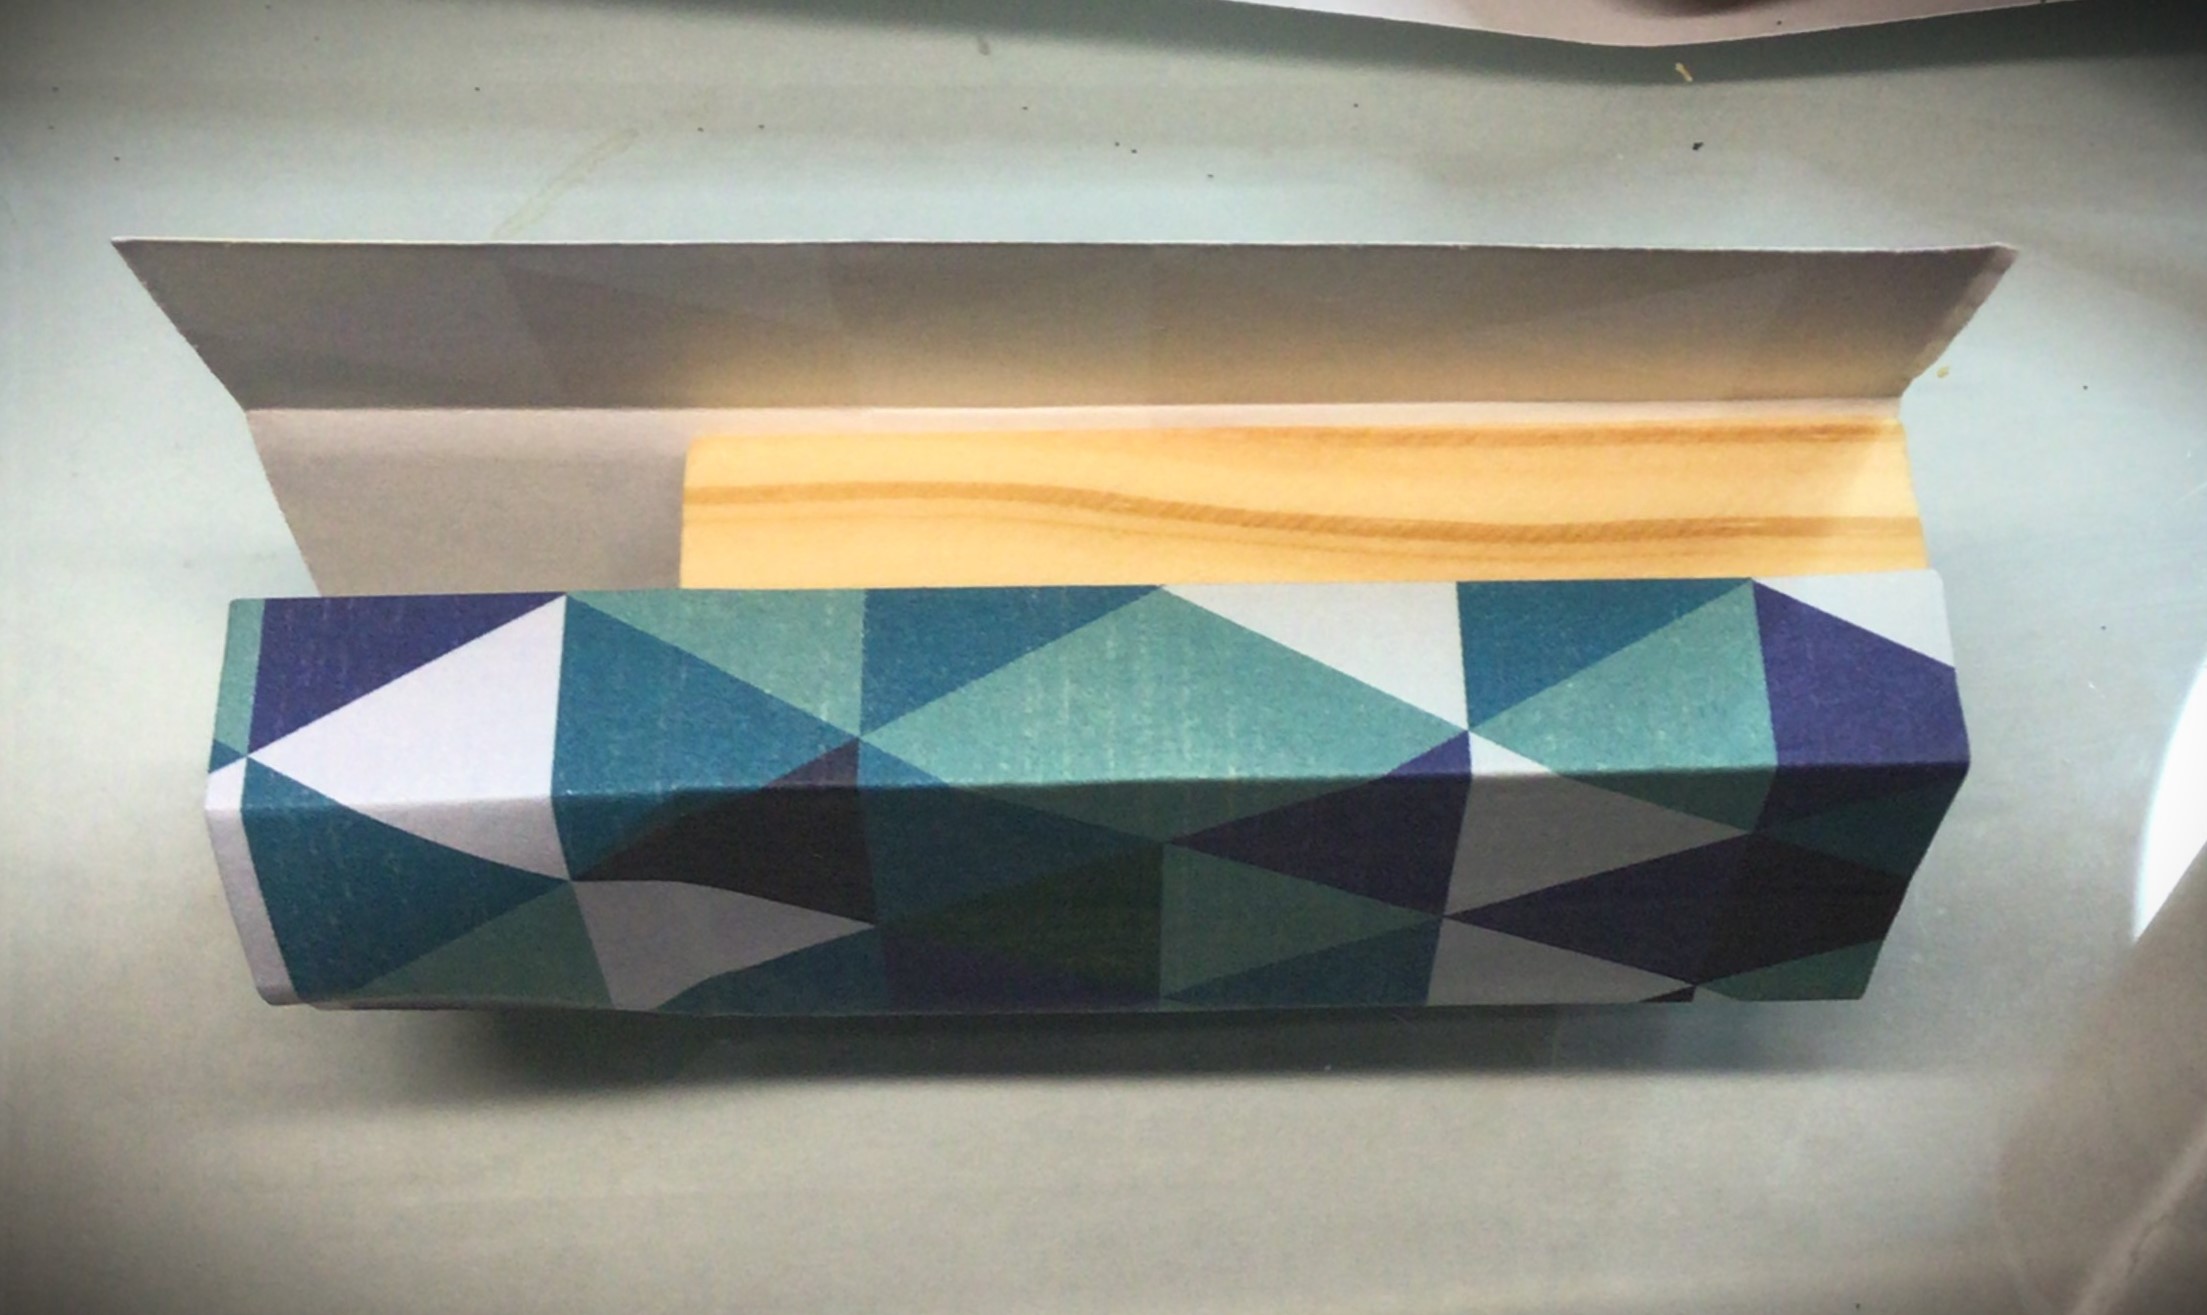
Once I trimmed my paper (leaving the bottom exposed, with enough left over to wrap the top), I created the folds in my paper before gluing it down. The one thing I hate about gluing down craft paper is that if you have to lift it to reposition it, the paper doesn’t look as nice. So to avoid this pit fall, I made sure to make all my creases first. This allowed me to put the edge of the wood block in the crease and line up before laying down the Mod Podge.

Plus there is the added bonus of knowing where your finishing end will land. In this case, I started my first crease by thinking of this blind end finish and placing the paper edge on the corner of a short end. By the end of my creasing job, the tail end had the paper over lapping around halfway on that same small end.

Start by gluing the paper down with this small end tail.

Work one end at a time and smooth out the paper as you lay it down. This will prevent the paper from slipping, having bubbles, or making creases as you go around your wood block.

When you come to the end, your last flap will be the section that lines up with the short end of the wood block. Apply glue to both the wood block and on top of the paper that you already glued down. The “present” how has a hidden seam where you don’t have to worry about hiding a back side of the present.

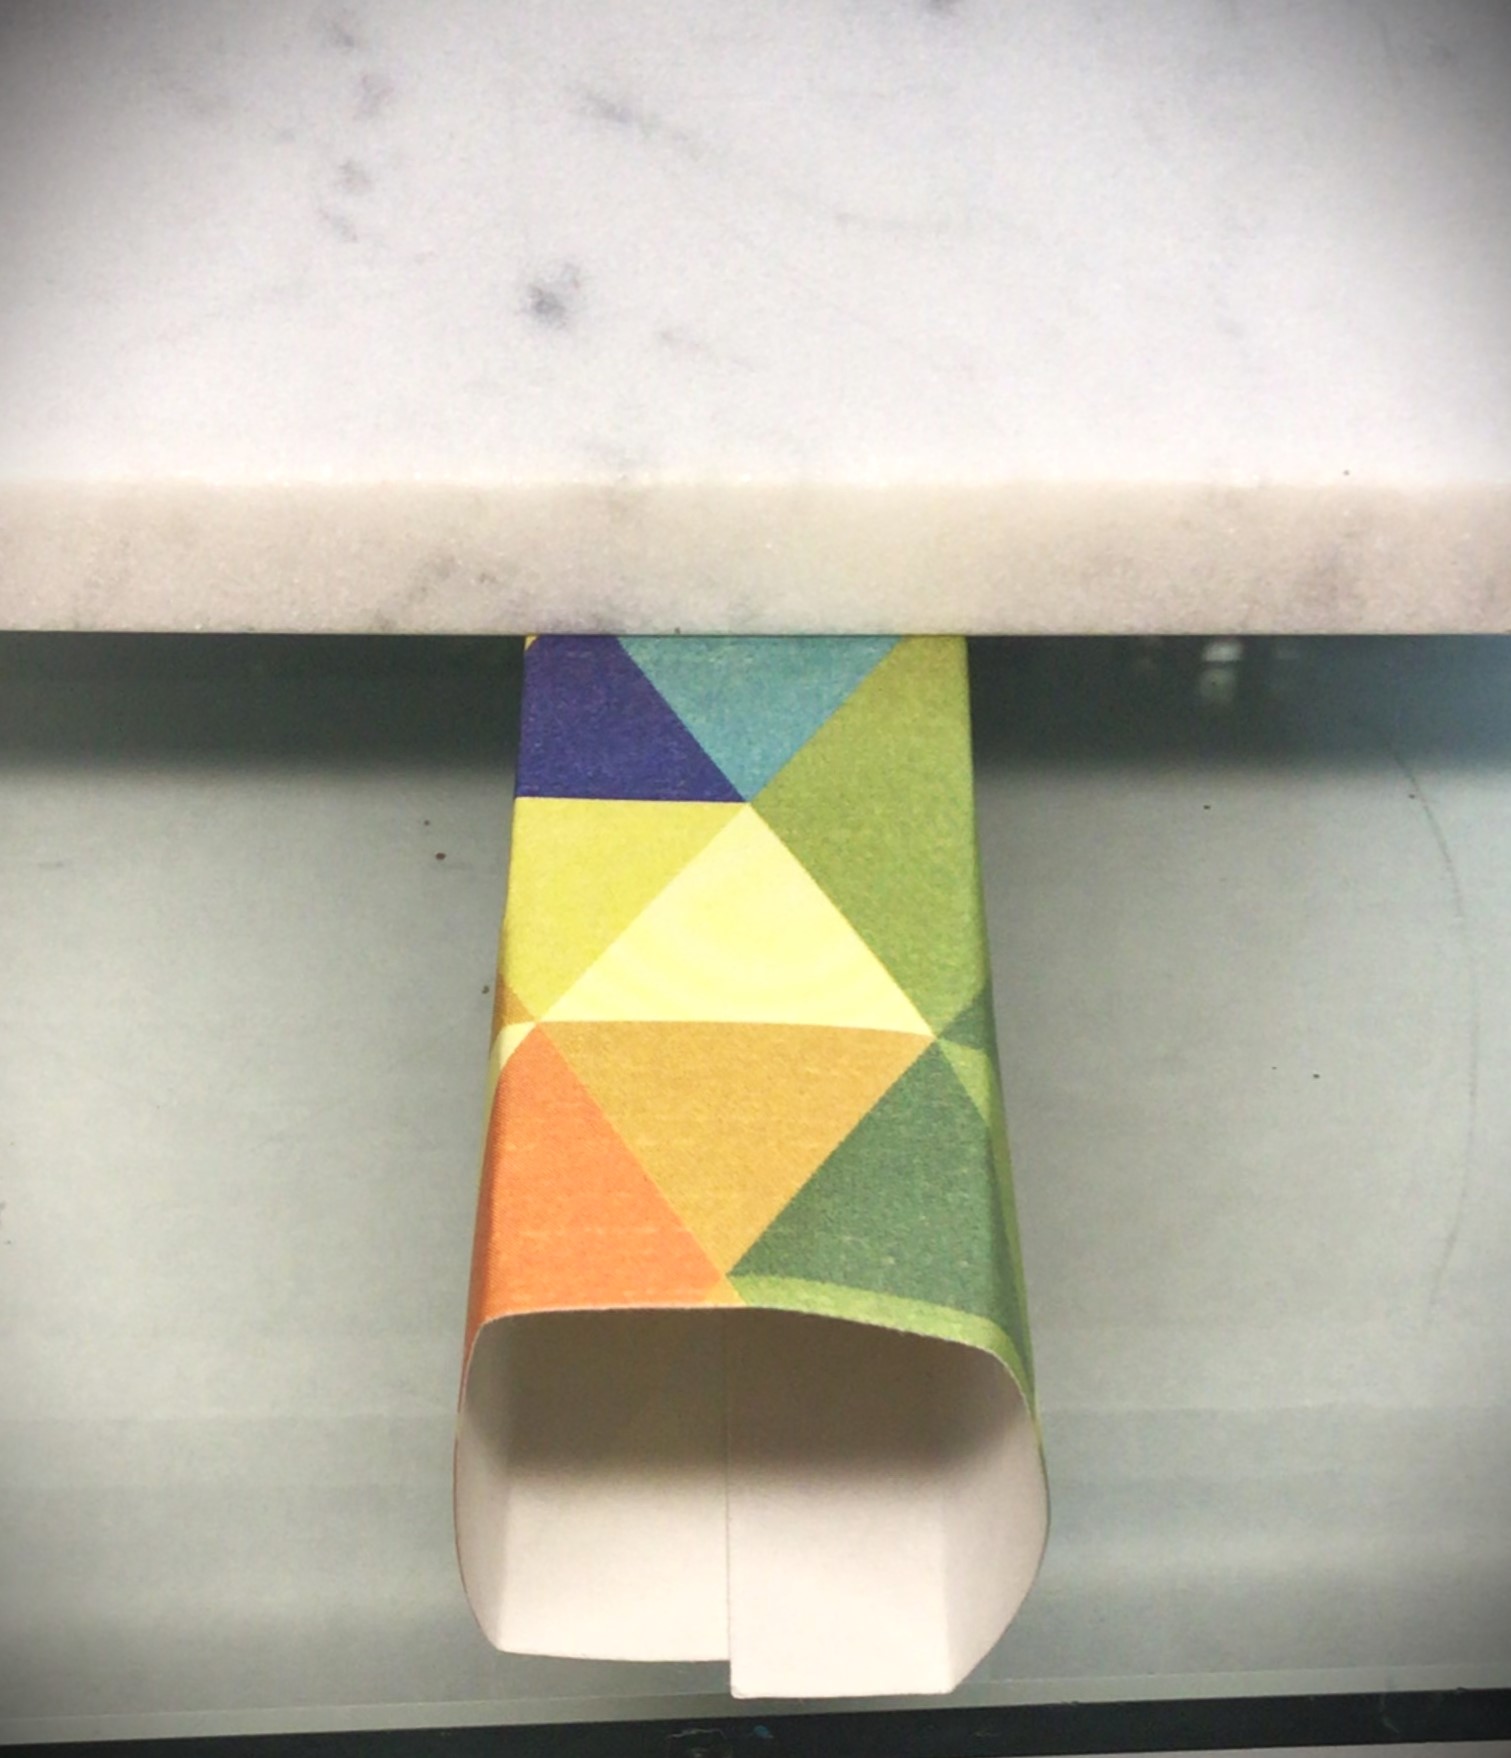
Put this seam side of the “present” table side down and place a weight on top of the block. This frees your hands up to do another step of the project while the glue dries, keeps the paper from lifting or wrinkling.

Once this seam side is dry, you are able to know wrap the top of the wood block. For this step, pre-creasing will also make this step easier.

Fold the seam side of the paper down first. Then fold the other short side of the block down next. Finally fold the long sides down.

Reopen the paper and apply Mod Podge down on the full top of the wood block. Fold down the seam side. Apply Mod Podge to the paper of the other short side and fold it down. Then put Mod Podge on the paper of the long side flaps and press them down in the order that you folded them.

When you “present” top is wrapped, you will want to add a weight to the top until the glue dries. (This once again frees your hands up to work on something else of the project.)

You will probably find that you need to put the “present” in between two items to keep it from falling over. You will see that I put it between a craft bin and one of my bottles of paint

Finishing Touches

In order to tie in the glitter from the teal tree and the pain finish of the craft paper, I decided to add some gold glitter trim to the bottom of the “present”.

TIP: To keep the glitter from shedding, consider applying a top coat of something. It’s whatever you have on hand. If you have some glitter glue, that seals in the glitter you just applied without adding a dull layer over the sparkle.

Once the glitter dried, I opted to add an embroidery floss ribbon. All my ribbons were disproportionate to the present. And I didn’t have any tiny premade bows to stick on top. So if your craft room also is limited in tiny items, consider things like embroider floss, thin hemp twine, baker’s twine, or even sewing thread wrapped around a few times.

Depending on what you use to finish off your present will determine how you attach your present to the wood base. Ideally, you would want to add the present with wood glue. In this instance, wood glue would have created more of a mess to clean up than hot glue. I placed hot glue on either side of the floss so that the glue would balance out the thickness of the floss and make the present secure.

Gifting Options

Desk Tree is perfect as is for gift exchanges and teacher’s gifts. But it’s even better when paired up with the little something extra that just wasn’t enough on its own.

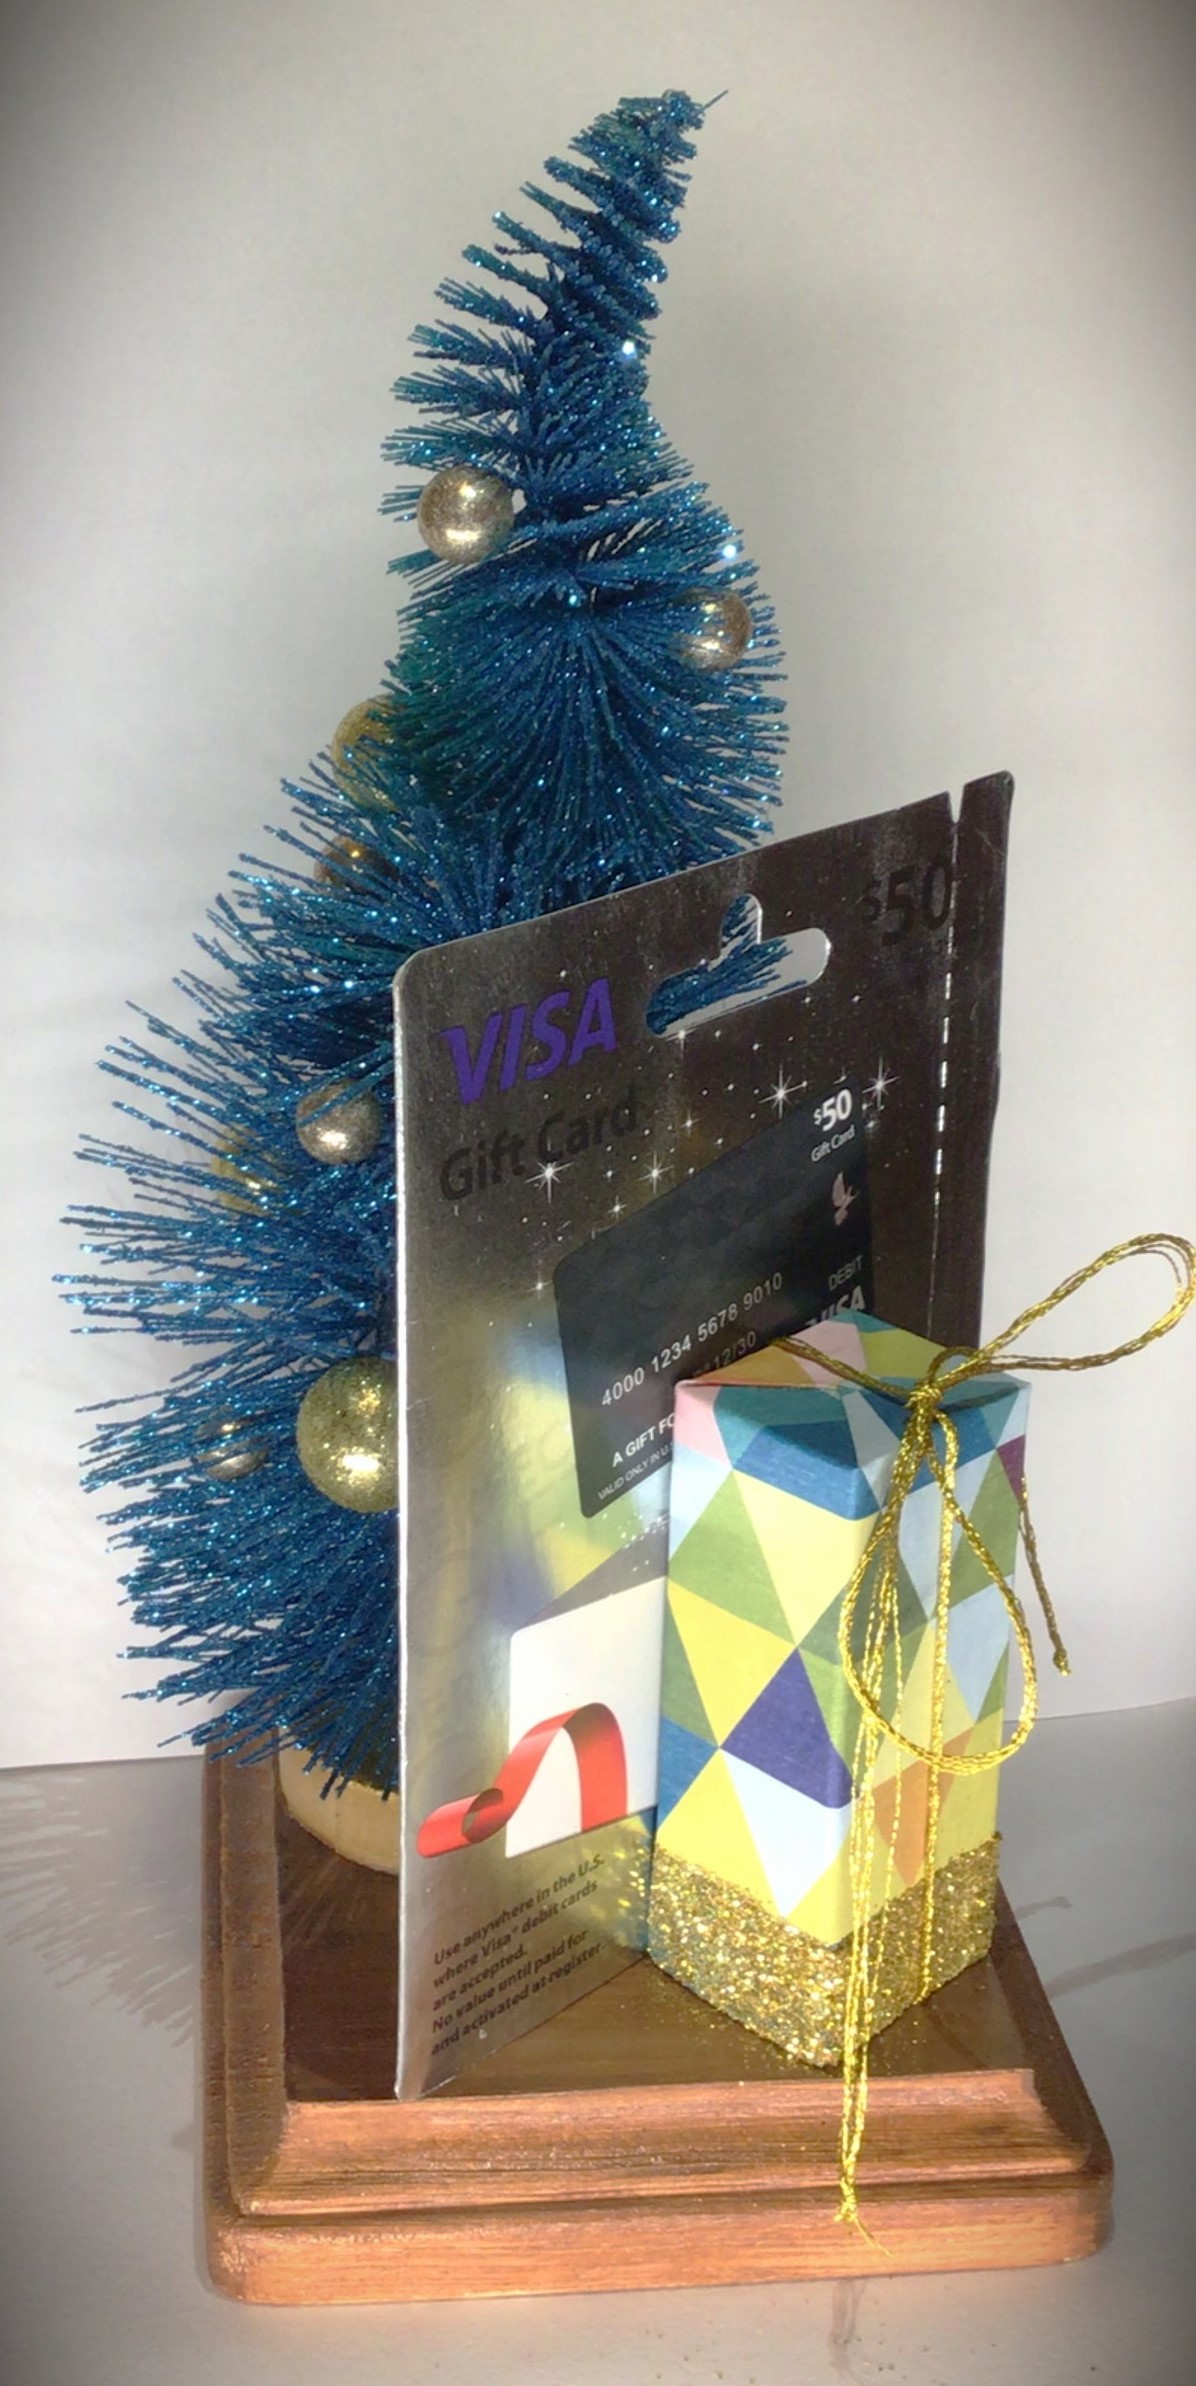
Here are two examples of adding a little something extra to a gift that can still be brought out year after year for holiday decor. Match this up with that perfect scented candle that you found. Or maybe that person you gifting only wanted a gift card. This is a festive way of dressing up a gift card!

No matter how you decide to gift this Desk Tree, you will not go wrong with this project!

SPECIAL ANNOUNCEMENT!!!

Starting with Desk Tree, I’m going to make Limited Editions available of crafts that you see in my blog.

There are many people who would rather “I can make that!” But there are others who are not so crafty inclined. I don’t want you to feel left out on ideas that you love.

For right now, shipping is only going to be made available for the United States. And all purchases are only through my website, Order Here. I will keep you updated on any changes as they become available.

If you have any questions about Limited Editions, please do not hesitate to reach out to me at info@pacificnorthwesteventdesign.com or here:

Items used in the making of this project

These links are affiliate links to products used in this project. We may receive a commission for purchases made through these links, but at no extra cost to you.

These are generic Jenga blocks that are great for crafting on a budget when your local dollar store is out of stock.

Last Christmas, my husband put these Dewalt clamps in my stocking for crafting. And they are definitely one of my favorite project tools.

At the time of this posting, this Mod Podge is on sale. There are many varieties and finishes, but I wanted to send you to the sale link.

I originally bought these Marble Tiles for working with HTV. But I’ve found that they have had other uses in my craft room, such as a weight for holding certain projects down.

Processing…
Success! You're on the list.

Leave a comment