
It doesn’t matter how many years you’ve been crafting and DIYing. You will fail. I fail.
What you do with failure determines what your future will look like. What your end product will look like. You can finish in a failure. Or you can take an option and end on a different note.
In fact, here is my most recent fail and how I pulled out of it.
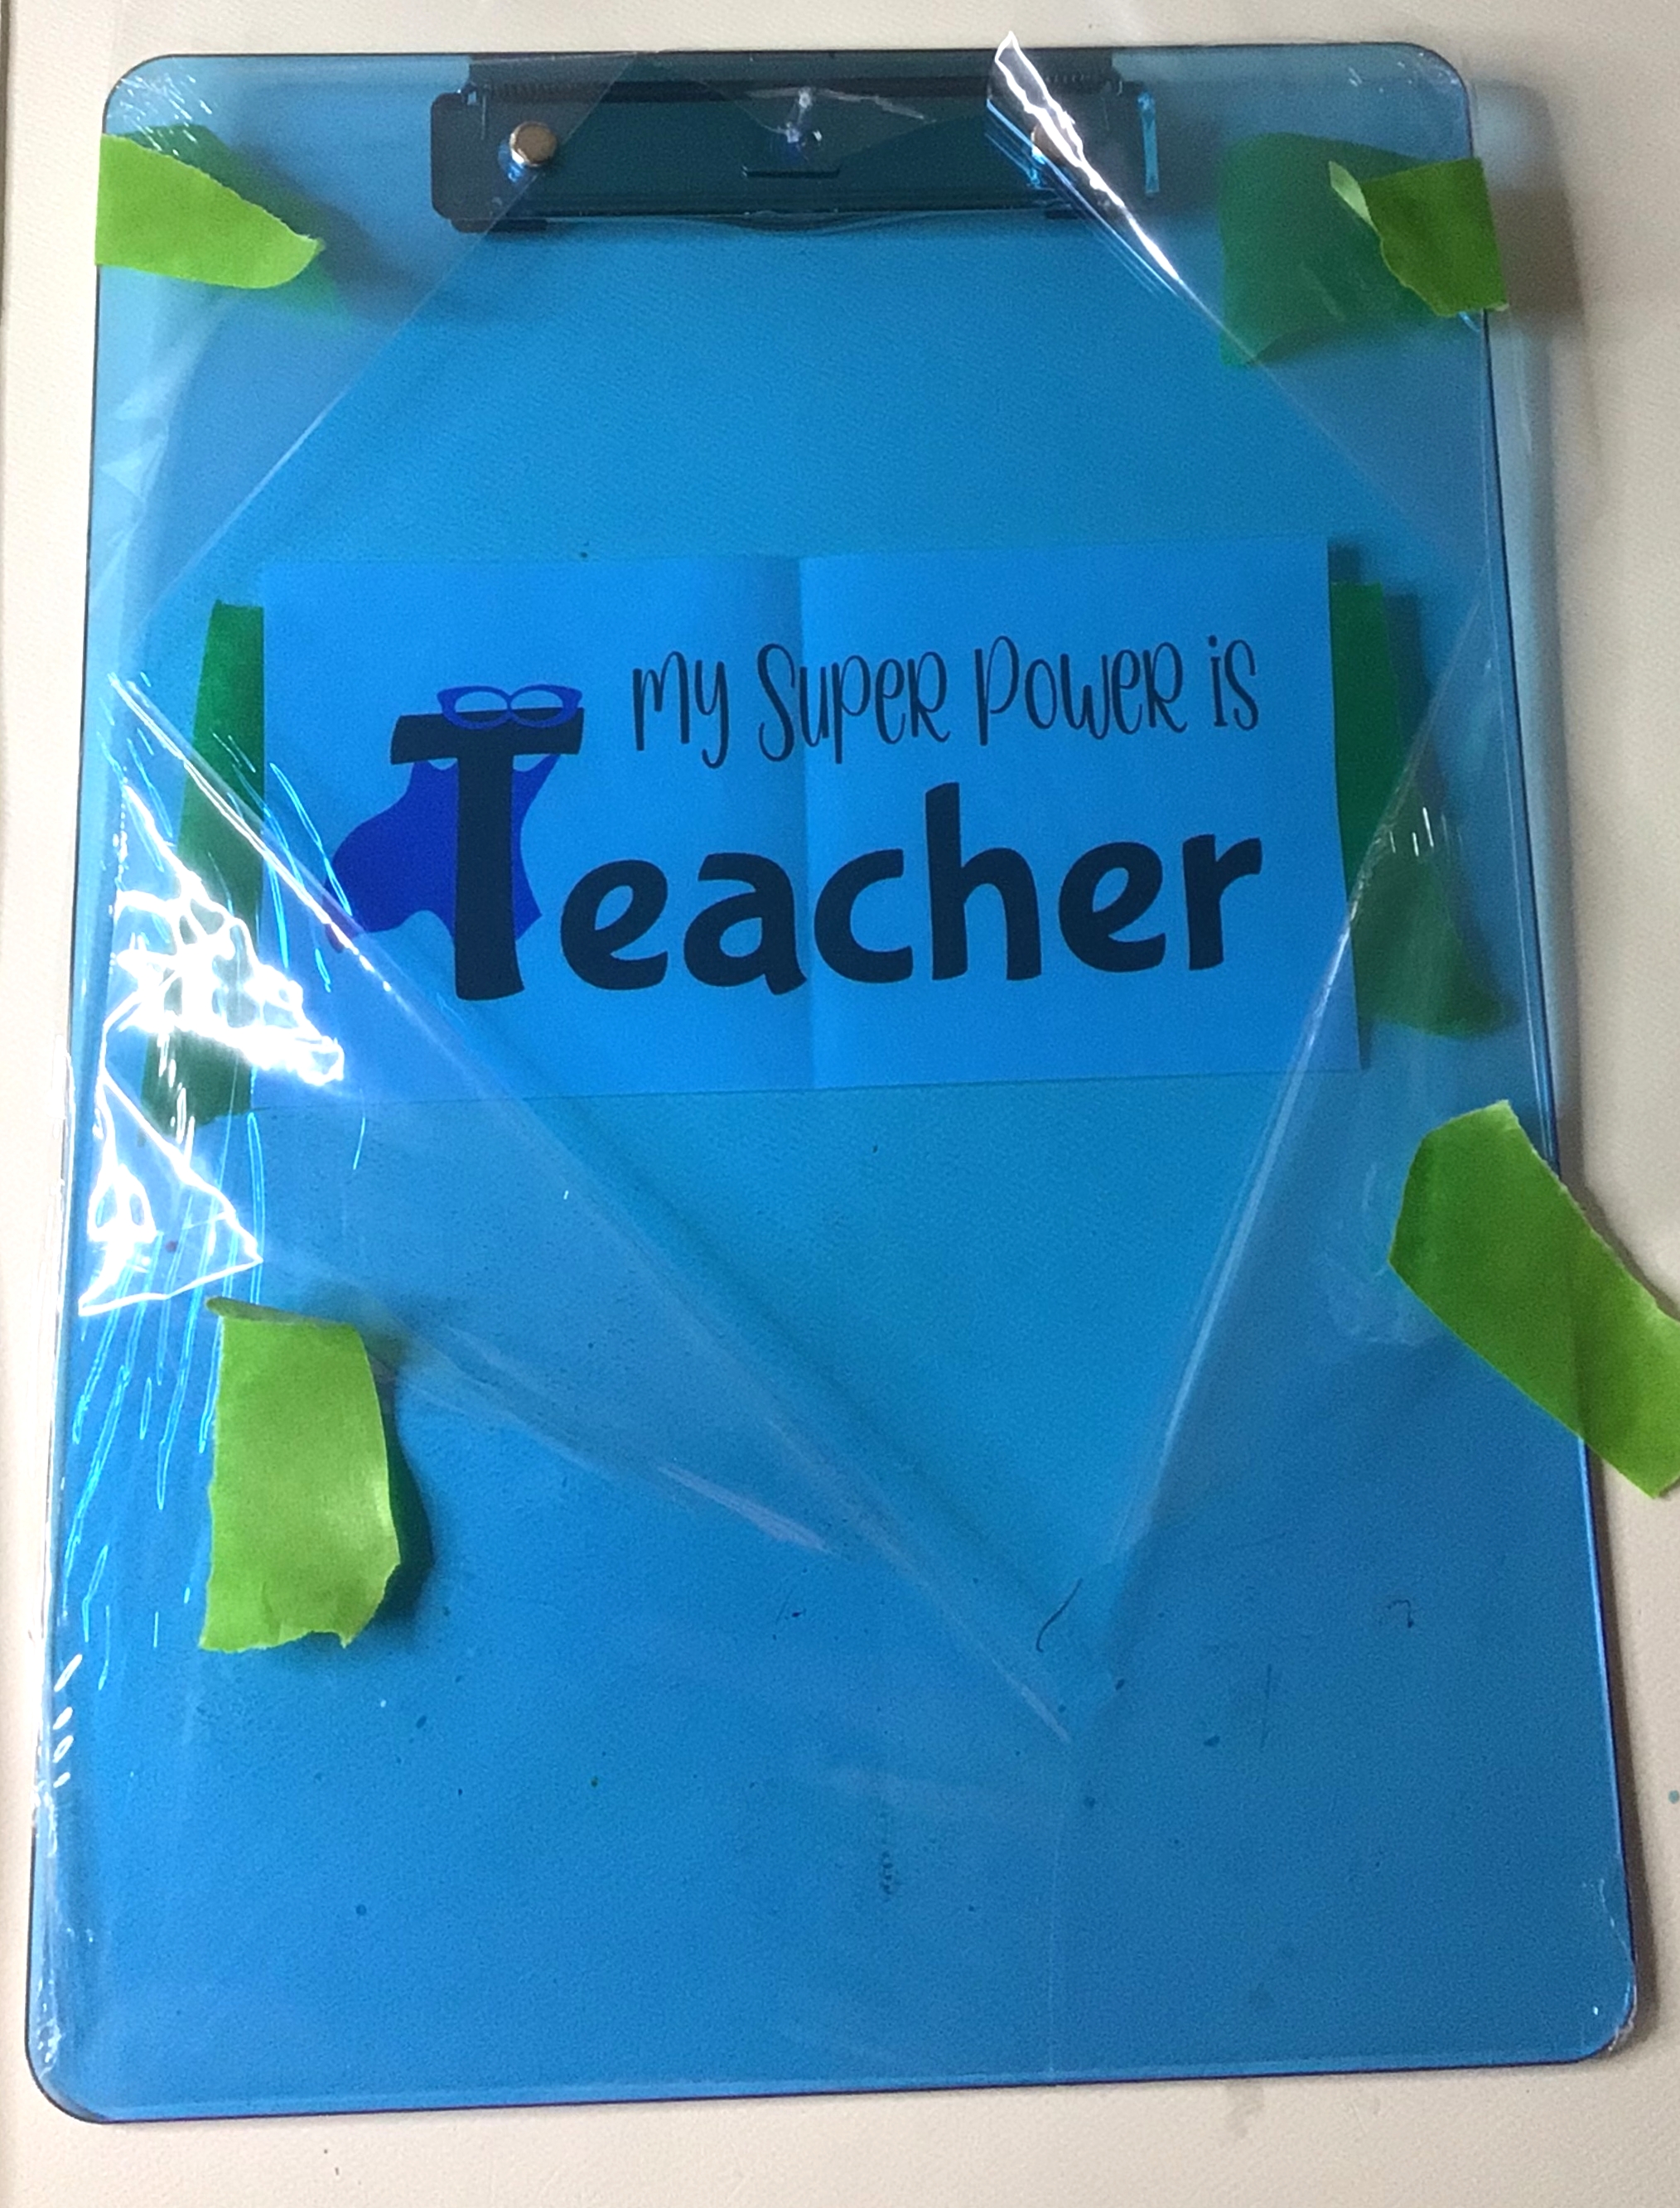
Two weeks ago I started working on a Teacher Appreciation gift for my son’s pre-school teacher. First, let me just say that it’s difficult coming up with a meaningful gift for a teacher that they don’t get a million of and you’re just one of those parents who giving a gift card just doesn’t feel personalized enough.
I help out in my son’s class and noticed that his teacher had one clip board. It’s pretty standard and who knows if it was on its last leg or was a work mule. But I do know that with home schooling my older son that a single clip board is not enough for me. And this was what birthed the idea of making a personalized clip board for our pre-school teacher.


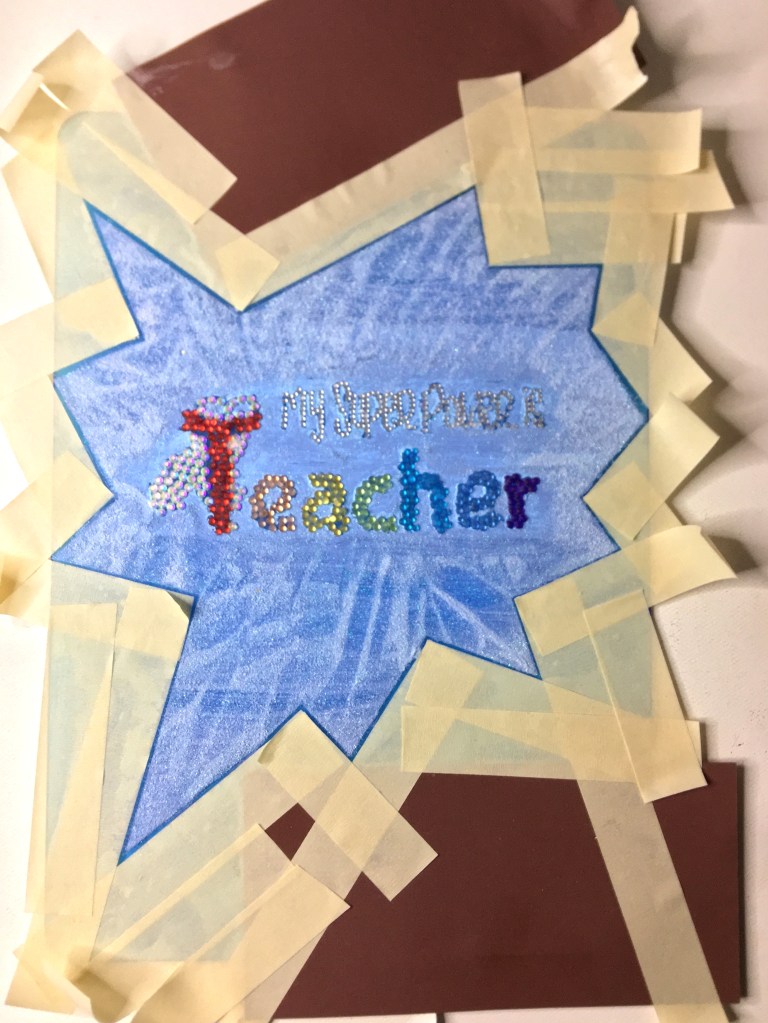
I find the diamond painting crafts a very relaxing no thinking type of craft. With that experience, I had high hopes of having fun and relatively easy time with this. What I should have counted on is that the Jewel and Metal Glue would have had a mind of its own and gotten all over the place.
I should have set up more protection against glue betrayal. With the print out of the design on the back side of the clip board, I can see exactly what my work field was going to look like. I should have taped on protective paper (just spare crafting paper) to protect the exposed board that was not being worked on.
As it was the glue, coming out of the tube, came out at larger quantity than I needed for the small text on the top. What I needed, to control glue quantity, was a tooth pick. It provided enough glue to adhere the gems, and kept the glue of glopping up and making a further mess. However, the clear glue also found ways of transferring to other parts of my hand and got on the board. The crafter who recommended this glue to me (and other crafters) said that it dried clear. And I was under the impression that it would be relatively invisible.
Yeah, not so much.
IF you can keep the glue minimal, it hides quite nicely. IF you get impatient or frustrated, the glue does travel. It does clump up. It does not dry invisible.
I also want to mention that the gemstones were the actual frustrating part. The tweezers that came with them did not pick up well or easily. The white pencil that came with them worked maybe half the time. I actually had to pull out a spare diamond painting tool and use that. The disadvantage that comes into play is the gem glue. It acts like a super glue and builds up. It causes the gems to stick to the tool. So make sure you take the time and clean whatever tool you are using regularly. By keeping the glue buildup to a minimum, you will keep the frustration down a little.
Tips that I have for my next time:
- Fully tape off the non-work area
- Try to not use the tiny gemstones
- Don’t be hasty, use a tooth pick for glue application
- If using the side of your hand, put tape on the side of your hand (to replace every now and then to prevent hand transferring of glue)
Correcting the Failure
There were a few ideas that I had to redeem the glue failure of this project. Had the failure just been hand transferring of glue, I would have made other icons, “pows”, comic speech bubbles, etc to add more of a graphic design. However the glue failure was mostly an eye sore around the text with the stones, where the glue was just too thick.
I opted for acrylic paint to cover the glue. On top of the paint were glitter glue and a layer of fine glitter.

Step One: Tape off your Comic Speech Bubble. With cutting the edges, it allowed for the continuation of the lines and making the edges as varied as you want them. Just make sure that you press your edges down well so that the paint and glue don’t feather under the tape.

Step Two: Paint. Between the letters and around the gemstones, I used an acrylic paint pin. The edge of the pen is just more firm and easier to manipulate than a paint brush.
Step Three: Add glue and glitter. Once the excess glitter is shaken off, peel the tape off of the clip board.

The wrinkles that you see here is just the uneven application of the glitter glue. I was playing with texture to see if I could get a comic sunbeam pattern.
Step Four: Tape off the clip board for sealing with clear acrylic spray paint. This paint will keep the glitter from shedding. (I sprayed two coats of paint.)
There’s two ways of reapplying the tape. The tape can be put right on the glitter line. Or, as I chose, I offset the tape so that I could seal the edges of the glitter, but also add a simple edge to the design. The clear acrylic paint creates a glazed appearance.
Be sure to press down all the tape edges well. If the edges are not fully pressed, it leaves the opportunity of the clear paint to feather under the masking tape.
Once you have sprayed your last coat, you are ready to remove the tape and paper. If you choose to remove the tape with the paint still wet, there is the chance that there will be some feathering. If you wait until the spray paint is dry, there will not be that potential transference.


As you can see with this side by side, particularly around the -her of teacher, it is possible to clean up glue failure. There is a trade off of not being able to keep a minimalist design esthetic. However, there is light at the end of the failure tunnel. Sometimes you can remove errors that just can’t be erased.
No matter what you are working on, take heart. If something goes wrong, it is not the end. You can fix it. Take a deep breath. Look at your options and see what all is available. If you have more than one option, try to visualize what it will look like if you go down that route. Which route is going to get you in a better place in the fewest amounts of steps? Which route is going to eliminate the failure in what you’re working on? Not all solutions are equal. But the more options you have the more you hope you have for your end product.

Teacher Super Power was the file used today. It can be found here!
