Cupboards Fighting Colds & Viruses

I don’t know about where you live, but in my local community parents have been scrambling to find their family’s cold and flu medicines and finding the shelves are picked over at best and empty at worst. As a mom, I know the feeling of panic that can set in when you can’t source the things that you need to make your children feel better. As an adult you shrug your shoulders and muscle through the illness. But when it comes to your kids….

What do you do when you can’t find the over the counter medicine that is your go to for colds? Or when your child’s prescription is on back order and you’re told to just wait?

The one bit of information that you’re not told when you’re growing up is that every bit of medication, prescribed or over the counter, was originally birthed from herbal remedies that have been scientifically studied for thousands of years. The pharmaceutical companies cannot patent or charge a premium price on what you can find in nature, sometimes your own back yard. In fact, the pharmaceutical companies take these natural herbal compounds and modify the molecular structure so that they create something “new” and are then able to patent this medicine to keep their competitors from replicating their recipe and make it possible to charge a premium price.

Photo by Wendy Wei on Pexels.com

Before I go further I want to state that I’m not putting down modern medicine or making any medical claims or promises. The intent of writing this post is that I want to help relieve parents from their fears, worries, anxieties, and feelings of helplessness as they wait for their children to get the medication that they need and is either out of stock or on back order. I also want to state that there is a time and a place for western medicine and seeing a doctor. Especially with young children, and any cold or illness that affects their breathing and ability to get enough oxygen into their system, medical attention is absolutely necessary. Clinics, Urgent Care, and Emergency Rooms have medical resources that you are not going to find at your local grocery store or pharmacy.

In the situation where you know that you are dealing with a common cold or virus that you’ve seen before your spice cupboard and/or garden have everything that you need to find some relief while you wait for the cold to run it’s course.

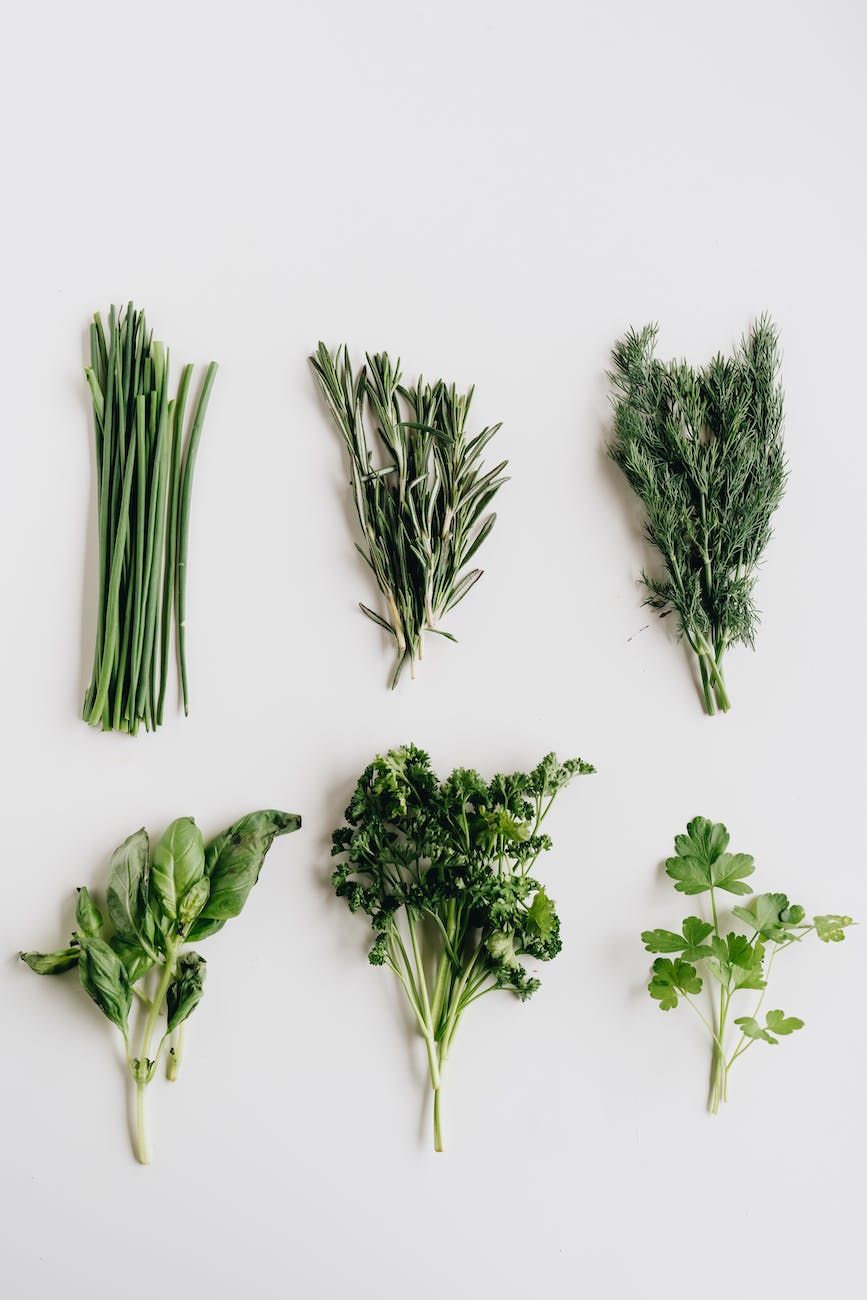
Herbs you may already have:

Healthline has an article here that breaks down herbs and what viruses they are particularly effective against. A good resource for more information of herbs can be found online here, from Annie’s Remedy. A heavy reading article in support of exploring natural remedies for viral infections can be found here, from National Library of Medicine.

Photo by alleksana on Pexels.com

Oregano is known for calming the stomach. This makes it particularly useful against stomach flu, norovirus, and rotavirus. (Healthline)

Sage is known to aid your digestive track, and remedy colds and fevers. “Test-tube research indicates that this herb may fight human immunodeficiency virus type 1 (HIV-1), which can lead to AIDS.” (Healthline)

Basil is known for settling the stomach (Annie’s Remedy) but also works to strengthen your immune system, notably your helper T cells. (Healthline)

Fennel “loosens congestion and make coughs more productive. Fennel also calms the dry, hacking cough of bronchitis.” (Annie’s Remedy) It boosts your immune system and decreases inflammation. (Healthline)

Garlic has long been known to be antimicrobial, opens the lungs for easier breathing, is an antioxidant, prevents blood clots caused by platelets (a blood thinner), fights cholesterol, lowers blood sugars. Studies have showed that it combats influenza, viral pneumonia and rhinovirus (common cold). Current studies have shown that it “enhances immune system response by stimulating protective immune cells”. (Healthline)

Advertisements

Lemon Balm is shown to have effects against bird flu herpes virus, HIV-1, and enterovirus. (Healthline) I am currently finding it extremely difficult to find the reputable source that told me that Lemon Balm is the herb of choice to fight the whole corona virus family. In my continued re-search of this information, I have found that it is effective if your family cold medication is Tamiflu. So if you are running around town for Tamiflu, Lemon balm is the herb that you can use in its place. (The Botanical Institute) There are medical discussions on this subject as you will find in this medical article. Here is another science article talking about other medicinal uses for other diseases, such as Alzheimer’s. And here at Natural Society.

Peppermint calms nausea and soothes the bowels. “Peppermint is a first herb of choice for treatment of colds and flu because it acts to relieve multiple symptoms at once: congestion, headaches and muscle aches, nausea and fever.” (Annie’s Remedy) It is also well known as being antiviral and anti-inflammatory, it is active in fighting against RSV (respiratory syncytial virus). (Healthline)

Rosemary is known for its Immune System support. It also stimulates “the central nervous system and circulation, …block histamine, the chemical culprit of both asthma and allergies.” (Annie’s Remedy) It is also active against influenza, herpes viruses, and hepatitis A. (Healthline) Study Finds is showing that studies are finding that rosemary is useful in fighting C-19 and Alzheimer’s.

Ginger “has antiviral effects against avian influenza, RSV, and feline calicivirus (FCV), which is comparable to human norovirus… found to inhibit viral replication and prevent viruses from entering host cells.” (Healthline)

Bay Leaf is known to be anti-inflammatory, anti-cancer, digestive relief, pain relief, good for your respiratory system, and help your immune system. (Nutrition and You)

Herbs you may not already have in your kitchen, but you’ve heard of:

Photo by Olga Kovalski on Pexels.com

Echinacea“is most effective when taken at the first onset of cold, sinus, gum inflammation or other infection symptoms.” (Annie’s Remedy) It is “particularly effective at fighting viral infections like herpes and influenza”. (Healthline)

Elderberries/Sambucus is known for being preventative in fighting the flu and common cold. It is best to take during cold and flu season and then increase dosage when you become ill. It assists your immune system and is not a complete preventative measure. It is “found to substantially reduce upper respiratory symptoms caused by viral infections”. (Healthline)

Licorice is known for aiding sore throats, coughs, chest pains, and stomach aches. It “is effective against HIV, RSV, herpes viruses, and severe acute respiratory syndrome-related corona virus (SARS-CoV), which causes a serious type of pneumonia. (Healthline)

Advertisements

Astragalus is shown to work against herpes viruses, hepatitis C, and avian influenza H9. (Healthline)

Ginseng all varieties are found to help your respiration & digestive systems, helps with headaches, shortness of breath, and fight viruses. “Korean red ginseng extract has exhibited significant effects against RSV, herpes viruses, and hepatitis A.” (Healthline)

Dandelion has many health properties such as supporting the Liver, ridding the body of excess toxins, and help control blood sugar levels. (Annie’s Remedy). It also fights hepatitis B, HIV, and influenza, and dengue. (Healthline)

What do you do with this information???

The importance of using herbs is that you give your body the building blocks that it needs to fight whatever it is that your body is being attacked with. You eat food so that your body has the nutrients it needs for brain function, muscle building, hydration, having over all healthy cells in your body with everything working as it should properly work. Herbs are like a laser pointer that have a focus in helping in a targeted area.

Advertisements

I know it’s hard for many people who were raised with Western Medicine to switch over and trust in herbs to do what pharmaceutical medicine does. Herbs don’t work as quickly, which is one reason why people tend to shy away from this way of helping your body and grab that cold medication off the shelf that you have experience with it working, because you grew up with it.

The difference between your tried and true cold medication and herbs is that the cold medication was formulated to be quicker acting to take care of your symptoms while your white blood cells fight the infection and you heal. The herbs may be “slower” acting because their function is to feed your white blood cells to give them the building blocks/nutrients they need to be healthy and become super charged to do their job. It takes a little time for your cells to respond to good “food” and adjust and become super workers to kick that virus’ butt. But that’s what herbs do.

The easiest way of using this information

Go one of two routes!

Photo by Olga Mironova on Pexels.com

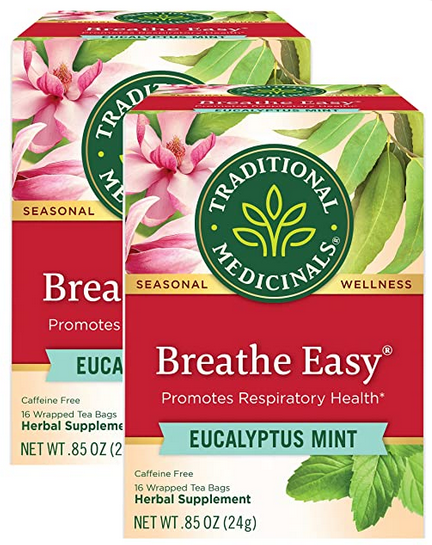
ONE— look for these ingredients in a tea. It’s as easy as boiling water. In fact, the last time I had a cold, I drank Breathe Easy Tea a couple of times a day and I didn’t have to take any cough syrup. It was a dry cough that was annoying and took forever to go away. But this made it so that I could breathe through the night without waking myself up coughing.

When I’m dealing with upset stomachs or nausea from me or my kids, I love steeping sliced ginger root in apple juice. It works better than Ginger Ale, which I grew up with drinking every time I got sick as a kid.

Photo by jenvit keiwalinsarid on Pexels.com

TWO–cook with them. I so hope that people catch my heart on this and start cooking more with herbs! It is one way that is definitely 100% in our power to help turn our health around when we begin to feel sick.

What prompted me to write on this subject this week is that for a second time a family member has tested positive for C-19. They both sought medical treatment and were released to go through the course of the virus at home. Talk about feeling helpless as theh one being sick and the family member who is left to watch them go through it.

For both family members, I cooked them chicken bone broth using herbs from this above list. And both times, after the first portion of broth, they both let me know that they felt a difference. One family member was hit extremely hard with nausea. The broth drastically cut that back so that they could get nutrients and liquids into their body. The second family member’s biggest complaint (other than lack of smell and taste) was that they had a sore throat. Immediately they felt a difference in their throat, again allowing them the ability to get more nutrients and liquids into their body.

In both of these examples, the point of the herbs was not to cure them. The human body is an amazing thing when it’s allowed to do what it does best. But for our bodies to function properly, we need food/nutrients and liquids.

Advertisements

How I make my C-Soup

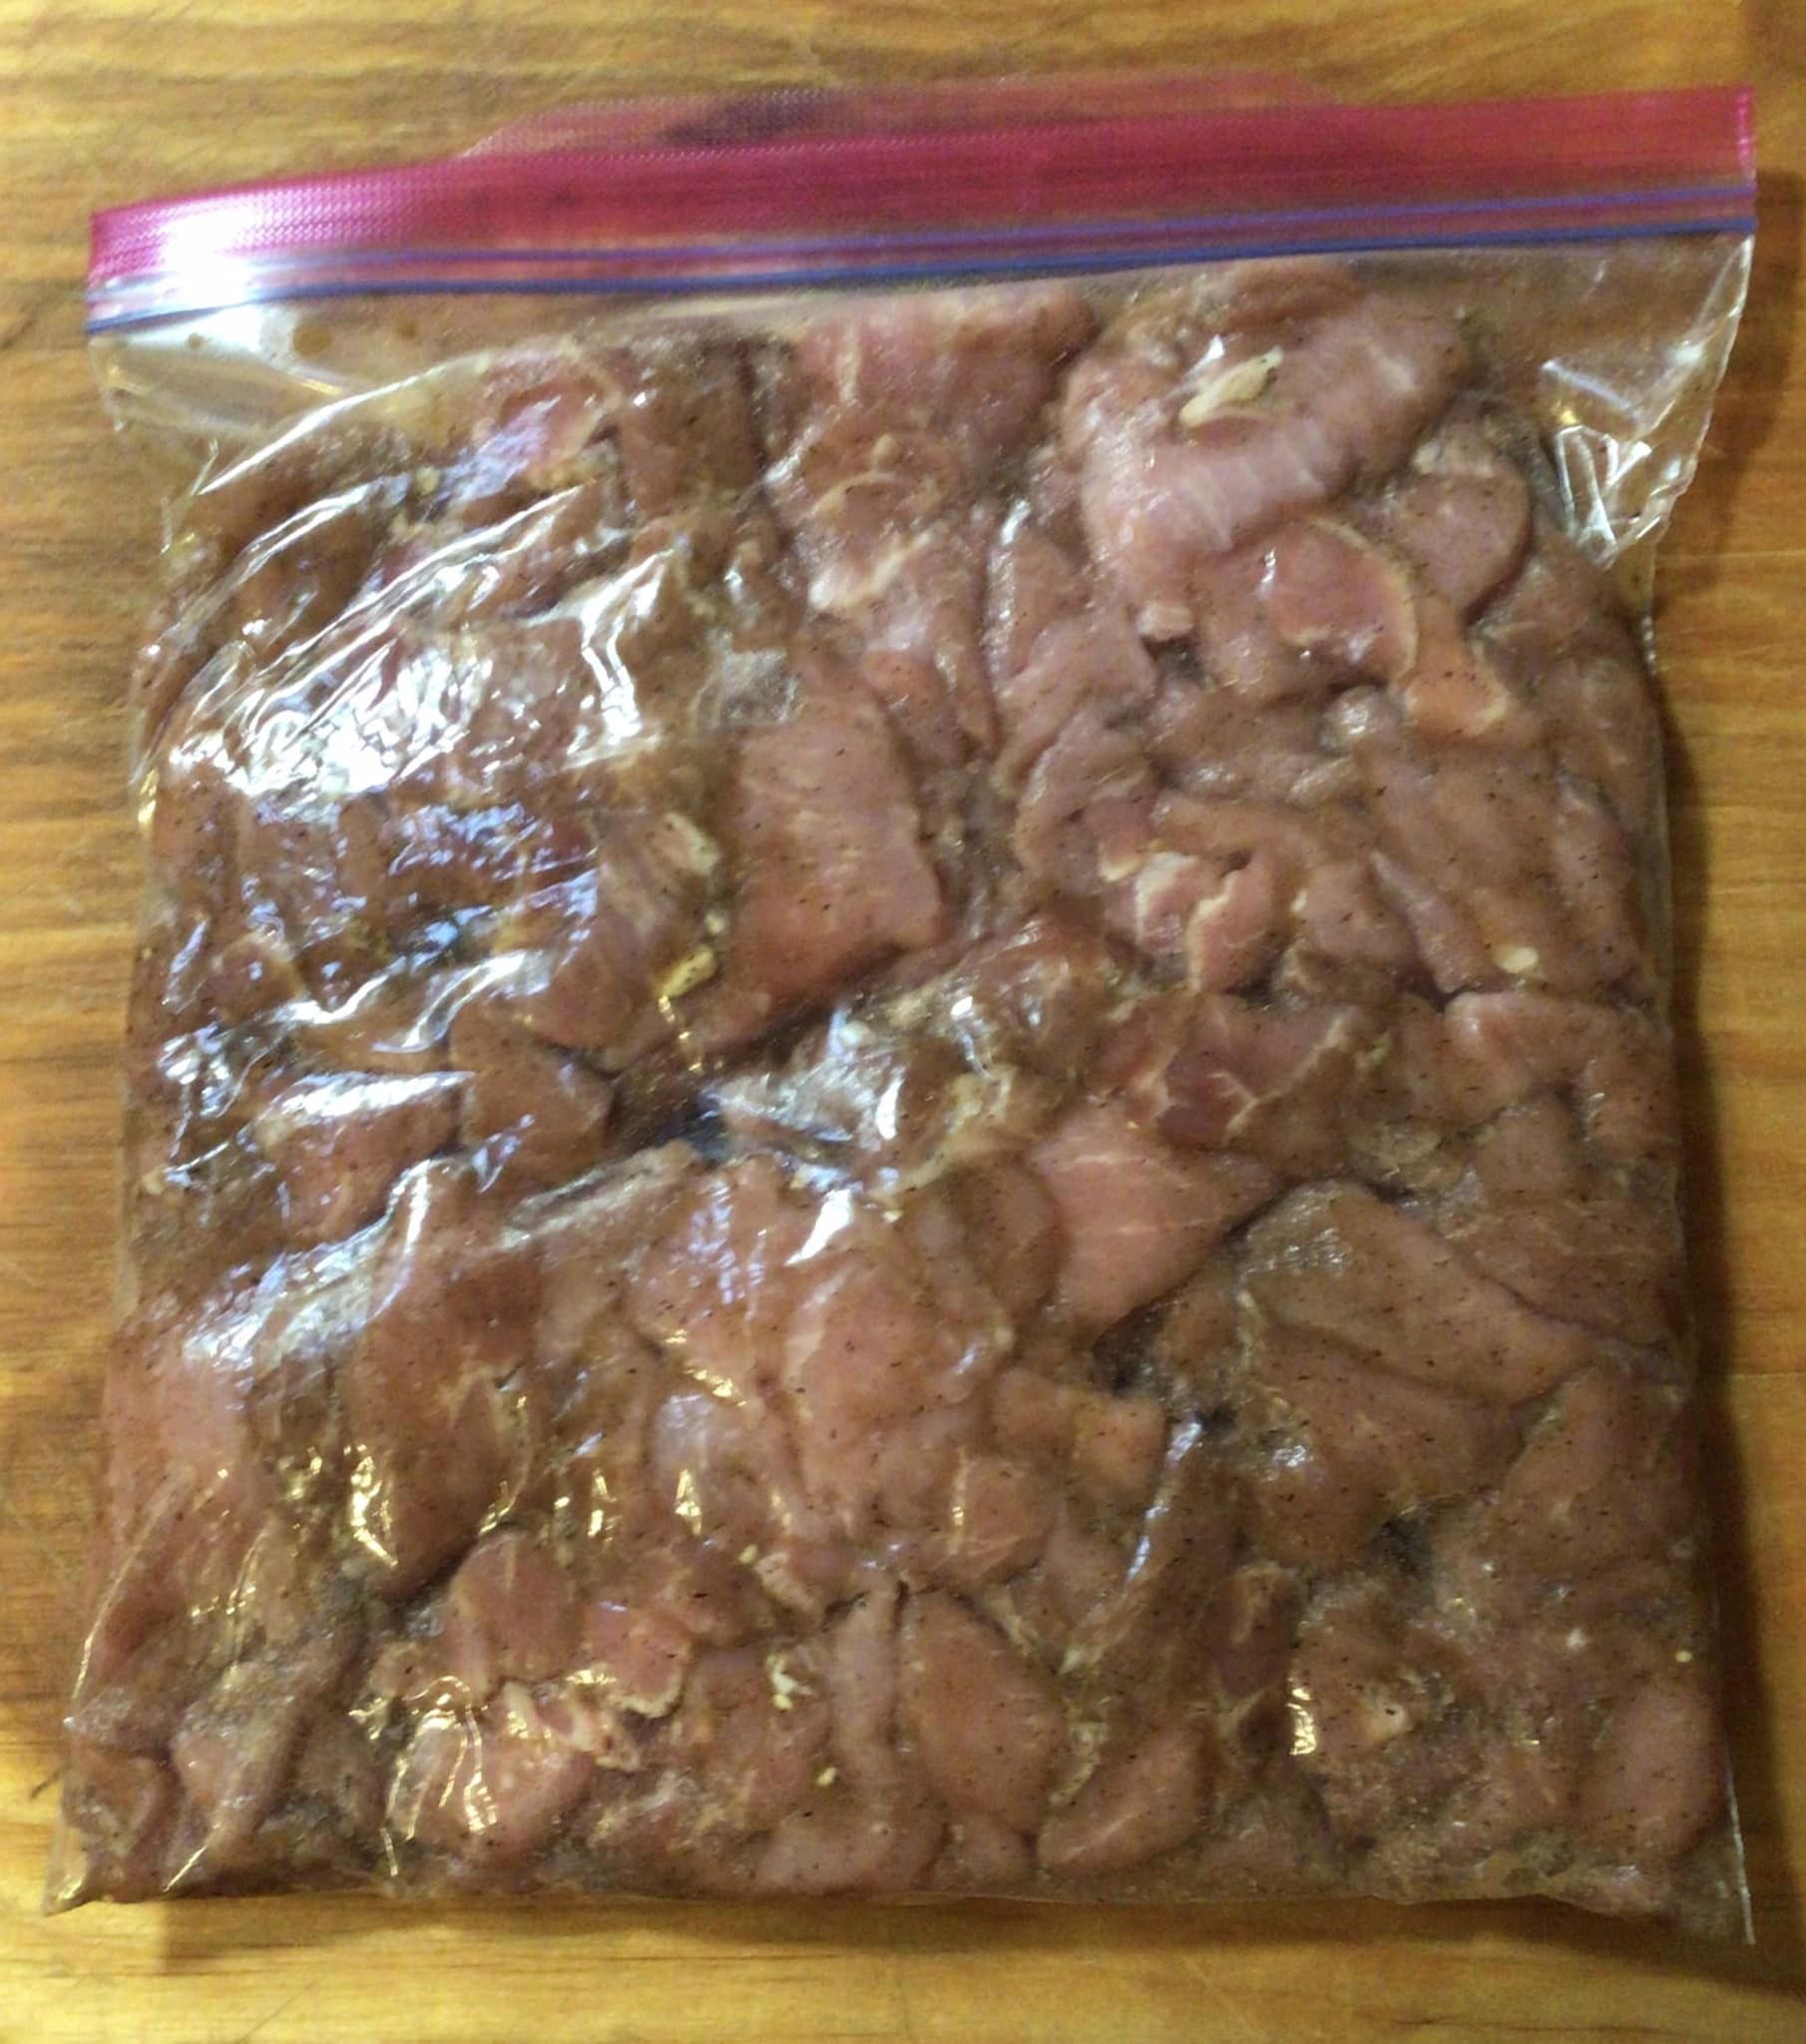
I’m still finding my precise measurements to give a proper recipe. But for the first family member I used fresh Lemon Balm. For the second family member I used dried Lemon Balm that I stored from this past summer.

First you prep for making your bone broth. Clean off your chicken bones and put them in your Instant Pot, Slow Cooker, or Stock Pot. Add water to the level of your cooker of choice (a full chicken’s bones, I usually add 32 oz of water)

Next, add your herbs. Here is what I use:

  • Lemon Balm: antiviral for the whole covid family (which covers your bases for all colds and flu)
  • Bay Leaves: antiviral
  • Oregano: antiviral, stomach soother
  • Basil: antiviral, Immune system support
  • Sage: stomach soother
  • Garlic: antiviral
  • Rosemary: antiviral, fights C-19
  • Ginger: stomach soother
  • Shallot or Onion: some antiviral properties
  • Black Pepper
Advertisements

Cook. In my Instant Pot, I run it for 2 hours. You can run the bone broth for as little as 1.5 hours. I run mine a little longer than everyone else because I want to make sure to extract all the goodness not just from the chicken bones, but also from the herbs. In a slow cooker, you will want to run it on high for about 24 hours. I haven’t made bone broth in a stock pot, so I can’t tell you the precise cook time. You will still want to run it low and slow like you would with a slow cooker. As you can see, you know why I prefer my Instant Pot. If I run out of my canned bone broth, I can have the soup on the road and delivered in a couple of hours. And it’s generally still warm so my family members don’t even have to warm up that first serving. It’s ready to go.

Strain out the herbs and season the stock with salt.

Adding the salt is important. If you can taste, the broth tastes better when it’s well seasoned with salt. And the first thing my taste testing children note is the lemon flavor after I seasoned the broth. Salt is also an electrolyte. So when someone is sick and not drinking, they need that salt to get their system going. In return, a well seasoned broth with naturally cause a thirst in their body where they will want more broth (meaning they’re getting more nutrients in their body) or water (which is needed to get rehydrated)

Typically, when broth making, people cool the broth to solidify the fat content. In this instance with feeding someone who isn’t really eating anything, keep the fat content in the broth. There are countless studies where there is a connection of fat with brain health. But more importantly, the fat in the broth is adding calories into a person who isn’t eating at this point in time. These calories are necessary for cellular function.


Advertisements

Forgive me for not having a precise recipe for you to follow yet. I felt an urgency to get this information out because I know of so many families who are feeling the pressure of not having grocery stores stocked like they use to be a few years ago. It’s important for people to know that you do have options still available to you, even when it feels like you’re playing a waiting game.

Take a look in your cupboard. See what spices you already have in your kitchen. Or in the tea you may already have in your pantry. You might be surprised at what nature’s medicine you already have at your fingertips to help you through the time that your body heals.

Other Valuable Resources

This post contains affiliate links that give us commissions on products purchased at no additional cost to you. These items listed here are from Amazon but may be purchased at local markets.
(This post contains affiliate links to products. We may receive a commission for purchases made through these links, but at no extra cost to you.)
[Sarah’s Disclaimer: FTC Disclaimer: This post contains affiliate links that give us commissions on products purchased. These items are what we used in the recipes. This includes both Amazon and Thrive Life. All thoughts and opinions are ours. Product was paid for by us, to review.]

The Forager’s Guide to Wild Foods has other herbs not mentioned here, shows where in the US they are located in the wild, their uses, and other valuable information.

If you go through the author’s site (not an affiliate link) you will also have the option of adding other books of hers at a discounted price.

Processing…
Success! You're on the list.

Leave a comment

Advertisements

Lather Up

How was your Christmas? Were you able to spend time with those you love?

In my house the whole month of December is difficult. But that’s the life of having a handful of young children in the house. I use to think that starting to decorate at the beginning of December and putting out presents as soon as they were wrapped was adding to the incessant build up of excitement and driving mom bonkers.

Nope.

We did things differently and things didn’t improve. My gift making still happened at night. Or should I say lasting into the wee hours of the morning. Lets just say that coffee is my friend.

But….

This gift, especially the soap, was probably my favorite gift to give.

I didn’t know how many people were having skin issues this year. And most people don’t talk about what they quietly suffer with. Part of it is the “I’ve tried everything” and no product on the market works.

The truth is that the local grocery stores have aisles dedicated to soap. And when you’re in that aisle you grab what you’ve purchased in the past (which may have been the brand that you grew up using) or it’s a sale based off of the label and its marketing claims. And we think that these area our only options.

Advertisements

You have another option

This is the video (three ingredients) that I watched that set me on the path of making my own soap, almost 3 years ago. It was an empowering feeling for me to make my first soap, Goat Milk Soap (4 ingredients), and stop buying the store bought soaps which have an ingredient list that looks something like this:

The comfrey soap in its mold.

Even though I took many chemistry courses in college, I can only tell you half of what is on product labels like this. If my children can’t sound out what the words on these kinds of labels have, that means that those ingredients are stuff made in the product labels of these soap corporations. Companies do this (take organic or natural items and change one chemical compound in the chain) they have made something they can patent and prevent other people from recreating (by pain of legal actions).

Soaps are made out of three items and three items alone: water, lye, and fats.

Yes, even those soaps that people claim are made without lye are actually made with lye. There’s a product on the market, melt-able soap base, that people claim is lye free but that is not true. This soap base is where the emulsification of the lye and fats has already happened for you. The lye and fats have already gone through the process of combining and so the lye has become safe to touch and no longer corrosive like in its original form (whether you use a crystalline lye or wood ash).

Advertisements

Here’s an example of a soap base. The first 5 ingredients are fats, followed by water, and then lye (sodium hydroxide). The end of the list is all the little extras that they added in to make their soap base unique from the others on the market.

In essence, this is an already made soap that a person at home can reshape and have the option of adding other things into for further personalization.

If you’re nervous about using lye, a soap base is going to be a good option for you. It’s not the best thing for your skin but definitely better than all the major brands on the store shelves.

Note: When making soap from scratch, with lye, you will need to cure your soap. This means that after you remove it from its mold (after it’s solidified for 24-48 hours), it will need to cure. This means that the soap sits for 4-6 weeks to dry out. While the soap dries, this allows the chemical transformation through emulsifying the lye and fats, to finish its work. When completed, they lye is no longer corrosive. The lye and fats molecular structures are completely joined and stable

Advertisements

Ingredient list from the soaps I made for Christmas

The two soaps that I made this year were Pumpkin Oatmeal and Comfrey Tea Tree.

Comfrey Tea Tree: Olive Oil, Aloe Vera, Coconut Oil, Avocado Oil, Lard, Sodium Hydroxide (Lye), Comfrey, Bentonite Clay, Tea Tree Oil

Pumpkin Oatmeal: Coconut Oil, Olive Oil, Distilled Water, Lard, Sodium Hydroxide (Lye), Almond Oil, Pumpkin Pure, Rolled Oats, Honey

Both soaps have only 9 ingredients that anyone can understand, colors of the soap come from the natural ingredients, and I can tell you the purpose of each of these ingredients and why they are good for your skin. You don’t need the lab chemicals to create lather or bar hardness. You don’t need the lab fragrances to give you a pleasant scent to wash with.

Note: “Fragrance” listed on an ingredient list of a mass produced soap, approved by USA FDA regulations, is all that has to be noted on a label even though it can include up to 200 different “fragrances” to make the scent of your soap. This is allowed because it’s modified in the lab and falls under proprietary patent laws.

Some of the comfrey soap after I cut it and before I set it aside to cure.

I know that not everyone approves of lard use in soap, usually for religious beliefs, but this fat can be switched out for tallow (beef, goat, or deer) which can align with religious beliefs. Or these animal fats can be omitted completely for the wide world of plant oils.

The variety of fats, found naturally in the world, each have different properties for your skin health and how it functions in a bar of soap. For example, lard is a single ingredient that adds hardness to the soap bar, creates lather, and adds to the shine and conditioning/softening of skin and hair.

One book that I highly recommend for understanding how fats work in soap making and benefits to your skin and hair is Simple & Natural Soapmaking by Jan Berry

Advertisements

Origin of the fats is also going to play a part in how it reacts with your skin.

Shea Butter is not all the same. In fact, this week I just learned that not only is there a difference in quality of Shea that comes from heat vs. cold pressed processed Shea, but also the region. If I remember the documentary correctly, Uganda Shea butter is absorbed quicker into the skin than the Shea produced from other regions. And I never would have thought it, but the beauty industry is already capitalizing on the difference of absorption rates of the Shea butter produced from eastern and western Africa. It’s not all the same.

So if you by chance tried Shea butter beauty products and felt like the fat just sat on the top of your skin instead of being absorbed as you were promised, the reason isn’t because Shea failed you. It’s because you used a product that had a lesser quality of Shea.

In this instance, if you can afford to purchase a higher quality of Shea butter, all evidence shows that this purchase for a higher quality is most definitely well worth it. I’m all for finding the deal, but moving forward I’m now going to purchase a better quality of Shea.

With animal fats, whether the animal grazed on foods naturally available to the animal vs. grain fed and various injections will all be passed on to you through your skin.

Why what you put on your skin matters

It took me going through my second quarter of Anatomy & Physiology to learn that your skin is your largest organ in your body. Your skin keeps all your insides in, but it also is a filter from the outside world trying to come inside you.

I really don’t know why I was so surprised by all this because growing up we all have the conversations about needing lotion for our skin. We already know that we can correct some conditions by adding lotion or medication, depending on what’s wrong with our skin. But we never think about what we are adding to our skin daily that’s potentially causing the problems to begin with.

An example of a soap label. Notice the difference in readability and ingredients compared to a bar of soap I made (my shampoo bar, currently curing, is the same ingredients that the bar of soaps listed above).

We’re told to wash our hands regularly, especially during cold and flu season (not to mention the marketing for this habit over the last three years). With this increase reminder to wash your hands, how long is that ingredient list? How many of those ingredients do you know how to say, let alone identify what they do in the soap? Is it your hand soap that is adding to your cracked hands during the winter?

For example, my hands crack and bleed every winter. There has never been a lotion that I could find to ease the pain, let alone prevent the cracking in the first place. Christmas was when my Comfrey soap finished curing and I could use this recipe for the first time. Just by the first use alone, the redness of my irritated skin cleared up. The cracks decreased in size by half and by the next day they were all healed. I still have dry knuckles because I stopped using the Comfrey soap (leaving it for my son who has more sensitive skin in need of good soap). The Pumpkin soap isn’t as healing, but it’s still preventing the cracks. The Comfrey soap has aloe vera in it (which the pumpkin does not), so I might have to change that recipe to add some aloe in.

But I think you can start to see just by how your ingredients work, the natural function of things found in your garden, you can easily make a soap for yourself, family or loved ones that meet your skin type needs and not have to spend hundreds or thousands of dollars on store products that just don’t work.

Advertisements

There’s just so much to talk about with soap making. I will have to come back to this subject in upcoming posts. But I wanted to start the thought in your mind that you really can make your own soap. You don’t have to just survive and live with the condition(s) that you currently have. The first step is to start by cutting that ingredient list in half. The fewer the ingredients and shorter the syllables of the words mean that you understand what you are putting on the largest organ of your body. You can pinpoint what irritates your skin and you can pivot by switching out a fat or other ingredient that offers a vitamin or mineral that your skin actually needs.

Leave me a comment below if you’re looking for a solution to an issue.

In 2023 I’m looking forward to talking more about how herbs and garden ingredients can benefit your body. And all you have to do is add them as a seasoning to the foods you already cook, which benefits your body from the inside. And you can already start now with making soap to help your body from the outside. Skip the lab ingredients and start using luxurious soap that uses all natural ingredients which can eliminate all the extras that you need to “fix” what other products are doing to you.

For example, one lifestyle change for my family is that we are switching to homemade shampoo bars. My goal is to find the recipe that makes a shampoo bar where I don’t have to use 3 different conditions to combat the dryness that I’m convinced is caused by the long ingredient list on my shampoo bottles.

Happy New Year!!!


Products that were either mentioned in the post or items that you may find valuable in making your own soap.

This post contains affiliate links that give us commissions on products purchased at no additional cost to you. These items listed here are from Amazon but may be purchased at local markets. These products were paid for by us and are not the only products available.

Simple & Natural Soapmaking by Jan Berry

After watching videos and reading different books, this is my personal favorite resource for recipes, ingredient information, and general soap making information.

Soap Mold Making Kit

I prefer cutting my own bars of soap and this is the set that I wished I would have bought the first time. The cutting block takes the guesswork out of eyeballing a uniform and straight cut.

Silicone Soap Mold

This is great for just getting started and you don’t want to think about portioning out bar sizes. The disadvantage is that the silicone is very flimsy under the weight of the soap. So make sure that you have cardboard or another hard surface to tansfer the molds to a different location while the soap solidifies.

Processing…
Success! You're on the list.

3 responses to “Lather Up”

  1. Cassandra Avatar
    Cassandra

    Valid information worded in layman’s terms. Thank you.

    Liked by 1 person

    1. Jihn baker Avatar
      Jihn baker

      My granny made lye soap, used it all her life, never had skin problems, i make basic lye soap myself, 3 lbs of greese, bacon preferably, but the drainings off cooked meat, 2 gallons of water, and one can lye, , i greate up some for clothes soap, i use it in place of aal types of soap, melt it and mix with water for dish soap, works better than cascade in the dish washer, the only problem is aquiring the lye, it extreamly hard to get in the stores because it is one of the main ingreidants in the manufacture of meth, and everytime i make soap i have to call the police and noify them, so i dont get charged with making meth, it smells the same, making meth or making soap,

      Like

      1. Pacific Northwest Event Design Avatar

        There shouldn’t be any fear in purchasing lye. I’ve been purchasing it for a few years now and have never had to report to a registery. There are certain over the counter medications that I’m aware of that there is a registry because of of it being associated with drug manufacturing. And in the instance of that product registry, there is a notation of who is buying what and at what quantity. For the manufacturing of drugs there is a specific amount that law enforcement starts paying attention to. For the average person, making soap at home, they are not going to come close to hitting that limit. I mention all this to prevent unnecessary fear from being spread.
        Thank you for sharing how you make your soap! And also sharing how you use it to also to clean clothes and dishes.

        Like

Leave a comment

Advertisements

Embracing Dry Meat

There are just certain cuts of meat that no matter how attentive you are, they just dry out. Instead of stressing out for a dry dinner, I’ve decided to embracethe dry and put it work for me. You’ve had the roast, chicken, and pork loin that just dry out no matter what. I know that I certainly have. And when we were able to get some pork loin for $0.99 a pound, we made the sale and I decided to make jerky!

I decided to try 2 different ways of seasoning, and 4 different flavorings. One was a wet rub (with minimal liquid) and the rest were marinades.

For the wet rub, this is the recipe that I used. It isn’t mine and even after searching through my devices and searching online, I can’t seem to find the post again. So if this is your recipe, please let me know so I can properly give you credit!

The benefit of a wet rub is that you have just enough liquid incorporate your seasoning into your meat without the need to drain off excess liquid. You can pull the meat straight from the bag and place on your dehydrating trays. But you will notice that the marinades absolutely need to properly drain or you will have to clean the bottom of your dehydrator. This wet rub didn’t need to be drained because the salt content didn’t have enough time to extract the water content from the jerky, like you see through the processing of bacon.

  • 1 Tbsp Worcestershire Sauce
  • 1 tsp. Salt
  • 1/2 tsp. Pepper
  • 1/2 tsp. Ginger
  • 1/2 tsp. Onion Powder
  • 1/4 tsp. Garlic
  • 2 tsp. Brown Sugar

This recipe calls for a rest period of 15 minutes before laying the meat out on the dehydrator racks. I processed at 160°F, even though some people say they process at 145°F. The thinness of the cut (I aimed for paper thin although there were a few pieces that were a bit thicker) I made allowed me to have crispy jerky strips at 5 hours. The thicker bits took another hour.

Advertisements

And let’s face it, I’m a busy mom and I usually don’t get around to process projects like this until the evening (usually while I’ve got the dinner cooking and I have a few minutes to do another task). The shorter processing time is most definitely my best choice.

For the marinades I chose from the Asian cuisine just because they are all great for an all round punch of flavor and generally well seasoned. From a local Vietnamese grocery store I had purchased a Honey Garlic Marinade and Korean BBQ sauce. From a local restaurant supply store I used Mr. Yoshida’s Original Gourmet sauce. (Mr. Yoshida’s is the sauce that I freezer marinade chicken and pork in for a quick pull out of the freezer “teriyaki” dinner where I don’t have to plan a marinating time.)

For marinating, I used the bowl and zipper bags. Obviously the bowl is the better option. However, in the middle of trying to get Christmas presents created and made, let’s just say I forgot two marinades for two days and am very glad that I used the zipper bags. My fridge space is at a premium right now and they were easier to store than a bulky bowl.

And as a side note, I highly recommend a longer marinade time than the recommended 15 minutes that I used for the wet rub and the Honey Garlic Marinade. Obviously the two day marinade imparted much more flavor into the jerky. 15 minutes on a marinade gives you only a hint of the flavor. However for a wet rub 15 minutes is most definitely all you need and you still get more flavor than the marinades.

Prepping the Jerky

You are going to run into a world of difference of opinion when it comes to jerky thickness. Some love the thin. Others prefer the thick cut. Then there are the people who love jerky that snaps and is crunchy. And others who want more of a soft chewy bite.

I really can’t tell you how you should cut your meat in prepping your jerky. Just know this. If you want the chewy bites of meat, you will want to cut the meat thick. If you want crunch and texture, you want to go with a paper thin cut (think Pho or Fondue, where slices of raw meat are added to the broth and cooked by the soup almost instantly).

Advertisements

The thickness of your meat is going to drastically determine your dehydrating time. So even if a recipe tells you that the time is x hours, in reality that is when you’re going to check the jerky. Chances are very good that you will need to add a few or several more hours depending on just how thickly you cut your meat.

The absolute cardinal rule of making jerky is that you have to remove as much fat as you can from your meat. Fat is the limiting factor for how long of a shelf life you can keep your meat before it turns rancid and is spoiled. Small thread like seams of fat is not going to be an issue because the heat of the dehydrator will usually render that fat out, especially on the super thin cuts of meat. If you prefer the thick cuts of jerky do not count on any rendering to take place at all. The fat that goes in will still be on the jerky when it comes out.

TIP: If you cut your meat against the grain you will have tender jerky that you don’t have to work and pull to take your bite. It’s the difference between have crispy jerky and looking like you’re a pup working on a raw hide.

Looking at the above pictures (of raw meat), you will notice that there was still fat on my slices. But here (below) you will notice that they rendered out.

In fact, what you see in these pictures is four trays worth of jerky that I piled up before packaging up. On the left is the Korean BBQ. And the right is the Mr. Yoshida’s marinade.

When dehydrating jerky make sure that the meat is laid out flat (not folded over into layers) and isn’t touching it’s neighboring piece of meat. If the meat over laps the jerky is going to stick together. It’s not too much of a problem with the very thin slices. But the thick slices, the meat will still be raw even after several hours of dehydrating.

Sealing it up for storage

The great thing about making jerky is that it does not require fridge or freezer space. If you have air tight containers, chances are that you will probably eat the jerky you made before it goes bad. (This is especially true if you were diligent in cutting off as much fat as possible.)

There are many great products out there. There are vacuum glass or plastic containers. You can vacuum seal in mason jars using a vacuum sealing lid attachment.

One word of caution on this one. There new canning lids have greatly reduced the amount of rubber used on their gaskets. Everything I vacuum sealed with these new seals has completely failed from about 1 month up to 4 months. So please be aware of the lids that you use for vacuum sealing. While these new lids have remained true for water bath and pressure canning, they have been a complete failure for vacuum sealing my dry goods. If you wish to vacuum seal in your mason jars, I highly recommend that you switch to a reusable gasket and lid set like the ones made by Tattler. The more cushion created by a thicker gasket you have, the greater the longevity of your vacuum seal is going to have in remaining in contact with your jar.

Advertisements

The method that I used for these roughly 15 pounds of pork loin (actual jerky weight is less because weight of water content was removed) was sealing in mylar bags.

Mylar bags can be used with a vacuum sealing system. However I don’t want to discourage you if you are on a budget. The truth is that I haven’t found a vacuum sealing system that I’m in love with. Even sous vide vacuum sealing systems have failed me and I’ve gotten rid of them. What I’m about to show you, I’m not happy with for long term storage. However I am very pleased with the results for at least a year’s shelf stable storage condition.

Below, I’ll leave a link to this model of a mylar sealer. It is not vacuum sealing, but it is economical for the families on a budget.

Once you place your jerky in the mylar bag, place an oxygen absorber. (Oxygen is the enemy of food preservation.) An oxygen absorber is all that you need in a bag like this. The bags, before sealing are open at the very top. Once I have the meat and oxygen absorber inside, I hand press the excess air out of the bag and use the zip lock to close it off.

By removing as much air as possible, it creates less work for your oxygen absorber. And in that process, there’s more absorbing properties available should you fail to seal the bag properly and a little air leaks in.

Advertisements

Oxygen absorbers are soft when they have the capacity to absorb more oxygen. When they are no longer functional, they become hard.

With the zip lock closed, I then place the bag in the sealing device. (Pay attention to the notched tabs that make opening the bag easier. You want to seal on the far side of that notch or else that feature will not open the bag for you when you’re ready to open your jerky.) This particular sealer works when you press the lever down on top of the mylar bag. There is a light that turns on when it is sealing and turns off when it’s finished. The maker recommends leaving the pressure on for an additional few seconds to make sure the seal occurs. And I highly recommend this step of patience. While this machine is economical, it’s not fool proof. I have better sealing than the sous vide machines I’ve previously used, but it still has its margin of errors.

One thing to look out for when sealing mylar bags are wrinkles in the seal.

As you can see here, the top part of the bag has a smooth seal. The bottom part, closest to the camera, has wrinkles. These wrinkles are where you seal can fail and put your oxygen absorber to work. If you see this, seal the bag again and manually check to see the condition of the seal. There have been a couple of times where I sealed the bag, but the seal absolutely failed and when I checked to see if the top was sealed, it popped right open as if I hadn’t sealed at all. No matter what, always check that seal!

Absorbers

There are two types of absorbers; oxygen and moisture. My jerky is so dry and snaps that I pass on the moisture absorber. If you are making a thicker jerky with more chew, you will most definitely want to add a moisture absorber into your bag with the oxygen absorber. After all moisture is that creates the environment for mold to set in on food. And we don’t want that.

And just because you’ve not had rain for a while does not mean that you are clear to skip the moisture absorber.

This past summer we were a couple months with zero rain and yet we had humidity levels in the 90% and higher range. This is completely unusual for the Pacific Northwest and frustrated me to no end. I was dehydrating my vegetables to turn them into powders for seasoning. I would shut my dehydrator off at night, when I went to bed, and in the morning my dried vegetables were moist and flaccid again. I was so frustrated!

The point of that story is that even though you don’t have rain falling doesn’t mean that you’re free of moisture.

Advertisements

With these rounds of making jerky I packaged them the same day, after they cooled down. I was not going to chance moisture being in my bags and ruining my jerky. (It also helps that my humidity levels were also in the 50% range, so I know the jerky was not being a moisture sponge while it cooled.)

Pay attention to your humidity levels. When in doubt add a moisture absorber with your oxygen absorber. And if your meat is thick cut, absolutely add that moisture absorber. It will keep your jerky’s texture and minimize the threat to your preservation.

TIP: If your absorbers come in a single large bag rather than smaller packages, you can still use the amount of absorbers that you need and seal the bag back up with your heat sealer. This will prevent oxygen from further exposing your extra absorbers. They will be preserved and ready for you to use when you’re ready to use them.

Which was my favorite Jerky?

I’m going to hands down say that my least favorite was the Honey Garlic Marinade. I had such high hopes for it because it smells so amazing! The problem was that the package directly said it was for 1 pound of meat and my jerky was 2.5 pounds. I will try this one again but make sure the meat to marinade ratio is true. The other problem was that the marinade turned out to be a low sodium finished product. My preference is toward a salty jerky. (Salt is a natural moisture absorber, it draws the water out of the meat. This is why jerky and preserved meat is always so salty.)

If you’re looking for a low sodium option for your jerky, than I think you’ll be pleased with the Honey Garlic Marinade. Both the honey and Garlic were mild in flavor, almost negligible in flavor–again, the problem of meat to marinade ratio.

In third place was the Mr. Yoshida’s jerky. While it was not my favorite and I may or may not make this jerky again, I do have to say that I loved this mild Teriyaki flavor. All the Teriyaki flavored jerky I have ever bought from a reputable jerky brand and always been too sweet and even off putting. I love Mr. Yoshida’s for having that palatable Teriyaki flavor.

I did learn from the Honey Garlic Marinade. So before I turned my dehydrator on, I sprinkled salt on top of this jerky. A light dusting of salt was just enough to season the meat without becoming a salt bomb. It enhanced the flavor of Mr. Yoshido’s. Even with two day’s marinating, had I not dusted with salt, the flavor would still have been bland.

Unless you’re going for a low sodium jerky, always salt it before you dehydrate it.

A very close second place goes to the Korean BBQ marinade. I will most definitely make this one again! There is a hint of sweetness, but you pick up bites of garlic. The reason for this is because the marinade had minced garlic in it. Even if you’re not familiar with Korean food, you will love this marinade just for the garlic. The best part is that you can eat and eat this jerky and you won’t need a breath mint.

This one was also dusted with salt before dehydrating. I played around with the salt levels on this one. A light dusting will keep you down in the lower sodium range. Although this marinade is still amazing with a heavier hand of salt, more to the traditional levels of saltiness. So you can go light or heavy on the salt with this one and still have an amazing jerky that beats out the ones that are bought in the stores.

My absolute favorite was the wet rub! I seriously had to bag that jerky up to keep from eating it all up. And even then it took self control not to open the bags that I just sealed. Flavor wise it’s true to the “original” that the professional brands sell. It’s not a fancy flavor, just good classic jerky. The salt level is probably on the moderate side. For my personal preferences, it’s on the upswing on the salty spectrum, but I also prefer my foods less salty than most people. If you like the salt, I would recommend, for the first time, sticking to the recipe above, and giving it a dusting before you put it in the dehydrator. If you’re a moderate salt person, the recipe is plenty good enough. And if you’re a low sodium person, go ahead and cut back on the salt.


Advertisements

Whether you’re limited on freezer space, want to take advantage of a great meat sale, looking for shelf stable foods, want a snack that won’t go bad on you, or just want to try something new, making jerky is definitely worth the time and effort!

You don’t even have to keep it in the snack food groups.

The great thing about jerky is that if you’re in a power outage setting you can use jerky as a meat in a soup. Thin slices of jerky will warm up and rehydrate rather quickly. The thicker jerky will give a soup texture. Or maybe you want to try something new with your chili or stew. You seriously don’t have to leave jerky in the category of a meat stick snack. There are so many uses that you can use it for when cooking for meals during an emergency or when you’re out enjoying nature.

What’s your favorite jerky flavor?


Products used in this post

This post contains affiliate links that give us commissions on products purchased at no additional cost to you. These items listed here are from Amazon but may be purchased at local markets.

ChoripDong Korean BBQ Sauce for Sliced Shortribs This product I could only find on the Canadian Amazon site. However it was at my local Vietnamese market.

Tattler Reusable Canning Lids

Regular Mouth

Wide Mouth

Processing…
Success! You're on the list.

Leave a comment

Advertisements

Holiday Cover Up

Let’s be honest. I panicked when I looked at the calendar and saw that I’m hosting a family get together on Christmas Eve.

I panicked a lot.

My house is tiny and very much lived in by three small children. And the state of this door says it all.

That hole in the paint, that’s where my oldest scrubbed the door until the paint came off. It was a stubborn pen stain. And who knew you could scrub the door so much the paint would come off???

We’ve lived in our house for over a decade. And I know it’s past time to repaint everything. In fact I have the vision for how I want to update our house interior. But I seriously can’t pull the trigger until we’re out of the color on the wall phase. All three do it. The oldest knows better but does it to push buttons when he’s angry at us. And evidently scrubbing his retaliation isn’t enough to break these outbursts.

Let’s just say that with all three back to back, I tell people it’s kind of nice because when you hit a phase you absolutely hate you only have to go through it once. Well the “wall art” phase is the first one that I hate. I just have to make it past this phase and I won’t have to go through it again!

Advertisements

The inspiration for this “hide my ugly doors” Holiday Cover Up was inspired by this YouTube video from Life of Style Blog, Dollar Tree Christmas DIYS 2022. I can’t improve her walk through for making a Paper Bag Snowflake, so I’m going to direct you to the 4:50 minute mark in the video. However I will give you some tips on how to make the snowflakes without making some easy to avoid mistakes.

Paper Bag Snowflake Tips

The paper bags that I used were not brown paper lunch bags. I happened to have white paper 2 lb bags that measure 4″ x 2.5″ and 7.5″ tall. Yes, my bags are smaller in proportion than the ones used in the video. But the shape of the bag is going to behave the same way no matter the size of the bag. I do want to mention that this 2 lb bag created about a 16″ snowflake. So if you do go with a lunch bag size paper bag, you are going to end up with a beautiful large snowflake!

  1. Leave large spaces between your cuts. I tried making delicate lines. And as you can see (picture 1 above) the spokes snapped when I glued the snowflake together.
  2. If you glue to the bag’s open end corners, 7 bags is only going to give you a half circle. Picture 2 shows you how stressed the paper becomes when you take it to the bag corners. You end up taking away the flexibility of the paper because you limit yourself to the length of the small side of your bag base. In my case, I limited the distance between spokes down to 2.5″.
  3. If you glue to the edge of the bag’s open end, 7 bags may not be enough. (Picture 3) I started off with 7 bags, but when I went to fold the two ends together, the 3D snowflake structure started to collapse and flatten. I cut more of the pattern and added in 2 bags first, but found that wasn’t enough. At that point I just made another 3 to bring the number to 12 bags and that was enough to take the stress out of the paper. It no longer looked like it was going to collapse and flatten.
  4. If you glue to the middle of the bag, the snowflake will be loose enough to not be stressed looking. I was most happy with everything about picture 4 (below). The paper was not stressed at all. There was flexibility. And it was the least frustrating in closing the snowflake. (If you are craft challenged, I think this tip will be the option that you will find most forgiving and less stressful for you.)

If you want additional ideas on who to close the snowflake AND make it reusable, check out the comments under the video. The velcro comment is ingenious and I will be making reusable snowflakes for the rest of the ones that I make for the season.

And let me just say this, I will not make a snowflake the old way again! Until a new idea comes around, this is my go to for making snowflakes. Depending on how intricate your cut design, I estimate that it took me about 7 minutes to make the snowflake (below) with three triangles down each side.

Please don’t limit this craft to just snowflakes. You can easily purchase bright fun color gift bags and make bunting for baby showers, birthdays, bridal showers, anniversaries, and anything else that you are celebrating. If you opt for the bunting, non-snowflake option, I highly recommend Tip 3 (above). It gives a full circle that reminds me of Latino bunting. And the airiness fits perfectly with Boho style.

Advertisements

Rigging Snowflakes

As I mentioned earlier, I have a small house. Most decorations I use are the ones that I can hang somewhere. So I made these snowflakes with a hanging line installed in the hot glue between two bags.

The easiest way of doing this is to make a loop on the end that you will be putting in the hot glue between the bags. Experience, through the years, has shown me that just gluing in the string with no further feature for the glue to hold on to, the string is just going to pull right out. So I’ve always used a loop, like you see here.

The loop allows glue to connect and hold on to three points of the string. Think of it acting like a Y. There is a natural pooling space between the arms of the Y and in the arm pits. And with paper also glued on either side, the string is anchored in pace.

In fact, my youngest swung at a snowflake hanging from my ceiling, with a roll of wrapping paper, like a piñata and the paper broke but the string held its place.

Hide the Ugly Door

At the Dollar Store I found rolls of candy striped wrapping paper. 1 roll of 40 square feet is enough to cover one door (front and back with a little left over for patch work).

I decided to wrap my doors instead of scrubbing and/or painting them because I have zero time to move this task to the top of my to-do list. I don’t have time to paint on top of the normal craziness that December brings every year. Not to mention that the only space I have to paint doors is outside and currently we have off and on snow. Wrapping the door did take me somewhere between an hour and two as it was. I couldn’t keep an active count because I did this while chasing and feeding kids. So I count this a success.

This door, I wrapped while it was still on its hinges. I’m pretty sure that this was the time suck because of how much time I had to spend in sliding the paper under the door and through the hinge space.

With the exception of working around the door handles, wrapping a door would most certainly be easier to do when it’s removed from the doorway.

That being said, I’m going to show you how I did this while keeping the door in place.

Do the front of the door first.

With some prepped pieces of painter’s tape, I draped the top of the paper over the top of the door and held it in place with a piece of tape. This freed me to go to the back side of the door and position the paper before anchoring it down.

TIP: Painter’s tape is amazing for this first part because it’s strong enough to keep the paper in place but release the paper and door without ripping the paper.

Now that the wrapping paper is going to stay in place, I went back to the front side and dealt with the door knob.

Take an exacto knife. With your free hand, run the paper down smoothly from the top of the door down to the top of the door knob. With the paper held in place, cut around the edge of the door knob with the exacto knife.

If you find it difficult to cut smoothly without ripping your paper (I did because the Dollar Store paper is cheap and very thin–it rips when you look at it funny) than cut an X or + over the door knob. This allows the knob to come through the paper and becomes easier to work around.

TIP: If your cuts are too big, it’s not a problem. Grab your clear tape that you use for wrapping presents. No one is really going to notice if the tape is glossy. They have to look for it to see it. But if you want to be thorough, use a matte finish tape. It will become invisible and no one is ever going to find it.

Advertisements

TIP: If the cut lines are jagged and uneven, don’t worry. When you’re all finished you can hide this by tying a thick ribbon around the door knob, hang a door decoration or even a stocking from the knob. When in doubt, place an accent decoration piece over the rough edge.

Once the door knob has a clean cut circle around it, this is now another anchor point to help you wrap the paper around the edges of the door.

For the hinges and the latch for the door, use the exacto knife and cut from the edge of the paper to the edge of the door. The flap that you want to remove you can either cut it off or fold it and slide it behind the paper on the face of the door.

TIP: The most difficult areas for me to work around were the top and bottom corners on the hinge side of the door. If you need to, cut the diagonal so that you’re only wrapping around one side at a time rather than two at the same time.

When you come to the bottom of the door, cut the paper from the roll a little longer than you think. I thought I gave myself about two or three inches to come up the back side of the door, I just barely had enough to come up onto the back face of the door. So don’t be afraid to give yourself more paper than you think you need.

Once the front face is all taped down, pick up the remnant of paper and hold it up to the back of the door. Find out where you need to cut to cover the exposed door, width wise. Lengthwise you will see that there’s not enough. And that’s okay. The excess width that you cut off will be enough to cover that bottom section and some pieces to patch around the other side of the door knob and anything you want to clean up (like painter’s tape that you used to tape down the front face).

With the pieces cut and ready to go, start taping those up. I started with the bottom so I could hold those pieces up with painter’s tape (which would then be covered by the larger back face paper). With these edges being seen (much like a present that you wrap in a piece meal fashion because of an oversized box or using paper scraps because you ran out of paper on Christmas Eve), use the clear tape and be as liberal as you would like to.

TIP: With the right printed pattern, it is possible to make everything line up perfectly and not have that piecemeal look. I had hoped that this candy cane print would have done that, but I got caught a few times where the stripes just wouldn’t line up.

Decorating the Door

There are so many options that you can go from here.

For example, one of the fads right for the last couple years is wrapping mirrors or paintings on the wall as presents. The door can be decorated the same way with ribbons and bows.

Don’t have enough wide ribbon. I found colored metallic duct tape in the auto aisle of my local dollar store. They weren’t on my shopping list, but I did take note. And if you hate ribbons slipping (like they will on a door), the metallic duct tape would be a perfect alternative because those “ribbons” will definitely stay in place once you lay them down.

Another idea is to take a poster board and make a “Do Not Open Til Christmas” sticker. (I probably won’t do it this year, but it’s on my list for future ideas.) Or an over sized gift label.

The Paper Bag Snowflake Video that I shared with you above was one video that my kiddos watched with me and they wanted to make those. So the snowflakes are my go to this year for decorating. It’s an easy enough craft that they can do with me. And now that I know how to optimize our production, even my young preschooler can practice his cutting skills and be able to make something for Christmas.

Please share with me your snowflake or door decorations.

How did these crafts go for you? What accent pieces did you use to complete your projects?

Processing…
Success! You're on the list.

2 responses to “Holiday Cover Up”

  1. Pacific Northwest Event Design Avatar

    When I add the comment block, I hit the + (add block icon) and type “comments” in the search bar. The comment plug in is then automatically added into the post. (It’s a feature that is already available and no additional download was needed.)

    Like

  2. 015 Avatar

    I hasve read so many posts regarding thhe blogger lovrs excep thi arrticle
    iis iin fact a nice article, keep iit up.

    Liked by 1 person

Leave a comment

Lost on What to Bring?

It never fails that there is a family get together that you don’t know what to bring. Or maybe it’s an office or friends get together. And this is especially painful for those of us who cook well and bring an amazing dish but no one wants to touch it because it’s not one of those Pinterest fad dishes.

This is what you want to bring!

Back at Easter I found a Pillsbury cream cheese and crescent appetizer. I can’t find the exact one, but this link is their fall version in case you want to use an official recipe.

The problem I had was that after more than a decade of marriage, no one in my husband’s family told me that they preferred salty/savory dishes over sweet dishes. And I love cooking pastries and sweets. So once I got that bit of information I finally got the secret to making something that they always want to eat, I feel loved, and I’m not bringing tons of leftovers home of my dish (because they don’t want to take any home).

Again, the above link is for the thanksgiving version. But the Easter version focused on fresh parsley instead of the cranberries. I wanted to keep my Thanksgiving appetizer simple, so I just recreated the Easter version and put it in a cup instead of in a carrot shape, like I did this past spring.

You really don’t need the recipe. For the parsley version all you need on hand is:

  • Pillsbury crescent rolls (feel free to use the generic brand, it’s just the carrier for the cream cheese!)
  • Cream cheese
  • Parsley
  • Flavored Salt (I love garlic so I use garlic salt, but feel free to use any herb/flavored salt you have on hand)

Create Your Shell

For Easter I made a carrot shape by wrapping strips around a cone of foil. For Thanksgiving, I made a bowl by cutting squares and baking them over the bottom of my silicone cupcake molds.

Here’s the trick! If you want to create bite size pieces, use mini cupcake molds. The standard cupcake molds creates pieces that take about 4 bites. Know the people at your party. My family wants the bites that they can just pop in their mouths (or take two bites if they’re being dainty and polite). So the mini is perfect for your grazing appetizer get-togethers. If you’re doing something like a sit down side, the larger (regular size cupcake mold) is perfect for preparing pre-made plates for your get together.

TIP: Use the oven temperature on the package of your crescent rolls. But cut back on the cook time. The minimum cook time on the package I used was 9 minutes. The perfect golden brown I found came at 7 minutes.

Mix Your Filling

For the two packages of crescent rolls that I used, I mixed up about 32 oz of cream cheese. At Easter I found that 16 oz was barely enough to fill my carrots. In fact, I scraped from some carrots to fill others just to make sure that there was “enough” for all the carrots. And this filling is great to have leftovers with because you can spread it on bagels or toast and you will love it just the same!

Taking from my days at working in a University Dining Hall, if you want creamy cream cheese, you want to take the 10 minutes or so to aerate your cream cheese. All you do is take your cream cheese and put it in a bowl and use a hand mixer on high speed. (The Pillsbury recipes never tell you this trick, but believe me you want to do it!)

Advertisements

When you first start mixing, you will feel the chunk and clunk of the dense cheese. After 10 minutes you will notice that it feels like you’re mixing a thick butter cream frosting. At this point is when you want to season the cheese. Everyone’s salt preferences are going to be different, so I’m not going to tell you an exact measurement to put in. I prefer to barely taste the salt, in fact I would never salt cream cheese for feeding me or my boys. For my husband’s family, though, I salt it a touch beyond my comfort zone–this hits their food pleasure center. So if you are no or low salt making these for people who love salty food, season the cheese enough that it’s just outside your comfort zone but not a salt bomb. If you like salty food, season it to your exact preference. If people tell you that you like salt too much, season the cheese so that it tastes bland to you, but you can still barely taste the salt.

Once the cheese is seasoned, then you want to add your seasonal flavor embellishment. Parsley is good no matter what time of year. I like using just parsley because it’s not going to clash or taste bad eating before or after another appetizer. Plus, parsley is known as a palate cleanser. So if someone eats an appetizer that did not sit well on their tongue, they can come right back to yours and reset their mouth to go on with their party eating.

TIP: Right before Thanksgiving, Monday to be exact, all the parsley was severely picked over and the bunch I bought, when I got home and opened it had some slimy wilted parsley in the center. I couldn’t serve that to family, so I grabbed my dehydrated parsley off my herb shelf. While I love fresh herbs, I keep dried herbs for this precise reason. So don’t be afraid to use any dried herbs that you have on hand!

Advertisements

With the above recipe link, you will notice that Pillsbury used cranberries and jalapeño. Don’t be afraid to use other flavors during the rest of the year. For example, back for Easter I grated some carrots and put carrots in with the fresh parsley. For spring and summer you could definitely use dehydrated or freeze dried berries. (Just be careful of your water content from berries if you use fresh. They can loosen your cream cheese so it becomes too soft and sloppy.) For a fall and winter option, don’t be afraid to add some Pecans, Walnuts, or other winter nut. Even a candied nut can be your friend for a little bit of sweet and savory combo!

Putting it Together

It is possible to pipe the cream cheese mixture into your crescent shell. You will want to do this when you’re finished mixing your filling. And if you don’t have a piping back and tips in your kitchen, all you have to do is put your cheese into a zip lock bag, snip and bottom corner (after you zipped it up with all the air pressed out). The only drawback to this method is that if your cheese was put back into the fridge or not aerated, then the bag is going to burst.

What do you do if the bag bursts?

Take two small spoons from your drawer. I teaspoon full of cream cheese is more than enough to fill the shells made from the bottom of the mini cupcake molds.

Once your shells are filled, you can finish them off with a dusting of parsley or other flavoring that you put into the cheese (crushed nuts, berries, fruit, etc.).


There you have it!

This is how you can make an impressive appetizer without spending a fortune and doesn’t require a degree from a chef school. But even if you have even less time or say that you burn boiling water, if you can bake crescent rolls then you can spend a little more and get the fancy flavored cream cheese that is pre-made for you.

Even if you seriously can’t cook the crescent rolls, skip the chip and dip route. Pick up the pre-made flavored cream cheese and swing by the bakery department in your local grocery store. You can find pre-sliced bread or even baguettes. Slice up the bread, spread some cheese on top, and sprinkle some parsley (or other ingredients mentioned above).

What’s your favorite appetizer to take to a party?


Items that might interest you for making this appetizer

These links are affiliate links. We may receive a commission for purchases made through these links, but at no extra cost to you.

Standard Sized Silicone Cupcake Molds

The silver platter I used was a wedding present. Here is a Silver Tray available in a similar style.

Or perhaps you’re looking for a Ceramic Tray.

Various Freeze Dried Fruits to choose from. These Cranberries are a seasonal favorite that’s unique from the fresh berries in the store where they are good for a year after opening.

Processing…
Success! You're on the list.

Leave a comment