Meet Frankenstein

Honestly, I should know better! Names have power. And the last time anything was very aptly named in my family was when my sister named her goldfish Sushi. It ate all the other fish in the tank.

I should have known that naming a starter Frankenstein was going to be a wild ride. But I’ll come back to that in a moment.

Today is the last day of this miniseries talking about yeast and bread making. I wanted to finish with my experience in making a Gluten Free alternative for in those who cannot keep a starter with flour, because of dietary restrictions. Because everyone should have the opportunity to keep a starter that meets their needs.

When I told my Mother in Law my plans for making a starter (my original flour starter), she was so excited and told me that I had to make a potato starter. She remembers having one from when she was a girl, but couldn’t find her recipe. And her memory was very limited in that process. She heard me out with my flour starter and insisted that it was just as simple and the same to make it from potato.

Of course I tried to verify everything she described with what everyone else has posted on Pinterest. And no, what my Mother in Law told me was different from what everyone else is doing. I’ll save you the search, unless you want to go down that rabbit hole. The rest of the world is making their potato starter using instant potatoes.

If you have a potato starter and use instant potatoes can you humor me and check the ingredients on the side of your box?

If you are comfortable with everything you see there, then I won’t say another word on that subject. Keep your starter healthy and keep making that glorious bread in your kitchen!

If you see anything there that you might not have been aware of or want to move toward a starter with fewer ingredients, you can transition your feed to using just a potato. I’ll show you how.

The Set Up

The little bit of information that I did receive from my Mother in Law was that the potato start from her childhood was just a boiled potato mixed with water.

Believe me I know exactly what you’re thinking! I thought the same thing.

There was not enough information to start with. What do you do with the potato? …I won’t bog you down with the list of questions that I had. Even with a degree in history, and having professors who assigned me to make food from out of circulation recipes, I had high hopes of finding some old recipe to work with. And all I had in the end was boiled potato and water.

BUT I wanted to make this experiment, with the thought in mind: How do you make yeast start with just what you can find in your pantry or garden?

It was a what-the-heck moment. Let’s do this thing!

I grabbed a potato, peeled and cubed it. Put it in a sauce pan with water and cooked that potato like I would mash potatoes. Only this time the seasoning, butter, and milk stayed where they were. Once the potatoes were soft, I removed them from the heat and reserved the water I boiled with. We all know that when you cook, all vitamins and nutrience end up in the cooking water. And I had no idea if the potato or the water has the stuff I want. (Also there’s the side objective of trying not to waste resources.)

And here is where I ended up with two potato starters. I didn’t have faith in my Mother in Law’s lack of directions. (To be fair, she hadn’t used this method in many decades and probably thought she never would.) So I chickened out and took Method Two. But the next day I decided I was doing myself a disservice by not attempting my Mother in Law’s way. If it failed, at least I had the other starter to fall back on.

METHOD ONE

  1. Mash the potatoes. In hind sight I didn’t mash them as smoothly as I wanted. The chunks are very obvious. But rest assured, even if your potatoes are chunky, you will still get healthy and viable starter.
  2. Mix in some of the cooking water. This is going to be a wet starter. So think between toothpaste and stew consistency.

I named this starter Carolyn.

METHOD TWO

  1. Mash the potatoes. In hind sight I didn’t mash them as smoothly as I wanted. The chunks are very obvious. But rest assured, even if your potatoes are chunky, you will still get healthy and viable starter.
  2. Mix in some of the cooking water. This is going to be a wet starter. So think between toothpaste and stew consistency.
  3. Add a couple Tbsp of starter from an established yeast.

I named this starter Frankenstein.

Why would Method Two work?

When researching about starters, you learn that you can turn a gluten based starter into a gluten free starter by slowly changing its food source away from being wheat based to your GF flour of choice.

I didn’t do the gradual change, because the food source and environment was completely different. So I just jumped all in and went at it from a science lab experiment of inoculating yeast into a new medium.

What if I’m transitioning my existing potato starter from potato flakes to potato?

The standard method of transitioning starters to a new food source is to feed on the following schedule:

Transition Day 1: Use 75% old food source + 25% new food source.

Transition Day 2: Use 50% old food source + 50% new food source.

Transition Day 3: Use 25% old food source + 75% new food source.

Transition Day 4: Use 100% new food source.

All the transitioning experts assure their audience that even with a gluten starter transitioning to gluten free, the more you feed the starter without the gluten food source, the more your starter transforms into gluten free. If you are GF by choice, you are good to start using your transitioned starter after day 3. If you are GF for medical reasons, then there comes an educated decision based off of your sensitivity. If you are very sensitive, and know your levels, you can do the math to determine what an acceptable amount for consumption is. Your bread recipe is going to have a yeast to flour ration, giving you an overall percentage. On Day 4, there is potentially a 62.5% gluten level in the yeast. Day 5, that drops down to 31.25%. Day 6, 15.63%. And so on. Now if your bread recipe keeps the baker’s ratio for bread making (2% of flour weight), Day 4 has a potential gluten amount of 1.25%. Day 5 has a potential amount of 0.63% in the bread. So you can see how this is an educated based decision of what is acceptable for your body.

Please note: I have not transitioned a yeast to a new food source other than what I did to Frankenstein. So I have no idea if Frankenstein is what’s normally expected, or just some fluke that succeeded. And Frankenstein I didn’t transitioned at all. I just dropped flour based yeast in a room temperature environment of potato and water.

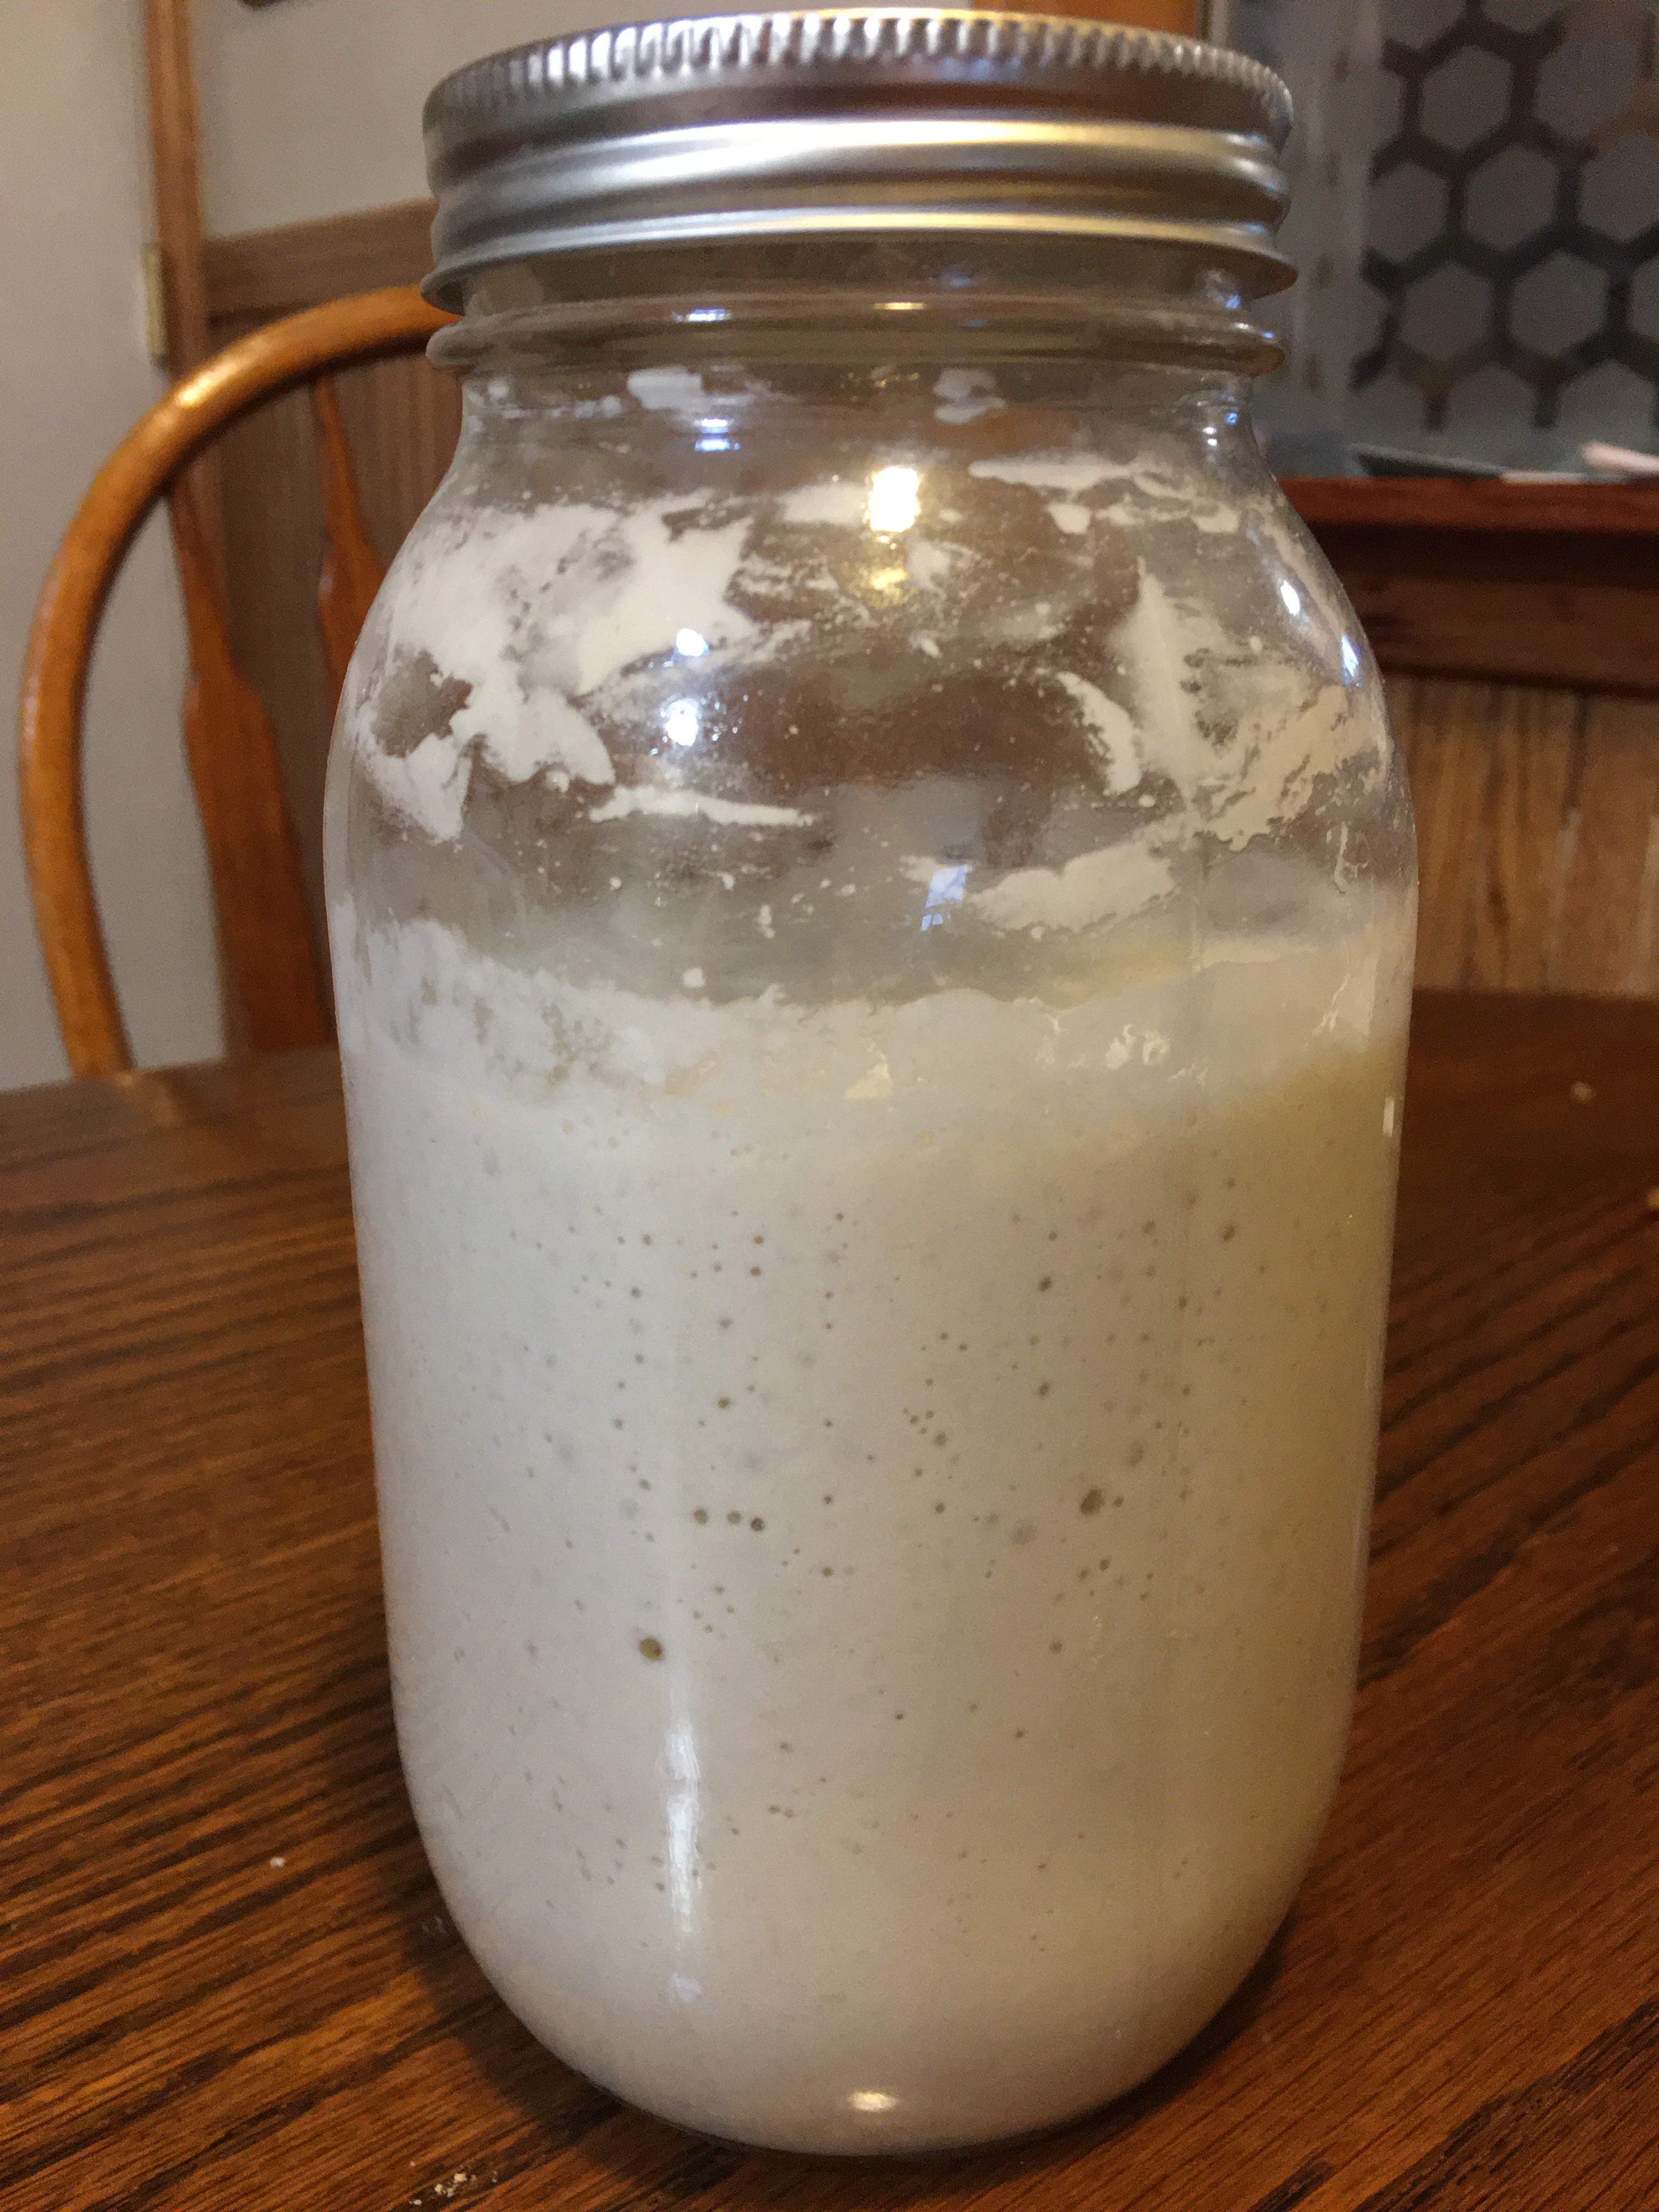
Picture 1 is Frankenstein. Picture 2 is Carolyn. These are just my starting point, pictorial references. So at least you have something to compare your potato starter with.

As a time saver for feeding, I boiled a couple of potatoes at the same time. I saved the left over mash and cooking water, and kept them in the fridge. When I was prepping for a feeding (twice a day) I took the mash and water out about an hour ahead of feeding time, so it could come to room temperature.
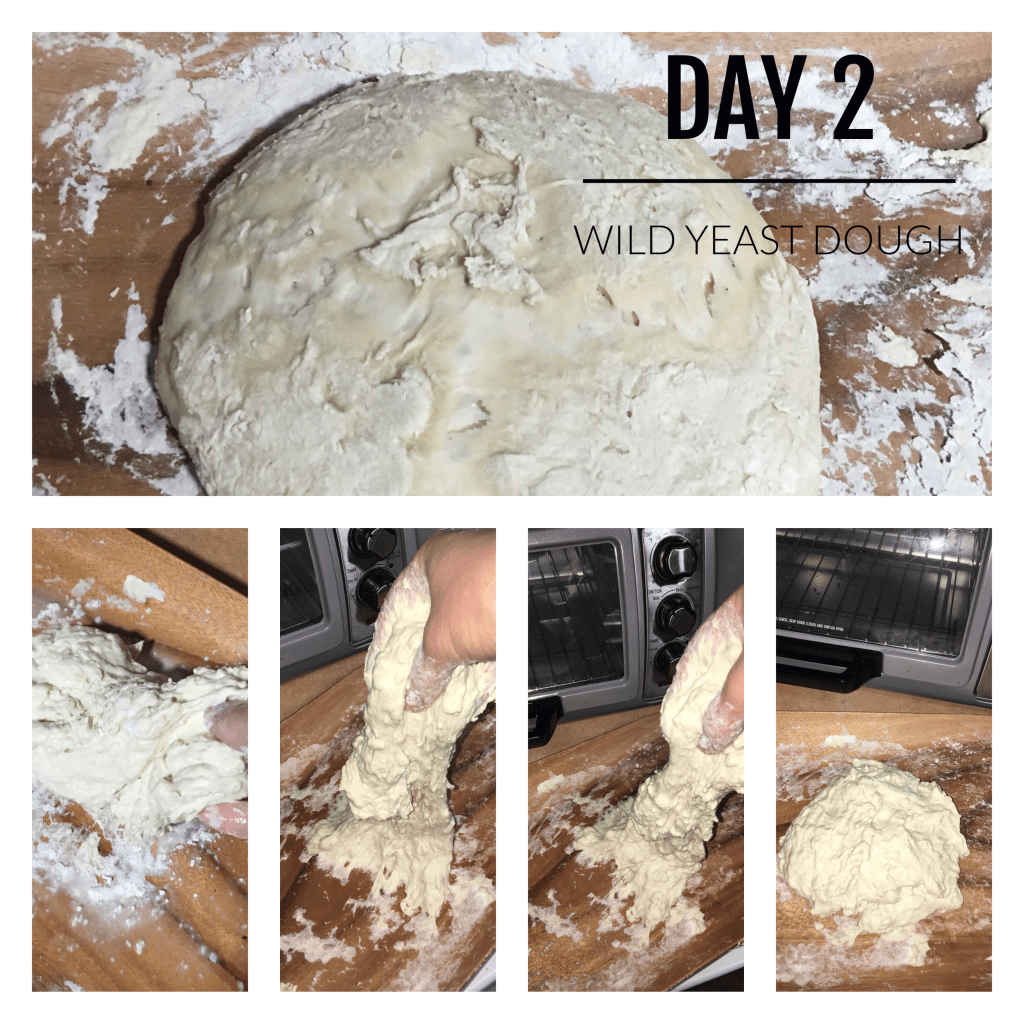
Day Two

I continued with a 2 time a day feeding of potato mash and the cooking water.

What I did not count on was Frankenstein (picture 2)!

Let me give you a close up on two of pictures in the set. In the above picture (picture two, top row, second from the left) you will notice that Frankenstein had clear striation between solid and liquid. When I placed a scraper in and gave to couple mixes to reincorporate the components for a feeding, I got Picture 1 (below). Frankenstein was alive!

I have never seen this kind of reaction in my life, especially in the world of yeast. This yeast, I called Frankenstein, was going crazy! In fact, Picture 2 (above) is the still of what I saw. There was movement in the jar that was very reminiscent of a lava lamp.

I mention all of this because if you decide to inoculate you potato start with another start, just to get active yeast from the get go, and you see foaming activity like this know that you are not alone. It happened to me and I have the photographic proof to prove it. The smell is standard for starter. It’s just the yeast activity that is the only difference.

What I fed Frankenstein and Carolyn were the same potato and cooking water. The only difference between the two starters is the origin of yeast. And that yeast came from my AP flour based starter, which never acted this way either.

Day 3

Continue with the 2 times a day feeding of potato mash and cooking water.

The activity with Frankenstein was still happening, but to a lesser level. Here are some pictures to show you where that starter was. I don’t seem to still have pictures for Carolyn.

I stopped taking pictures of Carolyn on Day 3 because I had some research to do.

If you remember from Valuable Resources, I mentioned things to look out for when keeping a starter. Your starter should never have mold, spores, or color on top. Neither should it have an acetone smell. On Day 5/6, I posted on Facebook, how Carolyn started smelling like butter.

Freddy is my flour starter.

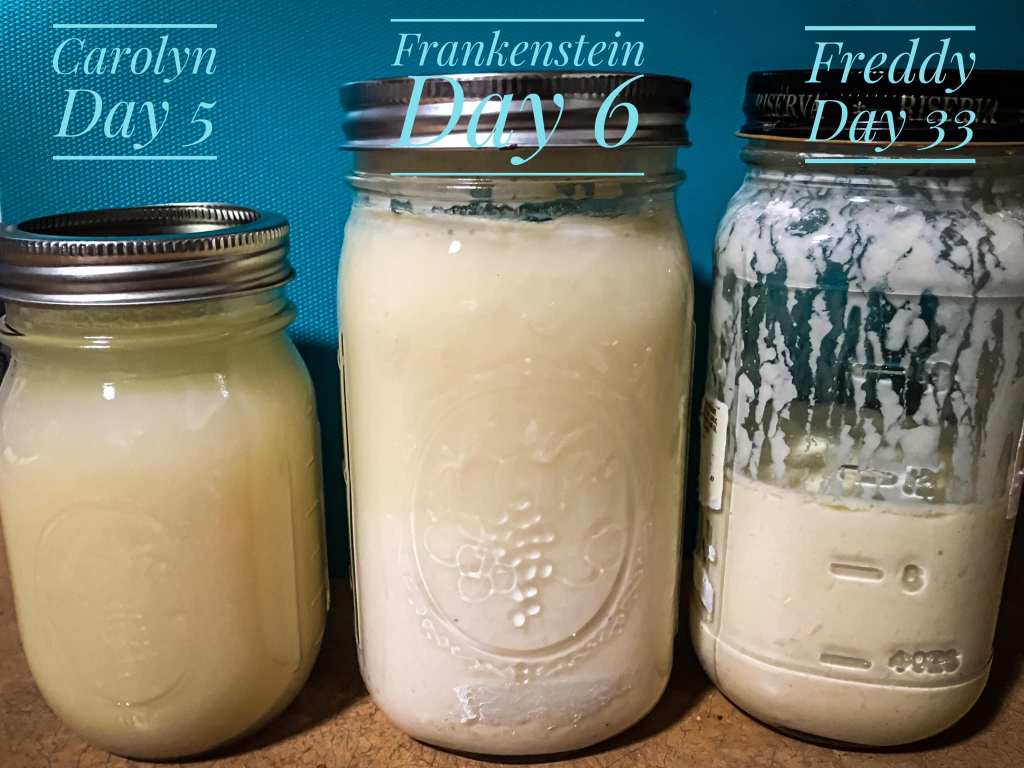
I’m going to pause here and just let my post communicate what happened to my 100% potato start.

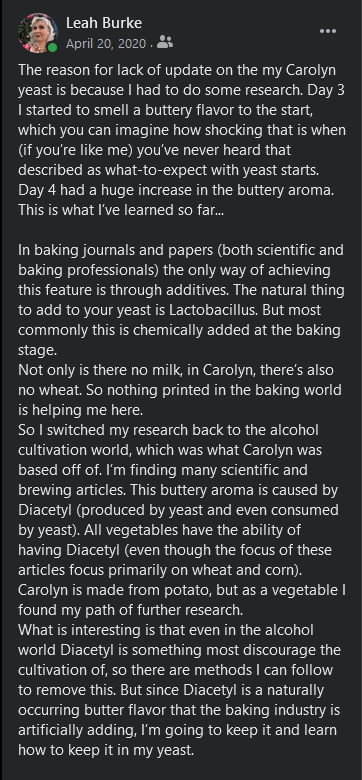
Here’s what happened, Carolyn was well on the path of turning herself into vodka. This will be a common problem, correcting Diacetyl, when you have a potato starter. This is because its potato based, not wheat based.

What I learned from Carolyn, and making a starter with next to no knowledge with what you’re doing, is that you HAVE to go back to a source that you know. Yes, I was making a starter. But this problem was not covered in anything written about sour dough starter for bread. It didn’t make much sense to look into the world of vodka making other than the fact that vodka making starts with a potato mash, which is exactly how Carolyn started. And within minutes of looking at sources in the vodka world, I found my answer.

For those curious, what caused the Diacetyl? It could have been a bacterial contamination. Or it could have been that this starter had oxidized. (Remember that yeast has anaerobic respiration.) I happen to believe that this time it was oxidation, because it happened on Day 3 which is when Diacetyl enters production of beer brewing. And all your alcohols have tools to keep oxygen out of your cultivation.

How did I heal Carolyn from Diacetyl?

There were a few options from the brewing and Vodka world. I started with adding salt into my starter (probably about 1 1/2 tsp worth. I guessed the measurement, and added a little bit more than what I thought I needed). This time, all I needed was the salt. The next day the butter smell was gone.

I cannot stress this enough. No matter what medium you use to feed your starter, yeast is a living organism. Every time you open your container to use or feed your starter, always visually check its health and smell it. Your yeast will tell you when something is wrong. And when you catch it quickly, you can tend to your yeast and keep it from going bad on you. It can turn around and come back into health.

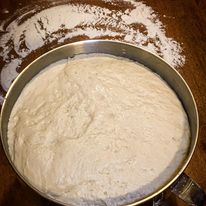
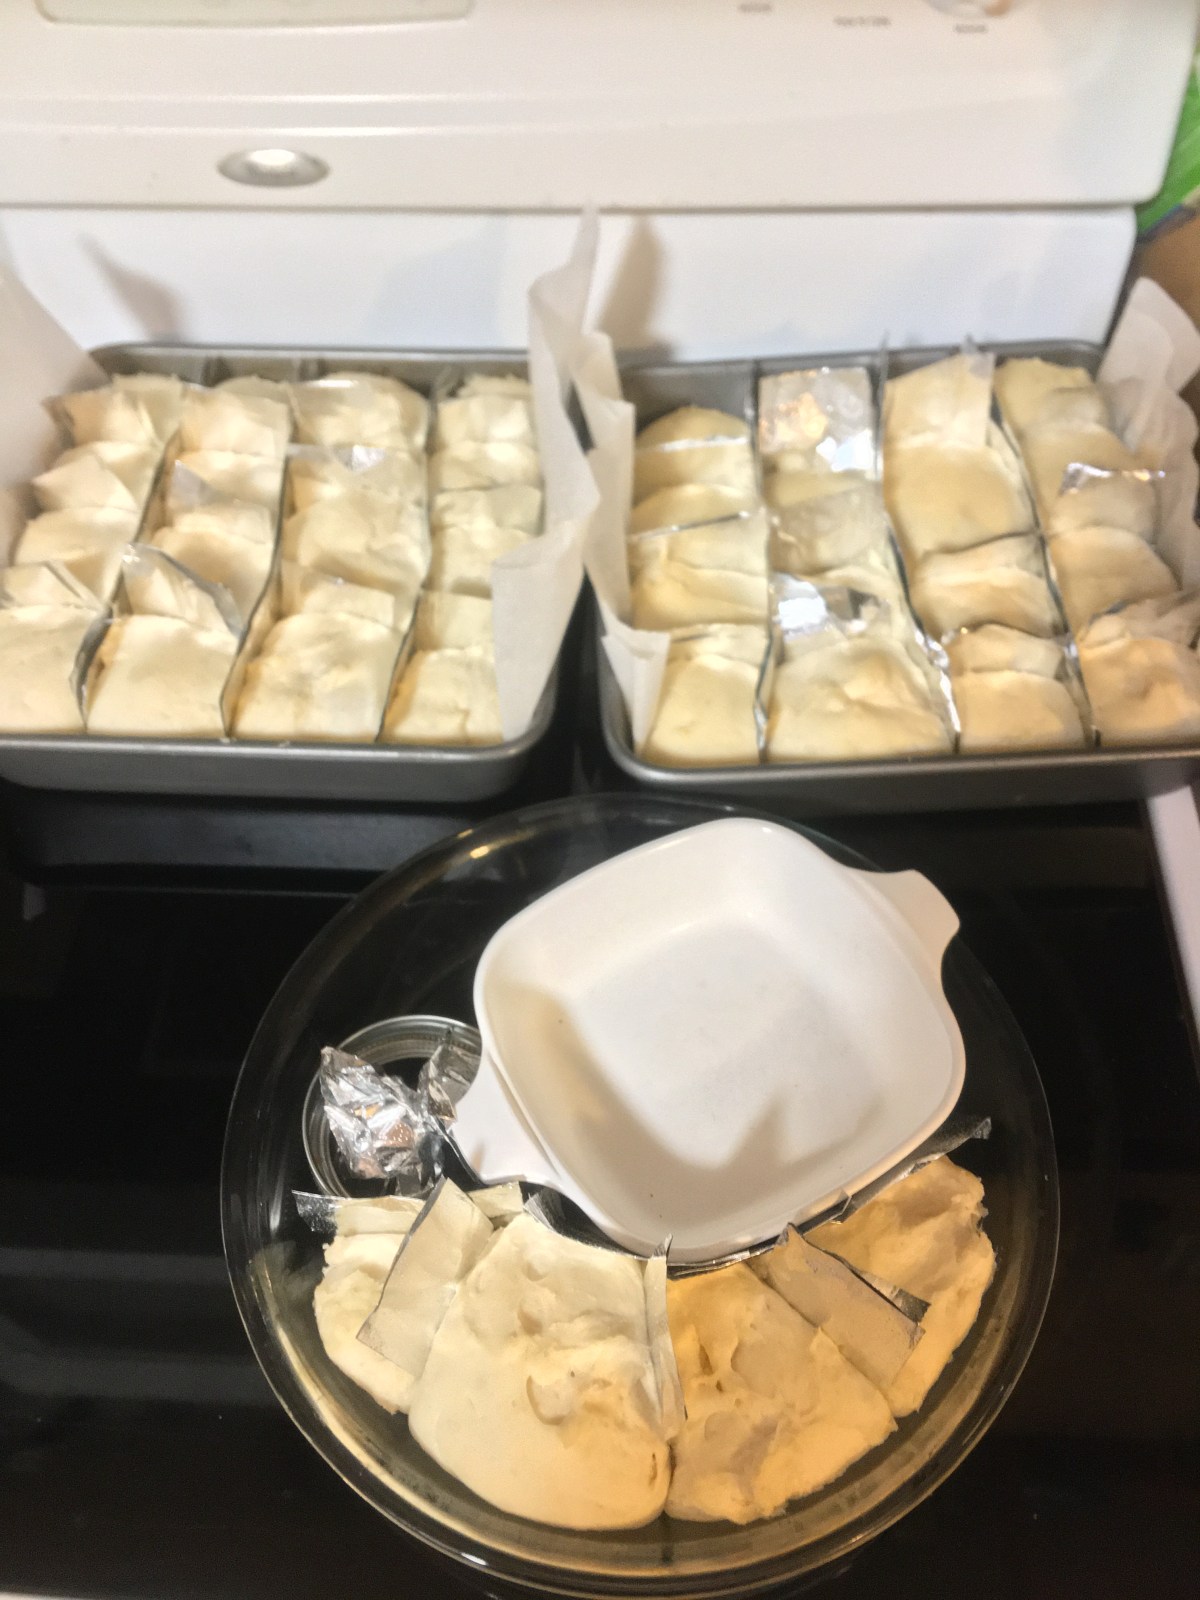
Here is a picture of how Carolyn started showing evidence of being healthy and active.

And the Pay Out

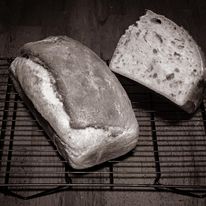
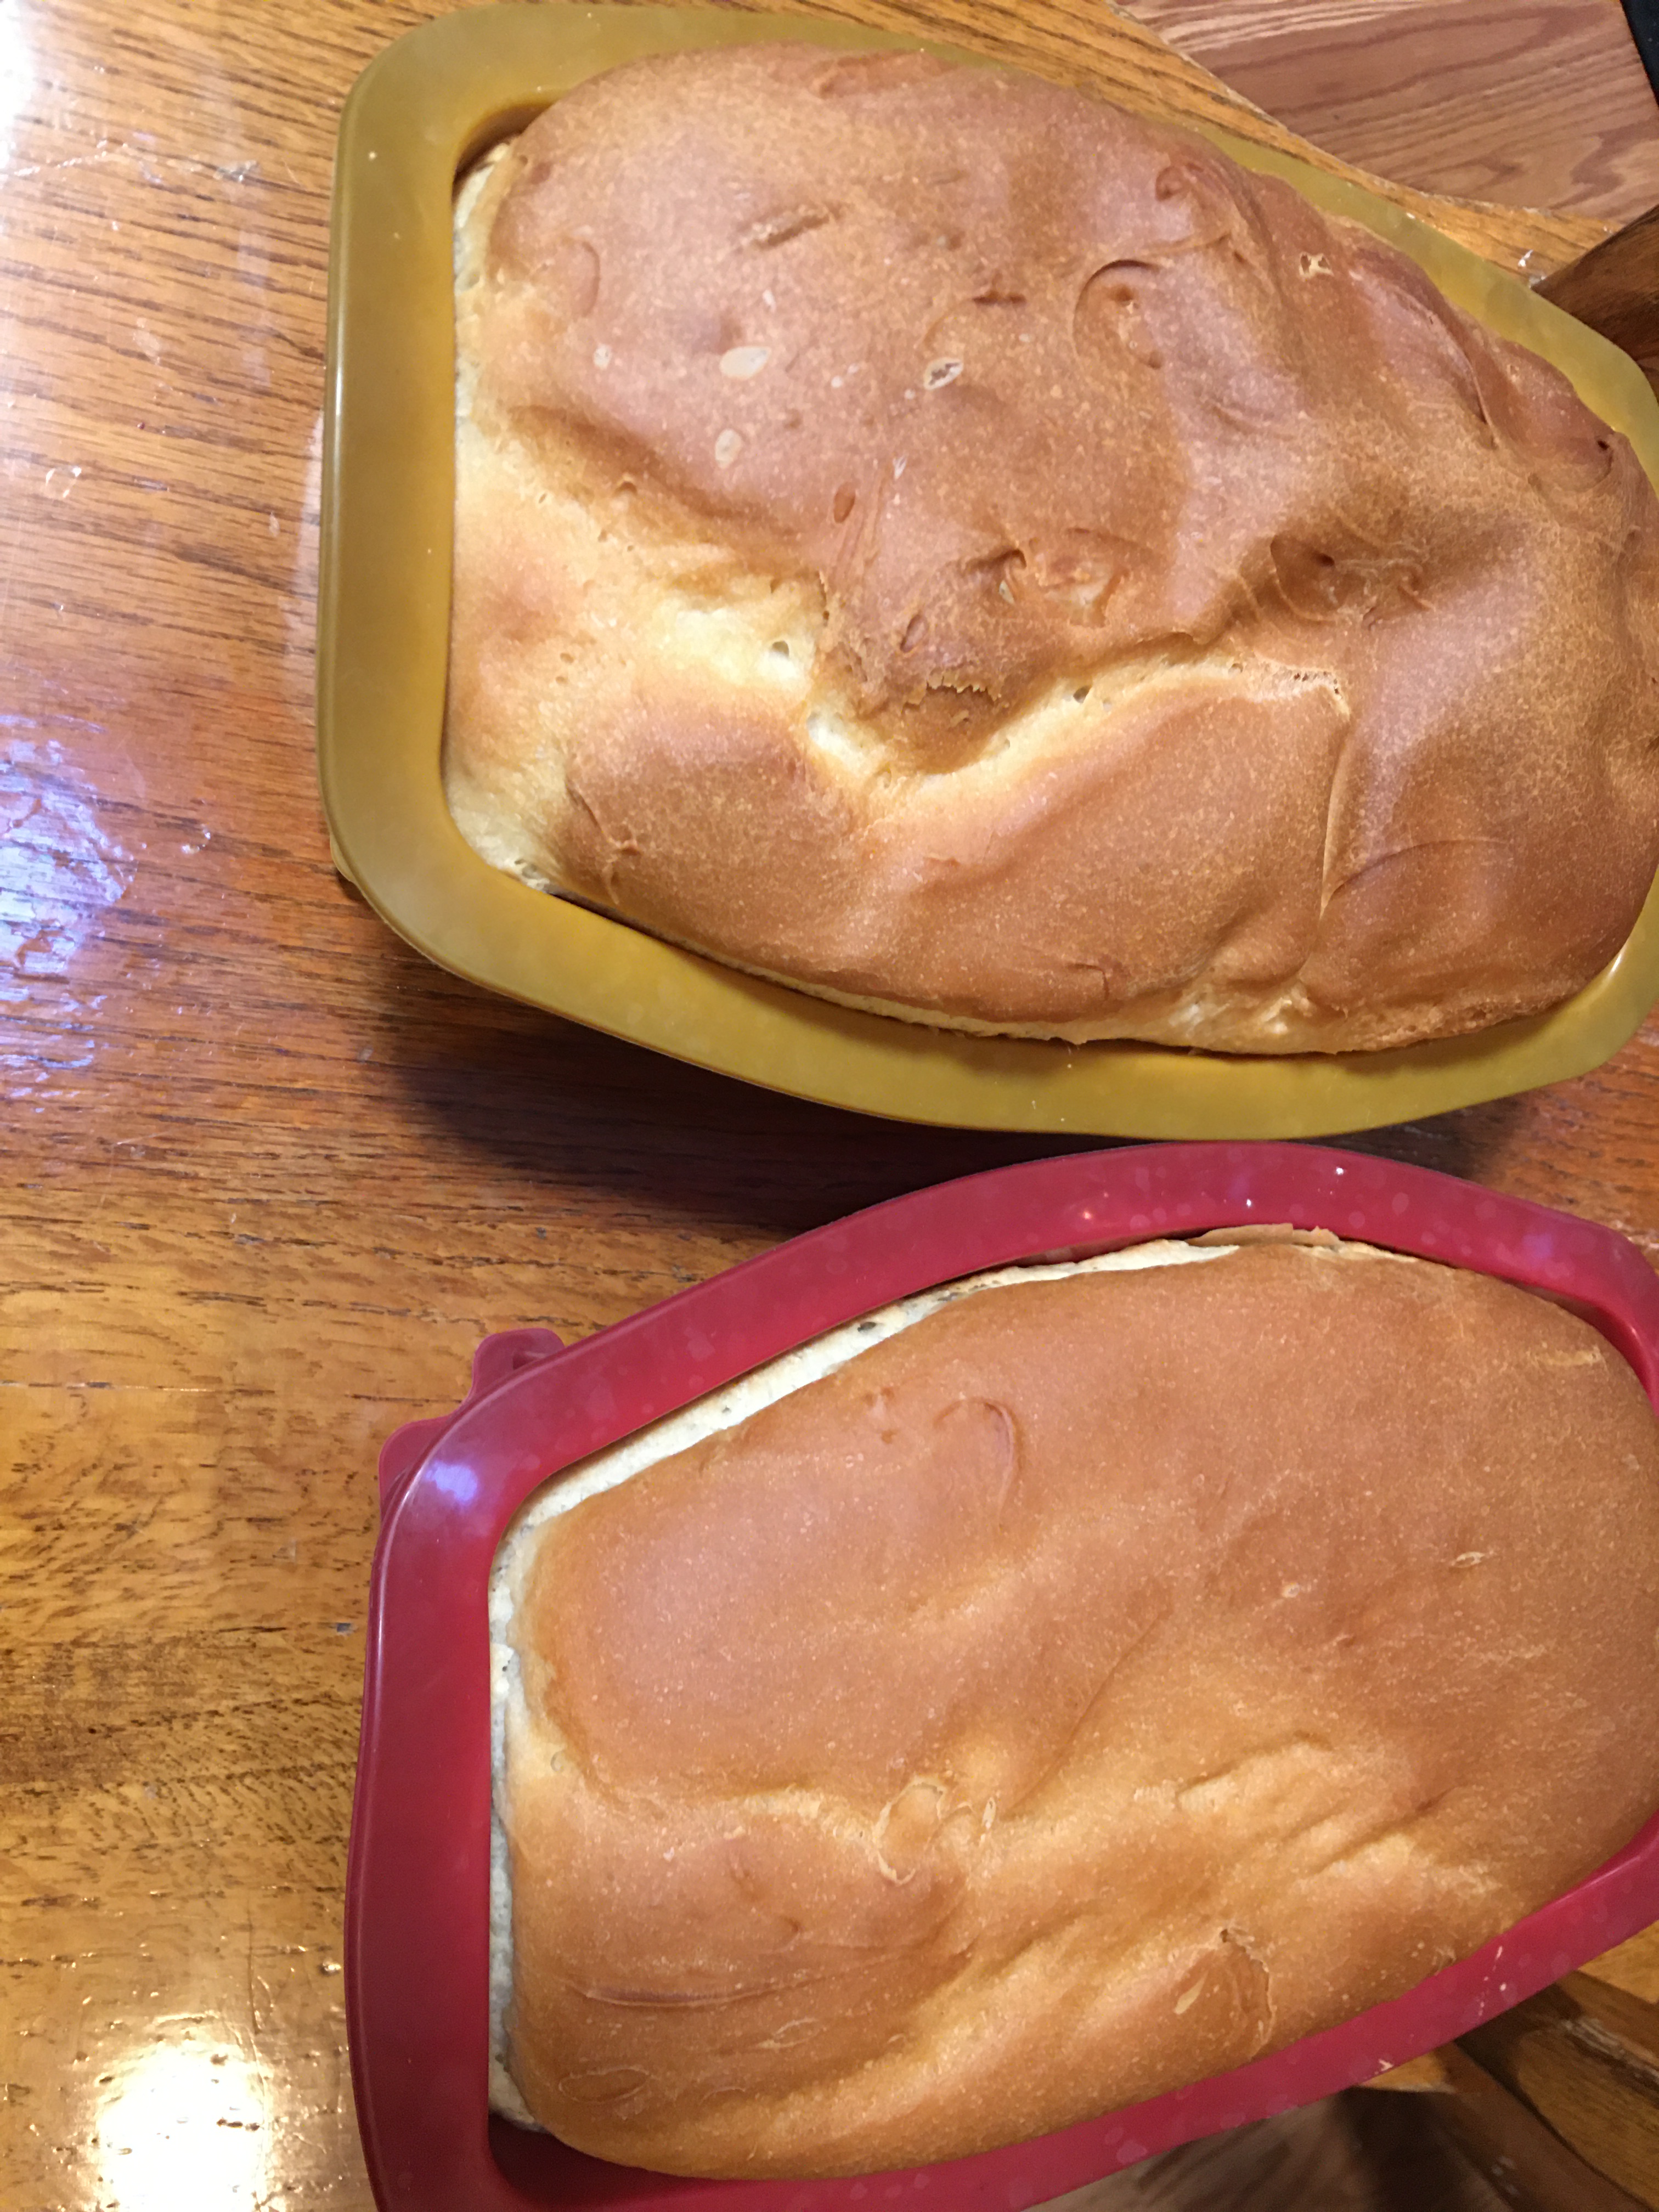
Nothing shows the yeast is active and healthy until you produce bread from your starter. This was the potato bread that I made from Frankenstein while I was tending to Carolyn.

Is there a flavor difference between bread baked from Carolyn (100% potato start) vs. Frankenstein (potato started with flour fed yeast)?

I preferred the flavor from Frankenstein. Even though I followed a potato bread recipe, Frankenstein had a blend of flavor between store bought potato bread and homemade sour dough bread. Carolyn produced bread that didn’t taste anything like potato bread. The loaves turned out like they should, the flavor was just off.

To be honest, it’s hard to say if there was something deficient with Carolyn or if the difference I tasted was the true difference between the two different methods of potato starter. This was also the point in time where my life got super busy and I could not keep up with keeping 3 starters. So shortly after baking with Carolyn, I let go of the two potato starters and kept feeding my flour starter.

Final Thoughts

There are several different reasons why making a starter from potatoes is a great idea. For example, I grow potatoes in my garden but not wheat. If I ever came to a place where I could not source the amount of flour that I use (to keep my boys in bread) than a potato starter would be amazing to conserve flour and use up the potatoes I grow.

You can make potato starter from potato and water.

In fact a starter from potato and water can serve double duty by providing the yeast for bread making and for distilling vodka (for all you home brewers and wine makers looking to branch out).

Last week, in Bread Recipe that Hasn’t Failed Me, I mentioned the science behind bread making. In the case of this week’s example, caring for Carolyn required a different science. Sometimes you have to look outside the normal beaten path of bread making, to find your answers. Bakers don’t have all the answers. They are gifted with their knowledge that they’ve cultivated. But there will be times in life where bread making takes you into another field of study to find the answers to the problem(s) you are solving. So be flexible. Don’t get frustrated if you’re searching turns up as a dead end. It takes a moment to stop, breath, and take your thinking down the path that runs parallel to the one you’re on.


Thank you for going down this detour in the creative world.

Conserving resources, making something out of the barest of materials, and using what you have on hand is an art form that needs to be resuscitated in the world that we live in right now. There are options that are still at all of our finger tips.

If there is a method of making something that you want help finding a method of creation (Just like my Mother in Law’s information of taking potato and water to make potato starter) and don’t know where to start, reach out to me or leave a comment below. I want to be creative with you!


As a special bonus, here is a sneak peek to this Monday’s release, 2022 Graduate

Processing…
Success! You're on the list.

One response to “Meet Frankenstein”

  1. A Yeasty Fix – How I Can Do That Avatar

    […] Meet Frankenstein I talked about the gluten free starter I made and how I had to bring that one back to health. That […]

    Like

Leave a comment

Bread Recipe That Hasn’t Failed Me

Last week I shared with you my process for making no waste yeast starter. And I promised you that this week I would share with you my bread recipe that hasn’t failed me and how to make tear apart rolls that are better than the ones you buy at the grocery store and bake at home.

First I want to take a moment to touch back on the subject of yeast. This last baking session I had was a perfect example of how life happens and sometimes your starter has a personality all of its own. I think mine was having a little temper tantrum for some reason.

Picture 1 (below) was the moment I pulled it out of the fridge. That sucker refused to double! I left it out over night (much longer than it’s doubling time) and all I got was Picture 2. You can see the bubbles clearly, so my yeast is present and doing its job. It was just temperamental. I added 2 Tablespoons of flour, no water). 3 hours later I had picture 3.

(Side note: I keep my yeast in a quart sized mason jar because my 400 g of starter fills the jar halfway. I don’t need a marker to mark my doubling volume. I know it’s ready to go when my starter reaches the top of the jar.)

SANDWICH BREAD (2 LOAVES)

Milk 2c 480ml Butter 4 Tbsp 56g Sugar 2 Tbsp 32g Salt 3 tsp 22g Flour 5c 700g Starter 1c 224g

  1. Warm Milk and Butter to about 110°F
  2. In a stand mixer bowl, with paddle attachment, add salt, sugar, and about a cup of flour (mixer speed 3)
  3. Add warm Milk and Butter to mixer bowl
  4. Add Starter
  5. Add Half of remaining flour
  6. Once everything is well incorporated, change paddle attachment to bread hook attachment and add the remaining flour.
  7. Once everything is well incorporated, and you want to build up the gluten levels, let the stand mixer knead your dough (speed 3) for 20 minutes.
  8. Divide dough into 2 standard bread pans
  9. Proof dough until it doubles
  10. Heat oven to 350°F
  11. Bake bread for about 30 minutes (Bread’s Internal Temperature is 200°F)

*I did not create this recipe and didn’t make notes on who or where I got this recipe from. I have tested several dozen bread recipe over the last two years. So if this is your recipe please let me know and I will give you credit here*

Please note that depending on your country of origin, this recipe may or may not fall under the category of bread. For example, Ireland defines bread containing sugar less than 2% the content weight of flour. So by Irish standards, this recipe does not meet its standard. I have reduced the amount of sugar, to Irish standards, and still baked beautiful loaves of bread. So please do not feel like you have to use this much sugar. By all means, reduce the sugar content to meet your dietary needs. It does not change the bread.

I happen to use this amount of sugar because my house is cool and my starter requires a little helping hand to proof. And the function of sugar in a bread recipe is to facilitate the speed at which your yeast works. So if you reduce your sugar content, please allow a little extra patience for your dough to proof.

The great news about making bread from starter, there is no real time limit for you to reaching full proofing. Starter proofing can be dragged out to 48 hours in your refrigerator. This extended period of proofing builds up the sour profile of your dough.

On average, I proof my dough anywhere from 9-12 hours. In fact, I make my dough at night and proof it over night. Then when I wake up in the morning I bake my bread and it’s cooled in enough time for lunch. In this proofing window my yeast produces a very mild sour note. My mom has always hated sourdough bread, and yet she loves my sandwich bread. I know this doesn’t adequately convey a universal comparison. But it gives a general reference point based off of your preference level of sour dough bread. I would love to make mine more sour, but being a busy mom, I usually don’t make it enough time to properly prepare. It’s more of an oh-crap-I’m-out-of-sandwich-bread scenario.

Which reminds me, I need to make more bread!!!

Here are a couple pictures of the last baking session. As you can see in Picture 1, my yeast looks like it’s on the weak side. Normally it’s a thick sheet of starter that once I start pouring, it pulls itself out of my jar into my weighing bowl. I have made bread from weaker yeast than this. In fact there have been a couple of times where my starter looked like a soft milk shake. It still made bread. It took a little longer to proof (about 3 hours longer than normal), but it still proofed.

Picture 2 is my no fuss method of splitting my dough directly in my silicone bread molds. I don’t shape it. And often times the pours are uneven. (The larger weight loaf will take additional time to reach 200°F.)

Picture 3 is finished bread. And Picture 4 is sliced so you can see how this batch turned out.

On the subject of slicing bread… Whether you are making a loaf like this, or if you make a boule loaf, if you ever find that your bread doesn’t bake as tall as you like there is a trick where you can make it look like your bread was taller. Instead of cutting your bread perpendicular to your cutting board, cut at a 45° angle. By angling your knife inward, the slice of your bread naturally looks taller. The two heels of the loaf are not usable for sandwiches, but it’s perfect for other uses; dipping in soups and stews, snacking on with some oil and vinegar, cubing for making croutons, or crumbing to make a crumb topping for a different recipe. There are plenty of other uses for these ends.

On To Making Rolls

For my rolls, I use the exact same recipe as I use for making sandwich bread. The only difference is how I form the dough.

There is another method that I’ve made pull apart rolls, but this method (which you see in the picture below) is my way of making rolls that have been a hit at family holiday. In fact, these ones are eaten before the store bought rolls.

While my stand mixer is kneading my dough, I start folding foil dividers. These are just a strip of foil that I fold in half. I have long ones that fit the full length of my pans. And then I also make strips that are about 2 1/2 inches wide. If you find that the mini dividers are not wide enough, don’t worry. You will just place them in the middle and the rolls will still separate perfectly.

For portioning out the rolls, I start on one side of my pan. I make a dollop with two Tbsp worth of dough in a corner, place a mini divider up next to the dough. Then I portion out the next roll and place the next divider. I keep this pattern of dough and dividers until I complete a row. Then I place a long divider next to the row and then start the next row. I continue in this manner until the pan is filled. Then I move to the next pan.

If you finish a pan and see that you do not have enough for another pan, don’t worry. In the bottom of the picture you will notice that I kept my pattern of portioning and dividing. When I ran out of dough, I placed a long strip divider and then I put oven safe containers in the pan to hold up the divider.

Once my dough is all portioned out for rolls, I set my pans aside and proof. (The picture above was taken after the rolls had proofed and right before I put them in the oven.)

Baking temperature is the same as the sandwich bread. The cook time is less. I start checking the internal temperature at about 20 minutes. The internal temperature remains 200°F.

Once the bread is done, you can take the foil dividers out right away or wait until they cool. The effect is the same and it’s easy to pull the rolls apart either way. I have noticed that I pull the dividers out right away, they slide right out. When the rolls are cooled down, the bread tends to stick to the foil. If you find that the bread is sticking, just fold the rolls along the dividers and they will release.

Why do you check the internal temperature?

There are so many variables when it comes to baking. What is your altitude? What is your humidity level? Does your oven run hotter or cooler than the person who gives you a recipe? These three things alone will change how your bread will bake for you. A constant is the internal temperature. Bread is universally done at 200°F. If the internal temperature is less, the bread is still wet in the middle. If the temperature is higher, the bread is over cooked, dry, and crumbles. So all my baked goods, I cook to an internal temperature instead of a baking time.

Does it matter if I use a metal bread pan or a silicone mold?

I’ve baked bread for a far longer time with metal bread pans. I grew up baking before silicone baking dishes were even an idea in an inventor’s mind. Metal pans have their drawback, but I don’t even flinch when I see them or need to use them. All that I do is cut a sling out of parchment paper. That way I can pick up the sling and remove my bread from the pan the moment I take it out of the oven, and put it on a cooking rack.

For the last two years that I’ve used nothing but my silicone molds, I absolutely adore them! I don’t need to use parchment paper. Nor do I need to grease the pan to get a loaf to release. My silicone molds are a luxury, but it makes my life much easier.

So feel free to use metal pans or silicone molds. Use what you have available to you and your budget.

What is a sling?

A sling is just a strip of parchment paper that covers the entire bottom of your bread pan, comes up two opposite sides, and over hangs enough where you can grasp both ends and pull the loaf of bread out of the pan.

Be advised that parchment paper is different than wax paper. Wax paper should not be used in the oven when baking, especially when there is exposed wax paper. I know several people who will disagree with me, stating that wax paper is okay if it is completely covered. I don’t even use up my time in these discussions. Parchment paper is oven safe and has no draw backs in your baking.

Does baking bread really vary like you say?

YES! When I first immersed myself into the science of bread making, I studied a few different things. In fact, here is a picture of one of my charts that I still have in my recipe notebook.

Humidity levels were directly related to whether my dough was wet or dry. Did it matter if my dough was wet or dry? Not really. But I was able to understand why using the exact same measurements of ingredients gave me different textures on different days.

I played around with measurements of yeast, kneading times…. Everyone always says that baking is a science. That everything has to be precise. My bread has always turned out and I’ve played with measurements of flour, yeast, salt, sugar, liquid and the one constant is that my bread has NEVER failed me. If you’re heavy on yeast, you double your proof quicker than if you cut your yeast to a lower level.

In fact, IF YOU NEED TO USE LESS YEAST go with a wetter dough and knead in more flour. There’s so many tutorials out there for making bread with kneading by hand. Go that route with less yeast. The reason why is because flour is the actual food for yeast. When you knead by hand, you add more a little more flour with each time you knead. You continue to grow more yeast the longer you go with this method. Your dough is done and ready to cook when it no longer sticks to your hands when you knead it after a rest.

What is Baker’s Percentage?

This is where people say that baking is a science, you HAVE to keep everything in proportion.

BAKER’S PERCENTAGE

Flour 100%

Water 66% (of flour weight)

Salt 2% (of flour weight)

Yeast 1.2% (of flour weight)

Even if you didn’t want to use my recipe above, this Baker’s Percentage is all that you need to make bread. Everything outside of flour, water, salt, and yeast is just fluff ingredients that will change the flavor profile.

While I will play around with measurements, the Baker’s Percentage is the baseline that we measure everything against. If you do not have enough of any of these 4 mandatory ingredients, this is the method by which you change a recipe to make bread.

By all means, play with a recipe. Change it. Make bread with what you have available. Your bread can succeed when you make alterations. Just know that to make bread, you need flour, water, salt, yeast. But you can even leave yeast out if resources are that short for you. Flour, water, and salt will make flat bread for you.

If you remember from last week, I fried up my starter. That was only flour and water OR just yeast starter from your jar. Know that no matter what circumstance you find yourself in, there remains a way to provide for yourself. Do not lose hope!

This has been a full week. There are no new cut files that I made to go with this post. However, For a special surprise you have a sneak peak for what will be released on Monday!!! Click here to be the first to get Hardware Labels or Hardware before everyone else. Have a great weekend!

Processing…
Success! You're on the list.

Valuable Resources

With inflation of food prices and rumors of food shortages, it’s really been on my heart about how and where my family sources its food. My heart especially breaks because if not in my own communities, there are most definitely places in this world where people will die from lack of food. I have connections with people outside of the US and it breaks my heart with just how food vulnerable people are.

My choices in food sourcing are not going to help people in different countries. Although I love my dream world where people in first world countries make individual choices, where as a collective all the extra food we don’t claim for ourselves gets reallocated to countries, places, and communities that are in more of a dire need of. That is my naive side that I hang on to, because I know full well that this is not how the world works.

So I focus on my local community. I have neighbors who are more food vulnerable than I am. So in being sensitive to my neighbors, who I can help, I have been changing how I shop to produce the foods from scratch that I have the knowledge to make. At various times I’ve seen the bread and dry pasta shelves bare. Even with stock at a good sale price, I still I don’t buy those items because these are two commodities I can make for myself. By not making those purchases, it frees up those resources for the families who don’t yet have the skills to make those products for themselves.

But I’m not content with just providing for my family. Not when I have the ability to help other families to provide for themselves.

Today I am focusing on helping anyone who wants to learn how to make their own bread.

I don’t know about your local market prices, but a loaf of bread runs for about $5. This does not mean that there isn’t cheaper bread to be had. But this is the average price if you look at all the shelf labels. Before my boys were born the average price was $1 a loaf, no matter what the brand name. So if for no other reason, now is a good time to learn how to make bread so you very easily can see how you can save a couple dollars every shopping trip, where you can use elsewhere in your family budget.

I want to teach you how I made No Waste Starter.

Why is this important?

When I made my Covid-Starter I researched the heck out of making a starter and the different schools of thought for bread making. Every starter tutorial out there always starts with a rather large quantity of flour and each day you throw out or discard cook half your starter. Even two years ago my thoughts were about how much of a waste of precious resource this method is. At the time flour was very plentiful, but my head went to where I can make bread when I don’t have flour to waste. And now we are most certainly in a time where many people are now finding themselves in a place where flour cannot be wasted.

I present to you my photo journal from two years ago where I made starter without discarding.

Being a historian, by education, I was fascinated with how bread has been made through the history of mankind. The feature that took over my creativity is the bread trough/bowl. Before mason jars, that we all use today, or starter crocks families used a wood trough or bowl to keep their starter.


Please note that you need to pay attention to your starter if you are using wood products to make your starter. Make sure the wood dish is clean and free of chemicals. Also note that wood holding liquid can bread bacteria. When making starter, there should be no colors or scents coming from your starter. New starter will not begin to have a sour smell until the end of a week. So if you find mold, spores of color, or any scent that does not smell like sourdough bread, throw out the starter and begin again. Wood products are viable vessels. But note that all of these potential contaminations can be found using any vessel, not just wood. So make sure your vessel is clean and you keep a clean work space while you cultivate your starter.


The vessel that you in the following pictures is an unfinished teak wood tray. The sides are raised, making it ideal of containing the starter as it grew through the feeding cycles.

DAY 1

For DAY 1 I cleaned my teak wood tray and my hands well, making sure that all soap was thoroughly rinsed off. Once ready, I mixed 2 Tablespoons of flour with equal amounts of water and mixed it together by hand on the tray. When finished mixing the pancake like batter I covered the tray with a clean tea towel to keep any foreign materials from falling into my starter and contaminating it. And then I just leave the tray out on my countertop. (My fridge was already covered with things confiscated from my boys. All my parents out there know what I’m talking about. But your countertop is just fine for your starter. It needs to be warm but in a place left alone.)

The science behind making your own starter yeast is that the water flour mixture becomes home to the natural yeast that floats in the air and lives on your hands.

DAY 2

I fed the yeast once in the morning and once in the evening. Each feeding was 2 more Tablespoons of flour and water, mixing/kneading it with clean hands. (I added the flour first and then add water to loosen it up and facilitate better incorporation. After each feeding I covered the tray with my tea towel.

As you see in the pictures, at the beginning of each feeding there was a crust on the tray and on the starter. This crust was easily dissolvable and reincorporated into the starter.

The bottom four pictures show you what I was looking at once I started working water and flour into the starter. I also show you the window test (how you tell in bread making that gluten is being formed in the bread–pull a portion up and watch how gravity pulls your dough). There is no uniformity here. So I wasn’t looking to see very much yeast activity. However, I know there is some yeast already active. Look in the first picture and you will see a couple of air bubbles (the visible presence of yeast respiration), with a very large one just off center on the bottom.

DAY 3

I continued with the morning and evening feeding of flour and water. After rehydration and incorporation of the crust and feeding, I covered the started back up.

I was excited today because there was more of a visible change that was taking place. There’s the increase in mass, but more importantly there was an increase in yeast activity. The bubbles were more prominent. (The bottom left picture is the best one for showing how much the yeast activity increased.) The middle right picture is the size of my starter, right before its feeding. The middle left and center pictures show you the change that has happened in just one day with a window test. The bottom center picture shows you the gluten structure that has formed, how sticky my starter became.

Why was I focusing on the gluten structure?

Gluten is not needed for yeast production. But I made a focus on capturing this information because gluten is what keeps the air bubbles in your bread. Gluten is an elastic structure. Without it you don’t have a way of seeing the amount of anaerobic respiration that is being produced. You can tell the health of your yeast by the size and amount of bubbles produced.

So while all the other starter methods you can read about don’t talk about gluten or keep this dry of a starter, this was an amazing process for me. I was able to see what was going on in yeast production. I could see that I was on a right track. And if you want to talk more about the science of yeast making, I can guarantee you that I have more to talk about than what is presented here. In fact, if you’re a homeschooling parent and want to have an AMAZING practical experiment for your student to see and understand respiration, this is most definitely for you!!!

The bottom right picture is my picture of impatience. I literally couldn’t wait to fry up some of the starter after a feeding. It didn’t taste great, but it didn’t taste bad. It has a sour flavor to it, but not in the classical sourdough sour. It was more like a citrus sour. It was not palatable. In fact, I took a nibble and just decided not to finish it. So when they say you can’t eat from a starter this early, it’s because it’s just not palatable.

Now if I was hard up for something to eat… I might be tempted to eat my sample here. However, I know I have enough food reserves where I’m not pressed to make this an eat vs. go hungry situation. If you are in an eat or go hungry situation try to get your yeast established before getting to this point. I would not recommend it at this point.

Side Note: I changed up my method a little bit here.

I didn’t want to keep having to deal with this crust, so after the second feeding I opted to get rid of the tea towel and switch to laying a piece of plastic wrap on top. I wanted to prevent the dehydration (which formed the crust) and retain the water content. I did not seal off the plastic wrap on the sides, just placed it on top so the starter was still somewhat exposed to the yeast in the air. I wasn’t afraid of not having yeast exposure because I was still kneading the starter with my hand for a few minutes each feeding. Plus I have the evidence that yeast is already present.

DAY 4

OMG I was literally doing a happy dance! Look at all those bubbles!!!!

Plastic wrap was most definitely NOT the material to use. Yes it did not inhibit yeast production. It’s the fact that the starter heavily clung to the plastic. There was no way I could pull or scrape starter off of the plastic wrap. There was also no way that I could reuse it. So if I’m trying to not throw any resource out, plastic wrap has better uses elsewhere. Here it’s a onetime use and a waste. (See below for what I switched to using.)

By having a less permeable cover, there was less dehydration, which I felt better about. It made the feeding quicker. And today I kept up with the morning and evening feeding.

As you can see, here in these bottom three pictures, there is more structure and less stickiness of the starter. When I pan fried this up, it was palatable fry bread. Thinking back now, after two years, I should have put a pinch of salt into the dough–bread is made up of flour, water, yeast, and salt. That is all you really need. The salt would have been something other than no flavor. Think of a salt free cracker, that is where this starter is at. If you are in dire need for food, you’re now at a point of having viable food.

I had these reusable sandwich wraps in my drawer. It’s a thicker plastic with velcro closures. I had to position the velcro on the sides so I didn’t have to clean them with every feeding. This plastic covering was a dream for yeast production because it didn’t fold in on itself and allowed me to scrape the starter off. The starter didn’t stick as much to it either. (See bottom left picture of Day 5 to see how little starter clung to the covering.

DAY 5

This was another day of morning and evening feeding. The reusable sandwich wrap still allowed a crust to form, but it was much more manageable and something I could live with for a balance between sustainability of resources and maintaining hydration. My goal is still to literally be hands on with my starter. So I still opted for the use of the tray instead of switching to a different vessel.

I was very pleased with the yeast production. And when I fried up a bit of the starter, there was now a very faint sourdough flavor to it. So that was evidence enough for me that my starter was ready for bread production.

Everyone else that I had read with about making a starter, none of them told me what it that you’re looking for is. They all just state 7 days like it’s some magical marker or transformation that happens at that point in time. I’m open to hear from anyone as to why you insist on waiting 7 days before a starter is ready for bread production. However, with years of baking bread with conventional dry fast acting yeast, and with scientific understanding of what the function of yeast is in bread, here are my indicators that your yeast is ready:

  • You can see evidence of yeast production: your starter has the same amount of bubbles as you would see in a slice of bread.
  • When you fry up starter, it produces palatable flat bread.

Okay, everyone who talks about starter says that you can’t make bread until your starter has doubled after a feeding. My yeast was already doubling before Day 5. So this indicator was not relevant for me. The two important things, hands down, are evidence of yeast being present and flavor. You won’t eat bread (whether in loaf form or flat bread) if it doesn’t taste good.

I should also note that the starter does by now have a very faint sourdough smell.

DAY 6

This was my first day of baking my own bread from my starter. I chose to make boule bread. One, the amount of yeast wasn’t as much as I keep now, but I had enough for the first recipe I tried with enough left over to feed and store. So the pictures you see here for Day 6 were the bread making process of the different kneading times and the transformation that you see with the dough as you go through the process. It went from rough lumpy looking to that beautiful smooth ball.

I’m not going to focus on this recipe or the process because it’s labor intensive. I haven’t even made a boule in several months. This is not my go to and not exactly practical for today’s busy schedule. I love boules and can probably get better height out of them, but I have a recipe and process that is much more mom friendly and something I can make every night for bread the next day. But I will talk more about that next week. I’ll give you my every day recipe next week with also my process of making rolls. Again that’s next week.

After I made this recipe, I fed the remainder of my starter and I actually transferred it into a quart size mason jar. One, my boys were starting to reach onto the counter and I didn’t want to have my work wasted because a curious boy decided to tip the tray over and knock my yeast on the floor. Two, I wasn’t (and still am not) in a position where I need to make bread every day. So for flour conservation, I put my starter in my fridge. The fridge slows the anaerobic respiration of the yeast so that you are able to feed your yeast and it is perfectly happy until you make your bread in a week.

What is the longest I’ve left my yeast untouched in the fridge?

I think it was 17 days. And boy was my yeast sad and weak. BUT even with weak yeast, I was still able to use that yeast without using a single discard and wasting precious resources. It took a little longer for my bread to proof, but the yeast pulled back in the dough and in my jar.

When do you pull your starter out of the fridge to use?

My best results have been when I take the starter out 1-3 hours before I want to use it. It warms the yeast up to an active state. But more importantly, more times than not, my yeast hasn’t finished its cycle and doubled in the fridge. But allowing it to finish it’s doubling in volume on the counter, it gets the yeast into its strongest and happiest state.

Have you used your starter while it was still cold and not yet doubled?

Yes! The yeast is still good. It’s just dormant and hasn’t used its entire food source. Here’s the drawback to using cold yeast. Your bread recipe liquid is warmed to an optimum temperature to really get your yeast excited, happy, and ready to eat. When it’s cold and put into a warm liquid, the temperature change can be a shock. And it does take longer for your yeast to get happy and get busy proofing your bread. So it’s not ideal using your yeast cold, but it’s not a deal breaker.

Remember, yeast is a living organism. It has certain conditions that make it happy and productive. It’s so easy to think of yeast as a non-living organism, but that’s not the truth. Yeast lives. It has an environment that is ideal. And when you recognize that, you can set your yeast up for great success in making bread.

When do you feed your starter?

I take my starter out of the fridge. Get it to room temperature and double in volume. Once the starter has doubled, I measure out the portion I need for my bread recipe. What remains in my mason jar, I clean up my jar by scraping down the remaining yeast with a silicone scraper. Then I add the flour and water, mix it well and put the lid back on. Then back to the fridge it goes until I cook another batch of bread.

How much do you feed your starter?

I always keep 400 grams of starter on hand. It fills a quart size mason jar about half way. This makes it easy to tell when my yeast has doubled without needing to do the rubber band trick that I saw all the time in tutorial videos.

Whatever weight of starter I take out for a recipe is what I replace with weight of flour and water for feeding. For example, if I take out 300 grams of starter, I put back in 170 grams of flour and 130 grams of water. The appearance of my starter is a little bit looser than you see in the pictures above, but I do keep my starter thicker than what I see everyone else keeping theirs at.

The most important reason for this is that this is what makes my yeast the most happy. My yeast remains strong and healthy and I have only had hooch in my mason jar one time in 2 years. The hooch formed because my water content was too high for the flour content. The yeast ate through all the flour and couldn’t use all the water. So it’s my opinion that if you have a problem with hooch, try feeding your starter less water.

Besides hooch production, excess water is going to add to the odds that you will through your starter environment off and make it ripe for other things to grow in your starter like bacteria and mold–which you will have to throw your starter out.

Another problem happens with too much water, the smell of acetone. I haven’t had this problem with my flour based starter, but it did happen with my potato starter. I’ll talk more about this is the post for the potato starter. But it happened because there was too much water. And this problem you can solve by adding salt into your starter. The salt balances out the starter’s environment and makes it inhospitable for the presence of bacteria that has started to set up shop in your starter. So know that the moment you smell your starter having an off scent, don’t wait to see if it goes away. Add a teaspoon or two of salt and be preventative. If you wait, you run the chance of losing your starter.

Is All Purpose Flour okay, or do I need bread flour?

I prefer All Purpose Flour. One time I bought a 25 pound bag of bread flour and immediately regretted it with the first batch of bread I made. Bread flour is supposed to only have a higher content of wheat protein in it to create more gluten. However it threw the salt content off on my bread. Even after I lowered the salt content in my recipe (by half), the flavor of the bread was still off. You may or may not notice the change in flavor, but I did. My boys did. So do not feel pressured into needing specialty flour to be able to make bread at home. In fact, I’ve received comments (from friends and family that I’ve gifted bread to) that what I made them tasted like high quality restaurant bread. And all I used was All Purpose Flour.

Side note: I’ve tried working with other flours to make gluten free bread. I’ve not yet found success in that experimental process. I have found success in making gluten free starter from potato–which will be featured in an upcoming post (it should be in two weeks). If I finally find gluten free flour (mixture) that I love in bread, I will quickly and excitedly share that because I have great love for bread. But I’m not going to share anything that I’m not passionate about.

Is there a difference between bleached and unbleached flour?

As far as quality of bread, I haven’t noticed a difference that makes me have a preference one way or another. I personally like using unbleached flour over all for everything. So that’s generally what I have in my pantry. However, you should use the flour that you have available to you and don’t have stress over it. And don’t let people pressure you one way or another.

If you have flour that just isn’t working for you, there are ways to alter a recipe to make it more palatable for you. I had to change recipes all the time when I was using dry active yeast, because I hated the flavor that yeast produced. My easiest and quickest way of altering it without changing the results of my bread crumb was simply by adding herbs. My go to herbs were always adding about 1 teaspoon of each: garlic powder, onion powder, and oregano. The salt content never changed. The dry/wet ratio never changed. And there was just enough flavor adjustment that I could eat the bread and it didn’t change it enough to ruin the overall sandwich flavor whether grilled cheese, peanut butter and jelly, or any combination of meat sandwiches.

Every master bread maker will tell you that you have to respect the ratios of the ingredients: flour, water, salt, yeast. Anything you add to that for flavoring is just a bonus. But I’ll talk more about that next week.

If there are any questions that you have, please leave them in the comments. I want to make sure you have all the information you need.

While this week’s post is on the outlying area of being creative I did want to share with you some new Cut Files that are related in subject. Be sure to visit my store to see what all is available for sale!

Processing…
Success! You're on the list.

What If I Fail?

It doesn’t matter how many years you’ve been crafting and DIYing. You will fail. I fail.

What you do with failure determines what your future will look like. What your end product will look like. You can finish in a failure. Or you can take an option and end on a different note.

In fact, here is my most recent fail and how I pulled out of it.

Two weeks ago I started working on a Teacher Appreciation gift for my son’s pre-school teacher. First, let me just say that it’s difficult coming up with a meaningful gift for a teacher that they don’t get a million of and you’re just one of those parents who giving a gift card just doesn’t feel personalized enough.

I help out in my son’s class and noticed that his teacher had one clip board. It’s pretty standard and who knows if it was on its last leg or was a work mule. But I do know that with home schooling my older son that a single clip board is not enough for me. And this was what birthed the idea of making a personalized clip board for our pre-school teacher.

Advertisements

I find the diamond painting crafts a very relaxing no thinking type of craft. With that experience, I had high hopes of having fun and relatively easy time with this. What I should have counted on is that the Jewel and Metal Glue would have had a mind of its own and gotten all over the place.

I should have set up more protection against glue betrayal. With the print out of the design on the back side of the clip board, I can see exactly what my work field was going to look like. I should have taped on protective paper (just spare crafting paper) to protect the exposed board that was not being worked on.

As it was the glue, coming out of the tube, came out at larger quantity than I needed for the small text on the top. What I needed, to control glue quantity, was a tooth pick. It provided enough glue to adhere the gems, and kept the glue of glopping up and making a further mess. However, the clear glue also found ways of transferring to other parts of my hand and got on the board. The crafter who recommended this glue to me (and other crafters) said that it dried clear. And I was under the impression that it would be relatively invisible.

Yeah, not so much.

IF you can keep the glue minimal, it hides quite nicely. IF you get impatient or frustrated, the glue does travel. It does clump up. It does not dry invisible.

I also want to mention that the gemstones were the actual frustrating part. The tweezers that came with them did not pick up well or easily. The white pencil that came with them worked maybe half the time. I actually had to pull out a spare diamond painting tool and use that. The disadvantage that comes into play is the gem glue. It acts like a super glue and builds up. It causes the gems to stick to the tool. So make sure you take the time and clean whatever tool you are using regularly. By keeping the glue buildup to a minimum, you will keep the frustration down a little.

Tips that I have for my next time:

  • Fully tape off the non-work area
  • Try to not use the tiny gemstones
  • Don’t be hasty, use a tooth pick for glue application
  • If using the side of your hand, put tape on the side of your hand (to replace every now and then to prevent hand transferring of glue)
Advertisements

Correcting the Failure

There were a few ideas that I had to redeem the glue failure of this project. Had the failure just been hand transferring of glue, I would have made other icons, “pows”, comic speech bubbles, etc to add more of a graphic design. However the glue failure was mostly an eye sore around the text with the stones, where the glue was just too thick.

I opted for acrylic paint to cover the glue. On top of the paint were glitter glue and a layer of fine glitter.

Step One: Tape off your Comic Speech Bubble. With cutting the edges, it allowed for the continuation of the lines and making the edges as varied as you want them. Just make sure that you press your edges down well so that the paint and glue don’t feather under the tape.

Step Two: Paint. Between the letters and around the gemstones, I used an acrylic paint pin. The edge of the pen is just more firm and easier to manipulate than a paint brush.

Step Three: Add glue and glitter. Once the excess glitter is shaken off, peel the tape off of the clip board.

The wrinkles that you see here is just the uneven application of the glitter glue. I was playing with texture to see if I could get a comic sunbeam pattern.

Step Four: Tape off the clip board for sealing with clear acrylic spray paint. This paint will keep the glitter from shedding. (I sprayed two coats of paint.)

There’s two ways of reapplying the tape. The tape can be put right on the glitter line. Or, as I chose, I offset the tape so that I could seal the edges of the glitter, but also add a simple edge to the design. The clear acrylic paint creates a glazed appearance.

Be sure to press down all the tape edges well. If the edges are not fully pressed, it leaves the opportunity of the clear paint to feather under the masking tape.

Once you have sprayed your last coat, you are ready to remove the tape and paper. If you choose to remove the tape with the paint still wet, there is the chance that there will be some feathering. If you wait until the spray paint is dry, there will not be that potential transference.

As you can see with this side by side, particularly around the -her of teacher, it is possible to clean up glue failure. There is a trade off of not being able to keep a minimalist design esthetic. However, there is light at the end of the failure tunnel. Sometimes you can remove errors that just can’t be erased.

No matter what you are working on, take heart. If something goes wrong, it is not the end. You can fix it. Take a deep breath. Look at your options and see what all is available. If you have more than one option, try to visualize what it will look like if you go down that route. Which route is going to get you in a better place in the fewest amounts of steps? Which route is going to eliminate the failure in what you’re working on? Not all solutions are equal. But the more options you have the more you hope you have for your end product.

Teacher Super Power was the file used today. It can be found here!

Advertisements

Processing…
Success! You're on the list.

Inspiration to Reality

Some of my favorite moments are helping make clients’ DIY moments turn into successes. And here is one of those moments.

The inspiration picture that Tina sent me was this burlap birthday banner.

I am such a fan of Pinterest and other creative social media. They provide the perfect jumping off point for communicating a clear vision.

For Tina, she already had the burlap banner that she wanted to use. Because hers was triangular instead of rectangular (as in the inspiration picture) the information that was imperative was the dimensions of the triangles.

From there, I was able to put together a mock up for her with two of the closest fonts I had, to the inspiration picture, and one slightly different just for fun.

The important thing to remember when changing up a shape is understanding how to maximize the space. For triangles you are going to be limited by bottom heavy letters and numbers. So in this case H, A, and 8 are the limiting characters to the font size. When doing a mock up usually the P is the problem child because centering the letter on the triangle usually ends up with the P running off of the pennant. However this is easily overcome with an optical illusion. Keep the P in perfect line with the other characters, but you bump it off center toward the right.

So if you ever find that your characters are running off of your pennant, and they are top heavy on a triangle, you can shift your character over and keep it on your pennant.

I was so happy that Tina and her family were excited who this banner turned out for their mother’s birthday. Tina was able to use a banner that she already owned and she made something for her mom.

If you are looking to DIY a Burlap Banner and wondering wondering what is the best way to attach characters, there are two methods that I recommend. My favorite is glue dots. The dots have the right about of stick power to last through your event. Plus it has the added bonus of being easily removed from the burlap without added work.

The second method is hot glue. if your event is outside on a nice hot day or with some strong winds, the glue dots will not be strong enough. The hot glue is prefect. The drawback to this method is that sometimes the glue does not want to release from the burlap. There are a few different ways of removing hot glue from burlap. My favorite, is to place the fabric between two sheets of parchment paper and reheat the glue with a hot iron. The parchment protects your iron and table from getting glue on them. With the hot glue fluid again, you can peel the glue off the fabric. A tooth pick, or other narrow tool, is useful in reaching any glue caught in the weave.

No matter if you are a beginner at crafting or trying a new crafting skill, if there is an inspiration picture or question about how to do something, do not hesitate to reach out.

I’m here for you!

Processing…
Success! You're on the list.