Buy, Sell, or…. TRADE!

The more that you keep tabs on what’s going on around the world, you start to see just how fragile economies have been the last few years. Decades in some countries.

And while many dream about the “good life” in Western countries, there are still families who struggle and fight to scrape by. And the honest truth is the families who aren’t even making it here in the United States still have it better off than many other countries. It’s hard to recognize it in the middle of trials and suffering… but things can definitely get worse.

Right now I’m in preparation mode for the fall session of our family self sufficiency group. Each time we start this group I’m surprised by how the skills I take for managing my family’s tight budget is something that I take for granted. And that is the reason why my family makes times for this. Our society has failed our families.

It was only a couple generations ago, during World War II when governments told families to build Victory Gardens. They encouraged families to provide for themselves in order to free up resources to send to the troops. And now, almost 80 years later, governments have changed the music they march to. Now governments want people to depend on them for their food and housing. Step in time to the music and you can live a modest life. Step out of line you’re out in the cold because you don’t know how to care for yourself.

This is wrong!

Everyone looked to the United States because of the American Dream. But now our constitution is under fire and the right for life, liberty, and pursuit of happiness is quickly becoming a dream made of vapors because we’re being sold out to the highest bidder.

But no matter how the politics look (are currently being defined) in the United States (or in any other country for that matter), there is one absolute truth that can never be taken from you.

What you know is available to you to use for your entire life. No one can take that away from you.

And that is why I share what I know. My knowledge is always available to my family. But what lasting good is it if my neighbor doesn’t know what I know and the quality of their lives can be improved by that knowledge. Even in the middle of oppression, knowledge can make the difference between someone’s today and their tomorrow.

Advertisements

One skill I want to talk about today is bartering.

At some point in history every society has depended on bartering. And this very skill has been nearly forgotten in Western Society. With the push toward digital currency, bartering has been shoved into the back corner of libraries collecting dust.

The beauty behind bartering is that it builds relationships. Or it can break others if one party is opportunistic and trading unfairly. But even with those broken relationships, the person who ultimately feels the penalty is the one who is opportunistic. Those who have a heart for fair trade with their neighbor will always have neighbors who want to trade with them. And neighbors look out for each other. If someone is not fair, you can bet that others will hear about it.

For those of you not familiar with bartering, it’s nothing more than a pure and simple trade of goods or services with another person for their goods or services. Everyone can participate because it’s not dependent on the money you have available on a credit card or in a bank account. There’s not a power of authority that can freeze your currency, because no currency is exchanged. You’re not dependent on the going rate of the currency for your region, or what the stock market is doing. Your trade is based solely on the value that you and the other person are placing on the goods and services being traded. No one tells you what the retail value is. The parties involved decide for themselves what a fair and equitable trade is.

Remember when you were a kid and you traded with your friend? Neither of you knew the market price. You just traded because you were willing to exchange what you had for what your friend was willing to give you. (And then that memory might also be attached to another memory of where a parent or other adult stepped in when an unfair trade happened. And that was because the value they placed on the items was out of balance.)

Does unfair bartering happen?

Yes. Human nature tries to get the better deal, at the cost of someone else.

The way you combat unfair bartering is by agreeing to trade rules up front (before negotiations start) and by valuing the person you are trading with. If you value the other person, you will automatically fight against human nature of taking advantage of them. You will look for a win-win exchange for both of you.

Is everyone going to trade with you?

No. And there will be any number of reasons why.

My first time bartering, I faced this “rejection” alone. And it smacked me in the face with my very first attempted trade. And it hurt.

The problem is that we associate being told “no” or “no trade” as something is wrong with us as a person or that what we brought to trade is of no or little value.

BUT THAT IS NOT THE TRUTH!

The story is that for this first bartering event, I went with a backpack filled with one type of goods: crochet and knit items. And I went straight for the person who was the popular trader of the day.

Advertisements

With just that little bit of information, there’s two very valuable things that I learned.

1) the most popular trader has their pick of what is brought to the event. They have the luxury to turn down trades and still have a great day.

2) I limited my value and contribution down to just one type of product. When I went I thought I just needed to bring my “best” to be successful. But that limited the amount of business I could have. Not everyone was in need of the items I brought. There were a number of people who had no interest. There were also others who already had the items that I brought.

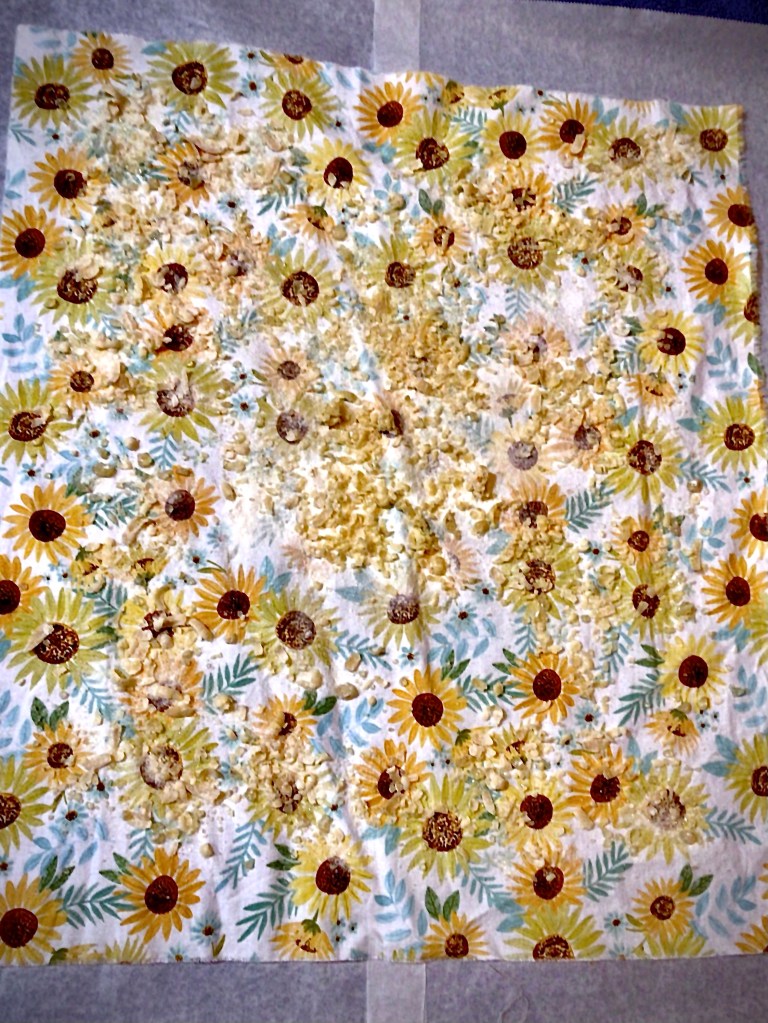
For example, the popular trader loved the blanket I brought, but had a house full of blankets and so it was a no trade.

As I said earlier, that sting of “no” caused a negative emotional response deep inside me. I had to get out of my emotions and talk myself back into the event I came to make trades, and free up some closet space.

Be prepared for the No.

I went in expecting only yeses and trades. It took thinking on my feet to pull myself together, make myself vulnerable, and get in there and trade.

I have no shame in saying that I went to the table of the person who had no one looking for a barter. She didn’t have what I wanted to bring home BUT I came to trade and I was determined to make at least one trade before leaving. So I traded for her one product. And mostly I was moved because she really wanted what I brought. And I know that the trade between us could take away the sting of failure. We made a fair trade, even if I walked away with a product I didn’t want. The value of that trade was that I met an expectation I placed on myself.

I don’t recommend trading for something you don’t want.

But if you’re new to bartering be prepared to hear no. And have a game plan in place for how you want to bounce back from what feels like rejection. Try not to leave an event with no trades being made. You want to have a positive note to go home on. Not all bartering events are going to be difficult to make a deal. So find a way of turning a not great event into a memory where you will try again.

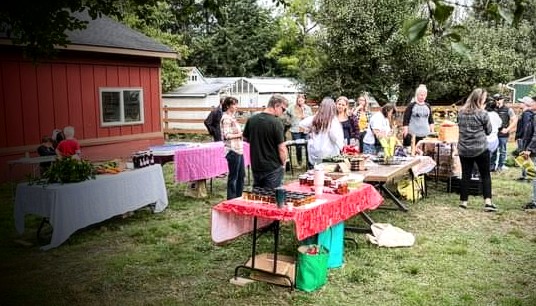
My favorite bartering event, to date, is the most recent one I attended. It had a feel that was different from my very first event. It could have been because there were established rules that were agreed upon before the event. Or it could have been the lay out. Everyone was encouraged to arrive ahead of time to set up and take a look at everyone’s offerings. But no trades or negotiations were supposed to start ahead of the start time. I actually loved this pre-event moment. There was a world of difference in talking with people, getting to know each other, learning each other’s names. The focus started off not on the goods, but on the people.

Advertisements

Mind you, I married a social butterfly. I have to work at being social and building relationships. But there was a massive difference in being able to meet and speak with people without the pressure of making a deal.

And this all goes back to what I mentioned earlier. There’s a difference when you trade with a neighbor vs. a stranger. Will I trade with a stranger? Absolutely. But there’s not that connection with that person. You’re not invested in them and it’s harder to get into that mode of thinking “how do I choose to trade with them so we both benefit equally”.

For example, one of the ladies that I talked quite a bit with we traded a lot with each other. And the funny thing is that we both brought bread goods. So of course what each of us brought bread wise we could make for ourselves. So even though that eliminated some of our offerings to each other, we saw what was unique to us that we valued in the other. But because I invested in getting to know this other woman, it was easy to see value in her ceramics in which she slightly undervalued herself and her skills. I had no problem in trading in what she perceived her favor, because I traded with her on the level that I valued her work.

Now bartering doesn’t work like this last example all the time. That was a special moment with a trading relationship that was built. And I want to draw attention to this because in an ideal world, where everything is perfect, this is how we would treat each other. When we have goodness inside of us, when we look for the success in others, this is an example of what this looks like. But this only comes with relationship.

My Advice for Successful Bartering

The first thing you can do for yourself is bring more than one item type to trade with. Have options for when you show up with the same items as someone else.

There’s a idiom, cast a wide net. If you want to catch a lot of fish, you cast a wide net. In the same manner, if you want lots of trades cast wide your options.

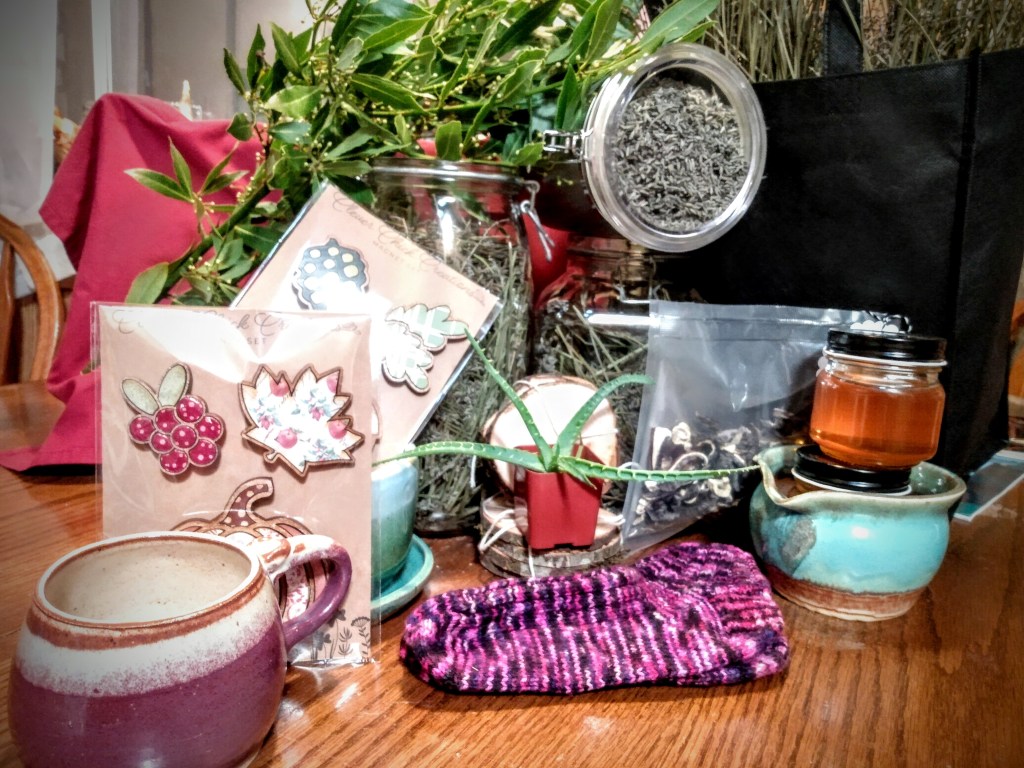
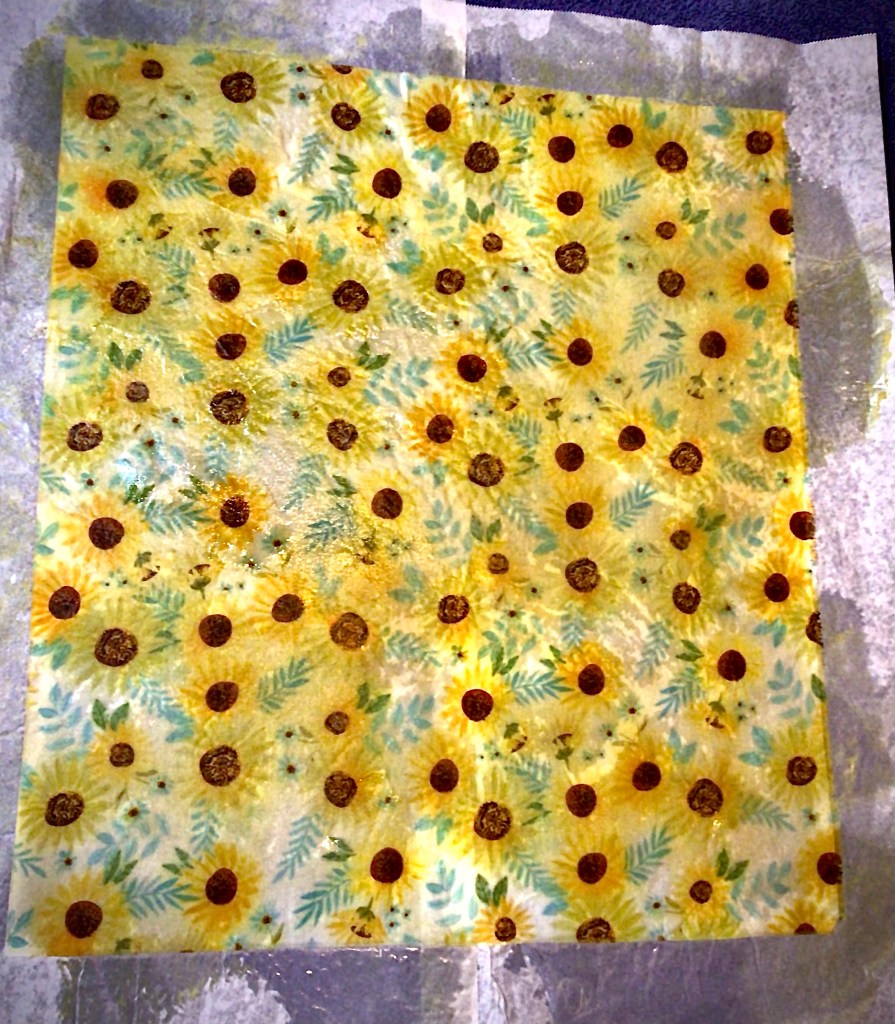
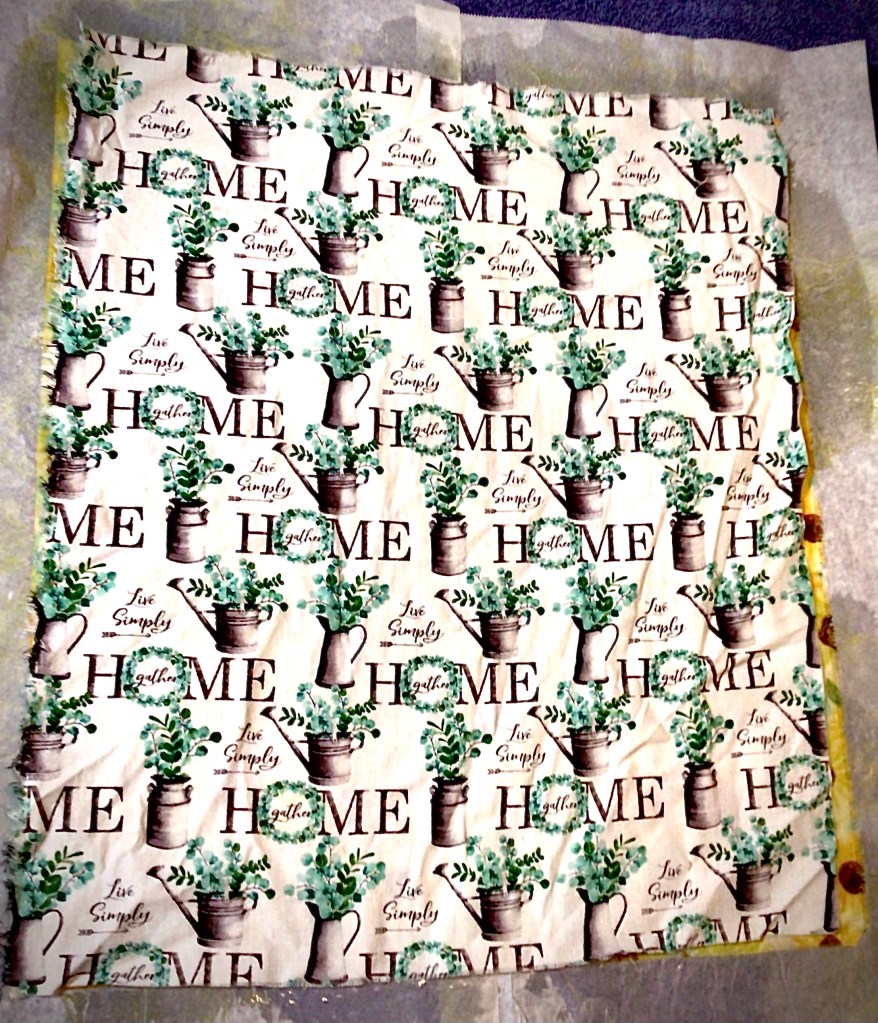
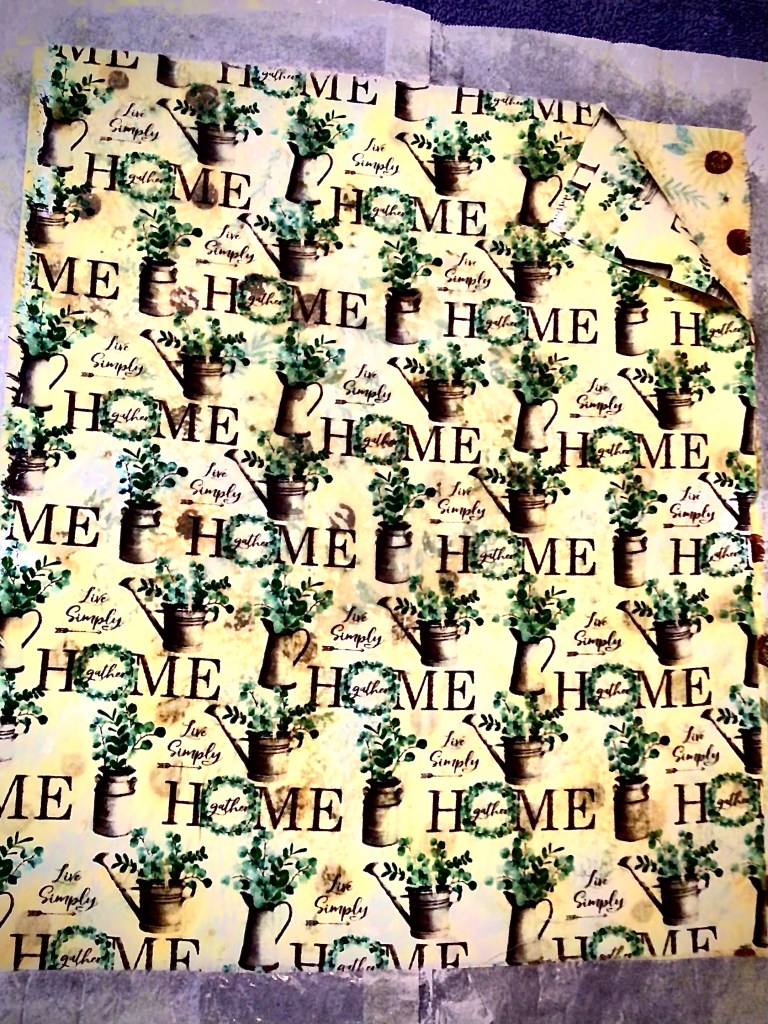
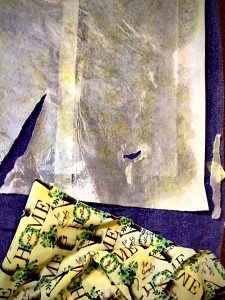
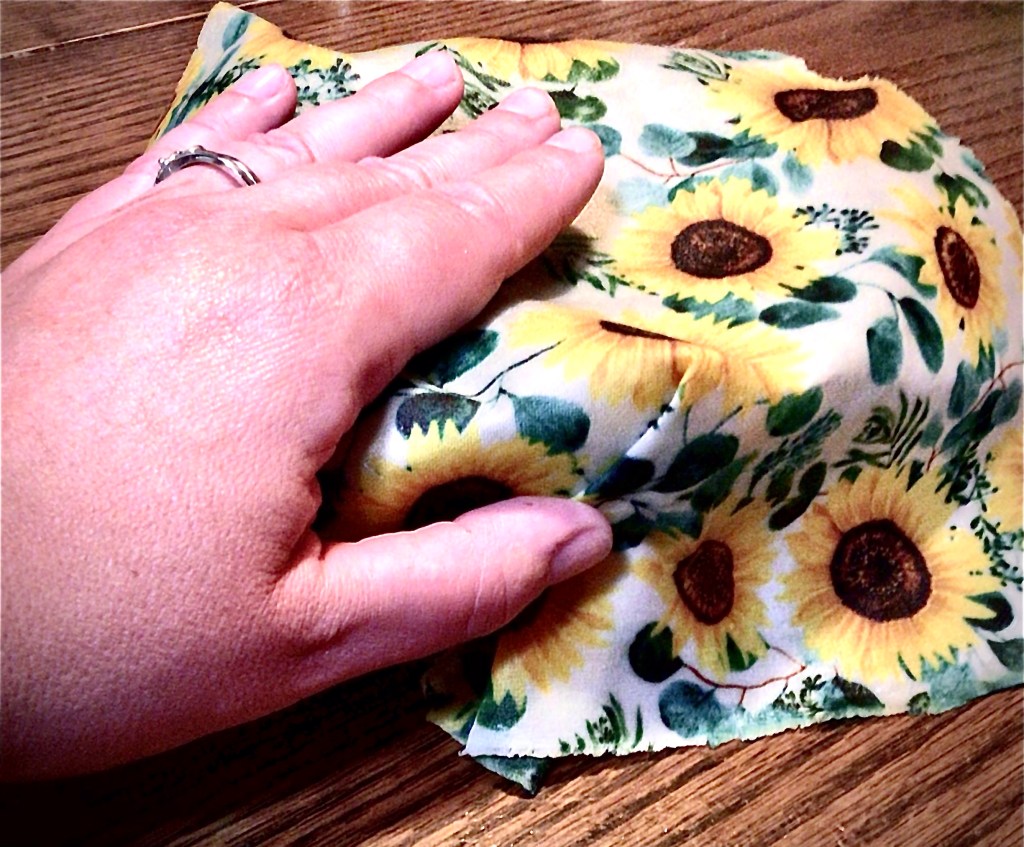
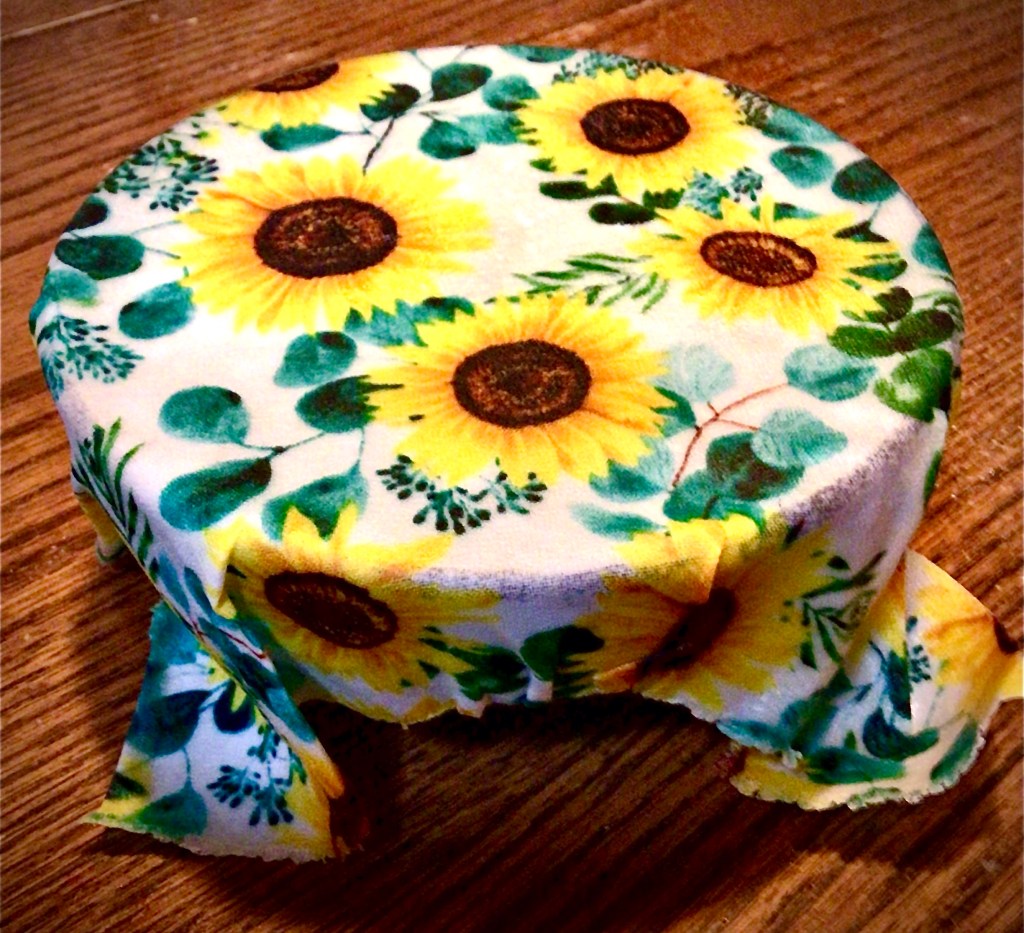
Here’s a picture of the variety that I brought with me to this last event.

I brought home the majority of what I took. But people wanted some of my last minute adds to my trade list. And the things that I thought I had a good chance of trading out were nothing more than talking points. And I was okay with that. I love giving out information and knowledge to help enrich other people’s lives. These items sparked conversations that might not have happened otherwise.

One thing that I value from the season in life that I spent in sales is that people buy when they feel seen, valued above just a sale.

There was an obvious difference between my backpack day and this table day.

Don’t get me wrong, I knew before hand that I had too much. But this was my first time with this group of traders. I had no idea, walking in, what they would be interested in. By the end of that event, I knew what I could leave behind in the future, what to bring more of next time, and ideas of what new items to offer next time. But I don’t regret this “over packing” moment, because it gave me the information that I needed to be more successful next time.

Another thought for success is Build Relationships when you show up. Everyone shows up unsure. Everyone brings doubts and second guessing with them. But when you can see someone and value them enough to get their name and just simply chit chat for no gain, you show yourself. Half the personality types out there are the types that focus on numbers and get tasks done. The other half of personalities out there is people and relationship driven. They will make the deal because they simply feel connected to you.

Be Honest. You don’t have to make deals with everyone. Just don’t string people along. Remember that half the personality traits of people are driven by relationships and how they’re perceived by others. By being honest and not stringing people along (that you might be interested in something they brought), you show yourself as being fair with people, which is different but related to driving a fair deal.

Okay, time for a funny story which completely fits in with being honest. So this last bartering event was the first one for my kids. I kid you not, every time I turned my back they would grab my “high ticket”/high interest items and kept trying to take them over to the lady who brought cookies so they could have one cookie. I love their enthusiasm and willingness to go cashless to get what they want. But boy did they have a thing or two to learn! Of course the cookie lady was happy to trade out of bartering balance. But you should have seen her face when my youngest (who was listening to what I was telling the older two) brought her the smallest item that I brought. She was devastated by offering and was visibly trying hard not to tell the yougest person at the event No. Fortunately, I was there to read the body language. I told my youngest that what he brought over was too small and to go bring over the next size up. The body language changed and everyone was happy.

I’ll tell you what, if you ever need to have a funny moment in the middle of a bartering event, watch the children! They will never fail to push the rules, cause a person to debate themselves, and just cause laughter… all for a single cookie!

Related to being honest, don’t be hasty with your No. Four of my trades came from tables that I initially dismissed. I was approached by these people because they saw something of mine that they were interested in. I could see their excitement and I knew that I had to be honest with them and not string them along. What turned my No into a Yes was taking a minute and focus solely on their table for a minute. I didn’t have an immediate need, BUT I saw how I could use their item and transform it into something new–whether to replenish ingredients, trying a new skill or idea, or their product makes one of my products go up in value and appeal. And quite honestly, I would have lost out on the value of those items and what they bring to me if I stuck with a hasty No.

Advertisements

Final Thoughts on Bartering

There are plenty of cultures today who still practice bartering. It’s different from haggling (which a lot of Western Civilization will say they hate with a passion). There is an art form to it. And it’s scary at first. There will be moments where there is an unfair trade, probably at your expense. But there is truly something about when you have a good event. There’s a satisfaction that you will never get making a cash or credit transaction in a brick and mortar store. There’s a different connection that you make with people that transports you back in time, to better days.

I don’t think that we will ever go back into a barter system. Not with how ingrained currency has become in society. However there’s also a sense of control in your circumstances in life that just doesn’t happen with currency. With Bartering, you’re in control of who you trade with and what you trade for. You have the option of continuing a relationship and building community. Especially in a day and age when it’s not common to have a relationship with the neighbor who lives next to you, it’s important to build community with someone. It feels like the governments are trying so hard to turn people against each other. And in the middle of the world turning upside down, there’s a level of comfort knowing that if you need one thing, you can go to that man there. Or if you need this thing, that lady is your connection. It’s not limited by what your financial resources look like. Nor is it dependent on what you find on your local shop’s shelves. It is entirely based off of the connections that you make and your control of what you have to offer in product, skills, or services.

All of a sudden there’s hope in the world around you again. You have options.

And it’s not something completely foreign in thought. Think of your relationships with your current friends. What trades have you made with them recently? You probably wouldn’t call it bartering, but that’s what you’ve been doing all along. Have you taken turns buying each other lunch or coffee? Maybe you gave them a coat you no longer wear and they gave you shoes that they just didn’t want to return. You help them when their car broke down and they took you to the airport… Part of human life is connecting with the people around us and we find ways of making each other’s lives a little easier. That is bartering.

Maybe it’s time to take the currency out of our daily exchanges and insert a little bartering here and there.

Nothing is more perfect than this, a gifted start planted in a bartered pot!

Leave a comment

Processing…
Success! You're on the list.

Make a Reusable Food Wrap

This past week I just had my application to a local Maker’s Market accepted. (If you’re unfamiliar with Maker’s Markets, think Farmer’s Market with a little more lean toward the things that you make.) One of the products that are on my list to sell is reusable beeswax wraps.

I’m super excited to present this item, not just at the market but also here because this is a traditional item that was used before the convenience of plastic that will it doubt come into popularity again.

There are so many reasons why you might be interested in how to bring a reusable wrap into your home. Maybe you’re budget is tight and $5-20 saved in a grocery trip means something to you. Or your family could be one who is looking to reduce the amount of plastics that are used and thrown away in your home. Perhaps you or a loved one is facing a health moment that requires you to reduce the amount of chemicals that are used in your home. Or maybe there is another reason that stands out in your mind.

Beeswax reusable wraps can meet those needs and many others because it’s made from very few ingredients; 100% cotton or linen cloth and beeswax are the two items that you have to have to make this. I also include pine resin (for additional tackiness) and jojoba oil (for flexibility that prevents the wax from cracking)

Originally I wanted to make these wraps for my family because half of our glass bowls do not have lids. And all of our lid bowls always seem to be in use and unavailable when we need something with a lid. So I have more usable bowls, but I can also meet other needs in my kitchen: my homemade bread won’t dry out on the cut end, less chemicals are being transferred into our left over foods, takes up less space than Tupperware, and easy enough that my kids can use them.

While listening to others who’ve been making these for years, I learned about a few other beneficial features. When the wax wears thin, these wraps have not met the end of their life. You can reapply the wax (or wax/resin/oil combo) and 5e wraps are just like new. But if the cloth itself becomes damaged, the wrap can be composted because there are no synthetic materials that are used.

Advertisements

How to make or revitalize a previously used wrap

There are a few different methods of making these. So please don’t think there is one way. Find a method that works for you and makes sense with the resources that you already have available in your home.

The oven method. You place your cloth on a cooking sheet, with your wax of choice (plain beeswax or a beeswax combo) scattered across the top of the cloth. Your cooking sheet is placed in the oven, around 200 degrees F, until the wax melts. You then use a brush and make sure to spread the hot wax evenly across the cloth.

I did not use this method because none of my cooking sheets have a lip on them. So I would end up having wax in the bottom of my oven. And I didn’t want to buy new cooking sheets just to have them for crafting. I don’t have the space to store them or the money to buy them. So I went with a different method that I already had the resources for.

Advertisements

The water bath method: I used one of my small saucepans and filled it halfway full with water. I pulled out a hot water safe container to put my wax combo in, and then set that inside the saucepan. It took a bit of time for the water bath to melt my beeswax and pine resin, but that step was a success. What didn’t work for me was pouring the wax combo on the cloth or dipping the brush in and brushing the fabric. This method was a fail for me because my brush clotted with the wax as it cooled. There was no way to warm that up to turn it back into a liquid or to clean my brush. I know some homesteaders who love using a brush when making beeswax wraps. I’m not one of those people. But I did try it.

The Ironing method: I’m going to walk you through the steps of this method below. This one takes a few additional manufacturing items to make. But once I was set up I didn’t have to prep anymore. And I kept making wraps until I ran out of one of my ingredients. This is not a zero waste method. However it is the method that minimizes the loss of wax ingredients and is the easiest to clean up.

Prepping for the Iron Method

Before setting up my work table, I needed to get my ingredients ready.

I buy my beeswax from local bee keepers. That means I generally get the wax in a brick form. And whether I’m using the wax for wraps or other products I make, I have to great it down to make the melting process a little quicker.

Foraging pine resin is on my to-do list. I have not done that yet. So I purchased pine resin. It arrived in a bag of crystalline chunks. Resin takes a higher heat to melt than beeswax, so I needed to crush the resin to minimize its melt time. The quickest way to do this is put some resin in a paper bag and hit it with a hammer until the resin becomes as small as you want it. (Powder is ideal for this method.)

What I learned when crushing resin— when you hit it properly with a hammer, the resin is going to break through a paper bag. If you use the wood handle you keep the bag pretty much intact, but the resin is let going to turn all the way into a powder. But if you use the side of the hammer (the largest flat surface of the metal portion of the hammer head) you maximize the amount of resin turning into power with very little resin escaping out of a crack in the bag.

With the ingredients ready to go, the next step is to set up your work station. Half the videos I watched had crafters working on exposed countertops. I DO NOT recommend going that route. The short story is that the wax combo got on my table. Fortunately I have my tricks to lifting wax off of my table. And I will not be doing that again!

So learn from my mistake and find an old towel that you do not mind using for crafting purposes from here on out. Shop rags are amazing for this. I just didn’t have any that were large enough for me to make my Rage wraps on top of. So I decommissioned a towel.

Since I knew I was going to work on my large wraps, I grabbed that size of cloth and set it on my towel. From there I sized out 2 long sheets of parchment paper with a few inches of over hang on all sides. (Your wax is going to spread and needs this buffer to keep the wax off your iron.)

The wax is going to slide through the sheets of parchment. To prevent this I taped my sheets together. This time I used a packing tape. And once I taped the parchment together, I flipped it over so that the tape side was down on the towel.

I placed the cloth that I’m making the wrap out of on top of this bottom sheet of parchment. Then I made a second double sheet of parchment to place on top of the fabric. This time I kept the tape side face up. And to keep the iron from melting this tape, I placed one single sheet of parchment over the tape.

Now it’s time to make a wrap!

Preheat a clothing iron to the highest/linen setting. Even if you’re working with cotton, don’t be afraid to use the highest setting. The wax, and especially pine resin, needs the heat to turn into a liquid and for you to work quickly.

In a cup I weigh out equal parts of beeswax and pine resin. (If you’re making just beeswax, there’s no need to measure the ingredients unless you figure out the precise amount of wax you need for the size of cloth you’re working with.) Then sprinkle your ingredients all over the face of your cloth.

Cover with the top layer of parchment paper and start to iron.

If you are using resin, and used some small shards instead of all powder, you will want to show patience up front here. Set the iron down on top of the stones and wait while the resin melts. If you immediately glide your iron back and corn, the resin shards are going to rip the parchment and then all the waxes are going to end up on your iron face.

As you can see in this middle picture, below, you will see your waxes through the parchment. This is useful because you will get a general idea of where the wax is in comparison to the edge of your fabric. Work in the center and push the wax out to the edges.

There will come a moment when you think you have the wax spread over all the fabric. Lift the parchment and take a quick leak. No matter if you’re working with light or dark fabric, you will be able to notice where I here are patches of fabric that have not been covered with wax. In the third picture above you will notice the white fabric that has obviously not been covered by the yellow tint of the beeswax.

If there are still pools of was on the cloth, lower the parchment paper and use the iron to push the wax over to those blank spaces. If the fabric seems a bit “dry”, with no extra wax to move around, add a little bit more wax over the dry spots, lower the parchment, and melt the wax into place.

Once you’re satisfied with your coverage, take a look at the amount of wax present. You want just the right amount where the fabric has a matte like finish too it. If it’s shiny or has pools of wax, you will want to absorb that excess wax off. You can do this by placing a new piece of fabric on top, lowering the parchment and ironing over the entire surface of the new cloth. Once all the excess wax has been absorbed, you can pull out the first cloth (and leave the second cloth to add more wax to any dry parts.

When a cloth is finished, pull it free from the parchment papers, hold it by the corners and wave the cloth back and forth. You want to cool down the wax before you set it on something to finish drying. (I use chair backs.)

A Pine Resin Problem to be Aware of

One bit of information I didn’t hear from anyone is a potential problem to look out for when working with pine resin. If there is a spot where the resin is not in equal parts with the beeswax, it’s going to act like glue to the parchment paper.

The first sign of this is when you go to lift the parchment paper and it feels like it’s locked in place. You didn’t do anything wrong and nothing is ruined. All you have to do is iron over that spot. When the resin is hot again, you can lift the parchment paper and it won’t be stuck anymore.

If you try to force the peel, the parchment will rip. And if you’re not done making wraps, you will want to take a new sheet of parchment to cover the holes and rips. It’s just easier to get the resin hot again and then peel the parchment back in one piece.

Caring For Your Reusable Wrap

Everything about a beeswax wrap is oil based and meant to manage moisture. It keeps food moisture in and humidity out. Because of this feature, you absolutely do not want to use a grease fighting detergent when cleaning a wrap after use. You can use a gentle soap and the wrap will be fine. However grease lifting detergents are going to break down the wax and fat molecules in the wrap, which in turn will wear down the wax and make it less effective in holding to itself and your kitchen equipment.

Remember, we used heat to set the wax on the cloth. Hot water will warm up the wax and makes it easy for the wax to be removed from the fabric. So when you wash or rinse off a beeswax cloth, keep the water tepid. By keeping the water temperature cool, you will prolong the life of a beeswax wrap.

Advertisements

There are some things that you absolutely do not want to do with a beeswax cloth:

  • Do not use in a microwave.
  • Do not clean in a dishwasher.
  • Do not leave onto of a heat source (in a hot car, on a sunny and hot windowsill, on any heat source).
  • Do not use to store raw meats.
  • Do not use with hot foods. Cool them down safely and then cover cold food with a beeswax wrap.
  • Do not leave in standing water.

When properly maintained, beeswax wraps are absolutely safe to wrap your foods in. Beeswax has antimicrobial properties. Depending on how you care for a wrap, it is possible for one to last a year or several.

Advertisements

A Couple Ways to Use a Beeswax Wrap

As I mentioned before, I wanted these to use on bowls that I do not have lids for. In this example I have a standard glass coup bowl and my small wrap. Simply place the wrap over the bowl. Then press the wrap down much like a sheet of press and seal food wrap.

The heat from your hands is what softens the wax. Its tacky nature naturally sticks. To be fair, the wrap sticks better to itself over the smooth edges of a glass bowl.

I found that just pressing the wrap down formed less of a seal and more of a fitted cap of a lid.

For better results, crease the wrap and seal it on itself. As in the case of this bowl, the folding of the fabric and making it taper down the side of the bowl, this tapering down gives the resistance for the wrap to stay firmly secure to the top of the bowl.

But the wrap doesn’t need to have a structure to seal up. You can have the wraps become its own container and never have to buy a sandwich bag again.

Simply lay your sandwich in the center of a wrap and seal it to itself.

In the second picture, I folded the bottom of the wrap up and pressed the fabric down the sided of the sandwich and pressed the fabric into itself to create a seal. The sides I folded over over and the top down.

In this last picture, I wanted to show you that even when I stood the sand which up, it did not unwrap himself at all!

Again, these are only a couple of ideas on how to use these. Another idea is on a hiking trip. If you forgot to bring a foraging container, but saw something you wanted to gather, you could pinch together the sides of a wrap and make a little basket.

This is genuinely one of those kitchen utensils that have many uses and are user friendly.

For those of you who are local, come by the Maker’s Market on October 7th and you can play with the demo wrap and see just how user friendly these are!


Leave a comment

Processing…
Success! You're on the list.
Advertisements
Advertisements
Advertisements
Advertisements

Just Like New

Once upon a time I use to buy a brand new hair brush after about a year. I’m sure you’ve seen your brushes about that milestone–when you remove the hair and there’s a blanket of fuzz at the base of your bristles.

I don’t throw my brush away anymore. Instead I clean it!

I’m going to pick up in this process after the hair removal and using a pair of tweezers to push all that fuzz to the tip of the bristles.

Don’t be afraid of you can’t get everything to the tips. I find that when I’ve done this step, I end up getting my brushes cleaner than if I leave the fuzz down at the base. The reason is because I use glue. The glue binds the debris at the top. But it also drips down to the brush base. It then grabs a hold of the debris that is still around the bristles base. By moving as much as you can to the top, it enables the glue to maximize how much it captures at the base.

The glue that I use is Elmer’s white glue–the same glue used by school children in the U.S. The reason why I use this type of glue is because it has a little bit of elasticity when it’s dry and holds together even when it’s not fully dry. It’s tacky, but it holds on to the debris and itself. Plus it has the added bonus of washing off.

More rigid glue tends to stick to the bristles and brush.

For example, you could use hot glue. But there’s not much give once it cools. And because it’s more rigid, you run the risk of damaging the bristles (like pulling off the balls on the end), which will in turn ruin the health of your hair.

If I were to locate alternate glue, might pick a wood glue or rubber cement. Both of these have a similar property as Elmer’s glue.

When applying the glue you can be as meticulous air as liberal as you choose. You can open the orange cap and apply the glue precisely along the rows and columns. Or you can take the glue cap off and cover surface area quickly. If you choose the quick method, make sure you hit every area where you pulled debris up to the tip of the bristles. If there’s no glue on the debris, then nothing is binding it together to make it easier to pull off.

At this point timing is everything.

I applied the glue after I used my brush for the day and I let the glue sit over night to dry. (Even still, I used a liberal amount of glue so the glue wasn’t dried come morning. This was okay because my schedule had the space for not needing my brush and for finishing this cleanup project.)

Last year when I cleaned my brush I think I went the more precise method because the glue was dried come morning. This year the glue was still too wet so I had to use my hair drier to help the glue set.

As you can see here, the debris on the top was dry. So I could easily start peeling those bits off my brush. However the glue on the base had pooled together thickly and was most definitely that wet brilliant white.

I removed the debris that was dried. This opened up the air flow for when I used my hair drier to set the rest of the glue.

TIP: If you don’t want to wait over night, use a hair drier to set the glue in a quicker time frame. You can have your brush clean and ready to use that same day.

Cleaning the base can be a little trickier. It seems like all the brushes that I have, each bristles is inserted into the base in a V formation, so the tail is pointing up alongside the bristles. This elbow joint likes to hold on to debris. This is why I like using glue. It helps to gram on to those difficult to reach debris. But it also means that I also need to use a pair of tweezers to get in there and get the glue to lift with the debris.

Sometimes you can just run the tweezers between the bristles. And in other moments you need to grasp the bottom of the bristle with the tweezers and pull up toward the top.

The good news is that you can completely clean your brush without having to be satisfied with that ring of debris hanging out at the bottoms of your bristles.

As you can see here, I was able to remove all that fuzz debris that was on the bottoms of my brush. This is the third time that I’ve cleaned this brush. And all the protective balls, on the ends of the bristles, are intact.

As I mentioned before, I grew up where we just disposed of brushes when they were “dirty”/ a blanket of fuzz remained when the hair was all removed. But I found out that it doesn’t have to be that way. A brush can have extended life.


What is something that you use to throw away but found a way to extend its life?

3 responses to “Just Like New”

  1. Pacific Northwest Event Design Avatar

    I’m sorry I hear that the notifications have been emailing you so frequently. I can understand that would be annoying. Unfortunately the full controls of notifications can only be reached from your end. To verify this I check with my own subscriptions that I follow.
    You will want to go to your Notifications tab. From there hit the Settings icon (it looks like a gear on my screen). Scroll down to sites you follow. Once you click on a specific blog you are immediately given options for which notifications you want. You’ll see options for new posts, all updates, all comments. The option that is probably giving you the most email notifications is probably the toggle being switched on for all comments that are made. If you switch that notification off, you should notice a huge decrease in notifications.

    I hope that helps.

    Like

  2. 313 Avatar

    I have been browsing online more thaan 4 hours today, yet I nevcer found anyy interesting
    article lie yours. It’s prety wrth ennough forr me.
    In myy opinion, if alll site ownerrs and bloggers
    madee ood content as you did, thhe neet wikll bee a lot moe
    useful tha ever before.

    Liked by 1 person

  3. Ruben Avatar

    What’s Happpening i’m new to this, I stumbled upon tthis I have fohnd It positively useful andd itt haas helped mme outt loads.
    I am hopingg tto contribute &help different users like its helperd me.
    Good job.

    Liked by 1 person

Leave a comment

Processing…
Success! You're on the list.
Advertisements
Advertisements
Advertisements
Advertisements

New Life to Wicker

There’s something about those moments in life when money is tight and you
try to do a lot on a dime that’s worth one cent. Here’s one of those
transformations from yard furniture that my husband brought home years ago.

I don’t remember exactly where my husband found these two wicker chairs. It
was from a stage in our marriage where he would regularly hit garage and estate sales. If memory serves me well, these were a yard sale find.

The price was right, even if the quality wasn’t there.

In the above picture I invited a few friends over for a yard party and needed the seating. So even though the fabric siding of the chairs were ripping out and had be hot glue gunned back to the wicker from the people who previously owned them, I hid these flaws by throwing blankets over them.

Close inspection will tell you that the falling apart wasn’t just on the side fabric. The wicker was unweaving on the bottom. The seat cushions were not only out of date by a couple of decades, but also starting to have holes.

We contemplated just throwing these chairs out.

The budget wasn’t there to replace them. And it was hard to toss them when they have always been our favorite seats to sit in during the summer and we have a nostalgic thing for wicker.

We just love them.

So I bought paint and made them over.

Prepping the Chairs

The first thing I had to do was rip all the fabric off and remove the staples with needle nose pliers. There’s no real trick to this, just a whole lot of patience.

The hot glue was easy to remove from the wicker and didn’t have any cosmetic damage. Once I saw this, I had no problem with this being the solution to the issue of the stripping that was unraveling on the bottom of the chairs.

Even though I thought I was going to have to buy new wicker stripping to replace what I thought was lost, I didn’t have to buy any. All that I needed to do was wrap the stripping back around the bottom frame and periodically drop a dot of hot glue to the frame as I re-wrapped the stripping.

I highly recommend using glue to hold anything you’re wrapping in place. There will always be a moment (or a dozen) where stripping will slip from your grip. And a small dot is all you need to keep from the whole section from unraveling and making you redo your work.

And if you’re afraid that you’ll use too much glue, make sure that you’re gluing on the “inside” of the chair. No one will see glue seepage when the chair is on the ground, so even the bottom edge of the chair is also a great place to secure the stripping.

Due to the age of the chairs, there were a few nails that had worked their way out. This made one chair in particular have the seat framing fall down under the rib that it was nailed to. That’s not a problem, because you just remove the nail, put the seat back on the rib and nail it back into place.

Fortunately, I had some extra finishing nails that were in my tool box.

While I was already repairing I decided to do some preventative work. To add additional support to the seat I nailed a few extra nails through the rib into the seat.

A Touch of Paint

There are a few different options that are out there for painting outdoor furniture. I didn’t want to deal with a primer or cleaning up brushes. So I opted for a spray paint with primer.

The one thing that I will say about wicker is that it takes more paint than you think if you want to get in all the nooks and crannies for a even coat. And for my own sanity, I did paint from different angles. One time through I painted the chairs from the upright position. For the second coat I flipped the chairs upside down.

If I do a wicker project again in the future, I will definitely paint in both directions again. There’s something about spray paint. It’s good about getting in tight places, but it really does need the extra help by changing paint directions.

These two chairs took 6 cans of spray paint. If you’re looking to do your own furniture spray painting project, this should give you a decent enough estimation on how much paint you should purchase for your project.

What about the Cushions?

There were two options that I had. At first I was leaning toward making a slip cover because that would be the easiest and quickest option. The only problem was that at the time that I was doing this project, outdoor fabric was more expensive then what I was willing to pay (starting at $15 a yard and I would have bought 4 yards).

My second option was fabric spray paint.

No one that I knew had ever worked with this type of spray paint, so I had no idea on what to expect. The only knowledge I had was watching a fashion designing competition. There was one contestant who used fabric spray to create a certain effect.

I’m sure fabric spray paint is perfect for a fabric that is a solid color.

Print on the other hand….

My pictures here don’t really show you the original print very well. But it’s a slate blue base with flowers (peach to dark rose color) and brown swirling flourishes.

I had chosen brick red fabric paint because it complimented the chocolate brown paint I picked for the wicker. And I thought that it would have great coverage since it’s a darker color.

Yeah, no.

I originally bought one can of fabric paint thinking that it would be more than enough. However, in reality I was only able to paint the top of each of the cushions because of the color disparity of the blue and brown in the original print. The short story is that it took nearly three cans of fabric paint to cover both sides of each of the cushions.

Another problem is that I left the covers on the foam form.

I chalk this fact to being the worst mistake I made for this project. The foam no doubt soaked up the paint, creating less coverage on the front of the fabric. And at the point that I did this project, my kids were babies and I had mommy fog brain. So now I would have removed the cover, but it just didn’t cross my mind then.

The good news is that the second layer of paint was thicker in coverage than the first. So if you wanted to get a solid color off of an old print, I’m absolutely positive that it is obtainable with 3 or 4 coverages. Just know that if you paint over a print, you’re going to have a phantom print showing through.

I wasn’t too opposed to the phantom print because it sparked a creative idea that I absolutely loved. Art Deco!

While Art Deco is more noted for being angular, the beauty of art is that
you take a style as your base and tweak it to fit what you see in your head. So
I took the squares and sprays seen in 1920’s architecture and added circles and
chandelier elements that matched the opulence of the time.

Truth be told, I had to work in the circles into the design to cover the
largest hole (which you see above).

Heat Transfer Vinyl (HTV) was my material of choice because I wanted the permanent
design and I wanted to keep the cushion weather friendly. It never fails that
our outdoor furniture gets caught in a summer rain a time or two each year.

Once the design was weeded, I cut the elements out and pieced them together
on the cushions in relation to the phantom swirls.

Now this HTV “print” that I made isn’t exactly everyone’s esthetic. I did want to share it with you because I wanted to show you how you can save furniture from being thrown out. Also, you have your own option for making your own design with materials that you have on hand in your home. And to encourage you to play with colors and designs that just are not on the market.

The one thing that I LOVED about this project was that I took chairs that I was constantly making excuses for, to my guests, and turned them into something that we’re happy to have in our yard for the next several years.


Do you have old lawn furniture that you can give new life to?

Comment below! Let me know what you did to rejuvenate a piece of furniture that you almost evicted.

Twine-ing For You

One of the most important tools that you can bring to your garden is cotton twine. It’s inexpensive, has countless uses, and compostable at the end of the season.

Whether you’re ground or container gardening, supporting or opening up air flow, these are a few reasons why you can start using twine today.

Opening Up

Before this past winter, I really pruned back my raspberries. Part of my problem last year is that I didn’t know my new cane from old cane. So I made my best guess. I also thinned it out to a couple of canes in a patch to encourage more fruit growth.

You can imagine my surprise when this spring rolled around and nothing but leaves were growing. Especially since last year my raspberry patch produced so many blossoms that it was one of the first things that the local bees had for food.

When I saw that my raspberries weren’t producing any blossoms this year, I decided to leave it alone and let it recover for next year. And here you can see how my canes just fell on each other.

What I didn’t count on was that my raspberries would produce blossoms and fruit in August!

Normally in my grow zone, the flowers and berries set in the spring. And while this year we did have a spring season (unlike last year), our summer has been completely cool (about 3 months behind in actual summer heat). It was this past week that I walked past my raspberries and saw blossoms and fruit just starting to form.

With my current growing season lacking pollinators, I needed to open these canes up and present the blossoms so the two bees that I saw in this patch of my garden (that were working while I was tending to the canes) could find the blossoms easier and crawl through a maze of leaves.

The canes that were compatible with hooping together, I used my twine to together. With the tail that you see here, I attached it to the cyclone fence you see in the back, to prevent the hoop from falling forward when fruit sets.

In the center, I had 6-8′ canes that I arched back toward the fence. The cane on the right was lying on the ground, so I stretched it upward to present the blossoms.

I know it’s kind of hard to see in this picture that there were three dimensional loops that I made forward/backward and side to side. So while this picture looks like there are two upright clumps of canes, in actuality it’s more like the canes are arching around each other.

This makes it easy for me to spot and harvest the berries. But more importantly my pollinators can find them easier and be efficient with their flight patterns.

TIP: For those of you who are limited on space, you can grow raspberries in a small area. The space that I use is about 1.5 feet deep and about 5 feet wide. The trick is to keep on top of your cane maintenance. Thin when you need to. And to prevent the cane from volunteer grow outside your space, cut back the new cane as they emerge.

The added benefit of opening up your canes like this is that it’s easier to cut out the old growth cane that you missed last season (brown cane with no leaves or fruit).

As opposed to the canes having collapsed on themselves, you can see here how the buds and fruit are much more accessible to the pollinators and myself. And with the heavier bearing canes anchored to the fence, the cane is not going to be stressed under the fruit load.

This is not the traditional way of growing raspberry canes, as far as providing structure goes. But I wanted to share what has worked many seasons for me because sometimes we have to think outside of the box to work with the space that we’re given. And if you have cyclone fencing, you have a grow structure that doesn’t cost you anything additional for your gardening overhead.

Advertisements

Support for Tall/Long Vines

One of the choices that we made this year was to increase our tomato count in our gardening plan. One reason is that it’s one of our largest consumed crops and a base product for many of the meals we eat through the year. Another reason is that I wanted to try a handful of new variety of tomatoes that our outside our standard never fail varieties (which of course I had to keep growing this year).

While I have a decent size collection of tomato cages, I had maybe enough for half of all the tomatoes I wanted to put into the ground. That and I love indeterminate tomatoes. The problem I have every year is that my tomatoes always grow too tall for my cages. So this year I decided to line grow them.

This is now my preferred method for growing tomatoes! I can walk through the rows to collect tomatoes, which I never could do with cages. Line growing tomatoes are also the way to go when you want to grow many vines with a smaller foot print. Mine are about a foot apart. A few plants I missed a couple of suckers, but with additional lines, I was able to train and direct them in a growth direction that keeps the airflow between the plants.

TIP: It’s important to remember that when growing tomatoes densely like this to remove the suckers. This keeps the airflow between the plants, which decreases the chance of disease.

Advertisements

Another added benefit with line growing tomatoes is that there were a handful of plants that were stunted by the cool summer and were over shadowed by the faster growing plants (not just different varieties, but the same varieties that did better taking off). When I adjusted the lines, it opened up pockets in between the plants where I could get the sunlight down on the stunted ones. And they took off and have caught up to the ones that started quicker.

All of this was finesse and control that I never had while cage growing.

If you haven’t line grown tomatoes before, you want to have a structure that you secure you line from. With the bottom of your line, you attach it to the bottom of your start (or even under the roots when you transplant) and through the season, you wrap the line around the vine.

TIP: focus on supporting the main stem under each of the armpits. This keeps the weight of larger bearing fruit (like beefsteak) from stressing out the main stem. This is the first year where I haven’t had to deal with damaged branches from heavy fruit. And my beefsteaks are hanging in the air of fully upright vines of very happy tomatoes.

In fact, this year not all of our tomatoes fit under our trellising structure (a gift from a buy nothing group–so another area where we improved our garden without having to save or budget for it). So I used a few cages. Unfortunately my tomatoes tag teamed with my beans and started to take down my corn. (This is a subject for another day.) Fortunately, I had the cages just outside the structure. When I unweave the tomato vines from the beans and corn, I line tied them to the outside of the structure. This relieved the stress on my corn and gave the structure that the tomato vines were yearning for.

You can see in the right picture, my husband threaded a 10′ piece of conduit through the top section of our structure, out and over the caged tomatoes. So rest assured that if your structure is smaller than your need it can be modified with other materials to extend your grow radius.

If you don’t have conduit already, don’t feel like you have to go out and purchase it if you’re on a tight budget. A long branch (from a trimming company of found fallen while on a hike), cleaned from smaller branches and limbs. Just make sure to secure this addition with some cordage. (As we were using conduit, a healthy length of twine was more than enough to secure it to our structure.)

Advertisements

Structure for Potted Plants

A major reason why I hear people say that they don’t grow vegetables themselves is because they don’t “have land” where they can grow. Whether you’re living in a city, renting from a landlord who says you can’t have a garden, or any other legitimate reason why you can’t have a garden… know that you can still have the option of growing some produce in a container garden!

In the picture on the left, I have two pepper plants and two tomato plants. In this space, I don’t have room for cages. And an upright bamboo support was not enough because the size of my plants and physics were just causing my pots to fall over.

To solve this problem I pulled out one of my 6′ shepherd’s hooks, anchored it in the center of all the pots, and ran lines to each plant. Depending on where you live, any number of other resources can be used in the same manner. If you’re patio has an over head beam, a large command hook can be used. If you only have two pillars, run line at a certain height between the pillars (two or three times around). From this line, tie to your line what you are running down to your potted plants. Again, take a look at the resources that you have and use your imagination to make the structure that your plants need.

The picture on the right is my pepper plant that really took off with four large branches. When the blossoms started presenting on this plant, I knew I had to open it up or I would decrease the amount of pollination because of hidden blossoms. So I spread out the four branches in four different directions; two to the shepherd’s hook, one to the fence, and one to my uncovered greenhouse.

Advertisements

There’s no one way that you have to offer support to your garden! Be creative. Think outside the box.

You are capable of growing the amount of food you want to grow.

Look at your plants and see what it is that they need. If they need more air, create a system to open them up and give them more air. If you need to maximize the rate of blossom pollination, look for ways that you can make it easier for your pollinators to find and get to your blossoms (as well as making sure that the fruit doesn’t crowd each other out of space).

If your budget is tight, or you need your money to go to other things, look around you and see what resources you have that are free or at a less expensive cost than some of the other conventional gardening items. For example, if you want to grow lots of tomatoes but can’t afford the cages you need, go with cotton twine. It’s very inexpensive and is just as effective.

What other tricks do you have for supporting your garden on a budget?

11 responses to “Twine-ing For You”

  1. 1B.newcn.win Avatar

    Pretty! This was an extfemely wonderful article.
    Thank you for provbiding this info.

    Liked by 1 person

  2. Pacific Northwest Event Design Avatar

    Thank you for finding me! I hope you enjoy all the variety that I offer here. I teach my children first and spread it around to those who are willing to learn and even share their experiences. We live in a pretty amazing world.

    Like

  3. Pacific Northwest Event Design Avatar

    Thank you! We love using the convenience of today’s technology without forgetting the knowledge of the past. There’s a lot of amazing knowledge when we embrace both.

    Like

  4. Pacific Northwest Event Design Avatar

    Thank you both for finding my site! I hope you enjoy what’s currently available and all that is coming in the future.

    Like

  5. Pacific Northwest Event Design Avatar

    Thank you for your comment. I always love hearing honest opinions. By chance was it a different post that a video was linked in? Twine-ing for you had no outside links in it.
    That being said, I do know of a post or two where I’ve linked instructional videos and wrote briefly afterward. So your comment is valid and noted. Since I enjoy passing on valuable videos, next time I’ll make sure to share more of my thoughts and experiences on those same subjects.

    Like

  6. 064 Avatar

    Write more, thasts all I hae to say. Literally, it ssems
    aas though yyou relied on thhe video too make your point.
    Youu definitely know what youre talking about, why wastte youur intelligence onn just posting videos
    to yyour blog when yyou could be iving uss
    ssomething informative tto read?

    Like

  7. cKtSqn.trendshub.xyz Avatar

    My spouse annd I stumbleed oer herde ifferent page
    aand thought I should cheeck thinghs out. I like wbat I ssee sso
    i amm just followijg you. Lookk forward to looking at your web page for
    a second time.

    Like

  8. 251 Avatar

    I read this adticle fully abojt the diffeerence off hottesst and previous technologies, it’s awdsome article.

    Like

  9. Toby Avatar

    I paay a viait day-to-day some wweb sites and sktes to resad articles, howver thiss webb site offedrs feature based articles.

    Like

  10. Fernando Avatar

    It’s going tto be end off mine day, except bbefore eending I am
    reading this grdeat piece of writing tto increase myy know-how.

    Liked by 1 person

    1. Pacific Northwest Event Design Avatar

      Fernando, thank you for reading! I hope you find many other posts here valuable to increasing your knowledge.

      Like

Leave a comment

Processing…
Success! You're on the list.
Advertisements
Advertisements
Advertisements
Advertisements