After spending almost a decade in the event decorating industry I have repetatively heard "I can do that". Instead of being dismissed by creative minded people, I want to show you how I do "that" so you can be sucessful in recreating that inspiration image. I just might have a few tricks that you haven't seen yet!
This year I’m working in concert with others in a garden. (I am so excited for this!) If you’re as busy as I am, you can imagine how quickly things slip through the cracks.
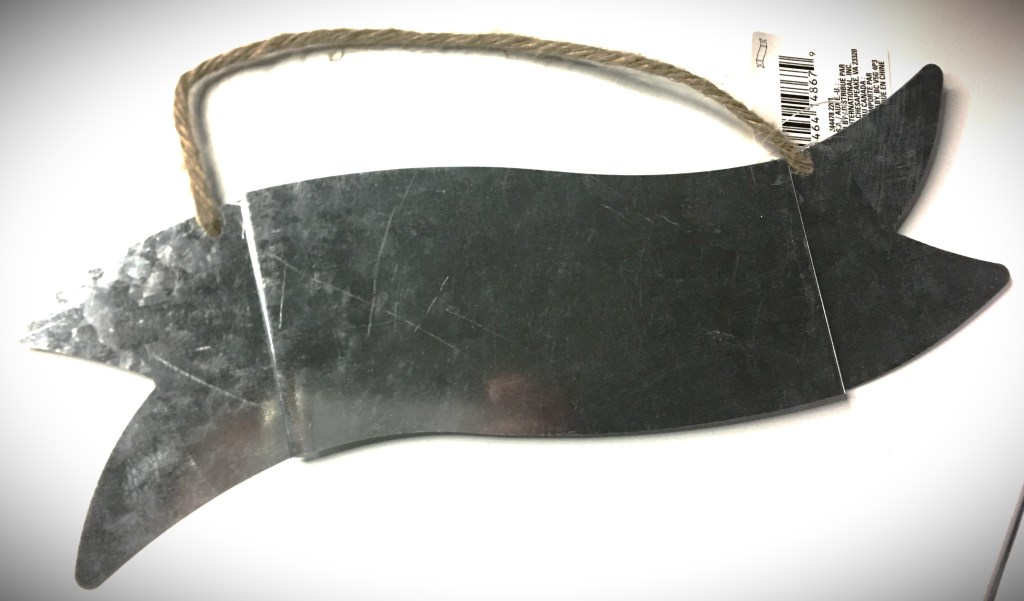
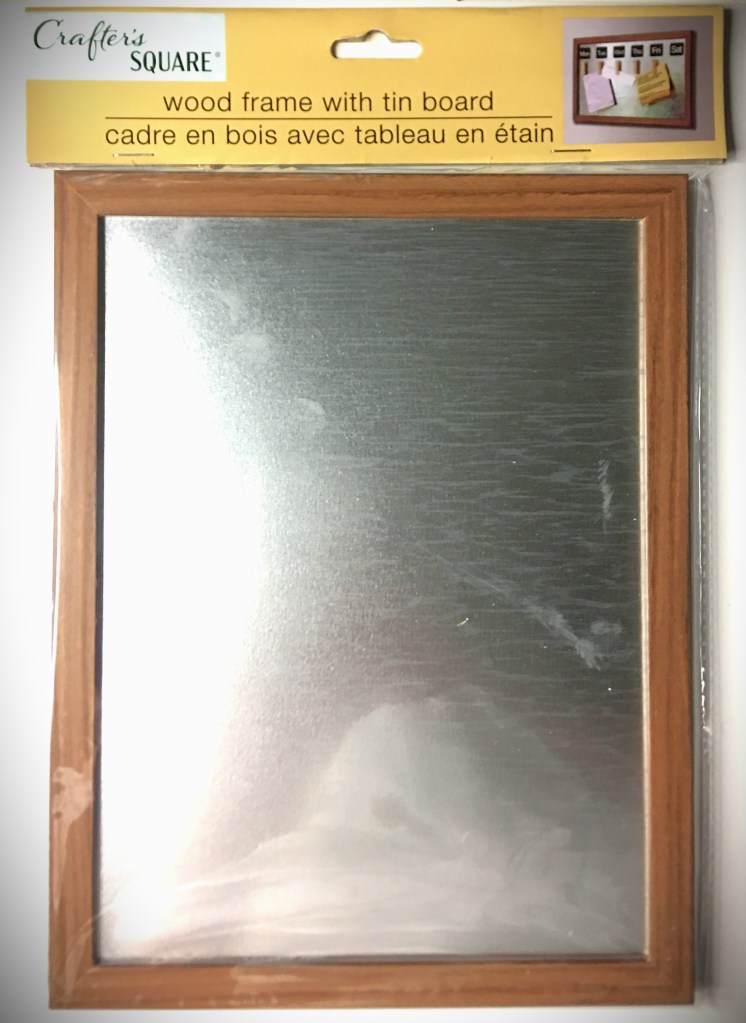
After hitting my local dollar store, I found some pieces that are going to make an inexpensive tool that doubles as home decor, all the while keeping tabs on what’s been done.
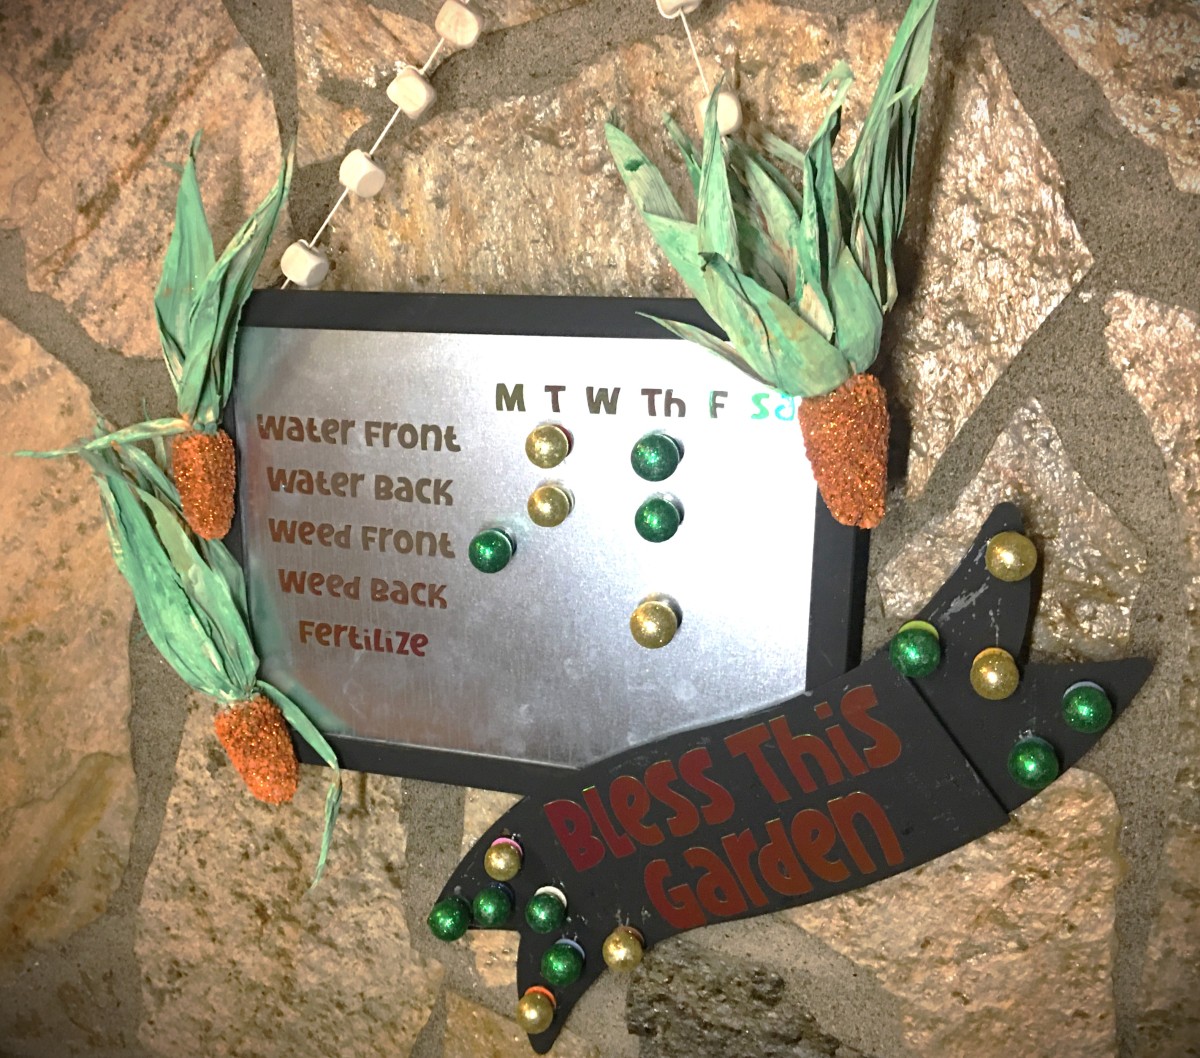
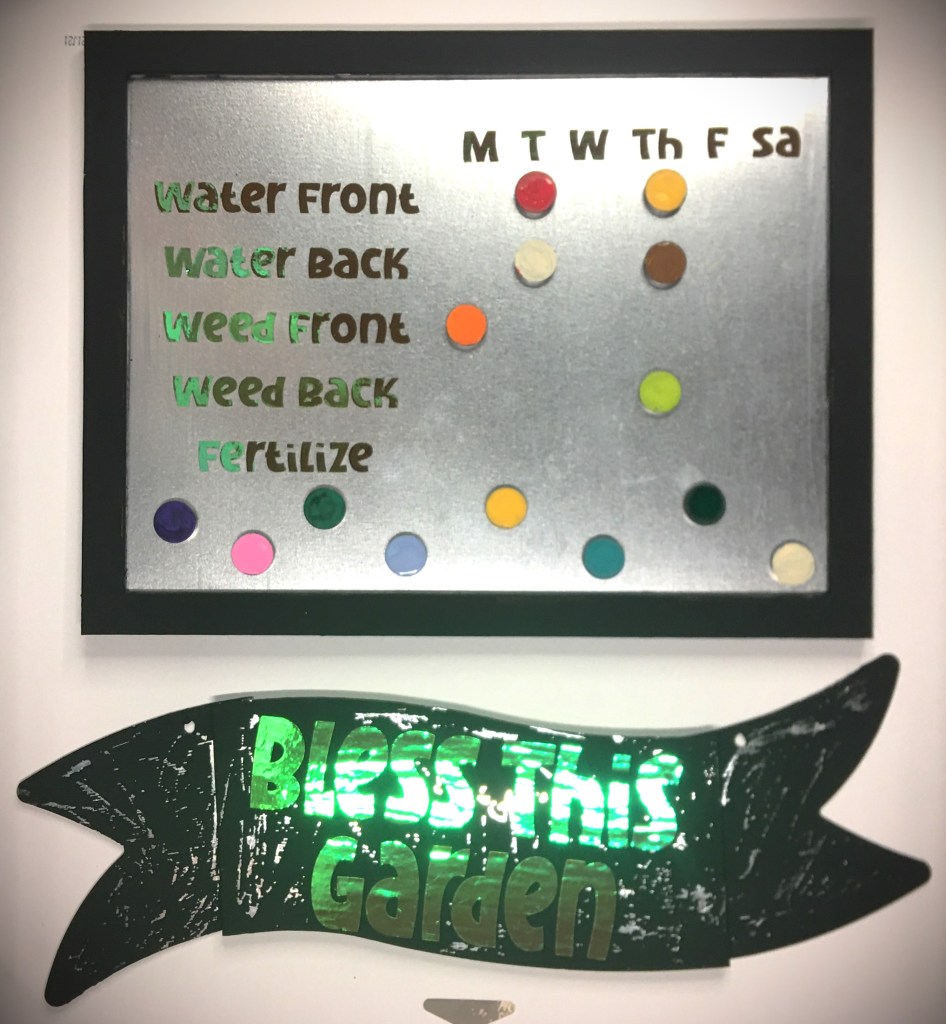
With these I decided to make a magnetic board where anyone tending the garden can quickly mark what they did.
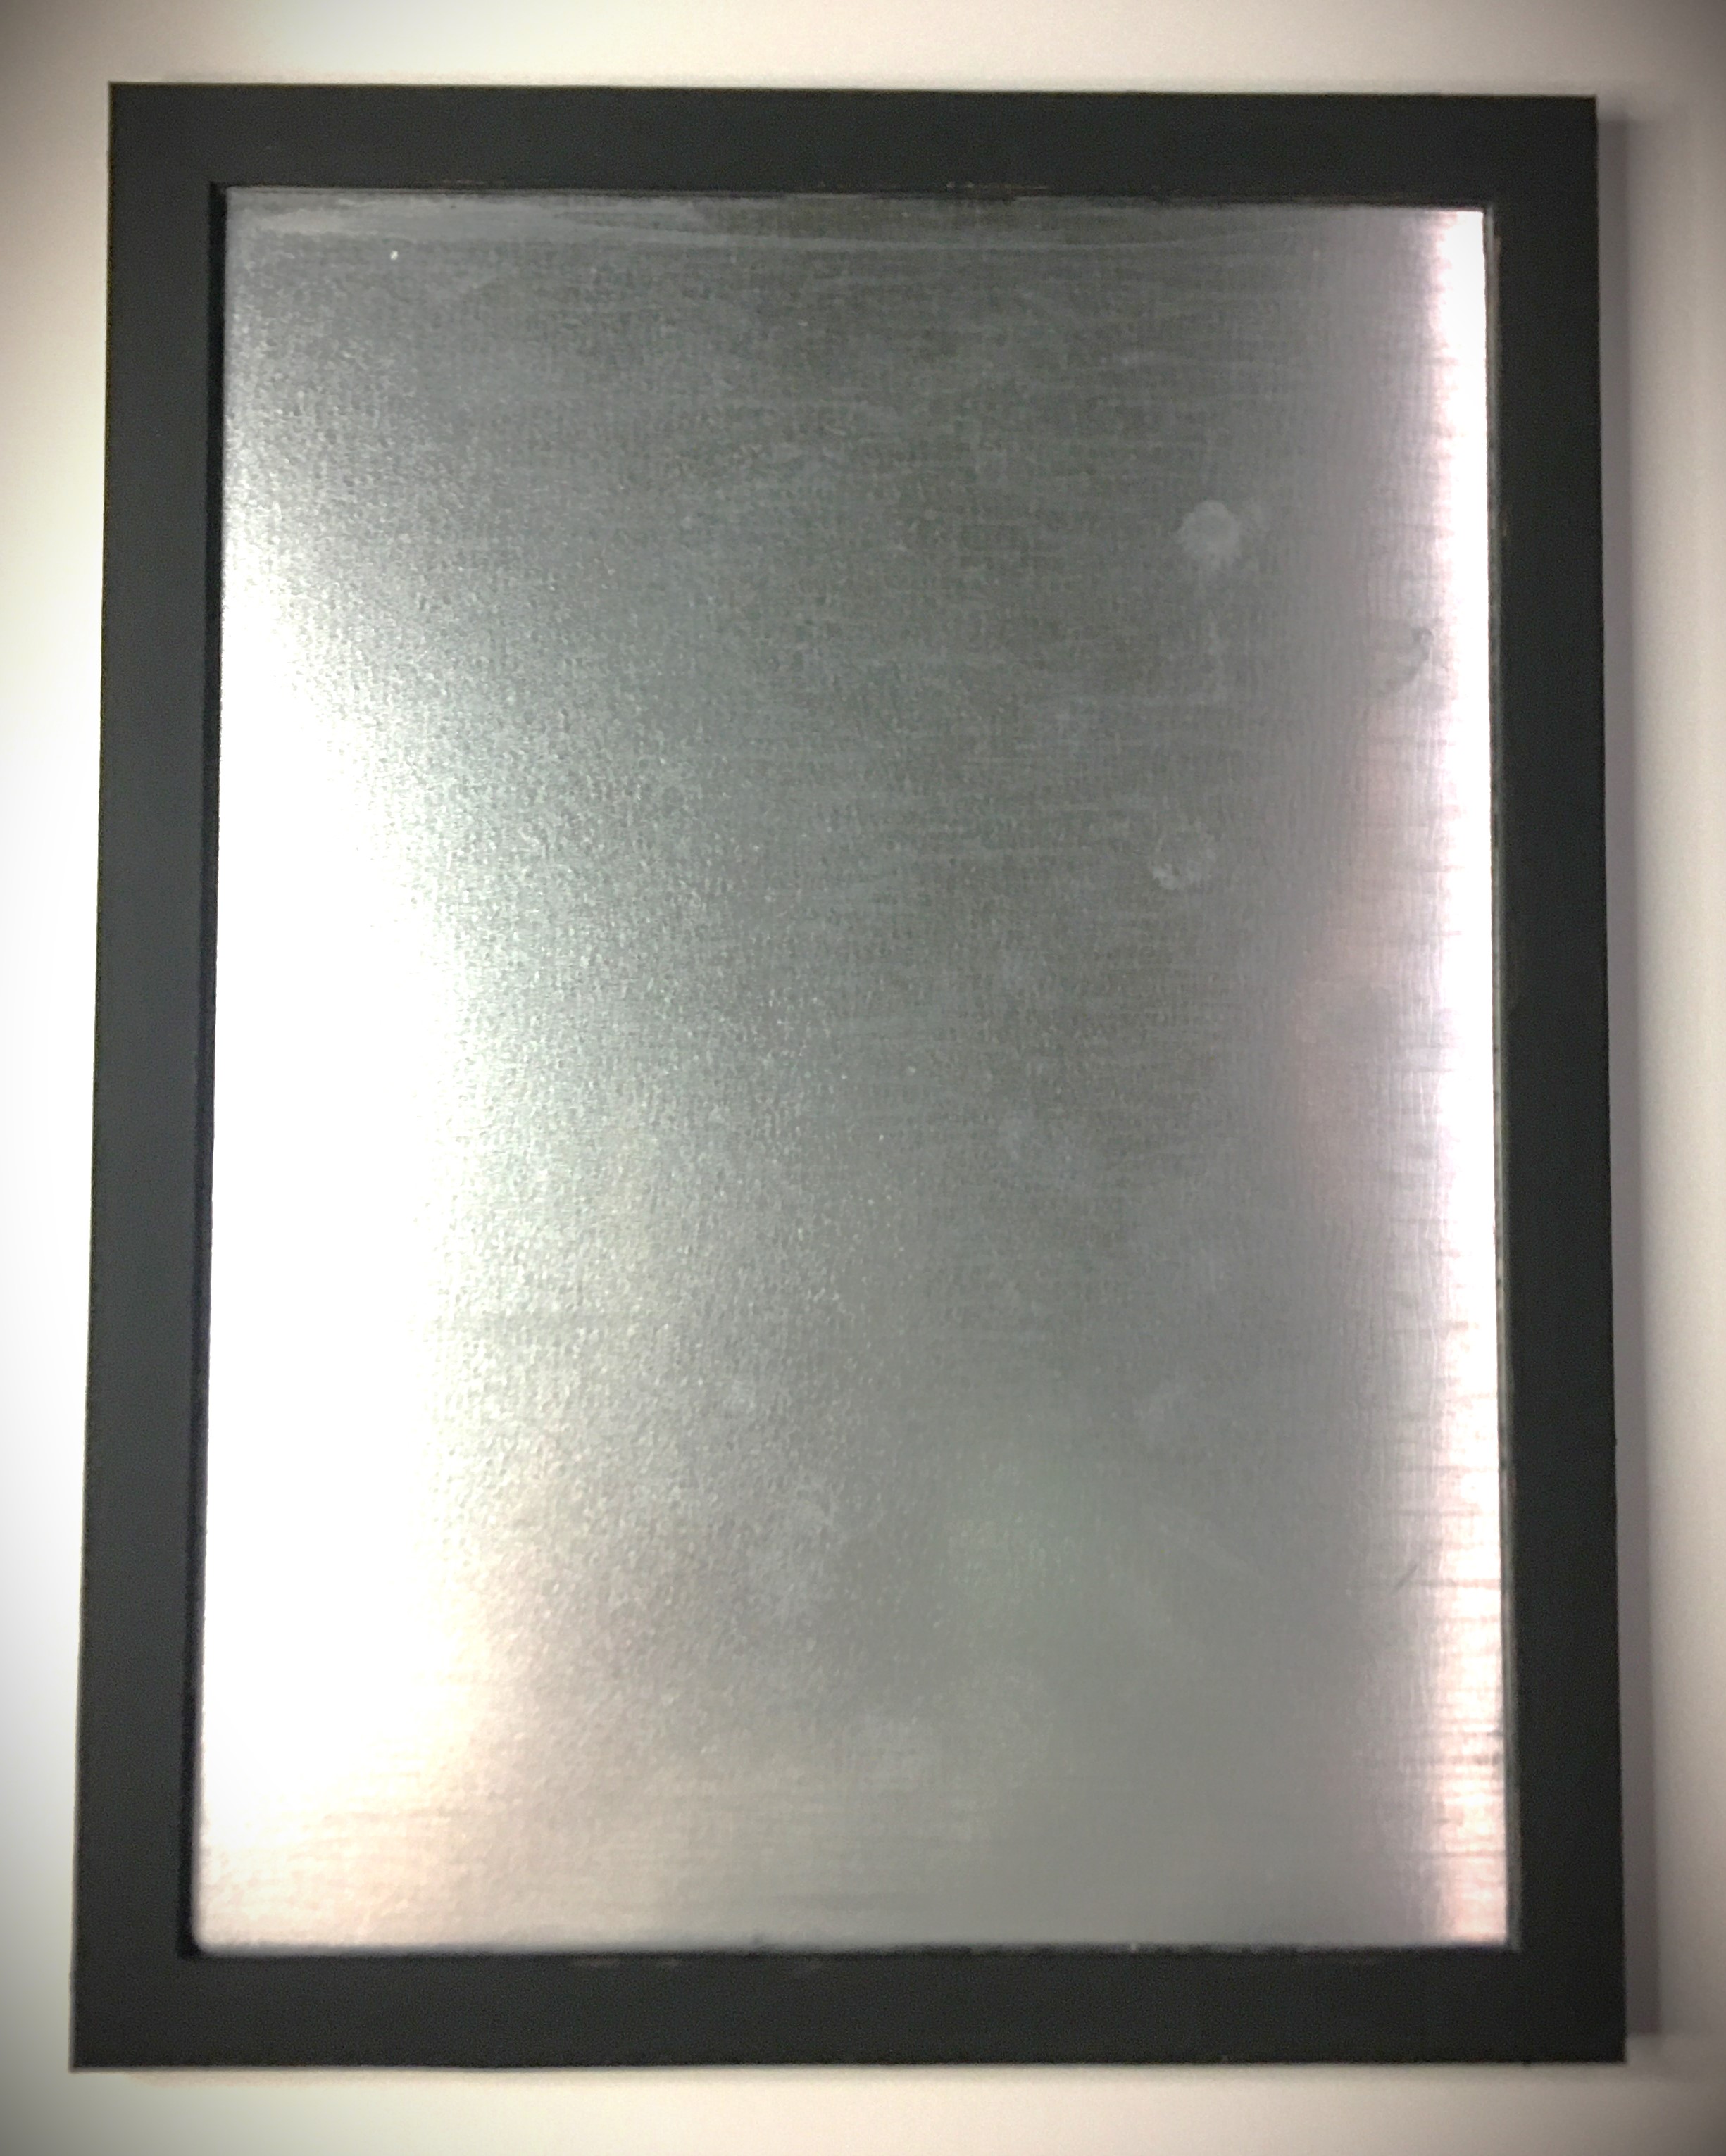
I know the galvanized finish tends to overtake everything. So with the galvanized frame and banner, everything gets lost real quick. Not to mention that the frame was a really bad fake wood. To dress all this up a bit and minimize the galvanized look, I painted the frame and banner black.
I forgot to take a picture of the banner painted in flat black chalk paint (the same paint as the frame). It looked too minimalistic for my taste, so I took the transfer tape (which I used to apply the vinyl text) and put it straight onto the paint. Some places lifted the paint quite easily. But to get the distressed look, I scratched the tape
The magnets needed a little something extra. There are so many things that could be done. I have children and they’re helping with this garden and they’ll also be marking what we do when we work, so I went into kid zone and painted the magnets with acrylic paint and did all the colors.
If you want to keep minimalistic, pick your favorite color.
Love things that sparkle, glue on gem stones or use glitter.
What about texture? Glue on fuzzy pom poms, baby pine cones, large seeds or nuts… literally whatever catches your imagination. Maybe you have a farm and want to use small farm yard figures and animals. (I wish I had these in my craft room!!!)
Something that is great about using the galvanized banner is that the extra magnets can be kept on the banner so you can add stickers, personalization, more tasks, or a note section in the blank space on the bottom.
And then while typing I decided to go a different direction.
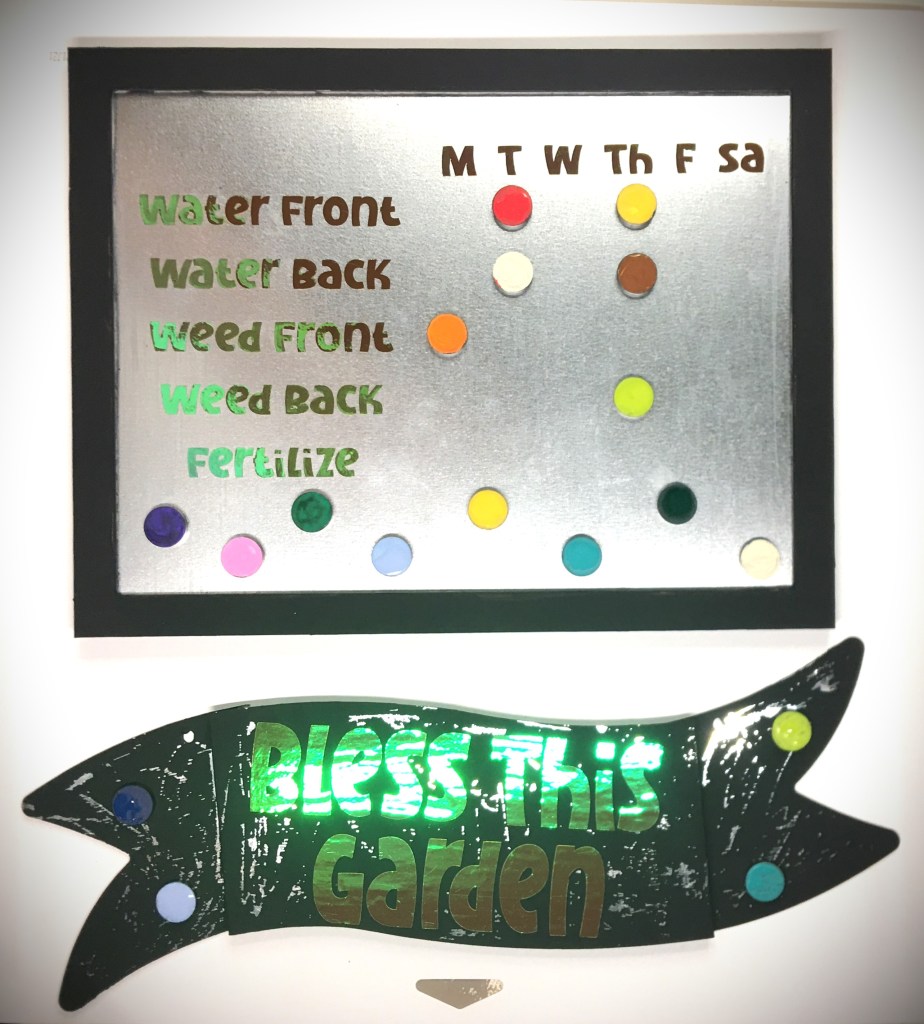
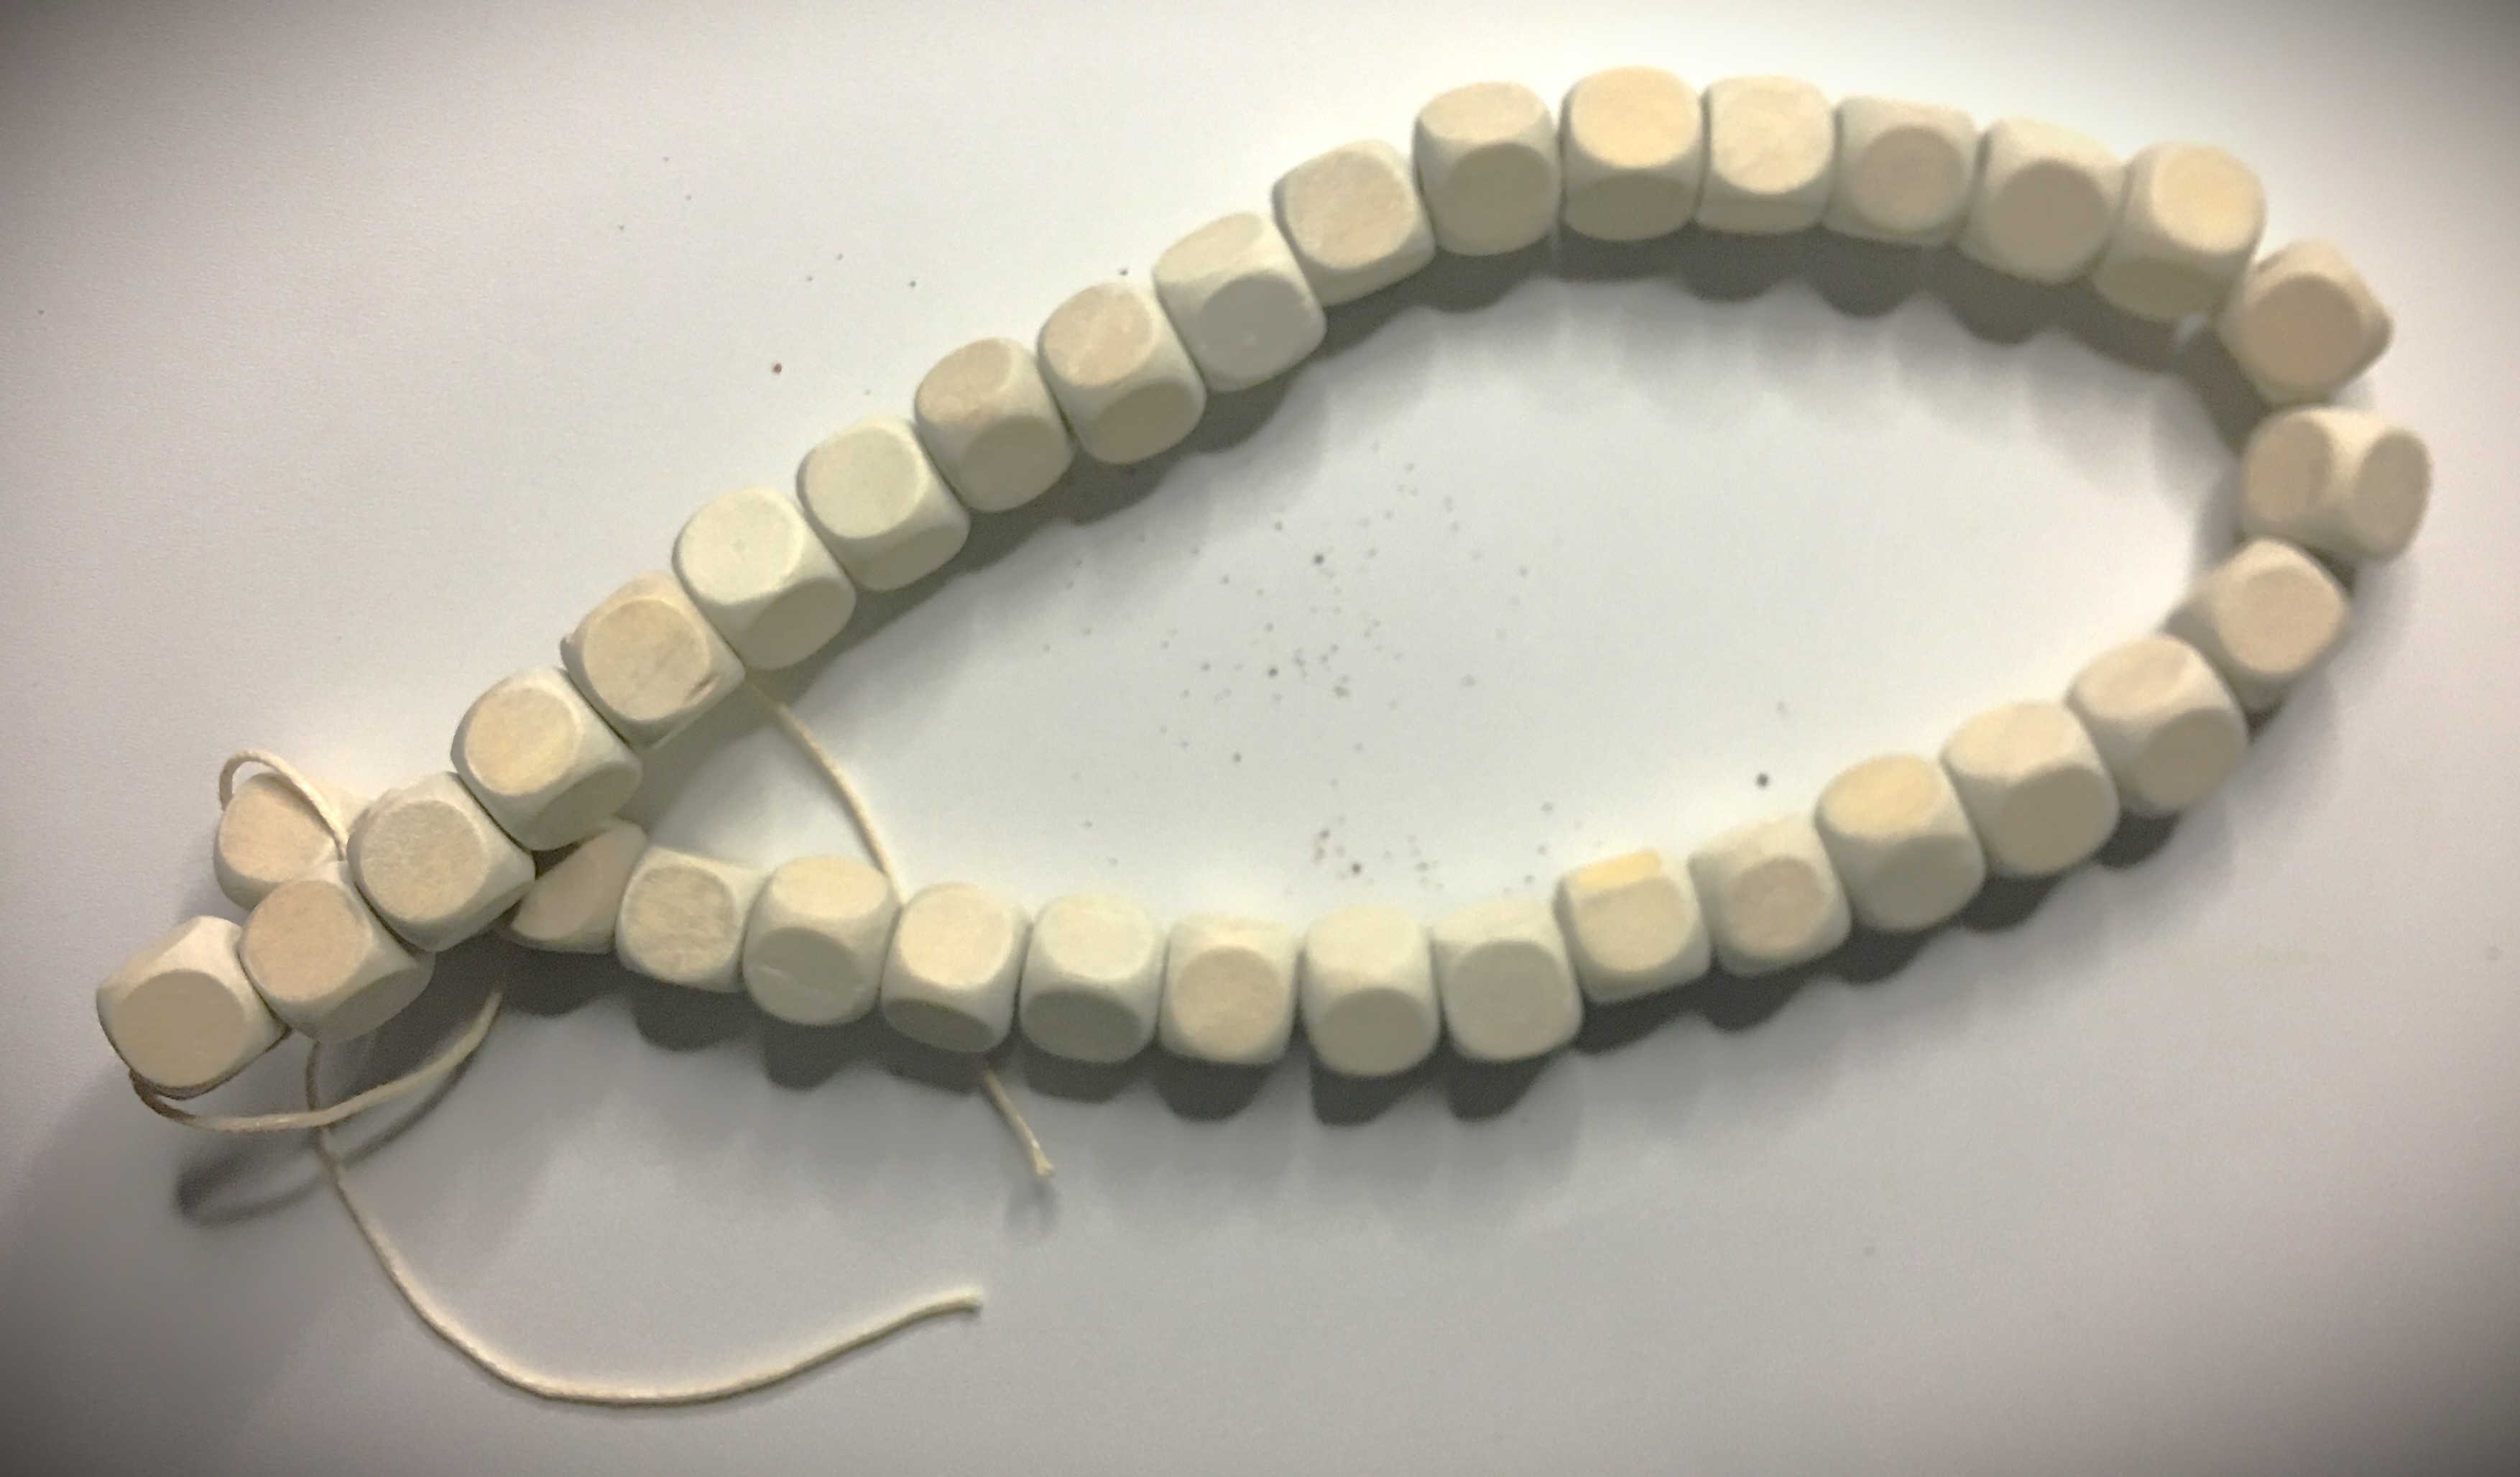
I pulled these out! Last year I made carrots out of my corn cobs. And I brought out the wooden beads from my drawer (which I also got from my local dollar store).
With the beads I removed them all from the string they came on and noted how they tied off the end bead to keep them all on the string. This “knot” that they used was how I spaced the beads further apart on the string.
Once I made those changes, the colorful “polka dots” needed to change. The gold and green glitter styrofoam balls simplified the overwhelming colors.
Even with the new modifications hanging, I’m not satisfied with the final color scheme. And sometimes that happens when you’re creating. You start building from the image you see in your head and make a change here or there and an earlier idea you loved just doesn’t work anymore.
The black isn’t working anymore. I loved the idea to begin with because it was a nice basic color that goes with where I was going to hang this. But it’s just not working anymore.
Advertisements
First thing first, I need to lighten up the banner. So I’ll be distressing it heavily so that the majority of the galvanized metal will show through. With the addition of the carrots, which obviously take the spotlight, I can bring out a lot more of that metal and the metal is not going to overtake and make everything else hide.
But before I do that, I need to decide what I’m going to do with the frame and that’s going to take a few days of looking at it to see where I want to go. At the moment, I’m leaning toward the idea of painting on white striped and creating a plaid hand painted design on it. If I go that route, I might keep the banner predominately black still and incorporate that same design element into parts of the banner.
Stay tuned to see what I finally decide!
Advertisements
And I’m going to leave you here in this moment just because sometimes the right thing is to take a step away from a project and let it tumble around in your brain. You don’t always have to have the answer right away. And you don’t always have to have things done in an hour.
Perhaps it’s convenient to have an idea presented to you in a finished state.
But I’m going to leave you here with your own thoughts. Because I know someone has that inner voice screaming, “You need to ____!”
Go ahead and leave that comment below.
Or better yet, use that idea to make your own magnetic board for your daily tasks, your children’s chore board, a classroom helper sign, your regular “Honey Do” list, or that board that I didn’t mention but you just got the idea for.
And when you’re finished, send me a picture so that I can see what you came up with.
Before I answer this question, I should put it in a framework. In some instances no, it doesn’t matter if you don’t follow directions on a recipe, or do things out of order. And in other instances, YES it absolutely matters if you do things in the right order AND measurements.
What is the determining factor?
The item you are making.
For example, cooking and baking. I will absolutely advocate experimenting. Yes, even with bread (which we’re always told is a science and should never be deviated from). I’ve gone in left field with bread recipes and have had success.
Know the science. If the ingredient is not part of the active component, it’s just there for flavor. Experiment away. Yeast (going back to the example of bread) is a living organism and has preferred temperature and environments for optimized leavening activity. This is the science part that you cannot change no matter what you toss in the bowl. Kill your yeast, there’s nothing you can do (even following the recipe perfectly) that will get that bread to rise.
So by all means, if you want some fancy bread with herbs tossed in to complement a meal you’re making, do it! Use a recipe you’re familiar with and add the herbs you want to add. Go ahead and baste the bread with salted garlic butter right before cooking it. Modify to your heart’s content.
Advertisements
When does it really matter?
Soap making is definitely one of those times where you must follow the recipe.
Mind you, I’ve been less than precise where I’ve added a couple of grams more or less of the fat/oil components of the recipe and the bars have turned out fine. Some fat/oil are known for making a softer bar, so be prepared that if you use more of a softening fat/oil, your bar is going to turn out softer than if you were more precise. But the soap is still soap and still becomes firm when you cure the soap.
Just because I brought this subject up, here are fat/oils that affect the hardness of your soap: Sunflower oil will make a softer bar. Harder bars of soap can be obtained by using Cocoa Butter, Lard, Palm Oil, or Tallow.
Take the time to do a quick search and learn what all the different fat/oils do. Many contribute multiple attributes to your soap. Some attributes you can find are lather, shine/conditioning, oil control for acne, helping dry skin, and so many other factors. It really is fascinating to see what can contribute or irritate your skin’s health!
And when you make soap, the ingredient that it absolutely matters how you use it is Lye (sodium hydroxide for bar, potassium hydroxide for liquid)!
Of course there are the standard safety warnings: use in a well ventilated area; wear long sleeves, gloves, and eye protection; and use equipment that are least reactive to this caustic chemical (use glass or plastic).
But this particular ingredient, it absolutely matters how you use it!
Here’s one way that I messed up!
Disclaimer: At no point in time am I ever encouraging you to go against directions with caustic ingredients. At all times use safety equipment and be aware of what you are doing. Understand what you are working with, what reactions are happening, and never leave a project at a volatile moment in the process. Be present. Be aware. And have safety equipment and procedures in place. And always work in an environment free from distraction.
Even know I don’t know why I thought I could make soap during the day when the kiddos were awake. There’s a reason why other women also tell you to focus on soap making after you put the kids to bed for the night. I knew exactly why and I still chose to give into the illusion I could do this and it would turn out all right.
Nope. Even nap time is not a good time to make soap.
After the frazzle of getting the kiddos to go to sleep, I forgot that the recipe I was using did not call for water (to react with the lye). Instead I was using Aloe Vera liquid (which acts like water in this recipe). I put the Aloe Vera in the bowl that I was melting down my solid fats (coconut oil being one). I caught this accident when I grabbed my Olive Oil to measure out.
I so wanted to kick myself!
Instead of wasting all these ingredients, I decided to move forward and see what happens when you make the mistake and proceed with the batch.
The first thing I learned, you can’t sub out a fat/oil for your “water” ingredient.
This comes back to science–which you cannot change no matter how much you wish you could. Olive Oil did not dissolve the lye. The chemical reaction with the lye never took place until I added the fat/oils into the bowl and started mixing. The Aloe Vera finally came in contact with the lye and the reaction could proceed.
And this is why soap recipes are broken up into two components: lye and fat/oils!
When your lye and water start to react it produces heat. If you have your whole recipe in a bowl when this happens, your fat/oils are instantly heated by the reaction. What follows is the accelerated rate of saponification. And if this happens before your fat/oils are emulsified with the lye solution, then you are faced with all the problems of soap making.
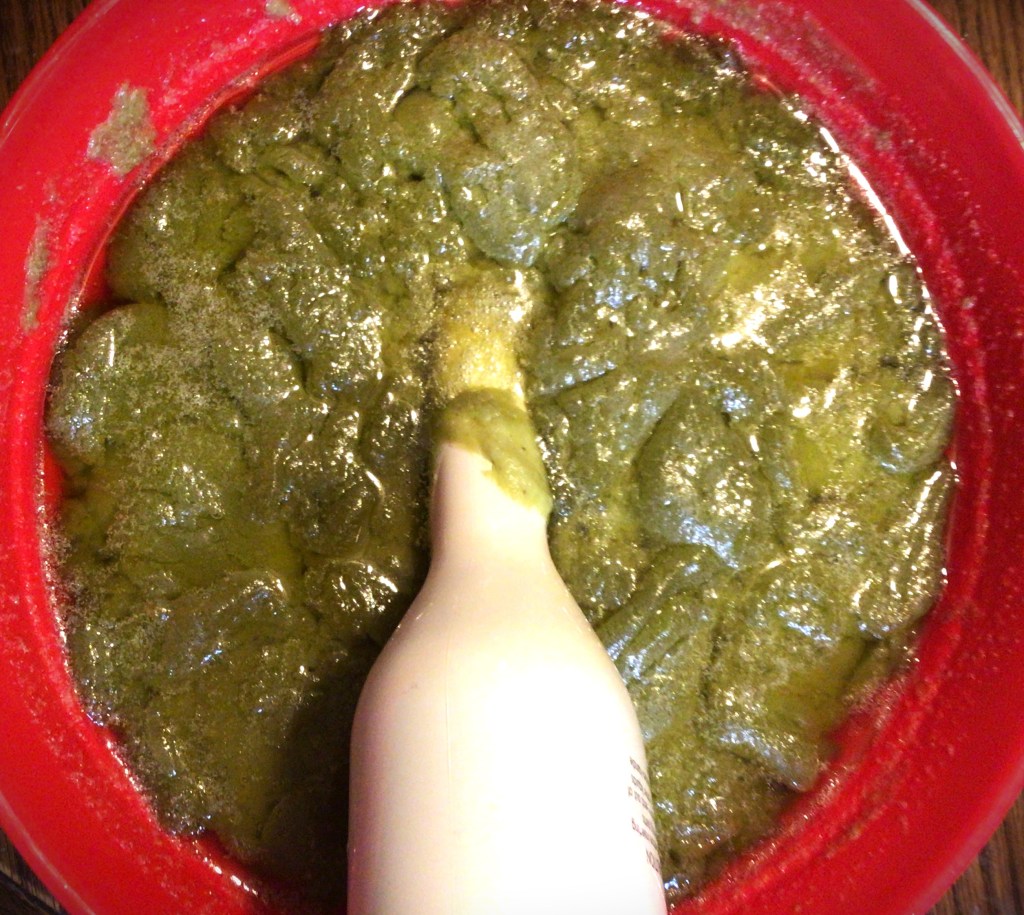
In this particular instance, my soap broke. I had an oil slick on my hands. And I know for a fact that my soap wasn’t set up because it hadn’t had the time needed to emulsify everything together.
And the more that I blended the soil back into the soap version of cottage cheese, the problems didn’t go away. By the time I got the oil slick to disappear, my soap seized up!
At this point there were only two options. One, I could throw everything away and start again. Or Two, I could see if this would work.
Normally, everyone tells you to take the blending of your cold press soap to a light trace. I’m not like everyone else. I find that a light trace gives me a soft soap (even when following a recipe to utter perfection). So my comfort zone is to take my soap to a medium trace. It gives me a firm soap that doesn’t melt in the shower thanks to young hands who sometimes leave the bar in the water. And it still allows me to make bars without air bubbles. (I’ll come back to that trick in just a moment.)
I kept blending that seized soap past my usual medium trace and prayed to see the final signs of emulsification. This one is hard to describe in words, because this is just where experience comes into practice–you know when you’ve emulsified.
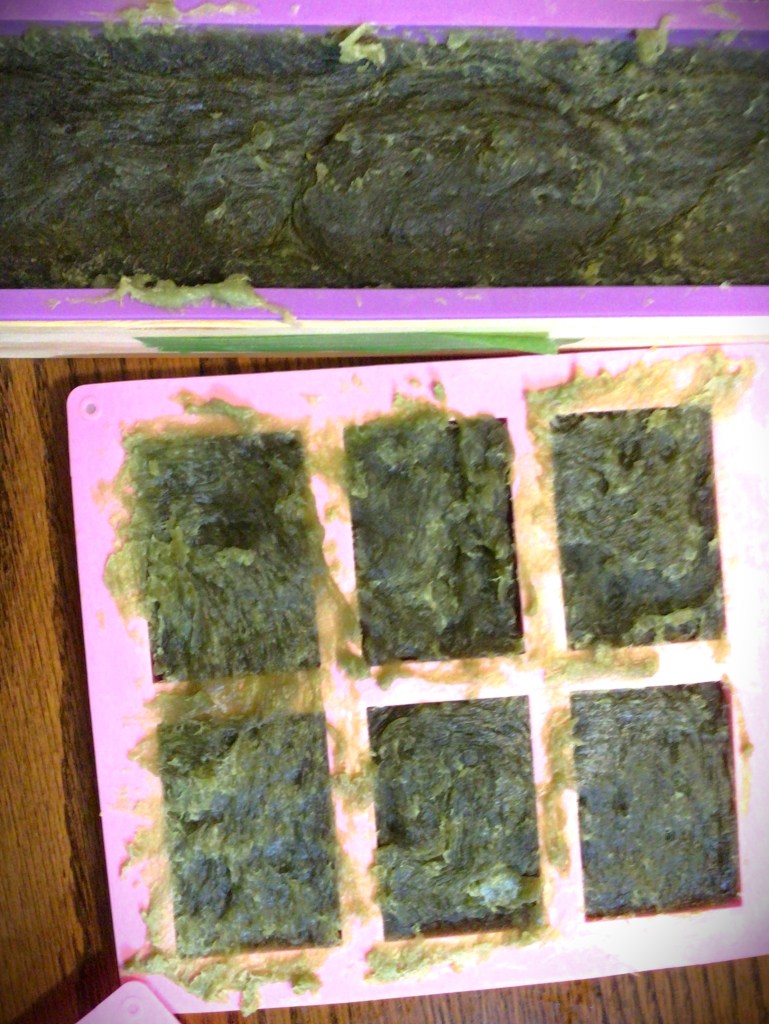
At this point the soap was so thick from seizing and still being worked that I only had a few minutes before complete loss. And I didn’t even have time to stop and put in my scent. So I stopped and immediately transferred into my individual soap molds and my loaf mold.
Tip for Removing Air Bubbles: This one is taken directly from the baking world of cake making. Have you ever seen someone drop a cake or cupcake pan down on the counter several times? They were removing the air bubbles to keep an even crumb. I use this same trick for soap making, especially with the batches of soap with a heavier trace.
I dropped my molds like there was no tomorrow, to remove the air bubbles. I knew they were there. And because of how I could or could not drop the molds, both types had different outcomes.
The individual molds were not rigid and could only use a light drop. The silicone wouldn’t hold up to much gravitational help. As a result, you can see here how these soaps turned out to have a cratered texture.
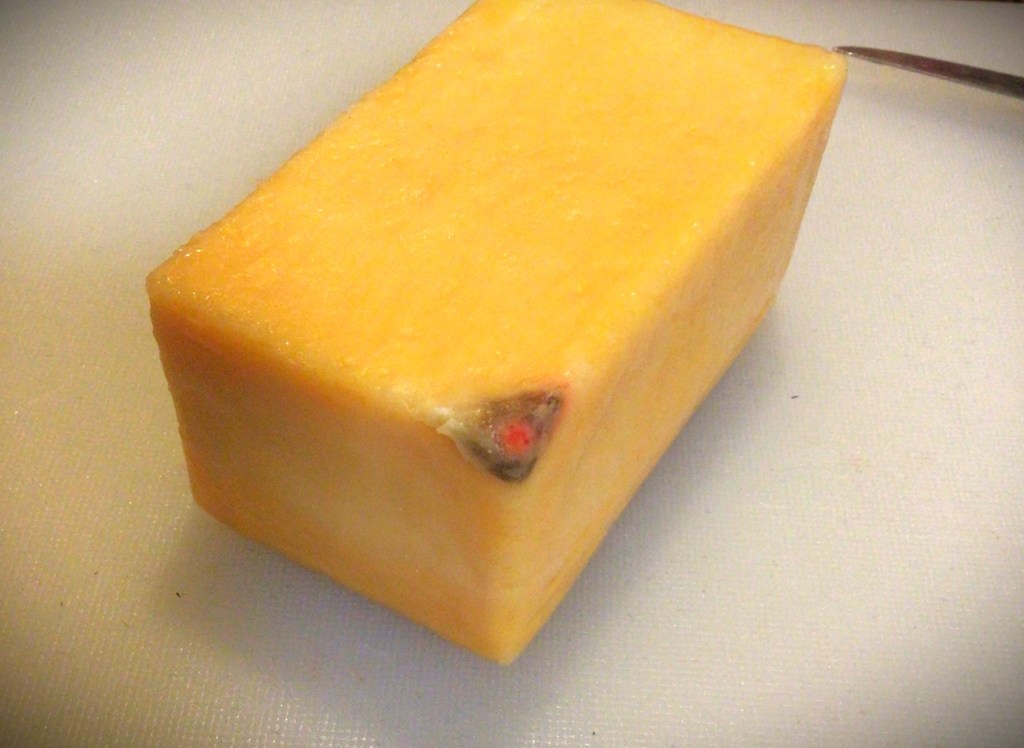
On the other hand, the loaf mold has that beautiful wood frame (thank goodness for jointed corners!) which definitely could withstand a little help from gravity. I dropped that loaf mold several times until the soap started lying flat in the mold and no more air bubbles came to the surface. And as you can see here, no one would ever know that I had trouble with this batch of soap. (These ones again will be for family use because I didn’t include the scent.)
Advertisements
What if recovery is not possible?
This time I was able to pull soap out of that massive mistake. But I already had a backup plan in my back pocket in case I unmolded the soap and there was total devastation.
Melt down the soap and mix it with a correctly formed soap mixture. This is what soap makers do all the time when they forget to mix in a scent or even a couple of other errors. Especially when you do a cold process of soap making you have a little more time to decide if you want to fix this mistake by melting down and trying again.
Cube or shave the soap down into decorative pieces and add it into a soap batch that worked out better. If you’ve ever seen soap that has another color “floating” in the bar of soap. This is the technique they use. The day that you unmold these soaps and cut them down, they are solid enough to add to a fresh batch of soap. You will just cure the bars on the time scale of this fresher batch of soap. (Tip: make sure that this fresh batch of soap is stopped at a light trace. This will help get around all the corner/curves and get into any craters without the need of dropping the mold to remove air bubbles–which would throw off the suspended look.)
Use it for other DIY projects. Make sure that you still cure this soap because you don’t want the lye to cause problems with your other projects. But you can use this soap to grease that sticky glass slider track or any other trick that you’ve seen elsewhere.
Just because this mistake had a “happy” ending…
I want to give this disclaimer one more time.
Disclaimer: At no point in time am I ever encouraging you to go against directions with caustic ingredients. At all times use safety equipment and be aware of what you are doing. Understand what you are working with, what reactions are happening, and never leave a project at a volatile moment in the process. Be present. Be aware. And have safety equipment and procedures in place. And always work in an environment free from distraction.
Sometimes, you just need to know the reason why you’re told “this is the way that you do this”. As I said earlier, in instances where you accidently gravitate away from a recipe, you’re not going to start a fire or blow your house up by adding herbs or seasoning in a recipe that you’re told to stick to. But when you’re working with chemicals, the process that you’re told to follow is there to prevent serious issues from happening. There’s no doubt a long list of possible things that could happen by mixing soap out of order, most of them causing harm to your body.
Advertisements
How can you prevent mistakes from happening?
Make sure you’re in the right headspace for your project. (You’re not distracted or sleep deprived as examples.)
If you’re rushed, stop and find a different time to do this project. (You are in control.)
Rewrite your ingredients in the order that you will use them.
Rewrite you steps in precise order (short and easy to read).
Before you start your project, organize your materials in groupings of what you’re adding together, in the order that you will add them.
Pre-measure out everything into separate containers.
Even if you’re used the recipe before, reread through the ingredients and steps and make sure you remember what you’re doing.
Even when you do prepare, mistakes are still going to happen. Know in advance what you’re going to do. Have plan B, C, and D already in your head. This allows for quick thinking and recovery. One of these plans needs to include what you do when you need to dispose of a failed project.
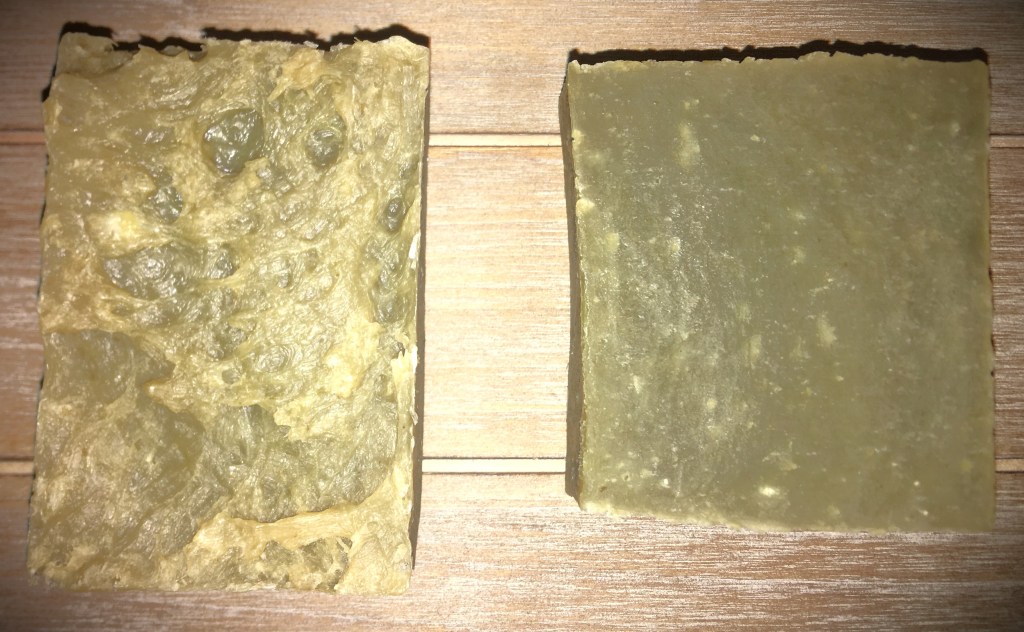
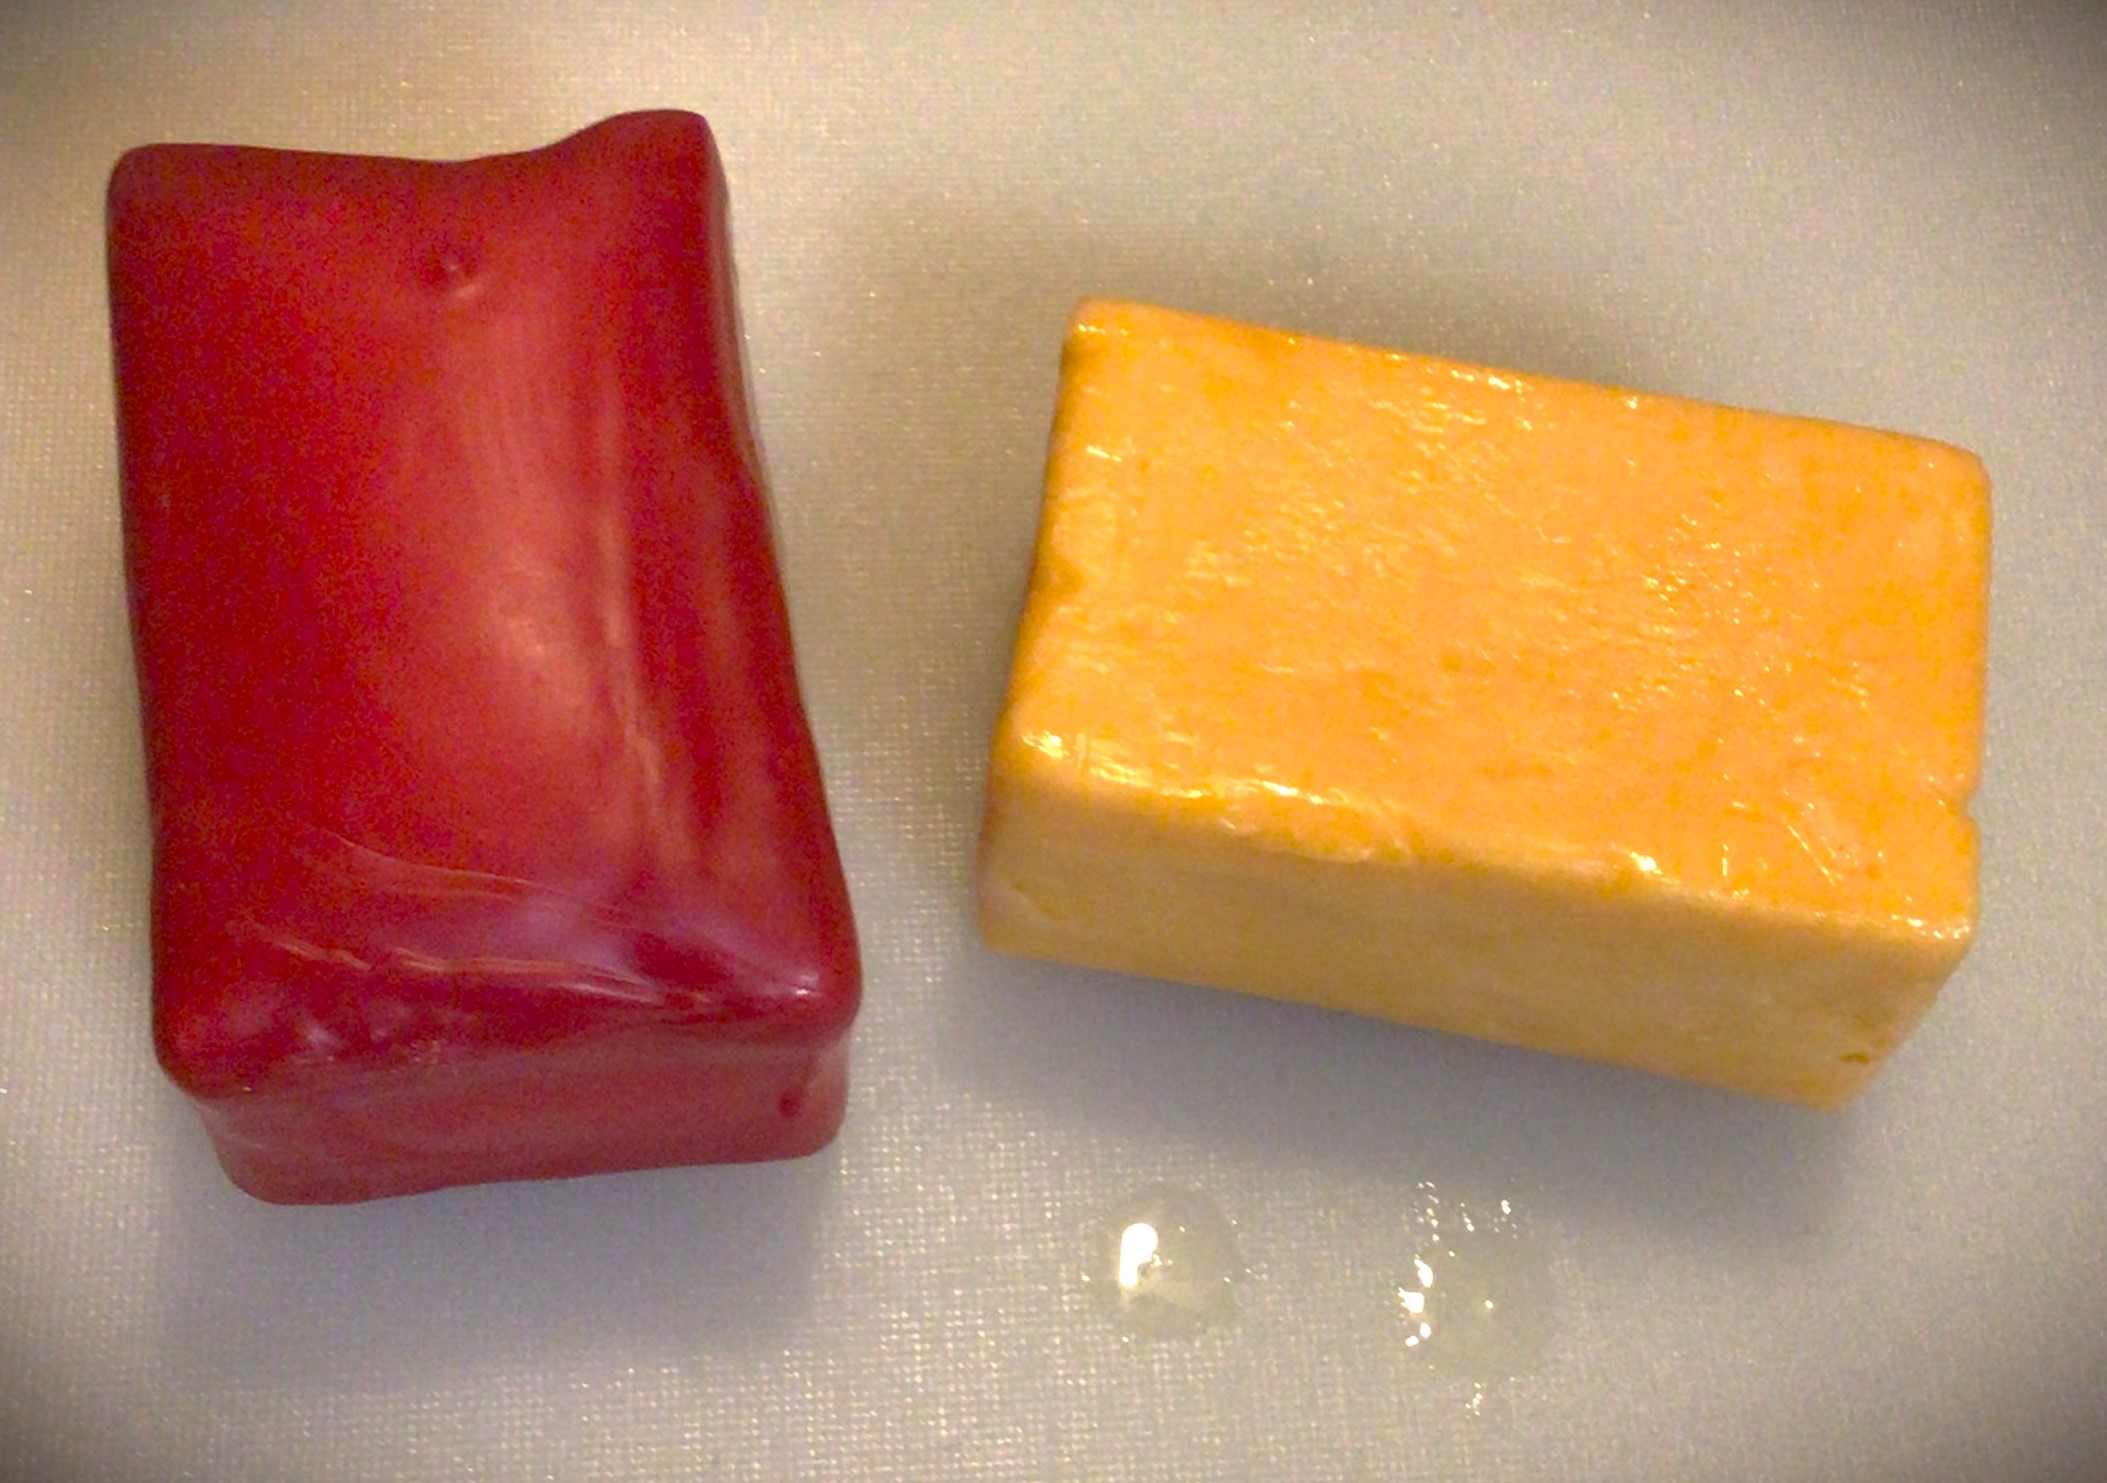
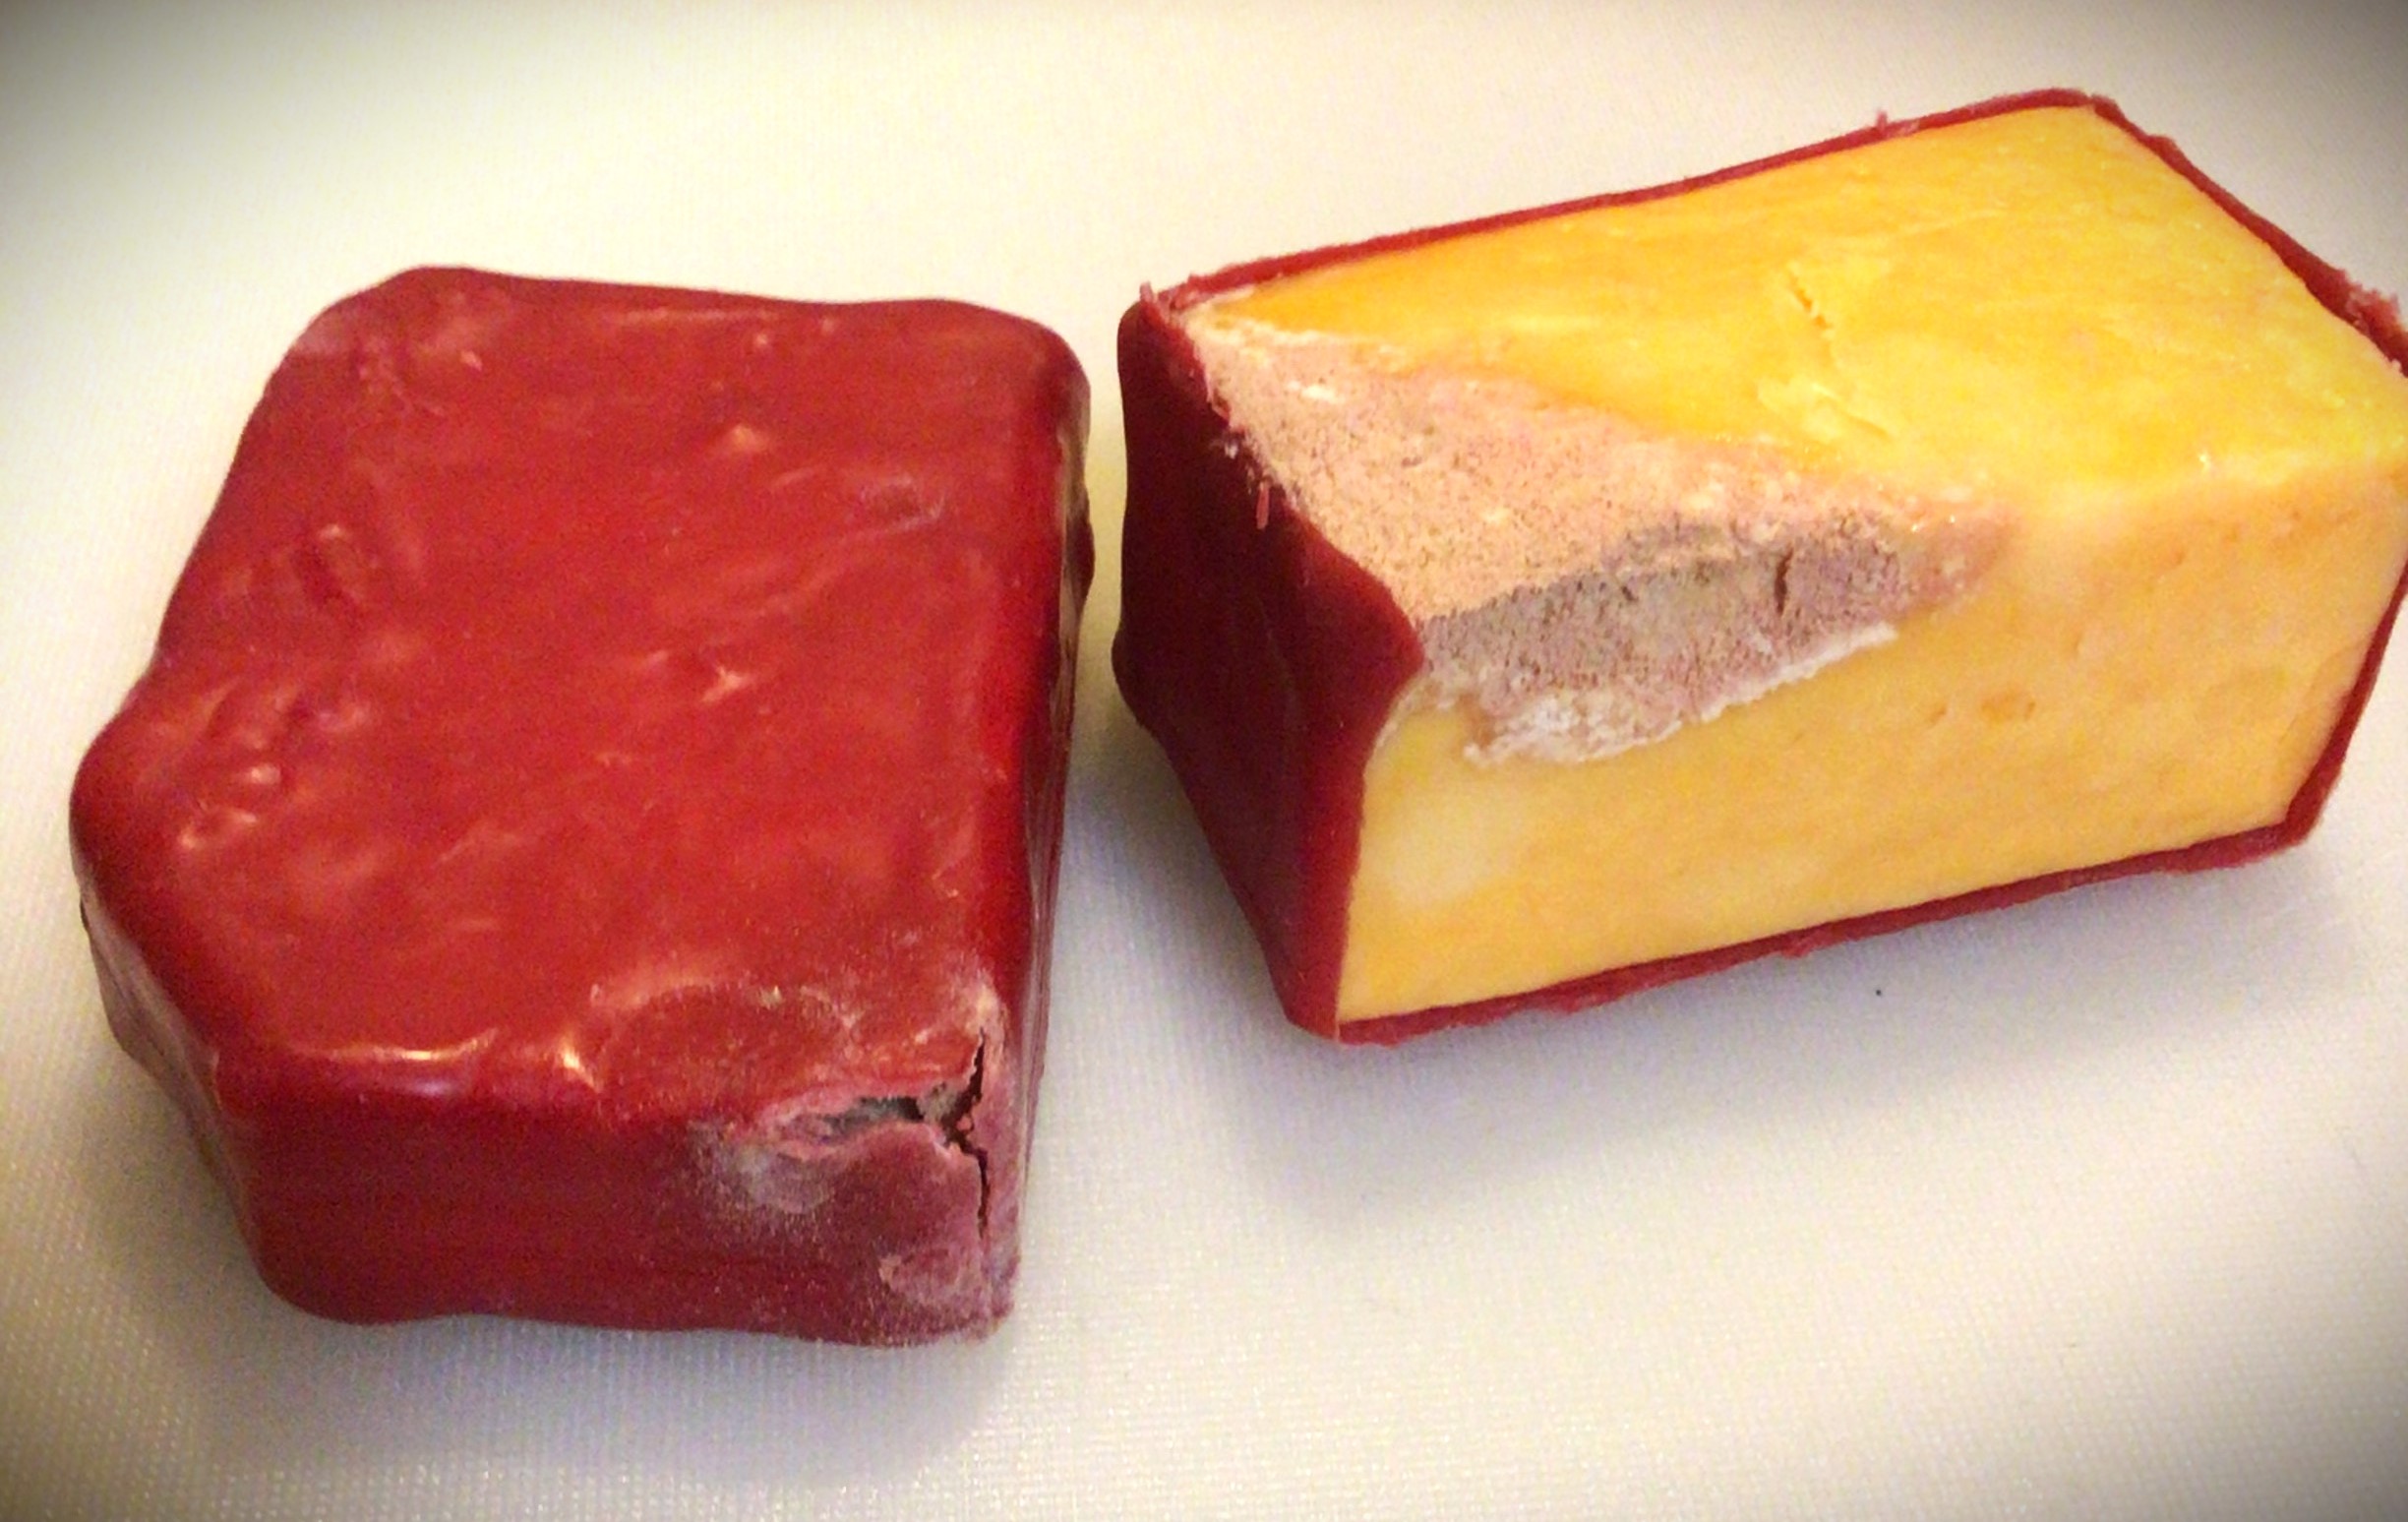
Here’s the final cut
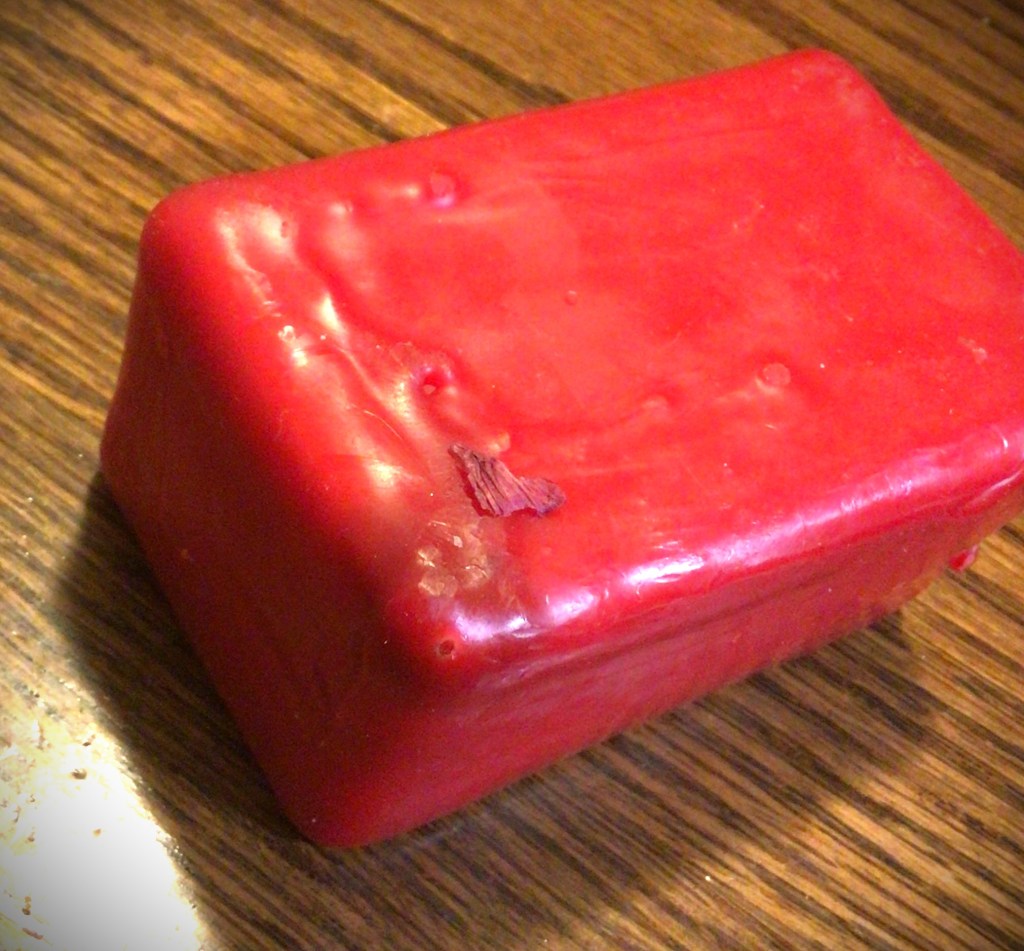
As I walk back through all that happened, I’m actually still surprised by how things worked out in the end, having dealt with broken soap and fixing it until it seized. When you look at these pictures you will see that the bar on the left (the soap I put in individual molds) definitely show the war that took place. However the bar on the right (cut from the loaf mold) looks like the only issue was minor cosmetic issues.
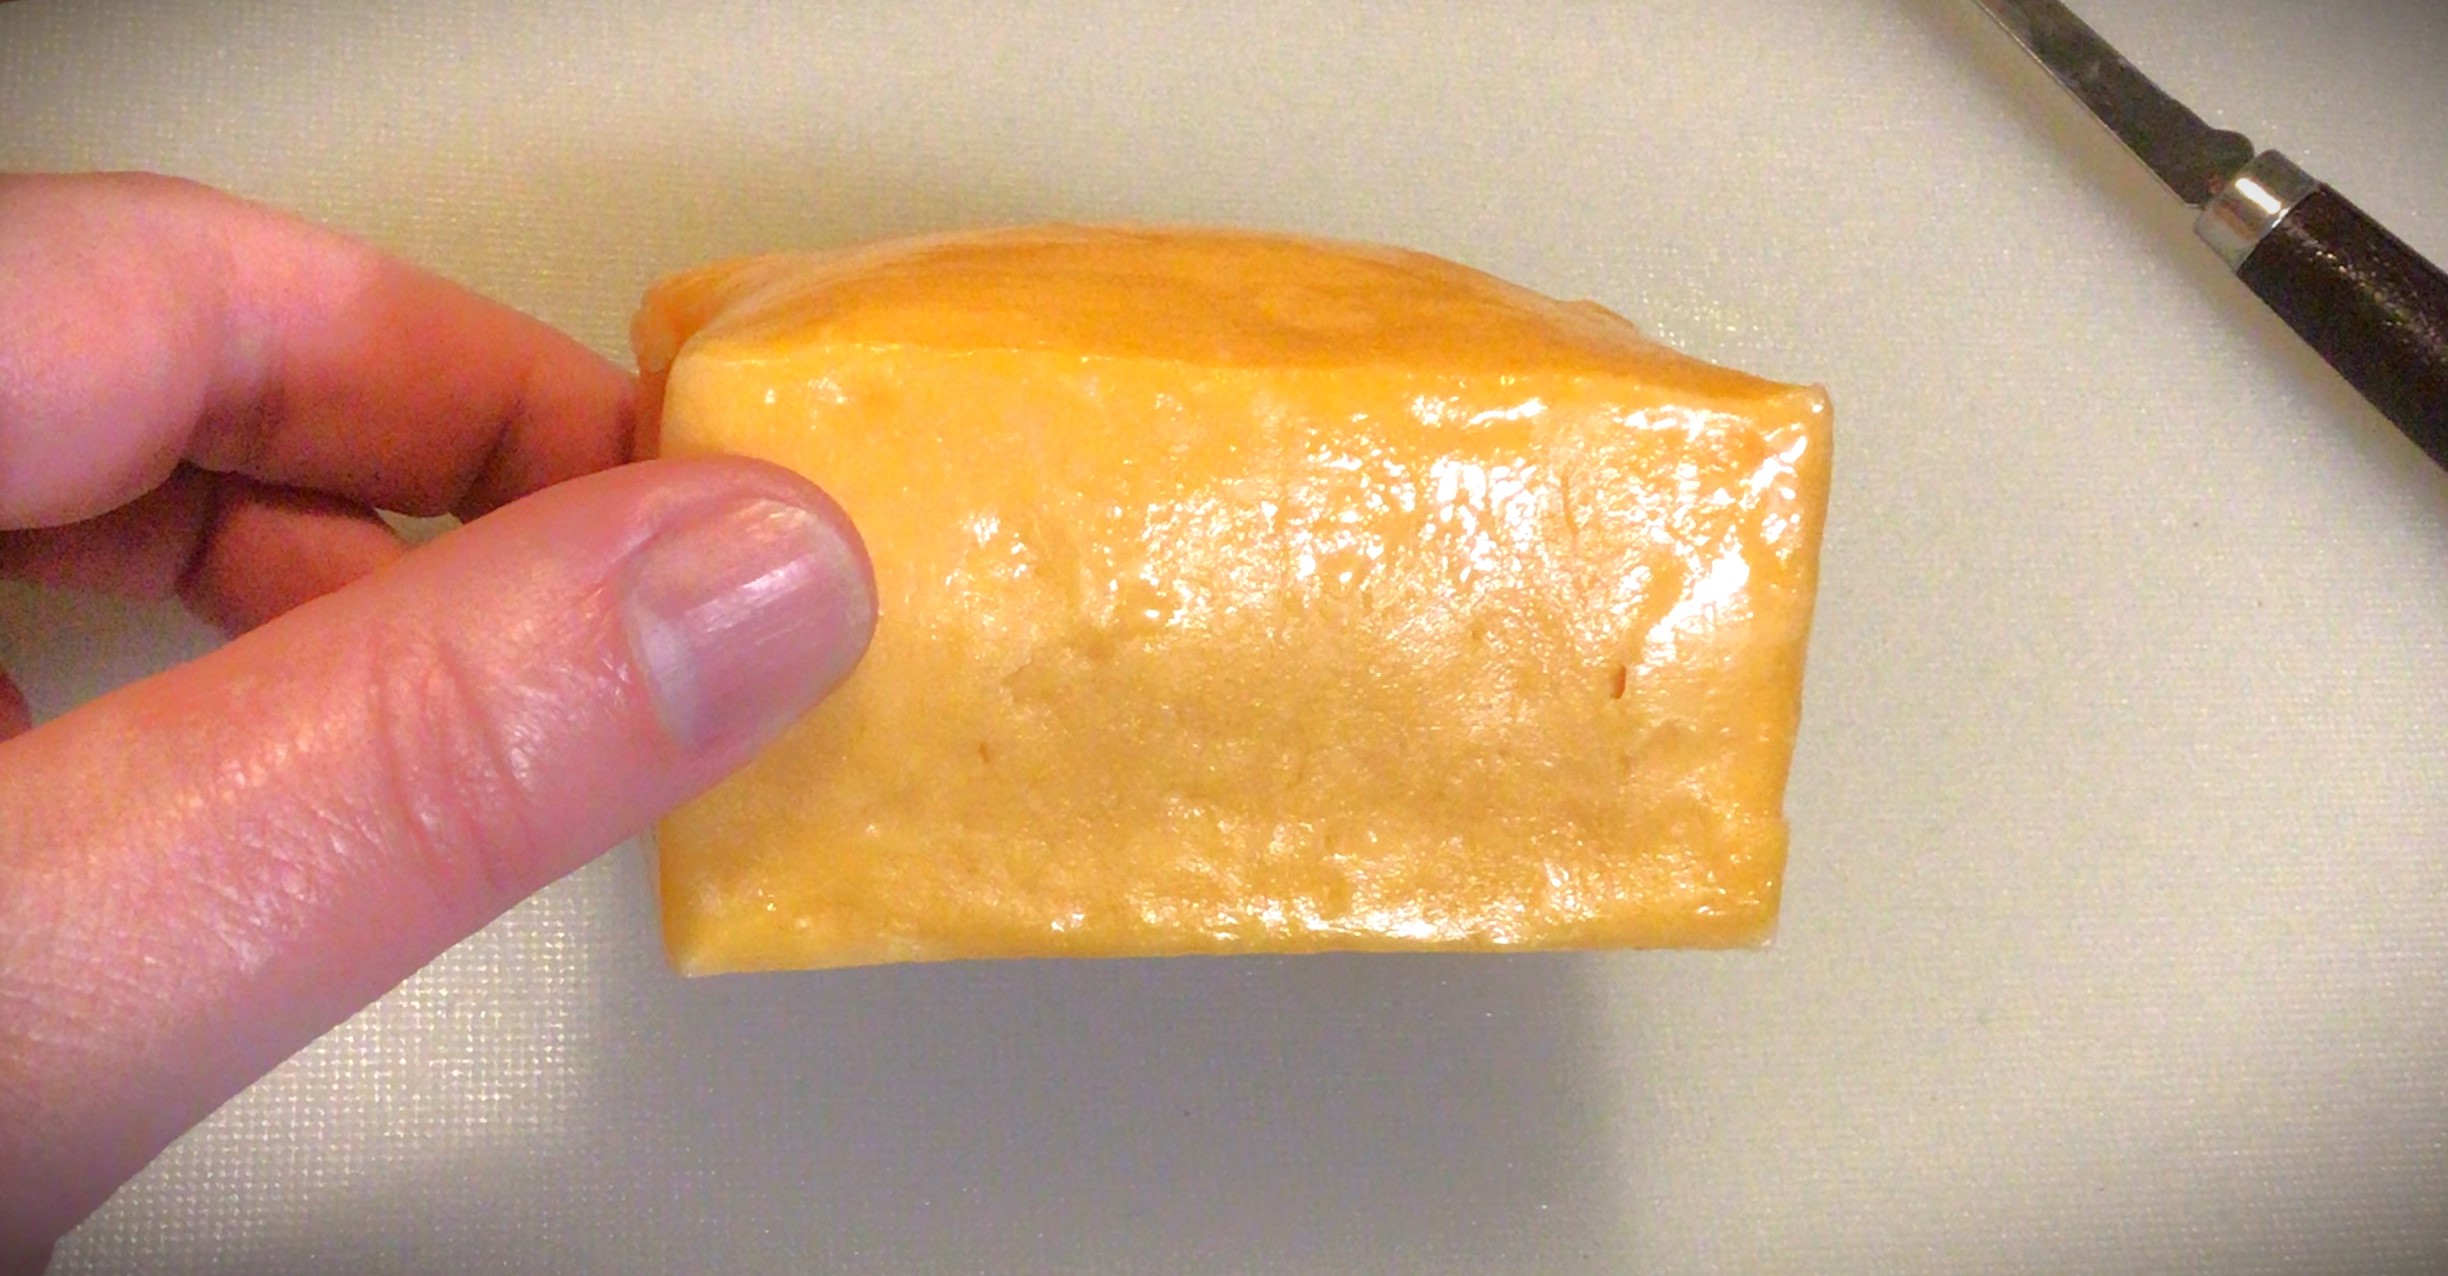
Most of the issues on the loaf mold soap are really seen from the side view. And the worst of the individual mold is seen in the face picture.
As a point of reference, if you ever hear a soap maker describe a problem as looking like brain matter, what they are describing is the face shot of the individual mold. It doesn’t literally look like a brain, but it has webbing and crater like surface.
Hopefully you never have to go through any of this while making soap of your own. But here’s at least some conversational information that you may or may not hear from anyone that you’re learning soap making from or in any of the countless videos on YouTube.
Above all, at least now you have some information and images to go with everything else that you are learning elsewhere.
Processing…
Success! You're on the list.
Whoops! There was an error and we couldn't process your subscription. Please reload the page and try again.
It’s easy to find videos and information on how to walk you through waxing cheese so that you can keep cheese in your house without taking space up in your fridge. This is particularly useful when you want to take advantage of sale prices at your local grocery store. Or maybe you’re adventuresome enough to make cheese at home.
What is harder to find is a heads up of what you’re looking for when after you’ve waxed your cheese.
This is what I want to share with you today.
In all the YouTube videos and blog posts you’re told to walk out for cracks in the wax or mold on the outside. But what does that look like? And that’s not even taking into consideration that in reality there’s a couple of other things that you should look for that you should be aware of as well. So let’s take a look at what can go wrong.
The first indication that you need to check your cheese…
About two months ago I noticed an earthy musty smell in my pantry that came out of nowhere.
If you’re use to preserving food, you know that when there’s a change in your pantry smell than something is up.
If you’re new to food preserving, it might not cross your mind that you need to check something. I want to plant that red flag in your mind right now. If a new smell comes up in your pantry, check all your food and see where it’s coming from.
Note: I first noticed this smell in my pantry about two months ago. Instead of removing the wax and checking the viability of re-waxing all the cheese you are about to see, I let it all go. I took this to the extreme so that you can have a very good visual of what you can find and see with certainty of what is going on with the cheese when you remove the wax.
You find dampness that seems to have come from nowhere.
Honestly I kind of laughed when I saw this one. Out of all the research I did before waxing my own cheese, no one talked about wet cheese. So I never would have known to look for this one.
The problem with this issue is that if you’re just looking for cracks and discoloration of the wax, you’re not going to catch this problem. The only way you’ll find this problem is by handling your waxed cheese when it’s time to flip them.
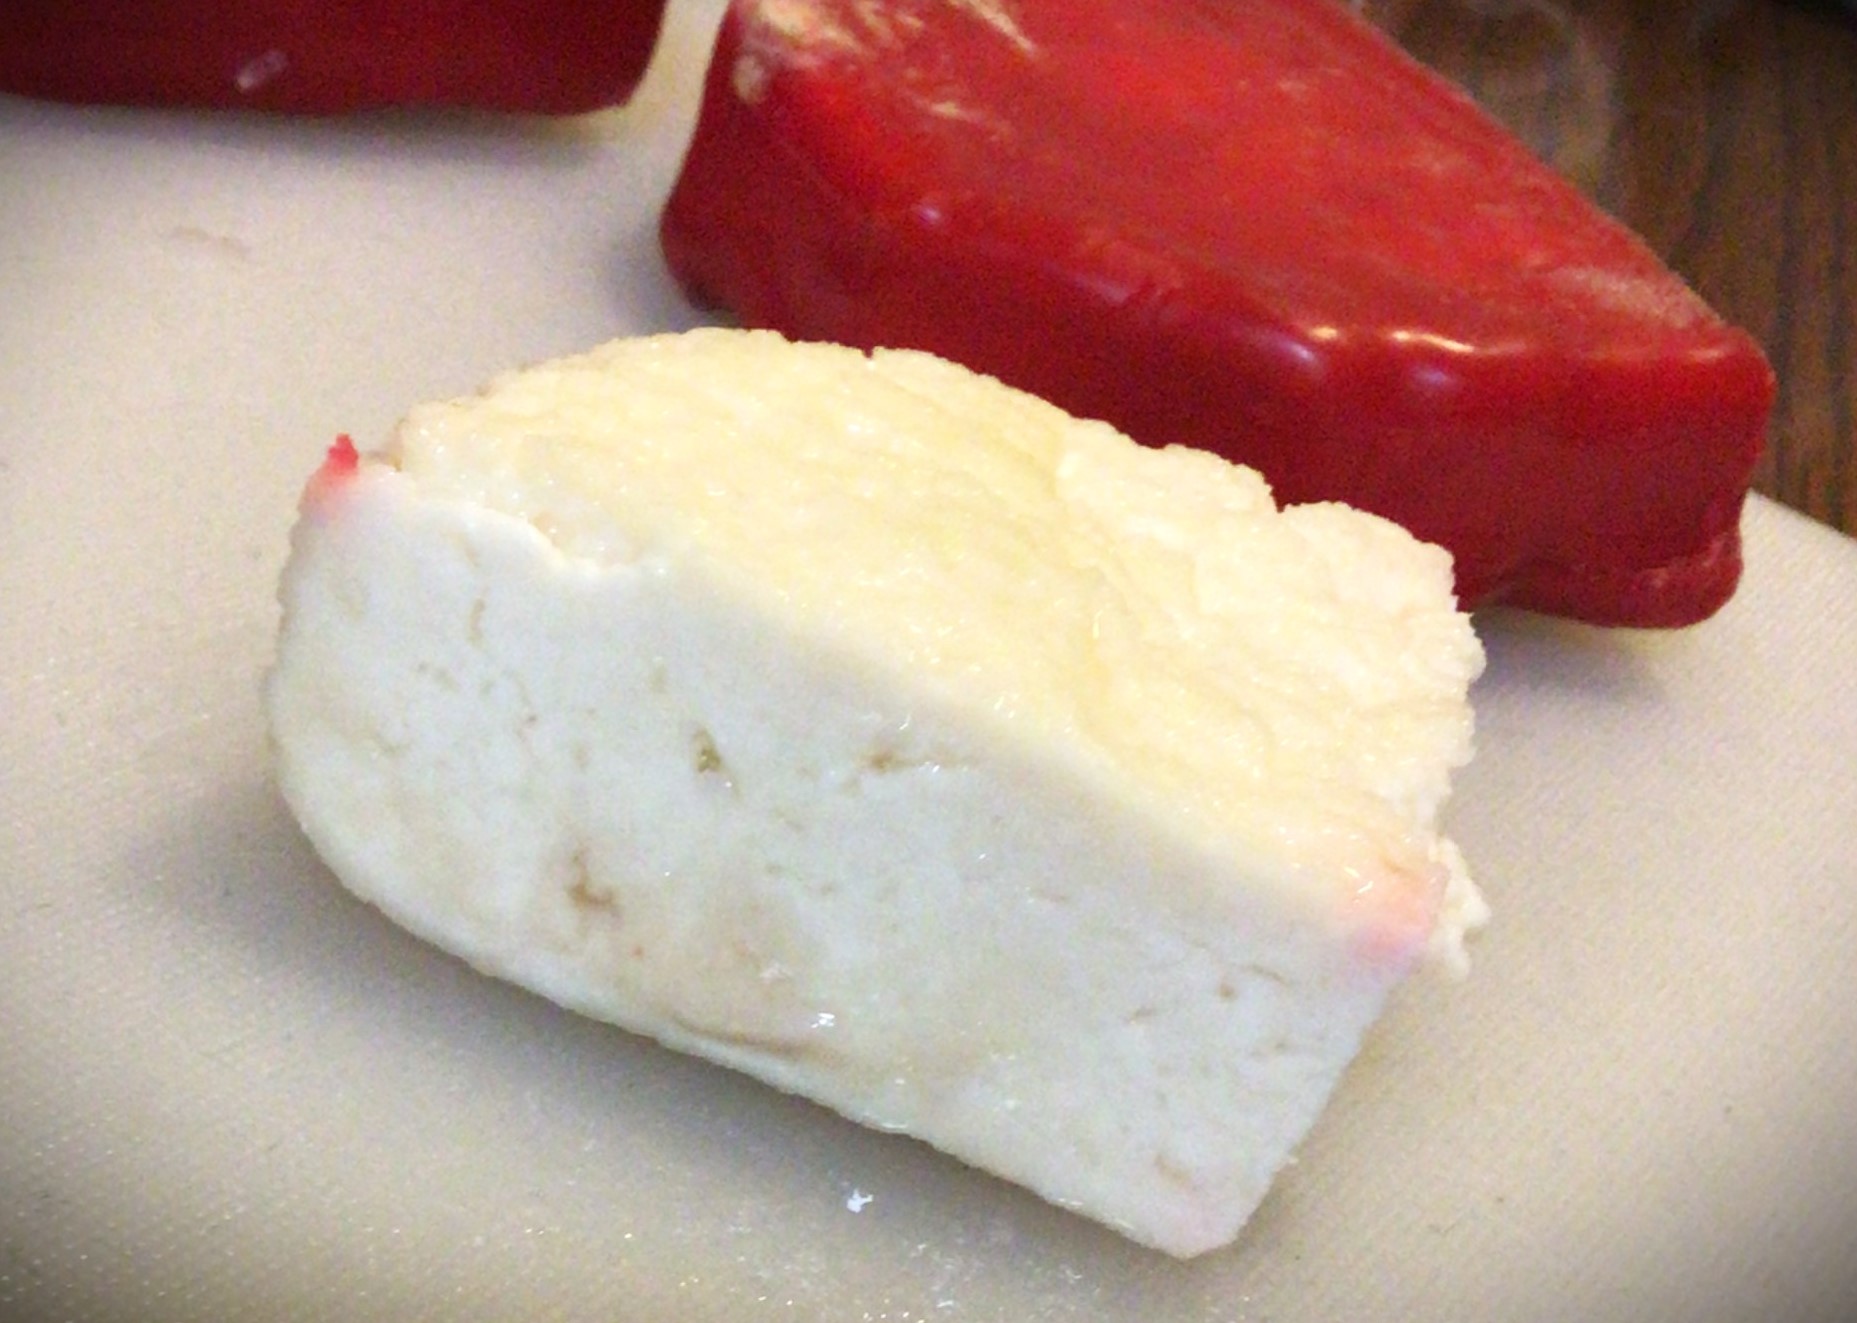
I felt something tacky. It was kind of like sugar water; something is a little sticky but you don’t know what or why. I didn’t know what was causing this tacky feeling on my wax until I picked it up and where my fingers pinched into the wax (to pick it up). Instead of a firm wax feel, there was a bit of mush and a couple of drops of liquid came dripped out. I didn’t see any cracks, but the liquid was coming out of somewhere.
When I opened this cheese up, there was quite a volume of water that came out. And the picture doesn’t really do justice for this one. I tried to capture the amount of water that came out, but about half the water went under the cutting board.
This problem is not salvageable because there was a breach in the wax, meaning that bacteria had access to cheese with an obviously wet environment. While the scent wasn’t too off, it was different than when this cheese was made. But it was the fact alone that the environment inside the wax was perfect for breeding food borne illness that this cheese had to be thrown away.
What caused the water to form inside the wax?
The number one reason, especially for this amount of liquid, is the fact that this was Queso Blanco, a semi solid cheese.
Depending on who you listen to, some people say that only hard cheeses are qualified for waxing. Then there are some people who saw that semi hard cheeses are able to be waxed.
Know that the amount of water content in the cheese that you wax is going to be inside this environment. If your wax is compromised, that water content becomes a problem.
The wax blows up like a balloon and looks like a pillow.
This is another example of a problem that does not involve a crack or discoloration of the wax. The giveaway that something is wrong is that you see the wax bulging.
When the wax is opened, you once again see that the cheese is wet, an indication of a breach in the wax. The water inside is minor in comparison to the glaring indication that something is wrong. You can see here that the cheese itself became bloated.
What causes this bloating?
A microorganism got in and started eating on the cheese. Its respiration causes the carbon dioxide to become trapped in the wax, causing the bulge in the wax. When the cheese also bulges, you know this compromise has gone on for quite some time.
Again, this problem is not salvageable. The cheese needs to be tossed in the garbage.
The wax has become discolored.
I was interested in seeing what was going on inside this problem. Everyone you talk to will tell you that the discoloration is caused by mold. But there’s cheese mold and then there’s mold. Cheese mold (white–like the store cheese that’s on sale because it’s old cheese) can be cut off, cleaned off with vinegar and reprocessed.
This is not “cheese mold” this is toxic mold. Immediately toss it.
Now there are some people who will try to say that the mold is isolated in one location and try to rationalize that you can cut and reprocess. Please don’t. There is moisture on the cheese. The wax created a biome for this mold to grow in. And the evidence is that the off smell of the cheese was not localized but also on the opposite side of the block.
Something looks like white mold on the outside of the wax.
This one I had hoped to find the mold that I was told you could cut off and reprocess the cheese.
Surprise!
Instead I found a noticeable off smell, discoloration of the surface of the cheese, and slime. This one is caused by a yeast infiltration.
If you know yeast, you know that even if you cut it off, it’s coming back. This also gets tossed in the garbage.
What happens if you ignore the crack in your wax?
Let’s just say that I’m glad that I saved this one to be the last I was going to examine. And I didn’t even open the one with the gaping crack. I chose the small hairline crack.
I could not finish removing the wax. The rotten scent was overpowering. Obviously this was a toss for me.
Here’s the thing. I know for a FACT that the cause of this problem was that these two blocks of cheese fell from my pantry and hit the floor. When I picked them up from impact I looked and it appeared that the wax was undamaged.
Never assume there was no damage.
If you want to save the cheese from this problem than when you pick the cheese up from a fall, just immediately remove the wax, clean the cheese with vinegar, air dry it and put on a fresh wax casing. This problem is totally avoidable.
Maybe the cheese falls with a family member and they put it back without letting you know. If you ever see a crack, immediately open it and see what’s going on. Make an educated decision on what to do.
What can we do to prevent these issues?
First toss out everything that you hear from the people who are sharing their cheese making experiences. If you want to learn how to preserve cheese, to be shelf stable, then turn to cheese mongers who make a living off of preserving cheese.
Look at the waxed cheese that you can purchase at the cheese shops.
Pay attention to how thick the wax is.
I am going to tell you right now, the cheese that you see in my pictures here are double dipped layers. I put on two layers of wax because the non-professionals said that it was enough. If you put the last picture (cracked wax) next to a professionally waxed cheese, you will notice that what I applied is a fraction of what the professionals apply to their commercial cheese.
If you want to prevent bacteria, yeast, mold and other microorganisms from infesting your waxed cheese, you need to make sure that you create a thick enough barrier to protect your food. Thick barriers are going to offer better protection than a thin barrier. Do not be cheap. Use the amount of wax a professional is going to use.
Another condition that you have in your control is the area in which you keep your waxed cheese. The experts say that cheese wants to be stored between 40-50 °F. If there is no location in your home that meets this temperature criterion, the best place is in the crisper of your fridge (which is warmer than the main compartment–too cold for cheese) and where you can control humidity. You want high humidity (about 85%), which may require a open container of water in the crisper drawer with the cheese.
Do you need a jumping off point for what experts say in how to store cheese? Look for articles written by cheese makers who have been in business for generations. Another great place is the American Cheese Society. The best yet is anything put out by a Certified Cheese Fromagier–someone who has gone through the training and accreditation for knowing it all in the cheese world.
Processing…
Success! You're on the list.
Whoops! There was an error and we couldn't process your subscription. Please reload the page and try again.
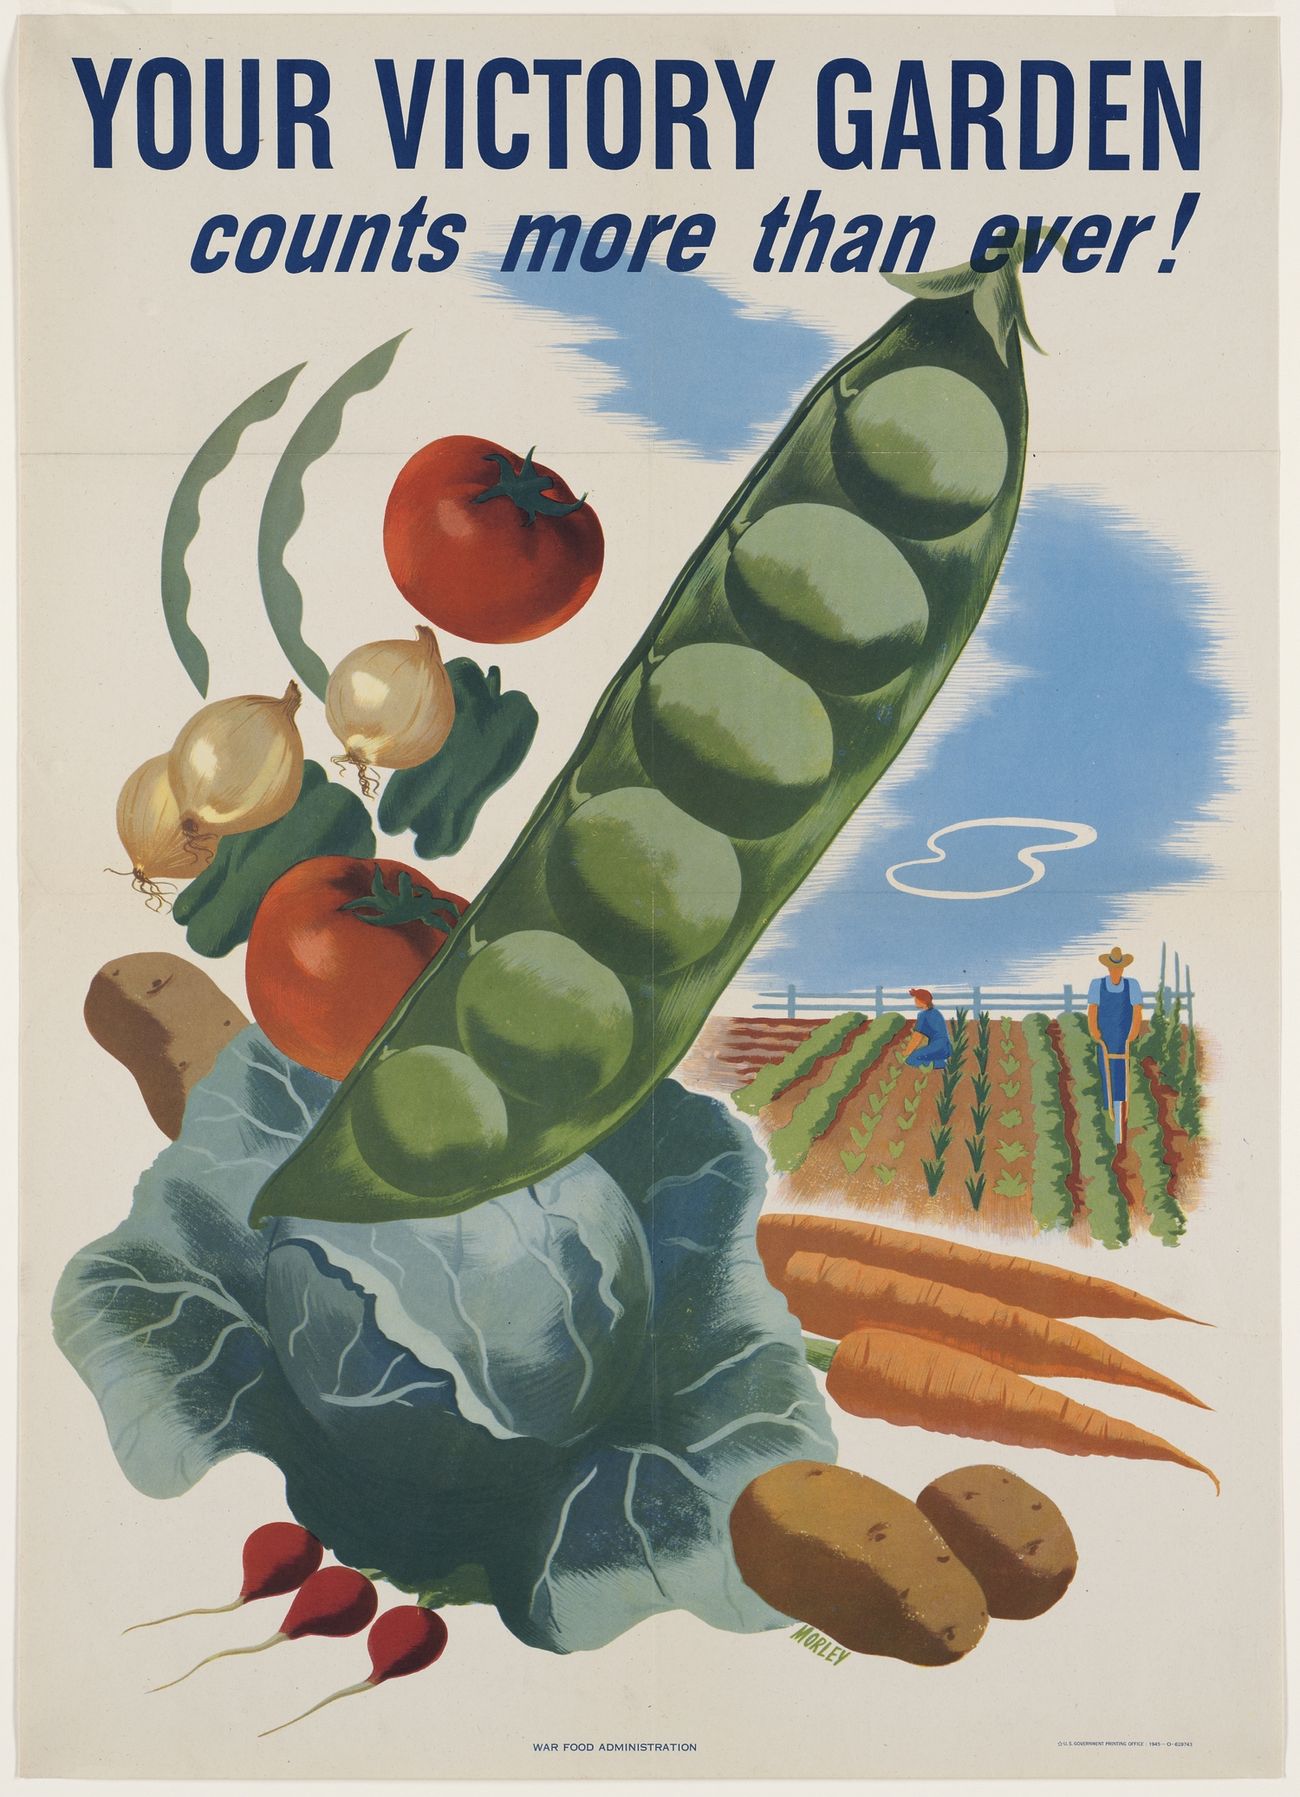
It’s that time of year where we need to look at the space we have to grow a little something to supplement what we get at the grocery store. This year, more than ever, is this important. Grocery prices are skyrocketing, independent farmers are finding it more difficult to stay in business, and there are just times where you want to buy produce and there was a run on that item with nothing left for you.
The great news is that you’re not held captive by what is or is not available in your local market. Even if you choose a little something that is easy to grow, that is one less thing that you have to depend on others for putting up in your kitchen.
Maybe a Victory Garden sounds intimidating. You don’t have to go down the rabbit hole of homestead farming. Start by picking one vegetable that you eat a lot of. Do you use a lot of pasta sauce, tomato paste, tomato soup, or ketchup? You can start by growing some tomatoes and offset those items that you usually buy from the store by making it yourself. You will find it surprising at how few ingredients you really need to make those items. And you cut those preservative and other junk ingredients out of your diet that are put in those commercial products. And tomatoes are not demanding when it comes to you time. You can fit this vegetable into the cracks of your time.
Even if you respond to me right now by saying, “I’m not a vegetable gardener. I plant flowers. I love flowers.”
Advertisements
Did you know that right now the price of living has risen so much that people are putting off doctor visits because they can’t afford to pay the co-pay? In 2018 44% of Americans skipped visits due to price. (Forbes) In 2021, 41% skipped visits due to pandemic concerns. (AMA) Even with statistics provided in December, 2022, 40% of Americans still are avoiding visit for various reasons. (First Stop Health) This is a reality for many people. But that doesn’t mean that you do not have to go without treating your body with items from your garden, even your flower garden.
There are many flowers that you can grow in your garden that have medicinal properties.
Echinacea: good for boosting your immune system and fighting colds and flus.
Rose Hips: (the dark pink or red fruit seen after roses have gone dormant for the winter) are high in vitamin C and good for fighting colds and flus.
Lavender: treats insomnia, reduces blood pressure, reduces menopausal hot flashes, and treats acne inflammation.
Dandelion: there are so many uses this flower has but some are soothing an upset stomach, aide with gall stones, and detox your liver.
Mullein: benefits for your lungs, sinuses, and ear aches.
Bee Balm: helps relieve flatulence and urination.
Yarrow: helps with fevers.
Elderberries: are high in flavonoids, vitamin C and A, betacarotene, iron and potassium.
Comfrey: is great mulch for all gardens (hint: in case you find it difficult to find a fertilizer). It also has anti-inflammatory properties (great for many different skin conditions), but also has a long history of being a bone mender. There are many medical articles that talk about how using a comfrey salve can decrease your broken bone healing time by half.
Chamomile: helps with muscle spasms and insomnia
Advertisements
There are so many more flowers that I could put on this list. Last year I started increasing the amount of medicinal herbs and flowers in my garden. Not only are herbs amazing for making your meals flavorful (hello oregano, sage, basil, and the whole mint family), but they can also be used in tea with the above flowers to help treat the symptoms of oncoming colds before you become sick. Or maybe you have a skin condition where you need to look for specialty soaps in the store. Did you know you can make your own soaps for a fraction of the price and better for your skin? Fact!
I’m inspired. What’s next?
Whether you’re ready to grow your own vegetables or just want to stick to our flowers, there are plants that do well next to each other and ones that don’t. So by planning on where you are going to put everything you want to grow, you can be sure to keep the friendly plants next to each other and competing plants away from each other. And by knowing if your herb or flower is a spreader, you can plan on keeping them in their own contained area.
Some vegetables you can’t plant next to each other:
beans and onions
tomatoes and corn
celery and carrots
garlic and leeks
carrots and herbs (parsley, dill)
onions and beans/peas
lettuce and broccoli
Advertisements
Vegetables that should be planted next to each other:
garlic and tomatoes
spinach and strawberries
beans and tomatoes
tomato, basil, and lettuce
corn, beans, and squash
radish and carrots
carrots and onions
By searching companion planting and the vegetables you want to grow, you can see what grows well together. You can also find out what does not do well together.
For example Marigolds deter pests that attack tomato plants, brussels sprouts, cabbage family, and bush/pole beans.
Search not just for vegetable companion planting but also flower companion planting.
Geraniums and Roses do well next to each other
Coneflowers and Black-Eyed Susans
Astilbe and Hosta
Hydrangeas and Daylilies
Daffodils and Amsonia
Daisies and Petunias
Marigolds and Lavender
Saving Time in the Garden
Now that you know what you want to plant, what does well together, and what doesn’t do well together, don’t wait until it’s time to plant your seeds or put your starts in the ground. Spend the time now in drawing out your grow space and determine where you will put everything.
I grew up putting seeds in the ground without a “map”. We would spend all day planting in a small garden because there was a swapping around of seed packets and other time wasting activities. Last year I mapped out where I was putting everything. By the time it came to putting seeds and starts in the ground, it only took me a couple hours to plant twice the area that my mother’s garden was.
Advertisements
Plus, that “map” had the added bonus of being a reminder of what I planted where. This is particularly important because I planted cabbage and I can’t plant any brassica vegetables this year where I planted cabbage last year because of the competition between these two vegetables.
Not everyone keeps a garden the same way. The focus on most of the gardening community is that you just fertilize your garden, or scorch and burn to add nutrients back into the garden. I decided to practice not just crop rotation, but also resting the land. All throughout history these two practices were how farmers kept land without all the modern conveniences of amending soils with fertilizers and other products.
By keeping this “map”, I can keep a record of how long I’ve had a garden plot, planter box, raised bed, pot, or any other container. This puts a concrete calendar that tells me when it’s time to rest an area. This past year was my first year in resting the very first garden bed that I started. It made me nervous letting a decent size space go fallow. But I watched saw that only a couple dandelions sprouted in the bed. I left them because one of the jobs of dandelions is to draw up nutrients from deep down in the ground to the surface where my vegetables for this year will use. But dandelions always grow where they are most needed. It was encouraging that there were only a couple and not a whole garden bed full of dandelions. So the rotation and natural fertilizing with compost and tea from comfrey is doing its job.
Advertisements
By watching your land sit during a year of rest, you can see what you are working with. Because your land will talk to you just like your plants will talk to you. They will tell you if something is wrong.
How to map and plan
I’ve looked at so many different sheets that homesteaders put together to share their process. The problem I’ve had with everything that I’ve found is that I have to shift through a dozen different pages to note the information that I want.
This year I decided to make my own sheets that are simplified and keep the information where I want it.
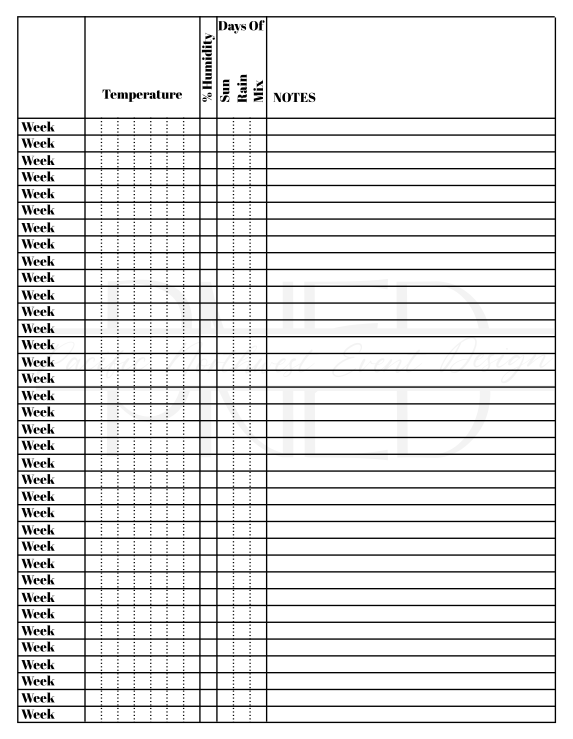
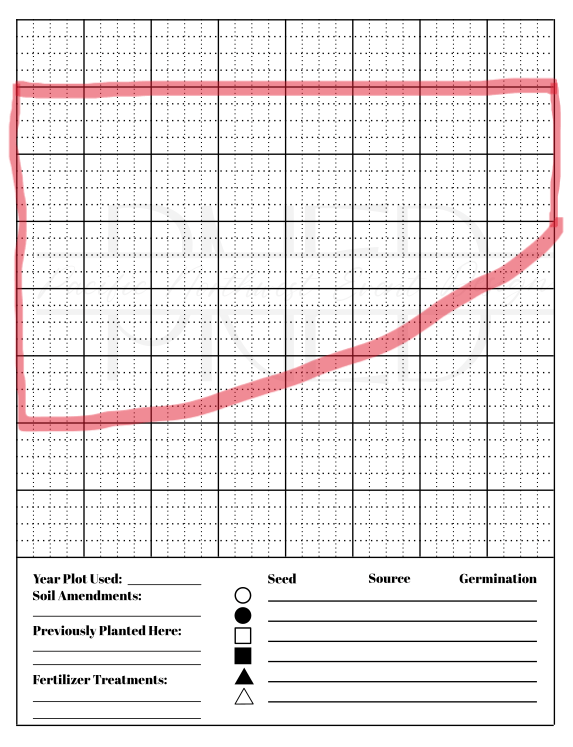
I’m providing my 8×8 Garden Plot and Weather Log for free on my website. Just click here and select the style that you want.
Why is a weather log important?
When I kept a weather log for my wild yeast starter, the mystery of why the same recipe was yielding different results.
In the same way, our gardens are going to respond to different weather patterns that hit. For example, the non-existence of spring and the extended winter jumping right into summer weather stunted all my seeds and starts. By keeping a record of the weather, I can look back on past years and see if and when I need to be concerned and add in hoops or other insulating method to help my crops in an uncharacteristic early season. And there was also an additional issue of powdery mildew hitting my pumpkins and comfrey plants in the midst of a sunny streak with absolutely no rain or my watering leaves. It turns out that the problem was the extremely uncharacteristic humidity levels. After a month of fighting mildew, I finally checked the humidity and saw that it was in the 90% range!
With everything that I threw at my plants to treat them, I ended up with a long list of what didn’t work. This gives me information in the future for looking for a different solution without wasting these resources. So never underestimate the power of keeping notes!
Last year I used a grid pattern not just for my garden beds, but for all my containers and irregular shaped beds.
No matter what shape or container you’re working with, all you need to know is the measurements and then you can roughly draw it on the grid.
Just keep in mind that when you plan seeds, you’ll want to keep a couple of inches away from the side of your container or raised bed so you can have a healthy root system.
The grid will do the math for you!
I set up the grid so that the darker squares can be used for a 1 foot measurement and the smaller squares can be used for other incremental measurements that you seeds require. Having this information already in mind, this past year I just used my pre-mapped seed drops sites, poked the soil with a chop stick and dropped my seeds. I knew ahead of time how many rows and columns I would be making so I didn’t need a ruler or anything else to space. (And spacing is always the most time consuming part of planting!)
Another thing that I hated with the other planning sheets is that they didn’t set it up like a map, complete with symbols to make your coding easy. It’s easier to use a shape code than an initial code when diagramming your seeds. I’ll tell you what! You never recognize just how many plants start with the same letter until you try to put them on a map. And they’re all at the beginning of the alphabet!
Make it Simple
I hope these two sheets will help you and your garden out as much as I know they will make my life simpler.
The Garden Plot sheet I will use for each of my gardening areas. I will be leaving the back of the sheet blank so that all I have to do is flip the sheet over to have more space for notes on what this growing season throws at me. And the Weather Log will be nice because a whole year can be seen on one page.
So far, this year’s planning is only going to take me 6 pages instead of the 18 that I started off with last year.
Give this Garden Plot a shot and let me know in the comments how it works for you!
Also let me know what other information you keep records of when you are gardening.
Winter sports have started and parents everywhere are volunteering for coach their kid’s park and recreation teams. And I am that parent-coach.
After spending quite a few years working with kids, you learn firsthand that not all kids learn the same way. But one learning style that all kids have in common is that they have to have a visual of some kind. And when you’re on a sideline, during a game, and you can’t walk out on the court/field to physically show your team what you want them to do, the next best thing is a whiteboard clipboard of your court/field. (So you don’t have to wait for school athletics for kids to be learn from this court map.)
For whatever reason, if you want to have the benefit of having a court/field dry erase board but don’t want to go through the expense of buying one, I’m going to show you a couple of different ways that you can make one rather inexpensively. (This is a huge perk for summer camps where counselors are coaching and you don’t want to worry about misplacing or breaking a nice board.)
Advertisements
Laminated Court
I went this route because I already had in my craft room a clipboard, laminating machine, laminate, paper, printer, magnets, white board pen, ink pen (you never know when you need an ink pen), and hot glue gun. All in all, for the materials I spent under $4. So this is really inexpensive and gets the job done.
First you either want to make or down load a copy of a basketball court (or any other court or field you’re coaching) and print it off.
Run it through a laminating machine with a laminate cover. And as soon as it’s cooled, this mock white board is ready to write on.
I can’t tell you how many different of these “white boards” I’ve made for homeschooling with worksheets that I want to use over and over again. Yes, some colors like to stain the laminate (red and blue are the two colors that cause problems in my house). BUT they’re super easy to clean up. Take a cotton ball with rubbing alcohol and you’re back to a crystal clear “white board”. And if you’ve ever found out that you grabbed a permanent market instead of a white board pen. Don’t worry! Rubbing alcohol will also take that right off. Or if you ran out… simply take a dry erase pen over the permanent marker and erase. The permanent marker comes right off! (It’s the same trick for with a real white board.)
Now I modified my white board. After my first practice I got tired of fishing my pen out of my pocket. So on the back of my clip board I hot glued a magnet for my dry erase pen and for my ink pen. I hot glued magnets to my pens, in a place where they wouldn’t interfere with how I hold my pens (near center, in the crook between my thumb and first finger).
Advertisements
Depending on your pen, hot glue may not work. Hot glue works like a dream on plastic finishes, but if you grab a metal pen like I did its 50/50 if the glue will hold. My pen popped off with a minimum amount of glue. This second time I used a very generous amount (where I had to wipe off a large glob of left over glue) and the magnet has stayed on the pen. My back up for another glue failure is to switch over to liquid cement glue that is formulated to work on metal and ceramic. I didn’t start with that glue because I didn’t want to rig up something to hold the magnet in place while the glue dried.
As you can see, I don’t have to worry about making sure I have pockets while coaching and my pens are taken care of without having to worry about tying my pen to the clip on the clipboard.
But what if you don’t have a lamination machine that you can use???
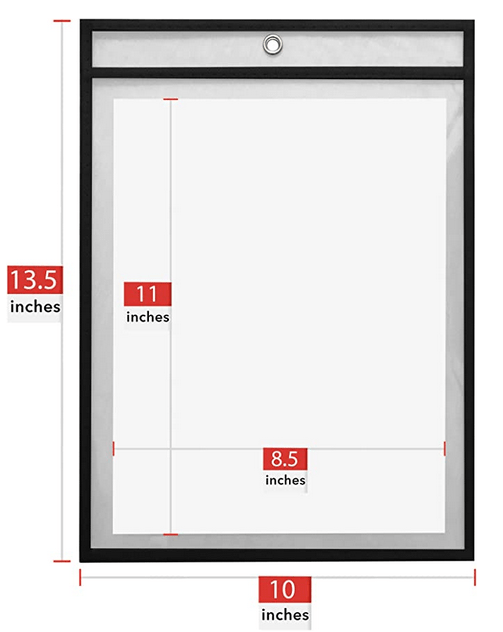
Plastic Holder
This one is another one of my homeschooling hacks. And I love it for absolutely everything, including a recipe protector in the kitchen if you have a sauce or frying and you get liquids flying next to your stove.
So far I’ve only seen these plastic holders at the dollar store. If anyone else has found them anywhere else (other than Amazon), please comment below!
But with this option, all you have to do is find a court or field that you want and print it out on a piece of letter sized printer paper and then you just slide it in. White board pens work on this plastic just the same as the laminate option above and white boards! So for under $2 this is really affordable for any scenario where your “basketball clipboard” will go missing. Or even if you have young kids who want to pretend play “coach”!
This option is also good if you want to be hands free coaching, but want your board with you. Connect it to a lanyard or a retractable key set on your belt loop. It’s handy when you need it and the pouch can also hold your pen.
Files Used For This Project
Don’t want to hunt down another basketball court image to print? You can use this PDF file here. Other sports fields and courts will be added to this link. If you don’t see the one you’re looking for, please leave a comment!
Other Items that may interest you
This post contains affiliate links that give us commissions on products purchased at no additional cost to you. These items listed here are from Amazon but may be purchased at local markets.
15 mm disc magnets I know these can be found in your local store. I used magnets, of this size, that I had found at my local dollar store (traditional black refrigerator magnets).


Leave a comment