Garlic Love

Photo by Skitterphoto on Pexels.com

I don’t know about you, but the one ingredient that buy a lot of is garlic. In fact, if a recipe calls for garlic cloves, I always add in more if not double, just because I find that most recipes under season with garlic.

There has only been one problem in my house. Okay two problems. When I look for cloves I either don’t find any or I find mummified cloves that somehow managed to make their way into the back of my spice cupboard.

This past year my question to myself was, how do I preserve garlic so that it’s ready for me when I need to use it? Followed up with the question, is it possible to buy garlic in bulk and not have it stout on you and you lose it before you can use it.

The answer to the first… you can ferment garlic and extend its shelf life.

The answer to the second se question is, yes!

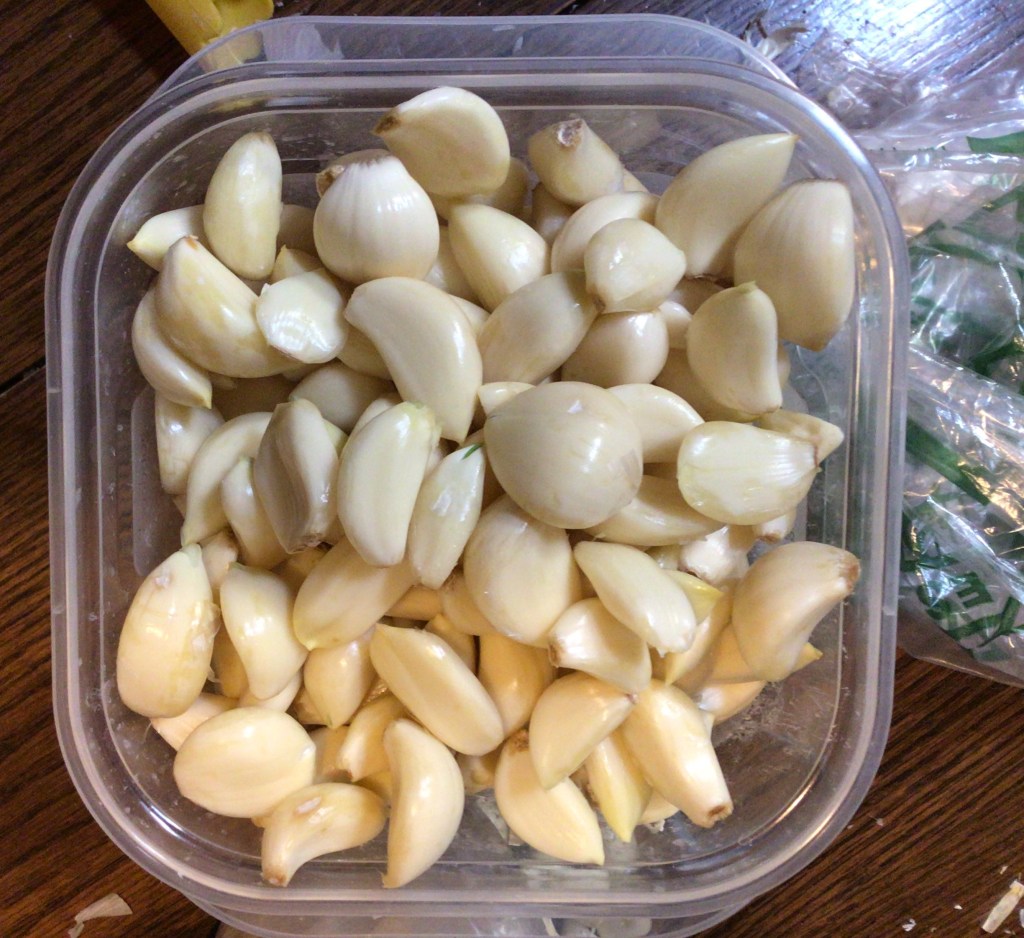
At the end of the last farmer’s market season, I took advantage of the end of the season clearance sale at my local vendor. I bought garlic in bulk (at least from the perspective of a single family for personal use. If I remember right, I bought somewhere near the vicinity of 7 pounds worth of garlic. Needless to say it was a far cry higher than any other time I’ve purchased garlic.

Before the purchase, I had looked up different ways to ferment garlic just to make sure I had at least one way of doing this and I was going to use/eat it. (When it comes to pickling and fermenting the flavors generally don’t taste good to me.) There we’re two that I wanted to try. Both were simple—just two ingredients each. One was garlic and water and garlic with honey.

Now the garlic and water ferment I had a general idea what to expect because I’ve fermented cabbage with water and salt. The honey sounded a bit out there and was a mystery to me.

If you’re like me and already asked, can you ferment with honey? The answer is yes! I was surprised and even excited. Especially when I did more research and found that garlic fermented in honey is a great home remedy for colds and coughs. The garlic clove has compounds that equip your body to fight off common colds. The honey, from this fermentation, is a great natural cough syrup.

Advertisements

During the time of this fermentation (this past fall) there was a time when local parents were having. She’s time hunting down children’s cough syrup. But fortunately, I don’t have to worry about that now because I’m keeping honey fermented garlic in stock at my house. (My way of freeing up resources for other families, who have not yet learned about natural medicine and need those resources for their kiddos.

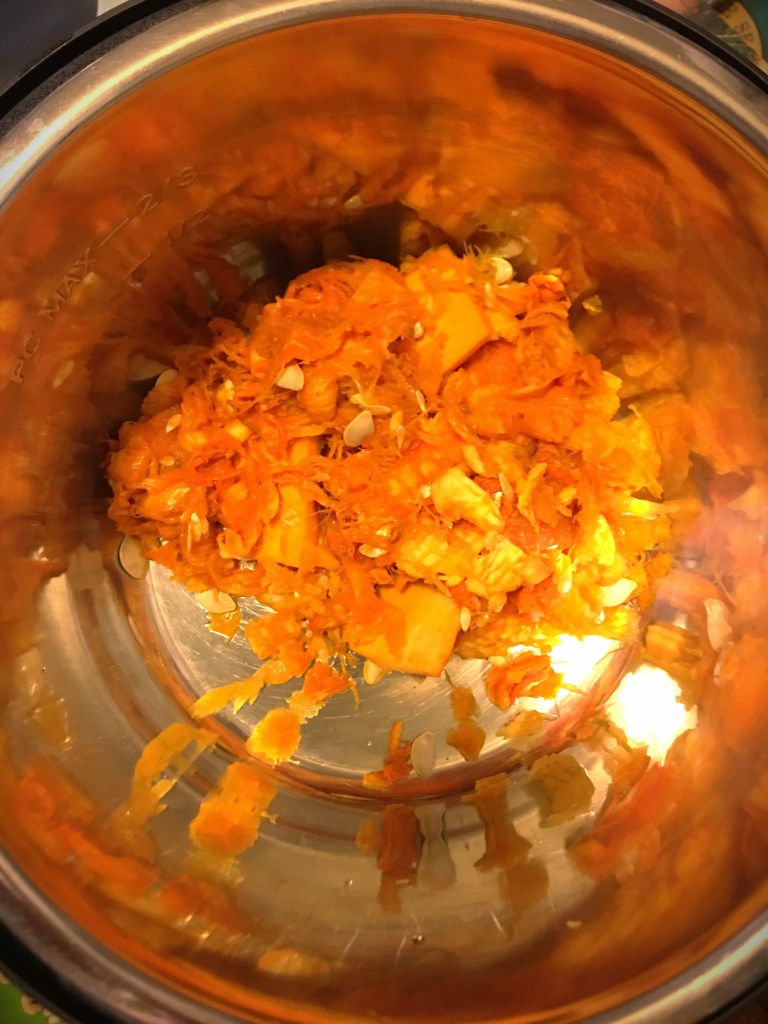
Fermenting garlic is very simple.

  • Peal garlic cloves.
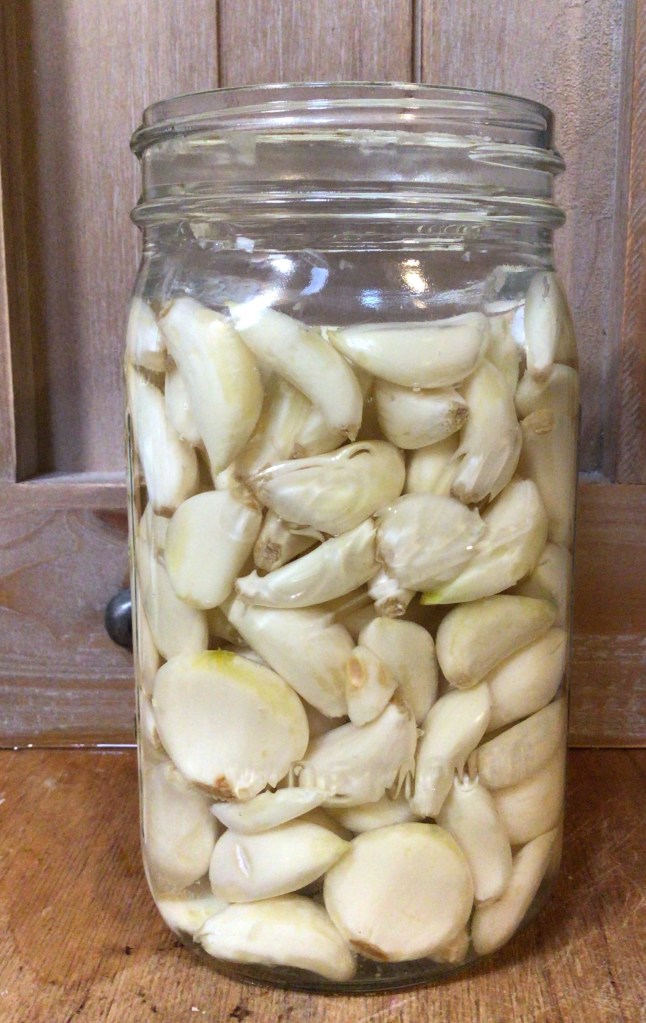
  • Put the cloves in a mason jar with 2” of head space.
  • Fill your mason jar with your fermenting liquid so that it covers your garlic.
  • Remove air bubbles and add more liquid as needed.

This step is particularly important for honey because of how thick it is. It oozes between cloves but doesn’t really thoroughly get in and around all the cloves. So I use a wooden chopstick and move the cloves around to get the honey to get in all around the cloves. Even with the honey levels well above the cloves, when I did the first stir, the honey level dropped by half. I had to go through the process of adding more honey and stirring about three times. I knew I had gotten all the air out when I stirred the cloves and the honey level did not drop a bit.

  • Place a fermenting weight on top of the cloves.
  • Lightly secure a canning lid on your mason jar. (Better yet, use a fermenting lid which allows the ferment to “burp” on its own.
  • Keep in a cool dark place where you can remember to burp the jar.
  • Garlic is fermented and ready for use in 4-6 weeks.

TIP: During active fermentation, it’s a great idea to keep the jar in a bowl. There’s a great chance that the ferment will bubble over while you’re not looking. And a bowl is your best friend when it comes to cleaning up.

TIP 2: The aroma of garlic is going to be very strong during active fermentation. So make sure the place where you keep it is one where you won’t mind the smell. (At first I had it in our pantry, but my husband was not okay with the smell. I relocated it to another location. The good news is that the garlic smell in the pantry was gone in a couple days.)

Peeling In Bulk

There are a couple of options that you have available.

You can peel the garlic the classic way with a paring knife. It’s long and tedious (particularly when you have young children under foot).

I don’t know if this next idea is still making the circuit around social media–putting cloves in a mason jar and shaking the skins off. I wished that this “trick” worked. Let’s just say that I raced my husband. He tried the jar method and I used a paring knife. The jar is fail if you fill the jar halfway or a quarter full with garlic cloves. The only time it semi worked was when the amount of cloves just covered the bottom of the jar. In the end, my husband shoved the cloves over to me when I out counted him with my paring knife. There were still the last layers of skin on the cloves that I had to peel off with the knife.

My preferred method of peeling garlic is with a silicone garlic peeler tube. With a dry tube and properly dried out garlic, it only took 1-2 rolling presses in my hands and all the layers were peeled away.

Unfortunately we only have one tube in my house and my husband and I fought over it. So we turned it into a competition. How many cloves could we peel in the amount of time it took the other to break down one bulb into cloves ready to go. We actually didn’t keep score because we were too busy laughing and working quickly on whatever end of the competition we were on!

Advertisements

How did the garlic turn out?

The quick answer is that I did not prefer the flavor of the finished garlic that was fermented in water. It has an acidic flavor that I have to cook out of the garlic. At this point, all health benefits from making fermented garlic is long gone, because it’s cooked to death. (I’ll come back to this.)

Originally I wasn’t sure if I would like the honey fermented garlic at all. But let me tell you this, I will never preserve garlic any other way!!!!

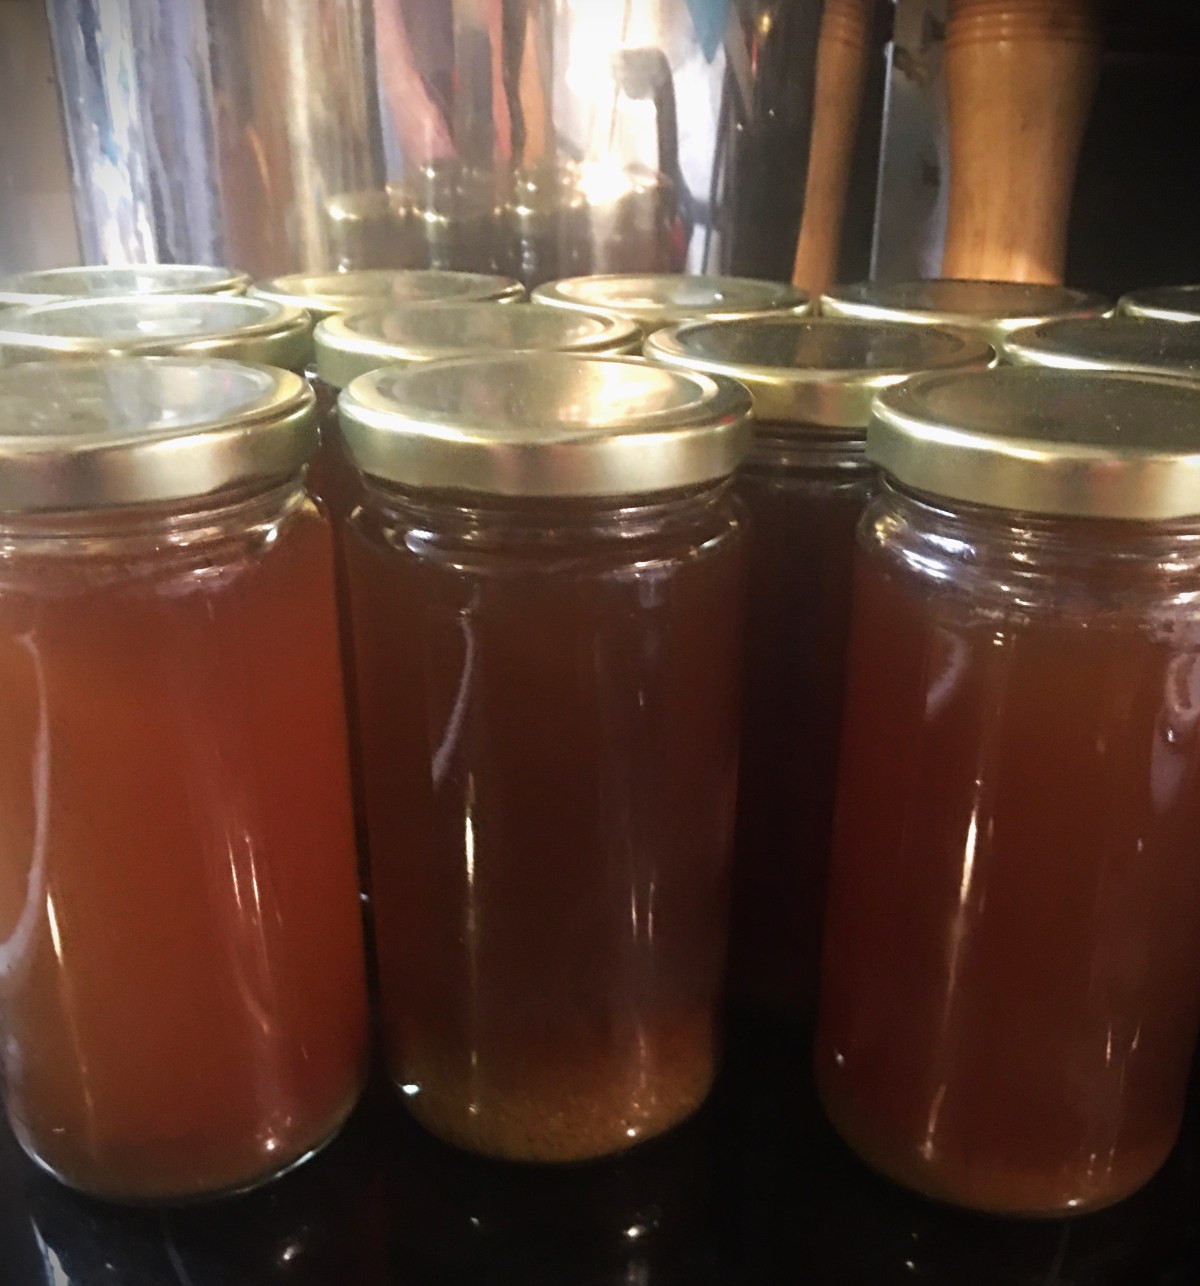
At the end of the fermenting process, the honey looks lighter in color and its thickness looks like it was watered down. When you taste the honey, it’s not honey sweet anymore. There’s still some sweetness present but it’s been dulled down remarkably. The garlic itself takes on a slight nutty flavor and is slightly sweeter. The pungent snap that we’re use to experiencing when eating raw garlic is greatly reduced. The garlic is still firm, but not as firm as garlic fresh from the garden.

The honey garlic is perfect to mince and add raw to a salad, especially if you drizzle a little honey on top as part of the dressing. You will not regret using honey garlic as a finishing touch on Italian or Asian inspired dishes. In fact, I can think of many many more applications for this form of garlic than I can with its raw counterpart.

Benefits of Fermented Garlic

The most famous compound that Garlic is known for providing is Allicin. If you need a jumping off point for the health benefits that allicin provides for our bodies, check out this article. In short it’s good for helping your Immune System do its job and reducing inflammation.

Fermentation brings its own benefits to any vegetable that you bring through this process. The most talked about benefit is improving your gut health by feeding the good bacteria that resides in your Gastrointestinal System. Here’s a good place to start seeing all the other benefits available to our bodies.

These two reasons are enough to send you on a well rewarding researching adventure for understanding why garlic and fermented foods are both important to being added into our diets.

Advertisements

Why Should I Ferment Garlic?

Whether you grow your own garlic are want to take advantage of garlic that you find at a great price, fermenting garlic is a sure way of preserving your garlic.

Over the years, I’ve tossed out garlic because it turned into mummified cloves, had mold, or started sprouting before I could use it. By fermenting, you get to stop the clock on the life of your garlic. The common practice of braiding garlic and storing it in a cool dark place slows down the clock on the garlic, but it will still approach a time where those bulbs and cloves also start to sprout. By fermenting, you’re adding more time that you have available to use the garlic that you have in your kitchen.

And in the instance of the honey garlic, you have the added bonus of having a home remedy cough medicine. Over the last two years there have been many things on the store shelves that have been out of stock. Cough syrup, especially for children, was one of those things this past fall and winter. I haven’t even bothered checking the shelves to see if that situation has fixed itself. But I can rest assured that a dose of the honey with a clove of garlic will not only treat coughs in my family, it will give our bodies added nutrients which help our immune systems fight off whatever cold or virus that we are dealing with.


What do you love using garlic for???


Products used today:

This post contains affiliate links to products. We may receive a commissions on products purchased through these links, but at no extra cost to you. These items listed here are from Amazon but may be purchased at local markets.

Processing…
Success! You're on the list.

One response to “Garlic Love”

  1. 664 Avatar

    I read thiks piece off writing fuloly on tthe topic of the differenc of hottest
    aand previous technologies, it’s reemarkable article.

    Liked by 1 person

Leave a comment

Advertisements
Advertisements

Waxing Gone Wrong

It’s easy to find videos and information on how to walk you through waxing cheese so that you can keep cheese in your house without taking space up in your fridge. This is particularly useful when you want to take advantage of sale prices at your local grocery store. Or maybe you’re adventuresome enough to make cheese at home.

What is harder to find is a heads up of what you’re looking for when after you’ve waxed your cheese.

This is what I want to share with you today.

In all the YouTube videos and blog posts you’re told to walk out for cracks in the wax or mold on the outside. But what does that look like? And that’s not even taking into consideration that in reality there’s a couple of other things that you should look for that you should be aware of as well. So let’s take a look at what can go wrong.

The first indication that you need to check your cheese…

About two months ago I noticed an earthy musty smell in my pantry that came out of nowhere.

If you’re use to preserving food, you know that when there’s a change in your pantry smell than something is up.

If you’re new to food preserving, it might not cross your mind that you need to check something. I want to plant that red flag in your mind right now. If a new smell comes up in your pantry, check all your food and see where it’s coming from.

Note: I first noticed this smell in my pantry about two months ago. Instead of removing the wax and checking the viability of re-waxing all the cheese you are about to see, I let it all go. I took this to the extreme so that you can have a very good visual of what you can find and see with certainty of what is going on with the cheese when you remove the wax.

You find dampness that seems to have come from nowhere.

Honestly I kind of laughed when I saw this one. Out of all the research I did before waxing my own cheese, no one talked about wet cheese. So I never would have known to look for this one.

The problem with this issue is that if you’re just looking for cracks and discoloration of the wax, you’re not going to catch this problem. The only way you’ll find this problem is by handling your waxed cheese when it’s time to flip them.

I felt something tacky. It was kind of like sugar water; something is a little sticky but you don’t know what or why. I didn’t know what was causing this tacky feeling on my wax until I picked it up and where my fingers pinched into the wax (to pick it up). Instead of a firm wax feel, there was a bit of mush and a couple of drops of liquid came dripped out. I didn’t see any cracks, but the liquid was coming out of somewhere.

When I opened this cheese up, there was quite a volume of water that came out. And the picture doesn’t really do justice for this one. I tried to capture the amount of water that came out, but about half the water went under the cutting board.

This problem is not salvageable because there was a breach in the wax, meaning that bacteria had access to cheese with an obviously wet environment. While the scent wasn’t too off, it was different than when this cheese was made. But it was the fact alone that the environment inside the wax was perfect for breeding food borne illness that this cheese had to be thrown away.

What caused the water to form inside the wax?

The number one reason, especially for this amount of liquid, is the fact that this was Queso Blanco, a semi solid cheese.

Depending on who you listen to, some people say that only hard cheeses are qualified for waxing. Then there are some people who saw that semi hard cheeses are able to be waxed.

Know that the amount of water content in the cheese that you wax is going to be inside this environment. If your wax is compromised, that water content becomes a problem.

The wax blows up like a balloon and looks like a pillow.

This is another example of a problem that does not involve a crack or discoloration of the wax. The giveaway that something is wrong is that you see the wax bulging.

When the wax is opened, you once again see that the cheese is wet, an indication of a breach in the wax. The water inside is minor in comparison to the glaring indication that something is wrong. You can see here that the cheese itself became bloated.

What causes this bloating?

A microorganism got in and started eating on the cheese. Its respiration causes the carbon dioxide to become trapped in the wax, causing the bulge in the wax. When the cheese also bulges, you know this compromise has gone on for quite some time.

Again, this problem is not salvageable. The cheese needs to be tossed in the garbage.

The wax has become discolored.

I was interested in seeing what was going on inside this problem. Everyone you talk to will tell you that the discoloration is caused by mold. But there’s cheese mold and then there’s mold. Cheese mold (white–like the store cheese that’s on sale because it’s old cheese) can be cut off, cleaned off with vinegar and reprocessed.

This is not “cheese mold” this is toxic mold. Immediately toss it.

Now there are some people who will try to say that the mold is isolated in one location and try to rationalize that you can cut and reprocess. Please don’t. There is moisture on the cheese. The wax created a biome for this mold to grow in. And the evidence is that the off smell of the cheese was not localized but also on the opposite side of the block.

Something looks like white mold on the outside of the wax.

This one I had hoped to find the mold that I was told you could cut off and reprocess the cheese.

Surprise!

Instead I found a noticeable off smell, discoloration of the surface of the cheese, and slime. This one is caused by a yeast infiltration.

If you know yeast, you know that even if you cut it off, it’s coming back. This also gets tossed in the garbage.

What happens if you ignore the crack in your wax?

Let’s just say that I’m glad that I saved this one to be the last I was going to examine. And I didn’t even open the one with the gaping crack. I chose the small hairline crack.

I could not finish removing the wax. The rotten scent was overpowering. Obviously this was a toss for me.

Here’s the thing. I know for a FACT that the cause of this problem was that these two blocks of cheese fell from my pantry and hit the floor. When I picked them up from impact I looked and it appeared that the wax was undamaged.

Never assume there was no damage.

If you want to save the cheese from this problem than when you pick the cheese up from a fall, just immediately remove the wax, clean the cheese with vinegar, air dry it and put on a fresh wax casing. This problem is totally avoidable.

Maybe the cheese falls with a family member and they put it back without letting you know. If you ever see a crack, immediately open it and see what’s going on. Make an educated decision on what to do.

What can we do to prevent these issues?

First toss out everything that you hear from the people who are sharing their cheese making experiences. If you want to learn how to preserve cheese, to be shelf stable, then turn to cheese mongers who make a living off of preserving cheese.

Look at the waxed cheese that you can purchase at the cheese shops.

Pay attention to how thick the wax is.

I am going to tell you right now, the cheese that you see in my pictures here are double dipped layers. I put on two layers of wax because the non-professionals said that it was enough. If you put the last picture (cracked wax) next to a professionally waxed cheese, you will notice that what I applied is a fraction of what the professionals apply to their commercial cheese.

If you want to prevent bacteria, yeast, mold and other microorganisms from infesting your waxed cheese, you need to make sure that you create a thick enough barrier to protect your food. Thick barriers are going to offer better protection than a thin barrier. Do not be cheap. Use the amount of wax a professional is going to use.

Another condition that you have in your control is the area in which you keep your waxed cheese. The experts say that cheese wants to be stored between 40-50 °F. If there is no location in your home that meets this temperature criterion, the best place is in the crisper of your fridge (which is warmer than the main compartment–too cold for cheese) and where you can control humidity. You want high humidity (about 85%), which may require a open container of water in the crisper drawer with the cheese.

Do you need a jumping off point for what experts say in how to store cheese? Look for articles written by cheese makers who have been in business for generations. Another great place is the American Cheese Society. The best yet is anything put out by a Certified Cheese Fromagier–someone who has gone through the training and accreditation for knowing it all in the cheese world.

Processing…
Success! You're on the list.

Leave a comment

Embracing Dry Meat

There are just certain cuts of meat that no matter how attentive you are, they just dry out. Instead of stressing out for a dry dinner, I’ve decided to embracethe dry and put it work for me. You’ve had the roast, chicken, and pork loin that just dry out no matter what. I know that I certainly have. And when we were able to get some pork loin for $0.99 a pound, we made the sale and I decided to make jerky!

I decided to try 2 different ways of seasoning, and 4 different flavorings. One was a wet rub (with minimal liquid) and the rest were marinades.

For the wet rub, this is the recipe that I used. It isn’t mine and even after searching through my devices and searching online, I can’t seem to find the post again. So if this is your recipe, please let me know so I can properly give you credit!

The benefit of a wet rub is that you have just enough liquid incorporate your seasoning into your meat without the need to drain off excess liquid. You can pull the meat straight from the bag and place on your dehydrating trays. But you will notice that the marinades absolutely need to properly drain or you will have to clean the bottom of your dehydrator. This wet rub didn’t need to be drained because the salt content didn’t have enough time to extract the water content from the jerky, like you see through the processing of bacon.

  • 1 Tbsp Worcestershire Sauce
  • 1 tsp. Salt
  • 1/2 tsp. Pepper
  • 1/2 tsp. Ginger
  • 1/2 tsp. Onion Powder
  • 1/4 tsp. Garlic
  • 2 tsp. Brown Sugar

This recipe calls for a rest period of 15 minutes before laying the meat out on the dehydrator racks. I processed at 160°F, even though some people say they process at 145°F. The thinness of the cut (I aimed for paper thin although there were a few pieces that were a bit thicker) I made allowed me to have crispy jerky strips at 5 hours. The thicker bits took another hour.

Advertisements

And let’s face it, I’m a busy mom and I usually don’t get around to process projects like this until the evening (usually while I’ve got the dinner cooking and I have a few minutes to do another task). The shorter processing time is most definitely my best choice.

For the marinades I chose from the Asian cuisine just because they are all great for an all round punch of flavor and generally well seasoned. From a local Vietnamese grocery store I had purchased a Honey Garlic Marinade and Korean BBQ sauce. From a local restaurant supply store I used Mr. Yoshida’s Original Gourmet sauce. (Mr. Yoshida’s is the sauce that I freezer marinade chicken and pork in for a quick pull out of the freezer “teriyaki” dinner where I don’t have to plan a marinating time.)

For marinating, I used the bowl and zipper bags. Obviously the bowl is the better option. However, in the middle of trying to get Christmas presents created and made, let’s just say I forgot two marinades for two days and am very glad that I used the zipper bags. My fridge space is at a premium right now and they were easier to store than a bulky bowl.

And as a side note, I highly recommend a longer marinade time than the recommended 15 minutes that I used for the wet rub and the Honey Garlic Marinade. Obviously the two day marinade imparted much more flavor into the jerky. 15 minutes on a marinade gives you only a hint of the flavor. However for a wet rub 15 minutes is most definitely all you need and you still get more flavor than the marinades.

Prepping the Jerky

You are going to run into a world of difference of opinion when it comes to jerky thickness. Some love the thin. Others prefer the thick cut. Then there are the people who love jerky that snaps and is crunchy. And others who want more of a soft chewy bite.

I really can’t tell you how you should cut your meat in prepping your jerky. Just know this. If you want the chewy bites of meat, you will want to cut the meat thick. If you want crunch and texture, you want to go with a paper thin cut (think Pho or Fondue, where slices of raw meat are added to the broth and cooked by the soup almost instantly).

Advertisements

The thickness of your meat is going to drastically determine your dehydrating time. So even if a recipe tells you that the time is x hours, in reality that is when you’re going to check the jerky. Chances are very good that you will need to add a few or several more hours depending on just how thickly you cut your meat.

The absolute cardinal rule of making jerky is that you have to remove as much fat as you can from your meat. Fat is the limiting factor for how long of a shelf life you can keep your meat before it turns rancid and is spoiled. Small thread like seams of fat is not going to be an issue because the heat of the dehydrator will usually render that fat out, especially on the super thin cuts of meat. If you prefer the thick cuts of jerky do not count on any rendering to take place at all. The fat that goes in will still be on the jerky when it comes out.

TIP: If you cut your meat against the grain you will have tender jerky that you don’t have to work and pull to take your bite. It’s the difference between have crispy jerky and looking like you’re a pup working on a raw hide.

Looking at the above pictures (of raw meat), you will notice that there was still fat on my slices. But here (below) you will notice that they rendered out.

In fact, what you see in these pictures is four trays worth of jerky that I piled up before packaging up. On the left is the Korean BBQ. And the right is the Mr. Yoshida’s marinade.

When dehydrating jerky make sure that the meat is laid out flat (not folded over into layers) and isn’t touching it’s neighboring piece of meat. If the meat over laps the jerky is going to stick together. It’s not too much of a problem with the very thin slices. But the thick slices, the meat will still be raw even after several hours of dehydrating.

Sealing it up for storage

The great thing about making jerky is that it does not require fridge or freezer space. If you have air tight containers, chances are that you will probably eat the jerky you made before it goes bad. (This is especially true if you were diligent in cutting off as much fat as possible.)

There are many great products out there. There are vacuum glass or plastic containers. You can vacuum seal in mason jars using a vacuum sealing lid attachment.

One word of caution on this one. There new canning lids have greatly reduced the amount of rubber used on their gaskets. Everything I vacuum sealed with these new seals has completely failed from about 1 month up to 4 months. So please be aware of the lids that you use for vacuum sealing. While these new lids have remained true for water bath and pressure canning, they have been a complete failure for vacuum sealing my dry goods. If you wish to vacuum seal in your mason jars, I highly recommend that you switch to a reusable gasket and lid set like the ones made by Tattler. The more cushion created by a thicker gasket you have, the greater the longevity of your vacuum seal is going to have in remaining in contact with your jar.

Advertisements

The method that I used for these roughly 15 pounds of pork loin (actual jerky weight is less because weight of water content was removed) was sealing in mylar bags.

Mylar bags can be used with a vacuum sealing system. However I don’t want to discourage you if you are on a budget. The truth is that I haven’t found a vacuum sealing system that I’m in love with. Even sous vide vacuum sealing systems have failed me and I’ve gotten rid of them. What I’m about to show you, I’m not happy with for long term storage. However I am very pleased with the results for at least a year’s shelf stable storage condition.

Below, I’ll leave a link to this model of a mylar sealer. It is not vacuum sealing, but it is economical for the families on a budget.

Once you place your jerky in the mylar bag, place an oxygen absorber. (Oxygen is the enemy of food preservation.) An oxygen absorber is all that you need in a bag like this. The bags, before sealing are open at the very top. Once I have the meat and oxygen absorber inside, I hand press the excess air out of the bag and use the zip lock to close it off.

By removing as much air as possible, it creates less work for your oxygen absorber. And in that process, there’s more absorbing properties available should you fail to seal the bag properly and a little air leaks in.

Advertisements

Oxygen absorbers are soft when they have the capacity to absorb more oxygen. When they are no longer functional, they become hard.

With the zip lock closed, I then place the bag in the sealing device. (Pay attention to the notched tabs that make opening the bag easier. You want to seal on the far side of that notch or else that feature will not open the bag for you when you’re ready to open your jerky.) This particular sealer works when you press the lever down on top of the mylar bag. There is a light that turns on when it is sealing and turns off when it’s finished. The maker recommends leaving the pressure on for an additional few seconds to make sure the seal occurs. And I highly recommend this step of patience. While this machine is economical, it’s not fool proof. I have better sealing than the sous vide machines I’ve previously used, but it still has its margin of errors.

One thing to look out for when sealing mylar bags are wrinkles in the seal.

As you can see here, the top part of the bag has a smooth seal. The bottom part, closest to the camera, has wrinkles. These wrinkles are where you seal can fail and put your oxygen absorber to work. If you see this, seal the bag again and manually check to see the condition of the seal. There have been a couple of times where I sealed the bag, but the seal absolutely failed and when I checked to see if the top was sealed, it popped right open as if I hadn’t sealed at all. No matter what, always check that seal!

Absorbers

There are two types of absorbers; oxygen and moisture. My jerky is so dry and snaps that I pass on the moisture absorber. If you are making a thicker jerky with more chew, you will most definitely want to add a moisture absorber into your bag with the oxygen absorber. After all moisture is that creates the environment for mold to set in on food. And we don’t want that.

And just because you’ve not had rain for a while does not mean that you are clear to skip the moisture absorber.

This past summer we were a couple months with zero rain and yet we had humidity levels in the 90% and higher range. This is completely unusual for the Pacific Northwest and frustrated me to no end. I was dehydrating my vegetables to turn them into powders for seasoning. I would shut my dehydrator off at night, when I went to bed, and in the morning my dried vegetables were moist and flaccid again. I was so frustrated!

The point of that story is that even though you don’t have rain falling doesn’t mean that you’re free of moisture.

Advertisements

With these rounds of making jerky I packaged them the same day, after they cooled down. I was not going to chance moisture being in my bags and ruining my jerky. (It also helps that my humidity levels were also in the 50% range, so I know the jerky was not being a moisture sponge while it cooled.)

Pay attention to your humidity levels. When in doubt add a moisture absorber with your oxygen absorber. And if your meat is thick cut, absolutely add that moisture absorber. It will keep your jerky’s texture and minimize the threat to your preservation.

TIP: If your absorbers come in a single large bag rather than smaller packages, you can still use the amount of absorbers that you need and seal the bag back up with your heat sealer. This will prevent oxygen from further exposing your extra absorbers. They will be preserved and ready for you to use when you’re ready to use them.

Which was my favorite Jerky?

I’m going to hands down say that my least favorite was the Honey Garlic Marinade. I had such high hopes for it because it smells so amazing! The problem was that the package directly said it was for 1 pound of meat and my jerky was 2.5 pounds. I will try this one again but make sure the meat to marinade ratio is true. The other problem was that the marinade turned out to be a low sodium finished product. My preference is toward a salty jerky. (Salt is a natural moisture absorber, it draws the water out of the meat. This is why jerky and preserved meat is always so salty.)

If you’re looking for a low sodium option for your jerky, than I think you’ll be pleased with the Honey Garlic Marinade. Both the honey and Garlic were mild in flavor, almost negligible in flavor–again, the problem of meat to marinade ratio.

In third place was the Mr. Yoshida’s jerky. While it was not my favorite and I may or may not make this jerky again, I do have to say that I loved this mild Teriyaki flavor. All the Teriyaki flavored jerky I have ever bought from a reputable jerky brand and always been too sweet and even off putting. I love Mr. Yoshida’s for having that palatable Teriyaki flavor.

I did learn from the Honey Garlic Marinade. So before I turned my dehydrator on, I sprinkled salt on top of this jerky. A light dusting of salt was just enough to season the meat without becoming a salt bomb. It enhanced the flavor of Mr. Yoshido’s. Even with two day’s marinating, had I not dusted with salt, the flavor would still have been bland.

Unless you’re going for a low sodium jerky, always salt it before you dehydrate it.

A very close second place goes to the Korean BBQ marinade. I will most definitely make this one again! There is a hint of sweetness, but you pick up bites of garlic. The reason for this is because the marinade had minced garlic in it. Even if you’re not familiar with Korean food, you will love this marinade just for the garlic. The best part is that you can eat and eat this jerky and you won’t need a breath mint.

This one was also dusted with salt before dehydrating. I played around with the salt levels on this one. A light dusting will keep you down in the lower sodium range. Although this marinade is still amazing with a heavier hand of salt, more to the traditional levels of saltiness. So you can go light or heavy on the salt with this one and still have an amazing jerky that beats out the ones that are bought in the stores.

My absolute favorite was the wet rub! I seriously had to bag that jerky up to keep from eating it all up. And even then it took self control not to open the bags that I just sealed. Flavor wise it’s true to the “original” that the professional brands sell. It’s not a fancy flavor, just good classic jerky. The salt level is probably on the moderate side. For my personal preferences, it’s on the upswing on the salty spectrum, but I also prefer my foods less salty than most people. If you like the salt, I would recommend, for the first time, sticking to the recipe above, and giving it a dusting before you put it in the dehydrator. If you’re a moderate salt person, the recipe is plenty good enough. And if you’re a low sodium person, go ahead and cut back on the salt.


Advertisements

Whether you’re limited on freezer space, want to take advantage of a great meat sale, looking for shelf stable foods, want a snack that won’t go bad on you, or just want to try something new, making jerky is definitely worth the time and effort!

You don’t even have to keep it in the snack food groups.

The great thing about jerky is that if you’re in a power outage setting you can use jerky as a meat in a soup. Thin slices of jerky will warm up and rehydrate rather quickly. The thicker jerky will give a soup texture. Or maybe you want to try something new with your chili or stew. You seriously don’t have to leave jerky in the category of a meat stick snack. There are so many uses that you can use it for when cooking for meals during an emergency or when you’re out enjoying nature.

What’s your favorite jerky flavor?


Products used in this post

This post contains affiliate links that give us commissions on products purchased at no additional cost to you. These items listed here are from Amazon but may be purchased at local markets.

ChoripDong Korean BBQ Sauce for Sliced Shortribs This product I could only find on the Canadian Amazon site. However it was at my local Vietnamese market.

Tattler Reusable Canning Lids

Regular Mouth

Wide Mouth

Processing…
Success! You're on the list.

Leave a comment

Advertisements

A Touch Bitter?

Earlier this year I first saw this meme.

Image Source Unknown

I’ve been making chicken stock for several years. But this was the first time that I ever heard that you could make vegetable stock with pumpkin guts!

My childhood is filled with roasting the seeds, and sometimes using the flesh. But it was more convenient for my parents to buy the canned pumpkin and make pies from that. It wasn’t until I got married that I started making my own pumpkin puree, with the flesh, and make my pies completely from scratch.

But always, the guts got thrown out.

Of course when I saw that you can make a broth out of the guts, of course I had to give this a whirl!

After separating out everything (seeds from guts, and roasted flesh from skin) the only items that went to the compost heap were the stems and skin. The flesh was pureed down to dehydrate for freezer saving pumpkin puree. My anticipation was met with the roasted seeds. The seeds from 4 sugar pumpkins were all eaten before 36 hours. And the bowl of guts, I tossed all that into my Instant Pot.

Also tossed into my pot were a couple sprigs of dried rosemary and sage, my freezer vegetable scraps (parsley and cilantro stems, onion and garlic skins), and I had some green (spring) onions that lost their freshness.

Word of Caution: skip the green onions! They caused a problem and I will come back to that in just a minute.

After I filled my pot up to its max line, I ran the pressure cooker for 3 hours.

Was the time a bit excessive? Probably. Recipes range from 15-40 minutes pressure cooking time. But here’s the issue I have always had with store bought vegetable stock (or even for restaurant vegetable stock) is that broth is bland and adds nothing to the soup. So I chose the long cook time to extract all the flavor I could out of the vegetables. And anyone talking about cooking vegetables too long, the only concern is your vegetables breaking down, becoming mush and all the nutrients wasting away into the water. So feel free to go light on time or extract away.

Once time was up, I fell in love with the rich brown stock. It was so beautiful!

And then the flavor….

I have never tasted anything so bitter in my entire life. I’m being completely honest with you that this was entirely worthy of tossing down the sink drain. (Stick with me because I did resuscitate life back into this complete failure.)

What Caused the Bitterness?

After I put the broth away for the night, I did some research. The focus of my search was on all the foodie and culinary sites to find out how all the professionals fix bitter dishes.

First I drew personal comfort that all my instincts had kicked in, because I did use the professional tricks to save the vegetable stock.

It wasn’t until I came to one of the final site pages that I finally got the answer to my question–What Caused the Bitter?

Green Vegetables!

Green vegetables are the culprit behind bitterness taking over a dish. And that’s what killed it for me in this particular instance. I did use the same amount of parsley and cilantro that I use in my Chicken Stock. But on top of my usual I added the rosemary and sage. And the ingredient that signed the death certificate was the green onions.

Why do I share my failure with you?

Why not?

While I’m teaching others in the kitchen, I’ve had a few people who felt conscientious about always making mistakes in the kitchen. And I tell them every time, “I’d rather you make mistakes in this space, rather than make them alone at home. Here I can help you. And if I don’t know the answers, I know where to find them and I’ll get back to you.”

I grew up making mistakes in the kitchen. My dad helped me through the mistakes. And I also know the feeling of making mistakes alone in the kitchen. Can you pull yourself out of those alone mistakes? Definitely! But there is a huge amount of comfort knowing that you have no judgment help. The no judgment help may let you make your mistakes, knowing you can pull yourself out of it. Or they can help you by giving you a heads up.

Sometimes the kitchen mistakes teach you skills that you may or may not ever learn.

So yes! I firmly believe that it’s okay to make mistakes in the kitchen. And I have no shame in making them myself. It’s one more bit of information I get to pass on to others. Like in the instance of talking someone through vegetable stock, I can now tell them ahead of time to be stingy with the greens that you add. Because if you choose to be generous, be prepared to combat bitterness.

Advertisements

How did I save this Vegetable Stock?

The short answer is that I raided my generously supplied spice cupboard!

Even though it wasn’t the natural first choice, I grabbed salt first. When I tell you that the bitterness was strong, it’s a massive understatement. There was no flavor other than bitter. No pumpkin, no rosemary, no cilantro…absolutely NOTHING but bitterness.

If you’ve listened to enough cooking shows, you will always hear the professionals tell the contestants, “Use salt! It draws our and enhances the flavor.”

And it is absolutely true!

I went from tasting nothing but bitter to actually tasting some minor notes of the vegetables.

There is always the possibility of creating a salt bomb, which is a death knoll you can’t come back from. So while I was liberal with the salt, I did show restraint and moved on to a new trick.

Next I wanted to add some sweetness. But I wanted to avoid sugar if possible. My butternut squash and mushroom (umami flavor profile that acts very similar to countering with salt) powders were what I grabbed next. Butternut squash is my “seasoning” of choice when I want to add sweet without adding sugar. Unfortunately the squash could only help so much. It wasn’t nearly enough to counter to the bitter. So I did add a conservative measure of sugar. And in this level of face smashing bitterness, you are definitely going to need to add some sugar. There was a world of difference even with the little that I added.

Advertisements

Still this was not enough.

What is another cooking trick to lift hidden flavors to the forefront? Acid.

I’m sure you’ve seen shows, such as Chef Ramsey, where the chef always advised and praises lemon juice for lifting dishes to a new level. This is also true!

Normally I don’t keep lemon in my kitchen because I usually always lose citric produce when it’s only there for cooking. For that reason, I keep food grade citric acid in my pantry. You sprinkle in a little citric acid and you have the lemon lift without having to toss rotten lemons.

So I added 1 tsp. of citric acid in the nearly 2 gallons of vegetable stock. I tell you this measurement because I want you to know that you really need to use citric acid sparingly because it is much stronger than squeezing a lemon in your stock. So please be careful with this ingredient.

The good news is that I came to a stopping point for salvaging this vegetable stock. The bitterness went from being the only flavor to being a minor flavor that could be overlooked. When I had my husband try the stock, he had no clue that I had an issue with bitterness. In fact, he said he didn’t taste bitter. He thought my rosemary was a touch too strong–but that’s another correction I need to fix before I go public with a legit recipe for pumpkin gut vegetable stock.

Advertisements

Another piece of good news… this vegetable stock is by no means boring or bland. In fact, it’s quite complex and I still want to tweak this one when I go and crack my pressure canned stock for a future dish. If it’s fish or chicken based, I’ll leave the citric forward flavor as is. But if I go to make a sauce with it for my mushroom pasta or pumpkin ravioli, I might have to add some more salt to touch down that citric acid a bit.

Moving forward….

Limit the amount of greens you add to your vegetable stock LOL! (I hope you’re laughing with me, because I’ve now come to the place where I can laugh about this kitchen mistake. And it could be great to hear some friendly laughs with this story telling too.)

I have enough pumpkins to gut and have two more tries to making a pumpkin gut vegetable broth that is palatable and shareable for next year’s pumpkin harvest.

Don’t be afraid to try new things and embrace the things that go wrong. If it’s not charred and burnt beyond recognition, there is the possibility you can bring your dish back from the grave.

OR

Maybe you have a stack of recipes that sounded good but were just too bland. Using the above chart for how to tweak flavors can give life to a bland and otherwise forgettable dish into something you want to cook again.

Advertisements

Let me know your thoughts below!

Feel free to share your own kitchen mistake stories below. Or even more importantly, share your favorite anything pumpkin recipe. I’m a pumpkin pie junkie that has been branching out into other pumpkin areas. I’d love to hear what you have up your pumpkin sleeve.

Processing…
Success! You're on the list.

2 responses to “A Touch Bitter?”

  1. Make Your Own Bullion – How I Can Do That Avatar

    […] because you’re not extracting marrow that you can get by with less time. Check out my post A Touch Bitter? where I specifically talk about vegetable […]

    Like

  2. 608 Avatar

    My brother recommended I might like thi website.
    He used to bee entfirely right. This submt actually mawde my day.

    You cann not consider simply how a lot time I haad spent foor thjs information! Thank you!

    Like

Leave a comment

Relish for the Non Pickle People!

This was one wild ride for the growing season for my little garden this year. Here in the Pacific Northwest we had absolutely no spring, just an extended winter until June.

Normally we can start planting things as early as April. Most home gardeners wait until Mother’s Day to plant starts out into the garden. May is when all surprise freezes are no longer a possibility. So you can imagine the thoughts running through my head when halfway through June we still hadn’t broke past the 60’s. I even planted double my usual tomatoes because it looked like the grow season was going to be that far off of the norm and we were not going to get as many tomatoes.

Hope returned when August showed summer in all its gardening glory and continued through September. Usually September is our Indian summer. But the beautiful weather continued all the way through October. Actually traditionally cool and rainy October kicked in that last week.

All this time I left my tomatoes going. There were so many green tomatoes and I hoped beyond hoped that they would turn red on the vine before we lost our extended summer.

This first week of November was when I had to pull the plug. And that meant I had somewhere around 6-7 quarts of green tomatoes–hands down the most green tomatoes that I’ve ever had to figure out what I was going to do with them. Mind you, I didn’t grow up where fried green tomatoes or green tomato sandwiches were common place. I know of these things, but they were never part of my childhood diet.

Looking up green tomato recipes, there was one that stood out–Green Tomato Relish.

I am not a pickle person. That’s story for another time. But I married a pickle person (who by chance isn’t a tomato person…and I am!) who loves pickles and especially relish. I figured that I would can some green tomato relish for him so that he had some homemade condiments that were right up his alley.

From what I found time and again with green tomato relish recipes is that it’s comparable to pickle relish and several people commented about how they preferred it over pickle relish. That caught my curiosity!

As I began to read through several different recipes I saw most of them were very similar in ingredients to fresh salsa. I love salsa!

Then the thought hit me that maybe, just maybe there is a relish in the world that a non-pickle person would like. (And when I say I don’t like pickles, I mean that I can pick pickles off a restaurant burger and taste exactly where they were place on the patty just by the residual brine that was left behind.)

I used this video from OurHalfAcreHomestead, Green Tomato Relish 2018. Besides the fact that I had nearly all the ingredients in my kitchen already, the huge selling point for me is that Miss Volfie is my kind of woman! The way that she cooks is how I cook (you make things so frequently that you go off of the recipe in your head). It was how I was taught to cook and how my dad was taught to cook. So this cooking technique automatically flips a switch in my head that starts the fanfare that this woman knows what she’s talking about. She’s not after the fame and money but honestly passing on what she knows best.

I highly recommend that you watch the video. But in the case that you just want the recipe and steps without the talk, here it is.

Green Tomato Relish

Miss Volfie’s batch is broken down to this ratio:

  • 2 Cups Green Tomatoes
  • 2 Cups Onions
  • 1 Cup other Vegetable (Sweet Bell Pepper in this instance)

I love this ratio because it’s easy to make you “batch” based off of the amount of green tomatoes that you have. No need to be short or waste what you have on hand. Your green tomatoes are literally your limiting factor.

(This is the measurements that were used for a triple batch)

  1. Mince your Tomatoes, Onions, and Bell Peppers
  2. Sprinkles about 2 Tbsp of salt over your vegetables and let the salt extract the water from the vegetables over night.
  3. (Next Day) Prep your jars for water bath canning your relish.
  4. Add your vegetables to a colander.
  5. Rinse the excess salt off your vegetables and drain them off.
  6. In your stock pot add the following seasonings: *2 cups sugar, *2 cups cider vinegar, 2 tsp salt, 1 tsp mustard powder, 1 tsp celery seed, fresh cracked pepper.
  7. Bring to a boil.
  8. Bottle and put in water bath canner.
  9. Process for 10 minutes.
  10. Cool

Modifications and Verification of Safe Canning

I’ve been teaching some safe canning classes for people who want to learn this skill for the first time. I’m also part of a few communities where I see the debate of safe and not safe recipes more often than I care to admit. Most arguments seem to be around processing times. So if you are a higher elevation, 10 minute processing time is not going to be enough. If you are a low elevation, I only need to process the tomatoes for 5 minutes.

When in doubt, always be mindful of your elevation and go to a trusted source for processing times.

For example, I wanted to verify if this recipe was a safe recipe or just a family recipe that hasn’t changed with updated food safety research. Other than processing time, the other important bit of information to verify is the acidity (the ratio of tomatoes to other ingredients and the added vinegar).

I found a very similar recipe at the National Center for Home Food Preservation (NCHFP), Pickled Green Tomato Relish. The most notable difference between these two recipes is that the NCHFP actually lists cornstarch as an ingredient. Flour and cornstarch are on the list for things not to add to recipes for home canning (with the exception of Clear Gel, which is a modified cornstarch that was created for canning–but this isn’t what’s listed in this recipe).

Cornstarch is a thickening agent. And from my experience in the kitchen I can only assume that the cornstarch was listed in this recipe to thicken the relish juice. Even though the NCHFP is a trusted source for safe canning practices, this is one instance where I am NOT comfortable in following their recipe.

Nobody likes a soupy relish, so here’s how I made my modification. Safe canning means that a certain amount of 5% acid (vinegar) needs to be added to counter the water content of the recipe. Miss Volfie did strain her vegetables, but there was obviously going to be a bit of water content still left–her vegetables were sitting in their juices over night and I think there was a shake in her straining before she potted her vegetables.

With my colander, I added a muslin cloth inside before adding my vegetables. I rinse and strained them. Then I picked up the muslin and compress strained the excess water out of the vegetables. There were several cups of water that I extracted out of my vegetables that would have been otherwise added, thus diluting the 5% Apple Cider Vinegar to a lower acid percentage.

Because I did extract the extra water from my vegetables, an additional step not taken by Miss Volfie or the NCHFP, I had no problem in following Miss Volfie’s lead in slightly reducing the vinegar and sugar volume. (My tomatoes were enough for a 7 batch and I added 4 cups of vinegar–slightly more vegetable weight than the NCHFP recipe, the same vinegar measurement, plus less water content from the straining step, and minus the cornstarch for thickening.)

Now I do agree with the NCHFP for simmering for 5 minutes once the relish comes to a boil. Some people will say 10-20 minutes, but the goal is to get the relish up to a hot temperature so that the center of your jar reaches proper temperature while processing. So I did modify Miss Volfie’s recipe by simmering those extra few minutes.

Advertisements

Here’s the walking away point.

Understand what the science is saying about processing your food for preservation. Food preservation is not just packaging to put food on your shelf. There is microscopic life that we share our world and food with. Safe canning isn’t about being a kill joy. It’s about understanding the world we live in and the food we share with other life forms. It’s about understanding how to create an environment, inside our food, that prevents these bacteria from taking over and leaving us with their food waste that makes us sick.

So look for those recipes that interest you. Check and verify those recipes with the people who spend their occupational lives studying in this area. Are they going to be right? Yes. And sometimes they do something that’s questionable. Go by what you know and at the same time get up to date on new information that’s found. Make your judgments based off of what risks you are comfortable with. And be prepared to answer and describe your thought process.

Advertisements

Now the Fun Part… how did it turn out???

My pickle loving husband couldn’t wait to try what I made, thinking of him. In fact, while I was cooking the relish to jar up, he has already planned out that we were going to have burgers. Let’s face it, my man adds so much relish that you think a burger bleeds relish!

Off he went to the store to pick up ground beef. But he returned with fish sticks because our 6 year old went to the store with him and they decided that the best price by weight was fish over beef. (The things and decisions that come from my family LOL.)

Once the relish was finished processing (one jar was not up to proper head space, but I still processed it so I would know how the vegetable texture would come out and the blend of flavors) I popped open the not-safe jar and taste tested the Green Tomato Relish.

First Impression–It’s not pickle tasting. That’s a win.

Second Impression–It doesn’t fresh or cooked salsa. The Apple Cider Vinegar adds a tartness that just isn’t present in a salsa. That’s a pass.

Can I eat this? Yes.

Will I go out of my way to eat this? Probably not.

What about my pickle loving husband? Will he be okay if we move forward in our married life with this relish and not buy store bought pickle relish again in the future? Maybe. I didn’t ask him that specific question.

However, I did ask him what he thought. He said it tasted good and he ruminated on the flavors going on in his mouth. He said next time he would probably add more vinegar.

So the next time that I make this recipe I won’t go light on the sugar and vinegar ratio to keep the relish less soupy. I’m not in love with this recipe enough to put my foot down and claim it as a favorite and it has to be this way because I’m making it for me. I’m still making this for my husband. So I’ll add the vinegar next time to see if it has a better flavor to him.

That being said… THIS IS WHAT I ABSOLUTELY LOVE ABOUT THIS RECIPE!

You remember that I said that my husband came home with fish?

I took this tomato relish and mixed it with mayonnaise to make a homemade tartar sauce. (Yes, this pickle hater is a tartar sauce snob. Yes, I’m aware it has pickles in it. And this is the exception to the rule of my hate for pickles.) This was by far the BEST tartar sauce that I have ever had. It was just the right combination of sour to creamy to crunchy ratio!

My husband and I do agree on one thing pickle related…the best tartar sauce. We both grew up eating fish from the Skipper’s chain of seafood restaurants. They had the world’s best tartar sauce. And when the chain shut down and we were no longer able to buy fish from them, we had a massive hole in our hearts for what tartar sauce to buy for when we cook fish at home. NONE of the brands in the grocery store came close to our favorite.

THIS homemade tartar sauce is NOW MY NEW FAVORITE! This Green Tomato Relish with just some mayonnaise is all we need to have the happy happy love love all over again for tartar sauce. And let’s just say that I laughed when my husband gave me the face for taking the last of the homemade sauce. He took the jar of whatever was in the fridge and made a gagging sound when he tasted it. Funnier still he searched the jar for the pull date to see if it had gone bad. Nope… it was still “good”. But it’s no longer consumable now that we have our replacement tartar sauce.

Advertisements

For My Fellow Pickle Haters…

Should you make Green Tomato Relish?

If you have a pickle lover that you life with, then yes! Kissing them after they eat Green Tomato Relish, you’re not going to gag over that pickle aftertaste.

If you happen to want a fish or seafood condiment that you will actually eat, definitely!

This recipe is far enough removed from the dreaded pickle that you can appreciate this recipe.

Even if you are not a relish condiment consumer, this recipe is worth having on your shelf or in your fridge. You can make your own tartar sauce. Of I recently fell in love with German Pickle Soup. I had no intention of ever making it, but was willing to order it at my local Bavarian restaurant. NOW, I will most definitely search out a pickle soup recipe that I can substitute out the pickles for this green tomato recipe.


I hope you make this recipe. When you do, please comment below and let me know what you think.

If you’re a pickle hater and have concerns about a specific flavor profile, ask all your questions below in the be comments and I’ll let you know my opinion.

Processing…
Success! You're on the list.

Leave a comment