Make a Reusable Food Wrap

This past week I just had my application to a local Maker’s Market accepted. (If you’re unfamiliar with Maker’s Markets, think Farmer’s Market with a little more lean toward the things that you make.) One of the products that are on my list to sell is reusable beeswax wraps.

I’m super excited to present this item, not just at the market but also here because this is a traditional item that was used before the convenience of plastic that will it doubt come into popularity again.

There are so many reasons why you might be interested in how to bring a reusable wrap into your home. Maybe you’re budget is tight and $5-20 saved in a grocery trip means something to you. Or your family could be one who is looking to reduce the amount of plastics that are used and thrown away in your home. Perhaps you or a loved one is facing a health moment that requires you to reduce the amount of chemicals that are used in your home. Or maybe there is another reason that stands out in your mind.

Beeswax reusable wraps can meet those needs and many others because it’s made from very few ingredients; 100% cotton or linen cloth and beeswax are the two items that you have to have to make this. I also include pine resin (for additional tackiness) and jojoba oil (for flexibility that prevents the wax from cracking)

Originally I wanted to make these wraps for my family because half of our glass bowls do not have lids. And all of our lid bowls always seem to be in use and unavailable when we need something with a lid. So I have more usable bowls, but I can also meet other needs in my kitchen: my homemade bread won’t dry out on the cut end, less chemicals are being transferred into our left over foods, takes up less space than Tupperware, and easy enough that my kids can use them.

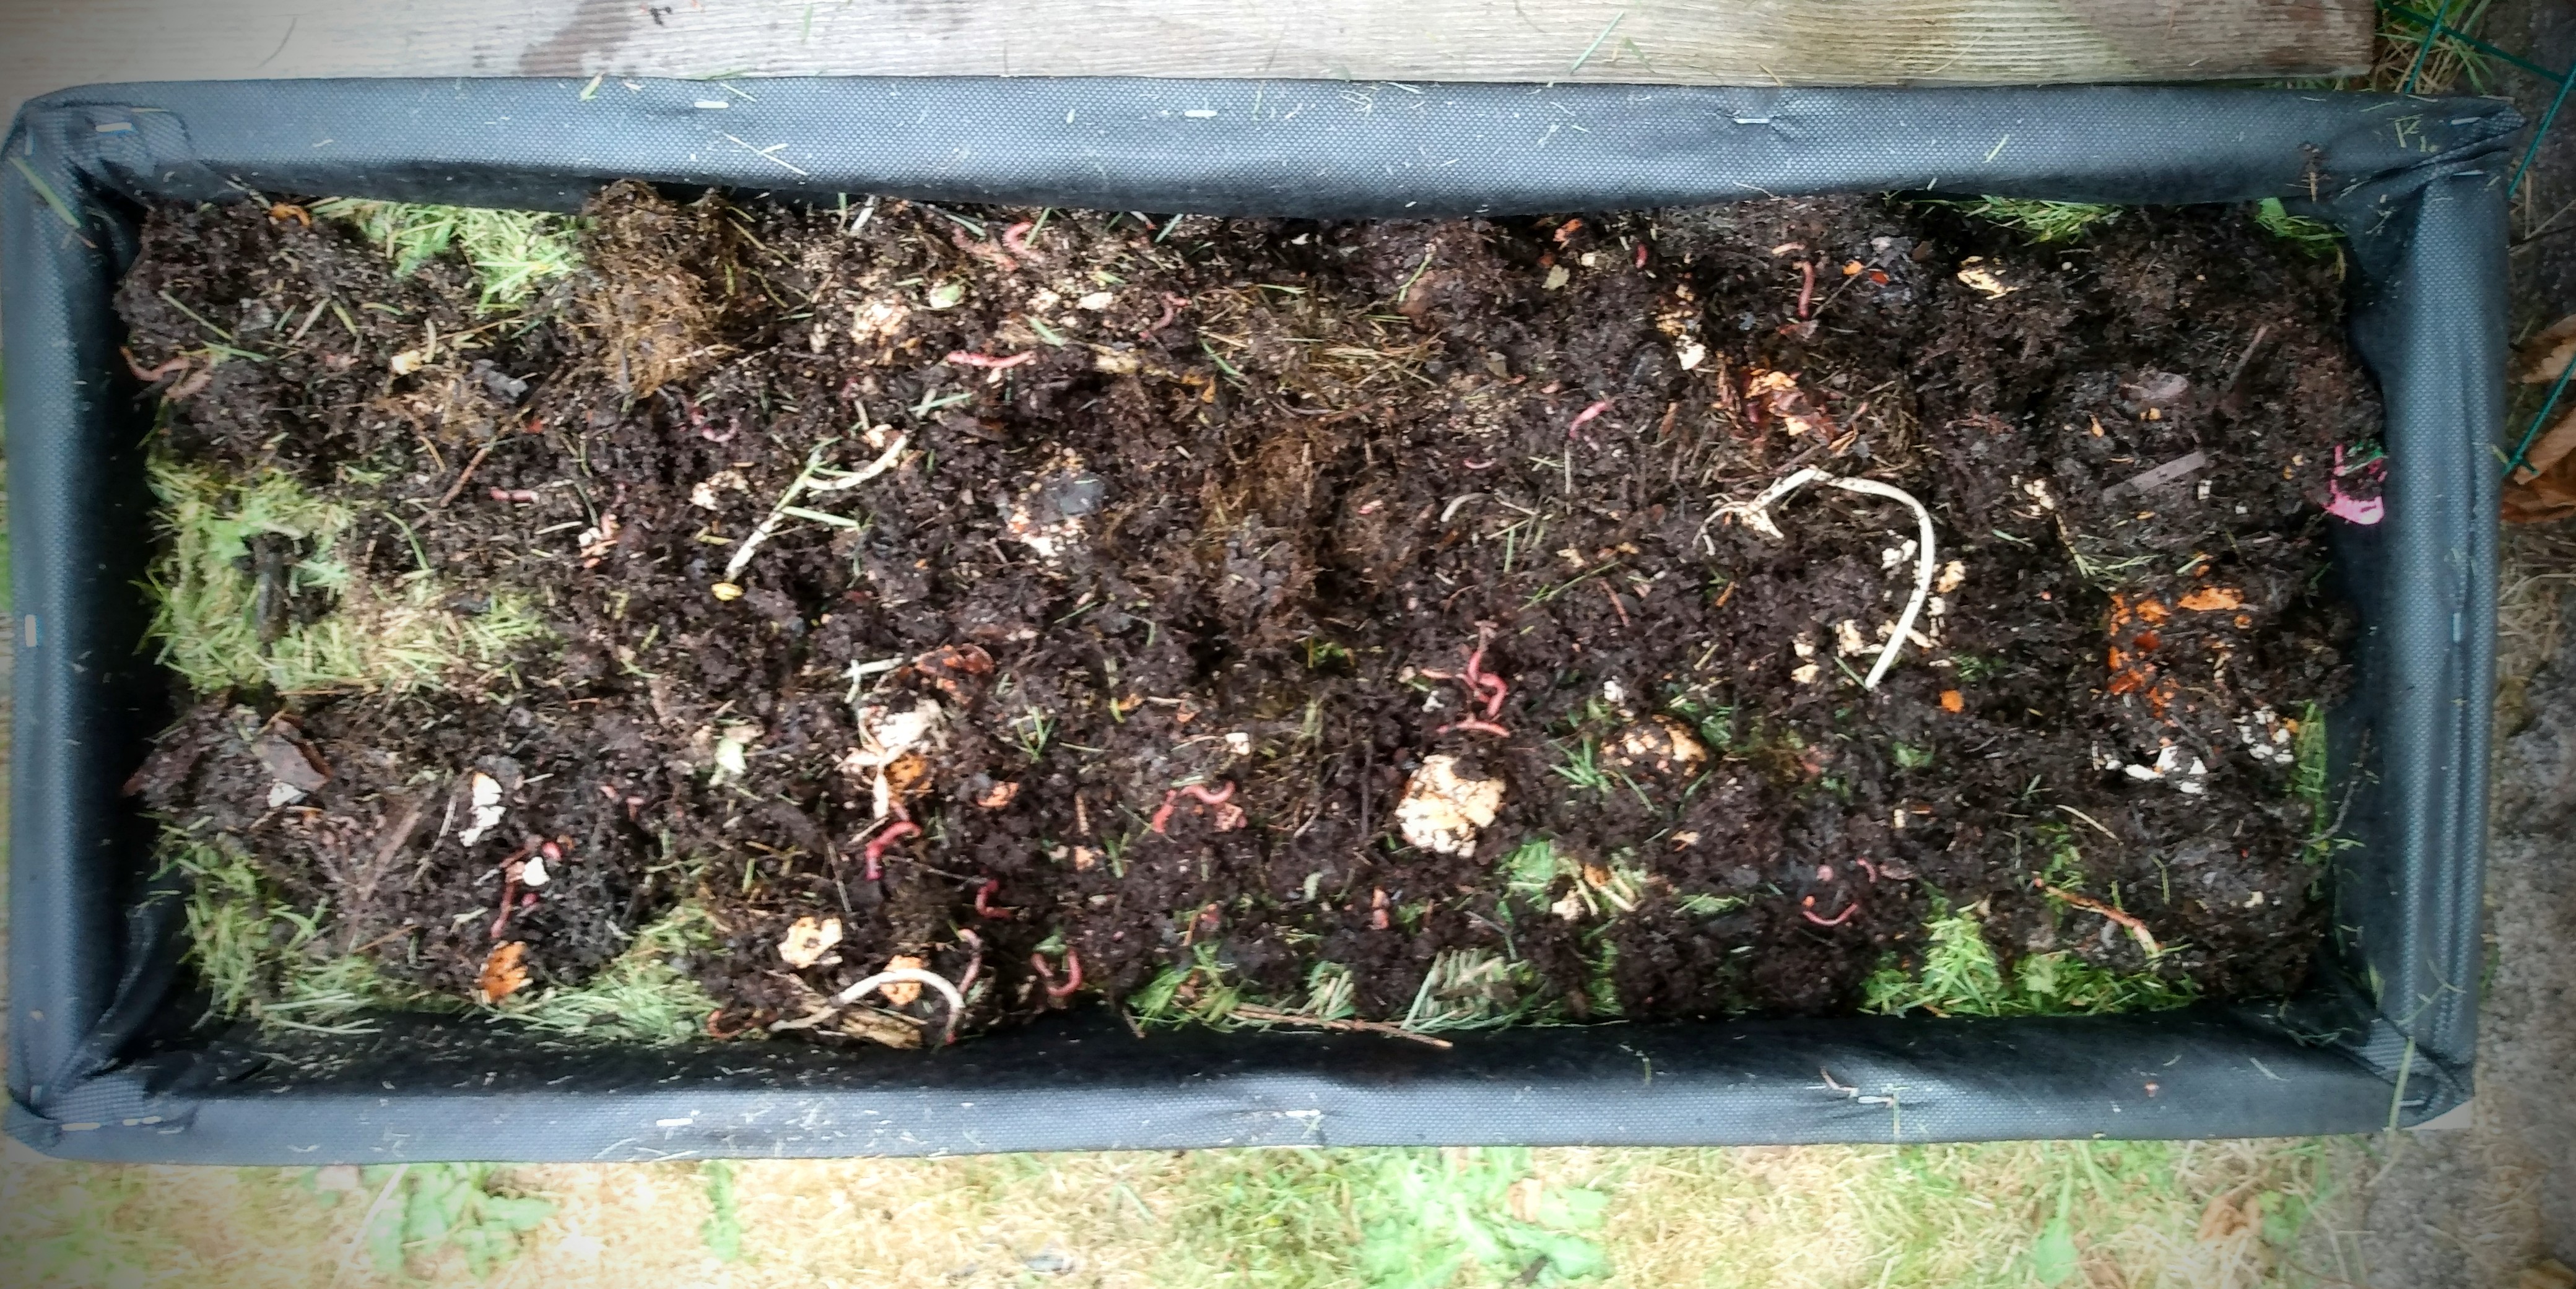
While listening to others who’ve been making these for years, I learned about a few other beneficial features. When the wax wears thin, these wraps have not met the end of their life. You can reapply the wax (or wax/resin/oil combo) and 5e wraps are just like new. But if the cloth itself becomes damaged, the wrap can be composted because there are no synthetic materials that are used.

Advertisements

How to make or revitalize a previously used wrap

There are a few different methods of making these. So please don’t think there is one way. Find a method that works for you and makes sense with the resources that you already have available in your home.

The oven method. You place your cloth on a cooking sheet, with your wax of choice (plain beeswax or a beeswax combo) scattered across the top of the cloth. Your cooking sheet is placed in the oven, around 200 degrees F, until the wax melts. You then use a brush and make sure to spread the hot wax evenly across the cloth.

I did not use this method because none of my cooking sheets have a lip on them. So I would end up having wax in the bottom of my oven. And I didn’t want to buy new cooking sheets just to have them for crafting. I don’t have the space to store them or the money to buy them. So I went with a different method that I already had the resources for.

Advertisements

The water bath method: I used one of my small saucepans and filled it halfway full with water. I pulled out a hot water safe container to put my wax combo in, and then set that inside the saucepan. It took a bit of time for the water bath to melt my beeswax and pine resin, but that step was a success. What didn’t work for me was pouring the wax combo on the cloth or dipping the brush in and brushing the fabric. This method was a fail for me because my brush clotted with the wax as it cooled. There was no way to warm that up to turn it back into a liquid or to clean my brush. I know some homesteaders who love using a brush when making beeswax wraps. I’m not one of those people. But I did try it.

The Ironing method: I’m going to walk you through the steps of this method below. This one takes a few additional manufacturing items to make. But once I was set up I didn’t have to prep anymore. And I kept making wraps until I ran out of one of my ingredients. This is not a zero waste method. However it is the method that minimizes the loss of wax ingredients and is the easiest to clean up.

Prepping for the Iron Method

Before setting up my work table, I needed to get my ingredients ready.

I buy my beeswax from local bee keepers. That means I generally get the wax in a brick form. And whether I’m using the wax for wraps or other products I make, I have to great it down to make the melting process a little quicker.

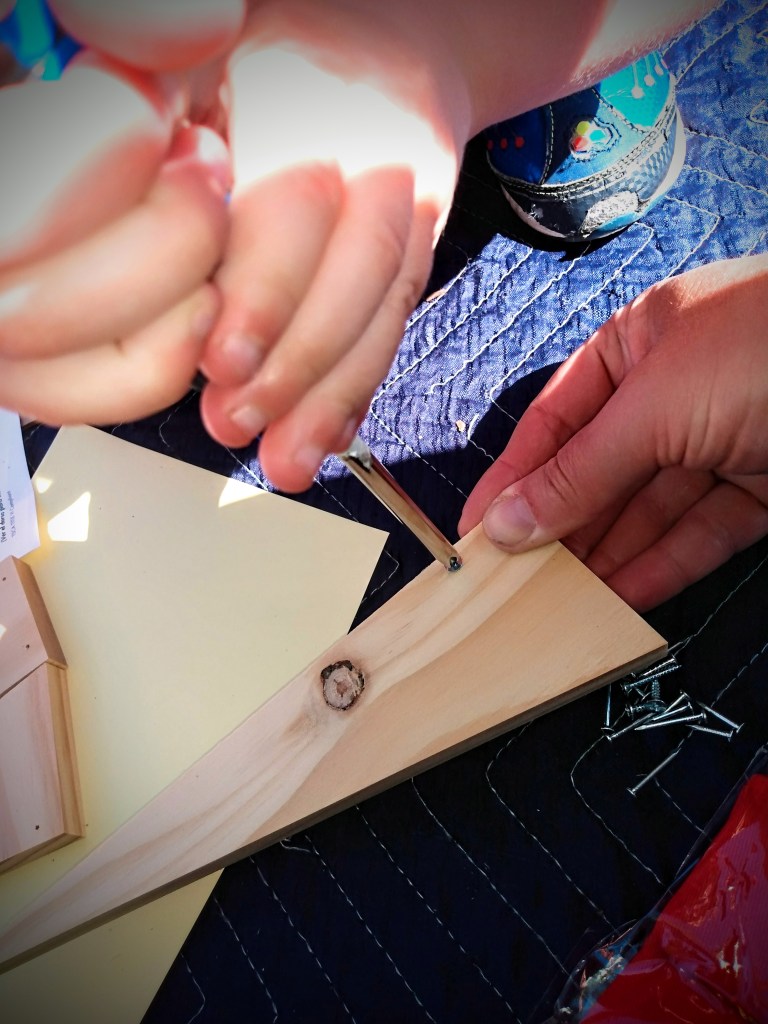
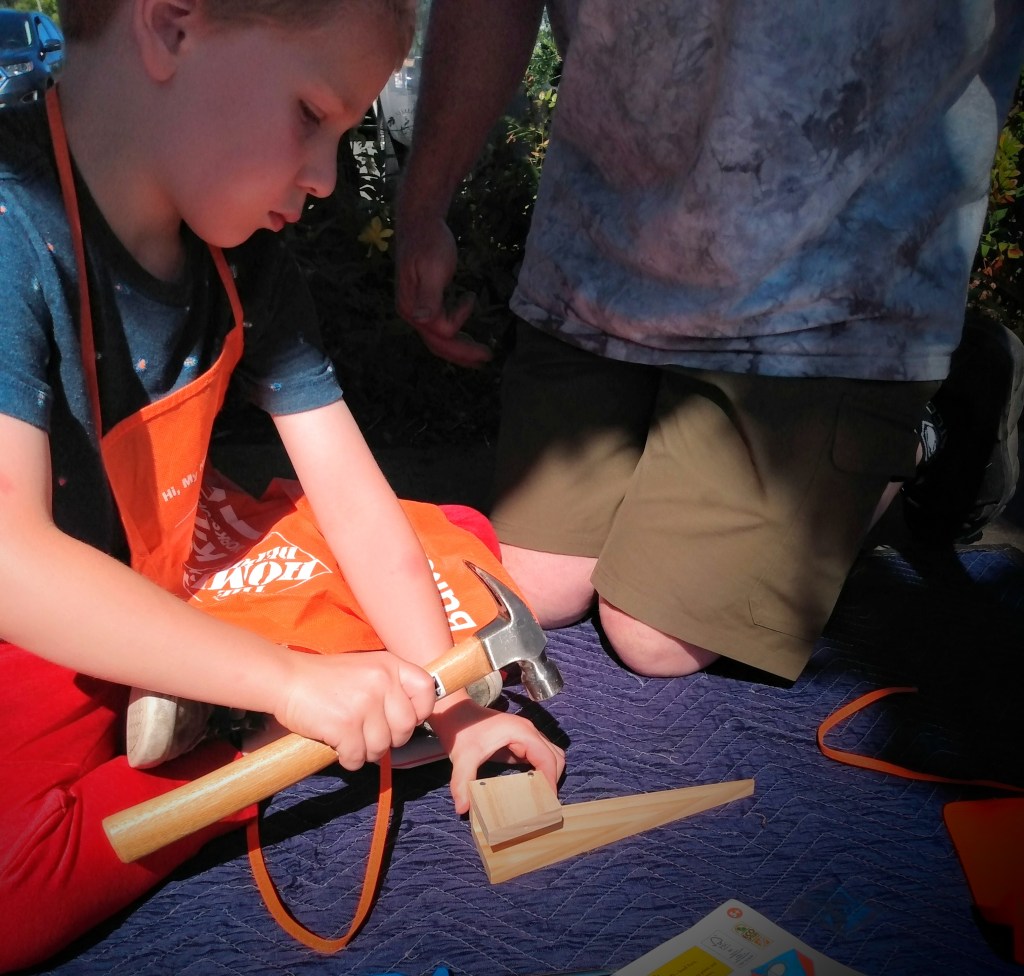
Foraging pine resin is on my to-do list. I have not done that yet. So I purchased pine resin. It arrived in a bag of crystalline chunks. Resin takes a higher heat to melt than beeswax, so I needed to crush the resin to minimize its melt time. The quickest way to do this is put some resin in a paper bag and hit it with a hammer until the resin becomes as small as you want it. (Powder is ideal for this method.)

What I learned when crushing resin— when you hit it properly with a hammer, the resin is going to break through a paper bag. If you use the wood handle you keep the bag pretty much intact, but the resin is let going to turn all the way into a powder. But if you use the side of the hammer (the largest flat surface of the metal portion of the hammer head) you maximize the amount of resin turning into power with very little resin escaping out of a crack in the bag.

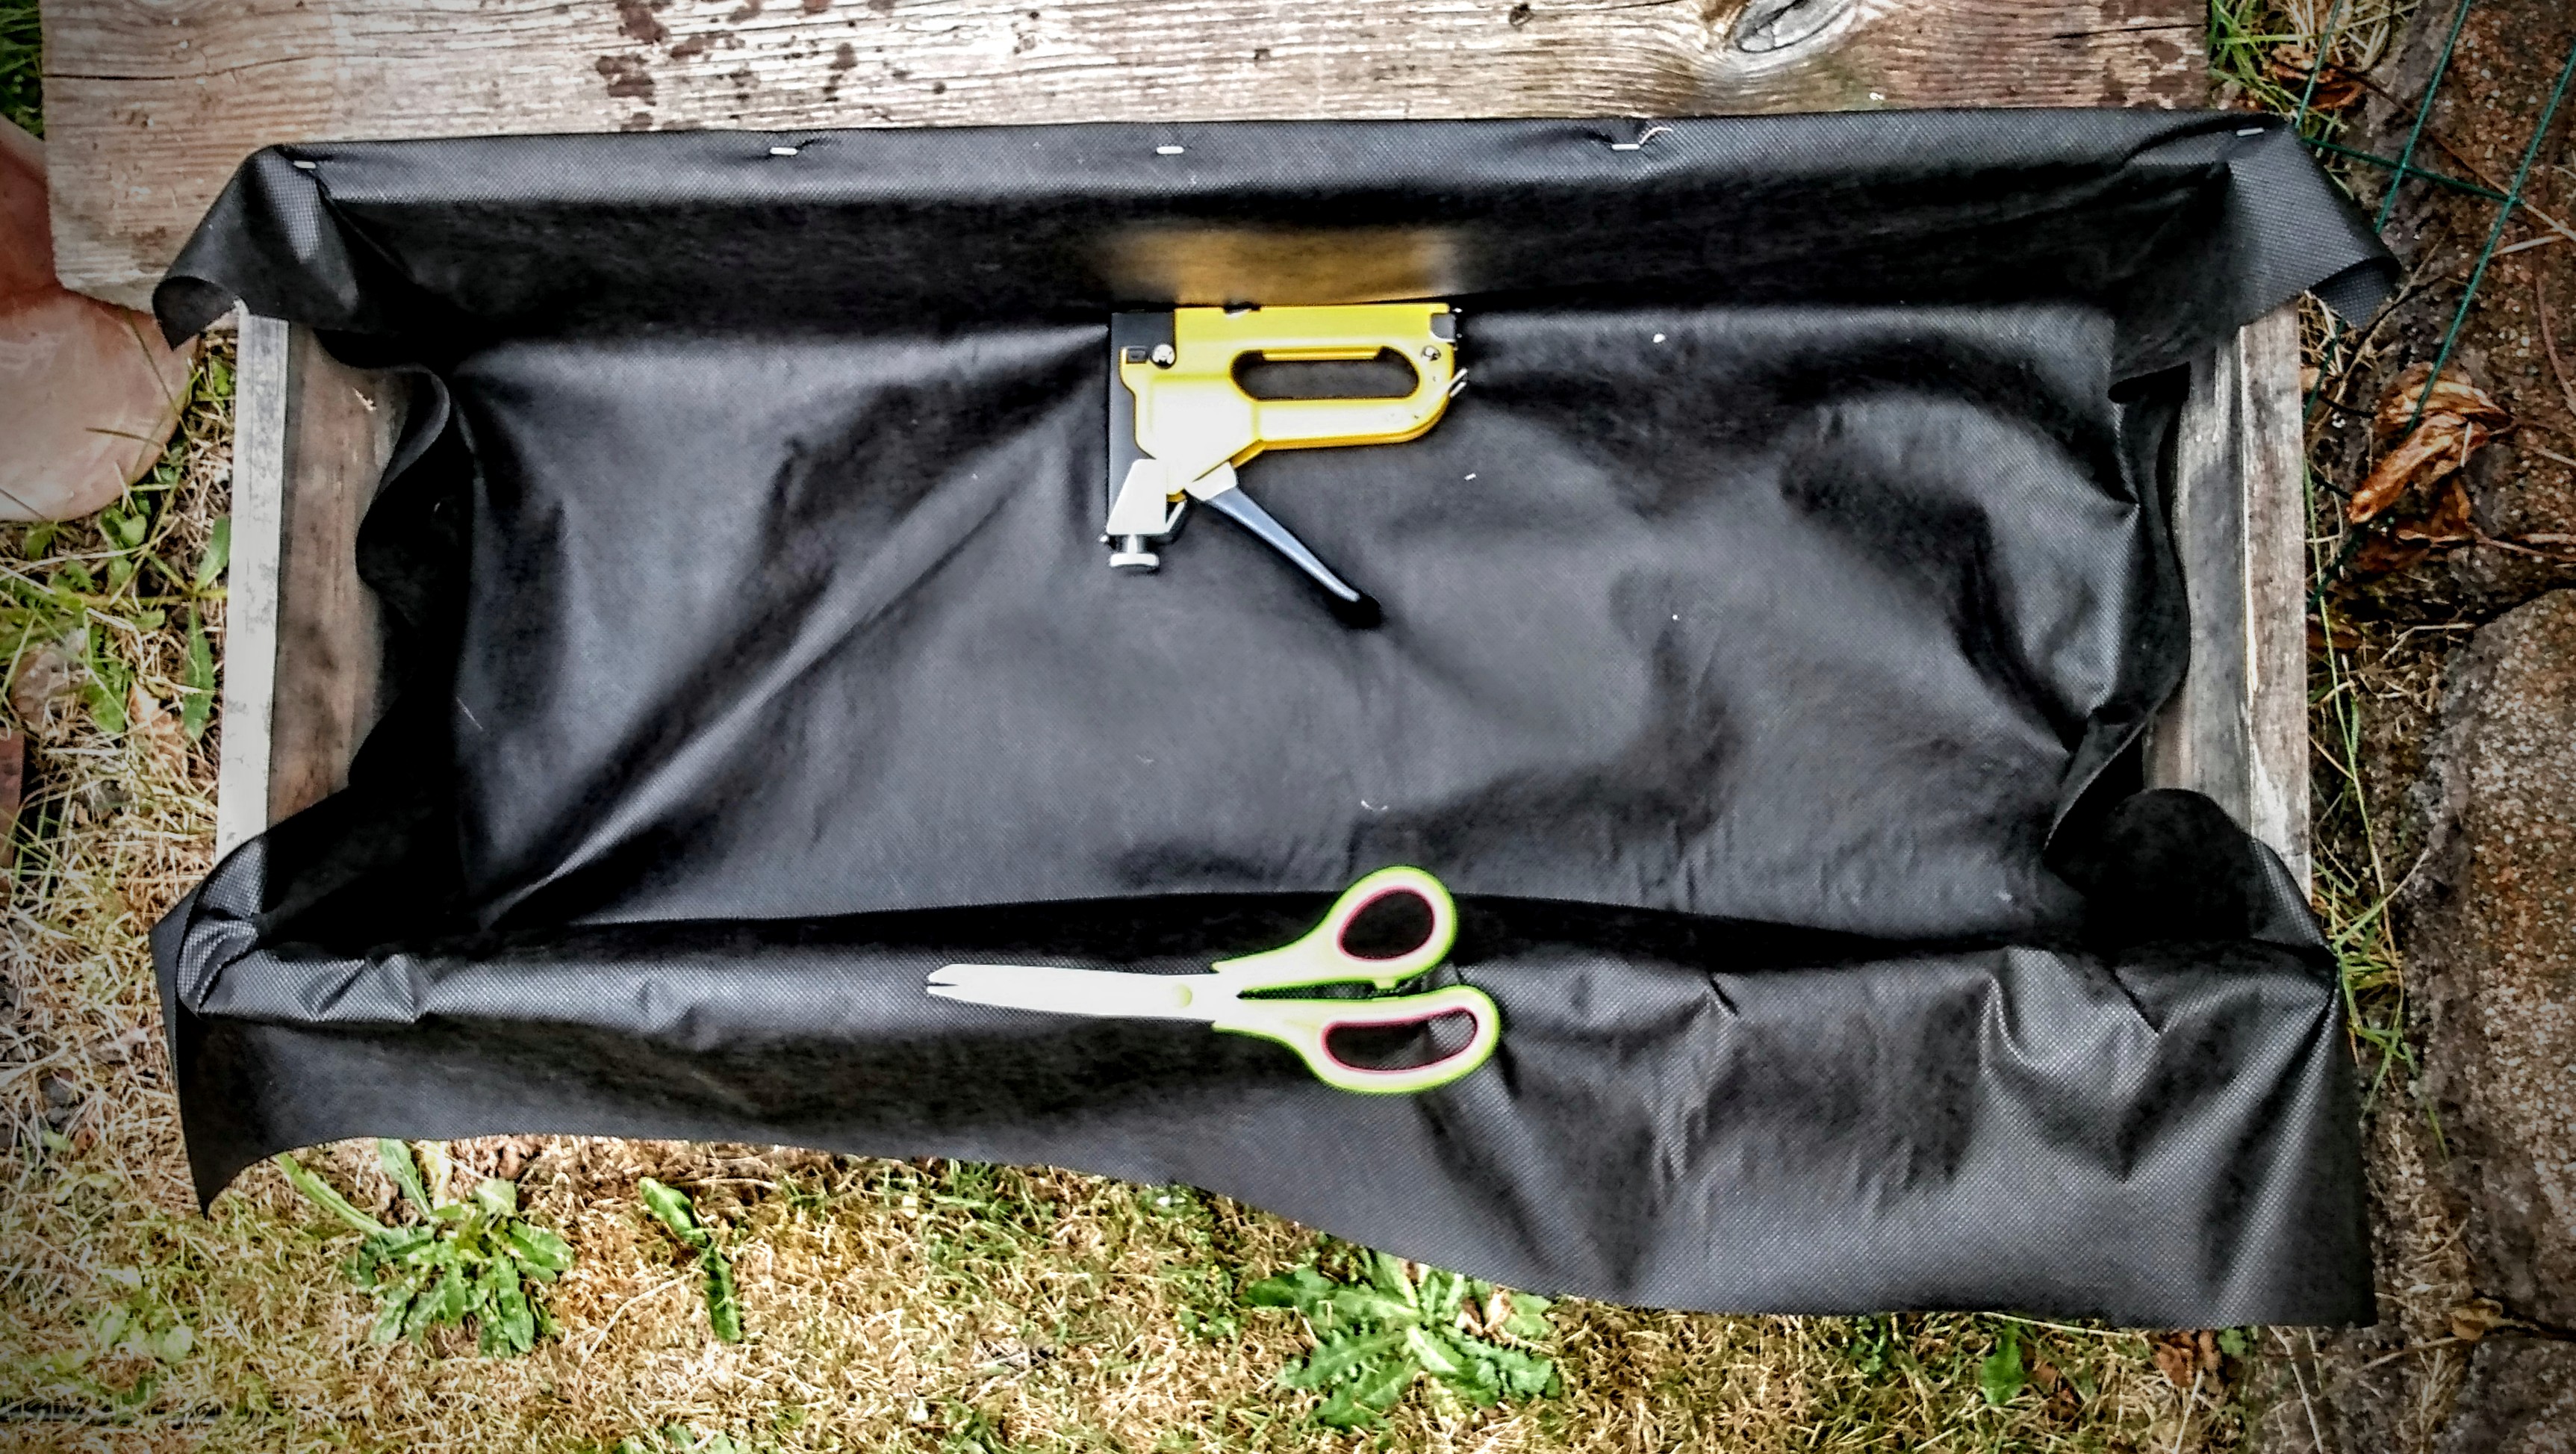
With the ingredients ready to go, the next step is to set up your work station. Half the videos I watched had crafters working on exposed countertops. I DO NOT recommend going that route. The short story is that the wax combo got on my table. Fortunately I have my tricks to lifting wax off of my table. And I will not be doing that again!

So learn from my mistake and find an old towel that you do not mind using for crafting purposes from here on out. Shop rags are amazing for this. I just didn’t have any that were large enough for me to make my Rage wraps on top of. So I decommissioned a towel.

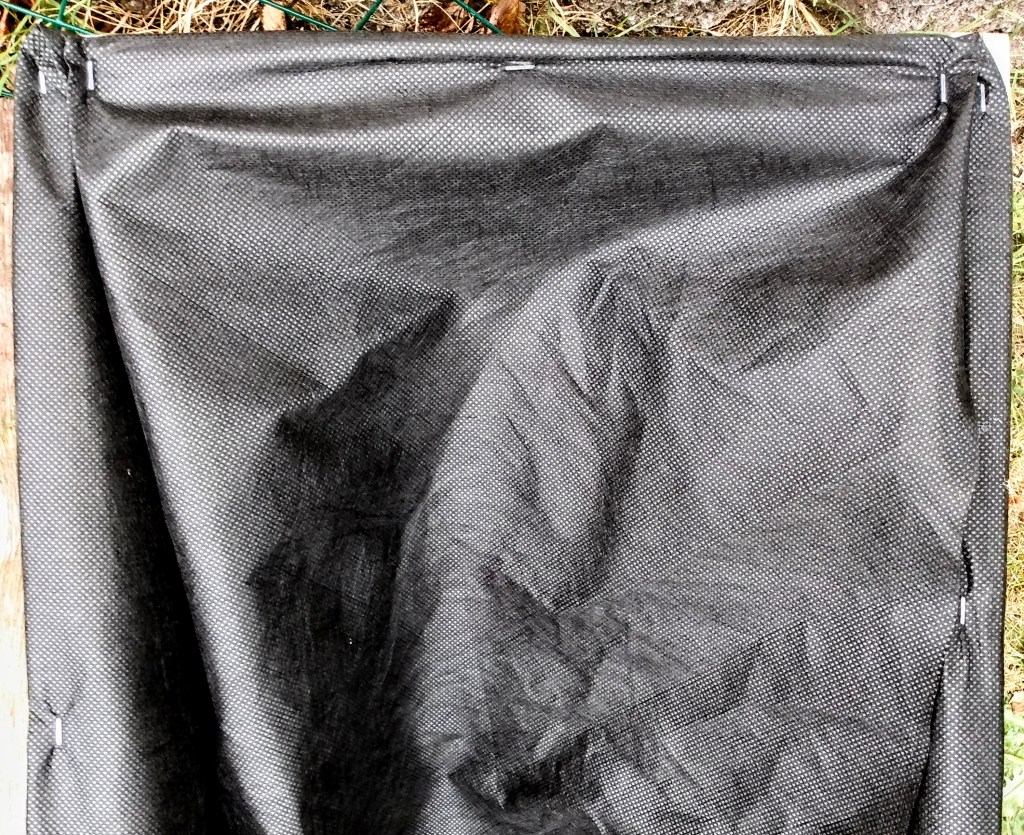
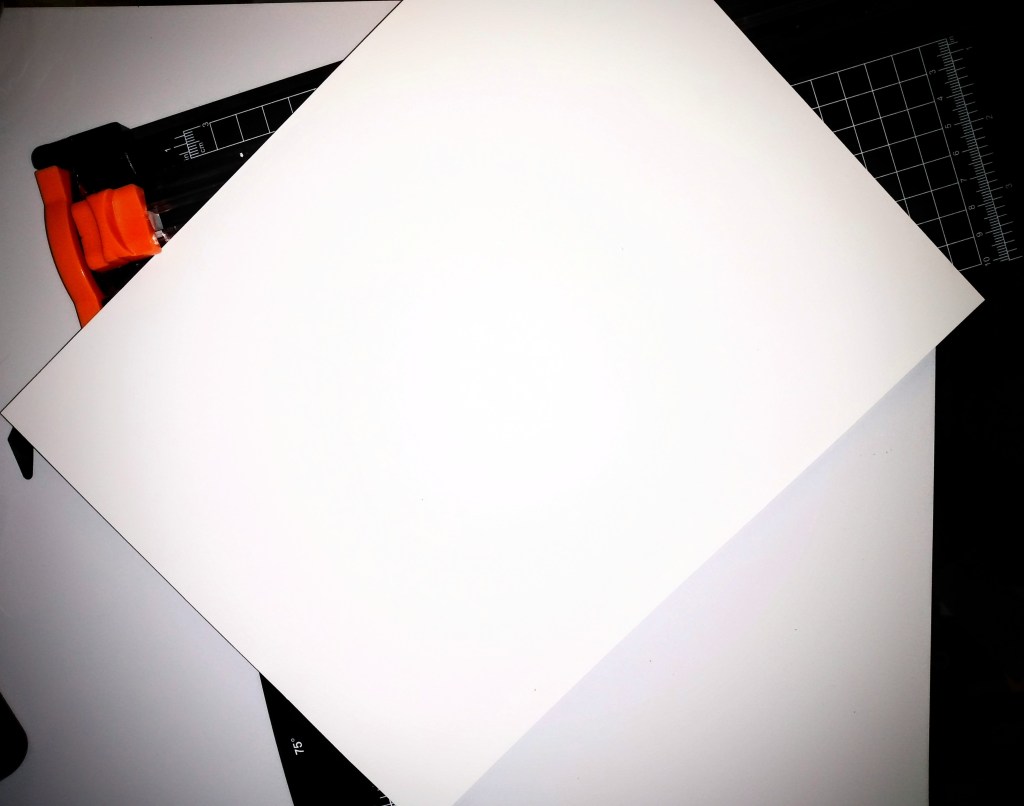
Since I knew I was going to work on my large wraps, I grabbed that size of cloth and set it on my towel. From there I sized out 2 long sheets of parchment paper with a few inches of over hang on all sides. (Your wax is going to spread and needs this buffer to keep the wax off your iron.)

The wax is going to slide through the sheets of parchment. To prevent this I taped my sheets together. This time I used a packing tape. And once I taped the parchment together, I flipped it over so that the tape side was down on the towel.

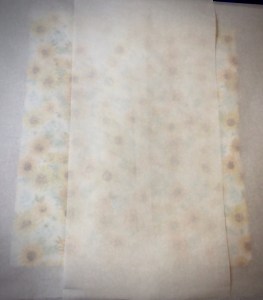
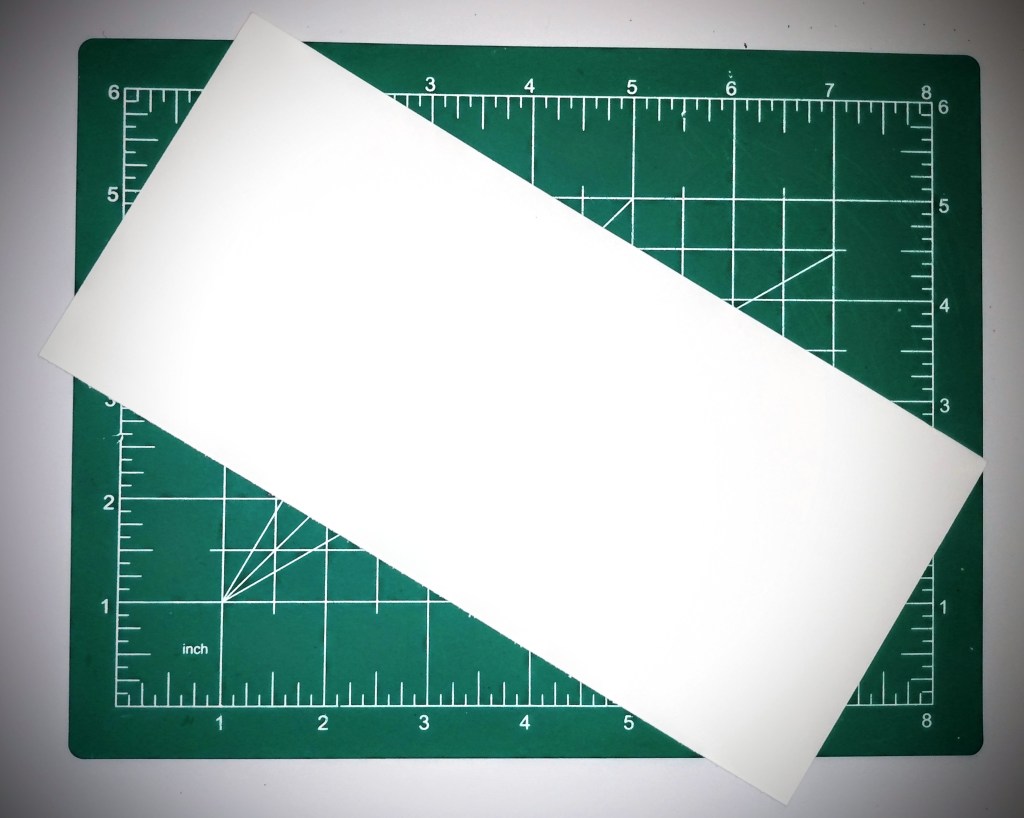
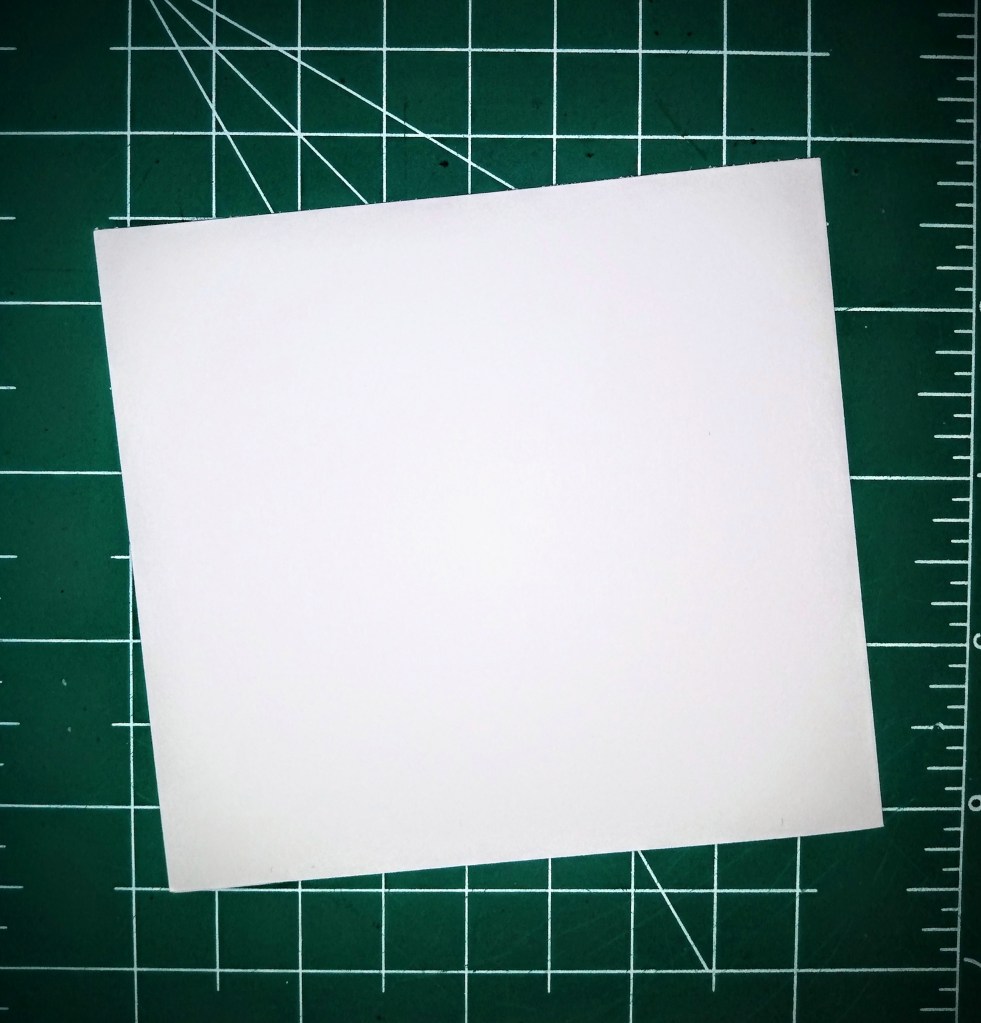
I placed the cloth that I’m making the wrap out of on top of this bottom sheet of parchment. Then I made a second double sheet of parchment to place on top of the fabric. This time I kept the tape side face up. And to keep the iron from melting this tape, I placed one single sheet of parchment over the tape.

Now it’s time to make a wrap!

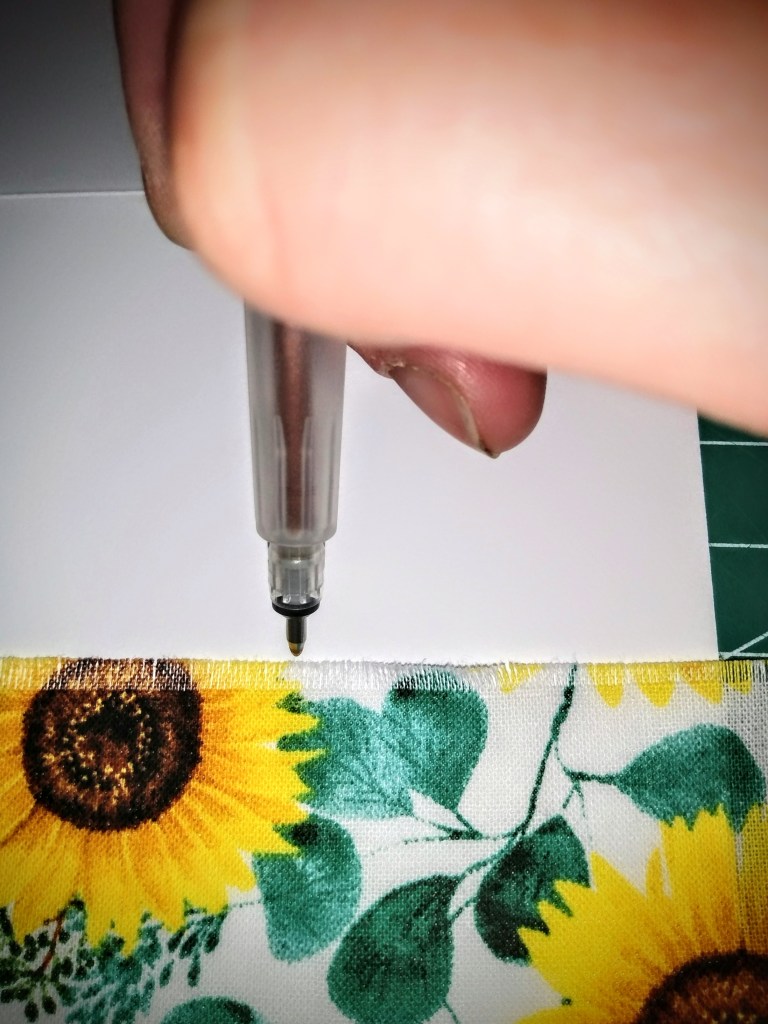
Preheat a clothing iron to the highest/linen setting. Even if you’re working with cotton, don’t be afraid to use the highest setting. The wax, and especially pine resin, needs the heat to turn into a liquid and for you to work quickly.

In a cup I weigh out equal parts of beeswax and pine resin. (If you’re making just beeswax, there’s no need to measure the ingredients unless you figure out the precise amount of wax you need for the size of cloth you’re working with.) Then sprinkle your ingredients all over the face of your cloth.

Cover with the top layer of parchment paper and start to iron.

If you are using resin, and used some small shards instead of all powder, you will want to show patience up front here. Set the iron down on top of the stones and wait while the resin melts. If you immediately glide your iron back and corn, the resin shards are going to rip the parchment and then all the waxes are going to end up on your iron face.

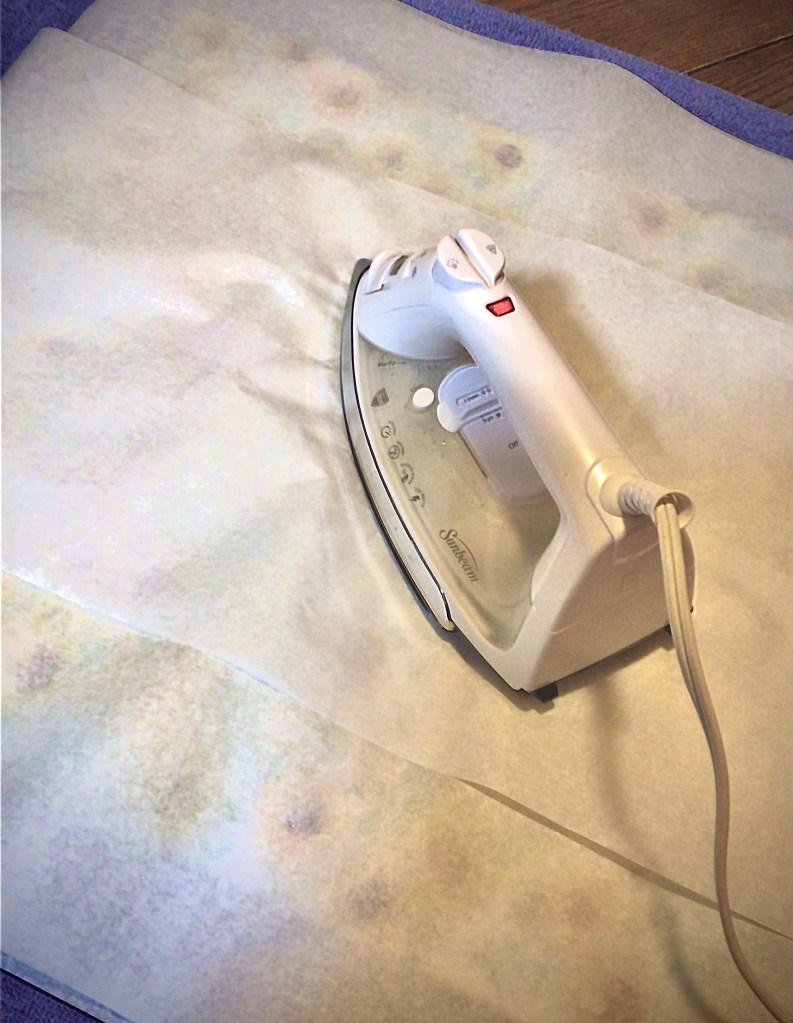
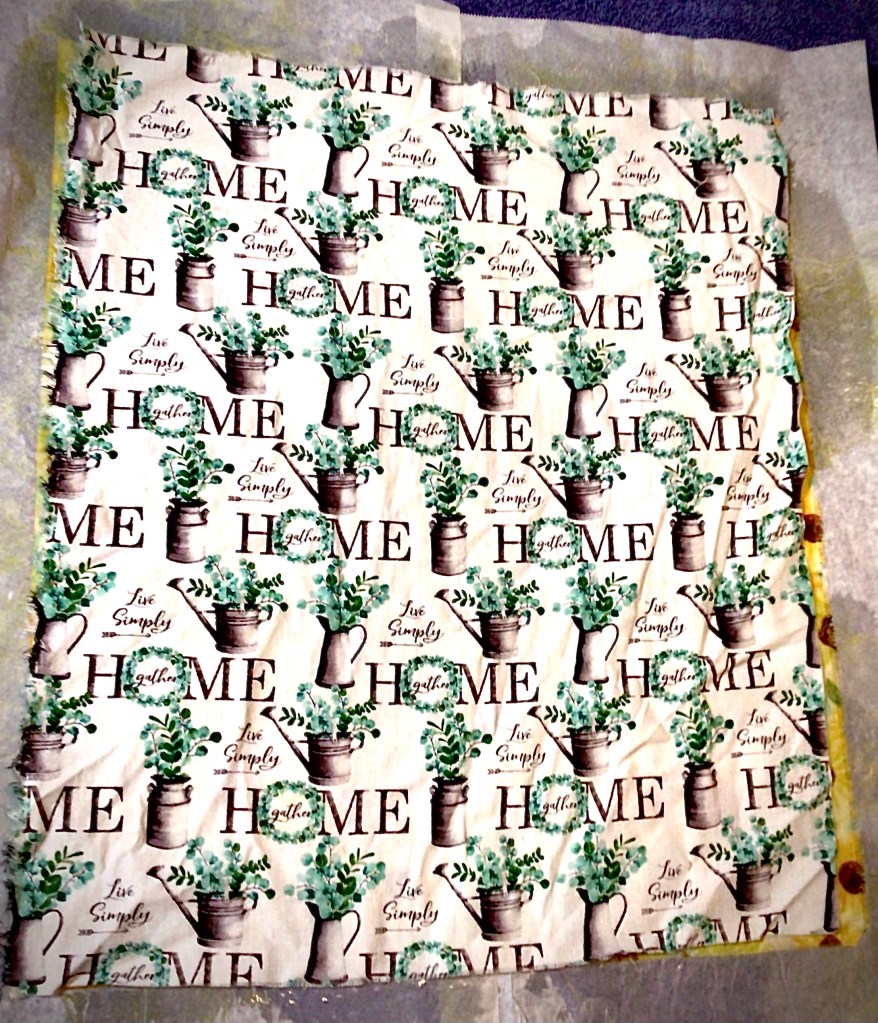
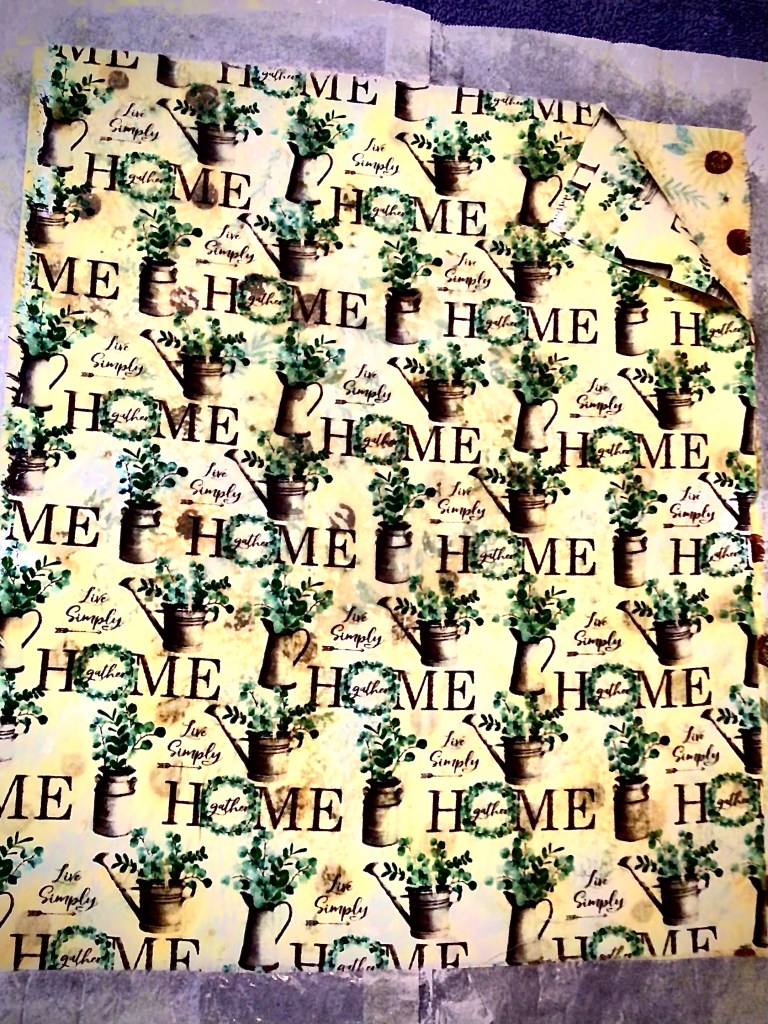
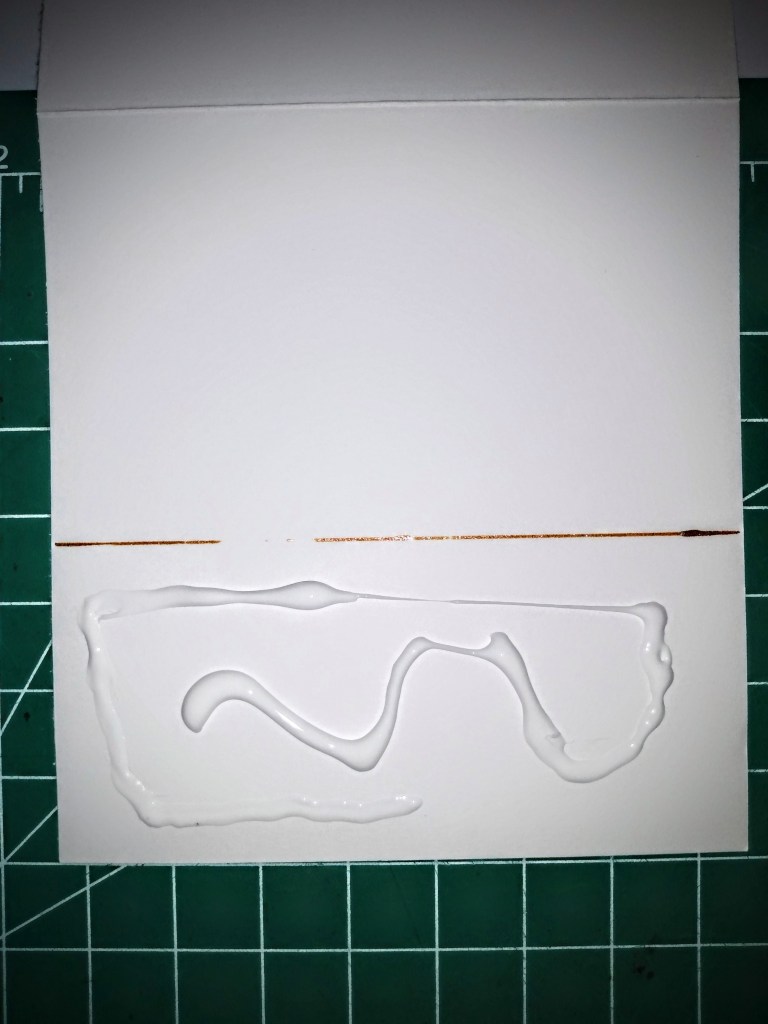
As you can see in this middle picture, below, you will see your waxes through the parchment. This is useful because you will get a general idea of where the wax is in comparison to the edge of your fabric. Work in the center and push the wax out to the edges.

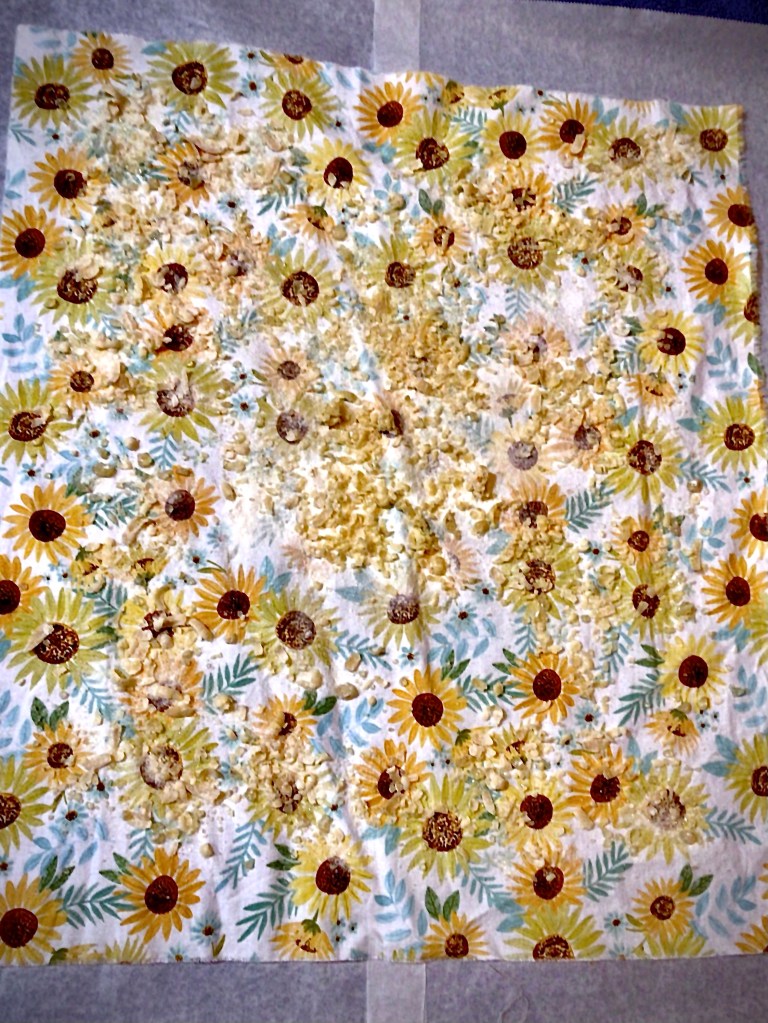
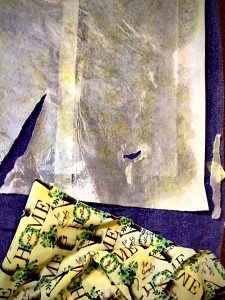
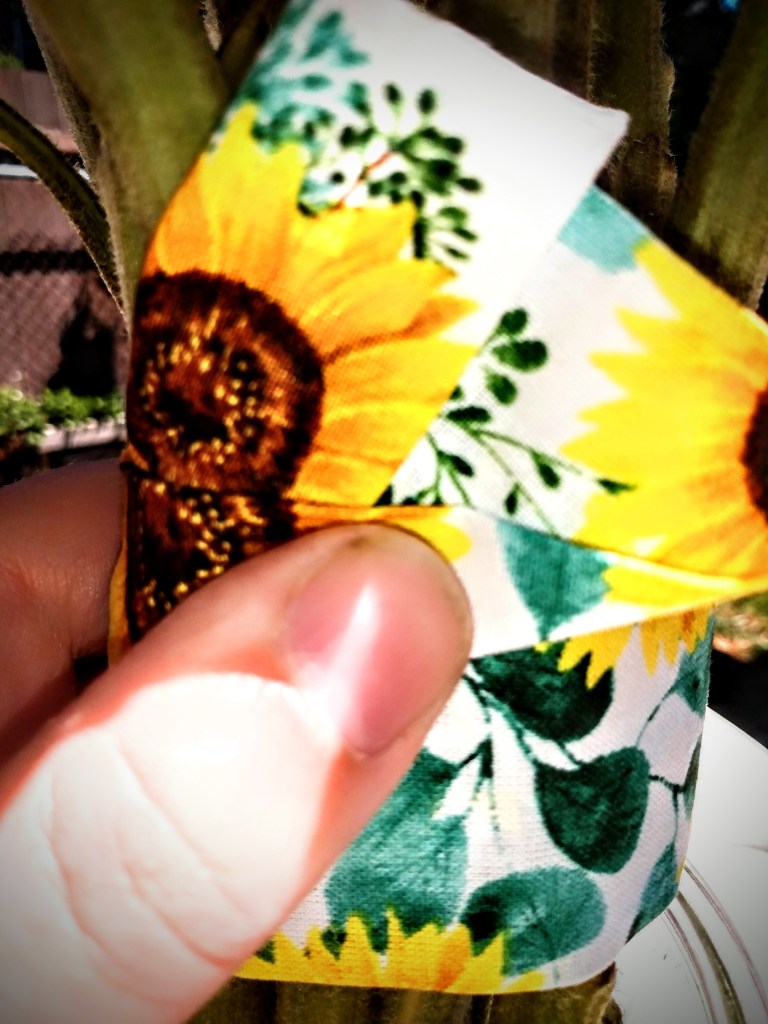
There will come a moment when you think you have the wax spread over all the fabric. Lift the parchment and take a quick leak. No matter if you’re working with light or dark fabric, you will be able to notice where I here are patches of fabric that have not been covered with wax. In the third picture above you will notice the white fabric that has obviously not been covered by the yellow tint of the beeswax.

If there are still pools of was on the cloth, lower the parchment paper and use the iron to push the wax over to those blank spaces. If the fabric seems a bit “dry”, with no extra wax to move around, add a little bit more wax over the dry spots, lower the parchment, and melt the wax into place.

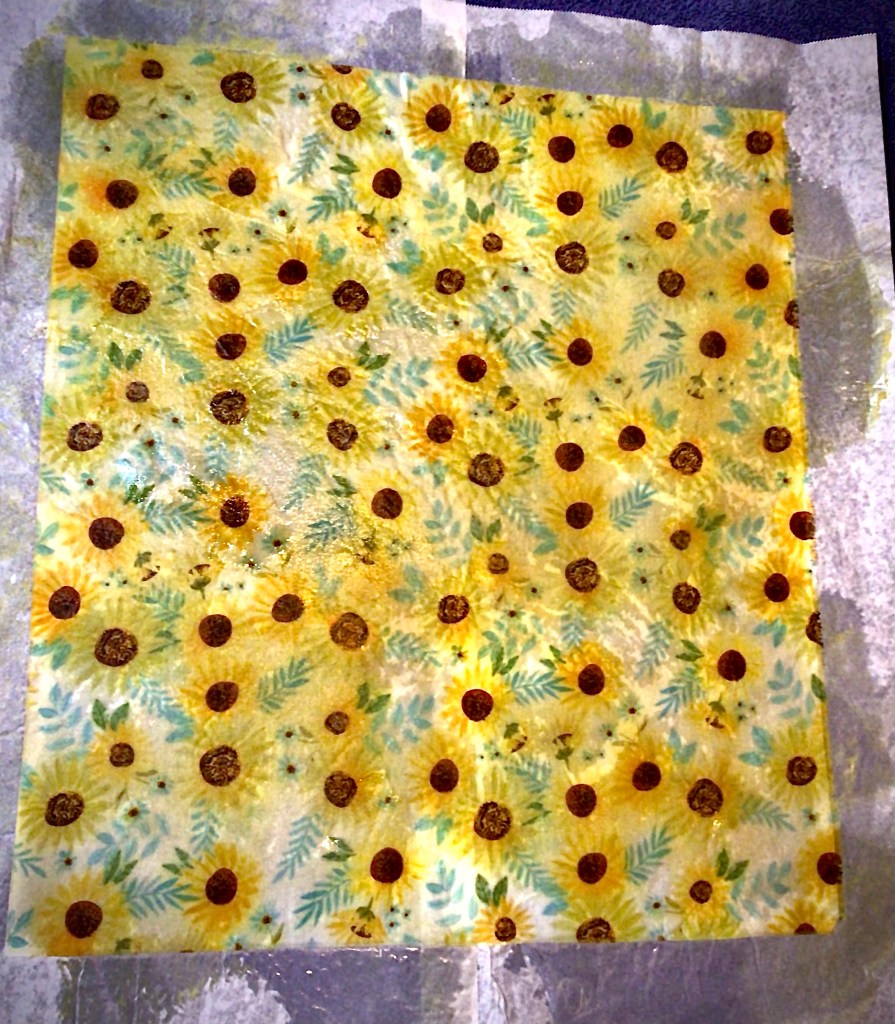
Once you’re satisfied with your coverage, take a look at the amount of wax present. You want just the right amount where the fabric has a matte like finish too it. If it’s shiny or has pools of wax, you will want to absorb that excess wax off. You can do this by placing a new piece of fabric on top, lowering the parchment and ironing over the entire surface of the new cloth. Once all the excess wax has been absorbed, you can pull out the first cloth (and leave the second cloth to add more wax to any dry parts.

When a cloth is finished, pull it free from the parchment papers, hold it by the corners and wave the cloth back and forth. You want to cool down the wax before you set it on something to finish drying. (I use chair backs.)

A Pine Resin Problem to be Aware of

One bit of information I didn’t hear from anyone is a potential problem to look out for when working with pine resin. If there is a spot where the resin is not in equal parts with the beeswax, it’s going to act like glue to the parchment paper.

The first sign of this is when you go to lift the parchment paper and it feels like it’s locked in place. You didn’t do anything wrong and nothing is ruined. All you have to do is iron over that spot. When the resin is hot again, you can lift the parchment paper and it won’t be stuck anymore.

If you try to force the peel, the parchment will rip. And if you’re not done making wraps, you will want to take a new sheet of parchment to cover the holes and rips. It’s just easier to get the resin hot again and then peel the parchment back in one piece.

Caring For Your Reusable Wrap

Everything about a beeswax wrap is oil based and meant to manage moisture. It keeps food moisture in and humidity out. Because of this feature, you absolutely do not want to use a grease fighting detergent when cleaning a wrap after use. You can use a gentle soap and the wrap will be fine. However grease lifting detergents are going to break down the wax and fat molecules in the wrap, which in turn will wear down the wax and make it less effective in holding to itself and your kitchen equipment.

Remember, we used heat to set the wax on the cloth. Hot water will warm up the wax and makes it easy for the wax to be removed from the fabric. So when you wash or rinse off a beeswax cloth, keep the water tepid. By keeping the water temperature cool, you will prolong the life of a beeswax wrap.

Advertisements

There are some things that you absolutely do not want to do with a beeswax cloth:

  • Do not use in a microwave.
  • Do not clean in a dishwasher.
  • Do not leave onto of a heat source (in a hot car, on a sunny and hot windowsill, on any heat source).
  • Do not use to store raw meats.
  • Do not use with hot foods. Cool them down safely and then cover cold food with a beeswax wrap.
  • Do not leave in standing water.

When properly maintained, beeswax wraps are absolutely safe to wrap your foods in. Beeswax has antimicrobial properties. Depending on how you care for a wrap, it is possible for one to last a year or several.

Advertisements

A Couple Ways to Use a Beeswax Wrap

As I mentioned before, I wanted these to use on bowls that I do not have lids for. In this example I have a standard glass coup bowl and my small wrap. Simply place the wrap over the bowl. Then press the wrap down much like a sheet of press and seal food wrap.

The heat from your hands is what softens the wax. Its tacky nature naturally sticks. To be fair, the wrap sticks better to itself over the smooth edges of a glass bowl.

I found that just pressing the wrap down formed less of a seal and more of a fitted cap of a lid.

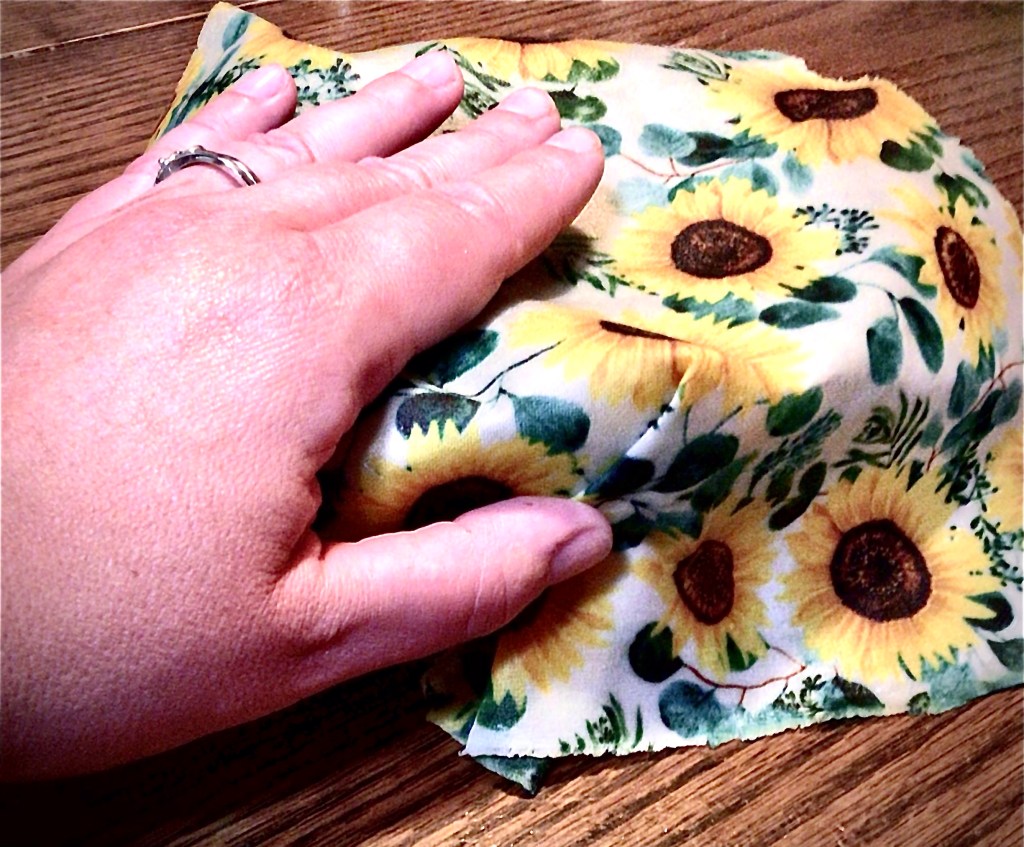
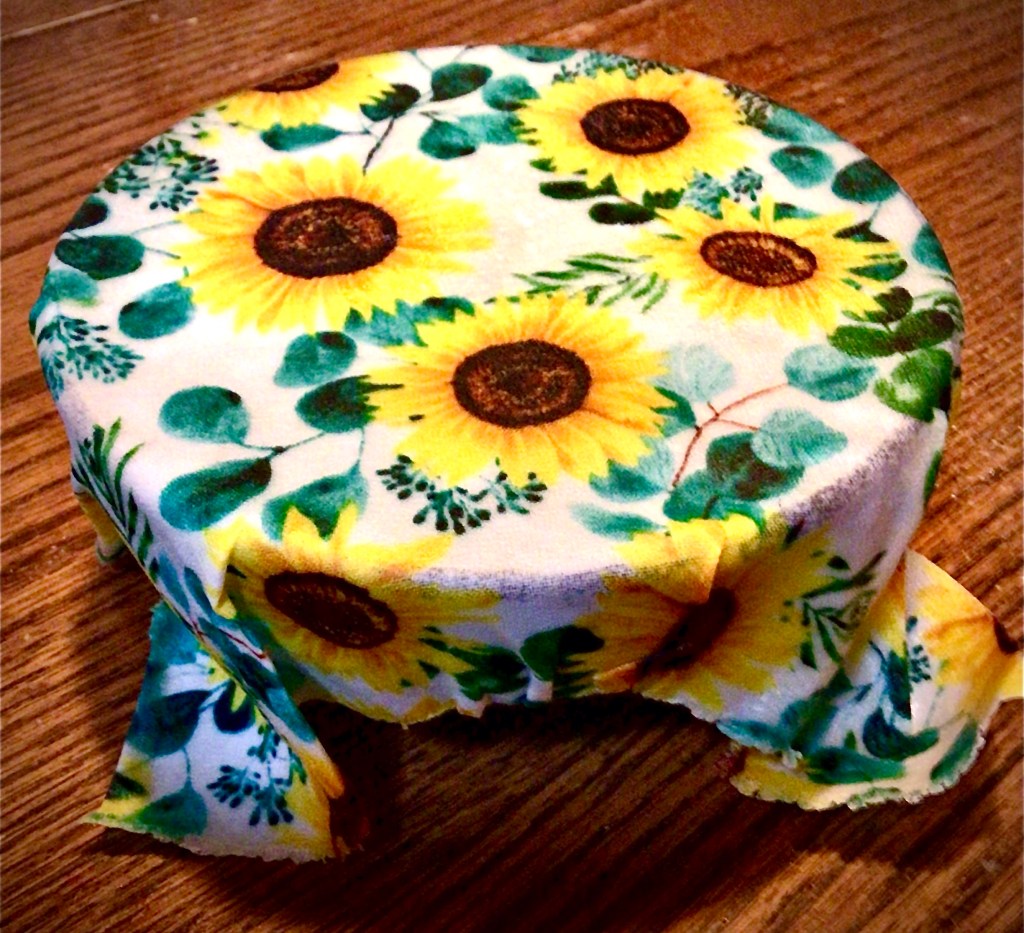
For better results, crease the wrap and seal it on itself. As in the case of this bowl, the folding of the fabric and making it taper down the side of the bowl, this tapering down gives the resistance for the wrap to stay firmly secure to the top of the bowl.

But the wrap doesn’t need to have a structure to seal up. You can have the wraps become its own container and never have to buy a sandwich bag again.

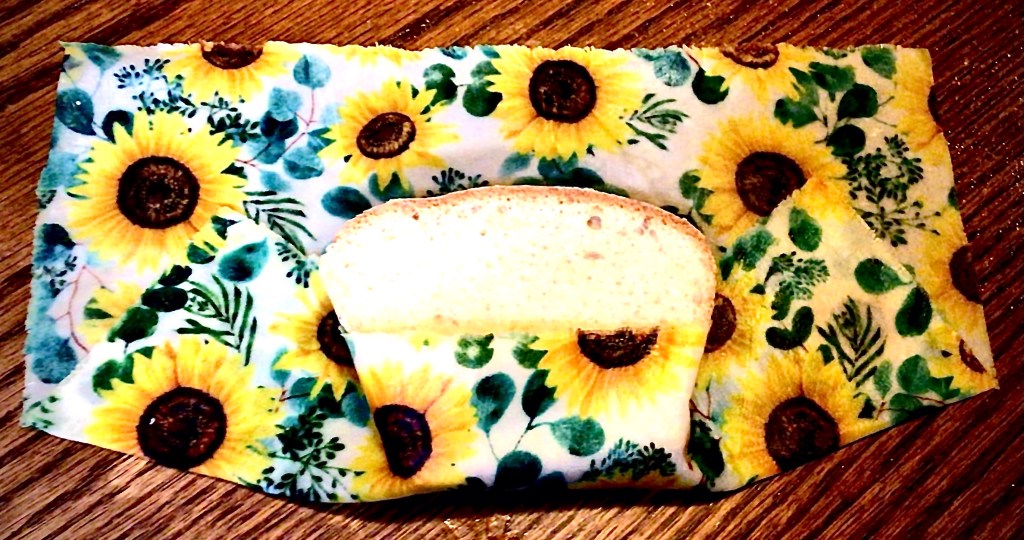
Simply lay your sandwich in the center of a wrap and seal it to itself.

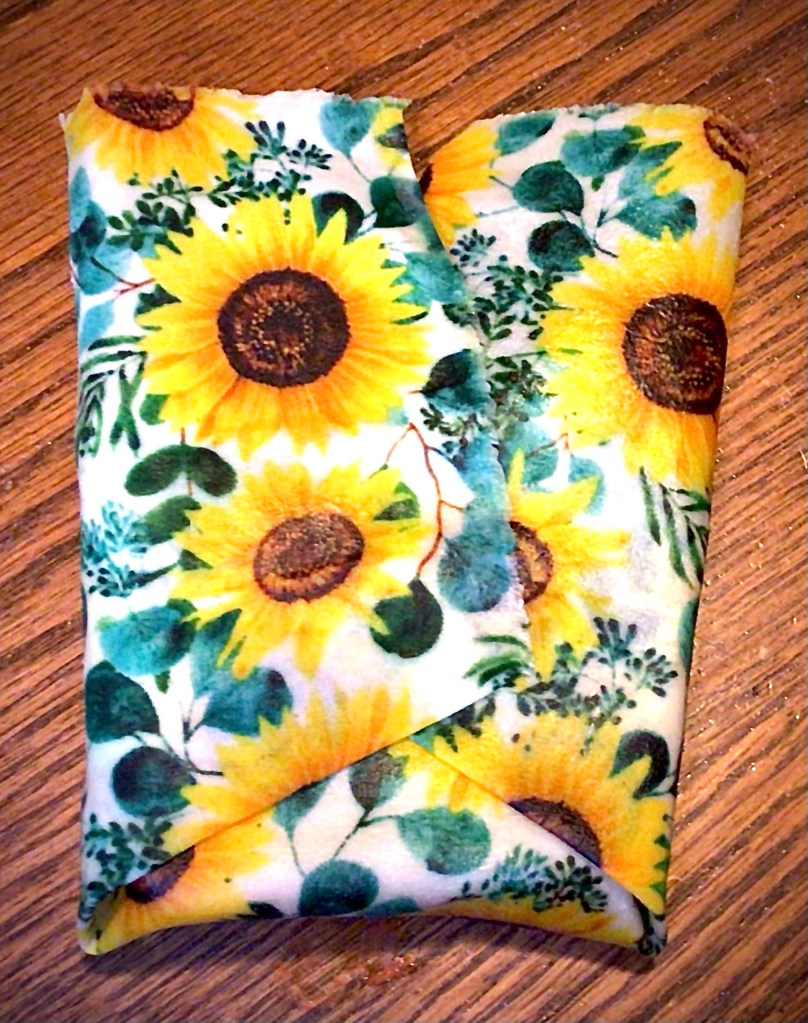
In the second picture, I folded the bottom of the wrap up and pressed the fabric down the sided of the sandwich and pressed the fabric into itself to create a seal. The sides I folded over over and the top down.

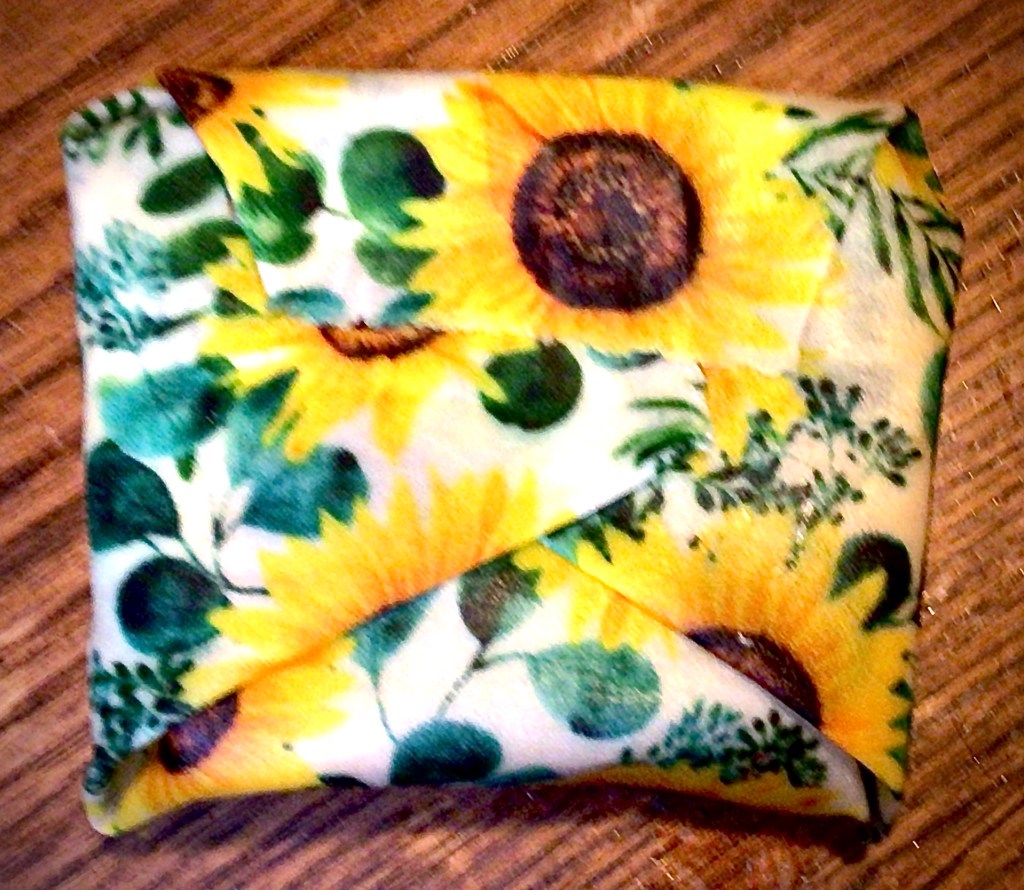
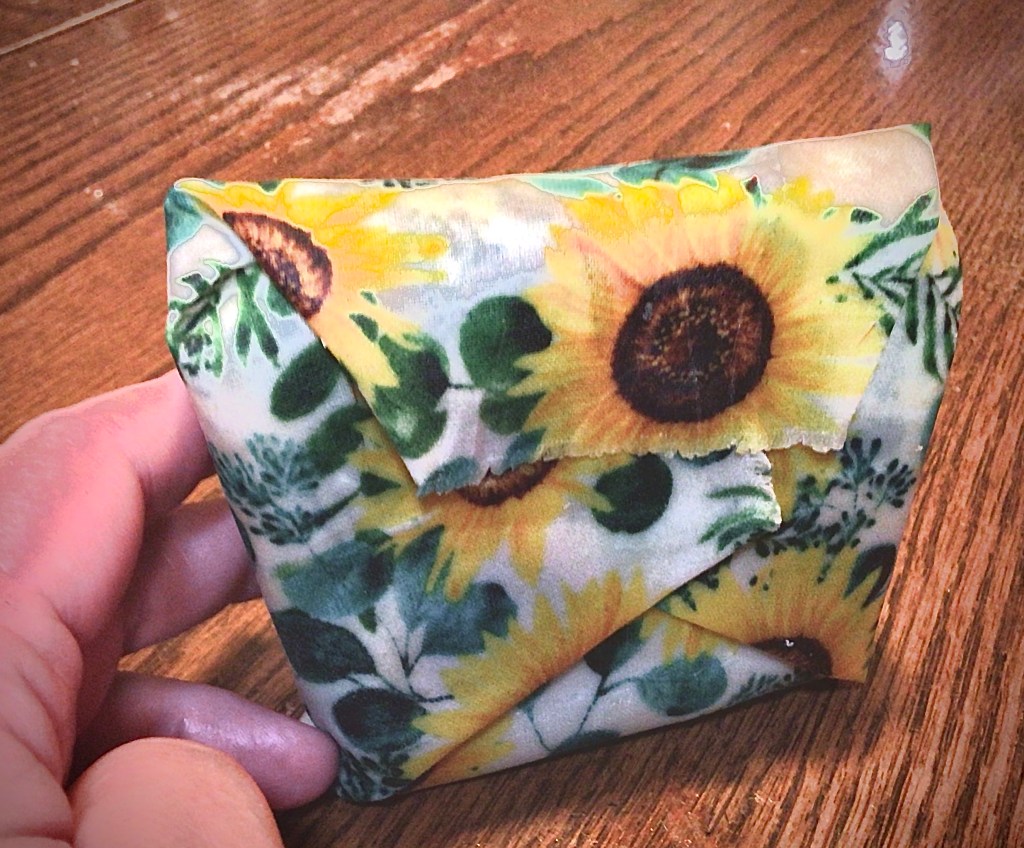
In this last picture, I wanted to show you that even when I stood the sand which up, it did not unwrap himself at all!

Again, these are only a couple of ideas on how to use these. Another idea is on a hiking trip. If you forgot to bring a foraging container, but saw something you wanted to gather, you could pinch together the sides of a wrap and make a little basket.

This is genuinely one of those kitchen utensils that have many uses and are user friendly.

For those of you who are local, come by the Maker’s Market on October 7th and you can play with the demo wrap and see just how user friendly these are!


Leave a comment

Processing…
Success! You're on the list.
Advertisements
Advertisements
Advertisements
Advertisements

Starting New Skills

The one thing that I appreciated from my childhood was just how many skills I learned from my parents; cooking, gardening, home repairs, auto repairs, and so much more. Part of this appreciation is seeing how many of these skills have become less and less commonplace in the younger generations. And it’s so promising to see a growing number of people seeking to learn these skills now.

Today I wanted to share a monthly experience that we have with our kids. Craft days!

I’m aware of three box stores in my local area that offer a free craft to kids; Home Depot, Lowes, and Joann Fabric. None of these stores are sponsoring this blog nor have they compensated me for this post. I mention them by name for the sake of helping out fellow parents who are looking to foster these skills in their kids or grand kids. They are free, which is perfect for families who don’t have the budget to purchase supplies.

Here’s what the corn hole craft project looked at the beginning of our morning.
Advertisements

We’ve been doing these hardware store crafts for five years now. And as long as the days get with small children, the time really flies by and they pick up the skills of using a hammer and screw driver too quickly.

This miniature corn hole craft was the first one where I sat down with my youngest and purposely focused on just being support. (The older kids decided they wanted to fly solo–time goes by too quickly where you’re sidelined on these crafts!).

My solo crafters wanting to build with no help.

Instead of telling my youngest how to build, I had him pull out the pictograph directions and tell me what we were doing for steps. I was just there to hold pieces for him while he built away.

My one and only job for the day, hold the project in place.

This is the child that loves having things in a certain order and done a particular way. But it was fun watching him process the building information and doing it the way that he saw makes sense. But what was a good surprise was seeing him use the claw end of the hammer when the nail wasn’t lined up the way he wanted it. He didn’t want to make corrections the way that I would. He wanted to fix the error his way.

This reminds me of a series of lessons from a virtual life skills summer camp that I watched with my kiddos this past month. This was a series teaching basic home electrical repair skills to teens. I watched it to learn for myself because this was one skill that I didn’t learn from my dad, but there’s times where my husband is so busy that I could do these things home repairs without waiting for his schedule to slow down for him to do it.

What’s amazing about whole families learning new skills is that we’re not dependent on one person taking care of a honey-do list. We’re enables to work as a team to get something done.

Advertisements

For example, even though my oldest is still in early elementary, he’s able to take care of nail and screw projects. I learned some new electrical skills to help my husband out. And my husband has been learning new food preservation skills to help in the kitchen.

For our family, it’s important to learn new skills and “cross train” because it creates value in our family. One person isn’t dumped on and obligated to do certain tasks by themselves. This can be overwhelming, especially as the adults in the house, because we’re constantly juggling our schedules and to do lists. Sometimes surprise tasks just become overwhelming because there’s not enough time in the day.

But when another family member knows how to do a task alongside you, it turns into a quality time moment instead of a stressed out I-don’t-have-time-for-this.

I don’t know about anyone else’s family, but my kids are already at the age where they want to feel valued and appreciated. And by giving them fix-it skills, it’s one thing where my kids can do something for my husband or I, feel accomplished, and then feel valued with a “thank you” and “you did a good job”.

And it’s not just with tools. The kids have been learning how to cook things on their own and they’re so proud of being able to cook breakfast for the family.

It doesn’t matter the age, people thrive on feeling appreciated and knowing that they contributed something. And that value isn’t taking into consideration the memories that are made in the process.

One of my favorite memories of working on cars with my dad was when he had me crawl under a car and do an oil change with only him available to talk me through the process. It was the late 80’s and one of the biggest fads for girls was wearing press on nails.

It was when I was removing the last bolt that two of my nails popped off and landed in the oil pan just as the oil gushed out. I started freaking out. My dad thought I had lost the bolt in the pan. He and my uncle started laughing their butts off when they found out that I was looking for my nails!

Let’s just say that after I fished the nails out of the oil that it didn’t take me long to realize that there was no way I was going to be able to salvage them.

Advertisements

There’s nothing in the world that would exchange for the memories that I have with working on cars with my dad. Nothing goes right all the time. And it’s these memories that bring patience when I’m working on skills with my boys. Things will go wrong. Some of those things will be hilarious. And it may only be these funny memories that they remember for the rest of their lives. But that’s okay.

I know that they don’t remember the times they’ve hit my fingers with a hammer. They won’t remember the frustration of first learning how to press down on a screw driver and turning at the same time, all just to get that screw to go down into a project. But their muscle memory will live on forever as they grow to learn more skills, such as home electrical repair, car repairs, garden building projects, making meals, and so many other valuable life skills.

What they will remember forever is that their mom and dad believed in them that they could make something. When frustration sets in, they know they can problem solve their way out of it because they were believed in. But above all they will take on the new challenge of learning something new because their parents continue to learn new skills.

We’re never too young to learn a new skill. Neither are we too old.

Maybe one day soon, they will learn a new skill. And as they show us, my husband or I will learn that new skill because they want to teach us something.

So whether you have kids or grand kids or not, learning a new skill is ageless. It’s a great memory building moment to teach the young (even teens) a new to them skill.

And it’s never too late to learn a new skill for yourself.

What new skill are you ready to learn now or pass on to the next generation?

One response to “Starting New Skills”

  1. best buy instagram followers site Avatar

    Way cool! Some extremely valid points! I appreciate you writing this post and also the
    rest of the site is extremely good.

    Liked by 1 person

Leave a comment

Processing…
Success! You're on the list.
Advertisements
Advertisements
Advertisements
Advertisements

Make A Container You Will Love

More and more people are moving to containers for growing their home gardens. So what do you do when you get sticker shock over the container prices online or in the box stores?

You build one!

Everyone talks about pallet projects. But I want to introduce you to crate raised beds.

My husband works for a company that builds machinery. The crates that are used there are tossed. Being resourceful and having access to free crates to reuse and repurpose, this is the way I build the majority of my container garden. This also has the added bonus of solving my time problem. I have so much on my plate, that building raised beds from scratch isn’t an option.

AND if you know how to use a pair of scissors and a staple gun, you can absolutely make this garden container!

There are so many different crates out there. The ones that I have and use as raised bed were formerly forklift crates. (They originally housed large machinery parts.)

With the crates you source, there are a couple of things to keep in mind.

  • If there is plywood (whether the floor or sides), you will need to remove it and replace with wood that hasn’t been chemically treated.
  • The crate floor should be solid. This will help contain your soil.
  • The sides are okay if they have gaps. We’ll line this and the soil will stay in.
  • Is this going to be a permanent or temporary container for your garden?
Advertisements

This last question is very important. It will determine if you need to source other materials for your container. You may find that you need screws, power drill, or even other parts if you plan on turning into a cold frame or want to add features like hoops.

The containers that are brought home to me are made out of pine. The boards are stapled together.

The containers that are brought home to me are made out of pine. The boards are stapled together. I know that these crates were not built to last forever. They’re not even sealed for weather. But being limited in time for my garden builds, I opt for leaving my crates as is.

Tip: you can weather protect wood by scorching it with a torch.

If you find that your crate is stapled together, this feature is going to limit how many seasons you will get out of your container.

For example, the boards of my 36″ x 36″ potato crate (above) started to pull away at the start of the third year. The wood is weathered but still as strong as the day the crate came home. This is one crate that I wished I would have reinforced with screws before filling. This crate got place before filling with dirt. And with the exception of this front face, there’s no easy way of coming back in to push the board back in place and screw in. It’s tightly spaced with other structures.

Tip: My hindsight advice is to increase the longevity of your crate container, reinforce the boards with screws, right from the beginning. This will prevent awkward maintenance in a few years.

Let me walk you through how I make my raised beds from crates

I’m using the smallest of my new crates 12″ x 32″ and about 18″ deep. (This one has been sitting for a couple months waiting for me to decide what I wanted to plant in it this season. I was gifted some pepper starts and knew exactly where they were going to go.)

Items you will need:

  • Wood Crate
  • Garden Weed Barrier
  • Scissors
  • Staple Gun

The first thing I do is fold over the edge of the garden barrier, to make a smooth finished edge, and staple it down across one edge of the crate. It’s not necessary to make a finished edge. I just like this step because sometimes the cut on my roll of barrier is slanted. So by making a new straight edge, this makes it easier to lay the barrier without worrying about it running sideways across the crate.

Note: When I line a crate larger than the width of my garden barrier, I line one side of the crate. Once that first piece is secure, I run a second piece for the opposite side of the crate. The overlapping of the barrier happens in the middle of the crate. There is no need to secure in the center floor of the crate because the weight of the soil will keep the barrier in place.

With this first edge of the crate secure, I drape the garden barrier across the top to make sure I’m laying it in centered and straight. Then I push the barrier down into the crate and make sure that the barrier has enough give to accommodate the full size of the bottom of the crate.

As you can see in the second picture, I trim my garden barrier a little longer than I need to fit inside the crate. One reason is that I usually don’t cut a straight line (obviously seen here). But more importantly, I learned over the last two years that you want more barrier inside the crate than you will think.

The crates I lined the first year, fitting the liner tightly to the inside. The following spring I noticed that these barriers started ripping out at the staples after the first winter of water and freezing. The barrier needed some flex that I did not allow for. So now I give some allowance.

Before I put my garden barrier away (and focus on securing the lining), I cut the width of the short side of the crate. Then I fold this strip of barrier in half and cut. Each half will line the sides of the crate. These side pieces I set aside (or stuffed in my pocket for this crate because of the wind). I set the roll of barrier to a side and go back to folding over the edge of this second crate long side, and staple it down in place.

Once the long sides of the crate are secure, I secure the edges along the short side to hold them in place before securing barrier down the short sides. This keeps them up and out of the way. And if you’re lining a crate while it’s windy out, you will thank me for having the barrier stay in one place so you can move through this project in the least amount of time.

First I take the overlap, from the edge of the crate, and fold this corner down before stapling. This gives a reinforced edge as well and bringing the excess barrier down inside the crate. This doesn’t look pretty, but this is all about telling the barrier where you want it to go and keeping it contained.

Can this excess be trimmed off?

Of course it can. But you will see in just one moment, by keeping the excess length and tacking it up the side, you are creating a barrier that will keep all your soil in your raised bed without having a completely sealed liner. I use the weight of my soil to work for me so I have less steps to take.

For the next step, I pull out one of my side crate pieces of barrier that I just cut and line my first short side. I fold the edge of the barrier down, just like I did with the long side of the crate, and stapled down this top edge and pushed the rest of the length of this side down over the rough edges that were tacked down from the longer side. This flap is great because not only does it cover the edges of where dirt could go down and over time wash out of the bottom of the crate, but it also redirects any of this soil movement back toward the center of the crate.

So if you have the choice of having a generous flap (like seen here in picture two) or trimming it down, make an educated decision in favor of what’s going to help you maintain your soil. After all one of the problems with container growing of any kind is the loss of soil, mostly through drainage at the bottom of your container.

Once you secure the second short side of the crate, you will see here in picture 3 that you have a fully lined crate.

The first time I lined a crate, with no one telling me how to do it, I must have taken an hour to do this. Even with taking pictures, this only took me about 15 minutes. The larger crates don’t take any additional steps. So it really is time efficient to take a fully made wood crate and line it to make your own raised bed.

If you did not line your crate where you want it’s forever home to be, make sure that you move it now. Even with this smaller crate, the weight of it filled is more than I can move on its own. Even with a hand cart, I still wouldn’t want to move it because I could just see myself knocking it over and spilling all my soil all across my yard. For my sanity (and your own), I just make sure I place my crate raised beds before I fill them.

Advertisements

How I fill my raised beds

I’ll start by saying that I don’t fill my raised beds like everyone else.

One reason is that I don’t have the gardening budget to buy as much soil as I would need to fill all my crates, especially the large ones.

Another reason is that I’ve talked with many people about different types of gardening are available for each of us to choose from.

The drawback to container growing (even raised beds) is that there comes a time where there will be a depletion of nutrients in soil. So even though I do top off my crates with raised bed potting soil, I choose to think long term with my raised beds.

Hugelkultur and Mound gardening have beautiful foresight in them. Both of these forms of gardening is that they put long term “food” into their structure building. Both contain wood (usually in the form of branches and limbs of trees, logs in larger structures) which is slow release nutrients that takes many years to decompose and incorporate nutrients back into the soil. If fact, this is the best way of getting the micronutrients into the soil that standard commercial fertilizers do not ever put back into your containers.

For this reason, I went back to my yard waste and compost. I grabbed some pine branches that we recently trimmed off of our trees, and a couple of handfuls of grass clippings. Especially with the large crates, these fillers are going to be amazing.

In the bottom of my crates I put the largest branches. Normally I put in camp fire sized pieces of wood in the bottom. This small crate doesn’t have depth for that. So I started off with what I consider my second layer, thin branches. Ever green boughs are perfect, not just because of the thicker needles (which take longer to break down than leaf waste) but also because they take up space.

Next I put down green grass clippings. One, they take up space and leave nice medium for plants to spread out their roots. Two, the grass fills in the branch gaps and holes perfectly.

Think of that science experiment where you’ve seen rocks added into a jar first. Then it’s followed by pebbles, then sand, and then water. It’s a perfect example of maximizing the fill of a contained space with an incondensable material like rock.

I pack my raised beds with as much long term nutrients as I can. And this method of packing with larger material first, working your way down to the smallest, is the best way of packing your container box.

From here, I went back and grabbed a couple of pitchforks worth of raw compost (complete with some of my worm residents) and the last of my current supply of raised bed potting mix.

Of course it was the moment that my kiddos saw me grab the compost that they came rushing at me. My youngest dove in and tried to rescue the worms from being placed in this crate. He was acting like I was kicking them to the curb and evicting them. It took me a moment to tell him that he didn’t need to take them back to the in ground garden, I need them here.

And that’s one thing that I haven’t heard anyone talk about. We all know that worms are great for our garden. In fact we don’t give them a second thought in our in ground garden. So why aren’t we talking about them in our container gardening?

Worms are very much needed for a good growing biome. They help break down materials. And since I put in some large materials, I could let them do their own thing, or I can see if I have some worms who want to take advantage of this new home. (And this is another reason why I don’t fully seal off my lining in the crates. The worms are free to come and go as they move their way through any loose openings that take place over time. (And these openings do happen, but they’re more controlled.)

Anyway, I chased my youngest down and got my worms back in my compost. Then I quickly dumped the potting soil down on top to keep him from digging them back out. (I swear that child loves worms!)

I finish off with the raised bed potting soil because that is ready to go and host my pepper starts.

The down side to this layered nutrients in a raised bed

You may want to choose to do straight soil. Especially if you’re planting starts that will shortly need to have structures to assist in their growth. Just like these peppers will need some structure.

This layering, especially in this smaller size of crate, makes it impossible to add bamboo stakes for my peppers. They were just falling over. Fortunately, I have some carbon fiber cold frame hoops. I haven’t added them yet to this crate, but I’ll put in a hoop over each row to drop lines for the peppers to grow up.

I mention all of this, because if you choose to layer and expect it to hold up a stake or tomato cage, this first year just doesn’t give it the soil density to hold up a structure. So be prepared to come up with an alternate plan.

Another disadvantage to this layering is that as you can see in these pictures, I filled my crate up to the top. Over the course of this growing season, and especially over winter (when the rain helps to draw all the smaller soil material to settle into the branches in the bottom, I will see that this crate will only be half full next spring.

In the spring, I’ll add more compost and soil into this crate. At this point I can add mulch on top and the volume of the crate will not go down any further.

Again, this isn’t a horrible down side. It’s just one to be aware of and plan for. But this crate is now set up for many years of container growing. It will be sustainably nutrient rich, especially when I add the mulch and keep that going every season.


How do you like to container grow?


Here are a couple items I find useful in my garden.

This post contains affiliate links to products. We may receive a commissions on products purchased through these links, but at no extra cost to you. These items listed here are from Amazon but may be purchased at local markets.

One response to “Make A Container You Will Love”

  1. Clove One Clove All – How I Can Do That Avatar

    […] Make a Container You Will Love is how I start off all my new boxes. This time I reused one of my existing boxes. My onions didn’t do so well in it this past grow season, so I’m changing it up to see how my garlic will do here. […]

    Like

Leave a comment

Processing…
Success! You're on the list.
Advertisements
Advertisements

Surprise Gift

It never fails that a moment in life comes when you forgot to get someone a gift or you received a last minute invitation. What do you do?

There’s a couple of things that I keep in my craft room all the time: fabric, ribbon, card stock, picture frames, paint, beads… You get the idea.

We had the privilege of meeting our neighbor’s parents, who came for a visit from halfway around the world. It’s amazing to see how much you can connect with people, especially when you don’t speak the same language. And even more amazing when you find out that you share some similar interests and find commonality.

It’s even more special when you receive an invitation to be a part of celebrating their 60th wedding anniversary.

I’ve been married for over a decade. So much has changed in the world since that day. I tried to think of how much the world will change in another 50. It blows my mind.

What is it like to celebrate a 60th anniversary in another country–one you may or may not have thought you’d be in when you were younger?

Of course I couldn’t pass up an opportunity to celebrate and honor a long lasting relationship like this. And while thinking about how to give a meaningful gift, with little personal history, and something that’s not burdensome for when they return home, I chose to focus on the memories. Celebrating the last 60 years of their memories together and giving them a memento of this trip, this moment in time.

Advertisements

My husband had taken a group picture at the end of a visit where we had them over and made for them their first American meal. I chose a picture because it travels well and is minimalistic for those who gravitate to that way of life. But I also couldn’t pass up giving some flowers because it’s something that brings happiness in the moment.

So for this quick to gather gift that’s pack full of memories and meaning, here’s an idea for you to consider the next time you need to find a gift in under two hours.

Pick a photo of you and the other person from your phone and send it to a local place that can print it out in an hour.

While that is processing you can stop by a shop, florist, road side stand, farmer’s market, or garden and gather some flowers that have meaning.

In this instance I chose sunflowers because with our guests, they saw the sunflower I had grown from seed and we talked about sunflowers and sunflower oil for quite some time. Sunflowers may not be their favorite flower, but in this gift, it’s a nod to something we connected with in the middle of a language barrier.

It just so happened that at home I had a vase on a shelf that I was saving for a time to reuse by gifting to someone, and I had some fabric with sunflower print on them.

As you notice here, sunflowers can be awkward if they’re not bundled. So I decided to bundle the flowers with a strip of cloth.

For a professional look of wrapping a bouquet, you want to first trim down the fabric you want to use into a strip. No matter how nicely you cut, the fabric will always fray. To give a clean edge, you want to press the strip of fabric. First, fold and press the raw edge. Then you’ll tri-fold and press the fabric into a wide ribbon. Now the edges won’t fray on you and you didn’t have to sew.

To make this wrap, you want to put one edge of the ribbon between the stems. Then you can wrap it tightly around the bouquet without the ribbon slipping on you.

When you get to the end of the ribbon, you want to fold the ribbon up at a 90° angle. The tuck this final edge down behind the wrap, between the stems. If the wrap is snug, it will hold the ribbon in place without using tape, pins, glue, or any other fastener.

The beauty of making a wrap like this is that the person you are gifting this to can use the fabric after the flowers are long gone. If this person is sentimental, they will no doubt find a way of repurposing and reusing this strip of fabric.

Don’t forget to use a small scrap of the fabric to make a card that matches.

Here, I took a piece of 8.5 x 11″ sheet of card stock and trimmed along the short edge a strip 4″ wide. This strip I folded in half to make a blank card that is 4 x 4.25″.

Using the left over sunflower fabric, I decided how wide of a ribbon I wanted to glue to the front of the card. You can be as precise as you want to be. I chose to wing it and just cut the fabric into a small strip.

This time I had to be careful about the edge because there’s no room for a folded seam. This fabric print looks good with a frayed edge, so I saved time by just removing the stray threads and embrace the fray. (As opposed to if I need to have a very clean edge and have to cut a straight edge.) Now the sides and bottom of the card need to have a straight edge, so I leave this ribbon large and will cut it down after I glue it to the cardstock.

For gluing the ribbon down, you want to decide where you want to place it and mark off the area. You will need to liberally apply glue to prevent fraying on the card, so drawing a glue line is very important. Make sure that where you draw the line will be hidden behind the ribbon, so make sure the line is lower than where you want it. Apply the glue and spread it evenly across the whole section, even over the edges. If you don’t put glue on the edges, the fabric will lift from the cardstock.

Gently lay the ribbon on top of the glue and make any adjustments that you need. When you are satisfied, take a scraper or plastic card, place it in the middle of the ribbon and press it to the edge of the card. Then place the scraper/card in the middle and press down in the opposite direction. This will secure your fabric to the card and remove any air pockets that may have been present.

Now that your ribbon is secure, you can flip the card over. With a pair of scissors, trim off the excess fabric.

I trim from the back because I can see exactly where the edge of the cardstock is.

The blank card is now ready for you to write you message on.

By now, your pictures should be ready to pick up. Once you have them, you can place them in a picture frame and you’re ready to bag or wrap your present.

From this gift given, the part of the gift that meant the most was the blessing that I wrote inside the card.

In today’s world, a blessing spoken over another person is something that’s not talked about. But it’s the most powerful gift that we can give another person. And to have those words writing for the person you’re gifting to read over and over again is life changing.

If you are unfamiliar with a blessing, it’s what you tell someone that you see in them now, but you also what you desire for their future. Instead of “I hope you have a happy birthday” or anniversary, I tell the person what I want to see in their lives for this coming year or the years moving forward.

In a time where people are struggling to see their purpose in life, why they matter, the most important thing you can give a person is a vision of something to look forward to. And the best part about a blessing that you speak over a person is that it’s not something that can be bought. It shows the person that you see them, you value them, and that they have a purpose to live for.

Whether you’re looking for making a meaningful gift on a tight budget, don’t know what to give a person, need an impactful last minute gift, or any other reason, know that you can speak into a person’s life and it means more to them than anything else you give them. So no matter what your gift giving situation is, know that a blessing from you can be the most impactful thing that you can give another person.

Never underestimate the power of your words.

And don’t hesitate to gift a blessing!


Processing…
Success! You're on the list.

One response to “Surprise Gift”

  1. Roy Avatar

    Hi to every one, tthe comtents prsent aat this web pzge are really remarkable foor peolle knowledge,
    well, keerp up the good wotk fellows.

    Like

Leave a comment

Advertisements
Advertisements
Advertisements
Advertisements

Getting Buzzy For Spring

There’s one skill that I’ve wanted to learn from a friend of mine, incorporating mason bees into my garden.

Here in North America, mason bees are the indigenous bee. They pollinate 45 times more than honey bees. And if you have young children, you don’t have to worry about there being an altercation and your child (or pet) from being stung. (We’ve been teaching our kiddos about bees because one day I want to have honey bees for honey production. So they already know what’s expected of them when it comes to our pollinating friends.)

I can’t even begin how excited I was when I received an email from a family locally owned hardware store that they were doing a craft for Earth Day, which involved making a home for mason bees.

Today I’m sharing with you the process that my kiddos went through to make a home for mason bees.

We were instructed to bring a soup can or cardboard milk container. The hardware store supplied the craft materials to decorate and make the bee home.

All my milk cartons still had milk in them and I haven’t bout soup in a can for well over a year now. What I did have available was an empty ten pound can. So if you don’t have a small can, know that it’s possible to make a home with a larger can.

Things you will need:

(Feel free to modify with the materials that you have on hand.)

  • Milk carton or soup can
  • Construction paper (printer paper, non-toxic colored paper, recycled paper, whatever you have on hand)
  • Tape
  • Straws
  • Cardboard tubes: toilet paper or paper towel (optional)
  • Corrugated cardboard (optional)
  • Scissors
  • Glue
  • Stickers (optional)
  • Twine
  • Pens, crayons, or other decorating medium (optional)
Advertisements

If this is a kid’s project you’re setting up for, cut all rolled paper and straws to the length that fits from the back of the soup can to the front.

You can even prep other materials for your bee house. If you have scrap blocks of wood, you can several holes through the block.

I don’t know what you have in surplus in your craft room. But I have many wine corks that have been waiting for just the right project. When I get a free afternoon, I’ll make an adult version with rolled cardboard, drilled scrap wood blocks, and my collection of wine corks that will also be drilled.

Here are some additional bits of information about mason bees, if you are unfamiliar with them.

Here is another resource to get you started on your path for creating a home for mason bees. If you want to buy mason bees to start your bee colony, I found this site which is still selling until May 22, 2023. They have a bee info page that can instruct you in how to care for mason bees to make sure that they remain healthy and happy.

If you’ve watched the movie The Pollinators (2020), then you understand the need to help support our local pollinating community. If you haven’t seen this documentary yet, it’s worth the time to understand what it going on with the bee population in the United States. And if it’s happening here, it’s very likely happening in other places.

Last year (2022) was a bad growing season in the Pacific Northwest (PNW). To this day I still believe with my whole heart that the bees were what made my garden successful, when others in my local community found only hardship. So for my gratitude, I already planned on adding more flowers to my garden as well as being a more hospitable home for my pollinators. With that being said, I will leave you with the pictures of my family. And once the weather clears, I’m going to examine closely where our best place of hanging this mason bee home is going to go.

Happy Earth Day!

Processing…
Success! You're on the list.

Leave a comment

Advertisements
Advertisements