After spending almost a decade in the event decorating industry I have repetatively heard "I can do that". Instead of being dismissed by creative minded people, I want to show you how I do "that" so you can be sucessful in recreating that inspiration image. I just might have a few tricks that you haven't seen yet!
Winter sports have started and parents everywhere are volunteering for coach their kid’s park and recreation teams. And I am that parent-coach.
After spending quite a few years working with kids, you learn firsthand that not all kids learn the same way. But one learning style that all kids have in common is that they have to have a visual of some kind. And when you’re on a sideline, during a game, and you can’t walk out on the court/field to physically show your team what you want them to do, the next best thing is a whiteboard clipboard of your court/field. (So you don’t have to wait for school athletics for kids to be learn from this court map.)
For whatever reason, if you want to have the benefit of having a court/field dry erase board but don’t want to go through the expense of buying one, I’m going to show you a couple of different ways that you can make one rather inexpensively. (This is a huge perk for summer camps where counselors are coaching and you don’t want to worry about misplacing or breaking a nice board.)
Advertisements
Laminated Court
I went this route because I already had in my craft room a clipboard, laminating machine, laminate, paper, printer, magnets, white board pen, ink pen (you never know when you need an ink pen), and hot glue gun. All in all, for the materials I spent under $4. So this is really inexpensive and gets the job done.
First you either want to make or down load a copy of a basketball court (or any other court or field you’re coaching) and print it off.
Run it through a laminating machine with a laminate cover. And as soon as it’s cooled, this mock white board is ready to write on.
I can’t tell you how many different of these “white boards” I’ve made for homeschooling with worksheets that I want to use over and over again. Yes, some colors like to stain the laminate (red and blue are the two colors that cause problems in my house). BUT they’re super easy to clean up. Take a cotton ball with rubbing alcohol and you’re back to a crystal clear “white board”. And if you’ve ever found out that you grabbed a permanent market instead of a white board pen. Don’t worry! Rubbing alcohol will also take that right off. Or if you ran out… simply take a dry erase pen over the permanent marker and erase. The permanent marker comes right off! (It’s the same trick for with a real white board.)
Now I modified my white board. After my first practice I got tired of fishing my pen out of my pocket. So on the back of my clip board I hot glued a magnet for my dry erase pen and for my ink pen. I hot glued magnets to my pens, in a place where they wouldn’t interfere with how I hold my pens (near center, in the crook between my thumb and first finger).
Advertisements
Depending on your pen, hot glue may not work. Hot glue works like a dream on plastic finishes, but if you grab a metal pen like I did its 50/50 if the glue will hold. My pen popped off with a minimum amount of glue. This second time I used a very generous amount (where I had to wipe off a large glob of left over glue) and the magnet has stayed on the pen. My back up for another glue failure is to switch over to liquid cement glue that is formulated to work on metal and ceramic. I didn’t start with that glue because I didn’t want to rig up something to hold the magnet in place while the glue dried.
As you can see, I don’t have to worry about making sure I have pockets while coaching and my pens are taken care of without having to worry about tying my pen to the clip on the clipboard.
But what if you don’t have a lamination machine that you can use???
Plastic Holder
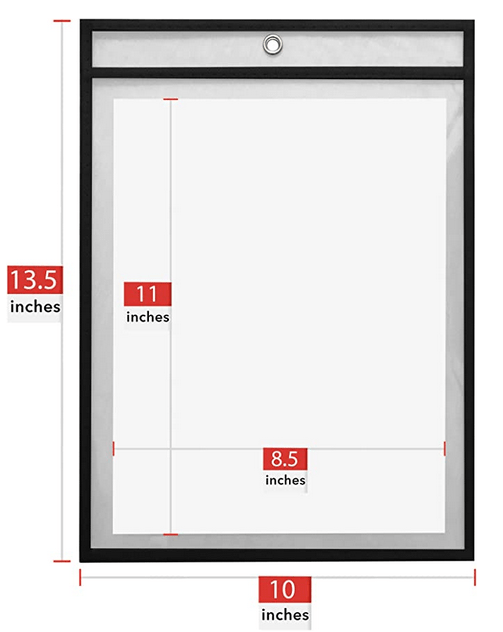
This one is another one of my homeschooling hacks. And I love it for absolutely everything, including a recipe protector in the kitchen if you have a sauce or frying and you get liquids flying next to your stove.
So far I’ve only seen these plastic holders at the dollar store. If anyone else has found them anywhere else (other than Amazon), please comment below!
But with this option, all you have to do is find a court or field that you want and print it out on a piece of letter sized printer paper and then you just slide it in. White board pens work on this plastic just the same as the laminate option above and white boards! So for under $2 this is really affordable for any scenario where your “basketball clipboard” will go missing. Or even if you have young kids who want to pretend play “coach”!
This option is also good if you want to be hands free coaching, but want your board with you. Connect it to a lanyard or a retractable key set on your belt loop. It’s handy when you need it and the pouch can also hold your pen.
Files Used For This Project
Don’t want to hunt down another basketball court image to print? You can use this PDF file here. Other sports fields and courts will be added to this link. If you don’t see the one you’re looking for, please leave a comment!
Other Items that may interest you
This post contains affiliate links that give us commissions on products purchased at no additional cost to you. These items listed here are from Amazon but may be purchased at local markets.
15 mm disc magnets I know these can be found in your local store. I used magnets, of this size, that I had found at my local dollar store (traditional black refrigerator magnets).
How was your Christmas? Were you able to spend time with those you love?
In my house the whole month of December is difficult. But that’s the life of having a handful of young children in the house. I use to think that starting to decorate at the beginning of December and putting out presents as soon as they were wrapped was adding to the incessant build up of excitement and driving mom bonkers.
Nope.
We did things differently and things didn’t improve. My gift making still happened at night. Or should I say lasting into the wee hours of the morning. Lets just say that coffee is my friend.
But….
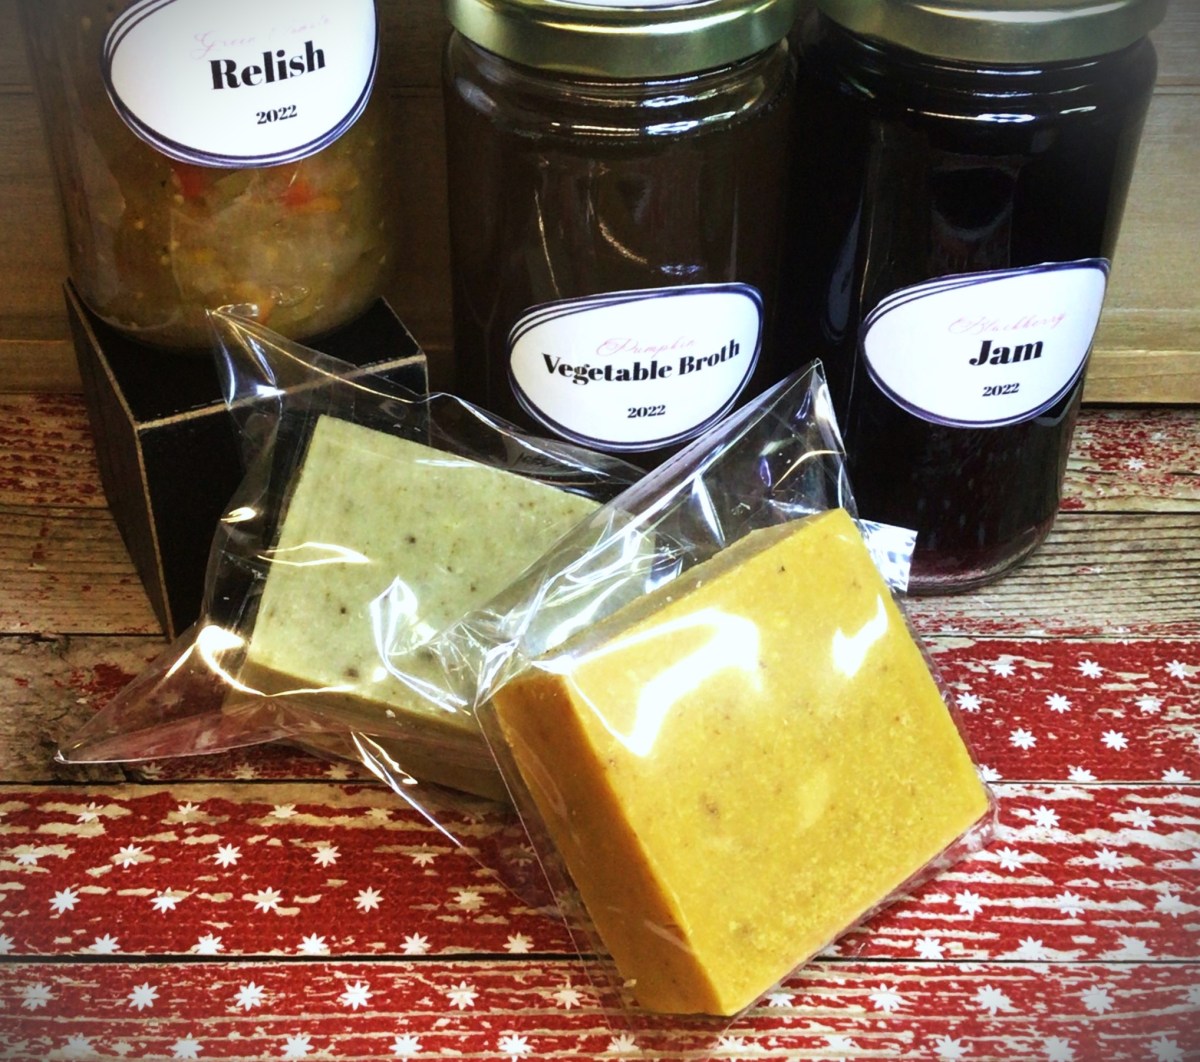
This gift, especially the soap, was probably my favorite gift to give.
I didn’t know how many people were having skin issues this year. And most people don’t talk about what they quietly suffer with. Part of it is the “I’ve tried everything” and no product on the market works.
The truth is that the local grocery stores have aisles dedicated to soap. And when you’re in that aisle you grab what you’ve purchased in the past (which may have been the brand that you grew up using) or it’s a sale based off of the label and its marketing claims. And we think that these area our only options.
Advertisements
You have another option
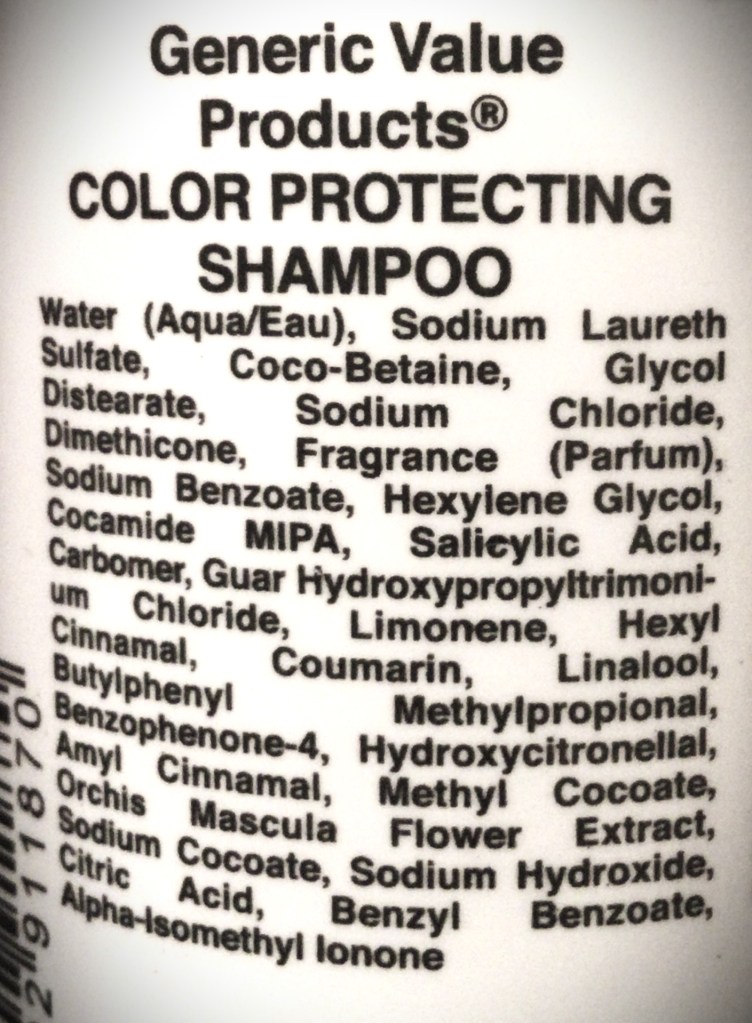
This is the video (three ingredients) that I watched that set me on the path of making my own soap, almost 3 years ago. It was an empowering feeling for me to make my first soap, Goat Milk Soap (4 ingredients), and stop buying the store bought soaps which have an ingredient list that looks something like this:
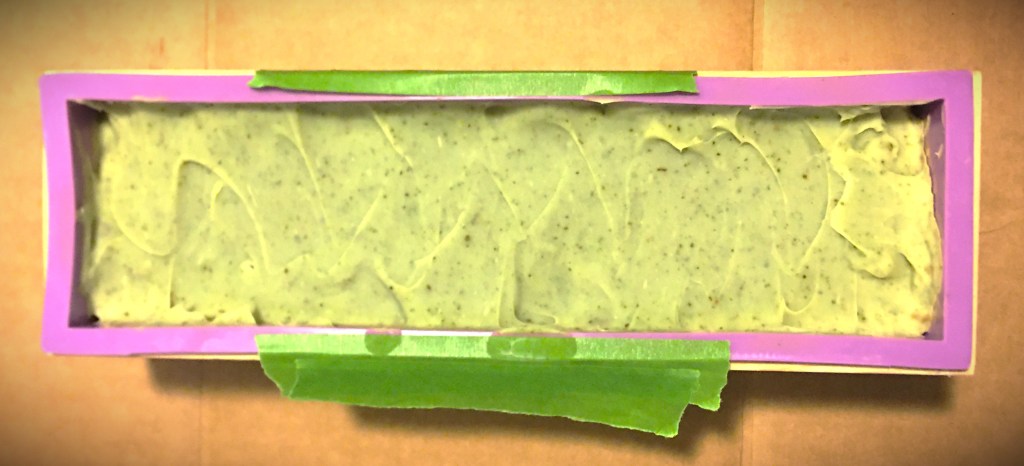
The comfrey soap in its mold.
Even though I took many chemistry courses in college, I can only tell you half of what is on product labels like this. If my children can’t sound out what the words on these kinds of labels have, that means that those ingredients are stuff made in the product labels of these soap corporations. Companies do this (take organic or natural items and change one chemical compound in the chain) they have made something they can patent and prevent other people from recreating (by pain of legal actions).
Soaps are made out of three items and three items alone: water, lye, and fats.
Yes, even those soaps that people claim are made without lye are actually made with lye. There’s a product on the market, melt-able soap base, that people claim is lye free but that is not true. This soap base is where the emulsification of the lye and fats has already happened for you. The lye and fats have already gone through the process of combining and so the lye has become safe to touch and no longer corrosive like in its original form (whether you use a crystalline lye or wood ash).
Advertisements
Here’s an example of a soap base. The first 5 ingredients are fats, followed by water, and then lye (sodium hydroxide). The end of the list is all the little extras that they added in to make their soap base unique from the others on the market.
In essence, this is an already made soap that a person at home can reshape and have the option of adding other things into for further personalization.
If you’re nervous about using lye, a soap base is going to be a good option for you. It’s not the best thing for your skin but definitely better than all the major brands on the store shelves.
Note: When making soap from scratch, with lye, you will need to cure your soap. This means that after you remove it from its mold (after it’s solidified for 24-48 hours), it will need to cure. This means that the soap sits for 4-6 weeks to dry out. While the soap dries, this allows the chemical transformation through emulsifying the lye and fats, to finish its work. When completed, they lye is no longer corrosive. The lye and fats molecular structures are completely joined and stable
Advertisements
Ingredient list from the soaps I made for Christmas
The two soaps that I made this year were Pumpkin Oatmeal and Comfrey Tea Tree.
Both soaps have only 9 ingredients that anyone can understand, colors of the soap come from the natural ingredients, and I can tell you the purpose of each of these ingredients and why they are good for your skin. You don’t need the lab chemicals to create lather or bar hardness. You don’t need the lab fragrances to give you a pleasant scent to wash with.
Note: “Fragrance” listed on an ingredient list of a mass produced soap, approved by USA FDA regulations, is all that has to be noted on a label even though it can include up to 200 different “fragrances” to make the scent of your soap. This is allowed because it’s modified in the lab and falls under proprietary patent laws.
Some of the comfrey soap after I cut it and before I set it aside to cure.
I know that not everyone approves of lard use in soap, usually for religious beliefs, but this fat can be switched out for tallow (beef, goat, or deer) which can align with religious beliefs. Or these animal fats can be omitted completely for the wide world of plant oils.
The variety of fats, found naturally in the world, each have different properties for your skin health and how it functions in a bar of soap. For example, lard is a single ingredient that adds hardness to the soap bar, creates lather, and adds to the shine and conditioning/softening of skin and hair.
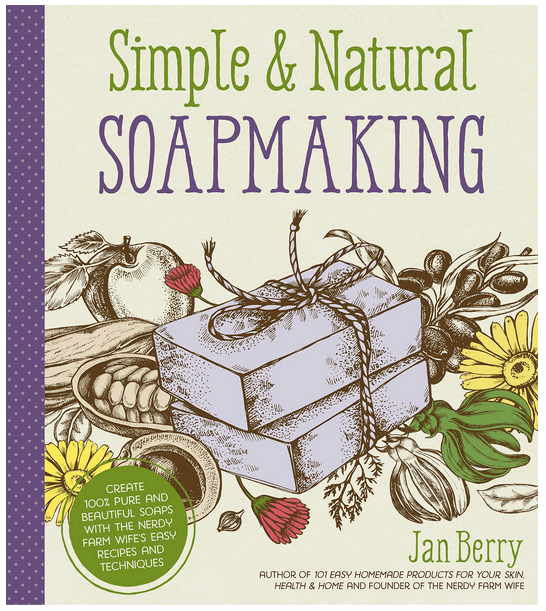
One book that I highly recommend for understanding how fats work in soap making and benefits to your skin and hair is Simple & Natural Soapmaking by Jan Berry
Advertisements
Origin of the fats is also going to play a part in how it reacts with your skin.
Shea Butter is not all the same. In fact, this week I just learned that not only is there a difference in quality of Shea that comes from heat vs. cold pressed processed Shea, but also the region. If I remember the documentary correctly, Uganda Shea butter is absorbed quicker into the skin than the Shea produced from other regions. And I never would have thought it, but the beauty industry is already capitalizing on the difference of absorption rates of the Shea butter produced from eastern and western Africa. It’s not all the same.
So if you by chance tried Shea butter beauty products and felt like the fat just sat on the top of your skin instead of being absorbed as you were promised, the reason isn’t because Shea failed you. It’s because you used a product that had a lesser quality of Shea.
In this instance, if you can afford to purchase a higher quality of Shea butter, all evidence shows that this purchase for a higher quality is most definitely well worth it. I’m all for finding the deal, but moving forward I’m now going to purchase a better quality of Shea.
With animal fats, whether the animal grazed on foods naturally available to the animal vs. grain fed and various injections will all be passed on to you through your skin.
Why what you put on your skin matters
It took me going through my second quarter of Anatomy & Physiology to learn that your skin is your largest organ in your body. Your skin keeps all your insides in, but it also is a filter from the outside world trying to come inside you.
I really don’t know why I was so surprised by all this because growing up we all have the conversations about needing lotion for our skin. We already know that we can correct some conditions by adding lotion or medication, depending on what’s wrong with our skin. But we never think about what we are adding to our skin daily that’s potentially causing the problems to begin with.
An example of a soap label. Notice the difference in readability and ingredients compared to a bar of soap I made (my shampoo bar, currently curing, is the same ingredients that the bar of soaps listed above).
We’re told to wash our hands regularly, especially during cold and flu season (not to mention the marketing for this habit over the last three years). With this increase reminder to wash your hands, how long is that ingredient list? How many of those ingredients do you know how to say, let alone identify what they do in the soap? Is it your hand soap that is adding to your cracked hands during the winter?
For example, my hands crack and bleed every winter. There has never been a lotion that I could find to ease the pain, let alone prevent the cracking in the first place. Christmas was when my Comfrey soap finished curing and I could use this recipe for the first time. Just by the first use alone, the redness of my irritated skin cleared up. The cracks decreased in size by half and by the next day they were all healed. I still have dry knuckles because I stopped using the Comfrey soap (leaving it for my son who has more sensitive skin in need of good soap). The Pumpkin soap isn’t as healing, but it’s still preventing the cracks. The Comfrey soap has aloe vera in it (which the pumpkin does not), so I might have to change that recipe to add some aloe in.
But I think you can start to see just by how your ingredients work, the natural function of things found in your garden, you can easily make a soap for yourself, family or loved ones that meet your skin type needs and not have to spend hundreds or thousands of dollars on store products that just don’t work.
Advertisements
There’s just so much to talk about with soap making. I will have to come back to this subject in upcoming posts. But I wanted to start the thought in your mind that you really can make your own soap. You don’t have to just survive and live with the condition(s) that you currently have. The first step is to start by cutting that ingredient list in half. The fewer the ingredients and shorter the syllables of the words mean that you understand what you are putting on the largest organ of your body. You can pinpoint what irritates your skin and you can pivot by switching out a fat or other ingredient that offers a vitamin or mineral that your skin actually needs.
Leave me a comment below if you’re looking for a solution to an issue.
In 2023 I’m looking forward to talking more about how herbs and garden ingredients can benefit your body. And all you have to do is add them as a seasoning to the foods you already cook, which benefits your body from the inside. And you can already start now with making soap to help your body from the outside. Skip the lab ingredients and start using luxurious soap that uses all natural ingredients which can eliminate all the extras that you need to “fix” what other products are doing to you.
For example, one lifestyle change for my family is that we are switching to homemade shampoo bars. My goal is to find the recipe that makes a shampoo bar where I don’t have to use 3 different conditions to combat the dryness that I’m convinced is caused by the long ingredient list on my shampoo bottles.
Happy New Year!!!
Products that were either mentioned in the post or items that you may find valuable in making your own soap.
This post contains affiliate links that give us commissions on products purchased at no additional cost to you. These items listed here are from Amazon but may be purchased at local markets. These products were paid for by us and are not the only products available.
After watching videos and reading different books, this is my personal favorite resource for recipes, ingredient information, and general soap making information.
I prefer cutting my own bars of soap and this is the set that I wished I would have bought the first time. The cutting block takes the guesswork out of eyeballing a uniform and straight cut.
This is great for just getting started and you don’t want to think about portioning out bar sizes. The disadvantage is that the silicone is very flimsy under the weight of the soap. So make sure that you have cardboard or another hard surface to tansfer the molds to a different location while the soap solidifies.
My granny made lye soap, used it all her life, never had skin problems, i make basic lye soap myself, 3 lbs of greese, bacon preferably, but the drainings off cooked meat, 2 gallons of water, and one can lye, , i greate up some for clothes soap, i use it in place of aal types of soap, melt it and mix with water for dish soap, works better than cascade in the dish washer, the only problem is aquiring the lye, it extreamly hard to get in the stores because it is one of the main ingreidants in the manufacture of meth, and everytime i make soap i have to call the police and noify them, so i dont get charged with making meth, it smells the same, making meth or making soap,
There shouldn’t be any fear in purchasing lye. I’ve been purchasing it for a few years now and have never had to report to a registery. There are certain over the counter medications that I’m aware of that there is a registry because of of it being associated with drug manufacturing. And in the instance of that product registry, there is a notation of who is buying what and at what quantity. For the manufacturing of drugs there is a specific amount that law enforcement starts paying attention to. For the average person, making soap at home, they are not going to come close to hitting that limit. I mention all this to prevent unnecessary fear from being spread.
Thank you for sharing how you make your soap! And also sharing how you use it to also to clean clothes and dishes.
Let’s be honest. I panicked when I looked at the calendar and saw that I’m hosting a family get together on Christmas Eve.
I panicked a lot.
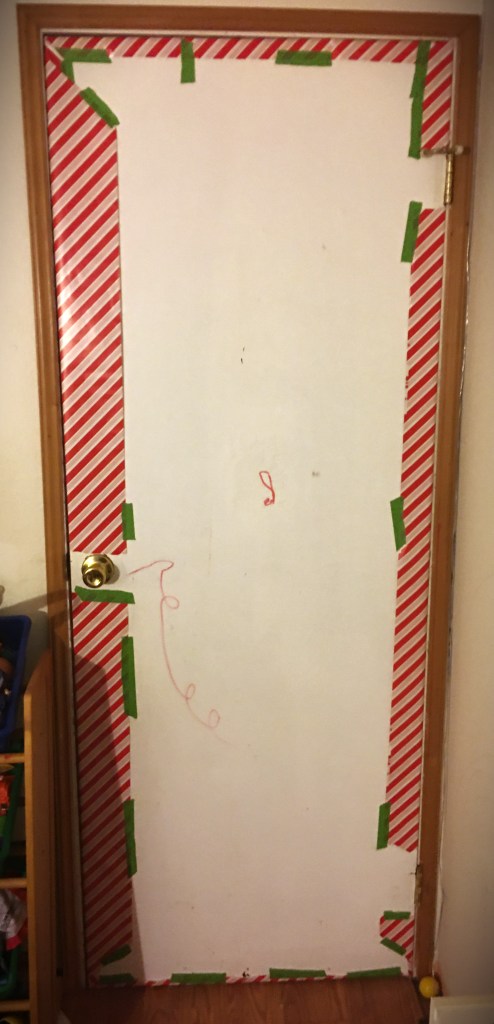
My house is tiny and very much lived in by three small children. And the state of this door says it all.
That hole in the paint, that’s where my oldest scrubbed the door until the paint came off. It was a stubborn pen stain. And who knew you could scrub the door so much the paint would come off???
We’ve lived in our house for over a decade. And I know it’s past time to repaint everything. In fact I have the vision for how I want to update our house interior. But I seriously can’t pull the trigger until we’re out of the color on the wall phase. All three do it. The oldest knows better but does it to push buttons when he’s angry at us. And evidently scrubbing his retaliation isn’t enough to break these outbursts.
Let’s just say that with all three back to back, I tell people it’s kind of nice because when you hit a phase you absolutely hate you only have to go through it once. Well the “wall art” phase is the first one that I hate. I just have to make it past this phase and I won’t have to go through it again!
Advertisements
The inspiration for this “hide my ugly doors” Holiday Cover Up was inspired by this YouTube video from Life of Style Blog, Dollar Tree Christmas DIYS 2022. I can’t improve her walk through for making a Paper Bag Snowflake, so I’m going to direct you to the 4:50 minute mark in the video. However I will give you some tips on how to make the snowflakes without making some easy to avoid mistakes.
Paper Bag Snowflake Tips
The paper bags that I used were not brown paper lunch bags. I happened to have white paper 2 lb bags that measure 4″ x 2.5″ and 7.5″ tall. Yes, my bags are smaller in proportion than the ones used in the video. But the shape of the bag is going to behave the same way no matter the size of the bag. I do want to mention that this 2 lb bag created about a 16″ snowflake. So if you do go with a lunch bag size paper bag, you are going to end up with a beautiful large snowflake!
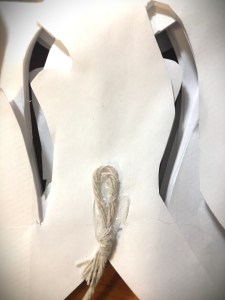
Leave large spaces between your cuts. I tried making delicate lines. And as you can see (picture 1 above) the spokes snapped when I glued the snowflake together.
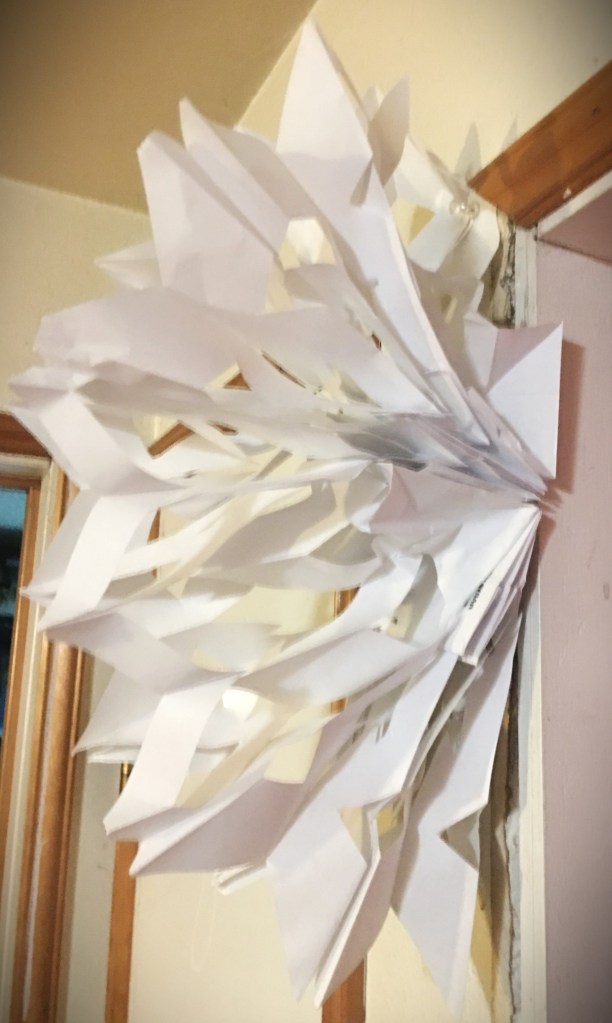
If you glue to the bag’s open end corners, 7 bags is only going to give you a half circle. Picture 2 shows you how stressed the paper becomes when you take it to the bag corners. You end up taking away the flexibility of the paper because you limit yourself to the length of the small side of your bag base. In my case, I limited the distance between spokes down to 2.5″.
If you glue to the edge of the bag’s open end, 7 bags may not be enough. (Picture 3) I started off with 7 bags, but when I went to fold the two ends together, the 3D snowflake structure started to collapse and flatten. I cut more of the pattern and added in 2 bags first, but found that wasn’t enough. At that point I just made another 3 to bring the number to 12 bags and that was enough to take the stress out of the paper. It no longer looked like it was going to collapse and flatten.
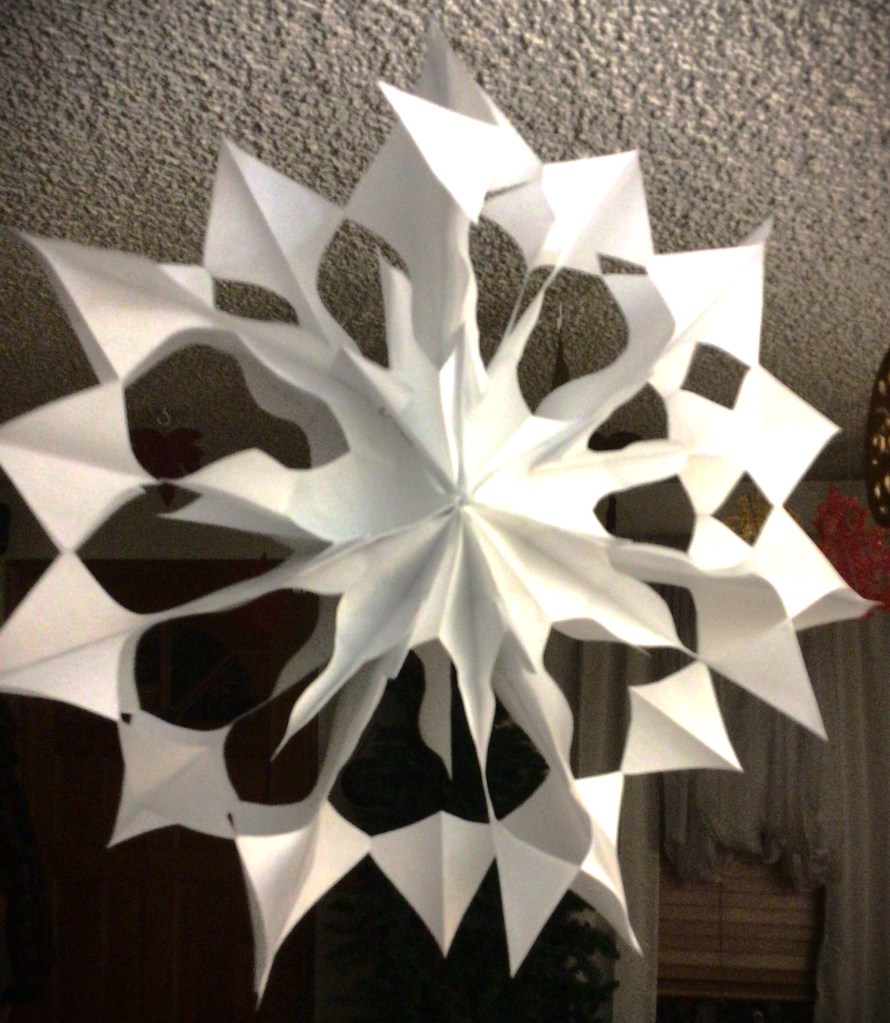
If you glue to the middle of the bag, the snowflake will be loose enough to not be stressed looking. I was most happy with everything about picture 4 (below). The paper was not stressed at all. There was flexibility. And it was the least frustrating in closing the snowflake. (If you are craft challenged, I think this tip will be the option that you will find most forgiving and less stressful for you.)
If you want additional ideas on who to close the snowflake AND make it reusable, check out the comments under the video. The velcro comment is ingenious and I will be making reusable snowflakes for the rest of the ones that I make for the season.
And let me just say this, I will not make a snowflake the old way again! Until a new idea comes around, this is my go to for making snowflakes. Depending on how intricate your cut design, I estimate that it took me about 7 minutes to make the snowflake (below) with three triangles down each side.
Please don’t limit this craft to just snowflakes. You can easily purchase bright fun color gift bags and make bunting for baby showers, birthdays, bridal showers, anniversaries, and anything else that you are celebrating. If you opt for the bunting, non-snowflake option, I highly recommend Tip 3 (above). It gives a full circle that reminds me of Latino bunting. And the airiness fits perfectly with Boho style.
Advertisements
Rigging Snowflakes
As I mentioned earlier, I have a small house. Most decorations I use are the ones that I can hang somewhere. So I made these snowflakes with a hanging line installed in the hot glue between two bags.
The easiest way of doing this is to make a loop on the end that you will be putting in the hot glue between the bags. Experience, through the years, has shown me that just gluing in the string with no further feature for the glue to hold on to, the string is just going to pull right out. So I’ve always used a loop, like you see here.
The loop allows glue to connect and hold on to three points of the string. Think of it acting like a Y. There is a natural pooling space between the arms of the Y and in the arm pits. And with paper also glued on either side, the string is anchored in pace.
In fact, my youngest swung at a snowflake hanging from my ceiling, with a roll of wrapping paper, like a piñata and the paper broke but the string held its place.
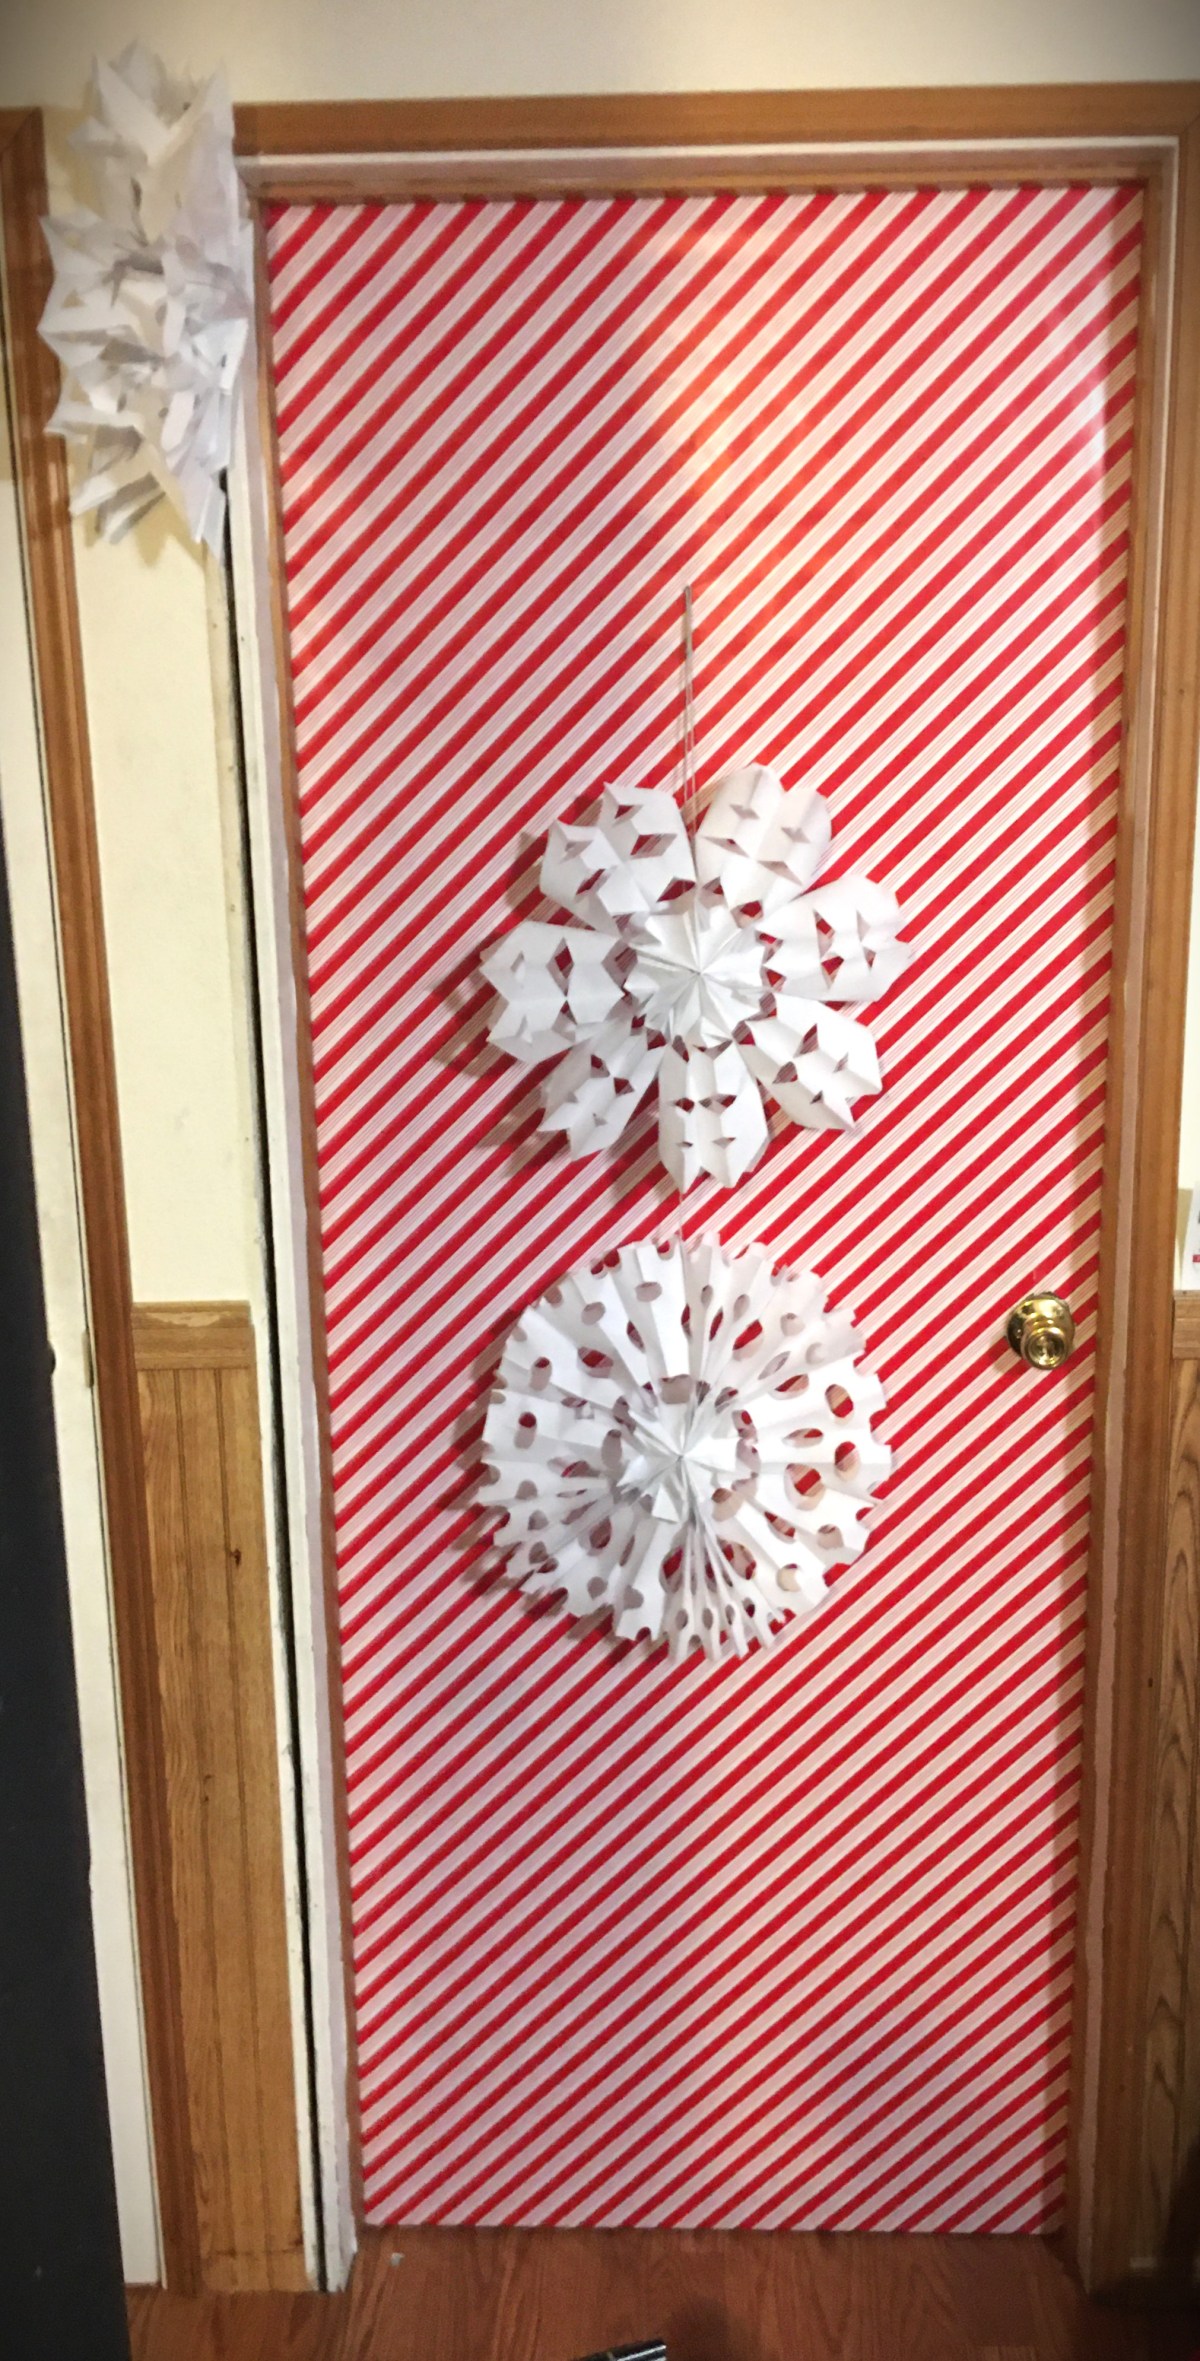
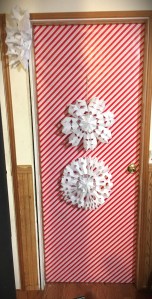
Hide the Ugly Door
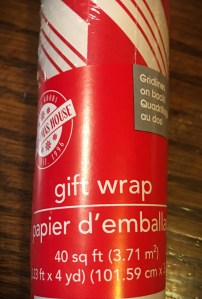
At the Dollar Store I found rolls of candy striped wrapping paper. 1 roll of 40 square feet is enough to cover one door (front and back with a little left over for patch work).
I decided to wrap my doors instead of scrubbing and/or painting them because I have zero time to move this task to the top of my to-do list. I don’t have time to paint on top of the normal craziness that December brings every year. Not to mention that the only space I have to paint doors is outside and currently we have off and on snow. Wrapping the door did take me somewhere between an hour and two as it was. I couldn’t keep an active count because I did this while chasing and feeding kids. So I count this a success.
This door, I wrapped while it was still on its hinges. I’m pretty sure that this was the time suck because of how much time I had to spend in sliding the paper under the door and through the hinge space.
With the exception of working around the door handles, wrapping a door would most certainly be easier to do when it’s removed from the doorway.
That being said, I’m going to show you how I did this while keeping the door in place.
Do the front of the door first.
With some prepped pieces of painter’s tape, I draped the top of the paper over the top of the door and held it in place with a piece of tape. This freed me to go to the back side of the door and position the paper before anchoring it down.
TIP: Painter’s tape is amazing for this first part because it’s strong enough to keep the paper in place but release the paper and door without ripping the paper.
Now that the wrapping paper is going to stay in place, I went back to the front side and dealt with the door knob.
Take an exacto knife. With your free hand, run the paper down smoothly from the top of the door down to the top of the door knob. With the paper held in place, cut around the edge of the door knob with the exacto knife.
If you find it difficult to cut smoothly without ripping your paper (I did because the Dollar Store paper is cheap and very thin–it rips when you look at it funny) than cut an X or + over the door knob. This allows the knob to come through the paper and becomes easier to work around.
TIP: If your cuts are too big, it’s not a problem. Grab your clear tape that you use for wrapping presents. No one is really going to notice if the tape is glossy. They have to look for it to see it. But if you want to be thorough, use a matte finish tape. It will become invisible and no one is ever going to find it.
Advertisements
TIP: If the cut lines are jagged and uneven, don’t worry. When you’re all finished you can hide this by tying a thick ribbon around the door knob, hang a door decoration or even a stocking from the knob. When in doubt, place an accent decoration piece over the rough edge.
Once the door knob has a clean cut circle around it, this is now another anchor point to help you wrap the paper around the edges of the door.
For the hinges and the latch for the door, use the exacto knife and cut from the edge of the paper to the edge of the door. The flap that you want to remove you can either cut it off or fold it and slide it behind the paper on the face of the door.
TIP: The most difficult areas for me to work around were the top and bottom corners on the hinge side of the door. If you need to, cut the diagonal so that you’re only wrapping around one side at a time rather than two at the same time.
When you come to the bottom of the door, cut the paper from the roll a little longer than you think. I thought I gave myself about two or three inches to come up the back side of the door, I just barely had enough to come up onto the back face of the door. So don’t be afraid to give yourself more paper than you think you need.
Once the front face is all taped down, pick up the remnant of paper and hold it up to the back of the door. Find out where you need to cut to cover the exposed door, width wise. Lengthwise you will see that there’s not enough. And that’s okay. The excess width that you cut off will be enough to cover that bottom section and some pieces to patch around the other side of the door knob and anything you want to clean up (like painter’s tape that you used to tape down the front face).
With the pieces cut and ready to go, start taping those up. I started with the bottom so I could hold those pieces up with painter’s tape (which would then be covered by the larger back face paper). With these edges being seen (much like a present that you wrap in a piece meal fashion because of an oversized box or using paper scraps because you ran out of paper on Christmas Eve), use the clear tape and be as liberal as you would like to.
TIP: With the right printed pattern, it is possible to make everything line up perfectly and not have that piecemeal look. I had hoped that this candy cane print would have done that, but I got caught a few times where the stripes just wouldn’t line up.
Decorating the Door
There are so many options that you can go from here.
For example, one of the fads right for the last couple years is wrapping mirrors or paintings on the wall as presents. The door can be decorated the same way with ribbons and bows.
Don’t have enough wide ribbon. I found colored metallic duct tape in the auto aisle of my local dollar store. They weren’t on my shopping list, but I did take note. And if you hate ribbons slipping (like they will on a door), the metallic duct tape would be a perfect alternative because those “ribbons” will definitely stay in place once you lay them down.
Another idea is to take a poster board and make a “Do Not Open Til Christmas” sticker. (I probably won’t do it this year, but it’s on my list for future ideas.) Or an over sized gift label.
The Paper Bag Snowflake Video that I shared with you above was one video that my kiddos watched with me and they wanted to make those. So the snowflakes are my go to this year for decorating. It’s an easy enough craft that they can do with me. And now that I know how to optimize our production, even my young preschooler can practice his cutting skills and be able to make something for Christmas.
Please share with me your snowflake or door decorations.
How did these crafts go for you? What accent pieces did you use to complete your projects?
Processing…
Success! You're on the list.
Whoops! There was an error and we couldn't process your subscription. Please reload the page and try again.
When I add the comment block, I hit the + (add block icon) and type “comments” in the search bar. The comment plug in is then automatically added into the post. (It’s a feature that is already available and no additional download was needed.)
This year is an interesting year to go into for Christmas. For some families, they are facing a tight budget and want to still have some wow while still meeting other necessities. Other families have taken the last few years to simplify their homes with a minimalistic look. And yet there are other people you will gift this year who are limited by space, be it home or office.
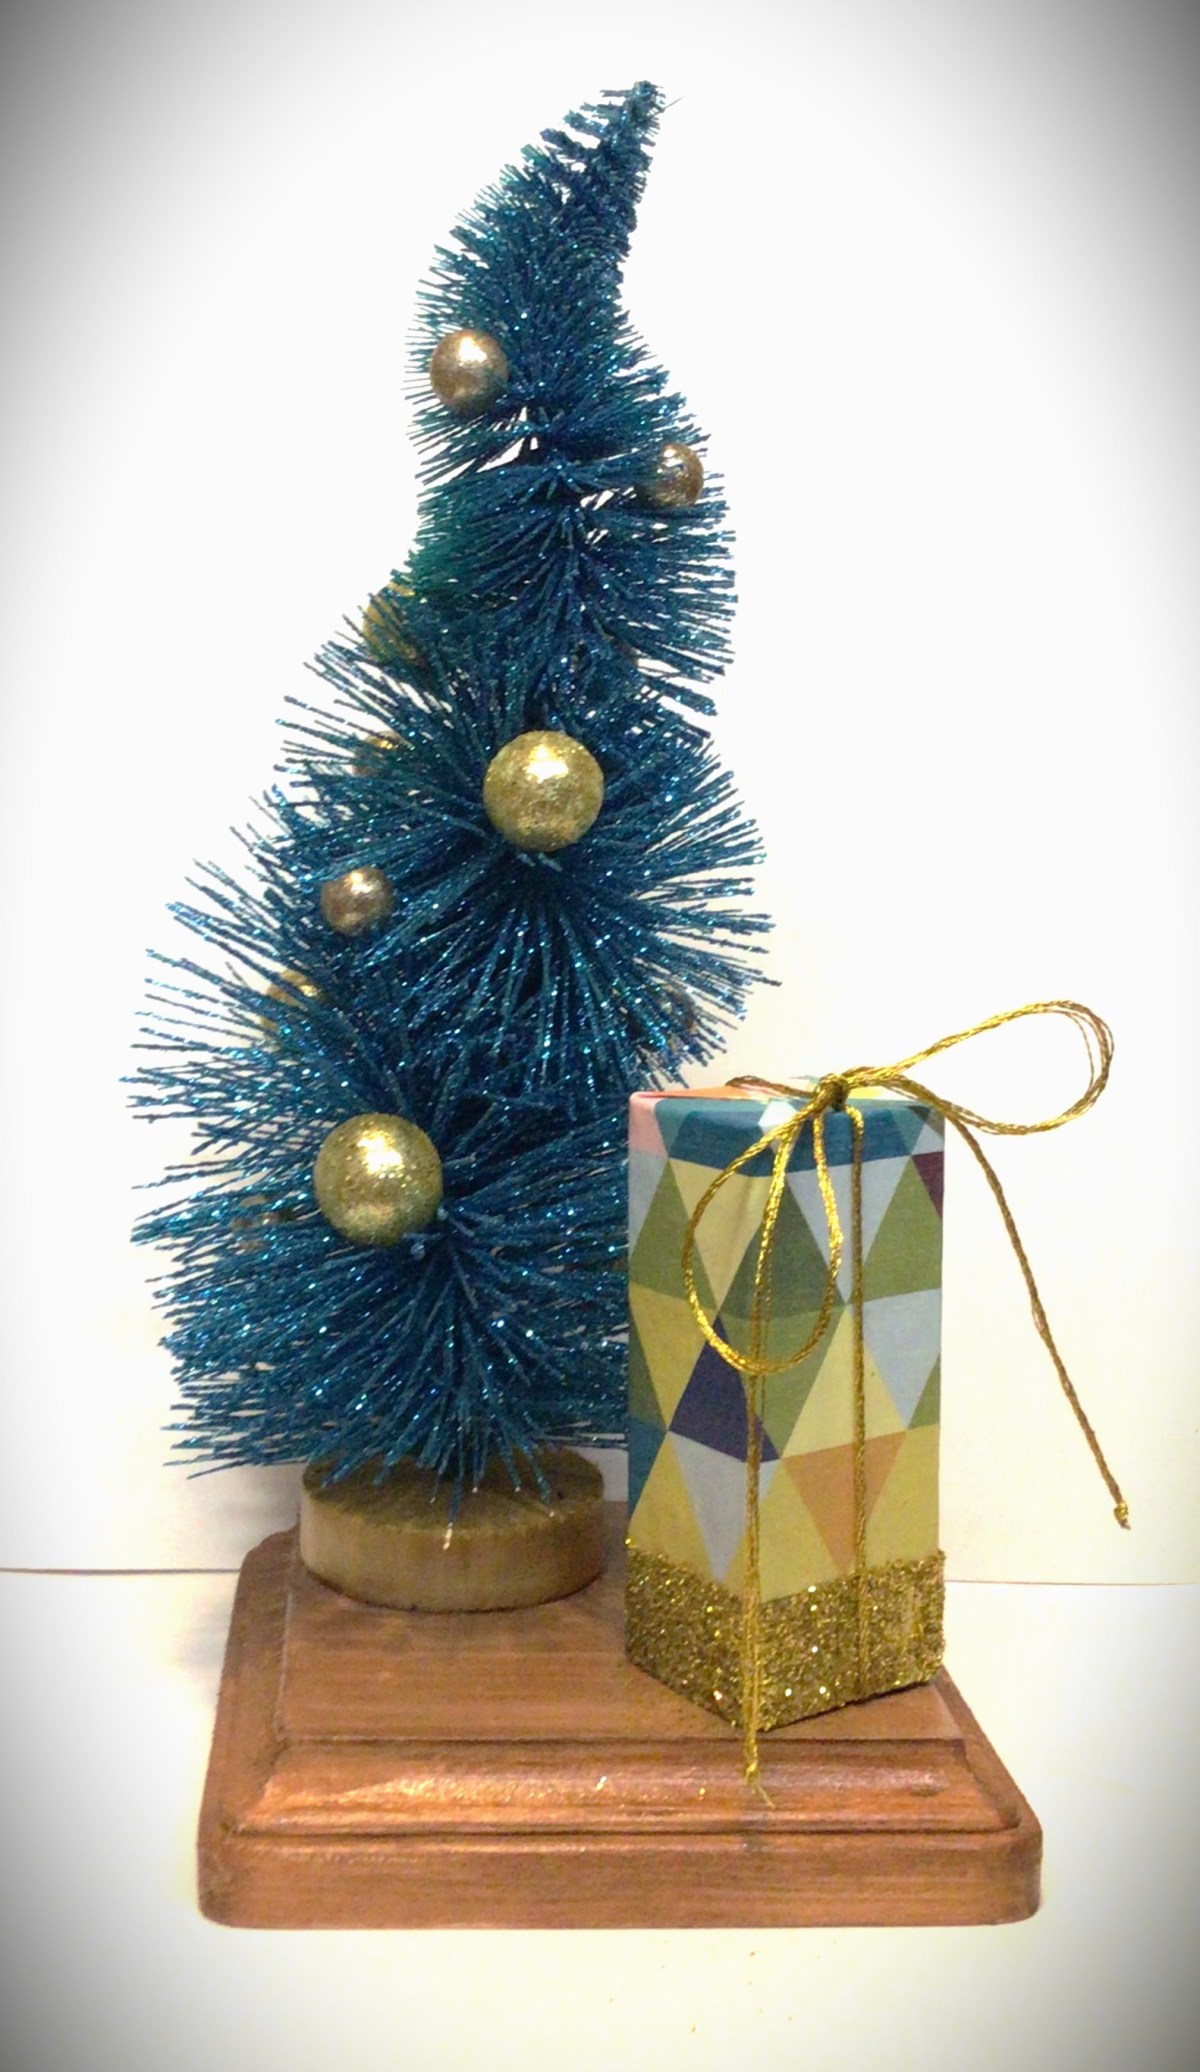
The first gift I want to present to you this year is the Desk Tree.
The beauty of the Desk Tree is that it is minimalistic in design and fits into small spaces at the same time. Not only that, but it is a blank canvas for other ideas that you already have in place for someone on your list. But I’ll come back to all these possibilities in a few moments. As well as the announcement of a special treat!
Let’s Make a Desk Tree
The fundamental components are the base, tree, and present. Everything else is completely customizable and based off of what you can find in your local shops or what you already have in your craft room. This time the only thing I purchased recently was the tree.
Other supplies I had on hand:
acrylic paint
paintbrushes
wood glue
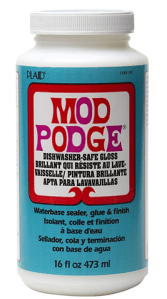
Mod Podge
hot glue gun
clamps
craft paper
glitter
gold embroidery floss
styrofoam balls (different sizes)
Prep All Wood Pieces
I didn’t choose to sand the wood, because I wanted to keep rough surfaces for the wood glue to adhere to well. In fact, where I glued two pieces of wood together I roughed it up by scratching into the wood with a wood carving blade.
Option: you can paint the base before or after you glue on your tree. For the example in this set of photos, I glued the tree on first and worked around it. For the other copies I made, I painted the base first and glued on the tree afterward. The disadvantage of adding the tree first is that you have to have a steady hand as you paint around the tree. The disadvantage of adding the tree after the base is completely finished is that you run the risk of scratching the “floor finish” if you rough up the spot where you will add the tree.
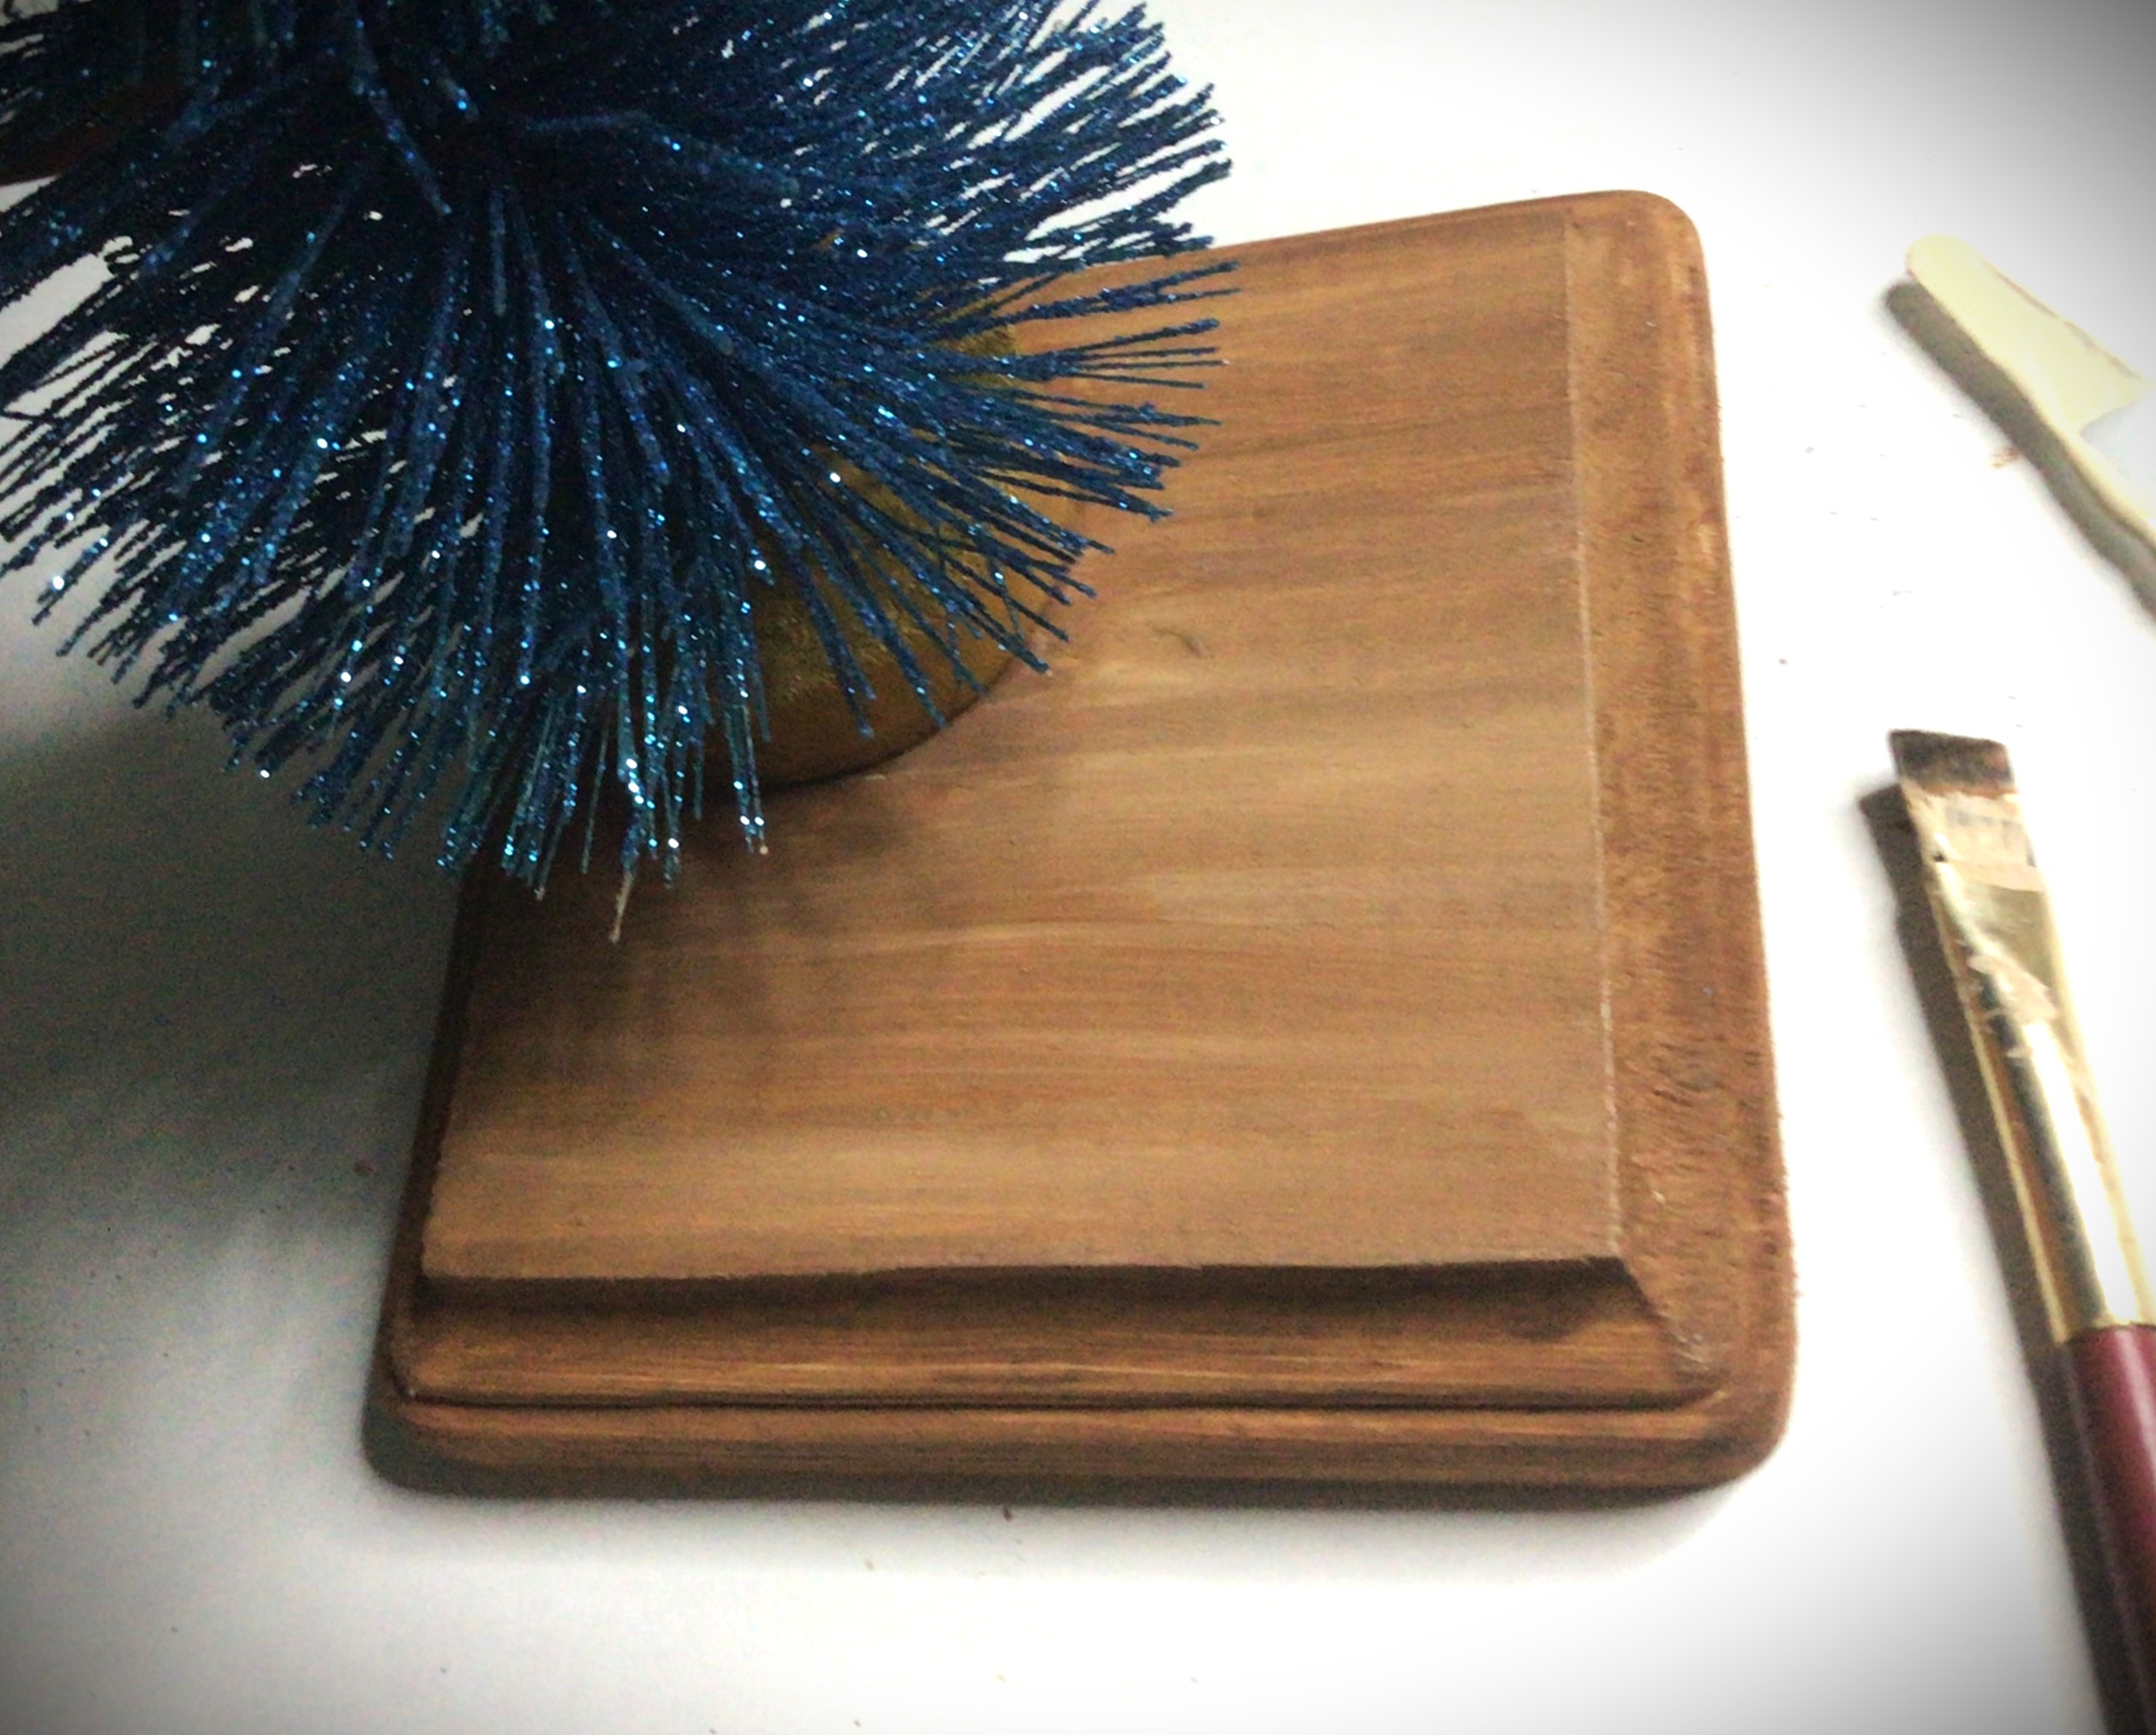
Paint the Base
I could have painted the tree base before gluing it on. But let’s be honest, I didn’t think about it until later. So just know that it is easier to paint the tree base before you glue it, but entirely possible to paint it while on the base. Just remember to paint the tree base before you paint the floor. Because I chose to go with gold accent to my teal tree, the gold tree base paint doesn’t ruin or effect the floor at all since it blends in with brown. This is another good reason to paint the tree base first. If your paint brush slips, it’s not going to throw off your paint job. And as you can see here, in the first picture, I cleaned the gold off my brush by just painting it on the “floor” going with the grain of the wood.
When you paint the “floor”, paint in the direction of the wood. This allows you to use thin coats of paint (making it a faster dry time) and if the wood grains show through, it adds to your paint job instead of competing with it.
Picture 2 I took to show you that you have the option of leaving any decorative edges of your wood different if your creativity is taking you in a different direction.
Picture 3 shows you the direction that I went, changing the color of the pine to more of a mahogany wood color.
Option: Perhaps you don’t want to paint the base to another wood color finish, but have a wood stain in your garage. Go ahead and use the stain!
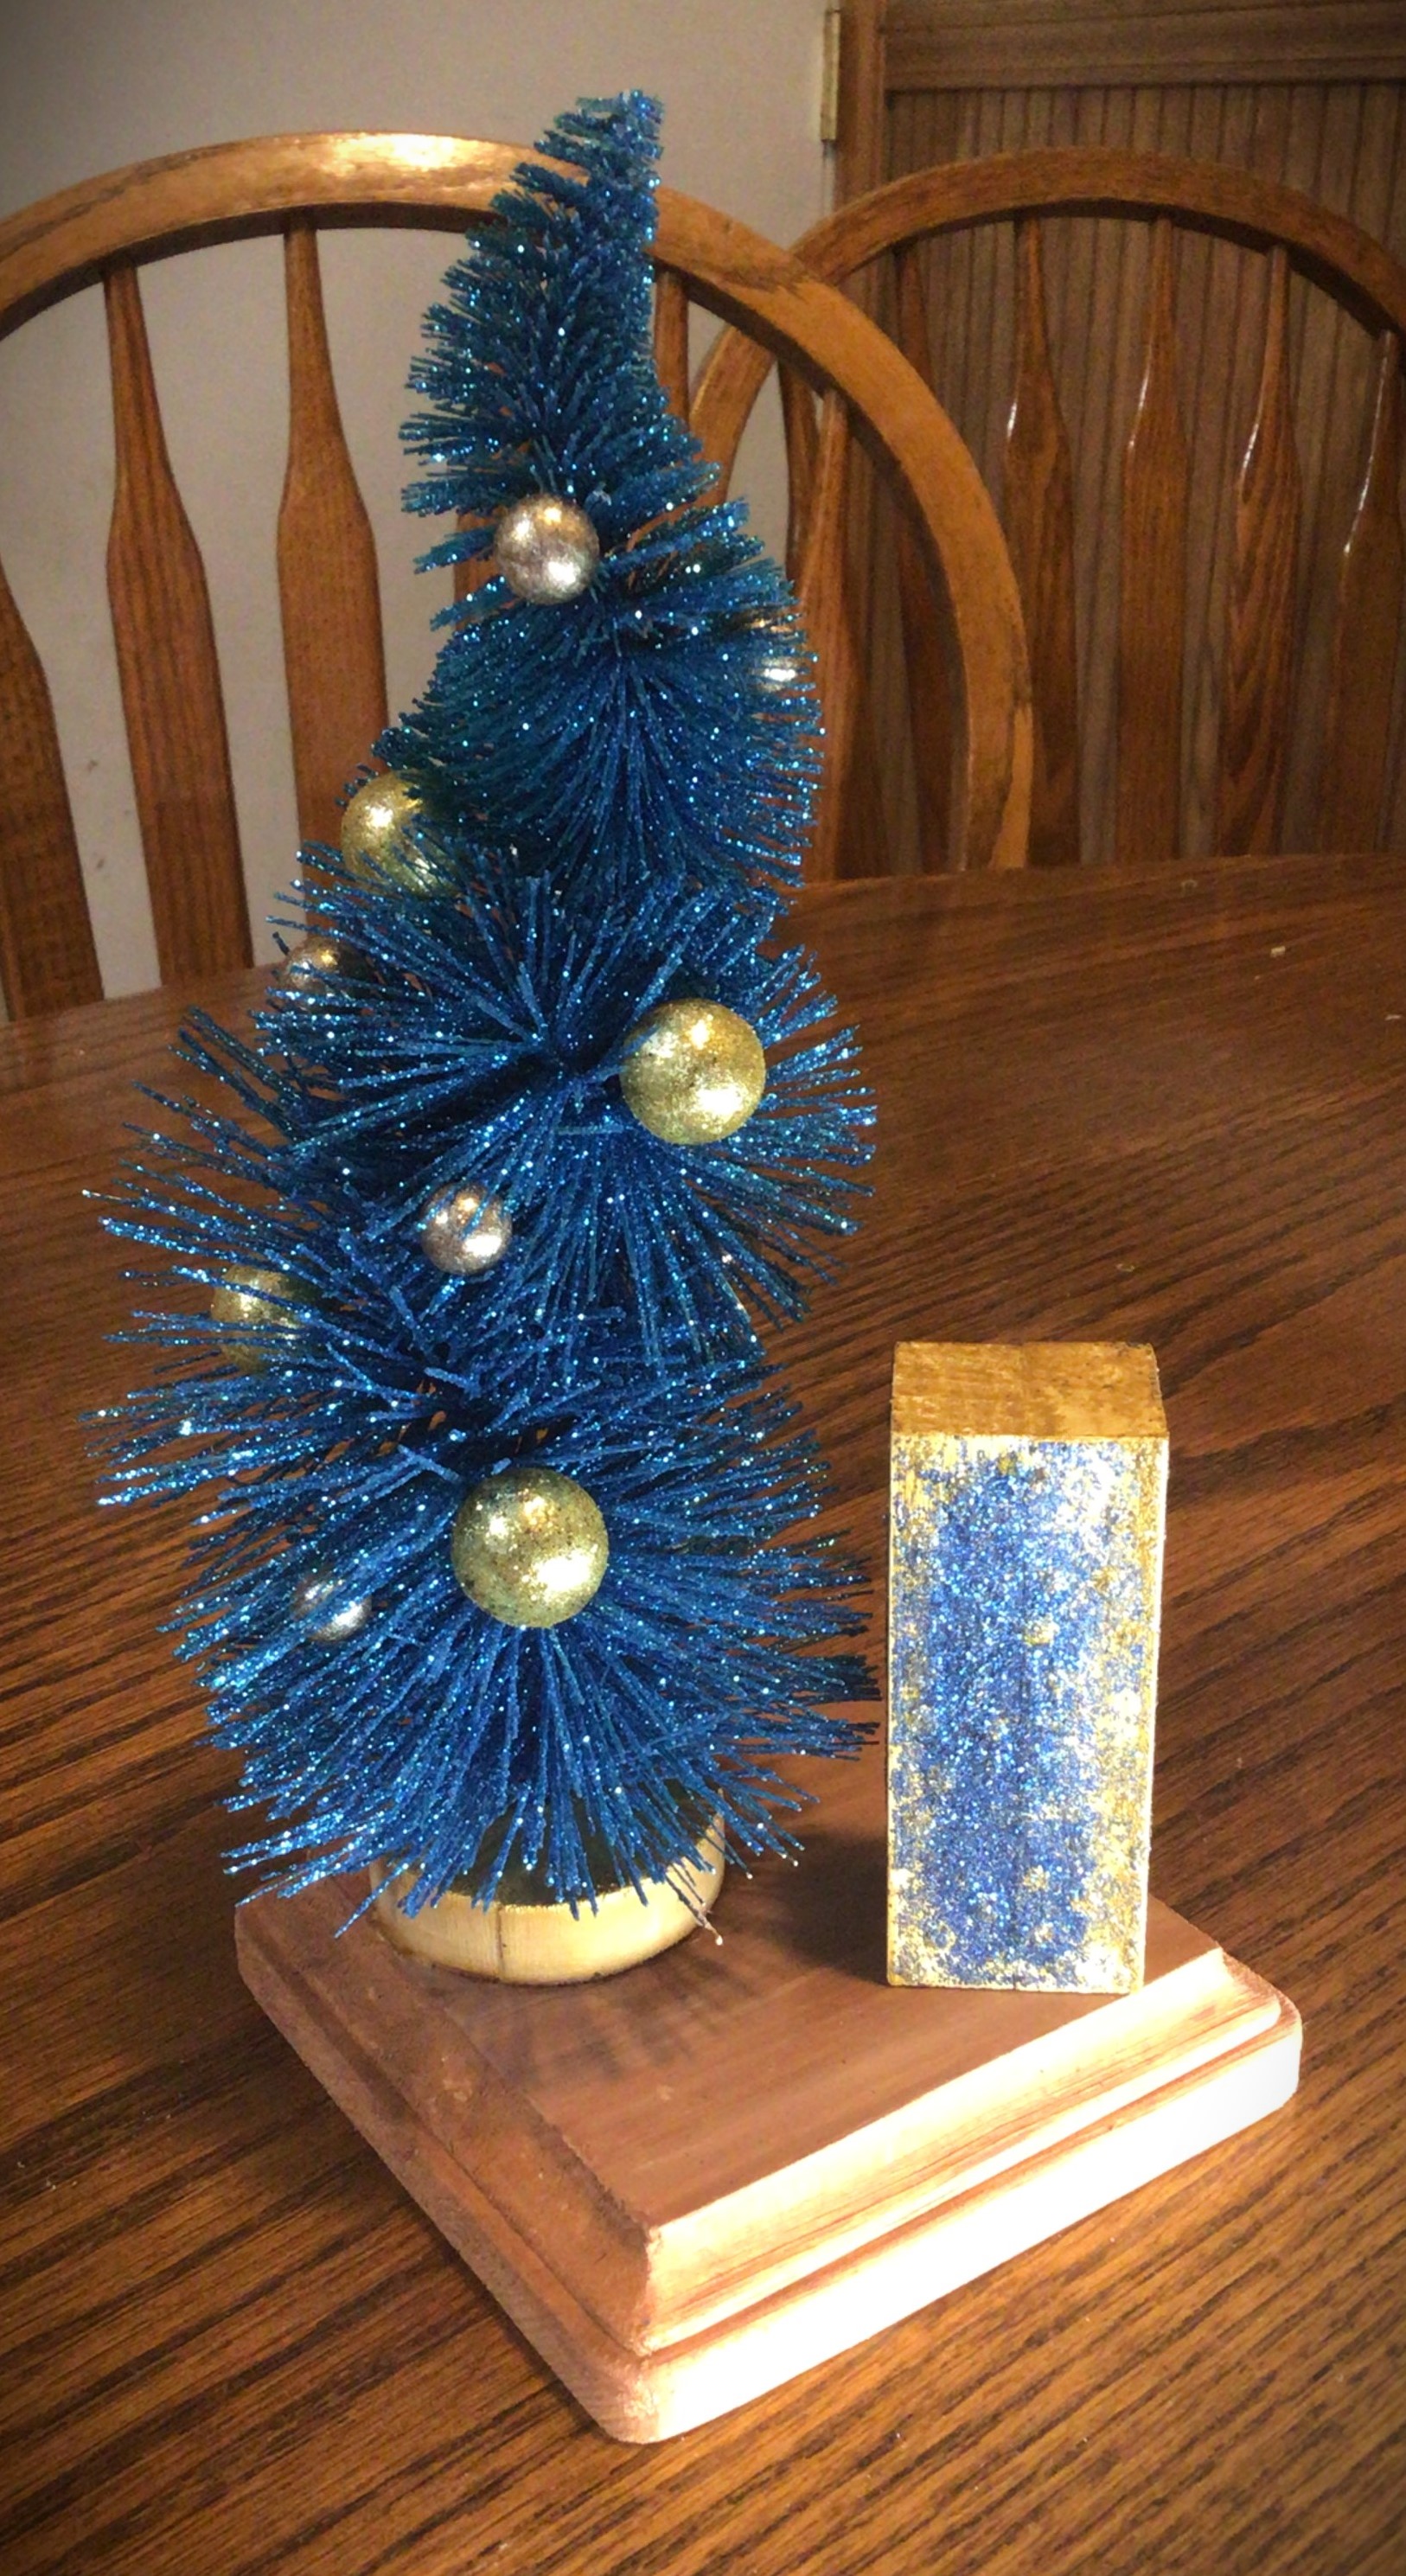
Stylize Your Tree Set
Sometimes you have to pause and put things together to see what direction you want to go with. Originally I had planned on painting my “present” and then add dots of glitter to make my own “wrapping paper”. Let’s just say that my polka dots looked like my preschooler made them. It wasn’t the vibe I was going for so I present to you my second option, glitter “wrapping paper”. For a different project, I might choose this option, but it wasn’t working for me either.
While I was staring at the teal tree with the “ornaments” that I put on it I asked myself what it was that attracted me to this tree. And the answer was the playful was that geometry was used. And then it hit me! I had geometric crafting paper.
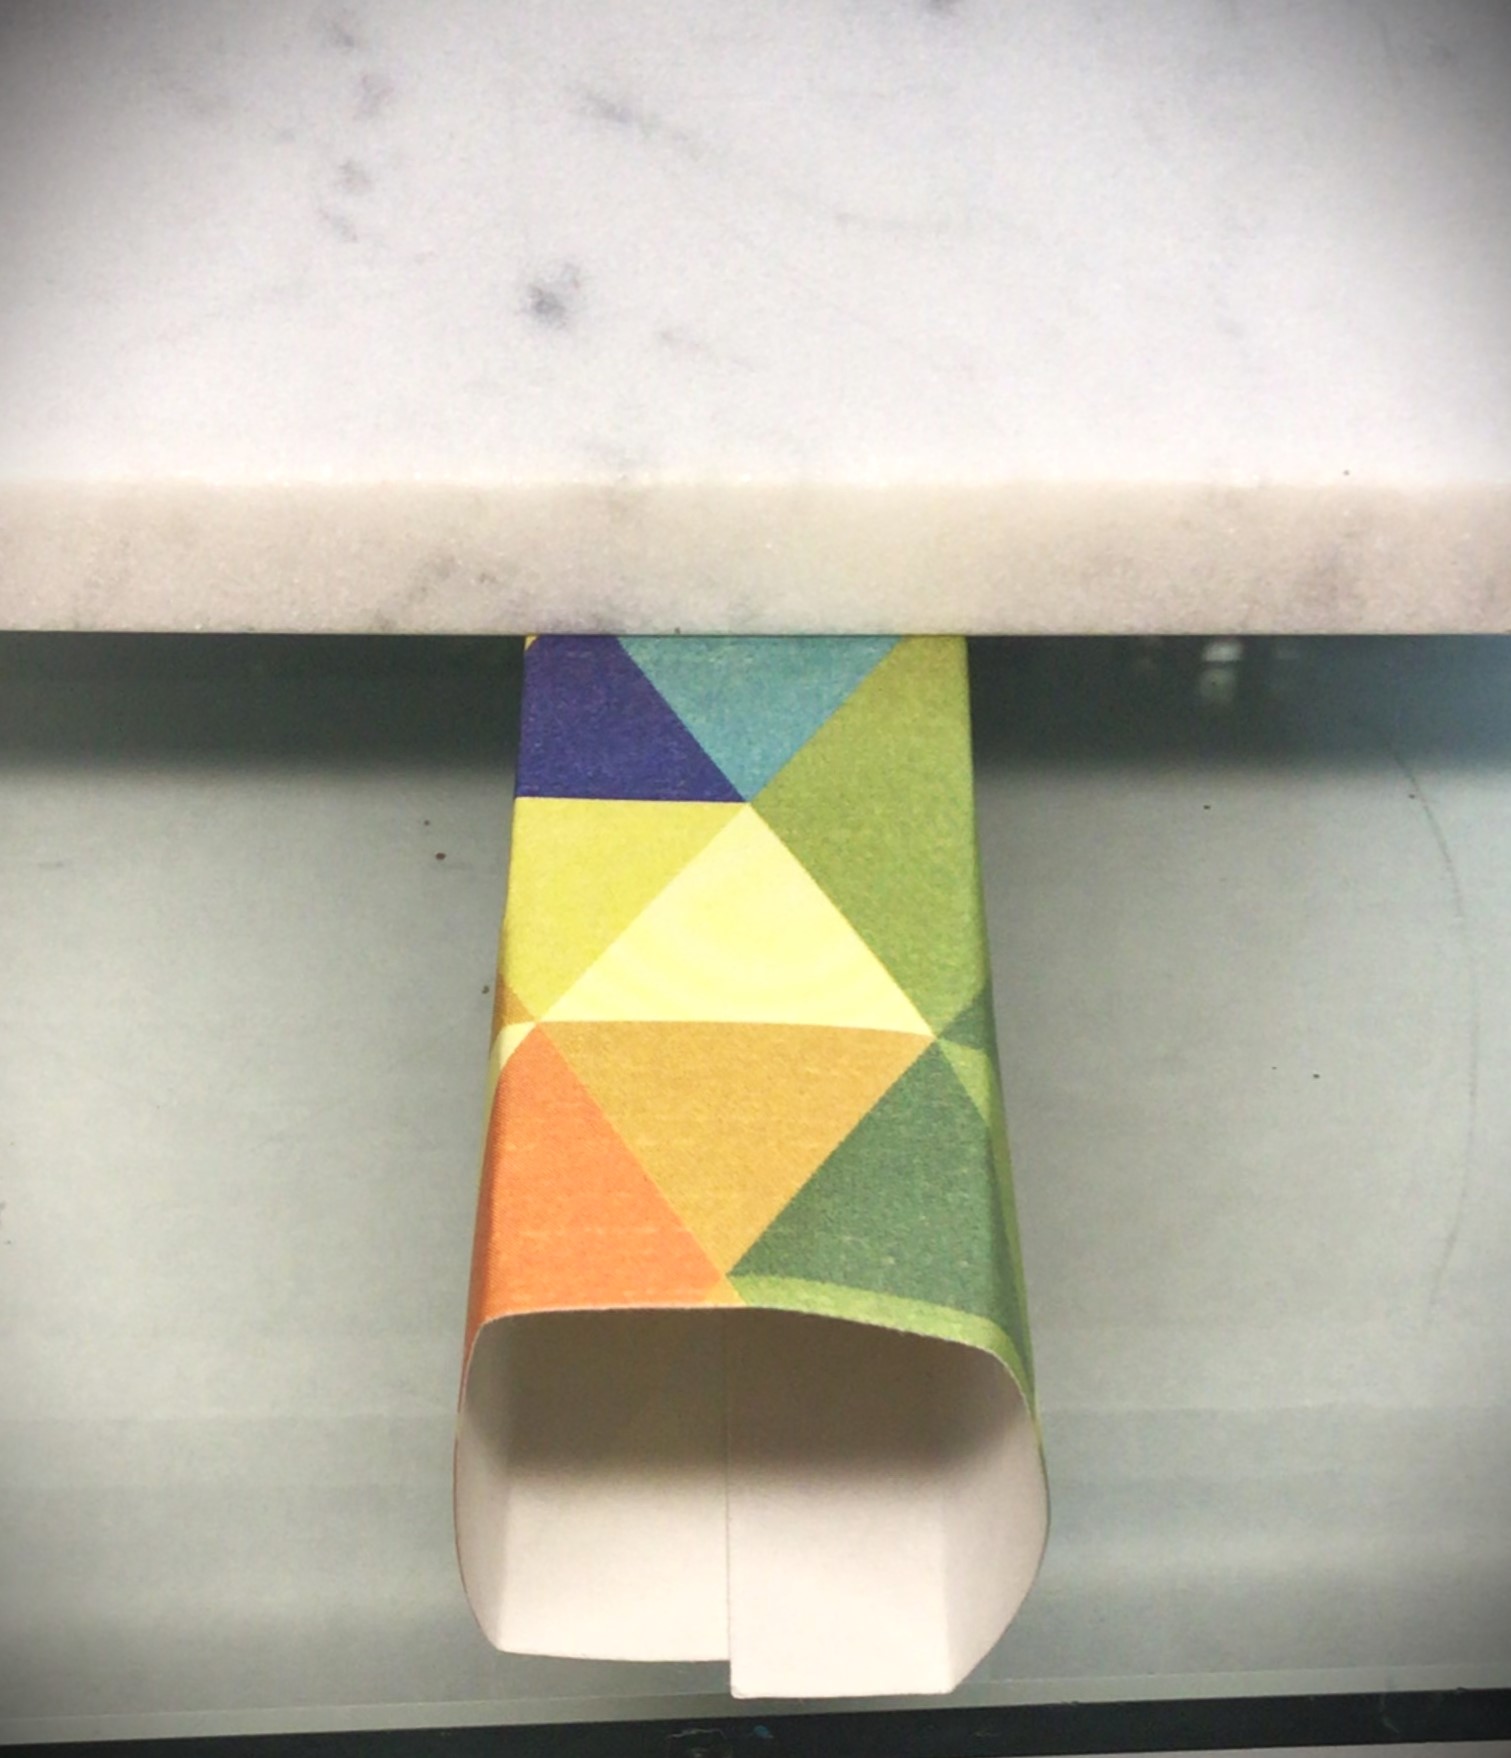
As you can see here, the geometric triangles brought symmetry to a very asymmetric and quirky tree. And the crafting paper just made my job of wrapping this “present” so much easier.
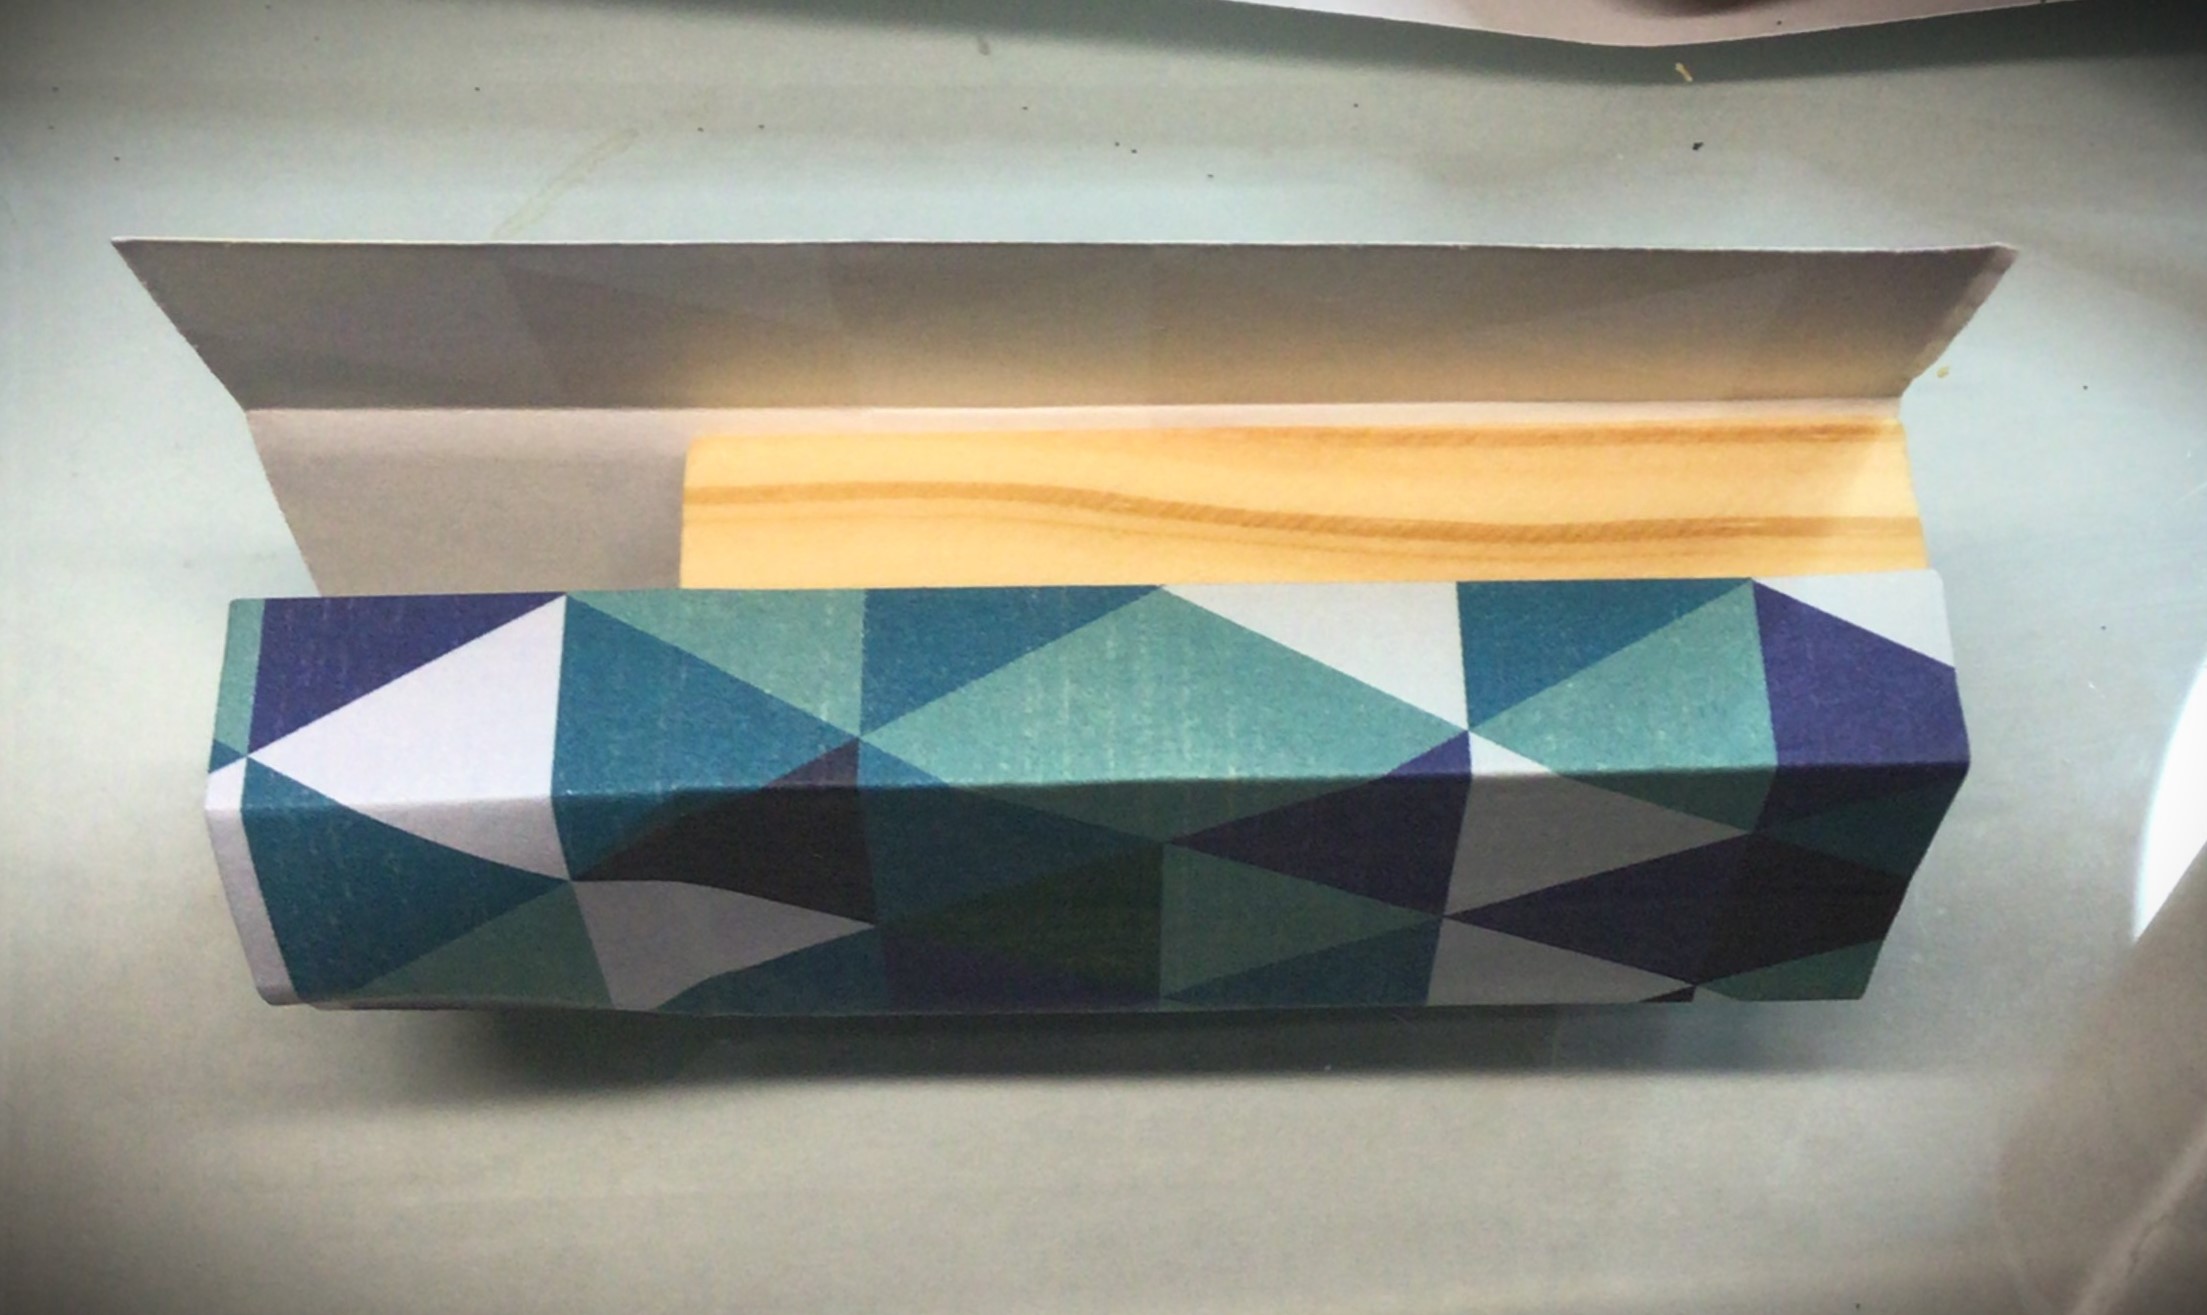
Wrap the Present
This is simpler than actually wrapping your Christmas presents because you get to use glue!
Once I trimmed my paper (leaving the bottom exposed, with enough left over to wrap the top), I created the folds in my paper before gluing it down. The one thing I hate about gluing down craft paper is that if you have to lift it to reposition it, the paper doesn’t look as nice. So to avoid this pit fall, I made sure to make all my creases first. This allowed me to put the edge of the wood block in the crease and line up before laying down the Mod Podge.
Plus there is the added bonus of knowing where your finishing end will land. In this case, I started my first crease by thinking of this blind end finish and placing the paper edge on the corner of a short end. By the end of my creasing job, the tail end had the paper over lapping around halfway on that same small end.
Start by gluing the paper down with this small end tail.
Work one end at a time and smooth out the paper as you lay it down. This will prevent the paper from slipping, having bubbles, or making creases as you go around your wood block.
When you come to the end, your last flap will be the section that lines up with the short end of the wood block. Apply glue to both the wood block and on top of the paper that you already glued down. The “present” how has a hidden seam where you don’t have to worry about hiding a back side of the present.
Put this seam side of the “present” table side down and place a weight on top of the block. This frees your hands up to do another step of the project while the glue dries, keeps the paper from lifting or wrinkling.
Once this seam side is dry, you are able to know wrap the top of the wood block. For this step, pre-creasing will also make this step easier.
Fold the seam side of the paper down first. Then fold the other short side of the block down next. Finally fold the long sides down.
Reopen the paper and apply Mod Podge down on the full top of the wood block. Fold down the seam side. Apply Mod Podge to the paper of the other short side and fold it down. Then put Mod Podge on the paper of the long side flaps and press them down in the order that you folded them.
When you “present” top is wrapped, you will want to add a weight to the top until the glue dries. (This once again frees your hands up to work on something else of the project.)
You will probably find that you need to put the “present” in between two items to keep it from falling over. You will see that I put it between a craft bin and one of my bottles of paint
Finishing Touches
In order to tie in the glitter from the teal tree and the pain finish of the craft paper, I decided to add some gold glitter trim to the bottom of the “present”.
TIP: To keep the glitter from shedding, consider applying a top coat of something. It’s whatever you have on hand. If you have some glitter glue, that seals in the glitter you just applied without adding a dull layer over the sparkle.
Once the glitter dried, I opted to add an embroidery floss ribbon. All my ribbons were disproportionate to the present. And I didn’t have any tiny premade bows to stick on top. So if your craft room also is limited in tiny items, consider things like embroider floss, thin hemp twine, baker’s twine, or even sewing thread wrapped around a few times.
Depending on what you use to finish off your present will determine how you attach your present to the wood base. Ideally, you would want to add the present with wood glue. In this instance, wood glue would have created more of a mess to clean up than hot glue. I placed hot glue on either side of the floss so that the glue would balance out the thickness of the floss and make the present secure.
Gifting Options
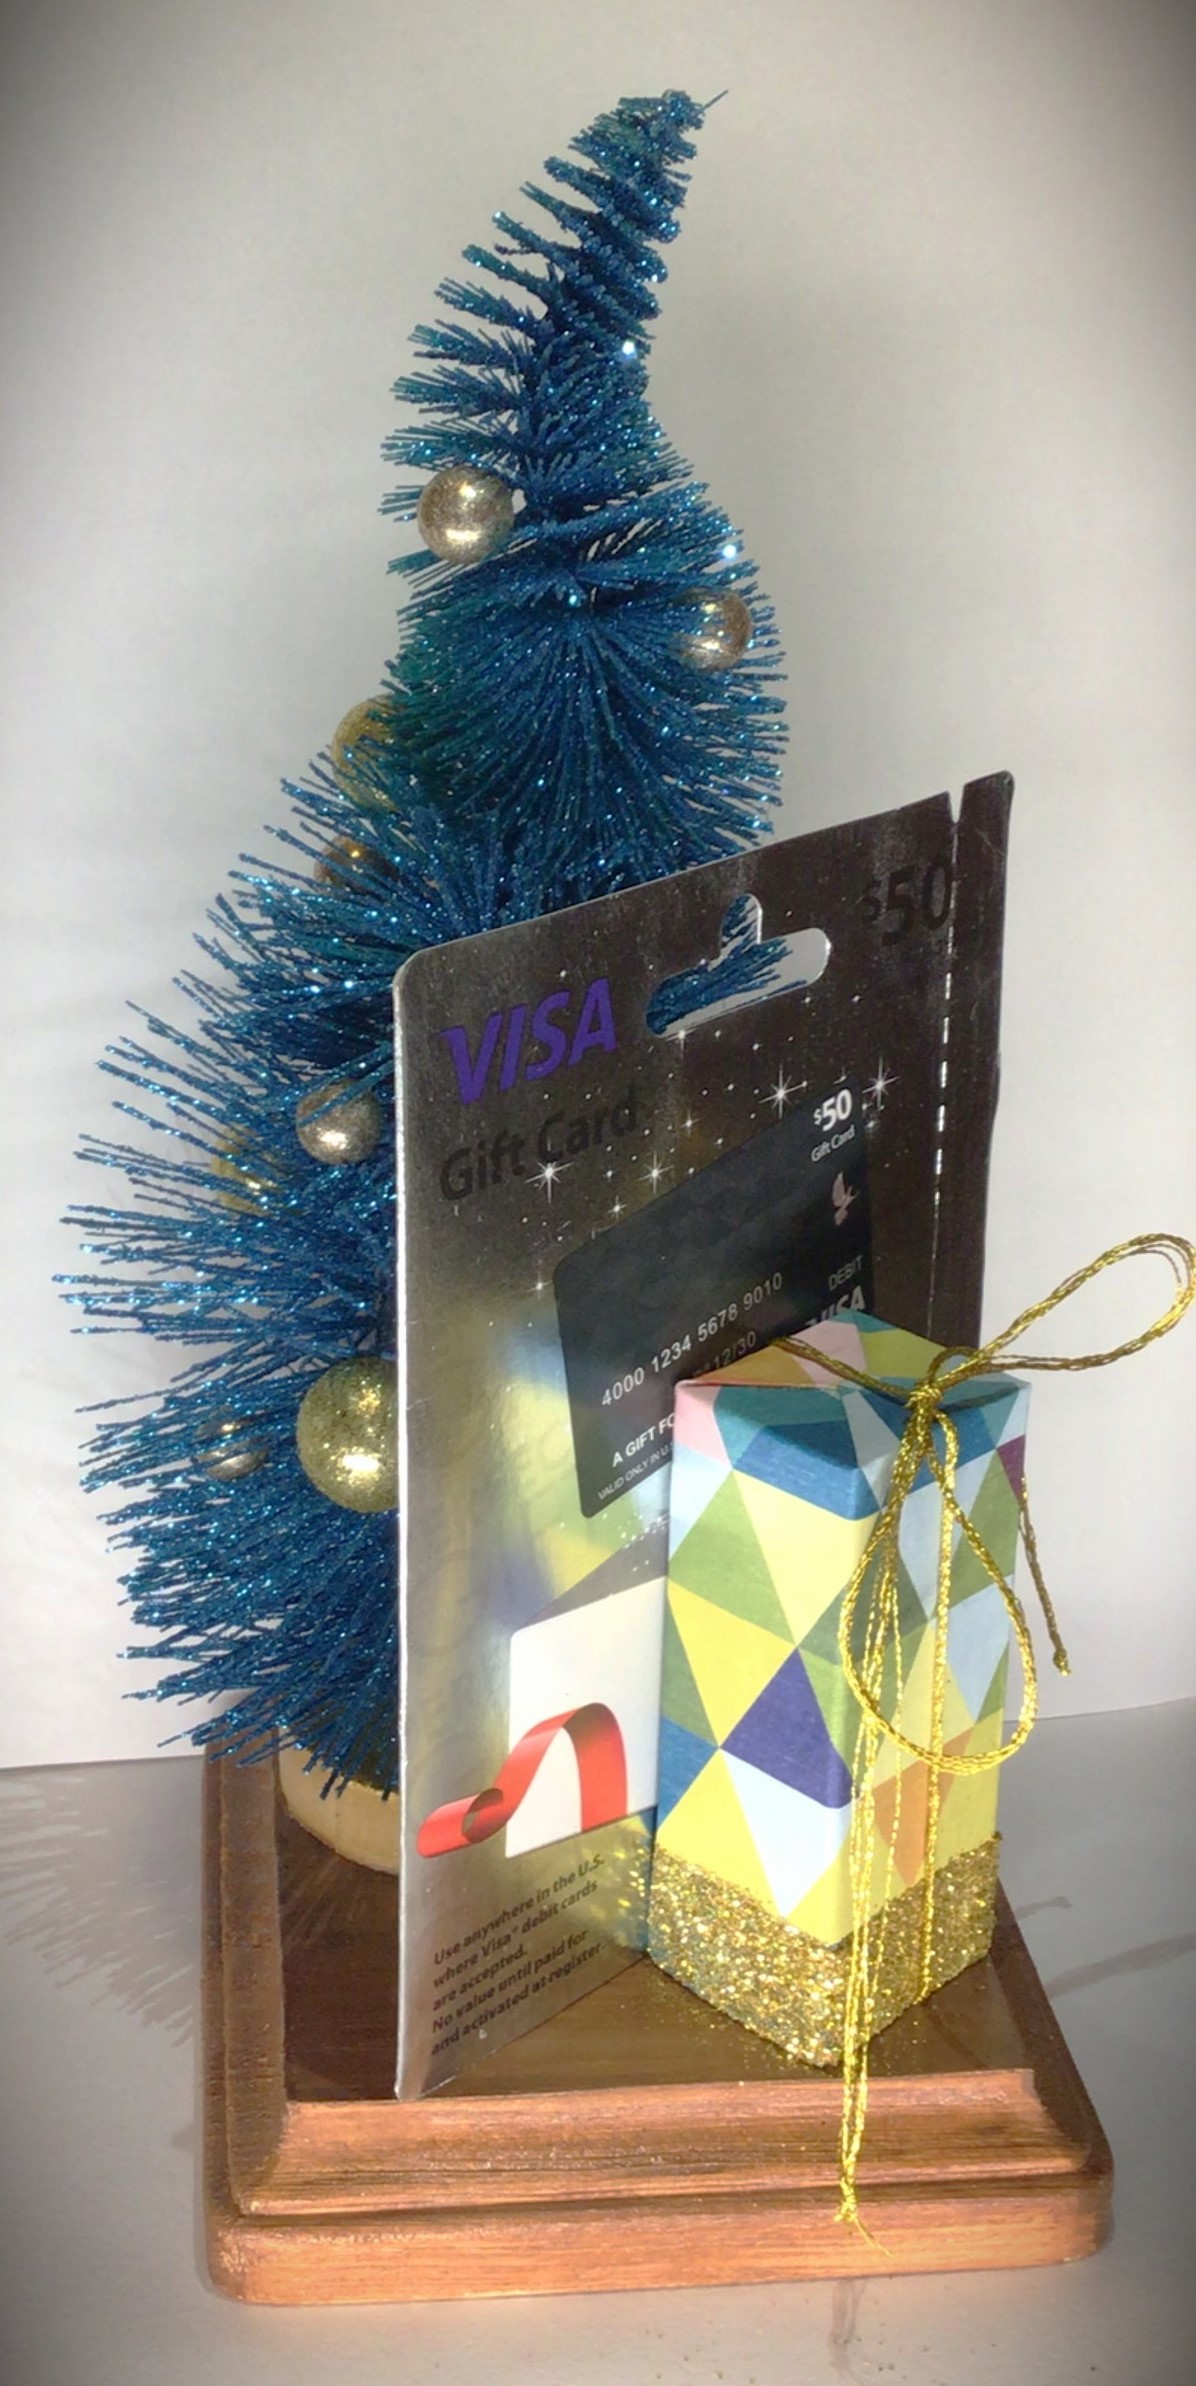
Desk Tree is perfect as is for gift exchanges and teacher’s gifts. But it’s even better when paired up with the little something extra that just wasn’t enough on its own.
Here are two examples of adding a little something extra to a gift that can still be brought out year after year for holiday decor. Match this up with that perfect scented candle that you found. Or maybe that person you gifting only wanted a gift card. This is a festive way of dressing up a gift card!
No matter how you decide to gift this Desk Tree, you will not go wrong with this project!
SPECIAL ANNOUNCEMENT!!!
Starting with Desk Tree, I’m going to make Limited Editions available of crafts that you see in my blog.
There are many people who would rather “I can make that!” But there are others who are not so crafty inclined. I don’t want you to feel left out on ideas that you love.
For right now, shipping is only going to be made available for the United States. And all purchases are only through my website, Order Here. I will keep you updated on any changes as they become available.
If you have any questions about Limited Editions, please do not hesitate to reach out to me at info@pacificnorthwesteventdesign.com or here:
These links are affiliate links to products used in this project. We may receive a commission for purchases made through these links, but at no extra cost to you.
These are generic Jenga blocks that are great for crafting on a budget when your local dollar store is out of stock.
Last Christmas, my husband put these Dewalt clamps in my stocking for crafting. And they are definitely one of my favorite project tools.
At the time of this posting, this Mod Podge is on sale. There are many varieties and finishes, but I wanted to send you to the sale link.
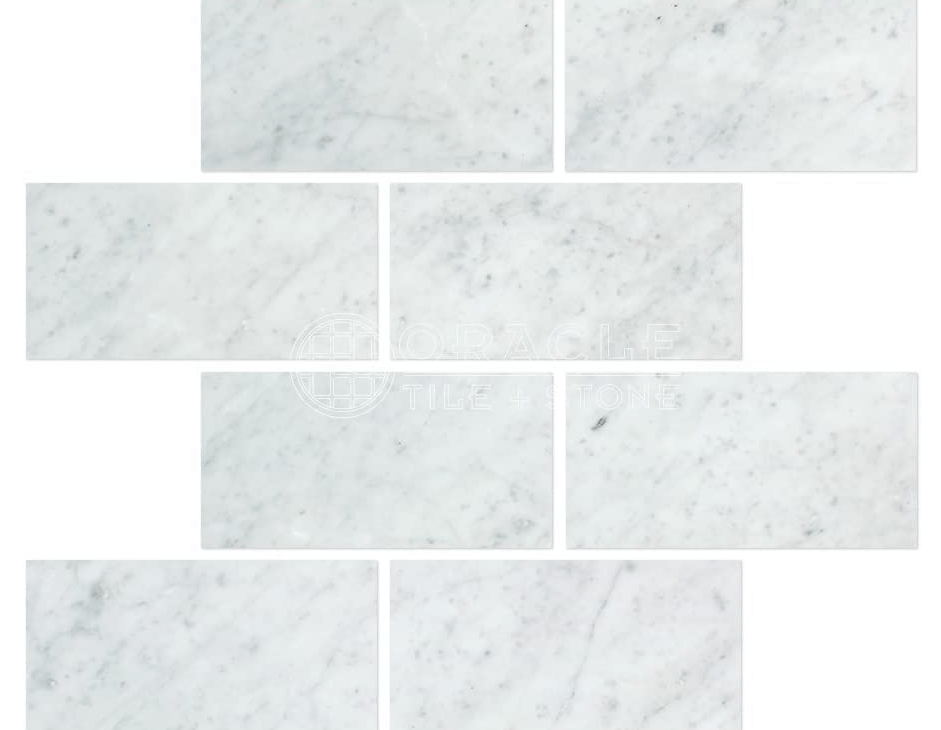
I originally bought these Marble Tiles for working with HTV. But I’ve found that they have had other uses in my craft room, such as a weight for holding certain projects down.
Processing…
Success! You're on the list.
Whoops! There was an error and we couldn't process your subscription. Please reload the page and try again.
Being crafty, I love it when I have the opportunity to bring a craft to any of my kiddo’s class. This week I got to dress up and have fun in a 3’s Preschool Class for their Harvest Party.
Whether you’re a parent, teacher of a class, or helper in a co-op class, you find out real quick how quickly the sticker price adds up on crafts. Needless to say, a dollar store is very handy when gathering items for a craft, especially when you can find blanks that are in a bundle.
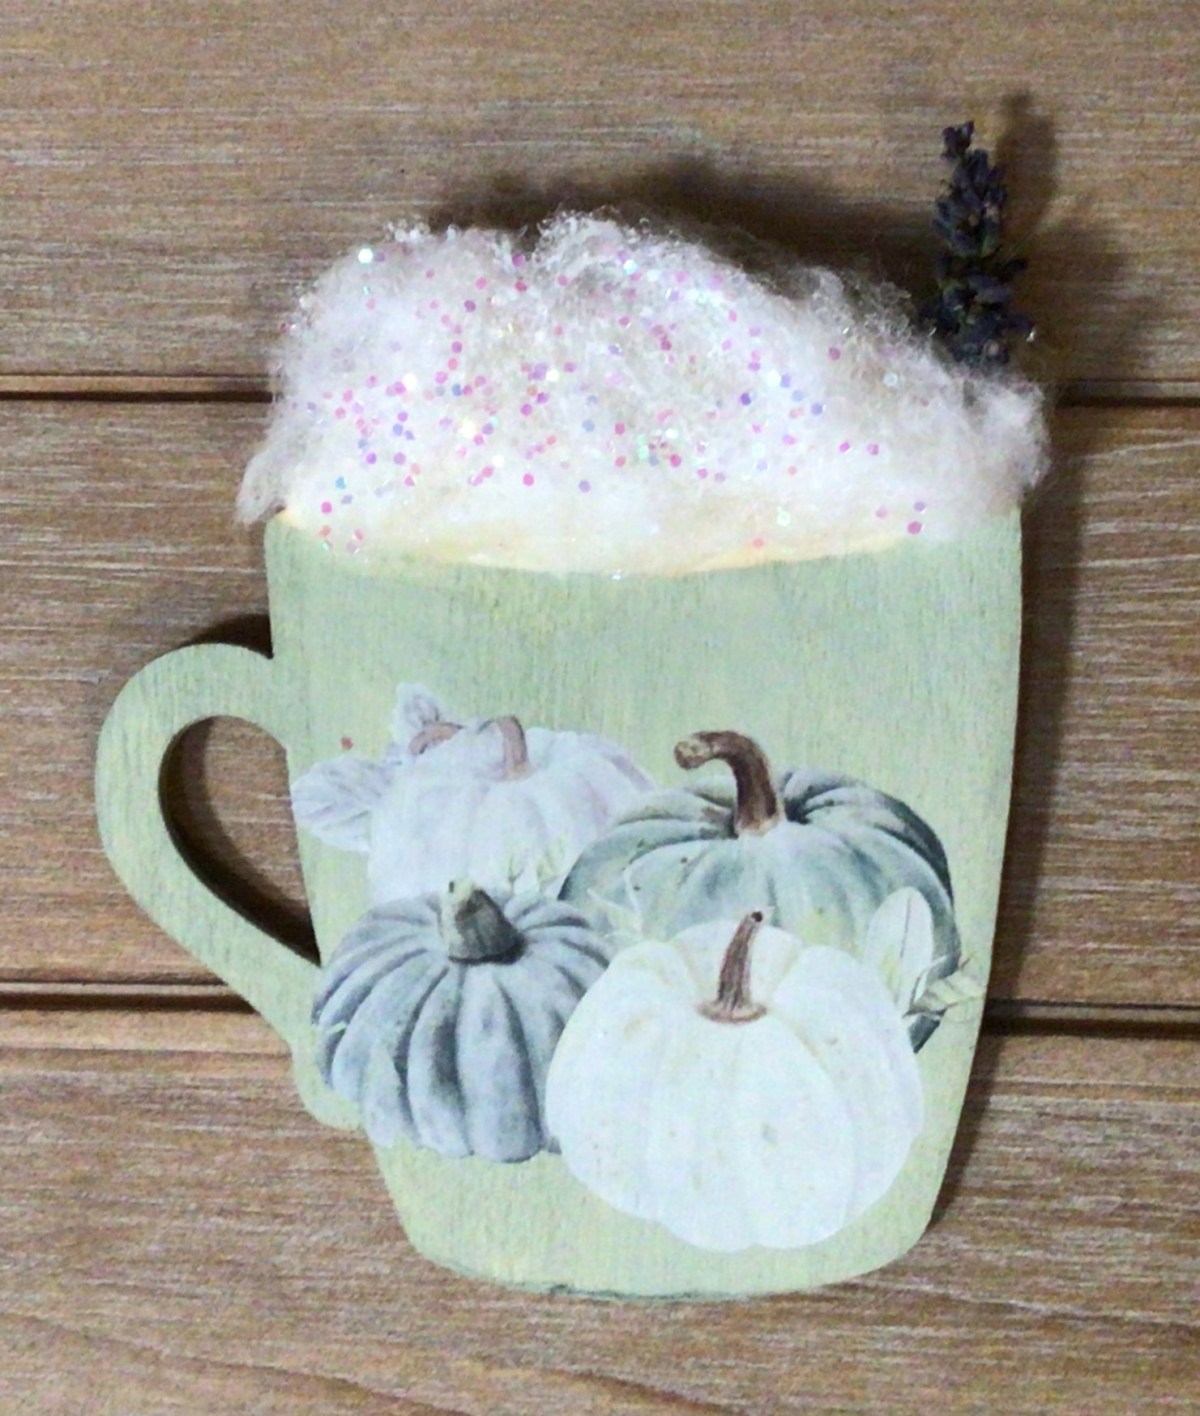
I found these cocoa cups and thought they were perfect for a craft. (The co-op preschool class that my kiddo is in is a wonderful blend where not everyone believes in celebrating all the holidays on the calendar. And I love these classes because there’s an opportunity to bring a little different.) So for this craft, I focused on embracing this comfort drink for the cooling weather.
For the mock up that I made for the teacher, I painted the mug with a single coat of sage colored acrylic paint. The one thing I love about balsa wood crafts is that it absorbs the paint and dries rather quickly with great coverage.
The next step was to add the whipped cream. For this I used hot glue and a cotton ball. For playing around purposes, to build up a 3d effect, I started with putting down a line of glue at the top of balsa wood swoop. I pressed the cotton down and pulled it up to keep a wispy and light effect. Then I added one more line and applied the cotton (continuing to pull it upward) and worked my way down to the lip of the mug. There were about 4 rows that I put in, with additional spots added, to fill in any bald spots.
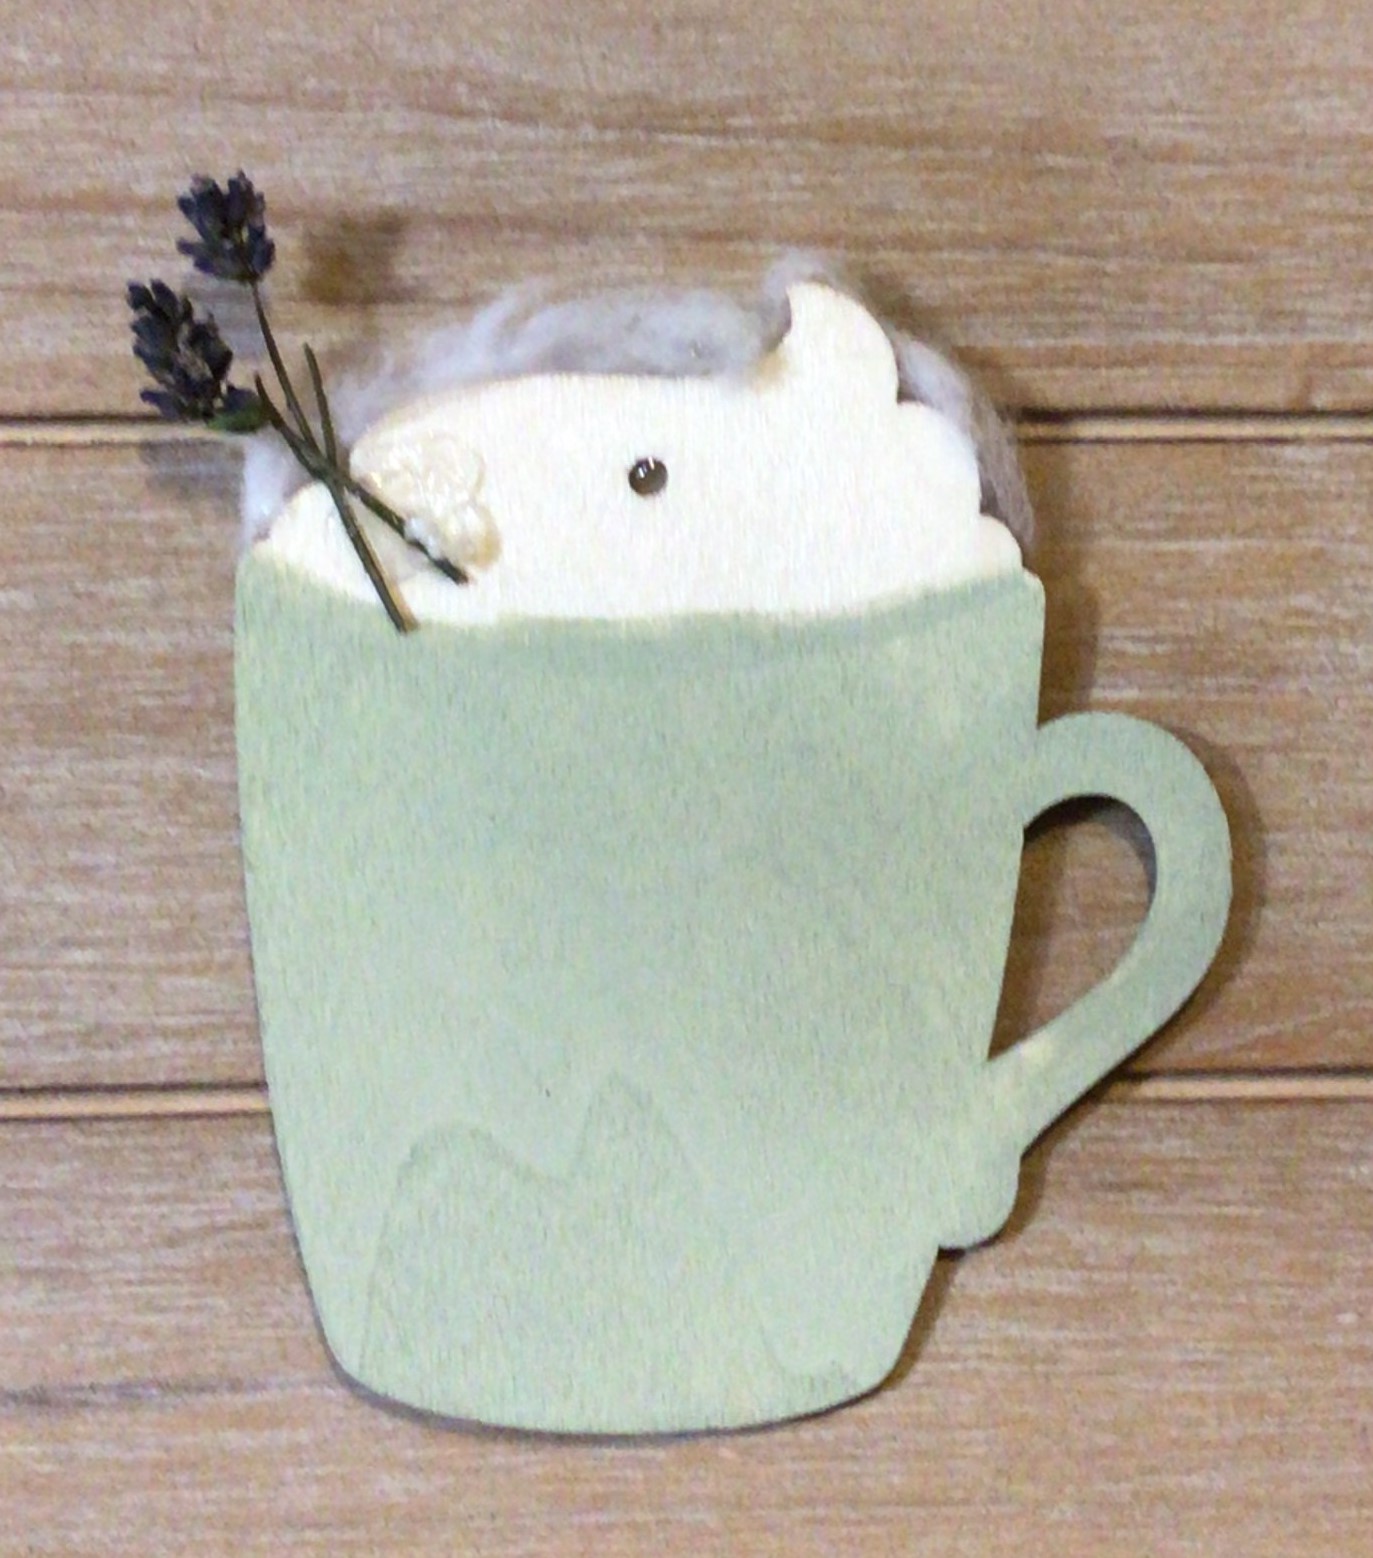
On the flip side I glued on two sprigs of lavender before laying down the cotton on the back side. If lavender is not your thing, the mini coffee stirring straws would be perfect substitutes because they’re thin enough for the cotton to overlap without any bulges and gives the illusion of something coming out of your cocoa.
Advertisements
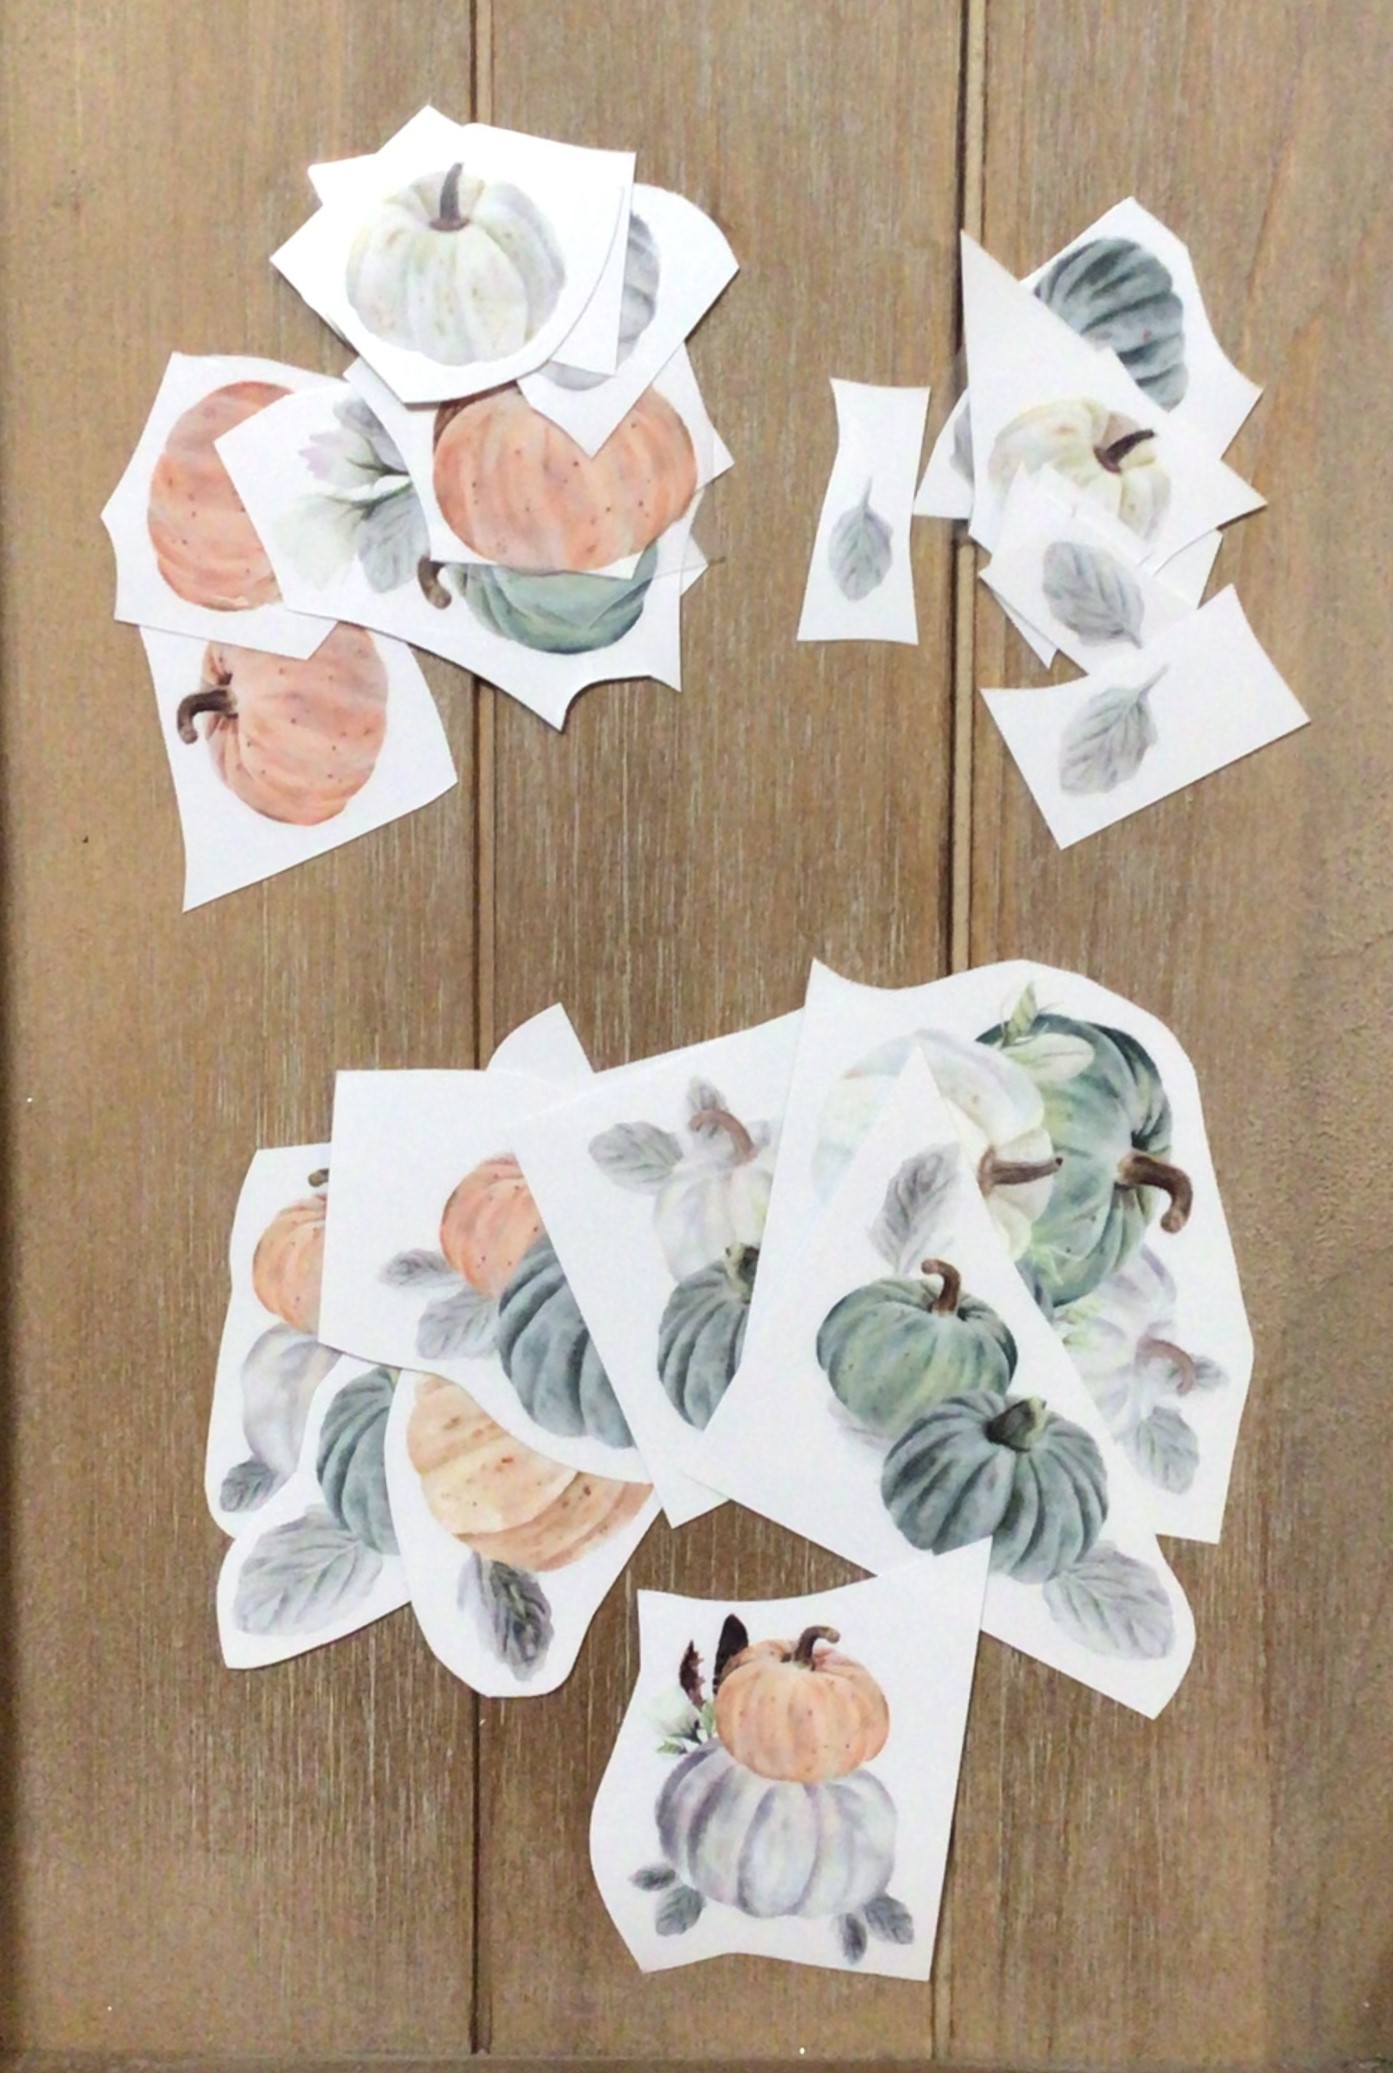
To decorate the mugs with a fall theme, I also grabbed these rub-on transfers from the dollar store as well. Each packet of transfers was enough to decorate the packet of 8 mugs.
In order to prevent fussing with all the elements with preschoolers, I put a mug and 3 transfers (a large, medium and small) in an envelope. Mainly I did this to keep things fair so the first group of kiddos wouldn’t take all the large pumpkins and leave the smallest leaves behind for the last group.
Here’s the thing with these transfers, they take some work. My original expectations were that these would be true to their name and take a little bit more rubbing than traditional stickers. In fact, the directions on the back of the package inferred such an expectation. But that’s not what I experienced. They don’t rub on at all. You have to scrape these babies onto your surface. I used a plastic crafting scraper and that tool failed to apply the rub on. I didn’t try using a coin like a scratcher ticket, but that idea is still in the back of my mind. The thing that worked for me was scraping the rub on with my finger nail.
Even with a thorough scraping of my nail, the transfer didn’t apply fully on the larger pumpkin groupings. And this was my biggest disappointment. BUT the transfers are forgiving. You can line these failed transfer sections back up and apply with relative success.
My biggest tip with these transfers is to take your time and gently lift up the clear transfer sheet. If the transfer doesn’t release, put the transfer back down and scrape it some more.
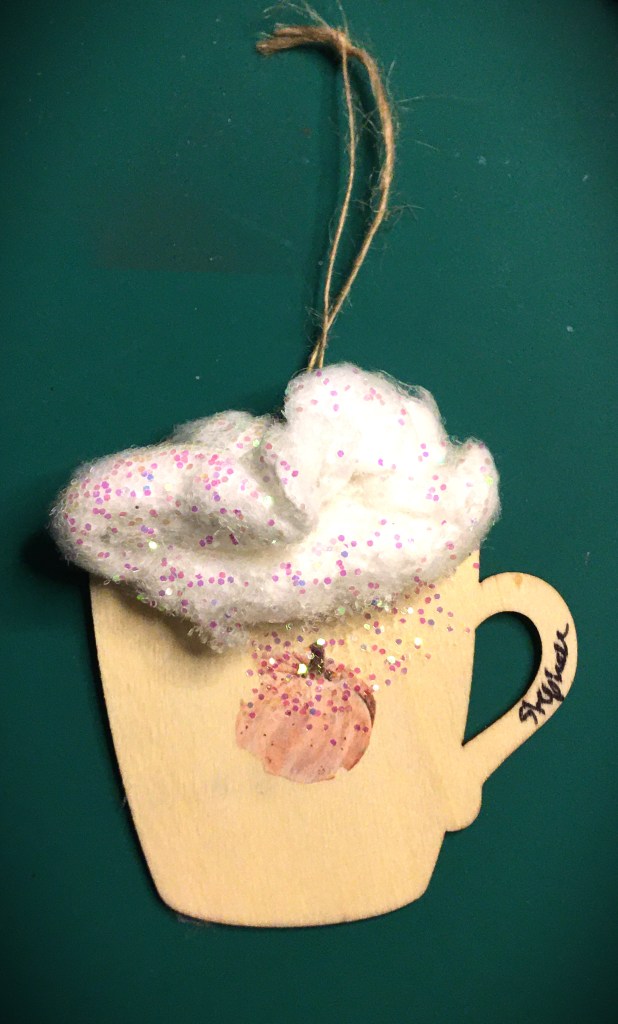
The original plan was to have the right above picture the completed project. The fact that I could see the hot clue peak through on the cotton prompted me to pull out my can of spray glue and glitter. Just by adding this little additional detail was enough to transform matted rough looking cotton back into something frothy and light looking.
That and I like glitter!
Advertisements
I kept this mock up to be pretty basic in design because I wanted it to be re-creatable for the preschoolers. Now if I were making this mock up for older kids or even a MOPS (or other ladies’) group then I would have dressed up the mug and made it more ornate with either some hand designs with acrylic paint pens, glitter pens, metallic embellishments, or so many other crafting items. In fact, I really wanted to take a small cluster of crafting fall leaves and make a little thin ribbon embellishment on the top of the mug handle.
There are other options for the whipped cream portion as well. I used cotton and my hot glue gun because I wanted the kids to be able to take their mugs home that day. But if you have more time with your class, you can use other materials and glues. I thought it could be fun using more glitter, or the tiny foam balls. Chunky white yarn could be amazing, especially for incorporating more whipped cream swirls. And I know kids would have amazing fun gluing marshmallows on top of the mug. (But I’ve seen kids pull off and eat food items off of crafts way too often. So I tend to opt out of that option. But… if I were to throw caution to the wind and let the kiddos play with marshmallows, then I would skip the glue entirely. Instead of glue I would use a royal icing. It dries like glue but is much more child friendly for those who eat crafts!
How did the craft turn out?
Oh my goodness! That day was just as chaotic as you think it’s going to be when you sign up to help in the class on a party day.
First, the schedule got blown out of the water and my party craft was slotted for right before the end of class, and parent pick up. I think it pretty much averaged where the kiddos made these mugs in about 3-5 minutes each.
Fortunately, this craft is easy to punt with and save time. First, skip the painting! Balsa is a wonderfully creamy color. And with the “rub-on” transfers, the focus goes to the transfers. To be honest, one of the girls really did beg to paint her mug the “pretty green”. She loved it and wanted it too. Fortunately the glitter saved me from a meltdown.
Advertisements
Kids love glitter!!!
I probably should have sprayed not just the cotton, but the whole mug to let them glitterfy the whole mug in lieu of the painting portion.
For the cotton portion, I just stretched the cotton ball out and handed it to the kiddo. I applied a liberal amount of hot glue and let the kids put the cotton down. (There was no incident with the glue. This 3’s class did an amazing job!)
The last step was to spray the cotton with spray glue and send the kids back to the table to finger sprinkle glitter onto their whipped cream over a paper plate. (If you spray from the mug toward the top of the whipped cream, you keep the spray entirely on the cotton.)
All of the mugs turned out differently. Some added more transfers than others. These kids lost interest in the transfers because they were not able to scrape hard enough to get them to apply. So if you’re doing this for young children, find a tool that lets you (preferably the kids) to apply with ease.
Advertisements
I wish I would have had time to take pictures of the ones that got made. This one was the one my kiddo made. Of course the one that followed me home was one of the less decorative one. So please don’t assume that this craft was too much for young kids. Time was the failure for this craft. My 6, 5, and 3 year olds were all excited for this craft and I stashed the extra mugs so that they could make them this weekend. I’ll update this post with how the mugs turn out when kids have time to do this project at their pace with the materials they want to use.
Now that November is around the corner, and winter on its’ heels, there is still plenty of time for a craft like this! Change up the colors and decoration add ons for Thanksgiving, Christmas, New Years, and even Winter Theme for January and February. Cocoa is something that kids love year round. (In fact, mine begged me for cocoa regularly during the summer!) So feel free to incorporate this easy craft into your curriculum or busy box for when you need something for kids to do. Or even do this yourself for those moments when you want to let loose on some creative steam but need to have it finished in a 10 minute crafting window!
Let me know how your crafts turn out!!!
Processing…
Success! You're on the list.
Whoops! There was an error and we couldn't process your subscription. Please reload the page and try again.


Leave a comment