After spending almost a decade in the event decorating industry I have repetatively heard "I can do that". Instead of being dismissed by creative minded people, I want to show you how I do "that" so you can be sucessful in recreating that inspiration image. I just might have a few tricks that you haven't seen yet!
While I made a component for last weekend’s Maker’s Market I played with glitter. I slowed down my mass production to share an easy way of creating an ombre effect that’s nearly effortless and will take every time for me.
The secret is all about your glue choice.
Growing up I always used Elmer’s Glue for sticking power. For ombre work, I find it’s the worst glue. There’s a few reasons for this, but for me the biggest problems I had was holes between two colors, awful looking clumping, and stark lines that just looked weird.
I’ve switched to using cheap watery glue instead.
Have you ever watched a professional cookie maker flood the icing to get that smooth design? Using watery glue has the same effect for creating glitter ombre!
So whether you’re new to crafting with glitter or use glitter on everything, more fluid glue is going to be your best friend. You can glue the sections you want to use one color glitter. Or you can lay down all your glue at once. The fluid movement of this type of glue is going to cause the glitter to drift a little and cause a natural blend. Not only that but if you have to go back in and add more glue because a spot was unexpectedly dry, a single drop will fill that hole and spread into the already laid glitter with no gaps.
Advertisements
Laying Down the Glue All at Once
This is my favorite way of doing ombre, particularly because I want to move quickly and optimize my production time.
First I get my glitter selection lined up. This is what allows me to lay a handful of colors while the glue is still wet.
Before I lay down the glue, I also decide which direction I want my colors to run; horizontal, vertical, or diagonal.
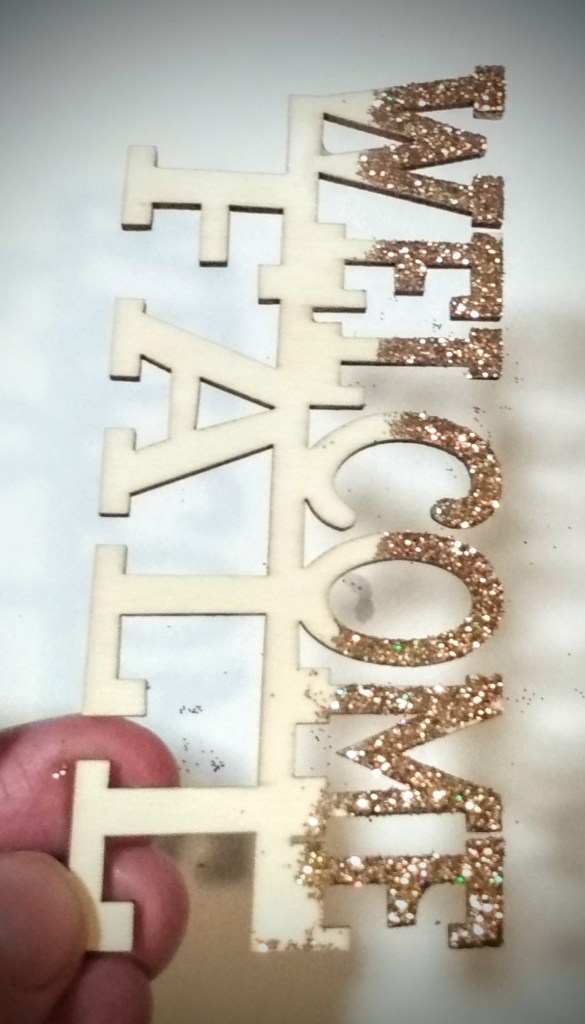
With that all prepped, that’s when I go ahead and lay the glue. I start at one end of my element and shake the glitter side to side to make a straight line. (Or a zig zag if I want peaks and valleys.)
If I’m going to make my own color blend, I’ll go ahead and shake out all the colors at once, without stopping between colors to put them back in their containers.
However, if I’m keeping my colors true, then I’ll lay that first edge color. Then shake off the excess with the glitter side down. Put the glitter away. Then grab the next color, shake out that next line. Shake off the excess with glitter side down. And repeat the whole process until all my glitter is put away.
Just so that you can go into this with confidence, I want to share with you the colors that I used here in Welcome Fall. The first color I used was a pale gold (as opposed to the bright and bold gold you usually see during Christmas). I followed that up with a bright pumpkin orange. And the final was a cherry red. I didn’t have concerns with the gold and orange because they had a similar base color that matched perfectly. The red doesn’t look bad here. I pulled it off in the final project that this was going on. However if you ever find that you’re questioning your color choices before you glue, I highly recommend taking some of the neighboring color and adding it in with the color you are hesitant with. This will tone down, and help bring the color into the family.
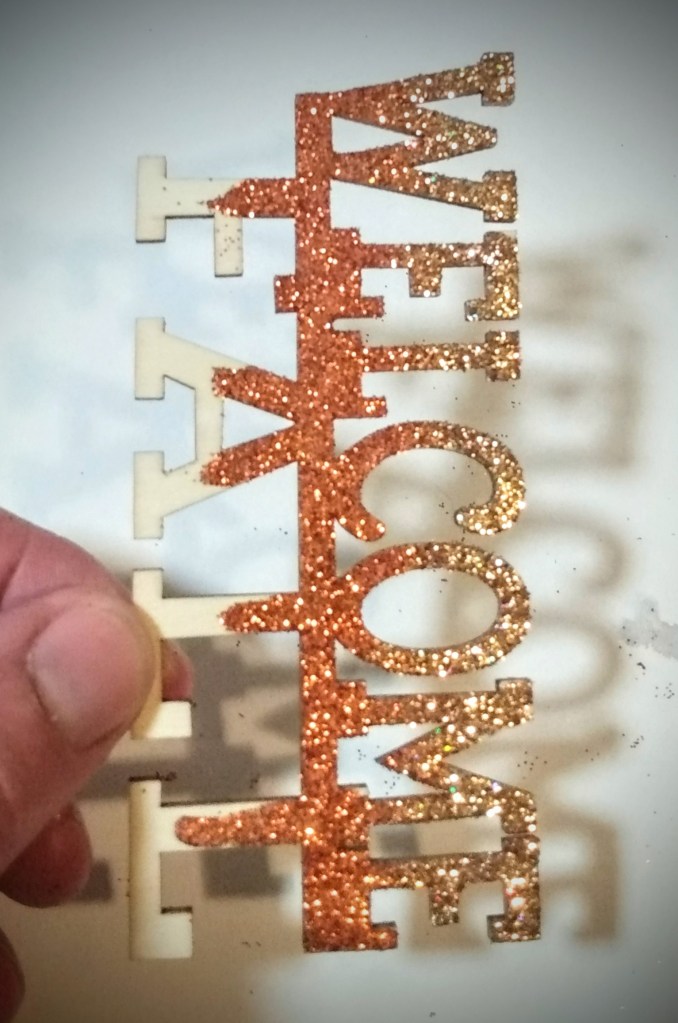
OR… another option, which you’ll see in the second picture above, let your middle color slide down on the glue and creates a drip effect. This will help from creating a stark line that can potentially form with colors of glitter that compete with each other.
Advertisements
Making Your Own Blend
As I mentioned above, you can blend your colors together. This green that I made is a perfect example of what happens when you blend.
The only green glitter I had on hand was a lime green that I bought from a spring line of glitter. There was no way that I could make that Easter egg green work in a fall theme. So I grabbed my blue and purple glitters to blend a darker green. If you look closely at this picture, you might be able to pick up the different colors. Around the middle, you’ll see some grains of blue that has a turquoise to it. And then around the perimeter you see the darkness of the purple glitter.
Maybe, you don’t want to make your own darker shade of green. Maybe you want a different color. How do you mix it?
Think about mixing paint and how when you use primary colors (red, yellow, blue) you make secondary colors (orange, green, purple). Glitter is going to work in the same manner. The big difference is that you’re not changing the individual grains of glitter to a new color. You’re creating the illusion of a new color by mixing different colors.
For the green that I made, I used the blue to take away the brightness of the lime. These two colors still have a fresh spring green color, so the addition of a darker color, like purple, makes the green dark. I didn’t use precise measurements. I added a little bit at a time so I don’t use my whole glitter stash and run out of colors to make corrections. Over all, it came down to the ratio of the lime taking up 50-60%, blue 30-40%, and purple 10-20%
The cherry red that I mentioned earlier, I partnered it with maroon that I absolutely love. The thought crossed my mind that I might need to make more of it because I bought it last fall and haven’t seen it since. My plan was to take the cherry red, mix a little bit of navy blue glitter (bright reds have an orange base and rich reds have a blue base–my reason for adding blue), and then black to get the red darker without changing the base color of the read. Brown would be an option if I wanted a lighter maroon. But for this dark maroon, black is the go to glitter.
The added bonus of mixing your own glitter blend is that you add dimension and something dimension to look at. Don’t get me wrong, glitter is enticing enough on its own. But the next time you play with glitter, mix a small batch of a color and look at it in comparison to the original flat color. You’ll understand what I’m talking about when it gives you something a little more.
Other Ideas
Before I close this post, I want to offer one more idea of what you can do to give your glitter work some dimension and adding a little “extra” to your work.
Take a look at “Give Thanks” in the picture above.
This one is a bit more subtle than the striped ombre, so you may need to get a closer look at this wooden tag. The picture doesn’t do it justice in comparison to what it looks like in person. But this is two different shades of gold. The darker (and more orange) gold is applied as a shadow on the left hand side of each of the letters.
Earlier I mentioned shaking glitter in a v or w shape to create a chevron pattern.
You can easily make poke a dots by dropping spots in one color and then surrounding the dots with a different color.
Feel free to not just play with colors, but also experiment with shapes and patterns. Depending on what pattern you’re making, you may need to be specific with how you lay down your glue. But there is no reason why you can’t make leaves, plaids, or anything else in glitter. If it becomes difficult to maintain shapes, take breaks between your layers. This will keep the glue from running and distorting the shape/pattern you make.
Advertisements
A Finishing Tip
The one disadvantage to working with fluid glue is that your glue might shed glitter because it doesn’t have the stick to keep the glitter in place. There are a couple of options that you have to seal in your glitter to minimize or eliminate shedding.
The first thing that I used, many many many years ago, was hair spray. This has the least about of stick out of the options I’ll share. It’s great if you’re in a pinch and don’t have any other products on hand. But the only shedding this is going to stop is contact shedding when you tap it. There will be some transfer if you run your finger in the glitter.
I love using clear acrylic spray! This is a great sealant that dries in a couple of minutes. The disadvantage is the fumes. But those disappear when the spray paint cures. I really don’t notice glitter loss through touch or contact/tapping. The finish is also the best option. However, you might see a dulling of the glitter’s sparkle depending on which brand you use.
If you have the time, polycrylic paint is the best as far as it goes to completely seal in all the glitter. This can be the determining factor if someone in your house, or the person you’re gifting too, hates glitter with a passion. This is completely sealed and there is no glitter loss. Just be aware that the fumes are strong and curing can take 24-48 hours. But the fumes will dissipate. I highly recommend that you dab polycrylic on. If you try to brush it on, you will get streaks, glitter will clump on your brush, and there will be brush tracks in your glitter.
While getting ready for an upcoming Maker’s Market, I’m reminded of a time I was in a crafting group. A couple of times a year the group would do a special session of crafting binges. One of the first things I made with this group was a reverse canvas. It’s one of the simplest crafting transformations that is so satisfying.
If you haven’t heard of a reverse canvas, or have yet to make one yourself, grab a framed canvas, screw driver or staple remover, paint, exacto knife, and stapler or staple gun. This is all you need to make your own reverse canvas.
At any of your craft stores, or even dollar store, you can find two types of canvases: frames canvas and canvas flat. The flat looks like canvas that has been glued to a piece of cardboard. (You can make this in a similar fashion as you’ll see with this reverse canvas.) A canvas frame is the one where you see the canvas stretched over a wooden frame.
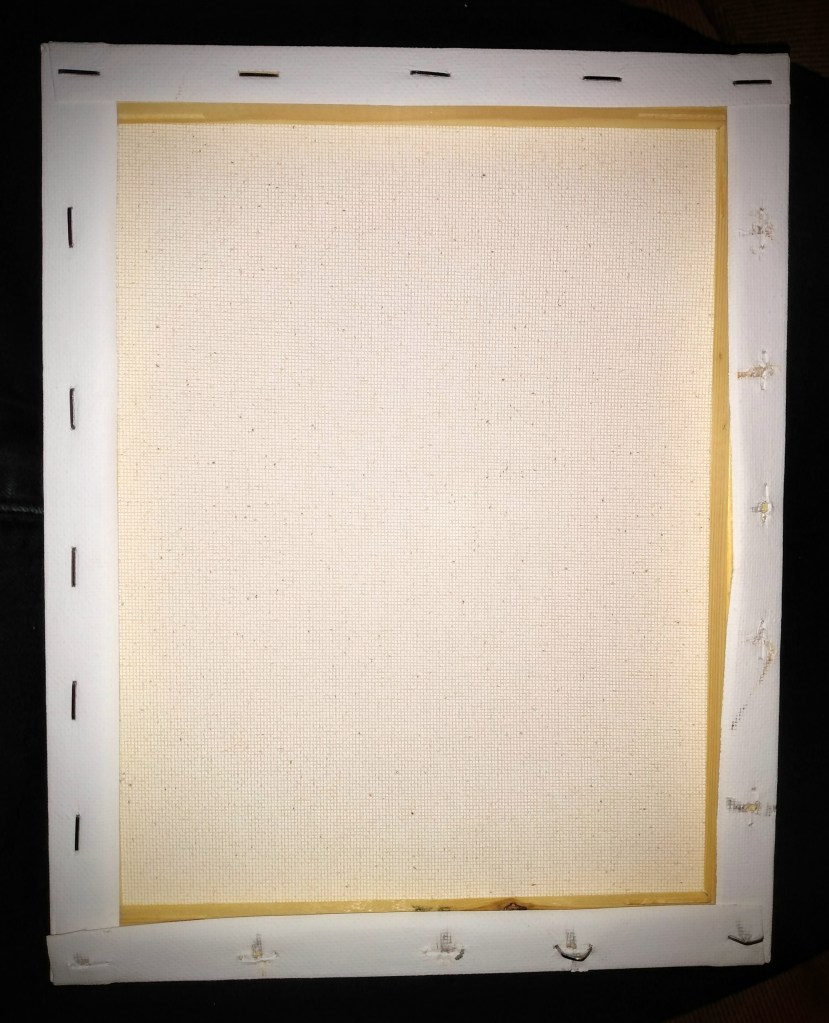
First, you want to flip your canvas frame over and remove the staples from the back. I’ve had some frames where this was easy. And there have been a few frames where I had to work to get those staples off. If you find that the staples don’t want to release from the wood, grab a piece of needle nose pliers. This will give you enough leverage where you can wiggle the staples out.
Don’t worry if your prying scars this side of the frame. With all the holes and splintering, this side of the frame will remain the backside that no one will see.
I’ve heard many crafters recommend using the exacto knife and cutting the canvas free from the frame by cutting on the side of the staple between the staple and the outside edge of the frame. If you don’t want to spend the time removing the staples, this is the method that you will love. The down side of this option is that the finished back of your reverse canvas is not going to be smooth as it could be But as I mentioned before, no one is going to see the back of the frame once it’s on the wall.
The rest of this walk through is under the assumption that you remove the staples. There are also other ways of reapplying the canvas, such as using hot glue, but I’m going to show you how to stretch the canvas. This is going to give you the best quality and make it look less DIY and more professional in finish.
Paint to Dress It Up
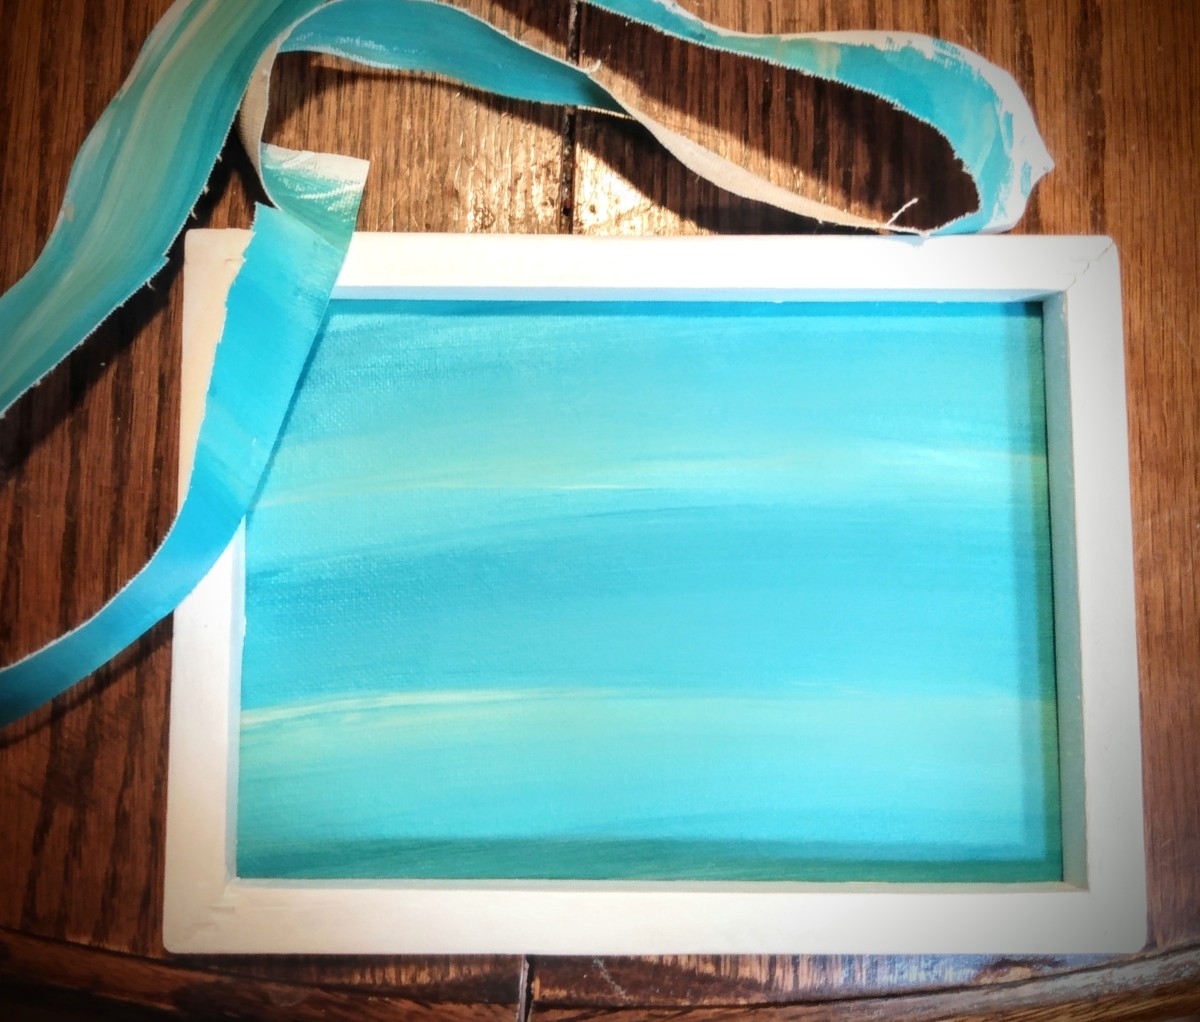
Of course you have the option to paint your frame and canvas at any point in time. My timing of choice is to paint the frame and canvas once they are separated from each other.
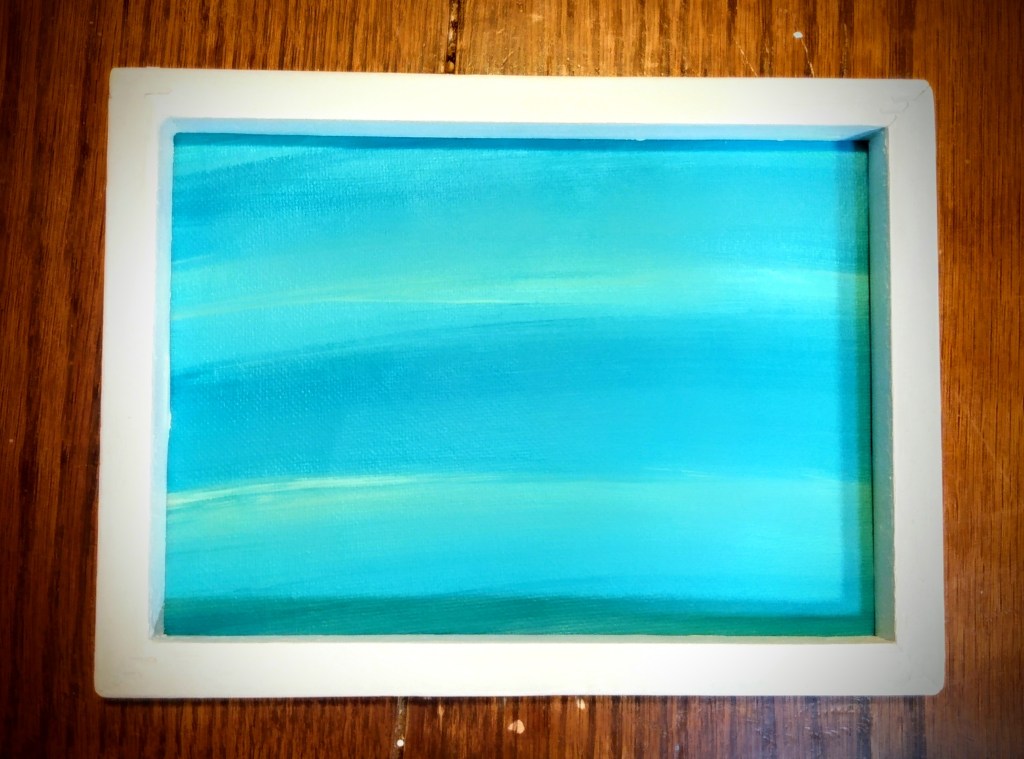
As you can see here, for one of my Market products, when you paint them separately, you are free to personalize and customize your project anyway that you want.
If you want to spray paint, you can. You can use glitter or other crafting medium. When the pieces are separated, you will never have the accidental over spray or find the need to tape off to protect one element while you’re working with the other. And if you want to try your hand at free hand painting one element, you can work absolute certainty of the work that you’re doing.
Once canvas and frame are dry, you are ready to put your canvas back on your frame.
TIP: If you wanted a pattern on the canvas (like I did above), make sure you take a look at your frame on top of your canvas. Make sure your lines, design, landscape or portrait are lined up like you want them in the frame. You may find that what you painted on the canvas doesn’t line up inside the frame like it did when you were just looking at the canvas.
Advertisements
It’s Time to Stretch
If you pre-lined up your canvas and frame (as described in the tip above), you will need to hold on to both pieces and carefully flip it over. Make sure that the canvas doesn’t slip. If it does, you may need to reposition it.
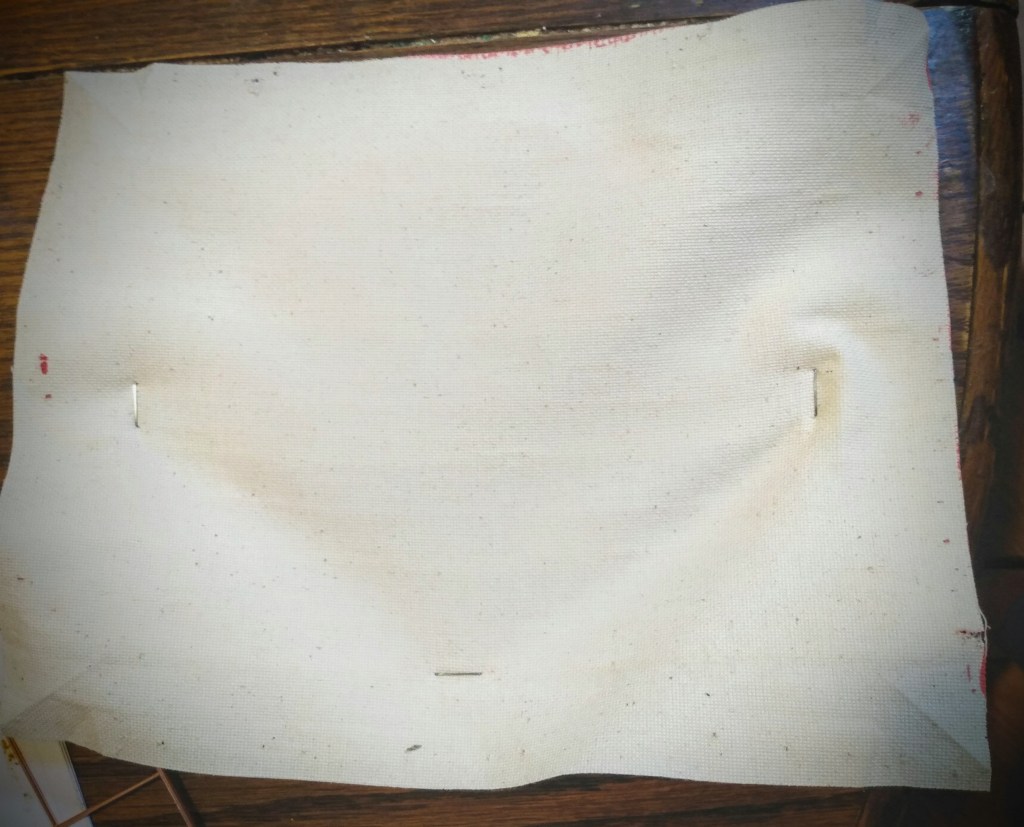
If you have a solid canvas, or one that doesn’t need positioned, start of by putting your frame front side down on your table or work surface. The staple holes side should be up. Next, place your canvas down with paint side down.
Find the center of the long side of your frame and staple your canvas to that spot.
Next, find the center of the other side of your frame and pull the canvas tight to that spot. You may need to use both hands. This will give you control in how tight you will make the canvas in the end. Once you feel the tension, staple the canvas, tight, to the center of that frame arm.
Find the center of the short end of your frame. Pull the canvas tight to that point. You should notice that you can pull it more than you did with the first pull you made. Staple it in place.
Find the center of the last side of the frame and pull the canvas tight. At this point, I start pulling the canvas to the outside edge of the frame and using the frame edge as leverage to keep the canvas tight as you staple.
As you look at these pictures you are going to really see the warping in the canvas just from these initial 4 staples. This is normal and in no way reflects the final product. In fact, the more that I pull the canvas, the more tension that I add. I find that if I gradually add more tension as I go the least likely I am of ripping my canvas from pulling too hard.
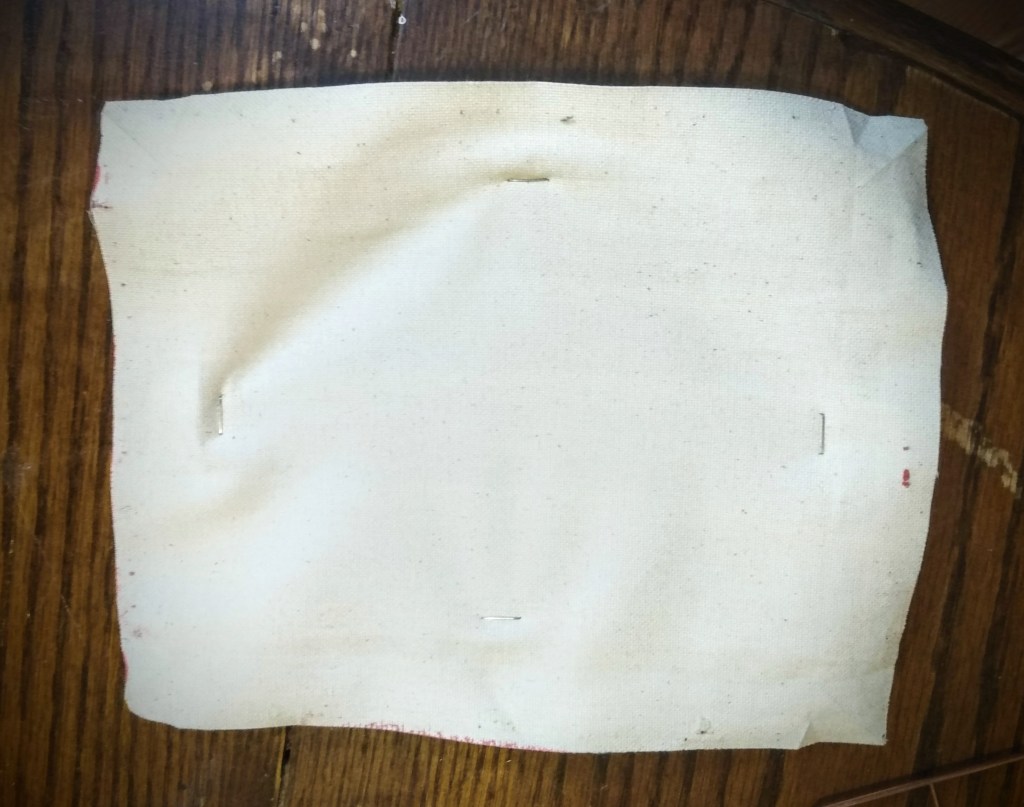
After these initial staples are in place, the next step is to aim your stapler about 2 inches to the side of center staple. Pull and stretch the canvas toward the nearest corner, in a diagonal pull. The original pulls were in an up/down directional pull. But after you place the first 4 staples, you want to pull diagonally to prevent bubble like ripples from forming around already set staples.
Another benefit to diagonal pulls is that this is how I get my canvas to keep tight like the skin stretched on top of a bongo.
Another truck to keeping a tight canvas is that as you start pulling diagonally, you want to alternate directions that you’re pulling in.
For example, if your frame (after the 4 initial staples) is orientated in front of you with the long frame size on the top and the short on the sides, keep your frame in this orientation. Start with a staple 2 inches to the right of the staple on you top long side. Then drop to the bottom long side and pull the canvas to the bottom left corner with adding a staple 2 inches to the left of the the bottom long frame side center staple. Then for the short frame side on your right hand side, pull the canvas toward that right bottom corner and place your staple 2 inches below the center staple. Finally move to the left hand side short frame side, pull the canvas toward the upper corner , and place the staple 2 inches above the center staple.
Advertisements
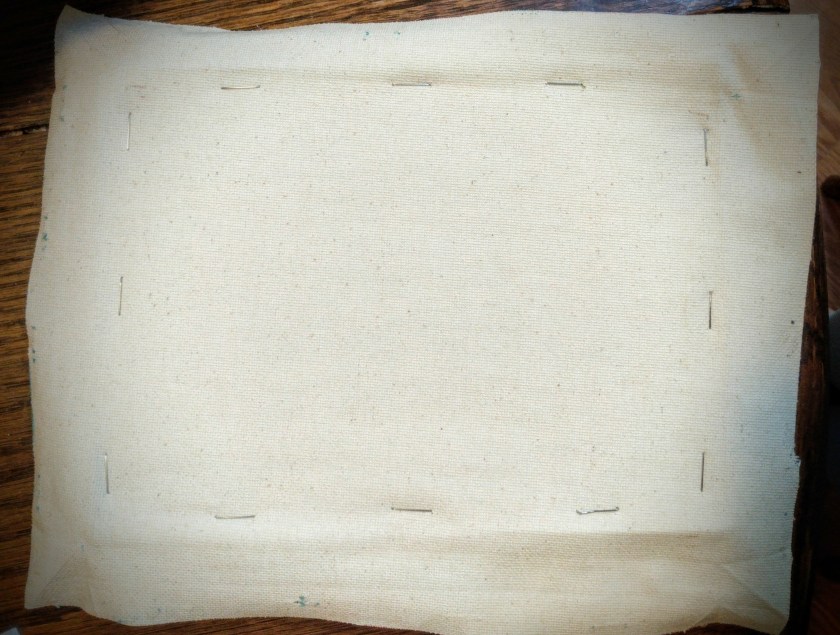
With these four staples in place, we’re now going to staple on the other side of the center staple to balance out the tension that we’re putting in the canvas.
The last pull was toward the upper left corner (on the short side). So now we’re going to go to the bottom right corner (on the long side). Pull to the lower right corner and staple to the right of the bottom center staple. Next, pull to the upper left corner and staple to the left of the upper center staple. Then pull to the upper right corner and staple above the right center staple. Finally pull to the lower left corner and staple bellow the left center staple.
At this point the canvas has an even pull and it’s a good time to check the front to see if any adjustments need to be made. If there is no design to the canvas you can keep stretching and stapling in opposite directions until the canvas is fully attached to the frame.
If you have a design, now is a great time to check to make sure that you are stretching with enough balanced tension that the design is still straight.
Is the design pulling or warping toward a short/long side of the frame? Then you pull the canvas tighter in the opposite direction. This will take pulling toward the two corners opposite of where it was gravitating toward.
If the design is gravitating toward a corner, you want to pull tightest on the opposite corner to bring the design back to its original orientation.
Once you’ve made the corrections that needed to be made (keep checking back to the front after each set of 4 staples to keep an eye on what you need to do), continue with the stretching and stapling until the canvas is reattached to the frame.
Time for a Trim
As you see here, all of the original funkiness from the 4 original staples has worked itself out. The center is smooth and tight. On the outside edges of the canvas you can still see bunches and creases of where I pulled tight against the frame (using it as leverage to pull the canvas tighter). None of this matters because we will trim off the excess canvas.
Flip the canvas over so you can see the front face. Grab your exacto knife. You are going to cut into the canvas at about a 45° angle behind the frame. This will cut enough of the canvas back so that you won’t see the edges from the front of the frame. The benefit of the exacto knife is that you can run the flat edge of the knife against the edge of the frame and cut a straight line.
It is possible to cut away the excess canvas with a pair of scissors. You will want to pay a little extra attention to where you are cutting. You will want to get the scissors in there so that you are cutting behind the frame. But at the same time you want to make sure that you aren’t cutting too close to or between the staples. Just like any taunt fabric, canvas will rip along the grain. This is particularly true when you have the tension that we built in with stretching the canvas.
And now you see the final product with the excess canvas cut away!
This particular canvas is ready for the next step in the product that I’m making, which is a 3D wall art.
But you can consider this as a crafting blank that you can add anything to it. You can stencil paint a design on it. Maybe you want to mod podge a photograph or note from a loved one. Or there could be a decal that you want to attach to this canvas. You could also have an early childhood stick figure drawing from your child or grand child that you want to frame in a unique way. This may be what you’re looking for.
There are so many different things that you can do with a reverse frame. You are only limited by your imagination.
One last thing I want to mention, before you add your favorite decorations to this canvas, think about how you want to hang this reverse canvas. The frame can stand by itself on a counter or table top as long as what you add is very light. Otherwise, like in my case of 3D art, you will want to add a mode of hanging.
Some options for hanging your art are:
drill a couple of holes into the back of the frame where finishing nails can hold up your frame on a wall
staple a long bit of ribbon to the two top corners of your frame
nail a portrait anchor on the back
You’re not limited to these ideas. But they are a few of the most common ones.
The one thing that I appreciated from my childhood was just how many skills I learned from my parents; cooking, gardening, home repairs, auto repairs, and so much more. Part of this appreciation is seeing how many of these skills have become less and less commonplace in the younger generations. And it’s so promising to see a growing number of people seeking to learn these skills now.
Today I wanted to share a monthly experience that we have with our kids. Craft days!
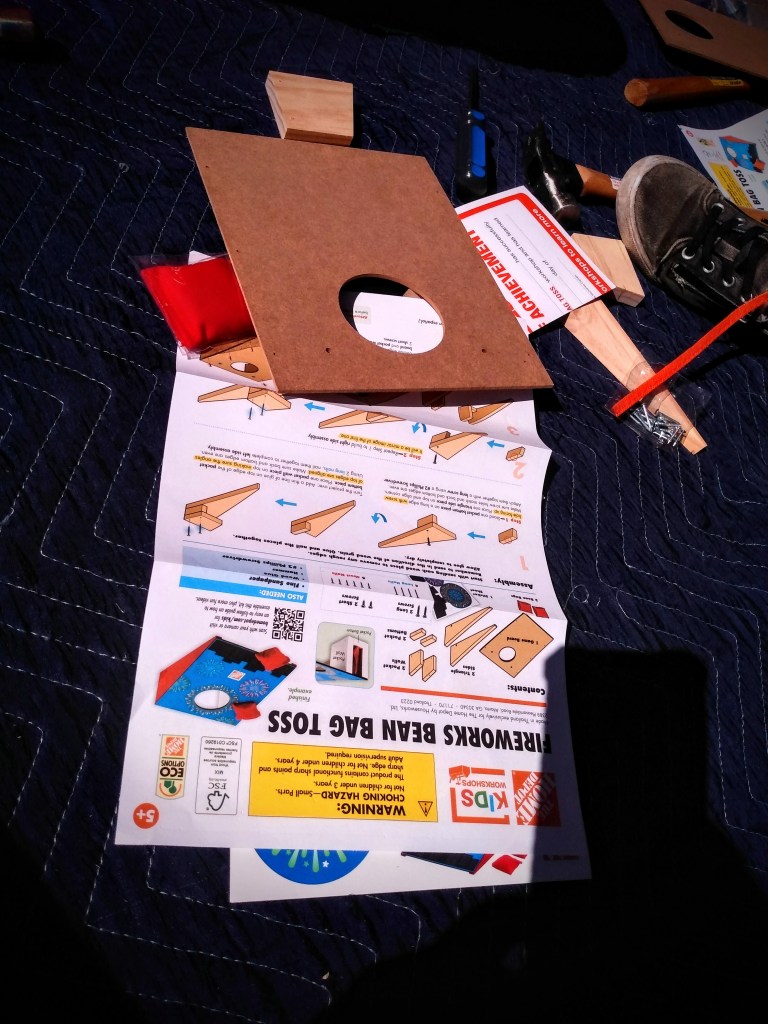
I’m aware of three box stores in my local area that offer a free craft to kids; Home Depot, Lowes, and Joann Fabric. None of these stores are sponsoring this blog nor have they compensated me for this post. I mention them by name for the sake of helping out fellow parents who are looking to foster these skills in their kids or grand kids. They are free, which is perfect for families who don’t have the budget to purchase supplies.
Here’s what the corn hole craft project looked at the beginning of our morning.
Advertisements
We’ve been doing these hardware store crafts for five years now. And as long as the days get with small children, the time really flies by and they pick up the skills of using a hammer and screw driver too quickly.
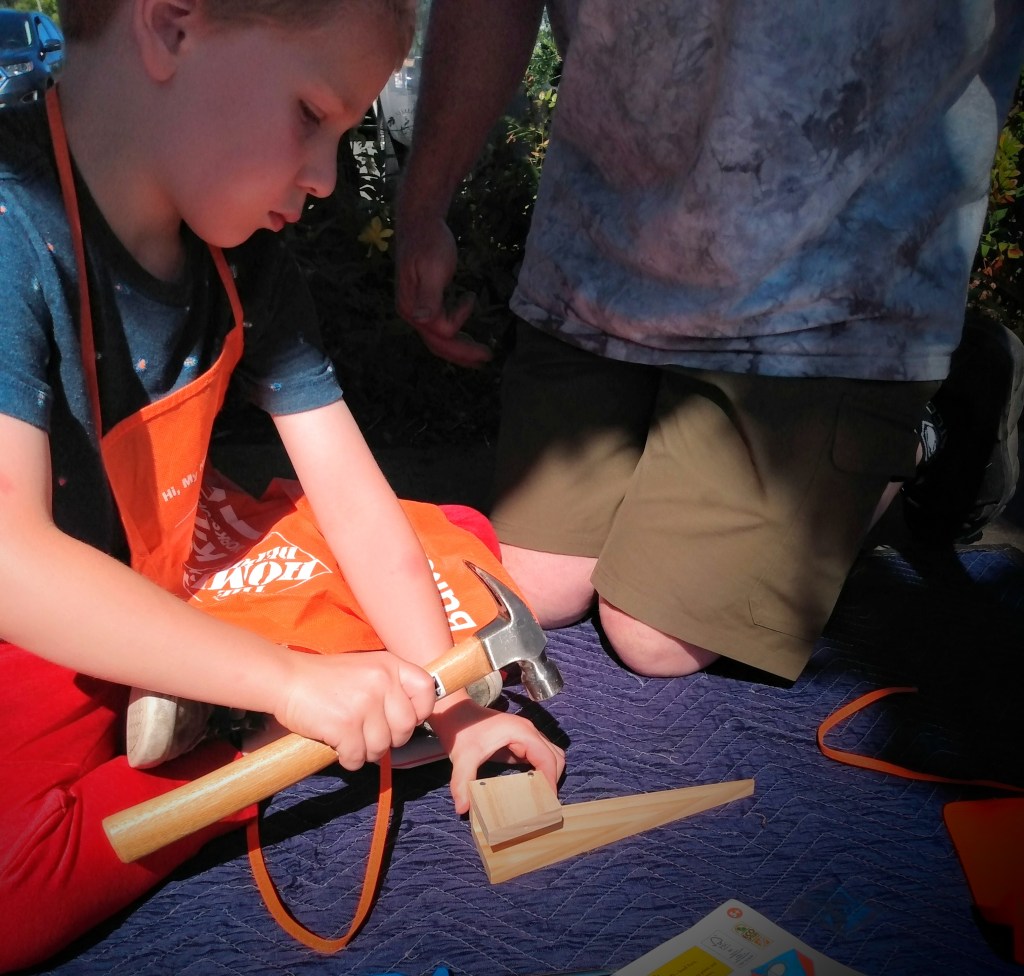
This miniature corn hole craft was the first one where I sat down with my youngest and purposely focused on just being support. (The older kids decided they wanted to fly solo–time goes by too quickly where you’re sidelined on these crafts!).
My solo crafters wanting to build with no help.
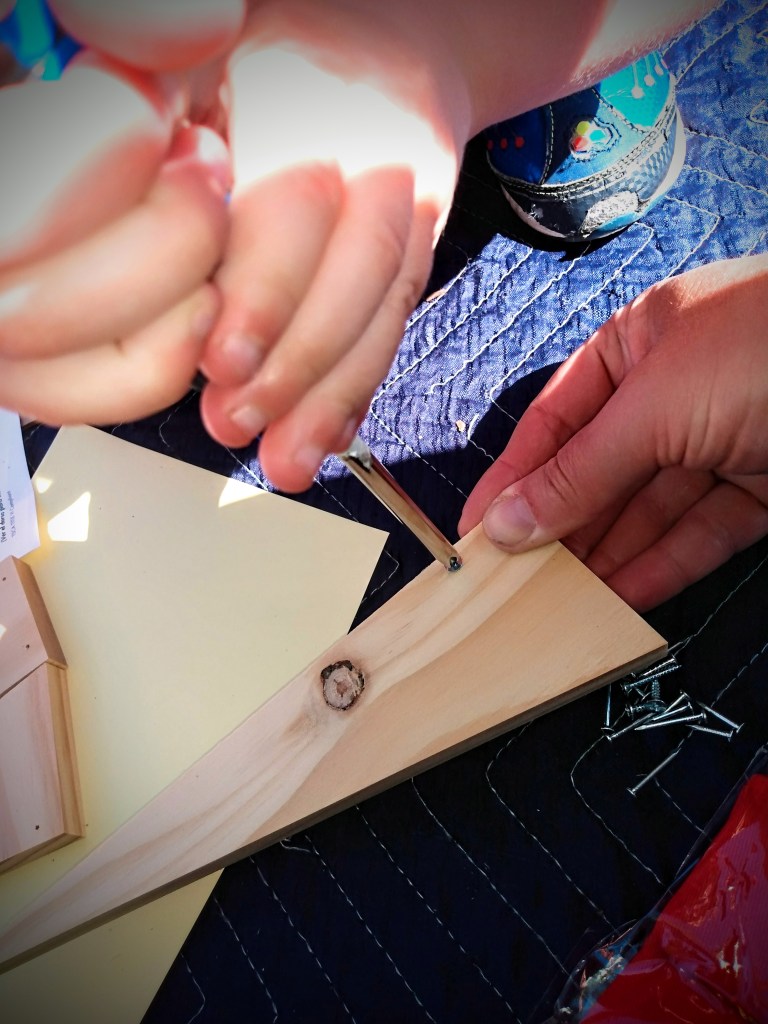
Instead of telling my youngest how to build, I had him pull out the pictograph directions and tell me what we were doing for steps. I was just there to hold pieces for him while he built away.
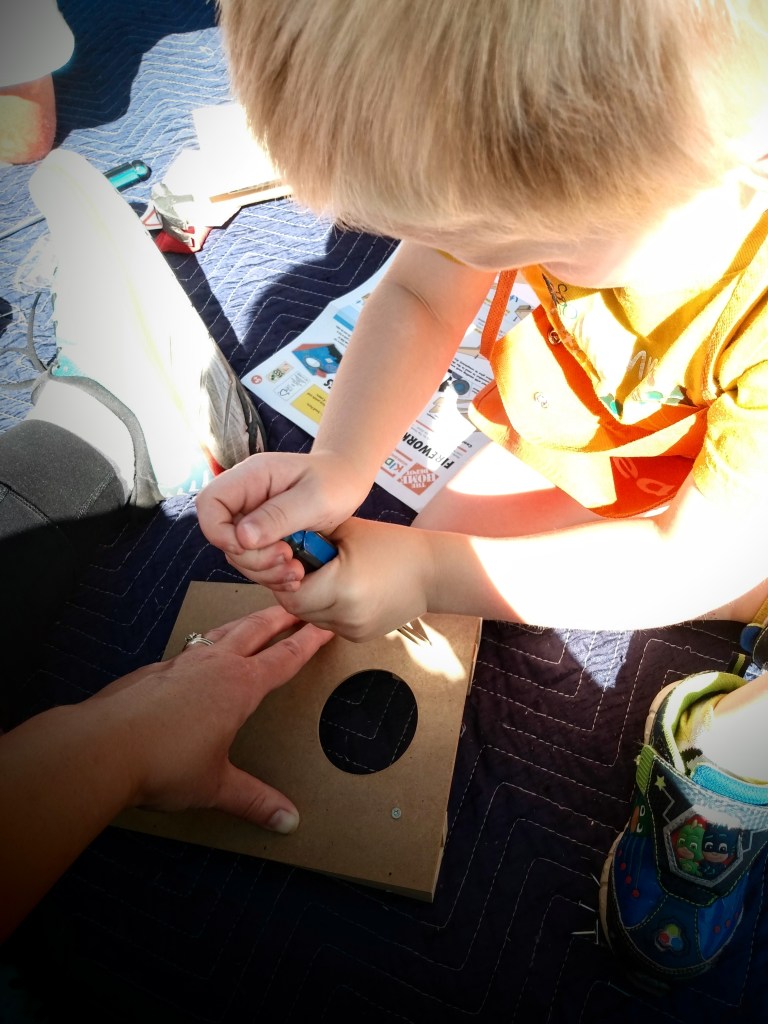
My one and only job for the day, hold the project in place.
This is the child that loves having things in a certain order and done a particular way. But it was fun watching him process the building information and doing it the way that he saw makes sense. But what was a good surprise was seeing him use the claw end of the hammer when the nail wasn’t lined up the way he wanted it. He didn’t want to make corrections the way that I would. He wanted to fix the error his way.
This reminds me of a series of lessons from a virtual life skills summer camp that I watched with my kiddos this past month. This was a series teaching basic home electrical repair skills to teens. I watched it to learn for myself because this was one skill that I didn’t learn from my dad, but there’s times where my husband is so busy that I could do these things home repairs without waiting for his schedule to slow down for him to do it.
What’s amazing about whole families learning new skills is that we’re not dependent on one person taking care of a honey-do list. We’re enables to work as a team to get something done.
Advertisements
For example, even though my oldest is still in early elementary, he’s able to take care of nail and screw projects. I learned some new electrical skills to help my husband out. And my husband has been learning new food preservation skills to help in the kitchen.
For our family, it’s important to learn new skills and “cross train” because it creates value in our family. One person isn’t dumped on and obligated to do certain tasks by themselves. This can be overwhelming, especially as the adults in the house, because we’re constantly juggling our schedules and to do lists. Sometimes surprise tasks just become overwhelming because there’s not enough time in the day.
But when another family member knows how to do a task alongside you, it turns into a quality time moment instead of a stressed out I-don’t-have-time-for-this.
I don’t know about anyone else’s family, but my kids are already at the age where they want to feel valued and appreciated. And by giving them fix-it skills, it’s one thing where my kids can do something for my husband or I, feel accomplished, and then feel valued with a “thank you” and “you did a good job”.
And it’s not just with tools. The kids have been learning how to cook things on their own and they’re so proud of being able to cook breakfast for the family.
It doesn’t matter the age, people thrive on feeling appreciated and knowing that they contributed something. And that value isn’t taking into consideration the memories that are made in the process.
One of my favorite memories of working on cars with my dad was when he had me crawl under a car and do an oil change with only him available to talk me through the process. It was the late 80’s and one of the biggest fads for girls was wearing press on nails.
It was when I was removing the last bolt that two of my nails popped off and landed in the oil pan just as the oil gushed out. I started freaking out. My dad thought I had lost the bolt in the pan. He and my uncle started laughing their butts off when they found out that I was looking for my nails!
Let’s just say that after I fished the nails out of the oil that it didn’t take me long to realize that there was no way I was going to be able to salvage them.
Advertisements
There’s nothing in the world that would exchange for the memories that I have with working on cars with my dad. Nothing goes right all the time. And it’s these memories that bring patience when I’m working on skills with my boys. Things will go wrong. Some of those things will be hilarious. And it may only be these funny memories that they remember for the rest of their lives. But that’s okay.
I know that they don’t remember the times they’ve hit my fingers with a hammer. They won’t remember the frustration of first learning how to press down on a screw driver and turning at the same time, all just to get that screw to go down into a project. But their muscle memory will live on forever as they grow to learn more skills, such as home electrical repair, car repairs, garden building projects, making meals, and so many other valuable life skills.
What they will remember forever is that their mom and dad believed in them that they could make something. When frustration sets in, they know they can problem solve their way out of it because they were believed in. But above all they will take on the new challenge of learning something new because their parents continue to learn new skills.
We’re never too young to learn a new skill. Neither are we too old.
Maybe one day soon, they will learn a new skill. And as they show us, my husband or I will learn that new skill because they want to teach us something.
So whether you have kids or grand kids or not, learning a new skill is ageless. It’s a great memory building moment to teach the young (even teens) a new to them skill.
And it’s never too late to learn a new skill for yourself.
What new skill are you ready to learn now or pass on to the next generation?
More and more people are moving to containers for growing their home gardens. So what do you do when you get sticker shock over the container prices online or in the box stores?
You build one!
Everyone talks about pallet projects. But I want to introduce you to crate raised beds.
My husband works for a company that builds machinery. The crates that are used there are tossed. Being resourceful and having access to free crates to reuse and repurpose, this is the way I build the majority of my container garden. This also has the added bonus of solving my time problem. I have so much on my plate, that building raised beds from scratch isn’t an option.
AND if you know how to use a pair of scissors and a staple gun, you can absolutely make this garden container!
There are so many different crates out there. The ones that I have and use as raised bed were formerly forklift crates. (They originally housed large machinery parts.)
With the crates you source, there are a couple of things to keep in mind.
If there is plywood (whether the floor or sides), you will need to remove it and replace with wood that hasn’t been chemically treated.
The crate floor should be solid. This will help contain your soil.
The sides are okay if they have gaps. We’ll line this and the soil will stay in.
Is this going to be a permanent or temporary container for your garden?
Advertisements
This last question is very important. It will determine if you need to source other materials for your container. You may find that you need screws, power drill, or even other parts if you plan on turning into a cold frame or want to add features like hoops.
The containers that are brought home to me are made out of pine. The boards are stapled together.
The containers that are brought home to me are made out of pine. The boards are stapled together. I know that these crates were not built to last forever. They’re not even sealed for weather. But being limited in time for my garden builds, I opt for leaving my crates as is.
Tip: you can weather protect wood by scorching it with a torch.
If you find that your crate is stapled together, this feature is going to limit how many seasons you will get out of your container.
For example, the boards of my 36″ x 36″ potato crate (above) started to pull away at the start of the third year. The wood is weathered but still as strong as the day the crate came home. This is one crate that I wished I would have reinforced with screws before filling. This crate got place before filling with dirt. And with the exception of this front face, there’s no easy way of coming back in to push the board back in place and screw in. It’s tightly spaced with other structures.
Tip: My hindsight advice is to increase the longevity of your crate container, reinforce the boards with screws, right from the beginning. This will prevent awkward maintenance in a few years.
Let me walk you through how I make my raised beds from crates
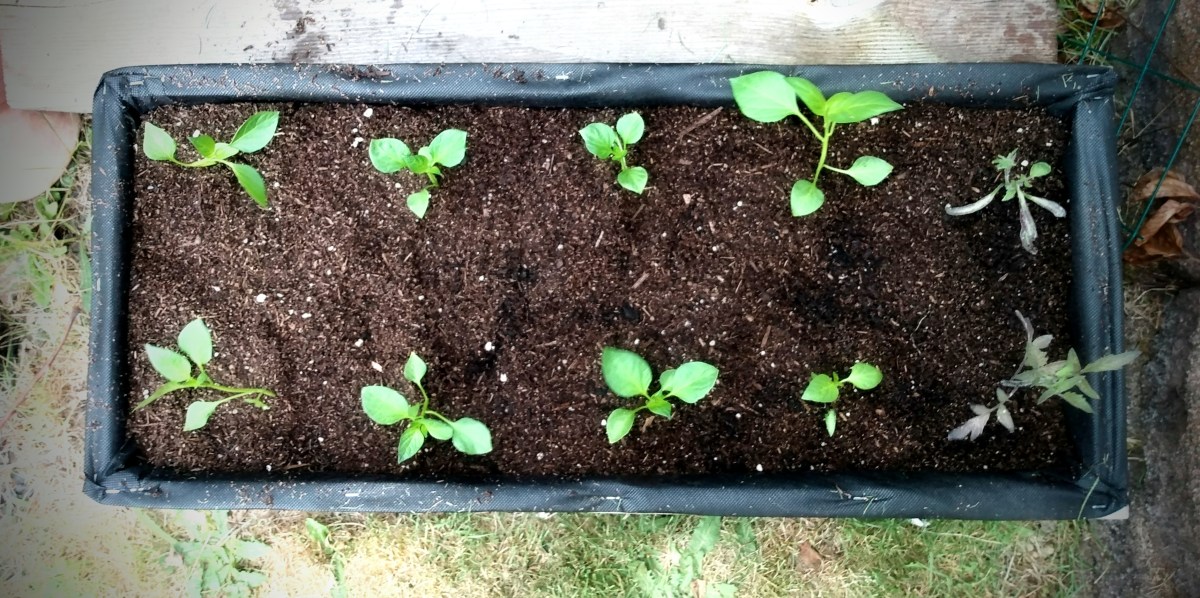
I’m using the smallest of my new crates 12″ x 32″ and about 18″ deep. (This one has been sitting for a couple months waiting for me to decide what I wanted to plant in it this season. I was gifted some pepper starts and knew exactly where they were going to go.)
Items you will need:
Wood Crate
Garden Weed Barrier
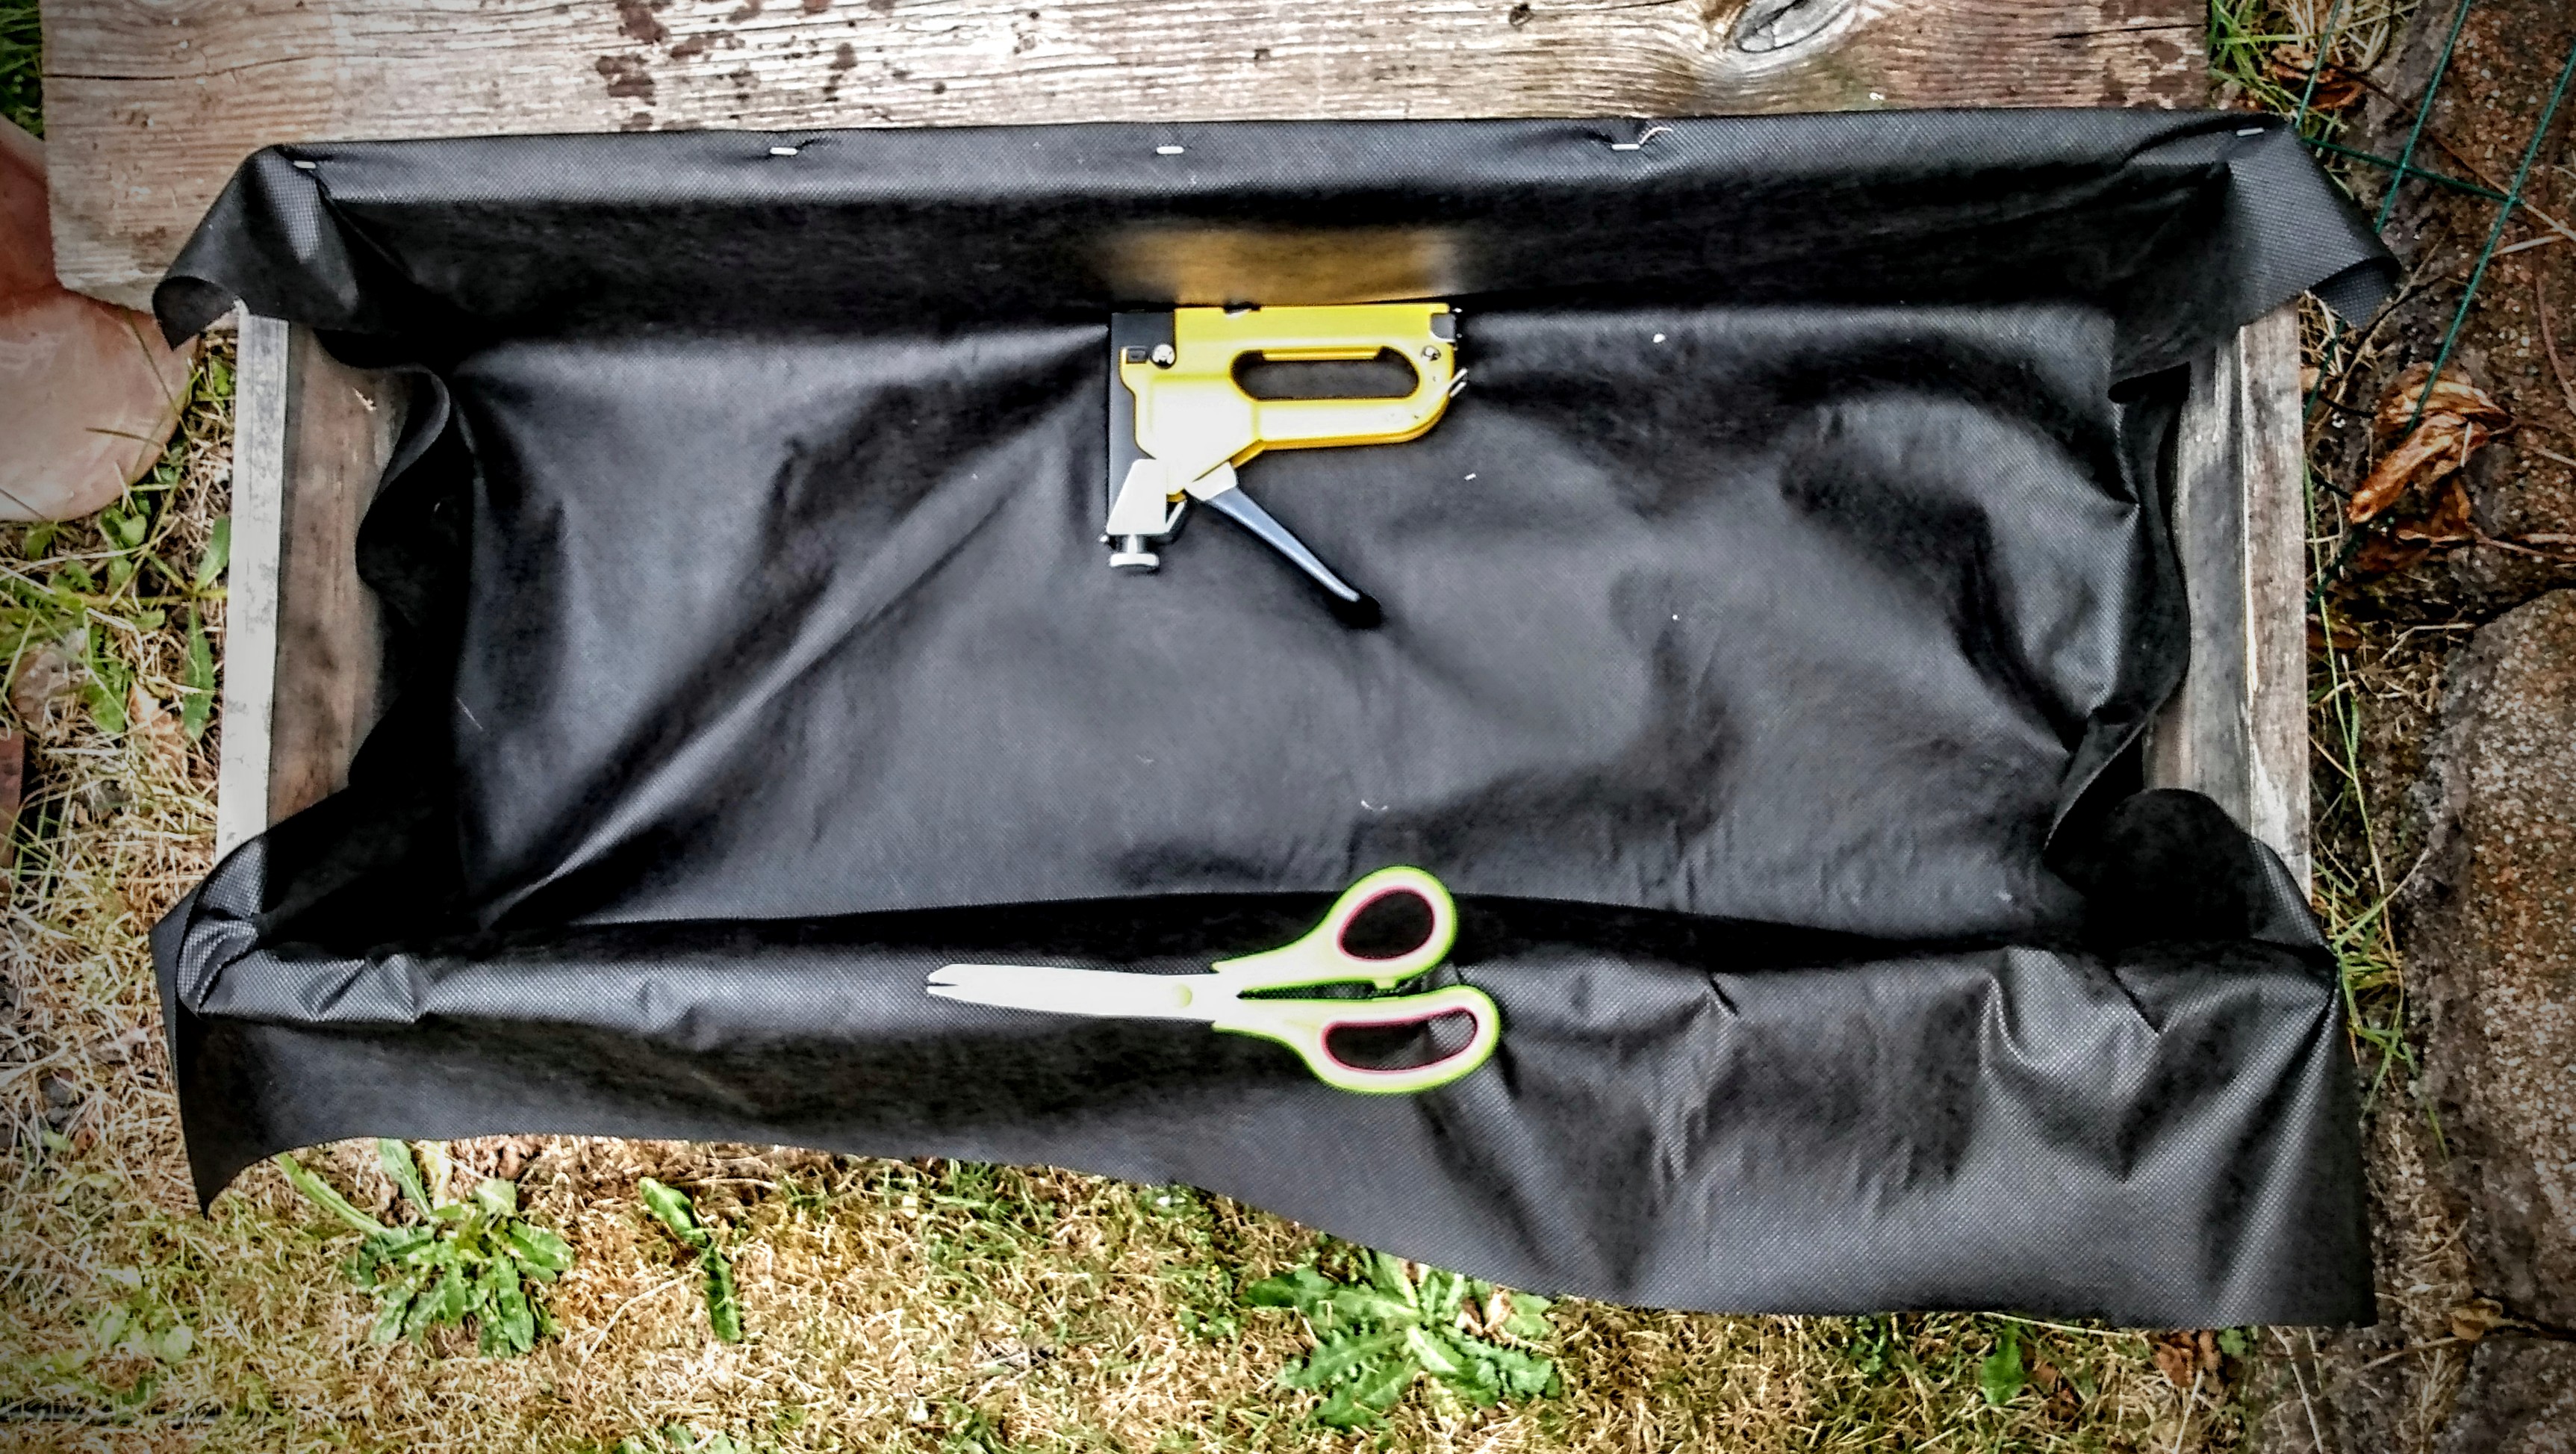
Scissors
Staple Gun
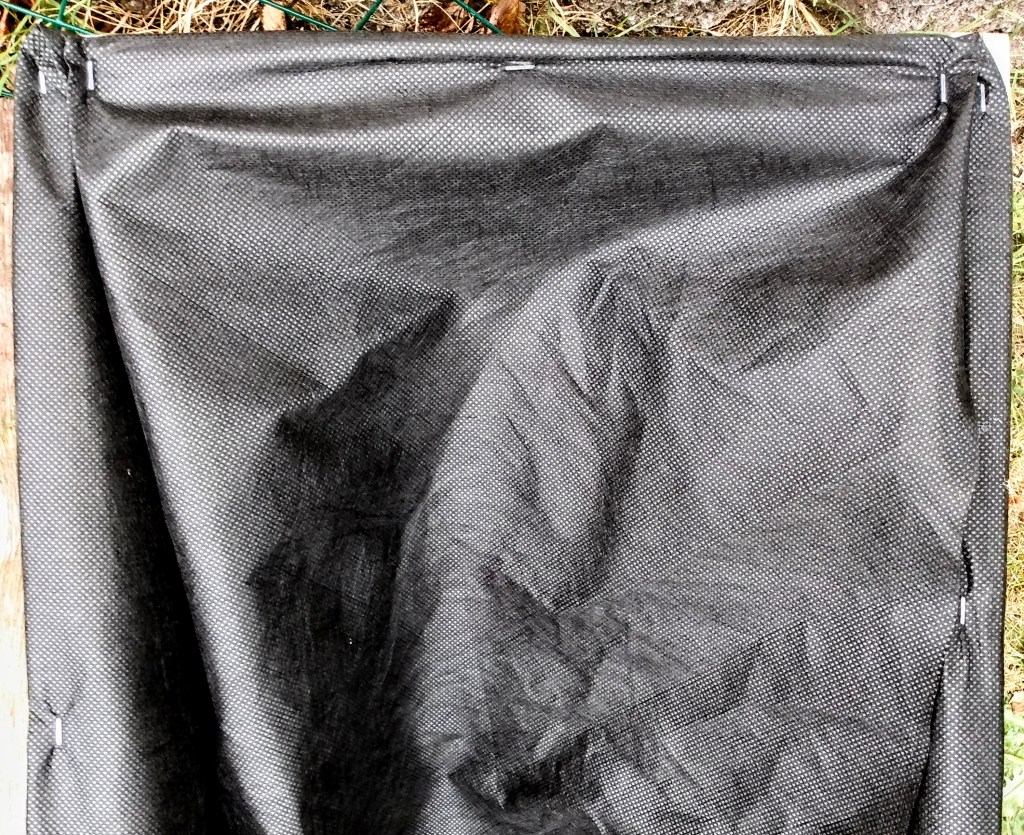
The first thing I do is fold over the edge of the garden barrier, to make a smooth finished edge, and staple it down across one edge of the crate. It’s not necessary to make a finished edge. I just like this step because sometimes the cut on my roll of barrier is slanted. So by making a new straight edge, this makes it easier to lay the barrier without worrying about it running sideways across the crate.
Note: When I line a crate larger than the width of my garden barrier, I line one side of the crate. Once that first piece is secure, I run a second piece for the opposite side of the crate. The overlapping of the barrier happens in the middle of the crate. There is no need to secure in the center floor of the crate because the weight of the soil will keep the barrier in place.
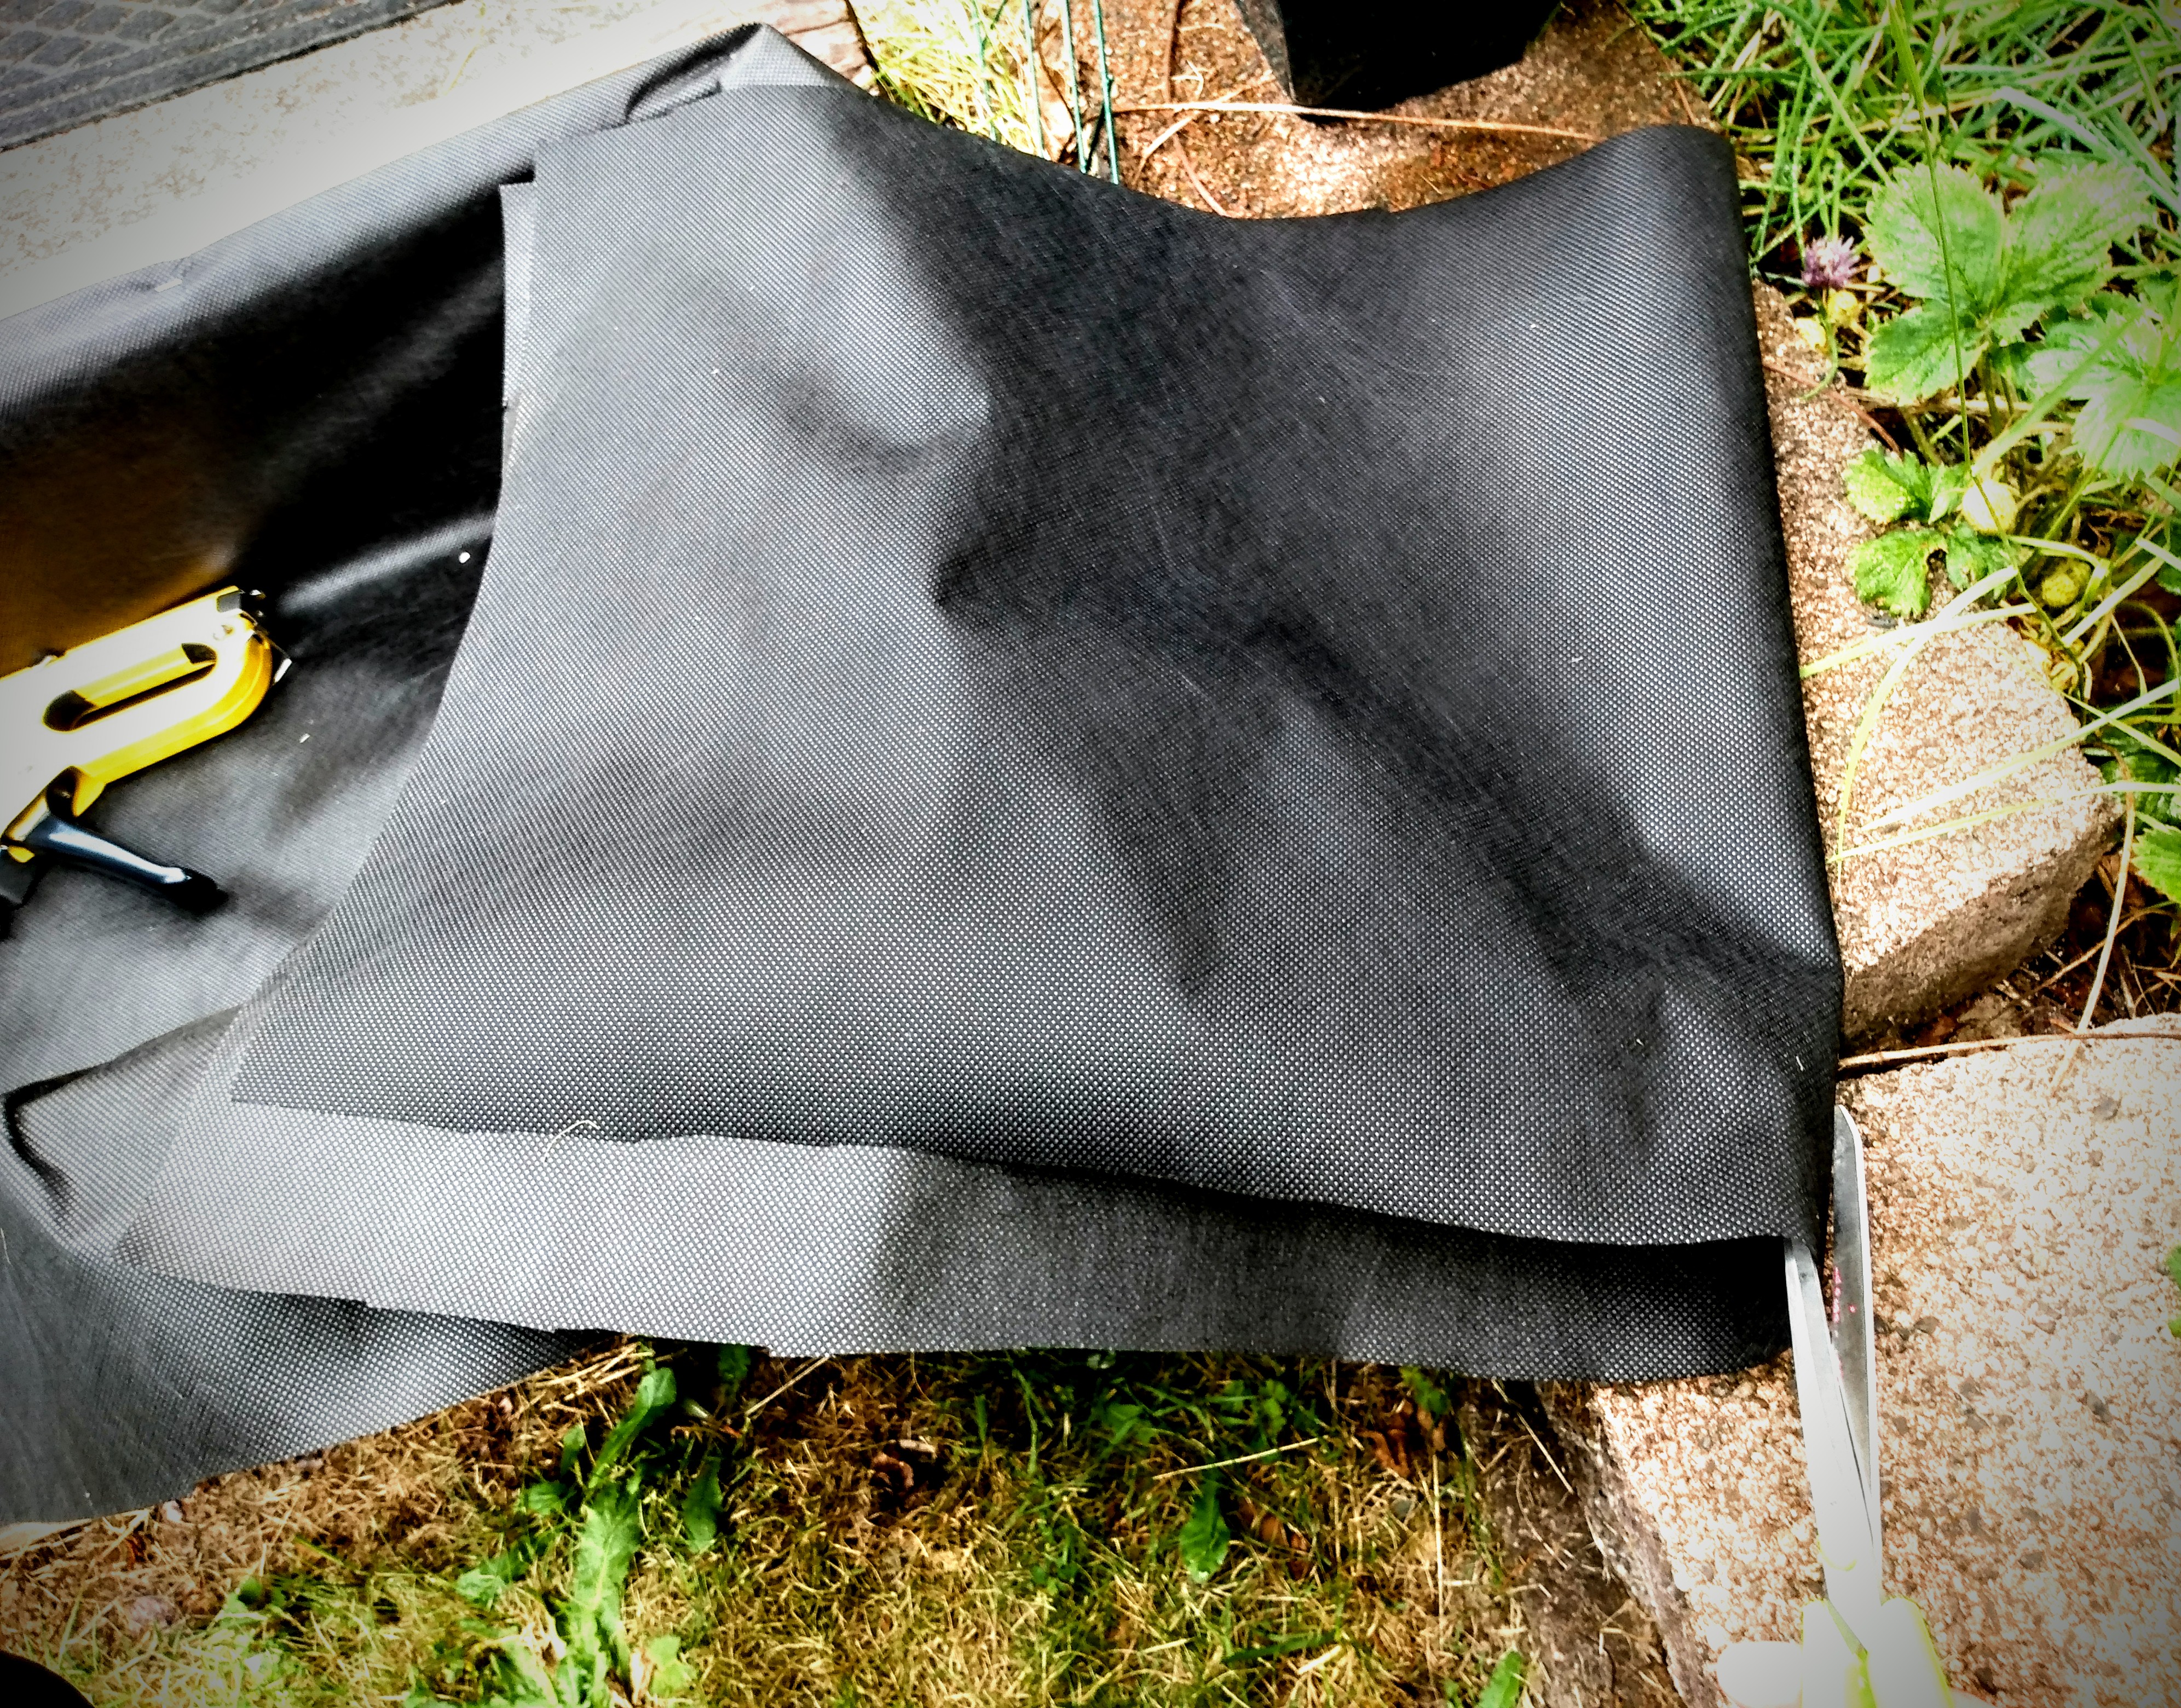
With this first edge of the crate secure, I drape the garden barrier across the top to make sure I’m laying it in centered and straight. Then I push the barrier down into the crate and make sure that the barrier has enough give to accommodate the full size of the bottom of the crate.
As you can see in the second picture, I trim my garden barrier a little longer than I need to fit inside the crate. One reason is that I usually don’t cut a straight line (obviously seen here). But more importantly, I learned over the last two years that you want more barrier inside the crate than you will think.
The crates I lined the first year, fitting the liner tightly to the inside. The following spring I noticed that these barriers started ripping out at the staples after the first winter of water and freezing. The barrier needed some flex that I did not allow for. So now I give some allowance.
Before I put my garden barrier away (and focus on securing the lining), I cut the width of the short side of the crate. Then I fold this strip of barrier in half and cut. Each half will line the sides of the crate. These side pieces I set aside (or stuffed in my pocket for this crate because of the wind). I set the roll of barrier to a side and go back to folding over the edge of this second crate long side, and staple it down in place.
Once the long sides of the crate are secure, I secure the edges along the short side to hold them in place before securing barrier down the short sides. This keeps them up and out of the way. And if you’re lining a crate while it’s windy out, you will thank me for having the barrier stay in one place so you can move through this project in the least amount of time.
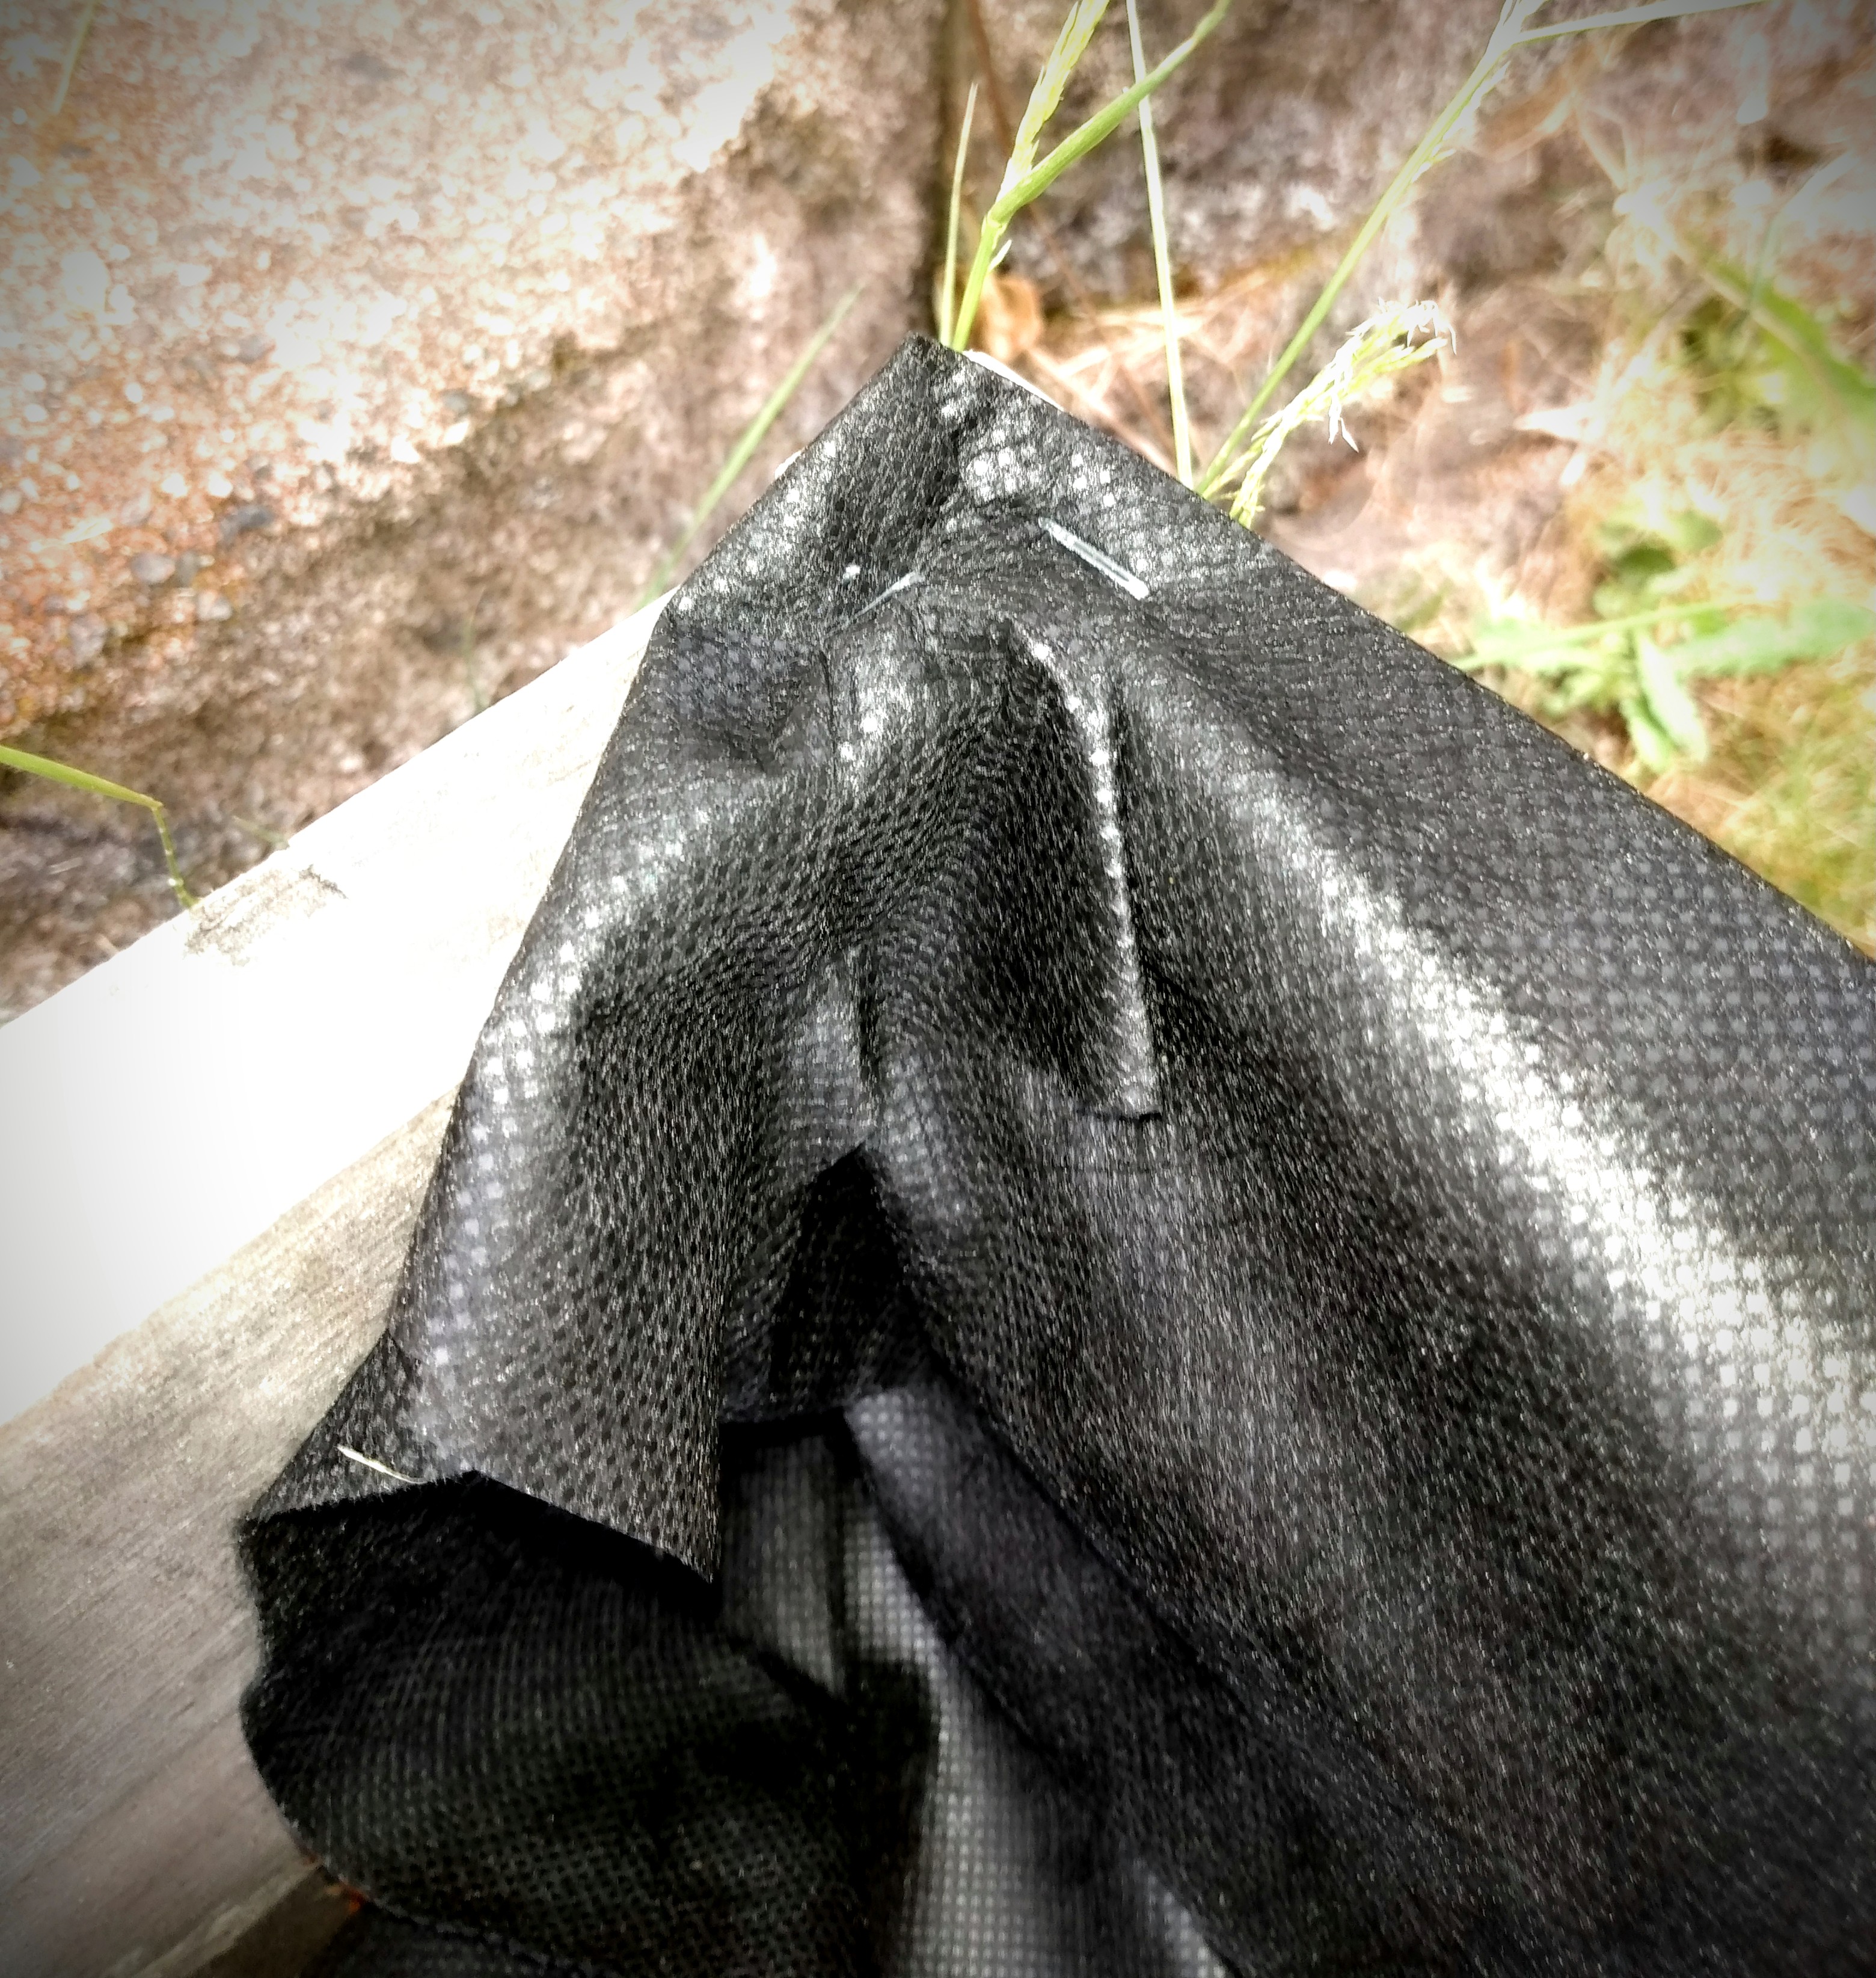
First I take the overlap, from the edge of the crate, and fold this corner down before stapling. This gives a reinforced edge as well and bringing the excess barrier down inside the crate. This doesn’t look pretty, but this is all about telling the barrier where you want it to go and keeping it contained.
Can this excess be trimmed off?
Of course it can. But you will see in just one moment, by keeping the excess length and tacking it up the side, you are creating a barrier that will keep all your soil in your raised bed without having a completely sealed liner. I use the weight of my soil to work for me so I have less steps to take.
For the next step, I pull out one of my side crate pieces of barrier that I just cut and line my first short side. I fold the edge of the barrier down, just like I did with the long side of the crate, and stapled down this top edge and pushed the rest of the length of this side down over the rough edges that were tacked down from the longer side. This flap is great because not only does it cover the edges of where dirt could go down and over time wash out of the bottom of the crate, but it also redirects any of this soil movement back toward the center of the crate.
So if you have the choice of having a generous flap (like seen here in picture two) or trimming it down, make an educated decision in favor of what’s going to help you maintain your soil. After all one of the problems with container growing of any kind is the loss of soil, mostly through drainage at the bottom of your container.
Once you secure the second short side of the crate, you will see here in picture 3 that you have a fully lined crate.
The first time I lined a crate, with no one telling me how to do it, I must have taken an hour to do this. Even with taking pictures, this only took me about 15 minutes. The larger crates don’t take any additional steps. So it really is time efficient to take a fully made wood crate and line it to make your own raised bed.
If you did not line your crate where you want it’s forever home to be, make sure that you move it now. Even with this smaller crate, the weight of it filled is more than I can move on its own. Even with a hand cart, I still wouldn’t want to move it because I could just see myself knocking it over and spilling all my soil all across my yard. For my sanity (and your own), I just make sure I place my crate raised beds before I fill them.
Advertisements
How I fill my raised beds
I’ll start by saying that I don’t fill my raised beds like everyone else.
One reason is that I don’t have the gardening budget to buy as much soil as I would need to fill all my crates, especially the large ones.
Another reason is that I’ve talked with many people about different types of gardening are available for each of us to choose from.
The drawback to container growing (even raised beds) is that there comes a time where there will be a depletion of nutrients in soil. So even though I do top off my crates with raised bed potting soil, I choose to think long term with my raised beds.
Hugelkultur and Mound gardening have beautiful foresight in them. Both of these forms of gardening is that they put long term “food” into their structure building. Both contain wood (usually in the form of branches and limbs of trees, logs in larger structures) which is slow release nutrients that takes many years to decompose and incorporate nutrients back into the soil. If fact, this is the best way of getting the micronutrients into the soil that standard commercial fertilizers do not ever put back into your containers.
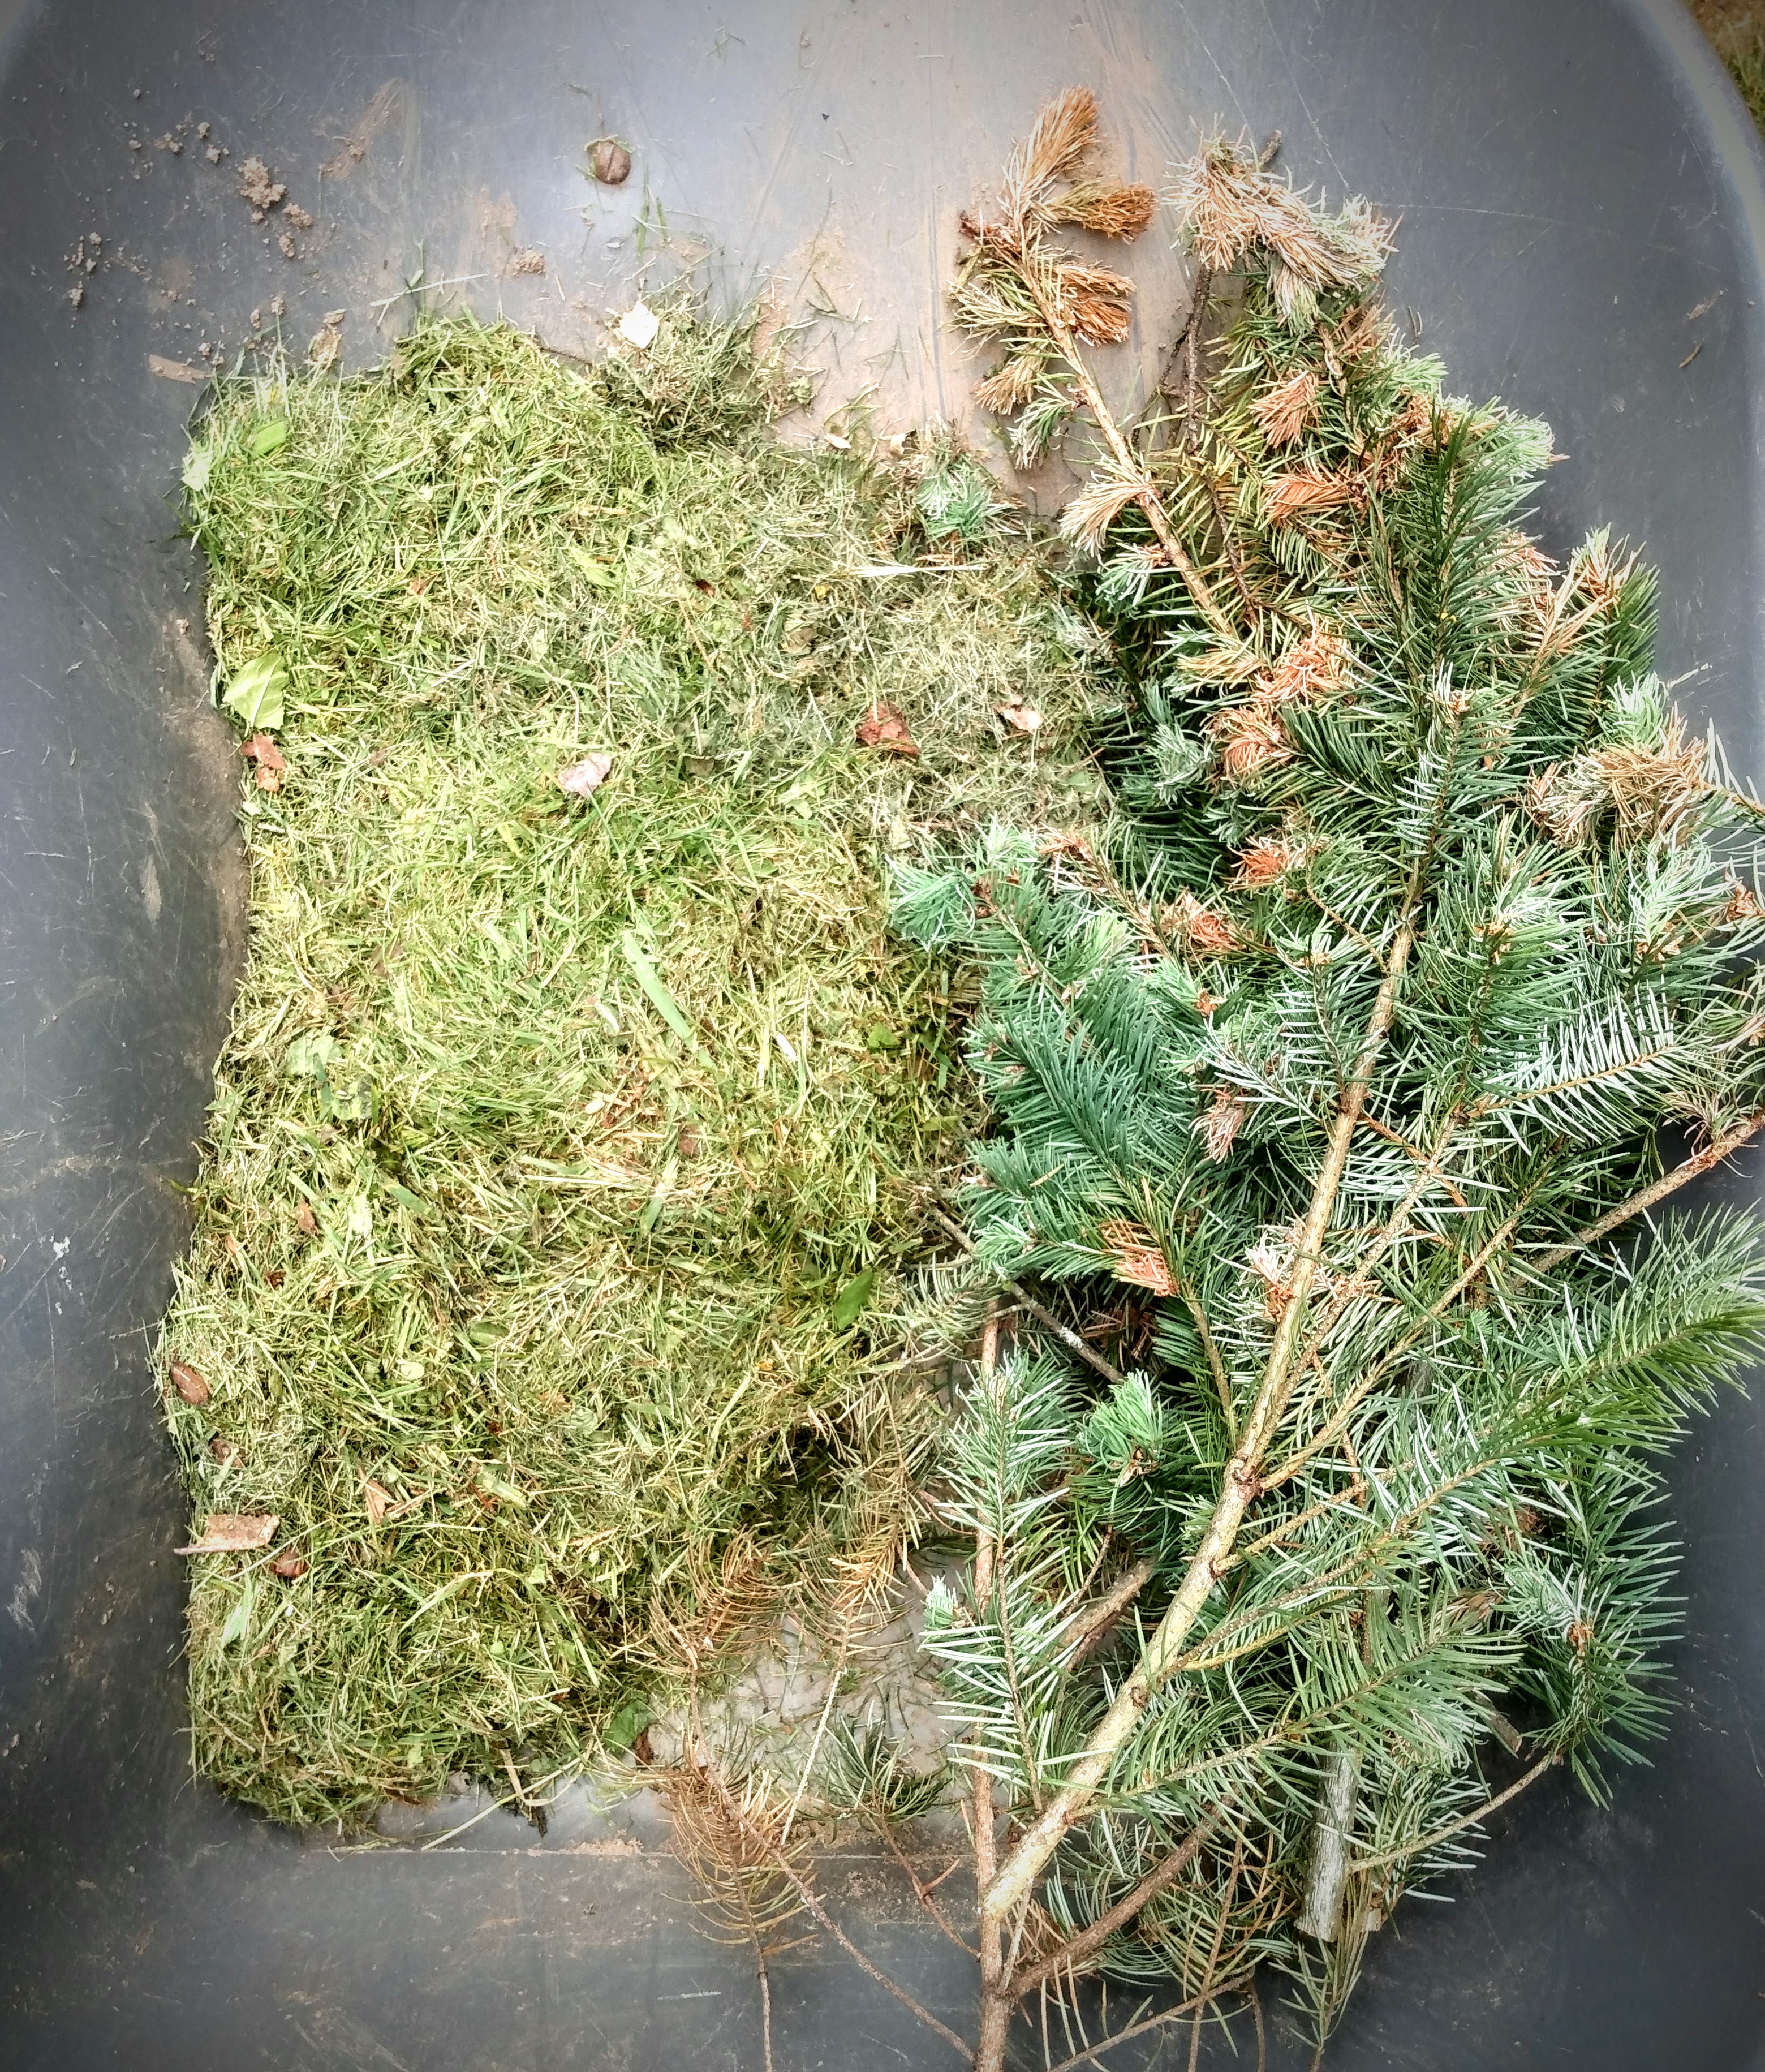
For this reason, I went back to my yard waste and compost. I grabbed some pine branches that we recently trimmed off of our trees, and a couple of handfuls of grass clippings. Especially with the large crates, these fillers are going to be amazing.
In the bottom of my crates I put the largest branches. Normally I put in camp fire sized pieces of wood in the bottom. This small crate doesn’t have depth for that. So I started off with what I consider my second layer, thin branches. Ever green boughs are perfect, not just because of the thicker needles (which take longer to break down than leaf waste) but also because they take up space.
Next I put down green grass clippings. One, they take up space and leave nice medium for plants to spread out their roots. Two, the grass fills in the branch gaps and holes perfectly.
Think of that science experiment where you’ve seen rocks added into a jar first. Then it’s followed by pebbles, then sand, and then water. It’s a perfect example of maximizing the fill of a contained space with an incondensable material like rock.
I pack my raised beds with as much long term nutrients as I can. And this method of packing with larger material first, working your way down to the smallest, is the best way of packing your container box.
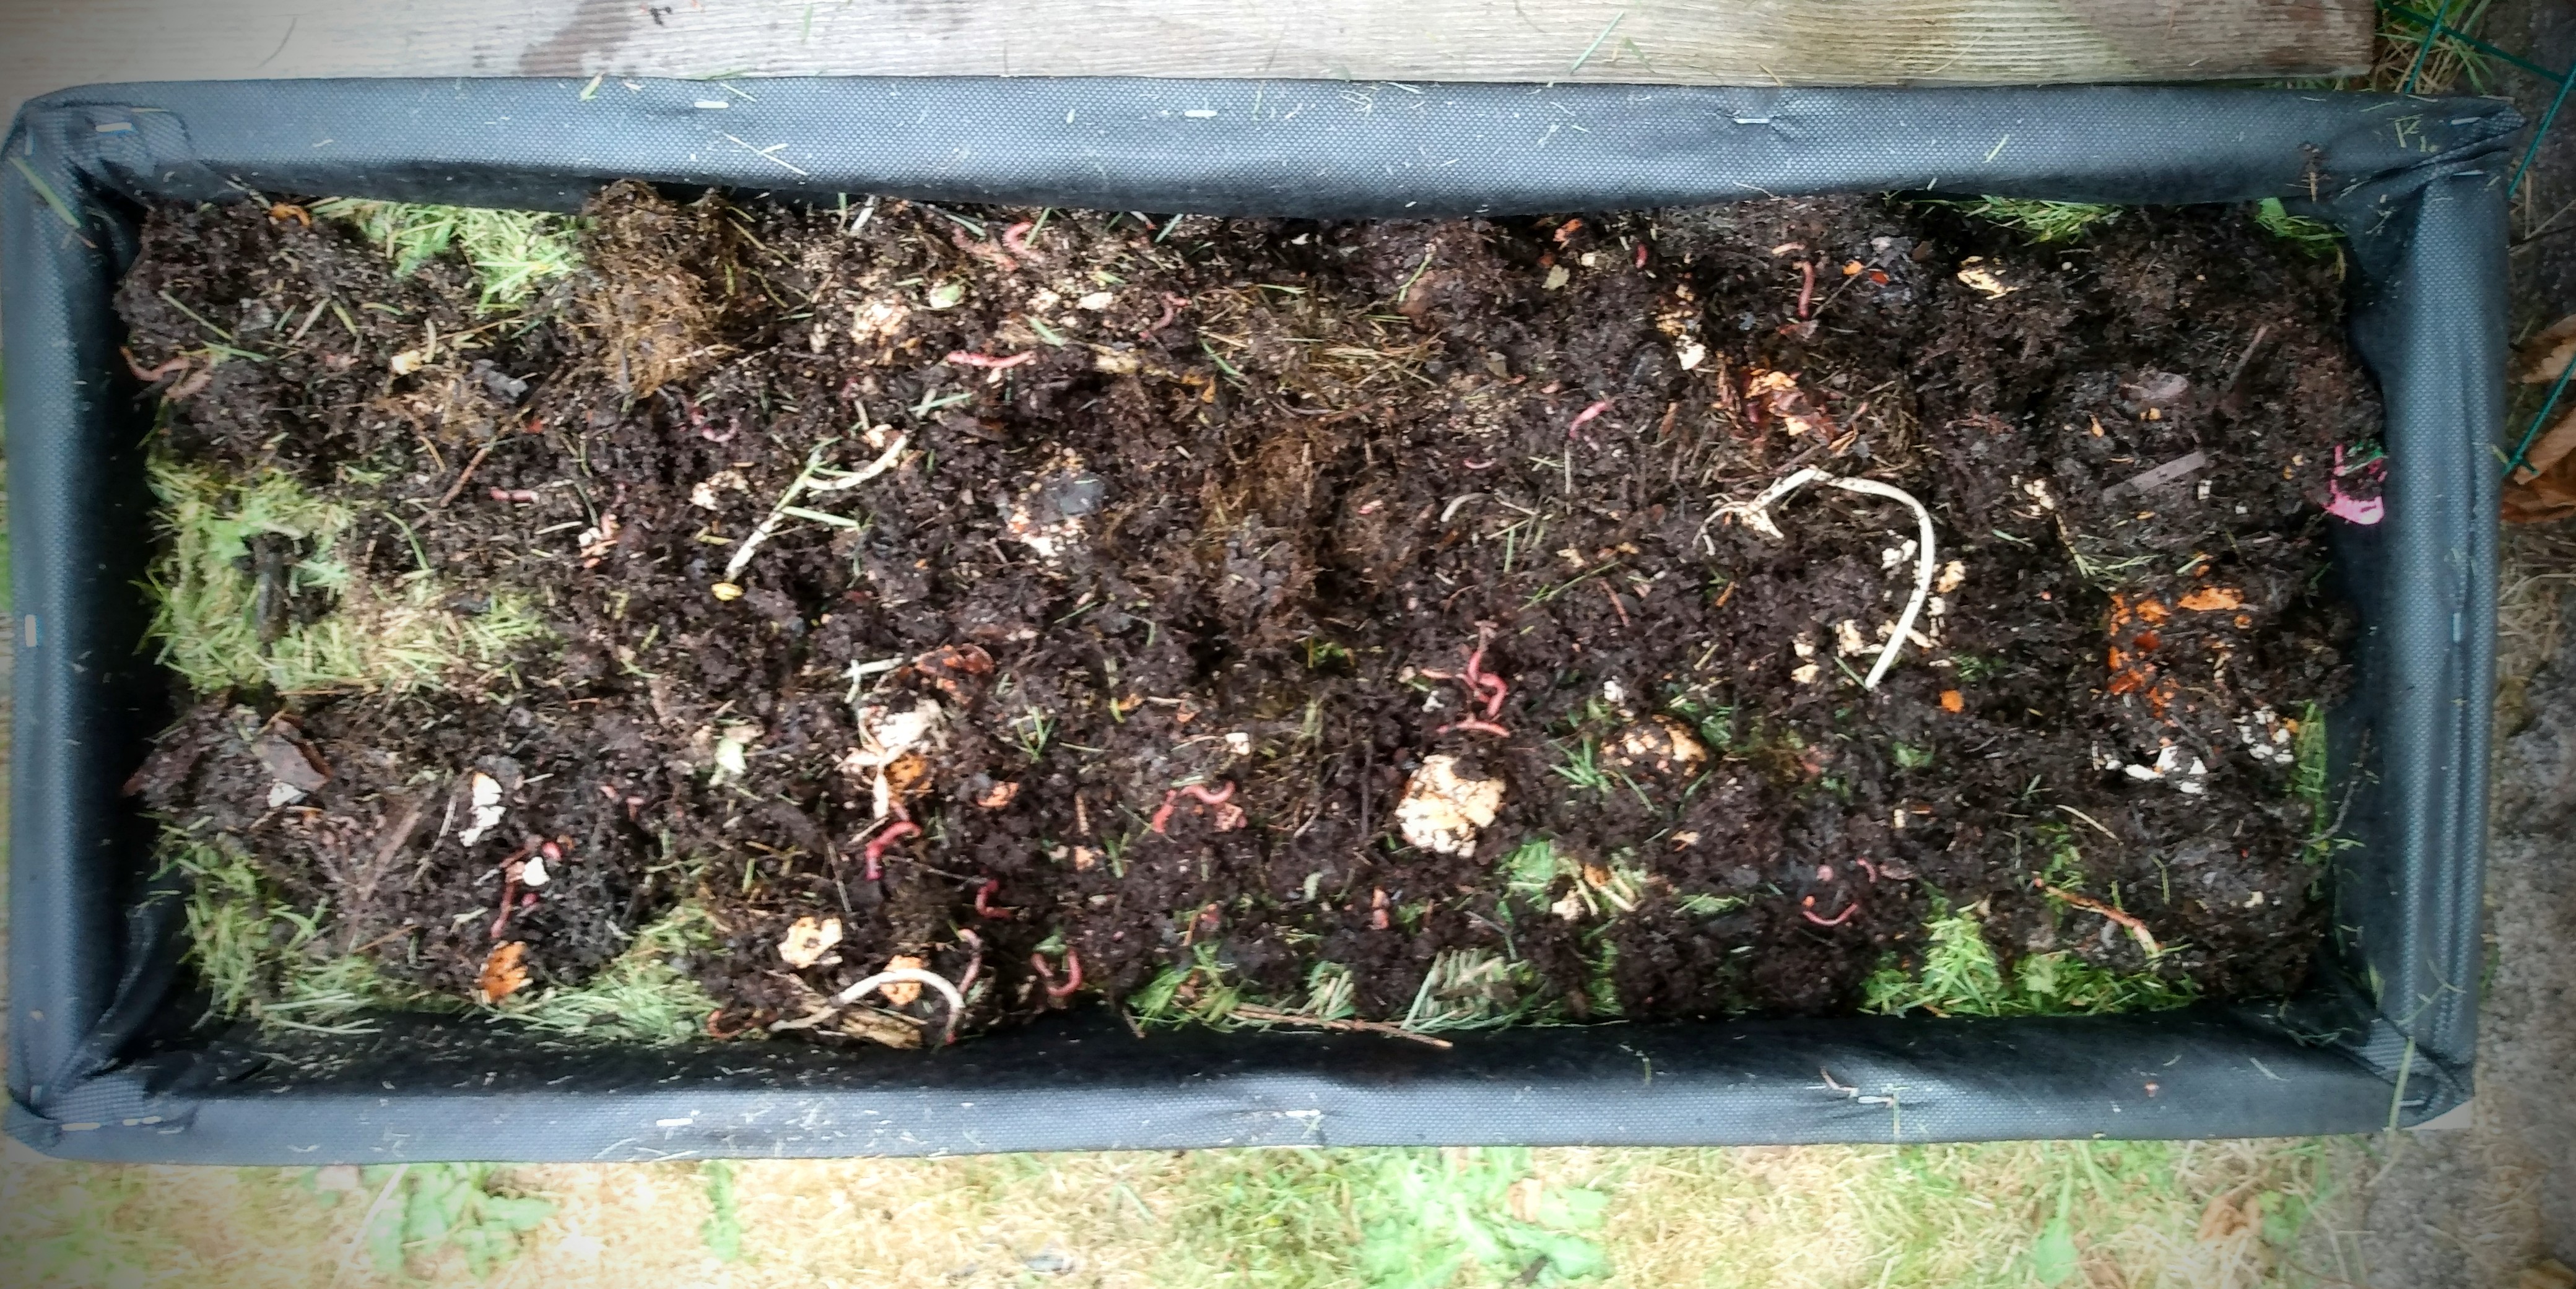
From here, I went back and grabbed a couple of pitchforks worth of raw compost (complete with some of my worm residents) and the last of my current supply of raised bed potting mix.
Of course it was the moment that my kiddos saw me grab the compost that they came rushing at me. My youngest dove in and tried to rescue the worms from being placed in this crate. He was acting like I was kicking them to the curb and evicting them. It took me a moment to tell him that he didn’t need to take them back to the in ground garden, I need them here.
And that’s one thing that I haven’t heard anyone talk about. We all know that worms are great for our garden. In fact we don’t give them a second thought in our in ground garden. So why aren’t we talking about them in our container gardening?
Worms are very much needed for a good growing biome. They help break down materials. And since I put in some large materials, I could let them do their own thing, or I can see if I have some worms who want to take advantage of this new home. (And this is another reason why I don’t fully seal off my lining in the crates. The worms are free to come and go as they move their way through any loose openings that take place over time. (And these openings do happen, but they’re more controlled.)
Anyway, I chased my youngest down and got my worms back in my compost. Then I quickly dumped the potting soil down on top to keep him from digging them back out. (I swear that child loves worms!)
I finish off with the raised bed potting soil because that is ready to go and host my pepper starts.
The down side to this layered nutrients in a raised bed
You may want to choose to do straight soil. Especially if you’re planting starts that will shortly need to have structures to assist in their growth. Just like these peppers will need some structure.
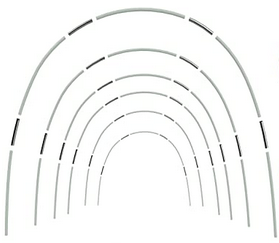
This layering, especially in this smaller size of crate, makes it impossible to add bamboo stakes for my peppers. They were just falling over. Fortunately, I have some carbon fiber cold frame hoops. I haven’t added them yet to this crate, but I’ll put in a hoop over each row to drop lines for the peppers to grow up.
I mention all of this, because if you choose to layer and expect it to hold up a stake or tomato cage, this first year just doesn’t give it the soil density to hold up a structure. So be prepared to come up with an alternate plan.
Another disadvantage to this layering is that as you can see in these pictures, I filled my crate up to the top. Over the course of this growing season, and especially over winter (when the rain helps to draw all the smaller soil material to settle into the branches in the bottom, I will see that this crate will only be half full next spring.
In the spring, I’ll add more compost and soil into this crate. At this point I can add mulch on top and the volume of the crate will not go down any further.
Again, this isn’t a horrible down side. It’s just one to be aware of and plan for. But this crate is now set up for many years of container growing. It will be sustainably nutrient rich, especially when I add the mulch and keep that going every season.
How do you like to container grow?
Here are a couple items I find useful in my garden.
This post contains affiliate links to products. We may receive a commissions on products purchased through these links, but at no extra cost to you. These items listed here are from Amazon but may be purchased at local markets.
[…] Make a Container You Will Love is how I start off all my new boxes. This time I reused one of my existing boxes. My onions didn’t do so well in it this past grow season, so I’m changing it up to see how my garlic will do here. […]
A few years ago, my oldest came home from school saying that he and one of his friends were BFFs. I asked him if he knew what that meant. He said, “Yes, mom, Bacon Friends Forever!”
I tried so hard not to laugh. He was serious. And it got me thinking about how no matter the culture people have always bonded together over food.
Today I want to talk about curing meat. If you are a non-pork eater (whether for religious or personal reasons) please stay with me here, because the curing of bacon is the same process as curing other meats. For example, Pastrami is made with beef using the same method (even with a different seasoning recipe). And you can even make Bacon using Beef as a substitute (there’s a recipe for this at the very end of the post).
The process of curing meat use to be common knowledge for all families before refrigerators were invented. In fact there are still many cultures around the world that still cure meat in their traditional ways. If you are interested in learning other methods 2 Guys & A Cooler is one channel that I follow. And what surprises me is just how similar all these other meat preserving methods are to making bacon.
Curing meats, in short, is the process of removing water from meat to make it shelf stable without refrigeration. This is done by using high amounts of salt.
The reason why salt works in preserving meat is because salt draws water out of the meat and creates a saline environment that makes the meat inhospitable to the growth of colonies of bacteria and mold.
Specific salamis are cured for a specific flavor brought from the controlled growth of certain mold. So, in this instance salt is the controlling agent to that mold growth.
I mention this before starting to show you how easy it is to cure meat because there are certain diets where it can be tempting to alter meat curing recipes. You need to keep the high salt content on order to not grow bacteria or mold on your meat, and making it dangerous to eat. There are methods to alter the saltiness of the meat later on in the curing process. So give me a moment, and I will come full circle back to salt levels.
Advertisements
Let’s Make Bacon!
There’s many bacon recipes found all over the internet. My husband and I have tried at least half a dozen. And that doesn’t include the experiments we made in trying to make our own. None of them compare to the recipe made by Jess Pryles, which is our go to recipe. The easiest way of describing it is to think of your favorite grocery store brand and multiplying your love for it a hundred times. Or think of the best bacon you had in a restaurant, and this bacon turns out better than even the finest restaurant. That’s how much we love this recipe. So this is the one I’m going to share with you because it’s not too sweet, not too spicy, smokes without burning or sticking to your smoker/grill, and the level of saltiness is easy to manage for your preference–both at the beginning of the curing process and at the end.
This recipe can be multiplied in direct relation to the weight of the pork belly you are working with. See “Managing Saltiness” to see how you want to treat this ingredient as well as the pink curing salt.
Managing Saltiness
Before I move on to the process I want to briefly walk you through your first option of managing the saltiness of your bacon–or any cured meat for that matter. You have two options of salt to use: fine grain salt or rock salt.
Fine grain salt is your table salt, kosher salt, or any other salt that has been milled down to a fine powder. Because of how small the salt has been broken down into, the salt easily penetrates deep into the muscle tissue of the meat. This will give you a punch in the face saltiness level that you can further modify at the end of the curing process.
Rock salt is the crystal salt that you usually see in the store for sea salt or Himalayan salt. There’s a couple of other salt options out there that uses the crystals or rocks to put in your own spice grinder or mill. Because the rocks are obviously larger than the salt grains, it takes it longer for the saltiness to enter into the meat tissue. This process speeds up as the water is extracted from the meat and “melts” the salt crystal/rock. If you prefer cooking on the less salt is more spectrum if cooking, this is the salt you want to use. (I’m in this spectrum, so I always use this salt for curing meat.)
One more thing I want to address, before moving on to the process, is the pink salt ingredient. If you are nitrite or nitrate sensitive, you definitely want to leave out this ingredient. Pink curing salt is included in many recipes because it is preserving agent. Depending on how quickly you move (or don’t move) through a pork belly depends on if this is a necessary ingredient for you.
Without the pink curing salt, your bacon can be kept in your fridge for a couple weeks before spoiling. So if you go through a lot of bacon, that the pink curing salt really isn’t necessary. But if it will take you months to eat through pounds (however big your pork belly is) you will need to think of an alternative long term storage option, such as bagging up the bacon in your family’s serving sizes and storing in the freezer.
As a comparison note, we cured whole bellies with the pink curing salt, and life happened. We were unable to cook with the bacon like we thought we would and it took us almost three months to finish that batch. It’s instances like this where families might choose to use a pink curing salt. But making bacon has happened long before the manufacture and sales of pink curing salt.
Advertisements
Curing Container
There are a couple of different options you can go with when it comes to what you will contain your bacon in while curing. You can choose to use zip lock bags, closed container, or open container.
The open container is easy because everyone has one. There are a handful of drawbacks though. First, you keep the curing bacon in your fridge, so an open container leaves your meat vulnerable to flavor exchange with other foods. The bacon is also vulnerable to other contaminates, such as someone sneezing while looking in the fridge. And the water extracted from the meat gums up in the bottom of the container through the curing process.
A closed container is by far better in regards that it prevents all the draw backs of the open container. Plus, if you are a family that eliminates or minimizes the amounts of plastics in your house, this fits in your lifestyle. But the drawback for the average home kitchen, is that you might not have a large enough reusable container for your meat to lie flat. I do have a Pyrex casserole dish (which has a lid) that’s the perfect size for a 5lb pork belly. However it comes out of meal cooking circulation for a week.
Both of these options are great for their own reasons. However it’s important to note that these two containing methods will require that you handle the curing meat by hand or other kitchen utensil such as thongs. So if you have any food handling aversions, this might be your determining factor.
The other option is using plastic zip lock bags. You will have to cut the meat down to fit in a one gallon size bag. Or you can leave it whole if you have 2.5 gallon bags. This option gives you an automatic barrier for when it’s time to flip the meat and contain all the extracted water. It is also the most space saving method in the fridge, if space is the limiting factor. The drawback to this option is the dreaded bag failure. If the seal is not secure, you will have the extracted water leaking in your fridge.
If you are using a 3 lb pork belly, the 1 Gallon Zip Lock Bag will be large enough. We generally use a 6-9lb belly and need the 2.5 Gallon Bag.
This bag method has been my method of choice with littles in the house. It just minimizes the other potential could-go-wrongs that happen in a very active house where the kids love to help and be part of the cooking process.
The pictures you see throughout this post are from the bag method and closed container, but we have done all three. They all work. But the open container method also dries out the meat, so it definitely does not come out as tender as the other two methods.
The Process
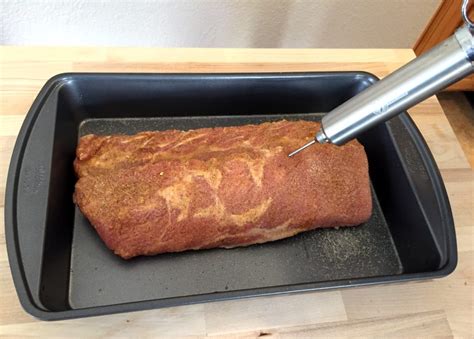
Measure out your seasoning ingredients (in direct relation to the weight of your pork) and set aside.
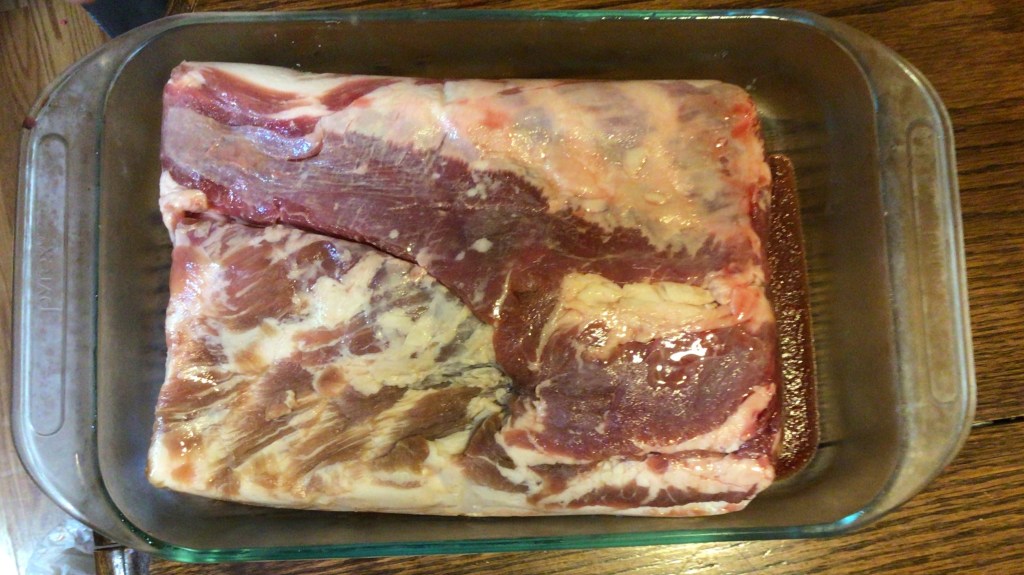
Remove your Pork Belly from it’s wrappings (whether direct from a butcher or from a wholesale meat provider) and rinse it off to remove any juices that it may have had in its packaging.
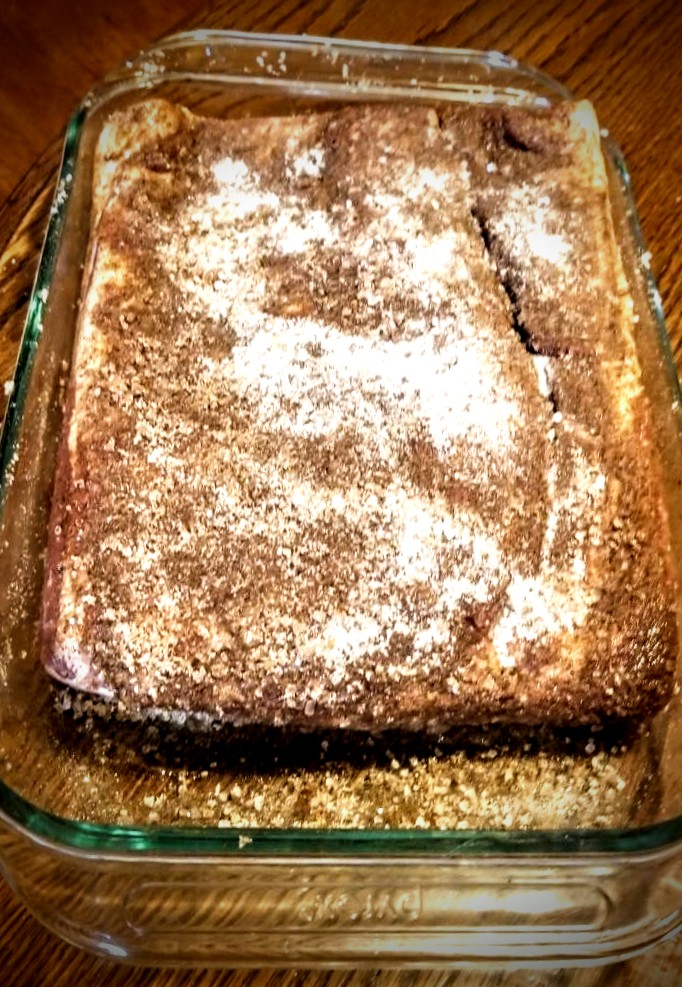
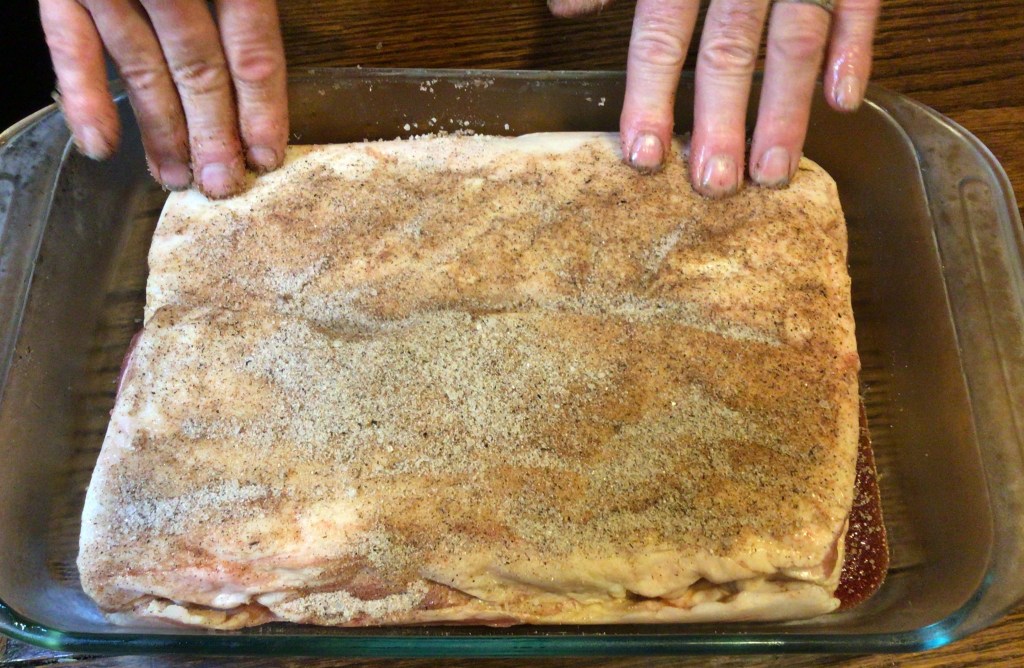
Season your meat with the seasoning ingredients, making sure that you have equal amounts on front and back, and all the ends. Be aware of all the creases in the meat and get the seasoning in there–the salt needs to be in here to make sure that all surface areas are covered in adequate salt. (If you are using the bag method, it’s easiest and cleanest to put the pork belly in the bag and season it in the bag. Seal up the bag once you’re finished.)
Close your bag/container and place the pork belly in the fridge.
For 7 whole days, flip the bacon over once in the morning and once in the evening.
Once the 7 days are up, can remove the cured bacon from the fridge or let it continue curing for a few additional days.
Remove the bacon from the bag/container and rinse off your pork belly. (See below for “Rinsing Advice”.)
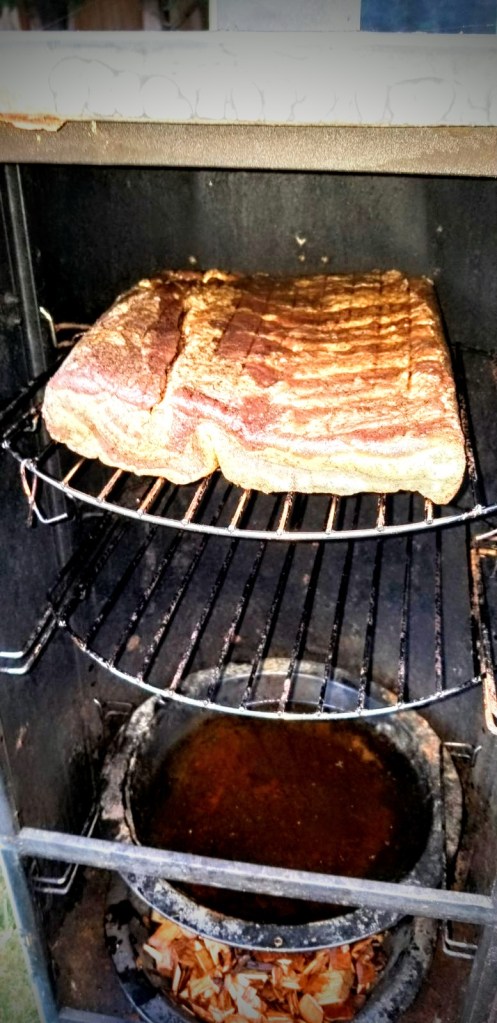
Now you will low and slow cook or smoke the pork belly, depending on what equipment you have available at your home. If all you have is your oven, set your oven on the lowest possible setting and cook the pork belly until you reach the internal temperature of 165°F. (See Below for “Cooking Options” to hear about the other ways you can cook/smoke the bacon.)
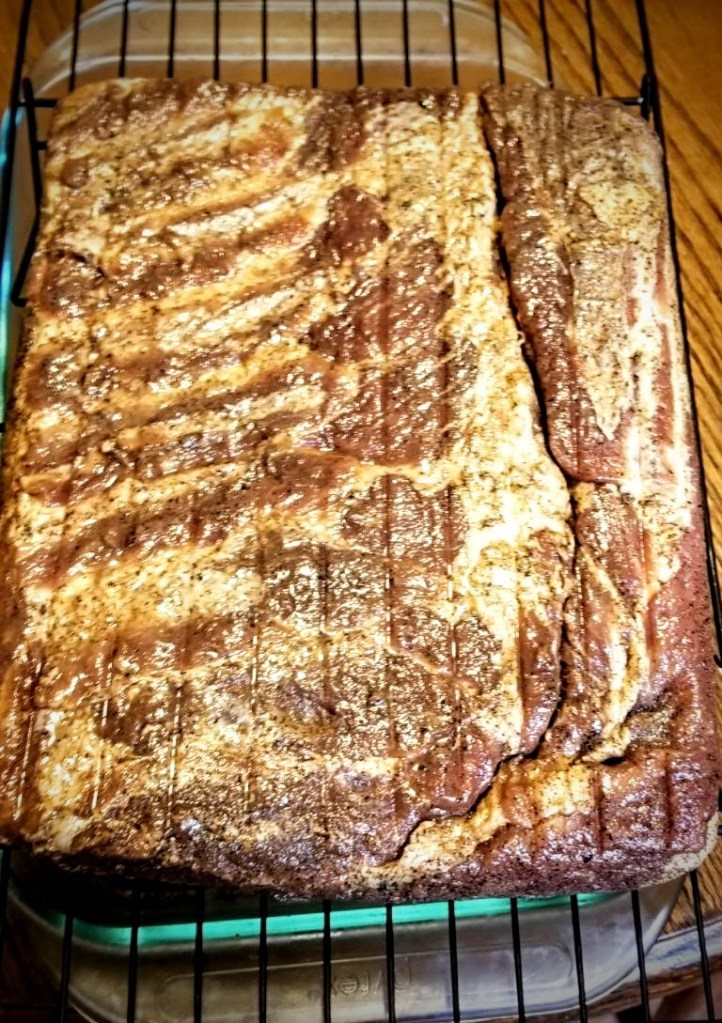
Once you’ve reached the correct internal temperature, you will remove it from the heat source and put it on a plate/tray and cover it with foil and let the pork belly come to room temperature. (See “Tenting Options” below.)
The room temperature pork belly can now be put in the fridge overnight. (See “Cutting Options” below)
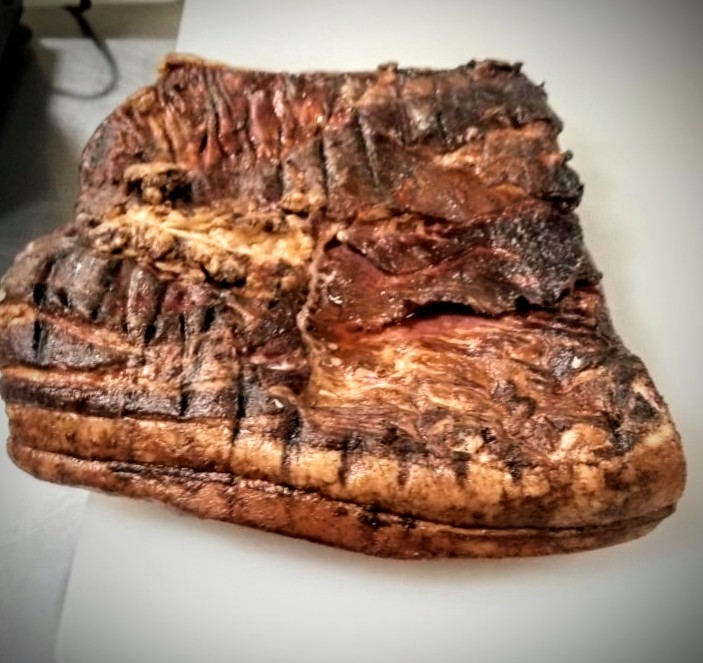
Slice the pork belly into the thickness of bacon you prefer, whether thick or thin.
You now have bacon!!!
Use this bacon just as you would with the bacon you’ve previously purchased from the butcher or local grocery store. If you are anything like my family, you will turn into a bacon snob and prefer the slices that you made over the store bought ones.
Rinsing Advice
This rinsing stage is going to look a little different for you depending on what type of salt that you chose to use.
As I mentioned above, my family likes the rock salt because we lean to the savory side of the food world, instead of the salty side. A generous rinsing off of the curing seasoning will leave a mild saltiness to it. A quicker rinse off is the maximum limit of our salt preference, but the starting off point for some of our family members.
If you choose to use a fine salt, a quick rinse is going to leave you with a salt bomb. (I did this once and that bacon was quickly reserved for soups and stews, and I don’t add any of the recipe’s called for salt. This bacon took care of the salt seasoning for the entire dish.) A generous rinse is what I consider a salt lover would prefer. But if you’re like our family of salt-less-is-more camp, but only have fine salt, I recommend filling a large bowl with clean water and letting the pork belly sit it for about a half hour or so. This is not going to undo the curing at all, but it will keep you from puckering from too-salty.
This is one ingredient that no one can tell you how to handle it, because everyone’s preferences are going to be all over the spectrum. So hopefully this section helps assists you in making salt choices that reflect your personal seasoning preference.
Advertisements
Cooking Options
We have cooked our pork bellies on our Traeger Grill and in a proper smoker. Both of these other cooking sources are great options, but our personal favorite is the smoker.
When it comes to grills, whether charcoal or propane, you want to use indirect heat. Even on the lowest setting/heat, it’s going to cook your bacon. This step should take no less than 3 hours. We are talking low and slow. And if you want to add that element of smoke flavor to your bacon, you can use a smoking chamber on your grill, like the one I have a link to below.
If you have a Traeger, or other grill that is a combo smoker, you want to keep your grill on the smoke setting and let the smoke cook your pork belly. It’s been a while since my husband smoked bacon on our Traeger, but he remembers it taking about 3-4 hours. Remember, this isn’t about time as much as it is about reaching that temperature of 165°F using just the heat from the smoke.
My husband loves the smoker that he found on a community “Free” page. This one allows you to customize your meat smoking experience better than a smoker/grill combo unit. His advice for using this cooking option is to soak your wood chips. At a bare minimum you soak them for 30 minutes, but 30-60 minutes is good. And in my ear, my husband is saying, “Do not soak grill pellets!” You definitely want the wood chips. And even with soaked chips, you still want to keep a tray of water in your smoker with your chips and meat. It keeps the humidity just right to keep the juices in your bacon.
The other advice that my husband popped in to give, is that if for whatever reason your pork belly just won’t come to temperature don’t worry. All you have to do is put it in your oven (lowest setting) and finish cooking it to 165°F.
Tenting Options
While this step can be omitted, you might consider to keeping it in your procedure. The tenting helps keep the steam in, instead of evaporating away while it cools down. My husband advocates that this is the secret that keeps his bacon from drying out.
If you want to tent your bacon but don’t want to use foil, you can use your lidded container (just don’t seal it).
Cutting Options
Here is where my husband and I have a slight difference of opinion. I have absolutely no problem slicing my bacon by hand. I’ve been slicing sandwich bread for over 3 years now, so I have a steady hand for this sort of thing. My husband prefers a meat slicer. Knife or machine, I’m an advocate for using what you have on hand.
We both do agree that letting the pork belly rest over night in the fridge is a huge step in your favor. If you slice your bacon at room temperature, you will more than likely find that it shifts on you and your blade slides out of place. By cooling the pork belly over night in the refrigerator, it firms the meat up and makes the slicing that much easier.
Why is it important to cure the pork belly for 7 days?
Depending on who you talk to, or where you look up information, you’re going to find a wide spectrum of curing time as an answer. But before I answer this question I want to make sure we’re on the same page about why we cure meat, in this case bacon.
All throughout history meat has been cured to preserve meat in a time before refrigeration was invented. In fact, many countries today still depend on curing to preserve meat. The enemy of meat (and food in general) is exposure to water, light, and heat. These three things degrade food, promote bacterial growth, and increase the chances of food borne illnesses. Salt is an amazing ingredient, because it changes (in this case) meat in such a way that water is removed and it creates an environment that bacteria does not like or live in.
In fact, in another scenario, I have the perfect example. The yeast that I use to make my bread, when I neglect it, starts to grow bacteria. The whole yeast culture is thrown off and smells horrible. However, this is the culture of wild yeast starter. You have a community here. When the community gets out of balance you have to make changes to bring it back into balance and make the community happy again. Salt does this. I toss in 2 tsp of salt into my out of balance starter, give it a good stir, and by the next day all is right in the world of my wild yeast starter. What happened? The salt changed the environment of the starter. The bacteria became unhappy and quit reproducing. Mean while, the yeast became happy and began to populate again or recovered from its illness (or however you want to look at it.)
Now a pork belly is so much larger than my quart size mason jar of yeast starter. It’s a thriving metropolis in comparison. It takes much longer for salt to infiltrate that pork belly and withdraw the water content of the belly. It takes time for the meat to cure and stabilize itself to withstand the threats to food preservation.
I saw one site say that it takes up to 24 hours to cure bacon using their method. The difference is that they have to inject the salt in deep throughout the pork belly. This method is not using an injection method. It is the meat bringing in the salt, and the salt working its way into the center of the belly. This takes time.
any2ndnow.com
There was another site that I saw claim that it only took 3 days to reach a “mild” cure. Food science being science, either it’s cured or it’s not cured. Cured meat is a process. It is a method. And the proof is behind the results on how the meat holds up over time. There’s nothing wrong with making salted pork. It doesn’t make it cured. It just means that it has a higher salt content that the meat that you pull out of your fridge or freezer. Please, let’s just call salted pork by its rightful name.
Can bacon be cured longer than 7 days? Absolutely! It’s not going to dry your pork belly out unless you’re using an open container. But that only happens because your fridge naturally evaporates water out of food that is left in there without being covered.
And let’s just be clear that evaporation or dehydration is not curing. Dehydration/evaporation is one method of preserving that is purely unique. Curing is an entirely different method of preservation, unique to itself. Every method has its own rules. Anything that doesn’t follow the rules is a different method for a different purpose.
I wanted to mention all of this because there were some friends of ours that we walked through the steps of how we cure our bacon. They stopped the curing step at three days and didn’t find the results that we said they should expect. There’s a couple of reasons why their first attempt of curing bacon didn’t turn out, so I can’t write definitively here what went wrong. I do know that we had shared from the same pork belly and the bacon had turned out with the above method. The two biggest suspicions I have is that not all the cuts and groves in the pork belly so the majority of the belly was working on becoming cured, but there were spots where bacteria had the opportunity to grow because the salt wasn’t there to make the meat an uninhabitable environment.
The other big potential of what went wrong is that the salt did not make it into the center of the meat. This is an important issue because remember, we are cooking low and slow. And since the center of meat is the last place to “cook”, this becomes a prime breeding ground for all sorts of potential food problems because salt wasn’t there to keep in check bad cultures. This then comes into realm of poor food handling.
I know that it’s tempting to take short cuts or speed things along quicker than described. We’ve all been there, especially when we’re excited to try a new skill and have great expectations. Please know that no matter how tempting it is, curing meats does take time. It can’t be rushed. And if you don’t believe me, you have to check out the link I have below for 2 Guys & A Cooler. They have amazing methods for making so many different cured meats that I can’t wait to get cracking to try. And what you see there just confirms what I’m saying that great meats take time.
Advertisements
Here are other recipes you may be interested in.
If you’re looking for a Beef Bacon (bypassing the pork all together), this is the recipe that I recommend. Disclosure, I have not tried this recipe yet. But this is the one that I have on hold for when I make that plunge.
If you’re interested in a Pastrami Recipe, this is the one that I have bookmarked.
2 Guys & A Cooler is definitely worth subscribing to if you’re looking at many other ways of curing meat. This link takes you to their video on making Biltong. I like their presentation because it all makes sense after making our own bacon for several years now.
This post contains affiliate links to products. We may receive a commissions on products purchased through these links, but at no extra cost to you. These items listed here are from Amazon but may be purchased at local markets.
If a smoker is not in your budget, this might be the tool to meet your needs.


Leave a comment