After spending almost a decade in the event decorating industry I have repetatively heard "I can do that". Instead of being dismissed by creative minded people, I want to show you how I do "that" so you can be sucessful in recreating that inspiration image. I just might have a few tricks that you haven't seen yet!
There’s one skill that I’ve wanted to learn from a friend of mine, incorporating mason bees into my garden.
Here in North America, mason bees are the indigenous bee. They pollinate 45 times more than honey bees. And if you have young children, you don’t have to worry about there being an altercation and your child (or pet) from being stung. (We’ve been teaching our kiddos about bees because one day I want to have honey bees for honey production. So they already know what’s expected of them when it comes to our pollinating friends.)
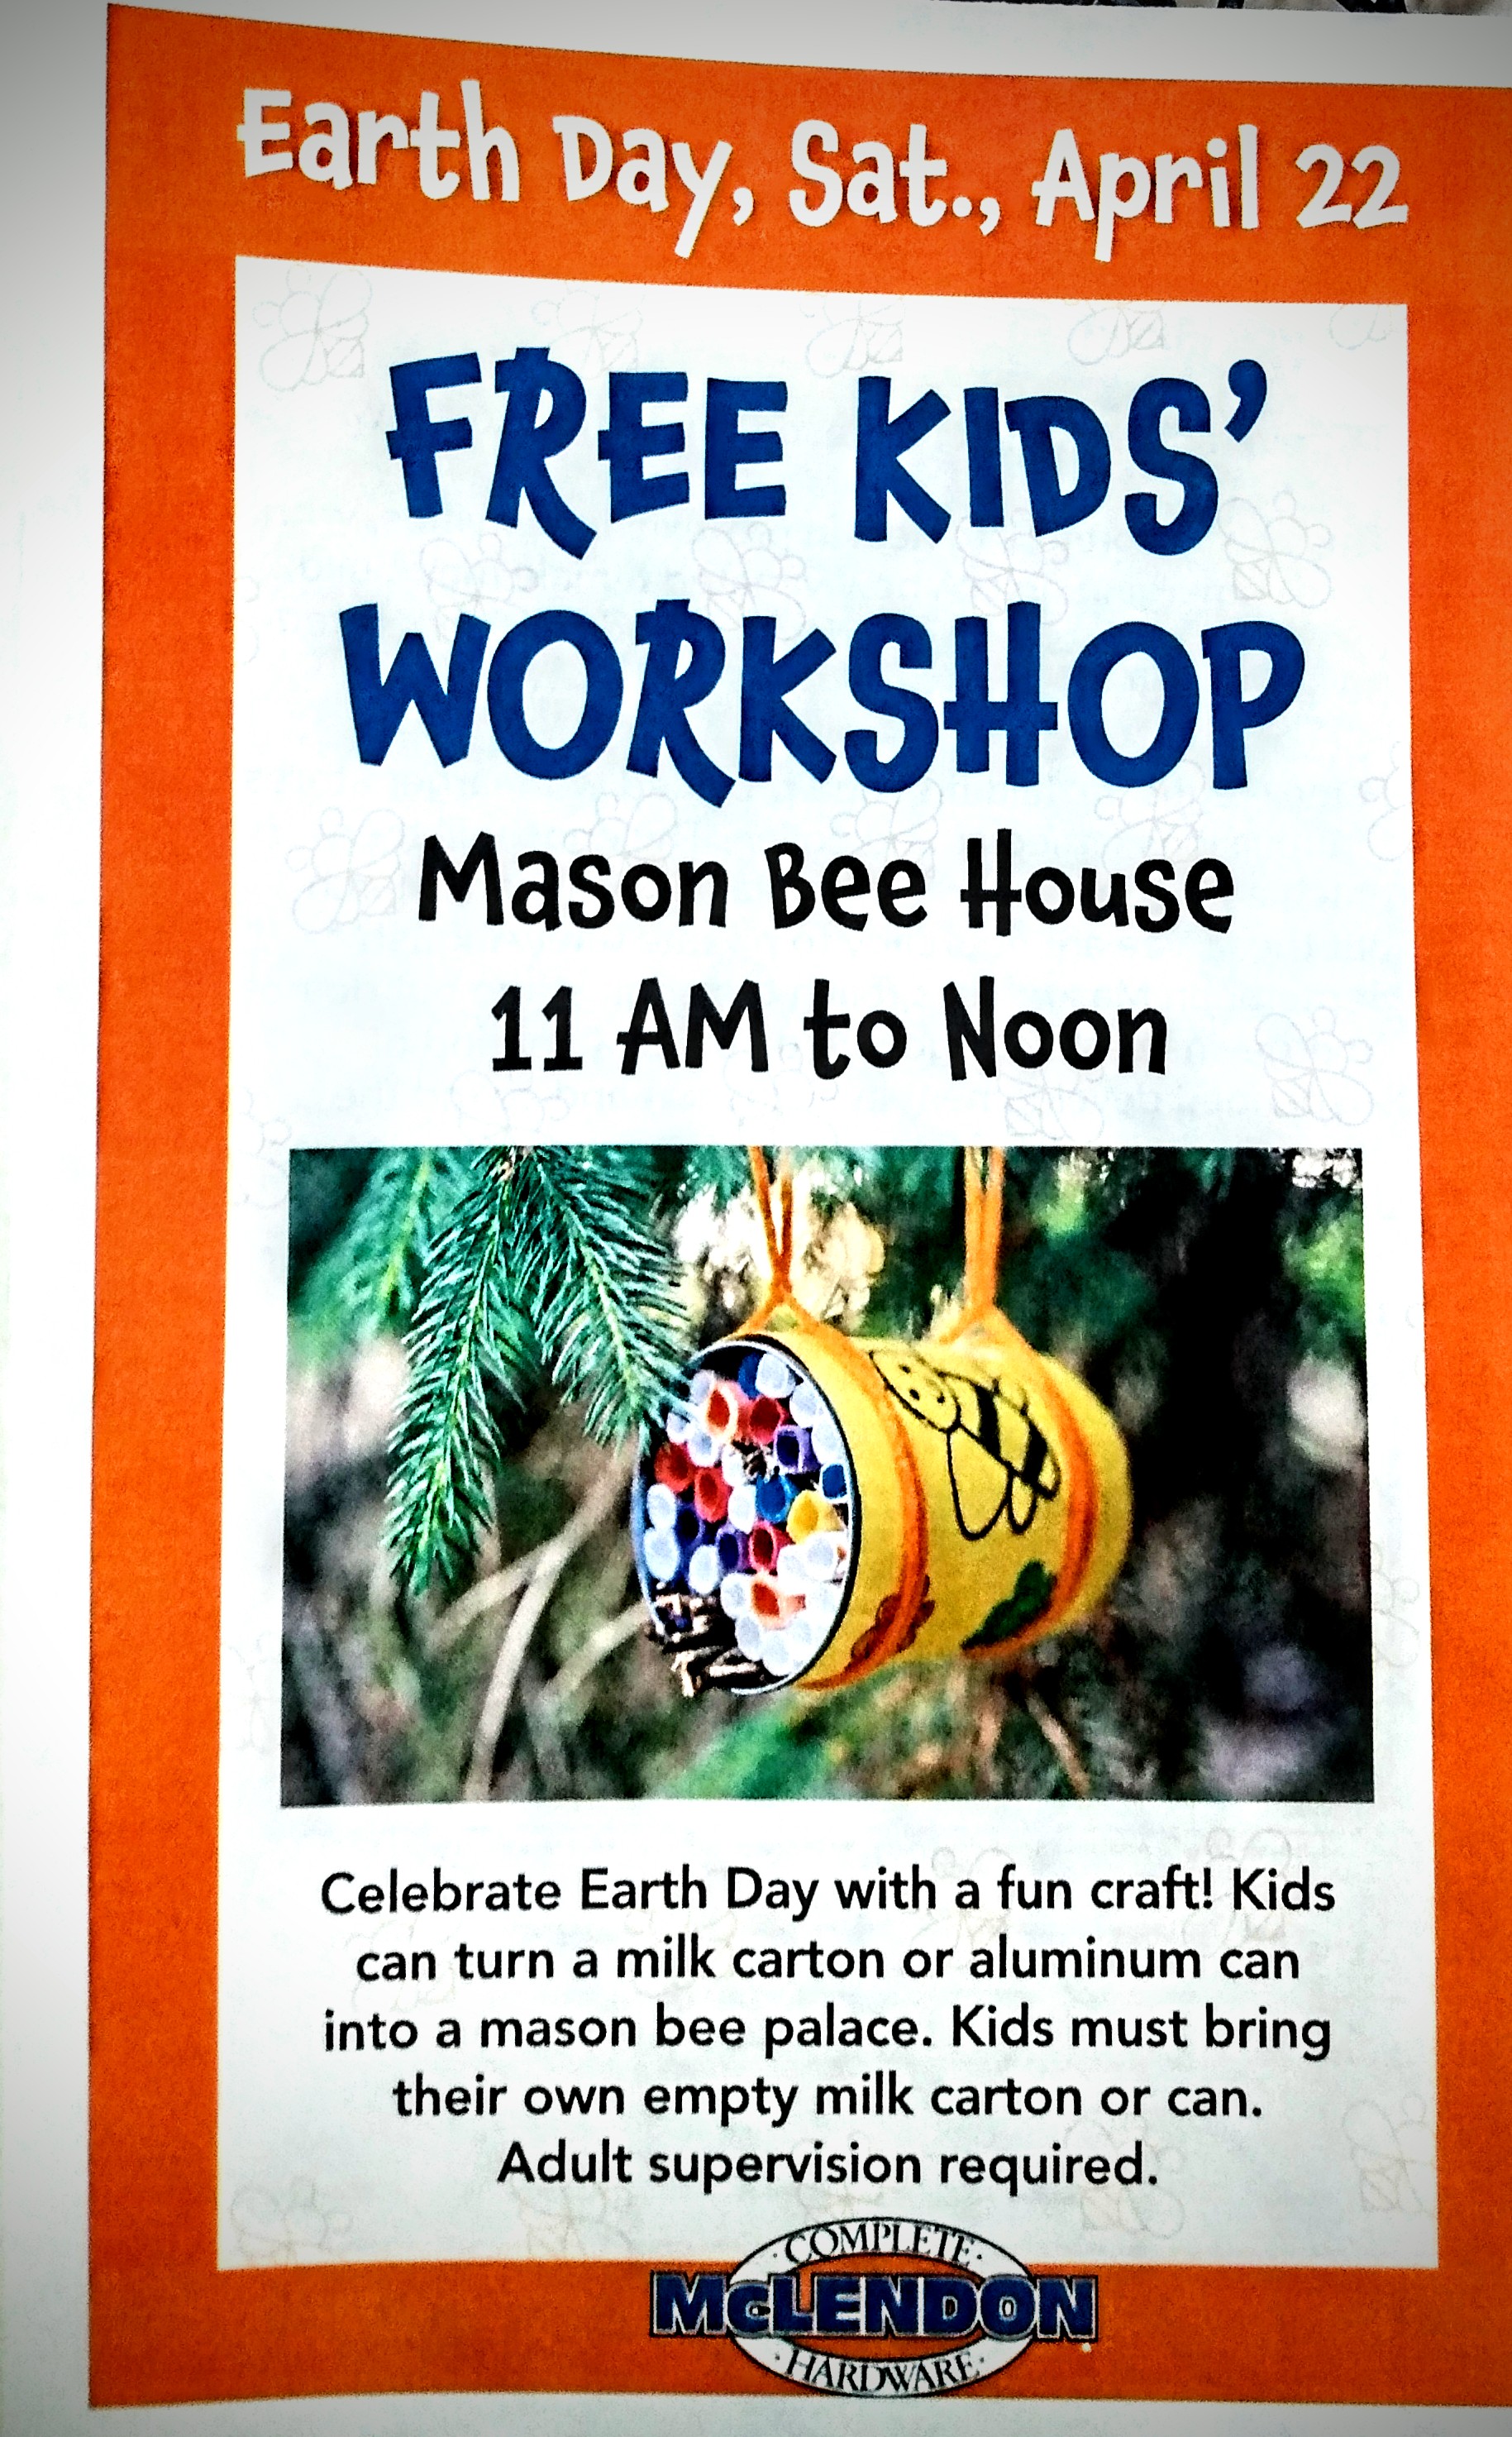
I can’t even begin how excited I was when I received an email from a family locally owned hardware store that they were doing a craft for Earth Day, which involved making a home for mason bees.
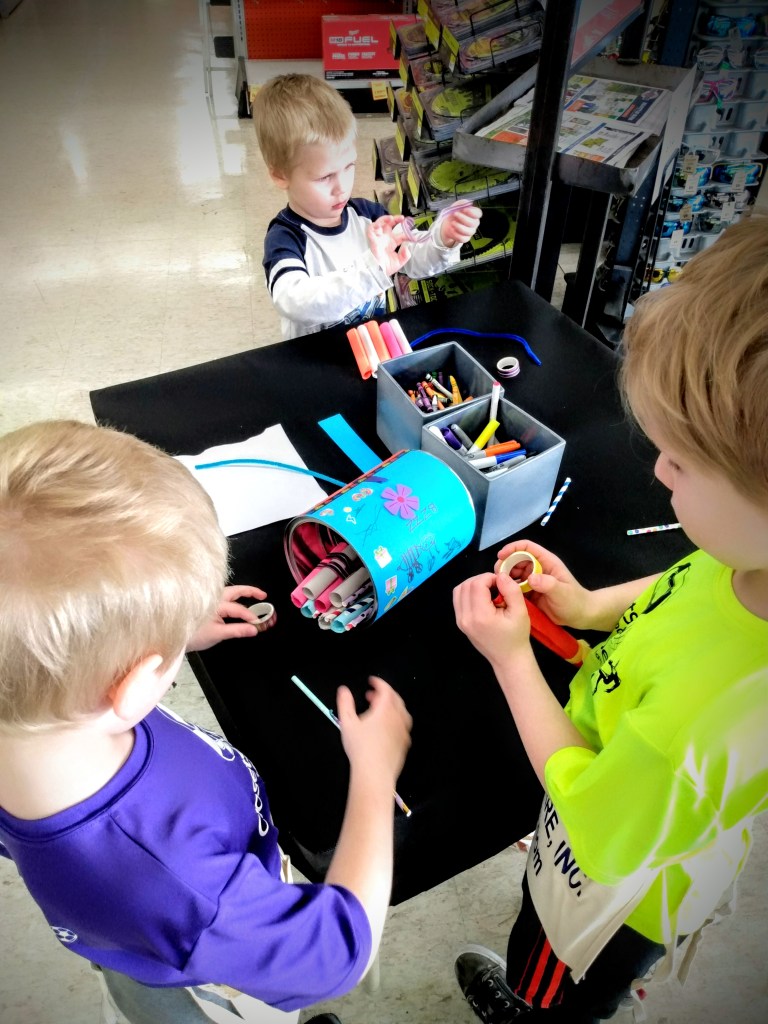
Today I’m sharing with you the process that my kiddos went through to make a home for mason bees.
We were instructed to bring a soup can or cardboard milk container. The hardware store supplied the craft materials to decorate and make the bee home.
All my milk cartons still had milk in them and I haven’t bout soup in a can for well over a year now. What I did have available was an empty ten pound can. So if you don’t have a small can, know that it’s possible to make a home with a larger can.
Things you will need:
(Feel free to modify with the materials that you have on hand.)
Milk carton or soup can
Construction paper (printer paper, non-toxic colored paper, recycled paper, whatever you have on hand)
Tape
Straws
Cardboard tubes: toilet paper or paper towel (optional)
Corrugated cardboard (optional)
Scissors
Glue
Stickers (optional)
Twine
Pens, crayons, or other decorating medium (optional)
Advertisements
If this is a kid’s project you’re setting up for, cut all rolled paper and straws to the length that fits from the back of the soup can to the front.
You can even prep other materials for your bee house. If you have scrap blocks of wood, you can several holes through the block.
I don’t know what you have in surplus in your craft room. But I have many wine corks that have been waiting for just the right project. When I get a free afternoon, I’ll make an adult version with rolled cardboard, drilled scrap wood blocks, and my collection of wine corks that will also be drilled.
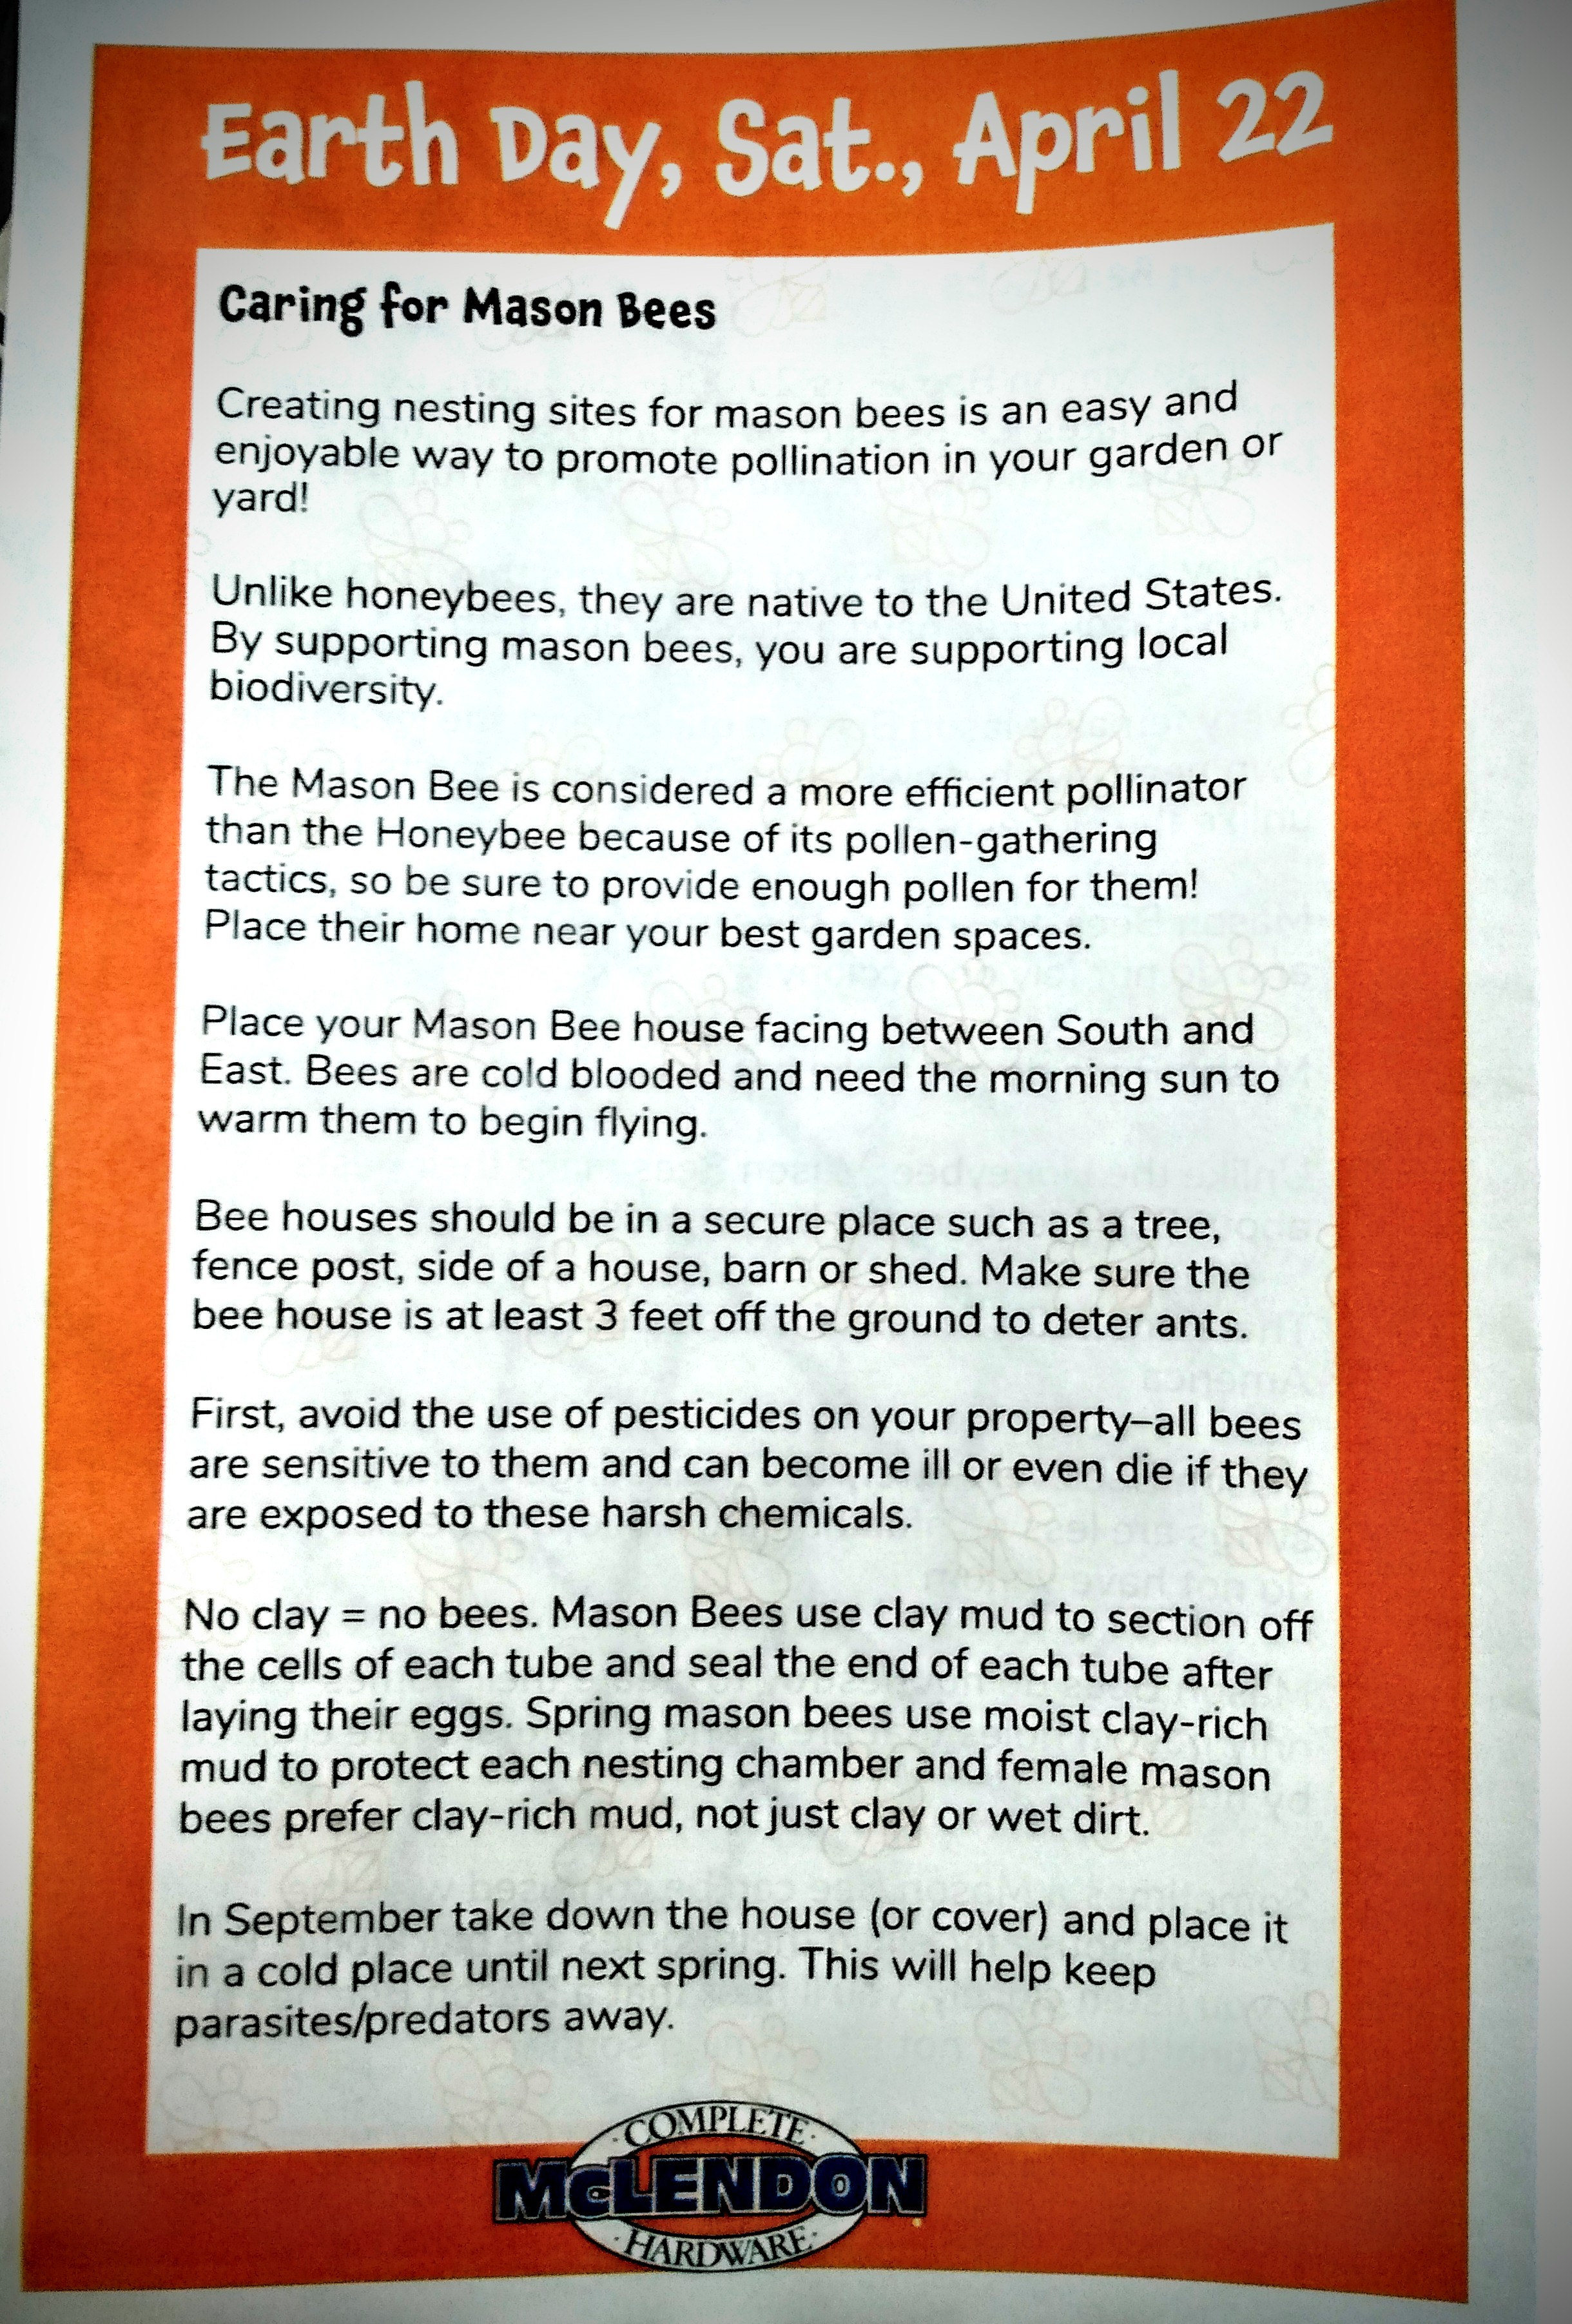
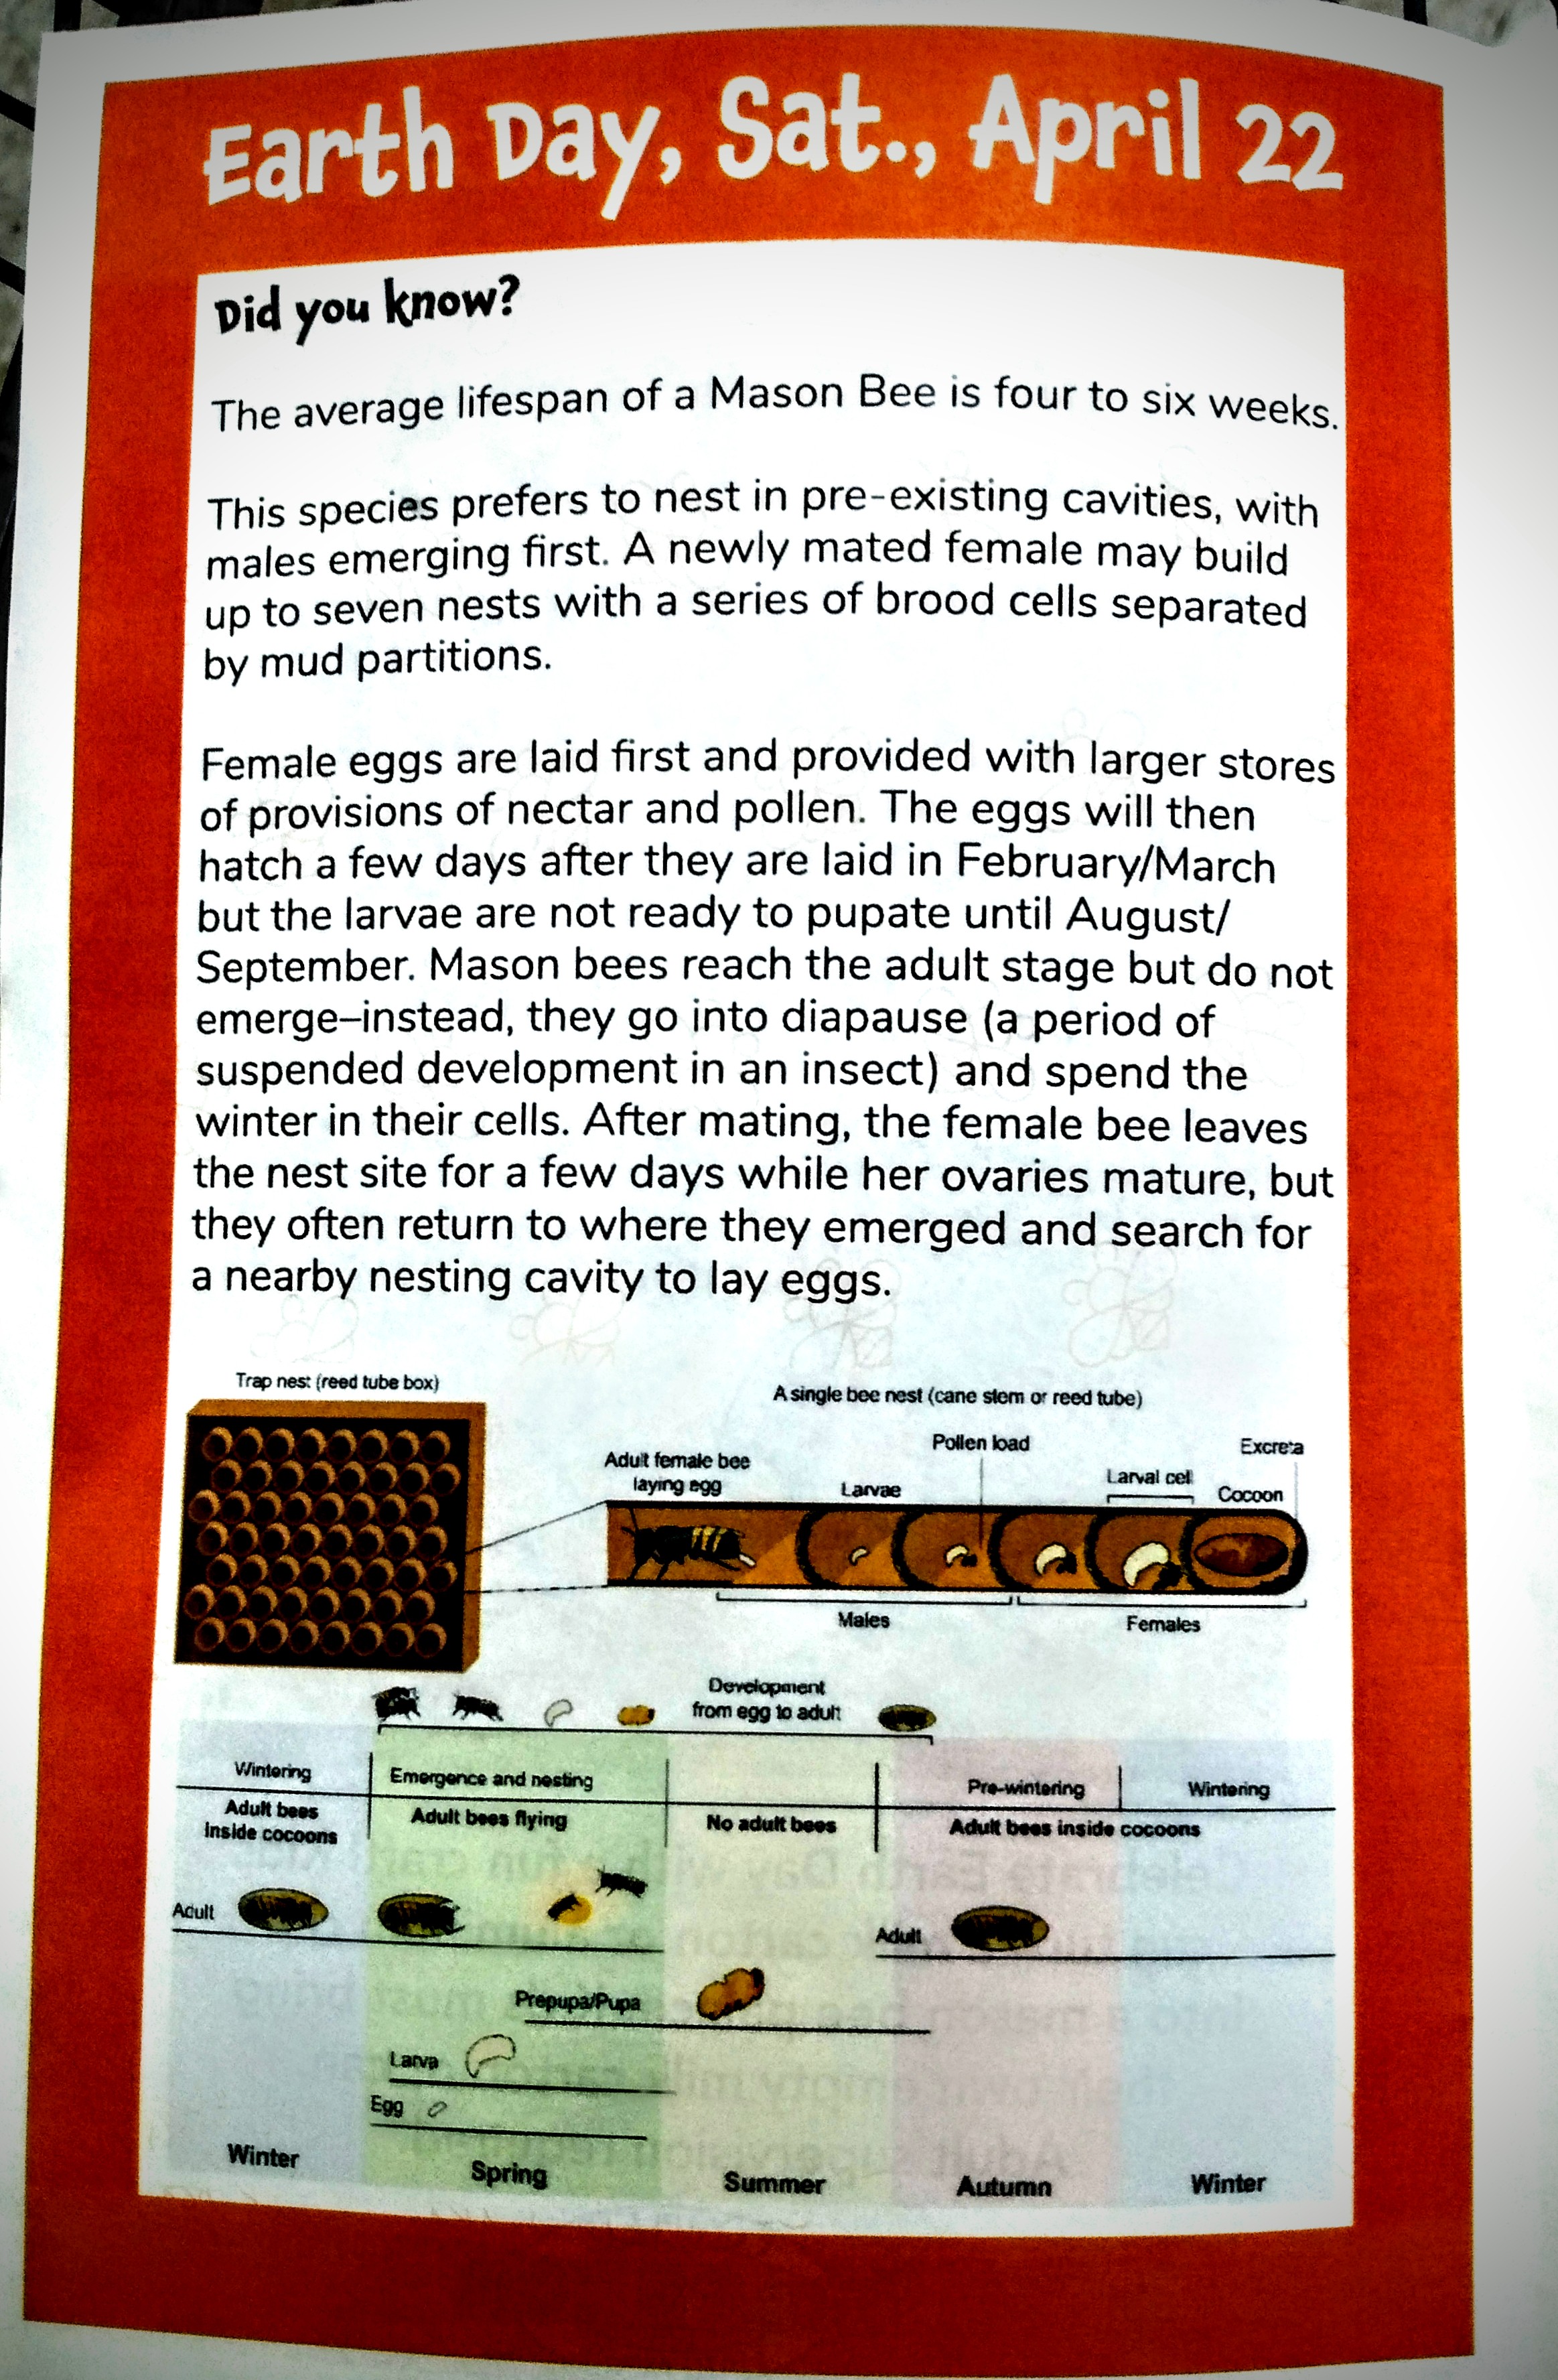
Here are some additional bits of information about mason bees, if you are unfamiliar with them.
Here is another resource to get you started on your path for creating a home for mason bees. If you want to buy mason bees to start your bee colony, I found this site which is still selling until May 22, 2023. They have a bee info page that can instruct you in how to care for mason bees to make sure that they remain healthy and happy.
If you’ve watched the movie The Pollinators (2020), then you understand the need to help support our local pollinating community. If you haven’t seen this documentary yet, it’s worth the time to understand what it going on with the bee population in the United States. And if it’s happening here, it’s very likely happening in other places.
Last year (2022) was a bad growing season in the Pacific Northwest (PNW). To this day I still believe with my whole heart that the bees were what made my garden successful, when others in my local community found only hardship. So for my gratitude, I already planned on adding more flowers to my garden as well as being a more hospitable home for my pollinators. With that being said, I will leave you with the pictures of my family. And once the weather clears, I’m going to examine closely where our best place of hanging this mason bee home is going to go.
Happy Earth Day!
Processing…
Success! You're on the list.
Whoops! There was an error and we couldn't process your subscription. Please reload the page and try again.
The one thing about approaching holidays is that you really get smacked in the face with everything that needs to be done.
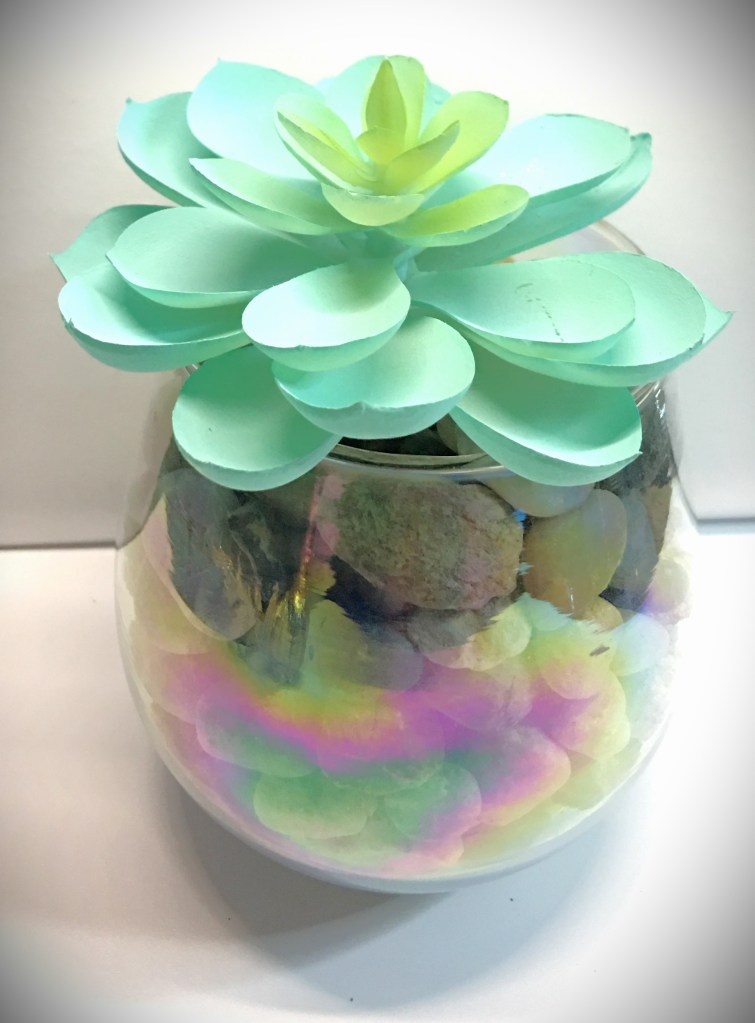
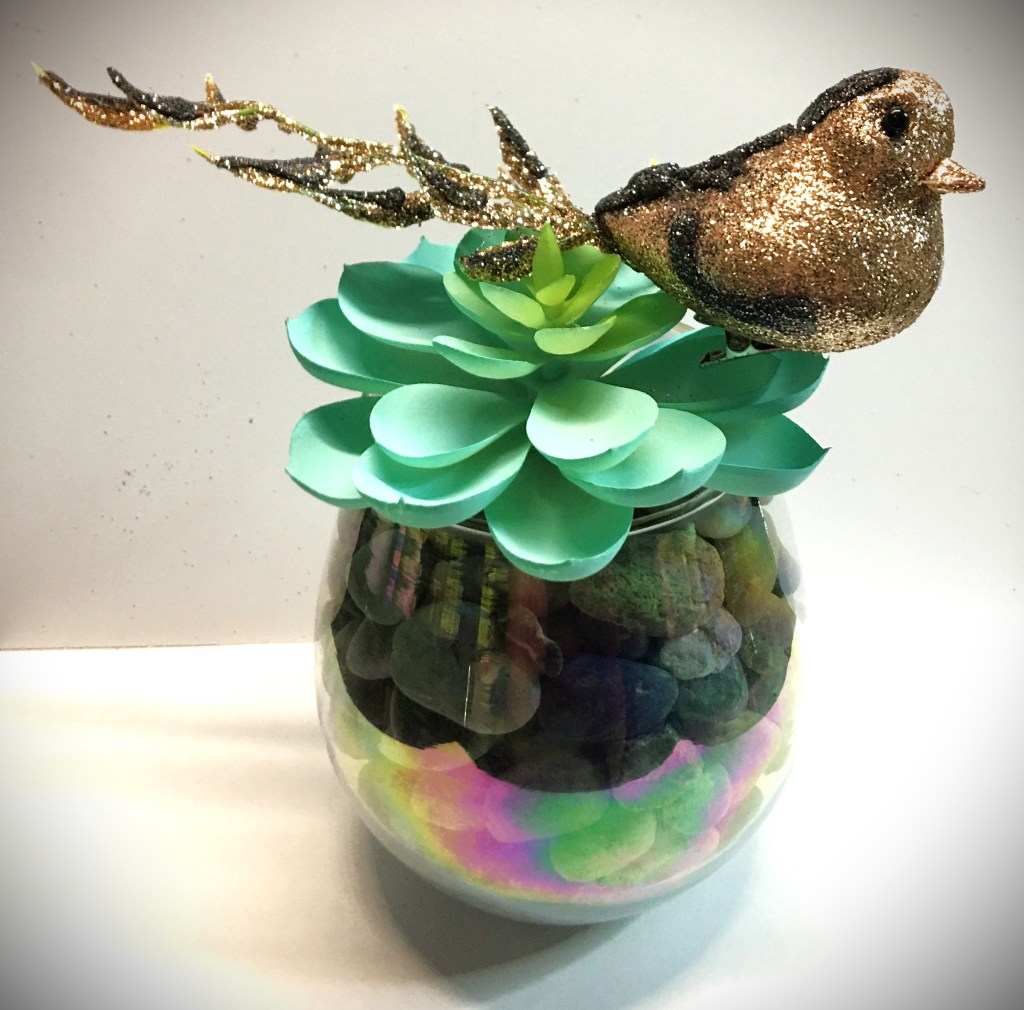
Whether you’re decorating sideboards for an Easter get together or just looking for something quick that fits in a space as small as a window sill to add a little color before spring finally unfurls. This quick craft is for you.
What you need:
1 Stemless Wine Glass
1 Bag of stones 18 oz/794 g
1 Faux Succulent
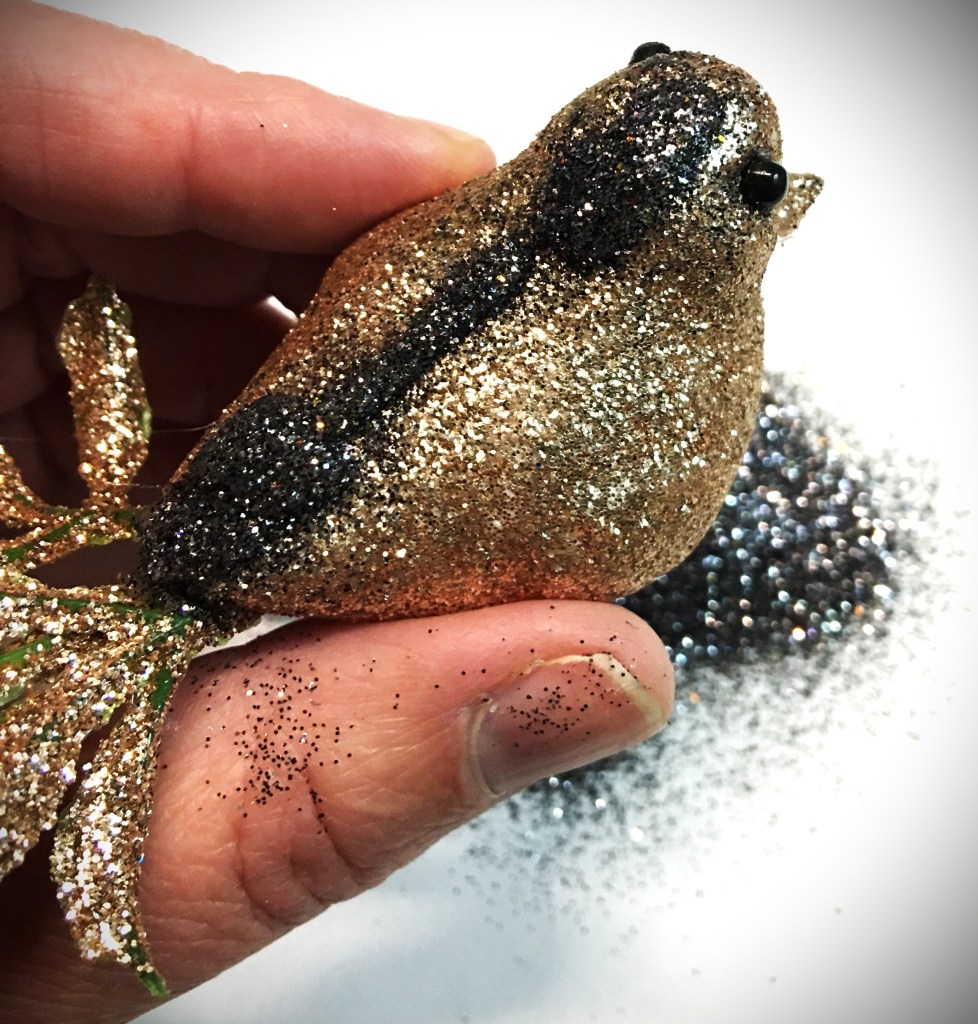
Any other accent piece that you would like to add (I chose a glittery bird)
Glue Gun
Accent Glitter
5 Minute Version
If you just want to toss something together, all you need is the glass, rocks, and succulent.
The succulent that I chose had a very thick stem. Because it was sturdy, I could pour the rocks in the glass and push the succulent stem into the rocks and moved on. (If the rocks have resistance, give the succulent stem a little swirl and it will sink right in.)
For whatever reason if the succulent just does not want to go into the rocks, never fear. Pour out the rocks with the exception of some in the bottom (or the level that you can easily push in the succulent). Then lift up the leaves on one side (and then the other) to add the stones in, around the stem.
Want to use real succulents?
You can do this using a real succulent of your choice. Make sure you verify if the succulent you want to use can life in rocks or if it needs cactus potting soil.
If your succulent needs soil, but you prefer the look of the rocks showing through the glass, you will need to take a little extra time layering the rocks outside and putting the soil in the center
Advertisements
Ten Minute Version
Follow the directions for the 5 minute version to get the glass filled and succulent set. The remaining time is dressing up accent piece that you are adding.
For example, the glitter bird that I’m using came from the dollar store and I wasn’t 100% satisfied with it. If I had feathers in my crafting room, I would have added feathers for the wings as well as the way it was set up with feathers on the tail. Unfortunately, I don’t keep feathers. So I needed to pull off the pink ones that came with the bird. The black eyes also seemed to stick out awkwardly. To remedy this, I grabbed my glue gun and black glitter and added glitter detail work to add dimension and character to the bird.
Thanks for spending a few minutes with me today. If you’re anything like me, you have a list as long as your arm to get done in less than 48 hours. My kiddos always look forward to a newly designed shirt. I haven’t got a fully developed idea for that yet. But I do have a spring edition ready to go dressing up some sock bottoms. They enjoyed the ones that I made for them for christmas. So I thought I would make a few more for them. You can check out sock designs here:
I have to love my husband who loves to give practical gifts. Usually he stays away from gifting flowers because they last for a few days before they’re composted. However, there are so many uses for not just roses but other flowers as well. While I’m going to be talking about roses here, there are so many other flowers that can be used in the exact same way!
For those who are unaware, roses are edible. (Before you do eat rose petals, make sure that they haven’t been sprayed with chemicals, pesticides, insecticides, or anything else that is harmful to you.) Roses contain vitamins A & C, Niacin, Potassium, Iron, Calcium, and Phosphorus. Some places where you’ll find fresh petals are on a dessert/cake or in beverages such as teas.
Advertisements
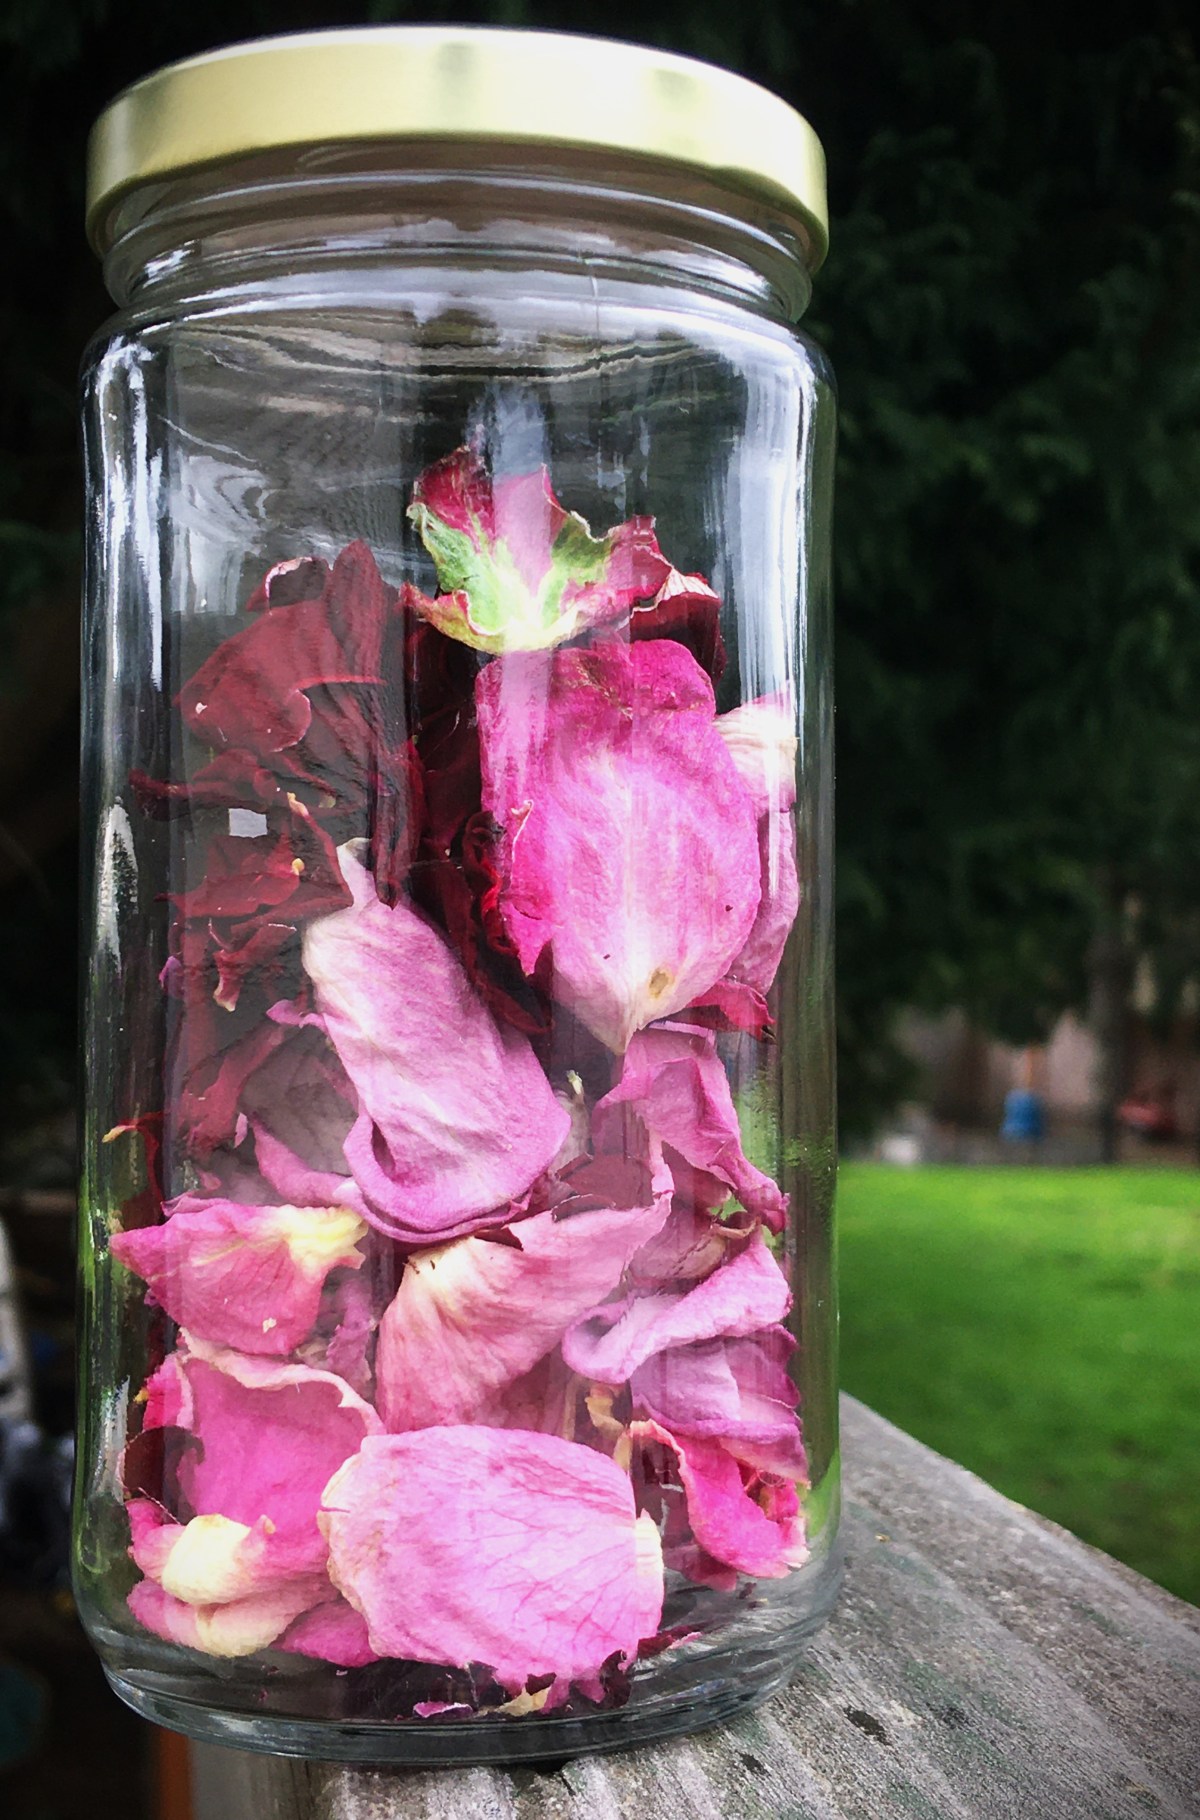
It’s not just the petals that are usable to our bodies. Rose hips (the bulb at the bottom of bud, harvested at the end of the rose season from the rose bush) is used in the beauty industry and baby products for the benefits it has to the skin.
The benefits to the skin is the primary reason why I decided from this last bouquet of roses that was given to me that I was going to use the petals for my next batch of soap.
I started making soap because I’m not okay with all the chemicals that are being used in soaps in the commercial market. Other than using soap dyes (which I’ve had my tub and skin discolored from bath bombs and other products) the mission I’m on is finding natural dyes to color my soap. For pink soap, I’ve seen soap makers use dyes or French clay.
Now Calendula is a well known floral natural food grade colorant. For red/pink colorant, Beets can be used in food. But anyone who’s worked with beets knows that your skin and clothes can be discolored. So I wanted to find a different red/pink colorant for my soap that I can grow in my garden. So I came to roses.
Advertisements
How to Process Roses
There’s two easy ways of doing this.
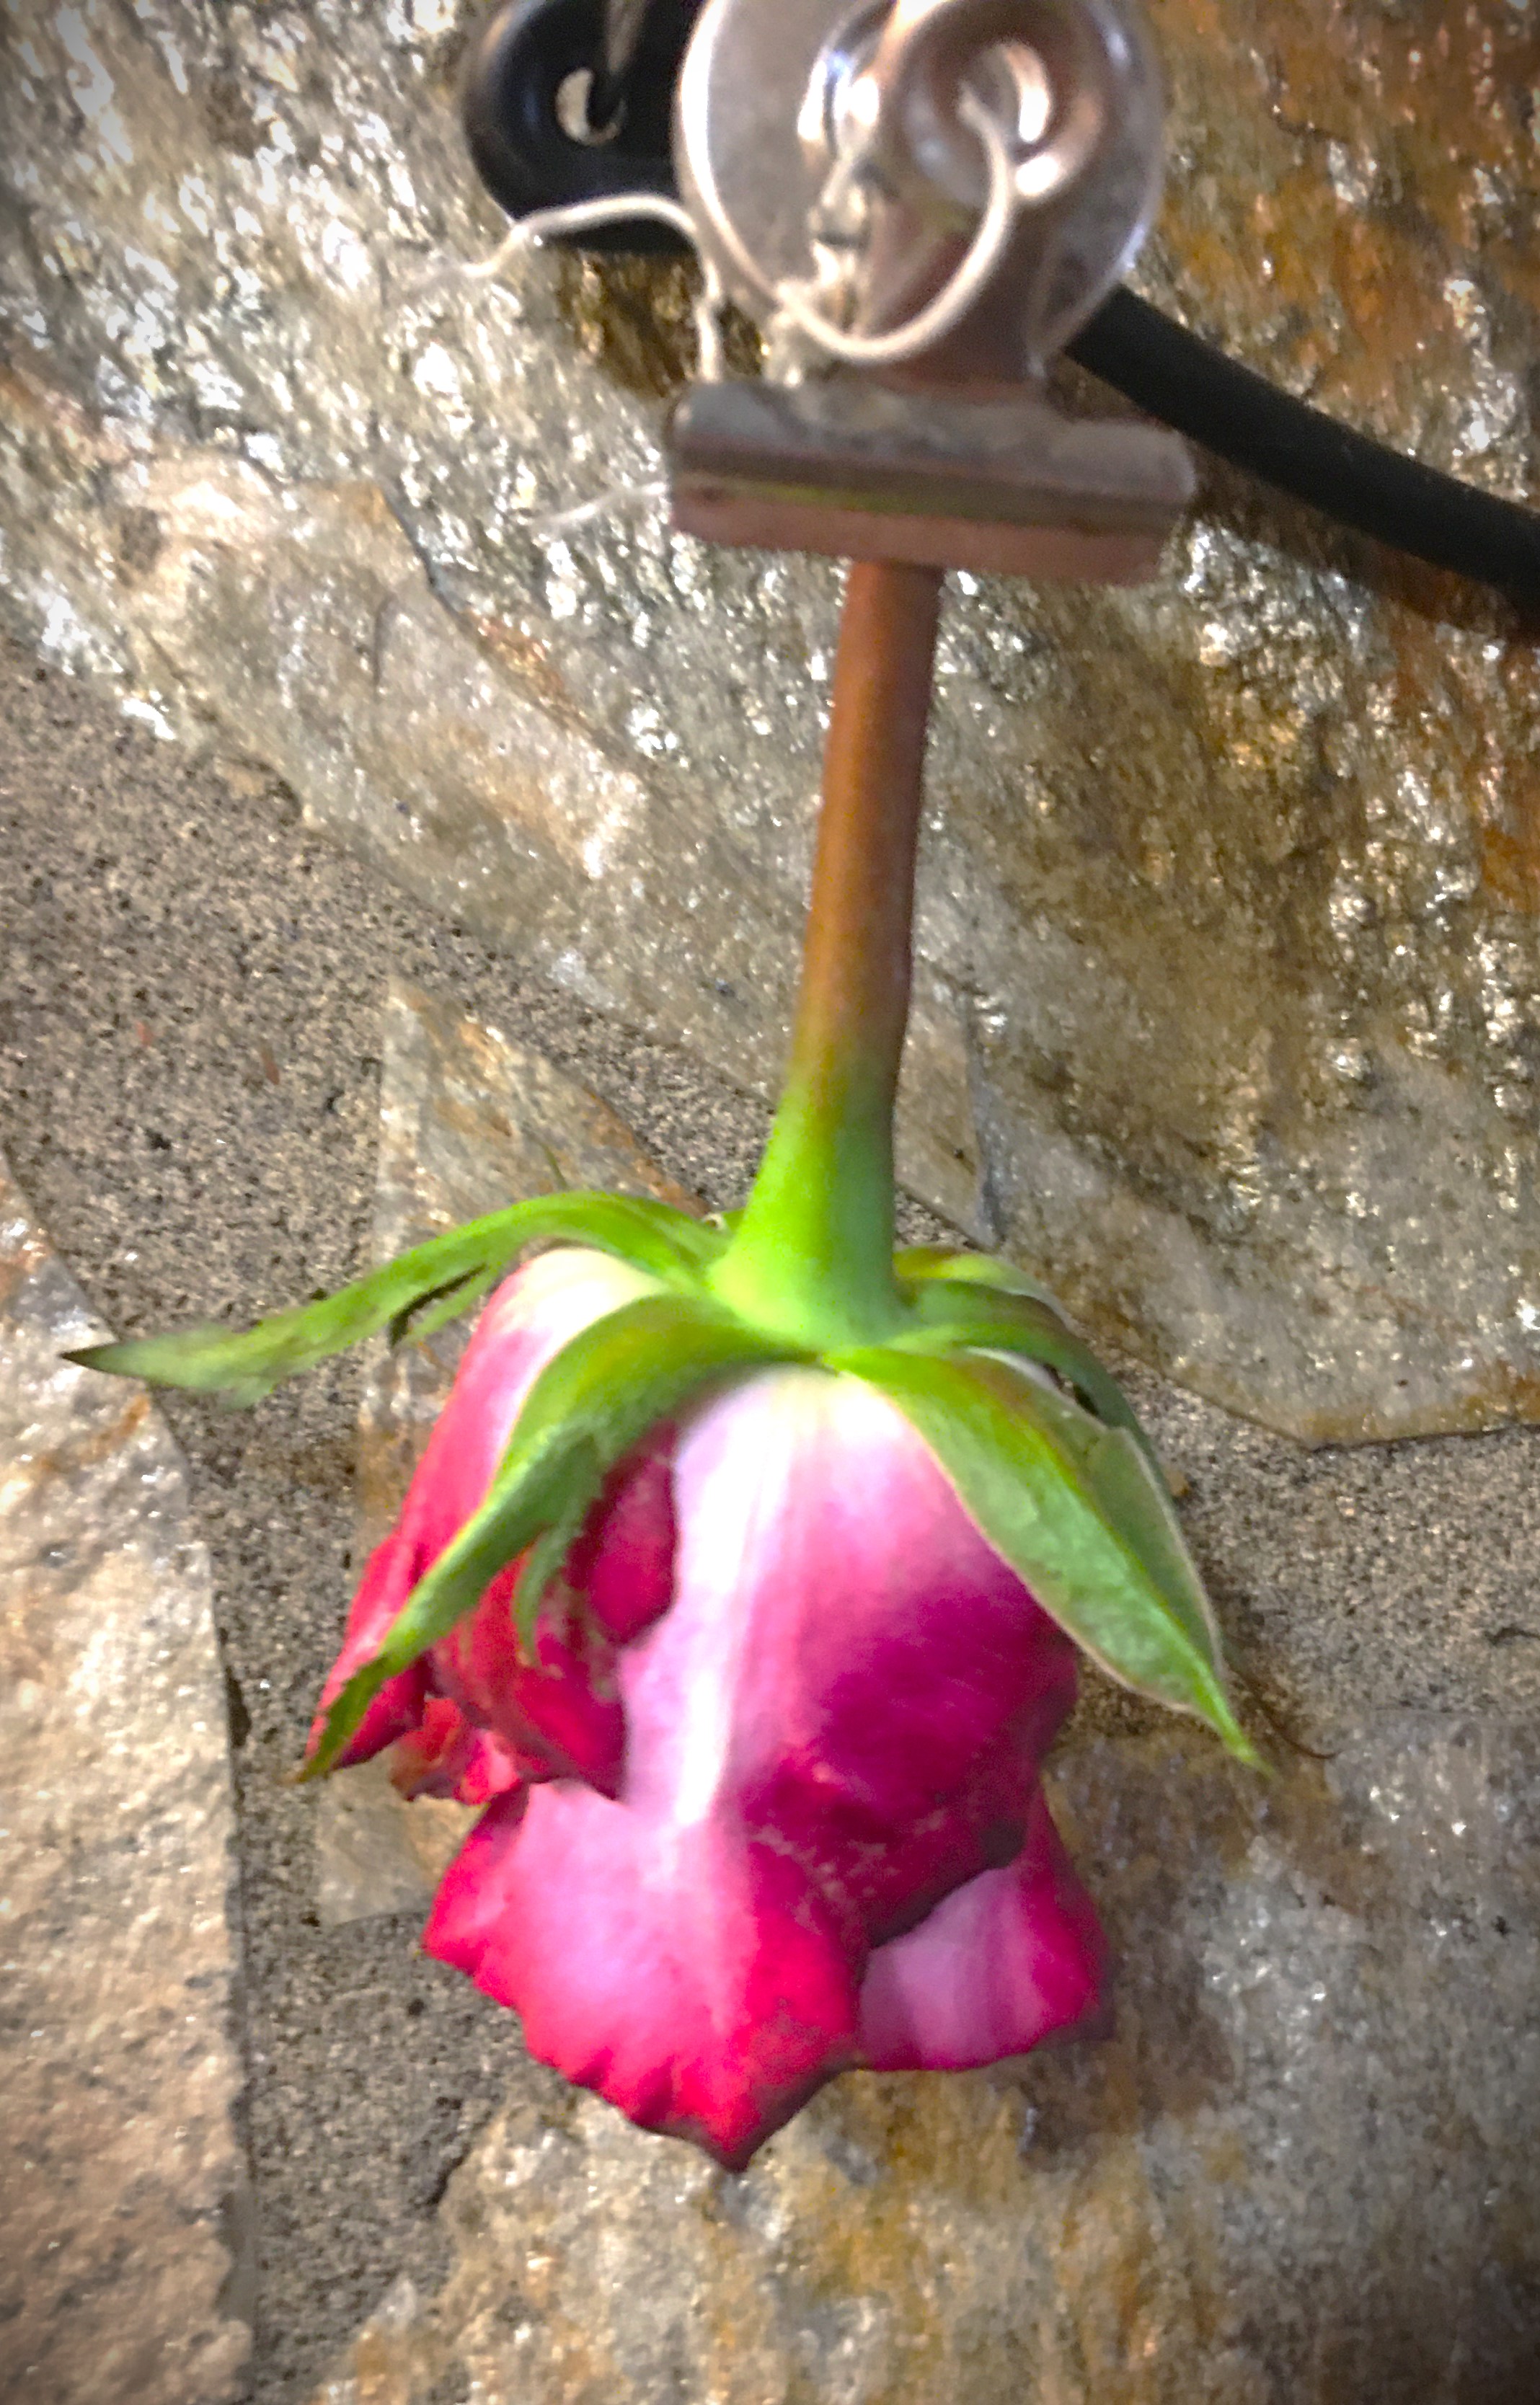
The first is to hang the roses upside down to slowly dry them out. The benefit of this method is that all the vitamins and natural compounds that our bodies benefit from are at a higher concentration when they are dried at a low temperature and slowly.
Ideally, the most benefit would come from using the petals fresh. And while it is possible to use fresh ingredients in soap making (I make orange colored soap using pumpkin puree), there’s no way of breaking down the petals for a smooth and consistent colorant unless you want to use a blender and puree it with the water content of your soap. While it’s not a bad idea, unless you grow roses year round (which I don’t) you have a limited supply due to the window of fresh flowers available. (This is the reason why dried petals are best for me.)
This drying method is slow and takes time. Also any white component will yellow as it dries out. This can affect your over all final color depending on which rose you use. With the red rose, not so much. But the other two, the tinge will be noticible.
So there’s the second method, using a dehydrator.
The benefit from using a dehydrator is that petals are finished drying in about 24 hours (at 90°F, the lowest setting on my dehydrator) and their colors are only affected by growing darker.
As you can see here, the white component on the pink flowers have not discolored too much. This is great because when I turn these petals to powders, I’ll retain a pink like quality.
Before I move on to finishing these petals, I want to mention that if you want to make a natural confetti for cake decorations or throwing for a party/wedding celebration, all that you need to do is crush your dried petals by hand and store them in an air tight container (like a lidded glass jar) to prevent them from rehydrating due to humidity in the air.
As you can guess, with the fact that there were lavender inner petals on the second rose (the one with the variegated pink and white outer flowers), this is the reason why I blended in the red petals with the pink ones, to keep the pink and stop the transitiontoward purple (although I’m not opposed to purple soap.)
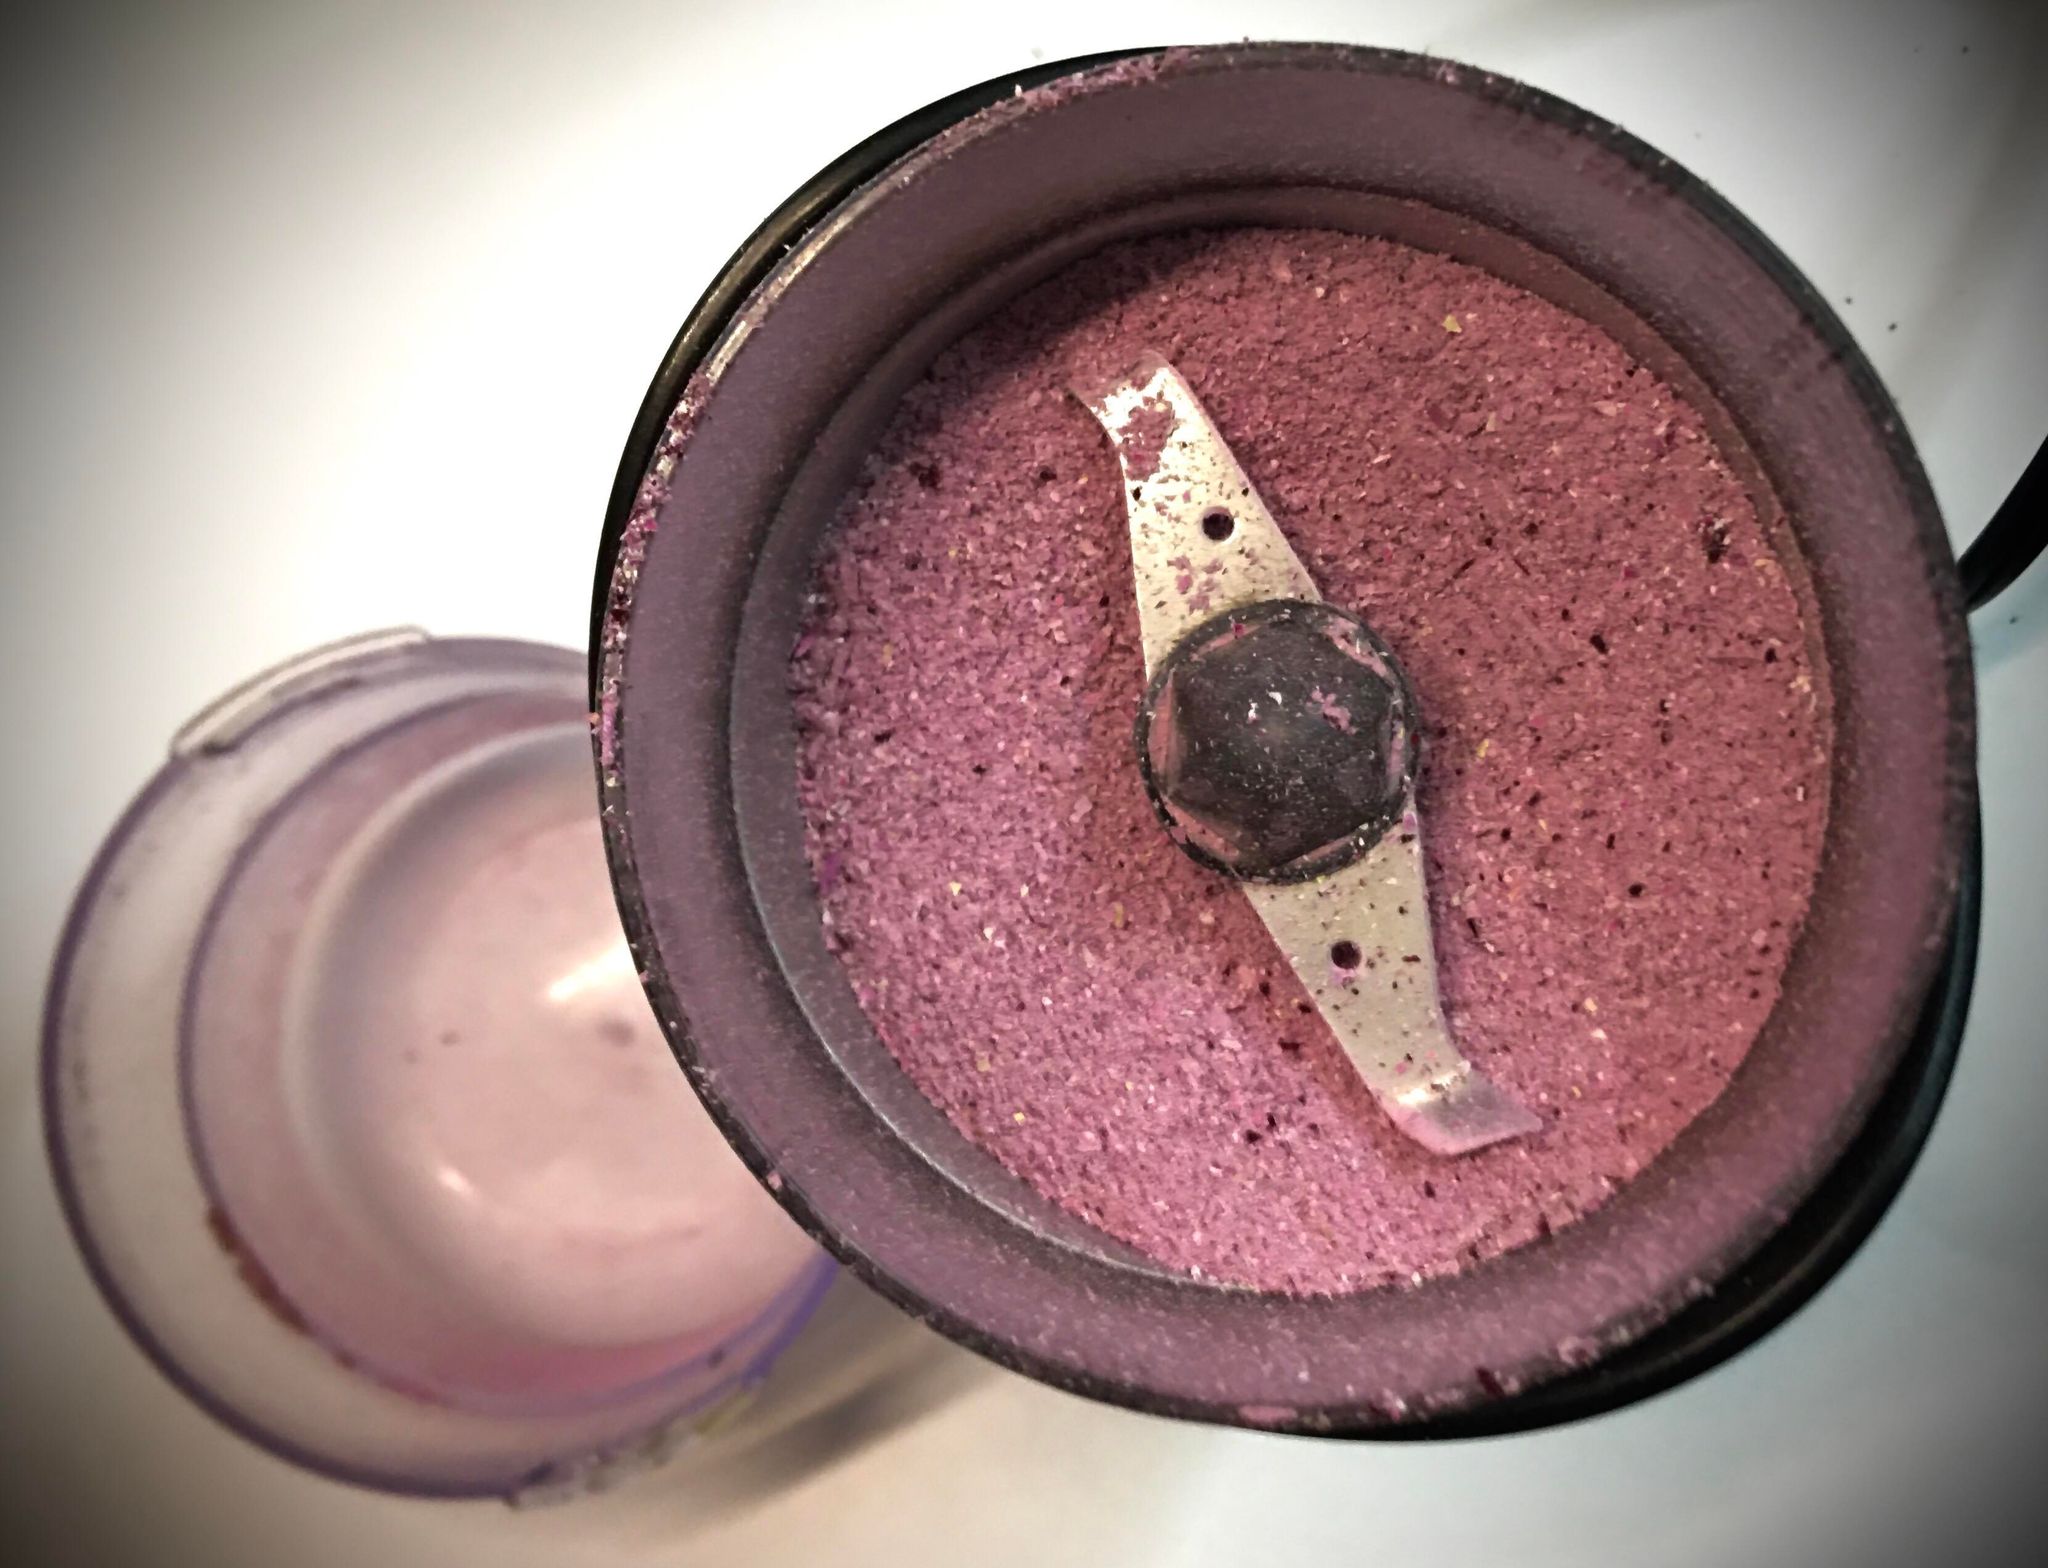
To make Rose Powder, all you need to do is put the crushed petals into a coffee or herb grinder and run it until you get the consistency that you are looking for. Because I’m looking to make a colorant for my soap and don’t want to have flower chunks in it, I took the powder down to a very fine grind.
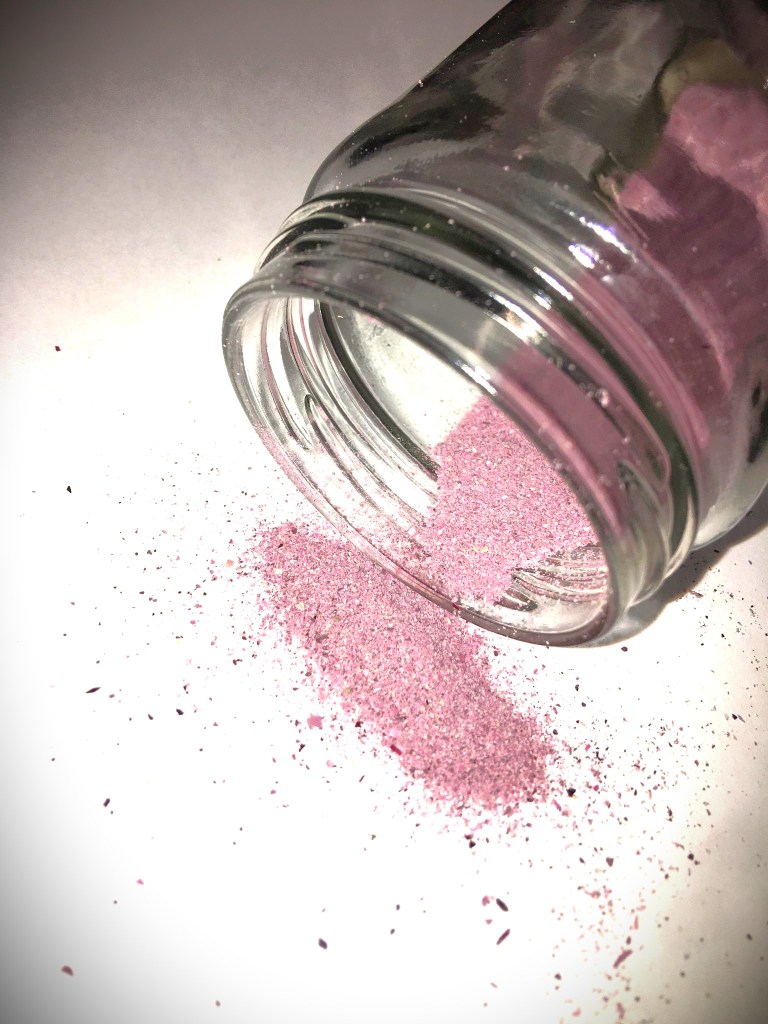
The fun part about Rose Powder is that you’re not limited to use it as a natural dye or colorant. You could dust this on the icing of a confectionary dessert. If you want to make pink pasta, use this powder as part of your dry ingredients. Mix the powder with a sugar or salt and you have a pink sugar or salt rim to your favorite beverage.
No matter what celebration you have coming up, keep this idea in mind. If you want to dress put your Easter cup you can make a sugar rim using all sorts of different colored edible flowers. Calendula gives you yellow/orange, Violets blue/purple, Hibiscus yellow/orange/pink/blue/purple, there are so many other flowers. If you want to see a quick list of different edible flowers, here’s a jumping of point here.
What unique way do you use flowers?
Processing…
Success! You're on the list.
Whoops! There was an error and we couldn't process your subscription. Please reload the page and try again.
I’m coming up on the end of my first season coaching basketball and I couldn’t let this moment pass without sharing some of what I’ve learned. And also share the thoughts that I wished I could have talked with my dad about.
Before I can share what I’ve learned I have to go further back. (And we get there, I’m sharing the photos of the craft that I made for my basketball boys. Directions to make this, or an alternate, are below.)
My dad was my first coach, my most favorite one. But he didn’t become a good coach on his own. He learned from one of the best, Coach Carter. He wasn’t one of the really blessed to play directly under the amazing wisdom of Coach Carter, but he was able to attend some of the basketball clinics that Coach put on for other young men. There were only select memories that my dad shared with me from his youth, but this season of his life he was very proud to pass on.
Even without the stories, I would have seen the fingerprint of Coach Carter on my dad. It wasn’t just playing Basketball in its purest form. More importantly, Coach Carter taught my dad how to value even the weakest and overlooked player on the team. For Coach Carter and my dad, there were no bench warmers. If you were on the team, you had a role to play on the court.
The most profound thing about this way of thinking is to watch over the years about how this shaped young men’s lives.
Once I went into Junior High (Middle School by today’s terminology) my dad was no longer my coach. He tried, but there were no openings. But he was able to get position as a boy’s team coach. Fortunately for me, the boys and girls teams played in different seasons. So even though I didn’t get to play on my dad’s teams, I gave up my free time to help my dad run his practices. Yes there were looks when I tried to help out boys my age during practice. That meant I ended up being a silent assistant.
While I did feel the sting of rejection about not having my knowledge accepted because I was a girl, I pivoted away from that and just learned more from my dad. I kept going to practices. I kept chasing balls and running drills. I wasn’t going to be shut out from something that was a part of me.
It took two seasons before I got to see the difference that a coaching style can make on the health of a team. The varsity coach was good, but he never had with his boys what my dad had with his junior varsity boys. On the varsity team the weakest player saw the least amount of playing time. Often times, those players were unsatisfied and felt rejected even by their own team member because they were the weakest link.
That wasn’t the case with my dad’s team. I watched the more skilled players still groan at the weakest links. But my dad refused to give up on them. He knew that he could make them better. And he did. The whole team had to work as a team, there was no exception. He gave more one on one attention to the weaker players. It was an investment. And it paid off.
There was one young man who wanted to quit the team because he knew he was the weakest link. But dad refused to give him an out. He helped him through his head space and built him up, until he could find self value. And once that young man found his self value, the team also valued him. To be fair, the team saw the potential in him before he saw it in himself.
What made that happen?
A coach who refused to give up on one of his boys. He kept calling out all the positive. Dad could see it deep down in him. After a little time, the rest of the team saw the skills deep down in him as well. They rallied behind him, encouraged, and cheered him on. With all this encouragement from his coach and team mates, the young man saw in himself what others saw in him. And he had a breakthrough that I hope has had lifelong results.
Advertisements
There was one other memory, of my dad’s coaching, that has stuck with me all these years.
One of my dad’s strong players transferred to a new school and he earned a place on the varsity team! We were so excited for him. And even though he didn’t have to do it, daddy rallied the whole team together and we all went to watch this young man play in a varsity game. It meant the world to him. His basketball family was in the audience cheering him on.
The problem was that the coach had a different philosophy in coaching. I won’t go into the details of that game. But afterward, we rallied behind our family and dad spoke one more time into his life. I don’t remember the words that dad said. But I do remember watching a young man buried under the weight of shame and disappointment. When dad was finished he was able to once again smile and hold his head up.
This was my Coach.
This is the type of coach that I want to be.
Back in January I welcomed my first team, 1st and 2nd grade boys.
From my own teaching experience I know that kids always perform better when you aim for the moon and allow them the space to pick up as much skill as they can on their own. For one, there’s always at least one kid who has higher skills than the rest of the team/group. If they’re not challenged, they can cause problems or they give up. The kids with the least skill sometimes feel overwhelmed by everything presented to them, but they don’t know that they can’t learn any of this. With the right teacher, a kid can learn anything because the adult believe that they can.
My first day of coaching, I didn’t know what I wanted to teach because my knowledge is strategizing at the middle school and high school level. So I opted out with teaching basketball terms and positions. None of these things were on the list or rules for this age group. But I didn’t want to coach at this age group. I didn’t want to dummy down this beautiful sport. I wanted the boys to be challenged and love the game that I grew up loving.
What was interesting was watching the parents during that first practice. Normally parents sit on the sidelines and talk or get caught up on work or personal items on their phone. Instead, I had the parent’s attention as well. Afterward, my husband told me that the parents were commenting that they were exciting because their kids were going to actually learn something this year.
This season I exposed them to using both hands, layups, screening, positions and a few other things. The point was never to get them to be proficient. I knew they wouldn’t. My whole goal was to get them to train their bodies in what it feels like to do certain skills. And in several years time, when it’s time for them to join a team that they have to try out for, and it matters, the skills that will be demanded of them at that point will already have a seed planted in them now. I took this year to set them up for success for another coach in the future.
Advertisements
But what I didn’t think I would have to encounter this early is the whole issue of the boys already picking out who were the skilled players and who should be treated as bench warmers. As a Parks and Rec team, everyone is supposed to have the same amount of play time–which is how I think it should be anyway. But the boys took it in their own hands, during games, to pass to the strong players only.
And this was where I wish my dad were still here to tell me how he got his team to be unified as a team. This isn’t something that all coaches know how to navigate and do it well. But my dad did. My only clues are what I have in my memories, but it doesn’t share light on his thoughts or capitalize on what he tried that went wrong.
If anyone is wondering about the answer to this issue, so far my best results have come from just the simple foundation of having a relationship with the boys. The fact that they feel valued makes it easier for them to see the team weaknesses (we own it all together instead of singling someone out) and problem solve. And giving them the options to problem solve gives them ownership of the team.
I’m sad that I’m losing a few boys next year. But I’m excited to look forward to having the boys request to be on my team again next year.
There’s no guarantee that I’ll get them back next year. All that I have is this moment in time.
So as a parting gift, I’m passing on a tradition from my parents.
Whenever dad coached out teams, my mom always crafted something that everyone got to take home. (I grew up in a generation where trophies were given to celebrate a few players. And only everyone took a trophy home when the team had a winning season.) One year mom made a felt pennant with the team name on it. (I still have it in a memory box.)
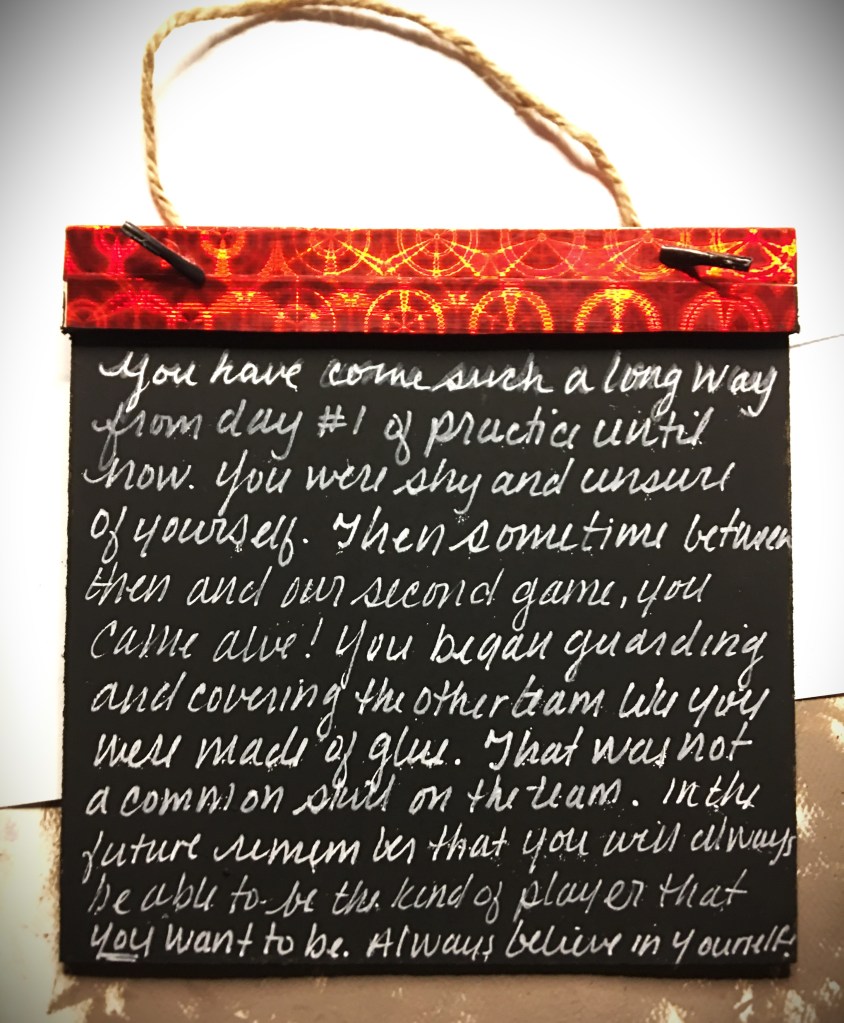
For my boys, I made stickers through the season, marking new skills that the boys learned. On the front of the chalkboard wall hang, the boys can keep their stickers like boy scouts badges. On the back I’m leaving a final message for the boys that they can look back on and see that they have had a coach in their corner. My goal is that no matter who coaches the boys in the future, they continually have a voice in their head cheering them on.
The perfect thing about this project is that it isn’t something that is just sports related. I know some teachers who give their students and end of the year present. Also, as a parting word to their students as they move on past their class room.
If this is something you would like to make for a child in your life, here is what I did.
What you Need:
6″ x 6″ Square Chalk Board (I found these ones at the Dollar Store)
Decorative Duct Tape (I found this holographic red at the Dollar Store in the Automotive aisle)
Black Chalk Paint
Permanent Vinyl
White Acrylic Paint Pen
Transfer Tape
Scissors
Paintbrush
Paint the sides and back of the chalk board black (or any other color of choice).
Apply the Decorative Duct Tape. The width of the tape covers the front, top, and top half of the back boarder. You can apply another strip of tape that I did or paint all the way up the back of the board.
On the front of the chalk board place your decorative elements. (In this instance, I did the team name and season year.)
On the back you can write your encouraging message. ( I also added the boy’s name so that they knew it was a message specific for them and not shared with the rest of the team.)
There are so many ways to make alternates of this.
You can mod podge on photographs on the front or back.
Have young children make a mother’s day painting.
Attach miniature clothes pins.
Attach metal strip on the top, bottom, or side to make a partial magnetic feature
If you are privledged to have children under your influence so that you can pour life into them, I hope that you are inspired by this project. A gift with modest materials can be transformed to be uplifting for years to come!
If you are a basket ball coach and are looking for stickers that you can make and pass on to your players, check out these designs!
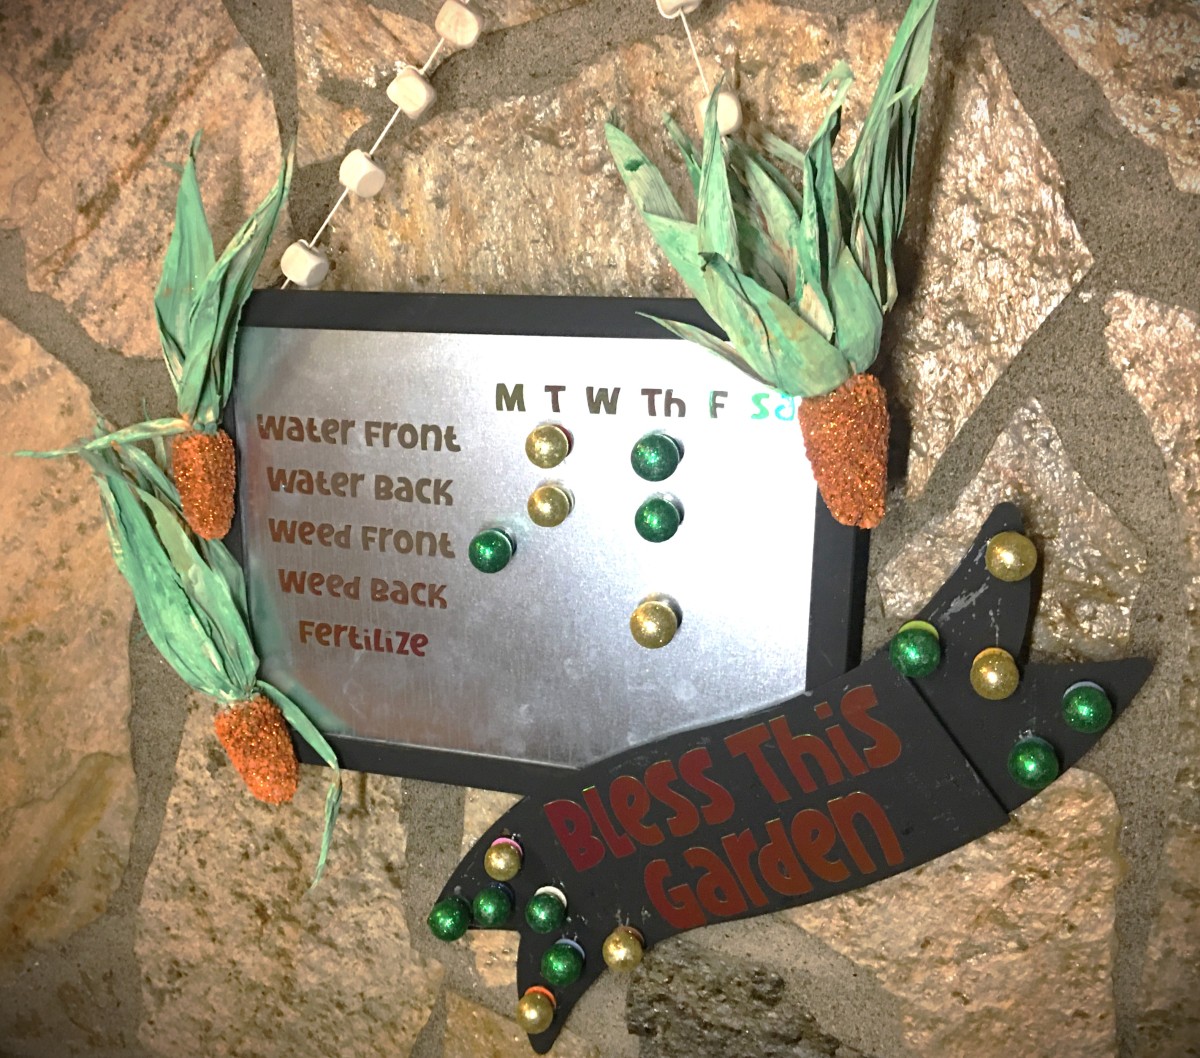
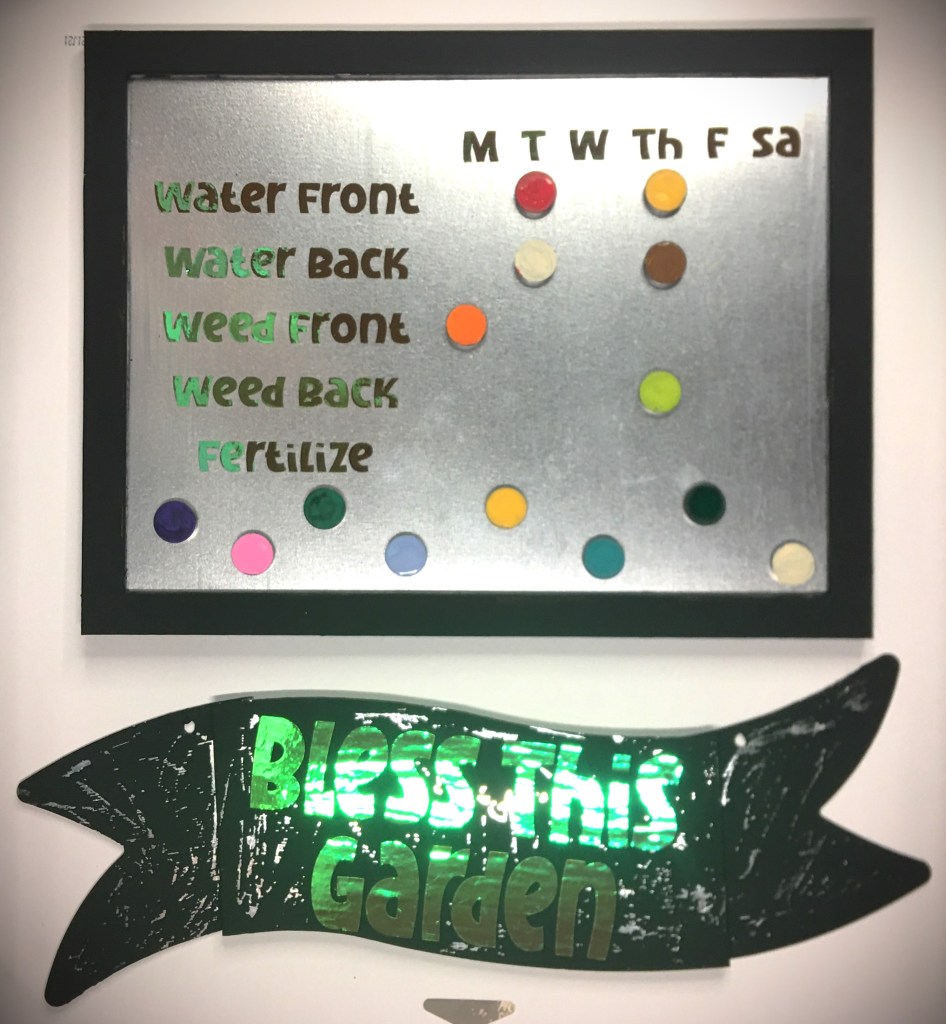
This year I’m working in concert with others in a garden. (I am so excited for this!) If you’re as busy as I am, you can imagine how quickly things slip through the cracks.
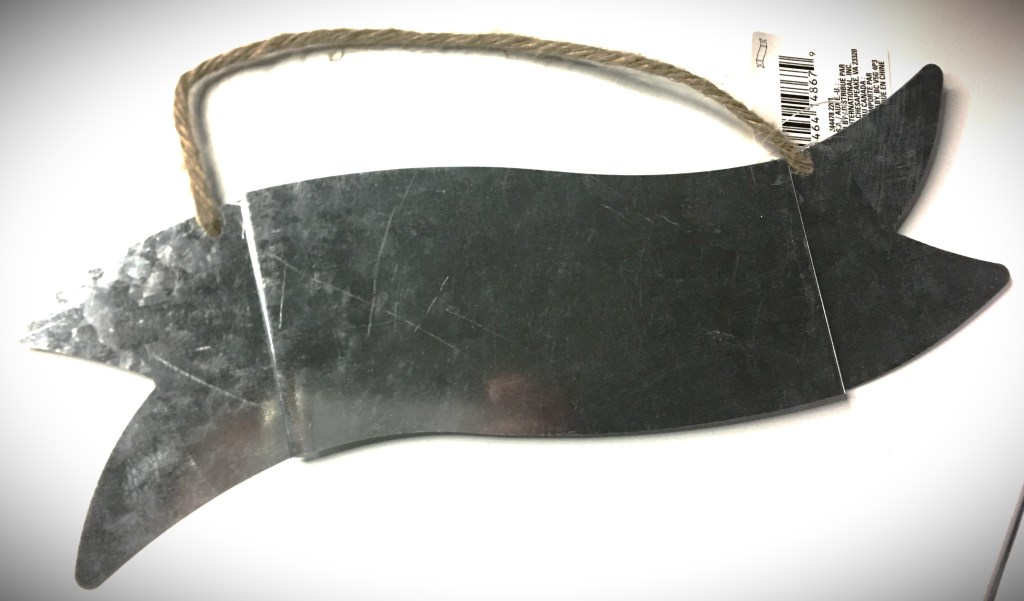
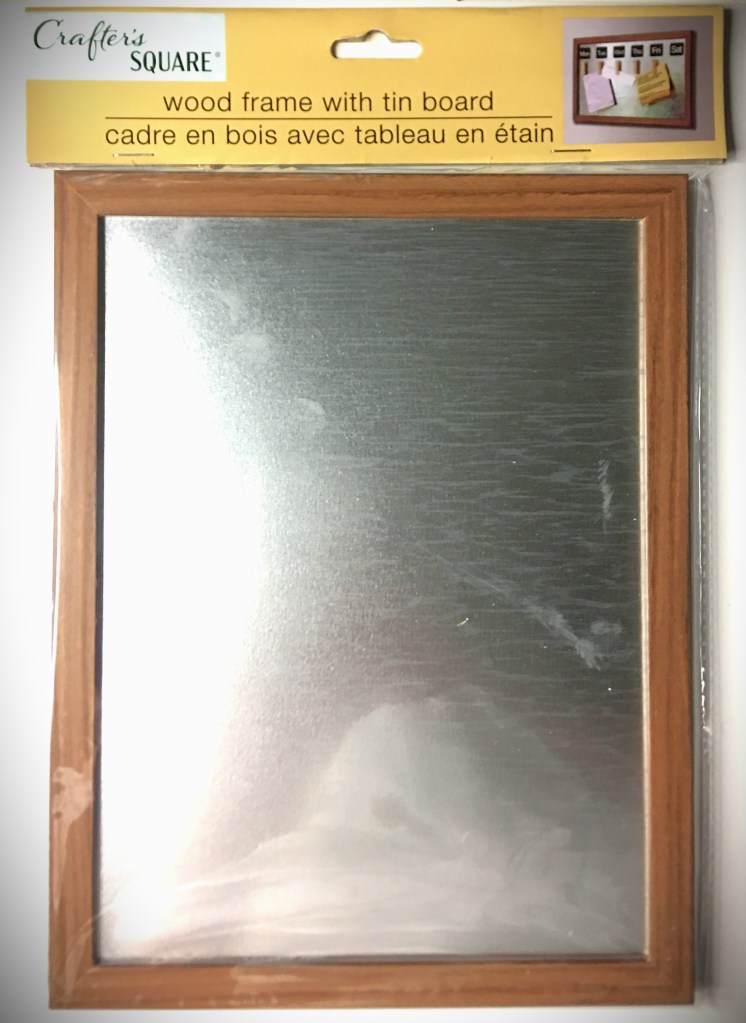
After hitting my local dollar store, I found some pieces that are going to make an inexpensive tool that doubles as home decor, all the while keeping tabs on what’s been done.
With these I decided to make a magnetic board where anyone tending the garden can quickly mark what they did.
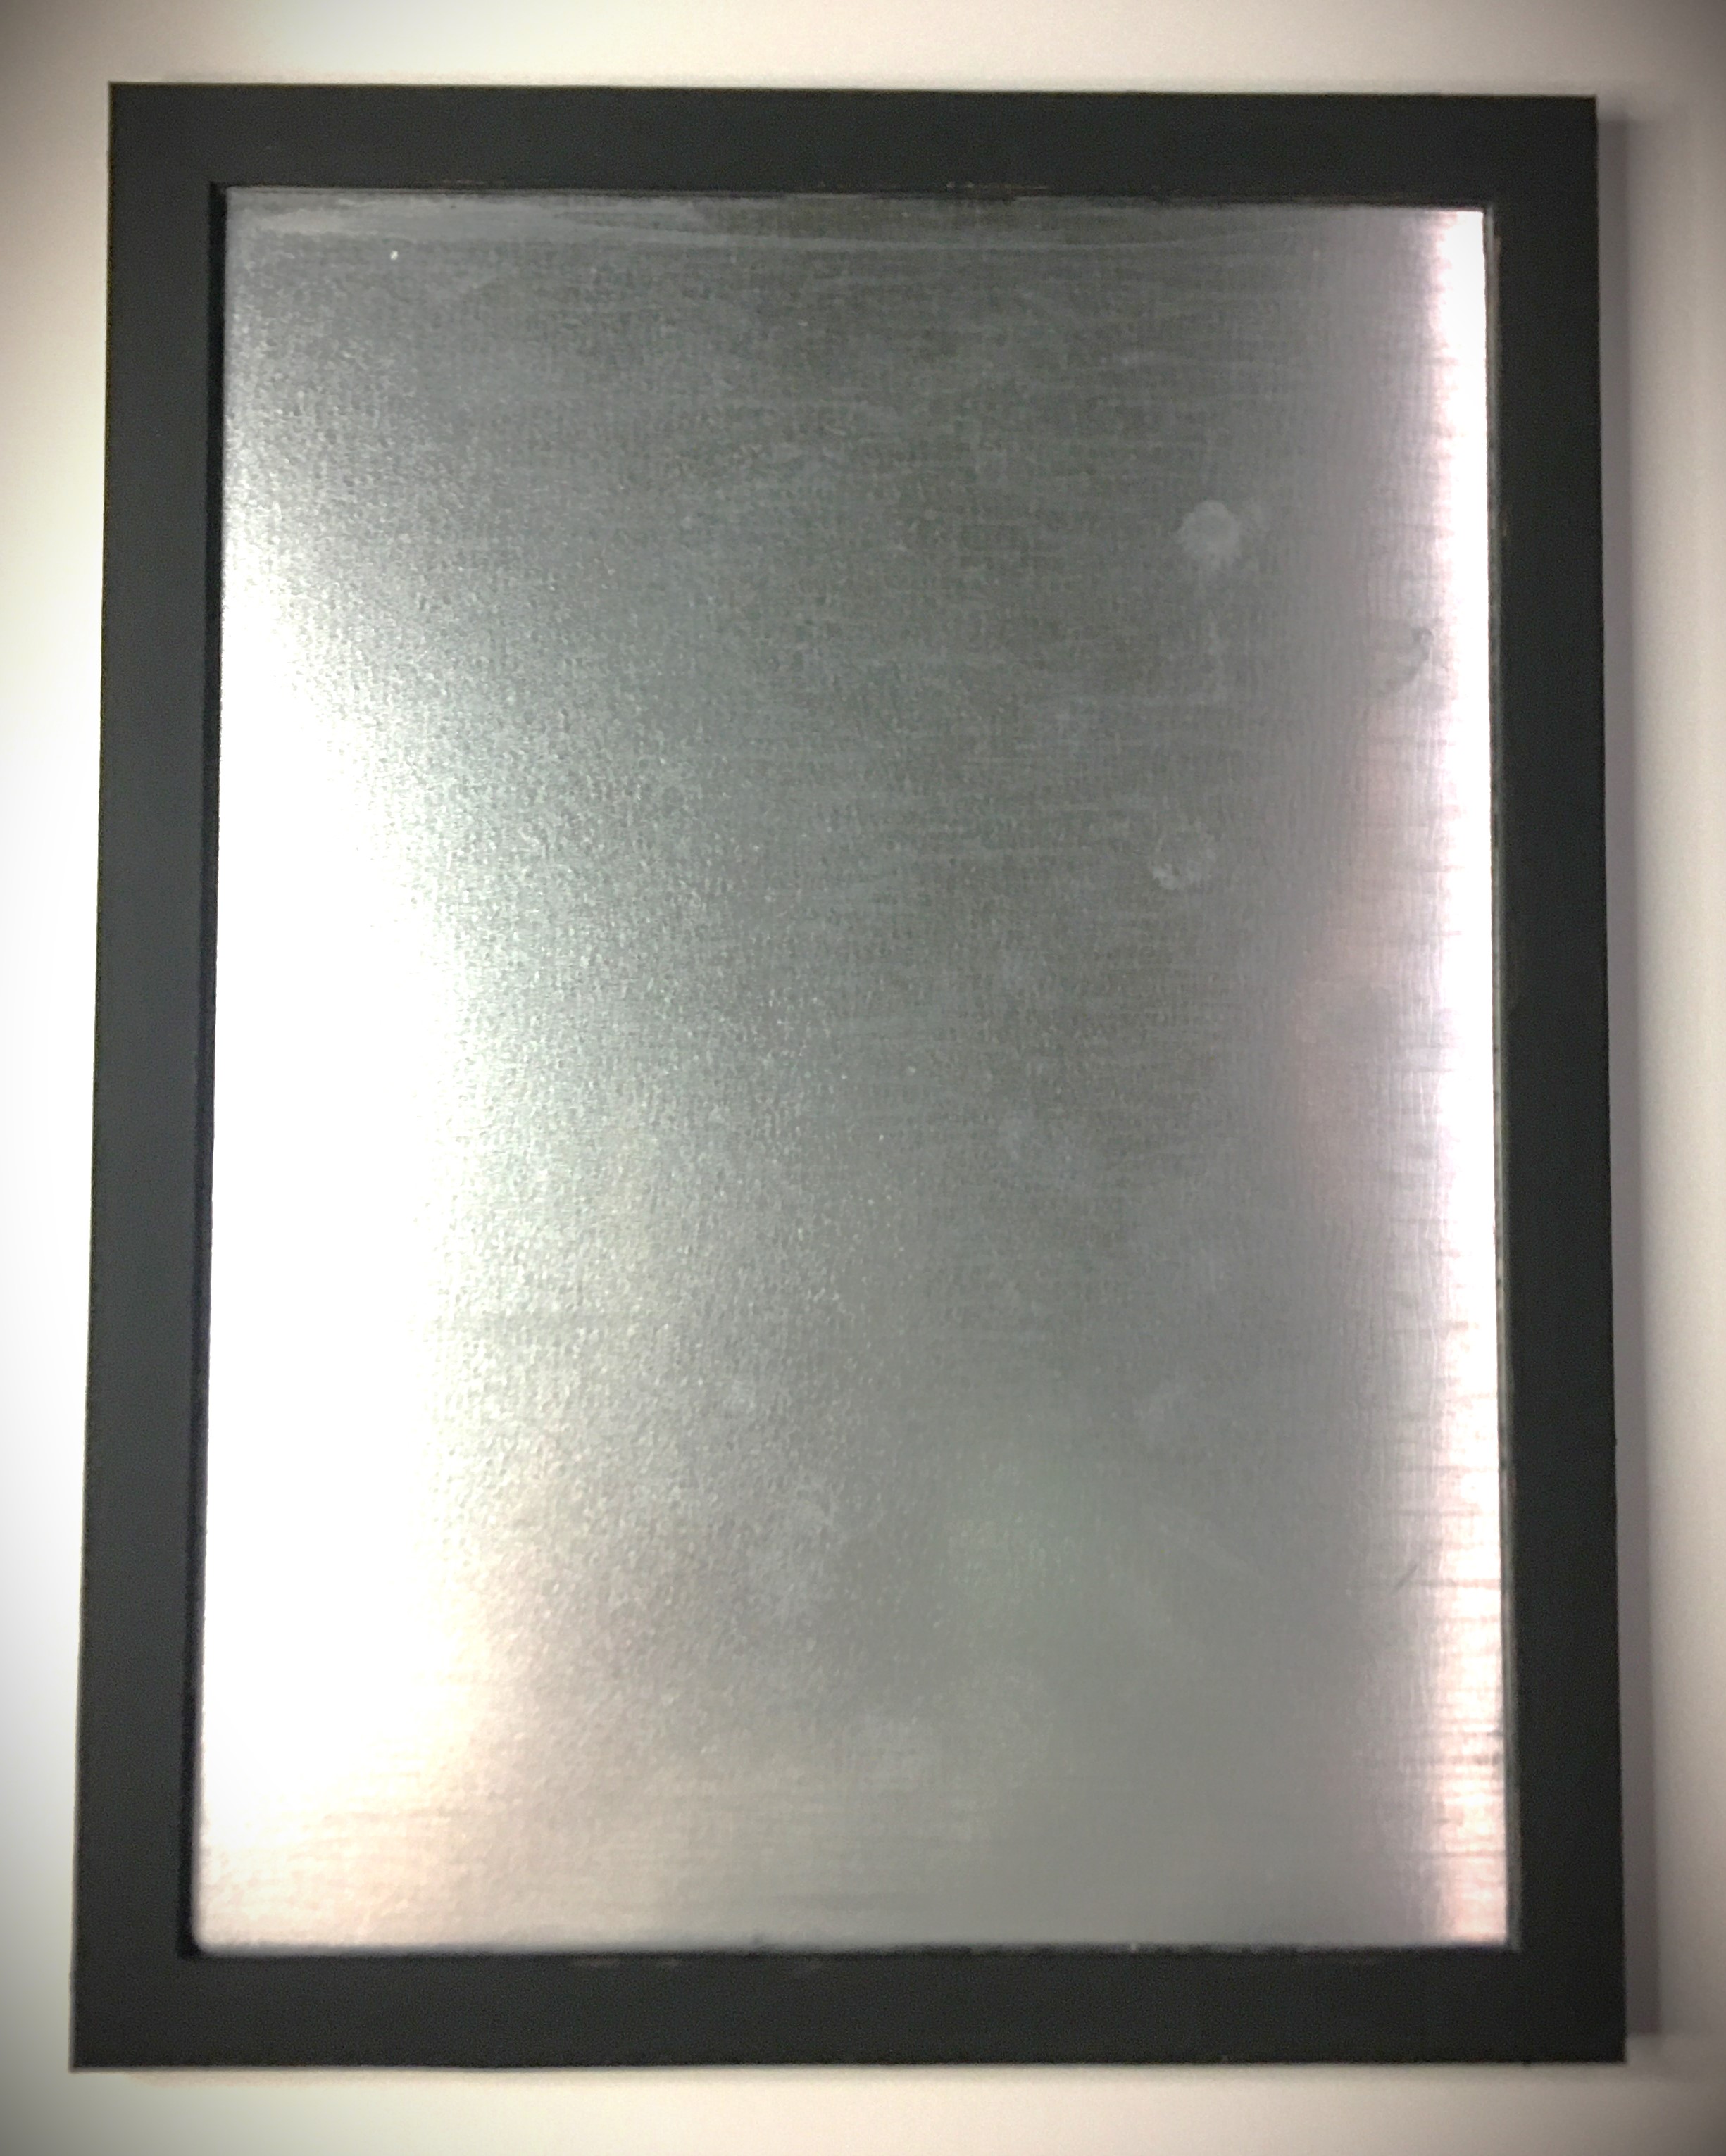
I know the galvanized finish tends to overtake everything. So with the galvanized frame and banner, everything gets lost real quick. Not to mention that the frame was a really bad fake wood. To dress all this up a bit and minimize the galvanized look, I painted the frame and banner black.
I forgot to take a picture of the banner painted in flat black chalk paint (the same paint as the frame). It looked too minimalistic for my taste, so I took the transfer tape (which I used to apply the vinyl text) and put it straight onto the paint. Some places lifted the paint quite easily. But to get the distressed look, I scratched the tape
The magnets needed a little something extra. There are so many things that could be done. I have children and they’re helping with this garden and they’ll also be marking what we do when we work, so I went into kid zone and painted the magnets with acrylic paint and did all the colors.
If you want to keep minimalistic, pick your favorite color.
Love things that sparkle, glue on gem stones or use glitter.
What about texture? Glue on fuzzy pom poms, baby pine cones, large seeds or nuts… literally whatever catches your imagination. Maybe you have a farm and want to use small farm yard figures and animals. (I wish I had these in my craft room!!!)
Something that is great about using the galvanized banner is that the extra magnets can be kept on the banner so you can add stickers, personalization, more tasks, or a note section in the blank space on the bottom.
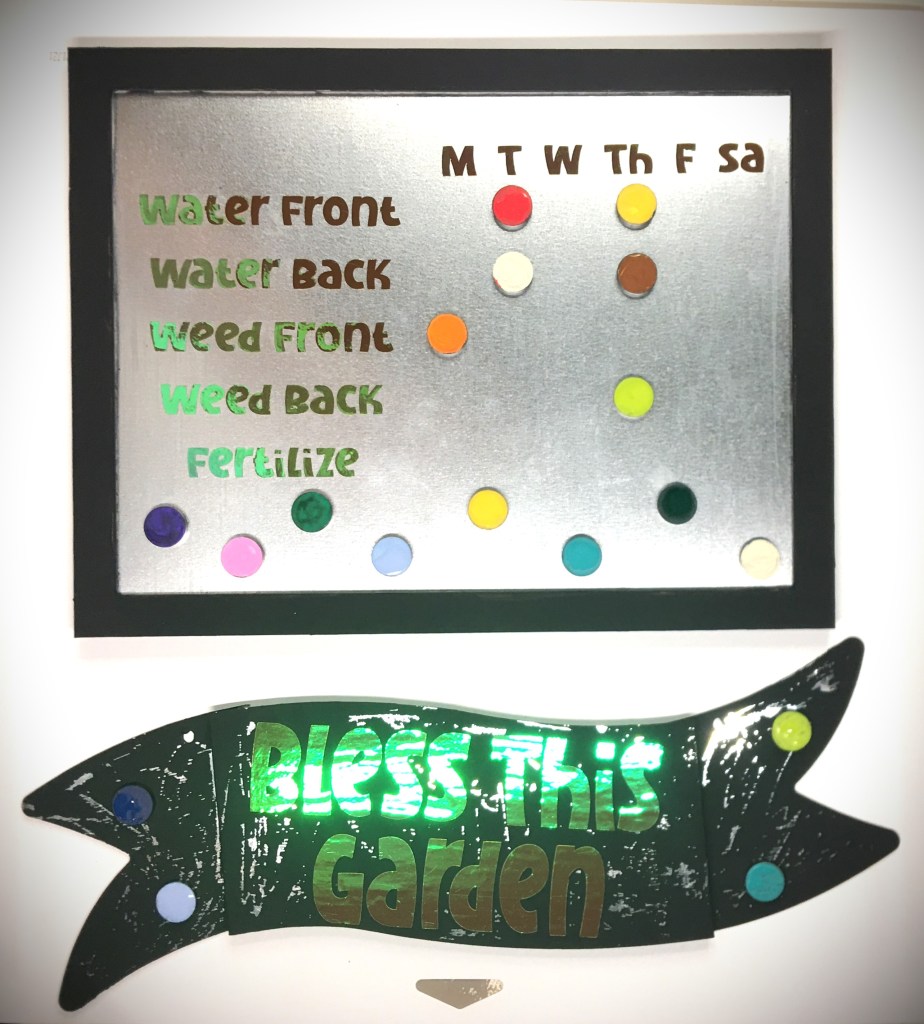
And then while typing I decided to go a different direction.
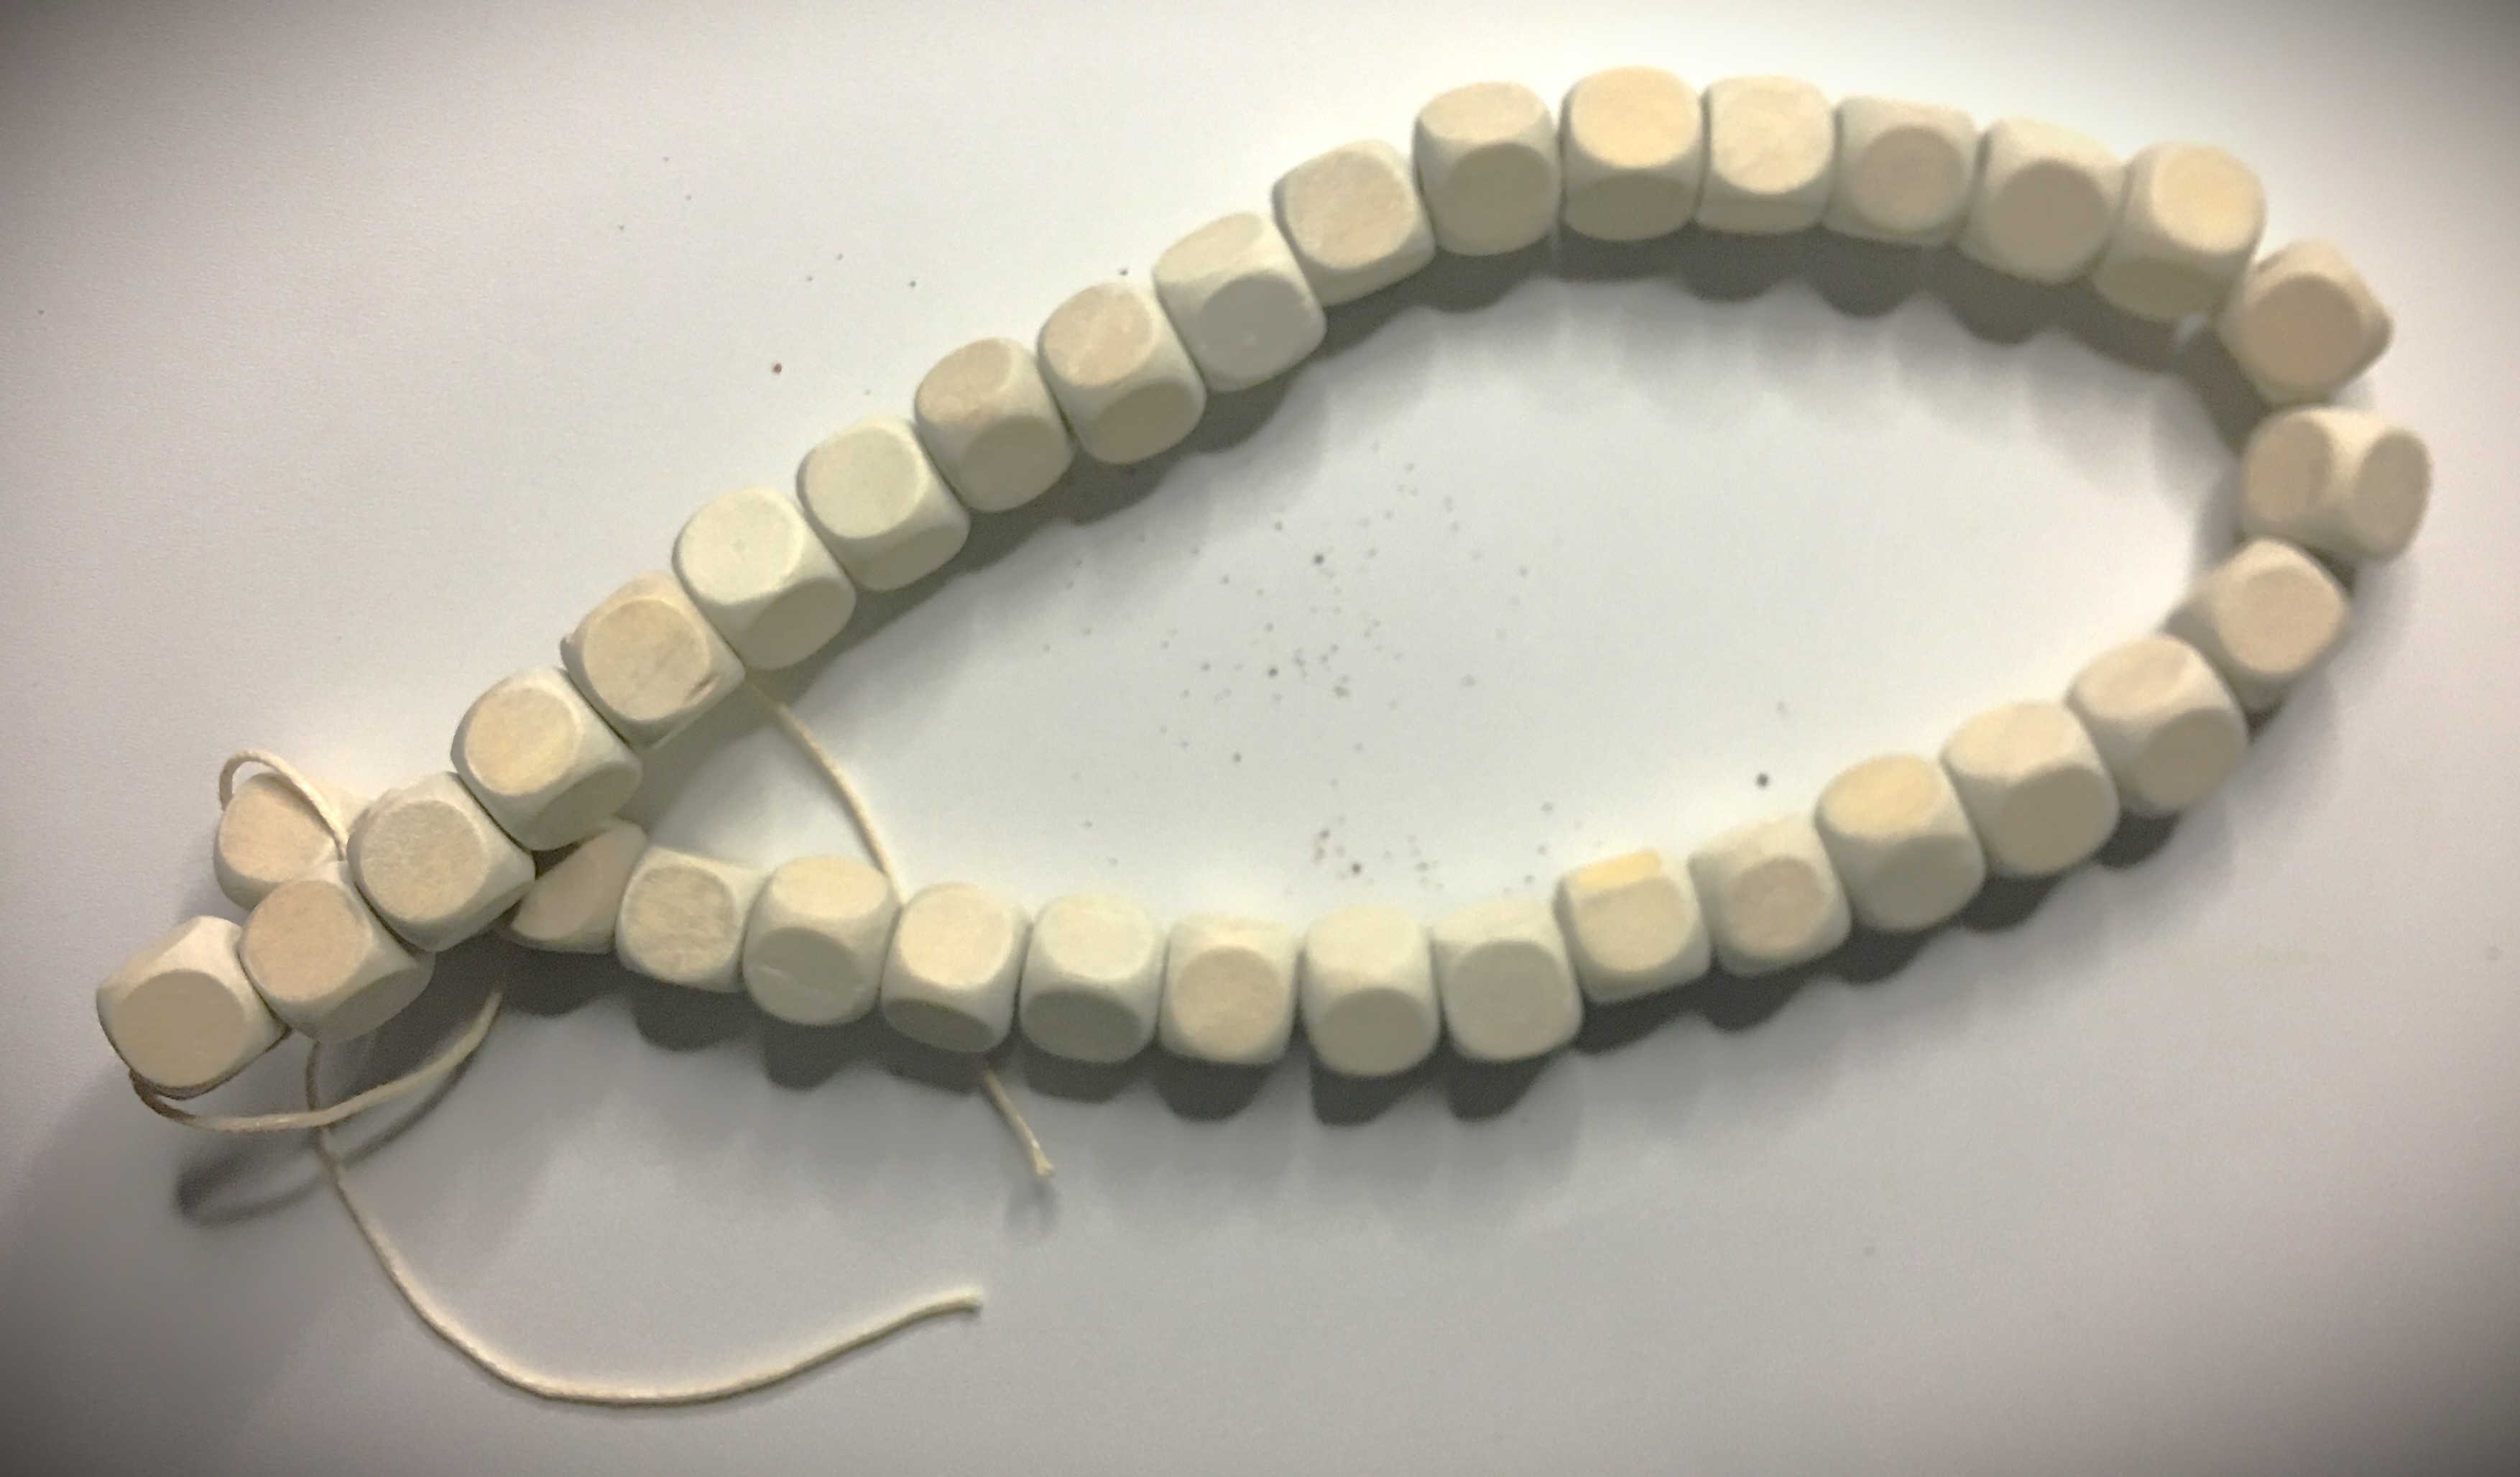
I pulled these out! Last year I made carrots out of my corn cobs. And I brought out the wooden beads from my drawer (which I also got from my local dollar store).
With the beads I removed them all from the string they came on and noted how they tied off the end bead to keep them all on the string. This “knot” that they used was how I spaced the beads further apart on the string.
Once I made those changes, the colorful “polka dots” needed to change. The gold and green glitter styrofoam balls simplified the overwhelming colors.
Even with the new modifications hanging, I’m not satisfied with the final color scheme. And sometimes that happens when you’re creating. You start building from the image you see in your head and make a change here or there and an earlier idea you loved just doesn’t work anymore.
The black isn’t working anymore. I loved the idea to begin with because it was a nice basic color that goes with where I was going to hang this. But it’s just not working anymore.
Advertisements
First thing first, I need to lighten up the banner. So I’ll be distressing it heavily so that the majority of the galvanized metal will show through. With the addition of the carrots, which obviously take the spotlight, I can bring out a lot more of that metal and the metal is not going to overtake and make everything else hide.
But before I do that, I need to decide what I’m going to do with the frame and that’s going to take a few days of looking at it to see where I want to go. At the moment, I’m leaning toward the idea of painting on white striped and creating a plaid hand painted design on it. If I go that route, I might keep the banner predominately black still and incorporate that same design element into parts of the banner.
Stay tuned to see what I finally decide!
Advertisements
And I’m going to leave you here in this moment just because sometimes the right thing is to take a step away from a project and let it tumble around in your brain. You don’t always have to have the answer right away. And you don’t always have to have things done in an hour.
Perhaps it’s convenient to have an idea presented to you in a finished state.
But I’m going to leave you here with your own thoughts. Because I know someone has that inner voice screaming, “You need to ____!”
Go ahead and leave that comment below.
Or better yet, use that idea to make your own magnetic board for your daily tasks, your children’s chore board, a classroom helper sign, your regular “Honey Do” list, or that board that I didn’t mention but you just got the idea for.
And when you’re finished, send me a picture so that I can see what you came up with.


Leave a comment