After spending almost a decade in the event decorating industry I have repetatively heard "I can do that". Instead of being dismissed by creative minded people, I want to show you how I do "that" so you can be sucessful in recreating that inspiration image. I just might have a few tricks that you haven't seen yet!
Whether you’re trying to prevent mix ups from lookalike items at work, on sports teams, or family members, there are just certain things that are flat out difficult to personalize.
For example, my mother in law gifted my boys duffle bags for soccer. Having triplicates of the same nylon bag is great for making sure that no one got a “better” bag. But without some identifier, it makes it difficult for the kiddos to figure out whose bag belongs to whom.
In this same situation, growing up my mom took a sharpie and wrote our names on the straps of our bags.
Fortunately there’s a way of personalizing without going full on retro.
Most people shy away from using iron on (or HTV) decals because the nylon bags melt so easy.
The simple tips with these kinds of bags are that you want to minimize the exposure of high heat that you can.
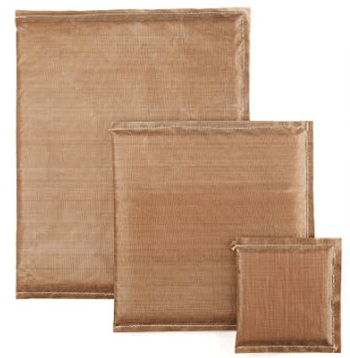
One you have selected your decal or made your own with your favorite sports font (and cut your HTV with your cutting machine), you want to grab a couple extra items. You want a pressing pillow or a folded up towel that you can place inside your bag and prevent an accidental melting of the two sides of your bag together.
Note: a pressing pillow is going to be a better option because it’s a smooth surface. Even when the nylon starts to get warm from the pressing, it’s a smooth surface that will keep your bag’s fabric smooth where you press. With a towel, especially terry cloth or a towel with some nap to it, the nylon will form against the nap and leave a texture behind when it cools down. So if at all possible, try to keep your barrier something with a smooth surface just to take you that one extra step closer to a perfect final product.
With your barrier inside your bag, you can then place your decal wherever you want on the bag. Just make sure that the pressing pillow or towel is directly under where your decal is going to be placed.
Advertisements
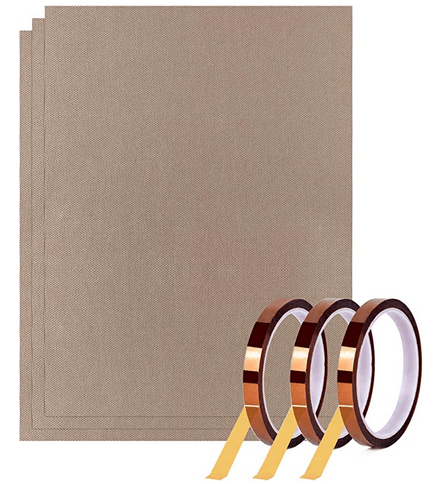
Depending on who you talk to, some crafters are going to tell you it’s okay to use parchment paper or wax paper over your decal. I’m going to steer you away from this advice. The nylon bags melt so easily (especially seeing that your decal is going to need some heat exposure to adhere properly). What is going to eliminate the potential for bag melt is to use a teflon sheet.
Teflon is going to distribute heat better than the other options. The heat bleeds out and so there’s not that clear demarcation that this was where your head source was applied. (This is especially important with an iron or a mini press, where you have a bit more precision with where you are pressing your heat.
Parchment paper will only keep is an okay alternative. I recommend making sure that your press is on a lower temperature, because parchment paper will not prevent discoloration from high heat on a delicate material.
If I can talk you out of one option, it would be the wax paper (or the press and seal that I’ve heard some crafters use as a vinyl carrier). You don’t want the wax (or the press and seal) side to be in contact with your heat source. There will be a residue transfer that is just going to give you some problems you definitely don’t want to deal with. And there are some materials, like nylon, that will absorb in anything that’s an oil based material. It is possible for the wax paper (or press and seal) to leave a halo effect on your nylon where you pressed. And it will be most noticeable if you’re like me and point your iron or press in any and every direction. Instead of having crisp lines, the halo could appear like a faint comic speech balloon.
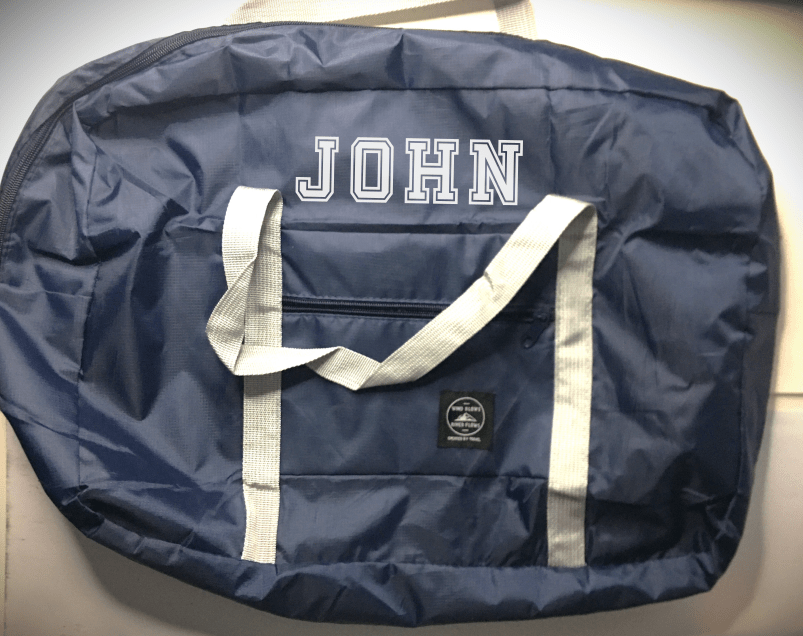
For the bags that I personalized for my boys, I used a teflon pressing pillow and covered the HTV with a teflon sheet.
Even though the job would have been quicker with my heat press, I opted for my mini press. It was easier for when a couple of the corners of a few letters didn’t want to adhere like the rest. I could pinpoint directly to the spot.
Note: Nylon doesn’t require as long of a press as cotton or canvas. So be sure to either drop your temperature a little or cut your pressing time. It’s easier to press a little longer than to scorch the nylon.
What’s great about knowing how to apply decals onto thin nylon bags is that now I know how I want to commemorate my kiddo’s sports teams through the years. I’ve designed some team logos that I will add on from previous sports seasons. And if I can’t come up with a design for some of the crazy young kiddo team names out there (like Tiger Squirrels) I can pick and font and just add the name.
I hope these tips will help take away the fear factor of personalizing items that we tend to stay far away from. By taking proper precautions and knowing how a material will react to something (like heat), you can most certainly make adjustments to make it a usable material for your creativity!
If you haven’t heard or seen Teflon sheets or pressing pillows here are a couple of links to familiarize yourself with the products. These are affiliate links. I may receive a commission for purchases made through these links, but at no extra cost to you.
We all have our favorite places to source decoration items for parties. And it becomes a challenge when we need to find things that just can’t be on the shelves anywhere.
Last week I shared some ideas on decoration ideas for retro 8-bit arcade games.
This week I want to share with you, keeping with the same theme, my hacks for ordering a cake and a fresh idea for dressing up a snack can.
How to order a cake from a bakery that doesn’t decorate with licensed characters.
We decided that we were going to get the cake from Costco this time. (I’ve used this same ordering technique with my local grocery store bakery department.)
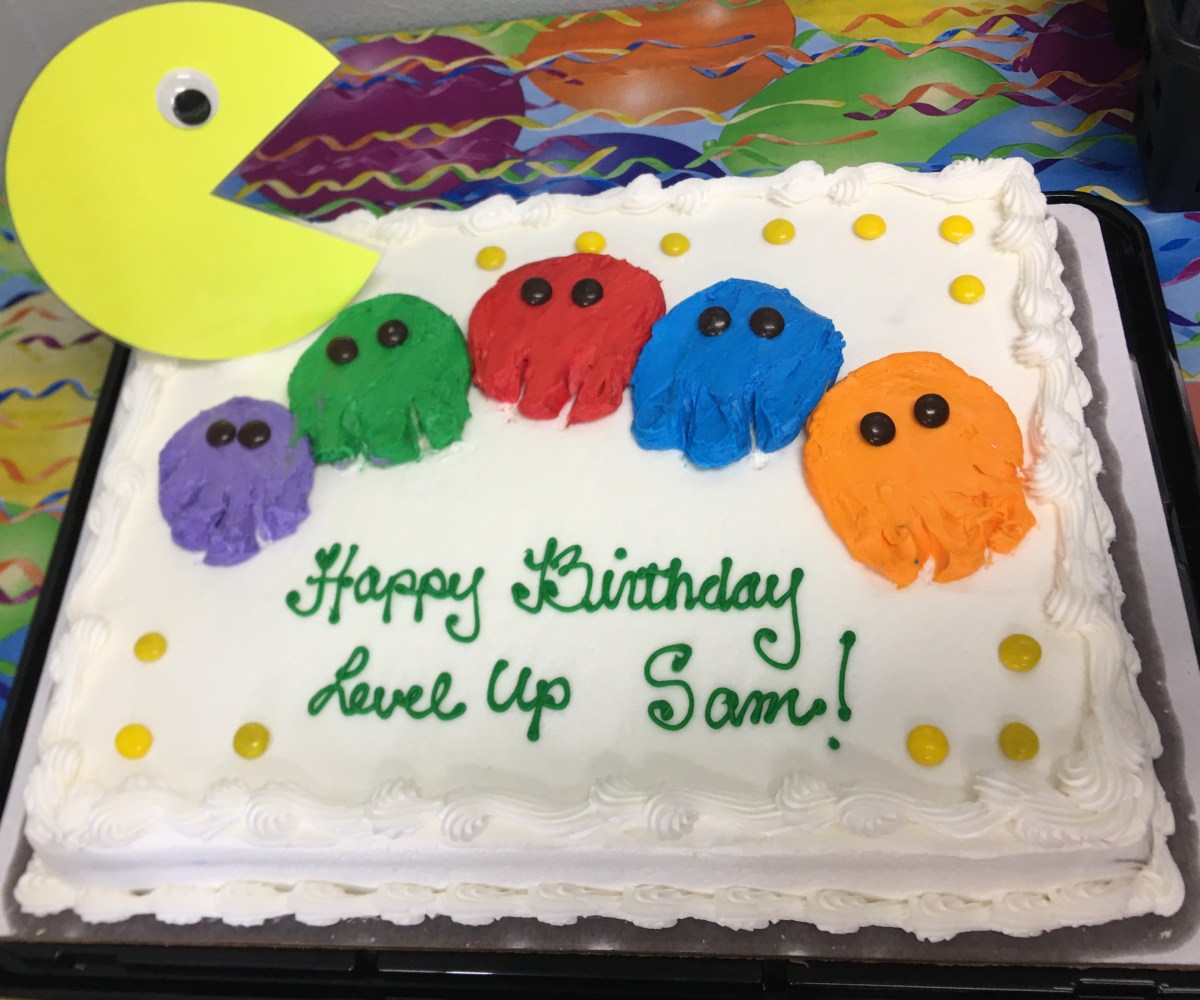
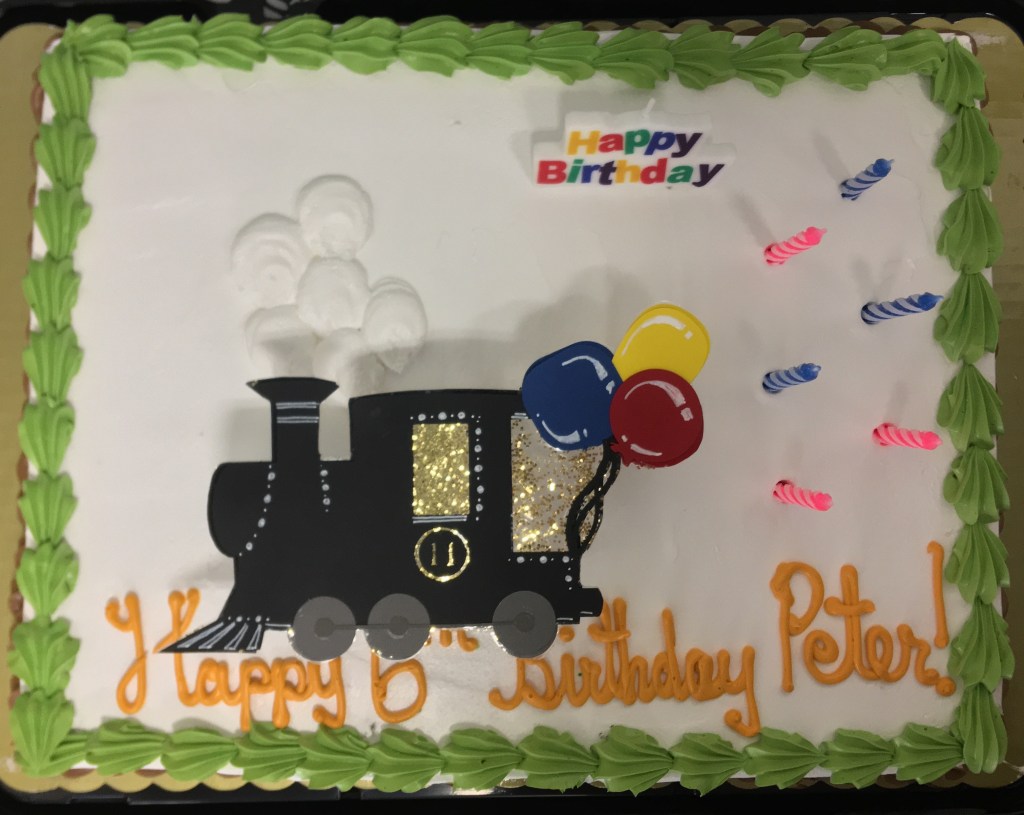
Before going in person or ordering online, you want to sit down and think of how you want to decorate your cake. Previously one kiddo wanted a train birthday and so I had to come up with a steam train engine cake. This time, how was I going to make a Pac Man cake?
First I made my Pac Man. He was cut out of yellow cardstock and laminated so that I wouldn’t have to worry with paper dye bleeding into the frosting.
The time that I made my train, I attached wooden dowels. This kept everything directionally proportional with the 3D focal point.
This time I needed to get Pac Man to stand up. So dowels were not going to work for me. This time I hot glued a plastic fork on the back. The fork thongs give the ability to stand Pac Man fully upright or reclined back at a 45 degree angle. I needed this flexibility because I had absolutely no idea how the bakery was going to follow my directions or what their placement was going to look like.
The one thing I can tell you with absolute certainty is that bakery staff looks forward to doing something different as long as it’s not making more work for them. So if you leave your note with your best manners and let them know what you’re going to do, they get excited about being part of something different.
For the train I had asked them to cluster the balloons together, with no strings, to make a cloud cluster for a train that I would place on the cake. I kid you not, I went to pick up this cake and heard all the bakery employees complain about this insane request that they got from someone. Instead of quickly decorating a cake, they were going to spend additional time and drag their day out.
Of course I thought they were complaining about my simple request and so I was bracing myself for some attitude. Instead, I got the complete opposite. One of the employees came to the counter to help me, went back for the cake, and all the employees came to the counter grinning ear to ear because they wanted to see the train.
The success to the train was that I didn’t ask for more “balloons” then they would normally give. I didn’t tell them specifically where I wanted them or how to position them. I didn’t demand a certain color. I left it simply with no strings, white cluster. My request saved them maybe a few seconds from what they normally would do. But that was a few seconds in their favor.
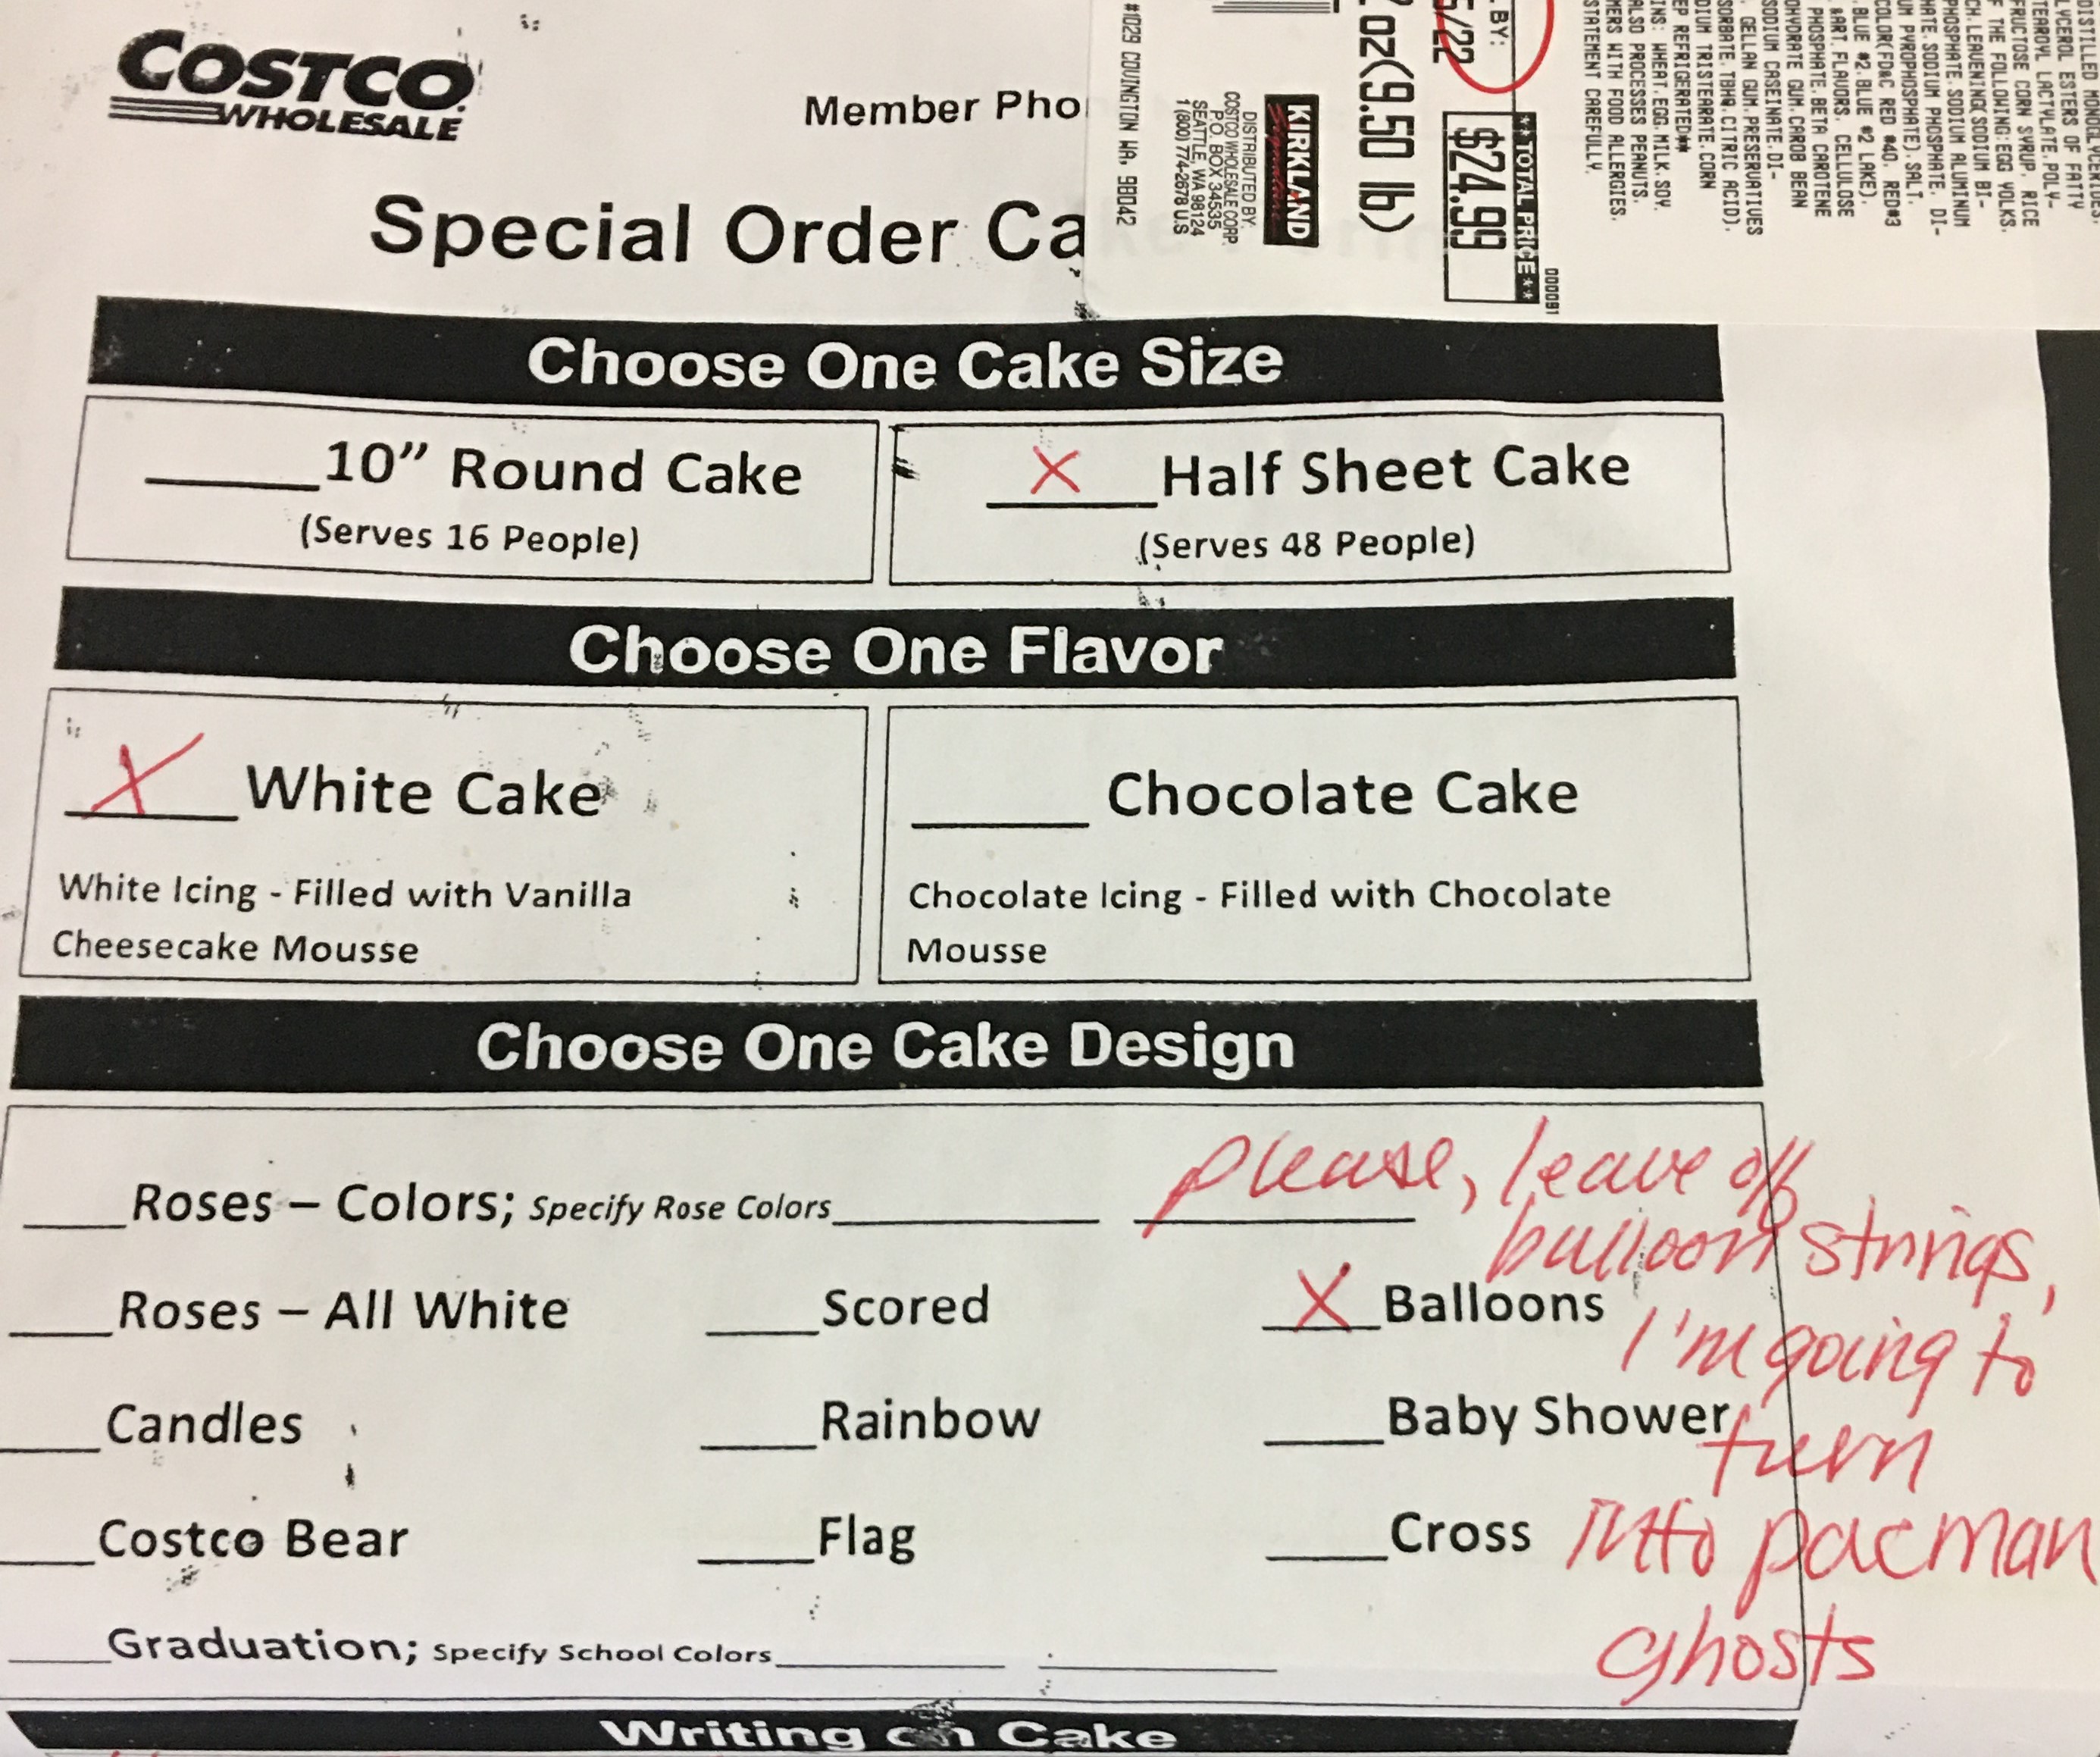
As you can see with my Costco order form, I asked for something simple. I don’t remember if these are their standard balloon colors or sizes. But they were great in giving me large balloons, the exact number I needed, and their colors!
I don’t know what this bakery’s response was, because my husband picked the cake up.
But I do have a story for this one, on the day that I placed the order.
My son was so excited to have a Pac Man cake that as we were leaving the bakery section, after filling the order form, he flagged down the nearest employee and blurted in a loud excited voice that he was getting a Pac Man cake. You should have seen the employees face when he had to tell my son that they don’t do licensed characters. My son cut him off and told him, “No! I’m getting a Pac Man cake!” I had to step in here and explain to the employee that I requested that the balloon strings be left off so I could turn them into ghosts and I would add a Pac Man at the party. The employee chatted for a few more minutes and kept repeating himself that this was a brilliant idea.
If a non-bakery employee was excited about my idea, you can just imagine how the bakery employees reacted when they saw the order form. If nothing else, it turned a typical boring day into something to talk about. Again, this wasn’t a request that added to their work time. It may have saved them seconds. But I’m assuming it was something fun that broke up the monotony.
While on the subject of cakes…..
I don’t know about your family, but I kid you not growing up and even with my own kids, we have at least one cake story that will live as a memory for a lifetime!
Advertisements
What is your cake of a lifetime story???
When we were kids, my mom locked my sister’s birthday cake in the car, at the lake, with the keys in the car.
I tried my hand at making a sculpted cake for my son’s birthday. He wanted a bubble birthday. So I attempted to make a bubble container cake. That cake makes me cry in the fetal position to this day, because the sponge was so dry that the dang cake kept crumbling and falling apart. It didn’t matter how many dowels I added to maintain the structure, that I used fondant for a little holding power, or that the cake was frozen… it was a nightmare!
And that photo I keep buried away in a digital file folder where I can cry as my son laughs as an adult and I have to recount that story. Because even though I hate it, I have to admit that it’s a story that deserves to live on.
So Yes! This Pac Man cake will live on for the ages. Not for the same reason as the Bubble Birthday Cake. But for this reason….
After I finished assembling the cake, I left the party room to go talk with the other moms while the kiddos played. After a time, my birthday boy walks up to me with his hands on his cheeks, devastated face, and trying hard not to cry as he exclaimed, “Someone ate Pac Man!”
I had zero idea what he was talking about, but seeing his reaction was enough that I got up and walked back to the party room to investigate.
Here my son is about to cry. As soon as I saw the cake I busted out laughing almost to the point of cry laughing, because that is absolutely hilarious!!!! This was no typical finger swipe of the frosting. Someone ate as many of the M&Ms as they could reach and took out a ghost in the process. And no, my laughter didn’t help my son. I looked down at him and told him it was going to be okay. I had already taken pictures of the cake. And then I asked him if he wanted to see what his cake looked like before this happened.
We went back to where everyone was at. As I picked up my phone to pull up the pictures I let the moms know that someone had ate the candy decorations off of the cake. They all were mortified, as any mother would be. I showed my son the picture. I fawned over it with him and once he was happy to at least to have seen his finished pre-eaten cake, he went back off to play. Then I showed the moms the picture and filled them in on what happened.
Advertisements
I don’t think they knew how to respond with how I was responding. As a mom, we’re all use to the finger swipes. But to see the cake pillaged! LOL Honestly, my whole thinking was that it could have been a whole lot worse. Someone could have taken a fist full of cake out of the cake. Being angry or interrogating the kids to find out who did it would not have restored the cake. It would have made the party uncomfortable for everyone.
What surprised me was that because I was okay with not knowing who did it, the moms began one by one asking their kids if they took the candy off the cake. None of the kids did. And it became a great mystery. It wasn’t until I mentioned this story in my newsletter that I realized that I never asked any of my three kids. Obviously birthday boy didn’t. His feelings were genuinely hurt in that moment. I assumed my oldest wouldn’t do it. Even though he’s a first grader, it’s just not his style. Now my youngest! That boy has the sweet tooth that the other two have never had. And he’s also in the food swiping stage. I did ask him the other day and he told me that he didn’t. But I also know that he’s at the stage of not telling the truth to see if he can get away with things.
To this very day, I’m going to error on the side that it was my youngest that plundered the cake, but I have absolutely no proof that he did. So officially the case is closed as a cold case. But secretly I still think it’s him.
A New Take on Snack Wrappers
I know I’ve seen the crafty labels that people put on Hershey bars or bags of chips. The one thing that I haven’t seen is a label for Pringles. And snack chips were one of my party purchases from Costco.
When trying to make a theme happen from scratch I really did one more item to pull it all together and finish it off. And what’s better than something you can put jokes on, for kids at an age who adore any joke you throw at them!
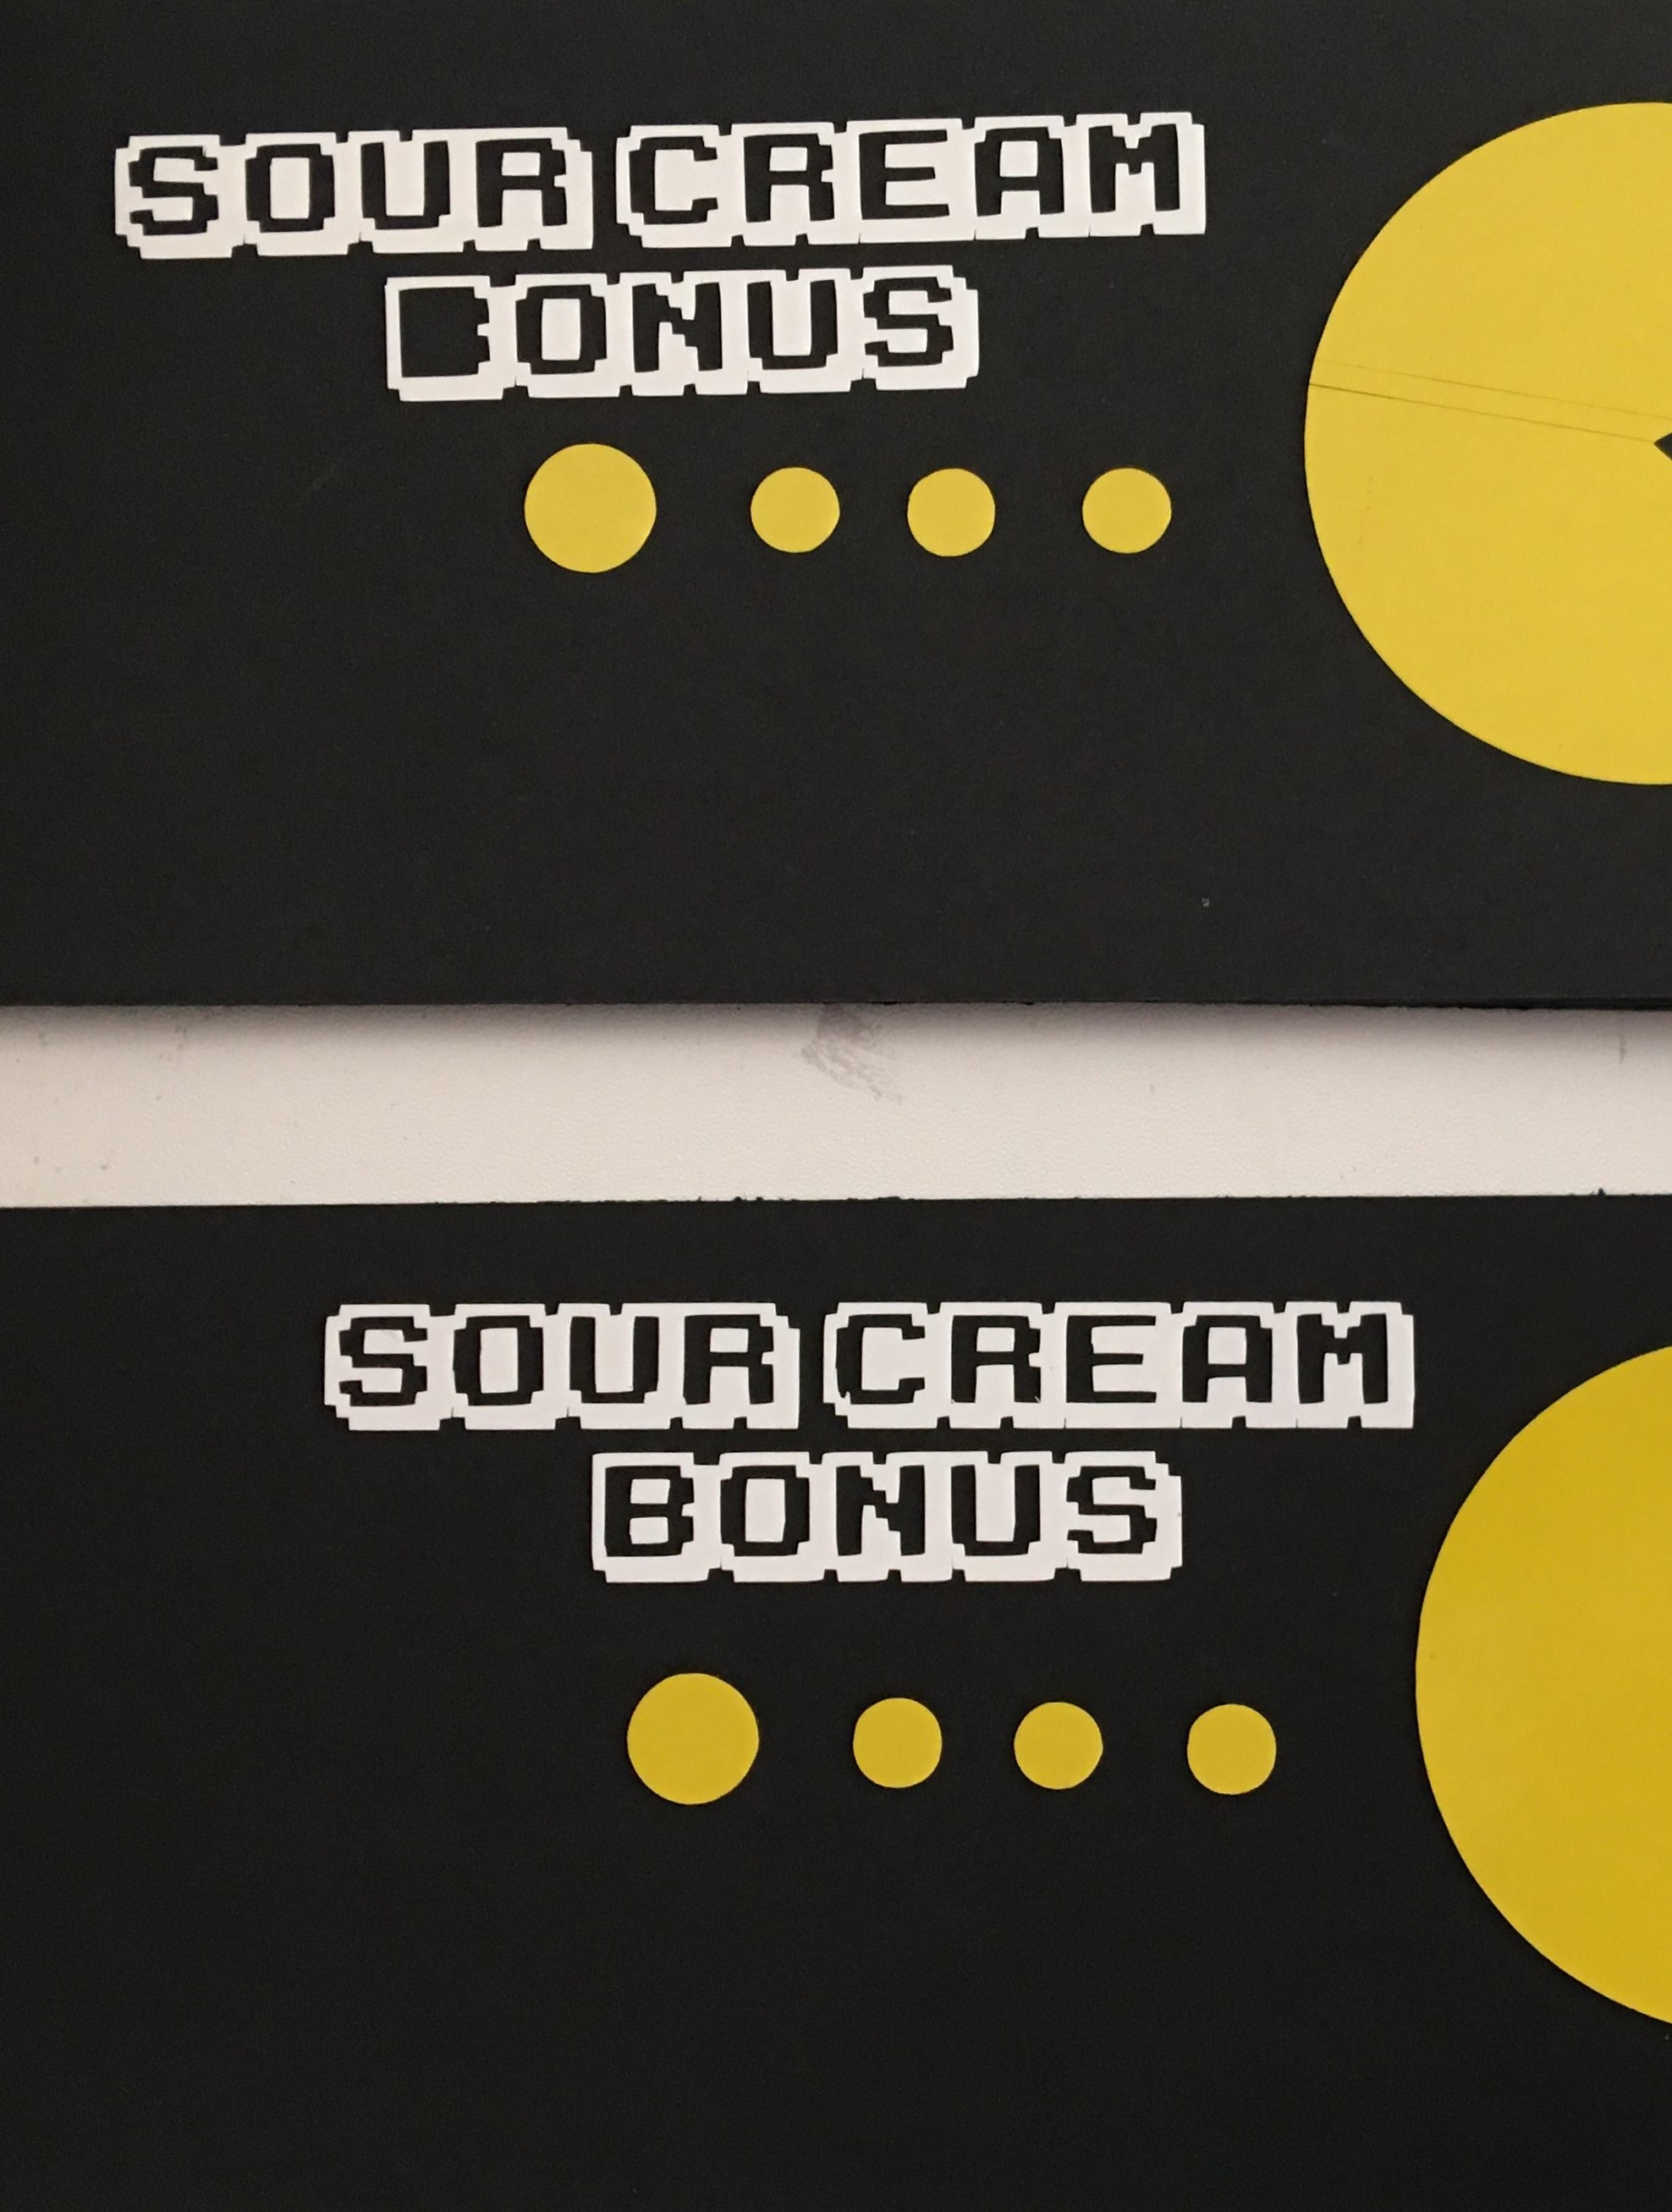
My first thought was to create a PDF that I could print off from my printer. However my color ink cartridge was empty and it was just easier to keep material cohesion by using black cardstock and vinyl. Plus I have acrylic pens and have hardly touched my white pen. So I cut from vinyl all that I could. And I wrote out the jokes.
Let me just say that I did not think I would find any Pac Man jokes. I was surprised when I did. There are kid friendly ones and there are adult friendly ones. So you kind of have to pick and choose which jokes you use for your party. But here is the site I used for one reference joke page. I didn’t save the sites and can’t find the second one that I pulled from. But it was a simple Google search and you don’t have to go far before you start seeing repeats. So it is a small joke world for this game. All in all I used 8 jokes that I recycled over the 36 mini tins that I dressed.
Before I show you how I attached these labels I want to point out a troubleshooting tip. I had a lot of weeding and transferring to do. And I’m not ashamed to say that I worked quickly because I had a lot of items to go through. I did lose some letter details, as you can see with this B.
Tip: If you lose details, use a white acrylic pen and draw it back in.
That is the one thing that I love about 8-bit fonts, if you lose a letter detail, all you need to know is how to draw a line or rectangle. I had a few cans that I had to correct. But I didn’t even tell my husband or kids and none of them noticed. And my detail orientated boys are quick to point something out to me that’s missing, wrong, or whatever corrections they want me to make because I didn’t do it just so. ….kids!
The assembly on these is super quick. If you’re using copy paper glue dots are all you need. For cardstock I needed hot glue.
The wrap is slightly longer then the circumference of the can because I didn’t want to have to deal with a hairline crack of color because it wasn’t cut precisely to precise measurement. Because there was overlap, I used two small dots of glue to anchor the edge down to the can. After wrapping the label around, I finished it off with a line of hot glue. There was no puckering or edge lifts. I advise against using glue like Elmer’s where you have to hold and wait dry. Hot glue was perfect because it dried by the time I had aligned and pressed everything into place.
Tip: The tab of the container seal is something that you want to pay attention to, so that no one struggles to open the can. A tried folding the tab up and press it back down after the label was attached. This took too long. So I went with option 2.
Tip 2: Slide the label up under the tab. Apply your anchor glue and then finish off the attachment. Having the tab on top of the label helped to align the label quicker. So it was a time saver guide.
An additional option that you can add to these cans is to apply a Pac Man sticker/vinyl on top to cover the Pringles man’s face. I chose not to do this because I wanted to not over complicate all that I had to arrange for the party.
Instead I opted to turn these cans into small coin banks for the boys as an after the party trinket. To make this modification, all you need to do is take a box cutter or exacto knife and slice a single cut through the clear lid. The best way of doing this is to cut with the lid on top of an empty can. The snack was not damaged and you have a proper safe way of making cuts without the lid slipping on you.
Tip: One cut is perfect if you want your coins to remain in the can and still allow a child to shake it and use it as an instrument. If you make a wider slot, you will allow the opportunity for coins to fall out.
I hope these cake stories made you laugh as much as I did. And that you enjoyed all the decorations and new ideas from this week and last. They were fun and well worth making.
If you have any cake stories, please share them in the comments below!
Files used Today:
The file for the Snack Can Label is found in this Archade Label set.
Processing…
Success! You're on the list.
Whoops! There was an error and we couldn't process your subscription. Please reload the page and try again.
This post contains affiliate links to products. We may receive a commission for purchases made through these links, but at no extra cost to you.
Sometimes I love being a mom. And there’s days where I can be found saying, “You want what?!”
Okay, so maybe that’s a bit of an over exaggeration. But only a little bit. Because when I asked my son what he wanted for his birthday theme, he told me he wanted a ghost eating, pellet chomping birthday. To my credit I didn’t flinch or bat an eye. But there was an onslaught on thoughts that ran through my head. Are you kidding me? No one has those decorations! How am I going to pull this one off???
The short story is that I put on my big girl crafty panties and I got to work.
The problems with trademarked images are endless. Anyone who is reputable will not make the trademarked characters for you. And those who can have gone through the trouble of getting the licensing rights to do so, which means you’re paying an arm and a leg for another person to make it for you.
In the area of cakes, the easy go around is to decorate the cake with toys and action figures that you can buy on any store toy aisle. But how do you decorate for a theme where nothing is for sale???
Yes, I actually questioned my rational as a mother for introducing my boys to retro arcade games. But I did conquer the boss round on this problem!
Advertisements
Buy what you can
Pac Man may not be the decorating be on the shelves, but plenty of ideas were.
Thanks to 8-bit style games like Mine Craft still kind of popular, there are the plates and napkins. Yes, the Game On is the wrong font and style. And the game controller is definitely the wrong millennium. Fortunately for me, this was a five year old’s birthday party. I wasn’t going to be given the fifth degree on accuracy of my decor.
Thank God!
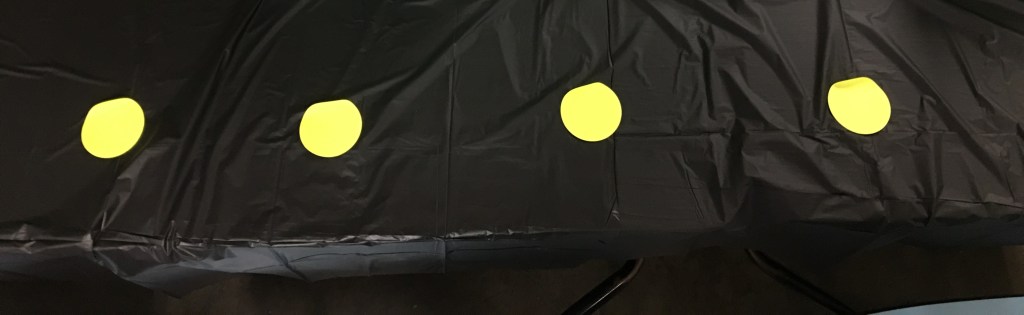
The one score that I was most excited for, and got me in the proper mind set for actually pulling this party off, was the stack of round yellow sticky notes that I found at the dollar store. The moment I saw them in the office supply aisle I had to severely restrain myself from doing my happy dance and squealing like an excited 5 year old!
For as much work as I was going to do in creating my own designs, I wasn’t going to have enough time to make a birthday banner. So you better believe I had zero issues with giving the round yellow sticky notes to my kids and telling them to put them all over the walls, windows, and on top of the black plastic table cloths. For under $10 I had the skeleton that made a Pac Man birthday happen!
Advertisements
Make What You Need
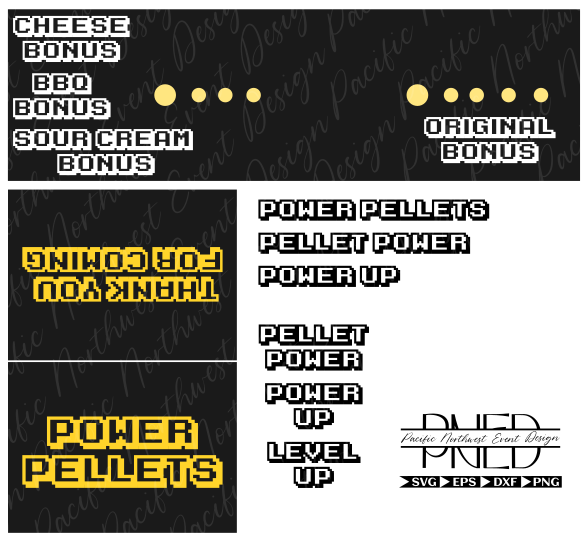
Fortunately for me, Pac Man was made in an era where things were basic in design and easy to create in my design program. And with this font, I was able to make things that my son was excited for and proud to talk about!
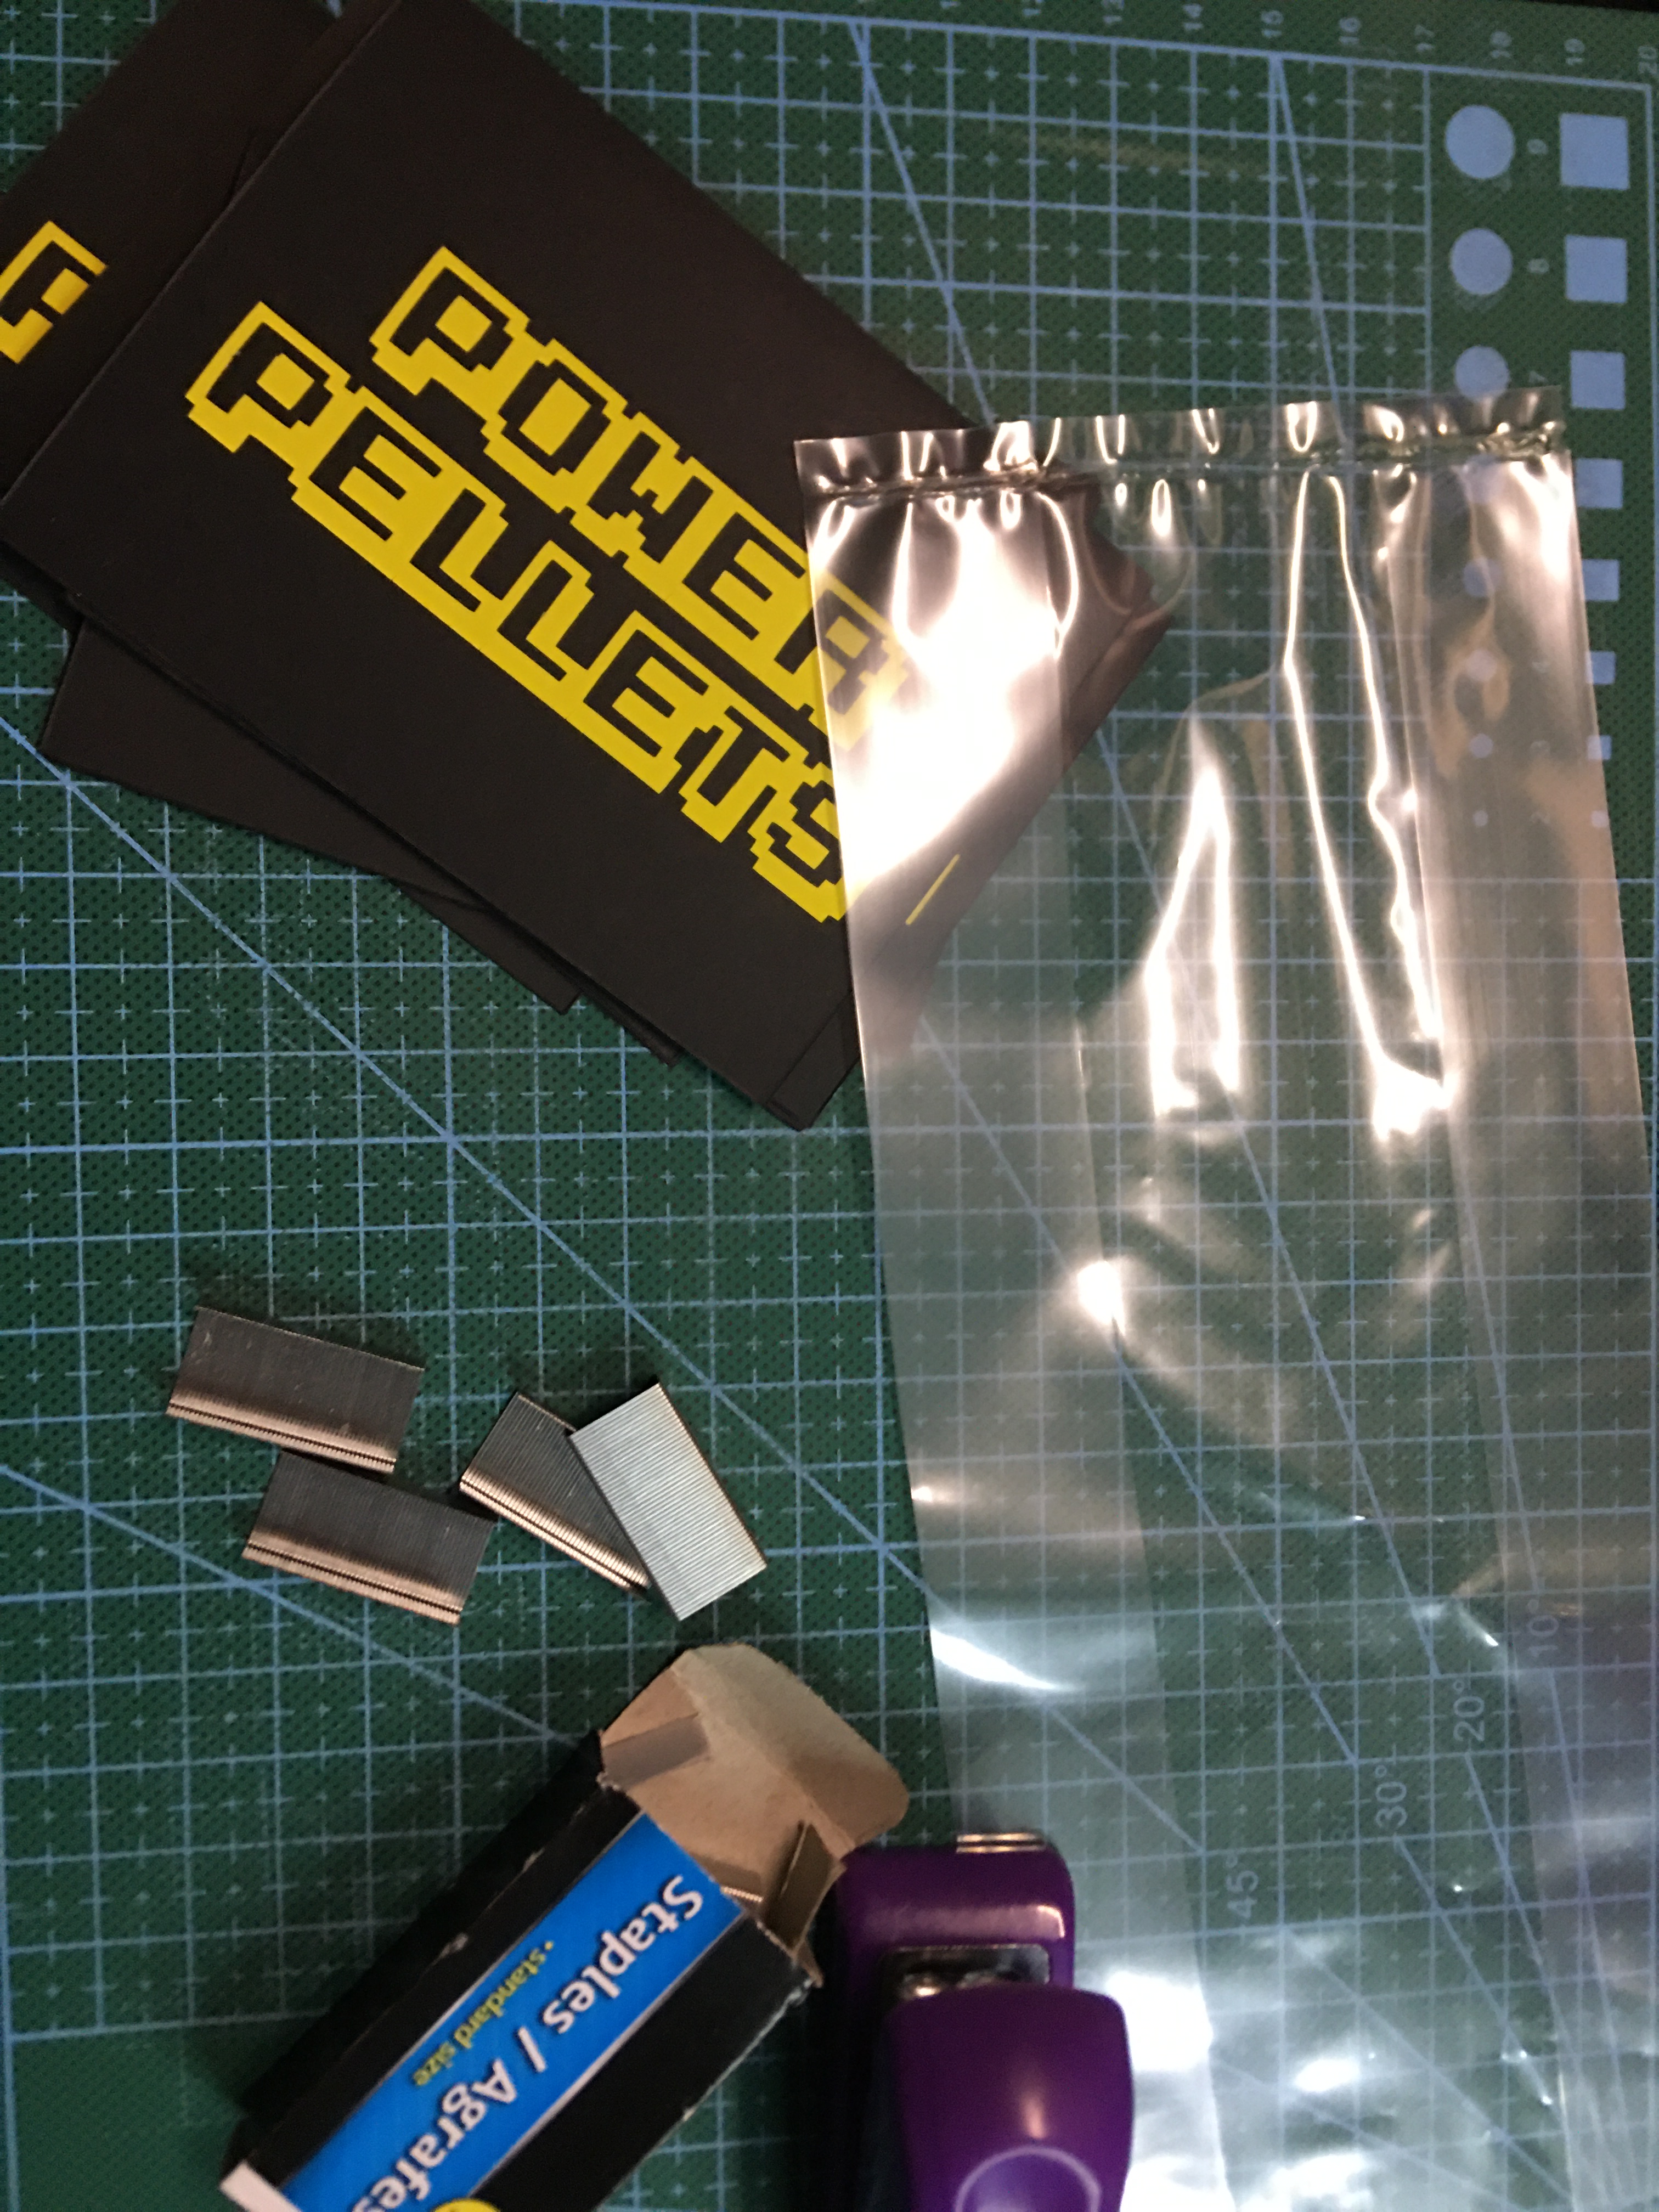
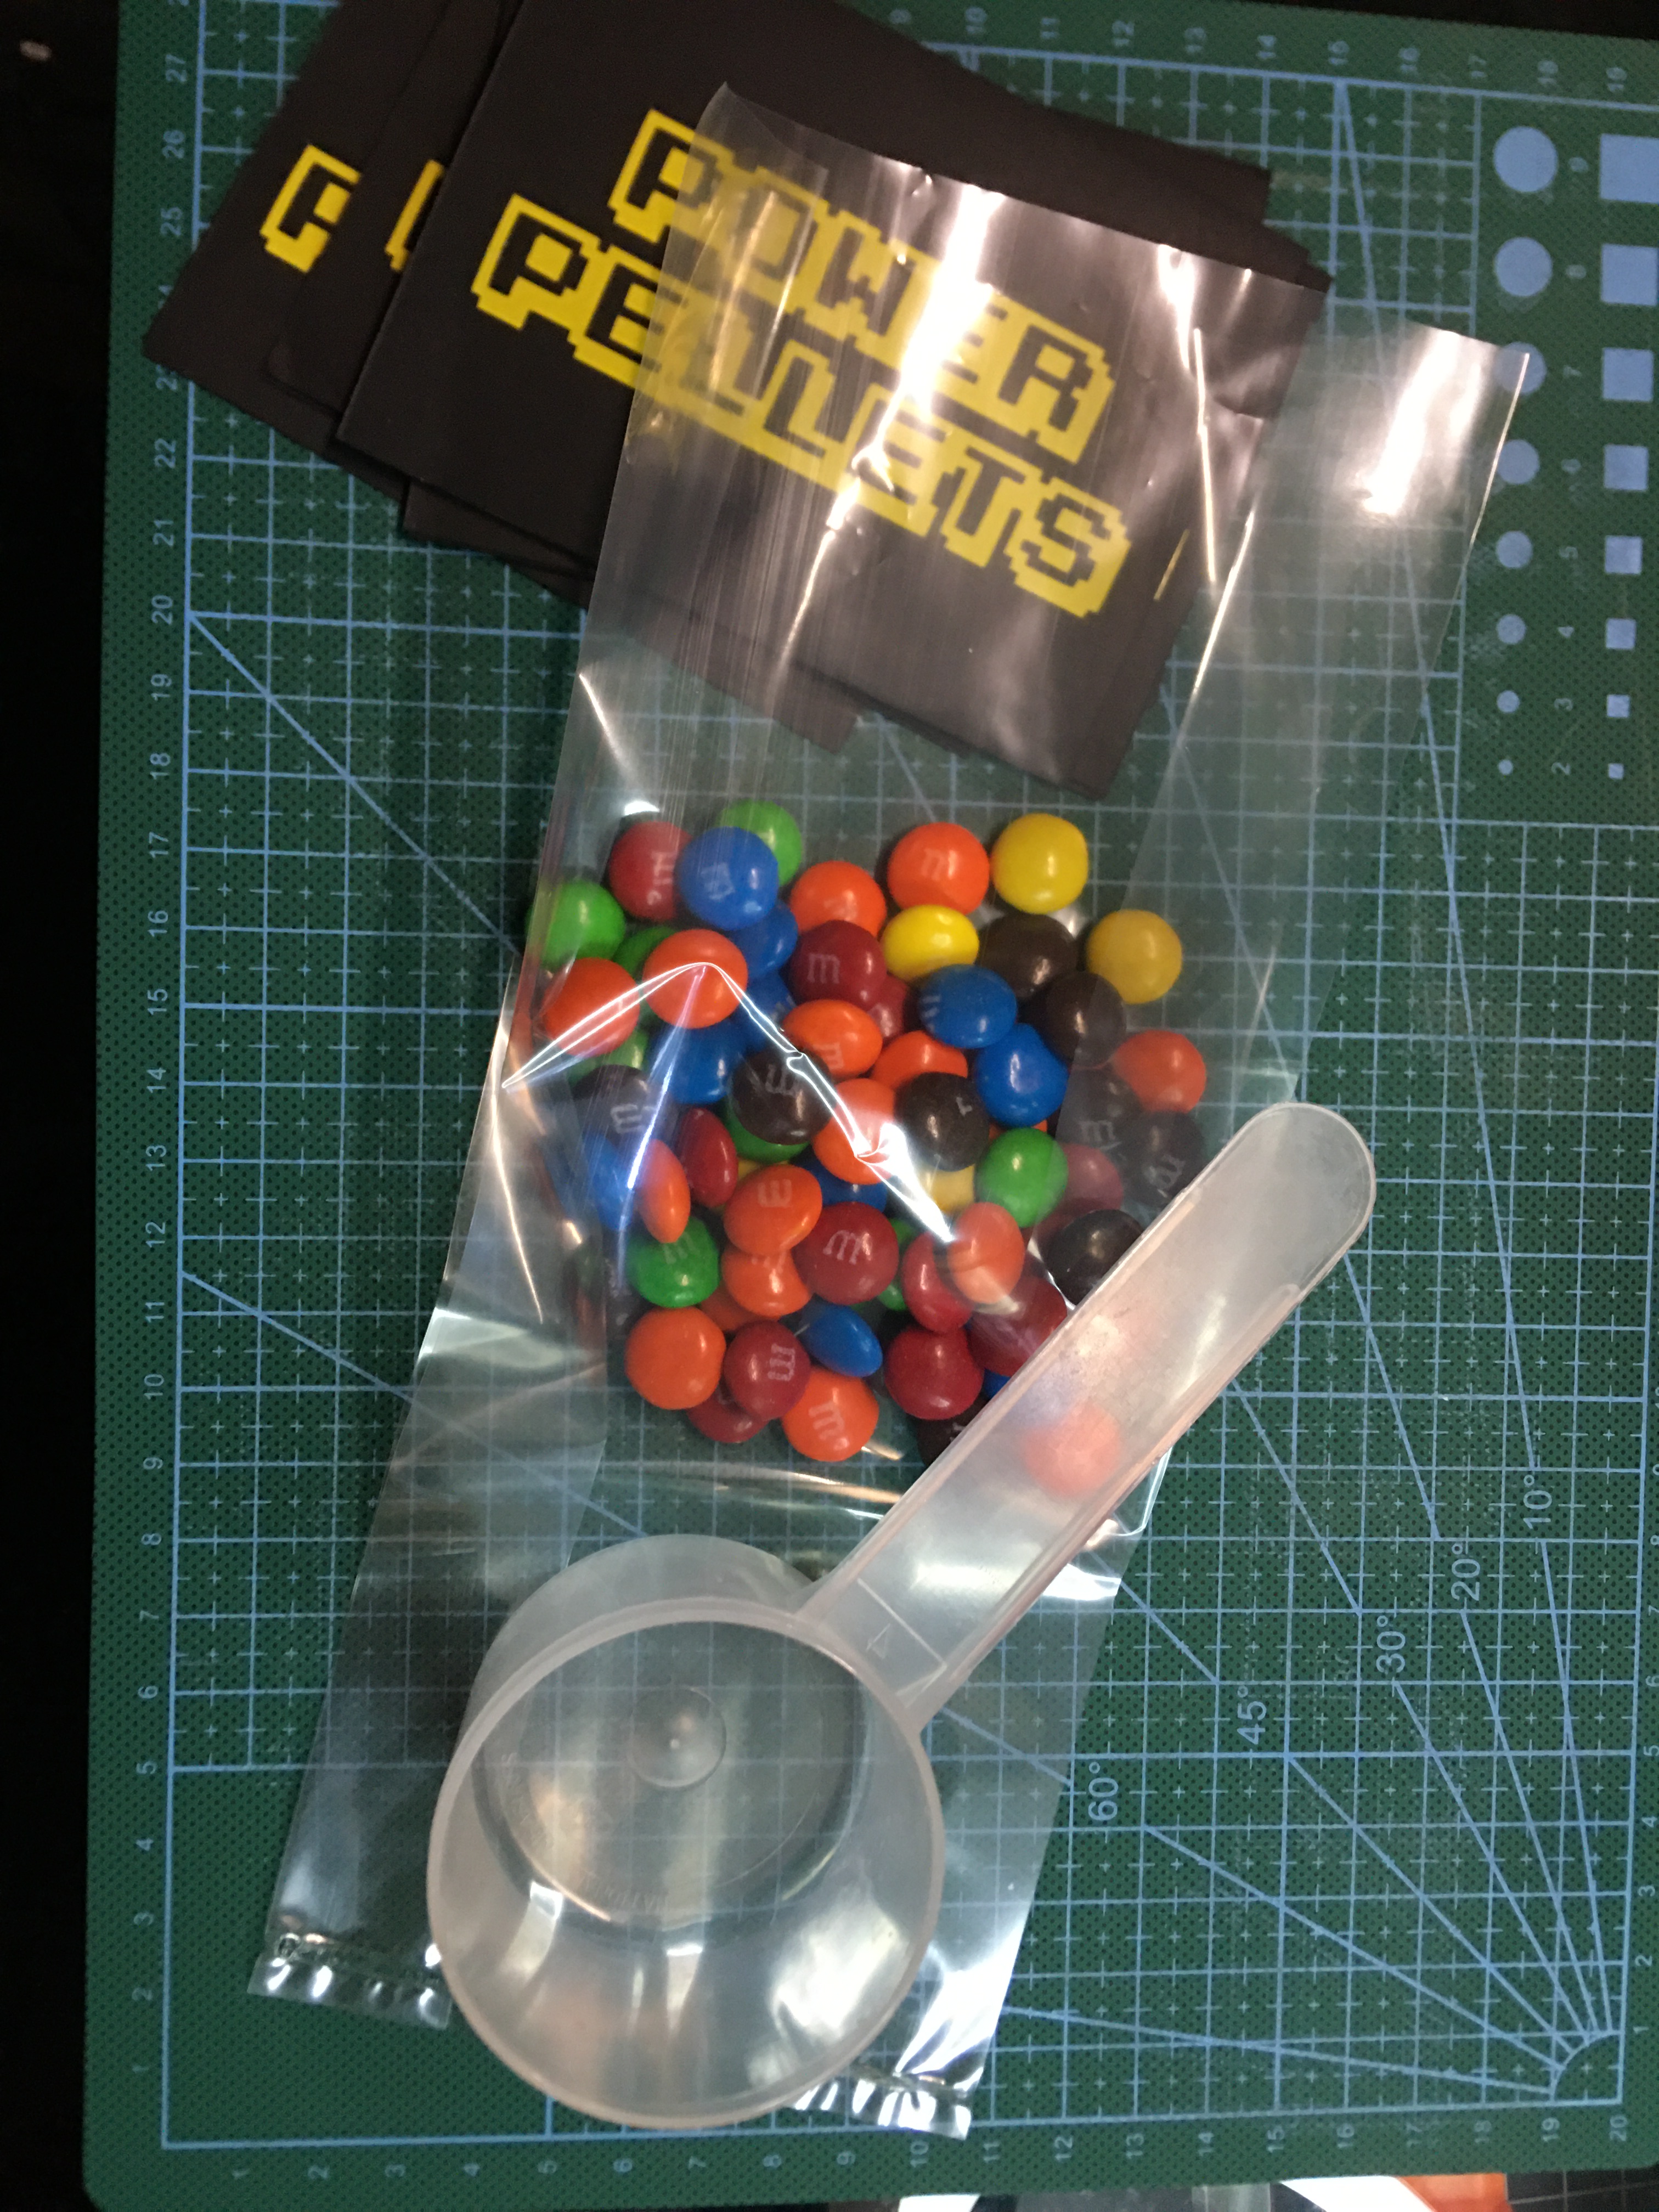
I was very excited when I found the round stick it notes, because this idea came right to me. The yellow M&M’s are perfect power pellets and the other colors are along just for the ride. But with the primary colors being predominant, it fits with the whole theme.
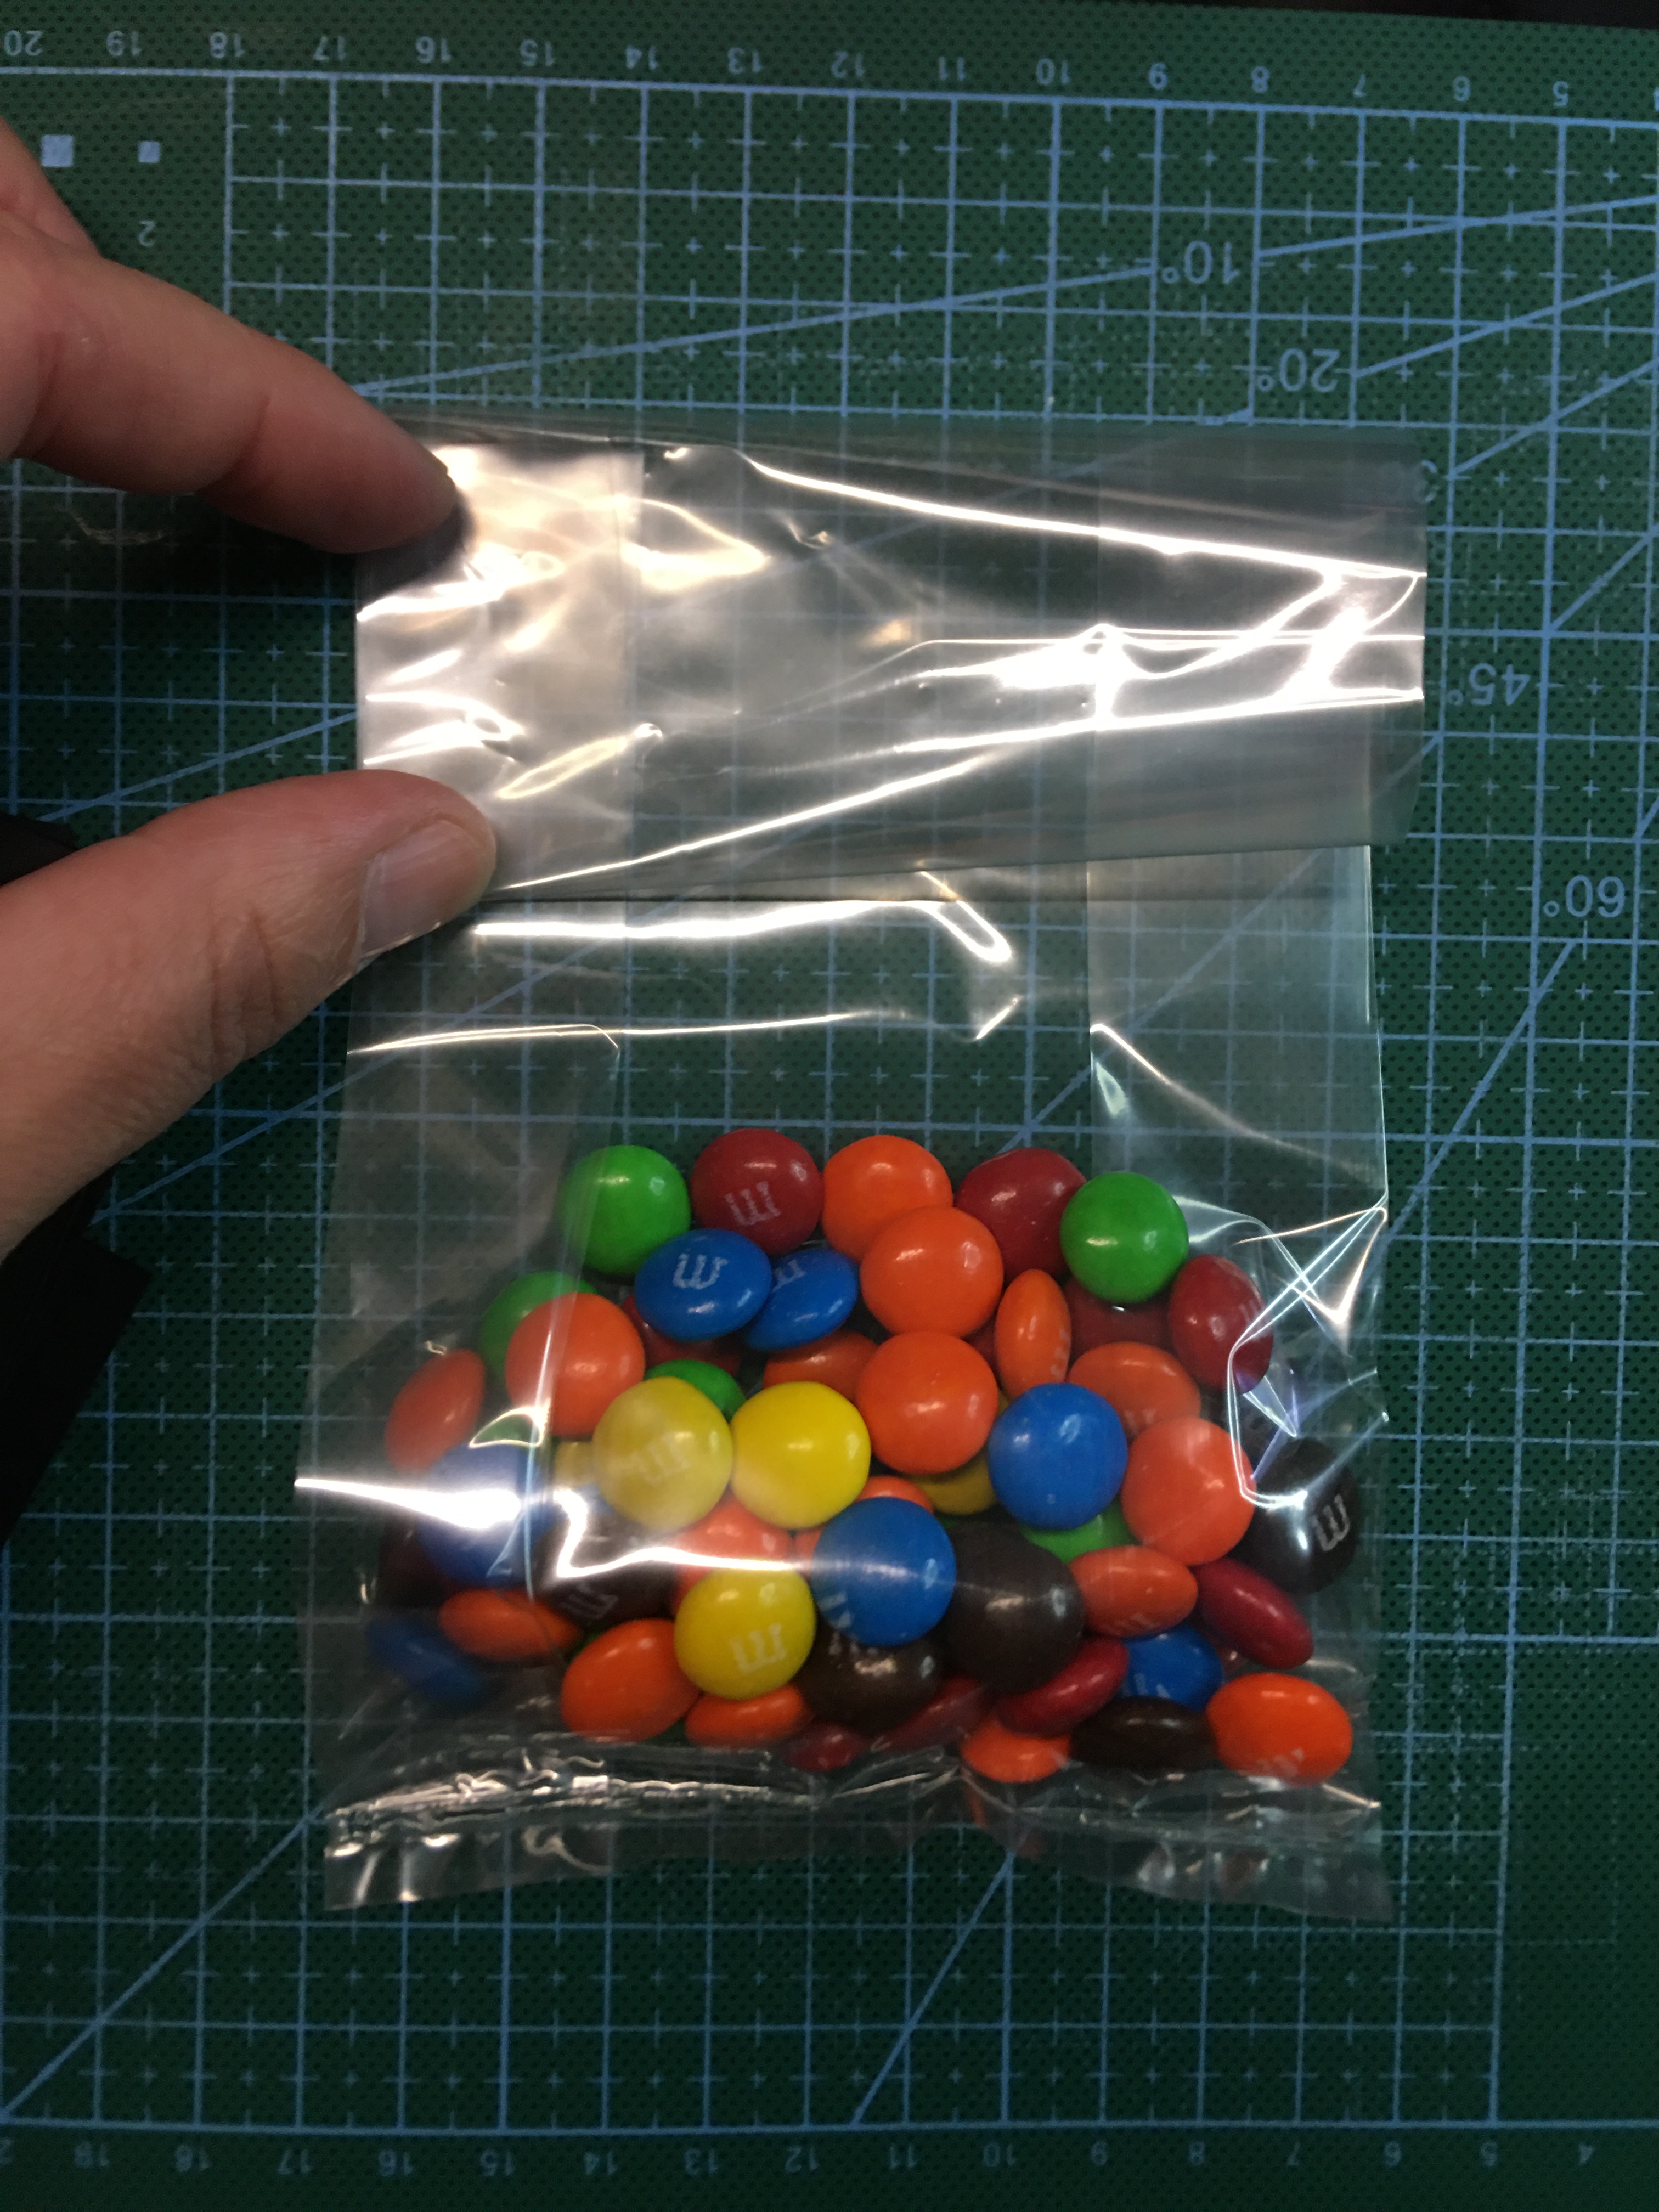
These are super easy to make to! All you have to do is put a scoop of M&M’s in a cellophane bag, fold it over to keep everything in, and staple a label over the top of the bag.
Tip: if you use a permanent pen to color the staples you can make the staples “disappear” and make a clean presentation.
The gift bags I also got from the dollar store, all I needed was a solid colored paper bag. I wanted blue or yellow, but green was all that was in stock. Not a problem, it’s a primary color that was present in the 80’s video games.
I used vinyl here just because it was quicker to make up all the bags this way, not worry about gluing a million pieces, and I could pack the bags right away!
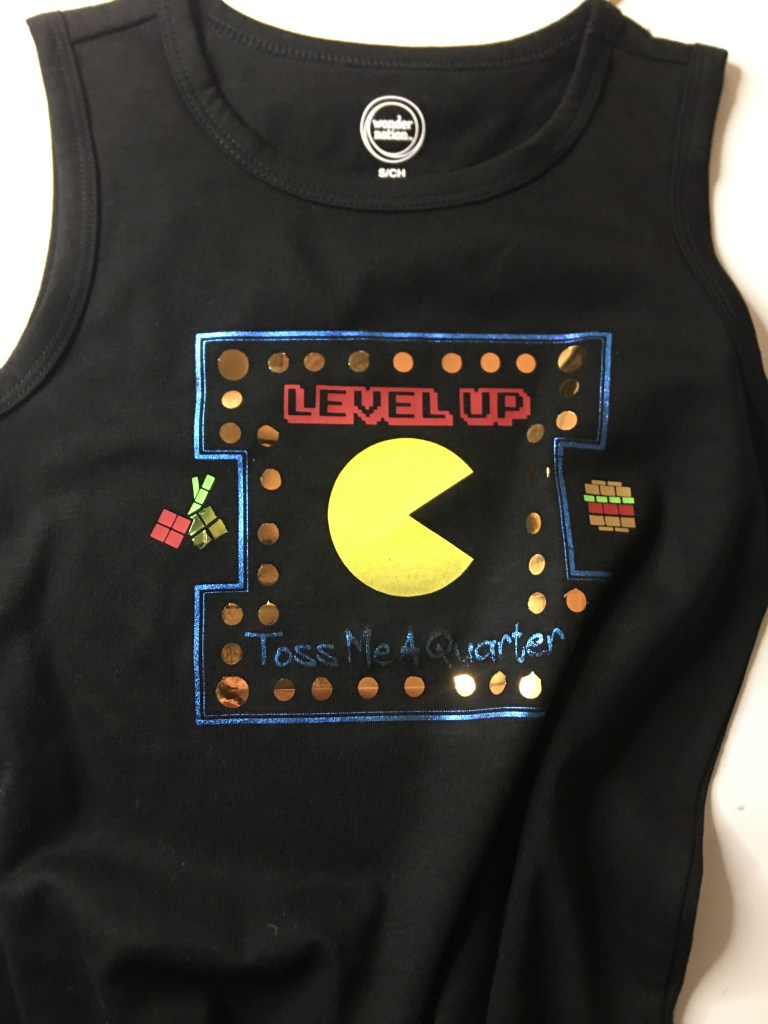
And for my boys, no birthday is complete without a birthday shirt.
I think my favorite part is “Toss me a Quarter” because my husband and I recently took my boys to a retro arcade and I lost count of how many times we were asked for more quarters. This design just brings back so many memories. And the best part is that you can remove this central figure (which is not included in the design for copy right reasons) and put any other character in. This is definitely a blank slate for your 8-bit digital art. Fortunately this character is simple enough to do on your own. In your cutting program take a circle and cut a slice of pie out of the circle with a triangle. If you’re cutting program is able to modify a circle, you can use that feature.
Advertisements
Solve A Problem
Sometimes the ideas that you need to decorate on otherwise obscure theme, is to solve a problem.
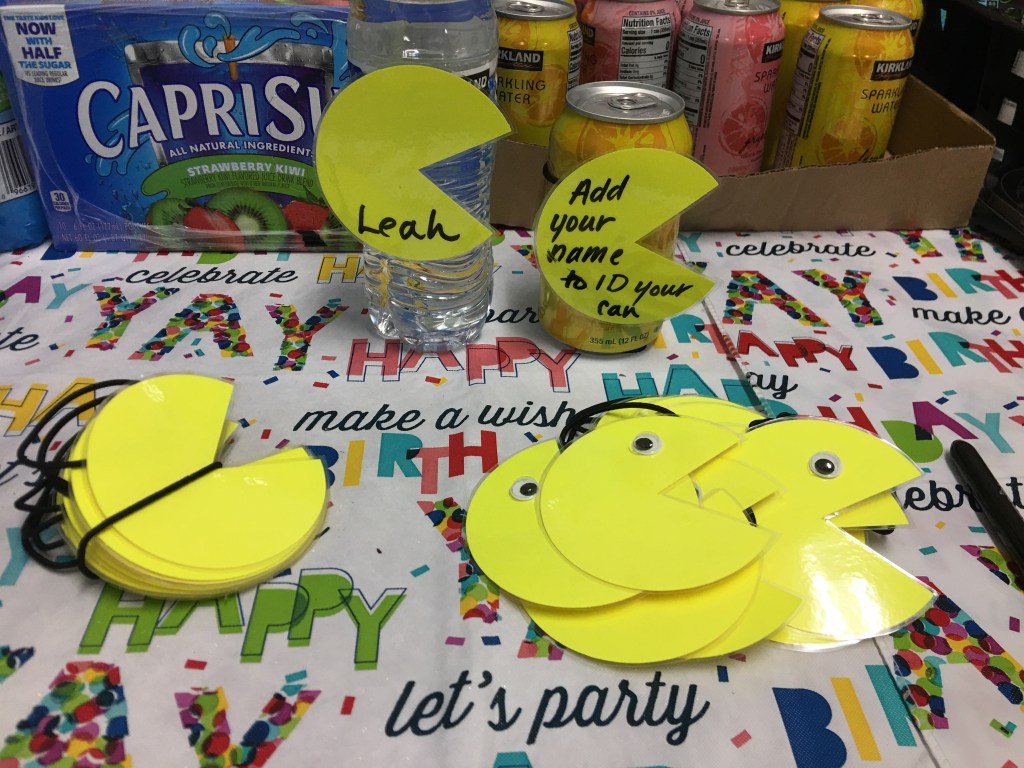
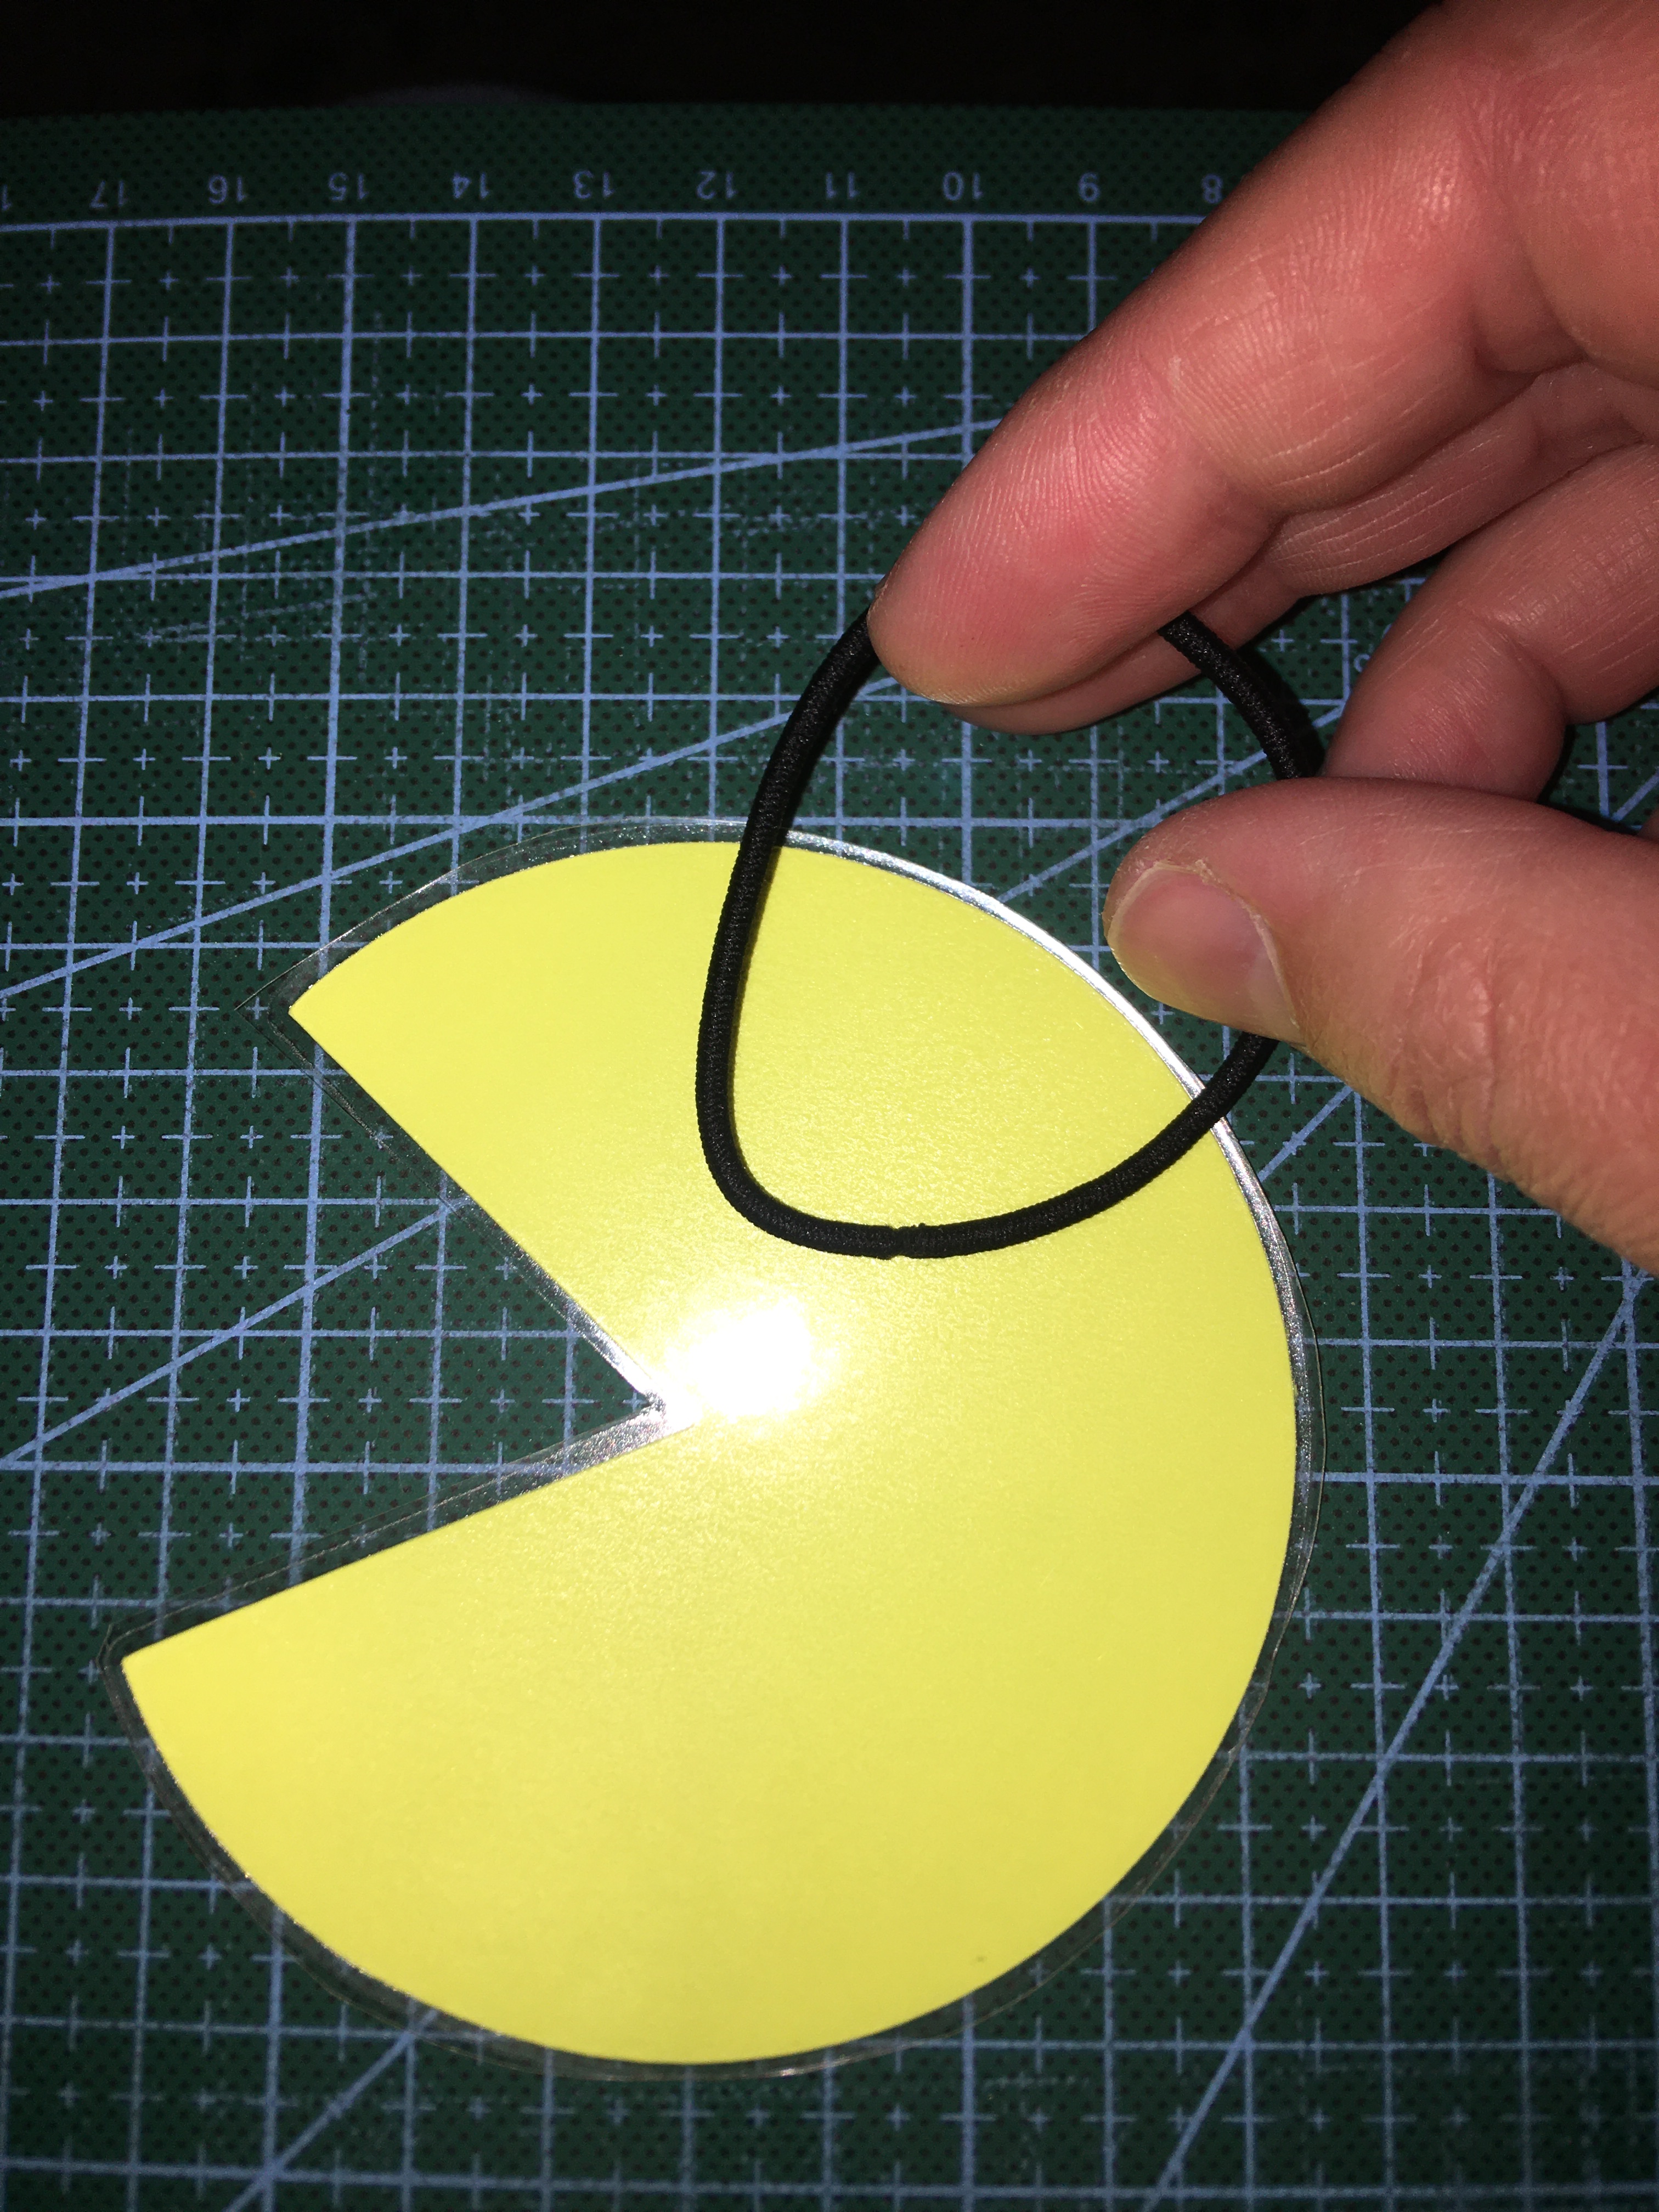
One problem that I’m forever facing at birthday parties and other get togethers where lots of people are around is the abandoned beverage can or bottle. I was able to incorporate my character in one more place by laminating my yellow buddy and attaching elastic to make a Can Label.
There are a few benefits of making these for a character party.
One, all you need is a wet erase pen and names stay legible. And after the party you erase names and you’re ready to go to reuse these beverage labels again in the future.
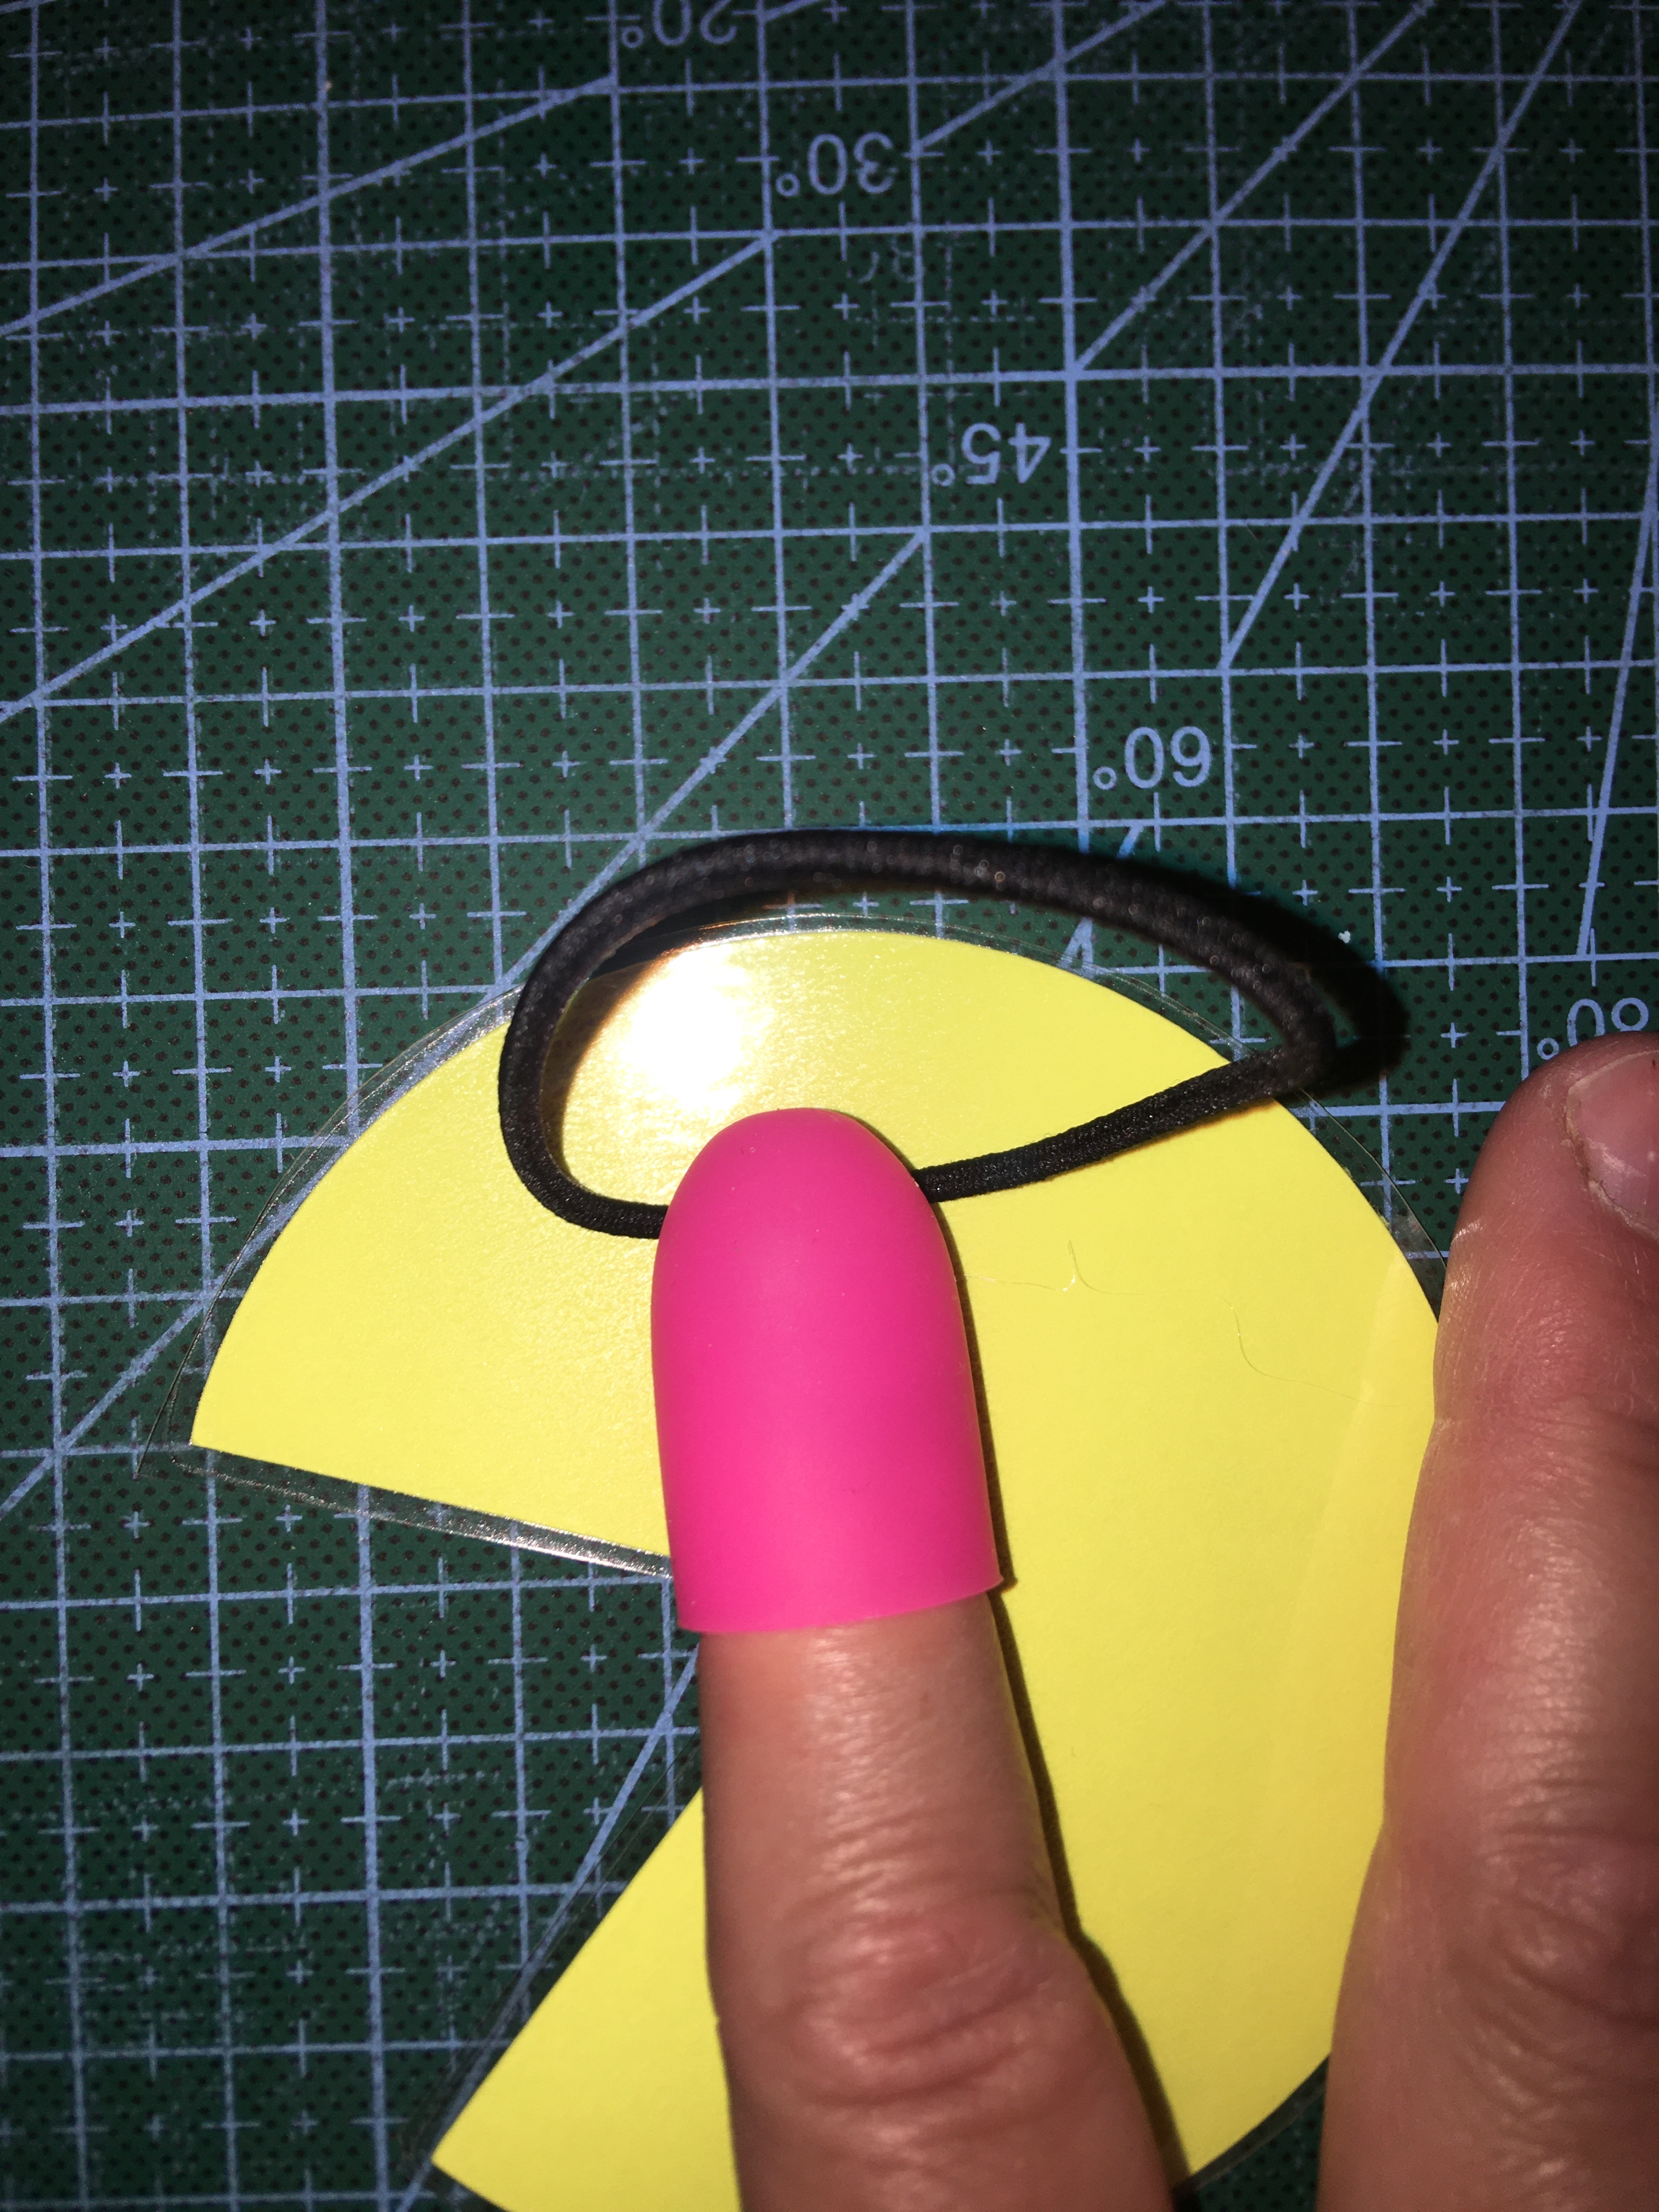
All you have to do is hot glue your hair elastic on (preferably where the seam is, to prevent elastic breakage). With a silicone finger cot, you can flatten your hot glue without burning your fingers.
Two, and possibly the best benefit of all, is if you ever find yourself in a situation where you forgot a hair elastic or yours breaks, this guy is easy to spot in a purse or car floor and your hair needs are over!
This idea will work with any kind of party or event. Bridal shower, cut out a diamond. Baby shower, cut out a bottle.
I know all this information was quick to get through and exciting. I have two more ideas to share with you next week, in addition on tips on how to order a trade mark cake from a bakery who doesn’t make trade mark cakes. So be sure to come back next week for those and a funny story about how this was a birthday party that my boys will NEVER forget!
Can these designs save you time for your next party that you can’t buy decorations for? Get Gift Bag, Level Up, and Arcade Labels here.
Processing…
Success! You're on the list.
Whoops! There was an error and we couldn't process your subscription. Please reload the page and try again.
(This post contains affiliate links to products. We may receive a commission for purchases made through these links.)
It never fails that you find something very cute to give something, but it comes with non-removable art that just not fit with what you want to gift or make for yourself. Maybe it is art that isn’t your style. Maybe it is a design that’s so cheap and is exactly the reason why you find it at the dollar store.
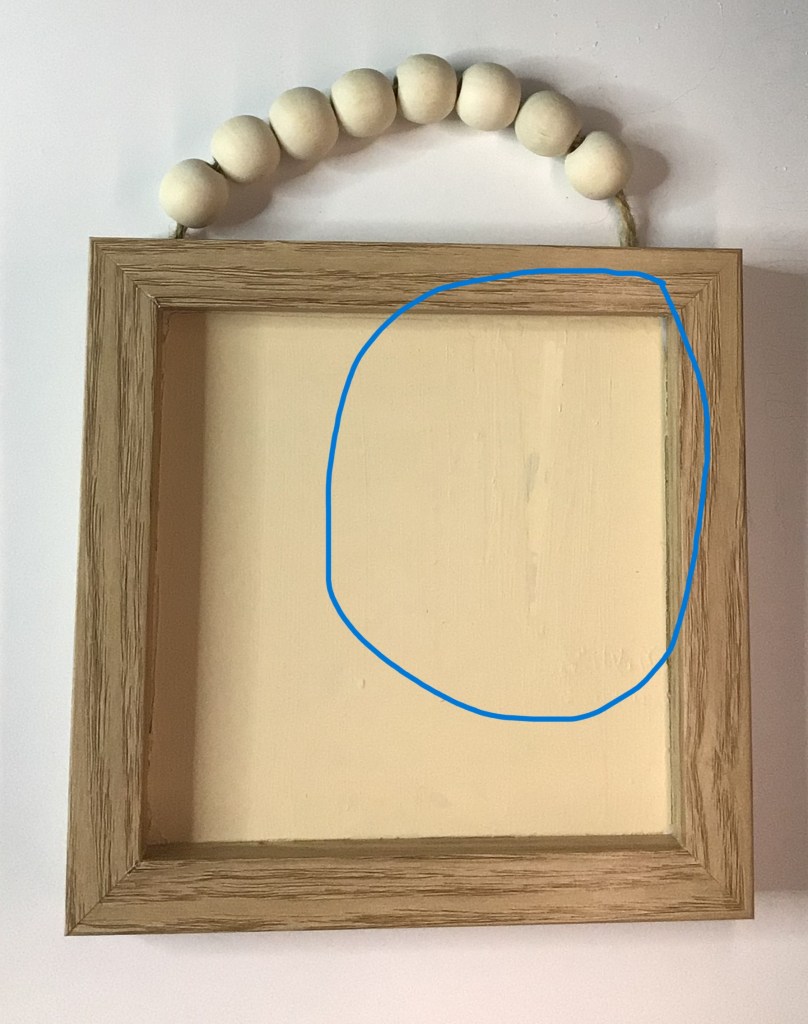
For example, I found this cute frame.
I found that the size was cute. And I absolutely loved the beaded clutch like handle. Best of all, I loved how the frame and handles were very much reminiscent of unfinished wood. This was the perfect blank slate that I could do so much with!
The negative mark was the non-removable art. Truth be told, I almost put this back on the shelf.
But here is how I turned this dollar store product into the perfect blank to make a personalized present.
First you paint over the non-removable art
Especially if you like the current state of the finish of the frame you’re working with, you want to grab some masking tape and tape off the frame to protect it from the paint. It doesn’t matter how handy you are with a paint brush, you really do want to take the few extra minutes to tape off the frame. It just takes an unexpected sneeze or someone sneaking up behind you, knock on the door, ring of the phone, or that your brush slips.
Apply the tape on the inside edge of the frame. Cut down the tape to the corner of the frame, so you can fold the edges over.
Once the frame is taped off, take your paint of choice and cover the original art.
I used Waverly Cashew Chalk Paint. Because this color is so pail, it took about 4 layers to cover up the dark original colors. The important thing to remember is that you always want to paint with thin layers. First they paint dries quicker. Second, you can apply cleaner layer lines.
If you choose to put on a thicker layer of paint to compensate for dark colors, it just takes forever to dry before you can add successive layers of paint.
Once the paint dries…
You have the choice of what you will do next. You can apply a stencil to paint on your new design. Or there is the option of hand painting a picture.
If you are done with all painting options, you’ll want to remove the tape.
Removing Tape
Depending on who you talk to, there are a handful of different theories on which time to remove the tape.
OPTION 1:
Some crafters say, remove the tape while the paint is wet. Yes, this method prevents peeling up the paint that you just laid down. The problem I have with this method is that if the paint is wet on the surface, it’s wet on the tape. So you have to pay attention to the paint on the tape as you pull it up:
Paint ending up back on your blank because of the tape flopping over backwards (or paint side down) on your frame.
Paint ends up on your fingers. Sometimes you forget, or think you avoided paint transfer, and then you find out later you had a small drop of paint on your finger and now you have a paint finger print.
Paint ends up somewhere else on your, like your shirt or pants.
OPTION 2:
Other crafters advise that you remove the tape when the paint is dry. This method is great for preventing all options of potential paint transfer. However, the problem with this method is that sometimes the paint adheres to the tape and pulls up off your project when you remove the tape. This is especially the case when the original surface is smooth or plastic.
OPTION 3:
A third group will tell you to wait for the paint to mostly dry. This is the happy medium to the first two options.
I’ve never been able to make OPTION 1 or 3 work for me. If there’s any wet paint, I’ll somehow find a way of getting it on me or transferring back onto my project. So my go-to is OPTION 2, wait for the paint to dry.
TIP for OPTION 2: right before you remove the tape, take an exacto knife, and run the blade along the bottom of the masking tape all around the frame. This will effectively separate the tape and paint.
What if my paint strips off with tape removal?
Have no fear! Take a breath and don’t panic. This is an easy fix.
The first thing you’re going to do is build back up your layers of paint on the surface where the paint stripped off.
TIP: To create the illusion of no paint stripping, keep from this new set of corrective paint layers from overlapping on to the original dry paint that remained intact.
Once you’ve built back up the layers of paint that had peeled off, you’re going to add one more layer of paint over the original and new paint. This will cover over any potential seams in the paint.
The best of all is that if you are going to add any decal over this paint, it is possible for the decal to cover over any potential seams. If you’re using this as a shadow box, the items you place in front of the painted back ground will cause enough shadows to distract from the seams.
This is an example of where one less layer of paint can show the difference of your paint patch job. Make sure to do the same number of layers, plus an additional layer over both original and new paint.
Adding decals over the background paint with transfer tape
I want to mention one more potential problem you can face, with paint peeling, with a project like this. Whether you’re adding vinyl or a decal with a clear piece of transfer tape, you will want to be mindful of this transfer tape. Even if the transfer tape has low tack, it can still find a way of holding the paint more than the paint is holding on to the project surface.
The way that I have gotten around this problem is that I think of the transfer tape ONLY having contact with the vinyl or decal, and hold those elements in their place for application. I go out of my way to NOT press the transfer tape down onto the paint.
Instead, what I do is gently place the design down on the painted surface so there is absolutely no adherence. The bonus to this is that you can use a weeding tool, palate or other tool to nudge the design center (or any other location) on the frame. Once the decal or vinyl is exactly where I want it placed, I only press down on the decal/vinyl with my finger. The pressure from your finger is enough to get the decal/vinyl to adhere. And once your elements are all pressed, you can then peel off the transfer tape without it pulling off your paint!
Can’t find a frame like this, but want to make one?
I have no idea if I will find this beaded frame again at my local dollar store. In fact I would be surprised if I ever did. There’s something about the cute things in that store chain, that you pretty much only find in stock one time.
The good news is that this is an easy frame to create!
Originally this frame has a 4 x 4 inch work space. But you can select any shadow box of any size.
You can make the wooden bead clutch handle by using a thick jute twine and stapling it to the frame.
Yes! This handle is literally stapled to a mini shadow box frame.
If you want a supply list, to make your own frame, here are the items you will need:
Wooden Beads: 16mm (Thumbnail size), 20mm (US Quarter is 24mm)
Staple Gun (if you choose to use a standard desk stapler, make sure that you use several staples on either side of the twine. The twine can be reinforced by using wood glue and gluing to the shadow box.)
Scissors
Paint/Stain (optional–if you want something other than unfinished wood)
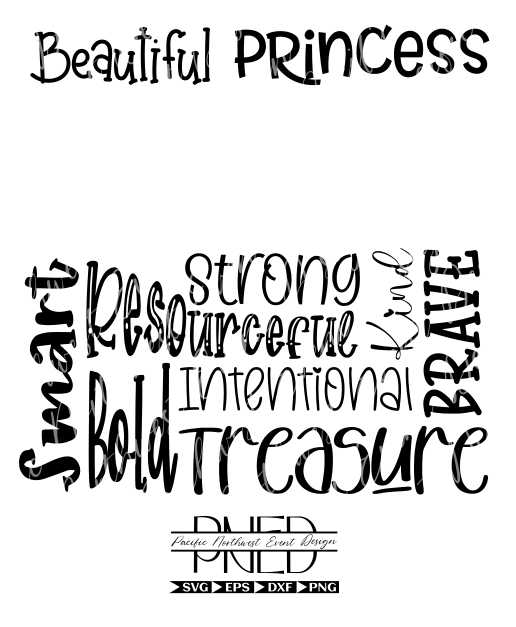
I hope you have just as much fun as I had making this Affirmation Gift!
The Baby Affirmation cut file used for this project can be found in my shop here. To personalize with the child’s name, just select your favorite bold font and place in the provided blank space.
Processing…
Success! You're on the list.
Whoops! There was an error and we couldn't process your subscription. Please reload the page and try again.
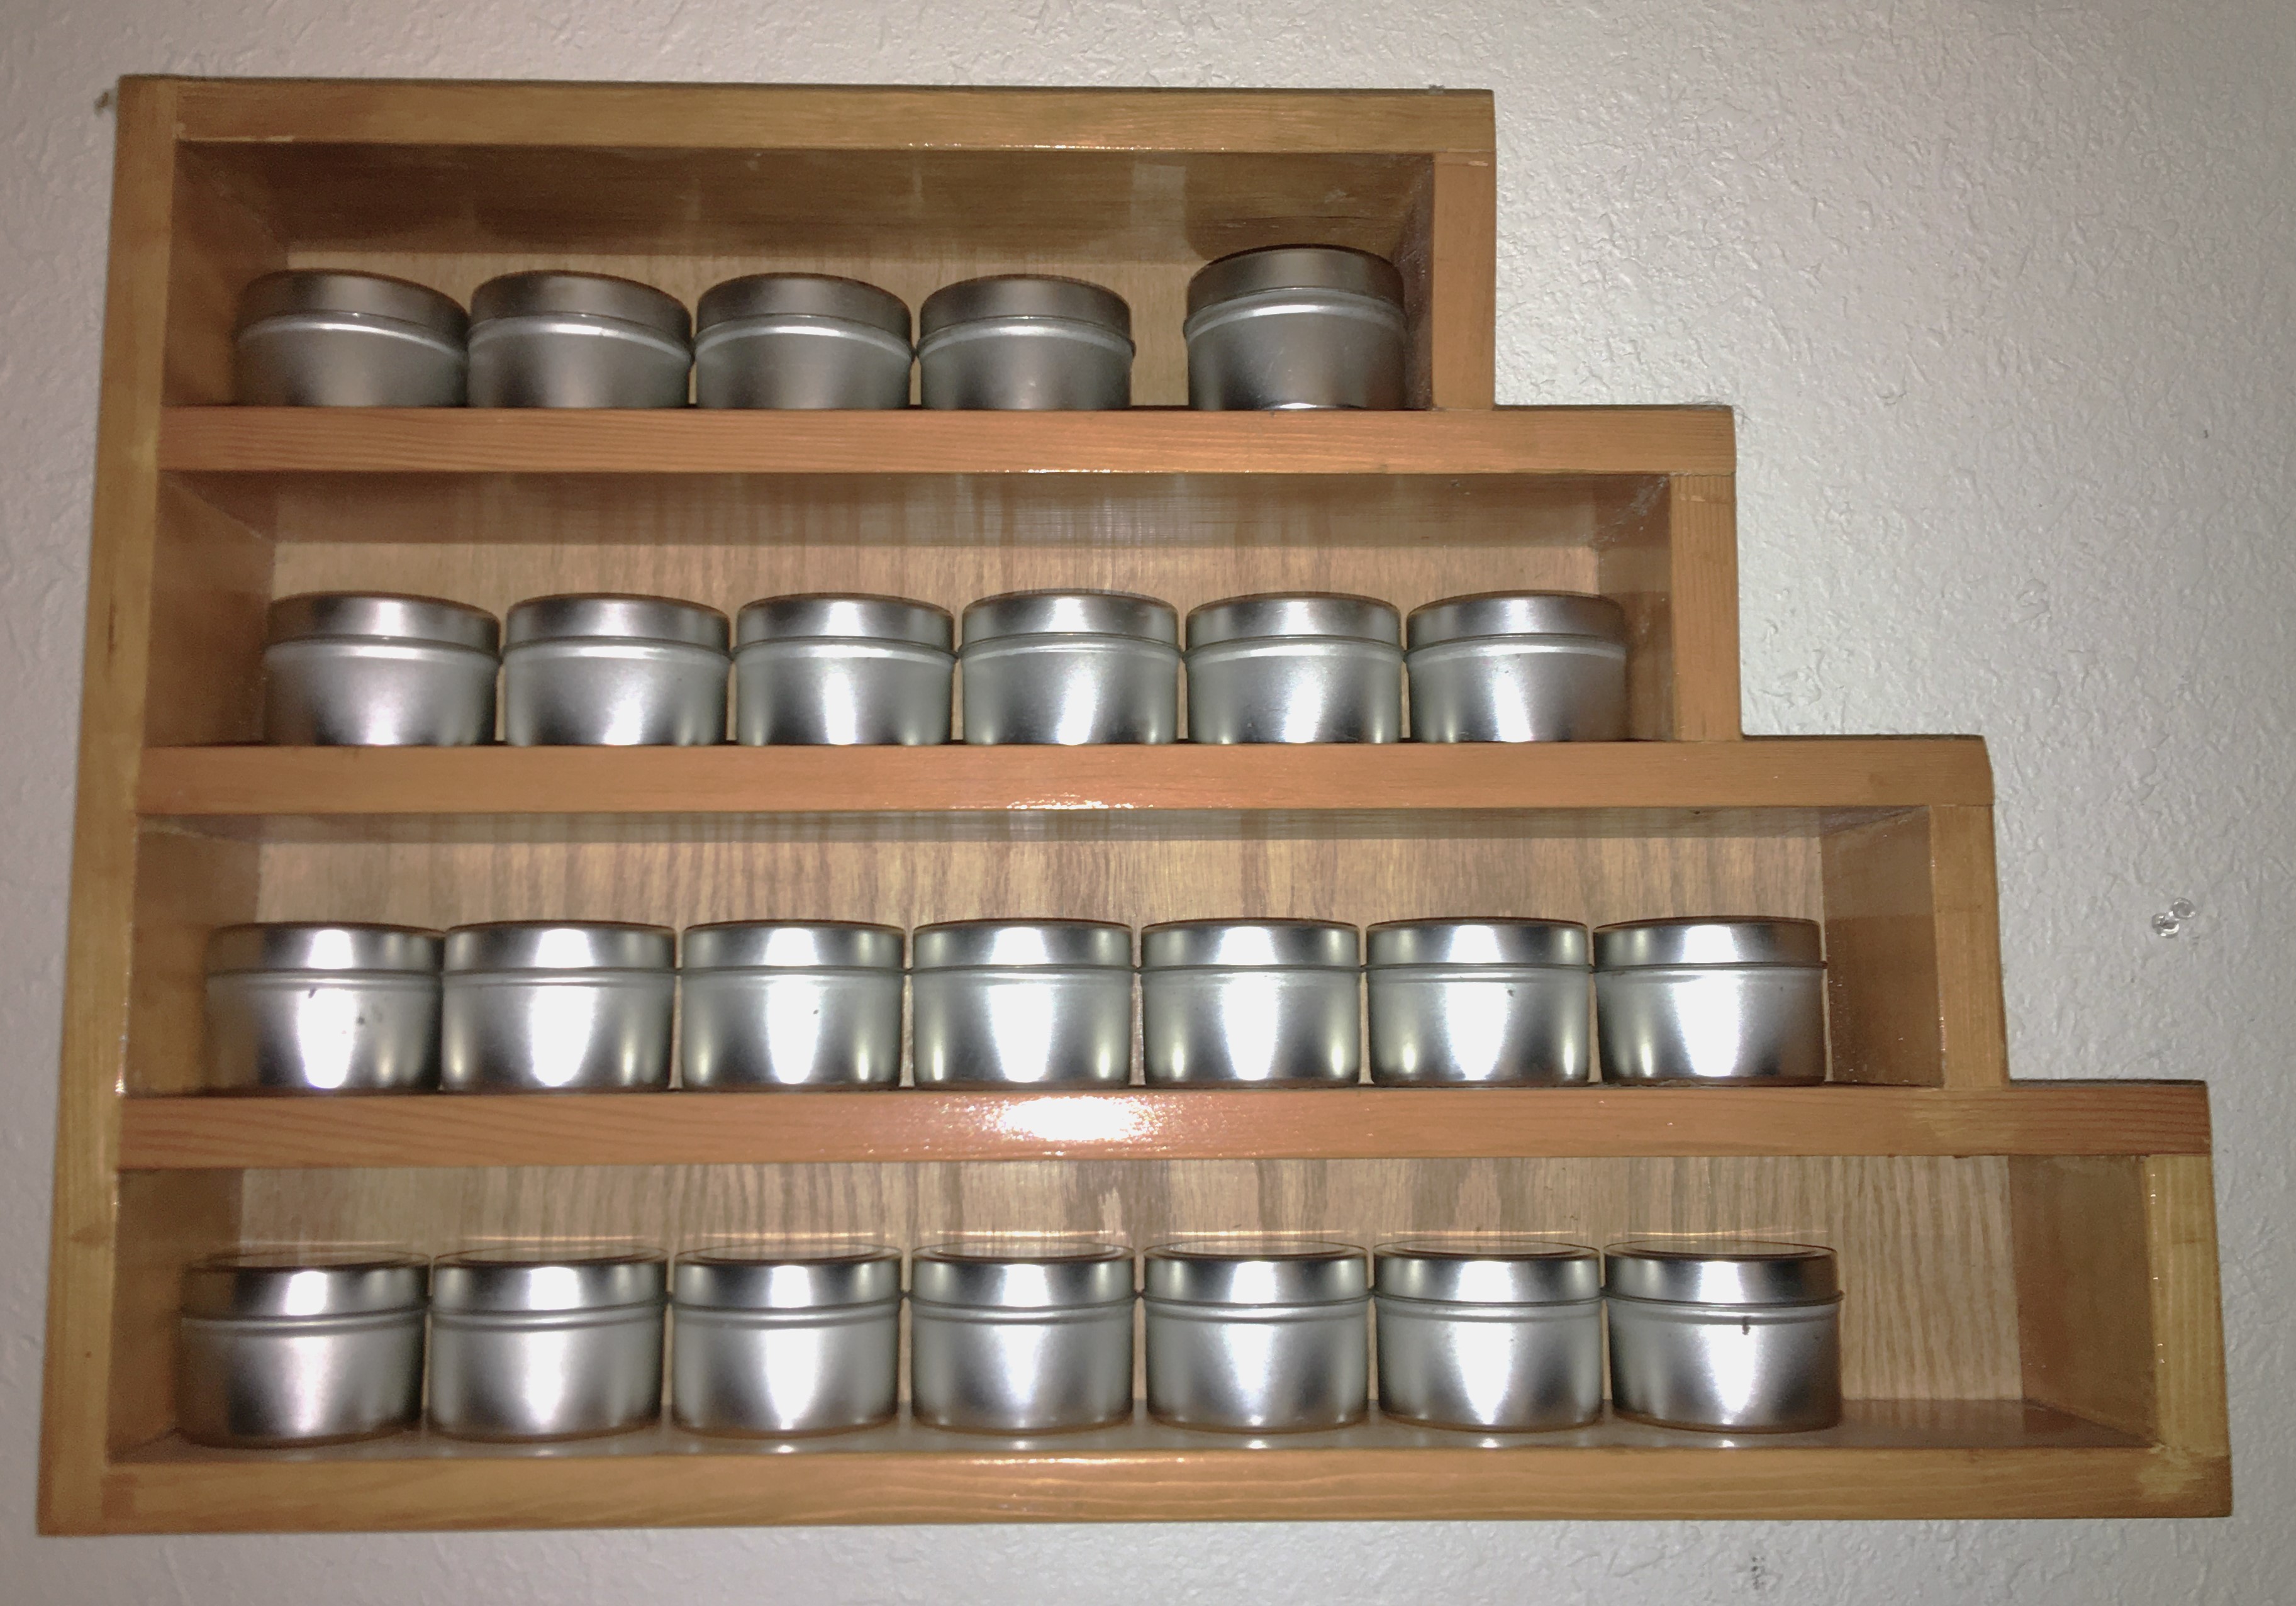
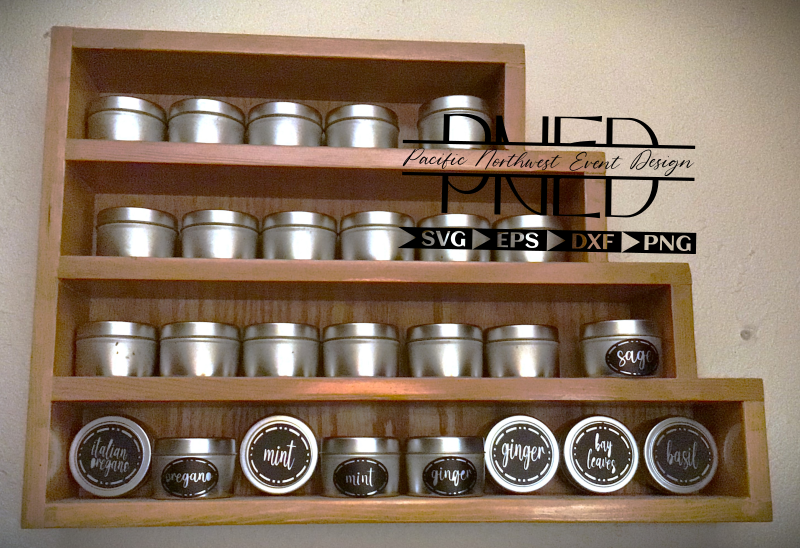
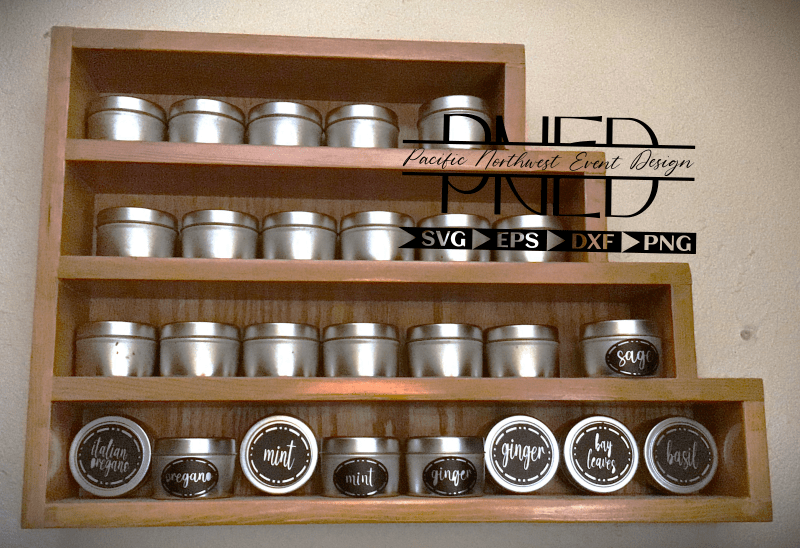
Long before I met my husband, his father had made and gifted him (and his siblings) a handmade spice rack. For well over a decade, we had intentions of displaying this gift and filling it with spices. However, the convenience of buying spices really took away the need of using the tins.
A few years ago I played around with my dehydrating skills and found new seasonings to cook with that I never thought of making.
I love mushrooms. There’s a gentle earthiness that comes with using them in a recipe. And when your family doesn’t go out of their way to eat mushrooms, I sneak them into sauces by dehydrating the mushroom and then grinding them down to a powder with a spice blender. Now I can have the benefit of having the flavor profile without my family seeing it and making their picky faces.
My absolutely favorite “spice” to cook with is actually butternut squash. I roast the squash in my oven. When it’s finished cooking I remove the flesh from the skin and mash it. From there, I take the mash and spread it across the fruit roll up tray of my dehydrator. Once the mash dries out, I also put that in my spice grinder and turn it into powder.
Here’s the absolutely most beautiful thing about turning your vegetables into powder! If you have a child or family member who turns their nose up at even the mention of vegetables, you turn it into a powder and season your food with it and your family has absolutely no idea that they are eating vegetables!
Not only this, but if you’ve made sauces before you are fully aware of how the traditional flour and corn starch have no benefit of flavor. You have to remember to cook down your flour. And if you use too much corn starch, and have sensitive taste buds, you can actually taste it. So there’s the issue of the texture; corn starch has a different texture and appearance than flour. But…instead of using these two traditional thickeners you can use dehydrated vegetables.
I prefer using potato flakes over flour and corn starch hands down. You can use potato flakes minutes from finishing your cook time. So if you forgot to cook flour to make rue, you have potato flakes. If you hate making slurry with corn starch and then wait for it to set, use potato flakes. I’ve had slurry take anywhere up to 10 minutes to take effect. But with potato flakes, it’s generally set in about two minutes.
That is my #1 mom hack of thickening a sauce, stew, or soup.
My #2 mom hack is using butternut squash instead of sugar!
If you’ve made your own tomato sauce before, you know the debate among the community: use sugar or not. Sometimes you need that sweetness to balance out that flavor profile. However, if you’re trying to eliminate sugar, or keep it to a minimum, what do you do?
You add butternut squash powder!
It’s sweet. You have an added vegetable in your meal. Plus, you have the added bonus of having yet another thickening agent that is healthy for you.
Advertisements
You would think, for as much as I make seasoning and thickening agents from vegetables, why haven’t I grown my own herbs yet?
It wasn’t until this year that I set out, with intention, growing herbs. And it was a great thing that I focused on herbs this year.
A family member tested positive this year with the strain of covid with assaults the gastro-intestinal track. But I had fresh herbs on hand that are anti-viral in nature, giving your body the building blocks to strengthen your immune system to do its job that it was designed to do.
Bay leaves are anti-viral, good for your body no matter which virus your body is fighting.
Lemon balm is also an anti-viral, but its properties are good for the whole coronal family of viruses. So it’s good if you test positive or if you’re fighting off the common cold (it’s from the same family).
So with these two herbs, and my homemade chicken stock, I had the building blocks to make a broth for this family member. Because their GI was being affected, of course food is sounding pretty horrible compared to other strains. To this broth, I added other herbs that I knew were beneficial for delicate GI and combating nausea; ginger, mint….
I’m still working on the recipe to making it recreatable. But I know I’m on the right track because this family member asked me to make a second batch of broth, because it tasted good AND it soothed their stomach so they could get some nutrients into their body.
The whole point of the broth was not to cure them from the virus. The whole goal was to get the nutrients into their body for them to get their body everything they need to fight the virus. Our bodies are amazing things. They’re meant to fight off disease. We just need to give them the building blocks to do their job.
And that is what is amazing about growing a garden. Whether you’re growing food to put on the table or growing herbs to make food taste better without all the extra ingredients in the now $6-10 bottles of seasoning at the store (sometimes more, and if they’re on the shelf).
Consider what it is that you can grow for your family. You may not have the yard to grow a garden. But with a sunny window, you can grow a few easy low maintenance herbs that are good for fighting colds and viruses. I buy bay leaves, because I don’t have the space for a bay tree. But Lemon Balm can be grown in a pot in a sunny window. And the mint family (which lemon balm comes from) is prolific and among the easies things you can grow. Plus it’s something that you plant once and it will keep coming back and grow.
Please comment below with the herbs you grow or with any hacks you have for using vegetables in a new way!
The file, Seasoning Labels, I used for these herb layers are now live in my shop here. The file comes with the labels oval in shape. To create these in the round, I just resized the oval into a circle. This font is amazing for retaining its shape!
Processing…
Success! You're on the list.
Whoops! There was an error and we couldn't process your subscription. Please reload the page and try again.


Leave a comment