Don’t Waste That Film

Earlier this week my son grabbed my phone and asked me to smile. Of course, out of my mouth came the standard mom response, “why?”

That one moment flooded me with memories.

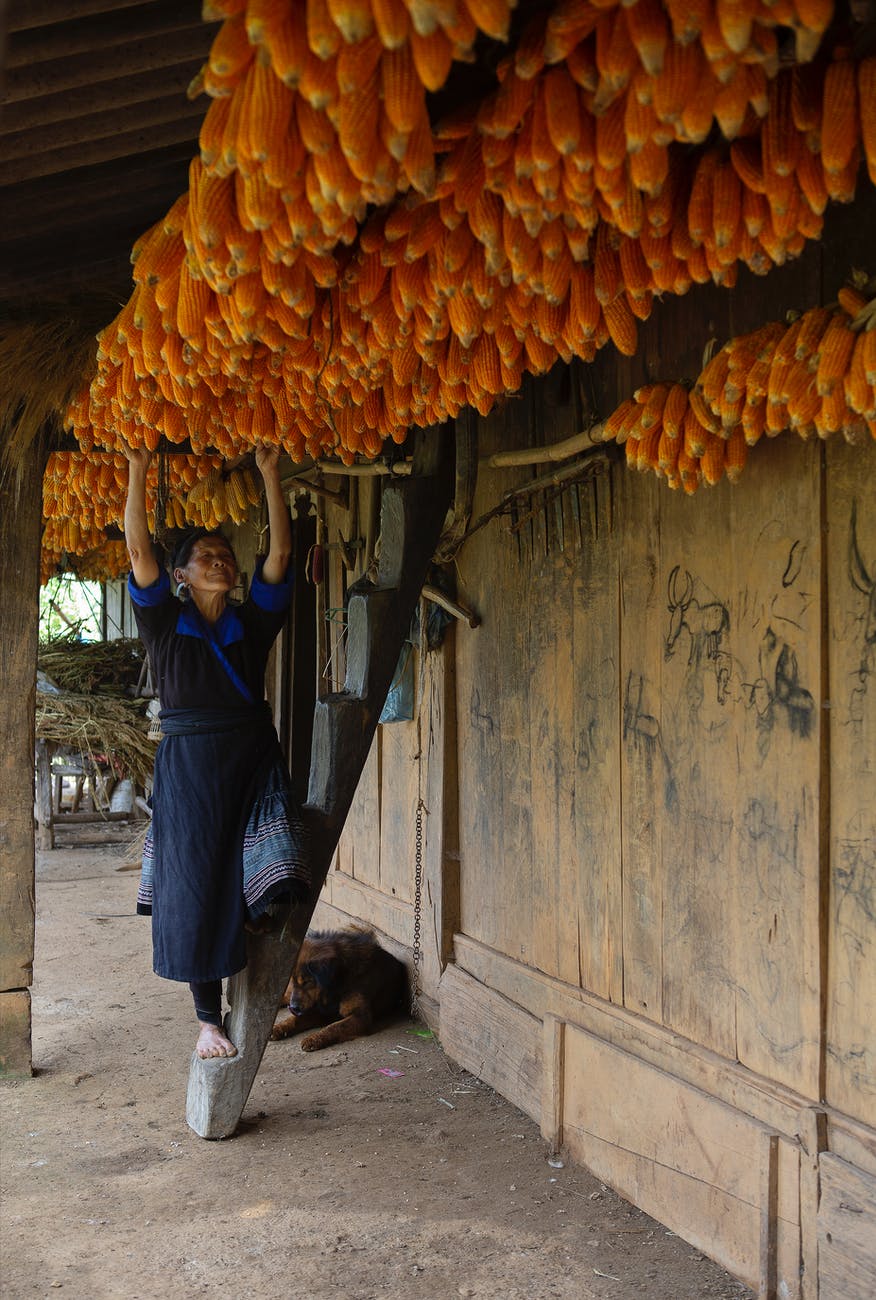
Flashing through my head were the countless images of the photographs that my grandparents took on their road trips. Images of the photographs that were taken during vacations while I was still a child.

If you’ve lived through life before the digital age, I know you remember all the moments where you questioned if the shot you were taking was the one that you wanted to take when you only have 24 frames on your roll. And how excited you were when you had any surprise bonus shots after you took your 24th picture. The pure excitement of what you were going to take a picture of, what you thought you would never be able to shoot.

There was one specific image that came to mind when my son told me to smile. It was the one picture that I took on a childhood Disney Land trip. We were done at the park for the day and waiting for the trolley to arrive to take us back to our hotel. My mom sat on the curb, talking with my dad. She took out her coin purse and had just pulled out her key when I snapped my picture.

We were all excited to get our pictures back from being developed. Our family tradition was always to sit down together to look at all of our memories that we captures. When we got to my roll of film, my mom’s response to the picture I took of her was why did I take that picture? Why did I waste that one frame?

I don’t remember my response. I probably just shrugged and said I don’t know.

But here is the thing. That picture stands out in my mind to this day, because it was a candid moment in life. It wasn’t posed. It wasn’t staged. It wasn’t the fake smile while you grit through your teeth, “take the picture already.” This was a picture of my mom in a moment of being my mom.

I don’t know if my son said anything while my mind went down memory lane. But I stopped tying my son’s soccer cleats and smiled for his picture.

Imporptu picture taken by my son. Not the best, BUT this is how my son sees me!

Take the pictures.

Let others take pictures of you.

During one open house that I was working, to sign up clients to decorate their weddings, this whole conversation came up. One bride was on a budget and was talking with her mom about what they wanted to do while talking with me. Part of me hated what came out of my mouth. But the other part stands by it 100%. For weddings, don’t ever skip out on having a person designated to take photographs. Even videos are important.

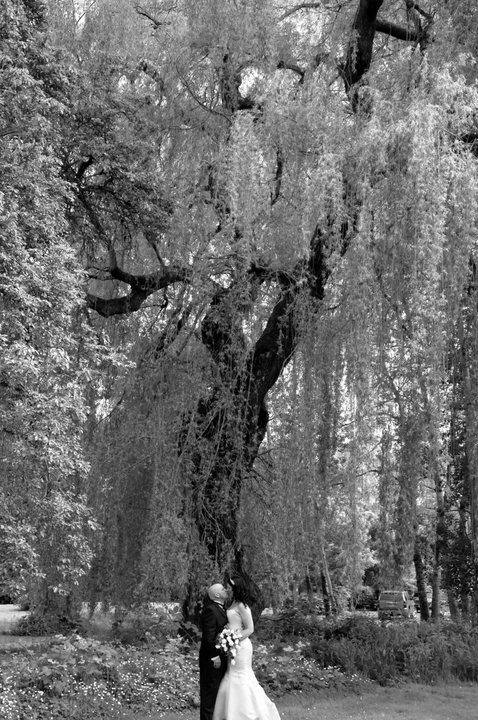
Weddings are one of the few times in life where all your family members come to celebrate with you. It’s the one time where the majority of family differences are set aside. (Yes, some differences can and still present themselves, but people are generally trying to put on their best behavior.) And it never fails that a year, maybe a handful of years later a loved one dies. And it was the last time that you saw them.

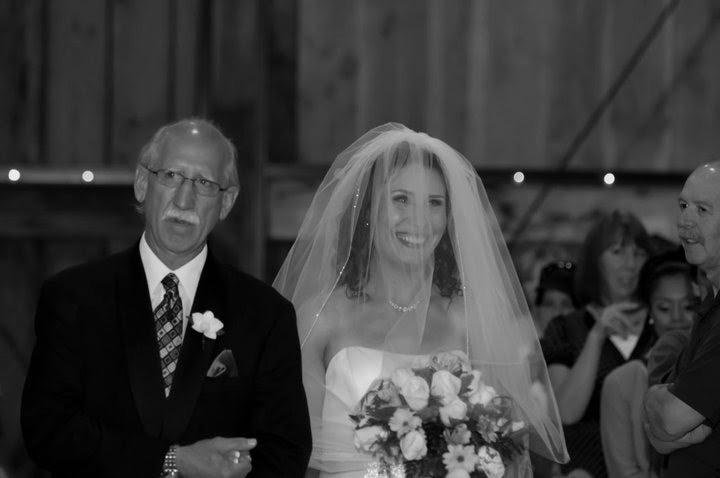
My wedding wasn’t the last time that my dad was in family pictures. But it was the last time that it was just him and I. And I was blessed to have a video taken of me dancing with my dad. You see, my boys never got the chance to meet my dad. I have plenty of pictures of him. But I grew up before the digital age. There were home video cameras, but it was one luxury items that was never on my family’s shopping list. And truth be told, my sisters have pictures of their weddings, but they didn’t have video of their weddings and their moments with my dad. (Sometimes we forget how quickly technology has made jumps and leaps in our lifetimes.)

This wedding video has become so much more than something my husband and I look back on and remember our forever day. I’ve sat down with my boys and periodically watch it with them so they can see who my dad was.

And this is precisely the reason why I absolutely do not regret talking myself out of a deal. I never wish anyone to lose a loved one. But I’m grateful if anyone has the opportunity to choose making lasting memories with loved ones, because there are moments of comfort that come when you can connect them in a time or day that the connection can’t be had.

Life changes so quickly. One moment you have a loved one with you and you can never imagine life without them. Or you have a friend or loved one that you are closer than close with and then life happens and there’s a difference. But the fond memories are still there.

I encourage you to make those moments.

And for all the brides that are planning their weddings that are on the side where a loved one is unable to be present for your big day, there are so many options that are coming more and more available to you to include them.

For my wedding, my husband missed his father on that day. He had passed away from cancer before we met, so it was physically impossible to have him present. The one thing that I did for my groom was plan a meaningful song for my husband to walk out to. Since his father was Irish, I chose an Irish song that my husband never knew before but spoke volumes to him. My Mother in Law also brought a picture of my Father in Law to set in a seat for him.

I know the photo in a chair is an antiquated idea, so I completely understand if that is last thing you want to do to honor a deceased loved one at your event. There are so many other brilliant ideas that are out there.

Families who have had advanced notice that a loved one would not live long enough for a wedding have made videos with wedding blessings/wishes, written letters, or even provided personal items for the “something old”.

Now there are the additional technology ideas of having a Q Code set up with the voice of the loved one that people can scan and hear the person. Or Spotify recordings that are being used. And who knows what will come in the near future to honor loved ones.

Even now, I’m kind of dating myself by remembering how Natalie Cole sang a duet with her father Nat King Cole. It wasn’t for a wedding, but just the desire of hers to fulfill her lifelong wish to sing with him. She had a well known black and white video of him singing Unforgettable, and she sang with the video of her father. Maybe that’s what you do to make a new memory with a loved one, where the time has passed.

Maybe your loved one is a grandmother who tatted or quilted. In fact, a Boho Wedding featuring a loved one’s tatted lace or doilies would be absolutely perfect! If it’s a small item that could be easily overlooked, make a shadow box and set it on the entry table. Or place it as part of your centerpiece on your sweet heart’s table.

There are even ways of incorporating a Grease Monkey loved one’s creations. Metal art or wheel hubs may not be appropriate for the wedding ceremony. But they can be incorporated in the decor for a cocktail hour or reception space.

The options are absolutely endless!

If you have a loved one that you want to honor, simply pick items that represent them. Any great decorator can find a meaningful way of incorporating absolutely anything so that it looks like its part of the larger decoration concept. It can still be classy. And you can absolutely still have the presence of your loved one with you on your big day.

Processing…
Success! You're on the list.

International Women’s Day & Crafting Month

Created to Make

It really is amazing to think about how much of our world and lives are all about creating something. Sometimes the first thing we think about when we hear “National Crafting Month” are the classic artistic skills of painting, quilting, sewing, crochet/knitting, needle point…everything that you would step into a crafting store to build your supply lists. Maybe you say you’re NOT a crafter because these classic forms of crafting feel as foreign and difficult as learning a language from a country on the other side of the world from you. But there is so much more to crafting.

Crafting is what we learn from others.

In my case I learned how to craft from my mom. She learned from her mom. She learned from her mom. And I’m not sure how far back that goes. So when people ask me, I’m at least a third generation crafter. I learned the old crafts. It’s what my matriarchs knew and passes on.

And while I move forward with new crafting technology and techniques, I’m also mindful of how things use to be done.

For example, the inspiration for what I’m writing today is birthed from current events, what every day women have done for centuries, and how to be creative in unifying these ideas.

For many years, my family has been taking care to learn how to grow a garden. One I have fond memories of my grandparent’s garden. My mom even off and on grew a garden.

I mention gardening because of the events unfolding in Ukraine, worldwide fertilizer production has been drastically cut back. In fact, many farmers around the world who depended on fertilizers to produce food for their local and global markets are not going to have the supply they will need. In fact, it is still uncertain if Ukrainian farmers will receive their wheat seeds in enough time for a spring planting. If they do not, many countries around the world will not have wheat to import, because Ukraine has been their wheat supplier.

Now I’m not a farmer. I don’t supply food for other families. However, I’m mindful of what is going on around the world market because I want to be aware. Knowing what I know, now, it’s becoming important to me to grow more for my family right not. Yes, inflation and the cost of groceries plays into that. It play into any first world country family who is living on a budget. And it’s ignorant of me to ignore the fact that so many other families, in areas not as prosperous as the place I call home. So to honor those families, where I may not have as much influence to change what they are facing, I’m making conscious decisions to change how I’m doing things right now. If I grow more, and use more of the resources that my two hands can produce for my family, than that frees up resources for others to provide for their families. I learned how to grow a garden as a child. Not all families around me learned that skill set. So I use my skills to provide for my family, so there’s less strain on my local market, which has a trickledown effect. If enough local families relieve the food chain, it relieves on a regional level. This in turns frees up resources on a national level. And in an ideal world, governments would not be wasteful and they would take these excess resources to relieve the food vulnerability in other countries.

And that would take me in a new conversation away from what I want to focus on today.

International Women’s Day

The one thing I love about being in the Pacific Northwest is that I grew up in an area where I learned about and ate cuisine from different places around the world. And from these different cultures I’ve learned food preparation that I would not have learned in a less culturally diverse community.

And while the most popular women to honor on International Women’s Day are politicians and celebrities, I want to draw attention and bring honor to the more humble group of women–village mamas. It doesn’t matter if a culture’s history was spent mostly in a tribal setting, rural village, or small townships, Mamas were the ones who made the world turn and kept families alive. They passed down cooking techniques and recipes that kept their people alive through countless seasons and years of famine, blight, war… they put the food on the table. And boy do mamas know how to make food resources stretch.

This week I’m particularly been in awe of all the women who fed their families in a variety of ways with one crop, corn.

Photo by Tran Le Tuan on Pexels.com

I’m not going to lie, I grew up where family recipes consist of cooking corn on the cob. And then you either eat it on the cob or cut it off the cob. Other than cornbread, that is what I inherited in my ancestral cook book. I will also be truthful and admit that corn is my least favorite. So yes, ladies around the world, please feel free to send me your favorite corn recipes. I will gladly embrace them, because I’m educating myself on the uses of corn to become less dependent on wheat for providing for my family. This fall, it is already on my books that I’m going to teach myself to make masa and tortilla from the corn I harvest this year. I have a general working knowledge and it will officially be put to the test.

And step one in my education, today, was shucking corn. Last fall I planted Strawberry Corn because it is a corn that can be popped and pop corn is one of my family’s favorite snacks. So I took my meager harvest that had been drying and doubling as fall and winter decorations, and I shucked.

As a historian, I’ve seen how village Latinas shucked corn by rubbing the ears together. Here is what I learned today….

There is a reason why these mamas use a basket or other larger vessel to shuck into. A soup bowl is not big enough. The kernels on the floor will be processed to germinate and put back into my garden this year. And I will have effectively doubled what I have previously planted in years past.

The easiest kernels to release are the ones at the ear tip. And those first ones take the most effort. Once I got seeds to release, I had a whole side of ear cleared in a couple of swipes. An up and down movement is what I found necessary to start the process. Once I was started a side to side movement seems to make the seeds drop much faster. Then on the last corn (with no other cob to rub against), I found that using my thumb in a downward movement (from the top of the cob), there was not much pressure that was needed to drop those last seeds.

Pacific Northwest Event Design

Another thing that any mama in a resource scarce place will tell you is that you waste nothing.

We as human beings were created to be creative people.

I harvested my corn, but here is where National Crafting Month comes in. What am I going to do with the cob and husks that are left over?

I’m not sure if there was another generation that followed my grandparents in making husk art. I honestly haven’t seen any creations at farmer’s markets for the fairgrounds since my grandparents passed away. I’m going to have to make a husk doll in the upcoming days and show you because they’re not popular hits in Google image search. I have 4 cobs left to craft with. So I’ll try my hand at that and make at least a brief posting on how that turns out. And if you’ve never heard or seen of a husk doll, then I’ll have the pleasure of passing on a little history.

But for today, I took three of my cobs and turned them into fun Easter decorations.

This is one craft that I will definitely do again in the future. In fact, I will have my boys do it. This is a messy craft, so be forewarned.

There are some bits of information that you need to know, if you’ve never had experience with corn cobs before. The husks take paint nicely with no real preparation. However, the paint feels like it takes forever to dry. I tried to keep my paint thin and it still took upward of two hours before the husks were completely dry.

Now you will absolutely love working with the cob portion!

The cob will absorb paint like a sponge. Drying will not be instantaneous but it surprised me at how quickly it was dry to the touch. I had planned on putting my glitter on wet paint, but I had to go with option 2, glue. The dry time is completely dependent on the type of glue you use and it’s dry time. The glitter does not shed easy, but some will come off on your finger if you swipe it (when dry).

Bringing it back around to celebrating women, what is something that you appreciate or want to know from women different from you?

How can you turn that into a craft to celebrate what it means to be a woman?

In fact, please comment below something that you admire about women in a culture different from your own. I’m always looking for new knowledge and skills. If you inspire a creation, I want to give you recognition as well.

Happy Belated International Women’s Day!

Processing…
Success! You're on the list.

Living Life In Color

Options For Creating Faux Stain Glass Windows

Color planning in my cutting software

With the increase of daylight, the approach of spring, and the first thoughts of Easter sprout ideas of how to bring new life and color into our lives.

This week end I’m participating in a crafting challenge. And one of the group crafts was a faux stain glass window.

When I go into these challengers, I focus on using the supplies in my office and only make a new supply purchase if I don’t have an item, or cannot think of an alternate item. Can I use a flat canvas instead of a framed canvas? Have my boys recently broken a toy that I can give a second life to? Have I recently purchased something that came in beautiful packaging that I can use to add dimension or further details?

I LOVE creating multi-medium products!

For this faux stain glass project, I didn’t have a framed piece of glass. (There are products on the market for making faux stain glass.) And I didn’t make that purchase because I have glass items I could pull from. What I chose to use was a half completed family schedule project.

I finally completed our family schedule for my early readers.

For over a year this picture frame hung, waiting for the inspiration for how to complete it. Do you have a project, or dozen, like that?

Well, this was the perfect glass for me to work with. All the vinyl already on the glass was placed on the front of the pane. And for faux stain glass, all the work is done on the back.

If you want to make a faux stain glass for your holiday switch out, an upcoming event, or as a fun project with your children, this is perfect for you. I’m working on my own designs to add to my shop. You might find another cut file artist who have some stain glass patterns. Or you can use a blank coloring book picture (children’s cartoon coloring book, adult coloring book, a blank mandala, or any other image). For these pages, all you have to do is upload them into your cutting machine program. When cutting out your glass outline, use a permanent vinyl that is the same color on the front and back. If you choose a vinyl that is printed or colored on one side and white on the back, you will have a white outline from your viewing side of your glass.

One common problem you may not avoid is your faux stain glass lines not releasing from your transfer tape. I have never had difficulty transferring to glass before. But even with all the tricks I know, I scrapped my first cut of vinyl and had to go with a Take Two.

I’m not sure if the problem was this pane of picture frame glass, the size of the project (10″ x 13″), or that my transfer tape was too sticky. But I did have to use my nails to scrape off the bottom quarter of my vinyl. So I adhered the transfer tape to both legs of my pants. I got the tack down to a barely sticky level. The vinyl still lifted in a couple of places, but at lease it released. The next time I do this technique with vinyl I am going to use transfer paper and see if the less tack released better.

An example of some extensive lifting of vinyl

To minimize the amount of lifting I recommend starting in a corner and slowly folding the transfer tape back on itself. As you start to see the lift, immediately start to press it back down with your finger. If you go too quickly, you will more thank likely have large sections pull back up from the glass. With the aid of your weeding tool, you can reposition and press down. However, it becomes more difficult to prevent creases in the vinyl when the uplifting sections get longer. So the sooner you can press these pieces down the better.

Another common problem is trapped air bubbles. You may not see it on this back side. But it is obvious from the front of the glass.

Advertisements

To overcome air bubbles, you will want to pierce the vinyl with the sharp point of our weeding tool or other needle. With a way for the air to escape, you can now use your finger nail to press the air out. This will also press the vinyl down. When you flip the glass back over you should notice that the bubble is gone.

If the air did not escape the bubble, then go back in with your weeding tool and make the hole a little bigger.

There have been several times I’ve done this on other projects. Most of the time the hole seals itself up. In a worst case scenario there will be a small wrinkle. But it will only be visible from the back side.

Once your vinyl is laid, you are ready for the fun part. Painting!

This time around, I tested a few different application methods to help you decide how you want to make your faux stain glass. In the picture below you will notice that the paint looks different between the greenery, tulips, and sky/clouds. I used three different preparations of acrylic paint. But in the past I have also used washable children’s finger paint and tempera paint. So don’t think you are limited to paint choices.

This is the paint side of the glass pain. You can see the difference of the three different acrylic techniques described below.

Glue Mixed With Acrylic Paint

What you see on the greenery is a mixture of Mod Podge with a couple drops of acrylic paint.

Depending on the directions you read, you might be told to use Mod Podge, white glue, or clear glue. The bottom line is, they’re all glue and they’re going to act the same. The problem I had with this method is actually a couple fold. First, glue clumps and thickens horribly the longer you work with this mixture. And even with a fine painting brush, your painting surface is going to increase the longer you work with the glue. With just the greenery portion, the tip of my brush doubled in size by the time I finished. So to combat the thickening glue paint mixture, start with your smaller/finer detailed areas first and end with your larger surface areas.

Another problem that I had with this method was the inconsistency of pigment placement. It didn’t matter what brush strokes I used, the color inconsistency was worse than a dog’s fur that is suffering from hot spots.

I kept flipping my glass over to check the visibility and progress. A second coat did not smooth things out. In the end I had to apply a third coat (by which the glue was already thick) where I was blobbing on dots right next to each other. Fortunately, at this point I was working with two shades of green. I took a toothpick and “drew in” leaf veins, blending in the shades. It brought a cohesion that was greatly missing.

My recommendation with this method: apply your glue/paint liberally. If you are using more than one color or shade in a single section, apply first at your lines and then work your way in to where you want the colors/shades to meet.

Acrylic Paint

My favorite paint to work with is acrylic paint. If it were possible to be in tune with an art medium, this is tied for first place with me. (It’s partner in crime is fabric.)

I was quickly frustrated with the glue mixture, that I decided to go straight to acrylic paint by itself. You will see this demonstrated in the blue sky and white clouds. (The clouds are not visible in the final product, because I painted the back of the picture frame holder white for cohesion.)

If you want paint brush stokes to add character to your glass, this is probably the medium of choice for you. The sky I applied with side to side brush strokes. The clouds I applied with circular strokes. So this is very easy to add textures and definition to your glass.

Here is the problem with this method. The front and back of your glass are going to look different. The front of the glass automatically gives the appearance of gloss. When acrylic dries, the finish is matte. Not to mention, if you’re choosing acrylic you’re choosing your stroke pattern. Your pattern is going to take precedence over painting over the finite edge of your vinyl (or permanent marker if that was the tutorial/directions your chose to follow).

That being said, with all the care and precautions I took, I was able to stay in the lines better with plain acrylic than I was with the glue and acrylic mixture. There was absolutely noway I could prevent going over the lines with the glue.

With these first two options, there was absolutely no way that I could keep the lines clean so that both sides were presentable. And I tried.

So that leads me to the third option I tested.

My recommendation: if you want visible brush strokes or create an umbre effect, this method is for you.

Advertisements

Acrylic Paint Pens

I chose this paint method for the tulip section, because I love visiting the Tulip fields each year. I love the bearded tulips and the multi colored ones alike. And if you couldn’t guess, I have an affinity for the red tulips with yellow tips.

And the acrylic pens were perfect for this kind of detail!

Again, I used the materials that i already had in my crafting stash. My acrylic pens are generic, but they did the job. And I can’t wait to purchase a better quality product to use.

For as much as I loved this method the best, over all the numerous products and techniques I’ve ever used on glass, they still had their own drawbacks. My number one problem is that the tips were so small in comparison to the size of my project. It’s a good thing that I find coloring calming and an avenue to my happy place. This was probably the most time consuming paint application.

Trial and error with this product is that the paint pen wants to apply a layer of paint too thin. I regularly had to shake the paint down to the tip. And about halfway through the tulips, I had to compress the tip to purposely create a small pool of paint to spread out.

Another draw back for this application method is that you cannot blend your colors. I, for one, have a pet peeve about muddying my pens. They can be ink, watercolor, or paint. I cannot muddy my tips. I need true colors. And because of this preference I worked with the yellow first, then went back through with the red. Even with my toothpick trick, the yellow was too dry to blend with using that method.

My recommendation: if you want to blend with the pens,work sections at a time. And if you like keeping your tips clean, leave a hair line separation between colors.

Another bonus for this method is that you have complete control over every application line of the paint. You have full control over not painting on or over the lines for each section. So if you want to have a flawless back and front, for duo viewing, this method is a must!

Drying Times

Maybe your method of choice is less about application and more about drying time. Believe me, I’ve conscientious about this because I have young children. Anything that takes long drying times I have to safe guard unless I want smears, prints, or transfers to my furniture and walls.

Acrylic Paint was the quickest. Especially since I only needed one coat of paint. The sections were dry pretty much when I finished the tulips. I give it an estimate of 20 minutes. As I mentioned before, acrylic paint dries with a matte finish. So the bonus here is that you don’t have to test touch to see if it is done drying. You see the difference.

The Acrylic Pen comes in second place for drying time. I have no estimate for you because on glass there was no noticeable change that I could see. The finish is just as glossy as when you first apply it. I had to test touch for dryness. I didn’t have a clock in front of me, so it could have been a ten minute dry time or twenty (from first painted section in relation to when I finished painting the entire project.) I would have zero qualms about putting the picture frame back on after an hour of drying time.

Glue with Acrylic Paint is like watching paint drying. It’s a slow process. But if you have worked with Mod Podge you know. Whatever wet glue you choose, you already know that takes several hours to properly dry. Mod Podge takes 24 hours to cure. And all of the drying time is very much determined by how thick you choose to paint. My glue had about an hour to dry.It was still mildly tacky, but I had to put the cover back on so little fingers didn’t damage the work I did.

Final Thoughts

With larger sections, this is a project that I believe even self proclaimed non-crafters can do. The important thing is selecting the paint method that you are most comfortable using. If the word paint intimidates you, but you still enjoy coloring a color page or two, then you will feel right at home with using an Acrylic paint pen set. It literally feels like coloring with markers. If you prefer a quick and done method, grab a brush and your choice of acrylic paint. If you love glue and/or medium manipulation than the mixture of glue and acrylic paint is definitely for you.

Everyone is going to have a different preference or comfort level. You craft with what is comfortable with you and your expectations. This is what truly sets you up for success. Whether you are making a faux stain glass window, the background for another project, or even transforming a vase into something more note worthy for your centerpieces.

If you want to clean up the back side of your glass pane, so that it’s more presentable, here are two options. If you have a steady hand and are good at lining pieces of vinyl up, you can cut out a second set of lines and apply it on the backside. The second option is picking your paint of choice and paint over the colors on the original set of lines. For example, on my project I could use a black sharpie, black acrylic paint with a fine tip brush, or my black acrylic pen to re-establish my black lines.

It’s my hope that you now feel enabled and courageous to try something new.

Paint Is Your Friend

And right now we can all use a little more color in our lives!

Processing…
Success! You're on the list.
Advertisements