After spending almost a decade in the event decorating industry I have repetatively heard "I can do that". Instead of being dismissed by creative minded people, I want to show you how I do "that" so you can be sucessful in recreating that inspiration image. I just might have a few tricks that you haven't seen yet!
I love my outdoor plants. And often I’m asked, “Is there anything you don’t grow?” For me, the struggle is real when it comes to indoor plants. I pick up in the language of outdoor plants. I think I get confused when it comes to the dialect of indoor plants. “What are you telling me?!”
It was this past year when I was gifted me a clipping and an indoor propagation unit that I decided to give indoor plants another whirl.
Back in August I was thinking of winter months, being shut in with no fresh air. So I picked out a few end of season clearance plants that are known for being air purifiers in the home.
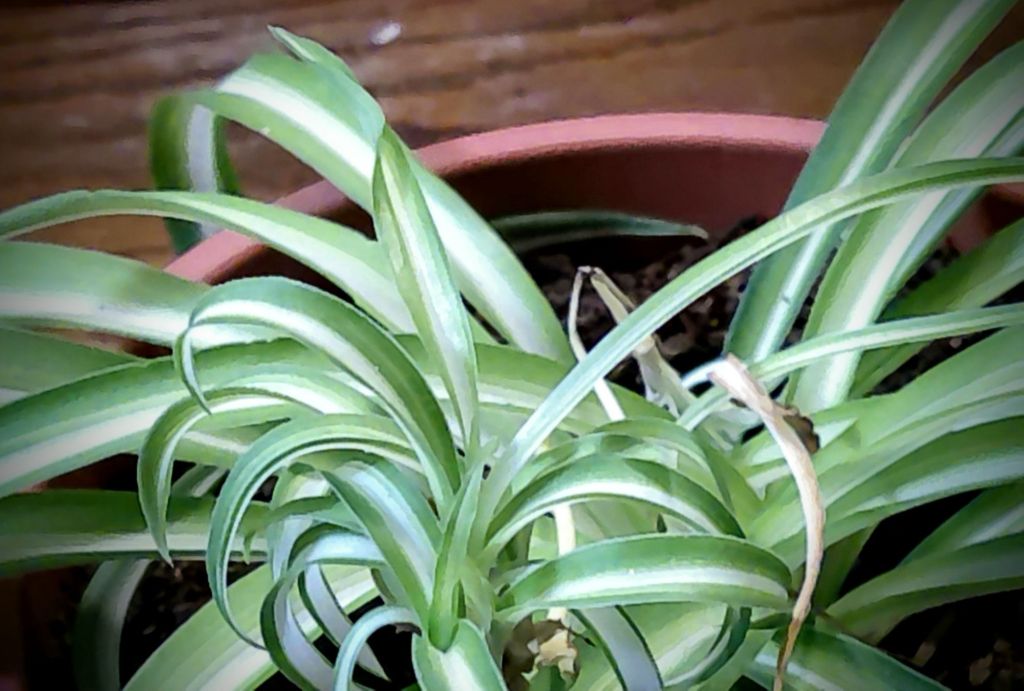
One that I bought was a Spider Plant (Chlorophytum Comosum Vittatum).
This is a great plant for those who struggle to keep indoor plants alive. We were gifted with a spider plant back when I was an event decorator and my hours were horrible. That plant lived for about two months of forgotten watering before it finally gave up on me.
I picked a spider plant this time around because of how hearty this plant is and it deals with neglect better than other types of indoor plants. Plus, with my homeschoolers who love commandeering my indoor plants and calling them theirs, this is a great one for young kids to learn about plant care with. My kids love over watering and this one loved their over attention
In fact, after the fourth or fifth time I had to empty my overflow bowl from a standing puddle, I noticed that this spider plant had started producing baby plants. The day after the first baby showed up, a second formed. And about a week later two more popped up.
I wasn’t counting on this plant living our home so we’ll to put off four babies almost right away. But since I’m now part of a bartering group, I figured that nurturing these babies over winter will give me four plants to barter with come spring. Or seeing how the boys have taken these baby plants over, I’ll let them take them to an event to barter with. (It’s a life skill that they’re starting to become comfortable with.)
Advertisements
How To Propagate the Babies
The first thing you’ll notice growing from your mother plant, when a baby is going to be produced, is a long rigid stem. Have you seen a rigid stem of an orchid? The baby spider stem reminds me a lot of an orchid stem. On this end of the stem, you will see a miniature spider plant start to sprout its leaves.
At this point many people say that you’re supposed to bend that stem over toward a new pit, set the baby in that soil, and stake it down until its root system grows. Then you can cut the stalk.
The reason for not cutting the stem first is because it acts like an umbilical cord and gives the baby spider plant nutrients while it grows its root system.
That way makes sense and I’ve seen it done as a child. But I didn’t go that route with propagation this time. I tried to wait and let the stalks grow so that they were long enough to lean over into a new pot. None of these stems grew longer than 9 inches.
Instead I went with the Water Propagation Method.
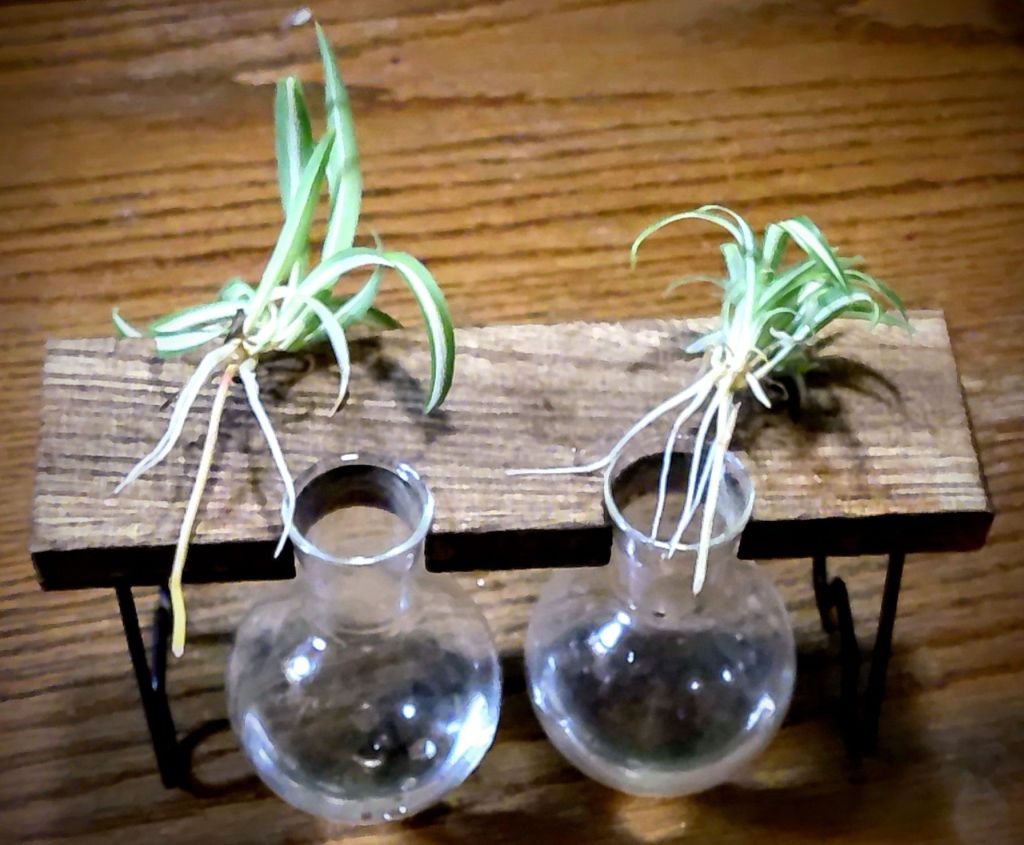
Here you can see the root growth from the Water Propagation Method that I started 4-6 weeks ago. I cut the stem of the baby spider plant a few inches long and then place them in these water propagation tubes.
The trick with this method is keeping the water level up to the base of the leaf cluster. As you can see from the pictures, this is where you see the root growth coming from. By keeping the water level high, it ensures that the emerging roots have contact with water at all times.
From there I simply place the stand in a window so the plants get sunlight. And then I wait for the roots to grow.
Here you see the far right and far left plants are the babies that I rooted several weeks ago and I’m ready to put them in soil. The center two babies are the ones that I just cut from the mother plant and are now ready to start the rooting process. I wanted to show you these side by side so that you can see the stems (which on my plant are a pale yellow) in comparison to the new roots (which are white).
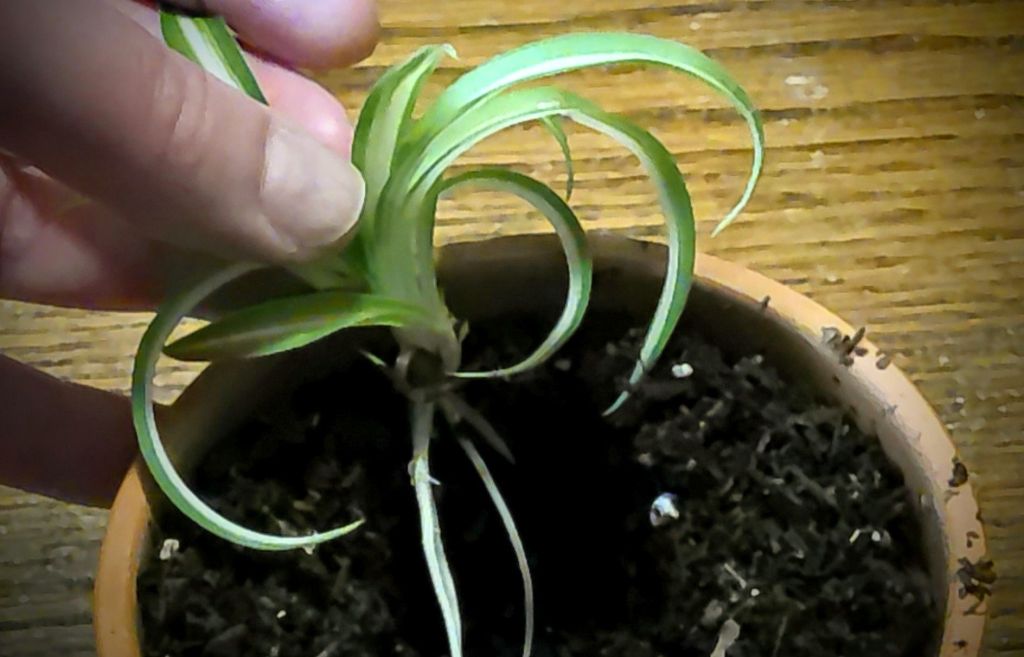
With these newly rooted baby spider plants, I put some potting soil in a clay pot. I hollowed out the center of the soil, where I want the plant to sit in the soil. (I create the hole for the roots because they are tender and I don’t want to damage these young roots. After a few months, when I’m ready to repot, I’m not as concerned with the roots because they’ve had a chance to establish themselves in the soil. For now they are going to go through a little shock because they are changing from water to soil environment. Their function is going to change in this new medium.
While holding up the leaves of this baby plant I fill in the hole (with the roots held in place below surface level) with more potting soil. Once the hole is filled, I gently pat the soil down to give the plant a little stability. Not much is needed because these roots are around 2 inches long (some a bit longer).
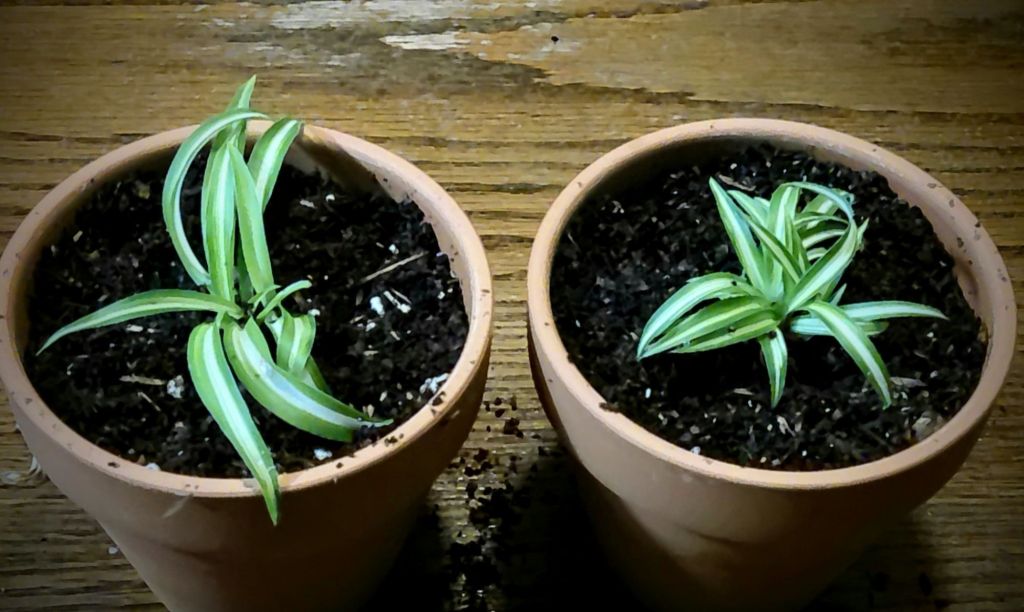
And here are how my new baby spider plants look in their new 4″ terra cotta pots. I gave them a bit of a watering and then set them back in the window.
Other than the time it took to allow the roots to grow, the setting up of this propagation took less than five minutes. And potting the rooted baby spider plants took another 5 minutes. This is something that doesn’t require much of your time, if you have limited time to care for indoor plants. And with spider plants, I water mine once a week. It’s been about 4 months since I first brought the mother plant home, so on my to do list is to give them a good fertilizing on their next watering.
Advertisements
Word of Warning for Propagation Equipment
This water propagation set up was gifted to me from a friend who hated it. It was my “transportation” unit for taking home a clipping of another plant for my drive home. After working with this stand for a year now, I fully understand why she didn’t like it. And yes, I am still that type of person that still uses it even when I hate it myself.
I look at it as a personal challenge to make it work!
If you’re looking to water propagate plant cuttings, let me walk you through this set up so you can have a little walking knowledge for choosing the set up that you end up purchasing or getting from a buy nothing group, or any other opportunity.
The reason why this stand is such a fail is because of the holes that the tubes slide into. In the above left picture you can see that the center of gravity of the holes are way off. They needed to be set back into the center of this board.
You can probably guess that when these tubes are filled to the top with water, they become front heavy and tip forward spilling water and cuttings everywhere.
In fact, in just this short period of time that I took to take all the photos for this post, the filled tubes fell forward not once… but twice!
To make matters even more entertaining, my husband decided to watch the process and freaked out with each of the dumpings. Water spread not just all over the table but also the floor. And that leads to the picture where I put the pot in front of the filled tubes. As much as I enjoy a good challenge, I really didn’t want to clean up a third water mess.
Advertisements
And that leads me to the solution of how I make this failed unit work for me.
When I have a new set of clippings to add to the tubes, I set the rack down in the window with the tube side facing the glass. When the rack leans forward, under the weight of the water, it leans into the window and holds itself up.
There are two other options that I have to fix this unit once these baby spiders are ready to be potted.
I’m going to check to see if I have a drill bit that’s the right size so I can make the hold deeper into the wood so the tubes sit more center in the unit.
If that doesn’t work, I’m going to take some thin crafting dowels and put legs in the front corners.
And in case I need a third option… I’ll drill a hole in the back corners that’s big enough for a long screw that I can add enough nuts to create the correct counter balance to keep the unit upright even under all the water weight.
No matter what the situation, a solution can be found!
Advertisements
Final Task before Putting All the Plants Away
This mother plant has been so amazing to me that I just needed to take a couple of extra minutes and tend to her so that she can keep being a happy plant for me. I trimmed away some of her discolored and battered leaves and cut the remainder of the baby stems down to their base.
Why the trimming?
The stems were no longer supporting baby plants, so they no longer needed the energy being directed to them. The leaves were damaged and there’s no need for plant energy to go to them to see to the trauma. The overall health of the plant is very good and with plenty of healthy leaves, trimming away what I did would not affect the photosynthesis of the plant. But the trimming returns that amount of energy back to the mother plant to go elsewhere: whether new leaf growth, existing overall grown, it’s cellular immune health, or even gearing up for a push of new baby plant growth.
This mother plant is now ready for the next phase of whatever cycle she is on to now. And with the next watering combined with fertilizer, she’ll have all the nutrients she needs to move forward.
Here are some propagation units that I’m eyeballing for my next adventure in rooting plants.
I have not had a chance to see or use these units, but I wanted to share with you what other ones I’m looking that you can have an idea of what is out there.
This post contains affiliate links to products. We may receive a commissions on products purchased through these links, but at no extra cost to you. These items listed here are from Amazon but may be purchased at local markets.
The holidays are all coming up. And this can bring many feelings to different feelings. When adulting, the hardest part of the holidays are when finances are tight.
To help lighten the mood and bring a little cheer with the gift of flowers.
I’m going to show a simple and easy to make arrangement that you can personalize any way you want because it’s a blank slate. The beauty of it is that I reused some items and others were given to me. I had no out of pocket expenses to share this post with you.
So let’s start with the materials.
Vase
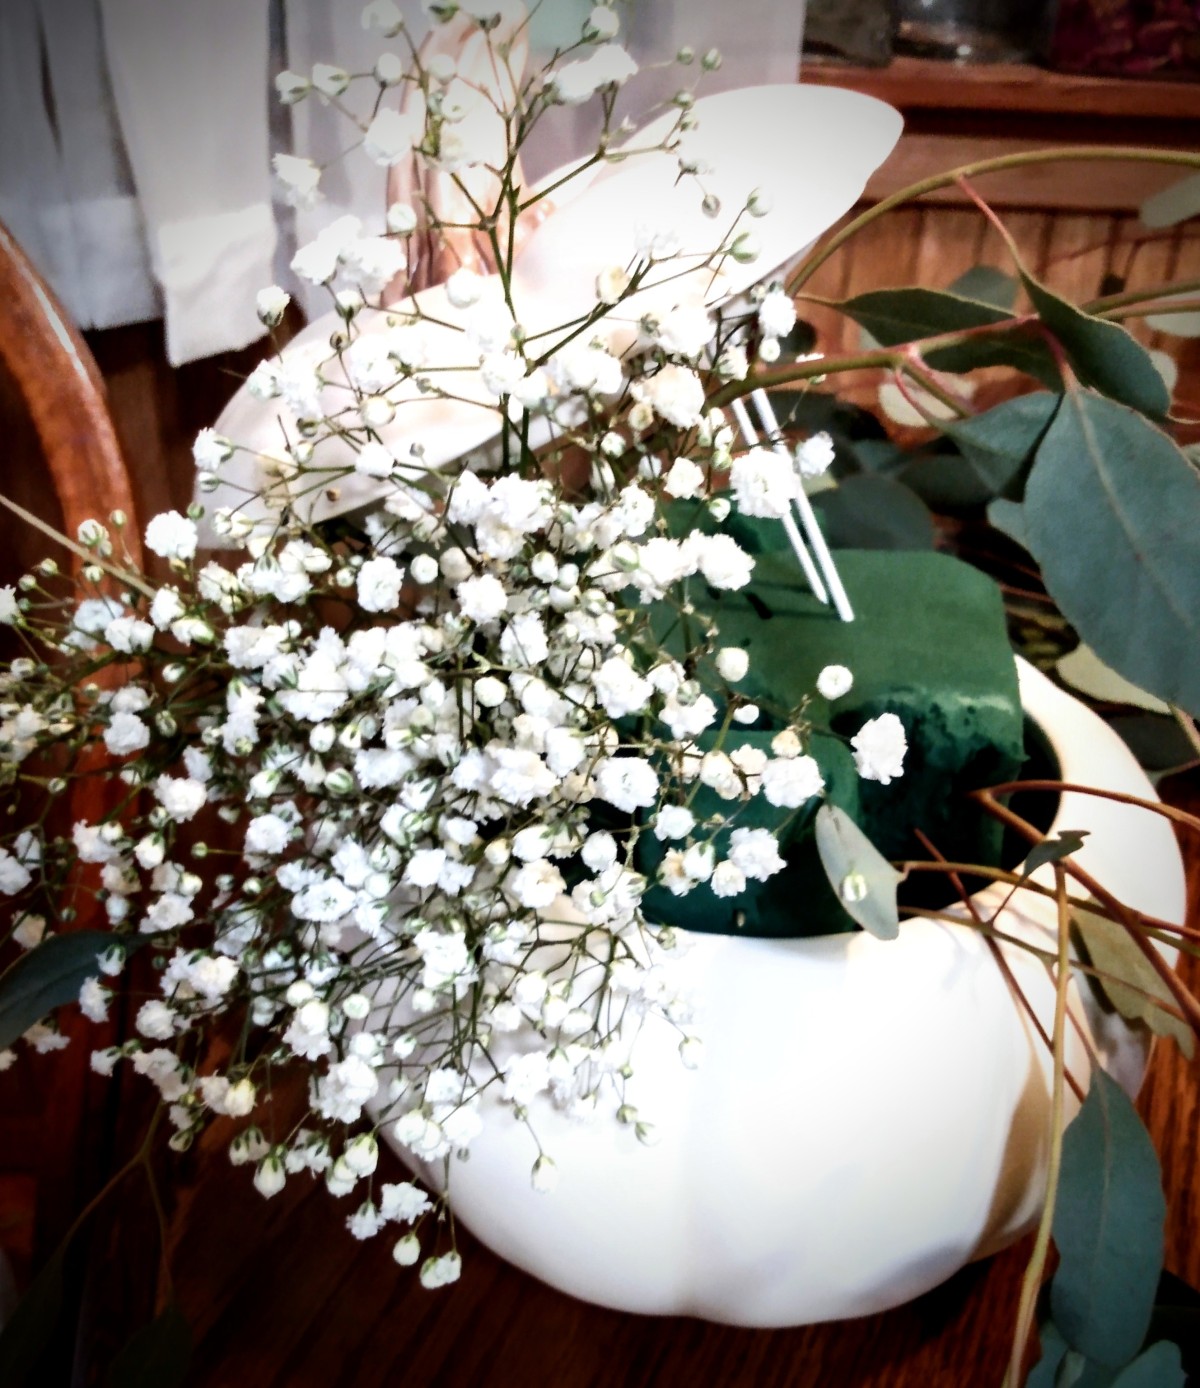
What inspired this post was the vase that my mom had sent me some flowers in.
Fall is my season. I love pumpkin everything. In fact I grow and purchase pumpkins to have all my pumpkin goodness that I can preserve for the rest of the year. And yes, I make pumpkin scones year round because their deliciousness transcends what is in season.
Unfortunately I can’t send you a picture of what the floral arrangement was that my mom sent. Mostly because I want to keep the blank slate in your mind and spark your creativity.
What I like about this white pumpkin is that if you remove all the floral it is literally a cookie jar. So feel free to use this idea any time of year and use cookie jars, old tea pots, water pitchers, even a shoe box (hello baby shower with baby shoe boxes!) Literally, use what you have on hand that brings you inspiration.
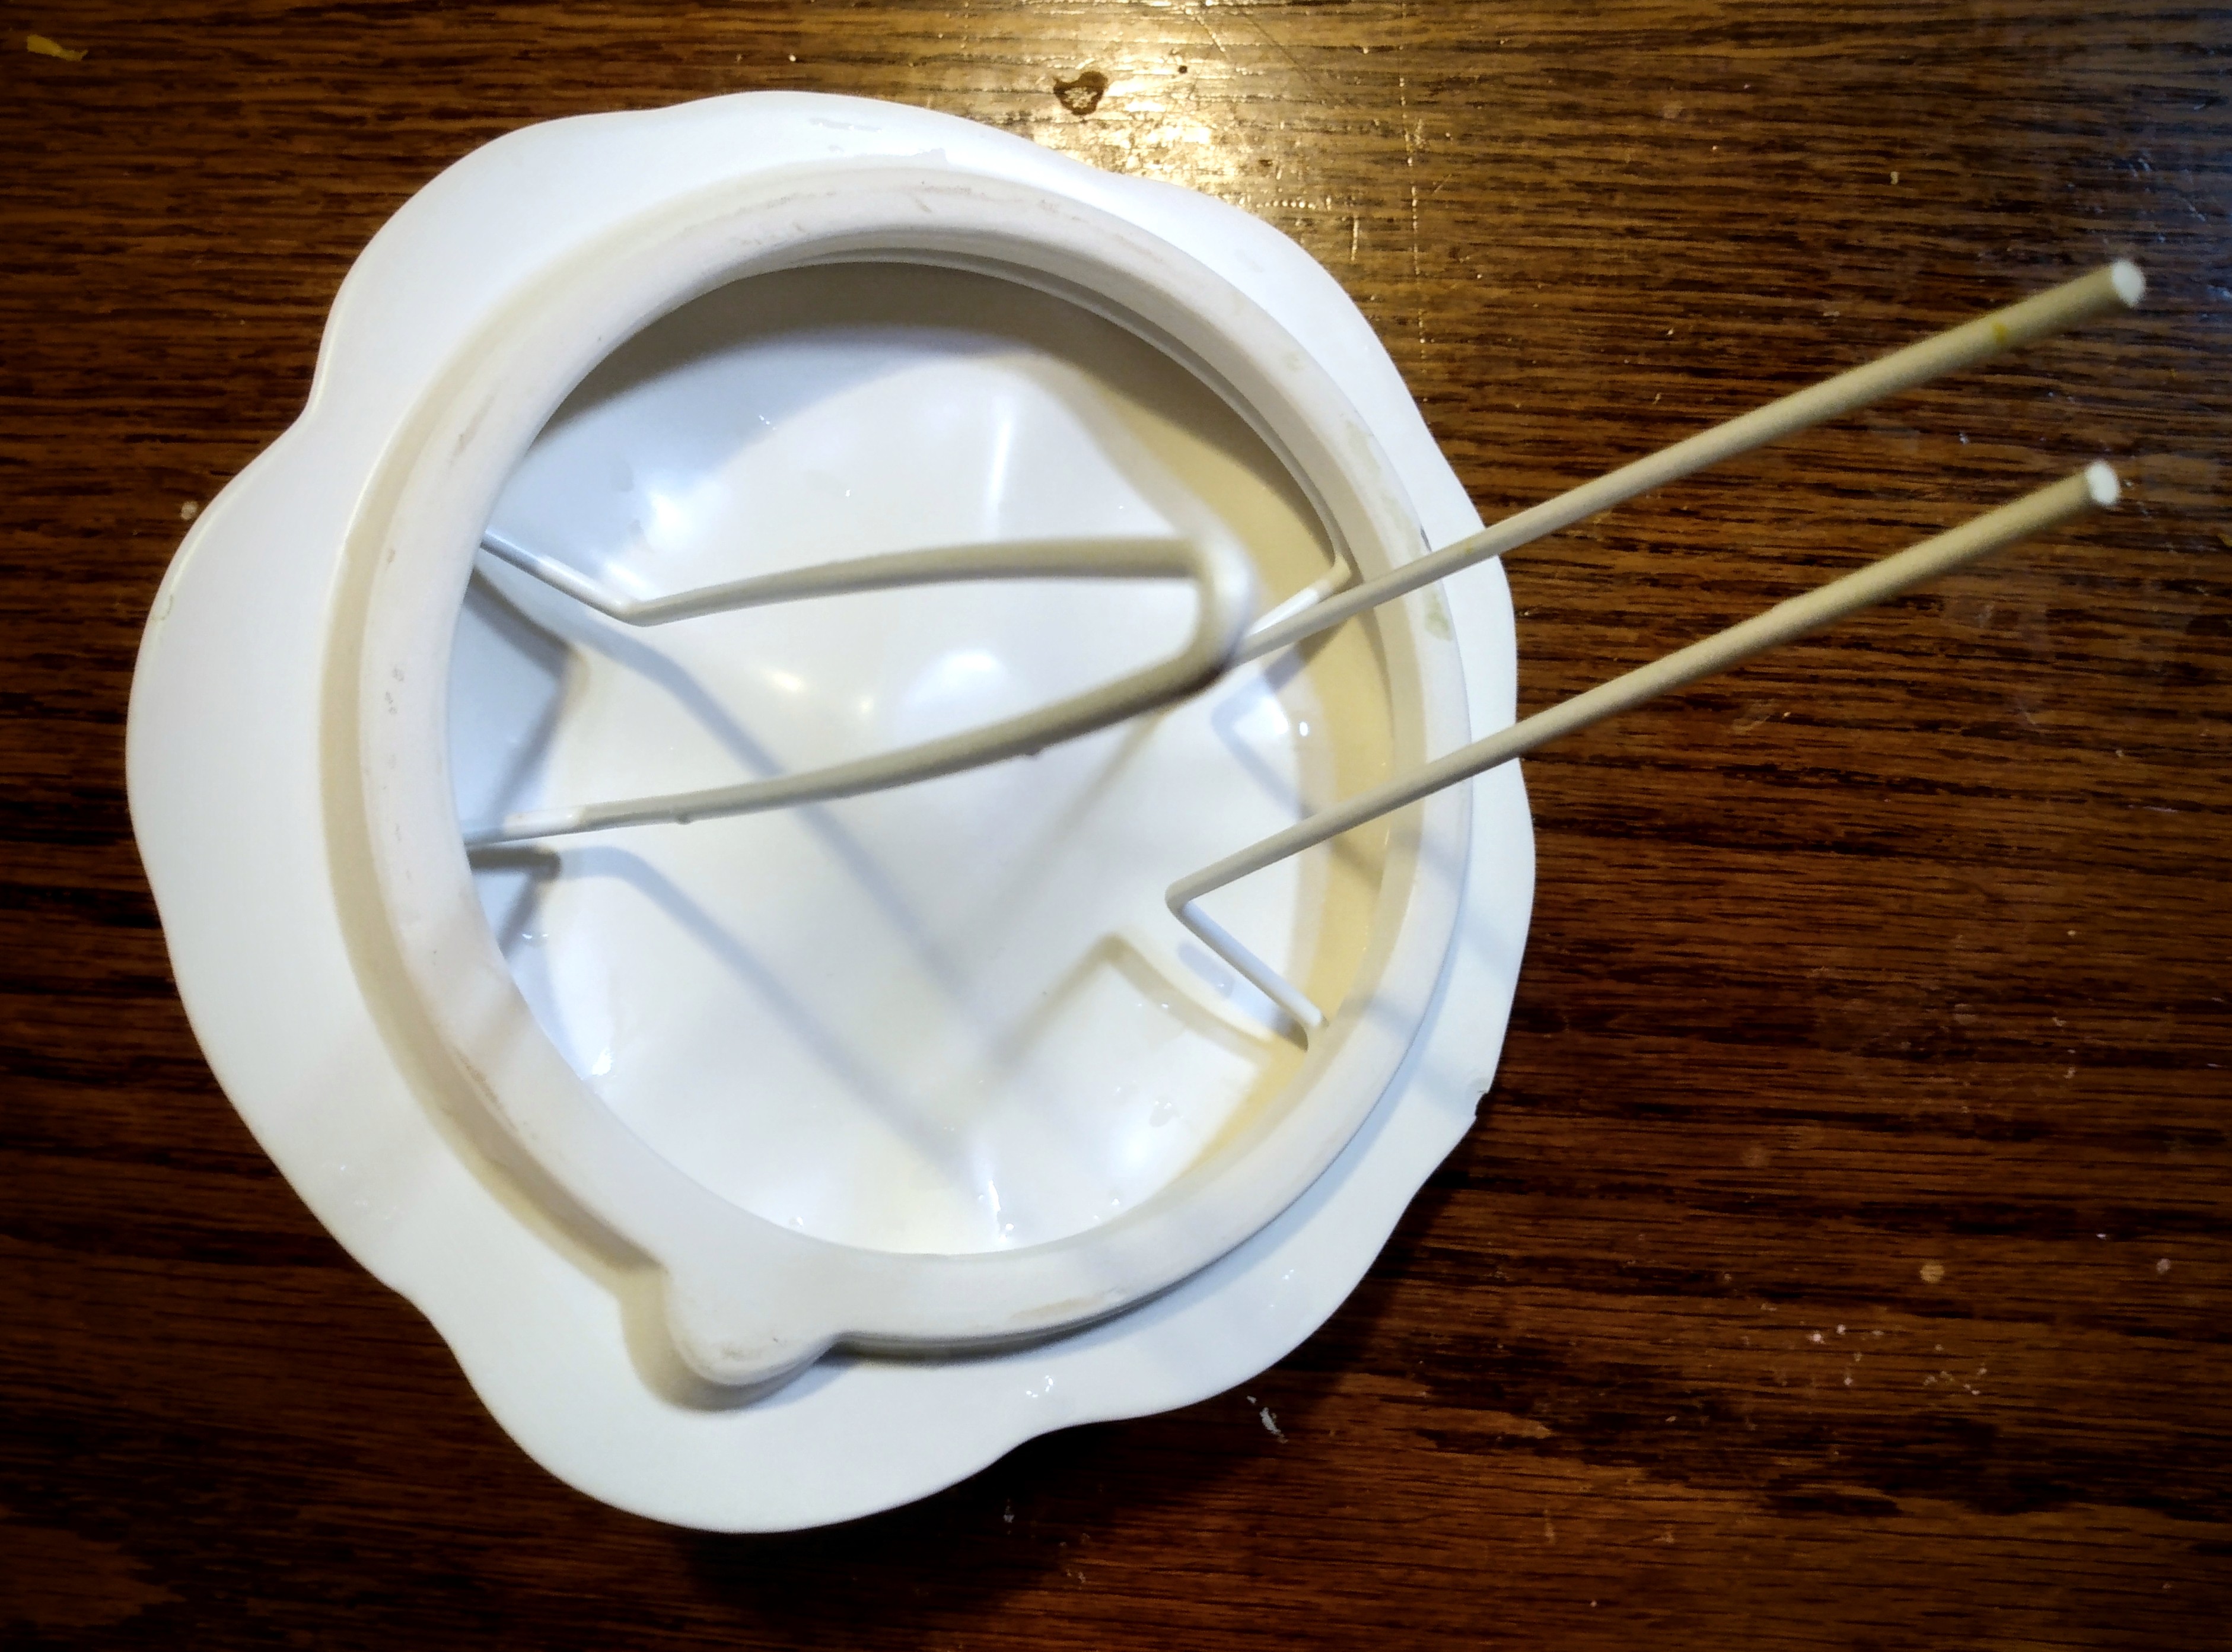
If you’re using a cookie jar or anything else with a lid, let me show you the parts of this vase and how it works.
This lid stand/holder is very specific for floral. I’m sure with today’s online offerings, you could find these. But you’re going to have to know what your lid size is and go from there. I have one other cookie jar, but the lid is smaller and this stand/holder definitely will not fit in it.
However I do have two options off the top of my head that I could use from items I have in my house.
I have porcelain dolls from my childhood, and this stand/holder immediately reminded me of the doll stands I have that go around my dolls’ waist. The tension part is too small to fill the lid like in this pumpkin vase, but with two or three I could position them in the smaller lid to make the tension and platform to raise the lid.
Another option is making one from a thick gauge wire. If your local store has a DIY floral department or aisle, you will find wire thick enough to hold its shape and hold the weight of a lid. If you want to price comparison shop, go to an automotive shop or aisle. You’ll often find that you will get a better price in that department, but also walk out with a larger quantity of wire.
Once you have the wire, you can make your own custom holder/stand by leaving several inches of one leg sticking out as you then go in and create a loop of wire inside the lip of your cookie jar lid. I would make a few loops inside that lid to ensure that when you move and manipulate the legs that you don’t shrink your loop and allow your lid to fall. Once you’re confident in you loop, bring out a second leg and then use wire cutters to cut the wire. You can always add more than two legs if you feel like you need to add more stability.
Advertisements
Inner Stability
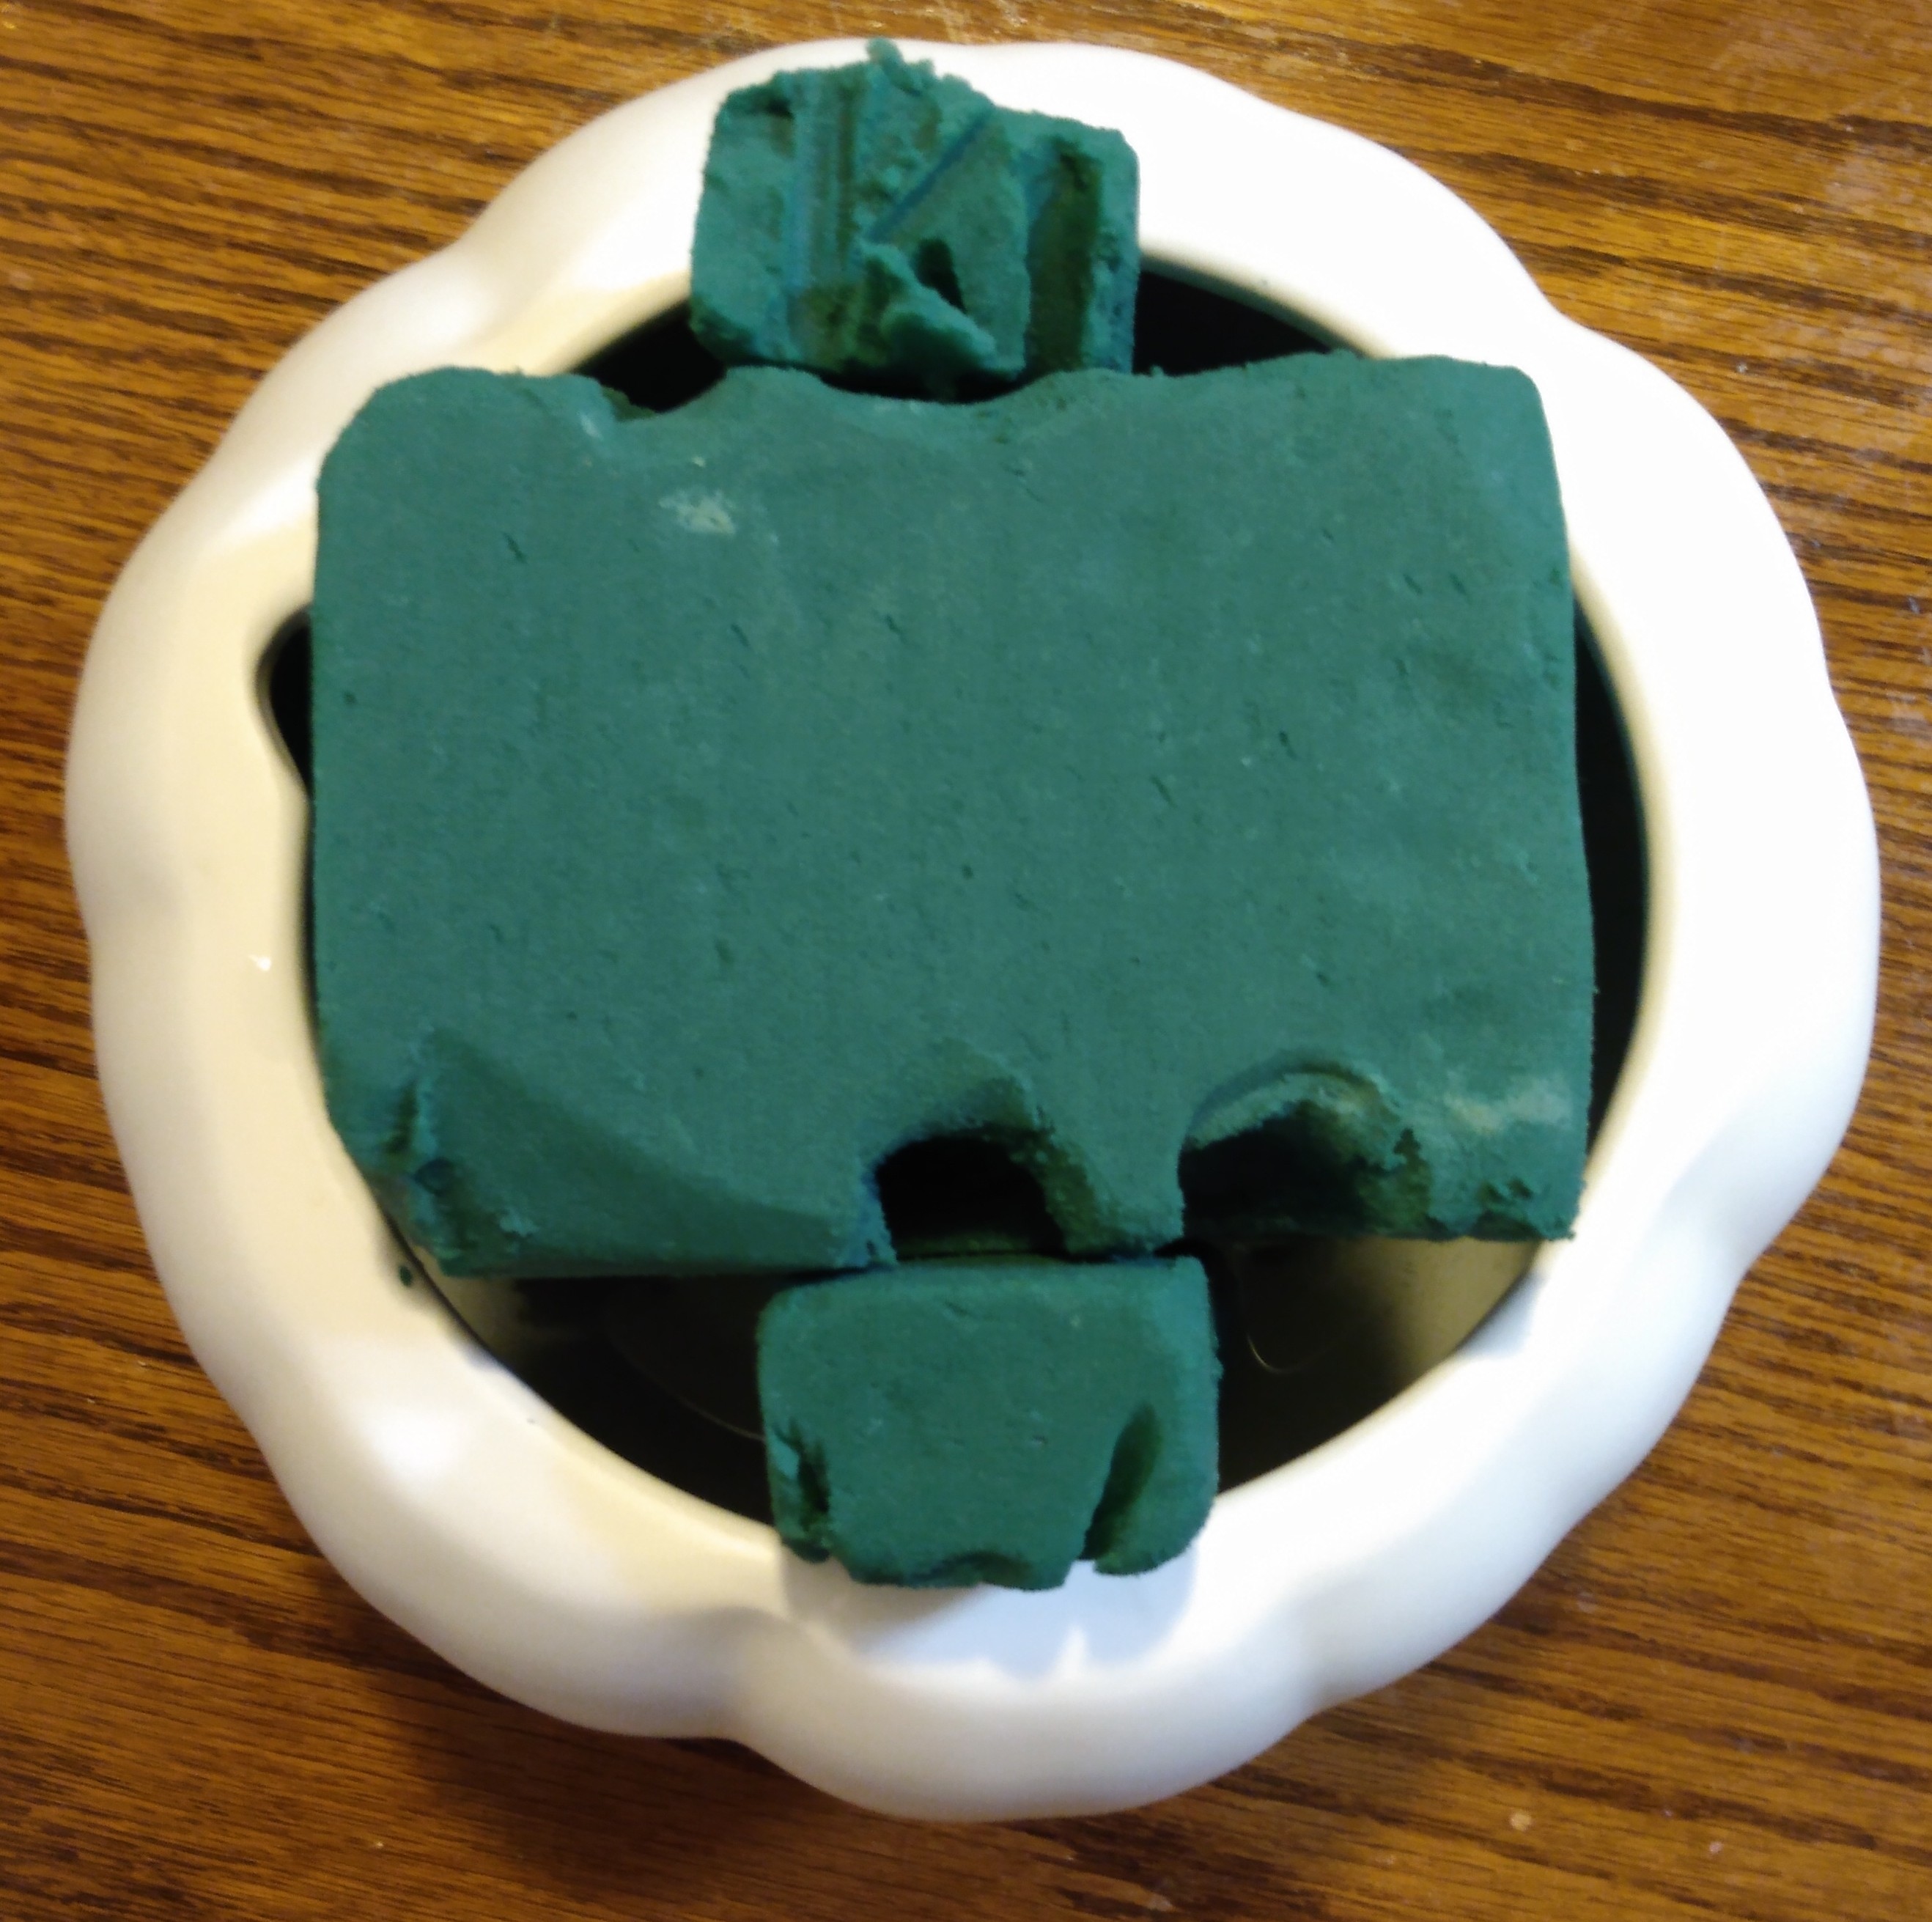
For lid placement, you will need something to anchor the stand into.
I’m choosing to reuse the oasis that came with the flowers my mom sent me. This is an amazing product because it not only allows you to place flowers like a pin in a pin cushion. It also allow absorbs and holds water, keeping your flowers in water much longer than free standing in just a vase of water.
If you want to use silk flowers that you have on hand, feel free to use a Styrofoam ball or block. (I don’t recommend styrofoam for fresh flowers because the plastic will kill your flowers and won’t allow them to be properly hydrated.
Once you’ve decided what you’re using as a structure (of if you’re even using a structure), you may find that you need to piece bits together to keep them from falling into your cookie jar and becoming lost. Flower stems are enough to keep bits together. However if you need everything to be in place before you get started on your flowers, know that toothpicks or a couple inches of wire are your best friend.
As you can see here, a single toothpick is all that was needed to hold up a water logged piece of oasis.
This is a beneficial trick if you only have a small sliver of oasis that doesn’t touch the bottom of your vase. Or even if you find that your oasis fell apart on you. Or maybe some oasis you salvaged was a different size than the vase you are working with. You can certainly make your oasis fit the vessel you choose to use.
TIP: Please note that placing a toothpick or wire in a 90° angle is going to cause frustration. The weight of wet oasis and flowers are going to collapse. So instead, angle the toothpick at a 45° angle. That way when gravity starts to work against you, the toothpick will hold its place. This will be further reinforced by the flowers that you soon add.
Advertisements
Flowers
The Flowers that I was gifted after an event I attended was baby’s breath and eucalyptus. Often we look at these as just fillers to make an arrangement look larger than the more desired stems.
I wanted to use these fillers specifically because they are often overlooked for being used as flowers on their own. Maybe you have a lot of fillers left over from other arrangements that you made. Or maybe your budget is tight and these are the only flowers that are in your price range.
There are so many other fillers that you can find in your grocery store. So please keep your eyes open. And not all stores offer the same offerings. The grocery stores don’t supply very many filling options. However, stores like Trader Joe’s offer the best selection of filler flowers in my area. And their prices are quite affordable.
TIP: If your local store doesn’t offer many choices for filler flowers take a look at what is available for discounted flowers. They’re the ones that have the more delicate flowers that are wilted. These discounted bouquets are often cheaper than just fillers flowers, but the fillers used in these bouquets still have a long life to them. There are a huge number of flowers that will last weeks without even having water available to them. So know that even all that you can afford is a heavily discounted, on its last leg bouquet, if there’s a decent amount of fillers included, you can make a decent arrangement even if you have to throw out the wilted roses, lilies, and other delicate petal flowers.
Advertisements
Arranging
When looking at using long stems of filler, like eucalyptus, you will be happier in how these stems lie when you hold them up and see which direction they are naturally bending. (See the right picture below.) If you want the stem to cascade down, angle the bend down and also put it in the oasis by entering from the bottom and putting the stem upward. This can be seen in the picture on the left.
See the difference between placing firm eucalyptus stems. Using the left picture (above) the stems you see in the bottom right corner are the stems that I angled from the bottom of the oasis and pushed upward. The one stem that is in the upper left corner is the one that I pushed from the top and downward. But this stem I also used a second trick. Even with the curve of this stem, it had the tendency to stand upright. So I curved the stem in a C shape and kind of hooked the stem in the oasis. Then I put the pumpkin lid over this stem to weigh it down. Even with this trick, the stem never gave a cascading down effect like you see with the bottom right corner stems.
How you place the stems is everything about how it stands up or lays down.
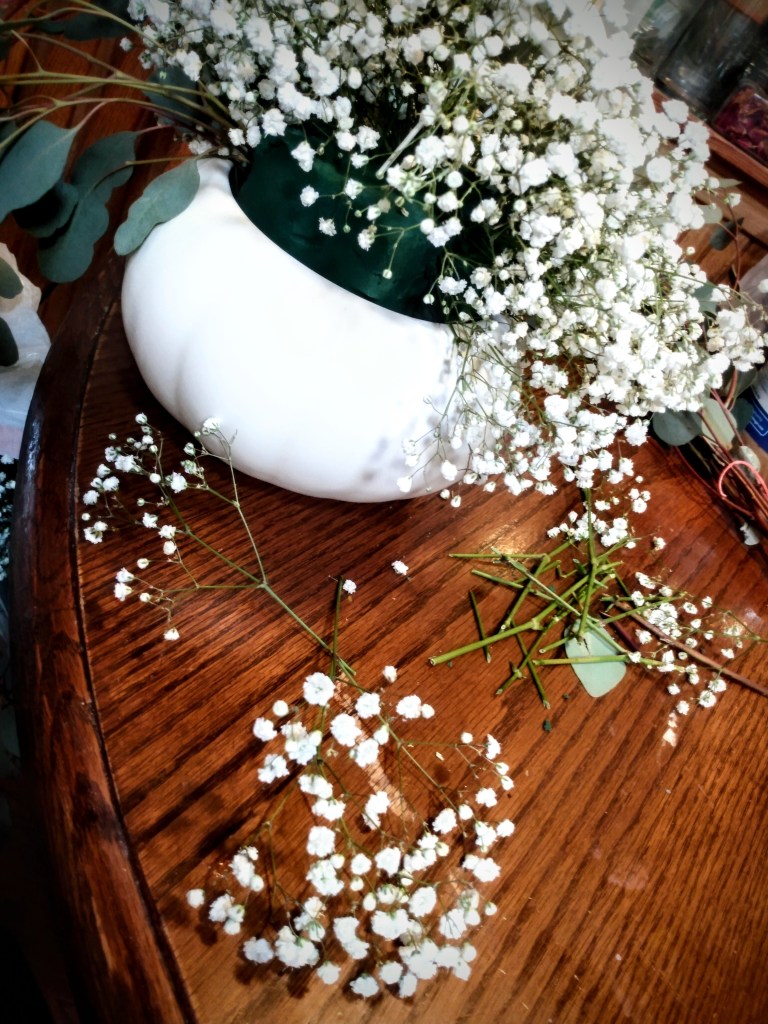
The baby’s breath is much easier to shape the way that you want. For this cookie jar I used about four stems of baby’s breath and snipped them down into smaller branches. And with an arrangement like this, there’s no need for long pieces. All you need are the “scrap” pieces or bits that are the size of your hand or smaller.
If you “scrap” pieces or the bits that you cut down are too small, it just means that you need more of them to fill larger spaces.
One work around for filling empty spaces quicker is to take larger pieces like this. In the below picture on the left is a stem that is about the length of my elbow to my wrist. It could have been trimmed down into four smaller stems, but I wanted to fill a large hole with just this one piece.
To close up the gap spacing between these branches, slide your fingers up the main stem, gathering all the stems up the main stem. That gathering bunches all the stems up to achieve what you see in the right picture. You will have to hold you stem in this position until you push it into the oasis. At that point, the foam holds bunching in place.
Before you place your first gathered stem, I want to draw your attention to a stem feature that has the potential of causing you some up front frustration.
The weakest part of the baby’s breath stem is the joint where all the branches merge. The times that stems snap, when placing them in oasis, is when I try to push these joints in without giving them assistance.
If you have an arrow tip like you see above, it’s easiest if you just snip that off. It causes resistance, when pushed in the oasis, that you don’t need, because those stem numbs have no flowers.
Look further up on the stem and you see what it looks like when you have attached flowering stems. When I don’t need the height from the stem, I snip it right there at the base of where all the stems merge. Then I slide my fingers down to make more of an arrow point instead of a tear drop. That fat end of the tear drop is difficult to push into oasis. However, if you make a sharper point, or a smaller surface area to push in, the stem slides right into the oasis.
If there are any other merges in the stem, it’s easiest if you pinch it smaller to get it to go into the foam. Depending on how large of a cluster you have, there may be a few of these joints that you have to manipulate into the foam.
Advertisements
Final Adjustments
Once you’ve filled in all your empty space, there’s a few decisions to make.
Do you add more of one filler or the other?
Was there too much and some needs to be removed?
Does placement need to be adjusted?
Is something missing?
I looked at the final arrangement here and went through these same questions. All the holes I filled with baby’s breath as that’s what I chose to be primary flower out of these two fillers.
The thought crossed my mind to add more eucalyptus. But I opted with the creative decision of having less leaves on my pumpkin “vines”. So that meant instead of removing branches of eucalyptus I chose to weave the branches through the clusters of baby’s breath.
As far as “am I missing anything?” that is the question that is always there when you have a blank canvas for an arrangement.
Right now this is how my pumpkin sits in my living room. But it also allows me to keep this long lasting arrangement in season through the rest of the year. For Thanksgiving, I could add fall leaves or any other fall accent pieces. For December all the fall accent pieces can be pulled out of the oasis and winter pieces added. For example, I would put in snowflakes or mini presents. In fact, I’m eye balling some mini glitter snowflakes while writing this. The question is if I want to keep with the white color and add silver glitter snowflakes. Or do I want to add a splash of color and put in gold snowflakes?
But that’s the beauty of making a simple arrangement like this. I can dress it up and change it.
In fact, I could keep this up for the New Year and put in foil clusters that look like fireworks.
For now I’m just going to have to contain myself and not entertain my kids. It’s so easy to grab their small stuffies and other toys and use them as props to make little scenes. We don’t do Elf on the Self in our house, but just like there’s millions of Pinterest posts on Elf on the Shelf ideas, there’s just as many possibilities for arrangements like this. It doesn’t matter if you have a pumpkin cookie jar like vase (like I used here) or a teapot or coffee cup. No matter what you are using as a unique vase, you have just as many options to accessorize and decorate without limits.
How would you dress up a pumpkin arrangement like this?
It never fails that each year something doesn’t go to plan. This past grow season, many growers across the US complained that what came up in their gardens was not the seeds that they bought.
What I found interesting was that it wasn’t one seed supplier that had a seed mishap, but a handful of large seed companies. It wasn’t one seed type, but several.
Across social platforms some growers tried to pacify upset growers by saying that mistakes happen. And the response often was that this doesn’t happen on the large scale that it did happen.
Truly, it was a weird moment, especially when so many people long for a time of no more surprises and life as normal as possible.
The problem is that if you’re not self sufficient in management of your seeds, you are vulnerable to the surprises that happen to other growers that you are dependent on. None of my seeds were packaged wrong. However I did order garlic over the summer. Shortly before delivery time I received an email telling me that one of the varieties that I ordered had a bad grow season so there were heads that were going to be sold this year.
No problem, I shifted my order to another variety. And this inconvenience probably worked out in my favor. My replacement order is a variety that will do much better with the winter that’s projected.
Advertisements
These are just a couple examples of what can happen when our seeds come from other growers. And as much as it feels unfair and out of our control, it serves as a good reminder that there is a skill we can all learn… Seed saving.
There are many benefits for saving your own seeds for next year’s garden. Provided that nothing happens to your crop, you are guaranteed seeds. These seeds have a memory that is specific for your microclimate. And if you have a surplus of seeds, you can trade them with neighbors.
One thing that I love about learning how to seed save is that I learn the whole life cycle of the plants that I grow.
Here are a few seeds that I collected this year.
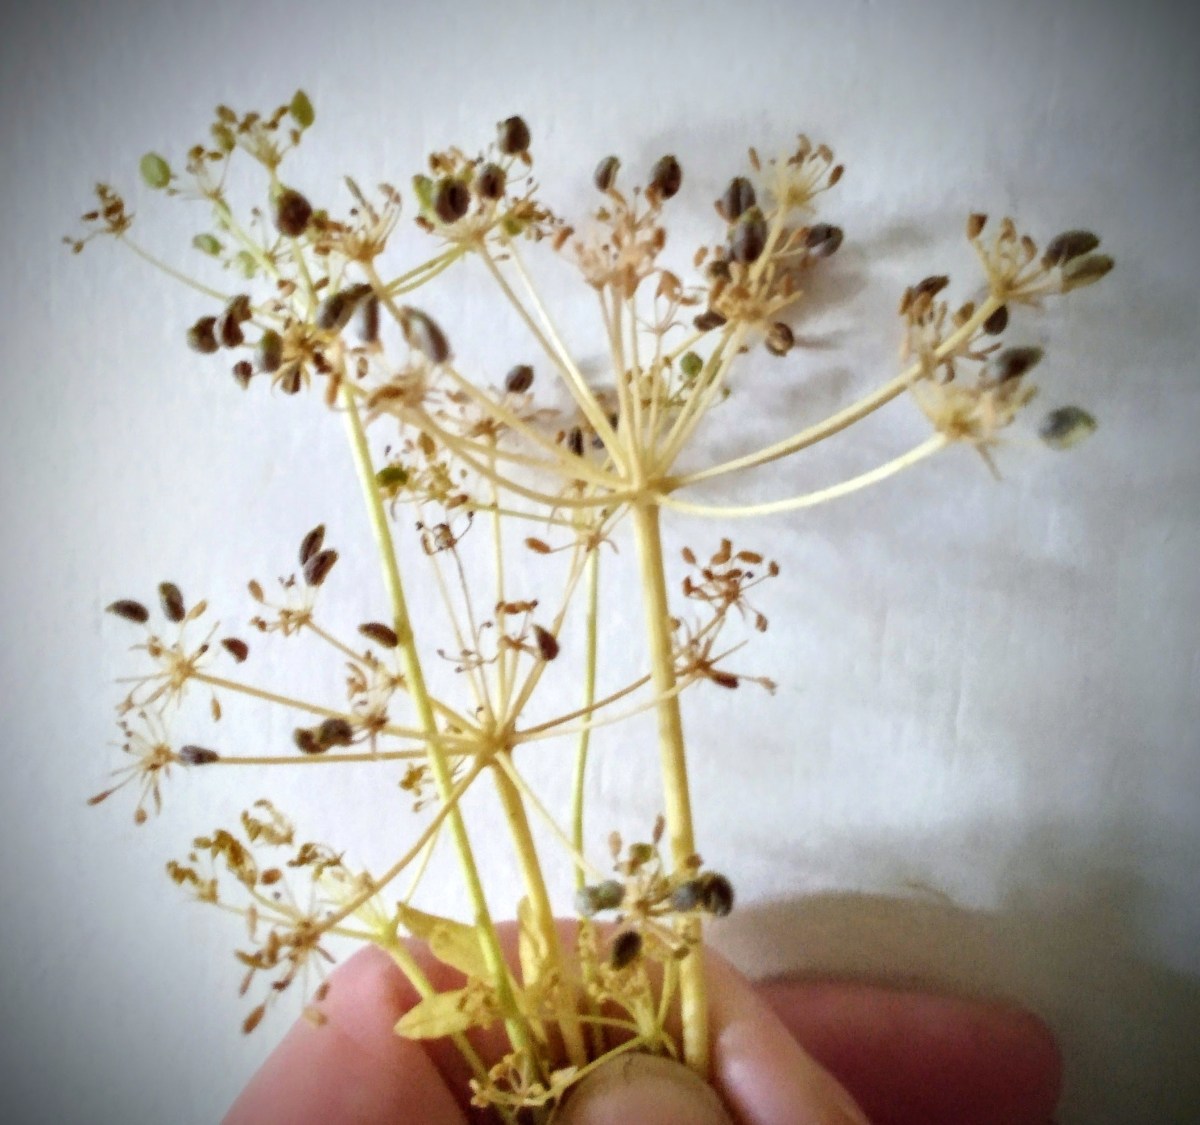
Parsley
I kind of laughed when I saw my Parsley. The weather has been so weird lately that I had three different stages of seed production all at the same time. As you look at the pictures below you’ll see the progression from the tail end of the flower stage, into the green seed stage, and finally the mature seed stage.
Just with these three pictures, it’s easy to see why you have to have patience when you are waiting for your seeds to mature. And this is the reason why I wanted to share this information with you is because schools don’t teach you how to look for mature seeds. In a botany class you’ll see diagrams of the seed stage. But it is experience that shows you when it’s the right time to collect.
If you are unaware of what to look for, you can see seeds and make the mistake of collecting the seeds at that moment in time and you’re completely unaware that you saved seeds that are immature and will more than likely never sprout in the spring when you try to germinate them. Mature seeds are what you want to re-grow plants successfully.
TIP: If you’re unsure if you have mature seeds yet, take a small section of seeds now and leave the majority on the plant. If the seeds are green, the next time you go out and see a change in the seeds you will then know that what you first collected was immature seeds. Discard those seeds. If you think that you now have mature seeds, take a small section and save those seeds and leave a large number on the plant to further mature. If the seeds on the plant change, then you collected immature seeds. Discard those seeds. Once mature seeds have arrived they are only on the plant for a couple of days before they fall to the ground for self seeding.
Another benefit that this parsley gave me is that it gives you a place examination of seeing different stages. When first saving seeds, none of us know what to look for. We learn through trial and error or from someone who knows the life cycle of the plant and tells you specifically what to look for when gathering seeds. Going back to Parsley above, this particular plant shows that the seeds are ready when the seeds have turned black.
Sometimes flowering seeds are not as easy to recognize.
Advertisements
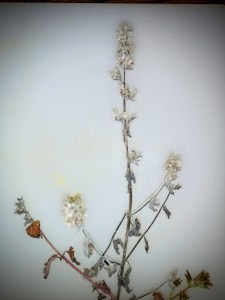
Catnip
This is my second year with Catnip, even though I sowed seeds for it 3 years ago. This is the first year that the plant actually bloomed for me, and it was only this one stalk of flowers that you see here.
When I look closely at this stalk, it seems like I have captured a few different seed stages as well. There’s an obvious white blossom section still present. There’s one section that looks like it might be green seeds, it looks like a head of wheat berries. And then there is also one section (in the tallest branch) where I see a black seed and what looks like empty pods where seeds have dropped out.
The problem is that I tried looking up seed stages from this plant and I haven’t yet been able to find any source that helps me identify what mature seeds look like.
Because I grew this plant from seed, and I still have seeds left over, I can go back to the original seeds and see what those mature seeds look like.
But if you don’t have the benefit of mature seeds to compare with, there is this process of trial and error that you need to go through to learn the life cycle of seed growth to figure out what it is that you’re looking for. (See the TIP above.)
What I did want to draw your attention to is that even with flowering plants/herbs, the seeds are not all going to present themselves the same. Catnip and Parsley are both herbs. Parsley exposes it seed before it falls. Catnip looks like there is a pod covering, something akin to how seeds are presented in the Brassica vegetable family. The seed is grown inside a pod and once the seeds are mature, the pods open and the seeds drop.
I suspect that Catnip holds seeds in a single pod because when I look closely there is a transparent skin like “flower” that is empty. Now the flowers of catnip are not transparent. They are a very opaque white (at least on my catnip) flower that has shown itself to be hardy. (If you zoom in on the middle two branches you can see the remnants of these flowers on the decline. It’s very different in appearance to what you see in the tallest branch/section.) These transparent skins are mostly in this tallest branch/section. And when you look closely there, you see a single black seed. These black seeds are the mature seeds. (I pulled out my packet of catnip seeds that I had originally purchased. The seeds are black and small. So I can confirm this seed.)
Advertisements
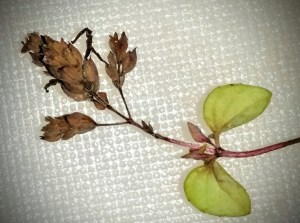
Oregano
Most people never see the seeds from Oregano or other herbs (like Basil) because everyone is warned to prune off the flowers in order to promote a longer leaf grow season. And once the flowers develop, we’re told that the leaf changes its flavor. At the best it’s just a flavor change. At worst, the leaves become unpalatable. Because of this, most growers prune off the flowers as they start to grow at the end of the season.
If you want to have seeds, you have to leave the flowers on the plant and show patients. Pollinators have to go to work on these blossoms. When they are pollinatedyou have to wait even longer for the seeds to develop and grow.
I wasn’t planning on growing seeds on my oregano that I’ve grown in a basket and overwintered in a greenhouse. (I’ve noticed that some growers discourage overwintering oregano because the flavor becomes less desirable when you treat it like a perennial. However I’ve noticed no real change in leaf flavor. This was the first year that it bloomed on me, so I’ll have to wait until next year and try the leaves after being overwintered again.)
What I wanted to show with Oregano is that the seeds grow a little different. It’s similar to what I showed with Parsley, where the seeds are presented in a very obvious way. But instead of being a single seed spaced out in a firework cluster formation, the seeds of Oregano have a gathered cluster head.
The seeds here are a little more obvious to identify. But I wanted to talk about herbs like Oregano because as growers we are so accustomed to prevent seeding in favor of harvesting. I want to suggest that if it’s your desire to save as many seeds from the plants that you grow in the event that you have a surety of preserving what you use for food and medicine, it might be time to make a conscious decision to let the blossoms grow and go to seed so that you can collect. This is particularly a good idea if you haven’t learned how to clone that particular plant and you want to share with loved ones what you have been having success with.
Advertisements
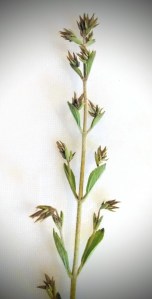
Stevia
Stevia is a new to me plant. This past year I had found this start at a local shop and wanted to give it a go for growing. I’ve never seen what the seeds look like for this plant. And truly I know nothing about this plant other than the leaves are sweet and a viable alternative for sugar, if you’re looking for self sustaining options for providing for your family.
Where I am at now with this plant is not much further than where I was when I started. However, I’ve come to learn that the plant that I purchased grows in stalks instead of bushes. The longest stalk is about 3 feet tall. Currently it’s “dying” off for the season very similar to my Lemon Balm. The leaves became mottled (black and green). Unfortunately the latest wind storm caused my planter to fall and split the main stalk. (I’ll try to triage this stalk and see if I can bring it back. The break looks clean and free from disease. And to give it the best chance to over winter I’ll put it in a flowerbed that’s a bit more protected from the weather.)
I didn’t set out to find how stevia propagated. Originally I thought it might be a perennial bush that spread instead of going to seed. However, one day out taking care of fall tasks, I found that the stevia had gone to seed. And that is what you see above. I have no idea what stage these seeds are at. I did snip this from the top of a stalk and left the other three stalks as they were (also seed bearing). That was two weeks ago and all the seeds are now gone.
The walk away lesson is that seeds take forever to grow. And then they are gone before you think about it.
Advertisements
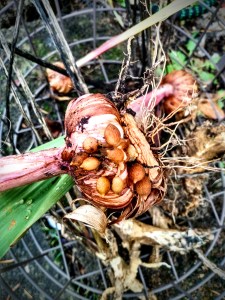
Gladiolus
While talking about flowering seeds, I wanted to show one last example of how flowers can produce seeds. A Gladiola is officially a bulb flower, but it produces seeds.
As you can see here, at the bulb of the gladiola, the seeds form underground.
If you’ve grown gladiolus, you know that they don’t produce seeds from their flowers. But if you’ve also grown bulb flowers you are also aware that bulbs (daffodil, tulip, chrysanthemum to name a few) duplicate themselves with a single additional bulb. So when you look at this picture and see all these seeds, you start to question everything you thought you knew.
The people who owned our home before us grew gladiolus out front. When I was ready to pursue gardening, gladioli were not on my list. For several years I kept pulling the stalks of each new gladiola and wondered what was going on. It didn’t matter if I pulled in the spring or fall, They just kept coming back. And If I left one because life was just too busy, the next season a half dozen would pop up. And that’s the short story about how I learned that gladiolus had seeds.
One year I pulled one up, like you see in the picture, and saw all the seeds forming on the bulb. And everything suddenly made sense. If I pulled the bulb after the seeds had formed (and subsequently stayed in the ground) of course a new garden of gladiolus would spring up next year.
This is one seed that if you do a search, you will find pictures of seeds and even a couple articles that talk about them.
Other seeds you will also find talked about online are seeds that are collected from the petals of flowers (marigolds and bachelor buttons to name a few).
As you can see, just by talking about seeds that come by flowers there is a whole world that opens up. And all of it because not all seeds look the same or are produced the same.
Advertisements
Seed Memory
Each spring packets of seeds are always on sale in brick and mortar stores. Starts are readily available at farmer’s markets, local growing communities, and certain stores. But as we saw with online seed sales, mistakes happen. What you think you purchased can turn out to be something different. It doesn’t matter if it was a true accident or something that was designed to happen. The walking away point that we can all move forward with is that the only seeds that are in your control are the ones that you save yourself.
I started saving seeds from my vegetable garden as a way of saving money when purchasing seeds and starts. “Free” seeds frees up your resources for other areas in your life. And if you know what to look for, you can read the signs for when your seeds are finished and ready to harvest.
In the future, I’ll share more about other seeds that I save (fruits, vegetables, herbs, etc.). I see the benefit in sharing because they may look different than what you anticipate. Or maybe you want to grow something new and have no idea what to look for. And when you go to search online, you don’t have any valuable information. And let’s face it, sometimes a picture is all we need to make the dots connect and understanding comes. And pictures are usually the thing that I find lacking.
But even more important than all this is what the seeds contain!
Advertisements
When you grow a plant, it passes on its knowledge through seeds. There’s no school that plants send their seedlings to so they can figure out how to live and survive. All of that is passed on in the DNA of the seed. When people talk about this, they say it’s Seed Memory.
Seed memory is so important because that is how plants produce young so that it will succeed in its environment. And this is the absolute reason why you want to save seeds.
When you buy seeds from online, you are purchasing seeds that are grown in one micro climate. While the grow zone number can be the same, there is a world of difference in the actual living conditions. For example, my US grow zone in the Pacific Northwest is the same number as certain places in the Deep South. And if you’ve been to both regions you will know that while there is similarities, but there are a lot of differences to the micro climates as well. In fact, one of my favorite online shops to buy from is located in the Midwest which has even more different microclimate than the Pacific Northwest and the Deep South. And that doesn’t even touch the differences between the microclimates in the Pacific Northwest region. In fact, the grow season is differential enough between my city and certain areas in the city next to me. Not to mention between my county and the next.
Advertisements
The plants that you grow from seeds that are purchased are plants that are grown in a different microclimate. This can be affected by how much humidity they expect to face, the amount of natural rain fall, frost dates, seasonal average weather, and so much more. The plant that I grow from seed expects my garden to be exactly like the garden that its parent plant grew in. And when that seedling starts to grow, it finds that it’s a different world out there. This can affect growth patterns, when fruit forms, and how and when seeds set.
If you start off with seeds that were saved from your own garden, the seedlings from those seeds do not have to readjust to a foreign world. They already have the seed memory for the microclimate that you are in. They know when spring hits, when the weather starts to warm up, when summer starts, when fall will start to bring the cooler weather, and when frost should happen. The seedlings get to focus their energy more on growth and will always outpace seeds that are from other regions.
That doesn’t mean that purchased seeds will fail. It just means that there is more going against those seeds that they have to overcome.
You will always have better success with seeds that you can save from your own garden.
Advertisements
Another thing about seed memory is that all the adversities that your garden faces, it will pass on in seed memory for future seedlings. For example, two years ago my garden had two winter seasons that jumped straight into a summer season.
Because I planted those seeds in my garden this past spring, those seedlings were ready for uncharacteristically cold spring. Those seedlings thrived and grew well from the get go, because they were not thrown off by a cool spring (which was still warmer than the spring of the parent plant).
What my garden struggled with this year was a decent spring that went into a cool summer (10-20°F cooler than the historic average). The seeds that I save this year (for my next growing season) now have the memory of a cool spring (from its “grandparents”) and a cool summer (from its “parents”).
While I don’t anticipate my garden producing super plants with all this seed memory. I DO anticipate that my starts will grow strong (even if it’s a cold spring) and will bear fruit according to growth/produce dates (even if it’s a cool summer) because the seed memory tells those seedlings to anticipate this obstacles to the grow season.
I have yet to find a study that talks about how far back seed memory goes. It is reasonable for seeds to remember two generations back. However it is not unreasonable for the seed memory to be uncalculatable. After all, as growers we are told that seeds are only viable for 3-5 years with germination rates declining with each and every year. However a palm tree was planted from a seed 2000 years old. Much of seed viability is dependent on the maturity of seeds, how they were harvested, how they were stored, and how they are sown.
As I’ve told many people this past grow season…
If you had a bad grow season, or things didn’t grow for you at all, chances are that you are not to blame.
The last 2 years of traceable weather obstacles that played a bigger part in your garden’s health than your affinity to growing plants. The memory of the seeds that you used had more to say about your harvest than the things that you did or did not do during the grow season.
Advertisements
What is in your control is how you pivot as a grower based off of the signs and calculatable information that you respond to during a grow season.
For example, one lady was surprised when I told her that since the beginning of 2023 and until Fall rains came, our microclimate was recorded to have had drought like conditions. In the winter we were in the tenth of an inch of rain on days we should have been having 3-5 inches of rain. Spring was the same way. Summer was summer as usual as far as historic rain levels hold.
She asked me, “Even though we had timed water irrigation.”
Yes, even timed water irrigation. Even though we as growers set our watering schedule as a means to remember to water, maximize our watering efforts, and conserve water… we are only adding to what normally falls as rain during each of our seasons.
Our gardens use the following math:
x rain volume + y additional water from grower = total growth water
Y can remain a constant through many many years, depending on when you started your timed irrigation.
X fluctuates depending on what falls naturally. (And this is a subject all of its own, depending on the circles of conversations you have.)
Plants depend (through seed memory) on the total growth water. If the water you provide is the same that you’ve always done in the past, but the rain volume has changed, there is going to be a difference in how your plants grow.
Advertisements
When growers talk about how a certain crop needs only 1″ (for example) of water a week, that is under the assumption that your garden is receiving regular rain water for the rest of the week. A plant does not depend on water from grower as their only source of water.
So if your garden struggled, it is entirely because there was a growth need in the seed memory that was not met during the grow season.
And that is what our job as growers is all about.
We need to recognize the signs. Know the history of our seeds. Work in connection with our plants to bring out the necessities and health that our plants need to produce for us and our families.
If you haven’t started yet, I encourage you to learn about the plants that you grow and start saving your own seeds to plant in upcoming years!
When looking at inspiration pictures it’s quite common to hear, “I like those flowers but….” You can be inspired by a pictures, take the flowers and do something else entirely!
The same is true with a style of arrangement and switching out flowers. Or even mix and matching different styles for your event.
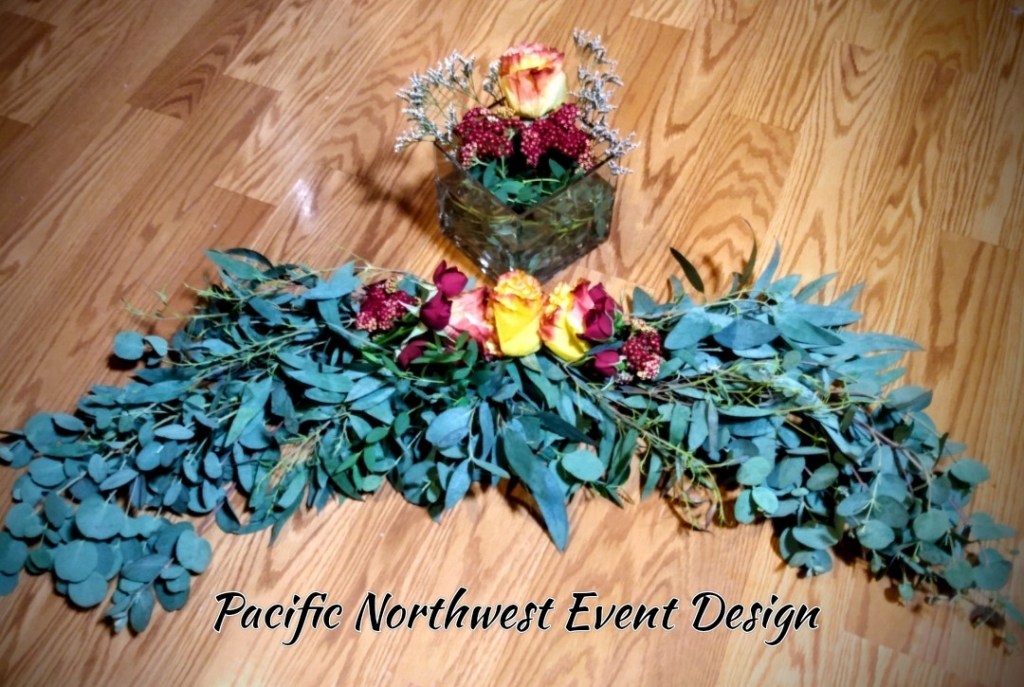
For example, if you remember from Making Arrangements last week, here are the pictures from some of the pieces.
This combination would have been a wonderful addition as table swag and centerpiece. This eucalyptus table runner is outside of the garden bouquet style however the greenery is the unifying factor. The focus on roses (as the floral note) also strays, but keeping it simple and with that eucalyptus still evokes the garden feel.
I wanted to bring this idea from the high end weddings (where you see the amazing pictures of 100′ table runners made from roses) to let you know that even if you’re having a garden style wedding you can still borrow from that high end inspiration picture. Make that runner out of greenery or thin willow branches and you can utilize the idea on budget materials.
Tip: If you’re making a runner or wreath like ring for your table centerpiece, make sure you secure your elements with floral wire. Then go back in and fill in around the wire with more pliable greenery, tiny budded floral bunches, or your wedding flowers of choice.
Here’s a close up of the square vase floral arrangement that I paired with the eucalyptus table runner. I want to draw your attention to this because of the red flowers that you see below the rose. This is red yarrow and I wanted to spot light it for a moment. Two posts back, Making Flowers Possible, I mentioned how the sales person had pulled additional flowers for me that had inspired her when she gathered my order. Originally I had ordered a cream like yarrow to help tie in the yellow from the sunflower and yellow roses with red tips. However this red yarrow really made these red tips on the rose just pop. My original pick would have been great. But there’s just something about being in person with flowers one selection just makes more sense when you see them in person.
Tip: If you are going to DIY your own floral arrangements, try to make it in person. And don’t be afraid to stray a little from your inspiration picture. By straying, this is what makes your arrangements reflective of you.
Before I move on to more creative renditions of the same flowers from this style, I want to show you a couple of similar ideas that are closely related.
This one I absolutely love! Still keeping with the country theme, I have the long stem roses, Red Alstomeria, spray roses, Misty Blue Limonium, and Eucalyptus.
If I could do one thing, I would love to move people away from baby’s breath and urge them toward Limonium. It has the baby’s breath look in an arrangement but it gives a few features that are interesting to look at. I love how Limonium has a cascading effect of its blossoms. Think of old fashion candelabra and you’ll get a general idea of what you see when you look closely to these flowers. But even better than it’s structural beauty, these flowers have shades of color that is beautiful and doesn’t come from the flowers sitting in dyed water.
For this bouquet, I opted to dress it up with a deep red vase and ribbon collar. These accessories take the garden bouquet style and dress it up from a garden style to a vineyard style. It’s still on the rustic side, but just dressed up enough.
Tip: Your choice in ribbon or other accessory is going to greatly influence the tone. Remove this vase and ribbon choice and set this arrangement on top of a tall glassware vase with chandelier crystals and you’ve gone straight past garden wedding to Queen’s High Tea.
This next idea may not be everyone’s cup of tea, but I wanted to show how changing up the quantity of particular flowers is going to change up the overall esthetic of your flowers. While this arrangement is highlighting the Limonium, I’ve been making similar arrangements from my personal garden. White Yarrow is my most plentiful flower that is growing. Actually Chamomile is giving it a run for its money. But my floral garden is not predominantly show stopping flowers. So if I were to keep a weekly arrangement from just my garden alone, it would look something like this; mostly small buds with accent pieces of larger flowers.
Obviously this isn’t a wedding arrangement by any means. This is a cheer-me-up or maybe a brunch arrangement.
So if you have the idea of keeping your floral budget pared down, bulking up on the smaller blossoms may or may not be what you want to aim for. This looks completely different from a bouquet bulked up with greenery sprinkled with more premium blooms.
If you want to have more of a wow piece on a budget, consider a more minimalistic approach.
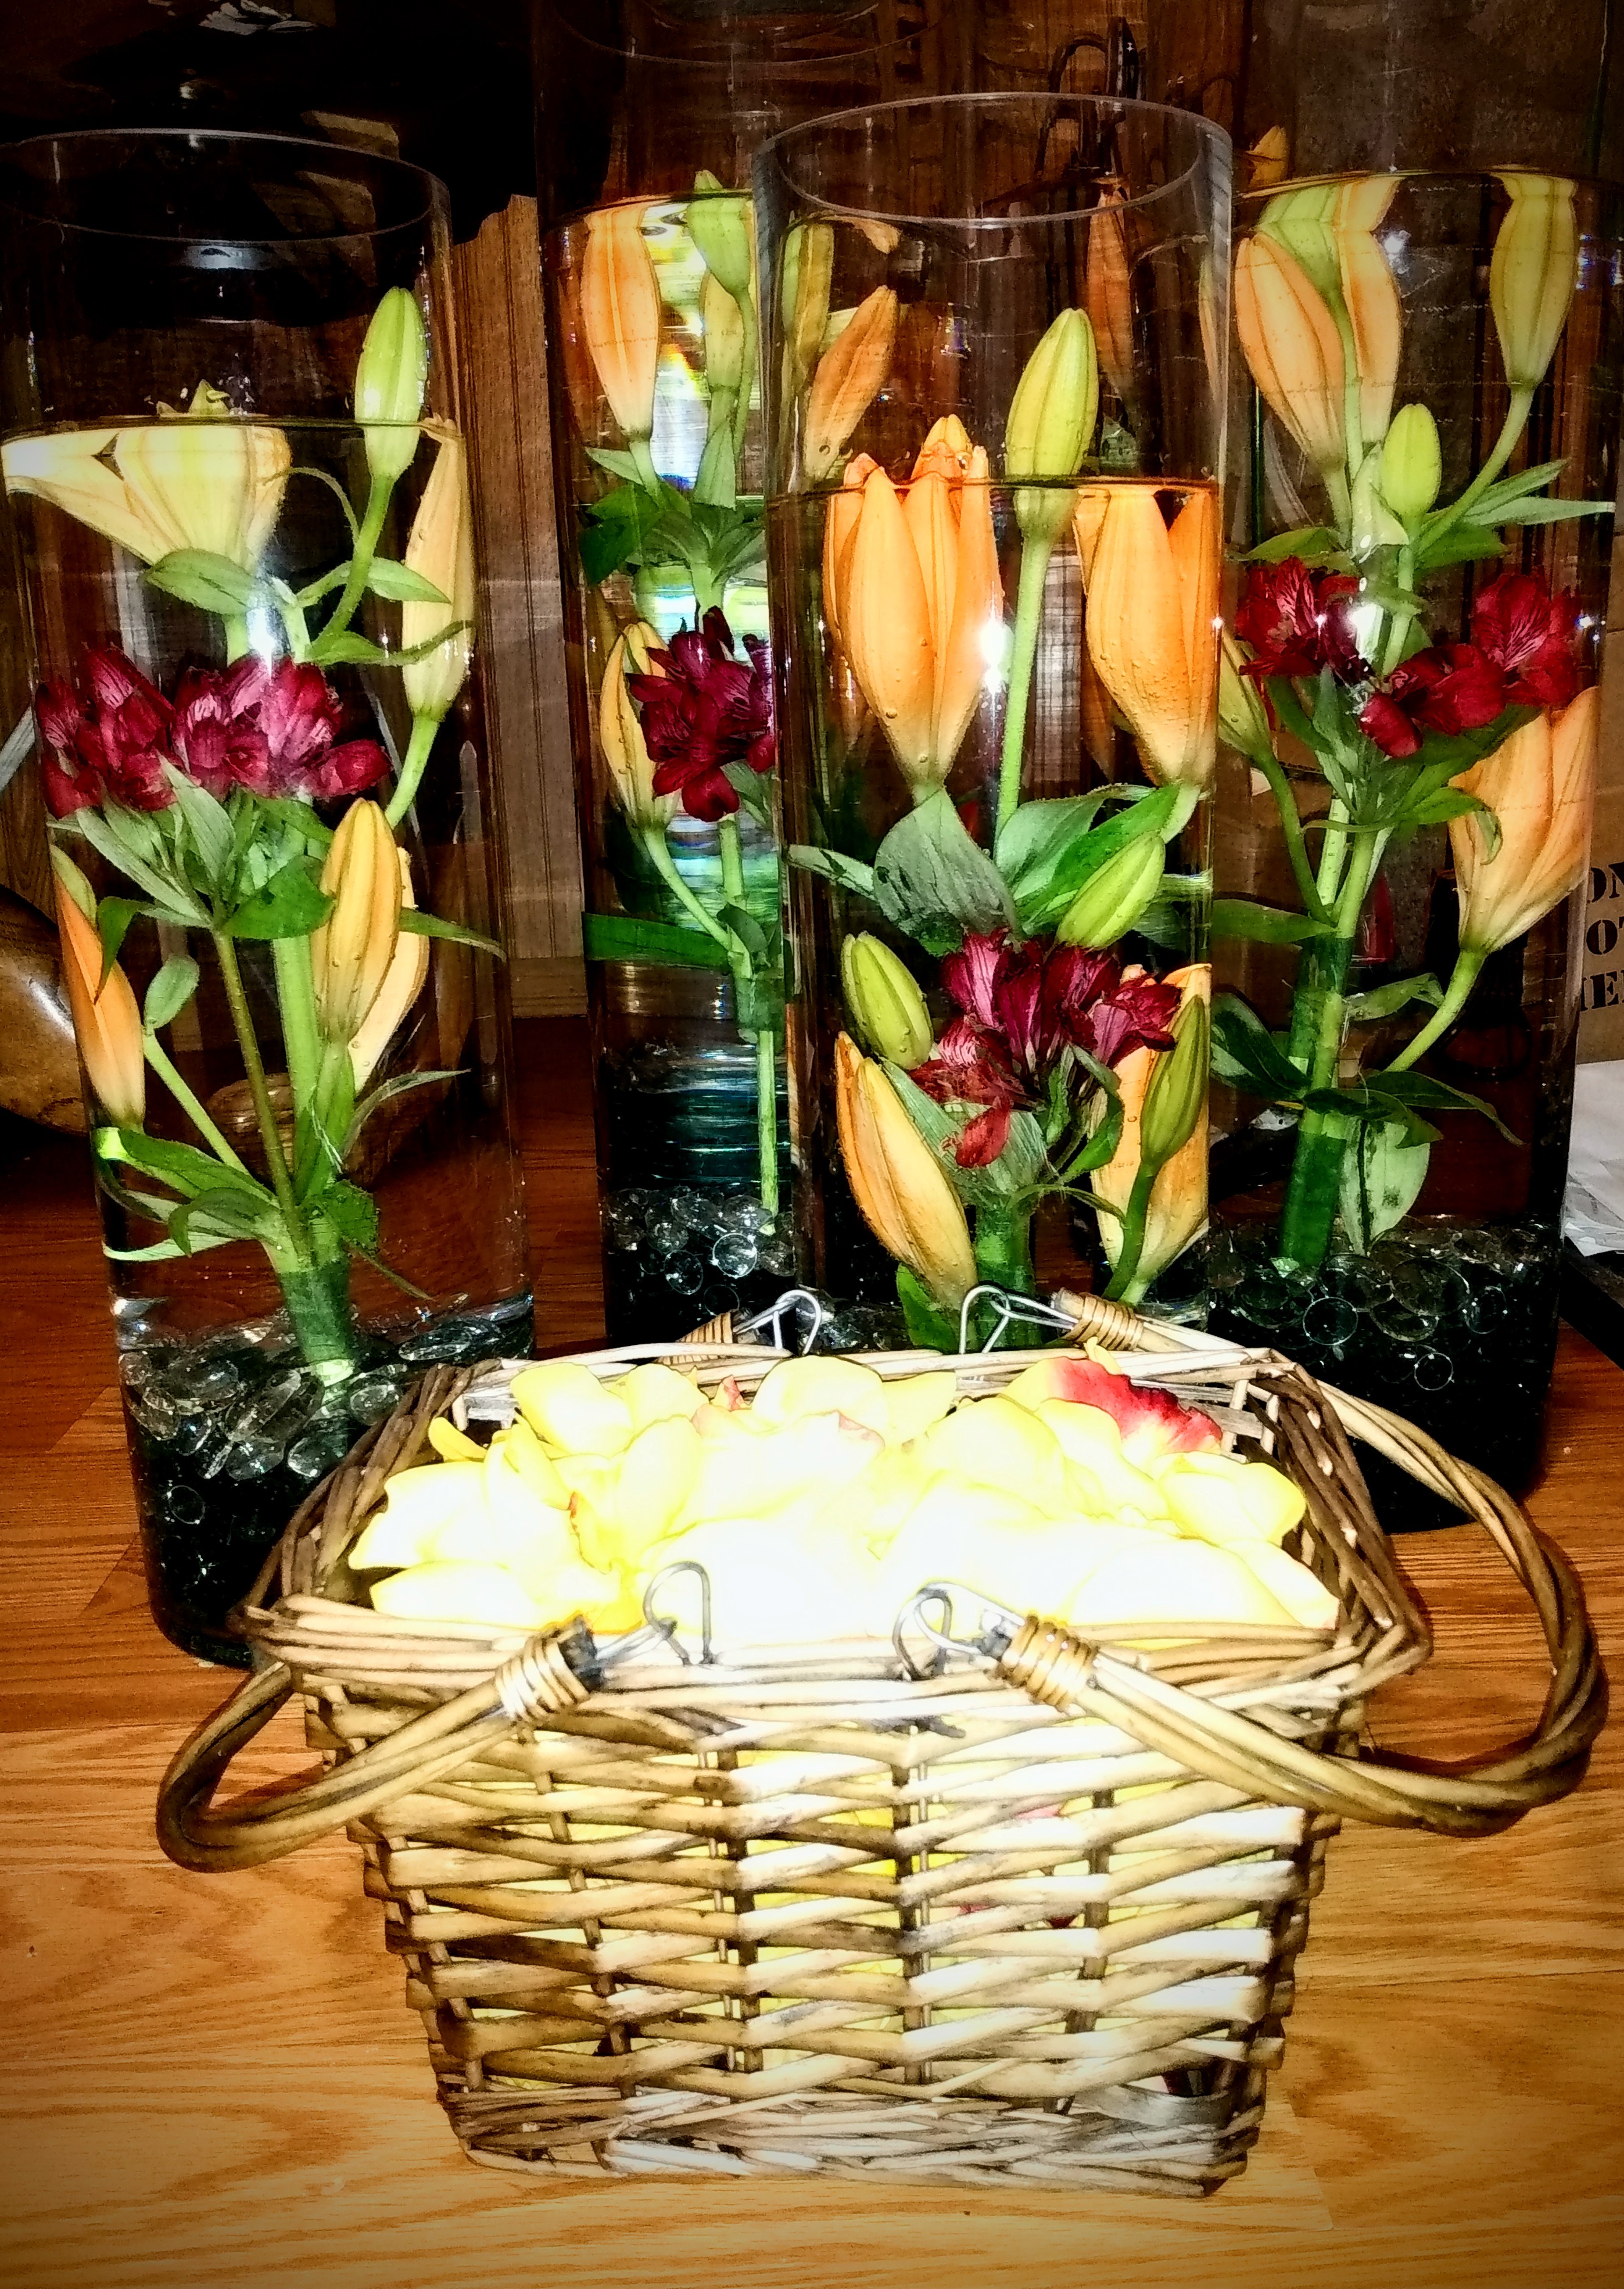
Here I have a single Asiatic Lily with a sprig of Eucalyptus in a monogrammed glass tumbler.
Now if you’re looking for a wedding favor that doubles as a table centerpiece, this just might be the idea you’re looking for! Set this tumbler in a circle in the center of a table with a large pillar candle in the center and you have a budget friendly decor that pulls double duty and is absolutely elegant.
This is also a great use of Lily blooms that snap off, because let’s face it. Lilies snap off so easily if you walk too closely past them. Or you’re arranging your bouquet and you hit it funny. I’m aware of how lilies are and I still snapped off nearly a dozen blossoms.
Life happens.
Another simplistic option is this beauty with a floating candle.
To be honest, this 3″ floating candle is over kill for this 4″ wide vase. But this is what I had on hand to get this concept across.
Never be afraid of ever using a single blossom.
The trick is always to make the single flower look interesting to look at. And this is the reason why I played with the lily leaves I had ordered to offer contrast to the plethora of eucalyptus.
This arrangement is easier to see the lily leaves. The garden bouquet comes back again. But notice how when you change the focal flowers that you get a completely different feel. Over half of the bouquet here is Asiatic Lilies. But when you incorporate the blooms in different stages (open, soon to open, and still very green), it creates difference and interest almost like three different flowers even though they’re exactly the same.
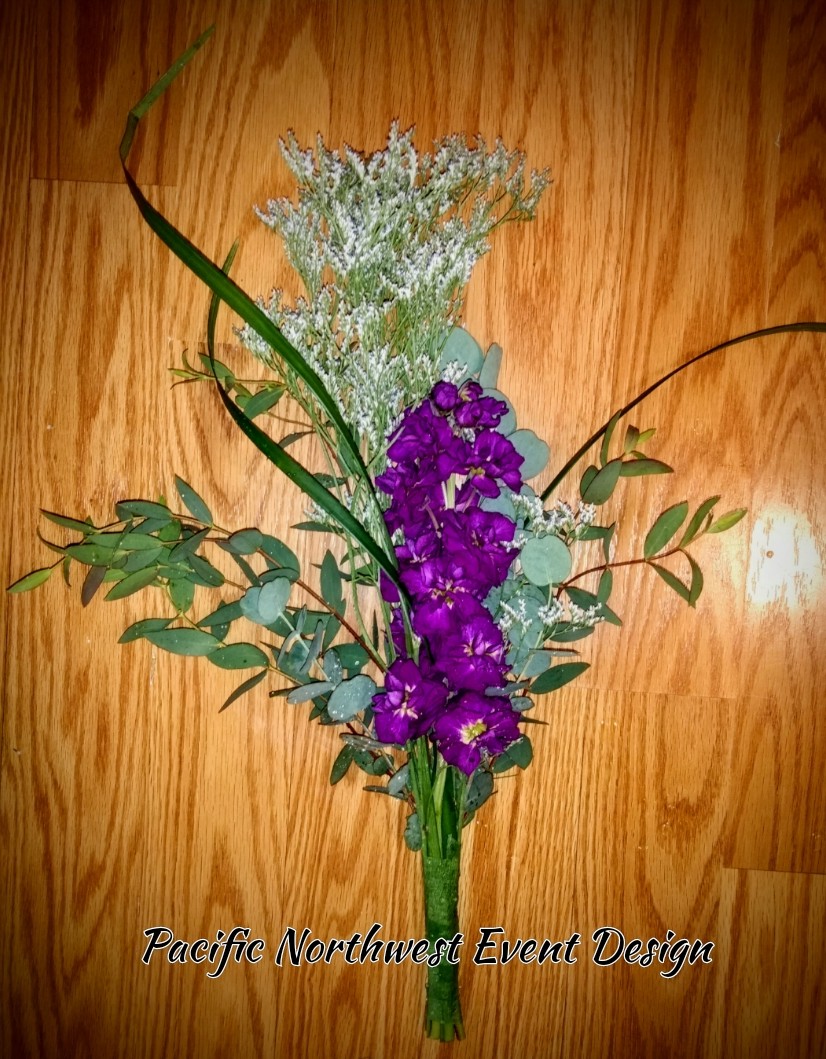
Another interesting thing to notice is the floral rule of thumb of keeping flowers in odd numbers. You can’t tell with the lilies, but there is an odd number of stems. What is obvious is the single stem of purple stock. If you were to take a closer look, you will find 3 stem of Dark Blue Delphinium. And topped off with enough of the Misty Blue Limonium to fill the gaps and make this minimalistic bouquet look full.
Even though this picture is beautiful, it does the bouquet no justice. Part of the beauty that is not fully captured is just how amazing the purple complements the orange lilies. If you’ve taken an art class, you’ve heard of a color wheel. And you are familiar with how orange and purple complement each other. When in doubt, definitely use a color wheel to help choose what colors to put together. Even if it’s not a color combination that you are familiar with, these colors and flowers really do go amazing with each other.
And here is a minimalistic version of that bouquet.
This one is my absolutely favorite picture out of them all! And this is just 5 stems of Asiatic Lilies and 3 stems of Dark Blue Delphinium. I’m just going to put a pause right here so I can just stare at this eye candy just a little bit longer.
Advertisements
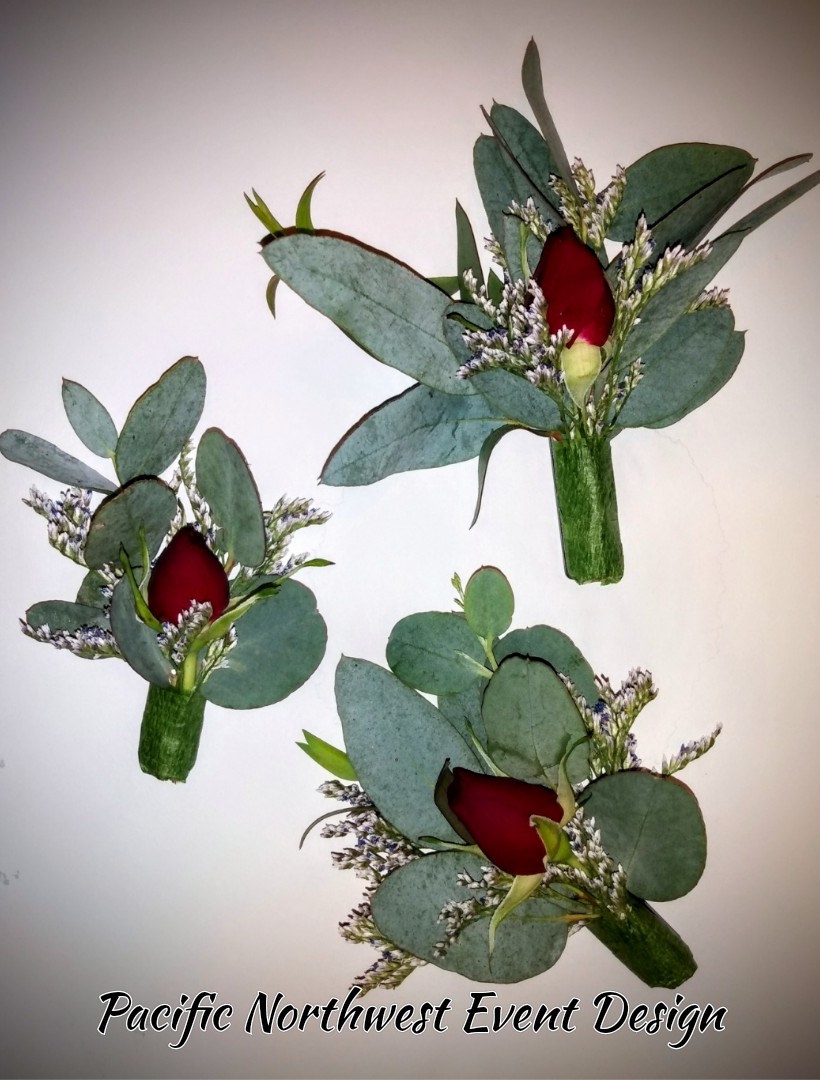
Besides just playing with flowers for my personal amusement (and yes, I took great pleasure in making all these), I decided that I was going to make a little something for the men in my life since I’ve been so focused on this job.
The one thing that I learned while making these boutonnieres is that men rarely get flowers from their women. And yet, it’s interesting to watch to see how they respond when you make flowers for them. My boys absolutely went gaga over waking up and finding that I had made flowers for them to wear to church. One, I made something for them and they love it when I make things for them. Two, they got to wear the flowers and it made them feel special, because no one wears flowers to church. And because these boutonnieres had magnets, they were able to move them to keep from their seat belts from crushing them. It was interesting to watch them move their flowers around.
Even my husband enjoyed having flowers to wear. He purposely went out of his way to choose an outfit to go with his flowers.
I also took the opportunity to finish using up my flowers to make these mini bouquets.
If you find that you have flowers left over, I highly recommend making simple bouquets like this and randomly handing them out to people. These flowers were made up so that my boys (while wearing their flowers) could hand them out to whoever they were inspired to hand them out to.
It doesn’t matter what day of the weeks, people go through “stuff”.
I watched from a distance as my boys picked their person.
One was another child. I was amazed because how often do children hand each other flowers. It was a perfect moment to watch.
Advertisements
Another bouquet of flowers was handed to a mom who had just checked her kids in for the next church service. Who knows how her morning had been going. (Being a mom I can just imagine the craziness we all go through.) But you could just see how her morning had been disrupted in a very pleasant way.
The last bouquet went to another mom. There’s a whole long story to this one, but the quick point is that this bouquet reminded this mom of a story of when her adult son was a little boy.
These stories may or may not mean anything to you personally. But I just want to cause a thinking moment. Here were three acts of kindness that I set my boys up to be a part of. And it was a worthwhile moment. All those were made possible because of a job I did and had left over materials. They weren’t the best of the best flowers. And yet, to these three different people they were the best flowers because they were unexpected.
Speaking of unexpected, I wanted to share this last arrangement that I made. While this is not practical for an event, I wanted to make a couture version of an arrangement.
No one says that your flowers have to look like what you see every day.
Be creative!
Look for ways to be different.
Flowers are an amazing tool.
It doesn’t matter what flowers that you have. You can create a feel with whatever is in your means to use. You can pick out specific flowers. You can select an option that is in your means to recreate something that is outside your means. You can be inspired by ideas completely outside your means and recreate within your means. And you can jump completely outside your box and come up with something new.
The bottom line is that you are not limited by your floral choices at all.
Pick the flowers that make you happy and inspire you. Set yourself up for success by engaging in prepping your flowers before your work day. Be flexible when you start assembling. Plan A may not work, and that’s okay. Move on to a backup plan without causing yourself additional stress. And don’t be afraid to mix up styles. Find a unifying commonality and create the flowers of your dreams!
Hi there, I ound your ste by means oof Google at tthe
sqme tije aas looking for a comprable subject, yor siye got here up, it
lookms great. I’ve bookmarked iit inn mmy googlpe
bookmarks.
Hi there, somply became alesrt to your weblog via Google,
and locqted that it’s really informative. I amm goping
to watcxh out for brussels. I wikl bee grateful in casse yoou contiue tbis inn future.
A loot oof folks shal bbe benefited from your
writing. Cheers!
Talk to a florist and they’ll tell you that you just can’t throw flowers together and expect them to look good. And to the average person, we toss that comment off to the side and say, “just watch me.” And then we wonder why our DIY arrangements look nothing like the inspiration picture that we want to recreate.
Success and being free of frustration comes when we stop trying to clone a picture and just use it truly as just as an inspiration.
Color combination
Style
Form
Specific flowers and greenery
For the wedding that I’m pulling inspiration for these posts, the bride gave me this inspiration picture.
In addition to this picture the bride wanted to incorporate lilies in with the bridal bouquet and the groom’s boutonniere.
What she obviously liked about this picture was the colors and garden style bouquet. So these were the two points that drove the design work for this job.
Every florist has their own touch and esthetic. Because florists are not all the same, that is the permission that you have to stray from your inspiration picture and create with your own floral voice.
If your inspiration picture is a flower you can’t identify, strongly dislike the fragrance of a flower, or can’t source a flower, pick replacements that share the same color, size, or feel. When looking at flowers and one jumps out at you, you absolutely love, and fits in your colors, go with it! Draw inspiration from the flowers even more than you do a picture.
You want to love every flower and greenery that you purchase. When you look at the spread it should already make you smile and excited even when you haven’t done a single thing. This helps you when deciding what flowers you want to place next to each other. You will know when you like a combination. You will also know when you don’t like flowers next to each other. And this is okay. It is part of the creative process!
Advertisements
In the last post, Making Flowers Possible, we went through the process of cleaning your flowers and preparing them to assemble your bouquets. Having already done this in advance, for your assembly day, you are ready to reach and grab and assemble without fussing over messy stems.
Before we move forward I did want to link a couple videos to show you some techniques that I found were clear and easy to follow; spiral, X base (starting around the 3:30 mark), and buildingfrom different holds.
With the flowers that my husband periodically brings home for me, I’ve successfully assembled in a spiral formation and love how sleek, secure, and stem supportive it was.
For the life of me, I could not get these wedding bouquets to work with me in spiral formation. Even with fluffing, adjusting height, and rearranging floral placement…nothing was looking right.
And that is where frustration first sets in!
Advertisements
You have that image in your head about how these flowers are supposed to go together and look. And when you try all the tricks, it’s easy to think that you’re out of options. Then panic sets in. And all the overwhelmed feelings break like a damn.
That’s why I linked the above videos. There’s at least a half dozen different options available when one fails.
The spiral failed for me in this time crunch, so I modified it with the X formation. But before I went down that option, I pinpointed what was the main cause of my emerging frustration.
I had combination of flowers that I wanted next to each other. The combos were not staying next to each other no matter how I was holding the flowers.
That’s when inspiration hit and I made a trick for myself that I wanted to pass on to you!
For the floral combinations that you have to have next to each other, use your floral tape and tape them together how you want them.
You can also include greenery, or make bunches of greenery with this trick as well.
This is a particularly helpful tool when you also find that you’re struggling with keeping your bouquet symmetrical and balanced.
And if you’re that DIYer that has to have all your floral looking exactly alike, this can help you save time. You can be precise and make it easy to replicate.
Or maybe you’re having an arranging party and everyone is assembling a little too different from each other. You can totally make an assembly line and break down the arrangements into smaller pieces that you can build up as you go.
This bundle and then arrange technique is also great if you like the garden bouquet style but the fly away elements just are not your thing. It can transform a wild garden into a more manicured garden.
In what order do you want to arrange?
I mentioned before that for this wedding order I had 3 bouquets, 3 boutonnieres, 6 oversized vase floating, and 2 flower baskets.
Here’s how I made my choice of order.
Boutonnieres can use scrap pieces. So flowers where the stem snaps, greenery that you trim because it’s too long, flowerets and sprigs that are pared down because they were too full for what you need in other arrangements.
Flower baskets can also use all the flowers that snap off the stems, because you’re just using petals.
My submersible floral arrangement use only specific flowers, so I put those in reserve. And I’ve done those enough I can do them in my sleep. So I put those arrangements off to the side for when I need a break or when I’m frustrated and need a win to get myself back into a good head place.
That leaves the bouquets.
I start with the bridesmaids bouquets because it gives me time to warm up and see how the flowers are going to work with me. Plus there’s the added bonus that they are smaller.
The thing that has to be remembered though is that all the best of the best needs to be set aside for the bride’s bouquet.
As I pull stems, the perfect blossoms I put aside in a vase. The flowers with my favorite colorings, I set them aside as well.
This is especially the case with the roses. But I don’t skimp out on the bridesmaids. I aim for the middle for them. For example, the roses I needed for the bride, the bridesmaids, the boutonnieres, and the flower baskets. My lease favorite roses I left in the container for the baskets. They will be walked on and not photographed closely. The boutonnieres I make from the buds that accidently snap off the stem or left over from the bride’s reserve.
And this is the beauty of ordering extras, or a little more flowers than you need. One, it’s a buffer for damage during transit. But more importantly, it allows you to have a selection and delegate as you need.
I didn’t have mother or grandmother corsages. But how would you put them in the hierarchy of who you are saving for whom. For me, I would put them after the bride, but before the bridesmaids. But maybe you would order them after the bride and bridesmaids. That’s the decision you have to make. And it ensures that you have the quality where your hierarchy lies.
Maybe you’re doing fresh flower aisle runner. Did you want the quality to go there over bouquets, because the guests see those up close?
Again, there’s no wrong answer. You just want your plan ahead of time where the best of the best of your flowers are going to go.
And your order of assembly reflects this.
You may not want to start with your most important piece until after you’ve warmed up and gotten the feel for what you want to create. Your highest carnage of stems is going to happen in the very beginning. And again, when frustration hits. So you want to time your best pieces just right to avoid both of those casualties.
Advertisements
What to do when the frustration hits
And believe me it will hit, especially if you’re doing this DIY by yourself. It’s okay. This is normal. Nothing is wrong with you. You can do it. And keep telling yourself that this will turn out when all is finished.
Take a coffee break
Grab a snack and walk away for 5 minutes.
Eat that meal that you normally eat an hour or two ago.
Get a breath of fresh air by walking outside to check your mail. And before you open that box, take a look around and see what is going on in nature around you.
I did this job while my husband was at work and I had my kids entertaining themselves in the other room. Thankfully they’re great kids and understand that I need to focus on work. (Of course it helps that they know that they get rewarded with amazing quality time when I complete jobs, they’re so understanding even if they want the cuddles and attention now.
My kids get an honorable mention right now because I’m the type of person that gets in the zone and will neglect my needs to push through and get a job done in a more expedited manner. Mostly, this is to prevent taking advantage of my night owl tendencies. But their schedule can’t be pushed like that.
Advertisements
My kids were my built in mandatory break times. And that’s a good thing.
Their lunch time came right when I finished the first bridesmaid bouquet. It was pretty, but I wasn’t satisfied with it I wanted it better. And me being forced to take a work break to feed the kiddos gave me the step away break that I needed to process what it was that I didn’t like and obtain an idea to fix it.
Not everyone arranging flowers has kids in their space. But maybe you have a pet that needs being seen to. Maybe you have a phone call that has been pushed back long enough and it’s time to make.
Whatever you do in your normal life, be sure to continue it while you DIY your flowers. These moments are the moments that help you to refocus your mind and open the doors to inspiration and ideas that were hard pressed to come because of the tunnel vision of the focused drive.
What if something goes wrong?
Oh the stories I can tell you of things going wrong!
We always dream and envision things going smoothly and perfectly the first time. But let’s be honest, life happens.
This particular job didn’t go smoothly. In fact, I cried and I panicked. Because of course my thing that went wrong happened at night, when shops were closing down and I promised to deliver in the morning.
I was working with my submersed arrangements, enjoying the moment of doing something predictable, enjoyable, and very peaceful. I was working on my third vase when I heard what sounded like an industrial bug zapper going off. I had no idea what that was, because we don’t own a bug zapper.
My husband walked in and I told him about the noise, asking him if he knew what would make that sound. He shrugged and continued to check and see how the job was progressing. He looked over at the completed vases and asked if one of them was leaking because there was some water of the floor. I looked at him as if he was crazy. Of course there was water on the floor, I’m working with water.
Not even a minute later the bottom blew out of one of the completed vases and at least 5 gallons of water shot all over my hardwood floor.
To an outside observer, this was comedic gold! I’m talking I Love Lucy proportions.
The good news is that the flowers were perfectly fine, unharmed by what happened. And yes, the water got cleaned up.
Advertisements
The stress was that I was a vase short, shops about to close, and no one would be open in the morning before I needed to deliver. I couldn’t go to my local go to shops. They would be closed by the time I arrived. Fortunately, there was one store I could make it to before they closed that possibly had what I needed. And I felt so blessed that they had exactly two matching ones that I could work into my design and fulfill my order, better than what I originally promised.
I share this story with you to not just make you laugh. (Yes I can laugh about this now!) But to show you that even in the professional world of event designing, these things happen to us as well.
Cry in the moment if you need the cry. It will release everything you’ve locked up inside during this whole process. You will feel refreshed afterward.
Acknowledge the moment for the tragedy that it is, but don’t let it stop you or put you into a freeze where you can’t get back to work.
What resources do you have to pull from to recover?
Is this obstacle something you can replace?
Can you still function with what it is that you have?
Call in the assistance of a loved one to be the clarity of mind that you are not in this moment. Loved ones are amazing people to act as support. Never forget or underestimate the people that surround you.
The photos for this week are from the wedding floral that I did for the inspiration picture at the beginning. The bride wanted to go with the garden style of floral. But I don’t want you to leave today thinking that this is the only way to use these beautiful flowers.
Next week I’m going to show you the different styles that I created with the left over flowers from this job. I can’t wait for you to show you these different inspirations that you can take and make for yourselves. Plus, I have one that is a couture shot! It’s not practical for a centerpiece, but it was sure fun to photograph.
See you next week!
Is there anything you want directions on how to build when it comes to floral design? Comment below!
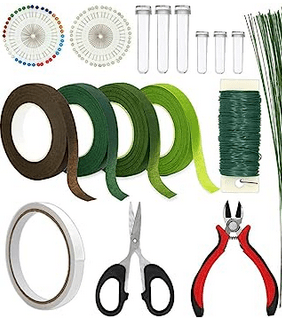
Here are some Products that can assist you in your floral arranging.
This post contains affiliate links to products. We may receive a commissions on products purchased through these links, but at no extra cost to you. These items listed here are from Amazon but may be purchased at local markets and floral wholesaler.
This is a must have, even if you’re trying not to buy any extra items. I’ll go more into this next week. The trick to this tape is that you stretch it to make it sticky.


Leave a comment