Can I do that???

Photo by Olya Kobruseva on Pexels.com

Right now I’m in the middle of several projects at the same time and instead of throwing something together for you, I decided to spend a coffee moment with you and just share about me. And I welcome you to email me and continue any conversation that you would like to have.

By nature I like being a person who has all the answers. Sometimes it’s because there are so many people out there who don’t have the answers and nothing is more frustrating than hearing someone say they don’t know. I also love researching and learning new things. I like being a person who says I don’t know but here is what I found out…. And in the last few years I’ve embraced those failure moments where things, methods, ideas just don’t work out. I no longer have a fear of saying that I failed at something. The brilliance of failing is that the failure is not the end all be all. I’ve come to the knowledge that failure in one attempt or ten attempts just means that something didn’t work in the process. Life isn’t static. It isn’t pass/fail on one attempt. Everything is a process. And it’s a process that incorporates the effects and influences of things outside us.

In the crafting world, there are so many methods out there where you have to make this item doing x, y and z in that precise order. But in reality, sometimes the person who makes the steps are aware of outside influences that can change how things turn out, or it’s just not something on their radar.

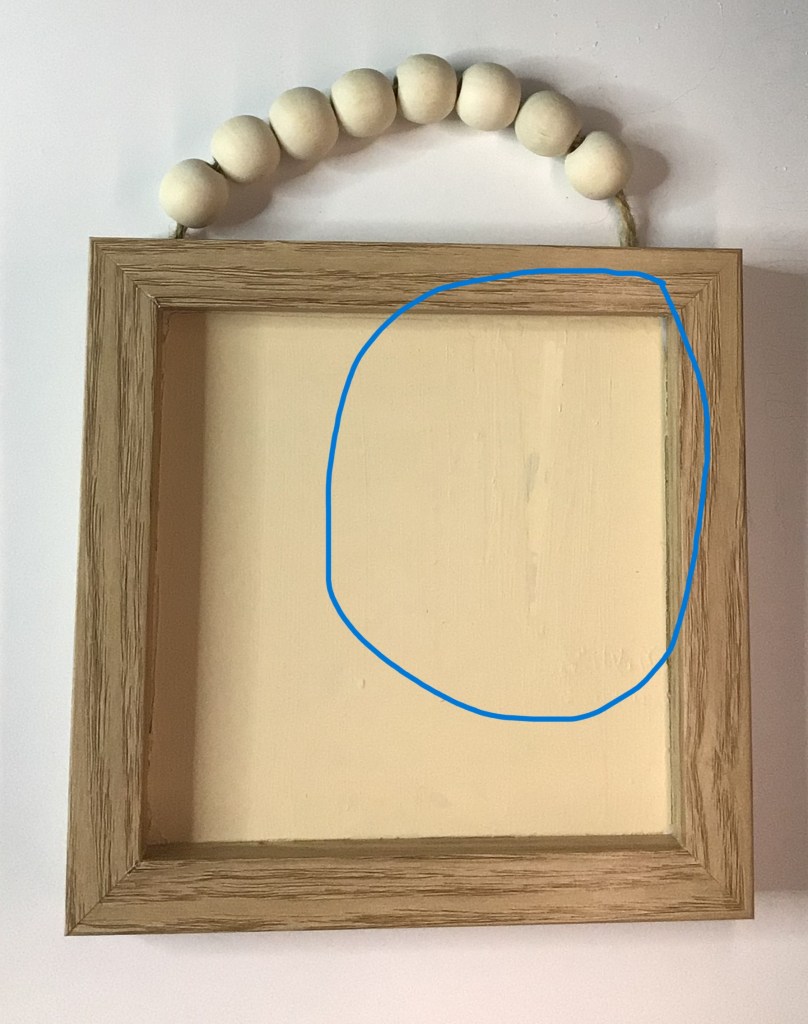
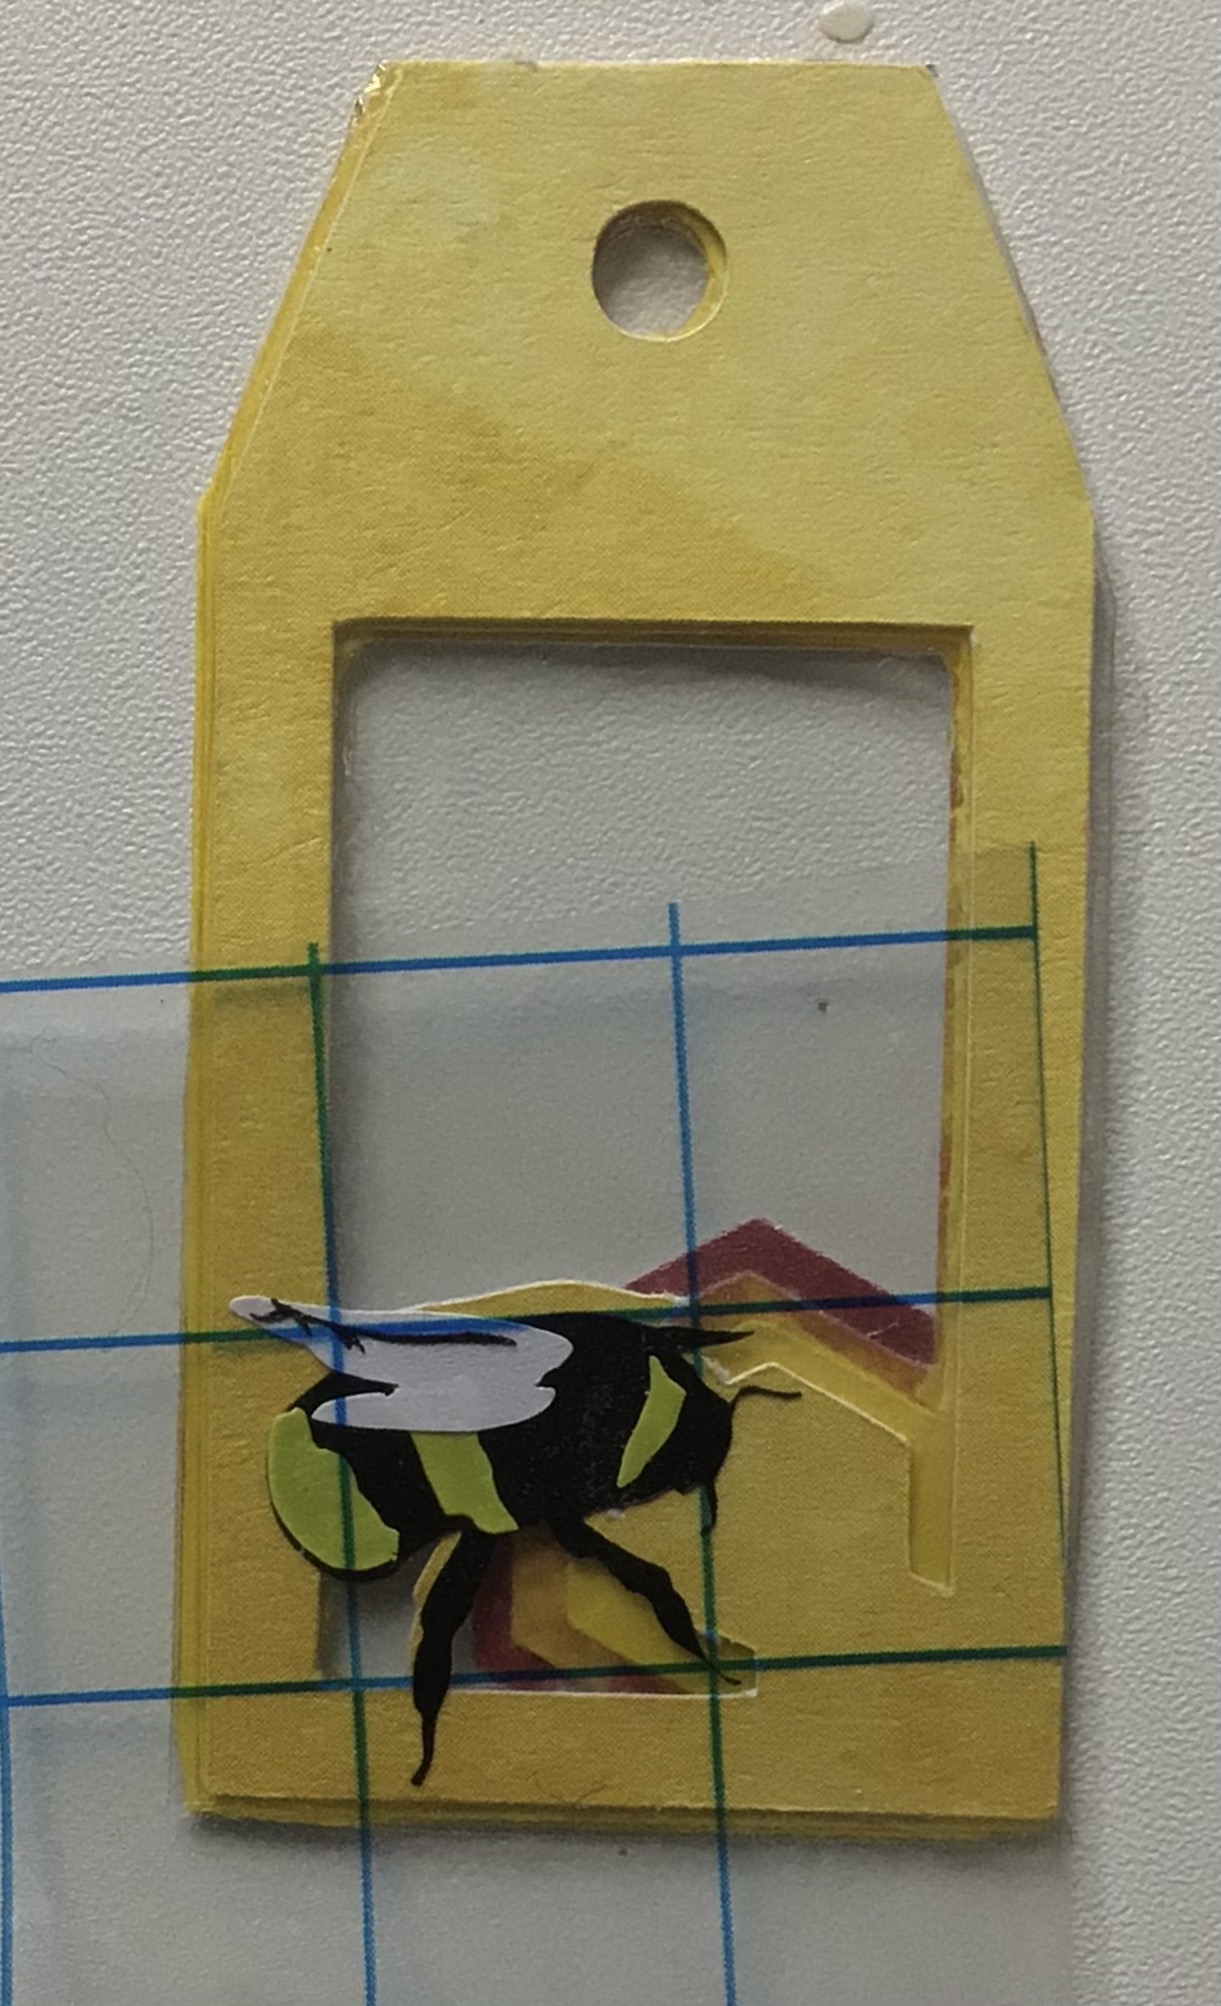
For example, in a crafting group someone was commenting on how the scorch pen didn’t work for a recommended group craft and they fault was on the pen instead of the recommended scorch paste. I’ve used the pen months before and I had the exact failure that she mentioned. But the difference in approach of project failure came down to the framework of thinking. I can’t vouch for what this crafter thought inside of her head, how she reacted emotionally. I can only assess by the phrases used in an online forum. The phrasing indicated that this lady attributed the craft failure to using the pen instead of the paste and the additional contributing factor of not using the exact same heat source (for burning the chemicals) were the reason why she couldn’t obtain the desired effect. On a different response level, I shared with her how I used the same product, used what was supposed to be the “correct” heat source, and still got the same results. It wasn’t the heat source. And it wasn’t the chemical source for that matter either. When I obtained a failed result, I noticed something. The chemical from the pen bled because of the wood grains. The scorch pen didn’t bleed in all directions. It bled in the direction where the wood grain left a miniature channel for the liquid to migrate around instead of remaining in the partitioned area created by the stencil. This same failure could have still been had with the scorch paste if the grain ridges were deep enough for the paste to be pushed through the stencil or seep out and under.

The problem wasn’t the product.

The problem was the outside source.

Photo by Joey Kyber on Pexels.com

The solution, even though I haven’t yet gone back to prove this for an absolute fact, is sanding the wood to make sure there is nowhere for the chemical product to move outside the stencil.

Life is so much like this. We see a result in someone and we try to go through their steps of getting that desired thing in our own lives. But for one reason, or several, it doesn’t give us the result that we desire. We chalk this up to failure. It feeds into our current (or long lasting) insecurities and feeds our preconceived ideas of ourselves.

“I tried that once…” It didn’t work. They were wrong. They have (knowledge, education, resources, money, family, time, support, etc.) that I don’t have. They had the chance that I didn’t have. I’m just a failure.

How many of those statements have we used in our own lives to excuse why something didn’t work?

What other statements have you used?

For the life of me I cannot remember what caused that triggered in me the need to be perfect. But perfectionism is a disease that eats at you just as much as being a serial failure. Sure a part of me hated letting other people down. But what ate me up the most is when I let myself down. I see in my head how things should be, how they should play out, and I use to beat myself up each and every time I failed those self expectations. I made myself miserable with these failures. Not just the event/activity but how I failed myself, sometimes repeatedly.

The turning point, for me, in this viewpoint of failure happened in college. I was interested in becoming a doctor and took the list of pre-med classes. I was challenged and I excelled in all the lower level classes. I watched others wash out and I was proud of myself for meeting my expectations.

Until….

I hit the wall that I just couldn’t break through. It didn’t matter how light or hard I hit those bricks, that wall would not move. It didn’t matter which angle I came from, there was not a chink in that mortar to gain leverage. There was no going above the wall, under it, or around it.

Photo by Element5 Digital on Pexels.com

Organic Chemistry and Advanced Calculus kicked my butt and won.

I had to change my focus and get my degree in another area, one that felt like an easy out because it came natural to me.

BUT…

I took a chance in going in a direction. I learned the human body and how the world works around it. I learned more than what I should actually write here. And even though I “failed” I learned information that I still use today. I understand my body, how it should work, and know what questions to ask and research when it doesn’t work the way it’s supposed to work.

That education also translated into understanding how my garden works even though I never took a botany or agriculture class.

Yes, my initial moment in failure devastated me. To no end! It was the first time I ever truly failed out of something where I couldn’t work my way out. But my walking away learning moment from that complete and utter failure is that there is always something to learn, pull from, and still have tools that I can walk away with.

The world is so quick to define failure as a hard STOP, do not cross, you cannot move beyond this point. But nothing can be further from the truth!!!

Failure is just the simple fact that something did NOT work. It’s NOT a reflection of you. It DOESN’T even define you. Failure IS simply a method that did not work.

Let me rephrase that.

Failure is simply a METHOD that did not work.

You are not a failure. You are never a failure. In fact, the secret of life is that you cannot fail. Ever.

There are always countless options in front of you when you see that failure is not a description of who you are as a person. When you switch the focus from you being a failure to the method of life being a failure, you suddenly see that there is so much out there for you that you couldn’t see before.

In fact, I’ll go as far as to say that when people tell you, “You are a failure” or “You failed me” it has ABSOLUTELY NOTHING TO DO WITH YOU! Instead it’s them shifting their own failure onto you because they can’t face or deal with the failure in their own lives.

So the answer to the post’s question is YES! Yes, you can do that.

And this is the heart behind these blogs. I talk a lot of about crafts, decorating, and food. These are areas that I’m passionate about and having working knowledge with. I dabble in a lot of other areas. And because of that I can say that these principles also work in all areas in life.

If you want to know why I walk with confidence and talk with confidence because I know I’m not a failure.

You’re not a failure

I take every moment, task, event, problem and look at the outside variables. There’s always something else that is an acting influence on what is happening and in some instances, not happening.

My goal is to enable you to see that you’re not a failure. You literally can do anything you want to do. If you want to pursuit a goal you march yourself right up to it. If you hit a wall you can’t go under, over, or around that you redirect yourself. BUT you take with you everything that you learned along the way. When life gives you a dead end, it is not failure. It IS a defining moment where you see the parameters of what you are gifted for in life. You can go to the left or the right and keep that wall on your side. Or you can keep the wall to your back and keep moving forward. The purpose is that you keep moving forward.

And when you hit another wall, you found another boundary, showing you where your purpose lies.

Photo by Arnie Chou on Pexels.com

There are some people who feel like all they do is hit one wall after another. My question is this. Are you hitting the same wall over and over again? Or have you just hit all the walls around your boundary and not understood their meaning?

If you’re hitting wall after wall, the focus should be turned away from the walls themselves and focusing in on this specific area inside all these walls. This is your gifting in life!

In fact, if you’re the one who feels like you’re always hitting the walls, you are at an advantage to someone who never feels the pain of trying and ramming the walls. You actually see the definition of where you are weak, the things outside of your wheelhouse. You can turn away from all those and see more clearly what your strengths are. And you can see more clearly what your purpose in life is all about.

The world is good at making us focus on the walls or glass ceilings. Because if we focus on the walls or the limitations in life we’re not seeing who we were designed to be. We are easily controlled and manipulated. We are easy to put into depression and give up on life.

BUT when we see our strengths and our calling, we are a powerhouse!

Each and every person alive has a purpose, because there is not another person like you. There is not another person like me. You have a specific meaningful job and function on this planet that others need that only you can provide. I need you. I need you because you’re not me. I don’t care what the mirror on your wall shows, that image does not define you. You reside inside your body. And that is where your purpose resides. You can be the most different person from me and I will still need you, because you have something inside you, at your core that we all need.

If you want to continue this conversation with me, please email me here:

← Back

I'm excited to see what you wrote!

Thank you for taking the time to reach out to me and share. I appreciate you and look forward to talking with you.

Or comment here:

Leave a comment

Processing…
Success! You're on the list.

Repurposing A Frame

(This post contains affiliate links to products. We may receive a commission for purchases made through these links.)

It never fails that you find something very cute to give something, but it comes with non-removable art that just not fit with what you want to gift or make for yourself. Maybe it is art that isn’t your style. Maybe it is a design that’s so cheap and is exactly the reason why you find it at the dollar store.

For example, I found this cute frame.

I found that the size was cute. And I absolutely loved the beaded clutch like handle. Best of all, I loved how the frame and handles were very much reminiscent of unfinished wood. This was the perfect blank slate that I could do so much with!

The negative mark was the non-removable art. Truth be told, I almost put this back on the shelf.

But here is how I turned this dollar store product into the perfect blank to make a personalized present.

First you paint over the non-removable art

Especially if you like the current state of the finish of the frame you’re working with, you want to grab some masking tape and tape off the frame to protect it from the paint. It doesn’t matter how handy you are with a paint brush, you really do want to take the few extra minutes to tape off the frame. It just takes an unexpected sneeze or someone sneaking up behind you, knock on the door, ring of the phone, or that your brush slips.

Apply the tape on the inside edge of the frame. Cut down the tape to the corner of the frame, so you can fold the edges over.

The tape that I used here was Green Frog Tape.

Once the frame is taped off, take your paint of choice and cover the original art.

I used Waverly Cashew Chalk Paint. Because this color is so pail, it took about 4 layers to cover up the dark original colors. The important thing to remember is that you always want to paint with thin layers. First they paint dries quicker. Second, you can apply cleaner layer lines.

If you choose to put on a thicker layer of paint to compensate for dark colors, it just takes forever to dry before you can add successive layers of paint.

Once the paint dries…

You have the choice of what you will do next. You can apply a stencil to paint on your new design. Or there is the option of hand painting a picture.

If you are done with all painting options, you’ll want to remove the tape.

Removing Tape

Depending on who you talk to, there are a handful of different theories on which time to remove the tape.

OPTION 1:

Some crafters say, remove the tape while the paint is wet. Yes, this method prevents peeling up the paint that you just laid down. The problem I have with this method is that if the paint is wet on the surface, it’s wet on the tape. So you have to pay attention to the paint on the tape as you pull it up:

  • Paint ending up back on your blank because of the tape flopping over backwards (or paint side down) on your frame.
  • Paint ends up on your fingers. Sometimes you forget, or think you avoided paint transfer, and then you find out later you had a small drop of paint on your finger and now you have a paint finger print.
  • Paint ends up somewhere else on your, like your shirt or pants.

OPTION 2:

Other crafters advise that you remove the tape when the paint is dry. This method is great for preventing all options of potential paint transfer. However, the problem with this method is that sometimes the paint adheres to the tape and pulls up off your project when you remove the tape. This is especially the case when the original surface is smooth or plastic.

OPTION 3:

A third group will tell you to wait for the paint to mostly dry. This is the happy medium to the first two options.

I’ve never been able to make OPTION 1 or 3 work for me. If there’s any wet paint, I’ll somehow find a way of getting it on me or transferring back onto my project. So my go-to is OPTION 2, wait for the paint to dry.

TIP for OPTION 2: right before you remove the tape, take an exacto knife, and run the blade along the bottom of the masking tape all around the frame. This will effectively separate the tape and paint.

What if my paint strips off with tape removal?

Have no fear! Take a breath and don’t panic. This is an easy fix.

The first thing you’re going to do is build back up your layers of paint on the surface where the paint stripped off.

TIP: To create the illusion of no paint stripping, keep from this new set of corrective paint layers from overlapping on to the original dry paint that remained intact.

Once you’ve built back up the layers of paint that had peeled off, you’re going to add one more layer of paint over the original and new paint. This will cover over any potential seams in the paint.

The best of all is that if you are going to add any decal over this paint, it is possible for the decal to cover over any potential seams. If you’re using this as a shadow box, the items you place in front of the painted back ground will cause enough shadows to distract from the seams.

This is an example of where one less layer of paint can show the difference of your paint patch job. Make sure to do the same number of layers, plus an additional layer over both original and new paint.

Adding decals over the background paint with transfer tape

I want to mention one more potential problem you can face, with paint peeling, with a project like this. Whether you’re adding vinyl or a decal with a clear piece of transfer tape, you will want to be mindful of this transfer tape. Even if the transfer tape has low tack, it can still find a way of holding the paint more than the paint is holding on to the project surface.

The way that I have gotten around this problem is that I think of the transfer tape ONLY having contact with the vinyl or decal, and hold those elements in their place for application. I go out of my way to NOT press the transfer tape down onto the paint.

Instead, what I do is gently place the design down on the painted surface so there is absolutely no adherence. The bonus to this is that you can use a weeding tool, palate or other tool to nudge the design center (or any other location) on the frame. Once the decal or vinyl is exactly where I want it placed, I only press down on the decal/vinyl with my finger. The pressure from your finger is enough to get the decal/vinyl to adhere. And once your elements are all pressed, you can then peel off the transfer tape without it pulling off your paint!

Can’t find a frame like this, but want to make one?

I have no idea if I will find this beaded frame again at my local dollar store. In fact I would be surprised if I ever did. There’s something about the cute things in that store chain, that you pretty much only find in stock one time.

The good news is that this is an easy frame to create!

Originally this frame has a 4 x 4 inch work space. But you can select any shadow box of any size.

You can make the wooden bead clutch handle by using a thick jute twine and stapling it to the frame.

Yes! This handle is literally stapled to a mini shadow box frame.

If you want a supply list, to make your own frame, here are the items you will need:

  • Shadow Box: 4×6 Frame, 8×8 Floating Glass Frame , 8×8 White Shadow Box, 3-Frame Set
  • Jute Twine
  • Wooden Beads: 16mm (Thumbnail size), 20mm (US Quarter is 24mm)
  • Staple Gun (if you choose to use a standard desk stapler, make sure that you use several staples on either side of the twine. The twine can be reinforced by using wood glue and gluing to the shadow box.)
  • Scissors
  • Paint/Stain (optional–if you want something other than unfinished wood)

I hope you have just as much fun as I had making this Affirmation Gift!

The Baby Affirmation cut file used for this project can be found in my shop here. To personalize with the child’s name, just select your favorite bold font and place in the provided blank space.

Processing…
Success! You're on the list.

Leave a comment

Shake That Card

Maybe it’s because of my inner child. Maybe it’s because I have a house full of small children. But the one thing I can say with all certainty is that I absolutely love things that glitter and things that move.

So of course, I’m going to love shaker cards.

Have you seen them before? The few that I’ve seen in the market place have chunky glitter or confetti. Well, I’m going to show you how you can make these for yourself.

But first I want to show you how I make my own confetti. After all, why would I buy confetti when I have some absolutely beautiful scraps that I really can’t bring myself to throw out? There’s textured prints that I love and color schemes too. They make me smile. But there’s the glitter card stock. In the paper world, glitter card stock is my crack. When I have sheets in my craft room, I save it for my favorite people and special projects. So of course I want to use every splinter of that beautiful goodness.

Confetti is super simple! You just your paper scraps and cut them down to this:

Really I do NOT have that much spare time that I buckets and buckets of homemade confetti. If I have a lot of a color or paper, I do recycle those. But there’s something about mixing all your favorite textures and prints and mixing a mosaic in a bag. And this is a confetti blend that you will never find in the store.

For the shaker card I’m going to use my yellow blend. For the shaker gift tag I’m going to use glitter. Feel free to customize any of your shakers with plastic pellets, wax pellets, beads, baking sprinkles, or anything else that your imagination brings to mind.

Assembling Shakers

The possibilities for this style are endless. All you need is to build up a frame, a solid back layer, a transparent front layer, and a decorative face to sandwich in that transparent layer.

For my transparent layer, I usually lean toward laminator sheets. This is what I used for the gift tag. But this time I’m using a plastic packaging for the card. It doesn’t give the crisp window pane effect. However, I know most people don’t have laminator sheets readily on hand, and I don’t want anyone to think that you absolutely have to use that one product. If you’re a green person, this makes one less bit of unrecyclable plastic going in the garbage. So there’s that. Also, another idea is taking the thick plastic “glass” that’s found in a very cheap picture frame. You’ll need to use a blade to cut that down to shape. And you might need to score and take several passes to get a clean line. But definitely use whatever you have on hand!

Cut everything with your cutting machine.

Once everything is cut (and weeded if you’re using vinyl) go ahead and seperate everything out; card, frames, and bees (or other accessories).

The cutting files for this card and gift tag can be found here.

Assemble each group separately and set aside.

This is one time where an organized work station is going to be in your best interest. If you use my Bee Card and Gift Tag, you can understand how things can get a little intimidating. (For projects like this I always include assembly directions. I’ve chosen to work through this project here, because visuals are amazing, especially for people who need to see something instead of being talked through it.) But once you have everything broken down into the three groupings for this project, it has a very easy feel to it.

For the Card, you fold it with the cut out window on the front cover. Apply the honey accent around the window. I used vinyl here, but I probably would have had more fun with card stock. After all I have some fun geometric paper. I stuck with solid colors to keep a cleaner and more streamlined piece.

TIP: If your work surface is white and your cardstock is white, try putting a contrasting color inside the card. I used a mini mat inside the card. This made it so easy to find the white edge of my cardstock and line up the vinyl.

TIP 2: With longer cuts of vinyl, application becomes easier when you use the hinge method and prevent the tails from sticking to other parts of the card. Sometimes it takes a little patience to line up all corner and lines to get a straight application.

The best advice I have for the bees is to leave the black silhouette on its backing and build up the layers one at a time. And if you have a straight tip needle, it is your best friend for when your layers shift on you and you need to adjust them. Just put the needle tip underneath, lift the vinyl and reposition it. If you leave the image of the bees up on your computer screen, it’s a great reference point for making sure everything goes in the right place.

There’s a trick when it comes to building up your frame. The glue that you choose really does matter. Usually I like using a spray adhesive (drawing lines with the straw inside the bottle), but I’ve had more glitter failure with that glue on frames than others. Hot glue gun is great for quick setting. But it tends to be thick and make your overall card weight heavier. So the best glue for this project is wood glue. It give you the light weight benefit while maintaining some flexibility in adjusting your frame so all the layers are square. The disadvantage to this glue is that you have to allow for dry time.

Make sure that when you add your glue, that there is a steady line. If there are any gaps, there will be a way for your confetti or glitter to escape. And when all your layers are in place, adding a weight will make sure that you have the best press and prevent your paper from curling while it dries.

Final Assembly

I waited overnight for the glue to dry (but that’s also because I’m a late night crafter. It’s the one time of day where I can get things done without interruption.)

With the shaker card, I used painter’s tape to hold the frame in place. The back of the card is also the back of the shaker portion. By placing the frame through the cut out of the card, when I open the card to fill the frame with confetti, it will stay in position.

I placed the front decal bumble bees on at this point just because it was convenient. With the shaker gift tag, I wanted to put the bumble bee on the bee outline without having to think of messing up a glue job. As you can see with the first picture, I didn’t quite make it square, so I needed to readjust.

If you find that you need to adjust vinyl decals, the best tool you have is a straight tip weeding tool or a sewing straight pin. The sharp point is convenient for wiggling in under the vinyl and lifting a corner. From there you can lift the vinyl. And if you keep it on the needle tip, you can back you fingers out of the way and have a cleaner sight for lining things up.

Turn your shaker tag upside down and open the card. With the frames open you can place your confetti or glitter with ease.

Shaker Gift Tag: I was originally going to use just fine glitter. But when I saw how much yellow I had going on, I needed to have another color in to break up the monotone. The paper choice I made was my black glitter cardstock. I love the color choice. What I would have done differently is add two more layers of frame in there, for a total of five layers. This cardstock is extremely thick and doesn’t move freely around in the shaker. But over all I was pleased with the fill and would not suggest using more fill than what you see here. I would call this tag filled at 50% capacity.

Shaker Card: As you noticed in my bag of confetti, my yellow was not varied at all. And I also wanted to avoid the monotone in this item also. So I grabbed some of my left over card stock from the honeycomb (not yet cut into confetti), added a pinch of my red, and finished it with some texture of the black and silver glitter card stocks. I would have tossed glitter in this one too, but I wanted to show you what it looks like with just confetti. The fill capacity of the card is about 25%. I could have added more, but again I wanted to have a visual reference for you to see what level of fullness you might prefer.

Watching people’s reaction is the true test of how successful something is made. I showed this card to my sister and after initially looking at all the detail, she instantly started shaking the card and smiled as she heard the confetti rattle around!

Want to dress up the card more?

Please do! You paper, vinyl, and other choices are going to make your card and shaker look completely different. You could use crafting foam sheets for the frame. You can use all paper. In fact, I know ladies who have such an amazing stash of paper, that makes my selection look like a kindergarten class project. But I try to be kind to my husband and not keep insane amount of supplies, like I would truly love to hold.

Now for dressing up on this particular card, I’m a bit limited. I went crazy with the confetti and that’s where the focal point went. Since I don’t want to compete with the confetti, I had to keep the honey accent pretty simple. I chose two different shades of fine glitter and used a glitter Elmer’s glue of a contrasting color (which adds a touch of depth to an otherwise flat glitter). To make fine accent lines, I used a tooth pick dipped in the glue to draw my lines. And as you already know, once you add glitter, your lines instantly grow thicker. So don’t be afraid of having a toothpick thin line. The glitter helps you out.

This particular design would also look amazing adding flowers, grass, or any other embellishment. So please don’t be shy to add what your project needs.

I hope you have as much fun making this card and gift tag as much as I do. Please leave a comment below and email me pictures of how yours turn out!

Here are the files for the Bumble Bee Shaker Card and Tag.

Please sign up for my newsletter for when my christmas and wedding editions of this style are released.

Processing…
Success! You're on the list.

Leave a comment

Easy Cheesy

Since last week I continued my experimenting with whey and I wanted to do a follow up post on what I learned. And this information is important because of the inflation, the items that are starting to not be stocked in the grocery stores, and supply chain issues.

So whether you are trying to be more efficient with how you spend your grocery budget, or if you’re trying to find a replacement for the things you cannot find on the shelves here are some ideas for you.

First, for those of you who are dependent on keeping some probiotics in your diet for your guy health, know that whey gives you a better option for probiotics. Check the label on your yogurt with probiotics. It’s been brought to my attention that those yogurts often have higher sugar content than other yogurts. If you’re not up to making your own yogurt, you can buy greek yogurt, stir in whey and you have a probiotics yogurt, at a better price, and lower sugar content.

If you make a dressing at home (for example we make Ranch) from a packet/scratch, switch out the milk content for whey. If your dressing calls for water instead of milk, still use whey instead of water. This simple switch automatically adds gut healthy probiotics and gives you the same dressing. The whey will impart a hint of lemon to the final product, but that gives new life to a favorite condiment that you take for granted or no longer excited about.

Whey also solved a problem that we had with the Ranch dressing we’ve experienced for the last 6 months or so. For whatever reason, the dressing (same recipe we’ve been using for years) always separated after a week. I was tired of this waste, and got excited when I came across an article that talked about how homemade mayonnaise normally lasts a week. However if you add whey into your homemade mayo, the shelf life increased for one week to a month. That was what caused me to substitute out milk for whey in our Ranch dressing mix. We are approaching two weeks and my dressing no longer separates. It hasn’t turned bad yet either.

So if you’re looking to extend your shelf life on a mix, look to whey.

Do you remember the list, I posted last week, about uses for whey?

I’ve been working my way through that list.

Here is everything that I got out of that first gallon of milk:

  • 1.5 pounds of Mozzarella Cheese
  • 4 loaves of Bread
  • 1 jar of Ranch dressing
  • 1 batch of homemade Doughnuts (which my boys and husband’s coworkers couldn’t eat enough of)
  • Pizza dough (enough for 2 large pizzas)
  • 66g of Ricotta Cheese
  • And I froze the whey left over whey before it went bad for 5 more loaves of bread.

I couldn’t believe how much I got out of 1 gallon of milk! If I had used milk for all of that, instead of whey, I would have used at least 2.5 gallons of milk.

How great is that?!!!!

Advertisements

More Cheese

I know that even with my first time experience, there’s a chance that someone might still be uncertain of making cheese. So I wanted to make Ricotta from the mozzarella whey. And Ricotta is the absolute easiest cheese to make.

If you were leery trying to make Mozzarella for the first time, try Ricotta!

Now above I already stated that I was able to recapture 66g more cheese by making Ricotta from the Mozzarella cheese. This was not enough Ricotta to make a lasagna dinner with for my family. So that same day I grabbed a gallon of milk from my fridge and made Ricotta from a second method.

Get ready to make the easiest cheese from one of these two methods!

Advertisements

Traditional Method From Whey

Before I made this first batch of Ricotta, I had already used about half of my whey from making Mozzarella. (I share this with you in case you’re reading these two methods to see which is going to yield you the most cheese–yes, I see you!)

With the traditional method, you put your whey into a stainless steel pot and turn on the heat to medium low.

That is it. You let it warm up to 200°F. There are small bubbles that start to form around the edge of the pot. Don’t be afraid if you don’t see Ricotta forming until the whey reaches in the neighborhood of 140°F. That was about the temperature that I started to see some action take place.

Once you reach 200°F, turn off the heat and remove the pot from the burner.

The instructions, that I followed, said to immediately remove the cheese and drain it.

Now Ricotta has smaller curds of cheese than mozzarella, so this time I used a cheese cloth to strain the curds from whey.

The instructions said to let the cheese drip dry for 2-8 hours depending on how dry you want your Ricotta. I had very gently squeezed the whey out and hung it to dry for an hour and a half before I taste tested it. It was already too dry for my liking and tasted like chalk. The instructions never told me to salt the Ricotta. So I’m going to tell you, salt the Ricotta.

Tip: Salting Ricotta is easier when it is warm instead of cooled from the drying process.

This is the left over whey that I put in the freezer to make 5 more additional loaves of bread. I pre-portioned the whey out into baggies so that all I have to do is defrost the whey in the fridge, the day before bread making day, and I don’t have to measure it out again.

The great news about this method, of Ricotta making, is that even though I didn’t stir the whey during this cooking process, my pot was clean on the bottom.

This traditional method is right in the skill level of my 6 year old’s cooking level. So if you were nervous or afraid of making Mozzarella, rest easy and KNOW that YOU CAN DO THIS! I have every confidence in you.

Advertisements

Ricotta From Milk Instead of Whey

As I already mentioned, 66g of Ricotta is not enough for a lasagna dinner. It is enough to make a spread out of and eat it on top of a toasted bagel.

I grabbed a fresh gallon of milk, the Ricotta recipe from the beginner cheese maker kit (that I shared last week) and tried a different method of making Ricotta. The Recipe I used called for whole milk and a couple of cups of heavy whipping cream. All that I had in my fridge was a gallon of 2%. So that is all that I used. From just 2% milk, I yielded 630g (1.4 lb) of Ricotta.

Into my stainless steel pot I added the milk, 1 tsp. Citric Acid, and 2 tsp. Non-iodinated salt. Turn the burner to low-medium heat. Leave the milk alone until it reaches 140°F. Then you scrape the bottom of the pan with a rubber/silicone spatula. Do not touch it again until you see the cheese layer, on top, crack and the whey start to boil up through that crack(s). Turn the burner off and put the pot on a cool part of the stove. Cover the pot and let it sit for 20-30 minutes.

Strain the Ricotta through a cheese cloth, inside a fine mesh strainer.

In this method, instead of air drying I used my spoon (or you can use your silicone spatula from earlier) and pushed the Ricotta around in the cheese cloth. The whey naturally separates without the gentle squeeze or drip drying. And while you push the Ricotta, take a pinch of salt at a time and season the Ricotta to taste.

You are in control of how salty your Ricotta tastes. And you are in control of the sodium content, for those who are on a low sodium diet.

I stopped pushing my Ricotta when I got to the creamy texture that I prefer. If you prefer your Ricotta to be drier and you’re not able to get it from just pushing the cheese in the cheese cloth, go ahead and hang it up to air dry in the cheese cloth. I recommend checking on your cheese every half hour just to make sure that you do not get too dry.

Tip: If your Ricotta gets too dry and you just can’t eat it like that, don’t worry. Mix in a little whey at a time to re-wet your cheese. If it becomes too wet, hang it up to dry again.

The only problem that I had with this method of making Ricotta is that the heat was a little higher than I did with the first method. The bottom of my pan did start to scorch, as you see here.

Even with this level of scorch, the flavor of the cheese was not harmed. But it was a close call. Moving forward, I know that my stove needs to remain at a medium Low temperature.

The next time that I make Ricotta from this method, I’m going to drop my heat a little BECAUSE I know that my stove runs HOT. I am forever reminding my husband to drop the heat when he cooks because it slips his mind that our stove does this and he has burning issues. He’s a good cook, he just expects our hot stove to behave like a normal stove and it just doesn’t.

Tip: Know your stove. If your stove runs hot, drop the heat a little lower. If your stove runs cooler, add a little more heat.

Advertisements

Differences in Whey

There is a difference in the appearance of the whey from Ricotta compared to the whey from Mozzarella. The Ricotta whey was not as clarified.

Independence Day weekend is very busy with my family, so I have yet to put the Ricotta whey into the pot and run a second batch. But as you see here, there is a lot of material left in this whey that I anticipate a greater return in additional Ricotta (vs. what I pulled out of the Mozzarella whey). I have time to food prep coming up early this next week. So be sure to sign up for my newsletter below and I’ll email you the results of this second run in my 7 July 2022 email. (If you are reading this past the email date, please comment below and I’ll respond with the results that I found).

Over all…

I’m excited to have cheese in the house that only has 3 ingredients: milk, citric acid, and salt. In a day and age where the ingredient lists grows longer and longer, this makes me feel good about the food I cook my family. Even more so, I learned new skills that I can teach my boys that I don’t have to wait until they’re older for them to make.

I am also happy that I have healthy probiotics on hand that I can add to as a seasoning and milk alternative to other recipes.

Please walk away from today with ideas on how to stretch your milk ingredients and add more nutrients into your other foods.

An idea that just popped into my head, how whey would work with making risotto. I know that I’ve made it with wine and also with chicken broth. So it makes me curious. I may have to try this out for dinner later on this week!


If you’re interested in making a Ricotta spread (which I use for my bagels), cut up some fresh herbs and mix it in with your cheese. I used the leaves from two sprigs of Italian Oregeno, from my garden, and used enough Ricotta for two bagels.

Use your imagination with the herbs that you have on hand.

Processing…
Success! You're on the list.

Leave a comment

Advertisements

Meet Frankenstein

Honestly, I should know better! Names have power. And the last time anything was very aptly named in my family was when my sister named her goldfish Sushi. It ate all the other fish in the tank.

I should have known that naming a starter Frankenstein was going to be a wild ride. But I’ll come back to that in a moment.

Today is the last day of this miniseries talking about yeast and bread making. I wanted to finish with my experience in making a Gluten Free alternative for in those who cannot keep a starter with flour, because of dietary restrictions. Because everyone should have the opportunity to keep a starter that meets their needs.

When I told my Mother in Law my plans for making a starter (my original flour starter), she was so excited and told me that I had to make a potato starter. She remembers having one from when she was a girl, but couldn’t find her recipe. And her memory was very limited in that process. She heard me out with my flour starter and insisted that it was just as simple and the same to make it from potato.

Of course I tried to verify everything she described with what everyone else has posted on Pinterest. And no, what my Mother in Law told me was different from what everyone else is doing. I’ll save you the search, unless you want to go down that rabbit hole. The rest of the world is making their potato starter using instant potatoes.

If you have a potato starter and use instant potatoes can you humor me and check the ingredients on the side of your box?

If you are comfortable with everything you see there, then I won’t say another word on that subject. Keep your starter healthy and keep making that glorious bread in your kitchen!

If you see anything there that you might not have been aware of or want to move toward a starter with fewer ingredients, you can transition your feed to using just a potato. I’ll show you how.

The Set Up

The little bit of information that I did receive from my Mother in Law was that the potato start from her childhood was just a boiled potato mixed with water.

Believe me I know exactly what you’re thinking! I thought the same thing.

There was not enough information to start with. What do you do with the potato? …I won’t bog you down with the list of questions that I had. Even with a degree in history, and having professors who assigned me to make food from out of circulation recipes, I had high hopes of finding some old recipe to work with. And all I had in the end was boiled potato and water.

BUT I wanted to make this experiment, with the thought in mind: How do you make yeast start with just what you can find in your pantry or garden?

It was a what-the-heck moment. Let’s do this thing!

I grabbed a potato, peeled and cubed it. Put it in a sauce pan with water and cooked that potato like I would mash potatoes. Only this time the seasoning, butter, and milk stayed where they were. Once the potatoes were soft, I removed them from the heat and reserved the water I boiled with. We all know that when you cook, all vitamins and nutrience end up in the cooking water. And I had no idea if the potato or the water has the stuff I want. (Also there’s the side objective of trying not to waste resources.)

And here is where I ended up with two potato starters. I didn’t have faith in my Mother in Law’s lack of directions. (To be fair, she hadn’t used this method in many decades and probably thought she never would.) So I chickened out and took Method Two. But the next day I decided I was doing myself a disservice by not attempting my Mother in Law’s way. If it failed, at least I had the other starter to fall back on.

METHOD ONE

  1. Mash the potatoes. In hind sight I didn’t mash them as smoothly as I wanted. The chunks are very obvious. But rest assured, even if your potatoes are chunky, you will still get healthy and viable starter.
  2. Mix in some of the cooking water. This is going to be a wet starter. So think between toothpaste and stew consistency.

I named this starter Carolyn.

METHOD TWO

  1. Mash the potatoes. In hind sight I didn’t mash them as smoothly as I wanted. The chunks are very obvious. But rest assured, even if your potatoes are chunky, you will still get healthy and viable starter.
  2. Mix in some of the cooking water. This is going to be a wet starter. So think between toothpaste and stew consistency.
  3. Add a couple Tbsp of starter from an established yeast.

I named this starter Frankenstein.

Why would Method Two work?

When researching about starters, you learn that you can turn a gluten based starter into a gluten free starter by slowly changing its food source away from being wheat based to your GF flour of choice.

I didn’t do the gradual change, because the food source and environment was completely different. So I just jumped all in and went at it from a science lab experiment of inoculating yeast into a new medium.

What if I’m transitioning my existing potato starter from potato flakes to potato?

The standard method of transitioning starters to a new food source is to feed on the following schedule:

Transition Day 1: Use 75% old food source + 25% new food source.

Transition Day 2: Use 50% old food source + 50% new food source.

Transition Day 3: Use 25% old food source + 75% new food source.

Transition Day 4: Use 100% new food source.

All the transitioning experts assure their audience that even with a gluten starter transitioning to gluten free, the more you feed the starter without the gluten food source, the more your starter transforms into gluten free. If you are GF by choice, you are good to start using your transitioned starter after day 3. If you are GF for medical reasons, then there comes an educated decision based off of your sensitivity. If you are very sensitive, and know your levels, you can do the math to determine what an acceptable amount for consumption is. Your bread recipe is going to have a yeast to flour ration, giving you an overall percentage. On Day 4, there is potentially a 62.5% gluten level in the yeast. Day 5, that drops down to 31.25%. Day 6, 15.63%. And so on. Now if your bread recipe keeps the baker’s ratio for bread making (2% of flour weight), Day 4 has a potential gluten amount of 1.25%. Day 5 has a potential amount of 0.63% in the bread. So you can see how this is an educated based decision of what is acceptable for your body.

Please note: I have not transitioned a yeast to a new food source other than what I did to Frankenstein. So I have no idea if Frankenstein is what’s normally expected, or just some fluke that succeeded. And Frankenstein I didn’t transitioned at all. I just dropped flour based yeast in a room temperature environment of potato and water.

Picture 1 is Frankenstein. Picture 2 is Carolyn. These are just my starting point, pictorial references. So at least you have something to compare your potato starter with.

As a time saver for feeding, I boiled a couple of potatoes at the same time. I saved the left over mash and cooking water, and kept them in the fridge. When I was prepping for a feeding (twice a day) I took the mash and water out about an hour ahead of feeding time, so it could come to room temperature.

Day Two

I continued with a 2 time a day feeding of potato mash and the cooking water.

What I did not count on was Frankenstein (picture 2)!

Let me give you a close up on two of pictures in the set. In the above picture (picture two, top row, second from the left) you will notice that Frankenstein had clear striation between solid and liquid. When I placed a scraper in and gave to couple mixes to reincorporate the components for a feeding, I got Picture 1 (below). Frankenstein was alive!

I have never seen this kind of reaction in my life, especially in the world of yeast. This yeast, I called Frankenstein, was going crazy! In fact, Picture 2 (above) is the still of what I saw. There was movement in the jar that was very reminiscent of a lava lamp.

I mention all of this because if you decide to inoculate you potato start with another start, just to get active yeast from the get go, and you see foaming activity like this know that you are not alone. It happened to me and I have the photographic proof to prove it. The smell is standard for starter. It’s just the yeast activity that is the only difference.

What I fed Frankenstein and Carolyn were the same potato and cooking water. The only difference between the two starters is the origin of yeast. And that yeast came from my AP flour based starter, which never acted this way either.

Day 3

Continue with the 2 times a day feeding of potato mash and cooking water.

The activity with Frankenstein was still happening, but to a lesser level. Here are some pictures to show you where that starter was. I don’t seem to still have pictures for Carolyn.

I stopped taking pictures of Carolyn on Day 3 because I had some research to do.

If you remember from Valuable Resources, I mentioned things to look out for when keeping a starter. Your starter should never have mold, spores, or color on top. Neither should it have an acetone smell. On Day 5/6, I posted on Facebook, how Carolyn started smelling like butter.

Freddy is my flour starter.

I’m going to pause here and just let my post communicate what happened to my 100% potato start.

Here’s what happened, Carolyn was well on the path of turning herself into vodka. This will be a common problem, correcting Diacetyl, when you have a potato starter. This is because its potato based, not wheat based.

What I learned from Carolyn, and making a starter with next to no knowledge with what you’re doing, is that you HAVE to go back to a source that you know. Yes, I was making a starter. But this problem was not covered in anything written about sour dough starter for bread. It didn’t make much sense to look into the world of vodka making other than the fact that vodka making starts with a potato mash, which is exactly how Carolyn started. And within minutes of looking at sources in the vodka world, I found my answer.

For those curious, what caused the Diacetyl? It could have been a bacterial contamination. Or it could have been that this starter had oxidized. (Remember that yeast has anaerobic respiration.) I happen to believe that this time it was oxidation, because it happened on Day 3 which is when Diacetyl enters production of beer brewing. And all your alcohols have tools to keep oxygen out of your cultivation.

How did I heal Carolyn from Diacetyl?

There were a few options from the brewing and Vodka world. I started with adding salt into my starter (probably about 1 1/2 tsp worth. I guessed the measurement, and added a little bit more than what I thought I needed). This time, all I needed was the salt. The next day the butter smell was gone.

I cannot stress this enough. No matter what medium you use to feed your starter, yeast is a living organism. Every time you open your container to use or feed your starter, always visually check its health and smell it. Your yeast will tell you when something is wrong. And when you catch it quickly, you can tend to your yeast and keep it from going bad on you. It can turn around and come back into health.

Here is a picture of how Carolyn started showing evidence of being healthy and active.

And the Pay Out

Nothing shows the yeast is active and healthy until you produce bread from your starter. This was the potato bread that I made from Frankenstein while I was tending to Carolyn.

Is there a flavor difference between bread baked from Carolyn (100% potato start) vs. Frankenstein (potato started with flour fed yeast)?

I preferred the flavor from Frankenstein. Even though I followed a potato bread recipe, Frankenstein had a blend of flavor between store bought potato bread and homemade sour dough bread. Carolyn produced bread that didn’t taste anything like potato bread. The loaves turned out like they should, the flavor was just off.

To be honest, it’s hard to say if there was something deficient with Carolyn or if the difference I tasted was the true difference between the two different methods of potato starter. This was also the point in time where my life got super busy and I could not keep up with keeping 3 starters. So shortly after baking with Carolyn, I let go of the two potato starters and kept feeding my flour starter.

Final Thoughts

There are several different reasons why making a starter from potatoes is a great idea. For example, I grow potatoes in my garden but not wheat. If I ever came to a place where I could not source the amount of flour that I use (to keep my boys in bread) than a potato starter would be amazing to conserve flour and use up the potatoes I grow.

You can make potato starter from potato and water.

In fact a starter from potato and water can serve double duty by providing the yeast for bread making and for distilling vodka (for all you home brewers and wine makers looking to branch out).

Last week, in Bread Recipe that Hasn’t Failed Me, I mentioned the science behind bread making. In the case of this week’s example, caring for Carolyn required a different science. Sometimes you have to look outside the normal beaten path of bread making, to find your answers. Bakers don’t have all the answers. They are gifted with their knowledge that they’ve cultivated. But there will be times in life where bread making takes you into another field of study to find the answers to the problem(s) you are solving. So be flexible. Don’t get frustrated if you’re searching turns up as a dead end. It takes a moment to stop, breath, and take your thinking down the path that runs parallel to the one you’re on.


Thank you for going down this detour in the creative world.

Conserving resources, making something out of the barest of materials, and using what you have on hand is an art form that needs to be resuscitated in the world that we live in right now. There are options that are still at all of our finger tips.

If there is a method of making something that you want help finding a method of creation (Just like my Mother in Law’s information of taking potato and water to make potato starter) and don’t know where to start, reach out to me or leave a comment below. I want to be creative with you!


As a special bonus, here is a sneak peek to this Monday’s release, 2022 Graduate

Processing…
Success! You're on the list.

One response to “Meet Frankenstein”

  1. A Yeasty Fix – How I Can Do That Avatar

    […] Meet Frankenstein I talked about the gluten free starter I made and how I had to bring that one back to health. That […]

    Like

Leave a comment