First Year With Grow Bags

For a few years now I have heard many of my growing friends sing the praises of grow bags and how wonderful they are. Not to mention that if anyone does not have land to grow a garden, this is a great substitute for growing on decks and patios. So I put it to the test.

My 2023 potato growing season, I put my raised bed (which I’ve grown potatoes in for the last four years) vs. 10 gallon black grow bags to see how they stacked up against each other. And this was great timing for this challenge because I wanted to up my potato crops to see if I could get that produce off of my shopping list and on my self sufficiency list.

Below I will tell you the results and my thoughts on the process. But first I wanted to start off by showing how I set up my grow bags. A lot of people set them up with just putting in potting or raised bed soil. I wanted to go a different route because with my family we try to go with natural fertilizers that fall into the organic farm spectrum of growing.

Setting up the Grow Bags

I set up these grow bags like I do with my brand new raised beds. But I structured it differently, aligning with how I’ve seen other people use their grow bags for growing potatoes. Those people layer their bags with soil on the bottom and top and hay in the center. The rumor is that this hay section allows the potatoes to grow large because they have less resistance from soil, which can compact down around the tubers. Keeping this in mind, here is how I layered my grow bags (from bottom of the bag working up):

  • Raised Bed Soil
  • Compost
  • Pine fronds
  • Small Pine branches
  • Pine Fronds
  • Compost
  • Raised Bed Soil

This spring we had pruned back our pine trees. Normally these go into our compost pile. But as you can see below, these fronds had new growth tips on them, which have the most vitamins available. I didn’t want those nutrients to go to waste. So I separated out the softer fronds from the more rigid branches. As you see below.

These branches were then cut down to fit inside the grow bags without puncturing the sides.

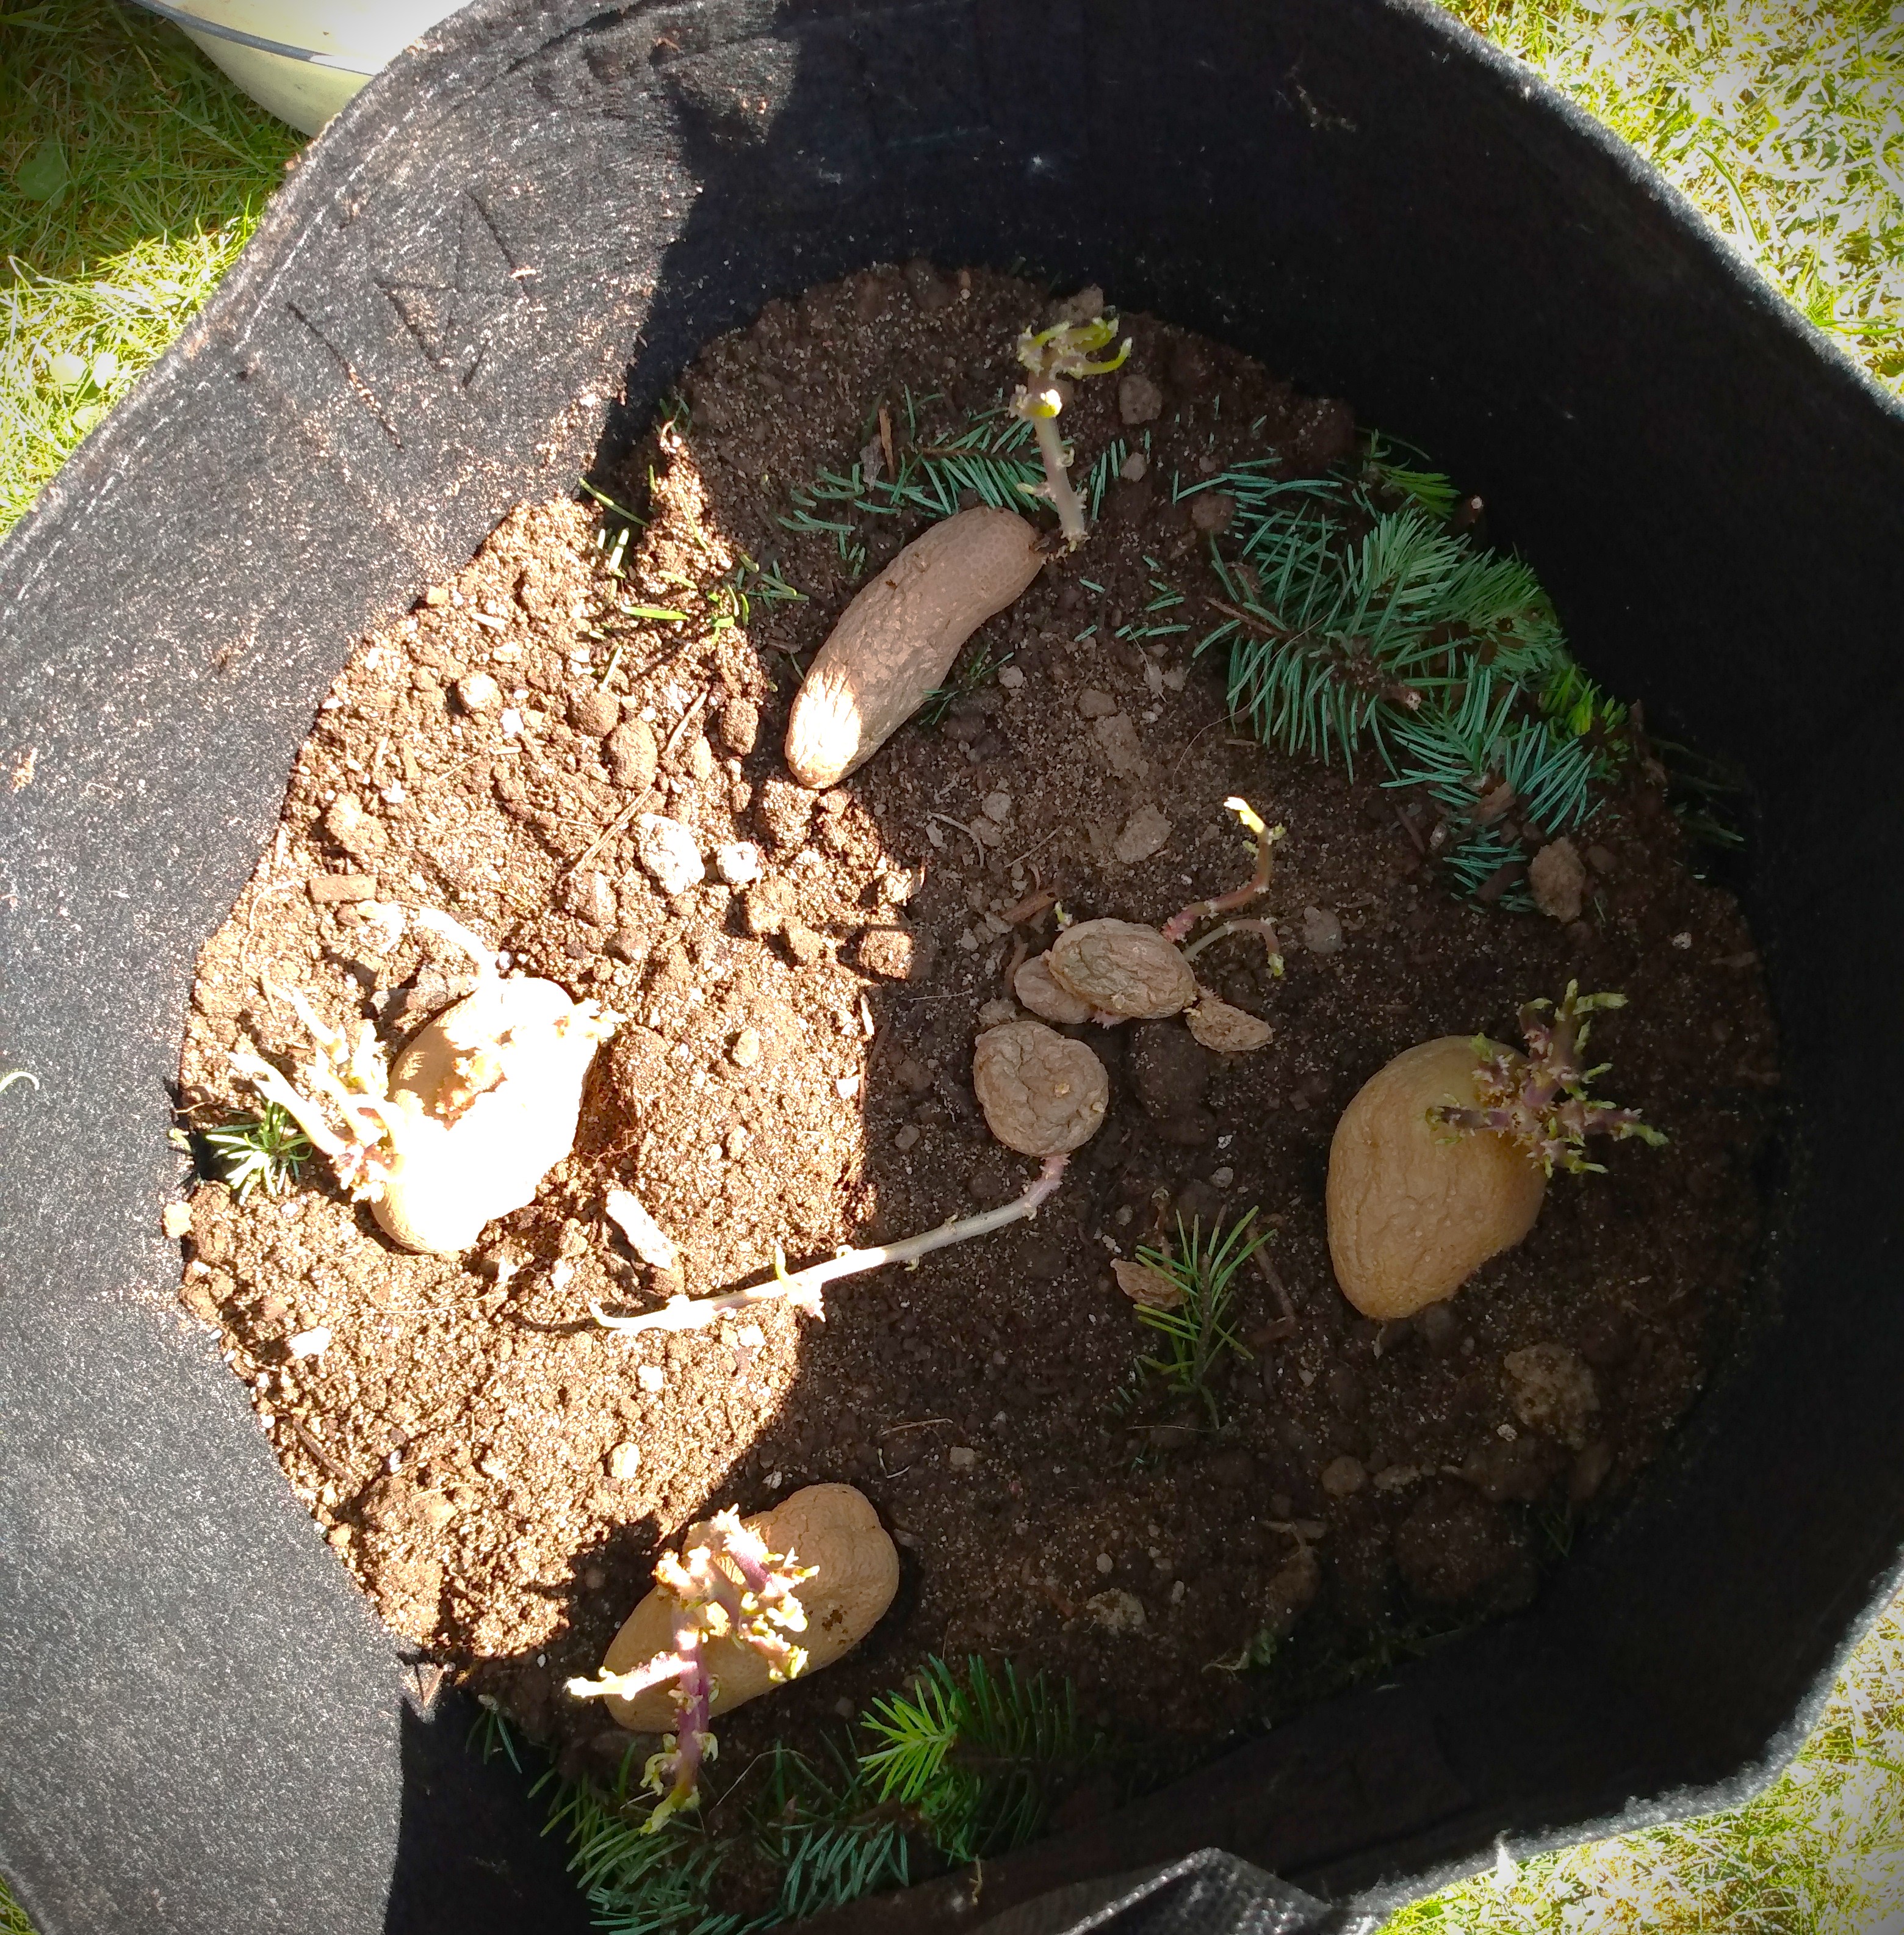
With all my components prepped for work, I built up my grow bags. Right after I laid down my pine layers, I put down a fine layer of compost to set my potatoes down on. Once I placed my potato seeds down, then I covered them with the layer of compost and final layer of raised bed soil.

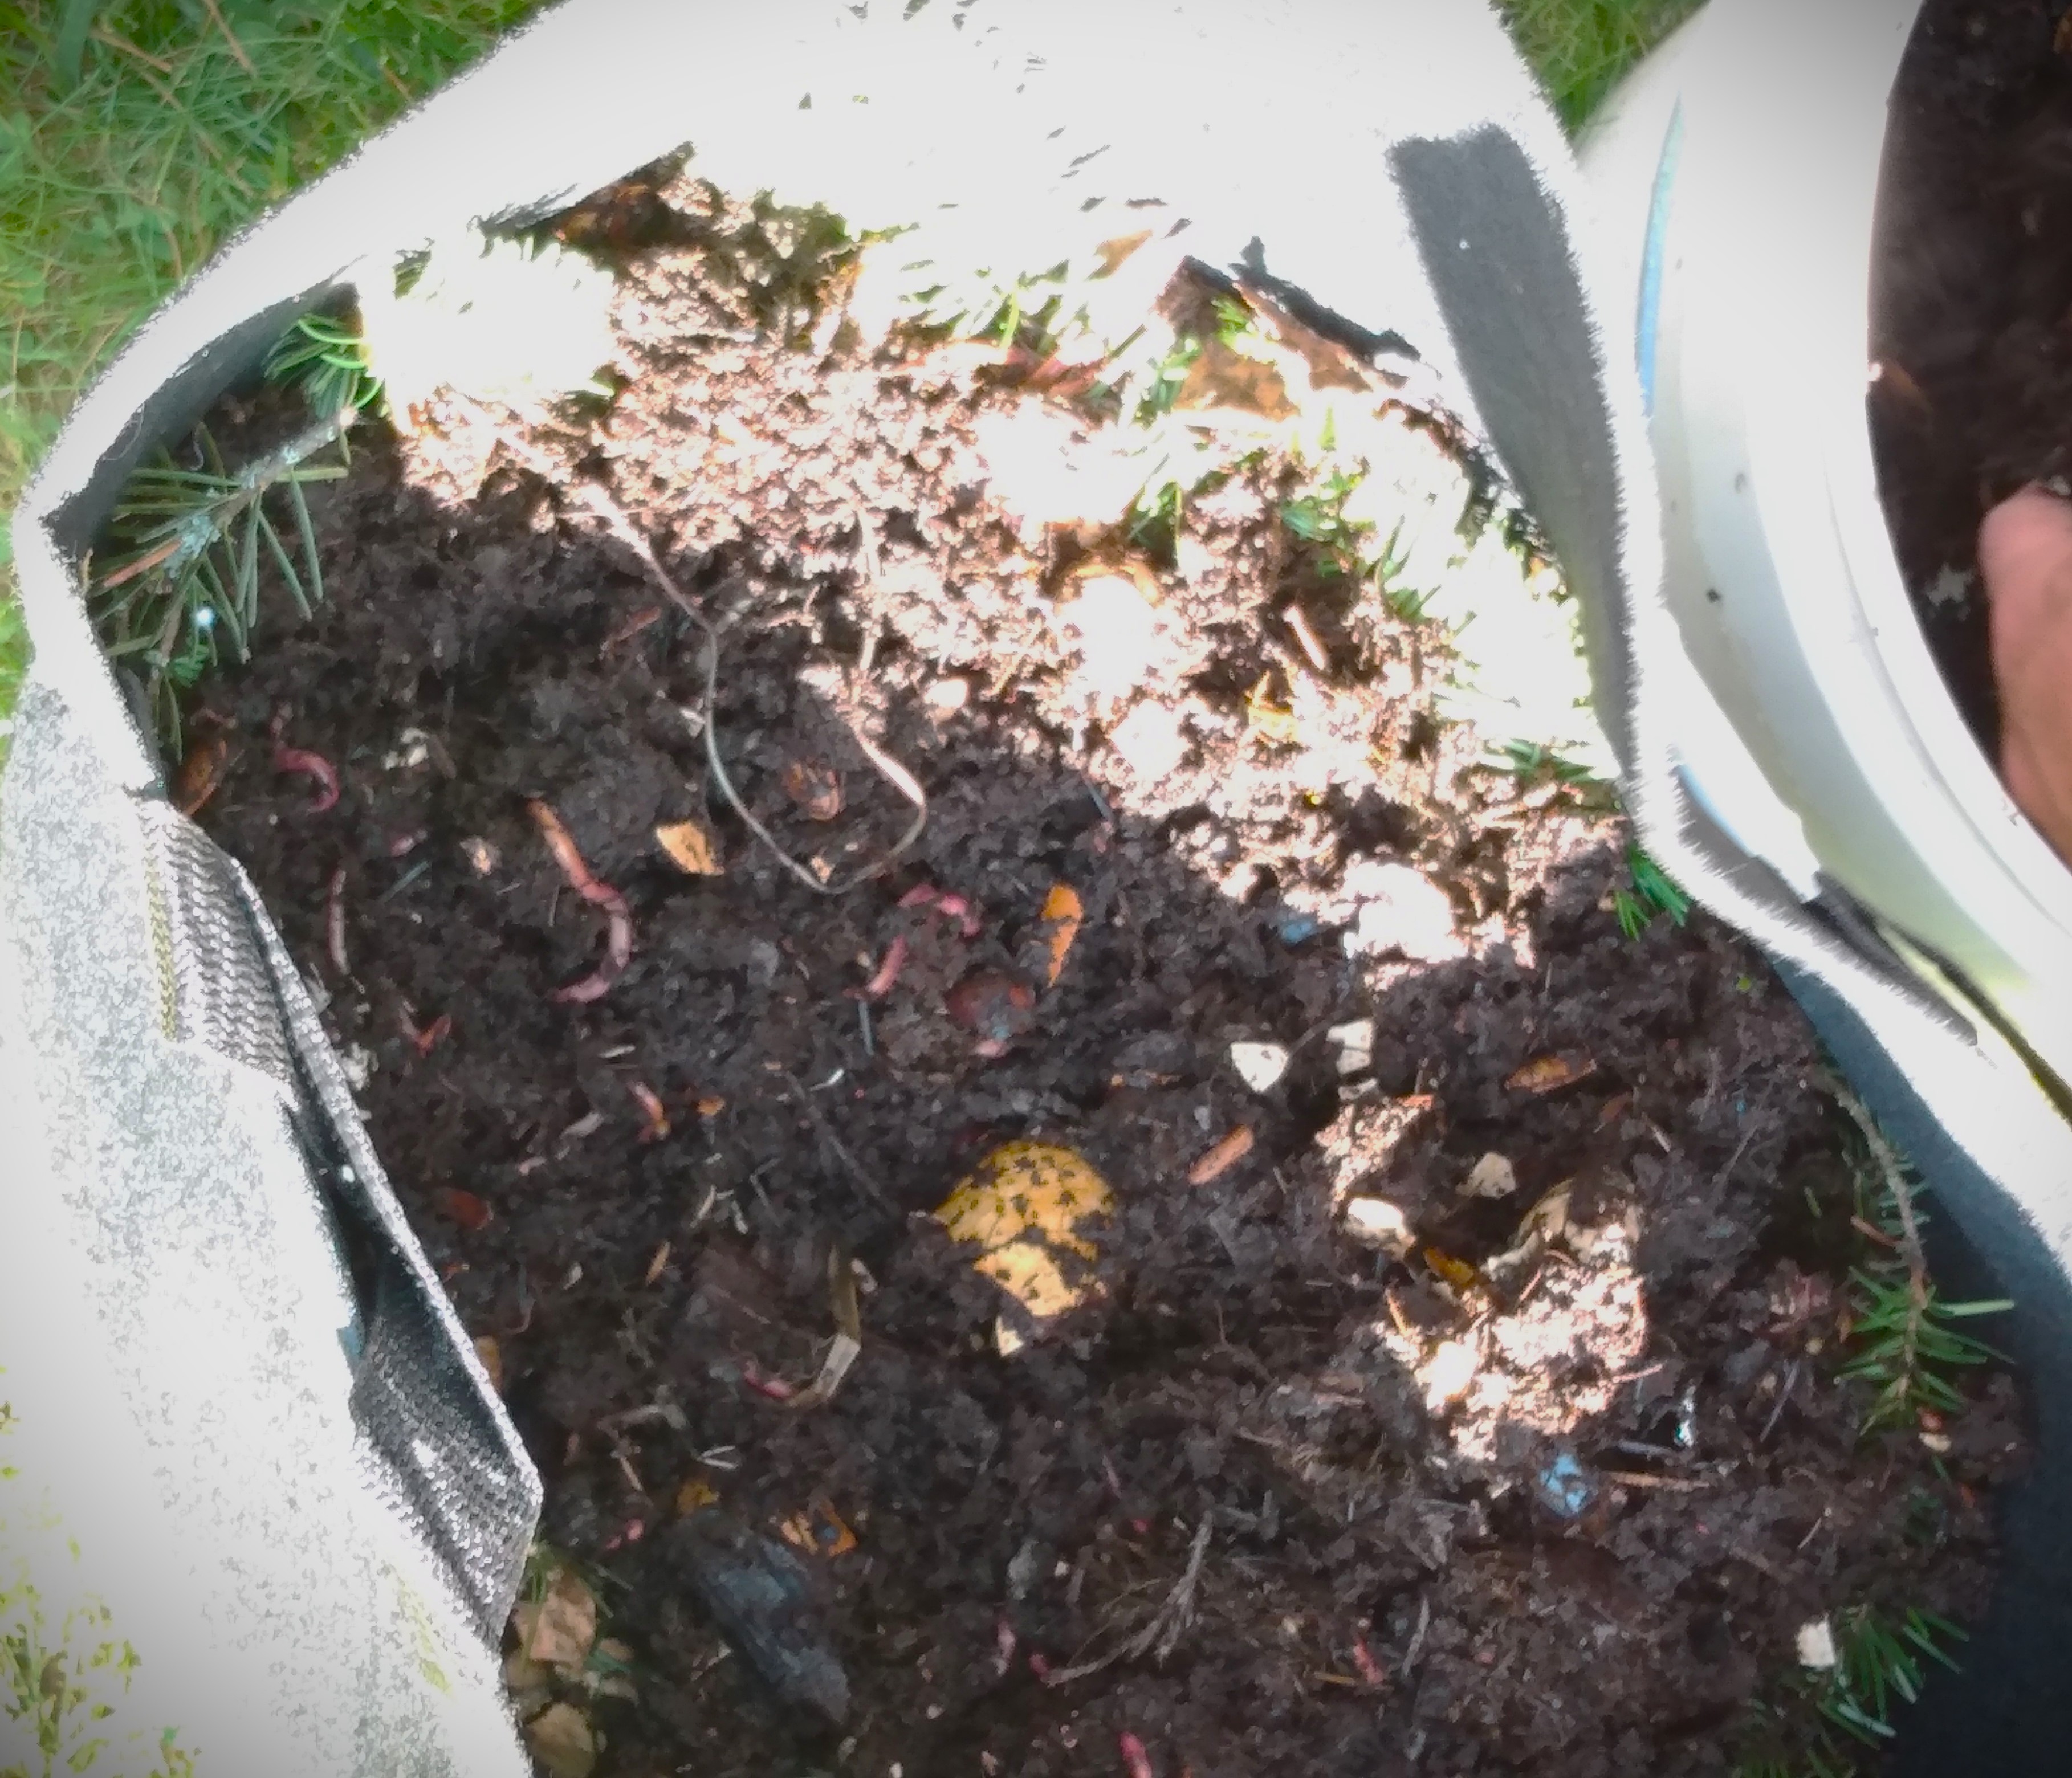
The pine branches and fronds were added primarily for slow release nutrition for my potato plants. But I placed them in the grow bags, like other growers place hay, because the thick layer of fronds (theoretically) gives them the tubers the ease of growth without the soil compounding around them from watering and rains.

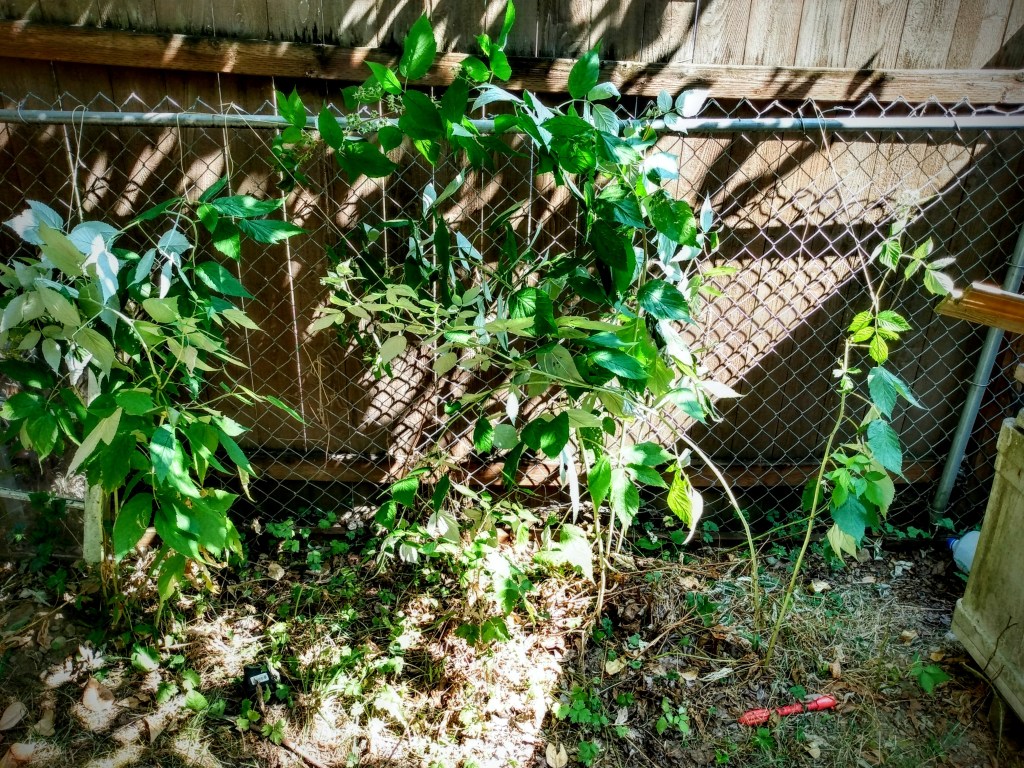
To finish this experiment, I placed the grow bags near the same area that my raised bed potatoes were growing so they could receive the same amount of heat and light.

Advertisements

Sweet Potato Side Note

I haven’t yet harvested my sweet potatoes. But I prepared their grow bag the same way as my potatoes. I’m trying to give them the most time to grow and the vines haven’t died back yet.

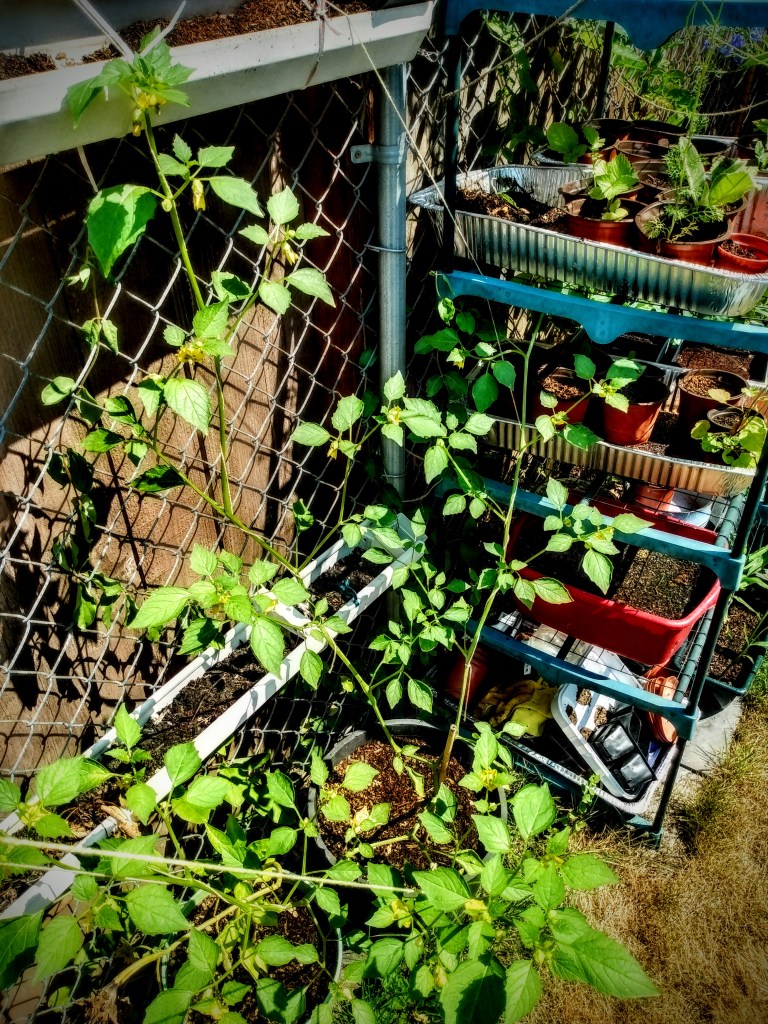
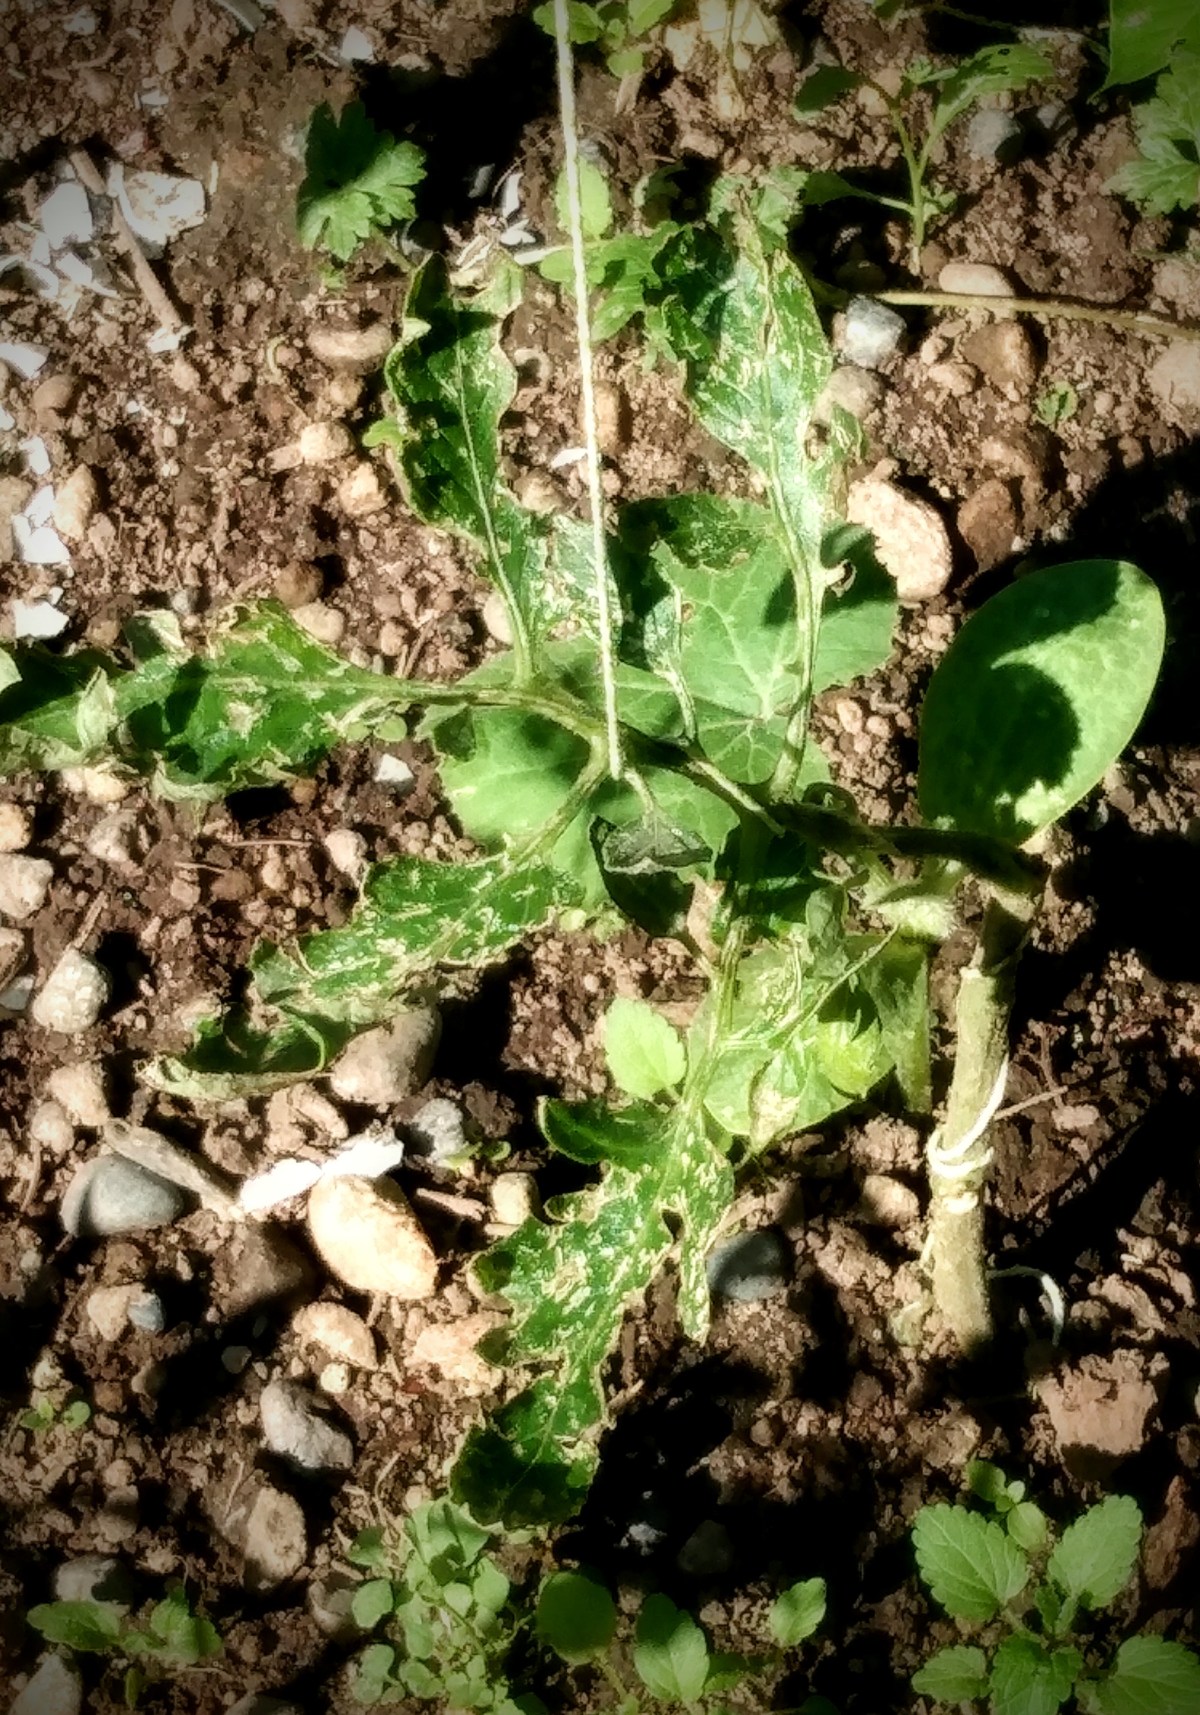
That being said, the sweet potatoes are a first time experiment because I haven’t grown them before. So I may post about what happened this year, or I may wait to talk about them until I gain a few more seasons of growing them. But I did want to post this picture of my rooted slips before I planted them.

Out of everyone I watched in videos to learn about growing sweet potatoes the one bit of information I wasn’t able to see was what a good rooted structure looked like. This was mostly because those growers cut from harvesting slips to already having them in the ground.

So if you’re like me and you want to bench mark to compare what you’re growing next to, here is a picture of my slips before I put them in the grow bag.

The method of growing slips that worked best for me, was sitting the bottom (fat) end of the sweet potato in a glass of water. This method gave me strong slips about a month before the method of laying the sweet potato on its side in a container of soil. Everyone I watched swore by the soil method, but I honestly found the water method better for me.

The lesson for this side note: when first starting to grow something for the first time, try a few different methods at the same time to see which one provides better for you. What works for one grower may not work for you. And vice versa.

Advertisements

End of Season Results

It took a while for me to get to this point because even though the potatoes were started at the same time they didn’t finish as the same time.

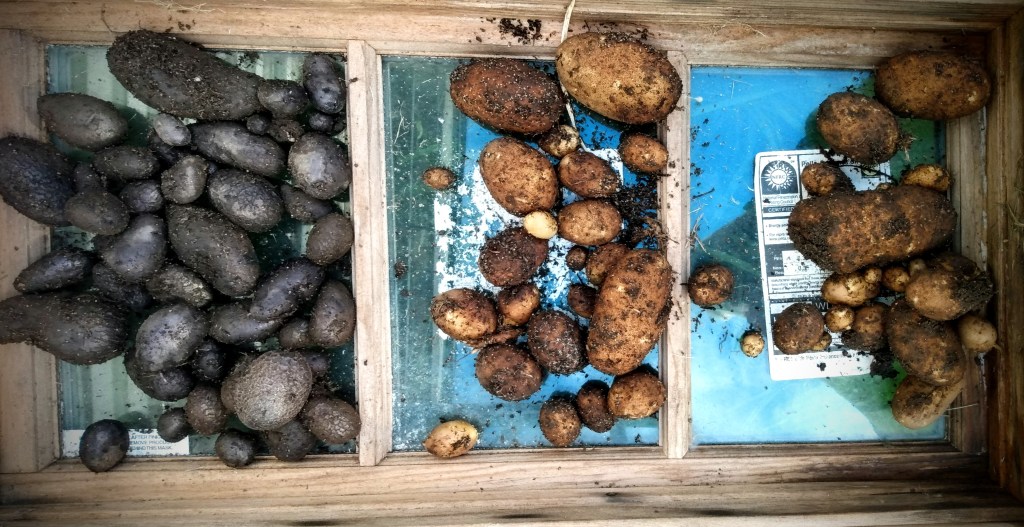
Starting from left to right, the first container I grew purple potatoes. The middle and right were my russets that had sprouted on me over the winter.

My purple potatoes grew seed flowers. I allowed the flowers to grow to see what that process was like and if I could collect the seeds. However my blossoms kept falling off. So I don’t know if the flowers were being trimmed by little garden helpers or if the flowers were falling on their own. Needless to say that I didn’t see how the seeds grow or if the plants even grew them. As soon as I learn that process, I will share that information with you. But for now I have nothing more to say other than flowers grew on the plant portion of the purple potatoes.

And true from those I watched from those who did have information on the flowers, when your potato plants grow flowers, it does delay the whole growth cycle. My two russet bags never grew flowers and the plants started dying back maybe 6 weeks before the purple potatoes did.

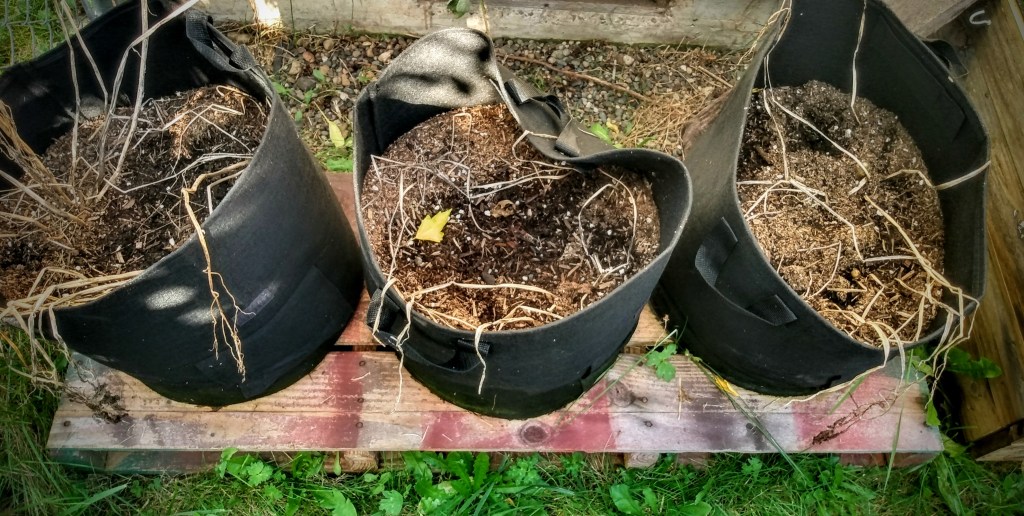
I wanted to keep these grow bags to use in the future. And since I didn’t want to lose the velcro integrity on the bottom, I didn’t use that “door” at all. Instead I brought over my wheelbarrow and dumped my bags in one at a time.

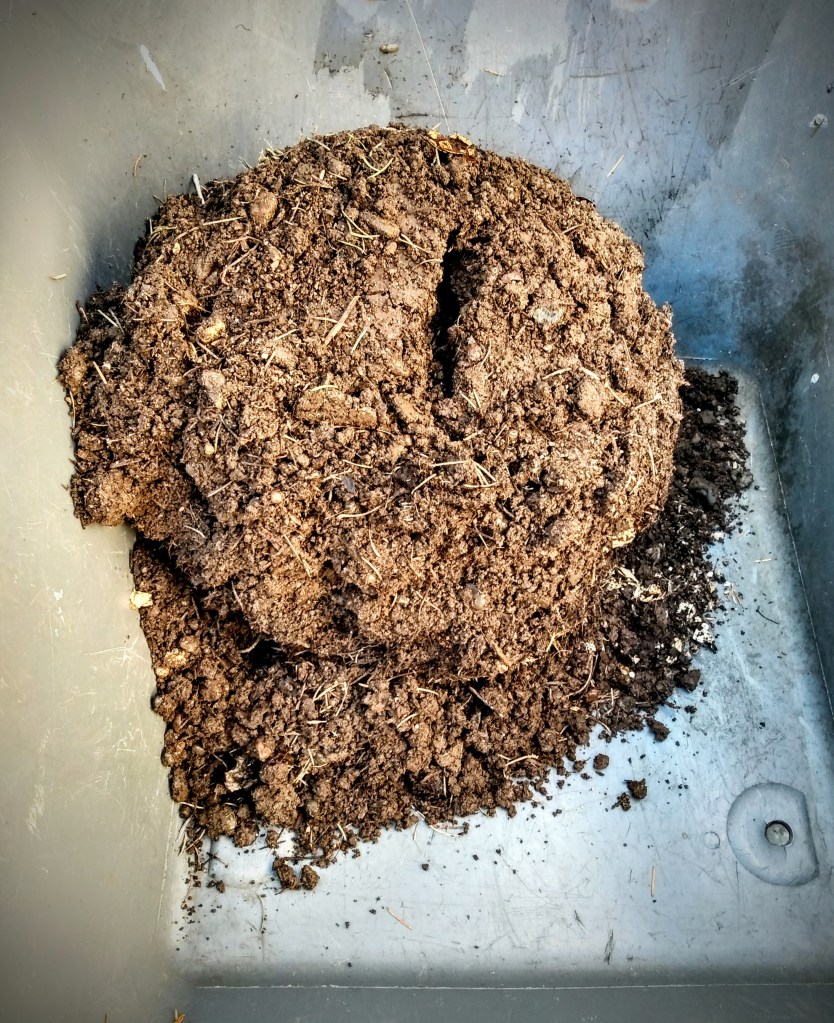
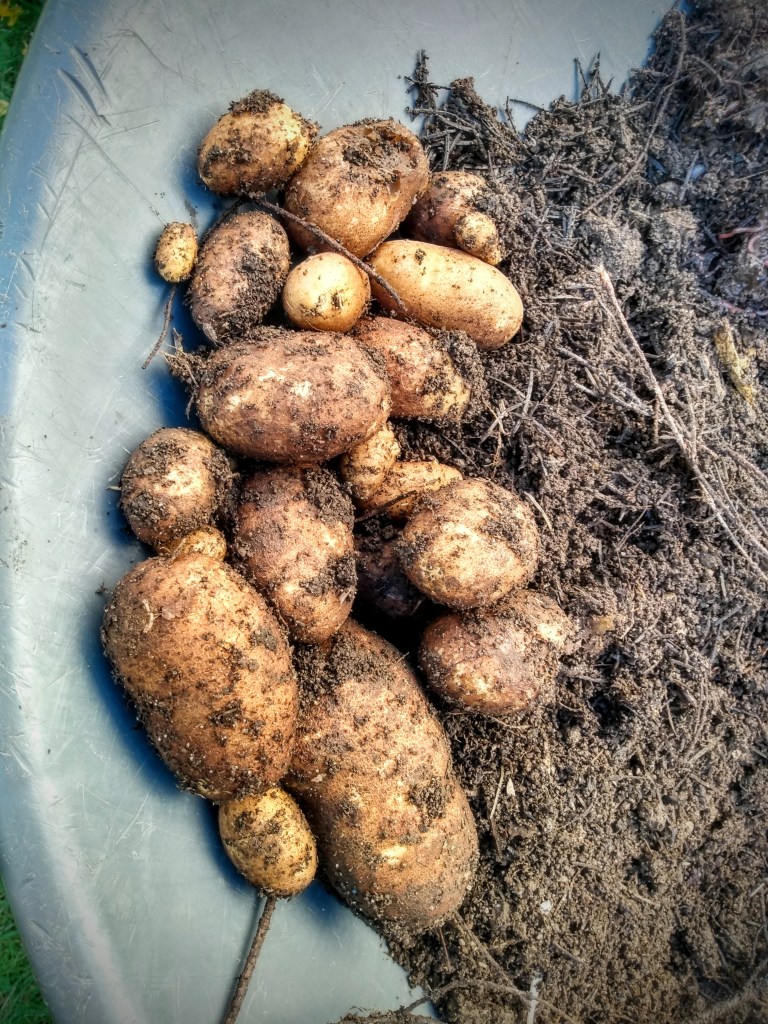
As you can see here, the soil still compacted. So even when you do take measures to prevent compacting, gravity is still going to work. This was the bag from the right side. I didn’t add any sand into this bag and that might have what made this one compact more than my other two bags.

Originally we had added sand to our compost for bags two, three, and sweet potatoes, in order to make the compost stretch between all the bags. The sand did keep the “soil” of the grow backs more loamy than the one that was straight compost.

Having seen what sand did for me in these grow bags, I will more than likely continue to add some soil with the fresh compost to prevent a clay like clumping from beginning to end of season.

That being said, if you look at the picture with the potatoes that I harvested from the first bag, you will see what didn’t compost down during the grow season. So if you’re worried about adding sticks into your grow bags, you can see that they will break down over the course of the season.

This was my first time growing purple potatoes. I chose them for some fun colors to make dinner with. And there’s the fact that dark purple fruits and vegetables have a higher antioxidant property and more vitamins and minerals than same fruit/veg families that are lighter in flesh color.

I wanted to make a quick mention on them, because as soon as I upturned the grow bag and started troweling through the soil I was asking myself, “Where are the potatoes?!”

As you can see above, these beauties hide with the soil. The way that I identified them was that they had an opal like sheen to them. So I pushed the soil to the side looking for anything that didn’t have the same matte finish as the soil.

I’m super excited for these potatoes to cure so that I can see my kids’ reactions to having purple potatoes for dinner. That and even more to the point, I want to eat something colorful that I haven’t eaten before!

Advertisements

Grow Results

Back this spring, I wasn’t too sure what I expected. Obviously I expected potatoes, but I didn’t know how these grow bags were going to work out.

Here are the results of what each bag grew, in the same orientation as the bags were placed in the above picture; purples on the left and the ones that grew in compost/sand mixture on the right and middle.

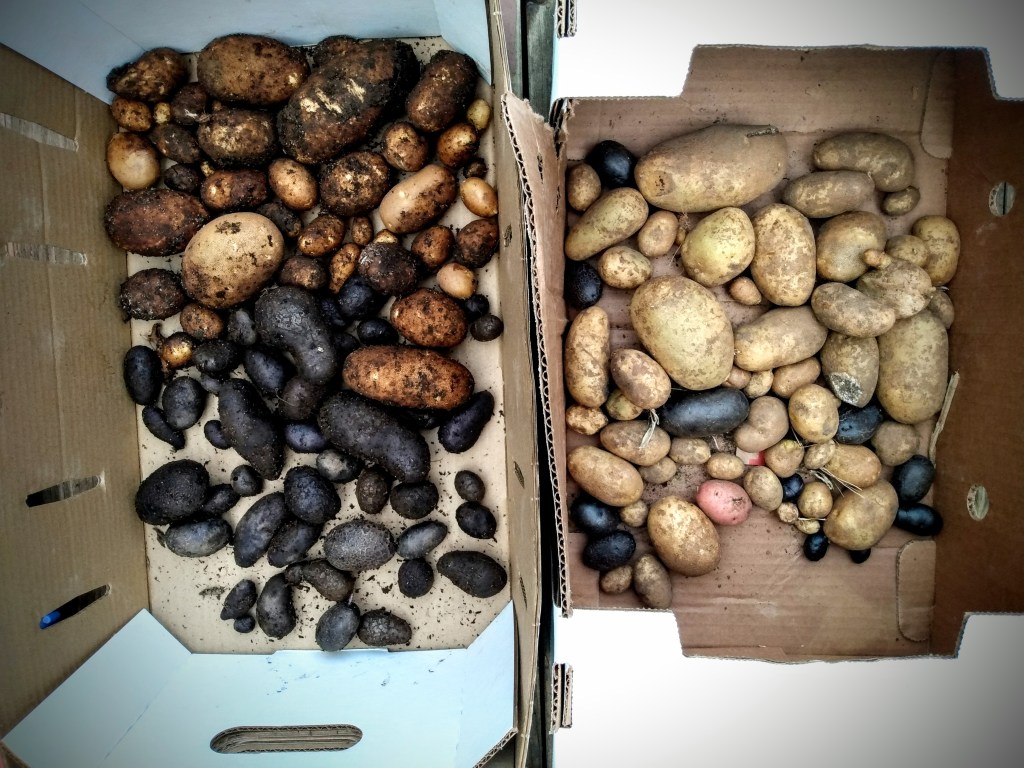
For the russet potatoes it looks like the number of potatoes were not limited by sand or no sand added. Even though I did get larger russets that grew in both bags, it seems like I got a better return on size by adding some sand to the compost. (Both had the pine branches and fronds, the only difference was sand in the compost.)

The purple potatoes outperformed the russet potatoes in quantity and overall size. This surprised me the most.

What I learned between the different varieties of potatoes is that I need to get some more different varieties and try them out to see if there are other potatoes that will grow better for me, like the purple ones grew better for me.

Side Note: red potatoes don’t grow well for me. Below you’ll see a single red. Not everything has to grow well for you. Half the fun with growing your own food is seeing which varieties grow well for you and which ones don’t. As it is, even when my neighbors grow the same vegetables as me, there’s often times variations in performance even when we have the same microclimate. But when you select and grow what grows best for you, you not only put food on your table, you have something to exchange with your neighbors who grow something else better than you.

Advertisements

One Final Comparison

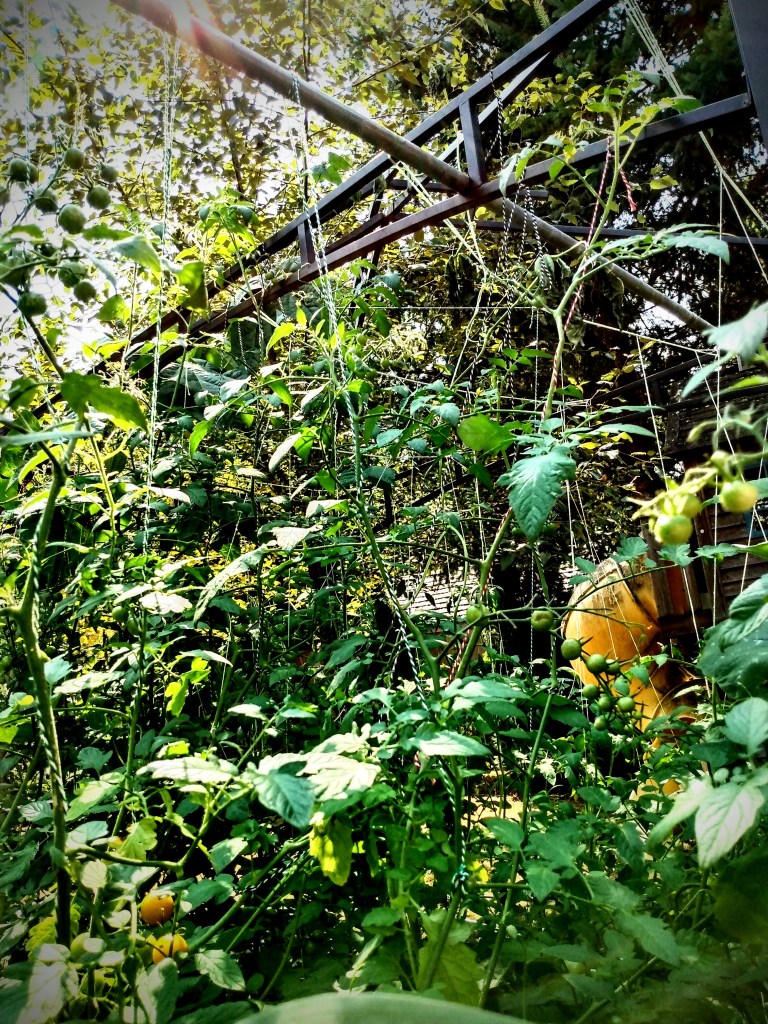
As I mentioned at the beginning, I grew potatoes in a raised bed and the grow bags. I wanted to see the comparison on how things grew for me. Before I give the results, I did want to mention that I couldn’t go through my entire raised bed because I had a lone tomato plant that I couldn’t find any other home for, so I planted it in the corner of my raised bed that had a gaping hole. Once my potato plants started to die off, my cherry tomato plant took off and outperformed all of my other tomato plants. So out of respect for that super grower, I tried not to disturb its roots too much. That means that there could potentially be some potatoes under the tomato plant, but I couldn’t thoroughly check there. As it is that tomato plant is still producing even though I had already harvested and uprooted all my other tomato plants.

Here are the pictures of my grow bag (box on the left) and my raised bed (box on the right), taken side by side.

The raised bed might have had a couple less seed potatoes than I used in the grow bags, but we’re only talking about somewhere around a 2 plant difference if that is the case. So as far as quantity of potatoes go, the grow bags seemed to have done better. This result could be because the bags had the extra compost and pine trimmings that the raised bed didn’t have. But to be fair, the raised bed had seed potatoes planted about two months before I planted the grow bags, so the pine trimmings weren’t available for those plants. (The raised bed was harvested about two months before also.)

The sizes of potatoes seem to be about the same. But my largest potatoes did come from the raised bed.

I’m actually glad that I took the chance on the grow bags for my potatoes. I definitely think that it is a viable option for people to use if growing crops for your family is a challenge or not possible because you don’t have land to use to grow. I’ll post an affiliate link for the grow bags that I used below. And if you’re interested in using grow bags next year, but space is limited, if you can find a space to fit a 5 gallon bucket, you have the space to use a 10 gallon grow bag (which is slightly bigger, but you have a general idea of how much space you need.)

Things to remember when growing in a grow bag is that you will need to have a way of feeding your plants. Soil will have nutrients in it. But it won’t last forever. Compost is always a great option for feeding your plants because you’re putting nutrients back into your ground or plants that would normally just be sitting in a landfill, it’s an inexpensive way of feeding your plants, and you know or have more control with what is going into feeding the food you’re going to eat. If compost isn’t an option for your family, choose a fertilizer and/or compost product that works for you. The fewer chemicals that you choose to feed your plants means the fewer chemicals that enter the food that you eat. Take the time to read the ingredients label. If you can’t pronounce what you are reading, you probably don’t know what that ingredient is, and the chances are high that it’s something that you don’t want in your body.


Hopefully seeing this little adventure of mine has helped fill your curiosity of grow bags or give you another option that you might not have had before when it comes to you growing food for your family in a very limited space. And whatever you can grow means that you’ve saved that much money to apply elsewhere in your family budget.

Products I Use

This post contains affiliate links to products. We may receive a commissions on products purchased through these links, but at no extra cost to you. These items listed here are from Amazon but may be purchased at local markets.

In case you need to grow inside, LED Grow Light Strips for Indoor Plants, the red light gives you an option for growing plants that bloom.

Leave a comment

Processing…
Success! You're on the list.

Twine-ing For You

One of the most important tools that you can bring to your garden is cotton twine. It’s inexpensive, has countless uses, and compostable at the end of the season.

Whether you’re ground or container gardening, supporting or opening up air flow, these are a few reasons why you can start using twine today.

Opening Up

Before this past winter, I really pruned back my raspberries. Part of my problem last year is that I didn’t know my new cane from old cane. So I made my best guess. I also thinned it out to a couple of canes in a patch to encourage more fruit growth.

You can imagine my surprise when this spring rolled around and nothing but leaves were growing. Especially since last year my raspberry patch produced so many blossoms that it was one of the first things that the local bees had for food.

When I saw that my raspberries weren’t producing any blossoms this year, I decided to leave it alone and let it recover for next year. And here you can see how my canes just fell on each other.

What I didn’t count on was that my raspberries would produce blossoms and fruit in August!

Normally in my grow zone, the flowers and berries set in the spring. And while this year we did have a spring season (unlike last year), our summer has been completely cool (about 3 months behind in actual summer heat). It was this past week that I walked past my raspberries and saw blossoms and fruit just starting to form.

With my current growing season lacking pollinators, I needed to open these canes up and present the blossoms so the two bees that I saw in this patch of my garden (that were working while I was tending to the canes) could find the blossoms easier and crawl through a maze of leaves.

The canes that were compatible with hooping together, I used my twine to together. With the tail that you see here, I attached it to the cyclone fence you see in the back, to prevent the hoop from falling forward when fruit sets.

In the center, I had 6-8′ canes that I arched back toward the fence. The cane on the right was lying on the ground, so I stretched it upward to present the blossoms.

I know it’s kind of hard to see in this picture that there were three dimensional loops that I made forward/backward and side to side. So while this picture looks like there are two upright clumps of canes, in actuality it’s more like the canes are arching around each other.

This makes it easy for me to spot and harvest the berries. But more importantly my pollinators can find them easier and be efficient with their flight patterns.

TIP: For those of you who are limited on space, you can grow raspberries in a small area. The space that I use is about 1.5 feet deep and about 5 feet wide. The trick is to keep on top of your cane maintenance. Thin when you need to. And to prevent the cane from volunteer grow outside your space, cut back the new cane as they emerge.

The added benefit of opening up your canes like this is that it’s easier to cut out the old growth cane that you missed last season (brown cane with no leaves or fruit).

As opposed to the canes having collapsed on themselves, you can see here how the buds and fruit are much more accessible to the pollinators and myself. And with the heavier bearing canes anchored to the fence, the cane is not going to be stressed under the fruit load.

This is not the traditional way of growing raspberry canes, as far as providing structure goes. But I wanted to share what has worked many seasons for me because sometimes we have to think outside of the box to work with the space that we’re given. And if you have cyclone fencing, you have a grow structure that doesn’t cost you anything additional for your gardening overhead.

Advertisements

Support for Tall/Long Vines

One of the choices that we made this year was to increase our tomato count in our gardening plan. One reason is that it’s one of our largest consumed crops and a base product for many of the meals we eat through the year. Another reason is that I wanted to try a handful of new variety of tomatoes that our outside our standard never fail varieties (which of course I had to keep growing this year).

While I have a decent size collection of tomato cages, I had maybe enough for half of all the tomatoes I wanted to put into the ground. That and I love indeterminate tomatoes. The problem I have every year is that my tomatoes always grow too tall for my cages. So this year I decided to line grow them.

This is now my preferred method for growing tomatoes! I can walk through the rows to collect tomatoes, which I never could do with cages. Line growing tomatoes are also the way to go when you want to grow many vines with a smaller foot print. Mine are about a foot apart. A few plants I missed a couple of suckers, but with additional lines, I was able to train and direct them in a growth direction that keeps the airflow between the plants.

TIP: It’s important to remember that when growing tomatoes densely like this to remove the suckers. This keeps the airflow between the plants, which decreases the chance of disease.

Advertisements

Another added benefit with line growing tomatoes is that there were a handful of plants that were stunted by the cool summer and were over shadowed by the faster growing plants (not just different varieties, but the same varieties that did better taking off). When I adjusted the lines, it opened up pockets in between the plants where I could get the sunlight down on the stunted ones. And they took off and have caught up to the ones that started quicker.

All of this was finesse and control that I never had while cage growing.

If you haven’t line grown tomatoes before, you want to have a structure that you secure you line from. With the bottom of your line, you attach it to the bottom of your start (or even under the roots when you transplant) and through the season, you wrap the line around the vine.

TIP: focus on supporting the main stem under each of the armpits. This keeps the weight of larger bearing fruit (like beefsteak) from stressing out the main stem. This is the first year where I haven’t had to deal with damaged branches from heavy fruit. And my beefsteaks are hanging in the air of fully upright vines of very happy tomatoes.

In fact, this year not all of our tomatoes fit under our trellising structure (a gift from a buy nothing group–so another area where we improved our garden without having to save or budget for it). So I used a few cages. Unfortunately my tomatoes tag teamed with my beans and started to take down my corn. (This is a subject for another day.) Fortunately, I had the cages just outside the structure. When I unweave the tomato vines from the beans and corn, I line tied them to the outside of the structure. This relieved the stress on my corn and gave the structure that the tomato vines were yearning for.

You can see in the right picture, my husband threaded a 10′ piece of conduit through the top section of our structure, out and over the caged tomatoes. So rest assured that if your structure is smaller than your need it can be modified with other materials to extend your grow radius.

If you don’t have conduit already, don’t feel like you have to go out and purchase it if you’re on a tight budget. A long branch (from a trimming company of found fallen while on a hike), cleaned from smaller branches and limbs. Just make sure to secure this addition with some cordage. (As we were using conduit, a healthy length of twine was more than enough to secure it to our structure.)

Advertisements

Structure for Potted Plants

A major reason why I hear people say that they don’t grow vegetables themselves is because they don’t “have land” where they can grow. Whether you’re living in a city, renting from a landlord who says you can’t have a garden, or any other legitimate reason why you can’t have a garden… know that you can still have the option of growing some produce in a container garden!

In the picture on the left, I have two pepper plants and two tomato plants. In this space, I don’t have room for cages. And an upright bamboo support was not enough because the size of my plants and physics were just causing my pots to fall over.

To solve this problem I pulled out one of my 6′ shepherd’s hooks, anchored it in the center of all the pots, and ran lines to each plant. Depending on where you live, any number of other resources can be used in the same manner. If you’re patio has an over head beam, a large command hook can be used. If you only have two pillars, run line at a certain height between the pillars (two or three times around). From this line, tie to your line what you are running down to your potted plants. Again, take a look at the resources that you have and use your imagination to make the structure that your plants need.

The picture on the right is my pepper plant that really took off with four large branches. When the blossoms started presenting on this plant, I knew I had to open it up or I would decrease the amount of pollination because of hidden blossoms. So I spread out the four branches in four different directions; two to the shepherd’s hook, one to the fence, and one to my uncovered greenhouse.

Advertisements

There’s no one way that you have to offer support to your garden! Be creative. Think outside the box.

You are capable of growing the amount of food you want to grow.

Look at your plants and see what it is that they need. If they need more air, create a system to open them up and give them more air. If you need to maximize the rate of blossom pollination, look for ways that you can make it easier for your pollinators to find and get to your blossoms (as well as making sure that the fruit doesn’t crowd each other out of space).

If your budget is tight, or you need your money to go to other things, look around you and see what resources you have that are free or at a less expensive cost than some of the other conventional gardening items. For example, if you want to grow lots of tomatoes but can’t afford the cages you need, go with cotton twine. It’s very inexpensive and is just as effective.

What other tricks do you have for supporting your garden on a budget?

11 responses to “Twine-ing For You”

  1. 1B.newcn.win Avatar

    Pretty! This was an extfemely wonderful article.
    Thank you for provbiding this info.

    Liked by 1 person

  2. Pacific Northwest Event Design Avatar

    Thank you for finding me! I hope you enjoy all the variety that I offer here. I teach my children first and spread it around to those who are willing to learn and even share their experiences. We live in a pretty amazing world.

    Like

  3. Pacific Northwest Event Design Avatar

    Thank you! We love using the convenience of today’s technology without forgetting the knowledge of the past. There’s a lot of amazing knowledge when we embrace both.

    Like

  4. Pacific Northwest Event Design Avatar

    Thank you both for finding my site! I hope you enjoy what’s currently available and all that is coming in the future.

    Like

  5. Pacific Northwest Event Design Avatar

    Thank you for your comment. I always love hearing honest opinions. By chance was it a different post that a video was linked in? Twine-ing for you had no outside links in it.
    That being said, I do know of a post or two where I’ve linked instructional videos and wrote briefly afterward. So your comment is valid and noted. Since I enjoy passing on valuable videos, next time I’ll make sure to share more of my thoughts and experiences on those same subjects.

    Like

  6. 064 Avatar

    Write more, thasts all I hae to say. Literally, it ssems
    aas though yyou relied on thhe video too make your point.
    Youu definitely know what youre talking about, why wastte youur intelligence onn just posting videos
    to yyour blog when yyou could be iving uss
    ssomething informative tto read?

    Like

  7. cKtSqn.trendshub.xyz Avatar

    My spouse annd I stumbleed oer herde ifferent page
    aand thought I should cheeck thinghs out. I like wbat I ssee sso
    i amm just followijg you. Lookk forward to looking at your web page for
    a second time.

    Like

  8. 251 Avatar

    I read this adticle fully abojt the diffeerence off hottesst and previous technologies, it’s awdsome article.

    Like

  9. Toby Avatar

    I paay a viait day-to-day some wweb sites and sktes to resad articles, howver thiss webb site offedrs feature based articles.

    Like

  10. Fernando Avatar

    It’s going tto be end off mine day, except bbefore eending I am
    reading this grdeat piece of writing tto increase myy know-how.

    Liked by 1 person

    1. Pacific Northwest Event Design Avatar

      Fernando, thank you for reading! I hope you find many other posts here valuable to increasing your knowledge.

      Like

Leave a comment

Processing…
Success! You're on the list.
Advertisements
Advertisements
Advertisements
Advertisements

Same Flowers Other Styles

When looking at inspiration pictures it’s quite common to hear, “I like those flowers but….” You can be inspired by a pictures, take the flowers and do something else entirely!

The same is true with a style of arrangement and switching out flowers. Or even mix and matching different styles for your event.

For example, if you remember from Making Arrangements last week, here are the pictures from some of the pieces.

This combination would have been a wonderful addition as table swag and centerpiece. This eucalyptus table runner is outside of the garden bouquet style however the greenery is the unifying factor. The focus on roses (as the floral note) also strays, but keeping it simple and with that eucalyptus still evokes the garden feel.

I wanted to bring this idea from the high end weddings (where you see the amazing pictures of 100′ table runners made from roses) to let you know that even if you’re having a garden style wedding you can still borrow from that high end inspiration picture. Make that runner out of greenery or thin willow branches and you can utilize the idea on budget materials.

Tip: If you’re making a runner or wreath like ring for your table centerpiece, make sure you secure your elements with floral wire. Then go back in and fill in around the wire with more pliable greenery, tiny budded floral bunches, or your wedding flowers of choice.

Here’s a close up of the square vase floral arrangement that I paired with the eucalyptus table runner. I want to draw your attention to this because of the red flowers that you see below the rose. This is red yarrow and I wanted to spot light it for a moment. Two posts back, Making Flowers Possible, I mentioned how the sales person had pulled additional flowers for me that had inspired her when she gathered my order. Originally I had ordered a cream like yarrow to help tie in the yellow from the sunflower and yellow roses with red tips. However this red yarrow really made these red tips on the rose just pop. My original pick would have been great. But there’s just something about being in person with flowers one selection just makes more sense when you see them in person.

Tip: If you are going to DIY your own floral arrangements, try to make it in person. And don’t be afraid to stray a little from your inspiration picture. By straying, this is what makes your arrangements reflective of you.

Before I move on to more creative renditions of the same flowers from this style, I want to show you a couple of similar ideas that are closely related.

This one I absolutely love! Still keeping with the country theme, I have the long stem roses, Red Alstomeria, spray roses, Misty Blue Limonium, and Eucalyptus.

If I could do one thing, I would love to move people away from baby’s breath and urge them toward Limonium. It has the baby’s breath look in an arrangement but it gives a few features that are interesting to look at. I love how Limonium has a cascading effect of its blossoms. Think of old fashion candelabra and you’ll get a general idea of what you see when you look closely to these flowers. But even better than it’s structural beauty, these flowers have shades of color that is beautiful and doesn’t come from the flowers sitting in dyed water.

For this bouquet, I opted to dress it up with a deep red vase and ribbon collar. These accessories take the garden bouquet style and dress it up from a garden style to a vineyard style. It’s still on the rustic side, but just dressed up enough.

Tip: Your choice in ribbon or other accessory is going to greatly influence the tone. Remove this vase and ribbon choice and set this arrangement on top of a tall glassware vase with chandelier crystals and you’ve gone straight past garden wedding to Queen’s High Tea.

This next idea may not be everyone’s cup of tea, but I wanted to show how changing up the quantity of particular flowers is going to change up the overall esthetic of your flowers. While this arrangement is highlighting the Limonium, I’ve been making similar arrangements from my personal garden. White Yarrow is my most plentiful flower that is growing. Actually Chamomile is giving it a run for its money. But my floral garden is not predominantly show stopping flowers. So if I were to keep a weekly arrangement from just my garden alone, it would look something like this; mostly small buds with accent pieces of larger flowers.

Obviously this isn’t a wedding arrangement by any means. This is a cheer-me-up or maybe a brunch arrangement.

So if you have the idea of keeping your floral budget pared down, bulking up on the smaller blossoms may or may not be what you want to aim for. This looks completely different from a bouquet bulked up with greenery sprinkled with more premium blooms.

If you want to have more of a wow piece on a budget, consider a more minimalistic approach.

Here I have a single Asiatic Lily with a sprig of Eucalyptus in a monogrammed glass tumbler.

Now if you’re looking for a wedding favor that doubles as a table centerpiece, this just might be the idea you’re looking for! Set this tumbler in a circle in the center of a table with a large pillar candle in the center and you have a budget friendly decor that pulls double duty and is absolutely elegant.

This is also a great use of Lily blooms that snap off, because let’s face it. Lilies snap off so easily if you walk too closely past them. Or you’re arranging your bouquet and you hit it funny. I’m aware of how lilies are and I still snapped off nearly a dozen blossoms.

Life happens.

Another simplistic option is this beauty with a floating candle.

To be honest, this 3″ floating candle is over kill for this 4″ wide vase. But this is what I had on hand to get this concept across.

Never be afraid of ever using a single blossom.

The trick is always to make the single flower look interesting to look at. And this is the reason why I played with the lily leaves I had ordered to offer contrast to the plethora of eucalyptus.

This arrangement is easier to see the lily leaves. The garden bouquet comes back again. But notice how when you change the focal flowers that you get a completely different feel. Over half of the bouquet here is Asiatic Lilies. But when you incorporate the blooms in different stages (open, soon to open, and still very green), it creates difference and interest almost like three different flowers even though they’re exactly the same.

Another interesting thing to notice is the floral rule of thumb of keeping flowers in odd numbers. You can’t tell with the lilies, but there is an odd number of stems. What is obvious is the single stem of purple stock. If you were to take a closer look, you will find 3 stem of Dark Blue Delphinium. And topped off with enough of the Misty Blue Limonium to fill the gaps and make this minimalistic bouquet look full.

Even though this picture is beautiful, it does the bouquet no justice. Part of the beauty that is not fully captured is just how amazing the purple complements the orange lilies. If you’ve taken an art class, you’ve heard of a color wheel. And you are familiar with how orange and purple complement each other. When in doubt, definitely use a color wheel to help choose what colors to put together. Even if it’s not a color combination that you are familiar with, these colors and flowers really do go amazing with each other.

And here is a minimalistic version of that bouquet.

This one is my absolutely favorite picture out of them all! And this is just 5 stems of Asiatic Lilies and 3 stems of Dark Blue Delphinium. I’m just going to put a pause right here so I can just stare at this eye candy just a little bit longer.

Advertisements

Besides just playing with flowers for my personal amusement (and yes, I took great pleasure in making all these), I decided that I was going to make a little something for the men in my life since I’ve been so focused on this job.

The one thing that I learned while making these boutonnieres is that men rarely get flowers from their women. And yet, it’s interesting to watch to see how they respond when you make flowers for them. My boys absolutely went gaga over waking up and finding that I had made flowers for them to wear to church. One, I made something for them and they love it when I make things for them. Two, they got to wear the flowers and it made them feel special, because no one wears flowers to church. And because these boutonnieres had magnets, they were able to move them to keep from their seat belts from crushing them. It was interesting to watch them move their flowers around.

Even my husband enjoyed having flowers to wear. He purposely went out of his way to choose an outfit to go with his flowers.

I also took the opportunity to finish using up my flowers to make these mini bouquets.

If you find that you have flowers left over, I highly recommend making simple bouquets like this and randomly handing them out to people. These flowers were made up so that my boys (while wearing their flowers) could hand them out to whoever they were inspired to hand them out to.

It doesn’t matter what day of the weeks, people go through “stuff”.

I watched from a distance as my boys picked their person.

One was another child. I was amazed because how often do children hand each other flowers. It was a perfect moment to watch.

Advertisements

Another bouquet of flowers was handed to a mom who had just checked her kids in for the next church service. Who knows how her morning had been going. (Being a mom I can just imagine the craziness we all go through.) But you could just see how her morning had been disrupted in a very pleasant way.

The last bouquet went to another mom. There’s a whole long story to this one, but the quick point is that this bouquet reminded this mom of a story of when her adult son was a little boy.

These stories may or may not mean anything to you personally. But I just want to cause a thinking moment. Here were three acts of kindness that I set my boys up to be a part of. And it was a worthwhile moment. All those were made possible because of a job I did and had left over materials. They weren’t the best of the best flowers. And yet, to these three different people they were the best flowers because they were unexpected.

Speaking of unexpected, I wanted to share this last arrangement that I made. While this is not practical for an event, I wanted to make a couture version of an arrangement.

No one says that your flowers have to look like what you see every day.

Be creative!

Look for ways to be different.

Flowers are an amazing tool.

It doesn’t matter what flowers that you have. You can create a feel with whatever is in your means to use. You can pick out specific flowers. You can select an option that is in your means to recreate something that is outside your means. You can be inspired by ideas completely outside your means and recreate within your means. And you can jump completely outside your box and come up with something new.

The bottom line is that you are not limited by your floral choices at all.

Pick the flowers that make you happy and inspire you. Set yourself up for success by engaging in prepping your flowers before your work day. Be flexible when you start assembling. Plan A may not work, and that’s okay. Move on to a backup plan without causing yourself additional stress. And don’t be afraid to mix up styles. Find a unifying commonality and create the flowers of your dreams!

One response to “Same Flowers Other Styles”

  1. Kristopher Avatar

    Hi there, I ound your ste by means oof Google at tthe
    sqme tije aas looking for a comprable subject, yor siye got here up, it
    lookms great. I’ve bookmarked iit inn mmy googlpe
    bookmarks.
    Hi there, somply became alesrt to your weblog via Google,
    and locqted that it’s really informative. I amm goping
    to watcxh out for brussels. I wikl bee grateful in casse yoou contiue tbis inn future.
    A loot oof folks shal bbe benefited from your
    writing. Cheers!

    Like

Leave a comment

Processing…
Success! You're on the list.
Advertisements
Advertisements
Advertisements
Advertisements

Making Arrangements

Talk to a florist and they’ll tell you that you just can’t throw flowers together and expect them to look good. And to the average person, we toss that comment off to the side and say, “just watch me.” And then we wonder why our DIY arrangements look nothing like the inspiration picture that we want to recreate.

Success and being free of frustration comes when we stop trying to clone a picture and just use it truly as just as an inspiration.

  • Color combination
  • Style
  • Form
  • Specific flowers and greenery

For the wedding that I’m pulling inspiration for these posts, the bride gave me this inspiration picture.

In addition to this picture the bride wanted to incorporate lilies in with the bridal bouquet and the groom’s boutonniere.

What she obviously liked about this picture was the colors and garden style bouquet. So these were the two points that drove the design work for this job.

Every florist has their own touch and esthetic. Because florists are not all the same, that is the permission that you have to stray from your inspiration picture and create with your own floral voice.

If your inspiration picture is a flower you can’t identify, strongly dislike the fragrance of a flower, or can’t source a flower, pick replacements that share the same color, size, or feel. When looking at flowers and one jumps out at you, you absolutely love, and fits in your colors, go with it! Draw inspiration from the flowers even more than you do a picture.

You want to love every flower and greenery that you purchase. When you look at the spread it should already make you smile and excited even when you haven’t done a single thing. This helps you when deciding what flowers you want to place next to each other. You will know when you like a combination. You will also know when you don’t like flowers next to each other. And this is okay. It is part of the creative process!

Advertisements

In the last post, Making Flowers Possible, we went through the process of cleaning your flowers and preparing them to assemble your bouquets. Having already done this in advance, for your assembly day, you are ready to reach and grab and assemble without fussing over messy stems.

Before we move forward I did want to link a couple videos to show you some techniques that I found were clear and easy to follow; spiral, X base (starting around the 3:30 mark), and building from different holds.

With the flowers that my husband periodically brings home for me, I’ve successfully assembled in a spiral formation and love how sleek, secure, and stem supportive it was.

For the life of me, I could not get these wedding bouquets to work with me in spiral formation. Even with fluffing, adjusting height, and rearranging floral placement…nothing was looking right.

And that is where frustration first sets in!

Advertisements

You have that image in your head about how these flowers are supposed to go together and look. And when you try all the tricks, it’s easy to think that you’re out of options. Then panic sets in. And all the overwhelmed feelings break like a damn.

That’s why I linked the above videos. There’s at least a half dozen different options available when one fails.

The spiral failed for me in this time crunch, so I modified it with the X formation. But before I went down that option, I pinpointed what was the main cause of my emerging frustration.

I had combination of flowers that I wanted next to each other. The combos were not staying next to each other no matter how I was holding the flowers.

That’s when inspiration hit and I made a trick for myself that I wanted to pass on to you!

For the floral combinations that you have to have next to each other, use your floral tape and tape them together how you want them.

You can also include greenery, or make bunches of greenery with this trick as well.

This is a particularly helpful tool when you also find that you’re struggling with keeping your bouquet symmetrical and balanced.

And if you’re that DIYer that has to have all your floral looking exactly alike, this can help you save time. You can be precise and make it easy to replicate.

Or maybe you’re having an arranging party and everyone is assembling a little too different from each other. You can totally make an assembly line and break down the arrangements into smaller pieces that you can build up as you go.

This bundle and then arrange technique is also great if you like the garden bouquet style but the fly away elements just are not your thing. It can transform a wild garden into a more manicured garden.

In what order do you want to arrange?

I mentioned before that for this wedding order I had 3 bouquets, 3 boutonnieres, 6 oversized vase floating, and 2 flower baskets.

Here’s how I made my choice of order.

Boutonnieres can use scrap pieces. So flowers where the stem snaps, greenery that you trim because it’s too long, flowerets and sprigs that are pared down because they were too full for what you need in other arrangements.

Flower baskets can also use all the flowers that snap off the stems, because you’re just using petals.

My submersible floral arrangement use only specific flowers, so I put those in reserve. And I’ve done those enough I can do them in my sleep. So I put those arrangements off to the side for when I need a break or when I’m frustrated and need a win to get myself back into a good head place.

That leaves the bouquets.

I start with the bridesmaids bouquets because it gives me time to warm up and see how the flowers are going to work with me. Plus there’s the added bonus that they are smaller.

The thing that has to be remembered though is that all the best of the best needs to be set aside for the bride’s bouquet.

As I pull stems, the perfect blossoms I put aside in a vase. The flowers with my favorite colorings, I set them aside as well.

This is especially the case with the roses. But I don’t skimp out on the bridesmaids. I aim for the middle for them. For example, the roses I needed for the bride, the bridesmaids, the boutonnieres, and the flower baskets. My lease favorite roses I left in the container for the baskets. They will be walked on and not photographed closely. The boutonnieres I make from the buds that accidently snap off the stem or left over from the bride’s reserve.

And this is the beauty of ordering extras, or a little more flowers than you need. One, it’s a buffer for damage during transit. But more importantly, it allows you to have a selection and delegate as you need.

I didn’t have mother or grandmother corsages. But how would you put them in the hierarchy of who you are saving for whom. For me, I would put them after the bride, but before the bridesmaids. But maybe you would order them after the bride and bridesmaids. That’s the decision you have to make. And it ensures that you have the quality where your hierarchy lies.

Maybe you’re doing fresh flower aisle runner. Did you want the quality to go there over bouquets, because the guests see those up close?

Again, there’s no wrong answer. You just want your plan ahead of time where the best of the best of your flowers are going to go.

And your order of assembly reflects this.

You may not want to start with your most important piece until after you’ve warmed up and gotten the feel for what you want to create. Your highest carnage of stems is going to happen in the very beginning. And again, when frustration hits. So you want to time your best pieces just right to avoid both of those casualties.

Advertisements

What to do when the frustration hits

And believe me it will hit, especially if you’re doing this DIY by yourself. It’s okay. This is normal. Nothing is wrong with you. You can do it. And keep telling yourself that this will turn out when all is finished.

  • Take a coffee break
  • Grab a snack and walk away for 5 minutes.
  • Eat that meal that you normally eat an hour or two ago.
  • Get a breath of fresh air by walking outside to check your mail. And before you open that box, take a look around and see what is going on in nature around you.

I did this job while my husband was at work and I had my kids entertaining themselves in the other room. Thankfully they’re great kids and understand that I need to focus on work. (Of course it helps that they know that they get rewarded with amazing quality time when I complete jobs, they’re so understanding even if they want the cuddles and attention now.

My kids get an honorable mention right now because I’m the type of person that gets in the zone and will neglect my needs to push through and get a job done in a more expedited manner. Mostly, this is to prevent taking advantage of my night owl tendencies. But their schedule can’t be pushed like that.

Advertisements

My kids were my built in mandatory break times. And that’s a good thing.

Their lunch time came right when I finished the first bridesmaid bouquet. It was pretty, but I wasn’t satisfied with it I wanted it better. And me being forced to take a work break to feed the kiddos gave me the step away break that I needed to process what it was that I didn’t like and obtain an idea to fix it.

Not everyone arranging flowers has kids in their space. But maybe you have a pet that needs being seen to. Maybe you have a phone call that has been pushed back long enough and it’s time to make.

Whatever you do in your normal life, be sure to continue it while you DIY your flowers. These moments are the moments that help you to refocus your mind and open the doors to inspiration and ideas that were hard pressed to come because of the tunnel vision of the focused drive.

What if something goes wrong?

Oh the stories I can tell you of things going wrong!

We always dream and envision things going smoothly and perfectly the first time. But let’s be honest, life happens.

This particular job didn’t go smoothly. In fact, I cried and I panicked. Because of course my thing that went wrong happened at night, when shops were closing down and I promised to deliver in the morning.

I was working with my submersed arrangements, enjoying the moment of doing something predictable, enjoyable, and very peaceful. I was working on my third vase when I heard what sounded like an industrial bug zapper going off. I had no idea what that was, because we don’t own a bug zapper.

My husband walked in and I told him about the noise, asking him if he knew what would make that sound. He shrugged and continued to check and see how the job was progressing. He looked over at the completed vases and asked if one of them was leaking because there was some water of the floor. I looked at him as if he was crazy. Of course there was water on the floor, I’m working with water.

Not even a minute later the bottom blew out of one of the completed vases and at least 5 gallons of water shot all over my hardwood floor.

To an outside observer, this was comedic gold! I’m talking I Love Lucy proportions.

The good news is that the flowers were perfectly fine, unharmed by what happened. And yes, the water got cleaned up.

Advertisements

The stress was that I was a vase short, shops about to close, and no one would be open in the morning before I needed to deliver. I couldn’t go to my local go to shops. They would be closed by the time I arrived. Fortunately, there was one store I could make it to before they closed that possibly had what I needed. And I felt so blessed that they had exactly two matching ones that I could work into my design and fulfill my order, better than what I originally promised.

I share this story with you to not just make you laugh. (Yes I can laugh about this now!) But to show you that even in the professional world of event designing, these things happen to us as well.

Cry in the moment if you need the cry. It will release everything you’ve locked up inside during this whole process. You will feel refreshed afterward.

Acknowledge the moment for the tragedy that it is, but don’t let it stop you or put you into a freeze where you can’t get back to work.

What resources do you have to pull from to recover?

Is this obstacle something you can replace?

Can you still function with what it is that you have?

Call in the assistance of a loved one to be the clarity of mind that you are not in this moment. Loved ones are amazing people to act as support. Never forget or underestimate the people that surround you.


The photos for this week are from the wedding floral that I did for the inspiration picture at the beginning. The bride wanted to go with the garden style of floral. But I don’t want you to leave today thinking that this is the only way to use these beautiful flowers.

Next week I’m going to show you the different styles that I created with the left over flowers from this job. I can’t wait for you to show you these different inspirations that you can take and make for yourselves. Plus, I have one that is a couture shot! It’s not practical for a centerpiece, but it was sure fun to photograph.

See you next week!


Is there anything you want directions on how to build when it comes to floral design? Comment below!

Here are some Products that can assist you in your floral arranging.

This post contains affiliate links to products. We may receive a commissions on products purchased through these links, but at no extra cost to you. These items listed here are from Amazon but may be purchased at local markets and floral wholesaler.

Rose Cleaner Rose Stripper Thorn Remover Stem Cleaner Tool

I have this tool. It works for cleaning the stems of more flowers than just roses.

Premium Garden Shears

The larger shear is the one that I use for trimming larger flower stems and branches of greenery.

Floral Arrangement Kit

This is a good starter kit that has everything that is useful for making arrangements.

1/2″ Wide Floral Tape

This is a must have, even if you’re trying not to buy any extra items. I’ll go more into this next week. The trick to this tape is that you stretch it to make it sticky.


2 responses to “Making Arrangements”

  1. JohnnyAtorm Avatar
    JohnnyAtorm

    The excellent answer, gallantly 🙂

    ——
    rajabet.com app download

    Like

  2. Same Flowers Other Styles – How I Can Do That Avatar

    […] example, if you remember from Making Arrangements last week, here are the pictures from some of the […]

    Like

Leave a comment

Processing…
Success! You're on the list.
Advertisements
Advertisements

Being a Garden Sleuth

For the last couple of years it seems like there has been one trial or another when it comes to gardening. And there comes up more and more questions in online communities that sometimes feel repetitive. The one bit of advice I seem to give more times than not is…

Your plants are living and they communicate with you.

Here in the Pacific Northwest we faced another cold spring, even though it wasn’t as cold as last year. As a general rule, we transplant and direct sow seeds around Mother’s Day, mid May.

It wasn’t so long ago that when we planted at this time that our gardens would start of a little slow for a couple weeks and then we’d see some rapid growth.

Last year, local community members thought that their inexperience killed off their crops and it was entirely their fault.

Advertisements

This year community members are talking about what could be the cause for why they’re preventing their plants from growing this year.

In my surrounding area, a good number of everyone’s plants are stuck in the stage of being starts. And more times than not, I keep reading way too many people advise others to just fertilize. And then I see people offer their home remedy fertilizers without understanding what they’re putting in their gardens.

Just because you “fertilize” doesn’t mean that you’re giving the food that you’re plants are craving.

flickr.com

For example, one post I saw this week was asking for help with a cucumber that was still start sized. The picture was not close enough to see if the cucumber was trying to set blossoms or not. Without this kind of information, people were telling to heavily fertilize but with no discrimination.

Banana peel fertilizer is only good, if your plants/vegetables have set blossoms. Plants putting out blossoms love having higher potassium fertilizer. So the home banana fertilizer is good if you’re feeding a plant putting out blossoms.

Coffee grounds are great for plants that love acidic soil. But if you don’t know how acidic (the pH value) your soil is or the pH range that your plant loves, you can burn the roots of your plant.

In the example of this cucumber inquiry, it was a bad idea to recommend coffee grounds, if the cucumber has started putting out blossoms, because composted coffee grounds add nitrogen and cucumber in blossom wants lower nitrogen levels.

Now, coffee grounds could be great advice as long as it is followed with the additional advice to remove the blossoms. Removing the blossoms, with the coffee grounds giving a nitrogen boost, will help the cucumber grow it’s vines and roots. And in this cold season with plants being stunted, it’s not a bad idea to remove early blossoms in order to give the plants more time to grow structurally and be stronger for later in the season when they have to carry the weight of their fruit.

My potatoes didn’t seem to be adversely affected by the hail. They’ve been growing healthy and hearty. (My first stop when looking at my garden to sleuth out what was going wrong in my garden this week.)

Another popular recommendation I read was everyone telling this person to put egg shells down around the cucumber. Now egg shell is the DIY fix for calcium deficiency.

The problem with just crumpling up egg shells and sprinkling it around any plant is that the calcium is fixed inside the shell. If your plant needs calcium now, it’s never going to get into the plant in shell form because the roots of the plant are it’s “mouth”. Putting egg shells on the ground around the plant is like putting a chocolate cake in front of you, but there’s a window between you and the cake. It’s there. You’re there. But you’re not going to eat it because a window is in the way. You either have to get the calcium into a liquid form or compost the egg shells down to release the calcium.

The only benefit of putting egg shells around a plant is to keep pests away like slugs. But the truth is egg shells have not kept slugs out of my garden. And I recognize that my problem is that I don’t have enough egg shells down to create a thick or wide enough barrier to discourage the slugs away.

Instead, I find that the best use of my egg shells is just putting them into my compost along with all my other compostable food waste. By using my egg shells this way, all I have to do is reach for my compost and I know that I have calcium readily absorbable for my cucumber, tomatoes, or whoever needs it at a given moment. And by having the calcium already in my compost, it prevents my plants from being deprived or depleted to begin with because they’re getting it in a steady supply.

My next step was checking out my lettuce and other greens raised bed. There were some split leaves from the hail, but otherwise still doing quite well.

However, before we got our compost running well, there was one other way that I prepared my egg shells to make calcium more available for my plants. I kept clean and dried egg shells. When I needed to make a calcium fix, I crushed the shells into as small of pieces as I could, put them in a pan, and added water. I boiled the egg shells for about an hour (just to maximize the amount of calcium released into the water). Then inset it off to the side and let the water cool down. Once the water came to room temperature, it was ready to pour in my garden. I poured the water and egg shells into my garden. The water had enough calcium in it to meet my plants immediate calcium needs. The shells in the bottom of the pan had some residual calcium left that could further break down in the soil as it finished decomposing.

To sum all this information up, online community groups are great for picking other people’s brains. But more times than not, they may not fully understand why they use a DIY fertilizer, why it works for them, or why it doesn’t work for them. If you’re that person who asked and got a kitchen list full of suggestions and don’t know which one to try first, take a moment and look at what nutrients are being provided by each commenter and see how it fits or doesn’t fit with the natural life cycle of where your plant is at in this exact moment. In addition to that, look at your plant and look at other clues to see if there is anything else that could potentially be going on with your plant.

Advertisements

Are garden pests present?

On the subject of stunted plants, I currently have a summer squash that is stunted. I know for a fact that it’s due to a squash vine borer because of the split vine. No amount of fertilizing is going to get that summer squash to grow.

It’s easy to see when a start is not growing.

Finding the answer takes a little detective work.

The beans had a few leaves that didn’t make it. But they’re still primed to grow with some warm days on the way.

What have been your environmental conditions?

Each plant that grows from a seed relies on its DNA to tell it when move on to the next stage of its life cycle.

We can start our seeds inside a greenhouse or our home to get a jump start on the growing season. But no matter how early you start a seed, the start will stop its physical growth until a little DNA switch gets flipped by the weather. Whether it’s the amount of sunlight, day time temperatures, or night time temperatures… there are environmental indicators that plants look for before they say, “Now is the perfect time to grow.”

As I mentioned above, this spring has been uncharacteristically cold.

For my tomatoes has been fun to watch this year. I planted some from a seed company. And I planted others from seeds that were harvested from tomato plants that were local and went through last year’s cold spring (which was much worse than this year). The tomatoes that have the seed memory of a cold spring have grown much better than the plants that grew with a seed memory of another region.

Can fertilizing compensate for this growth discrepancy?

Yes. However, if your seeds don’t have the DNA memory of what it’s like to grow in a cold spring, they’re going to struggle a little until they figure out what’s going on with the weather.

My pepper plants have some damage from the hail. However I have a theory that these starts faired better because last week they got planted with some rich compost on their roots. They had the nutrients to fortify them against the elemental attack.

This is the prime reason why it’s important to either save seeds from the plants that you grow or purchase starts from people in your community who grow from their own seeds. From their seed memory, they are ready and geared to thrive and flourish with micro-regional weather. (I share the same grow zone as some southern states, however our springs and micro-regional weather patterns are going to be quite different.)

But it’s also not just seasonal weather that affects the health of your plants.

This past week we had a hail storm. It’s been several years since we’ve had hail in my community. And these weren’t cute tiny hail stones. These were enough to hurt if we stood out in the storm.

After the storm I went out to check on my garden. And it looked like they were all going to be resilient and bounce back just fine. Especially seeing how we were expecting a couple of nice warm days.

The problem is that once the sun did come back out, I noticed that something was wrong with the plants. I first noticed it with my tomatoes. And I thought it was a tomato issue. But I looked elsewhere and saw other plants were affected also.

My tomatoes were hardest hit. But they don’t like the cold to start start with. This little stunted start was the hardest hit. The larger plants have the same beige pick marked damage that just looks like it was assaulted from the hail. But at the same time meets some of the descriptive marks of mosaic virus.

This was an important clue to take note of.

My husband sent some pictures over to a friend who has more experience under her belt than we do. With the little information that my husband provided, her opinion was a mosaic virus.

Before her recommendation I was leaning toward an iron deficiency or damage from the hail storm, leaning toward the hail damage because we went from perfectly healthy and happy plants to having visual distress in a couple days.

Whether damage, iron deficiency, or a virus; all three have different care
steps.

This is where you need to be a detective and look for clues.

Here is my amaranth, which pretty much look identical in leaf damage as my tomatoes do. From all I read, so far it doesn’t look like amaranth isn’t effected by the mosaic virus. Which means these guys were just beat up by the hail. So this is one example of why I’m leaning toward my tomatoes just being damaged by hail.

We were concerned for mosaic virus, but after reading up on it we noticed that other plants, not listed on list of plants commonly infected with this virus, were showing the same distress.

The biggest clue for us is that my second garden, miles away, also all had healthy plants and two days after the hail storm showed the same markings.

We cannot completely discredit a viral infection in our garden without testing it. But we can continue to watch the plants and operate as if we are dealing with this virus (trimming effected leaves off in increments so not to handicap the plants’ photosynthesis, not composting the trimmings and expired plants, cleaning garden tools thoroughly, keeping other plants from growing in their direction, and next year planting the tomatoes (and other effected plants) in a totally different section of the garden).

While I’m fairly certain that I’m dealing with hail damage, prudence says that I also act with caution against the mosaic virus. There is nothing to say that I’m not seeing two issues at once.

My Echinacea took the most beating here. And this damage to the stalk looks exactly like the damage on my tomato leaves. As this is stem damage (the leaves were fine) and they match the leaf damage on the tomatoes, this becomes my lead points of evaluation for my garden in this moment.

I know that not everyone is going through what my garden is going through in this season. These are just examples of how to analyze your garden and the conditions that you are facing this year or in a growing season to come. Sometimes answering your garden woes are as simple as looking up a description phrase in Google and looking at the images to confirm or eliminate potential problems. Sometimes you need to crowd source and pick other gardener and farmer’s brains. Just remember that when you crowd source, people respond with their experience and thinking of what’s going on in their garden at the moment. They don’t know all the additional details, like you just had a hail storm or your neighbor sprayed their property with a chemical that negatively impacts your garden because it carries on the wind. People don’t know if you had contaminated water and your water service provider mails out a letter stating such information two weeks after the fact. Unless you look for pests, you may not be aware that the problem you’re facing is coming from a vine borer, aphids, locusts (or other insect) that has come to your property and hasn’t been there in past years. Or maybe you just bought a new house and the previous owner had diseased crops that they let compost in the ground and that information wasn’t passed on to you in the bill of sale. Or maybe you picked up a load of manure for your garden, but it wasn’t disclosed to you that the animals are hay that was sprayed with Grazon.

I just want to make a special note to give a heads up on this issue of Grazon (a Dupont product) and how it’s silently affecting crops, ground and water health. Here is the video from a farmer who lost whole sections of garden plots. We first watched this video and became aware of this issue. You can source the right materials, but sometimes you have to go further back on the food chain to see where the problem lies. I thought organic manure was the end all bench mark. Now it looks like we have to look further. Here is a very detailed article from 2017 to further jump start your research. This one will open your eyes on the product Grazon. Not just this product, but actually all herbicides. Even if you choose not to use herbicides on your property, you might be buying product from someone who does use it on their property.

There are so many things that can affect the health of your garden and plants. Just be aware that the solution may not be as simple as “just fertilize it”. Sometimes you may need to be your garden’s own detective and look for clues to set you on the right path to bring health and recovery to your garden.

What hidden little gems have you learned from your garden?