After spending almost a decade in the event decorating industry I have repetatively heard "I can do that". Instead of being dismissed by creative minded people, I want to show you how I do "that" so you can be sucessful in recreating that inspiration image. I just might have a few tricks that you haven't seen yet!
This year I’m working in concert with others in a garden. (I am so excited for this!) If you’re as busy as I am, you can imagine how quickly things slip through the cracks.
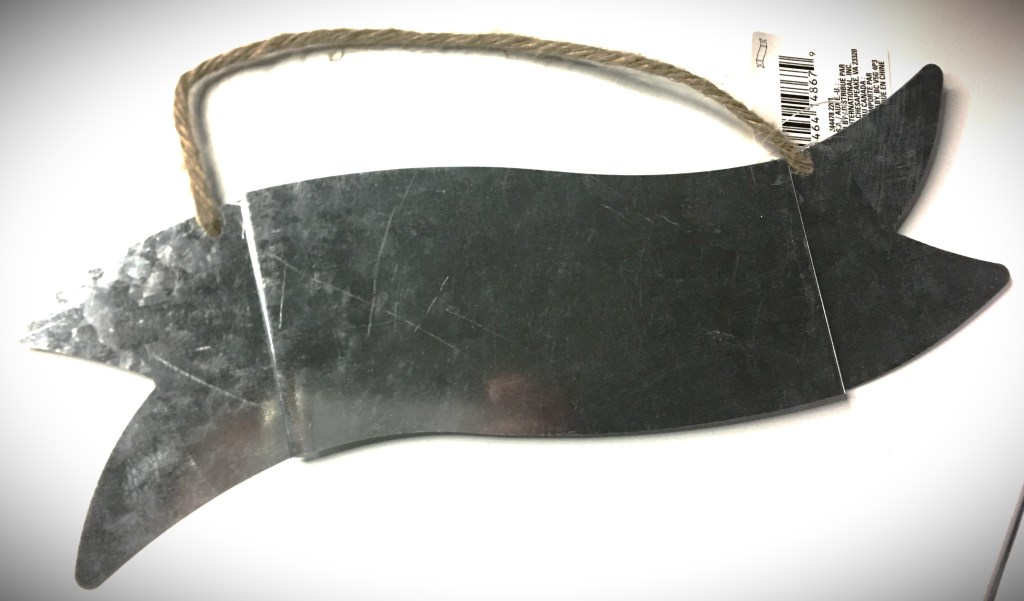
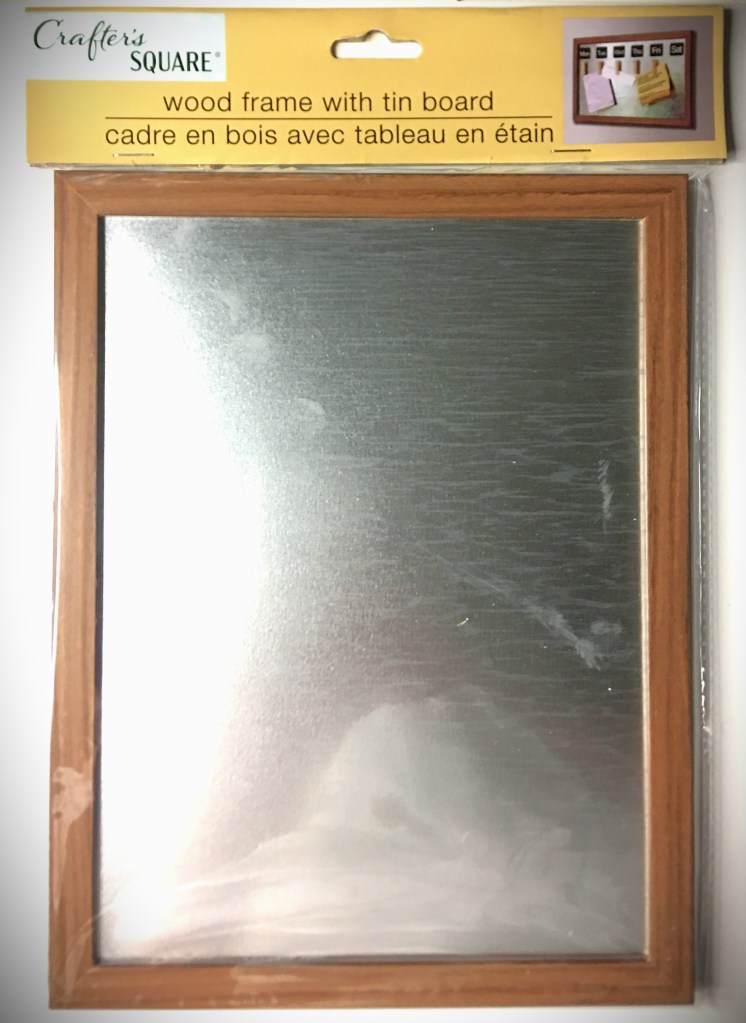
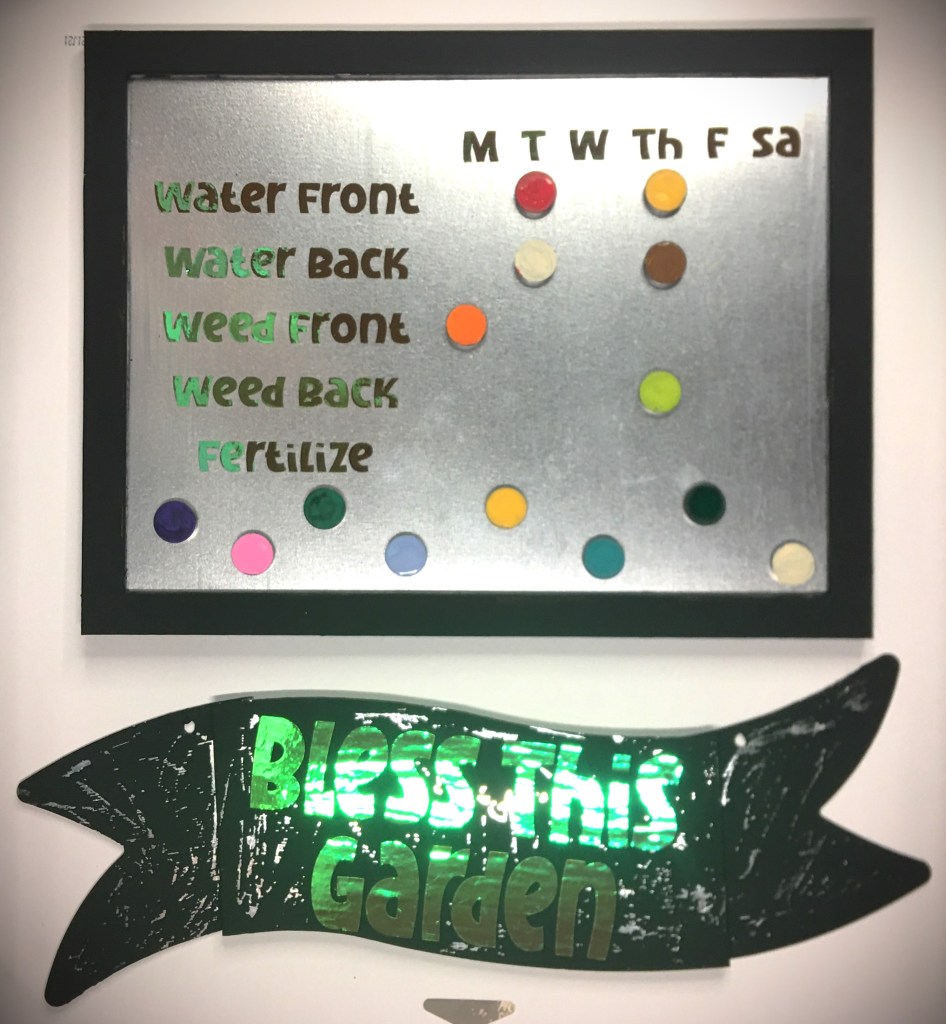
After hitting my local dollar store, I found some pieces that are going to make an inexpensive tool that doubles as home decor, all the while keeping tabs on what’s been done.
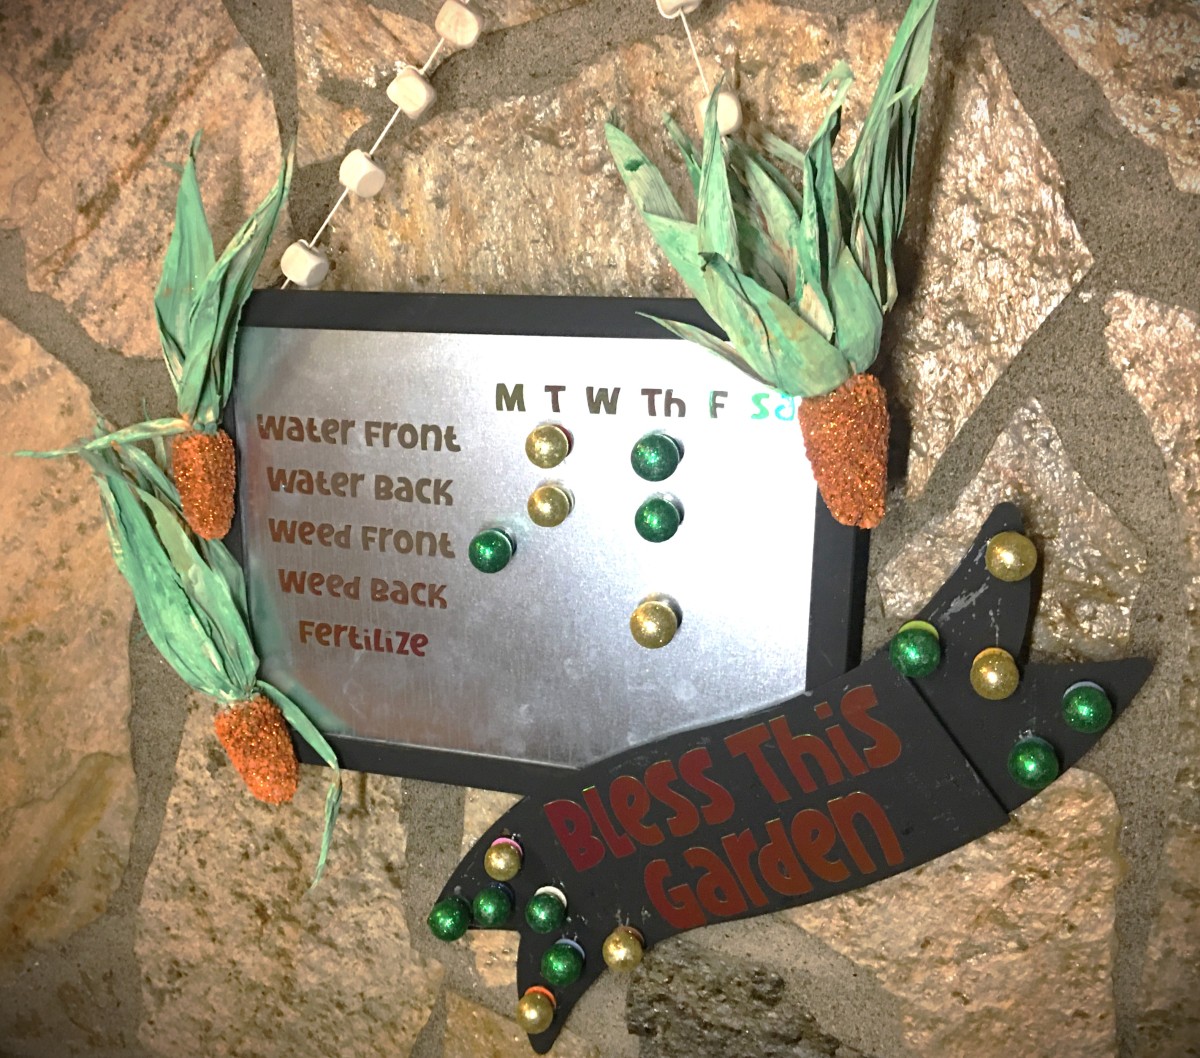
With these I decided to make a magnetic board where anyone tending the garden can quickly mark what they did.
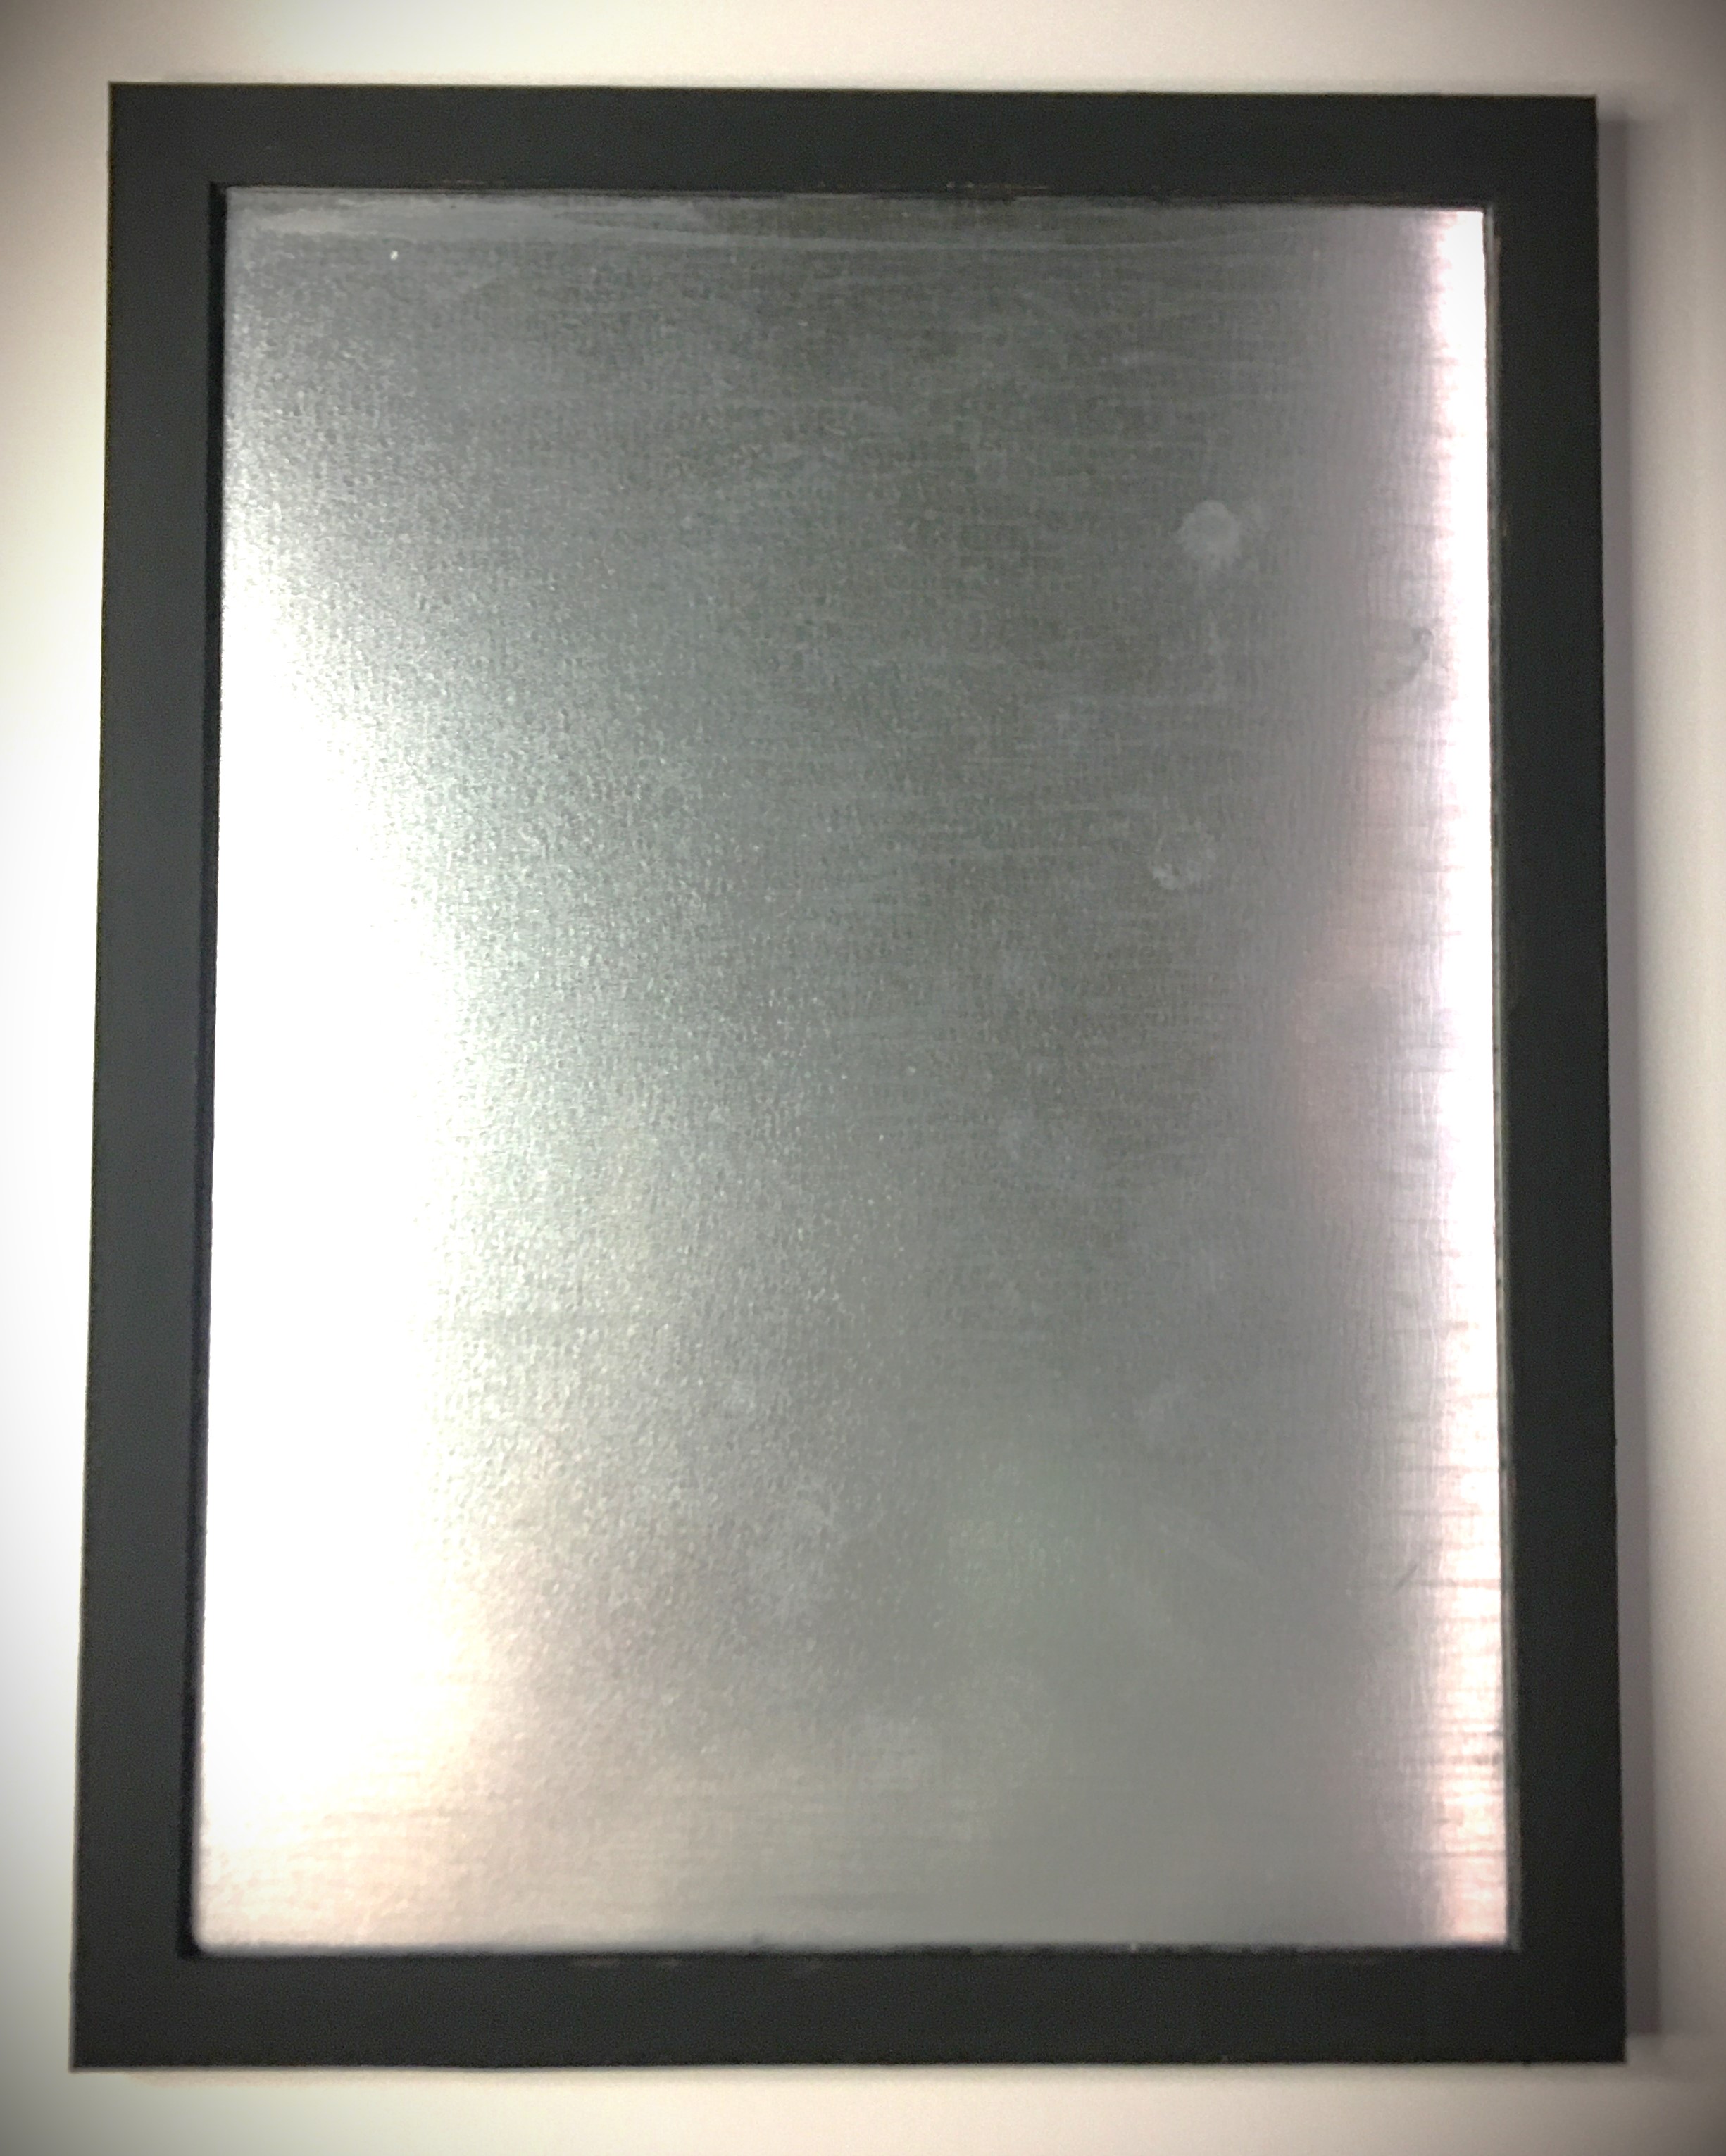
I know the galvanized finish tends to overtake everything. So with the galvanized frame and banner, everything gets lost real quick. Not to mention that the frame was a really bad fake wood. To dress all this up a bit and minimize the galvanized look, I painted the frame and banner black.
I forgot to take a picture of the banner painted in flat black chalk paint (the same paint as the frame). It looked too minimalistic for my taste, so I took the transfer tape (which I used to apply the vinyl text) and put it straight onto the paint. Some places lifted the paint quite easily. But to get the distressed look, I scratched the tape
The magnets needed a little something extra. There are so many things that could be done. I have children and they’re helping with this garden and they’ll also be marking what we do when we work, so I went into kid zone and painted the magnets with acrylic paint and did all the colors.
If you want to keep minimalistic, pick your favorite color.
Love things that sparkle, glue on gem stones or use glitter.
What about texture? Glue on fuzzy pom poms, baby pine cones, large seeds or nuts… literally whatever catches your imagination. Maybe you have a farm and want to use small farm yard figures and animals. (I wish I had these in my craft room!!!)
Something that is great about using the galvanized banner is that the extra magnets can be kept on the banner so you can add stickers, personalization, more tasks, or a note section in the blank space on the bottom.
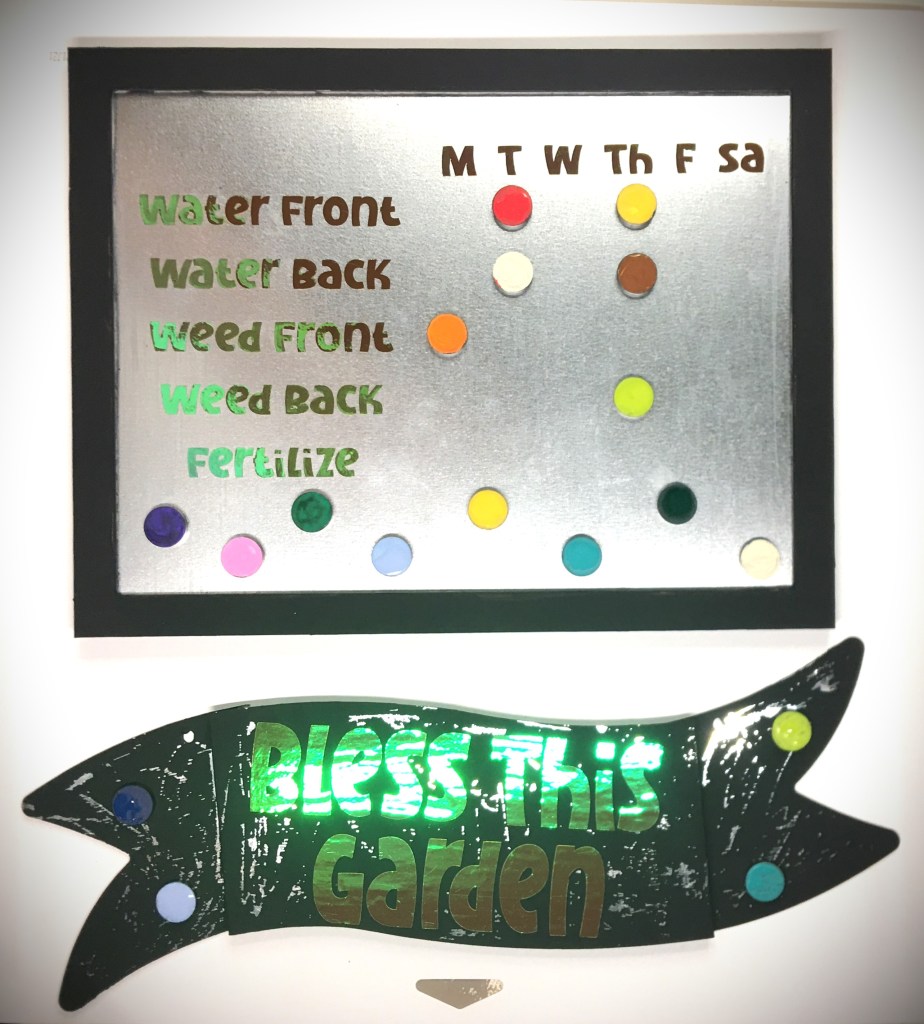
And then while typing I decided to go a different direction.
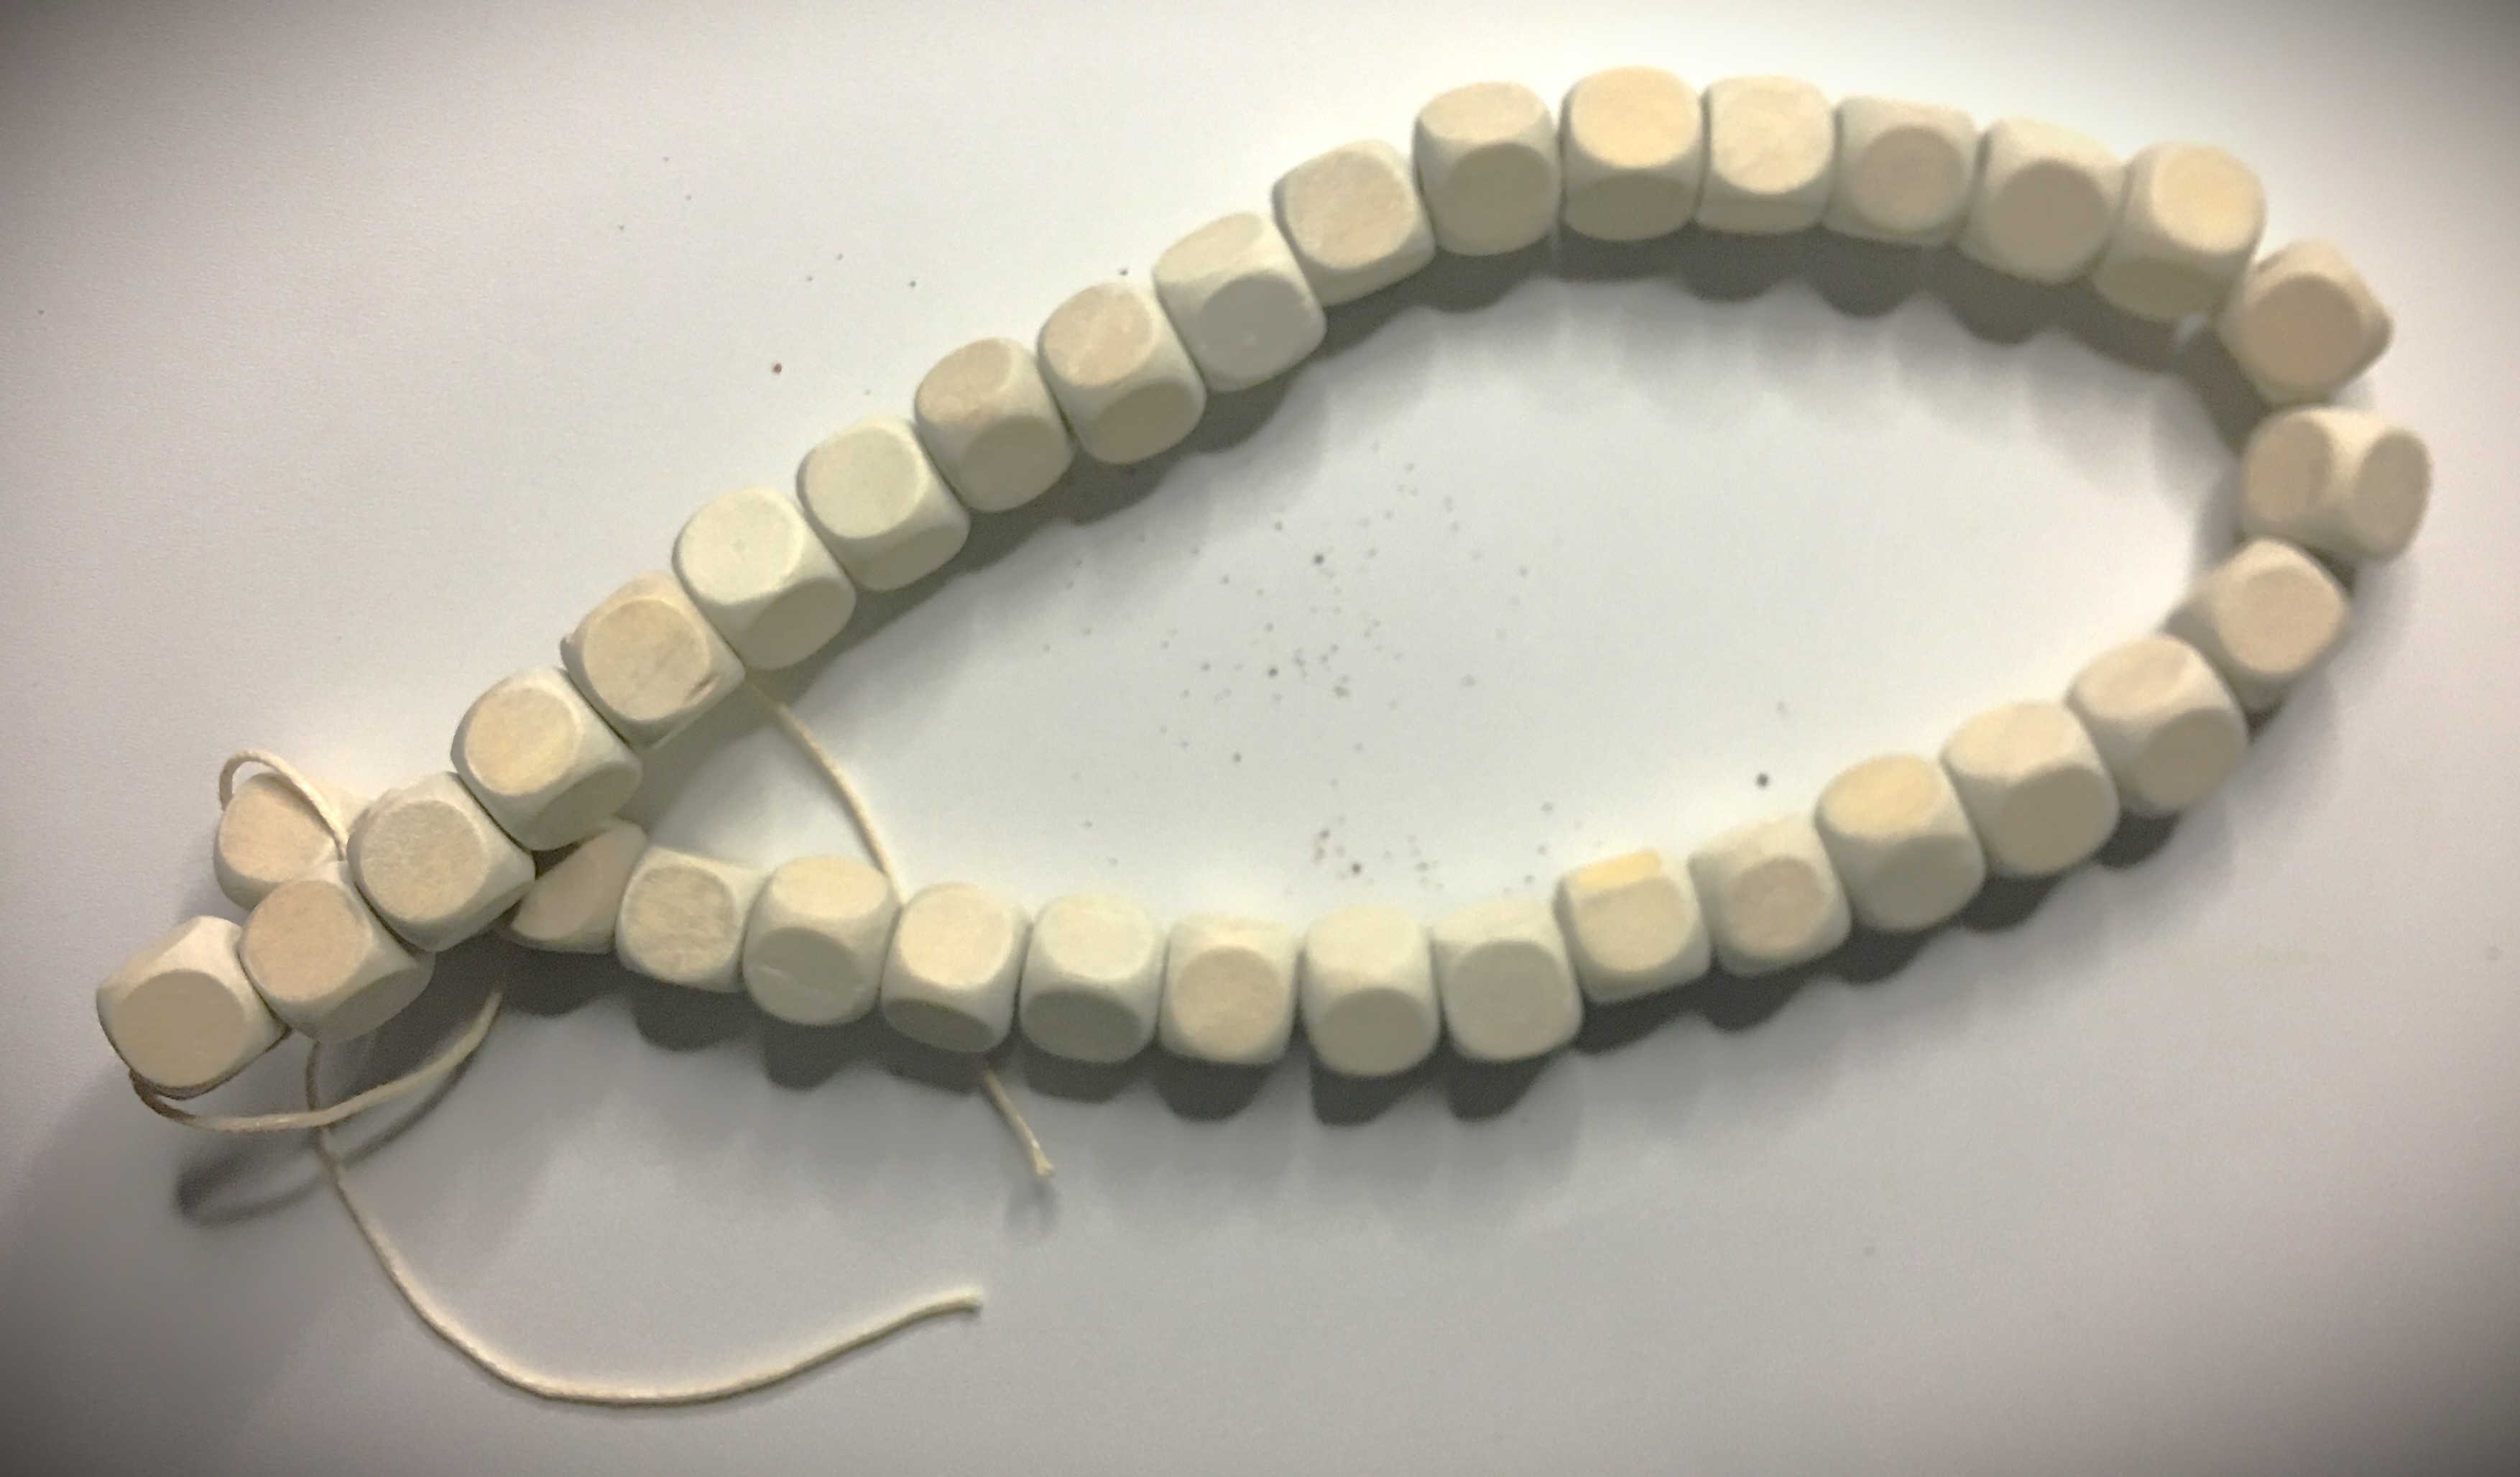
I pulled these out! Last year I made carrots out of my corn cobs. And I brought out the wooden beads from my drawer (which I also got from my local dollar store).
With the beads I removed them all from the string they came on and noted how they tied off the end bead to keep them all on the string. This “knot” that they used was how I spaced the beads further apart on the string.
Once I made those changes, the colorful “polka dots” needed to change. The gold and green glitter styrofoam balls simplified the overwhelming colors.
Even with the new modifications hanging, I’m not satisfied with the final color scheme. And sometimes that happens when you’re creating. You start building from the image you see in your head and make a change here or there and an earlier idea you loved just doesn’t work anymore.
The black isn’t working anymore. I loved the idea to begin with because it was a nice basic color that goes with where I was going to hang this. But it’s just not working anymore.
Advertisements
First thing first, I need to lighten up the banner. So I’ll be distressing it heavily so that the majority of the galvanized metal will show through. With the addition of the carrots, which obviously take the spotlight, I can bring out a lot more of that metal and the metal is not going to overtake and make everything else hide.
But before I do that, I need to decide what I’m going to do with the frame and that’s going to take a few days of looking at it to see where I want to go. At the moment, I’m leaning toward the idea of painting on white striped and creating a plaid hand painted design on it. If I go that route, I might keep the banner predominately black still and incorporate that same design element into parts of the banner.
Stay tuned to see what I finally decide!
Advertisements
And I’m going to leave you here in this moment just because sometimes the right thing is to take a step away from a project and let it tumble around in your brain. You don’t always have to have the answer right away. And you don’t always have to have things done in an hour.
Perhaps it’s convenient to have an idea presented to you in a finished state.
But I’m going to leave you here with your own thoughts. Because I know someone has that inner voice screaming, “You need to ____!”
Go ahead and leave that comment below.
Or better yet, use that idea to make your own magnetic board for your daily tasks, your children’s chore board, a classroom helper sign, your regular “Honey Do” list, or that board that I didn’t mention but you just got the idea for.
And when you’re finished, send me a picture so that I can see what you came up with.
It’s that time of year where we need to look at the space we have to grow a little something to supplement what we get at the grocery store. This year, more than ever, is this important. Grocery prices are skyrocketing, independent farmers are finding it more difficult to stay in business, and there are just times where you want to buy produce and there was a run on that item with nothing left for you.
The great news is that you’re not held captive by what is or is not available in your local market. Even if you choose a little something that is easy to grow, that is one less thing that you have to depend on others for putting up in your kitchen.
Maybe a Victory Garden sounds intimidating. You don’t have to go down the rabbit hole of homestead farming. Start by picking one vegetable that you eat a lot of. Do you use a lot of pasta sauce, tomato paste, tomato soup, or ketchup? You can start by growing some tomatoes and offset those items that you usually buy from the store by making it yourself. You will find it surprising at how few ingredients you really need to make those items. And you cut those preservative and other junk ingredients out of your diet that are put in those commercial products. And tomatoes are not demanding when it comes to you time. You can fit this vegetable into the cracks of your time.
Even if you respond to me right now by saying, “I’m not a vegetable gardener. I plant flowers. I love flowers.”
Advertisements
Did you know that right now the price of living has risen so much that people are putting off doctor visits because they can’t afford to pay the co-pay? In 2018 44% of Americans skipped visits due to price. (Forbes) In 2021, 41% skipped visits due to pandemic concerns. (AMA) Even with statistics provided in December, 2022, 40% of Americans still are avoiding visit for various reasons. (First Stop Health) This is a reality for many people. But that doesn’t mean that you do not have to go without treating your body with items from your garden, even your flower garden.
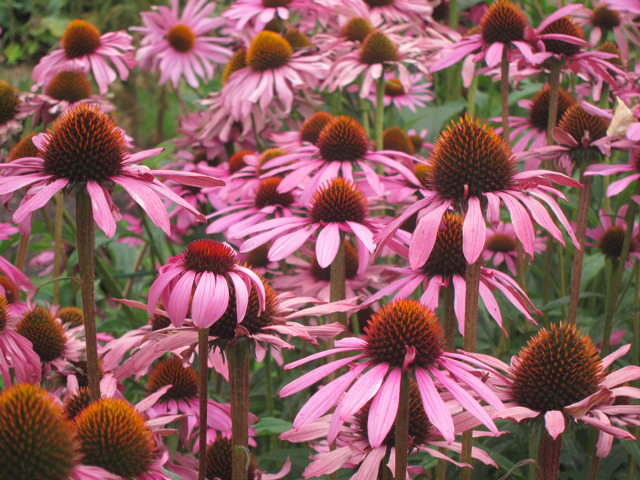
There are many flowers that you can grow in your garden that have medicinal properties.
Echinacea: good for boosting your immune system and fighting colds and flus.
Rose Hips: (the dark pink or red fruit seen after roses have gone dormant for the winter) are high in vitamin C and good for fighting colds and flus.
Lavender: treats insomnia, reduces blood pressure, reduces menopausal hot flashes, and treats acne inflammation.
Dandelion: there are so many uses this flower has but some are soothing an upset stomach, aide with gall stones, and detox your liver.
Mullein: benefits for your lungs, sinuses, and ear aches.
Bee Balm: helps relieve flatulence and urination.
Yarrow: helps with fevers.
Elderberries: are high in flavonoids, vitamin C and A, betacarotene, iron and potassium.
Comfrey: is great mulch for all gardens (hint: in case you find it difficult to find a fertilizer). It also has anti-inflammatory properties (great for many different skin conditions), but also has a long history of being a bone mender. There are many medical articles that talk about how using a comfrey salve can decrease your broken bone healing time by half.
Chamomile: helps with muscle spasms and insomnia
Advertisements
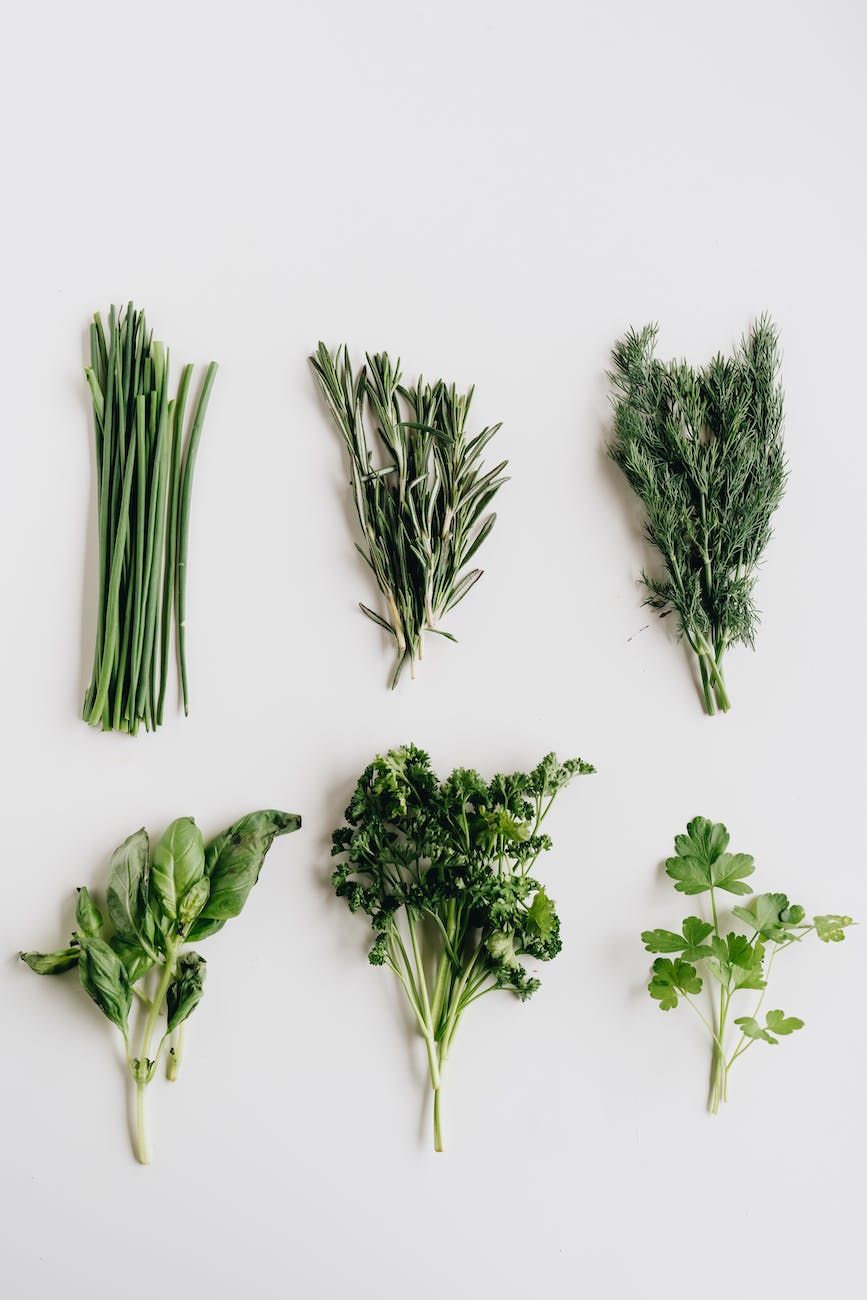
There are so many more flowers that I could put on this list. Last year I started increasing the amount of medicinal herbs and flowers in my garden. Not only are herbs amazing for making your meals flavorful (hello oregano, sage, basil, and the whole mint family), but they can also be used in tea with the above flowers to help treat the symptoms of oncoming colds before you become sick. Or maybe you have a skin condition where you need to look for specialty soaps in the store. Did you know you can make your own soaps for a fraction of the price and better for your skin? Fact!
I’m inspired. What’s next?
Whether you’re ready to grow your own vegetables or just want to stick to our flowers, there are plants that do well next to each other and ones that don’t. So by planning on where you are going to put everything you want to grow, you can be sure to keep the friendly plants next to each other and competing plants away from each other. And by knowing if your herb or flower is a spreader, you can plan on keeping them in their own contained area.
Some vegetables you can’t plant next to each other:
beans and onions
tomatoes and corn
celery and carrots
garlic and leeks
carrots and herbs (parsley, dill)
onions and beans/peas
lettuce and broccoli
Advertisements
Vegetables that should be planted next to each other:
garlic and tomatoes
spinach and strawberries
beans and tomatoes
tomato, basil, and lettuce
corn, beans, and squash
radish and carrots
carrots and onions
By searching companion planting and the vegetables you want to grow, you can see what grows well together. You can also find out what does not do well together.
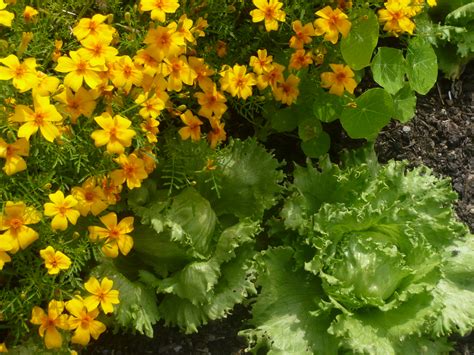
For example Marigolds deter pests that attack tomato plants, brussels sprouts, cabbage family, and bush/pole beans.
Search not just for vegetable companion planting but also flower companion planting.
Geraniums and Roses do well next to each other
Coneflowers and Black-Eyed Susans
Astilbe and Hosta
Hydrangeas and Daylilies
Daffodils and Amsonia
Daisies and Petunias
Marigolds and Lavender
Saving Time in the Garden
Now that you know what you want to plant, what does well together, and what doesn’t do well together, don’t wait until it’s time to plant your seeds or put your starts in the ground. Spend the time now in drawing out your grow space and determine where you will put everything.
I grew up putting seeds in the ground without a “map”. We would spend all day planting in a small garden because there was a swapping around of seed packets and other time wasting activities. Last year I mapped out where I was putting everything. By the time it came to putting seeds and starts in the ground, it only took me a couple hours to plant twice the area that my mother’s garden was.
Advertisements
Plus, that “map” had the added bonus of being a reminder of what I planted where. This is particularly important because I planted cabbage and I can’t plant any brassica vegetables this year where I planted cabbage last year because of the competition between these two vegetables.
Not everyone keeps a garden the same way. The focus on most of the gardening community is that you just fertilize your garden, or scorch and burn to add nutrients back into the garden. I decided to practice not just crop rotation, but also resting the land. All throughout history these two practices were how farmers kept land without all the modern conveniences of amending soils with fertilizers and other products.
By keeping this “map”, I can keep a record of how long I’ve had a garden plot, planter box, raised bed, pot, or any other container. This puts a concrete calendar that tells me when it’s time to rest an area. This past year was my first year in resting the very first garden bed that I started. It made me nervous letting a decent size space go fallow. But I watched saw that only a couple dandelions sprouted in the bed. I left them because one of the jobs of dandelions is to draw up nutrients from deep down in the ground to the surface where my vegetables for this year will use. But dandelions always grow where they are most needed. It was encouraging that there were only a couple and not a whole garden bed full of dandelions. So the rotation and natural fertilizing with compost and tea from comfrey is doing its job.
Advertisements
By watching your land sit during a year of rest, you can see what you are working with. Because your land will talk to you just like your plants will talk to you. They will tell you if something is wrong.
How to map and plan
I’ve looked at so many different sheets that homesteaders put together to share their process. The problem I’ve had with everything that I’ve found is that I have to shift through a dozen different pages to note the information that I want.
This year I decided to make my own sheets that are simplified and keep the information where I want it.
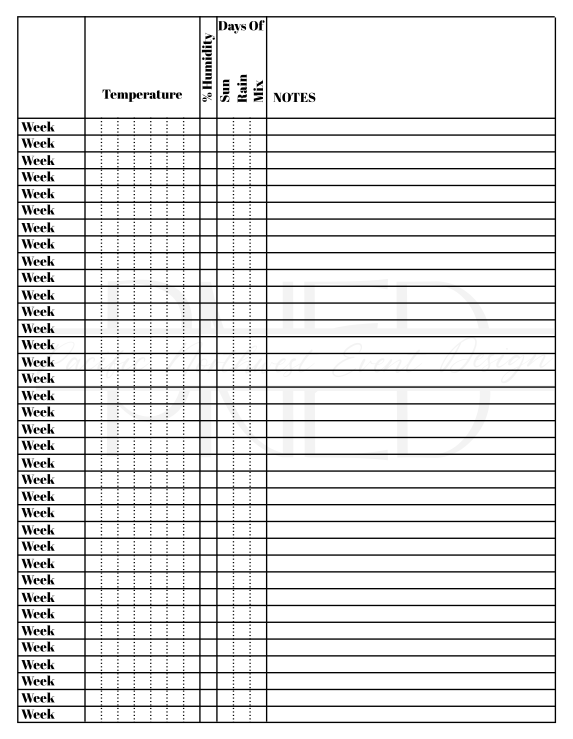
I’m providing my 8×8 Garden Plot and Weather Log for free on my website. Just click here and select the style that you want.
Why is a weather log important?
When I kept a weather log for my wild yeast starter, the mystery of why the same recipe was yielding different results.
In the same way, our gardens are going to respond to different weather patterns that hit. For example, the non-existence of spring and the extended winter jumping right into summer weather stunted all my seeds and starts. By keeping a record of the weather, I can look back on past years and see if and when I need to be concerned and add in hoops or other insulating method to help my crops in an uncharacteristic early season. And there was also an additional issue of powdery mildew hitting my pumpkins and comfrey plants in the midst of a sunny streak with absolutely no rain or my watering leaves. It turns out that the problem was the extremely uncharacteristic humidity levels. After a month of fighting mildew, I finally checked the humidity and saw that it was in the 90% range!
With everything that I threw at my plants to treat them, I ended up with a long list of what didn’t work. This gives me information in the future for looking for a different solution without wasting these resources. So never underestimate the power of keeping notes!
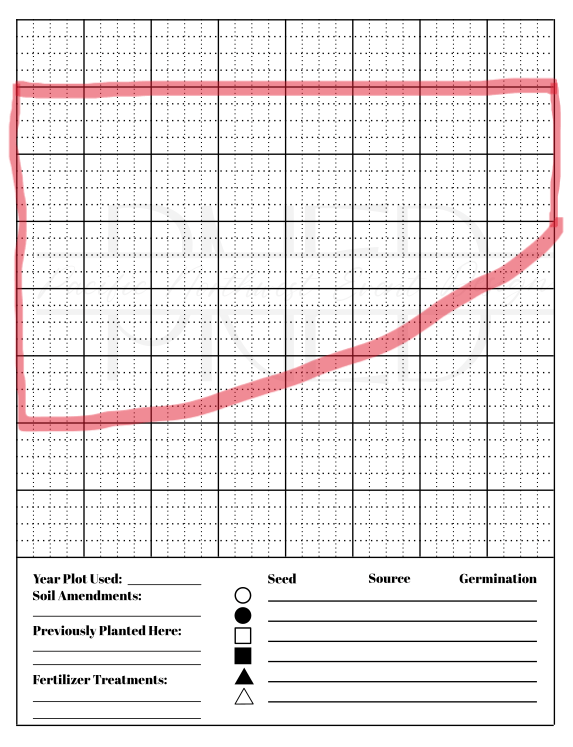
Last year I used a grid pattern not just for my garden beds, but for all my containers and irregular shaped beds.
No matter what shape or container you’re working with, all you need to know is the measurements and then you can roughly draw it on the grid.
Just keep in mind that when you plan seeds, you’ll want to keep a couple of inches away from the side of your container or raised bed so you can have a healthy root system.
The grid will do the math for you!
I set up the grid so that the darker squares can be used for a 1 foot measurement and the smaller squares can be used for other incremental measurements that you seeds require. Having this information already in mind, this past year I just used my pre-mapped seed drops sites, poked the soil with a chop stick and dropped my seeds. I knew ahead of time how many rows and columns I would be making so I didn’t need a ruler or anything else to space. (And spacing is always the most time consuming part of planting!)
Another thing that I hated with the other planning sheets is that they didn’t set it up like a map, complete with symbols to make your coding easy. It’s easier to use a shape code than an initial code when diagramming your seeds. I’ll tell you what! You never recognize just how many plants start with the same letter until you try to put them on a map. And they’re all at the beginning of the alphabet!
Make it Simple
I hope these two sheets will help you and your garden out as much as I know they will make my life simpler.
The Garden Plot sheet I will use for each of my gardening areas. I will be leaving the back of the sheet blank so that all I have to do is flip the sheet over to have more space for notes on what this growing season throws at me. And the Weather Log will be nice because a whole year can be seen on one page.
So far, this year’s planning is only going to take me 6 pages instead of the 18 that I started off with last year.
Give this Garden Plot a shot and let me know in the comments how it works for you!
Also let me know what other information you keep records of when you are gardening.
I don’t know about where you live, but in my local community parents have been scrambling to find their family’s cold and flu medicines and finding the shelves are picked over at best and empty at worst. As a mom, I know the feeling of panic that can set in when you can’t source the things that you need to make your children feel better. As an adult you shrug your shoulders and muscle through the illness. But when it comes to your kids….
What do you do when you can’t find the over the counter medicine that is your go to for colds? Or when your child’s prescription is on back order and you’re told to just wait?
The one bit of information that you’re not told when you’re growing up is that every bit of medication, prescribed or over the counter, was originally birthed from herbal remedies that have been scientifically studied for thousands of years. The pharmaceutical companies cannot patent or charge a premium price on what you can find in nature, sometimes your own back yard. In fact, the pharmaceutical companies take these natural herbal compounds and modify the molecular structure so that they create something “new” and are then able to patent this medicine to keep their competitors from replicating their recipe and make it possible to charge a premium price.
Before I go further I want to state that I’m not putting down modern medicine or making any medical claims or promises. The intent of writing this post is that I want to help relieve parents from their fears, worries, anxieties, and feelings of helplessness as they wait for their children to get the medication that they need and is either out of stock or on back order. I also want to state that there is a time and a place for western medicine and seeing a doctor. Especially with young children, and any cold or illness that affects their breathing and ability to get enough oxygen into their system, medical attention is absolutely necessary. Clinics, Urgent Care, and Emergency Rooms have medical resources that you are not going to find at your local grocery store or pharmacy.
In the situation where you know that you are dealing with a common cold or virus that you’ve seen before your spice cupboard and/or garden have everything that you need to find some relief while you wait for the cold to run it’s course.
Herbs you may already have:
Healthline has an article here that breaks down herbs and what viruses they are particularly effective against. A good resource for more information of herbs can be found online here, from Annie’s Remedy. A heavy reading article in support of exploring natural remedies for viral infections can be found here, from National Library of Medicine.
Oregano is known for calming the stomach. This makes it particularly useful against stomach flu, norovirus, and rotavirus. (Healthline)
Sage is known to aid your digestive track, and remedy colds and fevers. “Test-tube research indicates that this herb may fight human immunodeficiency virus type 1 (HIV-1), which can lead to AIDS.” (Healthline)
Basil is known for settling the stomach (Annie’s Remedy) but also works to strengthen your immune system, notably your helper T cells. (Healthline)
Fennel “loosens congestion and make coughs more productive. Fennel also calms the dry, hacking cough of bronchitis.” (Annie’s Remedy) It boosts your immune system and decreases inflammation. (Healthline)
Garlic has long been known to be antimicrobial, opens the lungs for easier breathing, is an antioxidant, prevents blood clots caused by platelets (a blood thinner), fights cholesterol, lowers blood sugars. Studies have showed that it combats influenza, viral pneumonia and rhinovirus (common cold). Current studies have shown that it “enhances immune system response by stimulating protective immune cells”. (Healthline)
Advertisements
Lemon Balm is shown to have effects against bird flu herpes virus, HIV-1, and enterovirus. (Healthline) I am currently finding it extremely difficult to find the reputable source that told me that Lemon Balm is the herb of choice to fight the whole corona virus family. In my continued re-search of this information, I have found that it is effective if your family cold medication is Tamiflu. So if you are running around town for Tamiflu, Lemon balm is the herb that you can use in its place. (The Botanical Institute) There are medical discussions on this subject as you will find in this medical article. Here is another science article talking about other medicinal uses for other diseases, such as Alzheimer’s. And here at Natural Society.
Peppermint calms nausea and soothes the bowels. “Peppermint is a first herb of choice for treatment of colds and flu because it acts to relieve multiple symptoms at once: congestion, headaches and muscle aches, nausea and fever.” (Annie’s Remedy) It is also well known as being antiviral and anti-inflammatory, it is active in fighting against RSV (respiratory syncytial virus). (Healthline)
Rosemary is known for its Immune System support. It also stimulates “the central nervous system and circulation, …block histamine, the chemical culprit of both asthma and allergies.” (Annie’s Remedy) It is also active against influenza, herpes viruses, and hepatitis A. (Healthline) Study Finds is showing that studies are finding that rosemary is useful in fighting C-19 and Alzheimer’s.
Ginger “has antiviral effects against avian influenza, RSV, and feline calicivirus (FCV), which is comparable to human norovirus… found to inhibit viral replication and prevent viruses from entering host cells.” (Healthline)
Bay Leaf is known to be anti-inflammatory, anti-cancer, digestive relief, pain relief, good for your respiratory system, and help your immune system. (Nutritionand You)
Herbs you may not already have in your kitchen, but you’ve heard of:
Echinacea“is most effective when taken at the first onset of cold, sinus, gum inflammation or other infection symptoms.” (Annie’s Remedy) It is “particularly effective at fighting viral infections like herpes and influenza”. (Healthline)
Elderberries/Sambucus is known for being preventative in fighting the flu and common cold. It is best to take during cold and flu season and then increase dosage when you become ill. It assists your immune system and is not a complete preventative measure. It is “found to substantially reduce upper respiratory symptoms caused by viral infections”. (Healthline)
Licorice is known for aiding sore throats, coughs, chest pains, and stomach aches. It “is effective against HIV, RSV, herpes viruses, and severe acute respiratory syndrome-related corona virus (SARS-CoV), which causes a serious type of pneumonia. (Healthline)
Advertisements
Astragalus is shown to work against herpes viruses, hepatitis C, and avian influenza H9. (Healthline)
Ginseng all varieties are found to help your respiration & digestive systems, helps with headaches, shortness of breath, and fight viruses. “Korean red ginseng extract has exhibited significant effects against RSV, herpes viruses, and hepatitis A.” (Healthline)
Dandelion has many health properties such as supporting the Liver, ridding the body of excess toxins, and help control blood sugar levels. (Annie’s Remedy). It also fights hepatitis B, HIV, and influenza, and dengue. (Healthline)
What do you do with this information???
The importance of using herbs is that you give your body the building blocks that it needs to fight whatever it is that your body is being attacked with. You eat food so that your body has the nutrients it needs for brain function, muscle building, hydration, having over all healthy cells in your body with everything working as it should properly work. Herbs are like a laser pointer that have a focus in helping in a targeted area.
Advertisements
I know it’s hard for many people who were raised with Western Medicine to switch over and trust in herbs to do what pharmaceutical medicine does. Herbs don’t work as quickly, which is one reason why people tend to shy away from this way of helping your body and grab that cold medication off the shelf that you have experience with it working, because you grew up with it.
The difference between your tried and true cold medication and herbs is that the cold medication was formulated to be quicker acting to take care of your symptoms while your white blood cells fight the infection and you heal. The herbs may be “slower” acting because their function is to feed your white blood cells to give them the building blocks/nutrients they need to be healthy and become super charged to do their job. It takes a little time for your cells to respond to good “food” and adjust and become super workers to kick that virus’ butt. But that’s what herbs do.
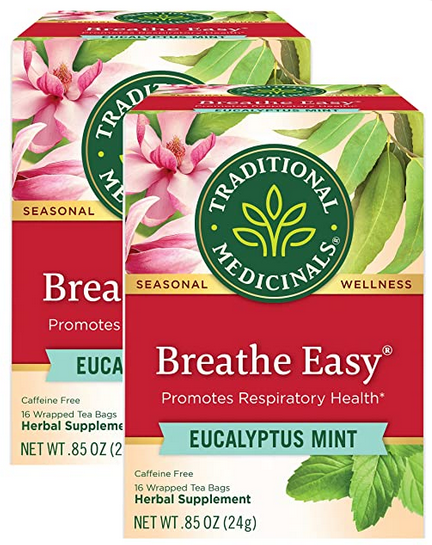
ONE— look for these ingredients in a tea. It’s as easy as boiling water. In fact, the last time I had a cold, I drank Breathe Easy Tea a couple of times a day and I didn’t have to take any cough syrup. It was a dry cough that was annoying and took forever to go away. But this made it so that I could breathe through the night without waking myself up coughing.
When I’m dealing with upset stomachs or nausea from me or my kids, I love steeping sliced ginger root in apple juice. It works better than Ginger Ale, which I grew up with drinking every time I got sick as a kid.
TWO–cook with them. I so hope that people catch my heart on this and start cooking more with herbs! It is one way that is definitely 100% in our power to help turn our health around when we begin to feel sick.
What prompted me to write on this subject this week is that for a second time a family member has tested positive for C-19. They both sought medical treatment and were released to go through the course of the virus at home. Talk about feeling helpless as theh one being sick and the family member who is left to watch them go through it.
For both family members, I cooked them chicken bone broth using herbs from this above list. And both times, after the first portion of broth, they both let me know that they felt a difference. One family member was hit extremely hard with nausea. The broth drastically cut that back so that they could get nutrients and liquids into their body. The second family member’s biggest complaint (other than lack of smell and taste) was that they had a sore throat. Immediately they felt a difference in their throat, again allowing them the ability to get more nutrients and liquids into their body.
In both of these examples, the point of the herbs was not to cure them. The human body is an amazing thing when it’s allowed to do what it does best. But for our bodies to function properly, we need food/nutrients and liquids.
Advertisements
How I make my C-Soup
I’m still finding my precise measurements to give a proper recipe. But for the first family member I used fresh Lemon Balm. For the second family member I used dried Lemon Balm that I stored from this past summer.
First you prep for making your bone broth. Clean off your chicken bones and put them in your Instant Pot, Slow Cooker, or Stock Pot. Add water to the level of your cooker of choice (a full chicken’s bones, I usually add 32 oz of water)
Next, add your herbs. Here is what I use:
Lemon Balm: antiviral for the whole covid family (which covers your bases for all colds and flu)
Bay Leaves: antiviral
Oregano: antiviral, stomach soother
Basil: antiviral, Immune system support
Sage: stomach soother
Garlic: antiviral
Rosemary: antiviral, fights C-19
Ginger: stomach soother
Shallot or Onion: some antiviral properties
Black Pepper
Advertisements
Cook. In my Instant Pot, I run it for 2 hours. You can run the bone broth for as little as 1.5 hours. I run mine a little longer than everyone else because I want to make sure to extract all the goodness not just from the chicken bones, but also from the herbs. In a slow cooker, you will want to run it on high for about 24 hours. I haven’t made bone broth in a stock pot, so I can’t tell you the precise cook time. You will still want to run it low and slow like you would with a slow cooker. As you can see, you know why I prefer my Instant Pot. If I run out of my canned bone broth, I can have the soup on the road and delivered in a couple of hours. And it’s generally still warm so my family members don’t even have to warm up that first serving. It’s ready to go.
Strain out the herbs and season the stock with salt.
Adding the salt is important. If you can taste, the broth tastes better when it’s well seasoned with salt. And the first thing my taste testing children note is the lemon flavor after I seasoned the broth. Salt is also an electrolyte. So when someone is sick and not drinking, they need that salt to get their system going. In return, a well seasoned broth with naturally cause a thirst in their body where they will want more broth (meaning they’re getting more nutrients in their body) or water (which is needed to get rehydrated)
Typically, when broth making, people cool the broth to solidify the fat content. In this instance with feeding someone who isn’t really eating anything, keep the fat content in the broth. There are countless studies where there is a connection of fat with brain health. But more importantly, the fat in the broth is adding calories into a person who isn’t eating at this point in time. These calories are necessary for cellular function.
Advertisements
Forgive me for not having a precise recipe for you to follow yet. I felt an urgency to get this information out because I know of so many families who are feeling the pressure of not having grocery stores stocked like they use to be a few years ago. It’s important for people to know that you do have options still available to you, even when it feels like you’re playing a waiting game.
Take a look in your cupboard. See what spices you already have in your kitchen. Or in the tea you may already have in your pantry. You might be surprised at what nature’s medicine you already have at your fingertips to help you through the time that your body heals.
Other Valuable Resources
This post contains affiliate links that give us commissions on products purchased at no additional cost to you. These items listed here are from Amazon but may be purchased at local markets. (This post contains affiliate links to products. We may receive a commission for purchases made through these links, but at no extra cost to you.) [Sarah’s Disclaimer: FTC Disclaimer: This post contains affiliate links that give us commissions on products purchased. These items are what we used in the recipes. This includes both Amazon and Thrive Life. All thoughts and opinions are ours. Product was paid for by us, to review.]
The Forager’s Guide to Wild Foods has other herbs not mentioned here, shows where in the US they are located in the wild, their uses, and other valuable information.
If you go through the author’s site (not an affiliate link) you will also have the option of adding other books of hers at a discounted price.
How was your Christmas? Were you able to spend time with those you love?
In my house the whole month of December is difficult. But that’s the life of having a handful of young children in the house. I use to think that starting to decorate at the beginning of December and putting out presents as soon as they were wrapped was adding to the incessant build up of excitement and driving mom bonkers.
Nope.
We did things differently and things didn’t improve. My gift making still happened at night. Or should I say lasting into the wee hours of the morning. Lets just say that coffee is my friend.
But….
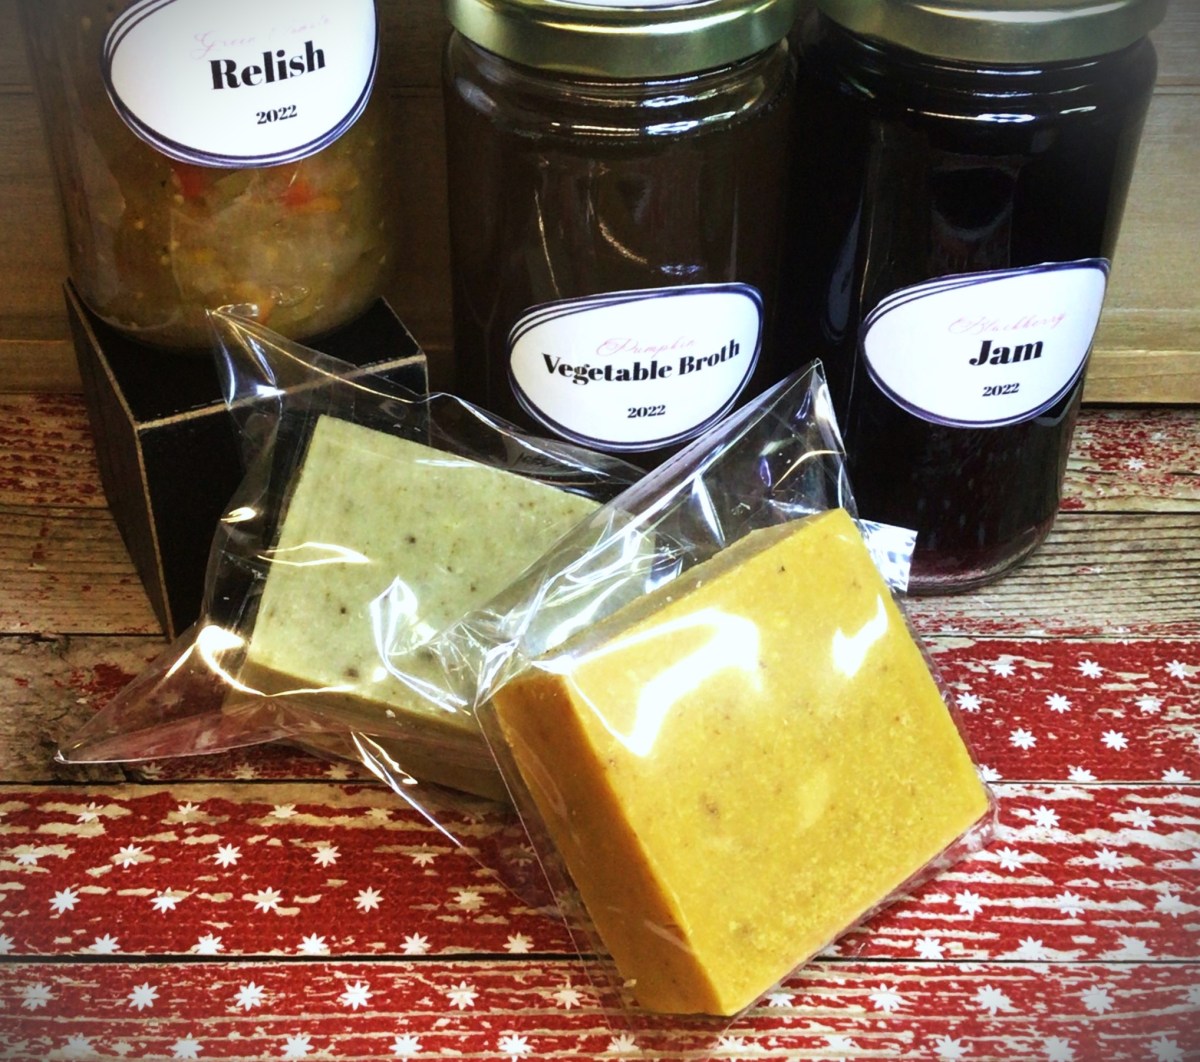
This gift, especially the soap, was probably my favorite gift to give.
I didn’t know how many people were having skin issues this year. And most people don’t talk about what they quietly suffer with. Part of it is the “I’ve tried everything” and no product on the market works.
The truth is that the local grocery stores have aisles dedicated to soap. And when you’re in that aisle you grab what you’ve purchased in the past (which may have been the brand that you grew up using) or it’s a sale based off of the label and its marketing claims. And we think that these area our only options.
Advertisements
You have another option
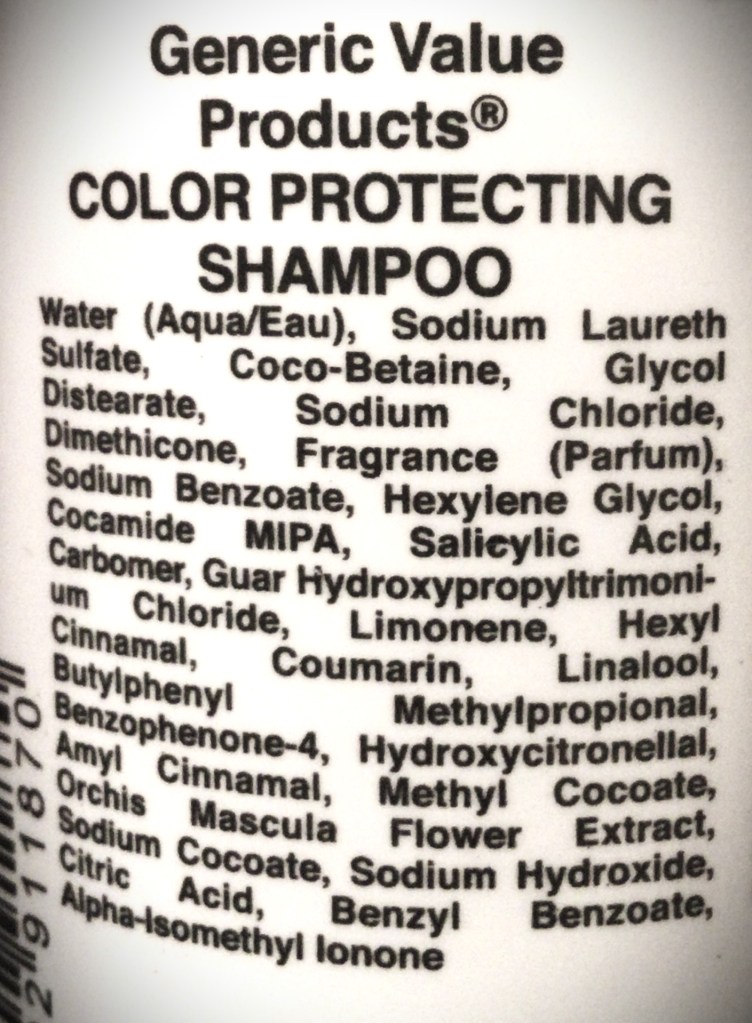
This is the video (three ingredients) that I watched that set me on the path of making my own soap, almost 3 years ago. It was an empowering feeling for me to make my first soap, Goat Milk Soap (4 ingredients), and stop buying the store bought soaps which have an ingredient list that looks something like this:
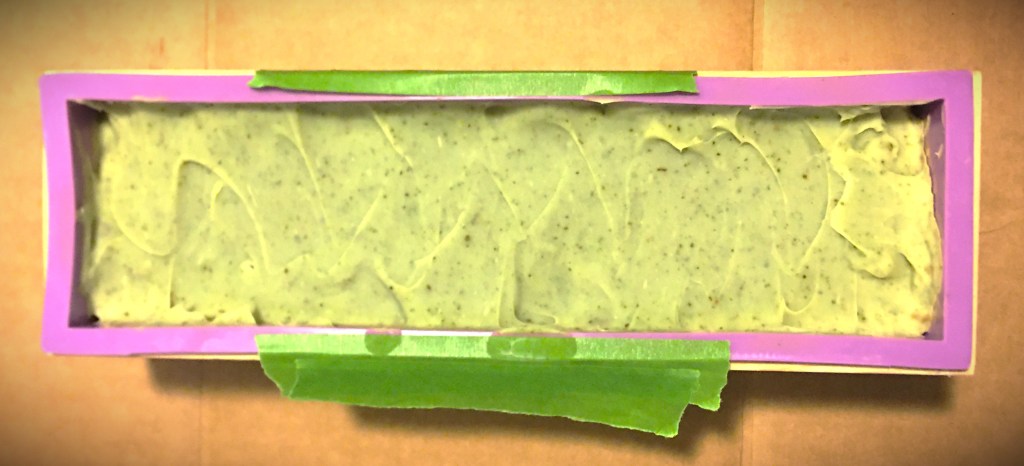
The comfrey soap in its mold.
Even though I took many chemistry courses in college, I can only tell you half of what is on product labels like this. If my children can’t sound out what the words on these kinds of labels have, that means that those ingredients are stuff made in the product labels of these soap corporations. Companies do this (take organic or natural items and change one chemical compound in the chain) they have made something they can patent and prevent other people from recreating (by pain of legal actions).
Soaps are made out of three items and three items alone: water, lye, and fats.
Yes, even those soaps that people claim are made without lye are actually made with lye. There’s a product on the market, melt-able soap base, that people claim is lye free but that is not true. This soap base is where the emulsification of the lye and fats has already happened for you. The lye and fats have already gone through the process of combining and so the lye has become safe to touch and no longer corrosive like in its original form (whether you use a crystalline lye or wood ash).
Advertisements
Here’s an example of a soap base. The first 5 ingredients are fats, followed by water, and then lye (sodium hydroxide). The end of the list is all the little extras that they added in to make their soap base unique from the others on the market.
In essence, this is an already made soap that a person at home can reshape and have the option of adding other things into for further personalization.
If you’re nervous about using lye, a soap base is going to be a good option for you. It’s not the best thing for your skin but definitely better than all the major brands on the store shelves.
Note: When making soap from scratch, with lye, you will need to cure your soap. This means that after you remove it from its mold (after it’s solidified for 24-48 hours), it will need to cure. This means that the soap sits for 4-6 weeks to dry out. While the soap dries, this allows the chemical transformation through emulsifying the lye and fats, to finish its work. When completed, they lye is no longer corrosive. The lye and fats molecular structures are completely joined and stable
Advertisements
Ingredient list from the soaps I made for Christmas
The two soaps that I made this year were Pumpkin Oatmeal and Comfrey Tea Tree.
Both soaps have only 9 ingredients that anyone can understand, colors of the soap come from the natural ingredients, and I can tell you the purpose of each of these ingredients and why they are good for your skin. You don’t need the lab chemicals to create lather or bar hardness. You don’t need the lab fragrances to give you a pleasant scent to wash with.
Note: “Fragrance” listed on an ingredient list of a mass produced soap, approved by USA FDA regulations, is all that has to be noted on a label even though it can include up to 200 different “fragrances” to make the scent of your soap. This is allowed because it’s modified in the lab and falls under proprietary patent laws.
Some of the comfrey soap after I cut it and before I set it aside to cure.
I know that not everyone approves of lard use in soap, usually for religious beliefs, but this fat can be switched out for tallow (beef, goat, or deer) which can align with religious beliefs. Or these animal fats can be omitted completely for the wide world of plant oils.
The variety of fats, found naturally in the world, each have different properties for your skin health and how it functions in a bar of soap. For example, lard is a single ingredient that adds hardness to the soap bar, creates lather, and adds to the shine and conditioning/softening of skin and hair.
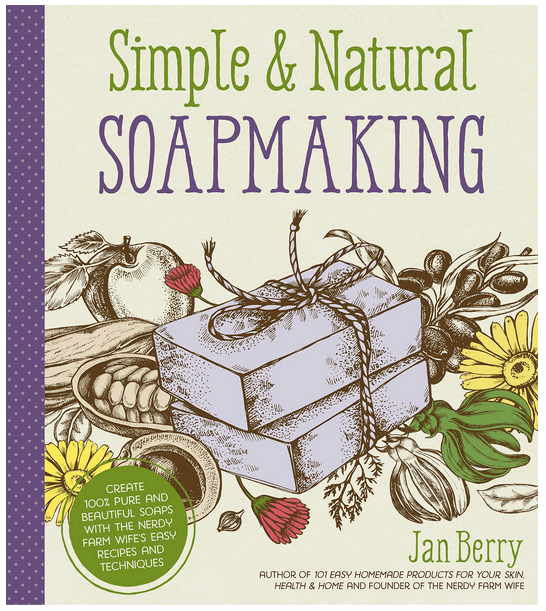
One book that I highly recommend for understanding how fats work in soap making and benefits to your skin and hair is Simple & Natural Soapmaking by Jan Berry
Advertisements
Origin of the fats is also going to play a part in how it reacts with your skin.
Shea Butter is not all the same. In fact, this week I just learned that not only is there a difference in quality of Shea that comes from heat vs. cold pressed processed Shea, but also the region. If I remember the documentary correctly, Uganda Shea butter is absorbed quicker into the skin than the Shea produced from other regions. And I never would have thought it, but the beauty industry is already capitalizing on the difference of absorption rates of the Shea butter produced from eastern and western Africa. It’s not all the same.
So if you by chance tried Shea butter beauty products and felt like the fat just sat on the top of your skin instead of being absorbed as you were promised, the reason isn’t because Shea failed you. It’s because you used a product that had a lesser quality of Shea.
In this instance, if you can afford to purchase a higher quality of Shea butter, all evidence shows that this purchase for a higher quality is most definitely well worth it. I’m all for finding the deal, but moving forward I’m now going to purchase a better quality of Shea.
With animal fats, whether the animal grazed on foods naturally available to the animal vs. grain fed and various injections will all be passed on to you through your skin.
Why what you put on your skin matters
It took me going through my second quarter of Anatomy & Physiology to learn that your skin is your largest organ in your body. Your skin keeps all your insides in, but it also is a filter from the outside world trying to come inside you.
I really don’t know why I was so surprised by all this because growing up we all have the conversations about needing lotion for our skin. We already know that we can correct some conditions by adding lotion or medication, depending on what’s wrong with our skin. But we never think about what we are adding to our skin daily that’s potentially causing the problems to begin with.
An example of a soap label. Notice the difference in readability and ingredients compared to a bar of soap I made (my shampoo bar, currently curing, is the same ingredients that the bar of soaps listed above).
We’re told to wash our hands regularly, especially during cold and flu season (not to mention the marketing for this habit over the last three years). With this increase reminder to wash your hands, how long is that ingredient list? How many of those ingredients do you know how to say, let alone identify what they do in the soap? Is it your hand soap that is adding to your cracked hands during the winter?
For example, my hands crack and bleed every winter. There has never been a lotion that I could find to ease the pain, let alone prevent the cracking in the first place. Christmas was when my Comfrey soap finished curing and I could use this recipe for the first time. Just by the first use alone, the redness of my irritated skin cleared up. The cracks decreased in size by half and by the next day they were all healed. I still have dry knuckles because I stopped using the Comfrey soap (leaving it for my son who has more sensitive skin in need of good soap). The Pumpkin soap isn’t as healing, but it’s still preventing the cracks. The Comfrey soap has aloe vera in it (which the pumpkin does not), so I might have to change that recipe to add some aloe in.
But I think you can start to see just by how your ingredients work, the natural function of things found in your garden, you can easily make a soap for yourself, family or loved ones that meet your skin type needs and not have to spend hundreds or thousands of dollars on store products that just don’t work.
Advertisements
There’s just so much to talk about with soap making. I will have to come back to this subject in upcoming posts. But I wanted to start the thought in your mind that you really can make your own soap. You don’t have to just survive and live with the condition(s) that you currently have. The first step is to start by cutting that ingredient list in half. The fewer the ingredients and shorter the syllables of the words mean that you understand what you are putting on the largest organ of your body. You can pinpoint what irritates your skin and you can pivot by switching out a fat or other ingredient that offers a vitamin or mineral that your skin actually needs.
Leave me a comment below if you’re looking for a solution to an issue.
In 2023 I’m looking forward to talking more about how herbs and garden ingredients can benefit your body. And all you have to do is add them as a seasoning to the foods you already cook, which benefits your body from the inside. And you can already start now with making soap to help your body from the outside. Skip the lab ingredients and start using luxurious soap that uses all natural ingredients which can eliminate all the extras that you need to “fix” what other products are doing to you.
For example, one lifestyle change for my family is that we are switching to homemade shampoo bars. My goal is to find the recipe that makes a shampoo bar where I don’t have to use 3 different conditions to combat the dryness that I’m convinced is caused by the long ingredient list on my shampoo bottles.
Happy New Year!!!
Products that were either mentioned in the post or items that you may find valuable in making your own soap.
This post contains affiliate links that give us commissions on products purchased at no additional cost to you. These items listed here are from Amazon but may be purchased at local markets. These products were paid for by us and are not the only products available.
After watching videos and reading different books, this is my personal favorite resource for recipes, ingredient information, and general soap making information.
I prefer cutting my own bars of soap and this is the set that I wished I would have bought the first time. The cutting block takes the guesswork out of eyeballing a uniform and straight cut.
This is great for just getting started and you don’t want to think about portioning out bar sizes. The disadvantage is that the silicone is very flimsy under the weight of the soap. So make sure that you have cardboard or another hard surface to tansfer the molds to a different location while the soap solidifies.
My granny made lye soap, used it all her life, never had skin problems, i make basic lye soap myself, 3 lbs of greese, bacon preferably, but the drainings off cooked meat, 2 gallons of water, and one can lye, , i greate up some for clothes soap, i use it in place of aal types of soap, melt it and mix with water for dish soap, works better than cascade in the dish washer, the only problem is aquiring the lye, it extreamly hard to get in the stores because it is one of the main ingreidants in the manufacture of meth, and everytime i make soap i have to call the police and noify them, so i dont get charged with making meth, it smells the same, making meth or making soap,
There shouldn’t be any fear in purchasing lye. I’ve been purchasing it for a few years now and have never had to report to a registery. There are certain over the counter medications that I’m aware of that there is a registry because of of it being associated with drug manufacturing. And in the instance of that product registry, there is a notation of who is buying what and at what quantity. For the manufacturing of drugs there is a specific amount that law enforcement starts paying attention to. For the average person, making soap at home, they are not going to come close to hitting that limit. I mention all this to prevent unnecessary fear from being spread.
Thank you for sharing how you make your soap! And also sharing how you use it to also to clean clothes and dishes.
I’ve been making chicken stock for several years. But this was the first time that I ever heard that you could make vegetable stock with pumpkin guts!
My childhood is filled with roasting the seeds, and sometimes using the flesh. But it was more convenient for my parents to buy the canned pumpkin and make pies from that. It wasn’t until I got married that I started making my own pumpkin puree, with the flesh, and make my pies completely from scratch.
But always, the guts got thrown out.
Of course when I saw that you can make a broth out of the guts, of course I had to give this a whirl!
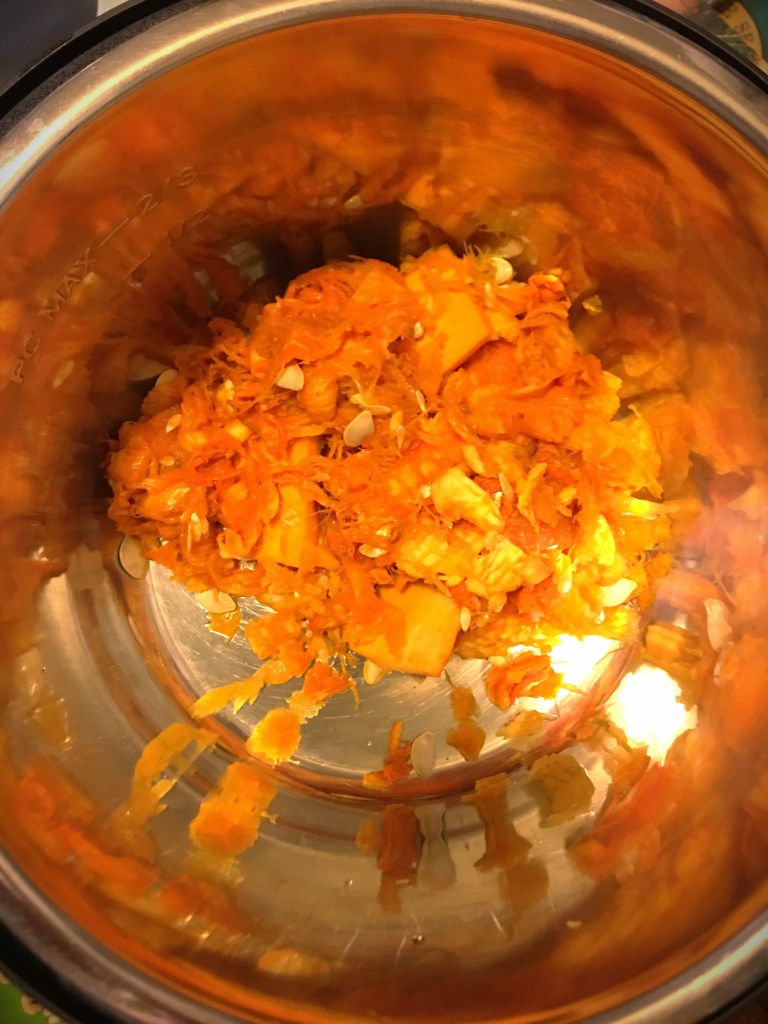
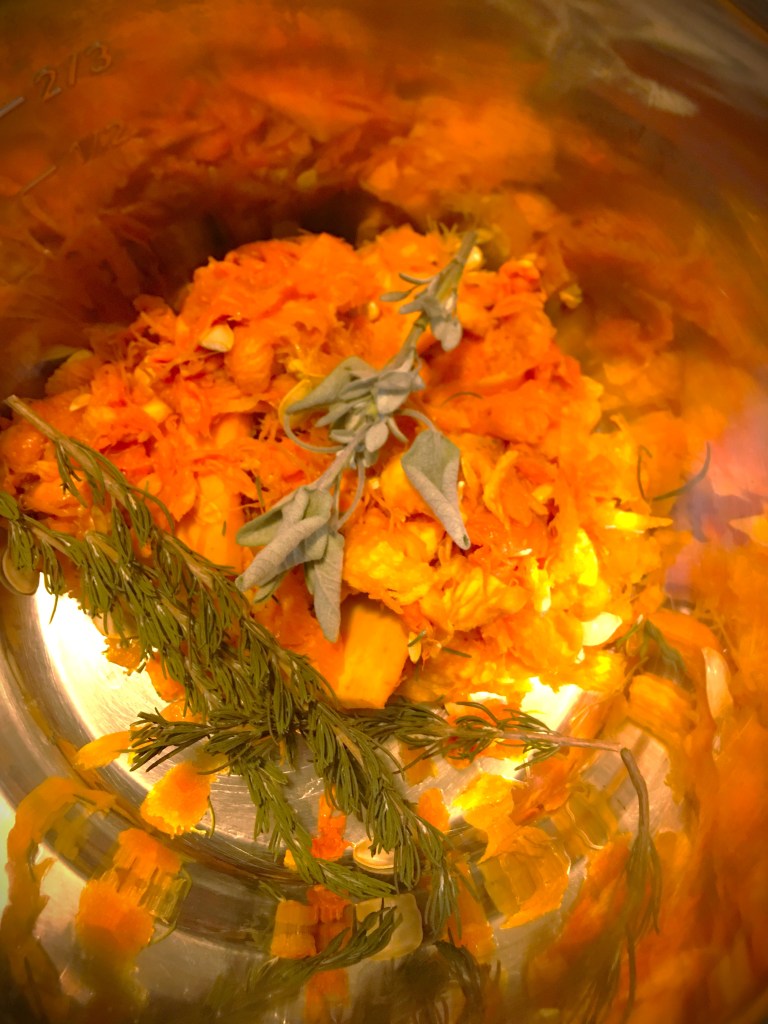
After separating out everything (seeds from guts, and roasted flesh from skin) the only items that went to the compost heap were the stems and skin. The flesh was pureed down to dehydrate for freezer saving pumpkin puree. My anticipation was met with the roasted seeds. The seeds from 4 sugar pumpkins were all eaten before 36 hours. And the bowl of guts, I tossed all that into my Instant Pot.
Also tossed into my pot were a couple sprigs of dried rosemary and sage, my freezer vegetable scraps (parsley and cilantro stems, onion and garlic skins), and I had some green (spring) onions that lost their freshness.
Word of Caution: skip the green onions! They caused a problem and I will come back to that in just a minute.
After I filled my pot up to its max line, I ran the pressure cooker for 3 hours.
Was the time a bit excessive? Probably. Recipes range from 15-40 minutes pressure cooking time. But here’s the issue I have always had with store bought vegetable stock (or even for restaurant vegetable stock) is that broth is bland and adds nothing to the soup. So I chose the long cook time to extract all the flavor I could out of the vegetables. And anyone talking about cooking vegetables too long, the only concern is your vegetables breaking down, becoming mush and all the nutrients wasting away into the water. So feel free to go light on time or extract away.
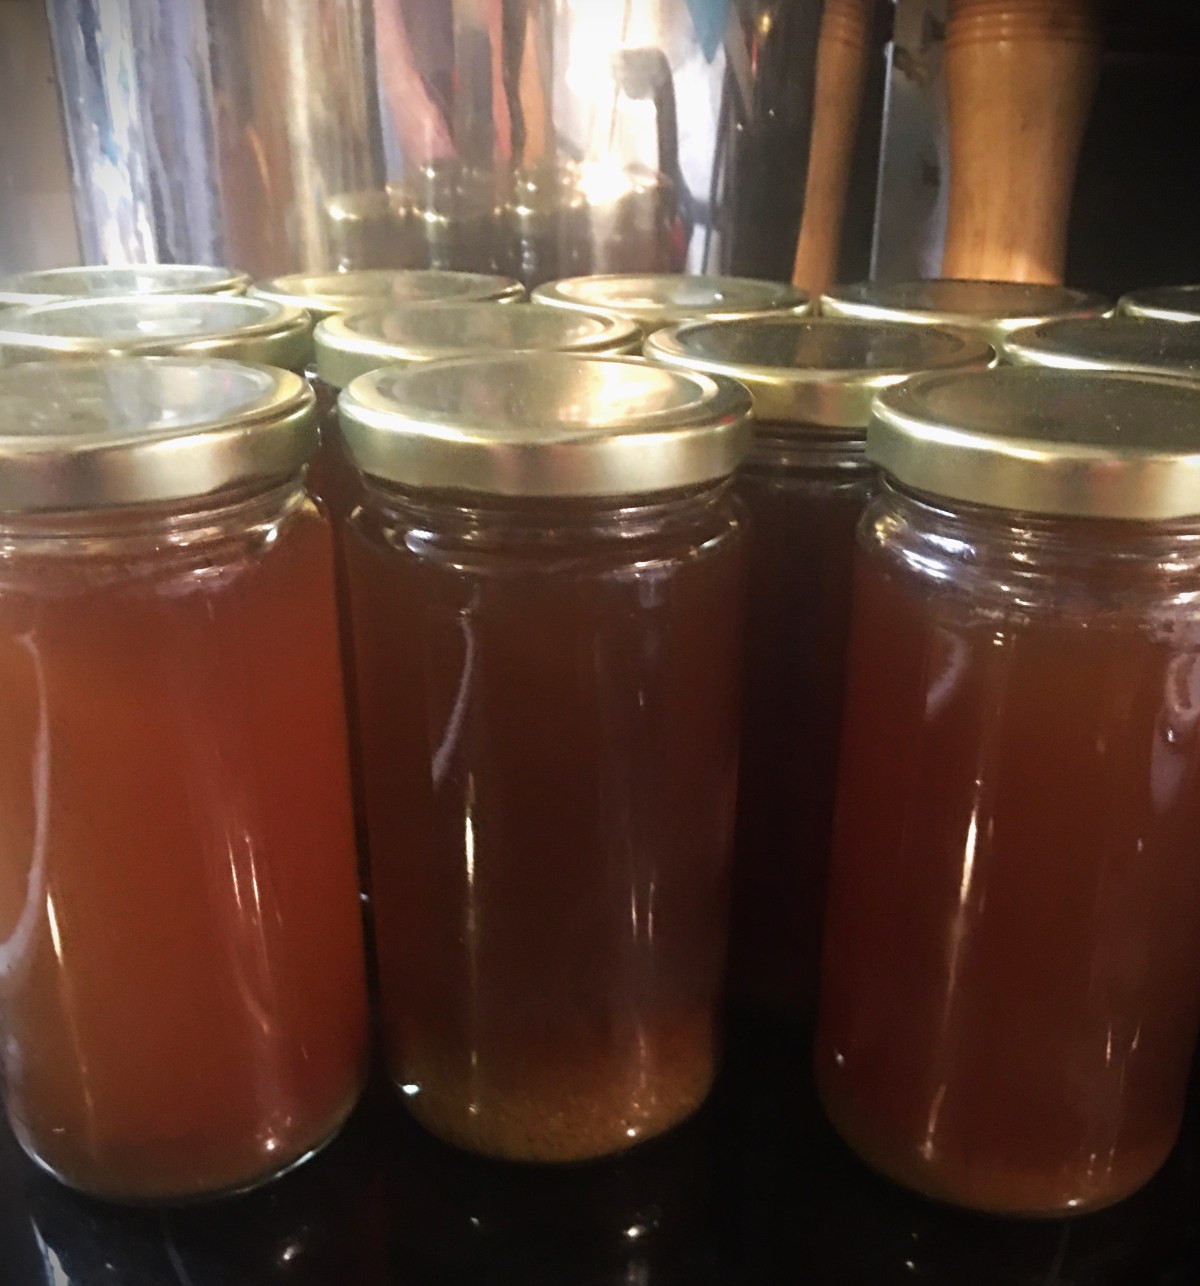
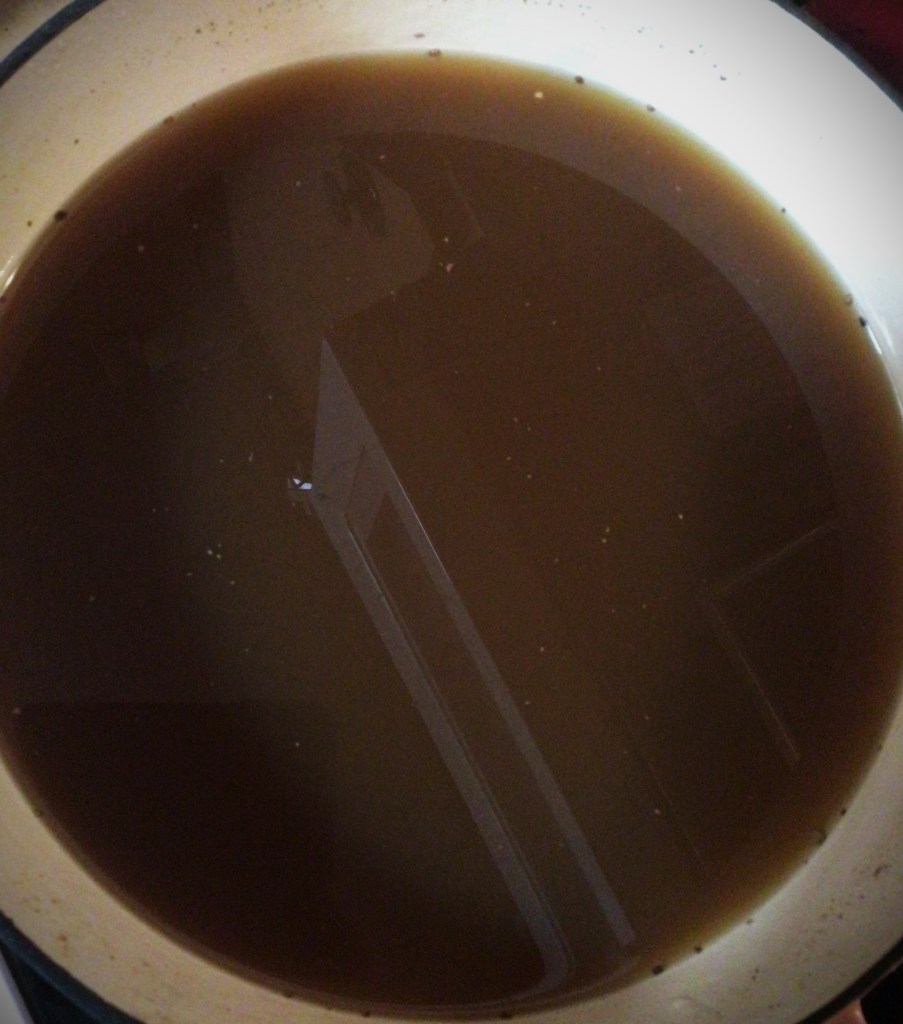
Once time was up, I fell in love with the rich brown stock. It was so beautiful!
And then the flavor….
I have never tasted anything so bitter in my entire life. I’m being completely honest with you that this was entirely worthy of tossing down the sink drain. (Stick with me because I did resuscitate life back into this complete failure.)
What Caused the Bitterness?
After I put the broth away for the night, I did some research. The focus of my search was on all the foodie and culinary sites to find out how all the professionals fix bitter dishes.
First I drew personal comfort that all my instincts had kicked in, because I did use the professional tricks to save the vegetable stock.
It wasn’t until I came to one of the final site pages that I finally got the answer to my question–What Caused the Bitter?
Green Vegetables!
Green vegetables are the culprit behind bitterness taking over a dish. And that’s what killed it for me in this particular instance. I did use the same amount of parsley and cilantro that I use in my Chicken Stock. But on top of my usual I added the rosemary and sage. And the ingredient that signed the death certificate was the green onions.
Why do I share my failure with you?
Why not?
While I’m teaching others in the kitchen, I’ve had a few people who felt conscientious about always making mistakes in the kitchen. And I tell them every time, “I’d rather you make mistakes in this space, rather than make them alone at home. Here I can help you. And if I don’t know the answers, I know where to find them and I’ll get back to you.”
I grew up making mistakes in the kitchen. My dad helped me through the mistakes. And I also know the feeling of making mistakes alone in the kitchen. Can you pull yourself out of those alone mistakes? Definitely! But there is a huge amount of comfort knowing that you have no judgment help. The no judgment help may let you make your mistakes, knowing you can pull yourself out of it. Or they can help you by giving you a heads up.
Sometimes the kitchen mistakes teach you skills that you may or may not ever learn.
So yes! I firmly believe that it’s okay to make mistakes in the kitchen. And I have no shame in making them myself. It’s one more bit of information I get to pass on to others. Like in the instance of talking someone through vegetable stock, I can now tell them ahead of time to be stingy with the greens that you add. Because if you choose to be generous, be prepared to combat bitterness.
Advertisements
How did I save this Vegetable Stock?
The short answer is that I raided my generously supplied spice cupboard!
Even though it wasn’t the natural first choice, I grabbed salt first. When I tell you that the bitterness was strong, it’s a massive understatement. There was no flavor other than bitter. No pumpkin, no rosemary, no cilantro…absolutely NOTHING but bitterness.
If you’ve listened to enough cooking shows, you will always hear the professionals tell the contestants, “Use salt! It draws our and enhances the flavor.”
And it is absolutely true!
I went from tasting nothing but bitter to actually tasting some minor notes of the vegetables.
There is always the possibility of creating a salt bomb, which is a death knoll you can’t come back from. So while I was liberal with the salt, I did show restraint and moved on to a new trick.
Next I wanted to add some sweetness. But I wanted to avoid sugar if possible. My butternut squash and mushroom (umami flavor profile that acts very similar to countering with salt) powders were what I grabbed next. Butternut squash is my “seasoning” of choice when I want to add sweet without adding sugar. Unfortunately the squash could only help so much. It wasn’t nearly enough to counter to the bitter. So I did add a conservative measure of sugar. And in this level of face smashing bitterness, you are definitely going to need to add some sugar. There was a world of difference even with the little that I added.
Advertisements
Still this was not enough.
What is another cooking trick to lift hidden flavors to the forefront? Acid.
I’m sure you’ve seen shows, such as Chef Ramsey, where the chef always advised and praises lemon juice for lifting dishes to a new level. This is also true!
Normally I don’t keep lemon in my kitchen because I usually always lose citric produce when it’s only there for cooking. For that reason, I keep food grade citric acid in my pantry. You sprinkle in a little citric acid and you have the lemon lift without having to toss rotten lemons.
So I added 1 tsp. of citric acid in the nearly 2 gallons of vegetable stock. I tell you this measurement because I want you to know that you really need to use citric acid sparingly because it is much stronger than squeezing a lemon in your stock. So please be careful with this ingredient.
The good news is that I came to a stopping point for salvaging this vegetable stock. The bitterness went from being the only flavor to being a minor flavor that could be overlooked. When I had my husband try the stock, he had no clue that I had an issue with bitterness. In fact, he said he didn’t taste bitter. He thought my rosemary was a touch too strong–but that’s another correction I need to fix before I go public with a legit recipe for pumpkin gut vegetable stock.
Advertisements
Another piece of good news… this vegetable stock is by no means boring or bland. In fact, it’s quite complex and I still want to tweak this one when I go and crack my pressure canned stock for a future dish. If it’s fish or chicken based, I’ll leave the citric forward flavor as is. But if I go to make a sauce with it for my mushroom pasta or pumpkin ravioli, I might have to add some more salt to touch down that citric acid a bit.
Moving forward….
Limit the amount of greens you add to your vegetable stock LOL! (I hope you’re laughing with me, because I’ve now come to the place where I can laugh about this kitchen mistake. And it could be great to hear some friendly laughs with this story telling too.)
I have enough pumpkins to gut and have two more tries to making a pumpkin gut vegetable broth that is palatable and shareable for next year’s pumpkin harvest.
Don’t be afraid to try new things and embrace the things that go wrong. If it’s not charred and burnt beyond recognition, there is the possibility you can bring your dish back from the grave.
OR
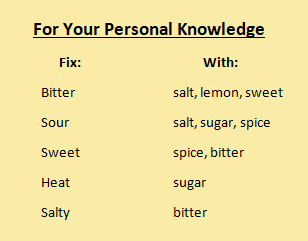
Maybe you have a stack of recipes that sounded good but were just too bland. Using the above chart for how to tweak flavors can give life to a bland and otherwise forgettable dish into something you want to cook again.
Advertisements
Let me know your thoughts below!
Feel free to share your own kitchen mistake stories below. Or even more importantly, share your favorite anything pumpkin recipe. I’m a pumpkin pie junkie that has been branching out into other pumpkin areas. I’d love to hear what you have up your pumpkin sleeve.
Processing…
Success! You're on the list.
Whoops! There was an error and we couldn't process your subscription. Please reload the page and try again.
[…] because you’re not extracting marrow that you can get by with less time. Check out my post A Touch Bitter? where I specifically talk about vegetable […]


Leave a comment