After spending almost a decade in the event decorating industry I have repetatively heard "I can do that". Instead of being dismissed by creative minded people, I want to show you how I do "that" so you can be sucessful in recreating that inspiration image. I just might have a few tricks that you haven't seen yet!
Happy Mother’s Day to all the moms who are celebrating today with their children, the moms who are missing their children, the moms who have lost their babies far too early, those who shared an all too brief moment with their babies, the mothers who are in the middle of a season of making the dream of motherhood a reality, and those who love on the children from other mothers who lean on you to be the loving assurance in this season of their life. No matter what motherhood looks like to you, Happy Mother’s Day!
Depending on who you talk to, some people feel that holidays are too commercialized. Others find it difficult to find the perfect gift. And others find it difficult to gift a loved one while feeling the financial pressures of this season of world history. No matter where you personally find yourself on this spectrum, I want to help you find inspiration on how you can find a meaningful gift for someone. Whether it’s a belated mother’s day present, a birthday, anniversary, father’s day, grandparents’ day, teacher appreciation, graduation, or any other occasion, know that you can gift in a meaningful way.
I’m going to use the example of the mother’s day gift that I gave one of the mothers in my life. While this may not apply to the person in your life, the same principle can be applied in finding what you can gift that special person in your life.
This mom loves talking about her memories. For many years she’s shared her precious memories of when she operated a daycare. And one of those fond memories is when she grew gardens with the children under her care.
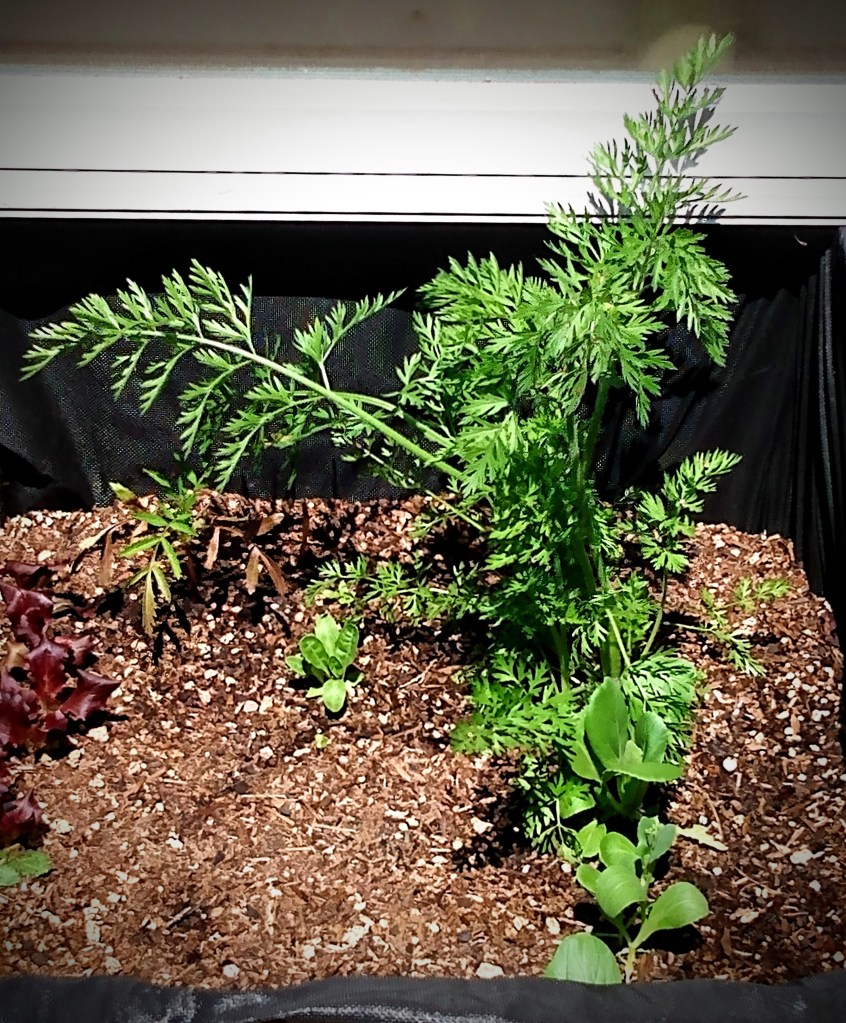
Growing salads in a container box.
One thing about moms, it seems pretty universal that sharing memories usually isn’t about the memory. It’s about reliving a moment in life that brought pleasure to them.
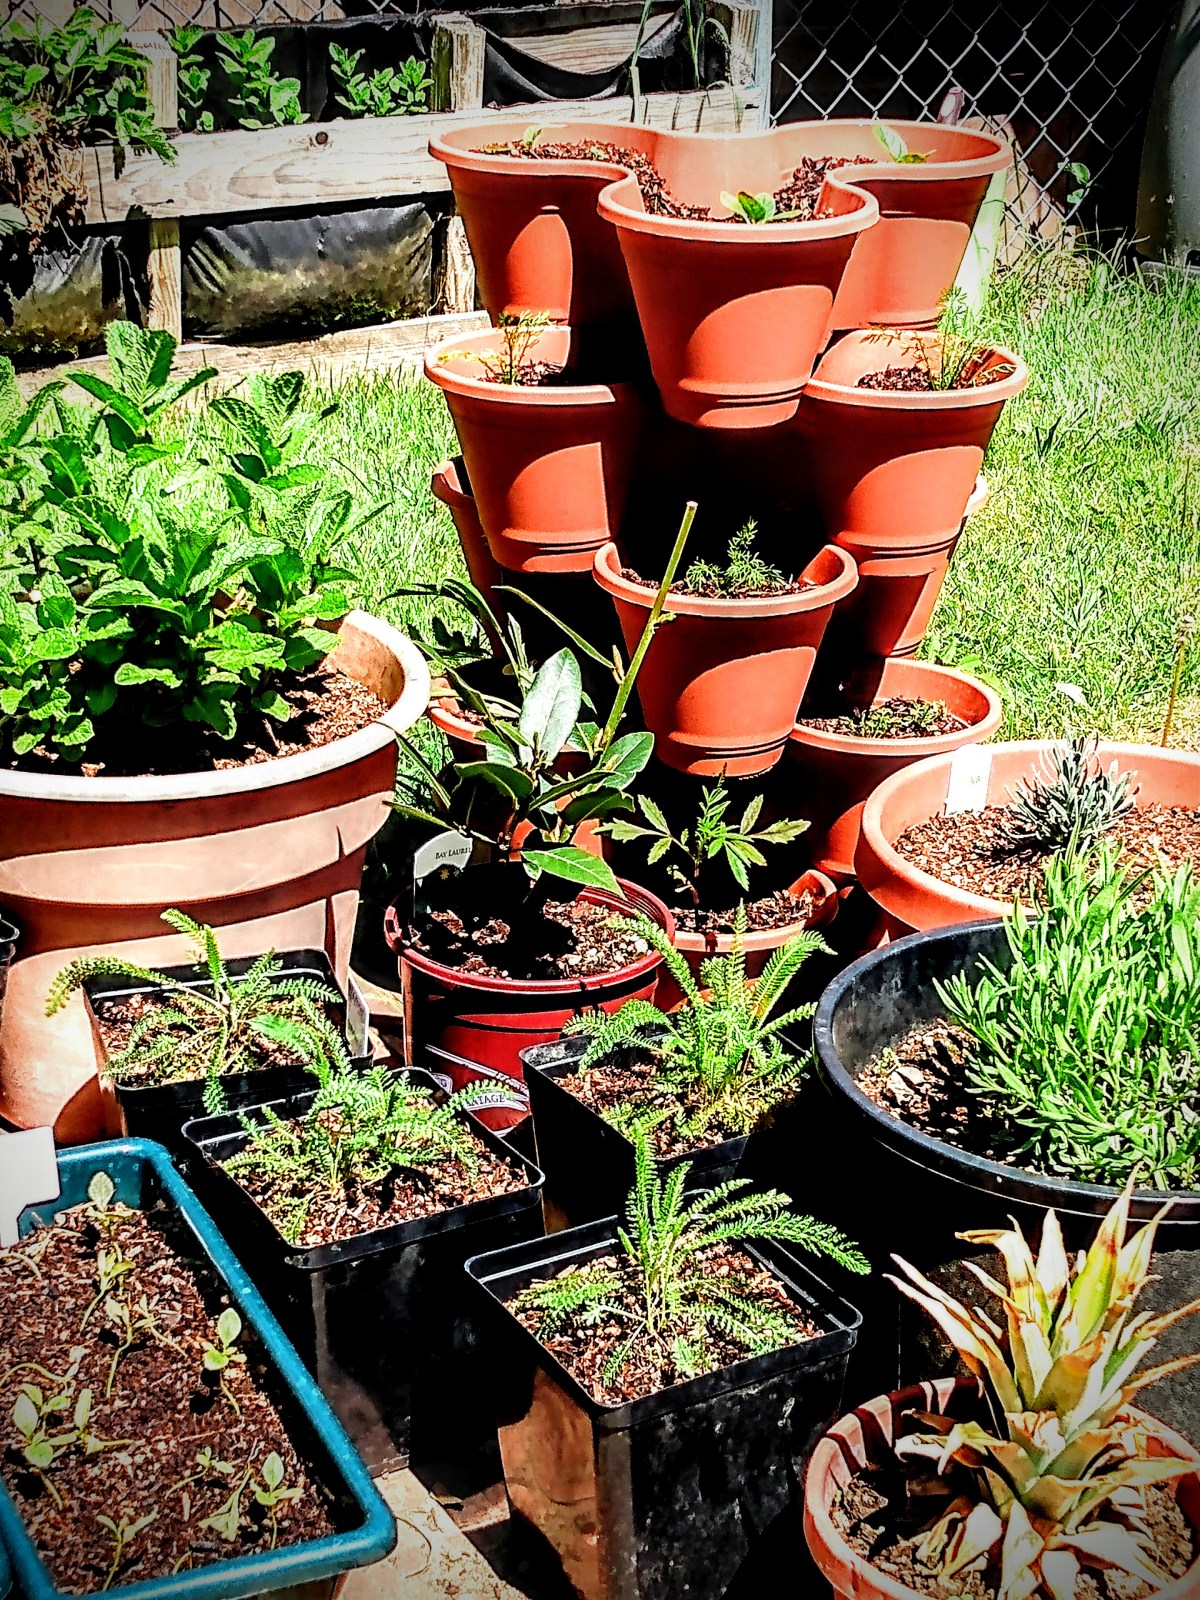
From this understanding, I knew that building a garden for this mom was a gift that would fill her love tank. Not only is it an opportunity for her to relive precious memories in the here and now, it also opened the opportunity to add more memories in association with these older memories. By building a garden and scheduling time to upkeep and tend to the garden, it was also guaranteeing visits and making time for her to spend time together.
Container growing for small spaces.
For this mom, she has two love languages. Her primary love language is gift giving. Her receiving love language is quality time.
Making a deposit of part of this season’s garden was not just a simple arrive, dig holes, put in start, say good bye, and move on with the day.
Advertisements
For this Mother’s Day gift, it took in the appearance of leaving all the gardening supplies in the car and starting off with a sit down chat and getting caught up with all the news, even if it was only a day since we last saw each other. Then, I was able to go prepare the garden beds for this first plant installment.
Even before I could bring out the plants, this mom was already so filled with love that she wanted to spend some more talking. As much as I wanted to stay task driven (my personality is to knuckle down and get a project done quickly so I can move on to the next task), this day was all about showing love to this mom.
Pallet boxes for narrow spaces and hanging baskets on cyclone fence
So we had another chat session.
When I could find a polite moment to get back to the task of putting the starts back into the ground, I made that move. And with the final post plant watering, I went back and gave this mom one last extension to the gift I was giving her.
Remember, I said that this mom shows love to others by giving to them. So while I was building this garden for this mom, I know that the one thing that would bring her even more pleasure is by telling her upfront that the goal of this garden is primarily to meet her primary produce needs, I’m planting more than she will personally need so that she can give from the garden to others.
I wish I could share with you the look on her face, because she was bursting with love. Knowing that she was having a garden this year was more than enough to help her feel love, she felt seen and more loved because the gift was enabling her to show love to others without need to be reserved or anything else. It was a gift that was freely given so that she could freely give to others.
Growing herbs in repurposed gutters hung on a cyclone fence.
I know that this story may or may not show you specifically what you can give the hard to shop for person, but there is a valuable lesson here.
A good gift is designed to make a person feel loved because it speaks to how they most readily feel loved.
If you don’t know this love language, ask your person how they most feel loved. They will gladly tell you. It could be a tangible object or food that makes them feel loved. Or it can be a non-tangible activity, expression, or display.
A great gift is one that fills their love tank, but also doubles as a tool to enable them to share their love with others.
Container growing garden with DIY budget friendly or recycled components. Chicken wire trellis threaded through upright supports.
Maybe your loved one is not like this mother. Maybe they don’t show love to others by giving them things. Maybe they show love through acts of service. However their schedule is busy. By gifting them your time to do tasks for them or help them create time, this can free up time where they can show love to others by spending time with another person.
My encouragement to you today is to be inspired with a gift idea that doesn’t come from the shelf of a store. Yes, there are many store bought items that are amazing and meaningful. I want to strike the inspirational fire to give a gift out of love and seeing the other person at a core level. And also enable them to pass on love to others.
Advertisements
Right now we live in an interesting moment in history. It is an uncertain time for many families. But it is also a prime moment to celebrate others by giving to them in a way that shows them that you remember past conversations. Where you have heard and remembered things that could have easily been passed off as trivial information in the moment.
Let’s show our loved ones that we see them. And we celebrate them for who they are.
Again, Happy Mother’s Day!
publicdomainpictures.net
This post contains affiliate links to products. We may receive a commissions on products purchased through these links, but at no extra cost to you. This item link is to Amazon but may be purchased at local markets, and found at your local library.
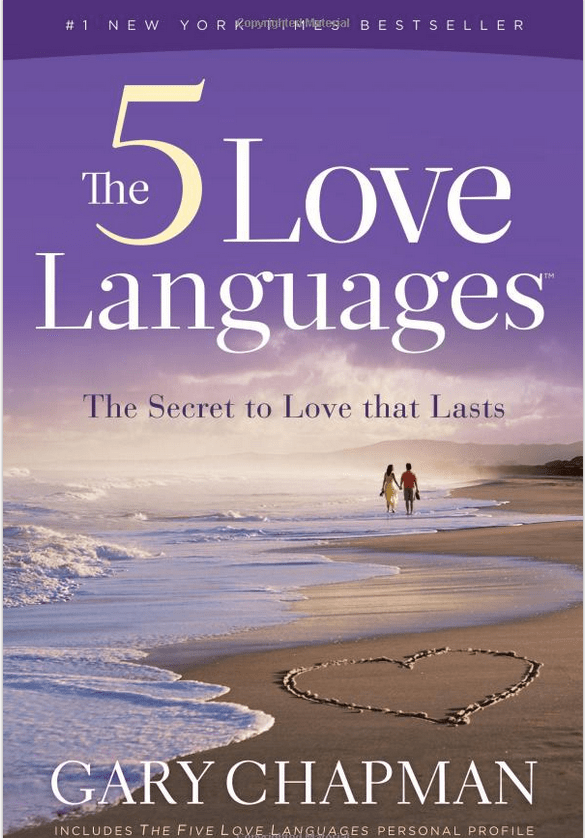
If you are unfamiliar with Love languages, here is the book that started it all.
Originally this was written for understanding your mate. There are several other editions available to meet other relationship needs such as children, being single, and in relationship of a military service member.
Processing…
Success! You're on the list.
Whoops! There was an error and we couldn't process your subscription. Please reload the page and try again.
There’s one skill that I’ve wanted to learn from a friend of mine, incorporating mason bees into my garden.
Here in North America, mason bees are the indigenous bee. They pollinate 45 times more than honey bees. And if you have young children, you don’t have to worry about there being an altercation and your child (or pet) from being stung. (We’ve been teaching our kiddos about bees because one day I want to have honey bees for honey production. So they already know what’s expected of them when it comes to our pollinating friends.)
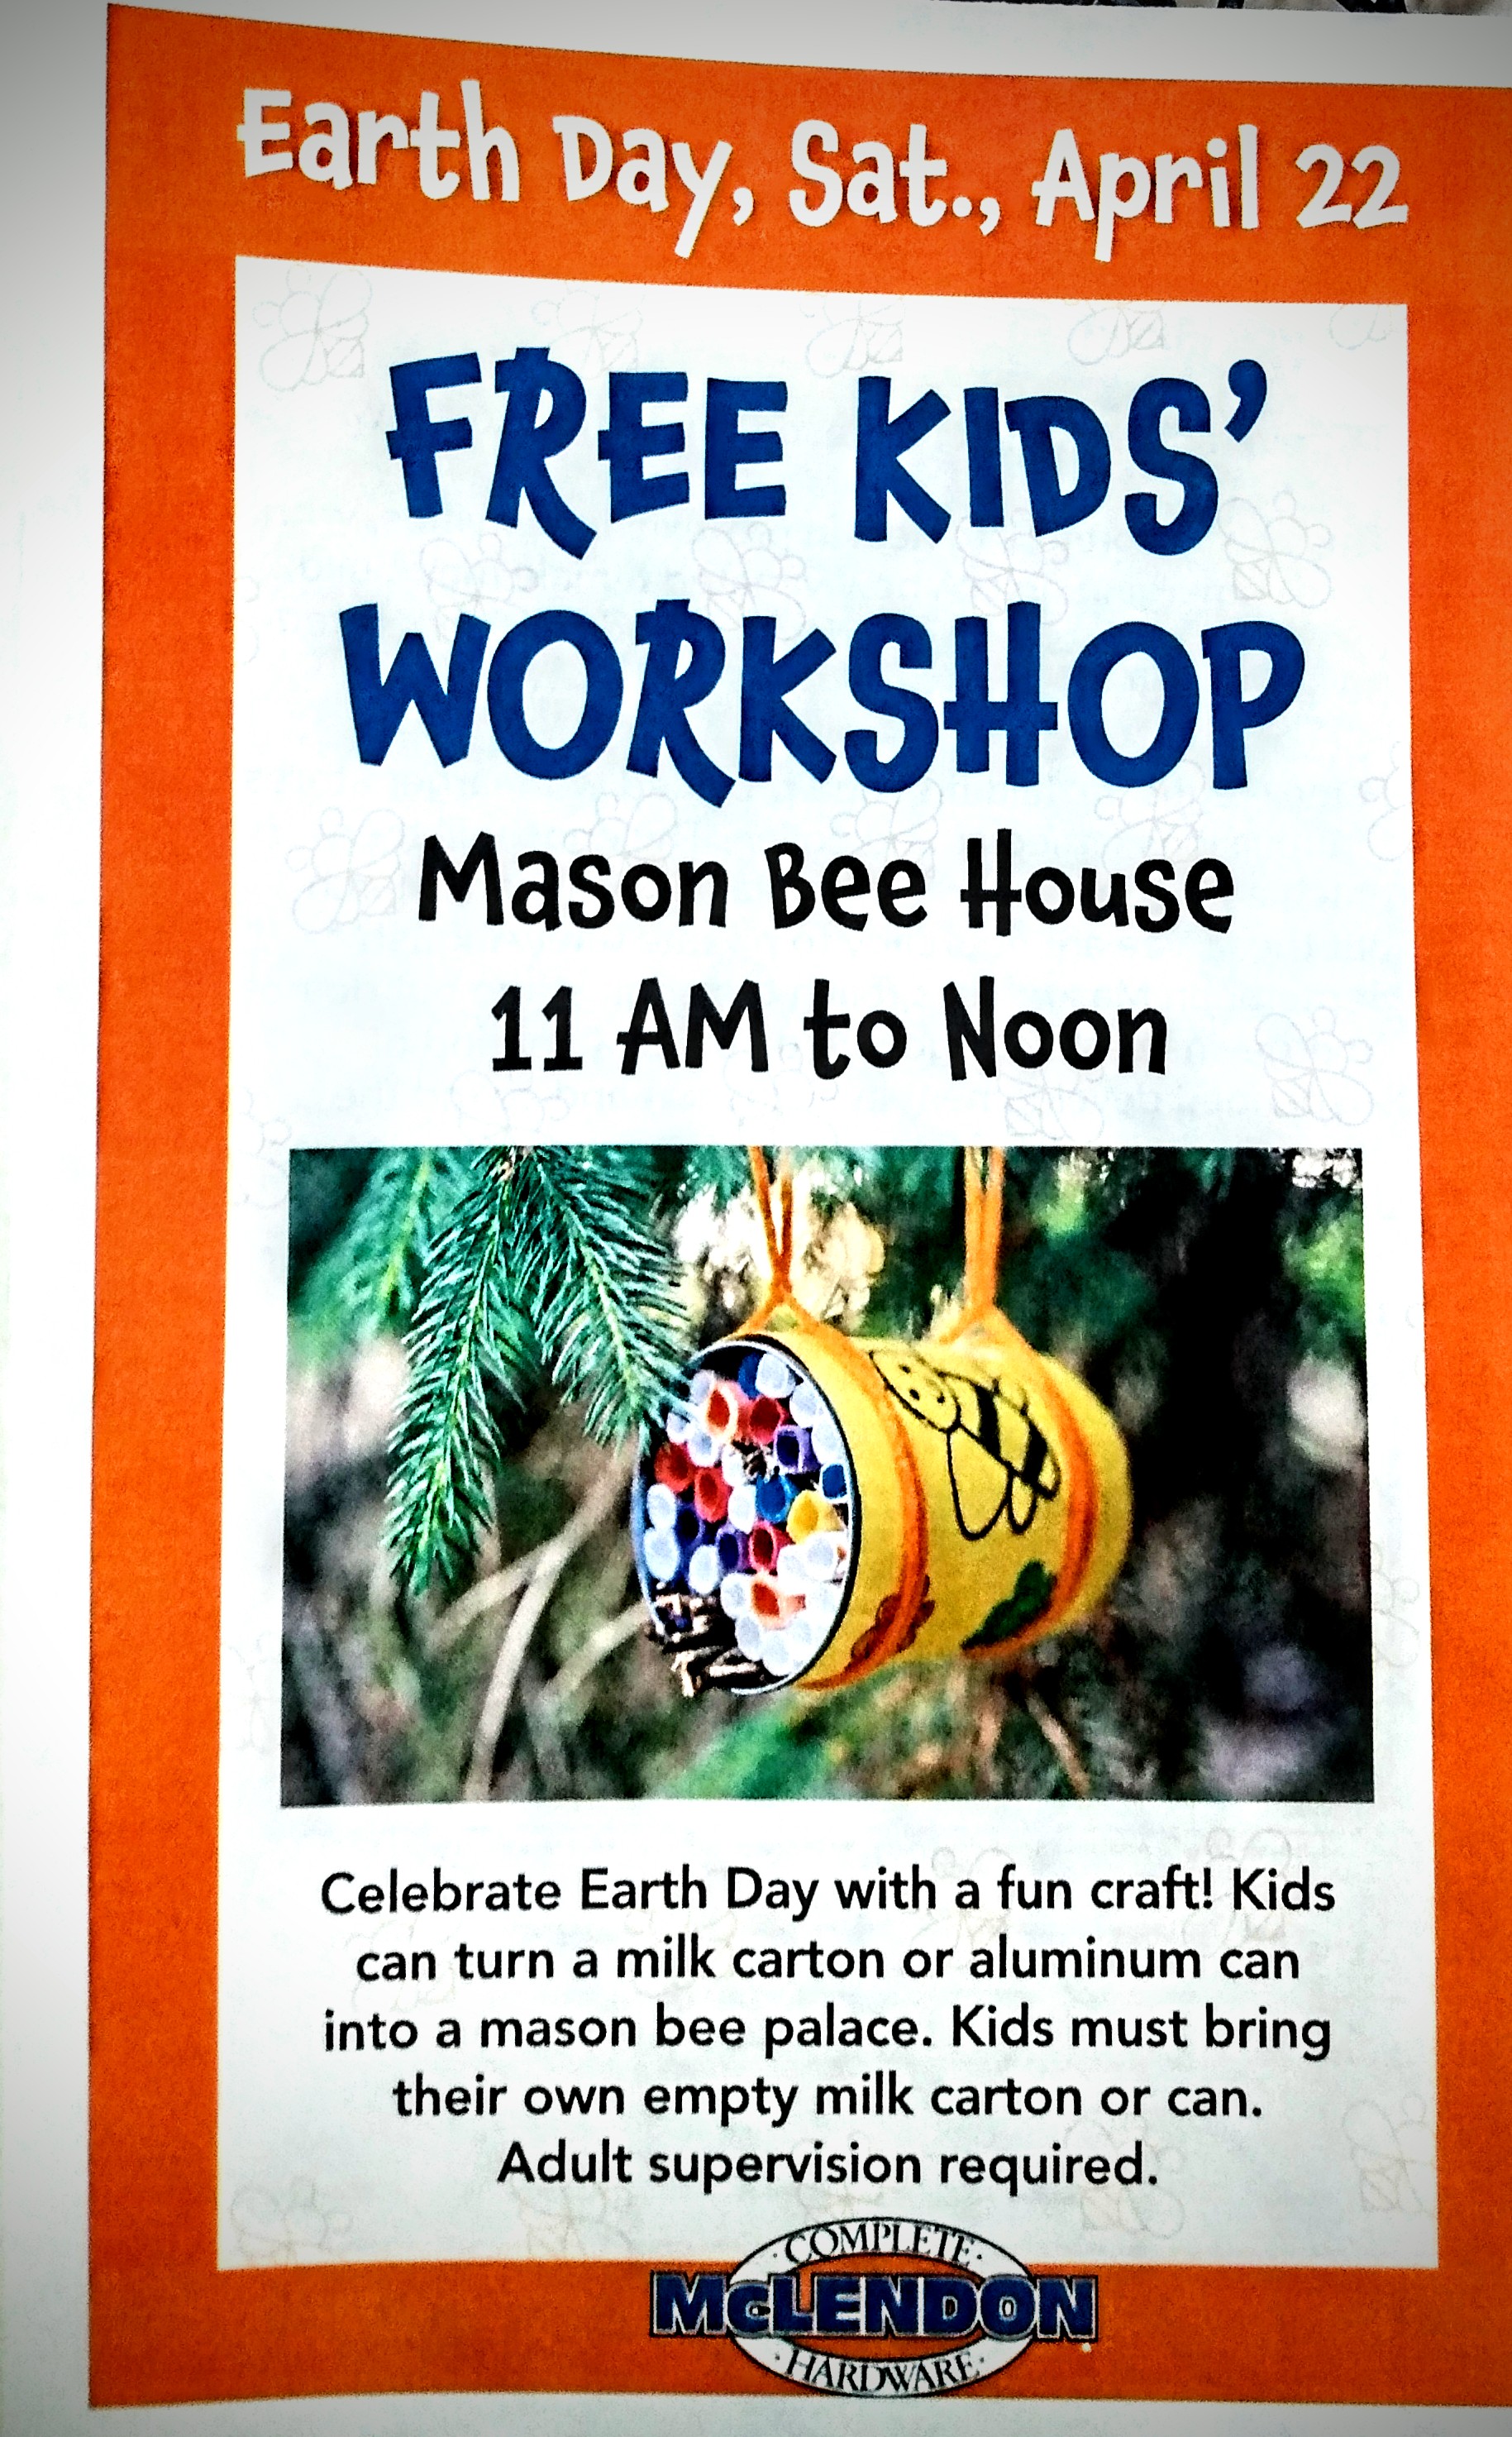
I can’t even begin how excited I was when I received an email from a family locally owned hardware store that they were doing a craft for Earth Day, which involved making a home for mason bees.
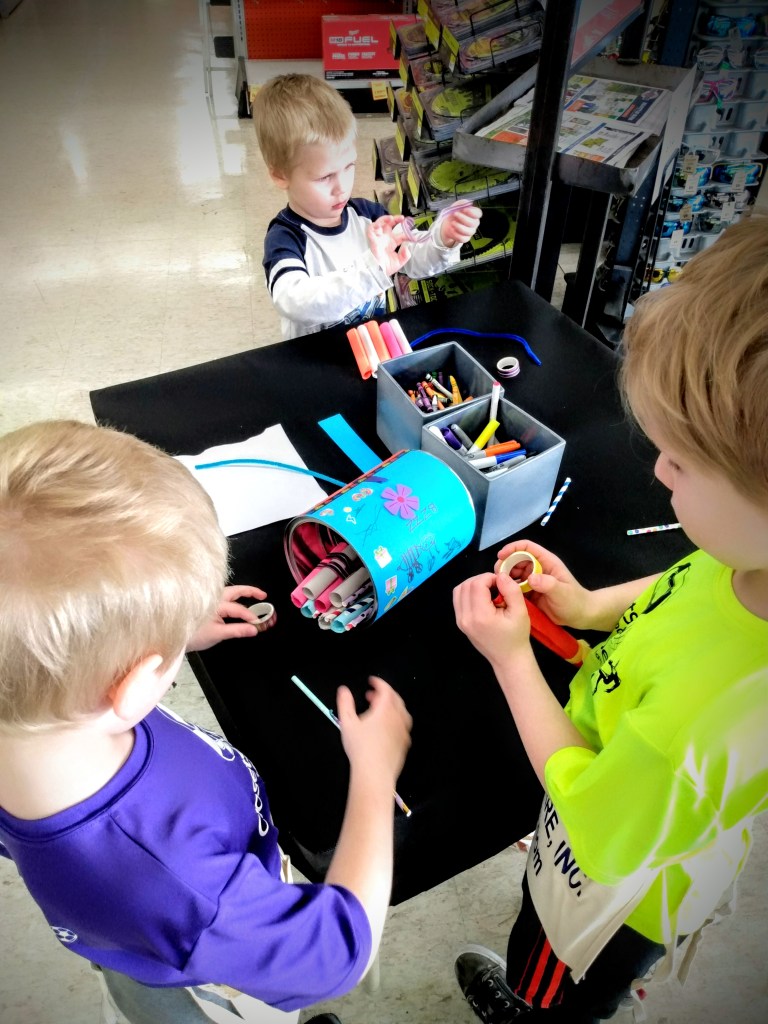
Today I’m sharing with you the process that my kiddos went through to make a home for mason bees.
We were instructed to bring a soup can or cardboard milk container. The hardware store supplied the craft materials to decorate and make the bee home.
All my milk cartons still had milk in them and I haven’t bout soup in a can for well over a year now. What I did have available was an empty ten pound can. So if you don’t have a small can, know that it’s possible to make a home with a larger can.
Things you will need:
(Feel free to modify with the materials that you have on hand.)
Milk carton or soup can
Construction paper (printer paper, non-toxic colored paper, recycled paper, whatever you have on hand)
Tape
Straws
Cardboard tubes: toilet paper or paper towel (optional)
Corrugated cardboard (optional)
Scissors
Glue
Stickers (optional)
Twine
Pens, crayons, or other decorating medium (optional)
Advertisements
If this is a kid’s project you’re setting up for, cut all rolled paper and straws to the length that fits from the back of the soup can to the front.
You can even prep other materials for your bee house. If you have scrap blocks of wood, you can several holes through the block.
I don’t know what you have in surplus in your craft room. But I have many wine corks that have been waiting for just the right project. When I get a free afternoon, I’ll make an adult version with rolled cardboard, drilled scrap wood blocks, and my collection of wine corks that will also be drilled.
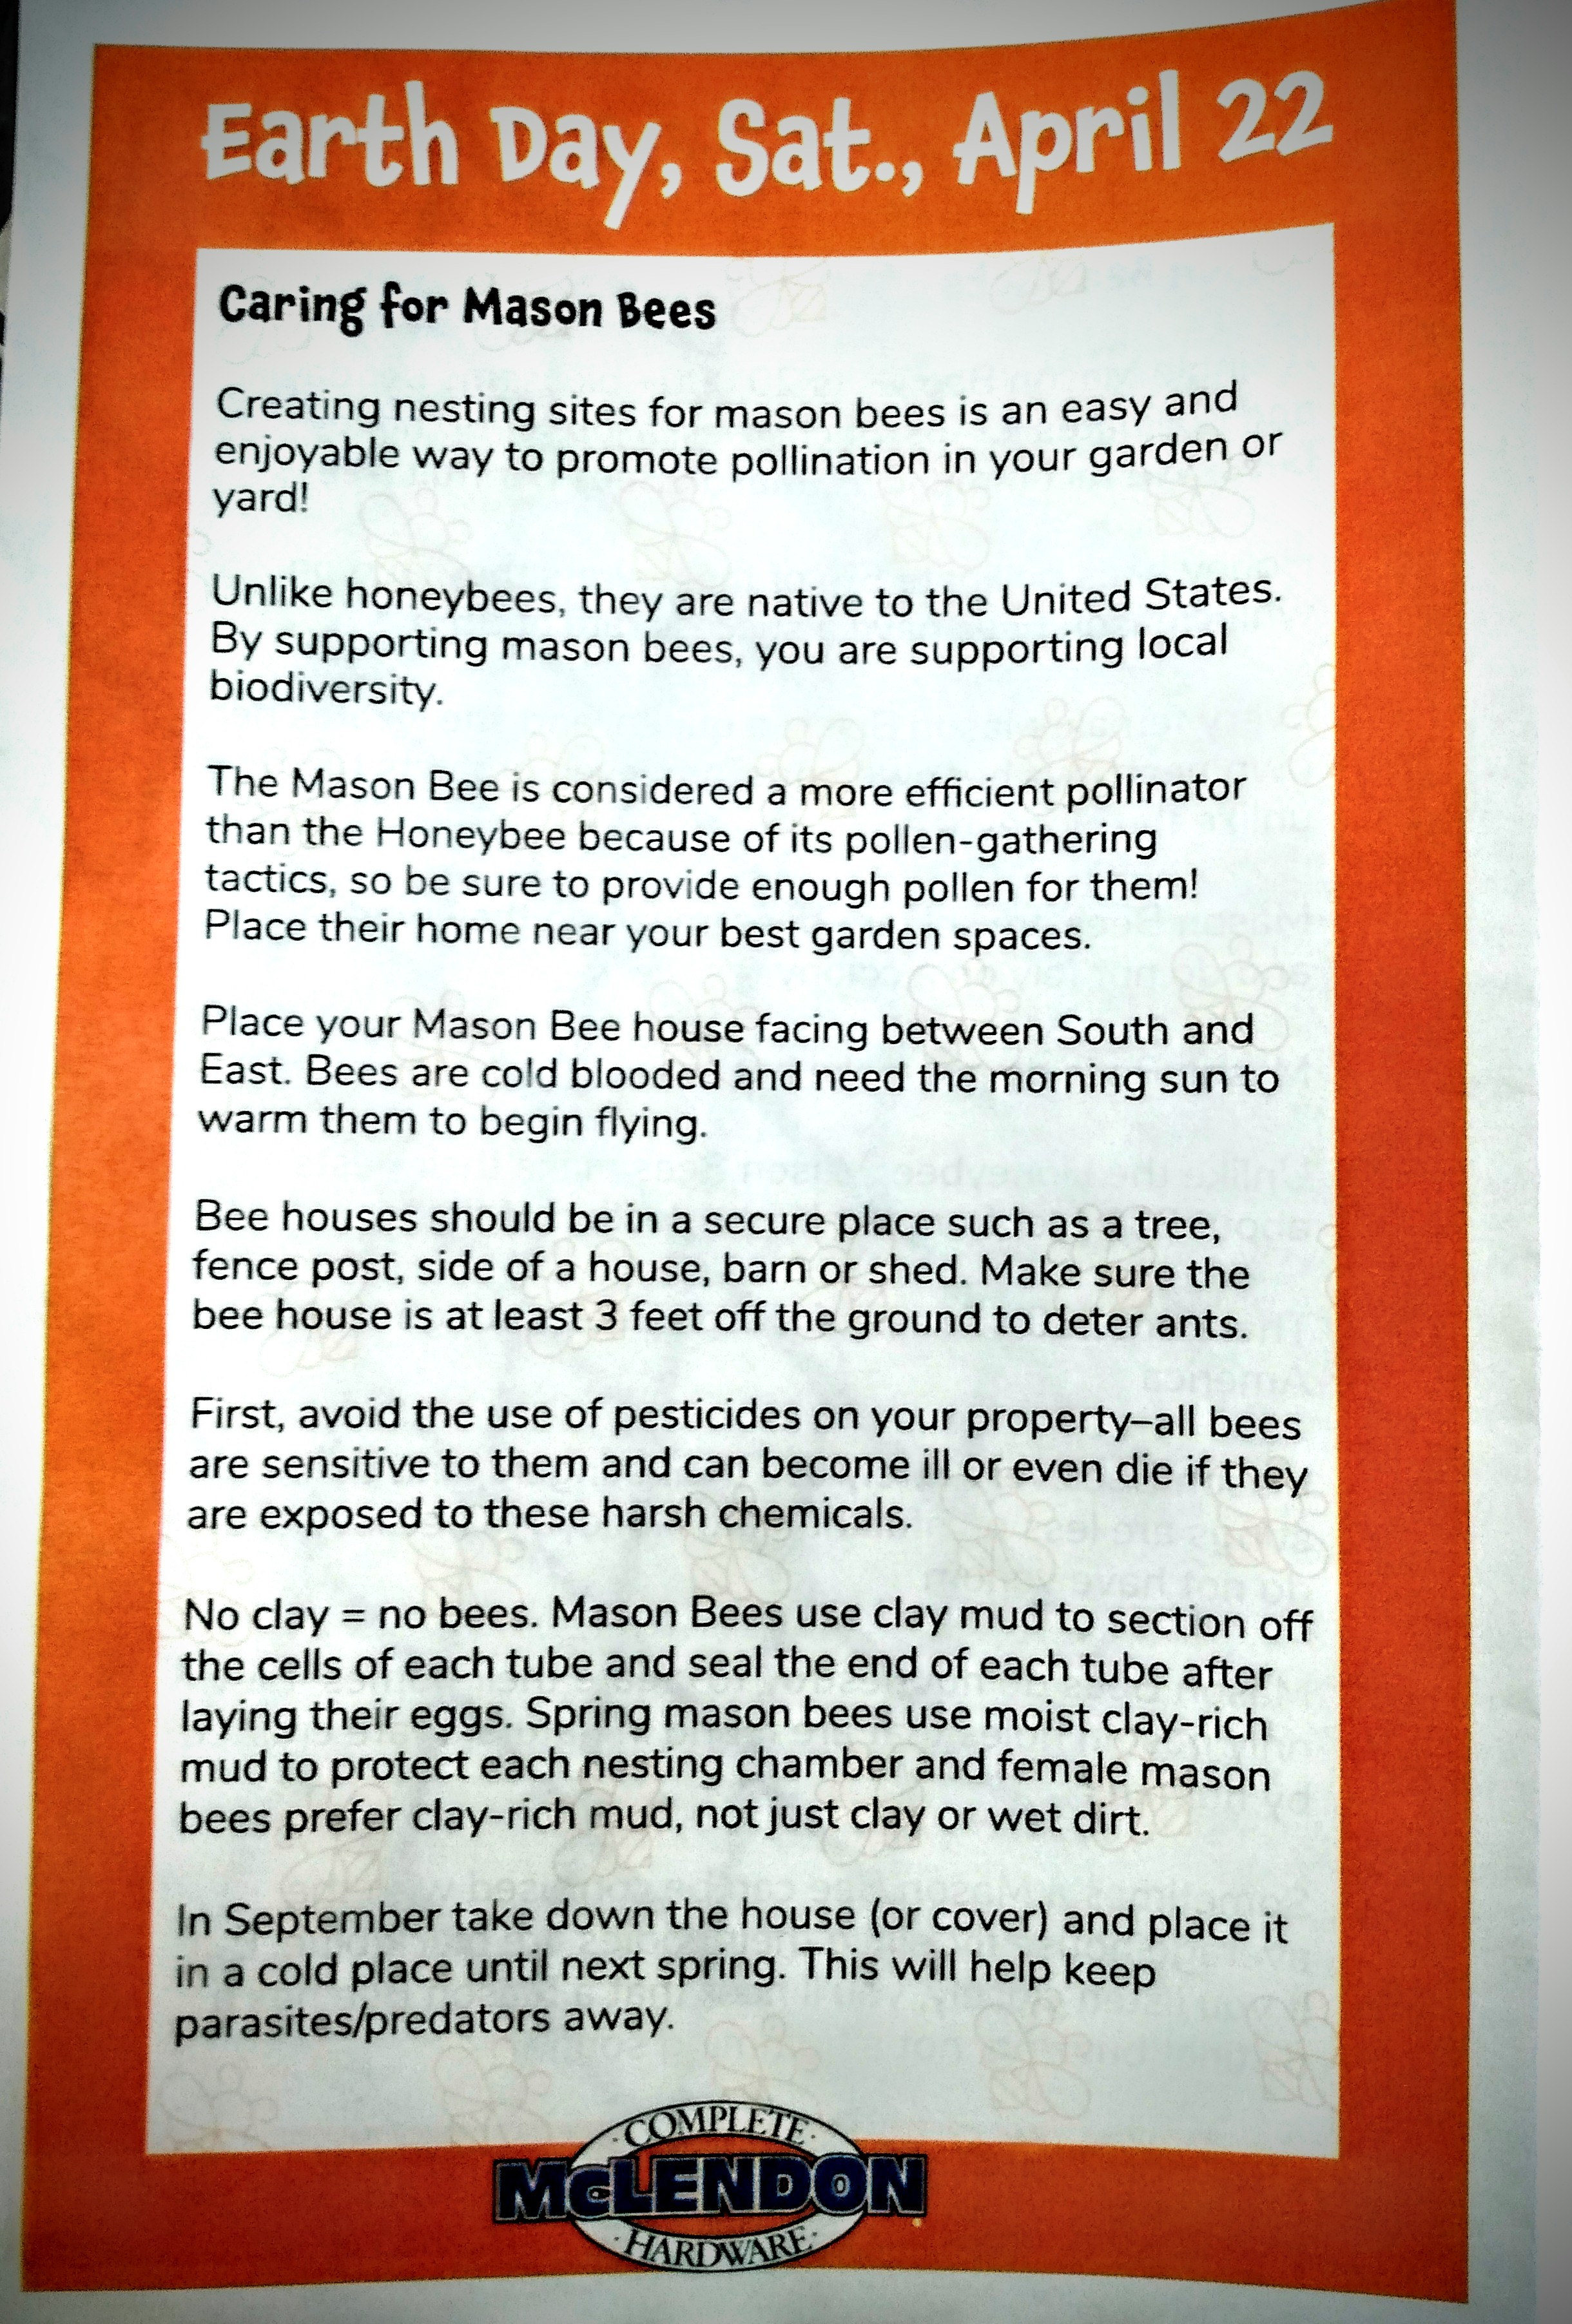
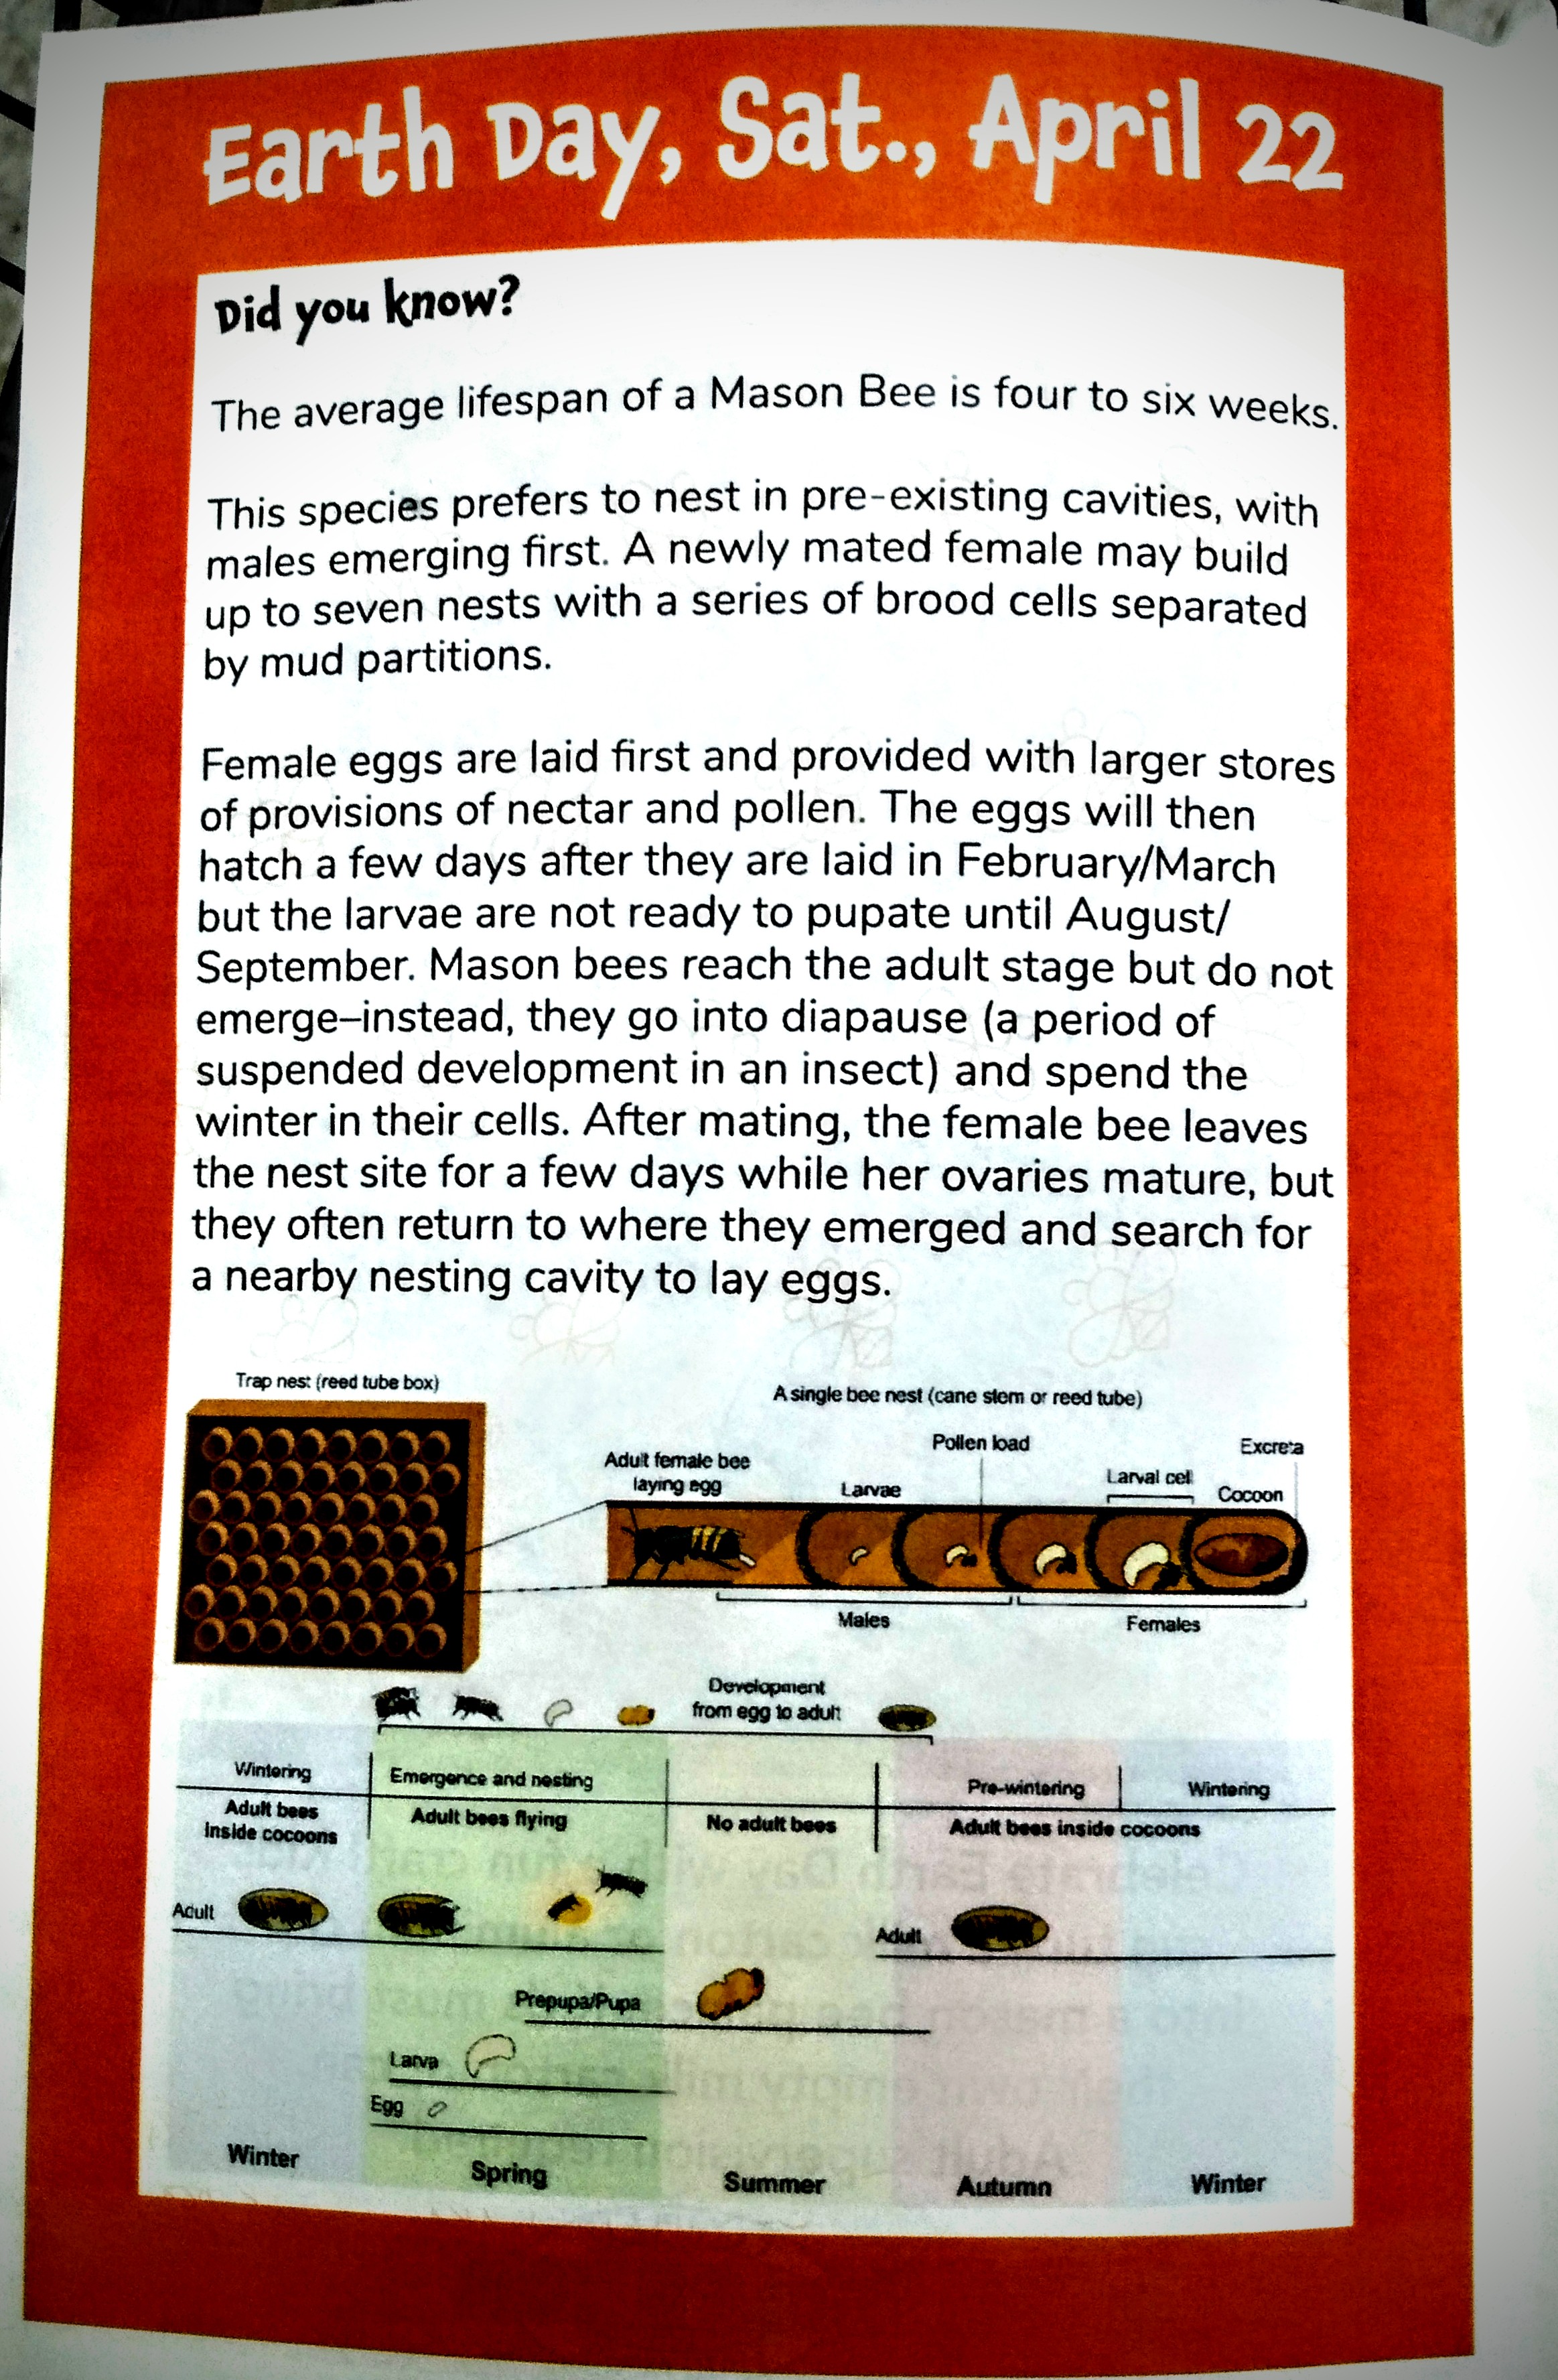
Here are some additional bits of information about mason bees, if you are unfamiliar with them.
Here is another resource to get you started on your path for creating a home for mason bees. If you want to buy mason bees to start your bee colony, I found this site which is still selling until May 22, 2023. They have a bee info page that can instruct you in how to care for mason bees to make sure that they remain healthy and happy.
If you’ve watched the movie The Pollinators (2020), then you understand the need to help support our local pollinating community. If you haven’t seen this documentary yet, it’s worth the time to understand what it going on with the bee population in the United States. And if it’s happening here, it’s very likely happening in other places.
Last year (2022) was a bad growing season in the Pacific Northwest (PNW). To this day I still believe with my whole heart that the bees were what made my garden successful, when others in my local community found only hardship. So for my gratitude, I already planned on adding more flowers to my garden as well as being a more hospitable home for my pollinators. With that being said, I will leave you with the pictures of my family. And once the weather clears, I’m going to examine closely where our best place of hanging this mason bee home is going to go.
Happy Earth Day!
Processing…
Success! You're on the list.
Whoops! There was an error and we couldn't process your subscription. Please reload the page and try again.
I won’t even say what else comes with this season. Let’s just say that as a mom of three young children, I’m fully aware of what the change of season means. And this past week, that came and knocked the energy out of me. Shoot I didn’t know I had any more energy to be knocked out! I thought my kiddos drained it from me to fuel their never ending supply of energy.
And yet, I was so grateful to have this soup already canned up and ready to go in my pantry. The chicken stock I make, I add antiviral herbs to it. Let me just say that Lemon Balm is my new favorite antiviral herb to cook with! (In a few weeks I’ll share more with you everything I put into my Chicken Stock. You’re going to love it!)
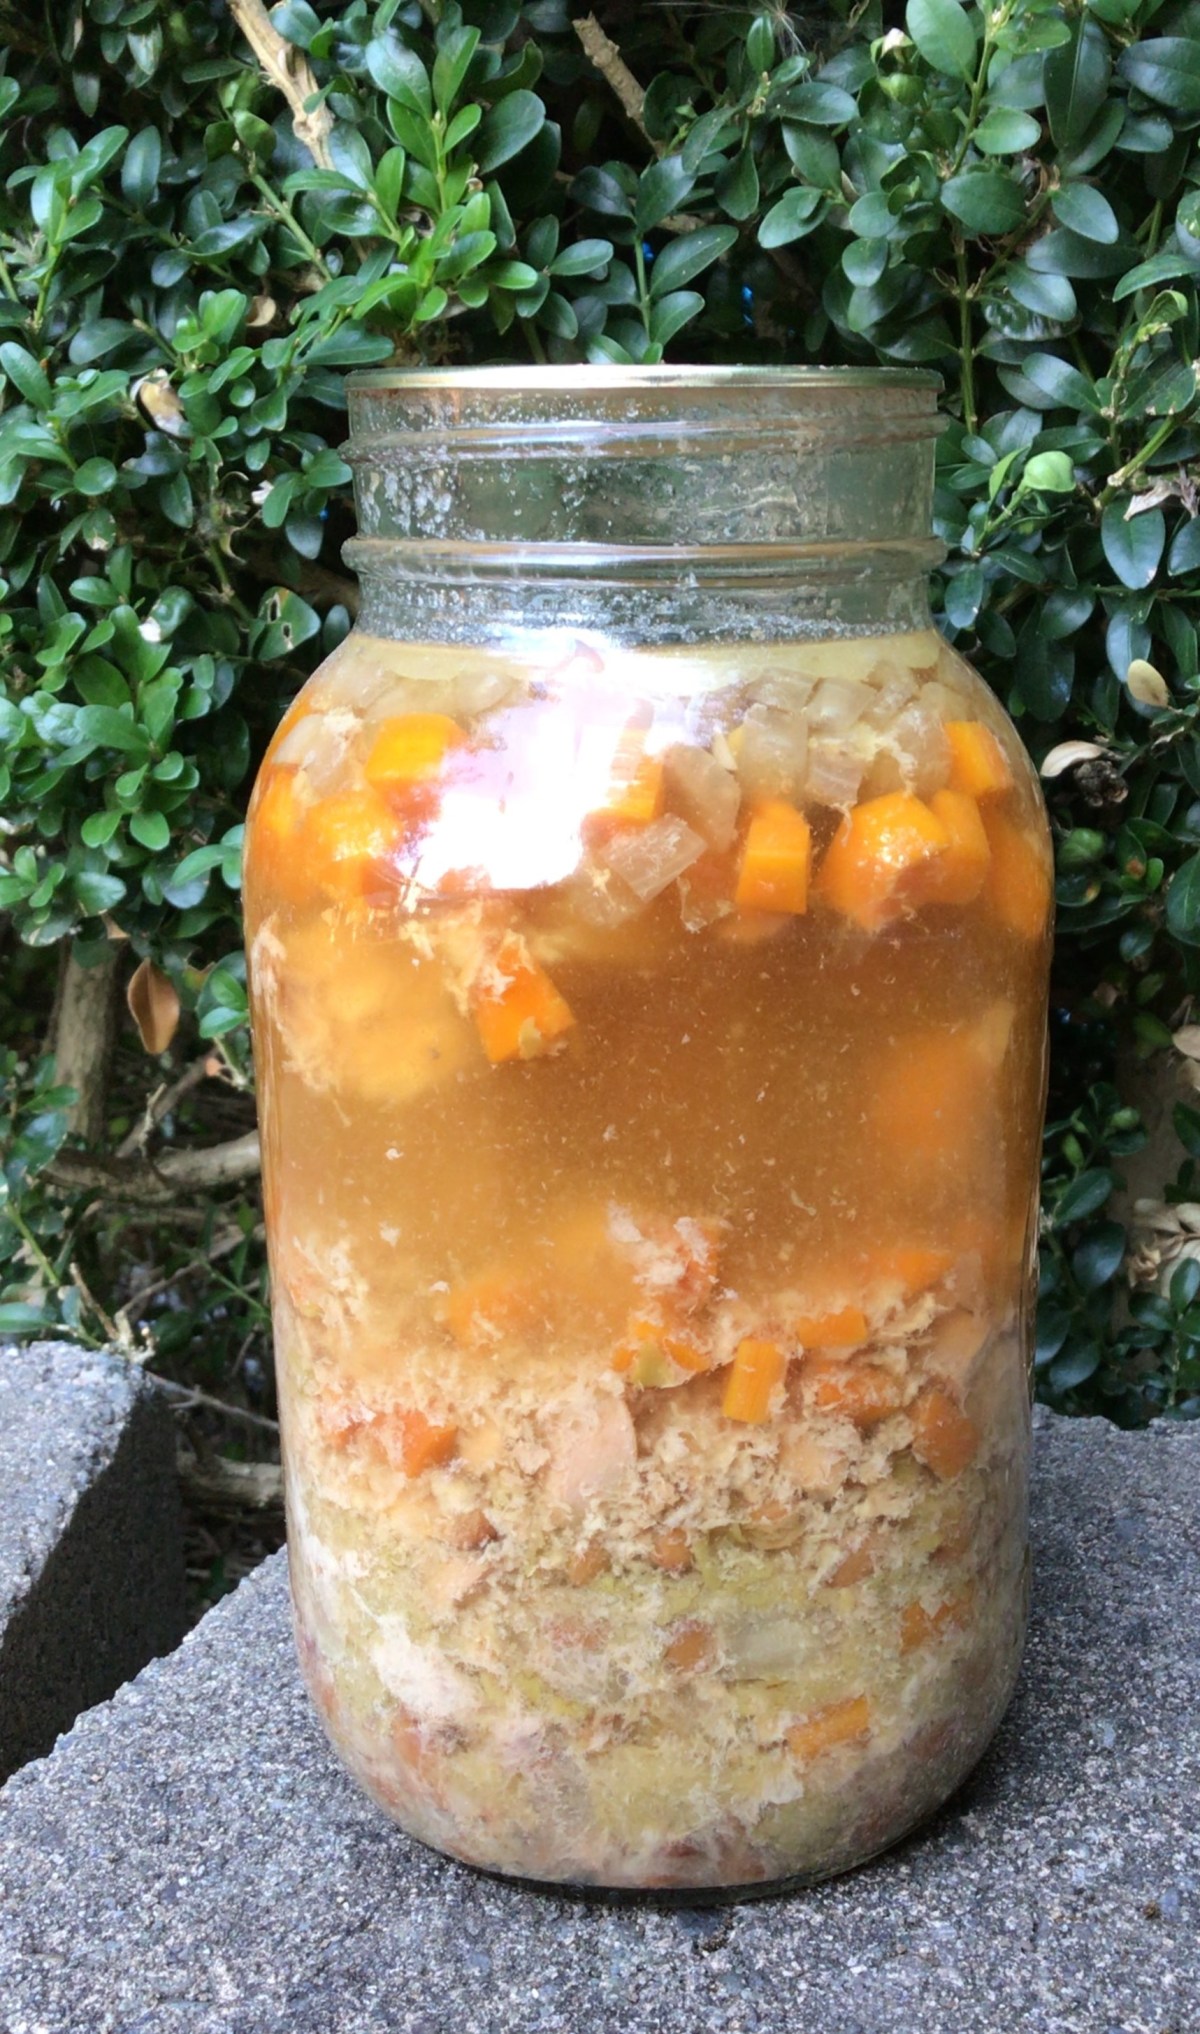
I want to share with you this recipe for Chicken Soup that is perfect for those days where you need healing chicken soup but don’t have the time or energy to make it from scratch. You will absolutely love this because it takes only 5 minutes to warm up–the same amount of time it takes to make condensed soup from the grocery store. BUT it has less ingredients and more immune boosting goodness. And even if your sick days are few and far between, this soup is quicker to heat up than going through a fast food drive through. Plus as the added bonus of being that IT item to use up some leftovers you have sitting in your fridge on the day you crack open this jar of soup.
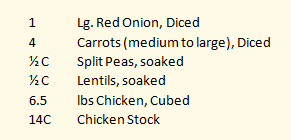
Yields: 7 Quarts of canned soup
Clean your jars and lids.
Prep your ingredients.
Cold pack your chicken, split evenly between all 7 jars.
For each of your ingredients, split evenly between all 7 jars. Start with the larger cut ingredients and end with the smaller peas and lentils.
(It’s easier to shake the smaller ingredients down into the cracks of larger ingredients than to shove the larger ones in on the smaller.)
Fill each of the Quart size jars with about 2 cups of chicken stock.
If you have Kosher or Sea Salt, you can season your soup now. Otherwise, do not put in your table salt or iodized salt. You will season your soup when you open you jar before serving.
Clean the rims of your jars with vinegar and then place lids and rings, finger tight.
Prepare your pressure canner.
Follow your canner’s directions for the correct process of canning with your canner.
For example, I am Sea Level – 1,000 foot elevation so I can the Chicken Soup with 10 lbs of pressure for 90 minutes in my weighted canner.
Once time is complete, turn off the heat and let your canner naturally release pressure.
When you can remove your lid, let the cans sit for an additional 10 minutes before removing them from the canner.
Allow your jars to sit 12-24 hours to seal. Then remove the rings and clean your jars before storing.
With new lids preserving your canned goods for up to 18 months, you have plenty of shelf life for this soup.
There are many options you have for this Chicken Soup.
You can season it and eat as is.
If you have left over rice or noodles in your fridge you can add those ingredients and still have rice and chicken or chicken noodle soup that is ready to eat with a 5 minute warm up on your stove.
With adding a thickening agent (slurry or corn starch) you can turn this into chicken and dumplings or a pot pie filling.
Maybe you have other small amounts of leftover meat, like Italian Sausage. You can use this meat to bulk up the soup, add some kale and parmesan and have a Tuscan style soup.
Or maybe you’re looking for something Latin in flavor. Grab some tortilla strips, grated jack cheese and add in Latin American seasonings and you can have Tortilla soup.
These ideas are a far cry from being authentic cultural cuisines. However I want to give you a few ideas on how you can turn one of your canned soups into a blank slate for some variety.
Advertisements
I know a lot of us really do not have time to prep meals for our families. In fact “meal prep” might have a double four letter word effect in your ears. And that’s okay. For roughly the same time it would take me to cook a soup from scratch for my family, I can make 7 meals that I can crack open and serve dinner in less time than it is for me to go through a drive through. And it’s healthier for us.
To heat up this dinner in 5 minutes, this is all I do:
Grab my jar from the pantry.
Grab my soup pot. And turn my burner on high.
Open the jar and pour the soup into the pot.
Fill the jar with Water and pour into the pot.
Put the jar in the dishwasher and set the table.
Taste the soup to make sure it’s seasoned the way I want it. (Add salt, because I usually only have table salt readily available, so it got canned without salt.)
And it’s dinner time.
If you have a college student who’s coming up on Mid Terms or Finals, this is perfect for them! Often times they’re up late and find themselves hungry after the cafeteria is already closed. This is something they can cook from their dorm room with a microwave or hot plate and have the brain food that they need. Or maybe they’ve caught a cold and need a little mama’s love in the form of soup. This is super convenient and perfect for a care package.
Advertisements
Looking for a gift idea for this Holiday Season?
This is soup is perfect for the new mother getting use to having baby at home, an elderly family member who retired their pots and pans, someone who is an avid camper or loves cooking by camp fire, or anyone else who can benefit from a quick home cooked meal without all the fuss.
Maybe you’re the type of person who loves gifting food to a neighbor, friend, or family when they become ill. Here is a quick way of gifting all that healthy goodness without your schedule batting an eye.
I highly recommend this recipe for everyone!
Do you need another gift idea?
This one is personal and doesn’t require you to have a master’s degree in art to make!
Here are some supplies that you will need:
Canvas
Paint
Paintbrush
Clear Acrylic Spray
Chalk pen/crayon, Paint pen, Pastel, or like craft item you can write with
(Optional) Sponge, Paper towel, Napkin, or Tissue
(Optional) Embellishments such as pre-cut vinyl design
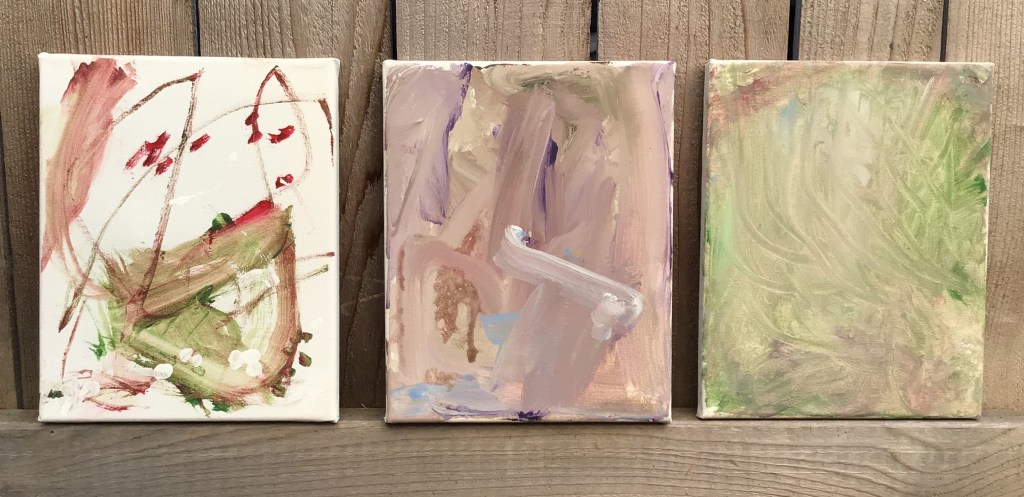
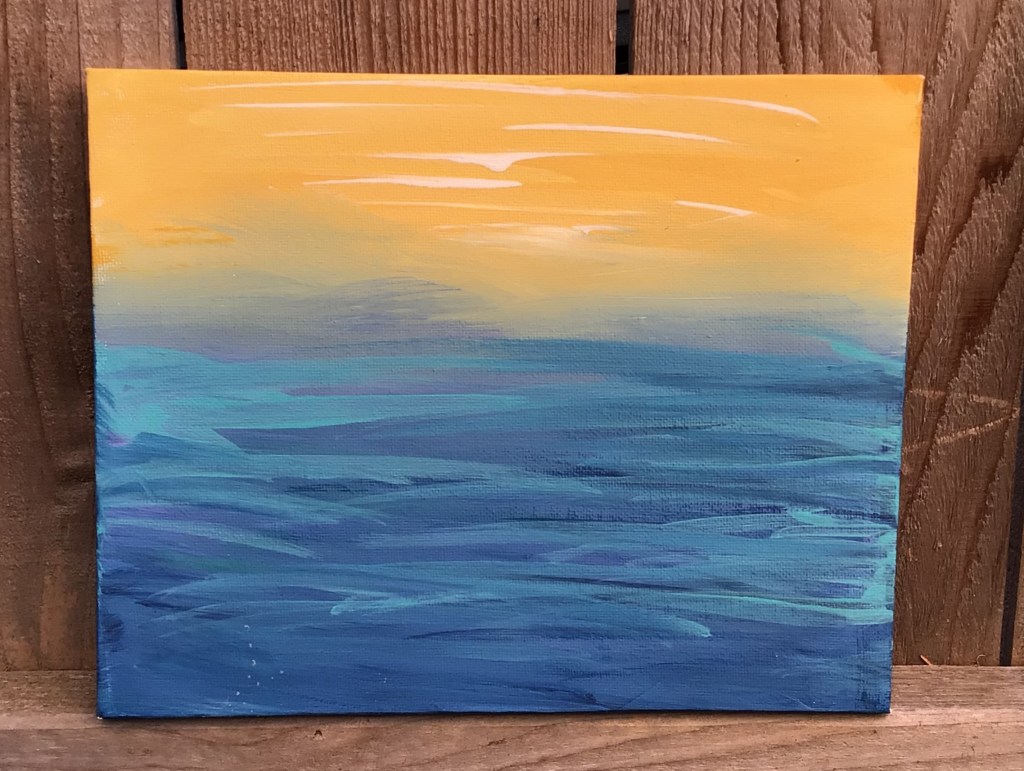
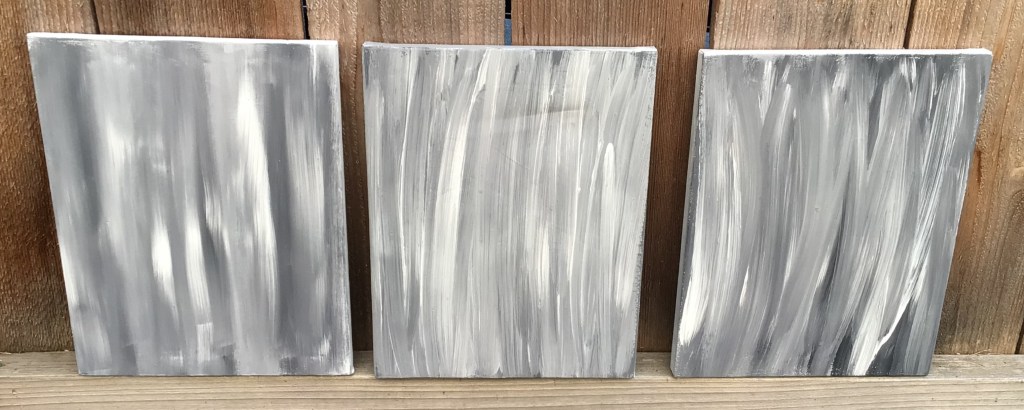
Paint a design on your canvas. You can do whatever design you would like. Here are some examples of canvases that I already have on hand. There are the canvases that my boys made 3 years ago.
And these are the ones that I have in the prepped stage for various projects that I have in the works. You can use coordinating colors, monochromatic colors, are shades for an abstract scene.
Let your canvas dry.
Spray your canvas with Clear Acrylic Spray and let dry. This step is important, because accidents happen and sometimes you want to “erase” a mistake. I’m a phonetic speller and sometimes I just get a word wrong. No worries. By having the acrylic spray dried before you start writing with your crafting pen of choice, you have the option of wiping away the mistake with a wet cloth. The only writing medium that gets to be a bit tricky is acrylic pens. That one you may not find having an “erasing” quality. Chalk pens and most pastels will generally work for excessive editing.
With your writing medium of choice write your message, series of quotes, words of encouragement, or whatever you’re inspired to say. When I made these gifts for nieces and nephews, it took about 7 quotes that I pulled from online to fill the 8×10 canvas with medium small print from top to bottom. You can write as large or small as you would like. Just be aware that the writing medium you choose to use will help you decide how small you are able to write. I used a chalk crayon that had a relatively large nib, so I wrote as small as I could and the words were as tall as the width of my pinky.
Advertisements
Decide if you would like to leave your writing clear and readable or if you would like to smudge the words to make an added texture on top of the painted design that you made. This choice is perfect for the people who believe that their handwriting isn’t pretty. By smudging your writing, you remove the uneven, shaky, or other characteristics of your handwriting that you may be self conscious of. If you choose to smudge, I recommend printing out a copy of your message that you can give with your gift, so the recipient has the opportunity to read the love that you wrote for them. For direction of smudging, that is completely up to your eye. I personally like smudging my work from left to right because I love using horizontal strokes when I paint. I do have some pieces that the strokes are vertical and so my esthetic is to smudge vertical with those, so the “text” doesn’t compete with the flow. But you could choose to smudge diagonally, circular, zigzag… each direction you go will give a different feel to your piece.
Once you are done writing and/or smudging spray your canvas with the Clear Acrylic Spray again. This is going to be a critical step for you. If you chose to smudge your “text”, the spray will prevent further smudging. If you want to add vinyl or HTV on top of your art, this spray is going to anchor your vinyl down. I’ve tried applying vinyl and HTV straight on a painted canvas and both have peeled off, taking paint with it. But every time that I’ve used the Acrylic Spray, vinyl and HTV both stay on the canvas perfectly.
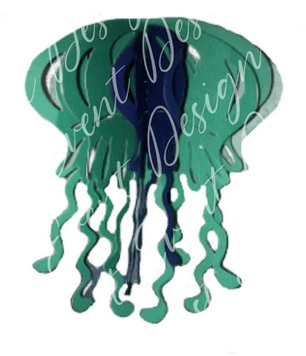
Embellish your gift. Your options are endless at this point. You can choose to make something and personal with just adding your recipient’s name. You can add scrapbooking embellishments with hot glue to add some glam or character. You could pray a frame with a metallic paint and make a modern framed art. Or perhaps you want to do four panels and keep them frameless. And then there’s always the option making a 3D piece using other crafting techniques, such as this.
If you find that you are on a budget this Holiday season, this is a perfect gift option for you. We are in a time in history where people need to hear how much they are loved and valued. So when you can poor into another person and share with them a hope of a future with them, it can hold profound meaning in their life right now. I have never before seen so many people facing suicide and thoughts of hopelessness like I’ve seen in the last few years. Sharing with someone how much they mean to you is something that you will never regret. And you never know that it might be the one thing that offers them hope in a time where it seems like everything is so wrong.
What is inspiring you right now? Do you have ideas sparking in your mind?
Right now I’m inspired with many of the changes that come with fall. This is the season that always has inspired me. In fact, my boys found a whole acorn that I so want to use as a piece of 3D art. I’m hoping I can find some more and have more than a single nut to work with!
Please comment below with what you want to make and even send me some pictures. I would love to see what creativity jumps to life in you!
Files used today
Spring Triple Panel comes with all you see here. Or you can select individual elements.
Lately I’ve been very interested in the Boho style of event designing. A lot of event designers and coordinators tend to gravitate toward the fantasy of rich and fancy feeling decor. There is nothing wrong with that. I gravitate toward that. There’s just something about pretty sparkly things grabbing our attention.
Even when I worked for a decorating company, there was this huge gravitation toward bringing the Boho brides nearer to the glittery and sparkly end of design. I know why there is that nudging toward that direction. But I’m not going to speak ill of other businesses. I just want to take this moment to see and recognize those brides, and other event organizers and celebrants, who want to stay more toward the end of the spectrum of the simplistic and natural look.
This post is for you!
What I want to focus on today are a couple of floral options that are different than what might be proposed to you when you talk with a florist; succulents and preserved wild or garden flowers.
I don’t know if you’ve taken the moment to look at all different colors available in succulents. They are definitely a wide spectrum that diverges from the cactuses and green succulents that your mind naturally gravitates toward.
The best part about succulents, especially if you’re DIY as much as you can for your wedding, is that you can get these in advance and arrange your centerpieces weeks in advance. This is true, even in the middle of winter!
The one thing that you want to pay attention to is the little amount of care that you need to give them. But these are not going to wither or die on you when you look at them funny. They just need to be kept in soil designed for succulents and give them a little water every now and then.
Tip1: Succulents loved being watered from below. So when watering them, place their dish (with drain holes) in a dish of water and give them a few hours to drink as much as they want. They have enough water when you see that the soil on top has been touched by water, not dry to touch.
Tip 2: If you see the petals start to have a wrinkled appearance, they are underwater. Make sure you soak them in a dish of water. It may take a little time. But once the succulents have gotten enough hydration they will look plump again and not wrinkled.
The only other thing that you have to pay attention to is how much light they get. Here in the Pacific Northwest, succulents are not about to get too much sunlight. They can be burnt by full sun, depending on your region. But in the couple weeks that you have them before your event, this is not likely going to be an issue.
Advertisements
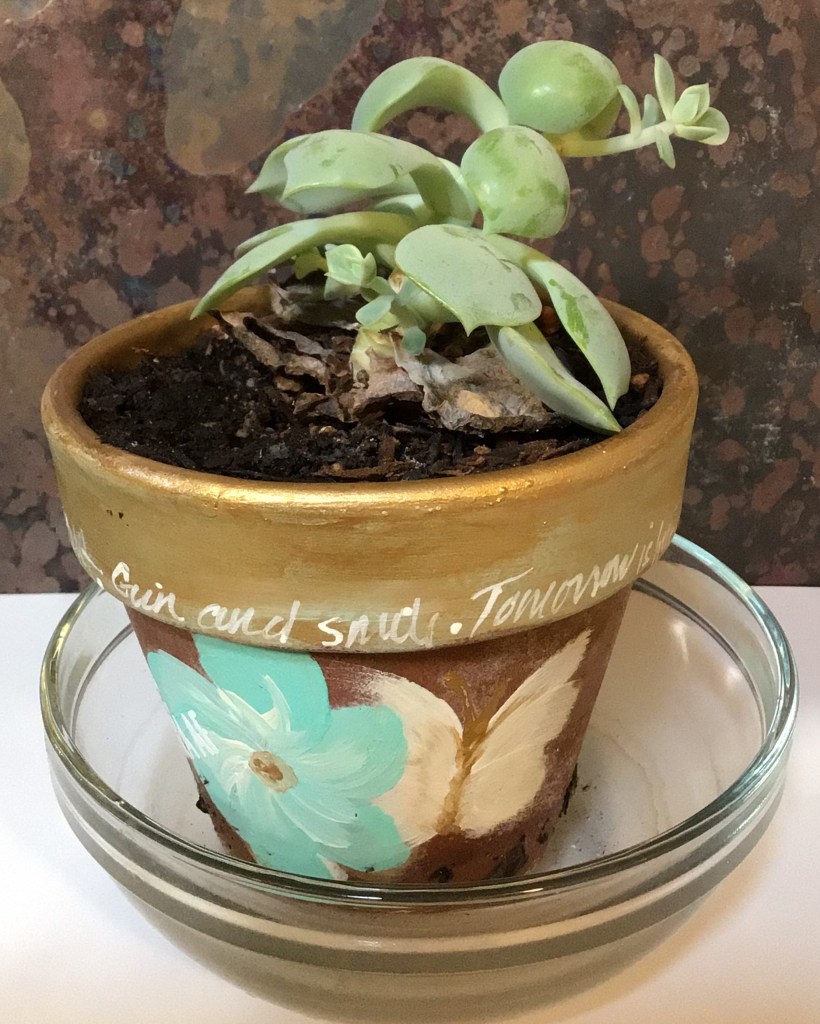
One issue that you might have is when you’re succulent undergoes what looks like a growth spurt.
This example is definitely an exaggeration of what you will see because I’ve had this succulent for well over a year. It started to bolt like this a couple of months after I received it. What happened here is that the window sill (eastward facing) did not receive enough light. So the plant grew to reach more sunlight.
Your succulents will stay small when they have enough light. So if you see this, or you notice that there is some growth that is starting, then you want to find your succelent(s) a sunnier location.
If you catch the growth quick enough, you can trim off the growth, and return your succulent back to the smaller size.
Take a length of dental floss, wrap it around where you want to trim and pull it tight. You can use scissors, but it will apply pressure from two points to cut. If you use thread or floss, you can apply even pressure around the plant. Also if have a cluster flower of a succulent, you can fit the floss in between the petals and top the succulent without damaging the rest of the plant.
The clipping you can then put in a new container with soil and it will propagate for you.
I put the topped succulent in this cup with water with another topped clipping that I’m waiting on soil for. It’s okay to put into water, but you want to get clippings into soil as soon as possible.
If you are saving money by propagating your own succulents from bought succulents, make sure that you give yourself enough time to let new buds grow. It doesn’t happen overnight. If you don’t have enough time, your succulents will look bald and not so happy.
Here is another What-Not-To-Do
This succulent was originally small like the first picture of succulents I showed you in this section. This one also grew to reach for more light. I should have trimmed this when it first started to grow. Had I done that, it would have remained small and cute. Instead, it changed its shape and spread. But what you can learn from this is what it will look like at the spot where you clip back the top your succulent. There is a small bud that you see on the top right. That grew in about two weeks after trimming. On the bottom left you see another bud grow in where I snapped off some of the larger leaves to practice propagation techniques that I’ve seen on FB reels.
If you are interested in looking to propagate succulents for your event, make sure you give yourself enough time to do so. You will want a couple of months to do this DIY. Talk with some local greenhouses with growers who have experience with succulents. Also there are FB groups dedicated to succulents. Join a group or two and learn from those who are succulent whisperers. There is a wealth of good viable information there.
I readily admit that I am not an expert. And there is a world of information available. Just do not take your advice from clips and reels on FB, Tick Tock, or anywhere else. I tried propagating leaves in a plastic bag, through a slit in paper to suspend over water, and directly in water. None of these have worked for me and I am most certainly a novice at propagating succulents. If you’re a novice, I suspect that these reel methods are not going to lead you to success either. (With the leaves, I tried about a dozen and not a single one grew. This is reason why I have little reason to believe these techniques work. Not working the numbers paid off. If I get a success rate of 1 out of 10 attempts, I call it a viable option.)
One other walking away point I want to draw your attention to, is take notice of the terra cotta pot decorations on my pots. These were painted on with acrylic paint and have stayed on the pots over a year later. So it will not flake off anything else. And this is an excellent way of incorporating your event colors. You can create endless possibilities with your design. Whether you go with feather like swirls, dots to simulate lace, stripes, or even using a stencil from any store’s craft department. You can certainly dress up your terra cotta to fit the look you are going for.
I’ve lost count of how many events that I decorated for where I would take home flowers after an event because there was no second life for the floral arrangements after a wedding.
Don’t get me wrong. I LOVED those events because I had pretty flowers to take home and enjoy for a week or two. That is definitely an occupation perk that I’ve enjoyed.
However, at the same time, it has always saddened me a little because I have always wanted people to have more bang for their buck when they are spending good money on a wedding or other event.
So here is where we join two very important passions of mine!
I breathe creativity and decorating. But I also love working in my garden and learning all the old skills of creating home supplements, natural cleaners, and especially new ways of putting food on my table.
The very day that I learned about making a Chive Blossom Vinaigretteis the very same day that I made it.
This is Day One of my Vinaigrette:
My Four year old and I did this together for the very first time and as soon as I saw how this jar looked I immediately thought, “How Beautiful!”
And this was the first, on many ideas that I had:
You can go with sentiments or go all the way with the couple’s monogram, name and wedding date, or even line art that goes with your over all Boho decor.
What I absolutely LOVE about this inspiration is that it’s simple but has so much LIFE after the wedding or event.
For example, this Chive Blossom Vinaigrette will become a salad dressing, meat marinade, or other meal flavor provider in as little as 3 weeks. The total cost for this is just your jar, the chive blossoms, and food vinegar. When you’re looking for cost saving centerpieces, you seriously can’t beat this for bang for your buck!
To do this idea, you will definitely have this be your day of preparation, so have a few hands on deck. You will want to clip your edible flowers, rinse them, and place them in the jars before adding the vinegar.
The reason why I say do this on the day of is because of the process needed to properly turn this into a proper dressing or marinade. It is shelf stable during the whole process, but it needs to be kept in a dark cool place for the 3 weeks of processing. You could also use the jars at the end of the three weeks, when the vinegar takes on a fuchsia/purple appearance. But you want to try to limit the heat and light exposure no matter if you do it at the beginning or end of processing.
Tip 1: This needs to be shaken once a day for the entirety of the three weeks. So you will have a cleaner look at the beginning of the process. At the end of the process, you will have some floating pieces from the flowers. That just naturally happens with daily agitation.
Tip 2: At the end of the 3 weeks, you will need to filter this vinaigrette through a cheese cloth to remove all debris (and rebottle) before you use this as a dressing/marinade.
Maybe puple is not the color that goes well with your Boho design. Here is a list of some other edible flowers that can be used in making your own version of a different vinaigrette. Or you can just put the blossoms of these flowers or others into a jar filled with water.
Nasturtiums
Pansies
Violets
Hostas
Borage
Calendula
French Marigolds
Chrysanthemums
Carnations
Hollyhocks
Sunflowers
Cornflowers
Gladioli
Honeysuckle
Dianthus
Antirrhinum
Tulips
Roses
Lavender
Pea Flowers
Broad Bean Flowers
Onion/Chive Flowers
Brassica Flower Heads
Pak Choi Flowers
Squash Flowers
Dandelions
Daisies
Chamomile Flowers
Red & White Clover Flowers
Chickweed Flowers
WARNING: Make sure that you only use flowers that have NOT had pesticides or herbicides used on them. Whatever has been applied to flowers will enter your body if you eat them or any extract that you make from them.
Advertisements
Flowers as herbs and seasoning have different flavors that they impart. Some have a peppery note to them. The chives that I grow are a garlic chive, so it imparts a garlic flavor without having to fuss with cloves of garlic. I’ve also started working with Lemon Balm (a member of the mint family) which imparts a lemon flavor. So I could have added tiny Lemon Balm leaves in with the chive blossoms. Which now that I think about it, I’m definitely going to add that to my vinaigrette as soon as I post this!
Another thing to keep in mind is that for thousands of years edible flowers and plant leaves have been used for natural medicine. For example, Lemon Balm is great for combating the viruses behind the common cold. So you can give your body the things it needs to keep healthy while adding flavor to your food.
If making a vinaigrette is not something you will use after the wedding (or other event), consider looking into making your own chemical free cleaner. For example, you can still use this mason jar idea and make a kitchen cleaner with lemon or orange slices and peels.
If you’re not looking for a natural cleaner, than even using berries and mint, basil or other leaves in water, is a great of washing your produce before you eat it while borrowing it for a few hours for your event.
There is one more option for Fall and Winter Events when most of the edible flowers are not in season. You can make Pine Syrup or Spruce Tip Syrup. I found this type of syrup interesting because I have spruce widely available around where I live and real Maple Syrup is a luxury on my family’s budget. This can be a pretty centerpiece as well because you use the new growth tips on a spruce tree or pine cones for the Pine Syrup. I’m sure that you can imagine the possibilities for all your holiday parties with this one!
Decorating the Mason Jars
The simplicity of these jars is beautiful all on their own. But maybe you want to dress them up a touch. What can you do to add a little panache?
Paint the jar ring (White, Gold, or other event color)
Apply glitter to the jar ring (after finished spray with a clear coat of paint to keep from leaving a glitter trail)
Use squares of pattern, texture, or fancy cloth on top (held in place by screwing the ring down onto the jar over the fabric)
Decorate the jar itself
Use the jar as a base for a taper candle (with candle holder) to raise the level of the candle above other centerpiece elements
Put your table number on top of the jar
I hope you’re just as excited about these ideas as I am. These are definitely something fresh for existing wedding and party themes. Be free to experiment with using some of your food preparation and preserving techniques the next time you are decorating for your next event!
Files Used In This Project
As a special treat I have a surprise for you! Visit my store and check out Love. Be sure to hang around and see what else is new. Every Monday at least one new SVG is added!
Processing…
Success! You're on the list.
Whoops! There was an error and we couldn't process your subscription. Please reload the page and try again.
The one thing that I love about budget and DIY weddings is that the couples, and their families, look for ways of reusing items after the wedding instead of using disposable items. And this is one thing that everyone can agree on, whether you’re a diehard Earth Day person, living Green, being Frugal, or just getting more bang for your buck.
I’m going to focus on one wedding item that tends to be wasteful or even a financial drain…wedding favors.
There are so many cute ideas out there. I really get it.
Some of them are practical. Like the paper fans on those hot summer outdoor weddings.
But if we’re being honest, how many of those items are really used by your guests after the wedding?
The problem that I see is that all those monogrammed, personalized items really don’t see a life outside of the wedding. The true exceptions are for the family and guests who are truly sentimental.
My husband is one of those sentimental people. I kid you not, he’s the one who collects the paper fans after the wedding and brings them home. His feelings are hurt if the one of the boys plays too rough with one and rips it. And 5 years later I just see a blue fan, but he remembers who wedding it was from and at least five new people he met, and a funny story or two from the reception.
So I want to challenge you to find a way to make your wedding favor do double duty. Or even triple duty!
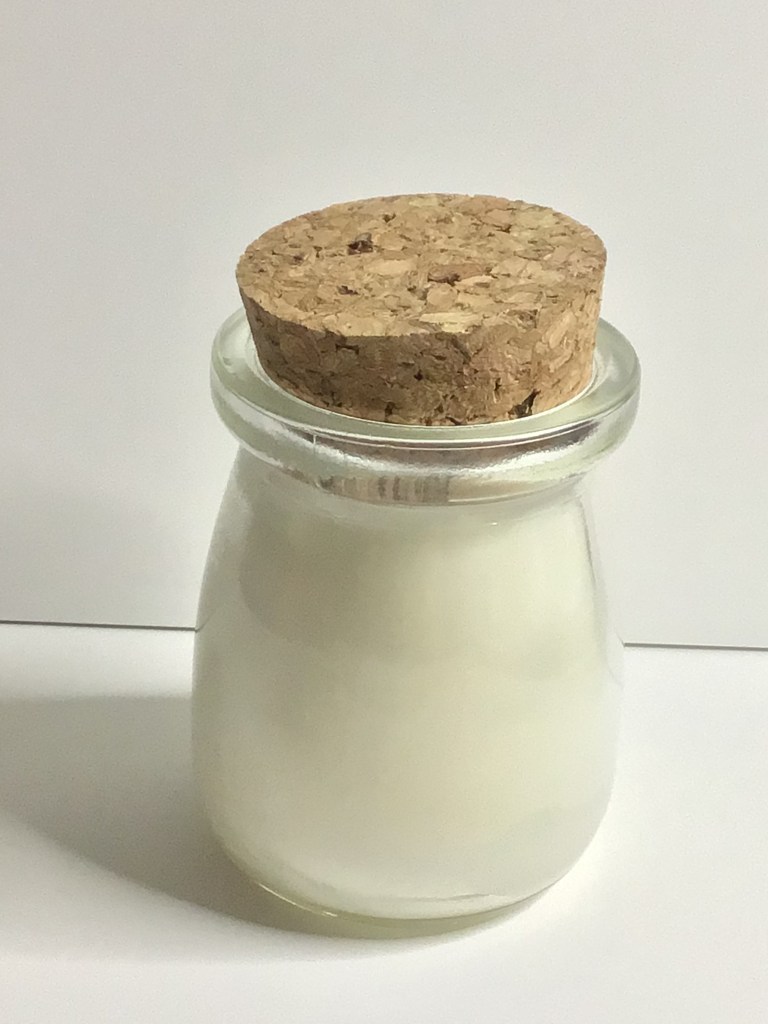
One idea I have for you are little candles that you can purchase at craft fairs and support a local vendor.
Advertisements
Use #1 Wedding Favor
Instead of personalizing these with your names, initials and wedding date, try finding phrases or words that represent your love for each other. Funny phrases work if you’re a funny or prank making couple. When you take away the obvious personalization and go with personalization that your guests can identify with, you automatically guarantee that your guests are going to want to take your favors home.
Use #2 Year Round Gifting
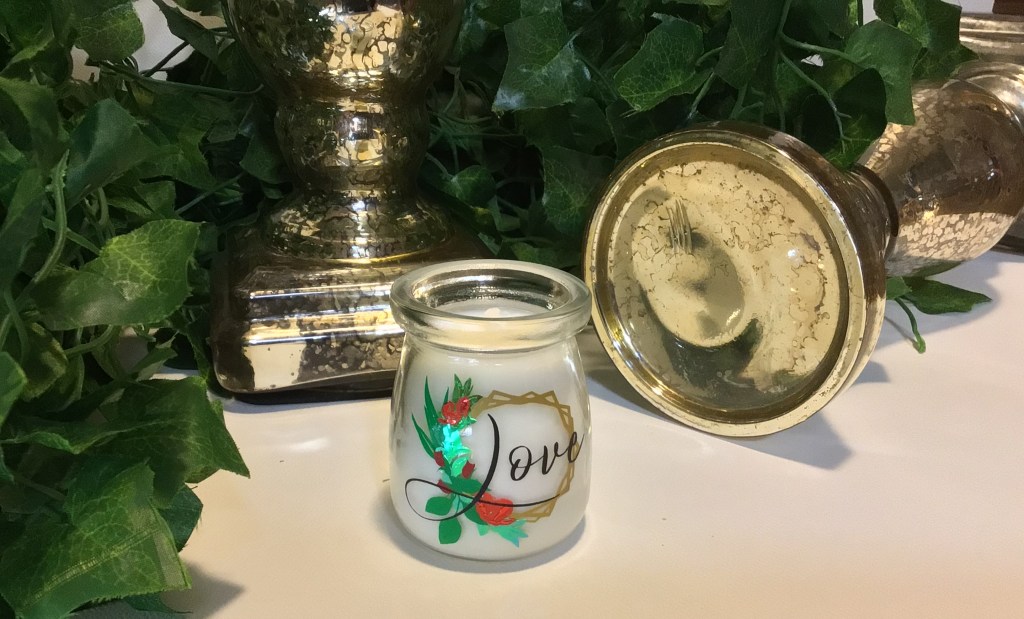
For example, if you’re keeping with the romantic or Boho themes, this floral wreath is absolutly perfect! It adds to your wedding decor, but it’s absolutely something that people will love to decorate their homes with when they leave our reception. Worse case scenario, you take a few home and they are still an appropriate gift to give for birthdays, Valentine’s Day, an add on trinket to another couple or bride, the possibilities are endless.
This decal is 2″ tall. Some of the details were eliminated to due to size. The rose buds you see here are about 3mm tall.
Use #3 Centerpiece Decorations
If you’re thinking about using tea light candles on your reception tables anyway, these are perfect because one purchase price for a favor is fully utilizable for your centerpiece. And if you design it just right, you can combine it with other candles. For example, here’s the same candle with gold mercury glassware.
Advertisements
Use #4 After the Candle is Gone
People love cute little things. Even more than that, they love cute little things that they can easily see using when the contents are gone.
This little jar is perfect for adding:
A new tea light
Coins
Q-tips
Toothpicks
Sink side jewelry holder
Small office supply holder (ex. tacks)
Tooth Fairy jar
Spice holder
And any crafty person can find a million uses for this size of a jar on a craft project
I think I bought several of these scented candles from a Christmas Craft Fair vendor for about $5 each. Yes, there are most certainly wedding favors out there that you can find cheaper per unit. BUT my big question is…
Which favor is going to be memorable for your guests? Pull double or triple duty for your decor? Will be used long after your wedding?
Another bonus to purchasing an item like this from a local vendor is that they are likely to work you a deal if you buy something in bulk from them. It’s something to talk to them about. But even at $5, it really is a great deal.
But the absolutely best thing about this favor is that it will absolutely not end up in the trash as soon as you leave for your honeymoon!
File Used Today, Love Wreath, will go live on Monday! There will also be other variations available. So be sure to check them out in my shop.
Processing…
Success! You're on the list.
Whoops! There was an error and we couldn't process your subscription. Please reload the page and try again.


Leave a comment