Comfort In a Jar

Hello Fall. Hello Soup Season.

I won’t even say what else comes with this season. Let’s just say that as a mom of three young children, I’m fully aware of what the change of season means. And this past week, that came and knocked the energy out of me. Shoot I didn’t know I had any more energy to be knocked out! I thought my kiddos drained it from me to fuel their never ending supply of energy.

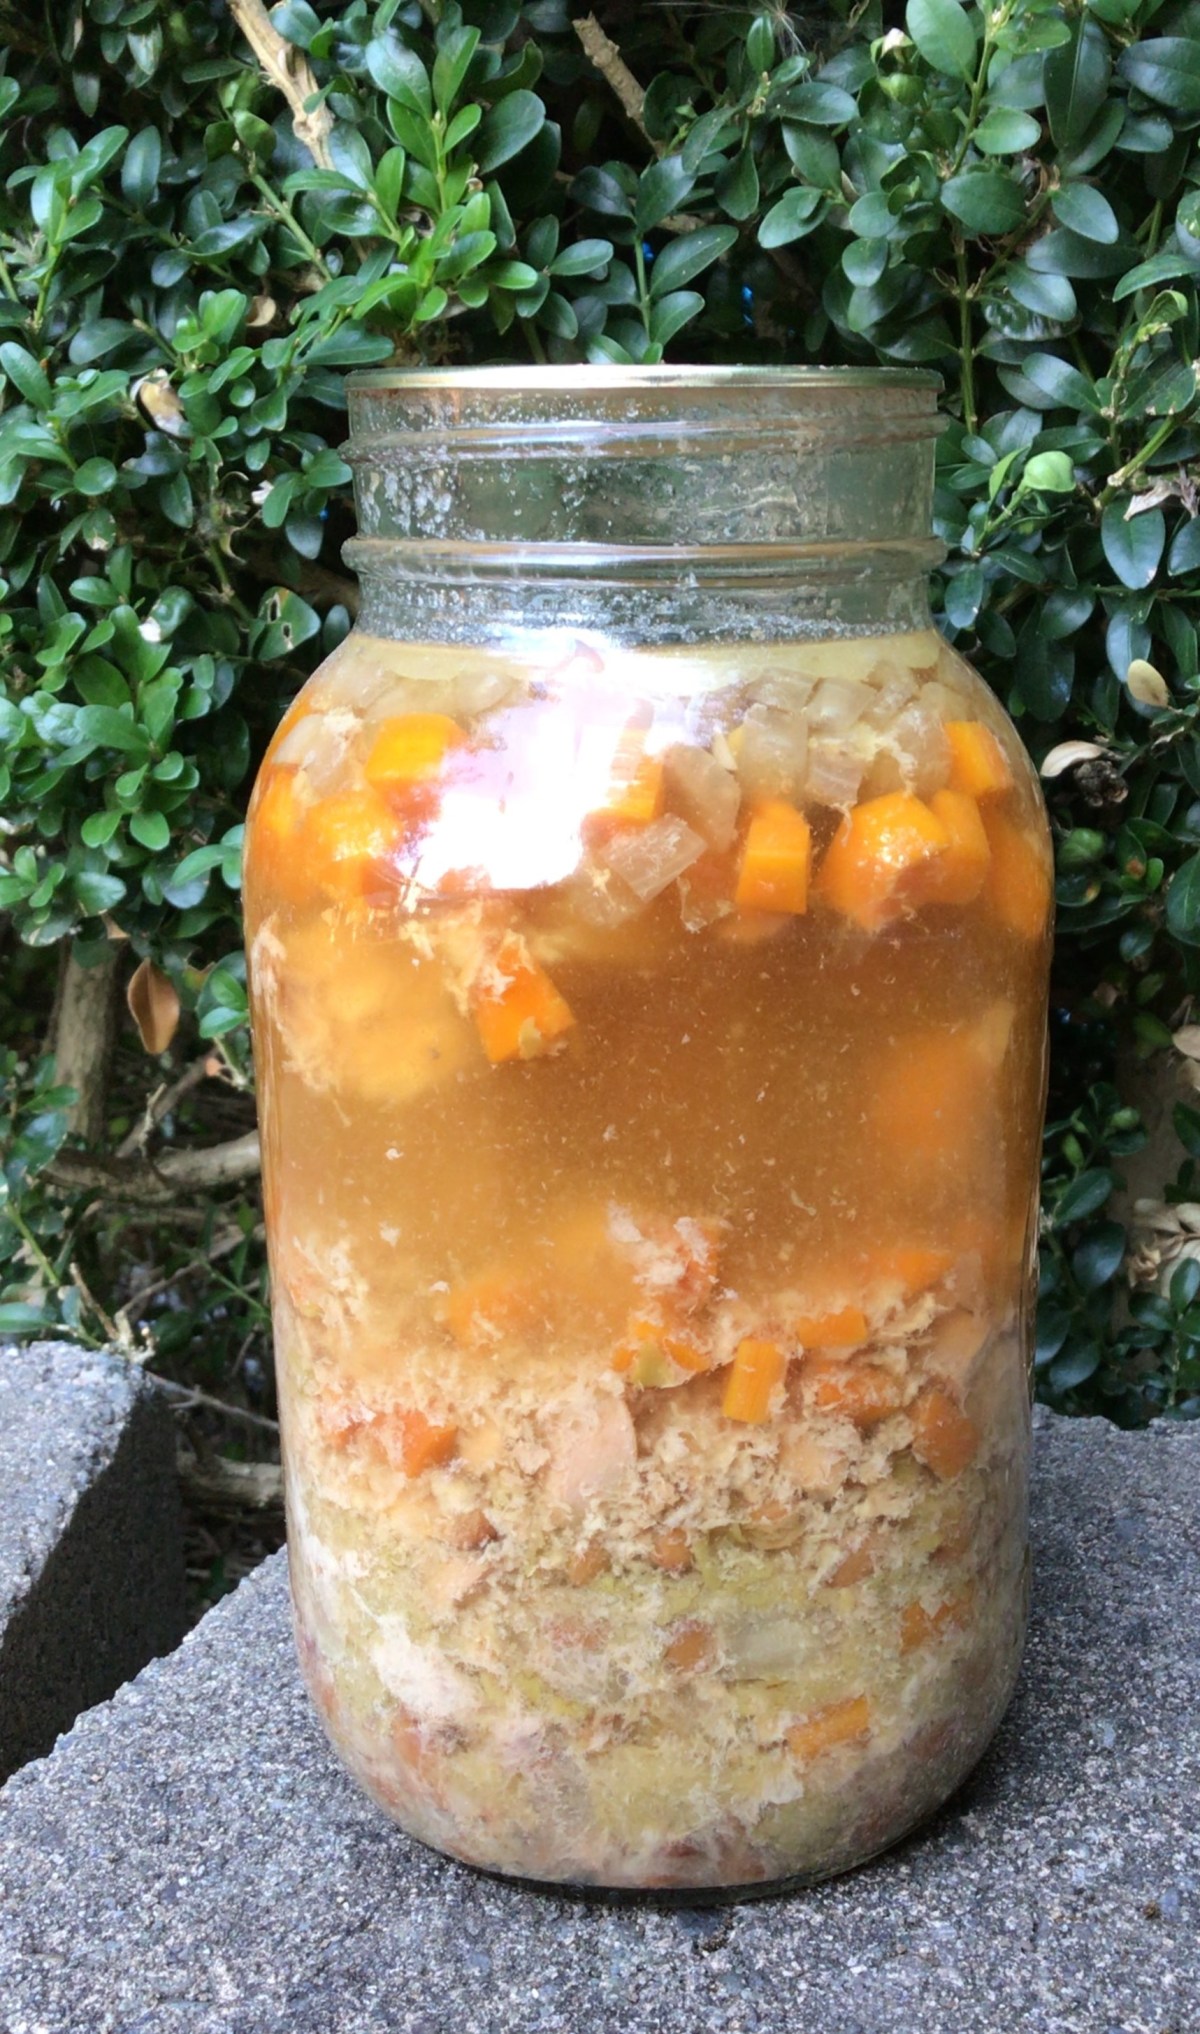
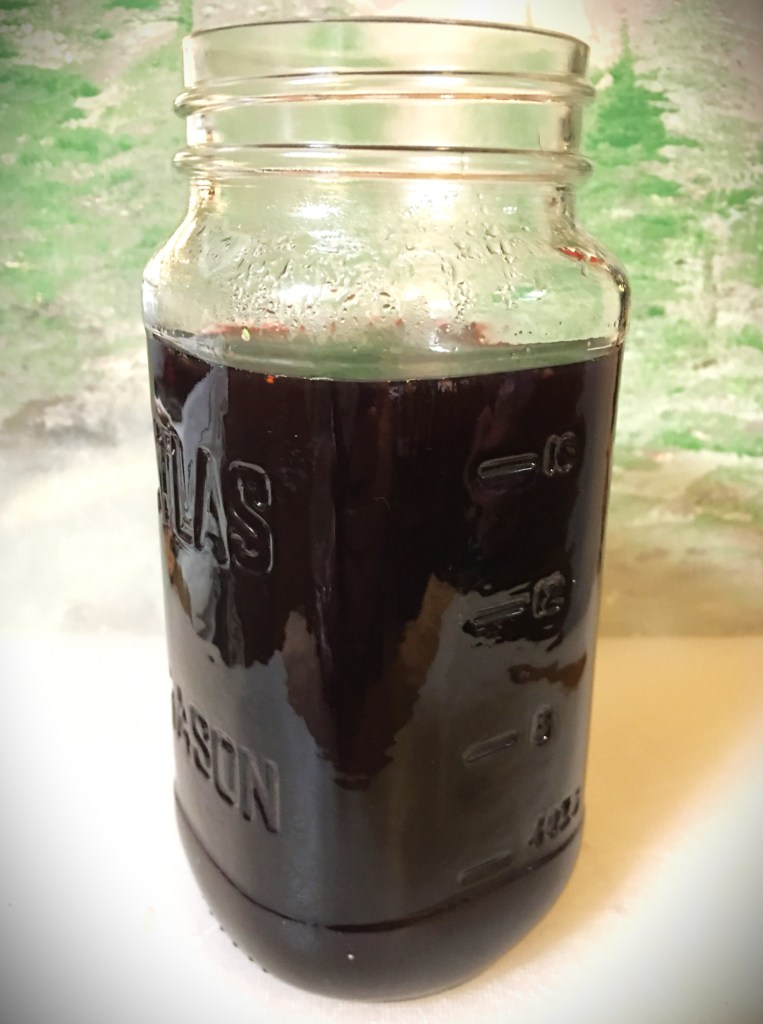
And yet, I was so grateful to have this soup already canned up and ready to go in my pantry. The chicken stock I make, I add antiviral herbs to it. Let me just say that Lemon Balm is my new favorite antiviral herb to cook with! (In a few weeks I’ll share more with you everything I put into my Chicken Stock. You’re going to love it!)

I want to share with you this recipe for Chicken Soup that is perfect for those days where you need healing chicken soup but don’t have the time or energy to make it from scratch. You will absolutely love this because it takes only 5 minutes to warm up–the same amount of time it takes to make condensed soup from the grocery store. BUT it has less ingredients and more immune boosting goodness. And even if your sick days are few and far between, this soup is quicker to heat up than going through a fast food drive through. Plus as the added bonus of being that IT item to use up some leftovers you have sitting in your fridge on the day you crack open this jar of soup.

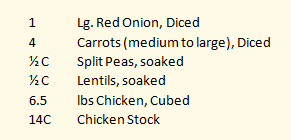
Yields: 7 Quarts of canned soup

  1. Clean your jars and lids.
  2. Prep your ingredients.
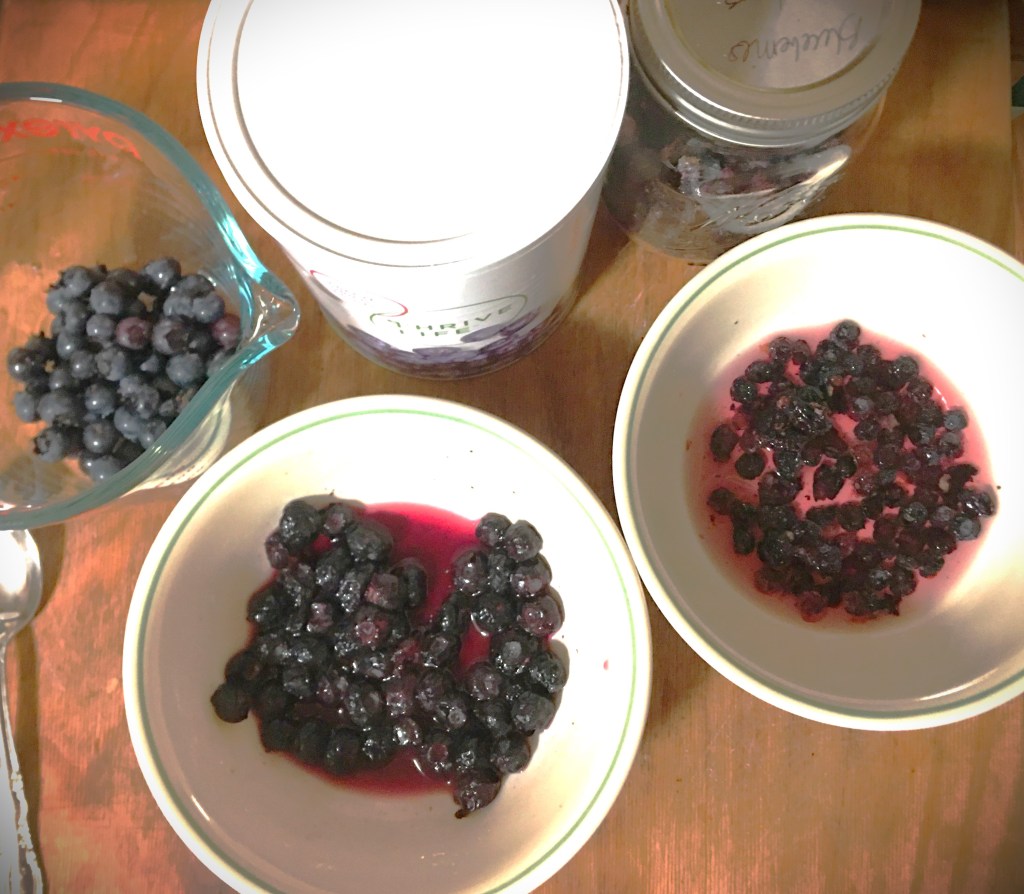
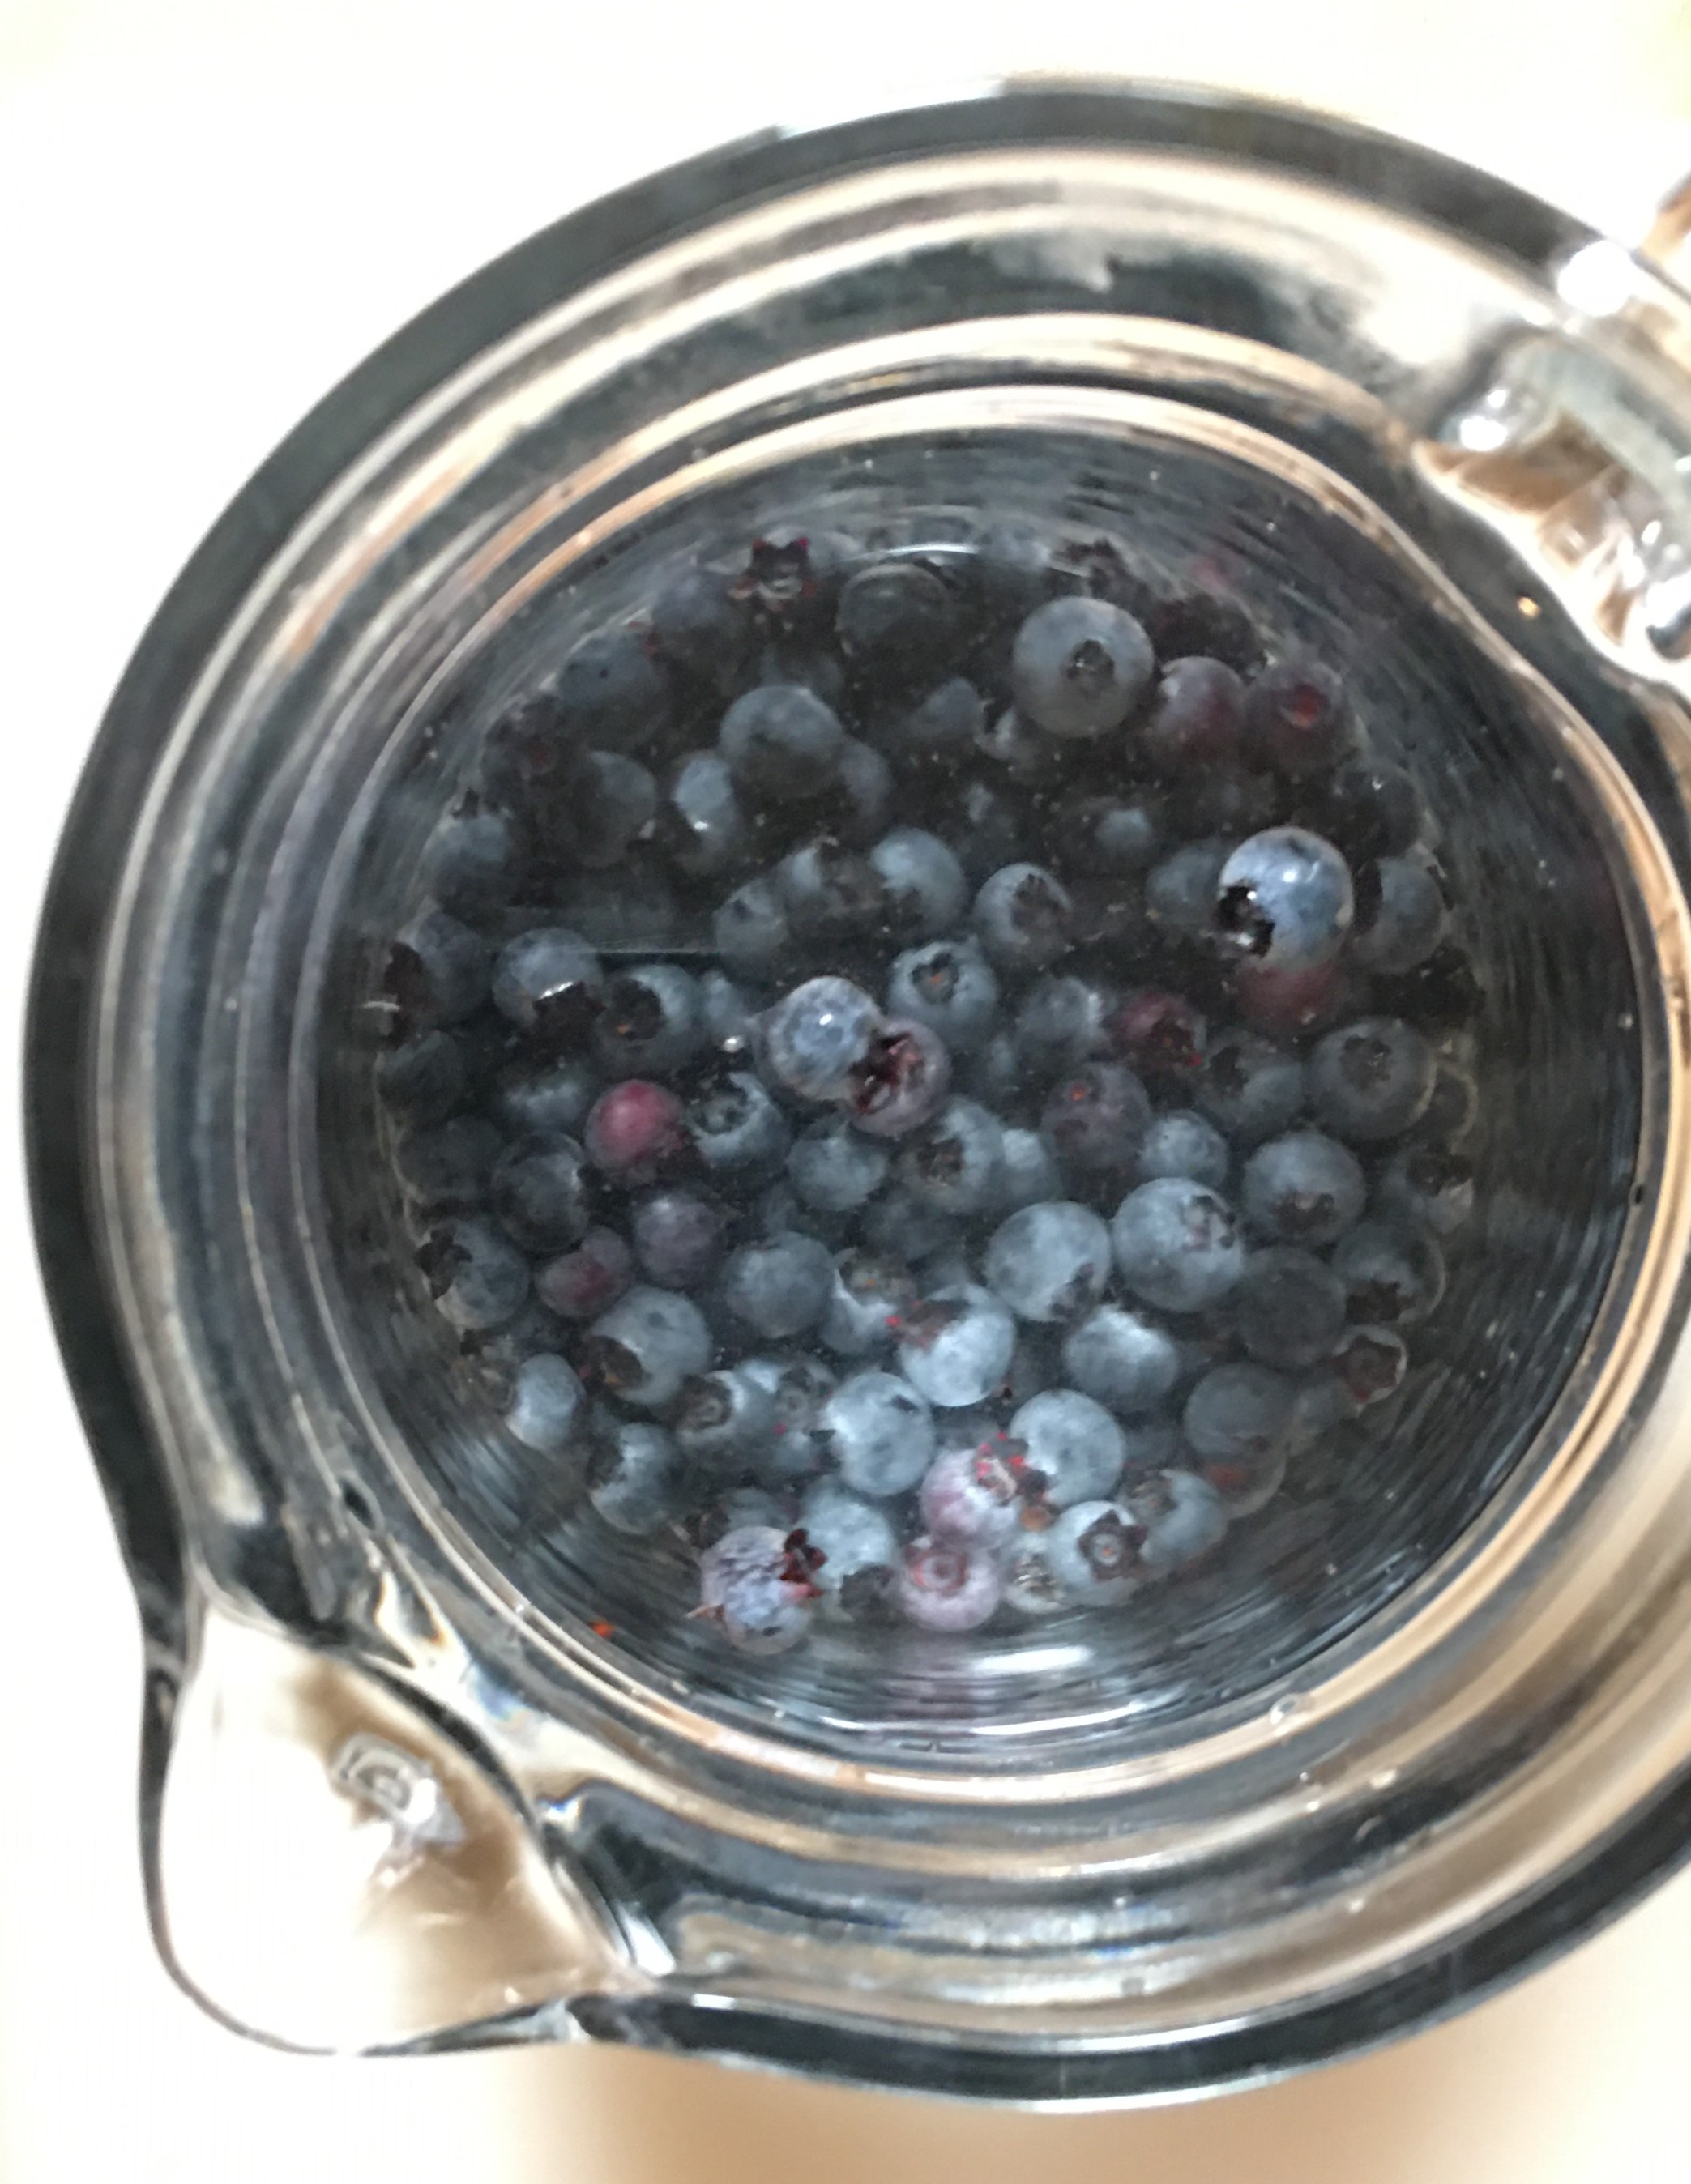
  3. Cold pack your chicken, split evenly between all 7 jars.
  4. For each of your ingredients, split evenly between all 7 jars. Start with the larger cut ingredients and end with the smaller peas and lentils.

(It’s easier to shake the smaller ingredients down into the cracks of larger ingredients than to shove the larger ones in on the smaller.)

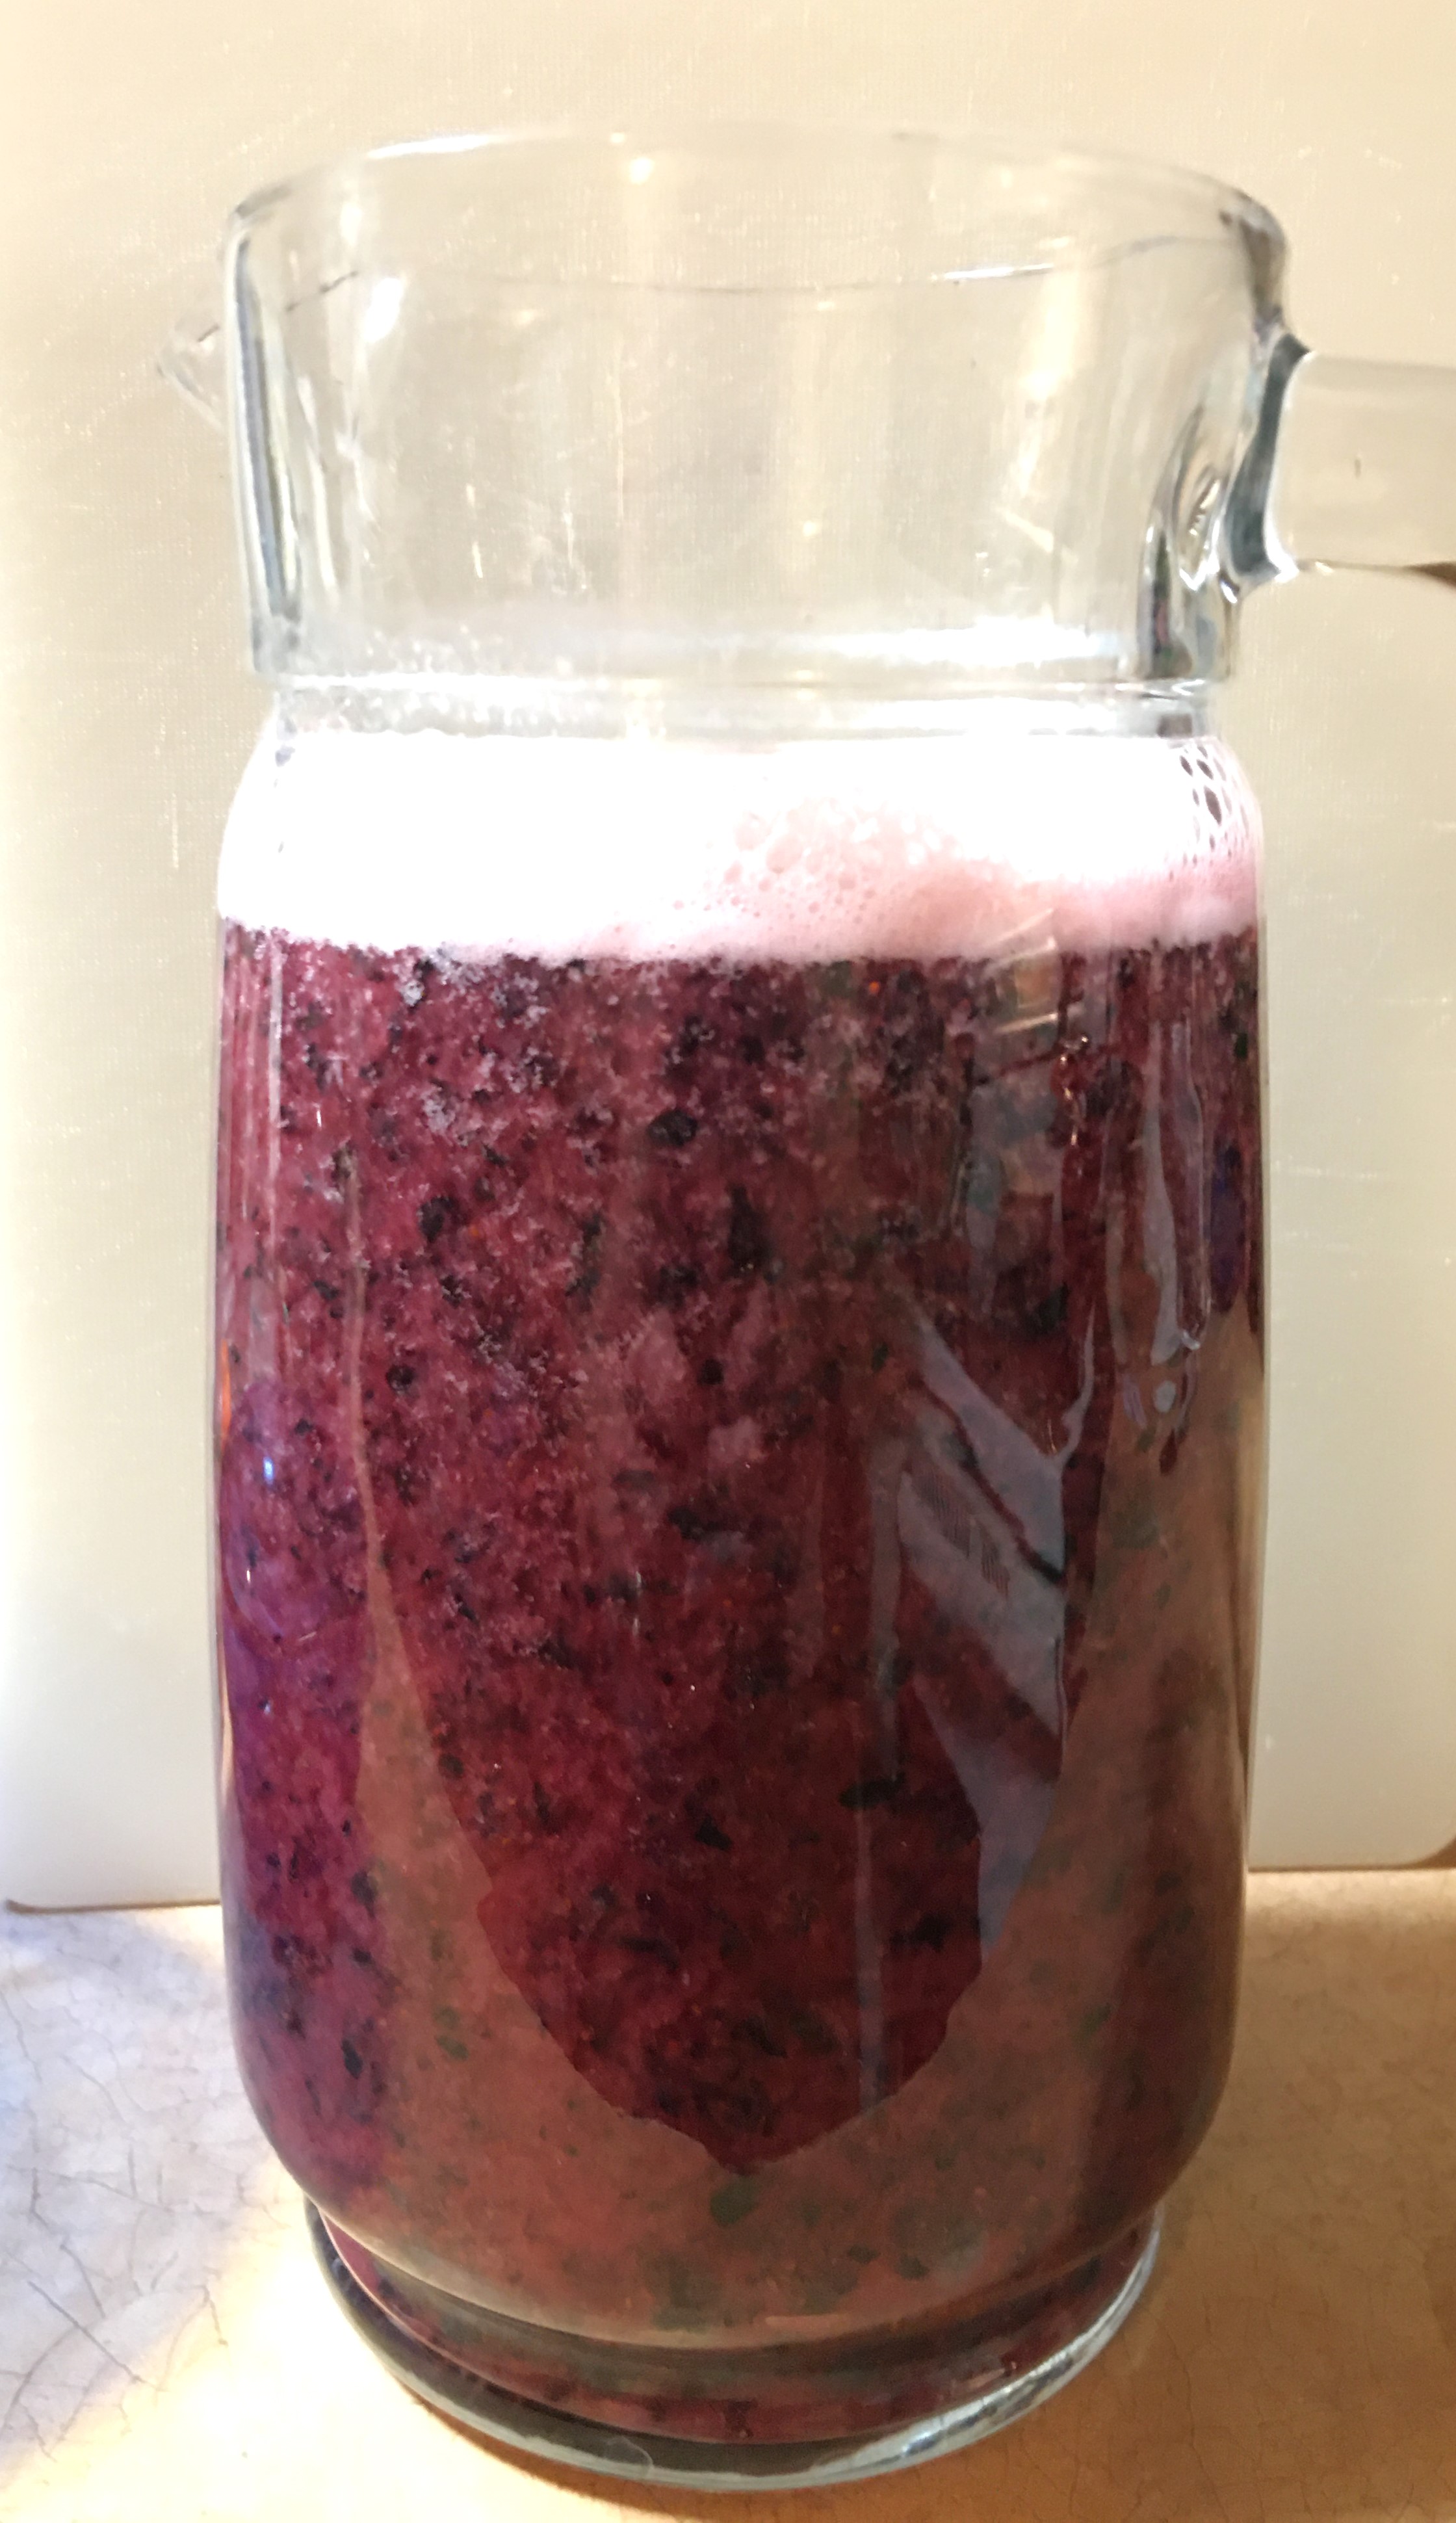
  • Fill each of the Quart size jars with about 2 cups of chicken stock.
  • If you have Kosher or Sea Salt, you can season your soup now. Otherwise, do not put in your table salt or iodized salt. You will season your soup when you open you jar before serving.
  • Clean the rims of your jars with vinegar and then place lids and rings, finger tight.
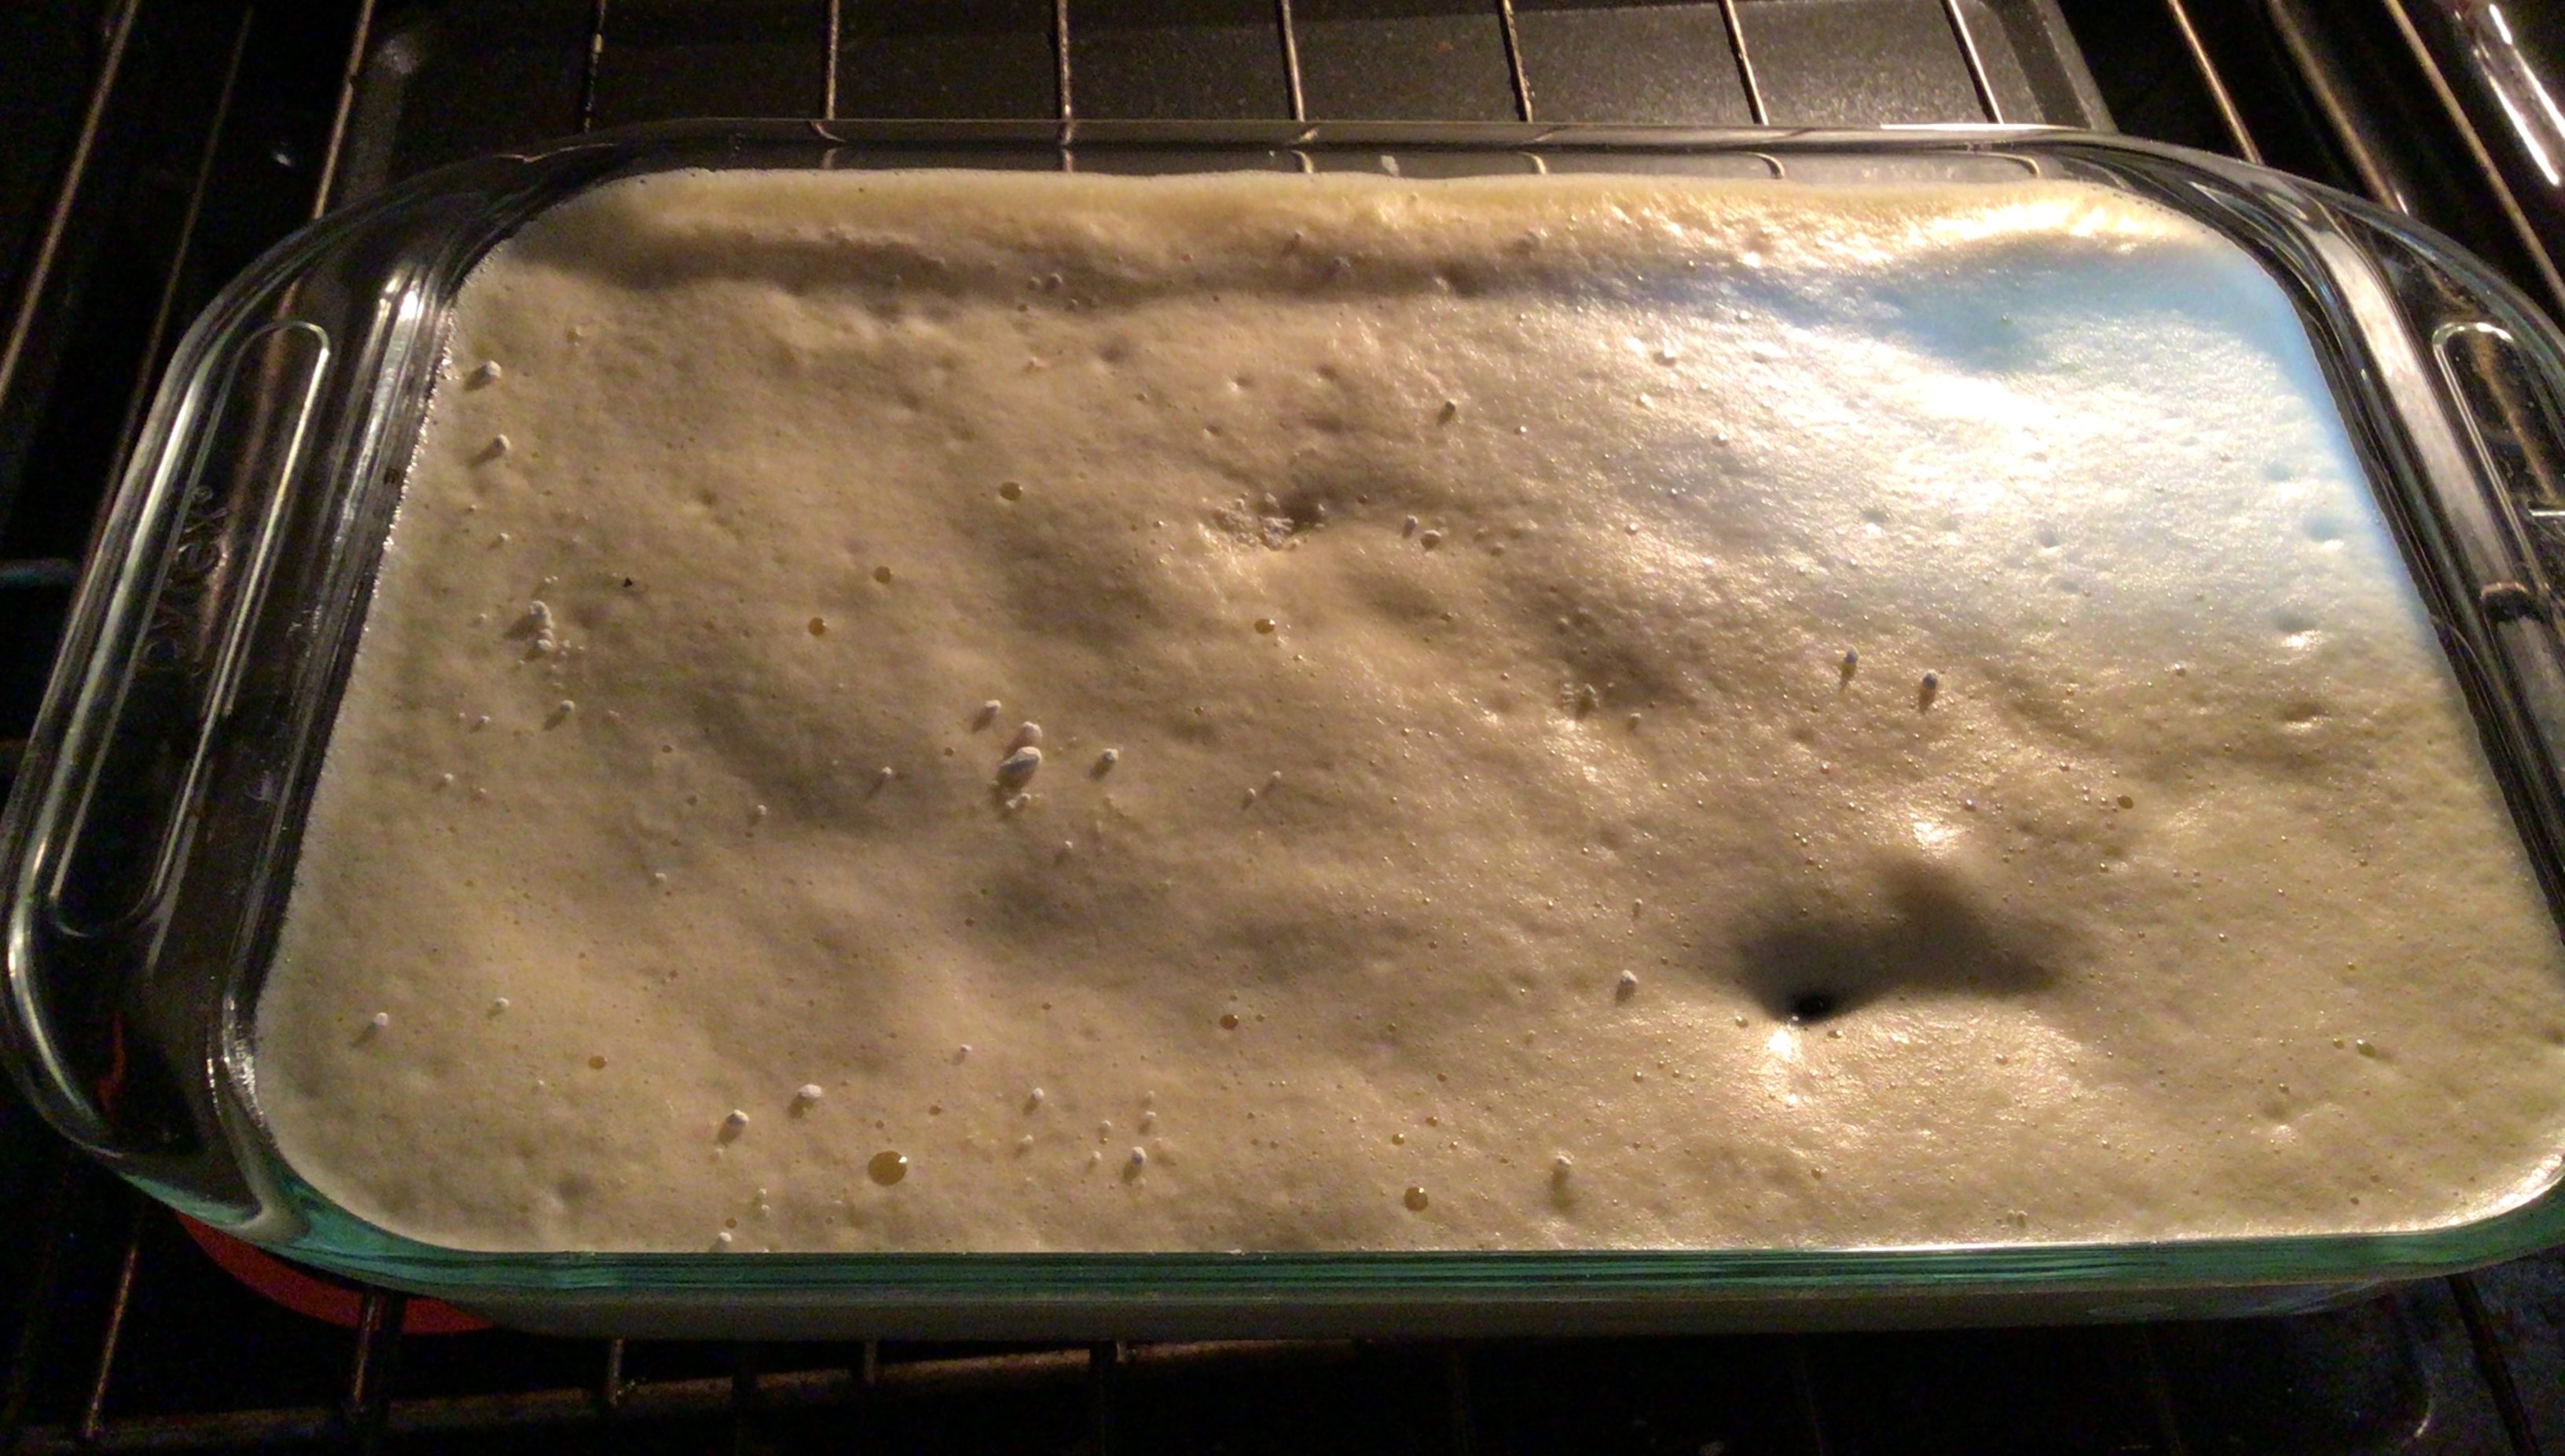
  • Prepare your pressure canner.

Follow your canner’s directions for the correct process of canning with your canner.

For example, I am Sea Level – 1,000 foot elevation so I can the Chicken Soup with 10 lbs of pressure for 90 minutes in my weighted canner.

  • Once time is complete, turn off the heat and let your canner naturally release pressure.
  • When you can remove your lid, let the cans sit for an additional 10 minutes before removing them from the canner.
  • Allow your jars to sit 12-24 hours to seal. Then remove the rings and clean your jars before storing.

With new lids preserving your canned goods for up to 18 months, you have plenty of shelf life for this soup.

There are many options you have for this Chicken Soup.

  • You can season it and eat as is.
  • If you have left over rice or noodles in your fridge you can add those ingredients and still have rice and chicken or chicken noodle soup that is ready to eat with a 5 minute warm up on your stove.
  • With adding a thickening agent (slurry or corn starch) you can turn this into chicken and dumplings or a pot pie filling.
  • Maybe you have other small amounts of leftover meat, like Italian Sausage. You can use this meat to bulk up the soup, add some kale and parmesan and have a Tuscan style soup.
  • Or maybe you’re looking for something Latin in flavor. Grab some tortilla strips, grated jack cheese and add in Latin American seasonings and you can have Tortilla soup.

These ideas are a far cry from being authentic cultural cuisines. However I want to give you a few ideas on how you can turn one of your canned soups into a blank slate for some variety.

Advertisements

I know a lot of us really do not have time to prep meals for our families. In fact “meal prep” might have a double four letter word effect in your ears. And that’s okay. For roughly the same time it would take me to cook a soup from scratch for my family, I can make 7 meals that I can crack open and serve dinner in less time than it is for me to go through a drive through. And it’s healthier for us.

To heat up this dinner in 5 minutes, this is all I do:

  1. Grab my jar from the pantry.
  2. Grab my soup pot. And turn my burner on high.
  3. Open the jar and pour the soup into the pot.
  4. Fill the jar with Water and pour into the pot.
  5. Put the jar in the dishwasher and set the table.
  6. Taste the soup to make sure it’s seasoned the way I want it. (Add salt, because I usually only have table salt readily available, so it got canned without salt.)
  7. And it’s dinner time.

If you have a college student who’s coming up on Mid Terms or Finals, this is perfect for them! Often times they’re up late and find themselves hungry after the cafeteria is already closed. This is something they can cook from their dorm room with a microwave or hot plate and have the brain food that they need. Or maybe they’ve caught a cold and need a little mama’s love in the form of soup. This is super convenient and perfect for a care package.

Advertisements

Looking for a gift idea for this Holiday Season?

This is soup is perfect for the new mother getting use to having baby at home, an elderly family member who retired their pots and pans, someone who is an avid camper or loves cooking by camp fire, or anyone else who can benefit from a quick home cooked meal without all the fuss.

Maybe you’re the type of person who loves gifting food to a neighbor, friend, or family when they become ill. Here is a quick way of gifting all that healthy goodness without your schedule batting an eye.

I highly recommend this recipe for everyone!

Do you need another gift idea?

This one is personal and doesn’t require you to have a master’s degree in art to make!

Here are some supplies that you will need:

  • Canvas
  • Paint
  • Paintbrush
  • Clear Acrylic Spray
  • Chalk pen/crayon, Paint pen, Pastel, or like craft item you can write with
  • (Optional) Sponge, Paper towel, Napkin, or Tissue
  • (Optional) Embellishments such as pre-cut vinyl design

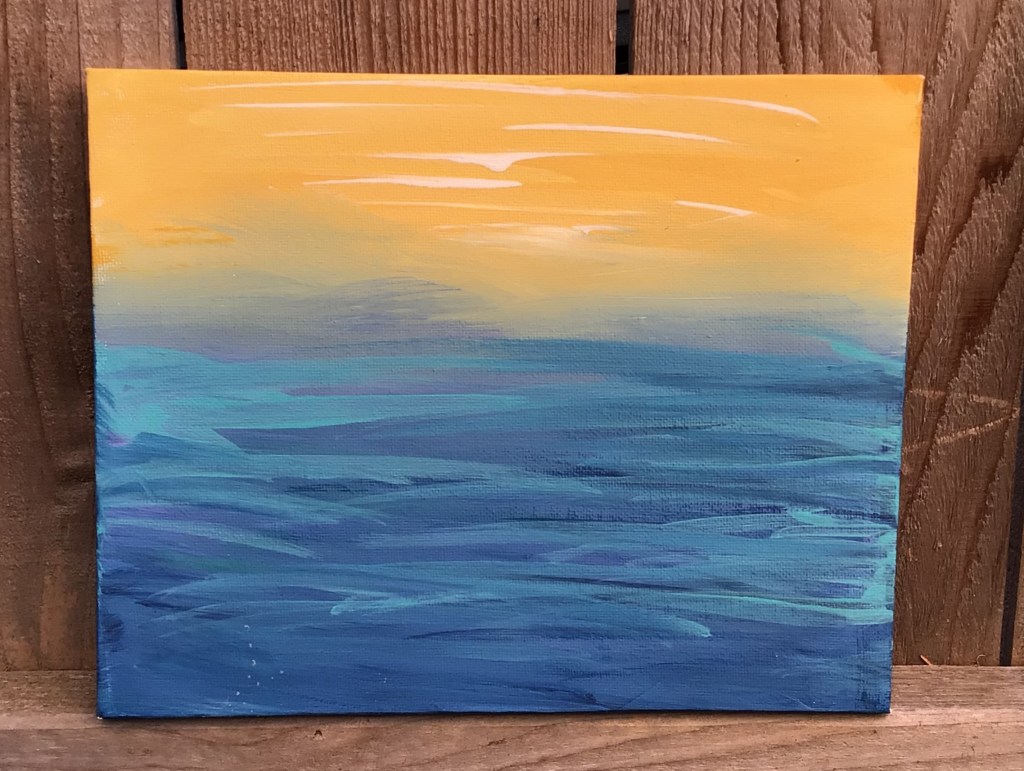
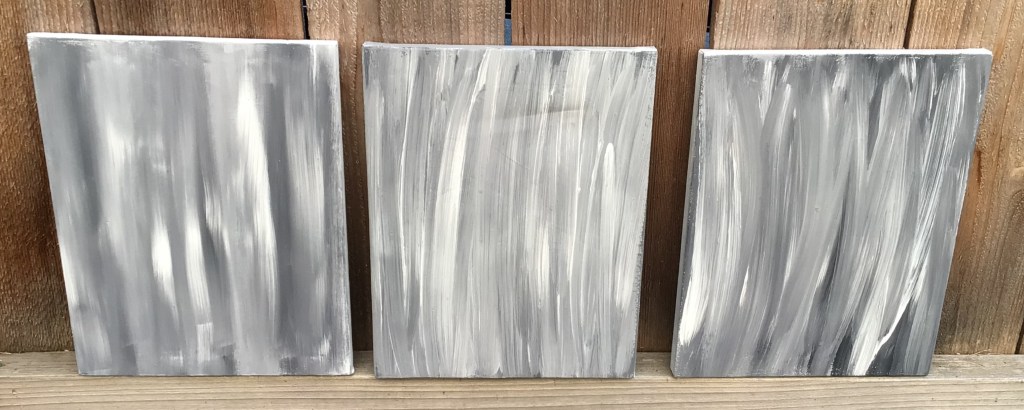
Paint a design on your canvas. You can do whatever design you would like. Here are some examples of canvases that I already have on hand. There are the canvases that my boys made 3 years ago.

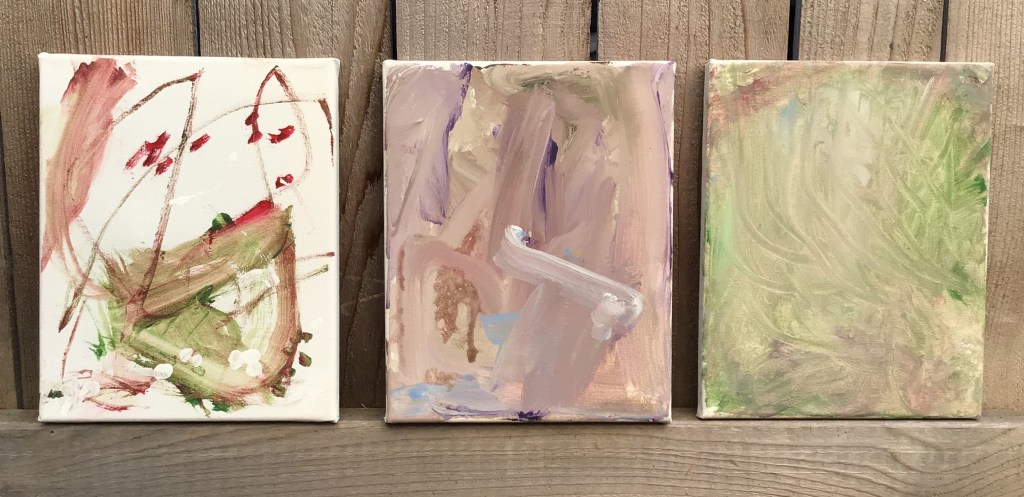
And these are the ones that I have in the prepped stage for various projects that I have in the works. You can use coordinating colors, monochromatic colors, are shades for an abstract scene.

Let your canvas dry.

Spray your canvas with Clear Acrylic Spray and let dry. This step is important, because accidents happen and sometimes you want to “erase” a mistake. I’m a phonetic speller and sometimes I just get a word wrong. No worries. By having the acrylic spray dried before you start writing with your crafting pen of choice, you have the option of wiping away the mistake with a wet cloth. The only writing medium that gets to be a bit tricky is acrylic pens. That one you may not find having an “erasing” quality. Chalk pens and most pastels will generally work for excessive editing.

With your writing medium of choice write your message, series of quotes, words of encouragement, or whatever you’re inspired to say. When I made these gifts for nieces and nephews, it took about 7 quotes that I pulled from online to fill the 8×10 canvas with medium small print from top to bottom. You can write as large or small as you would like. Just be aware that the writing medium you choose to use will help you decide how small you are able to write. I used a chalk crayon that had a relatively large nib, so I wrote as small as I could and the words were as tall as the width of my pinky.

Advertisements

Decide if you would like to leave your writing clear and readable or if you would like to smudge the words to make an added texture on top of the painted design that you made. This choice is perfect for the people who believe that their handwriting isn’t pretty. By smudging your writing, you remove the uneven, shaky, or other characteristics of your handwriting that you may be self conscious of. If you choose to smudge, I recommend printing out a copy of your message that you can give with your gift, so the recipient has the opportunity to read the love that you wrote for them. For direction of smudging, that is completely up to your eye. I personally like smudging my work from left to right because I love using horizontal strokes when I paint. I do have some pieces that the strokes are vertical and so my esthetic is to smudge vertical with those, so the “text” doesn’t compete with the flow. But you could choose to smudge diagonally, circular, zigzag… each direction you go will give a different feel to your piece.

Once you are done writing and/or smudging spray your canvas with the Clear Acrylic Spray again. This is going to be a critical step for you. If you chose to smudge your “text”, the spray will prevent further smudging. If you want to add vinyl or HTV on top of your art, this spray is going to anchor your vinyl down. I’ve tried applying vinyl and HTV straight on a painted canvas and both have peeled off, taking paint with it. But every time that I’ve used the Acrylic Spray, vinyl and HTV both stay on the canvas perfectly.

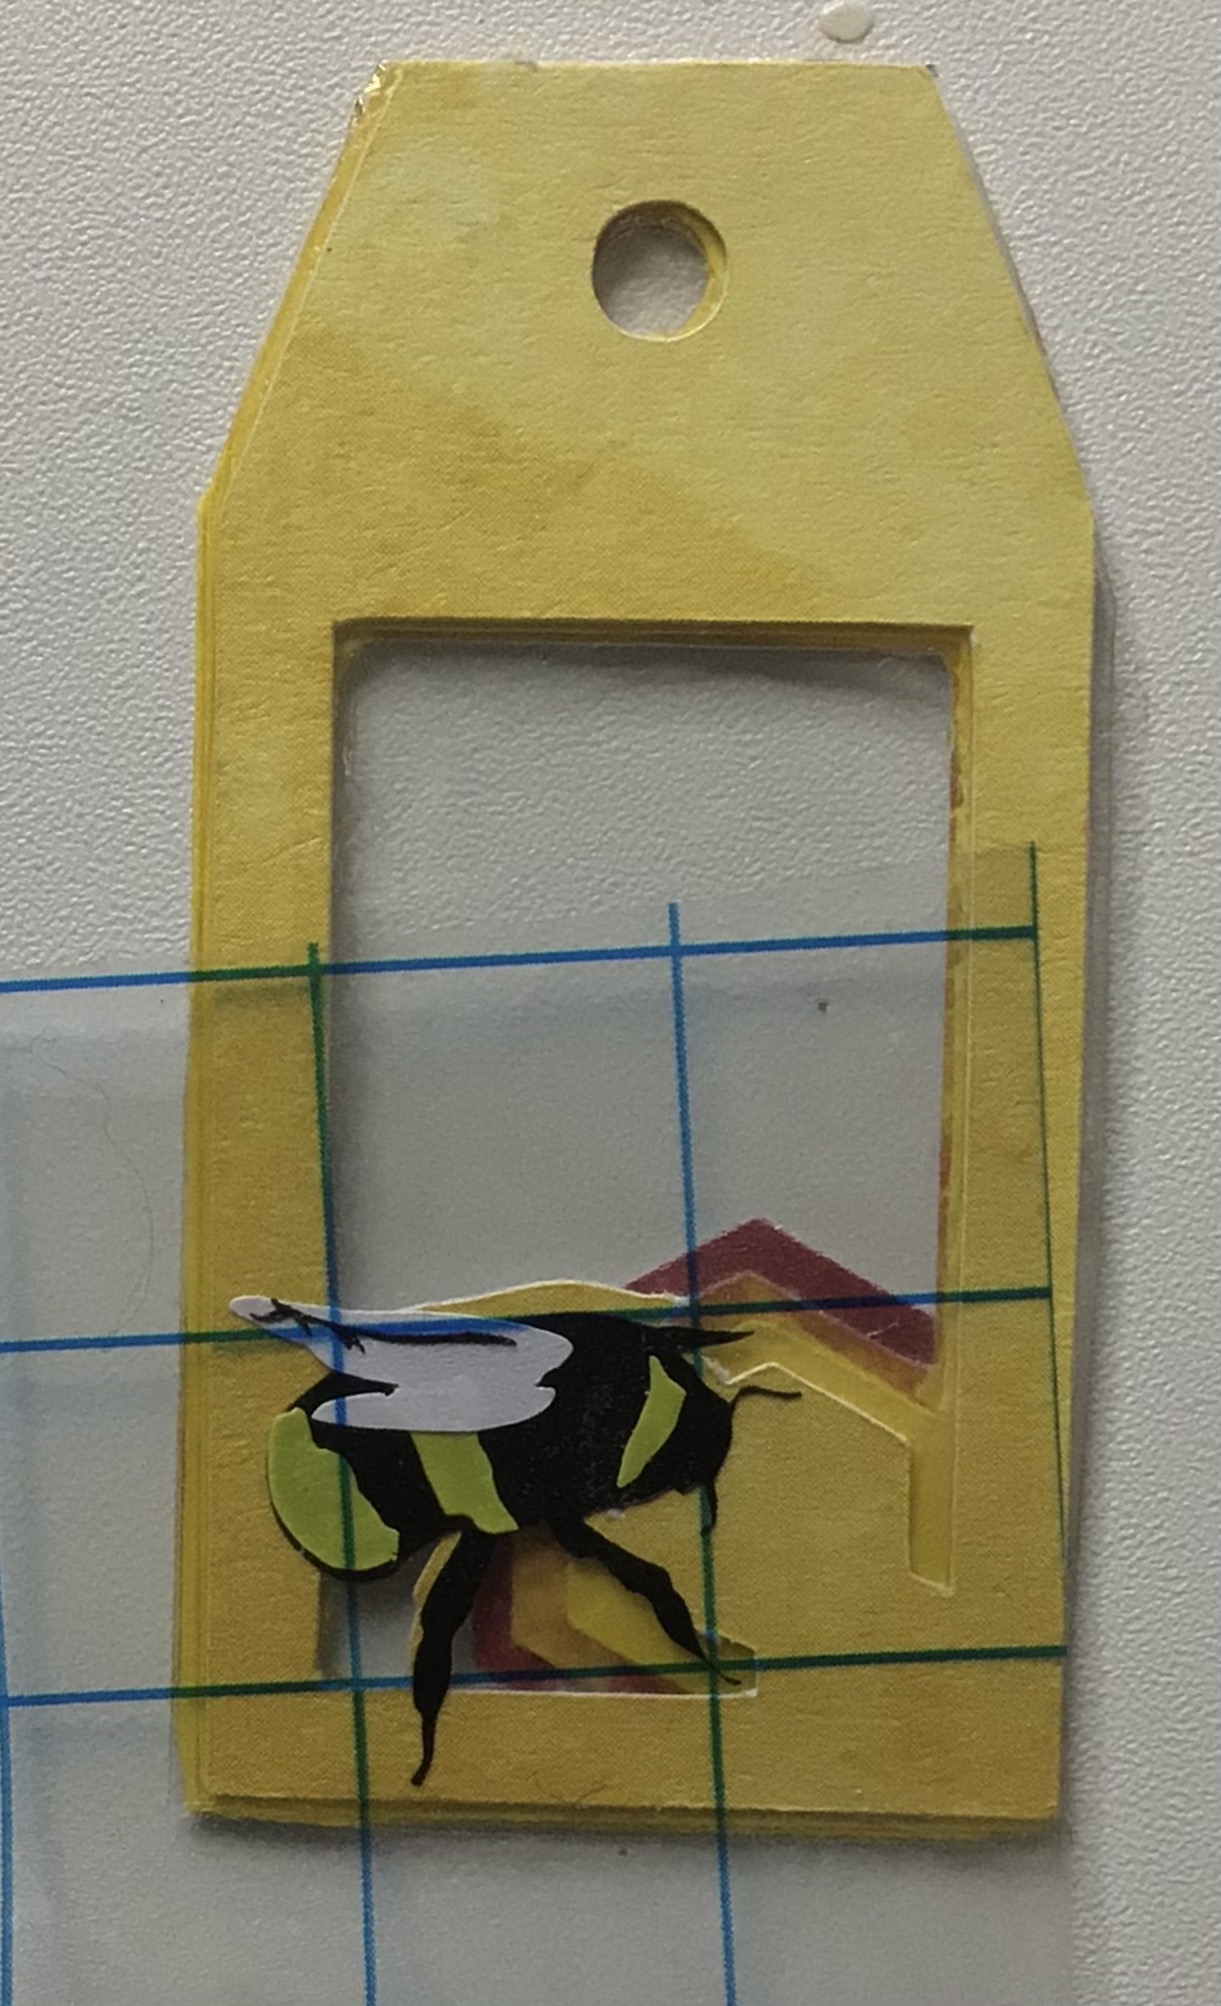
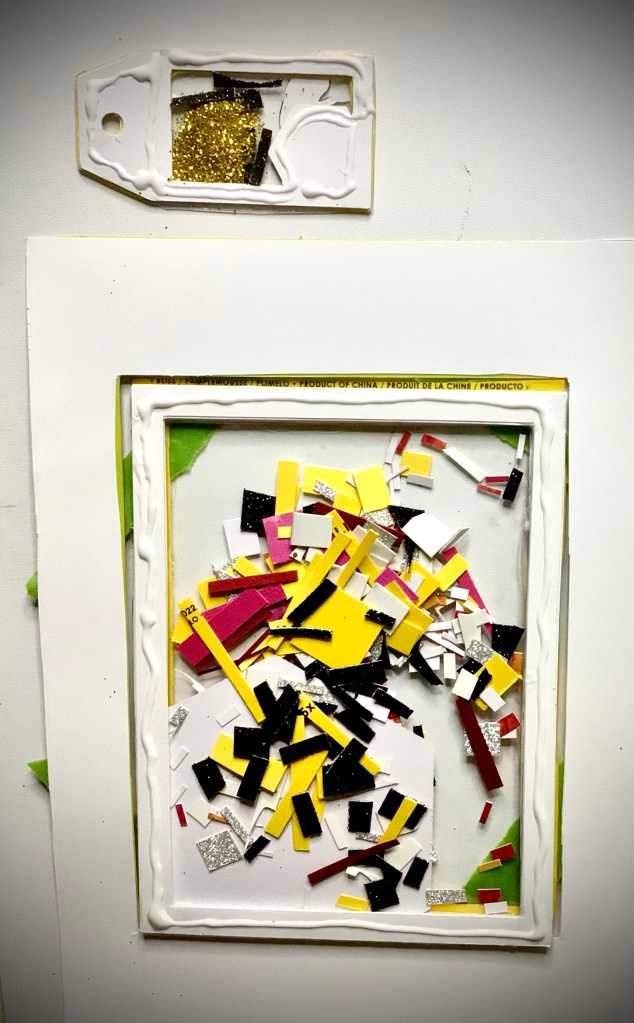
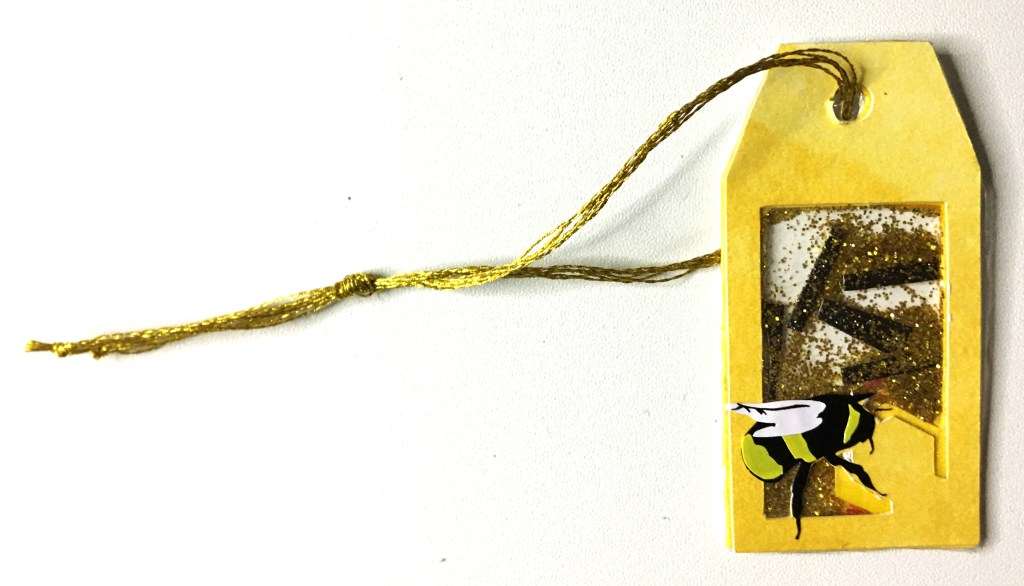
Embellish your gift. Your options are endless at this point. You can choose to make something and personal with just adding your recipient’s name. You can add scrapbooking embellishments with hot glue to add some glam or character. You could pray a frame with a metallic paint and make a modern framed art. Or perhaps you want to do four panels and keep them frameless. And then there’s always the option making a 3D piece using other crafting techniques, such as this.

If you find that you are on a budget this Holiday season, this is a perfect gift option for you. We are in a time in history where people need to hear how much they are loved and valued. So when you can poor into another person and share with them a hope of a future with them, it can hold profound meaning in their life right now. I have never before seen so many people facing suicide and thoughts of hopelessness like I’ve seen in the last few years. Sharing with someone how much they mean to you is something that you will never regret. And you never know that it might be the one thing that offers them hope in a time where it seems like everything is so wrong.

What is inspiring you right now? Do you have ideas sparking in your mind?

Right now I’m inspired with many of the changes that come with fall. This is the season that always has inspired me. In fact, my boys found a whole acorn that I so want to use as a piece of 3D art. I’m hoping I can find some more and have more than a single nut to work with!

Please comment below with what you want to make and even send me some pictures. I would love to see what creativity jumps to life in you!


Files used today

Spring Triple Panel comes with all you see here. Or you can select individual elements.

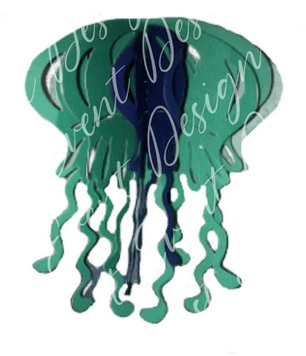
Jelly Fish element from my Jelly Fish Collection

Processing…
Success! You're on the list.

Leave a comment

Holy Jam Batman!

This post contains affiliate links to products. We may receive a commission for purchases made through these links, but at no extra cost to you.

One of the first things you’ll hear when you start in the world of making your own jams and jellies is that you MUST stick strictly to the recipe or your jam won’t set.

And the first thing anyone will set out and do is try to take a single batch recipe and double it or triple it, like you’re making chocolate chip cookies. After all, if your family goes through PB&J like nobody’s business you really don’t want to make 6 pints of jam at a time. That would take forever!

Plus, if you have kids underfoot there is absolutely no chance you’ll get four pots of jam on your stove top. Because the odds are that you’ll have a four ring circus around your ankles and all your pots start a rolling boil at the same time. At least that’s how things would play out in my house IF I had to make jam one batch at a time.

Fortunately for us, my husband and house a lady who was selling off her jam inventory and gave us her large batch recipe. Unfortunately I can’t share that recipe with you because of a verbal agreement that we made with her. And that’s one thing about my husband and I, we keep our word.

BUT, it got us on the path to know that you don’t have to make single batch jams and jellies if what you are really looking for is to make one large batch and set your family up for a year’s worth of jam in one day!

Advertisements

I’m sure that there are other large batch recipes out there if you took the time to search, but there’s not going to be many. One, too many people have a small business making jam for bazaars and other venues. And if you’re in the business, you’re not going to put your recipe online because that’s just not a good business model. Ball has an extensive jams and jelly section, but all of them are single batch. I haven’t had time to scour the pages of extension offices to see if they have large batch recipes. But I did find one rather quickly with the company that I buy my pectin in bulk.

Yes! You can buy pectin in bulk and at a far greater savings than buying the box of 2 packets of gel pectin at your local grocery store.

For the last several years I have been buying Hoosier Hill Farm Powder Pectin. They have an amazing product and I’ve preferred this over the gel/liquid pectin that I grew up using. It’s less mess. And like I mentioned above, it’s at a far better price than buying the same quantity in the gel/liquid form.

If you don’t have the time to search out your own large batch of Jam and Jelly recipe, you can use this one from Hoosier Hill Farm. You can go directly to the site through the link, but for your convenience I have it here:


Cooked Jam Directions and Recipes

  1. Locate and mark off fruit recipe on chart below. Check 8 OZ jars for defects. Because containers are not filled to the rim, one more container than the specified cup yield may be needed.

If jams will not be placed in boiling water bath, wash, scald and drain jars, or use automatic dishwasher with very hot rinse water. Keep hot.
If jams will not be placed in boiling water bath, wash jars and sterilize in boiling water for 10 minutes. Keep hot.
Wash lids and place in a small container. Cover with cooling water shortly before placing on filler jars. Always use new lids.

  1. Prepare fruit as directed in recipe.
  2. Measure amount of prepared fruit specified in recipe ingredients listing, pack solidly in cup. If measure is slightly short, add water.
    Place measured fruit in 6 or 8 quart sauce pot. Add lemon juice if listed.
  3. Measure sugar and set aside. DO NOT REDUCE SUGAR.
  4. Stir fruit pectin into prepared fruit. (Sauce pot must be no more than 1/2 full to allow for full rolling boil.)
  5. Bring to a full boil over high heat stirring constantly. At once stir in sugar. Stir and bring to a full rolling boil. (a boil cannot be stirred down). Then boil hard one minute stirring constantly. Remove from heat.
  6. Skim off foam with large metal spoon. Immediately ladle into jars leaving 1/4 inch space on top. With a damp cloth, wipe jars and threads clean.
  7. Immediately cover jars with hot lids. Screw bands on firmly.
  8. Place in boiling water bath carefully setting jars on rack in canner or large sauce pot of boiling water. Water should cover jars by 1 to 2 inches. Cover canner, and return the water to a boil, then boil 5 minutes. (At high altitudes, increas boiling time by 1 minute for each 1000 feet above sea level). Remove jars from canner.
  9. Let jam stand to cool. Check seals. Jar lids should be slightly concave or remain so when pressed. Remove bands from jars. Store jam in a cool dry place. (small amounts of unsealed jam may be covered and stored in the refrigerator).

I added the pint yield for anyone who might not yet have the conversion memorized.

Tip: The above jam recipe is a little on the loose side for my taste. So by cooking it a couple minutes longer on the rolling boil will firm it right up. The next time I run this recipe I’ll rolling boil for 3 minutes instead of 1.

What I want to point out is that this recipe does set jam every time. AND if you take a look at all the measurements you will see that they are exactly doubled or tripled the original measurements.

Can I use grandma’s recipe in a large batch?

I have yet to find any real information that says you cannot.

The rumor is that you can’t double a recipe because it won’t set. But here’s the deal, jams and jellies set because the sugar to pectin ratio is kept!

If companies dealing in high volume jams and jellies sales can make recipes in high quantity, you can too. You just have to understand the science and process behind making jams and jellies.

Pectin has to have a high sugar concentration to set. Low or No Sugar Pectin doesn’t have to have that sugar content because it has dextrose (a simple sugar extracted from corn and other vegetables). Because a sugar was already added into the Low or No Sugar Pectin, less is required when you you make your jam or jelly.

So if you are meticulous in your math for creating a larger batch of grandma’s jam then there is no reason why you can’t have success in doubling, tripling, or quadrupling grandma’s recipe!

Tip: Switch from measuring out your ingredients from cups to a unit of measurement, lbs. or grams. By switching to weight measurement you eliminate the dead space of your berries and the precise measurement of your dry ingredients. The reason why the set can be different in using the same recipe over and over again is because the weight of the measurements is different even if the look of your cup measurement seems to be consistent.

If you’re nervous about increasing your batch amount, you can take a trick from candy making to test your jam. Keep a bowl or glass of ice cold water handy. When your cook time is done, drop some of the jam into the water. If it’s not going to set, but remain a syrup, the jam/jelly will dissipate in water. If it is going to set, then it will gel up in the water.

I’ve known too many canners who process their jam and then wait until they crack open a jar to find that their jam/jelly didn’t set. The simple water test, or even setting a small quantity of jam in a bowl and putting it a freezer to cool down, will give you a rather quick indication if your jam/jelly will set or not.

If the jam/jelly doesn’t set or is too loose, then there was something wrong with the ratio of sugar to pectin. (This is all the more reason to find a successful recipe and translate it into weight measurements. Then you can recreate the recipe and have perfection each and every time.) Unfortunately I can’t advise you in adding more sugar or adding more pectin to your recipe because I can’t tell you where your recipe went wrong.

Advertisements

So in this moment of uncertainty, what I would do is head this off in a scientific approach– set aside two samples. In one sample sprinkle in a little more sugar. In the other sprinkle in a little more pectin. What happens? Which one thickens the jam/jelly? Which one makes it looser or no change at all? Also remember that if you’re using powder pectin, it will take a little bit for the pectin to do its thing. It has to hydrate and react with your jam/jelly.

The same goes with if your jam/jelly is too thick. The reason for it being too thick is either because there’s too much pectin or the jam/jelly got reduced too much (you cooked off the water content). There are some fruits that have more natural pectin in it. That’s the reason why apples don’t need pectin to make an apple jelly. So if you’re working with a jam that has a mixture of apple in it, then this is one thing to keep in the back of your mind, the effect that pectin has on your recipe.

But as I mentioned above in the recipe Tip, sometimes the only change you need to make is how long you run your rolling boil for. The longer your rolling boil goes, the more your water content will burn off. Just be careful not to burn your jam on the bottom of your pan. That flavor will permeate through your entire batch.

Making a Memorable Gift

We’re living in a moment of time where family budgets are taking an extreme hit. And with the holidays quickly approaching us I want to share with you one quick idea on how to make a budget friendly gift that will leave a lasting memory. So whether you’re looking to give a hostess, thank you, teacher appreciation, Christmas, or white elephant gift you can take this skill of jam/jelly making and make a gift that will be appreciated!

Once you’ve processed your jam and the jar has cooled, take a selection of material that fits the person or gifting moment. You can choose to cut the fabric in a square or a circle. Depending on if you’re using a wide mouth or standard jar lid will determine what size of square or circle you will make. Another determining factor will be if you want the overlying fabric to hang low or high.

Tip: Set your jar upside down on the back side of our fabric. With a marker or chalk, mark out 2″ from either side of the lid of your jar. Draw out your circle or square. (The Christmas Truck print was a 2″ square. The Red Plaid was a square cut 3″ off both sides of the lid.)

Once your fabric is cut place it on top of your lid and secure it with the jar ring, string, ribbon, or even elastic. Decorate as elaborate of simple as your taste leans.

And now you’re ready for the holidays with simple gifts that don’t suck the joy right out of your festivities!


These cute Jar Labels can be found here in a bundle.

Processing…
Success! You're on the list.

Leave a comment

Baking Blues

In case anyone ever wants to know, the time I can get my cooking on and experiment is when the rest of the family is in bed asleep. The down side is that baking usually wakes my husband up and he has instant munchies. Did I mention that it doesn’t matter how much noise I make, what wakes him up is the aroma of fresh baked goods?

The funny part is that while I was editing photos (while the last batched finished baking) he comes in and asks me which one is the best one!

It’s moments like this where I color coded my muffins. Originally I did it, to make it easier to differentiate between the different blueberries. But it made it easier to give a midnight “unbiased” taste tester say which one he preferred. He chose the yellow muffins, for the record, and we’ll get to the muffins in just a moment.

Difference Between Preserved Berries

Last week I gave the run down on how the different preparations of the berries turned out in their preserved state. Above is a picture that I didn’t use last week, because I reconstituted the berries for making the muffins. From left to right, you’re looking at fresh blueberries, freeze dried, and dehydrated.

I really can’t tell you how much I’ve been enjoying the berries we picked. There is such a difference in quality of flavor. So if you haven’t picked blueberries for yourself, please do this for you. I know you will not look at store berries the same!

The freeze dried blue berries (before reconstituting) were a trip. They had a near fresh blueberry flavor and they were like a powder bomb in your mouth when you bite into them. There was a moment where I had to remind myself what it was that I just bit, because it confuses the brain when you’re not use to this texture. BUT… when you reconstitute them, let me tell you. The closest I can describe them is that they taste just like the store berries. They’re not as good as the fresh berries I picked, but that could have been because they are different breeds of blueberries. That’s enough to give a little flavor difference. I did drink the juice in the bottom of the bowl and that DID taste just like the blueberry juice that I made in this next section. That closeness alone is what makes me sold on freeze dried blueberries. (Aside from the obvious that they are shelf stable and last a lot longer than fresh berries.)

I reconstituted the dehydrated berries for the same length of time as the freeze dried. If you remember from last week, I described the dehydrated berries as having a bite to them. I’m personally not a fan of eating the dehydrated blueberries as is. BUT once they’re reconstituted, they take on a texture very similar to craisins or raisins that are on the drier side. I would definitely put those on a charcuterie board or several other snacking options. I chose not to drink this reconstitution water, as you can see it looks like colored water. I know I would have been disappointed. It might be a different story if I used hot water instead of room temp and/or I let it sit longer than the 20 minutes that I did (while making my muffin mix).

Now that you’re all caught up on the different berries, lets see all that I made with them. Except for the muffins, all these recipes were new to me over the last month. So I hope you get some inspiration also and try something new!

Blueberry Juice

I needed to make blueberry juice for the kiddo friendly blueberry cordial that I wanted to make for the boys. (They heard that I was making cordial for myself and they wanted some too. So here’s the first stop.)

I’m going to save you the time–DO NOT look up how to make this on YouTube! It’s one of those processes where they all look alike and they all do pretty much the same thing to them. And those who were difference, like one lade added milk, it was just not going to fly for making cordial.

Literally all you need is blueberries and water–that is it!

Here I used 3 cups of berries and 5 cups of water.

It was pretty standard across the board that everyone used about 1.5 cups of water per cup of berries. I could have used less water, but I was happy with the amount of liquid with my immersion blender. Everyone I saw used a stand blender. I’m an immersion blender girl and this all fit perfectly in my glass water pitcher. Clean up was just easier for me. So use whatever blending tool you have. You could even use a hand masher if you wanted to or hand squeeze the berries. The bottom line is that you can drink the pulp if you want that in your blueberry juice. Or you’ll end up straining the pulp out and squeeze everything to get all the liquid out. The water is just a medium to make the process flow.

I am going to include a clink for you here though. One lady I saw used her pressure cooker to make the juice. And then she canned her juice for future use and it’s in its simplest form to meet the need of any recipe you’re looking to use. This was just one project that I didn’t want to undertake on top of everything that I already planned to do for this post. But if you’re a canner, definitely check this video out!

NOTE: In canning groups there is a lot of heat surrounding water bath canning and acidity levels. (“Just because Grandma did it doesn’t mean that it’s safe by today’s cooking standards.”) Cooked blueberries acid levels are below the acid threshold, so it is entirely safe to can cooked blueberry juice without adding acid to the juice before water bath canning.

Blueberry Cordial

For blueberry cordial the pulp does need to be strained out. Just about everyone I’ve seen uses cheese cloth. I happen to have a muslin cloth bag that I use for straining fruits all the time, particularly when I’m making my elderberry syrup. So I opted to skip the cheese cloth and just use my muslin bag. It turns a 2-3 step straining process into just a single step.

After straining, you’re left with a clear blueberry juice.

And if you’re wondering, the juice tastes like the blueberry equivalent of the watered down apple juice I’ve given my boys. It’s not sweet. And is nothing like the fresh blueberries that I used.

But that’s okay, because the Cordial recipe I chose to use is from a British gentleman and his process starts off with reducing the blueberry juice anyway. Here’s his video here.

I followed his directions and reduced it down to half its volume. Taste wise, that watered down flavor is gone. And what remains is an acidic version of the blueberries that I picked.

Here is where I agree with him, the sweetness level of your cordial is very much dependent on your preference levels. My volume of cordial was greater than his, and even after making the proper conversions from metric to imperial I still could not add as much sugar as he did.

With my end volume around twice the amount of his, he added roughly 1 cup of sugar to his cordial. I would have been happy with 1/2 cup of sugar. It was at the level of sweetness as a soda. However, with cordial being syrupy sweet I ended up with a final measurement of 3/4 cup of sugar. And at this level that tasted to me like the really sweet cough syrup. This is definitely a treat that I will add this as a flavoring to unflavored seltzer water for the boys.

And I’m sure that my husband will add this to his seltzer water too.

I’m keeping this in my fridge to keep it preserved for a month or two. But I’m sure it will probably go quick and I’ll need to pull out my freezer berries to make some more.

Spiked Blueberry Cordial

After tasting the blueberry cordial above, I’m now wondering how this one is going to turn out. The recipe for this adult cordial I found here. But I have a few weeks of waiting before I can sample this one and see if any adjustments need to be made. (I will come back into this post and add to my assessment of this recipe once I have this one completed.)

Full disclosure, I do not own a large enough glass container to pull off this full recipe. (That and I didn’t have enough fresh berries that were thawed and ready to go.) So I cut this recipe in half. The proportions were exactly the same, so I know this is going to turn out as it should.

If you want the half batch recipe, this is what I used:

  • 4 cups blueberries
  • 28 oz vodka
  • 1/2 cup sugar

Everything else I followed the directions.

Once this process has run its course, I’ll be back to give my thoughts.

Clafoutis

This recipe, Clafoutis, came my way on Facebook from a friend who was excited to pass this one when he heard that we picked blueberries this year. This is one of his favorite breakfasts and was eager to hear how we liked it.

I admit that I modified this recipe by way of the cooking vessel I used. I opted for my Pyrex because my largest pan is actually my cast iron pan I didn’t know if this recipe was going to expand in the oven or not. So it was my faithful Pyrex with a pan to catch anything that might fall over board during the cooking process.

I’m glad to report that nothing cooked over and it stayed in my Pyrex.

The batter itself reminded me so much of making German Pancakes. (This recipe expands, so now you know why I anticipated some expansion.) In fact, it tasted a whole lot like German Pancakes. The difference, of course, is the addition of blue berries. But also the clafoutis retains more of soufflé like structure. It does puff up and deflates a little after you pull it out and cut it. But on the scale of easy to difficult, this is definitely an easy recipe to make.

It’s super easy to bake and is definitely kid approved. I only made a single batch, but I certainly have to make a double the next time I make this recipe.

I wanted to make a quick note that baking did take longer in the Pyrex and there was the issue of the center being undercooked when time expired. The top was already brown. Because I needed extra cooking time, I did have to add some foil over the top.

If you’ve ever made a quiche, then you understand the jiggle in the center means more cook time is needed. The same is true with the clafoutis. If you see some jiggle, give it more time.

Blueberry Muffins

And now to the blueberry muffins I started off this post with!

Let’s be honest. Everyone and their grandmother have a dozen blueberry muffin recipes they can pull and one or two that they swear by. This is the one that I use, and I don’t even go to my cook books to look there. The problem that I have always had is that they are either too sweet or the moment you add fresh blueberries it turns into a swampy mess. Ina Garten’s recipe I swear was made for fresh blueberries to be added into it. It’s has the perfect amount of water to sponge ratio where your hands don’t get damp and sticky eating it.

So whether you want to use the recipe I use or the one that has been in your family for 70,000 generations here is some information that you can use to improve your blueberry muffin game.

I made one batch of muffin batter. And instead of adding the blueberries into the batter, I put the batter into my silicone cups and then added the blueberries to the color coded cups so I could pull off this ultimate side by side comparison. There was absolutely no way there was any difference in the batter or the sponge. This was entirely based off the berries themselves; fresh, freeze dried, and dehydrated.

In the blue cups I added the fresh blueberries.

The yellow cups have the reconstituted freeze dried berries.

And the red cups have the reconstituted dehydrated berries.

As you can see with this first baked picture, there is an obvious hydration difference between the sponges of the muffins.

The fresh berries, blue cup, are the standard reference point for the recipe that you choose to use. In my preference, the sponge is mildly sweet and firm with enough water content to keep it from being dry.

The reconstituted freeze dried blueberries, yellow cup, added more moisture content to the sponge, but the berries taste and texture wise are the same as the fresh berries. I walked away from this muffin with slightly tacky fingers and some crumb stuck to my fingers.

The reconstituted dehydrated blueberries, red cup, made the crumb dry up a bit. Instead of that perfect balance, it had the feel of what the perfect muffin feels like in a day or two after being baked. The crumb itself is still sweet, the dehydrated berries just took some of the moisture out. That being said, the dehydrated berries were sweeter than the fresh or freeze dried. And they offered a little different texture. You know that cheap box of premade blueberry muffin mix that you can buy at the store? The berry texture is pretty much the same. The berries are bigger than that boxed mix, otherwise there’s a very close comparison there.

If you remember above, my husband said he preferred the yellow cup muffins, freeze dried. I found that all too funny because I still prefer the fresh berry or blue cup muffins. But that just goes to show you just how much it comes down to personal preference.

Decorating with Blueberry Dust

Last but certainly not least, here is the secret baking trick that I alluded to last week!!!!!

The best part about the freeze dried berries is the perfectness about how you can break them down into a decorating powder. Not only is it easy enough to make a decorating powder in seconds. It is also sweet and gives a punch of flavor like you can’t imagine until you try it.

Yes! You can use a spice grinder and turn this into a beautifully fine powder that you can add to your butter cream for a beautiful lavender color with absolutely no food coloring. It also gives an intense blueberry flavor without watering down even your stiff peak frostings or fondants.

In this instance, I just put some crushed freeze dried blueberries into a plastic bag and rolled over it with my rolling pin a few times. Literally anyone can do this!

But my absolute favorite part is just how simplistically beautiful this is. Right here is the blueberry muffin mix from above, cooked in a donut mold. Sprinkled on top is powdered sugar and stripes of the blueberry powder. And finally it’s garnished with edible lavender and whole freeze dried berries.

This is the most beautiful and perfect baked good that I’ve made since having my kids. And it reminds me of the beautiful creativity inside me. It’s not anything spectacular. Because I know there are pastry chefs out there that can make me look like a toddler in my kitchen. But this is a simple wow treat that everyone can make for themselves. And all it takes is finding the products to bring into your basic kitchen and just having some fun.

I hope you try some of these ideas in your kitchen this week!


Products Used Today: This post contains affiliate links to products. We may receive a commission for purchases made through these links, but at no extra cost to you.

Processing…
Success! You're on the list.

Leave a comment

“Someone ate Pac Man!”

We all have our favorite places to source decoration items for parties. And it becomes a challenge when we need to find things that just can’t be on the shelves anywhere.

Last week I shared some ideas on decoration ideas for retro 8-bit arcade games.

This week I want to share with you, keeping with the same theme, my hacks for ordering a cake and a fresh idea for dressing up a snack can.

How to order a cake from a bakery that doesn’t decorate with licensed characters.

We decided that we were going to get the cake from Costco this time. (I’ve used this same ordering technique with my local grocery store bakery department.)

Before going in person or ordering online, you want to sit down and think of how you want to decorate your cake. Previously one kiddo wanted a train birthday and so I had to come up with a steam train engine cake. This time, how was I going to make a Pac Man cake?

First I made my Pac Man. He was cut out of yellow cardstock and laminated so that I wouldn’t have to worry with paper dye bleeding into the frosting.

The Cardstock Train sits ontop of the cake with a cluster of white balloons behind the smoke stack.

The time that I made my train, I attached wooden dowels. This kept everything directionally proportional with the 3D focal point.

This time I needed to get Pac Man to stand up. So dowels were not going to work for me. This time I hot glued a plastic fork on the back. The fork thongs give the ability to stand Pac Man fully upright or reclined back at a 45 degree angle. I needed this flexibility because I had absolutely no idea how the bakery was going to follow my directions or what their placement was going to look like.

The reverse side of Pac-Man has a clear plastic fork attached in the middle. The bowl of the fork and tines are below the body of Pac-Man.

The one thing I can tell you with absolute certainty is that bakery staff looks forward to doing something different as long as it’s not making more work for them. So if you leave your note with your best manners and let them know what you’re going to do, they get excited about being part of something different.

For the train I had asked them to cluster the balloons together, with no strings, to make a cloud cluster for a train that I would place on the cake. I kid you not, I went to pick up this cake and heard all the bakery employees complain about this insane request that they got from someone. Instead of quickly decorating a cake, they were going to spend additional time and drag their day out.

Of course I thought they were complaining about my simple request and so I was bracing myself for some attitude. Instead, I got the complete opposite. One of the employees came to the counter to help me, went back for the cake, and all the employees came to the counter grinning ear to ear because they wanted to see the train.

The success to the train was that I didn’t ask for more “balloons” then they would normally give. I didn’t tell them specifically where I wanted them or how to position them. I didn’t demand a certain color. I left it simply with no strings, white cluster. My request saved them maybe a few seconds from what they normally would do. But that was a few seconds in their favor.

As you can see with my Costco order form, I asked for something simple. I don’t remember if these are their standard balloon colors or sizes. But they were great in giving me large balloons, the exact number I needed, and their colors!

I don’t know what this bakery’s response was, because my husband picked the cake up.

But I do have a story for this one, on the day that I placed the order.

My son was so excited to have a Pac Man cake that as we were leaving the bakery section, after filling the order form, he flagged down the nearest employee and blurted in a loud excited voice that he was getting a Pac Man cake. You should have seen the employees face when he had to tell my son that they don’t do licensed characters. My son cut him off and told him, “No! I’m getting a Pac Man cake!” I had to step in here and explain to the employee that I requested that the balloon strings be left off so I could turn them into ghosts and I would add a Pac Man at the party. The employee chatted for a few more minutes and kept repeating himself that this was a brilliant idea.

If a non-bakery employee was excited about my idea, you can just imagine how the bakery employees reacted when they saw the order form. If nothing else, it turned a typical boring day into something to talk about. Again, this wasn’t a request that added to their work time. It may have saved them seconds. But I’m assuming it was something fun that broke up the monotony.

While on the subject of cakes…..

I don’t know about your family, but I kid you not growing up and even with my own kids, we have at least one cake story that will live as a memory for a lifetime!

Advertisements

What is your cake of a lifetime story???

When we were kids, my mom locked my sister’s birthday cake in the car, at the lake, with the keys in the car.

I tried my hand at making a sculpted cake for my son’s birthday. He wanted a bubble birthday. So I attempted to make a bubble container cake. That cake makes me cry in the fetal position to this day, because the sponge was so dry that the dang cake kept crumbling and falling apart. It didn’t matter how many dowels I added to maintain the structure, that I used fondant for a little holding power, or that the cake was frozen… it was a nightmare!

And that photo I keep buried away in a digital file folder where I can cry as my son laughs as an adult and I have to recount that story. Because even though I hate it, I have to admit that it’s a story that deserves to live on.

So Yes! This Pac Man cake will live on for the ages. Not for the same reason as the Bubble Birthday Cake. But for this reason….

Pac-Man cake has Pac-Man in the upper left corner. Five ghosts are in the center of the cake. The peremeter of the cake is lined with yellow M&Ms like the arcade game's power pellets. All but five of the M&Ms are missing. The M&M eyes of the far right ghost are missing. That ghost's frosting is smudged.

After I finished assembling the cake, I left the party room to go talk with the other moms while the kiddos played. After a time, my birthday boy walks up to me with his hands on his cheeks, devastated face, and trying hard not to cry as he exclaimed, “Someone ate Pac Man!”

I had zero idea what he was talking about, but seeing his reaction was enough that I got up and walked back to the party room to investigate.

Here my son is about to cry. As soon as I saw the cake I busted out laughing almost to the point of cry laughing, because that is absolutely hilarious!!!! This was no typical finger swipe of the frosting. Someone ate as many of the M&Ms as they could reach and took out a ghost in the process. And no, my laughter didn’t help my son. I looked down at him and told him it was going to be okay. I had already taken pictures of the cake. And then I asked him if he wanted to see what his cake looked like before this happened.

We went back to where everyone was at. As I picked up my phone to pull up the pictures I let the moms know that someone had ate the candy decorations off of the cake. They all were mortified, as any mother would be. I showed my son the picture. I fawned over it with him and once he was happy to at least to have seen his finished pre-eaten cake, he went back off to play. Then I showed the moms the picture and filled them in on what happened.

Advertisements

I don’t think they knew how to respond with how I was responding. As a mom, we’re all use to the finger swipes. But to see the cake pillaged! LOL Honestly, my whole thinking was that it could have been a whole lot worse. Someone could have taken a fist full of cake out of the cake. Being angry or interrogating the kids to find out who did it would not have restored the cake. It would have made the party uncomfortable for everyone.

What surprised me was that because I was okay with not knowing who did it, the moms began one by one asking their kids if they took the candy off the cake. None of the kids did. And it became a great mystery. It wasn’t until I mentioned this story in my newsletter that I realized that I never asked any of my three kids. Obviously birthday boy didn’t. His feelings were genuinely hurt in that moment. I assumed my oldest wouldn’t do it. Even though he’s a first grader, it’s just not his style. Now my youngest! That boy has the sweet tooth that the other two have never had. And he’s also in the food swiping stage. I did ask him the other day and he told me that he didn’t. But I also know that he’s at the stage of not telling the truth to see if he can get away with things.

To this very day, I’m going to error on the side that it was my youngest that plundered the cake, but I have absolutely no proof that he did. So officially the case is closed as a cold case. But secretly I still think it’s him.

A New Take on Snack Wrappers

I know I’ve seen the crafty labels that people put on Hershey bars or bags of chips. The one thing that I haven’t seen is a label for Pringles. And snack chips were one of my party purchases from Costco.

When trying to make a theme happen from scratch I really did one more item to pull it all together and finish it off. And what’s better than something you can put jokes on, for kids at an age who adore any joke you throw at them!

A stack of flat snack can wrappers are splayed on the desk. In the center of each label is a Pac-Man with power pellets on either side of him.  On the left portion of the labels are hand written jokes. On the right are chip flavor indicators; cheese bonus, original bonus, sour cream bonus.

My first thought was to create a PDF that I could print off from my printer. However my color ink cartridge was empty and it was just easier to keep material cohesion by using black cardstock and vinyl. Plus I have acrylic pens and have hardly touched my white pen. So I cut from vinyl all that I could. And I wrote out the jokes.

Let me just say that I did not think I would find any Pac Man jokes. I was surprised when I did. There are kid friendly ones and there are adult friendly ones. So you kind of have to pick and choose which jokes you use for your party. But here is the site I used for one reference joke page. I didn’t save the sites and can’t find the second one that I pulled from. But it was a simple Google search and you don’t have to go far before you start seeing repeats. So it is a small joke world for this game. All in all I used 8 jokes that I recycled over the 36 mini tins that I dressed.

Before I show you how I attached these labels I want to point out a troubleshooting tip. I had a lot of weeding and transferring to do. And I’m not ashamed to say that I worked quickly because I had a lot of items to go through. I did lose some letter details, as you can see with this B.

Tip: If you lose details, use a white acrylic pen and draw it back in.

That is the one thing that I love about 8-bit fonts, if you lose a letter detail, all you need to know is how to draw a line or rectangle. I had a few cans that I had to correct. But I didn’t even tell my husband or kids and none of them noticed. And my detail orientated boys are quick to point something out to me that’s missing, wrong, or whatever corrections they want me to make because I didn’t do it just so. ….kids!

The assembly on these is super quick. If you’re using copy paper glue dots are all you need. For cardstock I needed hot glue.

The wrap is slightly longer then the circumference of the can because I didn’t want to have to deal with a hairline crack of color because it wasn’t cut precisely to precise measurement. Because there was overlap, I used two small dots of glue to anchor the edge down to the can. After wrapping the label around, I finished it off with a line of hot glue. There was no puckering or edge lifts. I advise against using glue like Elmer’s where you have to hold and wait dry. Hot glue was perfect because it dried by the time I had aligned and pressed everything into place.

Tip: The tab of the container seal is something that you want to pay attention to, so that no one struggles to open the can. A tried folding the tab up and press it back down after the label was attached. This took too long. So I went with option 2.

Tip 2: Slide the label up under the tab. Apply your anchor glue and then finish off the attachment. Having the tab on top of the label helped to align the label quicker. So it was a time saver guide.

Three fully labeled snack cans are lined up side by side, showing different parts of the label. From left to right; Pac-Man, "Original Bonus", jokes.

An additional option that you can add to these cans is to apply a Pac Man sticker/vinyl on top to cover the Pringles man’s face. I chose not to do this because I wanted to not over complicate all that I had to arrange for the party.

Instead I opted to turn these cans into small coin banks for the boys as an after the party trinket. To make this modification, all you need to do is take a box cutter or exacto knife and slice a single cut through the clear lid. The best way of doing this is to cut with the lid on top of an empty can. The snack was not damaged and you have a proper safe way of making cuts without the lid slipping on you.

Tip: One cut is perfect if you want your coins to remain in the can and still allow a child to shake it and use it as an instrument. If you make a wider slot, you will allow the opportunity for coins to fall out.


I hope these cake stories made you laugh as much as I did. And that you enjoyed all the decorations and new ideas from this week and last. They were fun and well worth making.

If you have any cake stories, please share them in the comments below!

Files used Today:

The file for the Snack Can Label is found in this Archade Label set.

Processing…
Success! You're on the list.

Leave a comment

Advertisements

Shake That Card

Maybe it’s because of my inner child. Maybe it’s because I have a house full of small children. But the one thing I can say with all certainty is that I absolutely love things that glitter and things that move.

So of course, I’m going to love shaker cards.

Have you seen them before? The few that I’ve seen in the market place have chunky glitter or confetti. Well, I’m going to show you how you can make these for yourself.

But first I want to show you how I make my own confetti. After all, why would I buy confetti when I have some absolutely beautiful scraps that I really can’t bring myself to throw out? There’s textured prints that I love and color schemes too. They make me smile. But there’s the glitter card stock. In the paper world, glitter card stock is my crack. When I have sheets in my craft room, I save it for my favorite people and special projects. So of course I want to use every splinter of that beautiful goodness.

Confetti is super simple! You just your paper scraps and cut them down to this:

Really I do NOT have that much spare time that I buckets and buckets of homemade confetti. If I have a lot of a color or paper, I do recycle those. But there’s something about mixing all your favorite textures and prints and mixing a mosaic in a bag. And this is a confetti blend that you will never find in the store.

For the shaker card I’m going to use my yellow blend. For the shaker gift tag I’m going to use glitter. Feel free to customize any of your shakers with plastic pellets, wax pellets, beads, baking sprinkles, or anything else that your imagination brings to mind.

Assembling Shakers

The possibilities for this style are endless. All you need is to build up a frame, a solid back layer, a transparent front layer, and a decorative face to sandwich in that transparent layer.

For my transparent layer, I usually lean toward laminator sheets. This is what I used for the gift tag. But this time I’m using a plastic packaging for the card. It doesn’t give the crisp window pane effect. However, I know most people don’t have laminator sheets readily on hand, and I don’t want anyone to think that you absolutely have to use that one product. If you’re a green person, this makes one less bit of unrecyclable plastic going in the garbage. So there’s that. Also, another idea is taking the thick plastic “glass” that’s found in a very cheap picture frame. You’ll need to use a blade to cut that down to shape. And you might need to score and take several passes to get a clean line. But definitely use whatever you have on hand!

Cut everything with your cutting machine.

Once everything is cut (and weeded if you’re using vinyl) go ahead and seperate everything out; card, frames, and bees (or other accessories).

The cutting files for this card and gift tag can be found here.

Assemble each group separately and set aside.

This is one time where an organized work station is going to be in your best interest. If you use my Bee Card and Gift Tag, you can understand how things can get a little intimidating. (For projects like this I always include assembly directions. I’ve chosen to work through this project here, because visuals are amazing, especially for people who need to see something instead of being talked through it.) But once you have everything broken down into the three groupings for this project, it has a very easy feel to it.

For the Card, you fold it with the cut out window on the front cover. Apply the honey accent around the window. I used vinyl here, but I probably would have had more fun with card stock. After all I have some fun geometric paper. I stuck with solid colors to keep a cleaner and more streamlined piece.

TIP: If your work surface is white and your cardstock is white, try putting a contrasting color inside the card. I used a mini mat inside the card. This made it so easy to find the white edge of my cardstock and line up the vinyl.

TIP 2: With longer cuts of vinyl, application becomes easier when you use the hinge method and prevent the tails from sticking to other parts of the card. Sometimes it takes a little patience to line up all corner and lines to get a straight application.

The best advice I have for the bees is to leave the black silhouette on its backing and build up the layers one at a time. And if you have a straight tip needle, it is your best friend for when your layers shift on you and you need to adjust them. Just put the needle tip underneath, lift the vinyl and reposition it. If you leave the image of the bees up on your computer screen, it’s a great reference point for making sure everything goes in the right place.

There’s a trick when it comes to building up your frame. The glue that you choose really does matter. Usually I like using a spray adhesive (drawing lines with the straw inside the bottle), but I’ve had more glitter failure with that glue on frames than others. Hot glue gun is great for quick setting. But it tends to be thick and make your overall card weight heavier. So the best glue for this project is wood glue. It give you the light weight benefit while maintaining some flexibility in adjusting your frame so all the layers are square. The disadvantage to this glue is that you have to allow for dry time.

Make sure that when you add your glue, that there is a steady line. If there are any gaps, there will be a way for your confetti or glitter to escape. And when all your layers are in place, adding a weight will make sure that you have the best press and prevent your paper from curling while it dries.

Final Assembly

I waited overnight for the glue to dry (but that’s also because I’m a late night crafter. It’s the one time of day where I can get things done without interruption.)

With the shaker card, I used painter’s tape to hold the frame in place. The back of the card is also the back of the shaker portion. By placing the frame through the cut out of the card, when I open the card to fill the frame with confetti, it will stay in position.

I placed the front decal bumble bees on at this point just because it was convenient. With the shaker gift tag, I wanted to put the bumble bee on the bee outline without having to think of messing up a glue job. As you can see with the first picture, I didn’t quite make it square, so I needed to readjust.

If you find that you need to adjust vinyl decals, the best tool you have is a straight tip weeding tool or a sewing straight pin. The sharp point is convenient for wiggling in under the vinyl and lifting a corner. From there you can lift the vinyl. And if you keep it on the needle tip, you can back you fingers out of the way and have a cleaner sight for lining things up.

Turn your shaker tag upside down and open the card. With the frames open you can place your confetti or glitter with ease.

Shaker Gift Tag: I was originally going to use just fine glitter. But when I saw how much yellow I had going on, I needed to have another color in to break up the monotone. The paper choice I made was my black glitter cardstock. I love the color choice. What I would have done differently is add two more layers of frame in there, for a total of five layers. This cardstock is extremely thick and doesn’t move freely around in the shaker. But over all I was pleased with the fill and would not suggest using more fill than what you see here. I would call this tag filled at 50% capacity.

Shaker Card: As you noticed in my bag of confetti, my yellow was not varied at all. And I also wanted to avoid the monotone in this item also. So I grabbed some of my left over card stock from the honeycomb (not yet cut into confetti), added a pinch of my red, and finished it with some texture of the black and silver glitter card stocks. I would have tossed glitter in this one too, but I wanted to show you what it looks like with just confetti. The fill capacity of the card is about 25%. I could have added more, but again I wanted to have a visual reference for you to see what level of fullness you might prefer.

Watching people’s reaction is the true test of how successful something is made. I showed this card to my sister and after initially looking at all the detail, she instantly started shaking the card and smiled as she heard the confetti rattle around!

Want to dress up the card more?

Please do! You paper, vinyl, and other choices are going to make your card and shaker look completely different. You could use crafting foam sheets for the frame. You can use all paper. In fact, I know ladies who have such an amazing stash of paper, that makes my selection look like a kindergarten class project. But I try to be kind to my husband and not keep insane amount of supplies, like I would truly love to hold.

Now for dressing up on this particular card, I’m a bit limited. I went crazy with the confetti and that’s where the focal point went. Since I don’t want to compete with the confetti, I had to keep the honey accent pretty simple. I chose two different shades of fine glitter and used a glitter Elmer’s glue of a contrasting color (which adds a touch of depth to an otherwise flat glitter). To make fine accent lines, I used a tooth pick dipped in the glue to draw my lines. And as you already know, once you add glitter, your lines instantly grow thicker. So don’t be afraid of having a toothpick thin line. The glitter helps you out.

This particular design would also look amazing adding flowers, grass, or any other embellishment. So please don’t be shy to add what your project needs.

I hope you have as much fun making this card and gift tag as much as I do. Please leave a comment below and email me pictures of how yours turn out!

Here are the files for the Bumble Bee Shaker Card and Tag.

Please sign up for my newsletter for when my christmas and wedding editions of this style are released.

Processing…
Success! You're on the list.

Leave a comment