After spending almost a decade in the event decorating industry I have repetatively heard "I can do that". Instead of being dismissed by creative minded people, I want to show you how I do "that" so you can be sucessful in recreating that inspiration image. I just might have a few tricks that you haven't seen yet!
The one thing about approaching holidays is that you really get smacked in the face with everything that needs to be done.
Whether you’re decorating sideboards for an Easter get together or just looking for something quick that fits in a space as small as a window sill to add a little color before spring finally unfurls. This quick craft is for you.
What you need:
1 Stemless Wine Glass
1 Bag of stones 18 oz/794 g
1 Faux Succulent
Any other accent piece that you would like to add (I chose a glittery bird)
Glue Gun
Accent Glitter
5 Minute Version
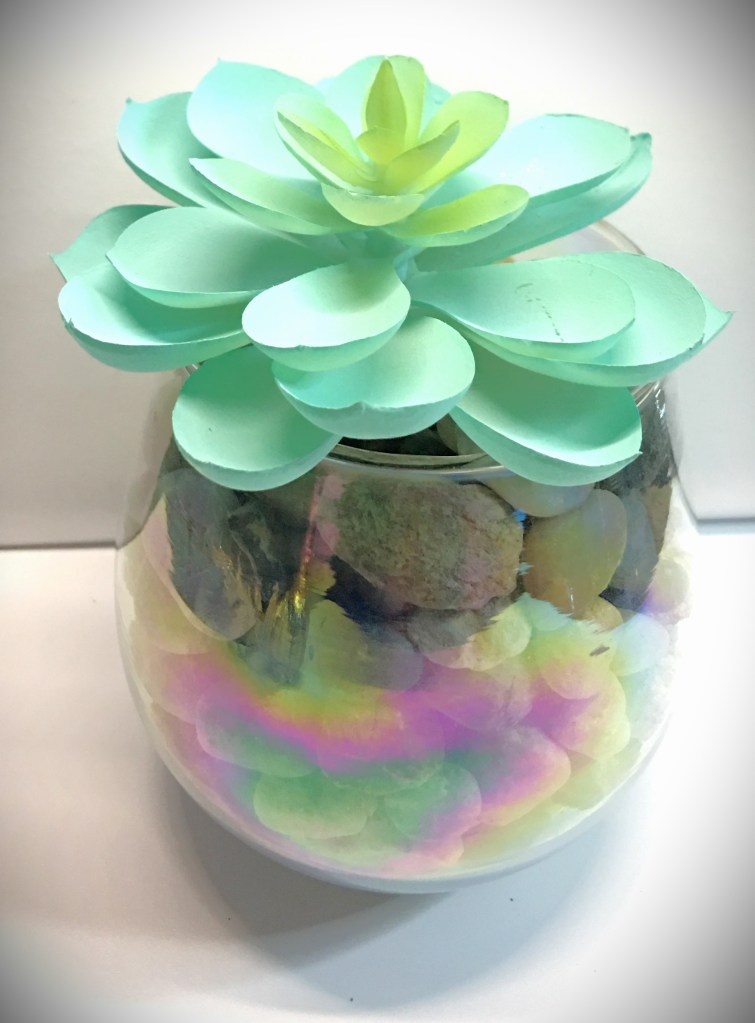
If you just want to toss something together, all you need is the glass, rocks, and succulent.
The succulent that I chose had a very thick stem. Because it was sturdy, I could pour the rocks in the glass and push the succulent stem into the rocks and moved on. (If the rocks have resistance, give the succulent stem a little swirl and it will sink right in.)
For whatever reason if the succulent just does not want to go into the rocks, never fear. Pour out the rocks with the exception of some in the bottom (or the level that you can easily push in the succulent). Then lift up the leaves on one side (and then the other) to add the stones in, around the stem.
Want to use real succulents?
You can do this using a real succulent of your choice. Make sure you verify if the succulent you want to use can life in rocks or if it needs cactus potting soil.
If your succulent needs soil, but you prefer the look of the rocks showing through the glass, you will need to take a little extra time layering the rocks outside and putting the soil in the center
Advertisements
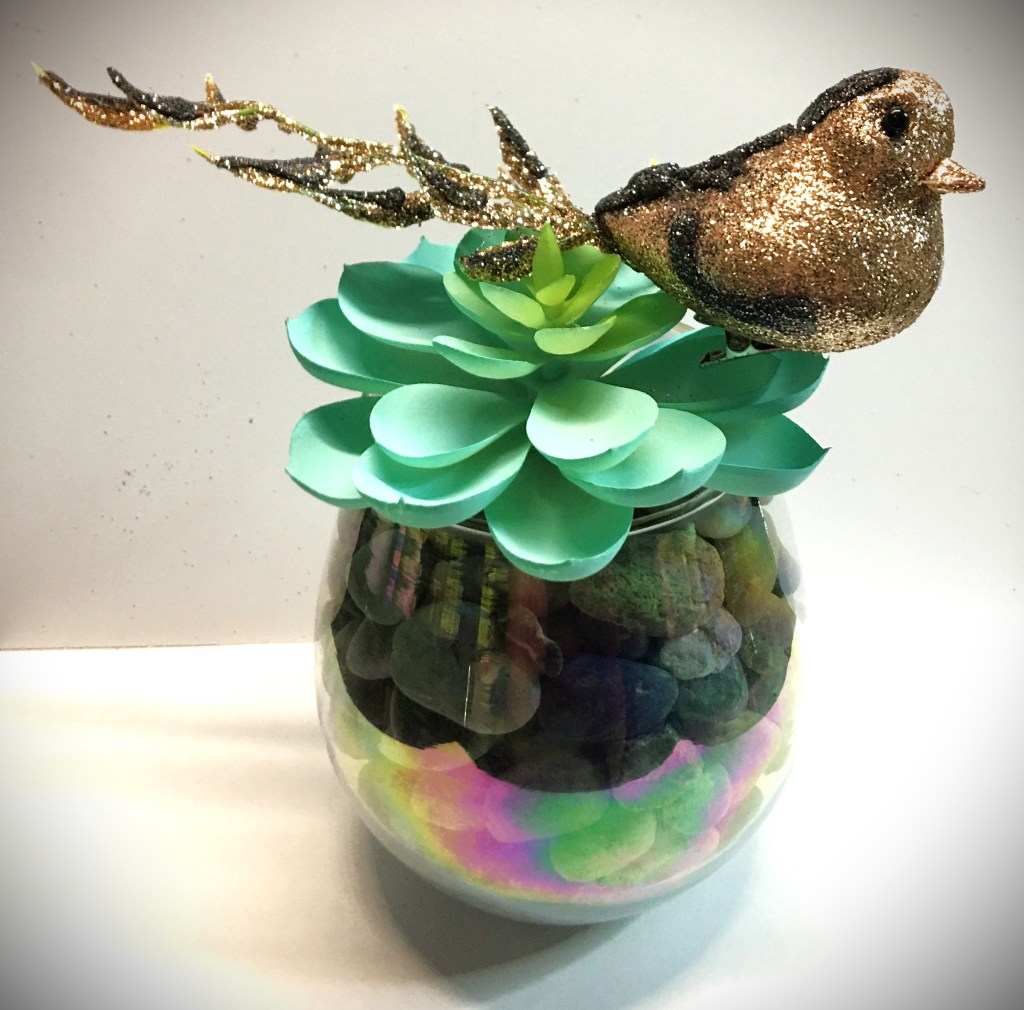
Ten Minute Version
Follow the directions for the 5 minute version to get the glass filled and succulent set. The remaining time is dressing up accent piece that you are adding.
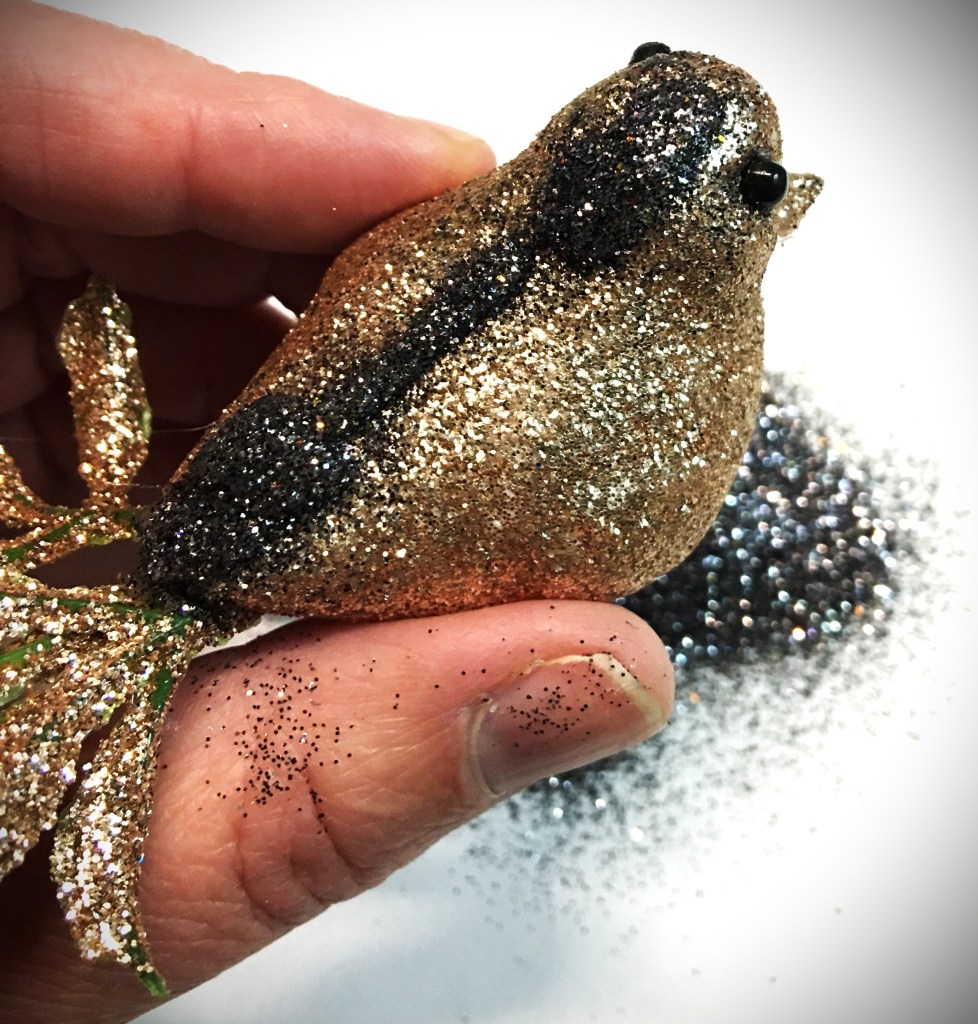
For example, the glitter bird that I’m using came from the dollar store and I wasn’t 100% satisfied with it. If I had feathers in my crafting room, I would have added feathers for the wings as well as the way it was set up with feathers on the tail. Unfortunately, I don’t keep feathers. So I needed to pull off the pink ones that came with the bird. The black eyes also seemed to stick out awkwardly. To remedy this, I grabbed my glue gun and black glitter and added glitter detail work to add dimension and character to the bird.
Thanks for spending a few minutes with me today. If you’re anything like me, you have a list as long as your arm to get done in less than 48 hours. My kiddos always look forward to a newly designed shirt. I haven’t got a fully developed idea for that yet. But I do have a spring edition ready to go dressing up some sock bottoms. They enjoyed the ones that I made for them for christmas. So I thought I would make a few more for them. You can check out sock designs here:
I’m coming up on the end of my first season coaching basketball and I couldn’t let this moment pass without sharing some of what I’ve learned. And also share the thoughts that I wished I could have talked with my dad about.
Before I can share what I’ve learned I have to go further back. (And we get there, I’m sharing the photos of the craft that I made for my basketball boys. Directions to make this, or an alternate, are below.)
My dad was my first coach, my most favorite one. But he didn’t become a good coach on his own. He learned from one of the best, Coach Carter. He wasn’t one of the really blessed to play directly under the amazing wisdom of Coach Carter, but he was able to attend some of the basketball clinics that Coach put on for other young men. There were only select memories that my dad shared with me from his youth, but this season of his life he was very proud to pass on.
Even without the stories, I would have seen the fingerprint of Coach Carter on my dad. It wasn’t just playing Basketball in its purest form. More importantly, Coach Carter taught my dad how to value even the weakest and overlooked player on the team. For Coach Carter and my dad, there were no bench warmers. If you were on the team, you had a role to play on the court.
The most profound thing about this way of thinking is to watch over the years about how this shaped young men’s lives.
Once I went into Junior High (Middle School by today’s terminology) my dad was no longer my coach. He tried, but there were no openings. But he was able to get position as a boy’s team coach. Fortunately for me, the boys and girls teams played in different seasons. So even though I didn’t get to play on my dad’s teams, I gave up my free time to help my dad run his practices. Yes there were looks when I tried to help out boys my age during practice. That meant I ended up being a silent assistant.
While I did feel the sting of rejection about not having my knowledge accepted because I was a girl, I pivoted away from that and just learned more from my dad. I kept going to practices. I kept chasing balls and running drills. I wasn’t going to be shut out from something that was a part of me.
It took two seasons before I got to see the difference that a coaching style can make on the health of a team. The varsity coach was good, but he never had with his boys what my dad had with his junior varsity boys. On the varsity team the weakest player saw the least amount of playing time. Often times, those players were unsatisfied and felt rejected even by their own team member because they were the weakest link.
That wasn’t the case with my dad’s team. I watched the more skilled players still groan at the weakest links. But my dad refused to give up on them. He knew that he could make them better. And he did. The whole team had to work as a team, there was no exception. He gave more one on one attention to the weaker players. It was an investment. And it paid off.
There was one young man who wanted to quit the team because he knew he was the weakest link. But dad refused to give him an out. He helped him through his head space and built him up, until he could find self value. And once that young man found his self value, the team also valued him. To be fair, the team saw the potential in him before he saw it in himself.
What made that happen?
A coach who refused to give up on one of his boys. He kept calling out all the positive. Dad could see it deep down in him. After a little time, the rest of the team saw the skills deep down in him as well. They rallied behind him, encouraged, and cheered him on. With all this encouragement from his coach and team mates, the young man saw in himself what others saw in him. And he had a breakthrough that I hope has had lifelong results.
Advertisements
There was one other memory, of my dad’s coaching, that has stuck with me all these years.
One of my dad’s strong players transferred to a new school and he earned a place on the varsity team! We were so excited for him. And even though he didn’t have to do it, daddy rallied the whole team together and we all went to watch this young man play in a varsity game. It meant the world to him. His basketball family was in the audience cheering him on.
The problem was that the coach had a different philosophy in coaching. I won’t go into the details of that game. But afterward, we rallied behind our family and dad spoke one more time into his life. I don’t remember the words that dad said. But I do remember watching a young man buried under the weight of shame and disappointment. When dad was finished he was able to once again smile and hold his head up.
This was my Coach.
This is the type of coach that I want to be.
Back in January I welcomed my first team, 1st and 2nd grade boys.
From my own teaching experience I know that kids always perform better when you aim for the moon and allow them the space to pick up as much skill as they can on their own. For one, there’s always at least one kid who has higher skills than the rest of the team/group. If they’re not challenged, they can cause problems or they give up. The kids with the least skill sometimes feel overwhelmed by everything presented to them, but they don’t know that they can’t learn any of this. With the right teacher, a kid can learn anything because the adult believe that they can.
My first day of coaching, I didn’t know what I wanted to teach because my knowledge is strategizing at the middle school and high school level. So I opted out with teaching basketball terms and positions. None of these things were on the list or rules for this age group. But I didn’t want to coach at this age group. I didn’t want to dummy down this beautiful sport. I wanted the boys to be challenged and love the game that I grew up loving.
What was interesting was watching the parents during that first practice. Normally parents sit on the sidelines and talk or get caught up on work or personal items on their phone. Instead, I had the parent’s attention as well. Afterward, my husband told me that the parents were commenting that they were exciting because their kids were going to actually learn something this year.
This season I exposed them to using both hands, layups, screening, positions and a few other things. The point was never to get them to be proficient. I knew they wouldn’t. My whole goal was to get them to train their bodies in what it feels like to do certain skills. And in several years time, when it’s time for them to join a team that they have to try out for, and it matters, the skills that will be demanded of them at that point will already have a seed planted in them now. I took this year to set them up for success for another coach in the future.
Advertisements
But what I didn’t think I would have to encounter this early is the whole issue of the boys already picking out who were the skilled players and who should be treated as bench warmers. As a Parks and Rec team, everyone is supposed to have the same amount of play time–which is how I think it should be anyway. But the boys took it in their own hands, during games, to pass to the strong players only.
And this was where I wish my dad were still here to tell me how he got his team to be unified as a team. This isn’t something that all coaches know how to navigate and do it well. But my dad did. My only clues are what I have in my memories, but it doesn’t share light on his thoughts or capitalize on what he tried that went wrong.
If anyone is wondering about the answer to this issue, so far my best results have come from just the simple foundation of having a relationship with the boys. The fact that they feel valued makes it easier for them to see the team weaknesses (we own it all together instead of singling someone out) and problem solve. And giving them the options to problem solve gives them ownership of the team.
I’m sad that I’m losing a few boys next year. But I’m excited to look forward to having the boys request to be on my team again next year.
There’s no guarantee that I’ll get them back next year. All that I have is this moment in time.
So as a parting gift, I’m passing on a tradition from my parents.
Whenever dad coached out teams, my mom always crafted something that everyone got to take home. (I grew up in a generation where trophies were given to celebrate a few players. And only everyone took a trophy home when the team had a winning season.) One year mom made a felt pennant with the team name on it. (I still have it in a memory box.)
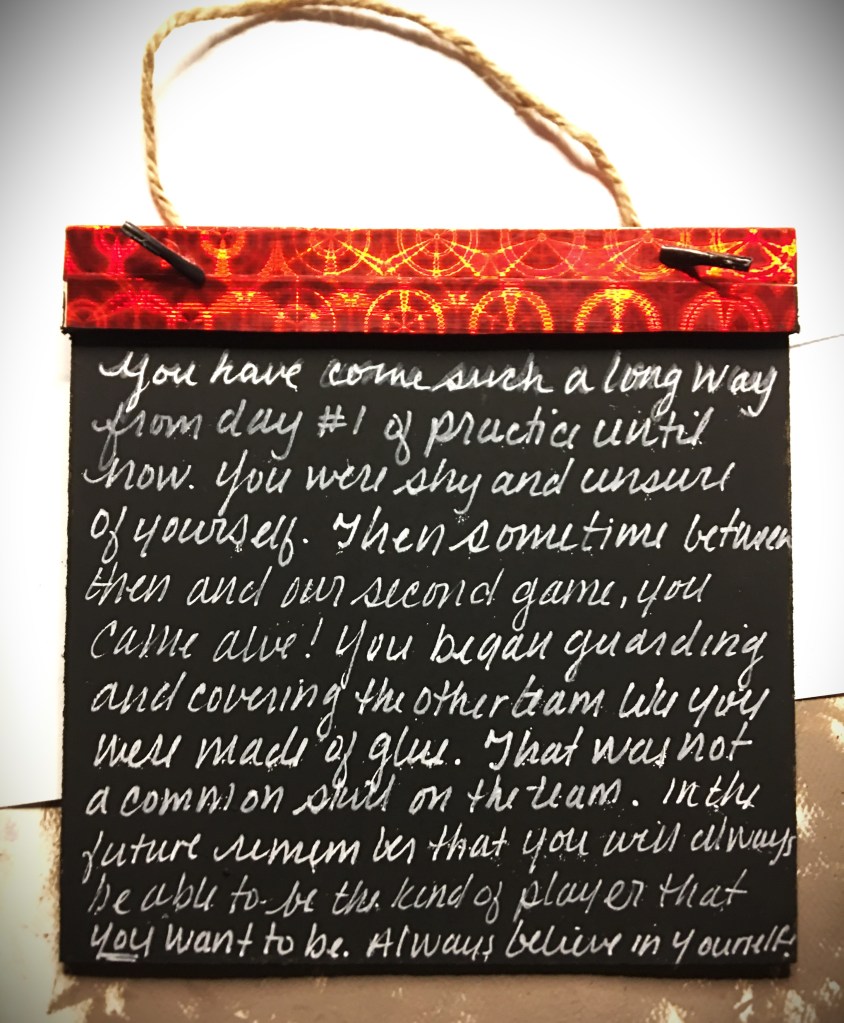
For my boys, I made stickers through the season, marking new skills that the boys learned. On the front of the chalkboard wall hang, the boys can keep their stickers like boy scouts badges. On the back I’m leaving a final message for the boys that they can look back on and see that they have had a coach in their corner. My goal is that no matter who coaches the boys in the future, they continually have a voice in their head cheering them on.
The perfect thing about this project is that it isn’t something that is just sports related. I know some teachers who give their students and end of the year present. Also, as a parting word to their students as they move on past their class room.
If this is something you would like to make for a child in your life, here is what I did.
What you Need:
6″ x 6″ Square Chalk Board (I found these ones at the Dollar Store)
Decorative Duct Tape (I found this holographic red at the Dollar Store in the Automotive aisle)
Black Chalk Paint
Permanent Vinyl
White Acrylic Paint Pen
Transfer Tape
Scissors
Paintbrush
Paint the sides and back of the chalk board black (or any other color of choice).
Apply the Decorative Duct Tape. The width of the tape covers the front, top, and top half of the back boarder. You can apply another strip of tape that I did or paint all the way up the back of the board.
On the front of the chalk board place your decorative elements. (In this instance, I did the team name and season year.)
On the back you can write your encouraging message. ( I also added the boy’s name so that they knew it was a message specific for them and not shared with the rest of the team.)
There are so many ways to make alternates of this.
You can mod podge on photographs on the front or back.
Have young children make a mother’s day painting.
Attach miniature clothes pins.
Attach metal strip on the top, bottom, or side to make a partial magnetic feature
If you are privledged to have children under your influence so that you can pour life into them, I hope that you are inspired by this project. A gift with modest materials can be transformed to be uplifting for years to come!
If you are a basket ball coach and are looking for stickers that you can make and pass on to your players, check out these designs!
How was your Christmas? Were you able to spend time with those you love?
In my house the whole month of December is difficult. But that’s the life of having a handful of young children in the house. I use to think that starting to decorate at the beginning of December and putting out presents as soon as they were wrapped was adding to the incessant build up of excitement and driving mom bonkers.
Nope.
We did things differently and things didn’t improve. My gift making still happened at night. Or should I say lasting into the wee hours of the morning. Lets just say that coffee is my friend.
But….
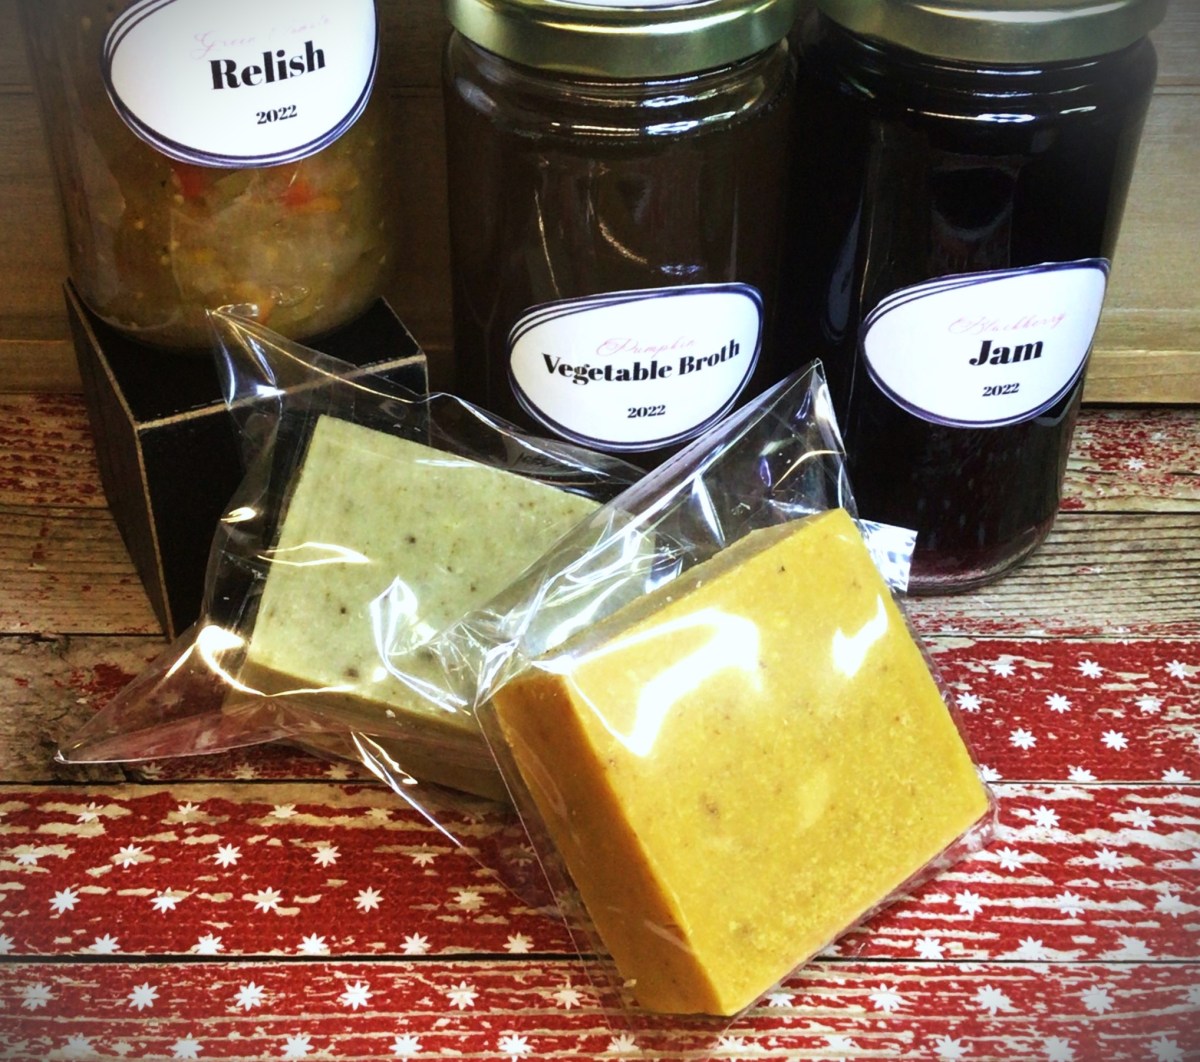
This gift, especially the soap, was probably my favorite gift to give.
I didn’t know how many people were having skin issues this year. And most people don’t talk about what they quietly suffer with. Part of it is the “I’ve tried everything” and no product on the market works.
The truth is that the local grocery stores have aisles dedicated to soap. And when you’re in that aisle you grab what you’ve purchased in the past (which may have been the brand that you grew up using) or it’s a sale based off of the label and its marketing claims. And we think that these area our only options.
Advertisements
You have another option
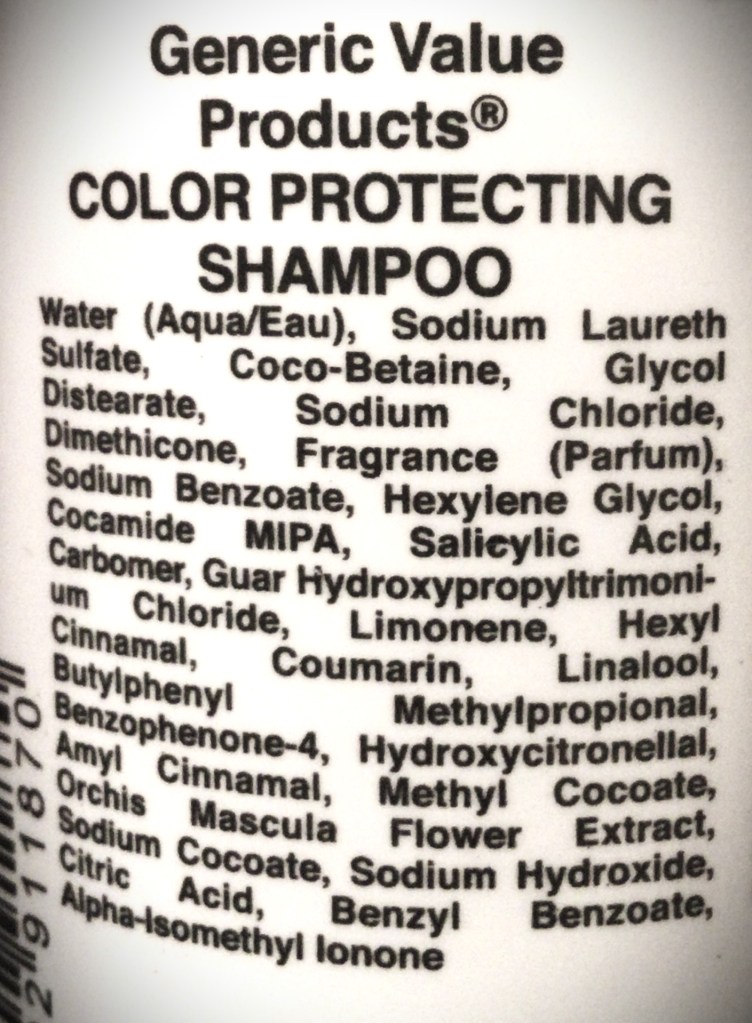
This is the video (three ingredients) that I watched that set me on the path of making my own soap, almost 3 years ago. It was an empowering feeling for me to make my first soap, Goat Milk Soap (4 ingredients), and stop buying the store bought soaps which have an ingredient list that looks something like this:
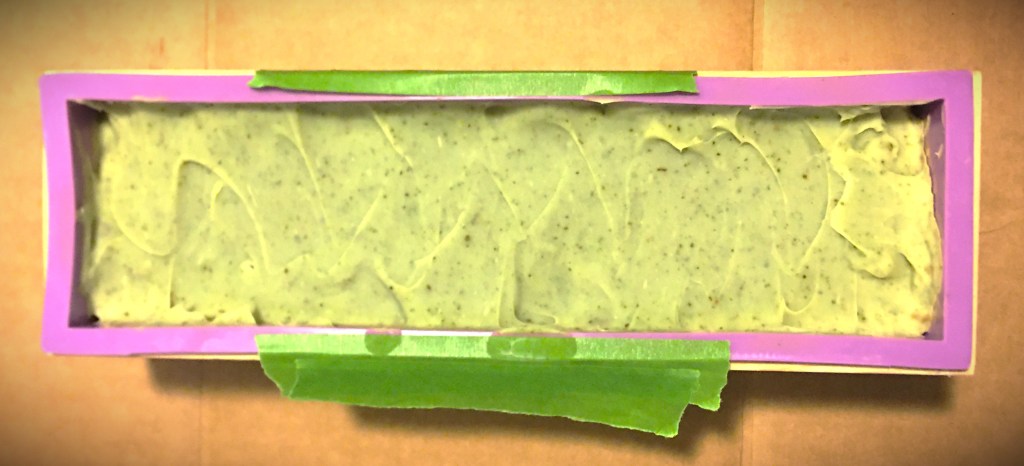
The comfrey soap in its mold.
Even though I took many chemistry courses in college, I can only tell you half of what is on product labels like this. If my children can’t sound out what the words on these kinds of labels have, that means that those ingredients are stuff made in the product labels of these soap corporations. Companies do this (take organic or natural items and change one chemical compound in the chain) they have made something they can patent and prevent other people from recreating (by pain of legal actions).
Soaps are made out of three items and three items alone: water, lye, and fats.
Yes, even those soaps that people claim are made without lye are actually made with lye. There’s a product on the market, melt-able soap base, that people claim is lye free but that is not true. This soap base is where the emulsification of the lye and fats has already happened for you. The lye and fats have already gone through the process of combining and so the lye has become safe to touch and no longer corrosive like in its original form (whether you use a crystalline lye or wood ash).
Advertisements
Here’s an example of a soap base. The first 5 ingredients are fats, followed by water, and then lye (sodium hydroxide). The end of the list is all the little extras that they added in to make their soap base unique from the others on the market.
In essence, this is an already made soap that a person at home can reshape and have the option of adding other things into for further personalization.
If you’re nervous about using lye, a soap base is going to be a good option for you. It’s not the best thing for your skin but definitely better than all the major brands on the store shelves.
Note: When making soap from scratch, with lye, you will need to cure your soap. This means that after you remove it from its mold (after it’s solidified for 24-48 hours), it will need to cure. This means that the soap sits for 4-6 weeks to dry out. While the soap dries, this allows the chemical transformation through emulsifying the lye and fats, to finish its work. When completed, they lye is no longer corrosive. The lye and fats molecular structures are completely joined and stable
Advertisements
Ingredient list from the soaps I made for Christmas
The two soaps that I made this year were Pumpkin Oatmeal and Comfrey Tea Tree.
Both soaps have only 9 ingredients that anyone can understand, colors of the soap come from the natural ingredients, and I can tell you the purpose of each of these ingredients and why they are good for your skin. You don’t need the lab chemicals to create lather or bar hardness. You don’t need the lab fragrances to give you a pleasant scent to wash with.
Note: “Fragrance” listed on an ingredient list of a mass produced soap, approved by USA FDA regulations, is all that has to be noted on a label even though it can include up to 200 different “fragrances” to make the scent of your soap. This is allowed because it’s modified in the lab and falls under proprietary patent laws.
Some of the comfrey soap after I cut it and before I set it aside to cure.
I know that not everyone approves of lard use in soap, usually for religious beliefs, but this fat can be switched out for tallow (beef, goat, or deer) which can align with religious beliefs. Or these animal fats can be omitted completely for the wide world of plant oils.
The variety of fats, found naturally in the world, each have different properties for your skin health and how it functions in a bar of soap. For example, lard is a single ingredient that adds hardness to the soap bar, creates lather, and adds to the shine and conditioning/softening of skin and hair.
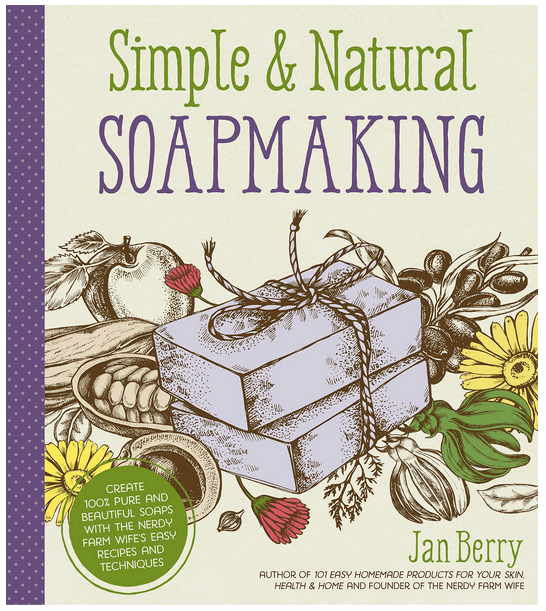
One book that I highly recommend for understanding how fats work in soap making and benefits to your skin and hair is Simple & Natural Soapmaking by Jan Berry
Advertisements
Origin of the fats is also going to play a part in how it reacts with your skin.
Shea Butter is not all the same. In fact, this week I just learned that not only is there a difference in quality of Shea that comes from heat vs. cold pressed processed Shea, but also the region. If I remember the documentary correctly, Uganda Shea butter is absorbed quicker into the skin than the Shea produced from other regions. And I never would have thought it, but the beauty industry is already capitalizing on the difference of absorption rates of the Shea butter produced from eastern and western Africa. It’s not all the same.
So if you by chance tried Shea butter beauty products and felt like the fat just sat on the top of your skin instead of being absorbed as you were promised, the reason isn’t because Shea failed you. It’s because you used a product that had a lesser quality of Shea.
In this instance, if you can afford to purchase a higher quality of Shea butter, all evidence shows that this purchase for a higher quality is most definitely well worth it. I’m all for finding the deal, but moving forward I’m now going to purchase a better quality of Shea.
With animal fats, whether the animal grazed on foods naturally available to the animal vs. grain fed and various injections will all be passed on to you through your skin.
Why what you put on your skin matters
It took me going through my second quarter of Anatomy & Physiology to learn that your skin is your largest organ in your body. Your skin keeps all your insides in, but it also is a filter from the outside world trying to come inside you.
I really don’t know why I was so surprised by all this because growing up we all have the conversations about needing lotion for our skin. We already know that we can correct some conditions by adding lotion or medication, depending on what’s wrong with our skin. But we never think about what we are adding to our skin daily that’s potentially causing the problems to begin with.
An example of a soap label. Notice the difference in readability and ingredients compared to a bar of soap I made (my shampoo bar, currently curing, is the same ingredients that the bar of soaps listed above).
We’re told to wash our hands regularly, especially during cold and flu season (not to mention the marketing for this habit over the last three years). With this increase reminder to wash your hands, how long is that ingredient list? How many of those ingredients do you know how to say, let alone identify what they do in the soap? Is it your hand soap that is adding to your cracked hands during the winter?
For example, my hands crack and bleed every winter. There has never been a lotion that I could find to ease the pain, let alone prevent the cracking in the first place. Christmas was when my Comfrey soap finished curing and I could use this recipe for the first time. Just by the first use alone, the redness of my irritated skin cleared up. The cracks decreased in size by half and by the next day they were all healed. I still have dry knuckles because I stopped using the Comfrey soap (leaving it for my son who has more sensitive skin in need of good soap). The Pumpkin soap isn’t as healing, but it’s still preventing the cracks. The Comfrey soap has aloe vera in it (which the pumpkin does not), so I might have to change that recipe to add some aloe in.
But I think you can start to see just by how your ingredients work, the natural function of things found in your garden, you can easily make a soap for yourself, family or loved ones that meet your skin type needs and not have to spend hundreds or thousands of dollars on store products that just don’t work.
Advertisements
There’s just so much to talk about with soap making. I will have to come back to this subject in upcoming posts. But I wanted to start the thought in your mind that you really can make your own soap. You don’t have to just survive and live with the condition(s) that you currently have. The first step is to start by cutting that ingredient list in half. The fewer the ingredients and shorter the syllables of the words mean that you understand what you are putting on the largest organ of your body. You can pinpoint what irritates your skin and you can pivot by switching out a fat or other ingredient that offers a vitamin or mineral that your skin actually needs.
Leave me a comment below if you’re looking for a solution to an issue.
In 2023 I’m looking forward to talking more about how herbs and garden ingredients can benefit your body. And all you have to do is add them as a seasoning to the foods you already cook, which benefits your body from the inside. And you can already start now with making soap to help your body from the outside. Skip the lab ingredients and start using luxurious soap that uses all natural ingredients which can eliminate all the extras that you need to “fix” what other products are doing to you.
For example, one lifestyle change for my family is that we are switching to homemade shampoo bars. My goal is to find the recipe that makes a shampoo bar where I don’t have to use 3 different conditions to combat the dryness that I’m convinced is caused by the long ingredient list on my shampoo bottles.
Happy New Year!!!
Products that were either mentioned in the post or items that you may find valuable in making your own soap.
This post contains affiliate links that give us commissions on products purchased at no additional cost to you. These items listed here are from Amazon but may be purchased at local markets. These products were paid for by us and are not the only products available.
After watching videos and reading different books, this is my personal favorite resource for recipes, ingredient information, and general soap making information.
I prefer cutting my own bars of soap and this is the set that I wished I would have bought the first time. The cutting block takes the guesswork out of eyeballing a uniform and straight cut.
This is great for just getting started and you don’t want to think about portioning out bar sizes. The disadvantage is that the silicone is very flimsy under the weight of the soap. So make sure that you have cardboard or another hard surface to tansfer the molds to a different location while the soap solidifies.
My granny made lye soap, used it all her life, never had skin problems, i make basic lye soap myself, 3 lbs of greese, bacon preferably, but the drainings off cooked meat, 2 gallons of water, and one can lye, , i greate up some for clothes soap, i use it in place of aal types of soap, melt it and mix with water for dish soap, works better than cascade in the dish washer, the only problem is aquiring the lye, it extreamly hard to get in the stores because it is one of the main ingreidants in the manufacture of meth, and everytime i make soap i have to call the police and noify them, so i dont get charged with making meth, it smells the same, making meth or making soap,
There shouldn’t be any fear in purchasing lye. I’ve been purchasing it for a few years now and have never had to report to a registery. There are certain over the counter medications that I’m aware of that there is a registry because of of it being associated with drug manufacturing. And in the instance of that product registry, there is a notation of who is buying what and at what quantity. For the manufacturing of drugs there is a specific amount that law enforcement starts paying attention to. For the average person, making soap at home, they are not going to come close to hitting that limit. I mention all this to prevent unnecessary fear from being spread.
Thank you for sharing how you make your soap! And also sharing how you use it to also to clean clothes and dishes.
Lately I’ve been very interested in the Boho style of event designing. A lot of event designers and coordinators tend to gravitate toward the fantasy of rich and fancy feeling decor. There is nothing wrong with that. I gravitate toward that. There’s just something about pretty sparkly things grabbing our attention.
Even when I worked for a decorating company, there was this huge gravitation toward bringing the Boho brides nearer to the glittery and sparkly end of design. I know why there is that nudging toward that direction. But I’m not going to speak ill of other businesses. I just want to take this moment to see and recognize those brides, and other event organizers and celebrants, who want to stay more toward the end of the spectrum of the simplistic and natural look.
This post is for you!
What I want to focus on today are a couple of floral options that are different than what might be proposed to you when you talk with a florist; succulents and preserved wild or garden flowers.
I don’t know if you’ve taken the moment to look at all different colors available in succulents. They are definitely a wide spectrum that diverges from the cactuses and green succulents that your mind naturally gravitates toward.
The best part about succulents, especially if you’re DIY as much as you can for your wedding, is that you can get these in advance and arrange your centerpieces weeks in advance. This is true, even in the middle of winter!
The one thing that you want to pay attention to is the little amount of care that you need to give them. But these are not going to wither or die on you when you look at them funny. They just need to be kept in soil designed for succulents and give them a little water every now and then.
Tip1: Succulents loved being watered from below. So when watering them, place their dish (with drain holes) in a dish of water and give them a few hours to drink as much as they want. They have enough water when you see that the soil on top has been touched by water, not dry to touch.
Tip 2: If you see the petals start to have a wrinkled appearance, they are underwater. Make sure you soak them in a dish of water. It may take a little time. But once the succulents have gotten enough hydration they will look plump again and not wrinkled.
The only other thing that you have to pay attention to is how much light they get. Here in the Pacific Northwest, succulents are not about to get too much sunlight. They can be burnt by full sun, depending on your region. But in the couple weeks that you have them before your event, this is not likely going to be an issue.
Advertisements
One issue that you might have is when you’re succulent undergoes what looks like a growth spurt.
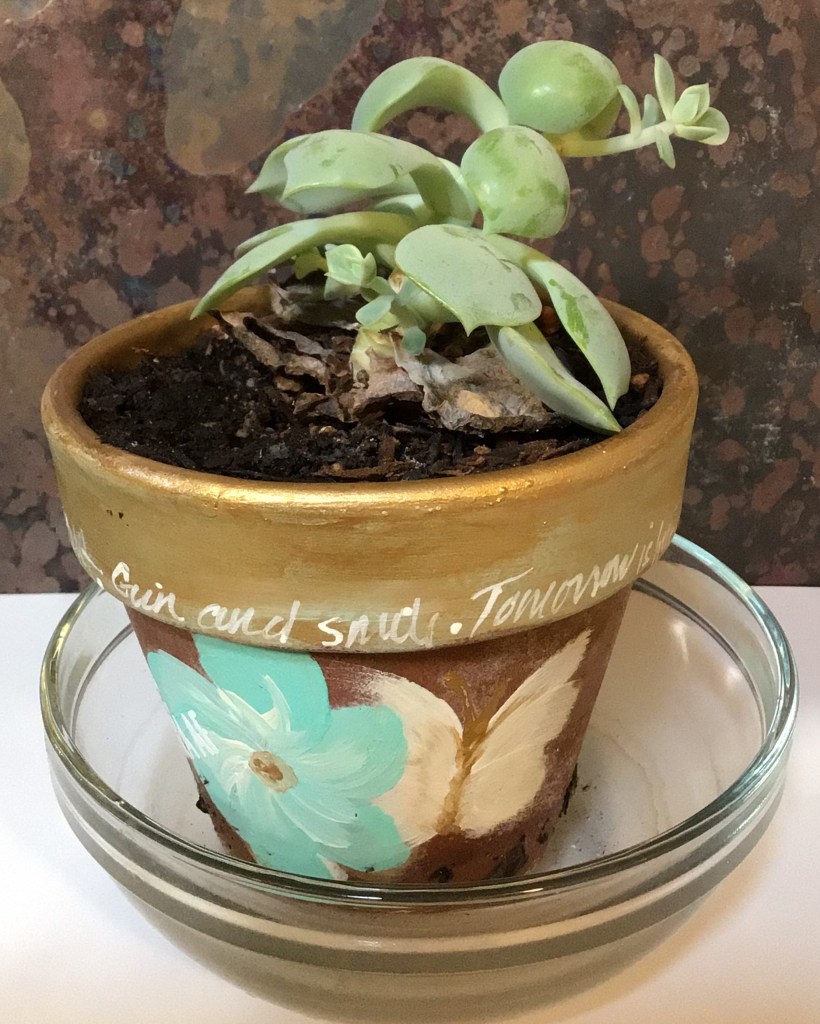
This example is definitely an exaggeration of what you will see because I’ve had this succulent for well over a year. It started to bolt like this a couple of months after I received it. What happened here is that the window sill (eastward facing) did not receive enough light. So the plant grew to reach more sunlight.
Your succulents will stay small when they have enough light. So if you see this, or you notice that there is some growth that is starting, then you want to find your succelent(s) a sunnier location.
If you catch the growth quick enough, you can trim off the growth, and return your succulent back to the smaller size.
Take a length of dental floss, wrap it around where you want to trim and pull it tight. You can use scissors, but it will apply pressure from two points to cut. If you use thread or floss, you can apply even pressure around the plant. Also if have a cluster flower of a succulent, you can fit the floss in between the petals and top the succulent without damaging the rest of the plant.
The clipping you can then put in a new container with soil and it will propagate for you.
I put the topped succulent in this cup with water with another topped clipping that I’m waiting on soil for. It’s okay to put into water, but you want to get clippings into soil as soon as possible.
If you are saving money by propagating your own succulents from bought succulents, make sure that you give yourself enough time to let new buds grow. It doesn’t happen overnight. If you don’t have enough time, your succulents will look bald and not so happy.
Here is another What-Not-To-Do
This succulent was originally small like the first picture of succulents I showed you in this section. This one also grew to reach for more light. I should have trimmed this when it first started to grow. Had I done that, it would have remained small and cute. Instead, it changed its shape and spread. But what you can learn from this is what it will look like at the spot where you clip back the top your succulent. There is a small bud that you see on the top right. That grew in about two weeks after trimming. On the bottom left you see another bud grow in where I snapped off some of the larger leaves to practice propagation techniques that I’ve seen on FB reels.
If you are interested in looking to propagate succulents for your event, make sure you give yourself enough time to do so. You will want a couple of months to do this DIY. Talk with some local greenhouses with growers who have experience with succulents. Also there are FB groups dedicated to succulents. Join a group or two and learn from those who are succulent whisperers. There is a wealth of good viable information there.
I readily admit that I am not an expert. And there is a world of information available. Just do not take your advice from clips and reels on FB, Tick Tock, or anywhere else. I tried propagating leaves in a plastic bag, through a slit in paper to suspend over water, and directly in water. None of these have worked for me and I am most certainly a novice at propagating succulents. If you’re a novice, I suspect that these reel methods are not going to lead you to success either. (With the leaves, I tried about a dozen and not a single one grew. This is reason why I have little reason to believe these techniques work. Not working the numbers paid off. If I get a success rate of 1 out of 10 attempts, I call it a viable option.)
One other walking away point I want to draw your attention to, is take notice of the terra cotta pot decorations on my pots. These were painted on with acrylic paint and have stayed on the pots over a year later. So it will not flake off anything else. And this is an excellent way of incorporating your event colors. You can create endless possibilities with your design. Whether you go with feather like swirls, dots to simulate lace, stripes, or even using a stencil from any store’s craft department. You can certainly dress up your terra cotta to fit the look you are going for.
I’ve lost count of how many events that I decorated for where I would take home flowers after an event because there was no second life for the floral arrangements after a wedding.
Don’t get me wrong. I LOVED those events because I had pretty flowers to take home and enjoy for a week or two. That is definitely an occupation perk that I’ve enjoyed.
However, at the same time, it has always saddened me a little because I have always wanted people to have more bang for their buck when they are spending good money on a wedding or other event.
So here is where we join two very important passions of mine!
I breathe creativity and decorating. But I also love working in my garden and learning all the old skills of creating home supplements, natural cleaners, and especially new ways of putting food on my table.
The very day that I learned about making a Chive Blossom Vinaigretteis the very same day that I made it.
This is Day One of my Vinaigrette:
My Four year old and I did this together for the very first time and as soon as I saw how this jar looked I immediately thought, “How Beautiful!”
And this was the first, on many ideas that I had:
You can go with sentiments or go all the way with the couple’s monogram, name and wedding date, or even line art that goes with your over all Boho decor.
What I absolutely LOVE about this inspiration is that it’s simple but has so much LIFE after the wedding or event.
For example, this Chive Blossom Vinaigrette will become a salad dressing, meat marinade, or other meal flavor provider in as little as 3 weeks. The total cost for this is just your jar, the chive blossoms, and food vinegar. When you’re looking for cost saving centerpieces, you seriously can’t beat this for bang for your buck!
To do this idea, you will definitely have this be your day of preparation, so have a few hands on deck. You will want to clip your edible flowers, rinse them, and place them in the jars before adding the vinegar.
The reason why I say do this on the day of is because of the process needed to properly turn this into a proper dressing or marinade. It is shelf stable during the whole process, but it needs to be kept in a dark cool place for the 3 weeks of processing. You could also use the jars at the end of the three weeks, when the vinegar takes on a fuchsia/purple appearance. But you want to try to limit the heat and light exposure no matter if you do it at the beginning or end of processing.
Tip 1: This needs to be shaken once a day for the entirety of the three weeks. So you will have a cleaner look at the beginning of the process. At the end of the process, you will have some floating pieces from the flowers. That just naturally happens with daily agitation.
Tip 2: At the end of the 3 weeks, you will need to filter this vinaigrette through a cheese cloth to remove all debris (and rebottle) before you use this as a dressing/marinade.
Maybe puple is not the color that goes well with your Boho design. Here is a list of some other edible flowers that can be used in making your own version of a different vinaigrette. Or you can just put the blossoms of these flowers or others into a jar filled with water.
Nasturtiums
Pansies
Violets
Hostas
Borage
Calendula
French Marigolds
Chrysanthemums
Carnations
Hollyhocks
Sunflowers
Cornflowers
Gladioli
Honeysuckle
Dianthus
Antirrhinum
Tulips
Roses
Lavender
Pea Flowers
Broad Bean Flowers
Onion/Chive Flowers
Brassica Flower Heads
Pak Choi Flowers
Squash Flowers
Dandelions
Daisies
Chamomile Flowers
Red & White Clover Flowers
Chickweed Flowers
WARNING: Make sure that you only use flowers that have NOT had pesticides or herbicides used on them. Whatever has been applied to flowers will enter your body if you eat them or any extract that you make from them.
Advertisements
Flowers as herbs and seasoning have different flavors that they impart. Some have a peppery note to them. The chives that I grow are a garlic chive, so it imparts a garlic flavor without having to fuss with cloves of garlic. I’ve also started working with Lemon Balm (a member of the mint family) which imparts a lemon flavor. So I could have added tiny Lemon Balm leaves in with the chive blossoms. Which now that I think about it, I’m definitely going to add that to my vinaigrette as soon as I post this!
Another thing to keep in mind is that for thousands of years edible flowers and plant leaves have been used for natural medicine. For example, Lemon Balm is great for combating the viruses behind the common cold. So you can give your body the things it needs to keep healthy while adding flavor to your food.
If making a vinaigrette is not something you will use after the wedding (or other event), consider looking into making your own chemical free cleaner. For example, you can still use this mason jar idea and make a kitchen cleaner with lemon or orange slices and peels.
If you’re not looking for a natural cleaner, than even using berries and mint, basil or other leaves in water, is a great of washing your produce before you eat it while borrowing it for a few hours for your event.
There is one more option for Fall and Winter Events when most of the edible flowers are not in season. You can make Pine Syrup or Spruce Tip Syrup. I found this type of syrup interesting because I have spruce widely available around where I live and real Maple Syrup is a luxury on my family’s budget. This can be a pretty centerpiece as well because you use the new growth tips on a spruce tree or pine cones for the Pine Syrup. I’m sure that you can imagine the possibilities for all your holiday parties with this one!
Decorating the Mason Jars
The simplicity of these jars is beautiful all on their own. But maybe you want to dress them up a touch. What can you do to add a little panache?
Paint the jar ring (White, Gold, or other event color)
Apply glitter to the jar ring (after finished spray with a clear coat of paint to keep from leaving a glitter trail)
Use squares of pattern, texture, or fancy cloth on top (held in place by screwing the ring down onto the jar over the fabric)
Decorate the jar itself
Use the jar as a base for a taper candle (with candle holder) to raise the level of the candle above other centerpiece elements
Put your table number on top of the jar
I hope you’re just as excited about these ideas as I am. These are definitely something fresh for existing wedding and party themes. Be free to experiment with using some of your food preparation and preserving techniques the next time you are decorating for your next event!
Files Used In This Project
As a special treat I have a surprise for you! Visit my store and check out Love. Be sure to hang around and see what else is new. Every Monday at least one new SVG is added!
Processing…
Success! You're on the list.
Whoops! There was an error and we couldn't process your subscription. Please reload the page and try again.
It doesn’t matter how many years you’ve been crafting and DIYing. You will fail. I fail.
What you do with failure determines what your future will look like. What your end product will look like. You can finish in a failure. Or you can take an option and end on a different note.
In fact, here is my most recent fail and how I pulled out of it.
Two weeks ago I started working on a Teacher Appreciation gift for my son’s pre-school teacher. First, let me just say that it’s difficult coming up with a meaningful gift for a teacher that they don’t get a million of and you’re just one of those parents who giving a gift card just doesn’t feel personalized enough.
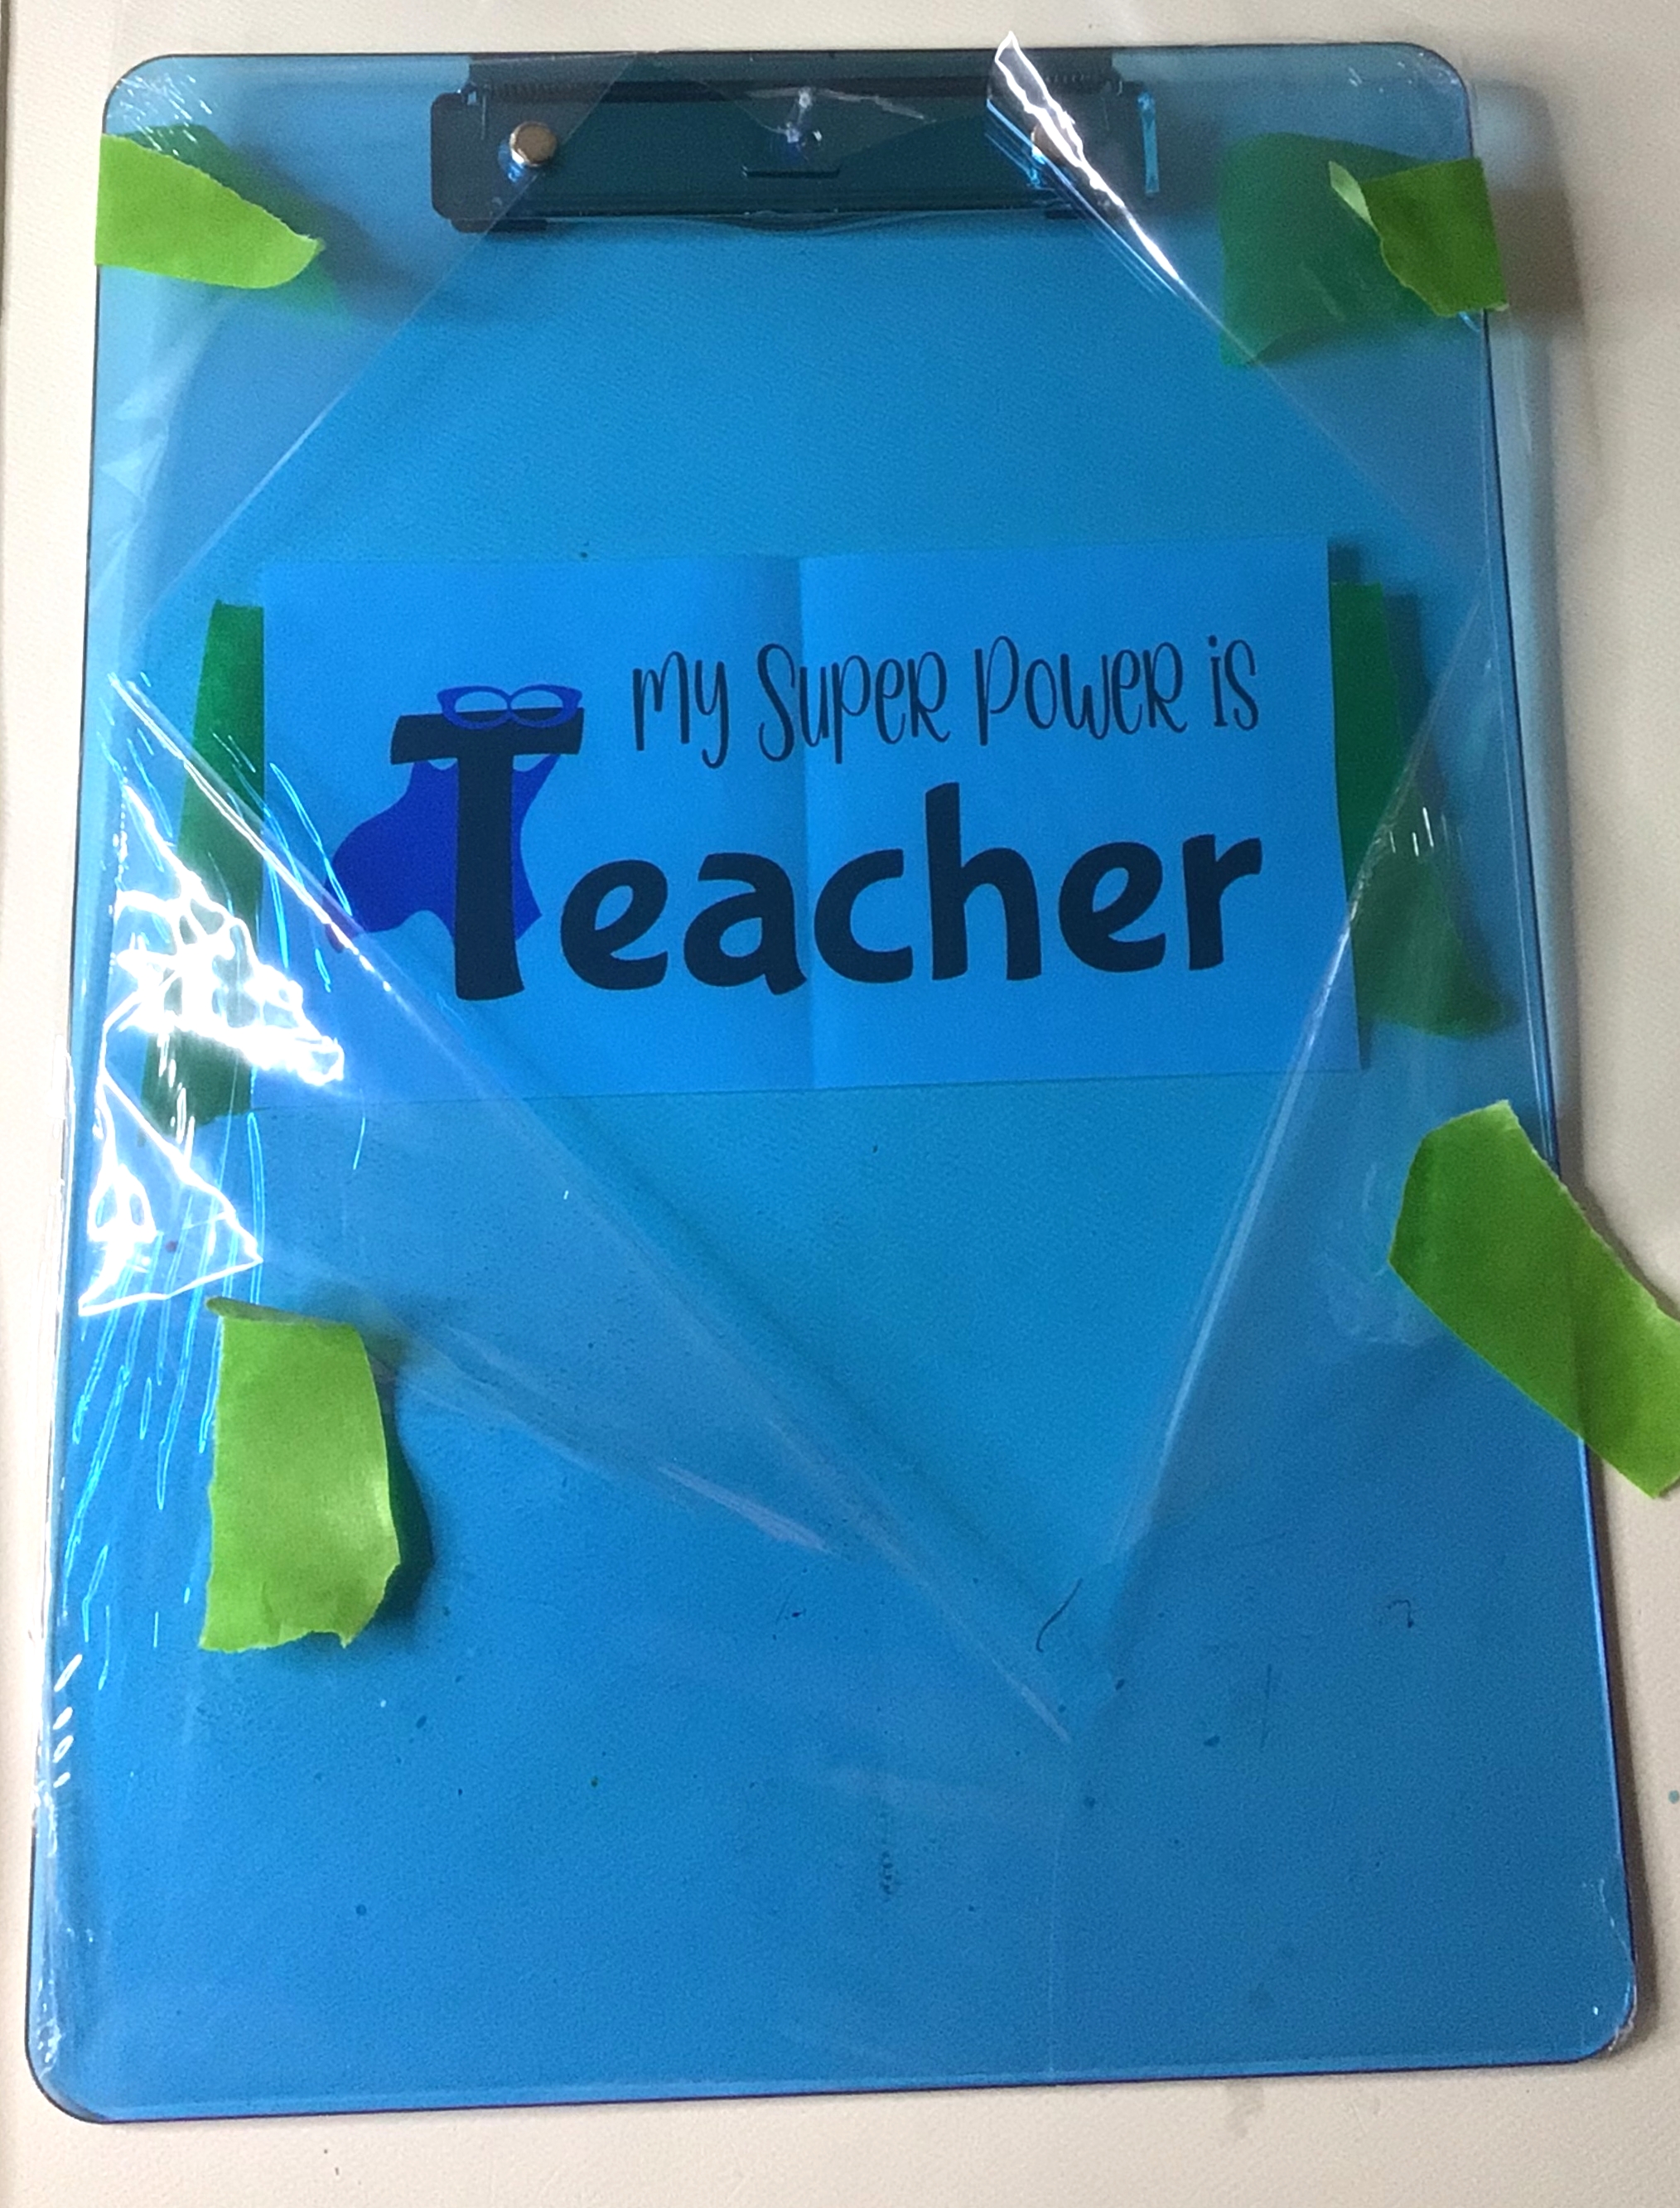
I help out in my son’s class and noticed that his teacher had one clip board. It’s pretty standard and who knows if it was on its last leg or was a work mule. But I do know that with home schooling my older son that a single clip board is not enough for me. And this was what birthed the idea of making a personalized clip board for our pre-school teacher.
Advertisements
I find the diamond painting crafts a very relaxing no thinking type of craft. With that experience, I had high hopes of having fun and relatively easy time with this. What I should have counted on is that the Jewel and Metal Glue would have had a mind of its own and gotten all over the place.
I should have set up more protection against glue betrayal. With the print out of the design on the back side of the clip board, I can see exactly what my work field was going to look like. I should have taped on protective paper (just spare crafting paper) to protect the exposed board that was not being worked on.
As it was the glue, coming out of the tube, came out at larger quantity than I needed for the small text on the top. What I needed, to control glue quantity, was a tooth pick. It provided enough glue to adhere the gems, and kept the glue of glopping up and making a further mess. However, the clear glue also found ways of transferring to other parts of my hand and got on the board. The crafter who recommended this glue to me (and other crafters) said that it dried clear. And I was under the impression that it would be relatively invisible.
Yeah, not so much.
IF you can keep the glue minimal, it hides quite nicely. IF you get impatient or frustrated, the glue does travel. It does clump up. It does not dry invisible.
I also want to mention that the gemstones were the actual frustrating part. The tweezers that came with them did not pick up well or easily. The white pencil that came with them worked maybe half the time. I actually had to pull out a spare diamond painting tool and use that. The disadvantage that comes into play is the gem glue. It acts like a super glue and builds up. It causes the gems to stick to the tool. So make sure you take the time and clean whatever tool you are using regularly. By keeping the glue buildup to a minimum, you will keep the frustration down a little.
Tips that I have for my next time:
Fully tape off the non-work area
Try to not use the tiny gemstones
Don’t be hasty, use a tooth pick for glue application
If using the side of your hand, put tape on the side of your hand (to replace every now and then to prevent hand transferring of glue)
Advertisements
Correcting the Failure
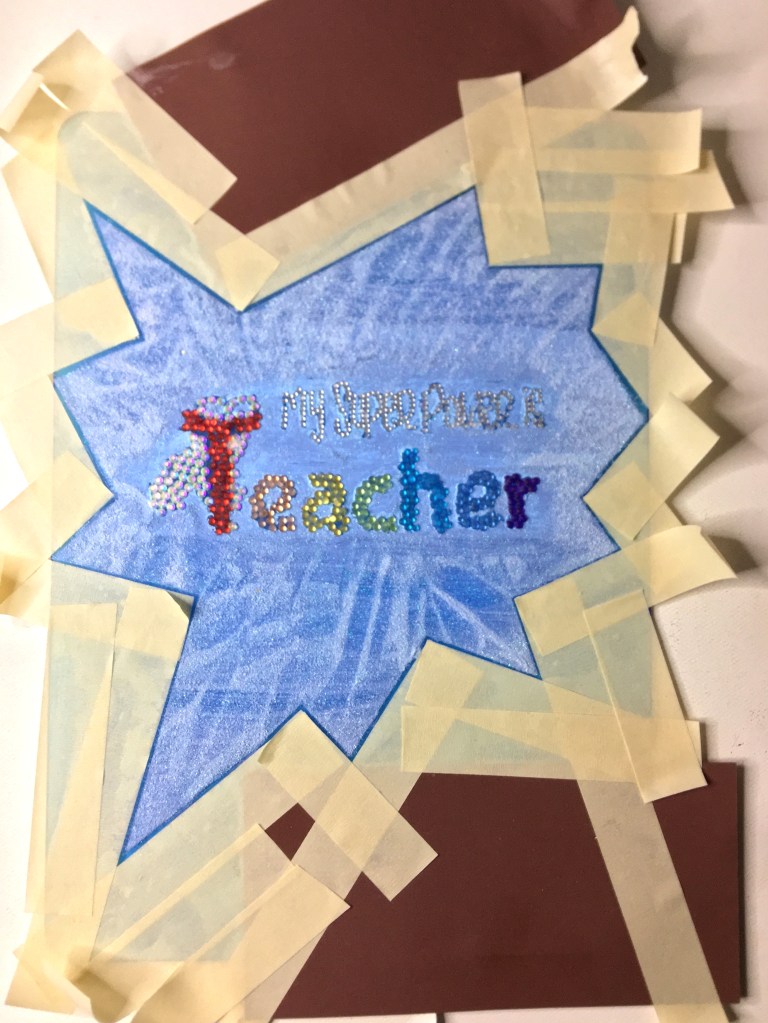
There were a few ideas that I had to redeem the glue failure of this project. Had the failure just been hand transferring of glue, I would have made other icons, “pows”, comic speech bubbles, etc to add more of a graphic design. However the glue failure was mostly an eye sore around the text with the stones, where the glue was just too thick.
I opted for acrylic paint to cover the glue. On top of the paint were glitter glue and a layer of fine glitter.
Step One: Tape off your Comic Speech Bubble. With cutting the edges, it allowed for the continuation of the lines and making the edges as varied as you want them. Just make sure that you press your edges down well so that the paint and glue don’t feather under the tape.
Step Two: Paint. Between the letters and around the gemstones, I used an acrylic paint pin. The edge of the pen is just more firm and easier to manipulate than a paint brush.
Step Three: Add glue and glitter. Once the excess glitter is shaken off, peel the tape off of the clip board.
The wrinkles that you see here is just the uneven application of the glitter glue. I was playing with texture to see if I could get a comic sunbeam pattern.
Step Four: Tape off the clip board for sealing with clear acrylic spray paint. This paint will keep the glitter from shedding. (I sprayed two coats of paint.)
There’s two ways of reapplying the tape. The tape can be put right on the glitter line. Or, as I chose, I offset the tape so that I could seal the edges of the glitter, but also add a simple edge to the design. The clear acrylic paint creates a glazed appearance.
Be sure to press down all the tape edges well. If the edges are not fully pressed, it leaves the opportunity of the clear paint to feather under the masking tape.
Once you have sprayed your last coat, you are ready to remove the tape and paper. If you choose to remove the tape with the paint still wet, there is the chance that there will be some feathering. If you wait until the spray paint is dry, there will not be that potential transference.
As you can see with this side by side, particularly around the -her of teacher, it is possible to clean up glue failure. There is a trade off of not being able to keep a minimalist design esthetic. However, there is light at the end of the failure tunnel. Sometimes you can remove errors that just can’t be erased.
No matter what you are working on, take heart. If something goes wrong, it is not the end. You can fix it. Take a deep breath. Look at your options and see what all is available. If you have more than one option, try to visualize what it will look like if you go down that route. Which route is going to get you in a better place in the fewest amounts of steps? Which route is going to eliminate the failure in what you’re working on? Not all solutions are equal. But the more options you have the more you hope you have for your end product.


Leave a comment