After spending almost a decade in the event decorating industry I have repetatively heard "I can do that". Instead of being dismissed by creative minded people, I want to show you how I do "that" so you can be sucessful in recreating that inspiration image. I just might have a few tricks that you haven't seen yet!
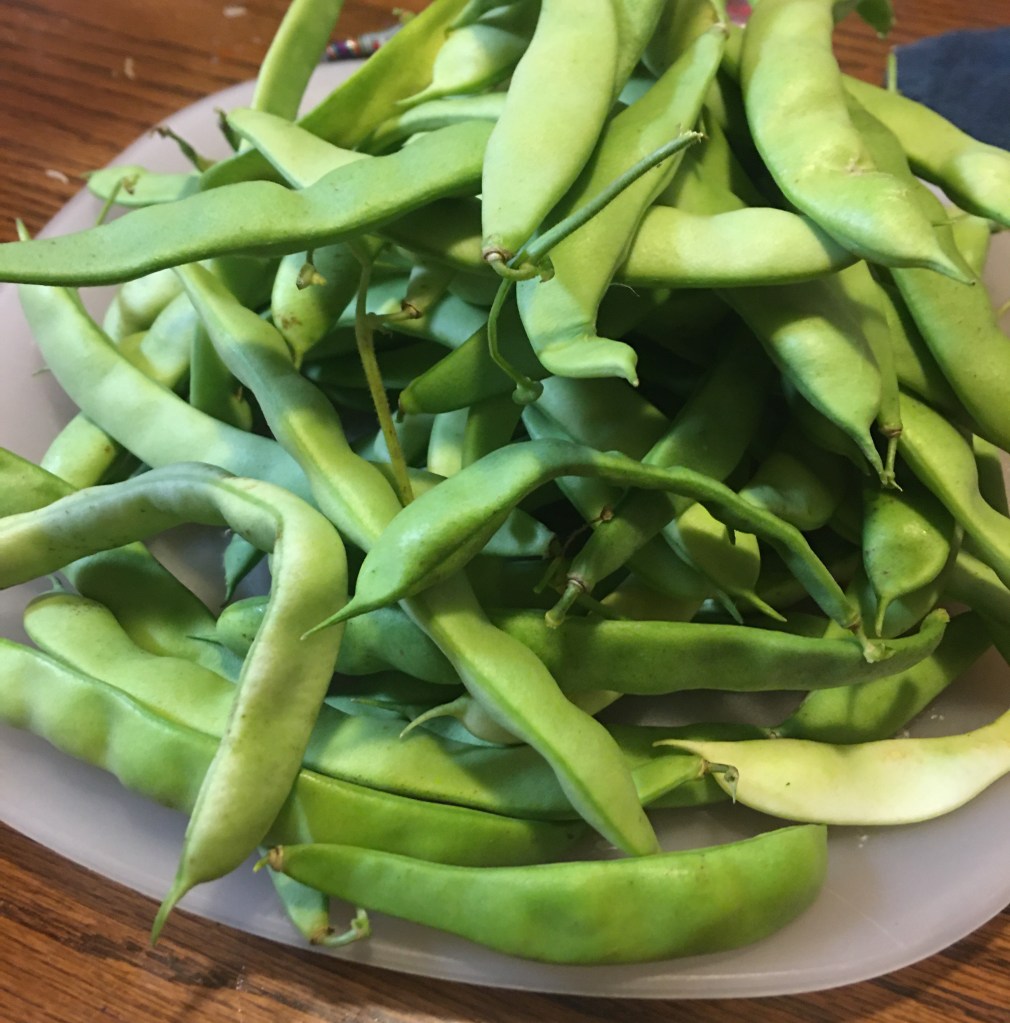
This was the first year that I grew a shell bean. I grew up with my grandparents and mom growing snap beans. In fact, snap beans were pretty much the only vegetable that I ate without issues. So I have a special place in my heart for beans.
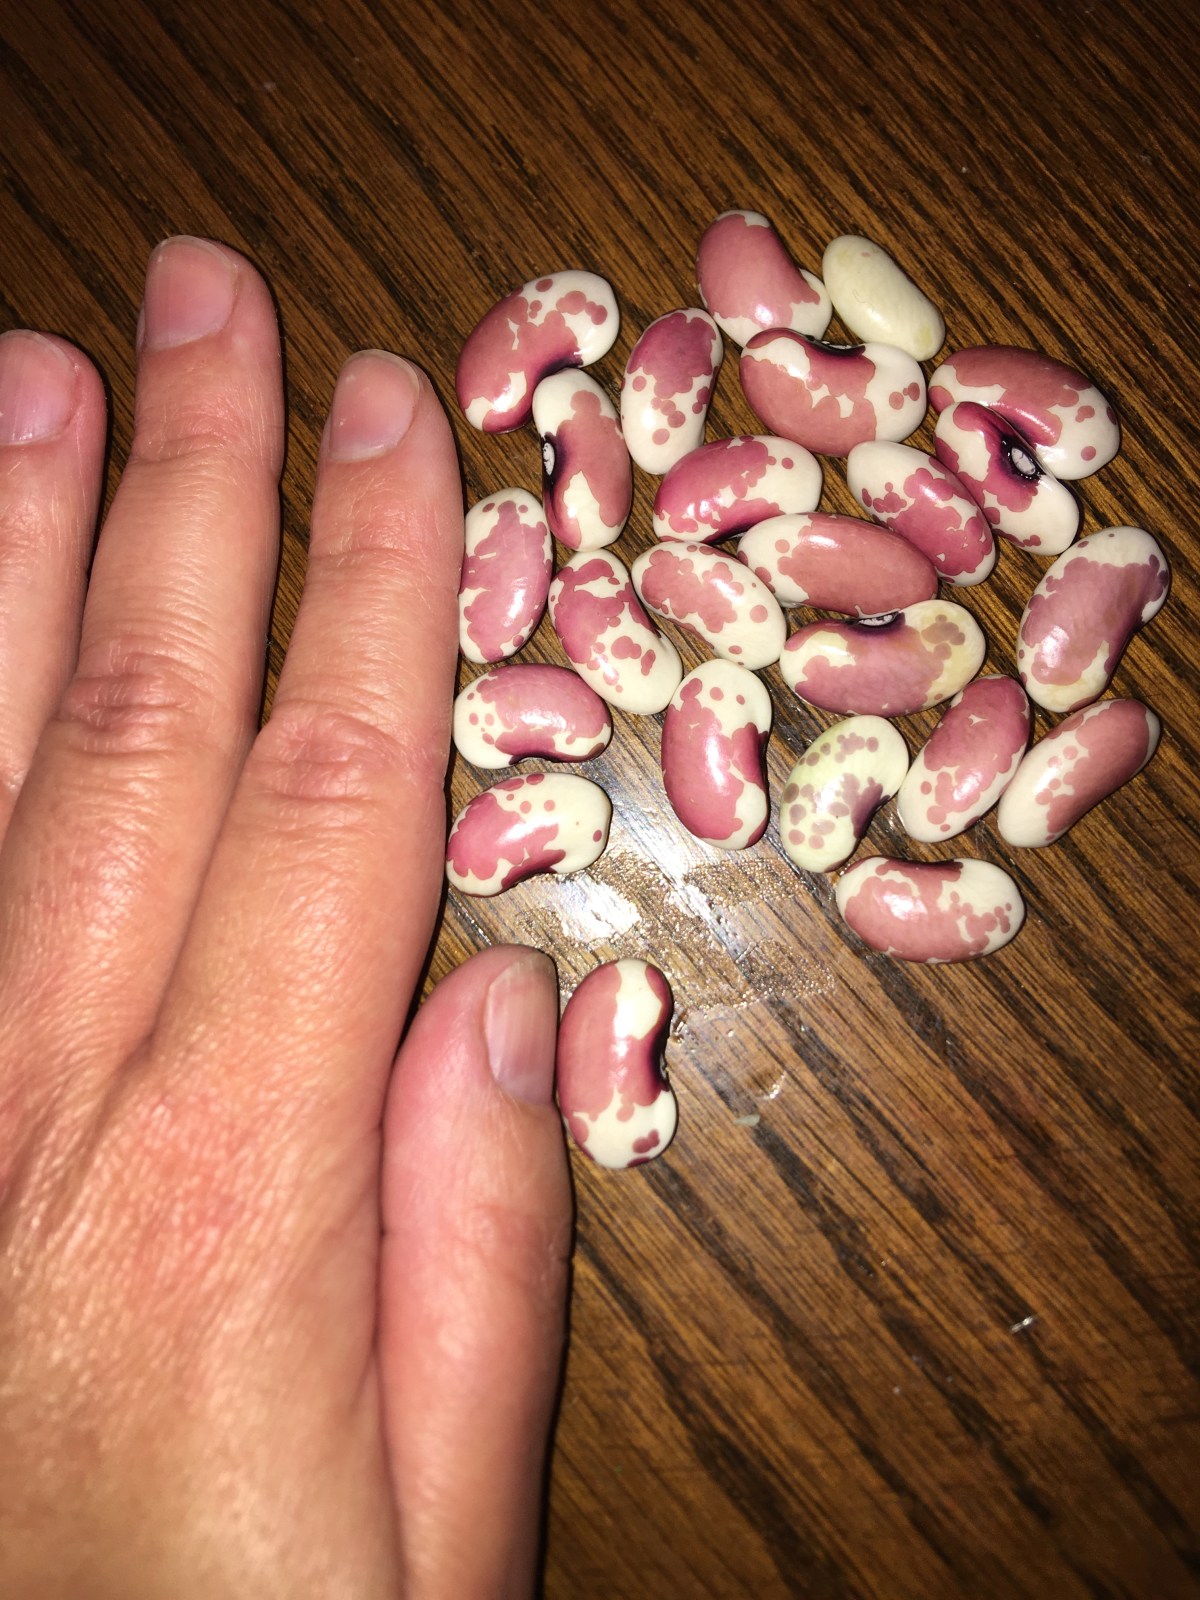
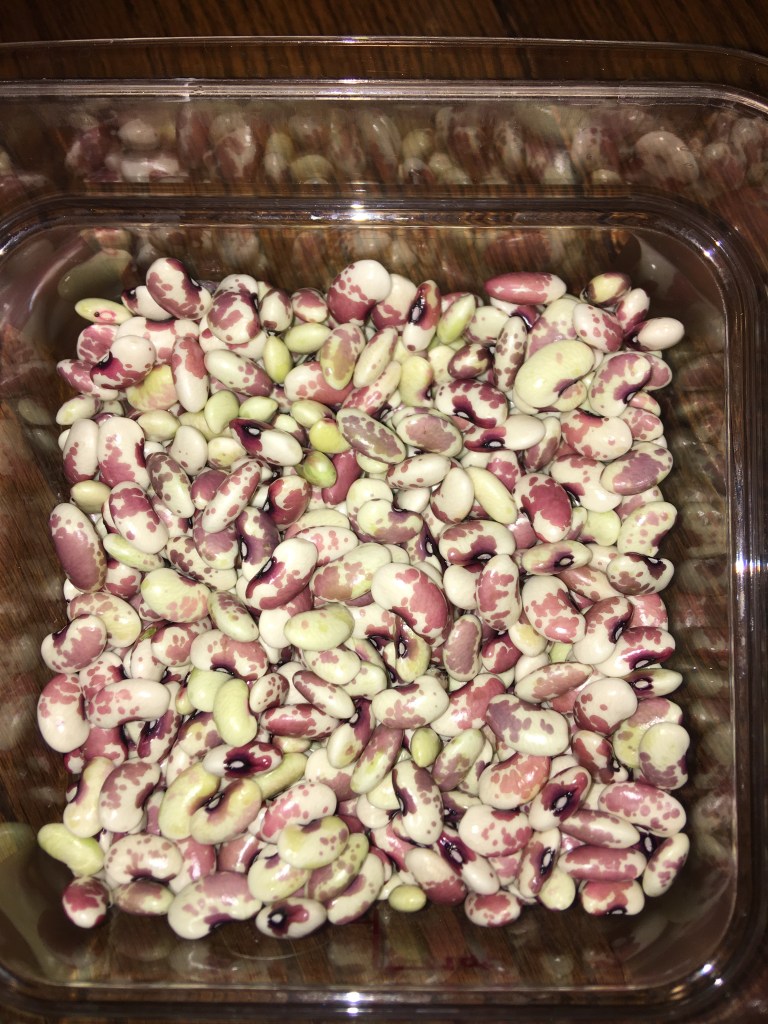
This is the shell beans that I grew this year, 1000 Year Cave Beans.
I think my beans loved being talked to when I watered them. I was surprised to see just how large these beans grew to become.
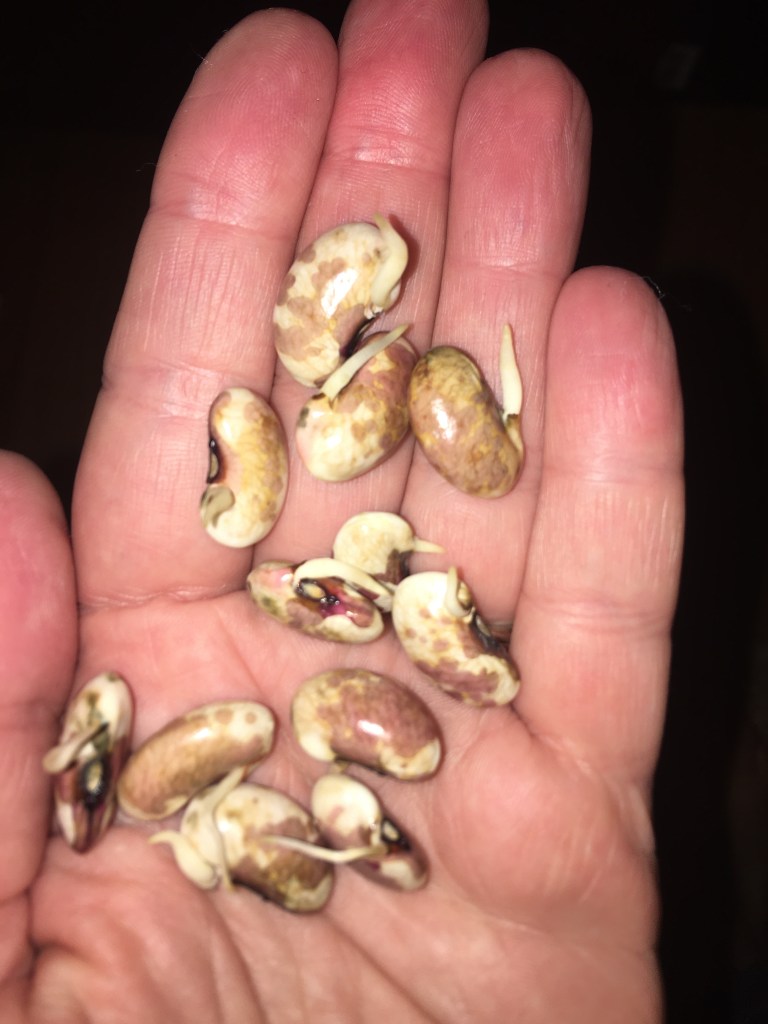
And just to show you how fresh these beans were, I didn’t anticipate them sprouting with in 3 days of me shelling them and waiting for more to mature so I could can a couple jars at once.
Advertisements
The one bit of information that I thought was prevalent was preserving beans of all kind. But with every safe recipe that I looked up every recipe was either for snap beans or dried beans.
When I teach people how to can, I always hand them safe recipes to select from, depending on what they want to can. And so these are the first sources that I turn to when I look to can a new food item that I’ve never canned before. And so I trust that what these experts say are what you are going to get. This is the one time that the extension office failed me. Here is the recipe that I used for my fresh shell beans. In full disclosure, if I were canning dried shell beans (such as the bagged beans from the dried foods aisle from the grocery store) this is absolutely the recipe that I would use.
But for fresh beans… I didn’t have canned beans. Instead I had half beans, half refried beans.
What happens when you can fresh shell beans the same as dried shell beans?
The gray in the water is the starch from the starch from this particular bean, 1000 Year Cave Bean. In fact, the starch left over in the bottom of the pan that I cooked these beans for the 30 minute stove top cook for a hot pack, was a richer version of this gray. In fact, it matched the gray on a pair of my camo pants. Next time I harvest these beans and prep them, I’ll take a picture of the bottom of my pan for you!
As you can see here, my beans started to break down due to the 75 minute processing time on top of the 30 minute hot pack cook time.
On the positive side, if you want to have canned beans that you can eat straight out of the can without needing to warm it up, the extension office recipe is perfect for it. All I added was the hot beans, hot fresh water, and 1/2 tsp salt for my pint sized jars. The beans were perfectly seasoned, soft, and very tasty. I am absolutely canning these beans again from here on out for the unforeseeable future.
The Extension Office recipe was also very pleasant for adding to my enchiladas recipe. In this instance, I really do appreciate a soft, smashable bean.
Unfortunately I need canned beans that I can toss into a soup, stew or chili where some firmness is needed.
Advertisements
Is there another safe recipe available?
I’m going to connect you to one of my favorite safe canners Melissa Norris, Pioneering Today. Please click the link to go straight to her directions. A video is also available.
If you’re on a time constraint, here’s the quick read of her directions:
Wash your jars.
Fill the clean jars with shelled beans until 1 1/2″ head space remains.
Add salt (1/2 tsp for pint, 1 tsp for quart).
Boil water and pour over the beans until you have 1″ head space.
(Remove air)
Clean the jar rims with a damp cloth, place lids, and screw down bands.
Place jars in your pressure canner.
Vent your pressure canner for 10 minutes.
(Once at pressure) process the beans at 10 lbs. of pressure for 50 minutes.
Once time is up, remove from heat and let your canner cool on its own.
When the lid unlocks, remove the lid but leave jars in the canner for about 10 minutes.
Remove the jars from the canner and set on the counter to cool for at least 12 hours and seal.
Store in your pantry.
If you are growing beans to supplement some of your grocery purchases, love gardening, or various other reasons… know that you can absolutely can your own beans. You can control what is used on your plants and what ingredients you add with your beans when you can them. The beans that I canned have 3 ingredients: beans, water, and salt. In comparison, the sale beans that I have in my pantry have an additional ingredient Calcium Chloride (an additive to absorb moisture which causes bacteria to thrive, “used pre- and post harvest to maintain firmness, reduce decay and prevent certain diseases… [and] as a drying agent.” (ingredi.com)
Advertisements
Store canned beans do have their benefit. I’m not going to pretend that I avoid them like a plague. For my family, we’re choosing to make a switch to lessen the additives in our diet. And with my young children, I want them to know where food actually comes from. I don’t want them to assume that food just mysteriously shows up on the store shelves. I want them to know where their vegetables come from. And where their meat comes from as well. (We love our local farmers!)
Plus I have the added bonus of not just hearing my oldest say, “Mom, can we can ____? I’m interested in that.” But it also helps establishes what we learn with our homeschooling. Math and science do matter on a daily basis. We can understand our world by working with it.
But most important of all, pressure canning beans (and other vegetables) make growing or store sale purchases a massive benefit to the family budget because we can preserve it and eliminate some of our food waste. And that is a win win for everyone!
Processing…
Success! You're on the list.
Whoops! There was an error and we couldn't process your subscription. Please reload the page and try again.
Since last week I continued my experimenting with whey and I wanted to do a follow up post on what I learned. And this information is important because of the inflation, the items that are starting to not be stocked in the grocery stores, and supply chain issues.
So whether you are trying to be more efficient with how you spend your grocery budget, or if you’re trying to find a replacement for the things you cannot find on the shelves here are some ideas for you.
First, for those of you who are dependent on keeping some probiotics in your diet for your guy health, know that whey gives you a better option for probiotics. Check the label on your yogurt with probiotics. It’s been brought to my attention that those yogurts often have higher sugar content than other yogurts. If you’re not up to making your own yogurt, you can buy greek yogurt, stir in whey and you have a probiotics yogurt, at a better price, and lower sugar content.
If you make a dressing at home (for example we make Ranch) from a packet/scratch, switch out the milk content for whey. If your dressing calls for water instead of milk, still use whey instead of water. This simple switch automatically adds gut healthy probiotics and gives you the same dressing. The whey will impart a hint of lemon to the final product, but that gives new life to a favorite condiment that you take for granted or no longer excited about.
Whey also solved a problem that we had with the Ranch dressing we’ve experienced for the last 6 months or so. For whatever reason, the dressing (same recipe we’ve been using for years) always separated after a week. I was tired of this waste, and got excited when I came across an article that talked about how homemade mayonnaise normally lasts a week. However if you add whey into your homemade mayo, the shelf life increased for one week to a month. That was what caused me to substitute out milk for whey in our Ranch dressing mix. We are approaching two weeks and my dressing no longer separates. It hasn’t turned bad yet either.
So if you’re looking to extend your shelf life on a mix, look to whey.
Do you remember the list, I posted last week, about uses for whey?
I’ve been working my way through that list.
Here is everything that I got out of that first gallon of milk:
1.5 pounds of Mozzarella Cheese
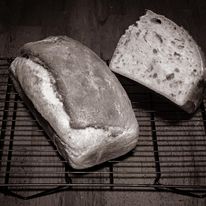
4 loaves of Bread
1 jar of Ranch dressing
1 batch of homemade Doughnuts (which my boys and husband’s coworkers couldn’t eat enough of)
Pizza dough (enough for 2 large pizzas)
66g of Ricotta Cheese
And I froze the whey left over whey before it went bad for 5 more loaves of bread.
I couldn’t believe how much I got out of 1 gallon of milk! If I had used milk for all of that, instead of whey, I would have used at least 2.5 gallons of milk.
How great is that?!!!!
Advertisements
More Cheese
I know that even with my first time experience, there’s a chance that someone might still be uncertain of making cheese. So I wanted to make Ricotta from the mozzarella whey. And Ricotta is the absolute easiest cheese to make.
If you were leery trying to make Mozzarella for the first time, try Ricotta!
Now above I already stated that I was able to recapture 66g more cheese by making Ricotta from the Mozzarella cheese. This was not enough Ricotta to make a lasagna dinner with for my family. So that same day I grabbed a gallon of milk from my fridge and made Ricotta from a second method.
Get ready to make the easiest cheese from one of these two methods!
Advertisements
Traditional Method From Whey
Before I made this first batch of Ricotta, I had already used about half of my whey from making Mozzarella. (I share this with you in case you’re reading these two methods to see which is going to yield you the most cheese–yes, I see you!)
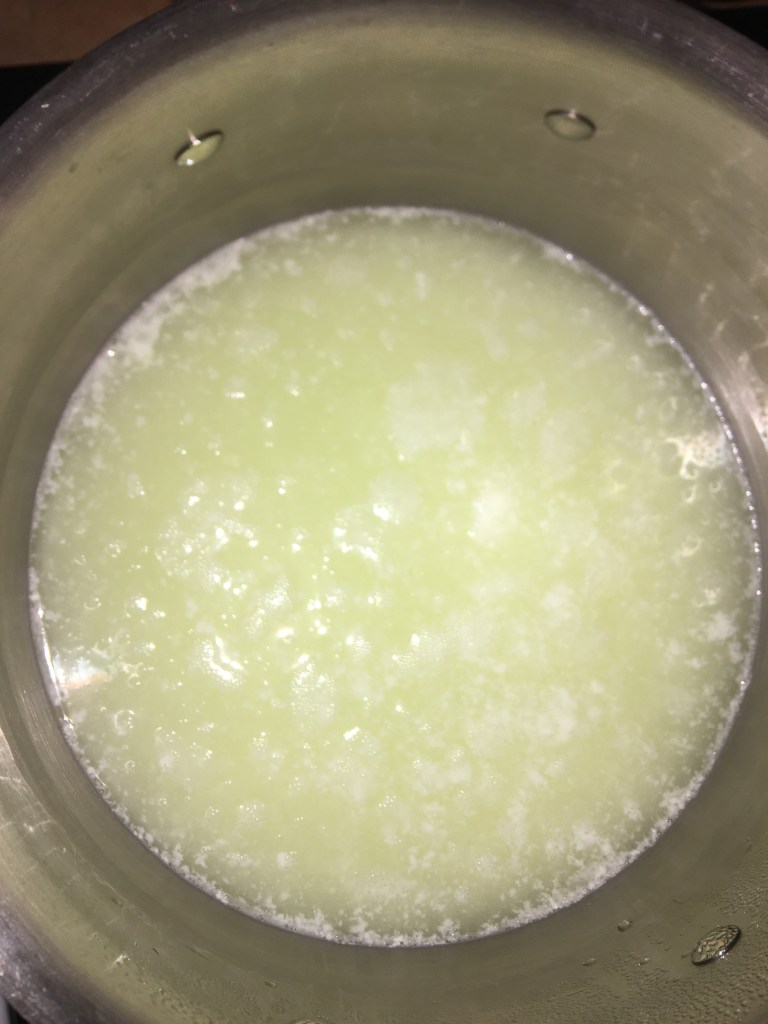
With the traditional method, you put your whey into a stainless steel pot and turn on the heat to medium low.
That is it. You let it warm up to 200°F. There are small bubbles that start to form around the edge of the pot. Don’t be afraid if you don’t see Ricotta forming until the whey reaches in the neighborhood of 140°F. That was about the temperature that I started to see some action take place.
Once you reach 200°F, turn off the heat and remove the pot from the burner.
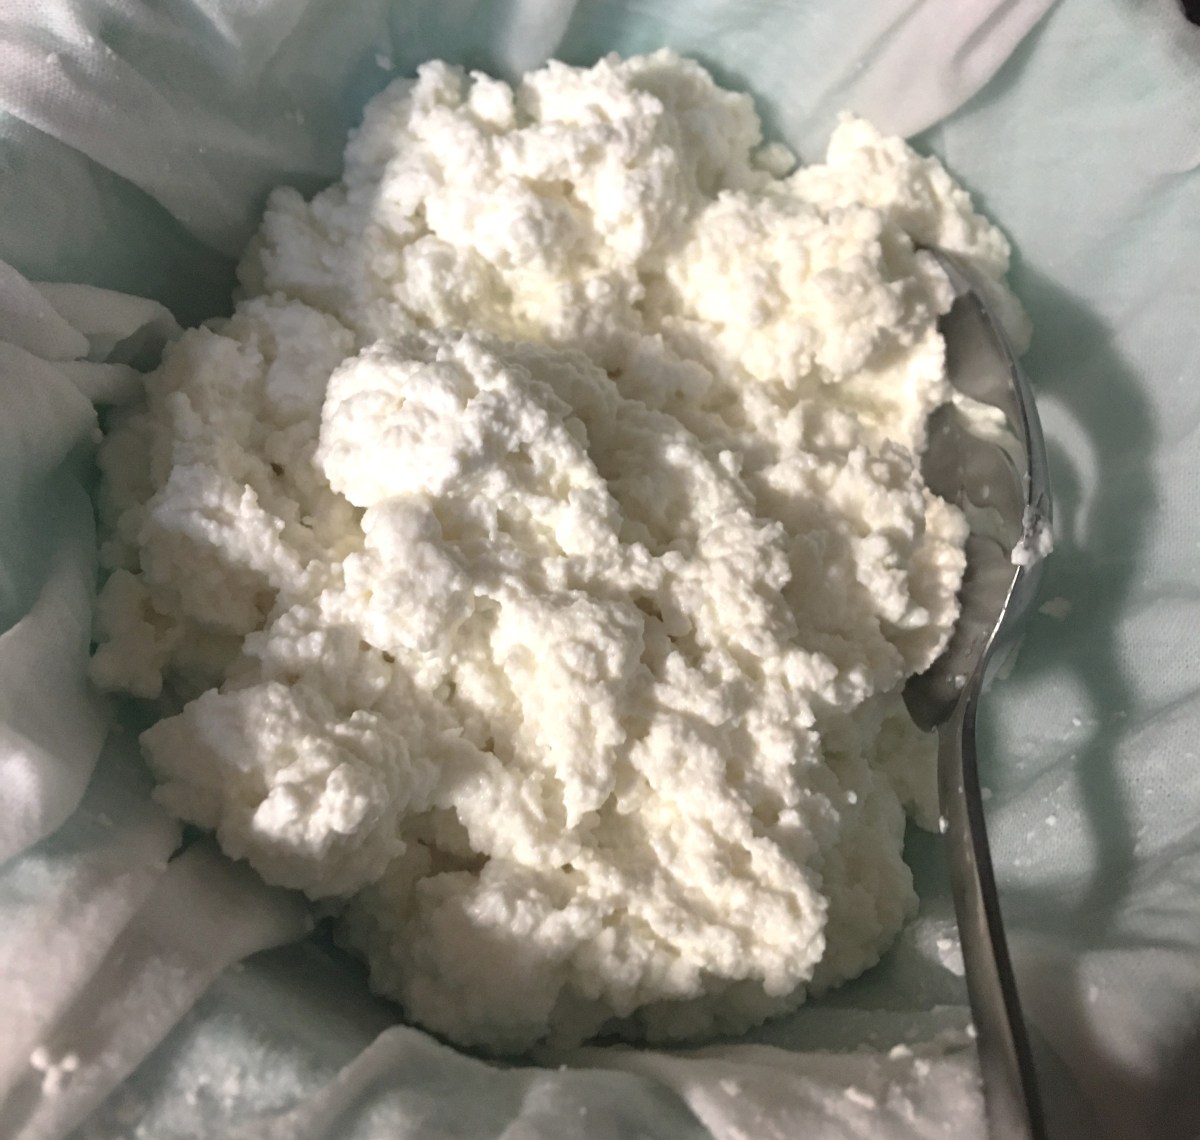
The instructions, that I followed, said to immediately remove the cheese and drain it.
Now Ricotta has smaller curds of cheese than mozzarella, so this time I used a cheese cloth to strain the curds from whey.
The instructions said to let the cheese drip dry for 2-8 hours depending on how dry you want your Ricotta. I had very gently squeezed the whey out and hung it to dry for an hour and a half before I taste tested it. It was already too dry for my liking and tasted like chalk. The instructions never told me to salt the Ricotta. So I’m going to tell you, salt the Ricotta.
Tip: Salting Ricotta is easier when it is warm instead of cooled from the drying process.
This is the left over whey that I put in the freezer to make 5 more additional loaves of bread. I pre-portioned the whey out into baggies so that all I have to do is defrost the whey in the fridge, the day before bread making day, and I don’t have to measure it out again.
The great news about this method, of Ricotta making, is that even though I didn’t stir the whey during this cooking process, my pot was clean on the bottom.
This traditional method is right in the skill level of my 6 year old’s cooking level. So if you were nervous or afraid of making Mozzarella, rest easy and KNOW that YOU CAN DO THIS! I have every confidence in you.
Advertisements
Ricotta From Milk Instead of Whey
As I already mentioned, 66g of Ricotta is not enough for a lasagna dinner. It is enough to make a spread out of and eat it on top of a toasted bagel.
I grabbed a fresh gallon of milk, the Ricotta recipe from the beginner cheese maker kit (that I shared last week) and tried a different method of making Ricotta. The Recipe I used called for whole milk and a couple of cups of heavy whipping cream. All that I had in my fridge was a gallon of 2%. So that is all that I used. From just 2% milk, I yielded 630g (1.4 lb) of Ricotta.
Into my stainless steel pot I added the milk, 1 tsp. Citric Acid, and 2 tsp. Non-iodinated salt. Turn the burner to low-medium heat. Leave the milk alone until it reaches 140°F. Then you scrape the bottom of the pan with a rubber/silicone spatula. Do not touch it again until you see the cheese layer, on top, crack and the whey start to boil up through that crack(s). Turn the burner off and put the pot on a cool part of the stove. Cover the pot and let it sit for 20-30 minutes.
Strain the Ricotta through a cheese cloth, inside a fine mesh strainer.
In this method, instead of air drying I used my spoon (or you can use your silicone spatula from earlier) and pushed the Ricotta around in the cheese cloth. The whey naturally separates without the gentle squeeze or drip drying. And while you push the Ricotta, take a pinch of salt at a time and season the Ricotta to taste.
You are in control of how salty your Ricotta tastes. And you are in control of the sodium content, for those who are on a low sodium diet.
I stopped pushing my Ricotta when I got to the creamy texture that I prefer. If you prefer your Ricotta to be drier and you’re not able to get it from just pushing the cheese in the cheese cloth, go ahead and hang it up to air dry in the cheese cloth. I recommend checking on your cheese every half hour just to make sure that you do not get too dry.
Tip: If your Ricotta gets too dry and you just can’t eat it like that, don’t worry. Mix in a little whey at a time to re-wet your cheese. If it becomes too wet, hang it up to dry again.
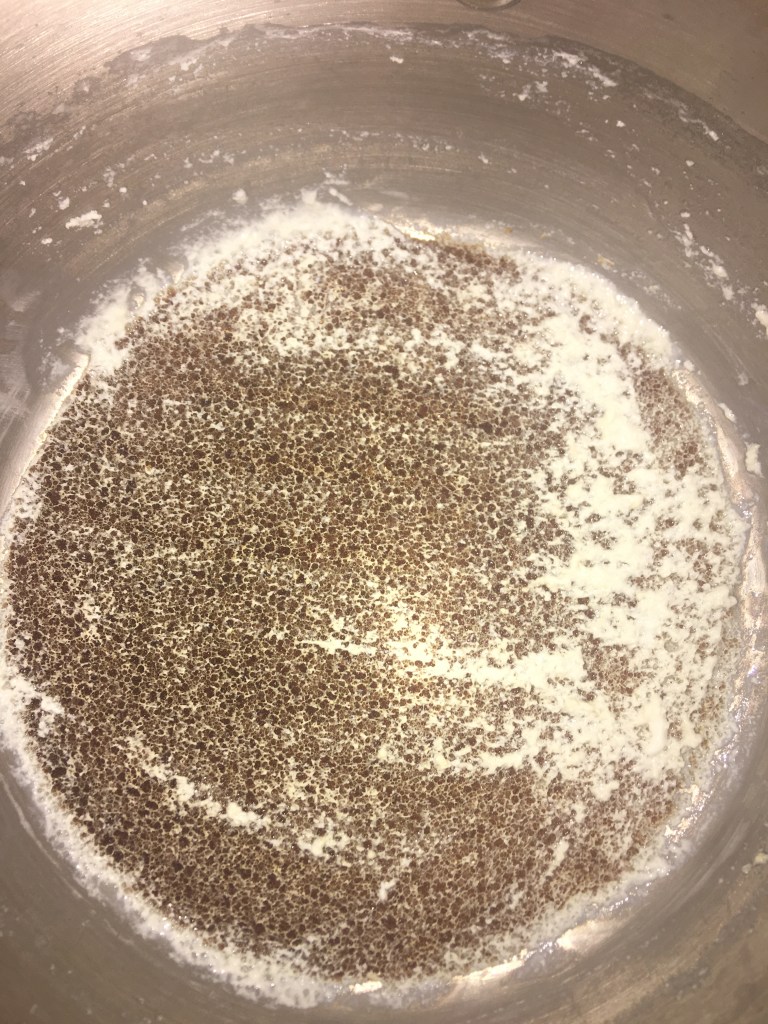
The only problem that I had with this method of making Ricotta is that the heat was a little higher than I did with the first method. The bottom of my pan did start to scorch, as you see here.
Even with this level of scorch, the flavor of the cheese was not harmed. But it was a close call. Moving forward, I know that my stove needs to remain at a medium Low temperature.
The next time that I make Ricotta from this method, I’m going to drop my heat a little BECAUSE I know that my stove runs HOT. I am forever reminding my husband to drop the heat when he cooks because it slips his mind that our stove does this and he has burning issues. He’s a good cook, he just expects our hot stove to behave like a normal stove and it just doesn’t.
Tip: Know your stove. If your stove runs hot, drop the heat a little lower. If your stove runs cooler, add a little more heat.
Advertisements
Differences in Whey
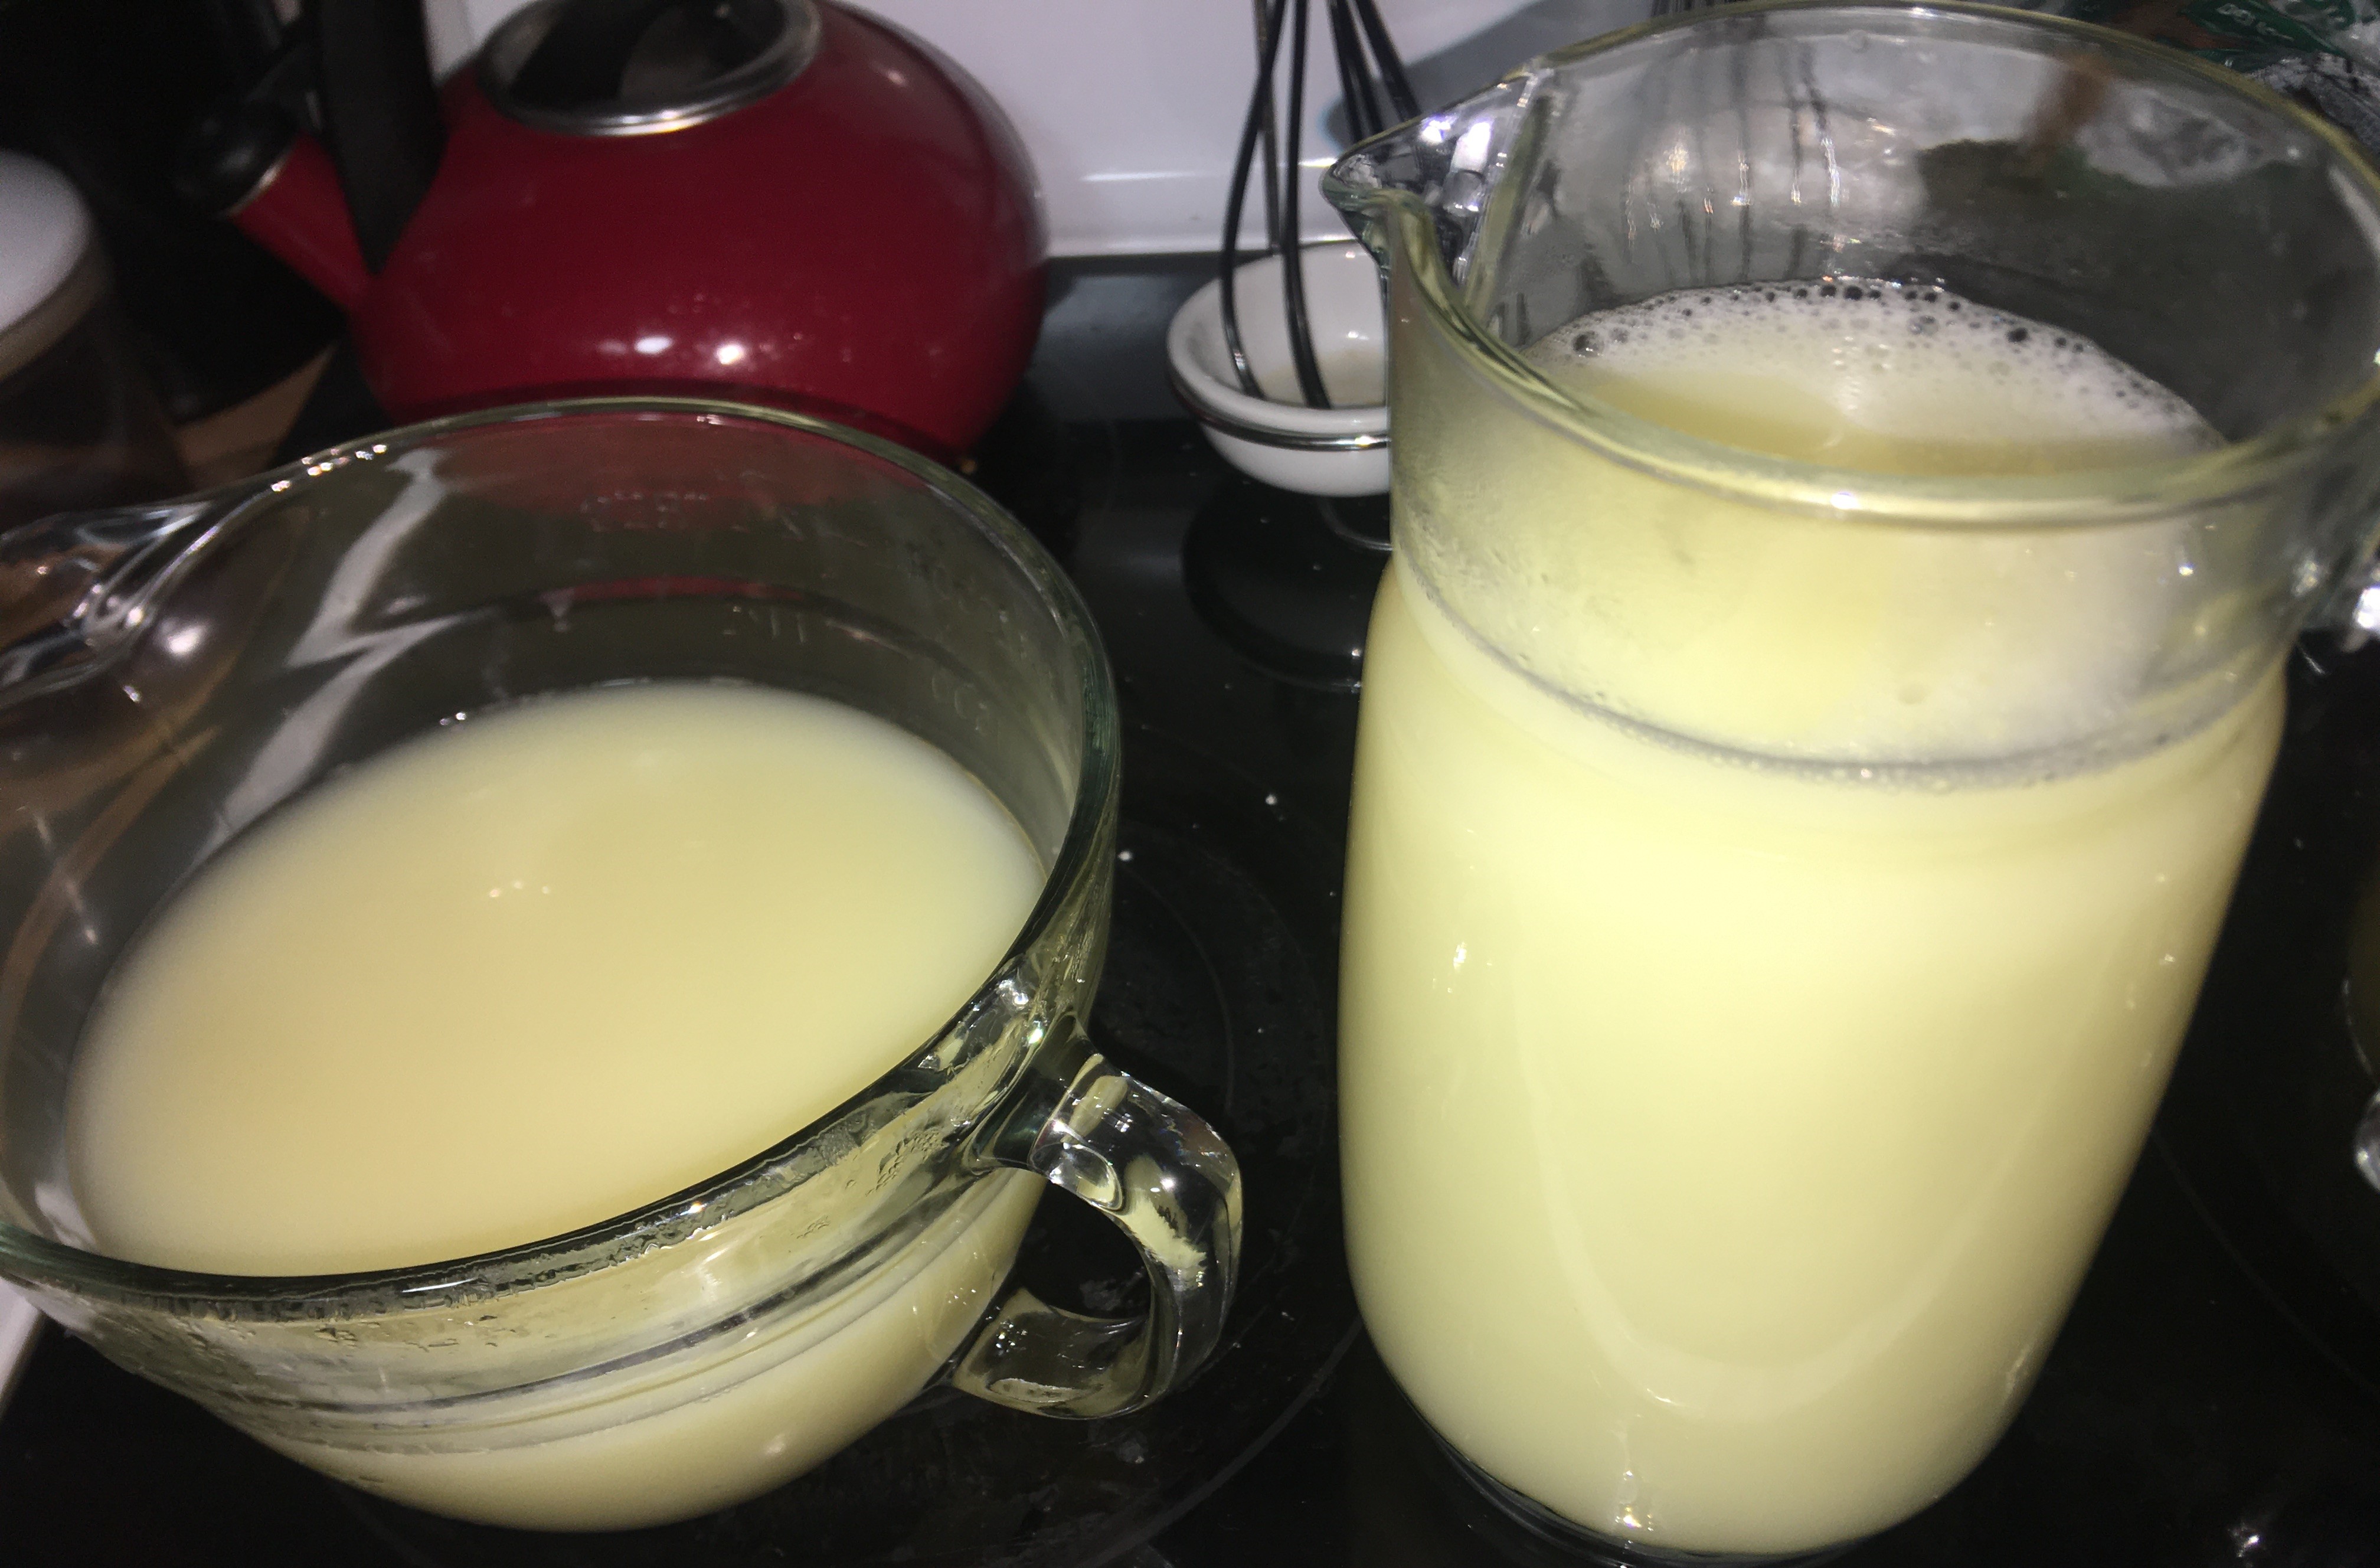
There is a difference in the appearance of the whey from Ricotta compared to the whey from Mozzarella. The Ricotta whey was not as clarified.
Independence Day weekend is very busy with my family, so I have yet to put the Ricotta whey into the pot and run a second batch. But as you see here, there is a lot of material left in this whey that I anticipate a greater return in additional Ricotta (vs. what I pulled out of the Mozzarella whey). I have time to food prep coming up early this next week. So be sure to sign up for my newsletter below and I’ll email you the results of this second run in my 7 July 2022 email. (If you are reading this past the email date, please comment below and I’ll respond with the results that I found).
Over all…
I’m excited to have cheese in the house that only has 3 ingredients: milk, citric acid, and salt. In a day and age where the ingredient lists grows longer and longer, this makes me feel good about the food I cook my family. Even more so, I learned new skills that I can teach my boys that I don’t have to wait until they’re older for them to make.
I am also happy that I have healthy probiotics on hand that I can add to as a seasoning and milk alternative to other recipes.
Please walk away from today with ideas on how to stretch your milk ingredients and add more nutrients into your other foods.
An idea that just popped into my head, how whey would work with making risotto. I know that I’ve made it with wine and also with chicken broth. So it makes me curious. I may have to try this out for dinner later on this week!
If you’re interested in making a Ricotta spread (which I use for my bagels), cut up some fresh herbs and mix it in with your cheese. I used the leaves from two sprigs of Italian Oregeno, from my garden, and used enough Ricotta for two bagels.
Use your imagination with the herbs that you have on hand.
Processing…
Success! You're on the list.
Whoops! There was an error and we couldn't process your subscription. Please reload the page and try again.
For about a year and a half now, I have wanted to make cheese at home.
What kept me from doing it for so long?
I lied to myself stating that it was just the fact that my days are busy with three young kiddos in the house. It’s a convenient enough excuse. But deep down these were the core issues that I was dealing with. Maybe you’re familiar with these fears.
It’s too difficult.
What am I going to do to keep from burning my hands?
If you had a childhood like mine, and you pulled homemade taffy, you know what I mean about burning your hands. At least with taffy you could coat your hands with as much butter (or other fat product) to protect your flesh from the hot candy. And if you’ve read about Mozzarella making, you know you have to pull cheese. Buuuuut, you can’t put butter on your hands.
Let me tell you something. I am so glad that I set my fears aside and dove in to make my first Mozzarella!!!
Advertisements
First let me assure you that I did NOT burn my hands. So you can rest assured that you can also keep your hands safe.
Second, Mozzarella cheese making is so much easier than I made it out to be in my head. In fact, the next time that I make more cheese, I’m going to have my 6 year old help me. With the exception of handling the warmish hot cheese for the stretching and shaping, I know he can do this with me verbally walking him through the steps. So if you think cheese making is too difficult, I think you’ll also be surprised with how easy it is.
I used this beginner cheese making kit from Standing Stone Farms. Their recipe comes in the kit, which is included here with their permission. Thank you Paula Butler for allowing me to share this recipe! Here is another link for their products, and the link for this beginner cheese making kit on Amazon.
If you want to branch out on your own with a different recipe, I know there were a couple that I specifically or indirectly linked to throughout the post.
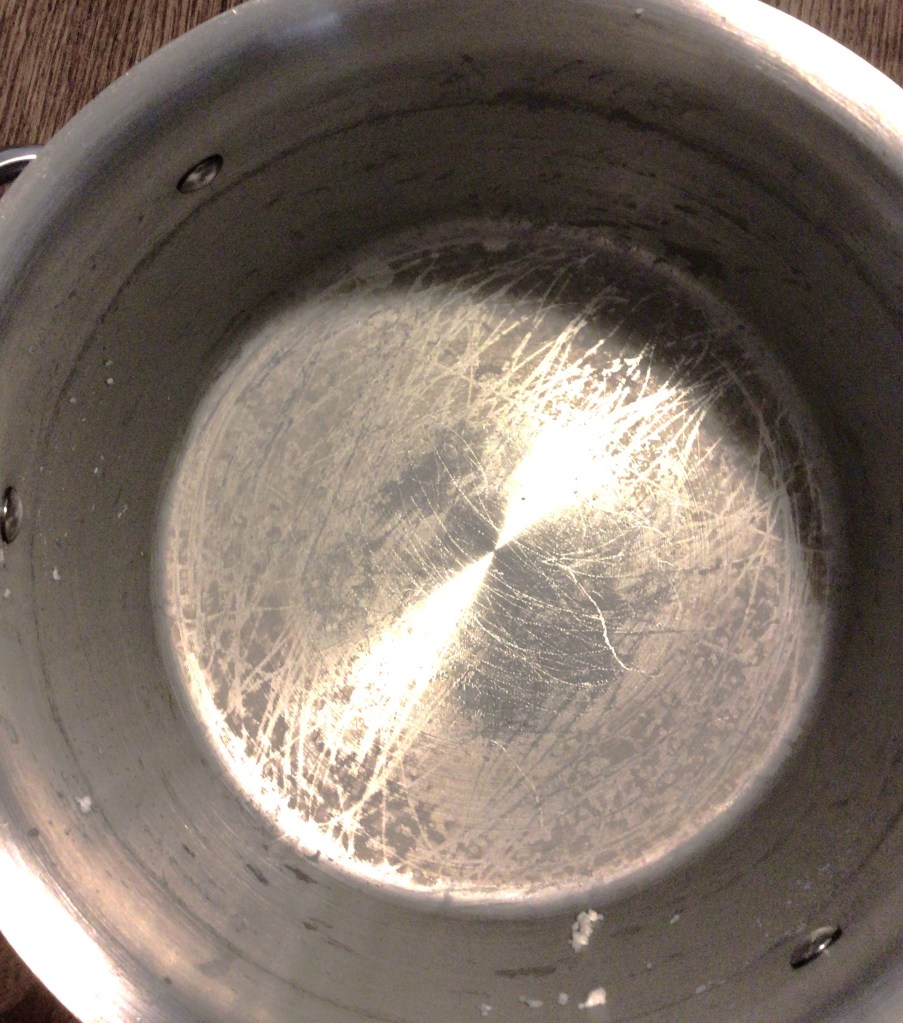
Before I get in the flow of my first time experience, I want to mention now another fear I had. It didn’t rear its ugly head until I had my pot on the stove and the milk already on heat. Let’s just say I’ve scorched many pans cooking milk based soups and chowders. If you cook with milk, you know what I mean. There comes a point where you just accept it as normal.
So now you understand what I mean when I say, I had a legitimate fear of scalding my milk because I’ve been told in the directions, that with Mozzarella cheese you have to be gentle when you infrequently “stir” the milk and you can’t circular stir your milk. Maybe some Italian Mama will comment and say, “Pssht, stir the milk.” Or maybe they’ll agree. So please Italian Mama’s comment and put some minds to rest!
Here is an after the cheese making shot of my pot. My pan didn’t scorch. This is cooked over medium low heat and this was the damage done. So if one of your fears is burning the milk, as long as you keep your temp low and slow you won’t burn your milk.
Making the Cheese
I know another real fear in cooking is not having pictures of what is normal so you have something to compare to. In what I’ve read in my own research, I haven’t seen any pictures like this. I want to set you up for success!
These are all in stage order so you can compare your own journey as you go.
What I didn’t anticipate was how quickly the Acidic Acid works in curding the milk. That gets added to the milk before you turn heat on the burner. And almost right away curds started forming. Obviously the acid and the milk are going to react. So don’t freak out if you turn on your burner, look at your milk and suddenly think, “OMG did I just put in expired milk?!” No you didn’t. The process is already under way.
At 88°F I added the Calcium Chloride and Liquid Rennet.
After all this instant gratification of seeing curd growth, I have to admit it was hard to have the patience for curd temperature to reach 104°F.
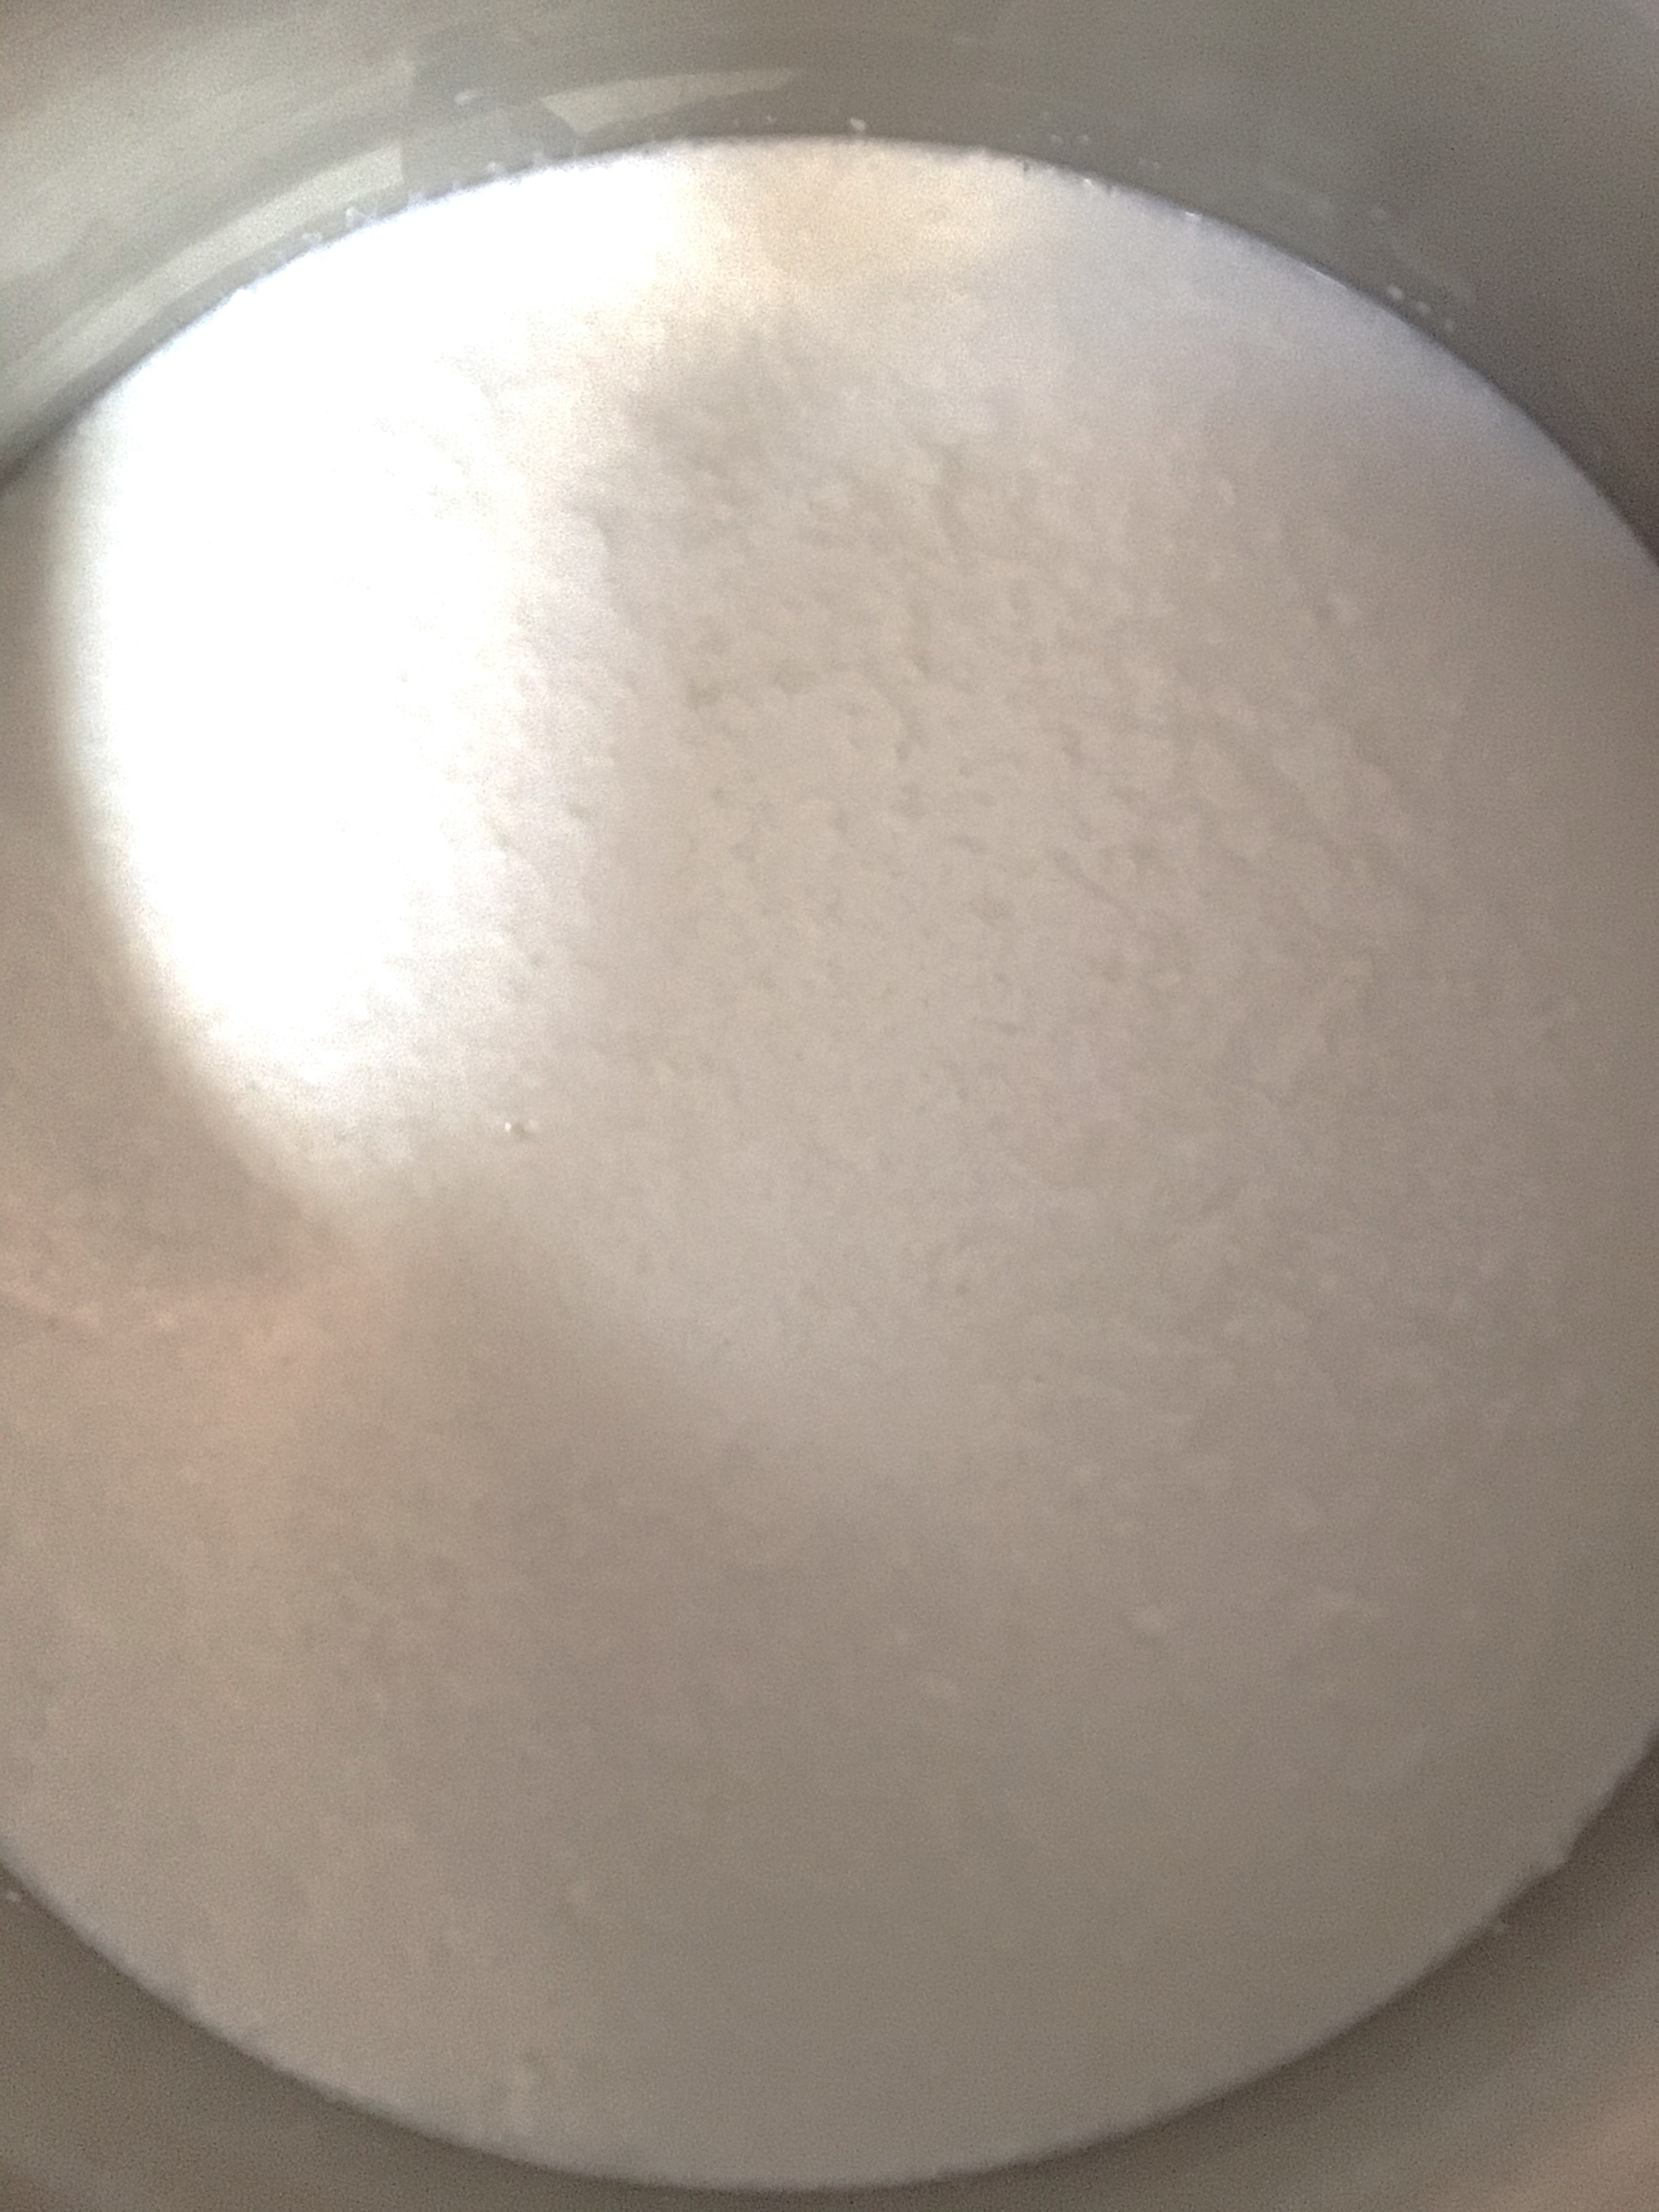
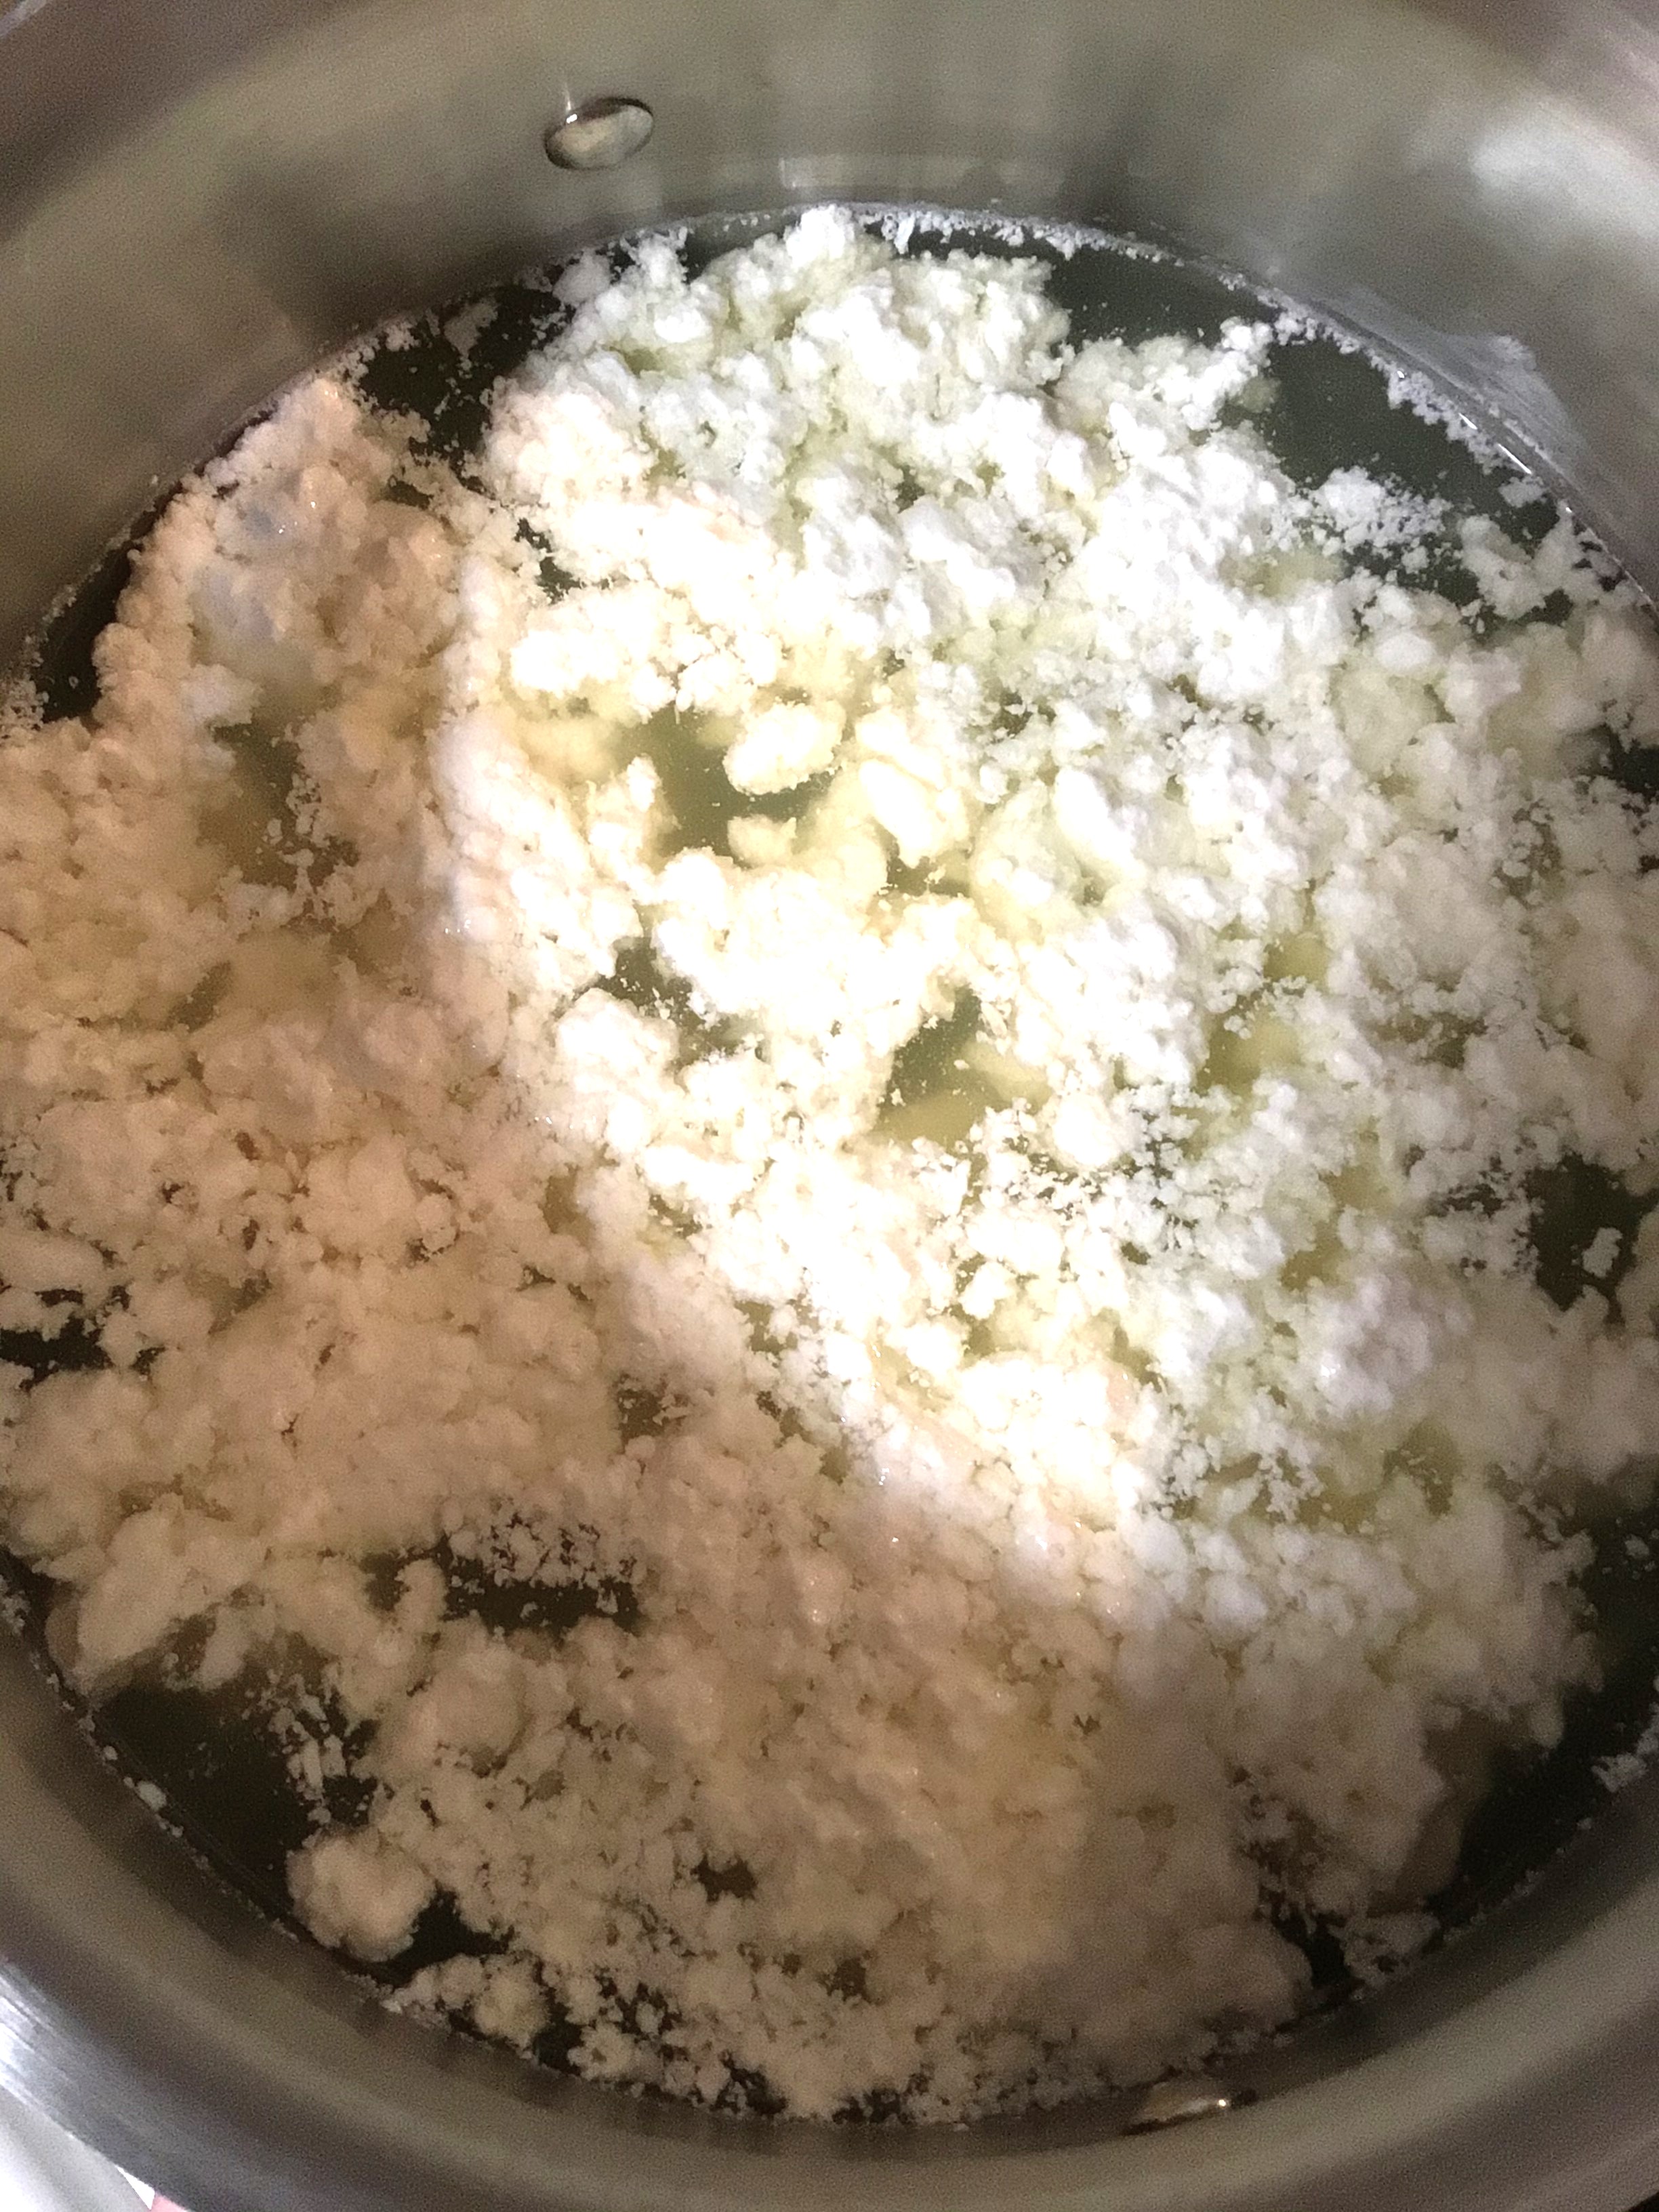
Again, as a first time cheese maker, I assumed that whey was going to be milky white. So you can guess how it felt when I saw the whey was yellow and I asked, “What did I do wrong?”
Nothing. I did nothing wrong. Whey is going to be yellow. The pictures below do no justice to it. It kind of reminds me of neon yellow lemonade. So if you have yellow liquid with your curds, you’re doing great!
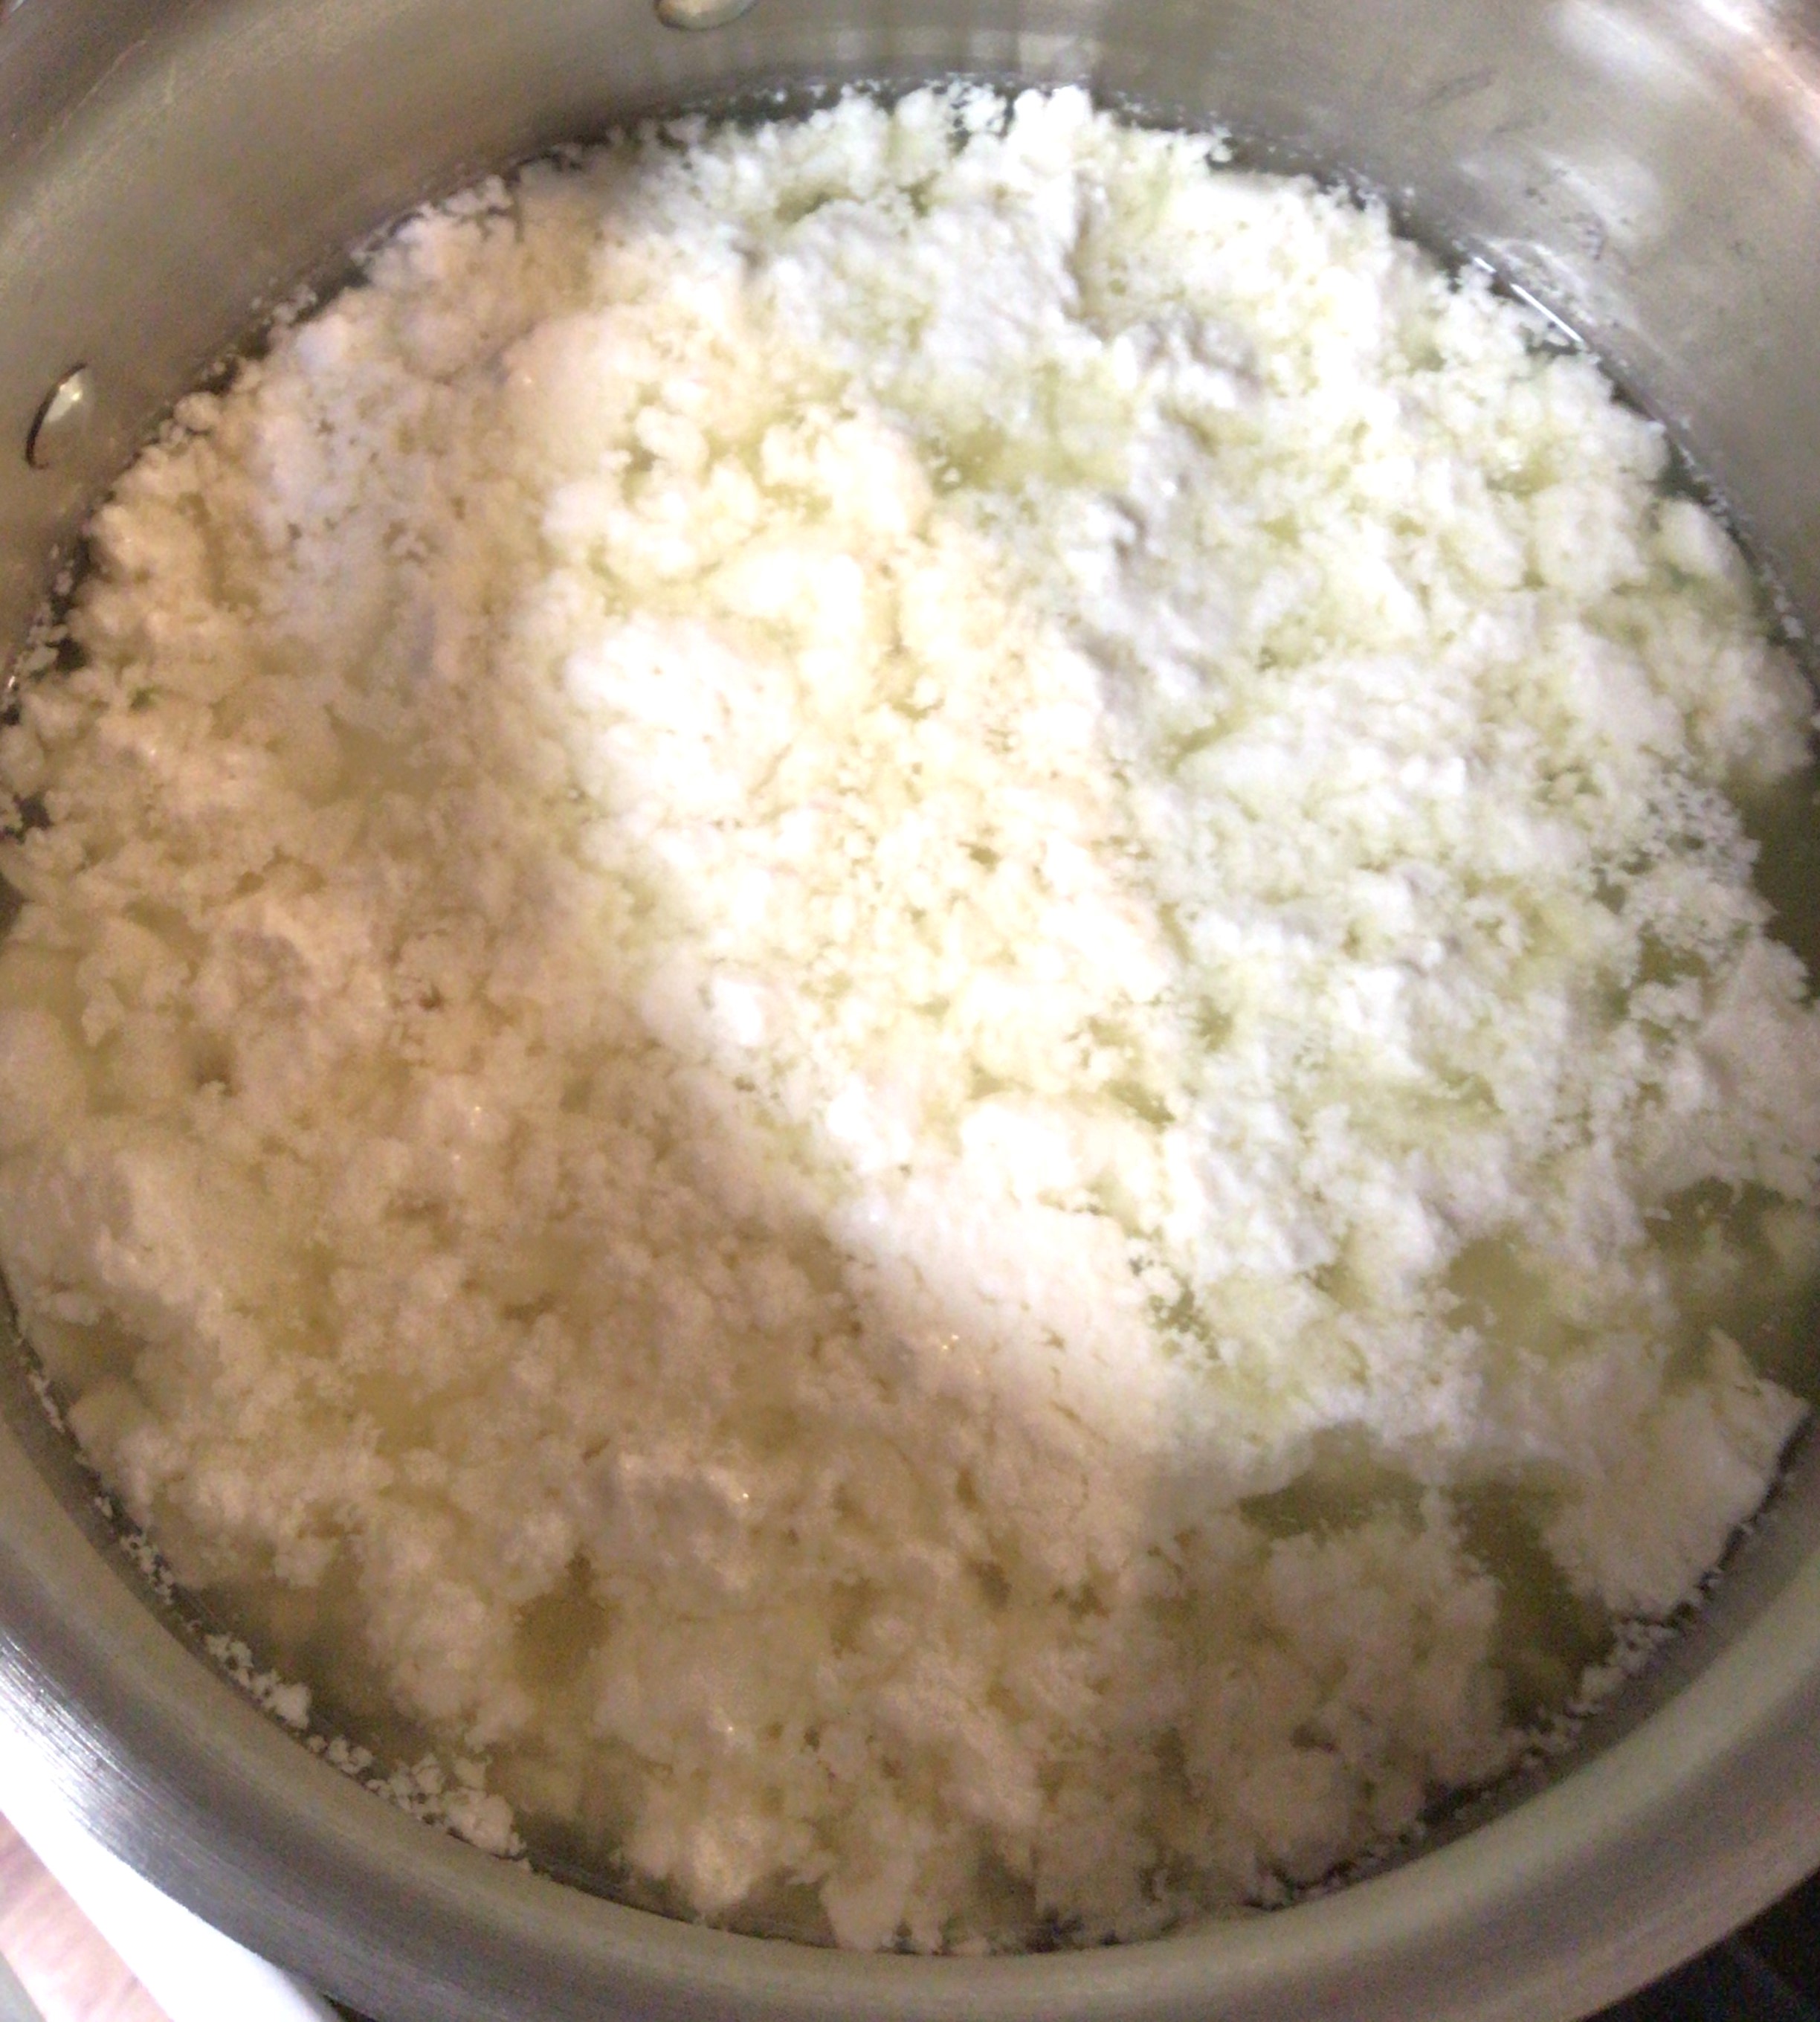
Once your curds come to temp, remove them from heat and let them sit for 2 minutes. Once the time is up it’s straining time!
I was super excited for this part! Looking down from the top of my pot, I thought I was going to pull out something like large squeaky cheese curds. I tried to be gently lifting the curds out of the pot with a slotted serving spoon. Low and behold, I was pulling out Titanic Iceberg cheese curds. Okay, maybe that’s an exaggeration, but there were a good dozen chunks that stretched over the edges of my slotted spoon. I felt like a rock star.
Once the cheese is all strained out there’s one of two methods you can go; stovetop or microwave heating of the cheese. Normally, I avoid using my microwave. I think it best serves me as a bread/cookie box. However, I undertook this new venture during nap time and the kiddos would be waking up any time. So I opted for the microwave. This method works, but I have the feeling I can get better results with the stove top next time. Again, I just don’t cook using my microwave unless I’m cooking popcorn or quickly heating leftovers.
The heating of the cheese is to help release the whey from the curds. And the light addition of salt before each 60 session of warming is to help extract the liquid from the curd. Once you have about a Tbsp of whey left you’re good to move on to the stretching and forming of the Mozzarella.
In the directions I was using, I was told I could use a metal spoon to fold over the cheese while it was hot. And you better believe I took advantage of that tip. (I still cringe at childhood taffy pulling. That candy was hot!)
By the time that I got to the point of this first picture, the spoon lost its effectiveness and I was ready to bite the bullet and go to town using my hands. It was still hot (something similar to a hot spa towel, hot but not flesh burning) but quickly cooled down as I stretched it a couple of times.
For shaping, I decided to go the method that bread makers use when folding the dough under to build up surface tension for boule bread.
Tip: This method of folding the cheese under did two things. One, when the cheese cooled to hold its shape, there’s a canyon like crevice on the center bottom. Two, when I cut a test slice for my mom today that surface tension made a dense slice. If you want a solid slice of goodness, this shaping method might work for you.
Tip 2: I suspect that if you’re looking for more of a string cheese pull apart texture, the method that you’re probably looking for is to keep with a taffy pulling method. Keep going with a pull and fold until you start to feel the cooling of the cheese tightening it up. Then I would focus smoothing the surface for that finished look.
Tip 3: If you’re looking for that soft, squishy ball of mozzarella, I’m pretty sure you’re looking to just stretch it a couple of times, smooth the exterior and then let it cool in your brining liquid or whey.
Once the cheese is shaped, it’s time to put it in liquid to cool and store. I should have just put the cheese back into some of its whey. Or even just water, because I had seasoned it to my liking before I stretched and shaped. The brine I had made was 1 Tbsp of kosher salt in 4 cups of water. It’s too salty for my liking.
If you are sodium sensitive or limit the amount of salt you use, I recommend skipping the storage in brine.
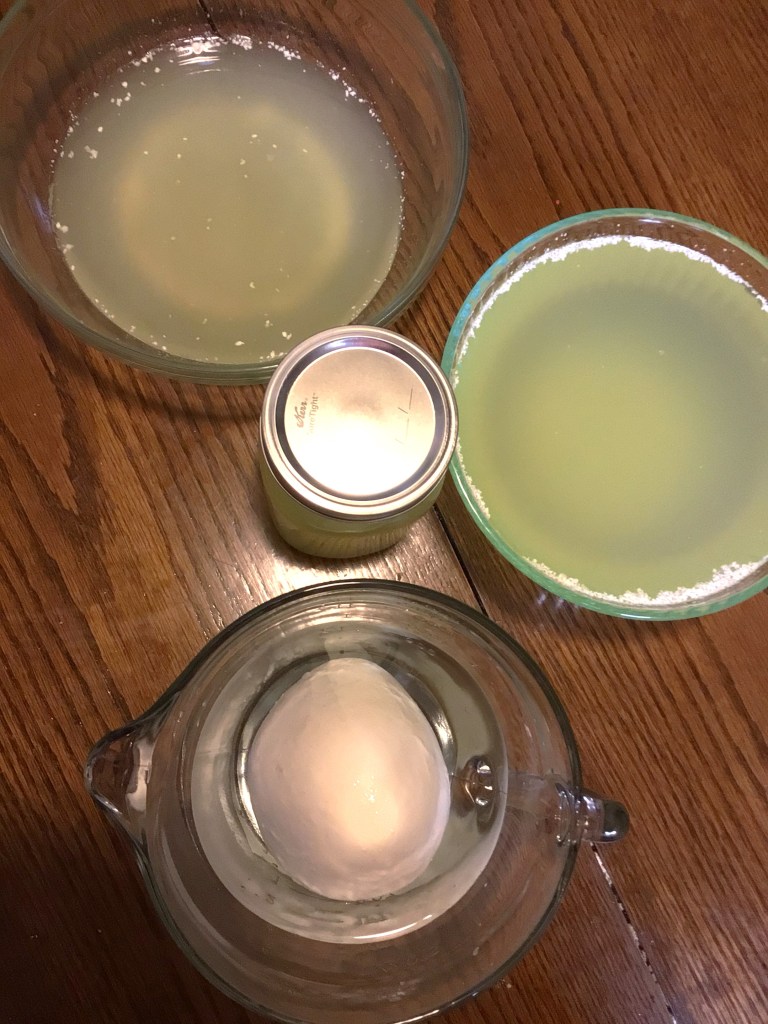
As you can see here, I have a bit more whey then I thought I would. And I looked at my table wondering what I’m going to do with all this whey. But I think I’m going to be okay. The day of and the day after I made the cheese, I used all the whey in the bowl on the top left.
What I’ve Used Whey For
The first thing I made with the whey is my bread recipe that I posted a few weeks ago, found here. The full volume of milk that I use for my bread, I completely replaced with equal volume of whey.
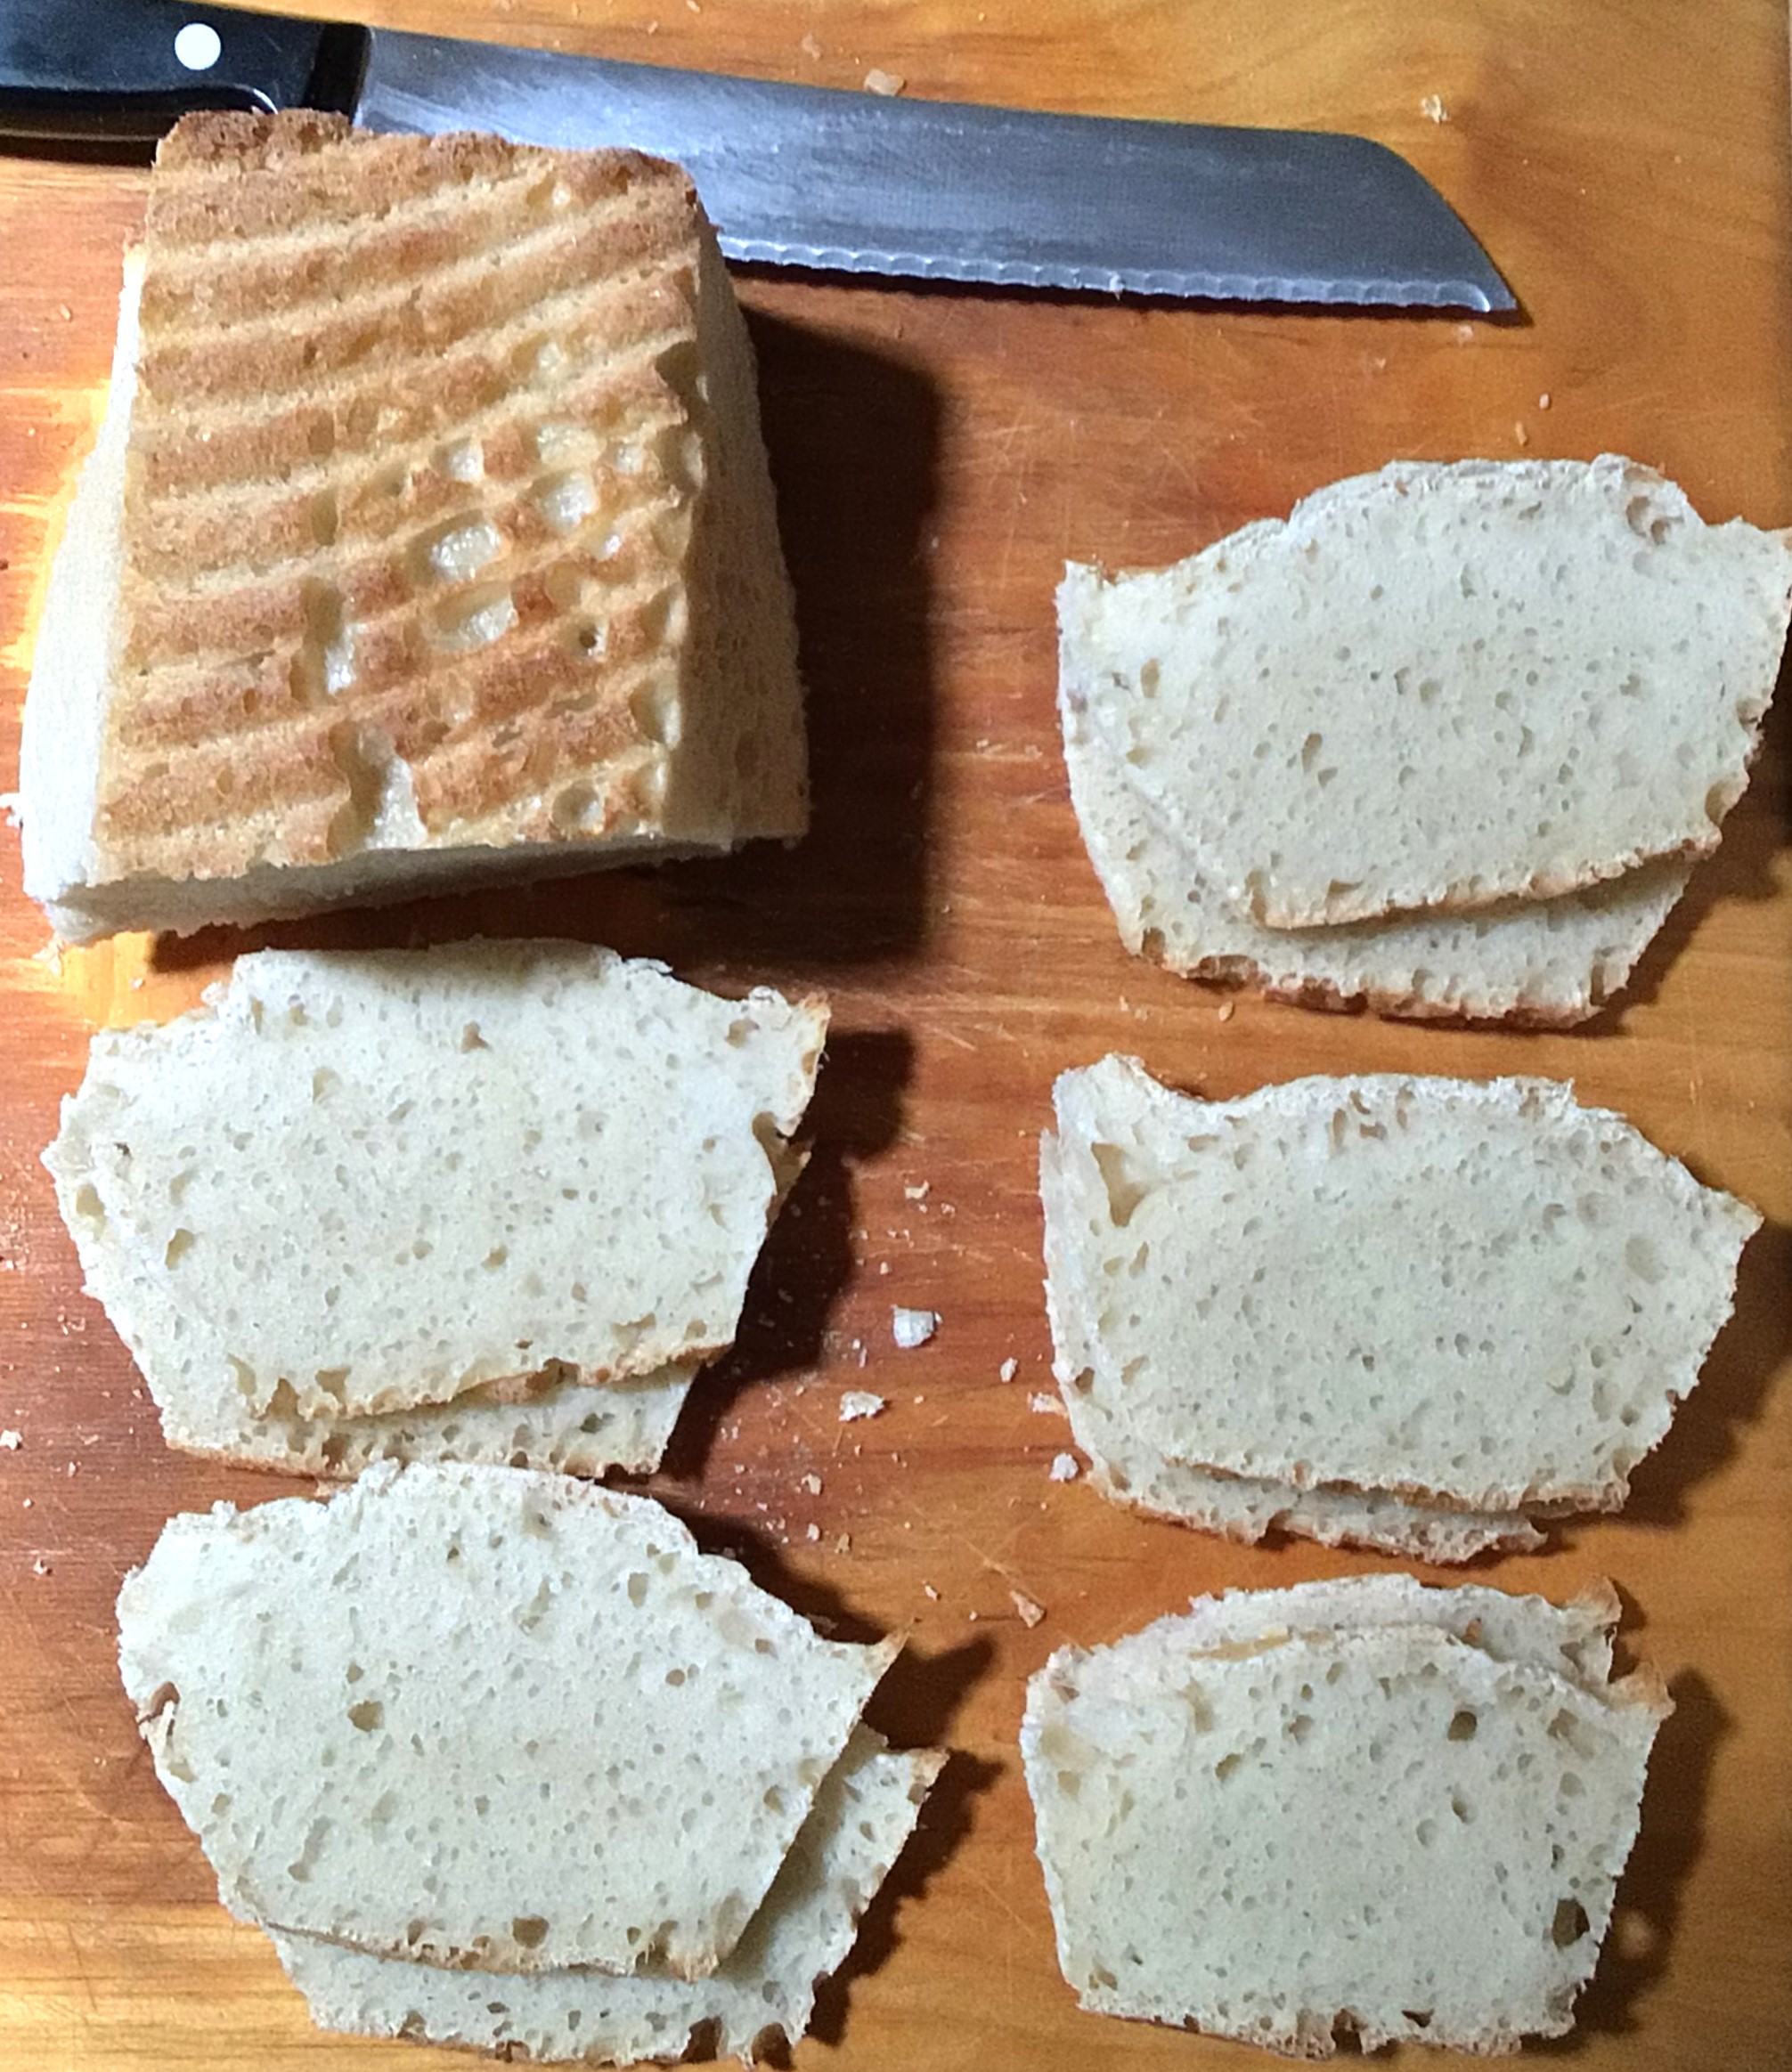
There were a couple of differences that I found with using whey in my bread recipe. One, the dough was much wetter than I’ve ever seen my dough, even on high humidity days. (Picture below) I’m the only person in my family who doesn’t eat raw bread dough, but I have nibbled before just to know what everyone feels so appealing about stealing my dough during proofing. With the whey, the dough feels smoother in my mouth and has a more sweet and bread like flavor than just the overpowering flour flavor that my dough has with milk.
I accidently forgot my dough (thank you children who pushed all my buttons that evening) and my dough over proofed. Because it over proofed I can’t tell you an accurate description of how the whey proofed with the bread. Nor can I tell you how the flavor was different with the whey vs. milk. If you’ve over proofed your bread before, you’ve probably noticed that not only do you have flat tire bread, but there’s also a kind of funk to it. When I over proof bread, the only good thing it’s really good for is grilled cheese sandwiches. My boys won’t really touch it. However comparing over proofed bread flavor, I can tell you this. My boys at 3/4 of a loaf for their PB& J (asking me to make extra sandwiches–this only happens on fresh from the oven days of properly cooked bread). Flavor wise, the only difference from properly cooked and this over proofed was that the natural sourness of the bread was neutralized. And I was about ready to bust out my oil and vinegar and have that for lunch. So I’m excited to try again and do a properly proofed baking of bread with whey!
For Taco Night I decided to take advantage of whey’s natural probiotics, as well as solve my problem with homemade ranch dressing separating after a week.
Ranch Dressing with whey really surprised me! I used a premixed packet, added the store bought real mayo, and for the cup of milk that I normally use I substituted out 3/4 C of whey. I have never tasted ranch dressing that was so good! It had a citrus lemon flavor to it that just lifted it from normal hum drum standard condiment to I think I have a cooking secret ingredient. I had my mom taste it (and she doesn’t do ranch dressing) and she immediately said that she was so glad that she tried it. To her she picked out a cucumber like sub-note, which makes sense with my husband’s reaction that you can taste the herbs in the dressing instead of being overpowered by the mayo.
With the Refried Black Beans that I plopped out of the can into my little sauce pan, I added whey instead of water to get that smooth spreadable consistency. If you think that canned beans are heavy, you most certainly won’t think so after adding whey to it. Again, there was a citrus note that just lifted it into something lighter and much more pleasing to eat.
Advertisements
Let’s just say that those two changes were enough to transform Taco Night into a let’s stay home and skip eating out. I have had some amazing authentic Mexican Food from Chefs who used family recipes. And the only restaurant I would now take over my family Taco Night is Los Cubanos in San Jose, where the Chef has cooked for Presidents and A-Listers.
I am amazed at how much whey can improve the flavor of run of the mill, standard recipes.
As I mentioned earlier, I’m writing this post as a first time cheese maker, so you can have an idea what to expect from a first timer and not someone who has been making cheese over and over and perfected their skills before sharing with the world. I want you to know what you can expect when you first try your hand at cheese making.
Please Try! I want to know what results you find.
As you can see I’ve only tried the whey in three things. But I did pull a search of different ways that whey can be used. I’m going to forewarn you that the list that follows is extensive, but don’t let it intimidate you. I’m looking at this list with Christmas Morning excitement, because the quantity of whey in my fridge is going to get used up AND there are so many different things that I get to try! And let’s face it, I am definitely going to be making more cheese in the future.
Other Uses For Leftover Whey
Ferment Foods “such as sauerkraut, ginger ale, ketchup, and pickles.” Almanac.com
Added to your stock of choice (replacing a cup or two of water)
Use when making Risotto
Substitute for Orange Juice in smoothies and baking.
Substitute for Lemon Juice in recipes, vinaigrette, and cocktails
Make Fermented Salsas, Dips, & Spreads (more recipes on this one link than I can state. Looks like it covers just about everyone’s flavor profile. So you should be able to find at least one to excitedly work with)
Expectations for Best Use Dates
From the Cheese Making directions I used, the Mozzarella is good for 2 week when stored in bring or water. It can be frozen for up to 3 months.
From what I’ve read, frozen whey is good for 3-6 months. (But you will not be able to make any cheese products from frozen whey.) People have made Ricotta cheese with whey that’s been in the fridge for 4 days. One source says that it’s good for 5-6 days. Another says no longer than a week. If you dehydrate it into a powder, you have 6 months refrigerated or 6 days at room temperature on the counter.
If you are looking for a more professional answer, instead of experiential hearsay, the USDA liquid milk products are good in refrigerators for 1 week. Cheeses are good frozen for 3 months. This doesn’t answer precisely for liquid whey, but it appears to fit with circumstantial evidence.
So if you don’t think you’ll get to all your whey right away, be sure to freeze it.
Your whey has gone bad when it has a rancid smell and/or bitter taste.
Pulling from being a breast feeding mom “rancid” and “bitter” may not be what you think. It’s more of an “off” sent/flavor. Yes I tasted my fresh breast milk and warmed frozen breast milk. When the milk was within the 6 month recommended frozen window, it warmed with not much flavor difference. Older freezer milk, when warmed did not have the same flavor. It had more of a sour instead of sweet taste.
In the same manner I recommend that you take a little taste of the liquid whey that you produce and focus on remembering the smell. That way when you ever have a question if the fresh or frozen liquid whey is still good you have a working knowledge to pull from instead of the random descriptors that writers use to convey a thought. After all your taste buds are going to pick up something different than mine, and the milk we could be using could be different in base flavors. (Ask a picky child what this means LOL.)
I know this is a lot of information, but I hope it empowers you into making some cheese and using the whey for other uses. Be sure to leave a comment below about what cheese you make and what you’ve made with the whey.
I know that I will never look at a gallon of milk the same!
Check out what’s new in my store for Cut Files that you can use on your favorite crafting machine. New Releases go live every Monday!
Processing…
Success! You're on the list.
Whoops! There was an error and we couldn't process your subscription. Please reload the page and try again.
Lately I’ve been very interested in the Boho style of event designing. A lot of event designers and coordinators tend to gravitate toward the fantasy of rich and fancy feeling decor. There is nothing wrong with that. I gravitate toward that. There’s just something about pretty sparkly things grabbing our attention.
Even when I worked for a decorating company, there was this huge gravitation toward bringing the Boho brides nearer to the glittery and sparkly end of design. I know why there is that nudging toward that direction. But I’m not going to speak ill of other businesses. I just want to take this moment to see and recognize those brides, and other event organizers and celebrants, who want to stay more toward the end of the spectrum of the simplistic and natural look.
This post is for you!
What I want to focus on today are a couple of floral options that are different than what might be proposed to you when you talk with a florist; succulents and preserved wild or garden flowers.
I don’t know if you’ve taken the moment to look at all different colors available in succulents. They are definitely a wide spectrum that diverges from the cactuses and green succulents that your mind naturally gravitates toward.
The best part about succulents, especially if you’re DIY as much as you can for your wedding, is that you can get these in advance and arrange your centerpieces weeks in advance. This is true, even in the middle of winter!
The one thing that you want to pay attention to is the little amount of care that you need to give them. But these are not going to wither or die on you when you look at them funny. They just need to be kept in soil designed for succulents and give them a little water every now and then.
Tip1: Succulents loved being watered from below. So when watering them, place their dish (with drain holes) in a dish of water and give them a few hours to drink as much as they want. They have enough water when you see that the soil on top has been touched by water, not dry to touch.
Tip 2: If you see the petals start to have a wrinkled appearance, they are underwater. Make sure you soak them in a dish of water. It may take a little time. But once the succulents have gotten enough hydration they will look plump again and not wrinkled.
The only other thing that you have to pay attention to is how much light they get. Here in the Pacific Northwest, succulents are not about to get too much sunlight. They can be burnt by full sun, depending on your region. But in the couple weeks that you have them before your event, this is not likely going to be an issue.
Advertisements
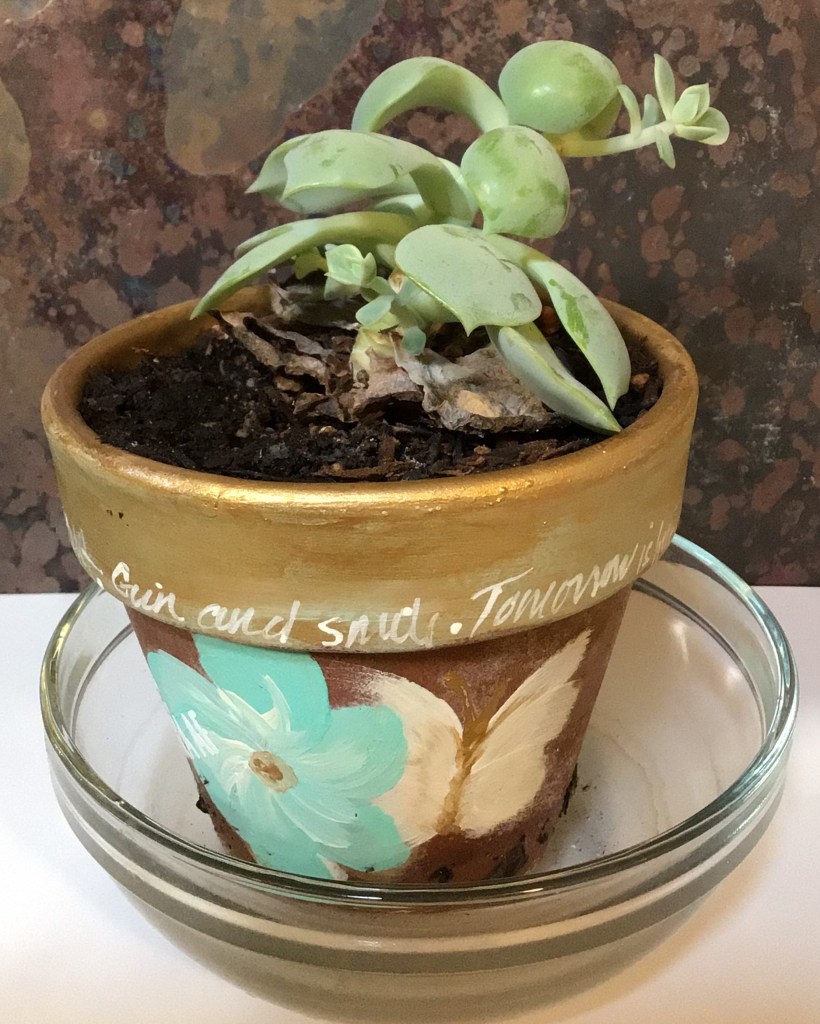
One issue that you might have is when you’re succulent undergoes what looks like a growth spurt.
This example is definitely an exaggeration of what you will see because I’ve had this succulent for well over a year. It started to bolt like this a couple of months after I received it. What happened here is that the window sill (eastward facing) did not receive enough light. So the plant grew to reach more sunlight.
Your succulents will stay small when they have enough light. So if you see this, or you notice that there is some growth that is starting, then you want to find your succelent(s) a sunnier location.
If you catch the growth quick enough, you can trim off the growth, and return your succulent back to the smaller size.
Take a length of dental floss, wrap it around where you want to trim and pull it tight. You can use scissors, but it will apply pressure from two points to cut. If you use thread or floss, you can apply even pressure around the plant. Also if have a cluster flower of a succulent, you can fit the floss in between the petals and top the succulent without damaging the rest of the plant.
The clipping you can then put in a new container with soil and it will propagate for you.
I put the topped succulent in this cup with water with another topped clipping that I’m waiting on soil for. It’s okay to put into water, but you want to get clippings into soil as soon as possible.
If you are saving money by propagating your own succulents from bought succulents, make sure that you give yourself enough time to let new buds grow. It doesn’t happen overnight. If you don’t have enough time, your succulents will look bald and not so happy.
Here is another What-Not-To-Do
This succulent was originally small like the first picture of succulents I showed you in this section. This one also grew to reach for more light. I should have trimmed this when it first started to grow. Had I done that, it would have remained small and cute. Instead, it changed its shape and spread. But what you can learn from this is what it will look like at the spot where you clip back the top your succulent. There is a small bud that you see on the top right. That grew in about two weeks after trimming. On the bottom left you see another bud grow in where I snapped off some of the larger leaves to practice propagation techniques that I’ve seen on FB reels.
If you are interested in looking to propagate succulents for your event, make sure you give yourself enough time to do so. You will want a couple of months to do this DIY. Talk with some local greenhouses with growers who have experience with succulents. Also there are FB groups dedicated to succulents. Join a group or two and learn from those who are succulent whisperers. There is a wealth of good viable information there.
I readily admit that I am not an expert. And there is a world of information available. Just do not take your advice from clips and reels on FB, Tick Tock, or anywhere else. I tried propagating leaves in a plastic bag, through a slit in paper to suspend over water, and directly in water. None of these have worked for me and I am most certainly a novice at propagating succulents. If you’re a novice, I suspect that these reel methods are not going to lead you to success either. (With the leaves, I tried about a dozen and not a single one grew. This is reason why I have little reason to believe these techniques work. Not working the numbers paid off. If I get a success rate of 1 out of 10 attempts, I call it a viable option.)
One other walking away point I want to draw your attention to, is take notice of the terra cotta pot decorations on my pots. These were painted on with acrylic paint and have stayed on the pots over a year later. So it will not flake off anything else. And this is an excellent way of incorporating your event colors. You can create endless possibilities with your design. Whether you go with feather like swirls, dots to simulate lace, stripes, or even using a stencil from any store’s craft department. You can certainly dress up your terra cotta to fit the look you are going for.
I’ve lost count of how many events that I decorated for where I would take home flowers after an event because there was no second life for the floral arrangements after a wedding.
Don’t get me wrong. I LOVED those events because I had pretty flowers to take home and enjoy for a week or two. That is definitely an occupation perk that I’ve enjoyed.
However, at the same time, it has always saddened me a little because I have always wanted people to have more bang for their buck when they are spending good money on a wedding or other event.
So here is where we join two very important passions of mine!
I breathe creativity and decorating. But I also love working in my garden and learning all the old skills of creating home supplements, natural cleaners, and especially new ways of putting food on my table.
The very day that I learned about making a Chive Blossom Vinaigretteis the very same day that I made it.
This is Day One of my Vinaigrette:
My Four year old and I did this together for the very first time and as soon as I saw how this jar looked I immediately thought, “How Beautiful!”
And this was the first, on many ideas that I had:
You can go with sentiments or go all the way with the couple’s monogram, name and wedding date, or even line art that goes with your over all Boho decor.
What I absolutely LOVE about this inspiration is that it’s simple but has so much LIFE after the wedding or event.
For example, this Chive Blossom Vinaigrette will become a salad dressing, meat marinade, or other meal flavor provider in as little as 3 weeks. The total cost for this is just your jar, the chive blossoms, and food vinegar. When you’re looking for cost saving centerpieces, you seriously can’t beat this for bang for your buck!
To do this idea, you will definitely have this be your day of preparation, so have a few hands on deck. You will want to clip your edible flowers, rinse them, and place them in the jars before adding the vinegar.
The reason why I say do this on the day of is because of the process needed to properly turn this into a proper dressing or marinade. It is shelf stable during the whole process, but it needs to be kept in a dark cool place for the 3 weeks of processing. You could also use the jars at the end of the three weeks, when the vinegar takes on a fuchsia/purple appearance. But you want to try to limit the heat and light exposure no matter if you do it at the beginning or end of processing.
Tip 1: This needs to be shaken once a day for the entirety of the three weeks. So you will have a cleaner look at the beginning of the process. At the end of the process, you will have some floating pieces from the flowers. That just naturally happens with daily agitation.
Tip 2: At the end of the 3 weeks, you will need to filter this vinaigrette through a cheese cloth to remove all debris (and rebottle) before you use this as a dressing/marinade.
Maybe puple is not the color that goes well with your Boho design. Here is a list of some other edible flowers that can be used in making your own version of a different vinaigrette. Or you can just put the blossoms of these flowers or others into a jar filled with water.
Nasturtiums
Pansies
Violets
Hostas
Borage
Calendula
French Marigolds
Chrysanthemums
Carnations
Hollyhocks
Sunflowers
Cornflowers
Gladioli
Honeysuckle
Dianthus
Antirrhinum
Tulips
Roses
Lavender
Pea Flowers
Broad Bean Flowers
Onion/Chive Flowers
Brassica Flower Heads
Pak Choi Flowers
Squash Flowers
Dandelions
Daisies
Chamomile Flowers
Red & White Clover Flowers
Chickweed Flowers
WARNING: Make sure that you only use flowers that have NOT had pesticides or herbicides used on them. Whatever has been applied to flowers will enter your body if you eat them or any extract that you make from them.
Advertisements
Flowers as herbs and seasoning have different flavors that they impart. Some have a peppery note to them. The chives that I grow are a garlic chive, so it imparts a garlic flavor without having to fuss with cloves of garlic. I’ve also started working with Lemon Balm (a member of the mint family) which imparts a lemon flavor. So I could have added tiny Lemon Balm leaves in with the chive blossoms. Which now that I think about it, I’m definitely going to add that to my vinaigrette as soon as I post this!
Another thing to keep in mind is that for thousands of years edible flowers and plant leaves have been used for natural medicine. For example, Lemon Balm is great for combating the viruses behind the common cold. So you can give your body the things it needs to keep healthy while adding flavor to your food.
If making a vinaigrette is not something you will use after the wedding (or other event), consider looking into making your own chemical free cleaner. For example, you can still use this mason jar idea and make a kitchen cleaner with lemon or orange slices and peels.
If you’re not looking for a natural cleaner, than even using berries and mint, basil or other leaves in water, is a great of washing your produce before you eat it while borrowing it for a few hours for your event.
There is one more option for Fall and Winter Events when most of the edible flowers are not in season. You can make Pine Syrup or Spruce Tip Syrup. I found this type of syrup interesting because I have spruce widely available around where I live and real Maple Syrup is a luxury on my family’s budget. This can be a pretty centerpiece as well because you use the new growth tips on a spruce tree or pine cones for the Pine Syrup. I’m sure that you can imagine the possibilities for all your holiday parties with this one!
Decorating the Mason Jars
The simplicity of these jars is beautiful all on their own. But maybe you want to dress them up a touch. What can you do to add a little panache?
Paint the jar ring (White, Gold, or other event color)
Apply glitter to the jar ring (after finished spray with a clear coat of paint to keep from leaving a glitter trail)
Use squares of pattern, texture, or fancy cloth on top (held in place by screwing the ring down onto the jar over the fabric)
Decorate the jar itself
Use the jar as a base for a taper candle (with candle holder) to raise the level of the candle above other centerpiece elements
Put your table number on top of the jar
I hope you’re just as excited about these ideas as I am. These are definitely something fresh for existing wedding and party themes. Be free to experiment with using some of your food preparation and preserving techniques the next time you are decorating for your next event!
Files Used In This Project
As a special treat I have a surprise for you! Visit my store and check out Love. Be sure to hang around and see what else is new. Every Monday at least one new SVG is added!
Processing…
Success! You're on the list.
Whoops! There was an error and we couldn't process your subscription. Please reload the page and try again.
Honestly, I should know better! Names have power. And the last time anything was very aptly named in my family was when my sister named her goldfish Sushi. It ate all the other fish in the tank.
I should have known that naming a starter Frankenstein was going to be a wild ride. But I’ll come back to that in a moment.
Today is the last day of this miniseries talking about yeast and bread making. I wanted to finish with my experience in making a Gluten Free alternative for in those who cannot keep a starter with flour, because of dietary restrictions. Because everyone should have the opportunity to keep a starter that meets their needs.
When I told my Mother in Law my plans for making a starter (my original flour starter), she was so excited and told me that I had to make a potato starter. She remembers having one from when she was a girl, but couldn’t find her recipe. And her memory was very limited in that process. She heard me out with my flour starter and insisted that it was just as simple and the same to make it from potato.
Of course I tried to verify everything she described with what everyone else has posted on Pinterest. And no, what my Mother in Law told me was different from what everyone else is doing. I’ll save you the search, unless you want to go down that rabbit hole. The rest of the world is making their potato starter using instant potatoes.
If you have a potato starter and use instant potatoes can you humor me and check the ingredients on the side of your box?
If you are comfortable with everything you see there, then I won’t say another word on that subject. Keep your starter healthy and keep making that glorious bread in your kitchen!
If you see anything there that you might not have been aware of or want to move toward a starter with fewer ingredients, you can transition your feed to using just a potato. I’ll show you how.
The Set Up
The little bit of information that I did receive from my Mother in Law was that the potato start from her childhood was just a boiled potato mixed with water.
Believe me I know exactly what you’re thinking! I thought the same thing.
There was not enough information to start with. What do you do with the potato? …I won’t bog you down with the list of questions that I had. Even with a degree in history, and having professors who assigned me to make food from out of circulation recipes, I had high hopes of finding some old recipe to work with. And all I had in the end was boiled potato and water.
BUT I wanted to make this experiment, with the thought in mind: How do you make yeast start with just what you can find in your pantry or garden?
It was a what-the-heck moment. Let’s do this thing!
I grabbed a potato, peeled and cubed it. Put it in a sauce pan with water and cooked that potato like I would mash potatoes. Only this time the seasoning, butter, and milk stayed where they were. Once the potatoes were soft, I removed them from the heat and reserved the water I boiled with. We all know that when you cook, all vitamins and nutrience end up in the cooking water. And I had no idea if the potato or the water has the stuff I want. (Also there’s the side objective of trying not to waste resources.)
And here is where I ended up with two potato starters. I didn’t have faith in my Mother in Law’s lack of directions. (To be fair, she hadn’t used this method in many decades and probably thought she never would.) So I chickened out and took Method Two. But the next day I decided I was doing myself a disservice by not attempting my Mother in Law’s way. If it failed, at least I had the other starter to fall back on.
METHOD ONE
Mash the potatoes. In hind sight I didn’t mash them as smoothly as I wanted. The chunks are very obvious. But rest assured, even if your potatoes are chunky, you will still get healthy and viable starter.
Mix in some of the cooking water. This is going to be a wet starter. So think between toothpaste and stew consistency.
I named this starter Carolyn.
METHOD TWO
Mash the potatoes. In hind sight I didn’t mash them as smoothly as I wanted. The chunks are very obvious. But rest assured, even if your potatoes are chunky, you will still get healthy and viable starter.
Mix in some of the cooking water. This is going to be a wet starter. So think between toothpaste and stew consistency.
Add a couple Tbsp of starter from an established yeast.
I named this starter Frankenstein.
Why would Method Two work?
When researching about starters, you learn that you can turn a gluten based starter into a gluten free starter by slowly changing its food source away from being wheat based to your GF flour of choice.
I didn’t do the gradual change, because the food source and environment was completely different. So I just jumped all in and went at it from a science lab experiment of inoculating yeast into a new medium.
What if I’m transitioning my existing potato starter from potato flakes to potato?
The standard method of transitioning starters to a new food source is to feed on the following schedule:
Transition Day 1: Use 75% old food source + 25% new food source.
Transition Day 2: Use 50% old food source + 50% new food source.
Transition Day 3: Use 25% old food source + 75% new food source.
Transition Day 4: Use 100% new food source.
All the transitioning experts assure their audience that even with a gluten starter transitioning to gluten free, the more you feed the starter without the gluten food source, the more your starter transforms into gluten free. If you are GF by choice, you are good to start using your transitioned starter after day 3. If you are GF for medical reasons, then there comes an educated decision based off of your sensitivity. If you are very sensitive, and know your levels, you can do the math to determine what an acceptable amount for consumption is. Your bread recipe is going to have a yeast to flour ration, giving you an overall percentage. On Day 4, there is potentially a 62.5% gluten level in the yeast. Day 5, that drops down to 31.25%. Day 6, 15.63%. And so on. Now if your bread recipe keeps the baker’s ratio for bread making (2% of flour weight), Day 4 has a potential gluten amount of 1.25%. Day 5 has a potential amount of 0.63% in the bread. So you can see how this is an educated based decision of what is acceptable for your body.
Please note: I have not transitioned a yeast to a new food source other than what I did to Frankenstein. So I have no idea if Frankenstein is what’s normally expected, or just some fluke that succeeded. And Frankenstein I didn’t transitioned at all. I just dropped flour based yeast in a room temperature environment of potato and water.
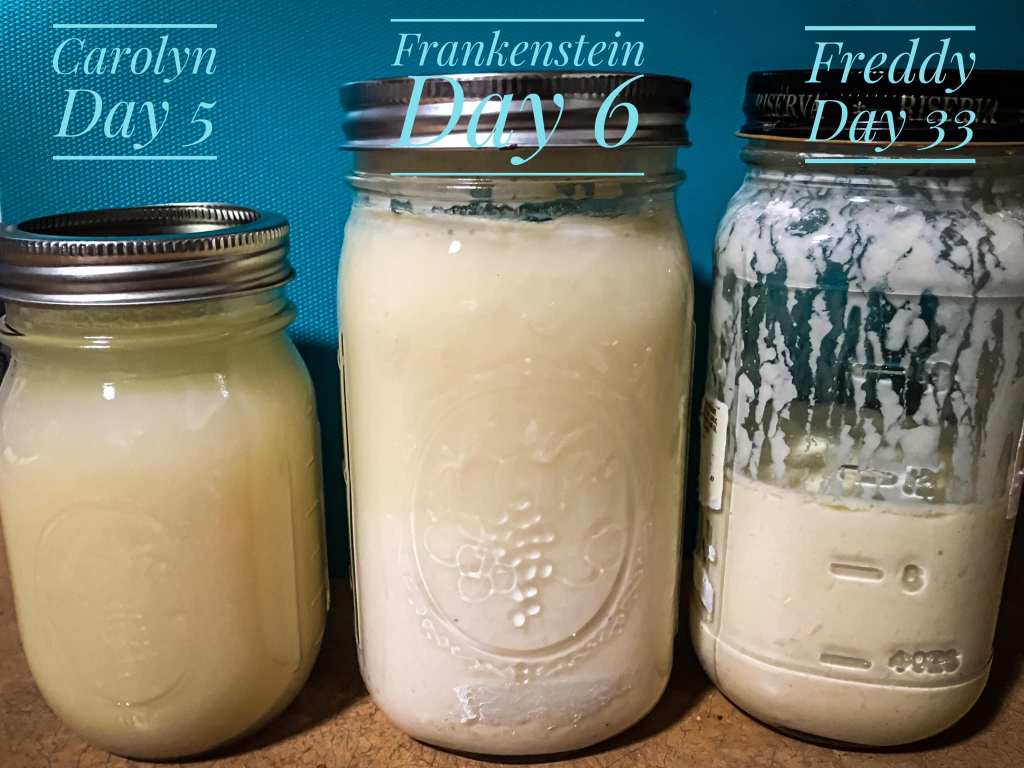
Picture 1 is Frankenstein. Picture 2 is Carolyn. These are just my starting point, pictorial references. So at least you have something to compare your potato starter with.
As a time saver for feeding, I boiled a couple of potatoes at the same time. I saved the left over mash and cooking water, and kept them in the fridge. When I was prepping for a feeding (twice a day) I took the mash and water out about an hour ahead of feeding time, so it could come to room temperature.
Day Two
I continued with a 2 time a day feeding of potato mash and the cooking water.
What I did not count on was Frankenstein (picture 2)!
Let me give you a close up on two of pictures in the set. In the above picture (picture two, top row, second from the left) you will notice that Frankenstein had clear striation between solid and liquid. When I placed a scraper in and gave to couple mixes to reincorporate the components for a feeding, I got Picture 1 (below). Frankenstein was alive!
I have never seen this kind of reaction in my life, especially in the world of yeast. This yeast, I called Frankenstein, was going crazy! In fact, Picture 2 (above) is the still of what I saw. There was movement in the jar that was very reminiscent of a lava lamp.
I mention all of this because if you decide to inoculate you potato start with another start, just to get active yeast from the get go, and you see foaming activity like this know that you are not alone. It happened to me and I have the photographic proof to prove it. The smell is standard for starter. It’s just the yeast activity that is the only difference.
What I fed Frankenstein and Carolyn were the same potato and cooking water. The only difference between the two starters is the origin of yeast. And that yeast came from my AP flour based starter, which never acted this way either.
Day 3
Continue with the 2 times a day feeding of potato mash and cooking water.
The activity with Frankenstein was still happening, but to a lesser level. Here are some pictures to show you where that starter was. I don’t seem to still have pictures for Carolyn.
I stopped taking pictures of Carolyn on Day 3 because I had some research to do.
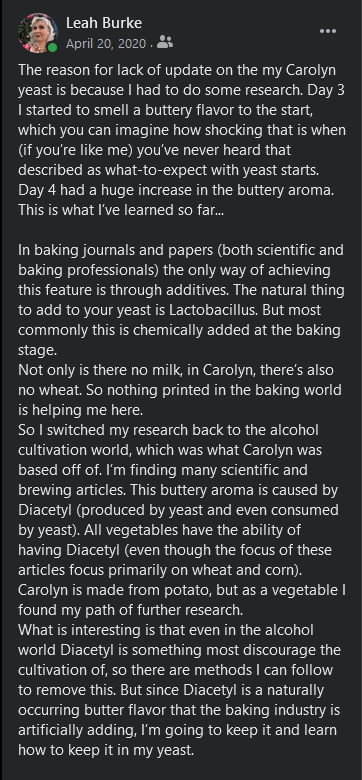
If you remember from Valuable Resources, I mentioned things to look out for when keeping a starter. Your starter should never have mold, spores, or color on top. Neither should it have an acetone smell. On Day 5/6, I posted on Facebook, how Carolyn started smelling like butter.
Freddy is my flour starter.
I’m going to pause here and just let my post communicate what happened to my 100% potato start.
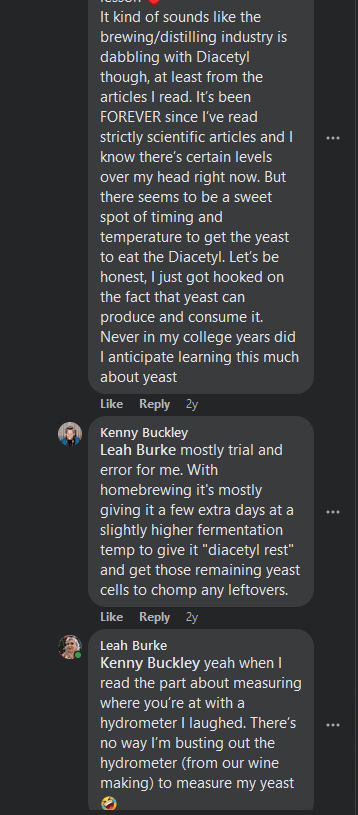
Here’s what happened, Carolyn was well on the path of turning herself into vodka. This will be a common problem, correcting Diacetyl, when you have a potato starter. This is because its potato based, not wheat based.
What I learned from Carolyn, and making a starter with next to no knowledge with what you’re doing, is that you HAVE to go back to a source that you know. Yes, I was making a starter. But this problem was not covered in anything written about sour dough starter for bread. It didn’t make much sense to look into the world of vodka making other than the fact that vodka making starts with a potato mash, which is exactly how Carolyn started. And within minutes of looking at sources in the vodka world, I found my answer.
For those curious, what caused the Diacetyl? It could have been a bacterial contamination. Or it could have been that this starter had oxidized. (Remember that yeast has anaerobic respiration.) I happen to believe that this time it was oxidation, because it happened on Day 3 which is when Diacetyl enters production of beer brewing. And all your alcohols have tools to keep oxygen out of your cultivation.
How did I heal Carolyn from Diacetyl?
There were a few options from the brewing and Vodka world. I started with adding salt into my starter (probably about 1 1/2 tsp worth. I guessed the measurement, and added a little bit more than what I thought I needed). This time, all I needed was the salt. The next day the butter smell was gone.
I cannot stress this enough. No matter what medium you use to feed your starter, yeast is a living organism. Every time you open your container to use or feed your starter, always visually check its health and smell it. Your yeast will tell you when something is wrong. And when you catch it quickly, you can tend to your yeast and keep it from going bad on you. It can turn around and come back into health.
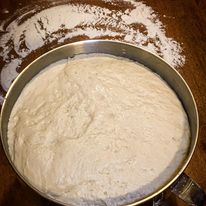
Here is a picture of how Carolyn started showing evidence of being healthy and active.
And the Pay Out
Nothing shows the yeast is active and healthy until you produce bread from your starter. This was the potato bread that I made from Frankenstein while I was tending to Carolyn.
Is there a flavor difference between bread baked from Carolyn (100% potato start) vs. Frankenstein (potato started with flour fed yeast)?
I preferred the flavor from Frankenstein. Even though I followed a potato bread recipe, Frankenstein had a blend of flavor between store bought potato bread and homemade sour dough bread. Carolyn produced bread that didn’t taste anything like potato bread. The loaves turned out like they should, the flavor was just off.
To be honest, it’s hard to say if there was something deficient with Carolyn or if the difference I tasted was the true difference between the two different methods of potato starter. This was also the point in time where my life got super busy and I could not keep up with keeping 3 starters. So shortly after baking with Carolyn, I let go of the two potato starters and kept feeding my flour starter.
Final Thoughts
There are several different reasons why making a starter from potatoes is a great idea. For example, I grow potatoes in my garden but not wheat. If I ever came to a place where I could not source the amount of flour that I use (to keep my boys in bread) than a potato starter would be amazing to conserve flour and use up the potatoes I grow.
You can make potato starter from potato and water.
In fact a starter from potato and water can serve double duty by providing the yeast for bread making and for distilling vodka (for all you home brewers and wine makers looking to branch out).
Last week, in Bread Recipe that Hasn’t Failed Me, I mentioned the science behind bread making. In the case of this week’s example, caring for Carolyn required a different science. Sometimes you have to look outside the normal beaten path of bread making, to find your answers. Bakers don’t have all the answers. They are gifted with their knowledge that they’ve cultivated. But there will be times in life where bread making takes you into another field of study to find the answers to the problem(s) you are solving. So be flexible. Don’t get frustrated if you’re searching turns up as a dead end. It takes a moment to stop, breath, and take your thinking down the path that runs parallel to the one you’re on.
Thank you for going down this detour in the creative world.
Conserving resources, making something out of the barest of materials, and using what you have on hand is an art form that needs to be resuscitated in the world that we live in right now. There are options that are still at all of our finger tips.
If there is a method of making something that you want help finding a method of creation (Just like my Mother in Law’s information of taking potato and water to make potato starter) and don’t know where to start, reach out to me or leave a comment below. I want to be creative with you!
As a special bonus, here is a sneak peek to this Monday’s release, 2022 Graduate
Processing…
Success! You're on the list.
Whoops! There was an error and we couldn't process your subscription. Please reload the page and try again.


Leave a comment