After spending almost a decade in the event decorating industry I have repetatively heard "I can do that". Instead of being dismissed by creative minded people, I want to show you how I do "that" so you can be sucessful in recreating that inspiration image. I just might have a few tricks that you haven't seen yet!
Happy Mother’s Day to all the moms who are celebrating today with their children, the moms who are missing their children, the moms who have lost their babies far too early, those who shared an all too brief moment with their babies, the mothers who are in the middle of a season of making the dream of motherhood a reality, and those who love on the children from other mothers who lean on you to be the loving assurance in this season of their life. No matter what motherhood looks like to you, Happy Mother’s Day!
Depending on who you talk to, some people feel that holidays are too commercialized. Others find it difficult to find the perfect gift. And others find it difficult to gift a loved one while feeling the financial pressures of this season of world history. No matter where you personally find yourself on this spectrum, I want to help you find inspiration on how you can find a meaningful gift for someone. Whether it’s a belated mother’s day present, a birthday, anniversary, father’s day, grandparents’ day, teacher appreciation, graduation, or any other occasion, know that you can gift in a meaningful way.
I’m going to use the example of the mother’s day gift that I gave one of the mothers in my life. While this may not apply to the person in your life, the same principle can be applied in finding what you can gift that special person in your life.
This mom loves talking about her memories. For many years she’s shared her precious memories of when she operated a daycare. And one of those fond memories is when she grew gardens with the children under her care.
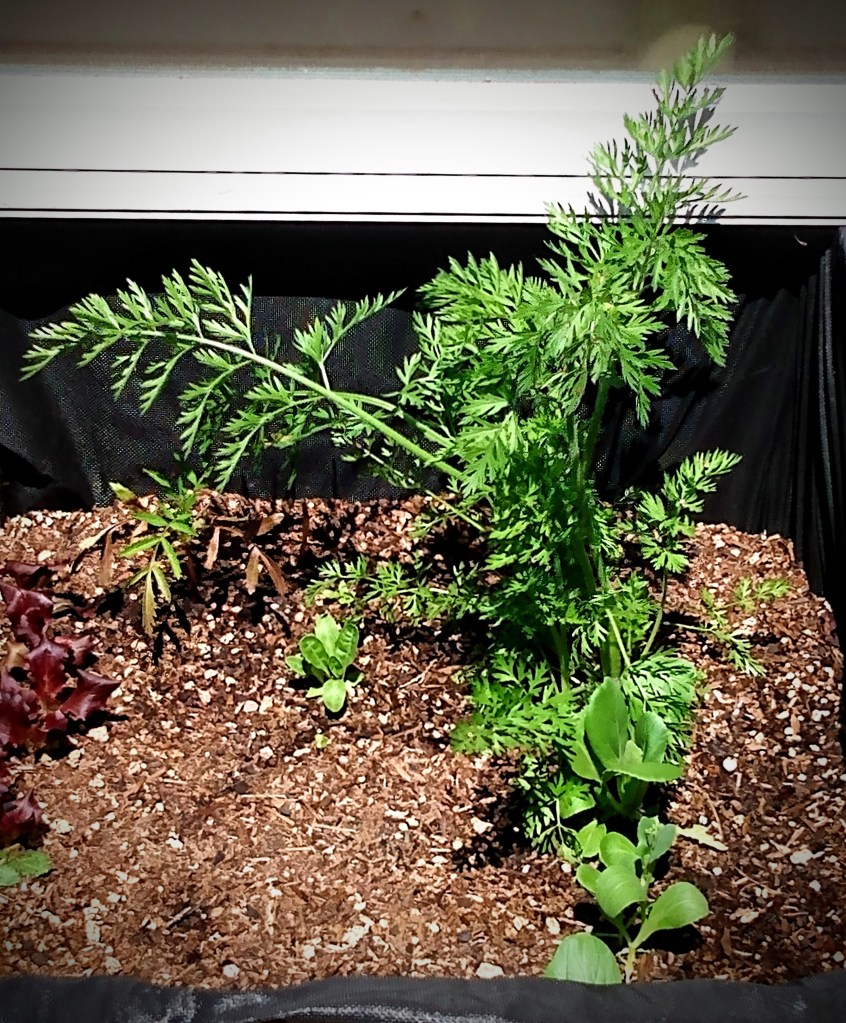
Growing salads in a container box.
One thing about moms, it seems pretty universal that sharing memories usually isn’t about the memory. It’s about reliving a moment in life that brought pleasure to them.
From this understanding, I knew that building a garden for this mom was a gift that would fill her love tank. Not only is it an opportunity for her to relive precious memories in the here and now, it also opened the opportunity to add more memories in association with these older memories. By building a garden and scheduling time to upkeep and tend to the garden, it was also guaranteeing visits and making time for her to spend time together.
Container growing for small spaces.
For this mom, she has two love languages. Her primary love language is gift giving. Her receiving love language is quality time.
Making a deposit of part of this season’s garden was not just a simple arrive, dig holes, put in start, say good bye, and move on with the day.
Advertisements
For this Mother’s Day gift, it took in the appearance of leaving all the gardening supplies in the car and starting off with a sit down chat and getting caught up with all the news, even if it was only a day since we last saw each other. Then, I was able to go prepare the garden beds for this first plant installment.
Even before I could bring out the plants, this mom was already so filled with love that she wanted to spend some more talking. As much as I wanted to stay task driven (my personality is to knuckle down and get a project done quickly so I can move on to the next task), this day was all about showing love to this mom.
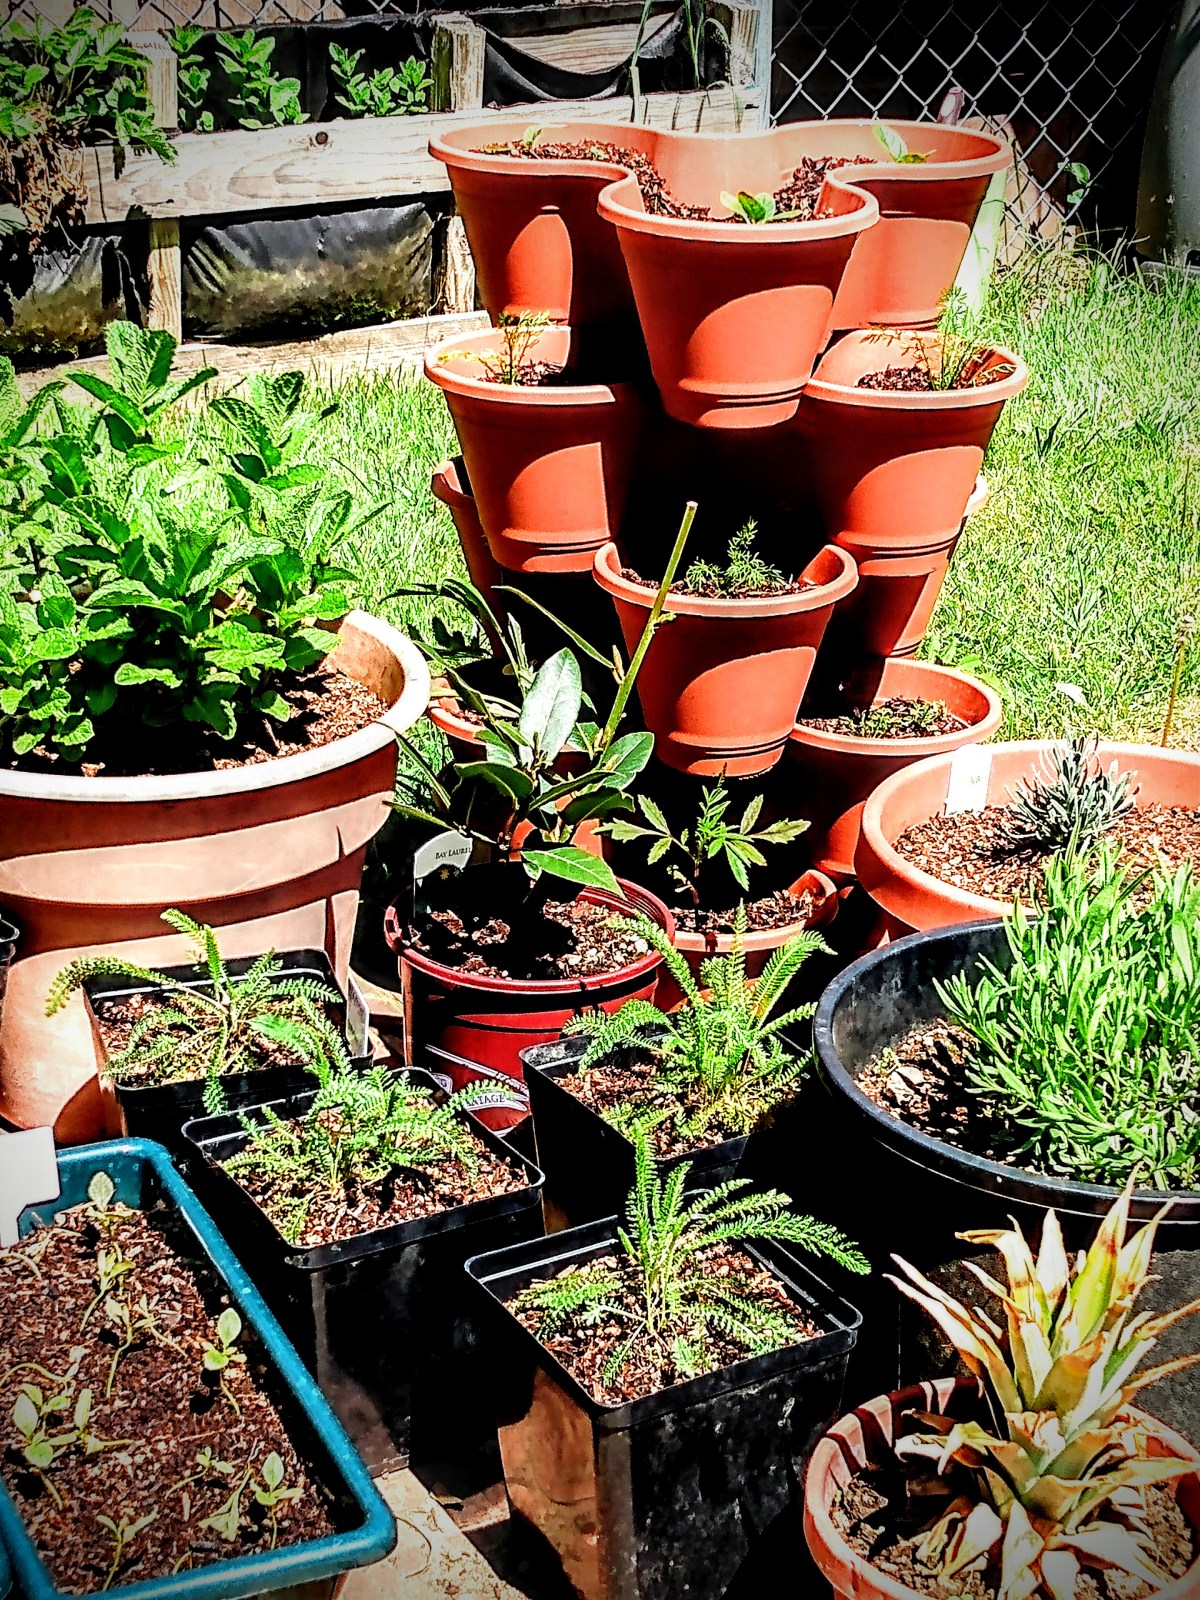
Pallet boxes for narrow spaces and hanging baskets on cyclone fence
So we had another chat session.
When I could find a polite moment to get back to the task of putting the starts back into the ground, I made that move. And with the final post plant watering, I went back and gave this mom one last extension to the gift I was giving her.
Remember, I said that this mom shows love to others by giving to them. So while I was building this garden for this mom, I know that the one thing that would bring her even more pleasure is by telling her upfront that the goal of this garden is primarily to meet her primary produce needs, I’m planting more than she will personally need so that she can give from the garden to others.
I wish I could share with you the look on her face, because she was bursting with love. Knowing that she was having a garden this year was more than enough to help her feel love, she felt seen and more loved because the gift was enabling her to show love to others without need to be reserved or anything else. It was a gift that was freely given so that she could freely give to others.
Growing herbs in repurposed gutters hung on a cyclone fence.
I know that this story may or may not show you specifically what you can give the hard to shop for person, but there is a valuable lesson here.
A good gift is designed to make a person feel loved because it speaks to how they most readily feel loved.
If you don’t know this love language, ask your person how they most feel loved. They will gladly tell you. It could be a tangible object or food that makes them feel loved. Or it can be a non-tangible activity, expression, or display.
A great gift is one that fills their love tank, but also doubles as a tool to enable them to share their love with others.
Container growing garden with DIY budget friendly or recycled components. Chicken wire trellis threaded through upright supports.
Maybe your loved one is not like this mother. Maybe they don’t show love to others by giving them things. Maybe they show love through acts of service. However their schedule is busy. By gifting them your time to do tasks for them or help them create time, this can free up time where they can show love to others by spending time with another person.
My encouragement to you today is to be inspired with a gift idea that doesn’t come from the shelf of a store. Yes, there are many store bought items that are amazing and meaningful. I want to strike the inspirational fire to give a gift out of love and seeing the other person at a core level. And also enable them to pass on love to others.
Advertisements
Right now we live in an interesting moment in history. It is an uncertain time for many families. But it is also a prime moment to celebrate others by giving to them in a way that shows them that you remember past conversations. Where you have heard and remembered things that could have easily been passed off as trivial information in the moment.
Let’s show our loved ones that we see them. And we celebrate them for who they are.
Again, Happy Mother’s Day!
publicdomainpictures.net
This post contains affiliate links to products. We may receive a commissions on products purchased through these links, but at no extra cost to you. This item link is to Amazon but may be purchased at local markets, and found at your local library.
If you are unfamiliar with Love languages, here is the book that started it all.
Originally this was written for understanding your mate. There are several other editions available to meet other relationship needs such as children, being single, and in relationship of a military service member.
Processing…
Success! You're on the list.
Whoops! There was an error and we couldn't process your subscription. Please reload the page and try again.
I have to love my husband who loves to give practical gifts. Usually he stays away from gifting flowers because they last for a few days before they’re composted. However, there are so many uses for not just roses but other flowers as well. While I’m going to be talking about roses here, there are so many other flowers that can be used in the exact same way!
For those who are unaware, roses are edible. (Before you do eat rose petals, make sure that they haven’t been sprayed with chemicals, pesticides, insecticides, or anything else that is harmful to you.) Roses contain vitamins A & C, Niacin, Potassium, Iron, Calcium, and Phosphorus. Some places where you’ll find fresh petals are on a dessert/cake or in beverages such as teas.
Advertisements
It’s not just the petals that are usable to our bodies. Rose hips (the bulb at the bottom of bud, harvested at the end of the rose season from the rose bush) is used in the beauty industry and baby products for the benefits it has to the skin.
The benefits to the skin is the primary reason why I decided from this last bouquet of roses that was given to me that I was going to use the petals for my next batch of soap.
I started making soap because I’m not okay with all the chemicals that are being used in soaps in the commercial market. Other than using soap dyes (which I’ve had my tub and skin discolored from bath bombs and other products) the mission I’m on is finding natural dyes to color my soap. For pink soap, I’ve seen soap makers use dyes or French clay.
Now Calendula is a well known floral natural food grade colorant. For red/pink colorant, Beets can be used in food. But anyone who’s worked with beets knows that your skin and clothes can be discolored. So I wanted to find a different red/pink colorant for my soap that I can grow in my garden. So I came to roses.
Advertisements
How to Process Roses
There’s two easy ways of doing this.
The first is to hang the roses upside down to slowly dry them out. The benefit of this method is that all the vitamins and natural compounds that our bodies benefit from are at a higher concentration when they are dried at a low temperature and slowly.
Ideally, the most benefit would come from using the petals fresh. And while it is possible to use fresh ingredients in soap making (I make orange colored soap using pumpkin puree), there’s no way of breaking down the petals for a smooth and consistent colorant unless you want to use a blender and puree it with the water content of your soap. While it’s not a bad idea, unless you grow roses year round (which I don’t) you have a limited supply due to the window of fresh flowers available. (This is the reason why dried petals are best for me.)
This drying method is slow and takes time. Also any white component will yellow as it dries out. This can affect your over all final color depending on which rose you use. With the red rose, not so much. But the other two, the tinge will be noticible.
So there’s the second method, using a dehydrator.
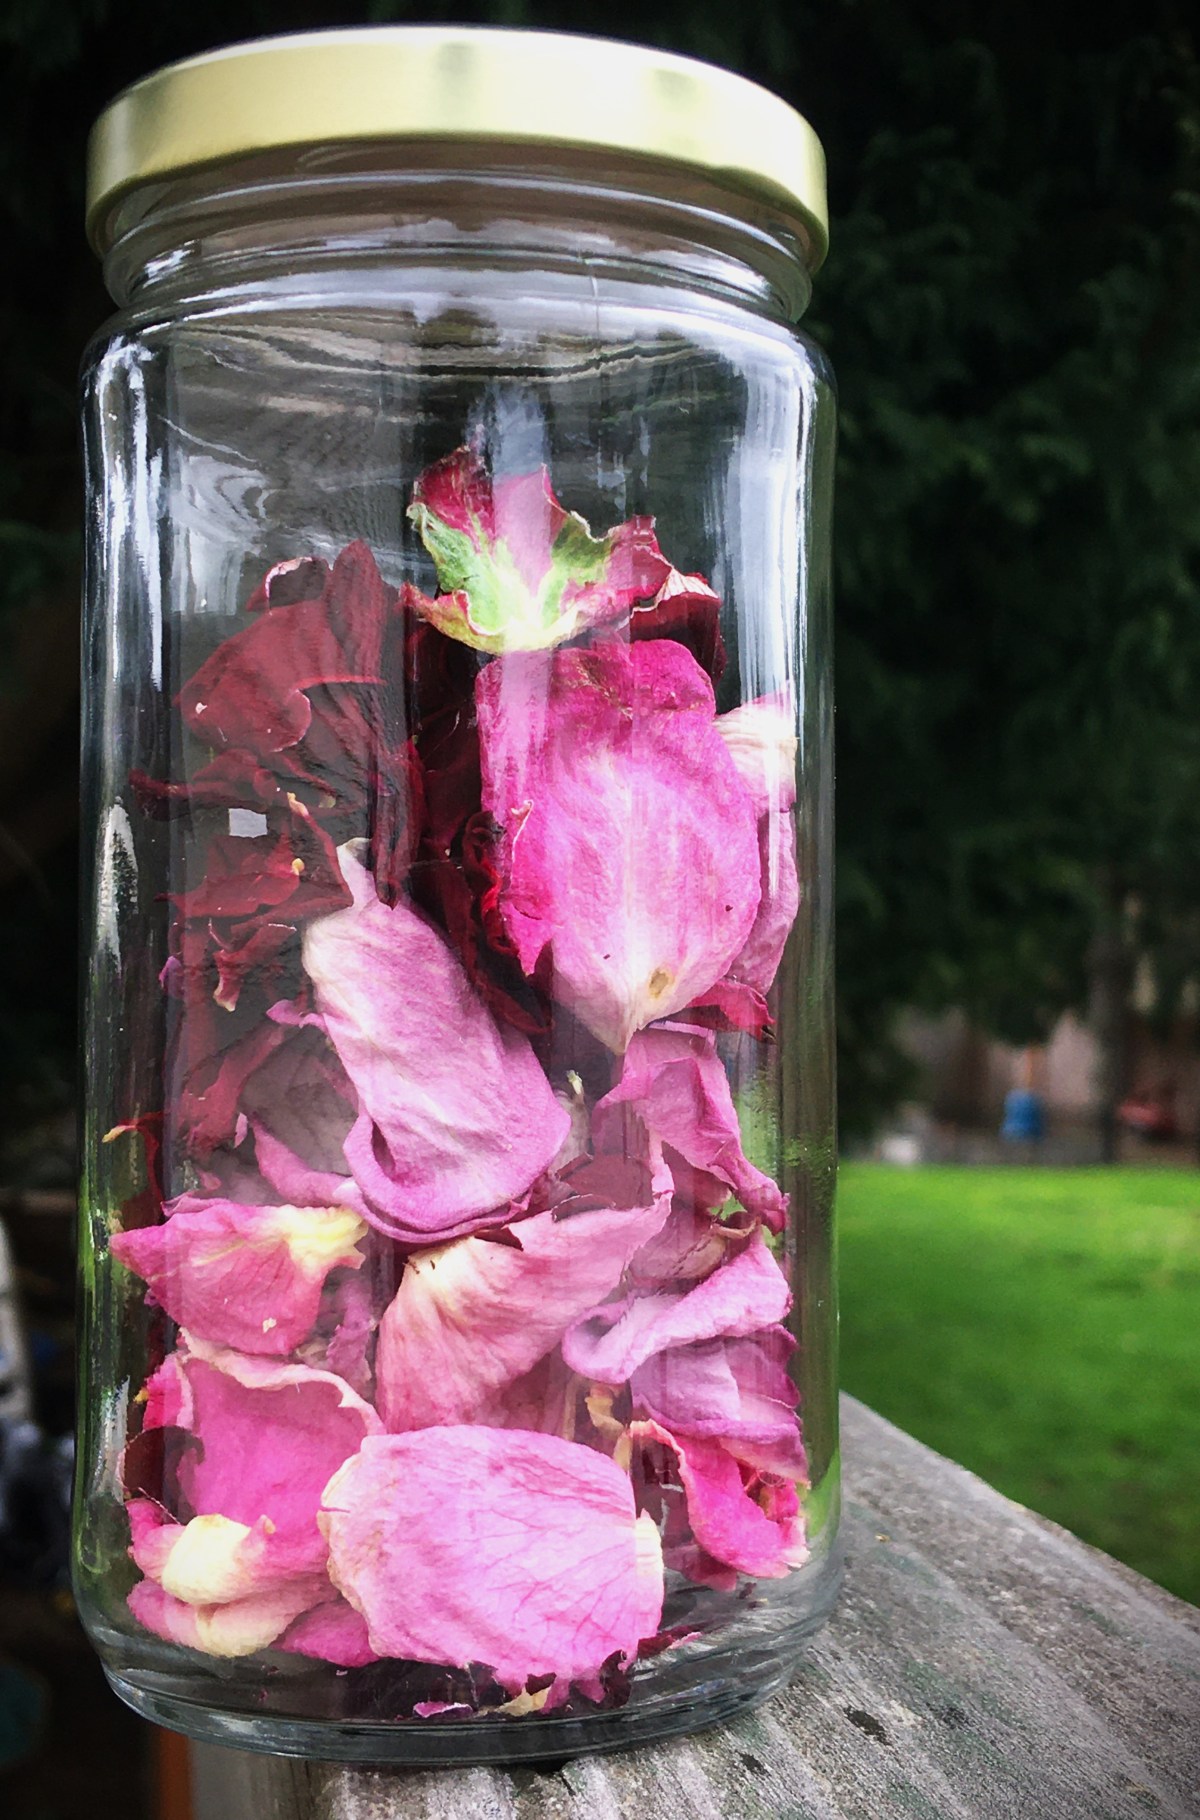
The benefit from using a dehydrator is that petals are finished drying in about 24 hours (at 90°F, the lowest setting on my dehydrator) and their colors are only affected by growing darker.
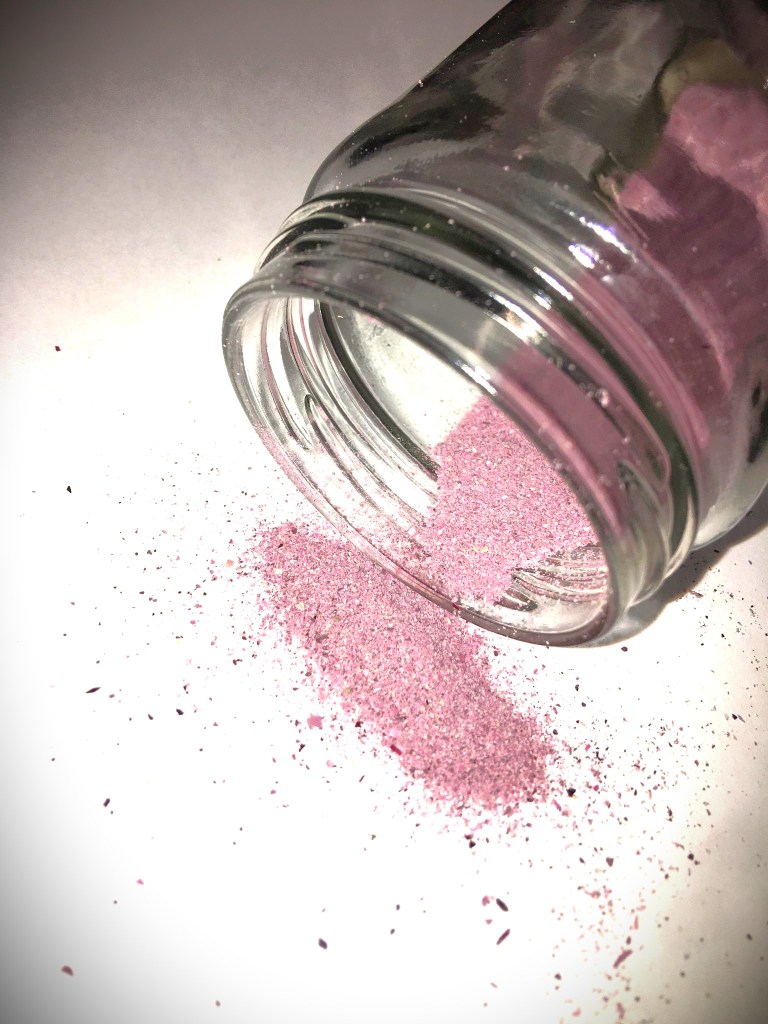
As you can see here, the white component on the pink flowers have not discolored too much. This is great because when I turn these petals to powders, I’ll retain a pink like quality.
Before I move on to finishing these petals, I want to mention that if you want to make a natural confetti for cake decorations or throwing for a party/wedding celebration, all that you need to do is crush your dried petals by hand and store them in an air tight container (like a lidded glass jar) to prevent them from rehydrating due to humidity in the air.
As you can guess, with the fact that there were lavender inner petals on the second rose (the one with the variegated pink and white outer flowers), this is the reason why I blended in the red petals with the pink ones, to keep the pink and stop the transitiontoward purple (although I’m not opposed to purple soap.)
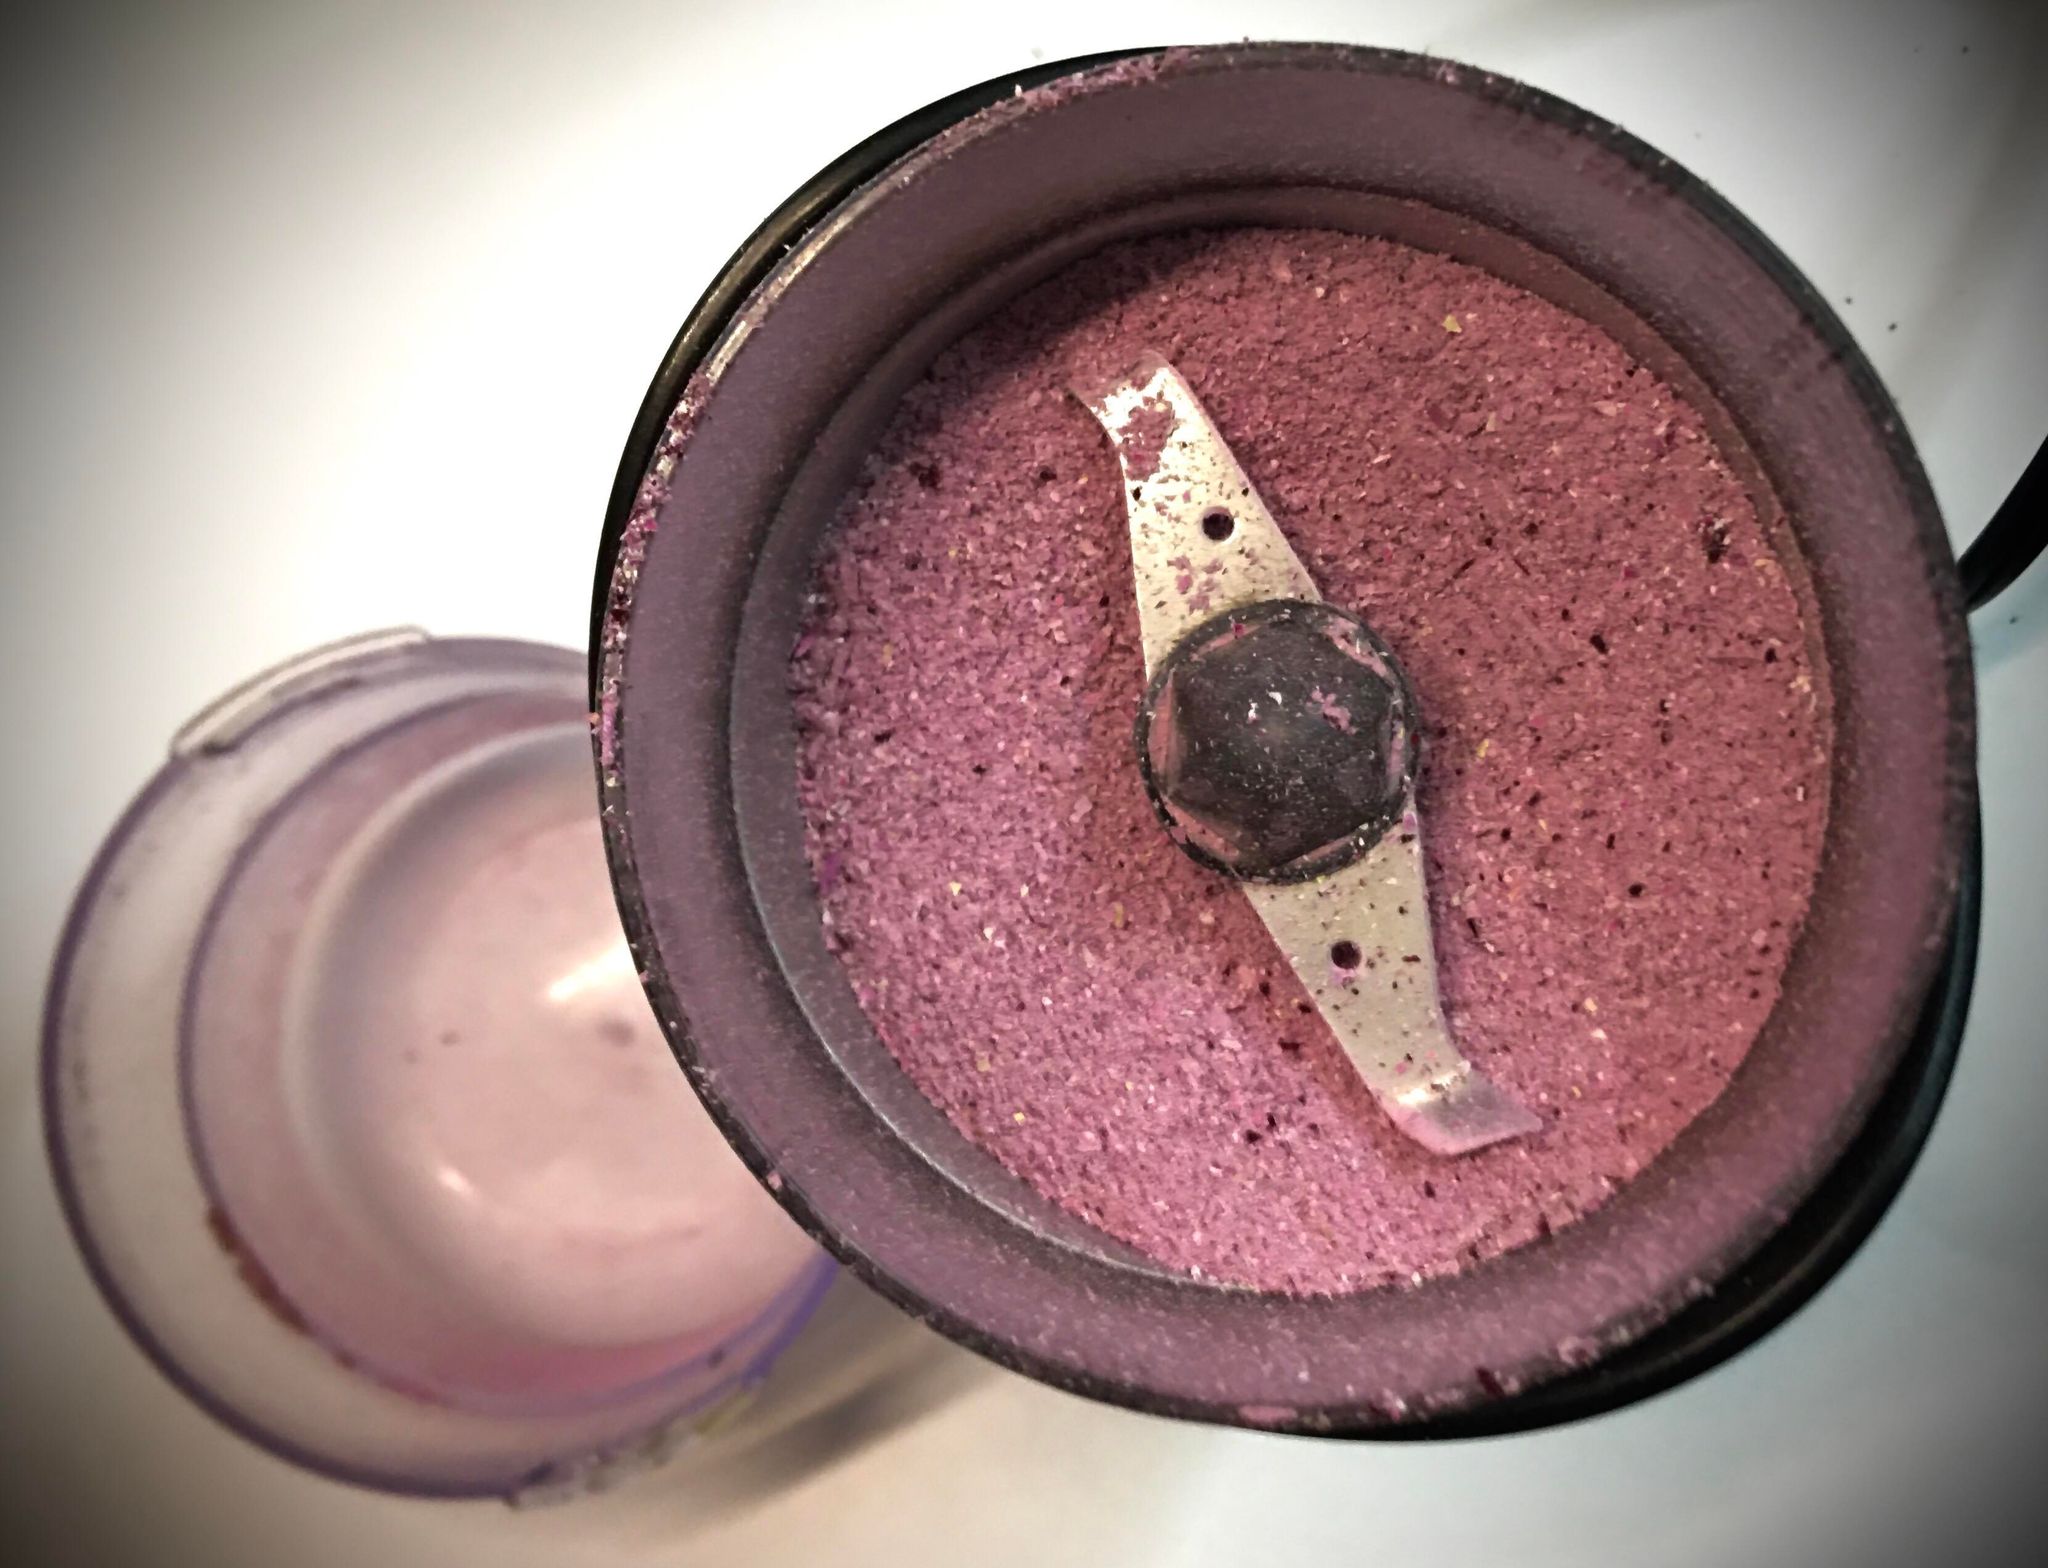
To make Rose Powder, all you need to do is put the crushed petals into a coffee or herb grinder and run it until you get the consistency that you are looking for. Because I’m looking to make a colorant for my soap and don’t want to have flower chunks in it, I took the powder down to a very fine grind.
The fun part about Rose Powder is that you’re not limited to use it as a natural dye or colorant. You could dust this on the icing of a confectionary dessert. If you want to make pink pasta, use this powder as part of your dry ingredients. Mix the powder with a sugar or salt and you have a pink sugar or salt rim to your favorite beverage.
No matter what celebration you have coming up, keep this idea in mind. If you want to dress put your Easter cup you can make a sugar rim using all sorts of different colored edible flowers. Calendula gives you yellow/orange, Violets blue/purple, Hibiscus yellow/orange/pink/blue/purple, there are so many other flowers. If you want to see a quick list of different edible flowers, here’s a jumping of point here.
What unique way do you use flowers?
Processing…
Success! You're on the list.
Whoops! There was an error and we couldn't process your subscription. Please reload the page and try again.
In case anyone ever wants to know, the time I can get my cooking on and experiment is when the rest of the family is in bed asleep. The down side is that baking usually wakes my husband up and he has instant munchies. Did I mention that it doesn’t matter how much noise I make, what wakes him up is the aroma of fresh baked goods?
The funny part is that while I was editing photos (while the last batched finished baking) he comes in and asks me which one is the best one!
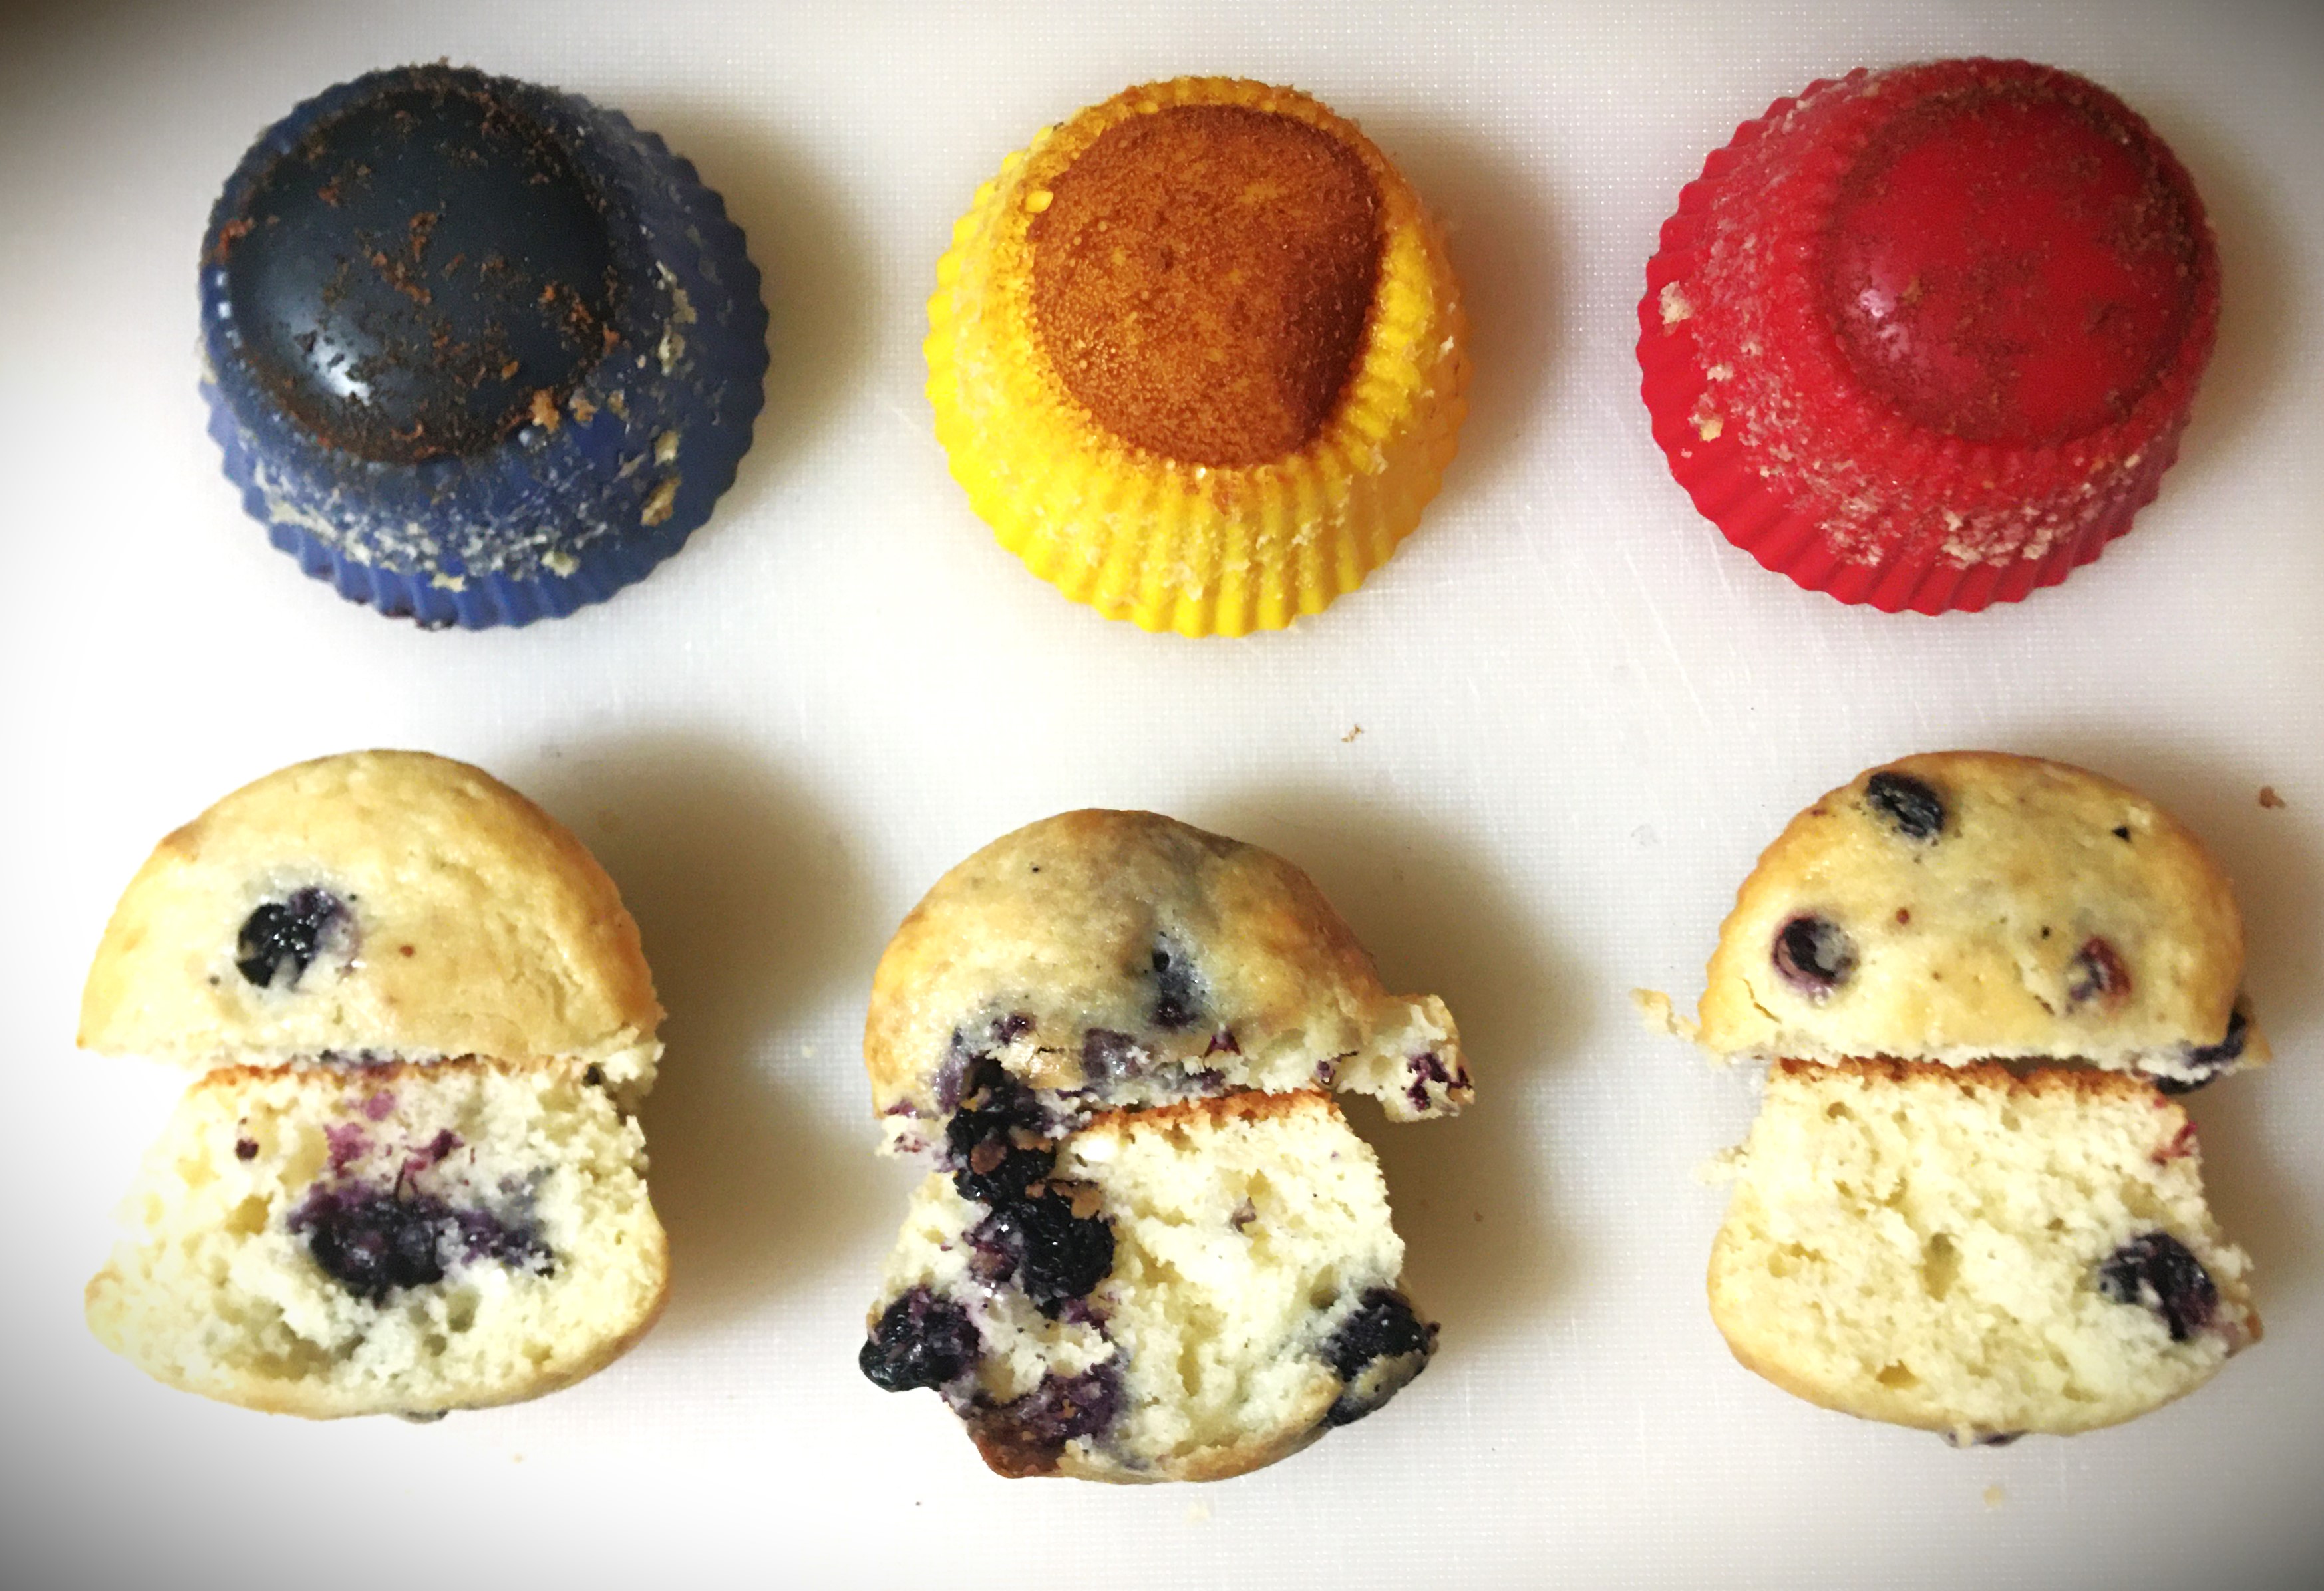
It’s moments like this where I color coded my muffins. Originally I did it, to make it easier to differentiate between the different blueberries. But it made it easier to give a midnight “unbiased” taste tester say which one he preferred. He chose the yellow muffins, for the record, and we’ll get to the muffins in just a moment.
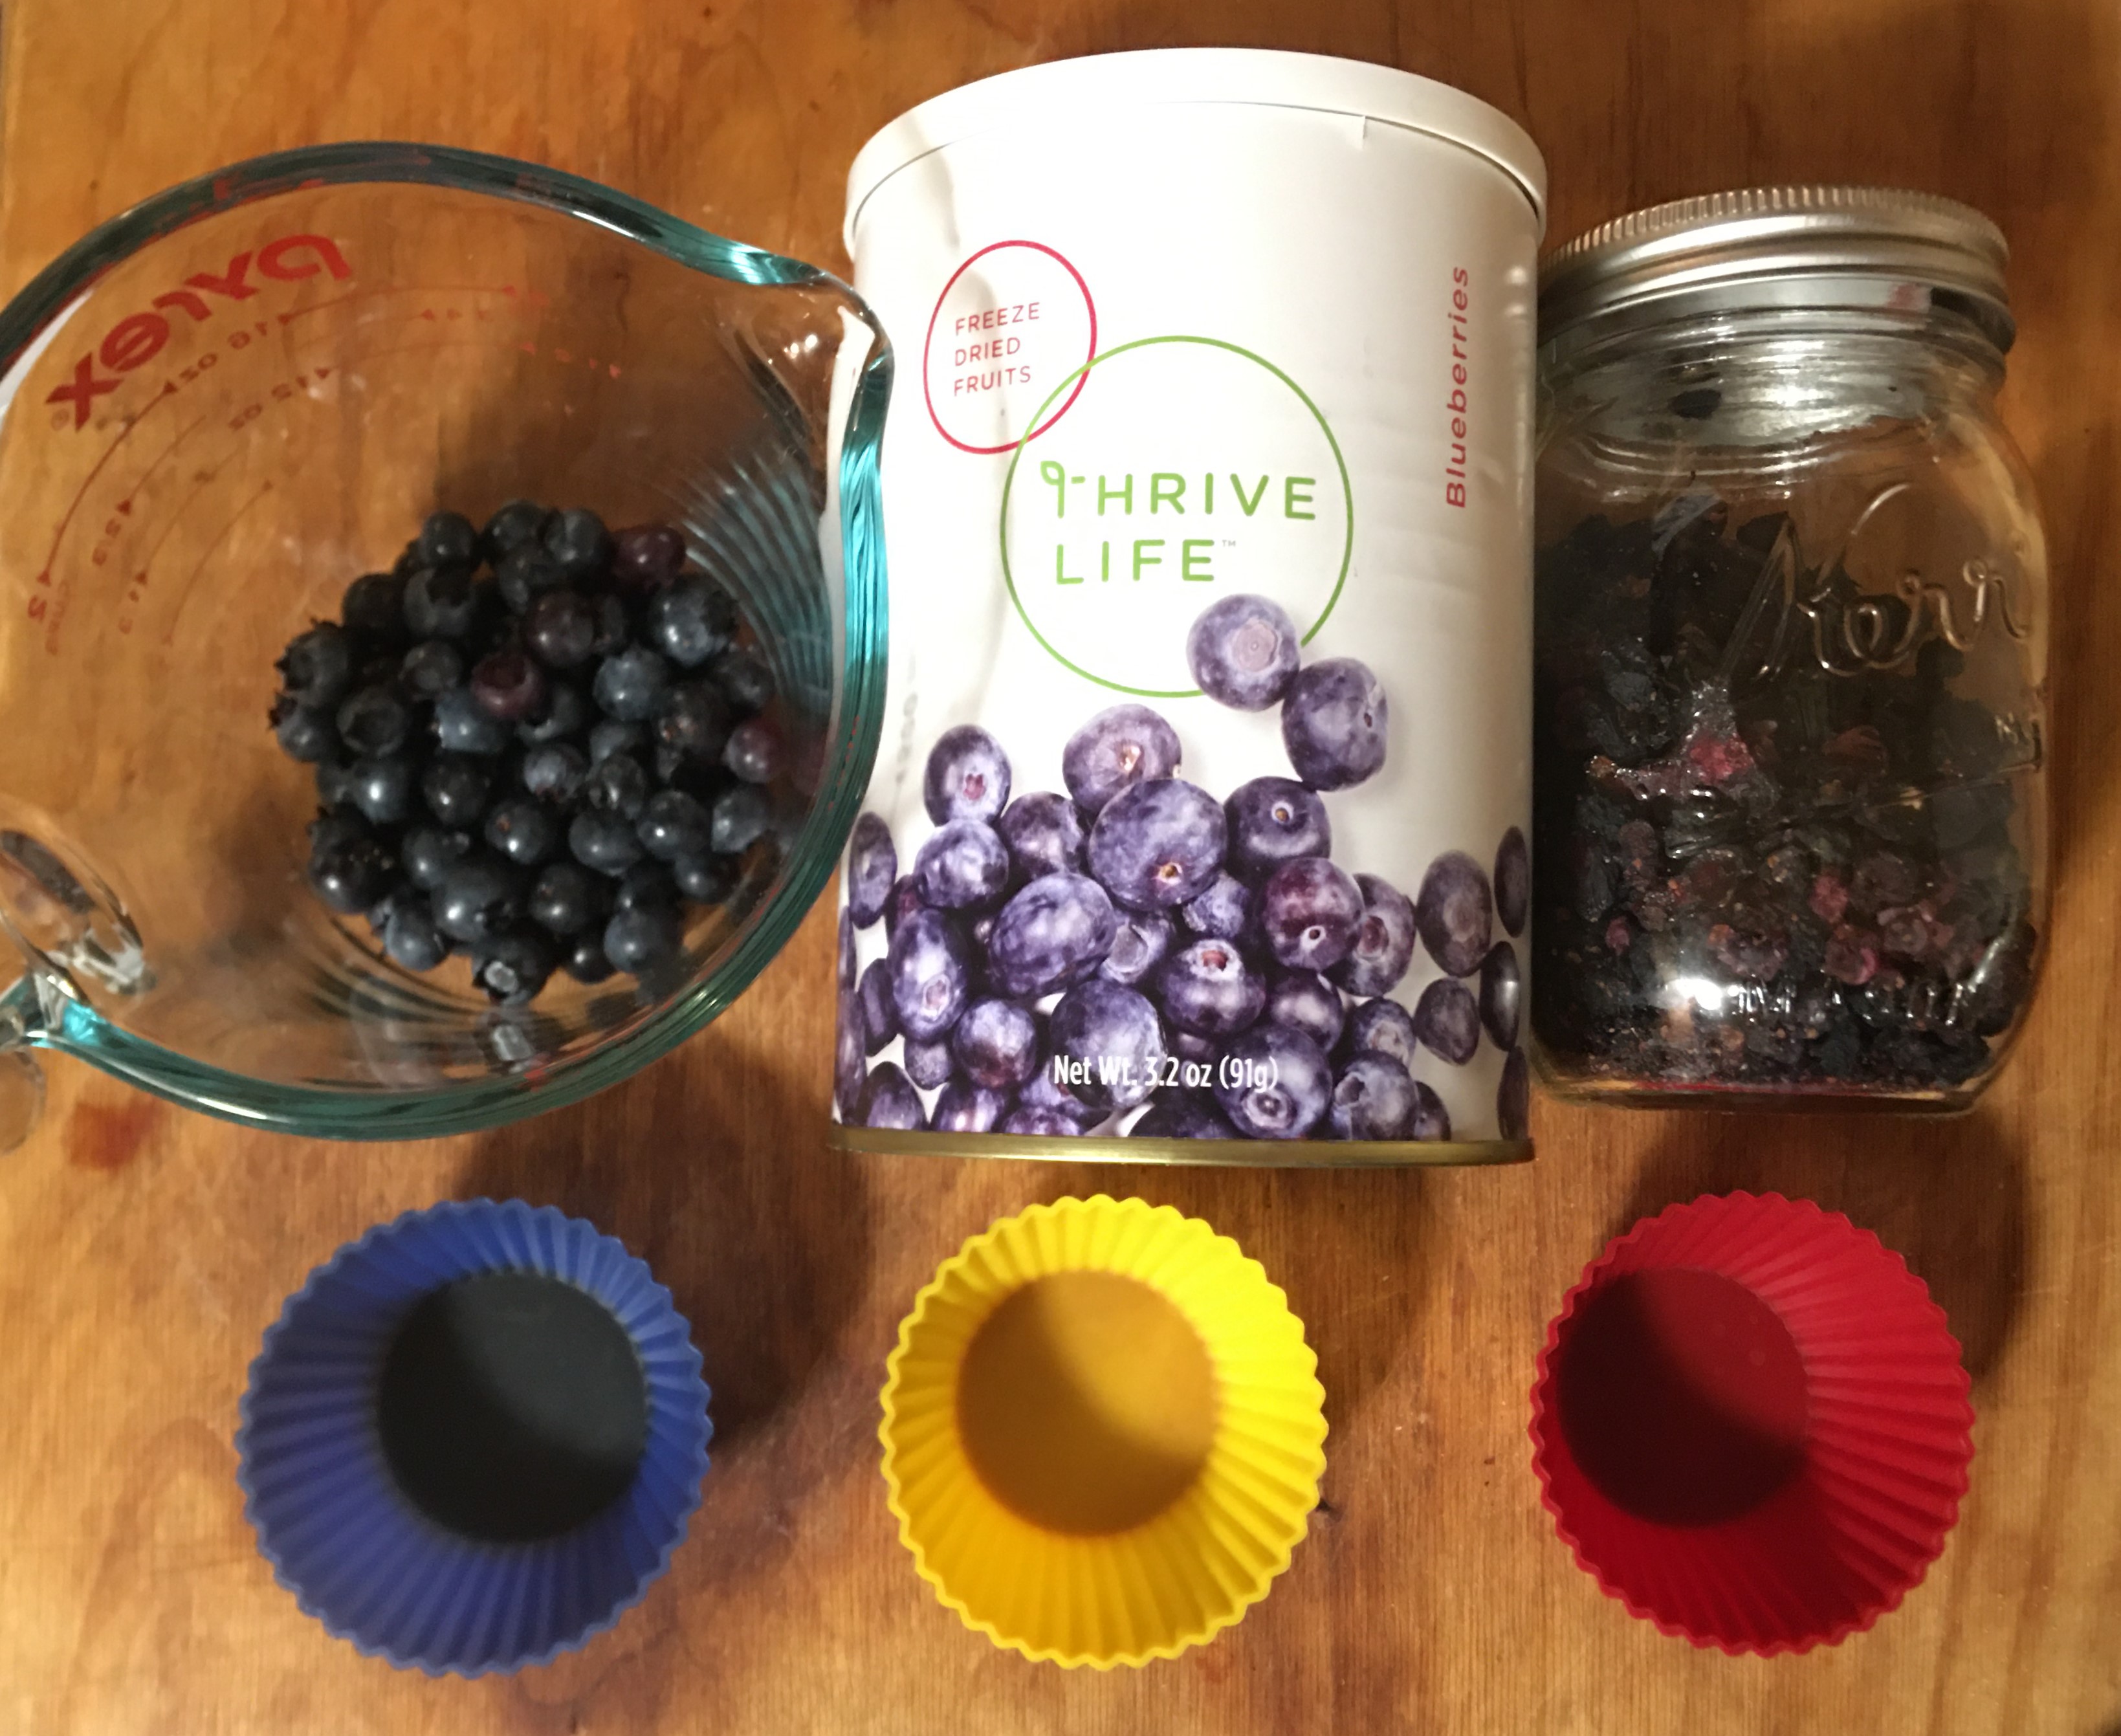
Difference Between Preserved Berries
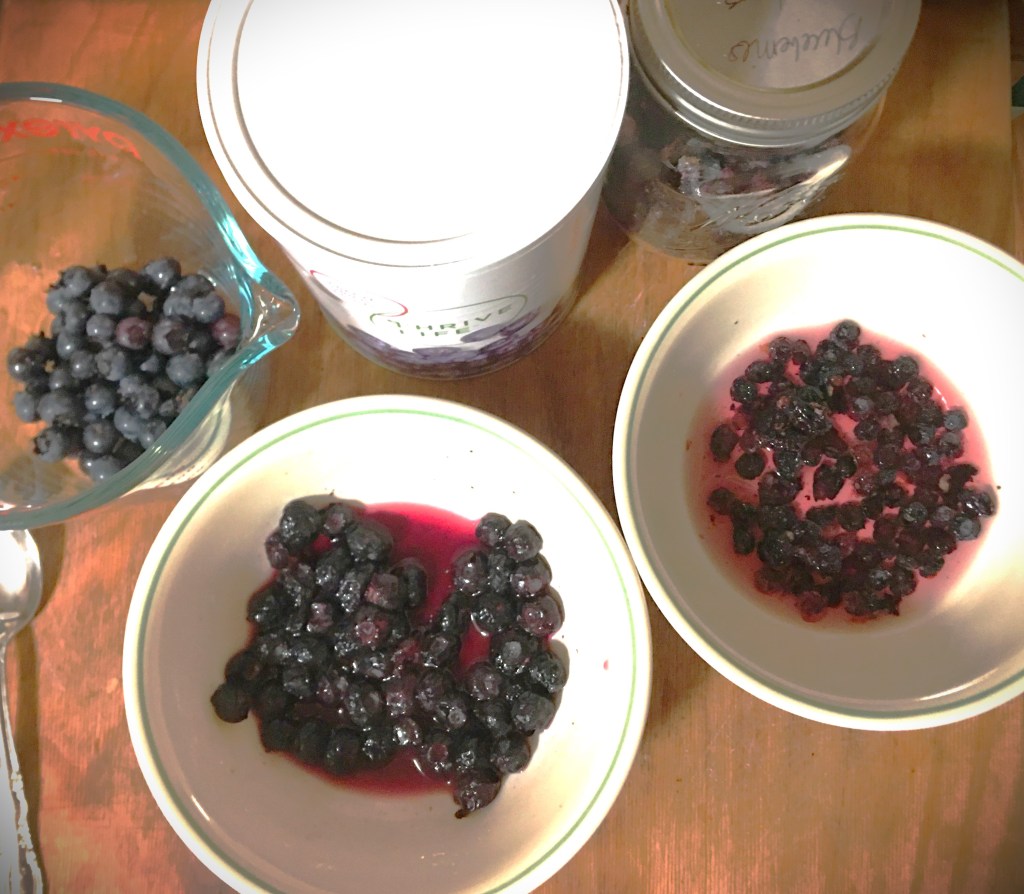
Last week I gave the run down on how the different preparations of the berries turned out in their preserved state. Above is a picture that I didn’t use last week, because I reconstituted the berries for making the muffins. From left to right, you’re looking at fresh blueberries, freeze dried, and dehydrated.
I really can’t tell you how much I’ve been enjoying the berries we picked. There is such a difference in quality of flavor. So if you haven’t picked blueberries for yourself, please do this for you. I know you will not look at store berries the same!
The freeze dried blue berries (before reconstituting) were a trip. They had a near fresh blueberry flavor and they were like a powder bomb in your mouth when you bite into them. There was a moment where I had to remind myself what it was that I just bit, because it confuses the brain when you’re not use to this texture. BUT… when you reconstitute them, let me tell you. The closest I can describe them is that they taste just like the store berries. They’re not as good as the fresh berries I picked, but that could have been because they are different breeds of blueberries. That’s enough to give a little flavor difference. I did drink the juice in the bottom of the bowl and that DID taste just like the blueberry juice that I made in this next section. That closeness alone is what makes me sold on freeze dried blueberries. (Aside from the obvious that they are shelf stable and last a lot longer than fresh berries.)
I reconstituted the dehydrated berries for the same length of time as the freeze dried. If you remember from last week, I described the dehydrated berries as having a bite to them. I’m personally not a fan of eating the dehydrated blueberries as is. BUT once they’re reconstituted, they take on a texture very similar to craisins or raisins that are on the drier side. I would definitely put those on a charcuterie board or several other snacking options. I chose not to drink this reconstitution water, as you can see it looks like colored water. I know I would have been disappointed. It might be a different story if I used hot water instead of room temp and/or I let it sit longer than the 20 minutes that I did (while making my muffin mix).
Now that you’re all caught up on the different berries, lets see all that I made with them. Except for the muffins, all these recipes were new to me over the last month. So I hope you get some inspiration also and try something new!
Blueberry Juice
I needed to make blueberry juice for the kiddo friendly blueberry cordial that I wanted to make for the boys. (They heard that I was making cordial for myself and they wanted some too. So here’s the first stop.)
I’m going to save you the time–DO NOT look up how to make this on YouTube! It’s one of those processes where they all look alike and they all do pretty much the same thing to them. And those who were difference, like one lade added milk, it was just not going to fly for making cordial.
Literally all you need is blueberries and water–that is it!
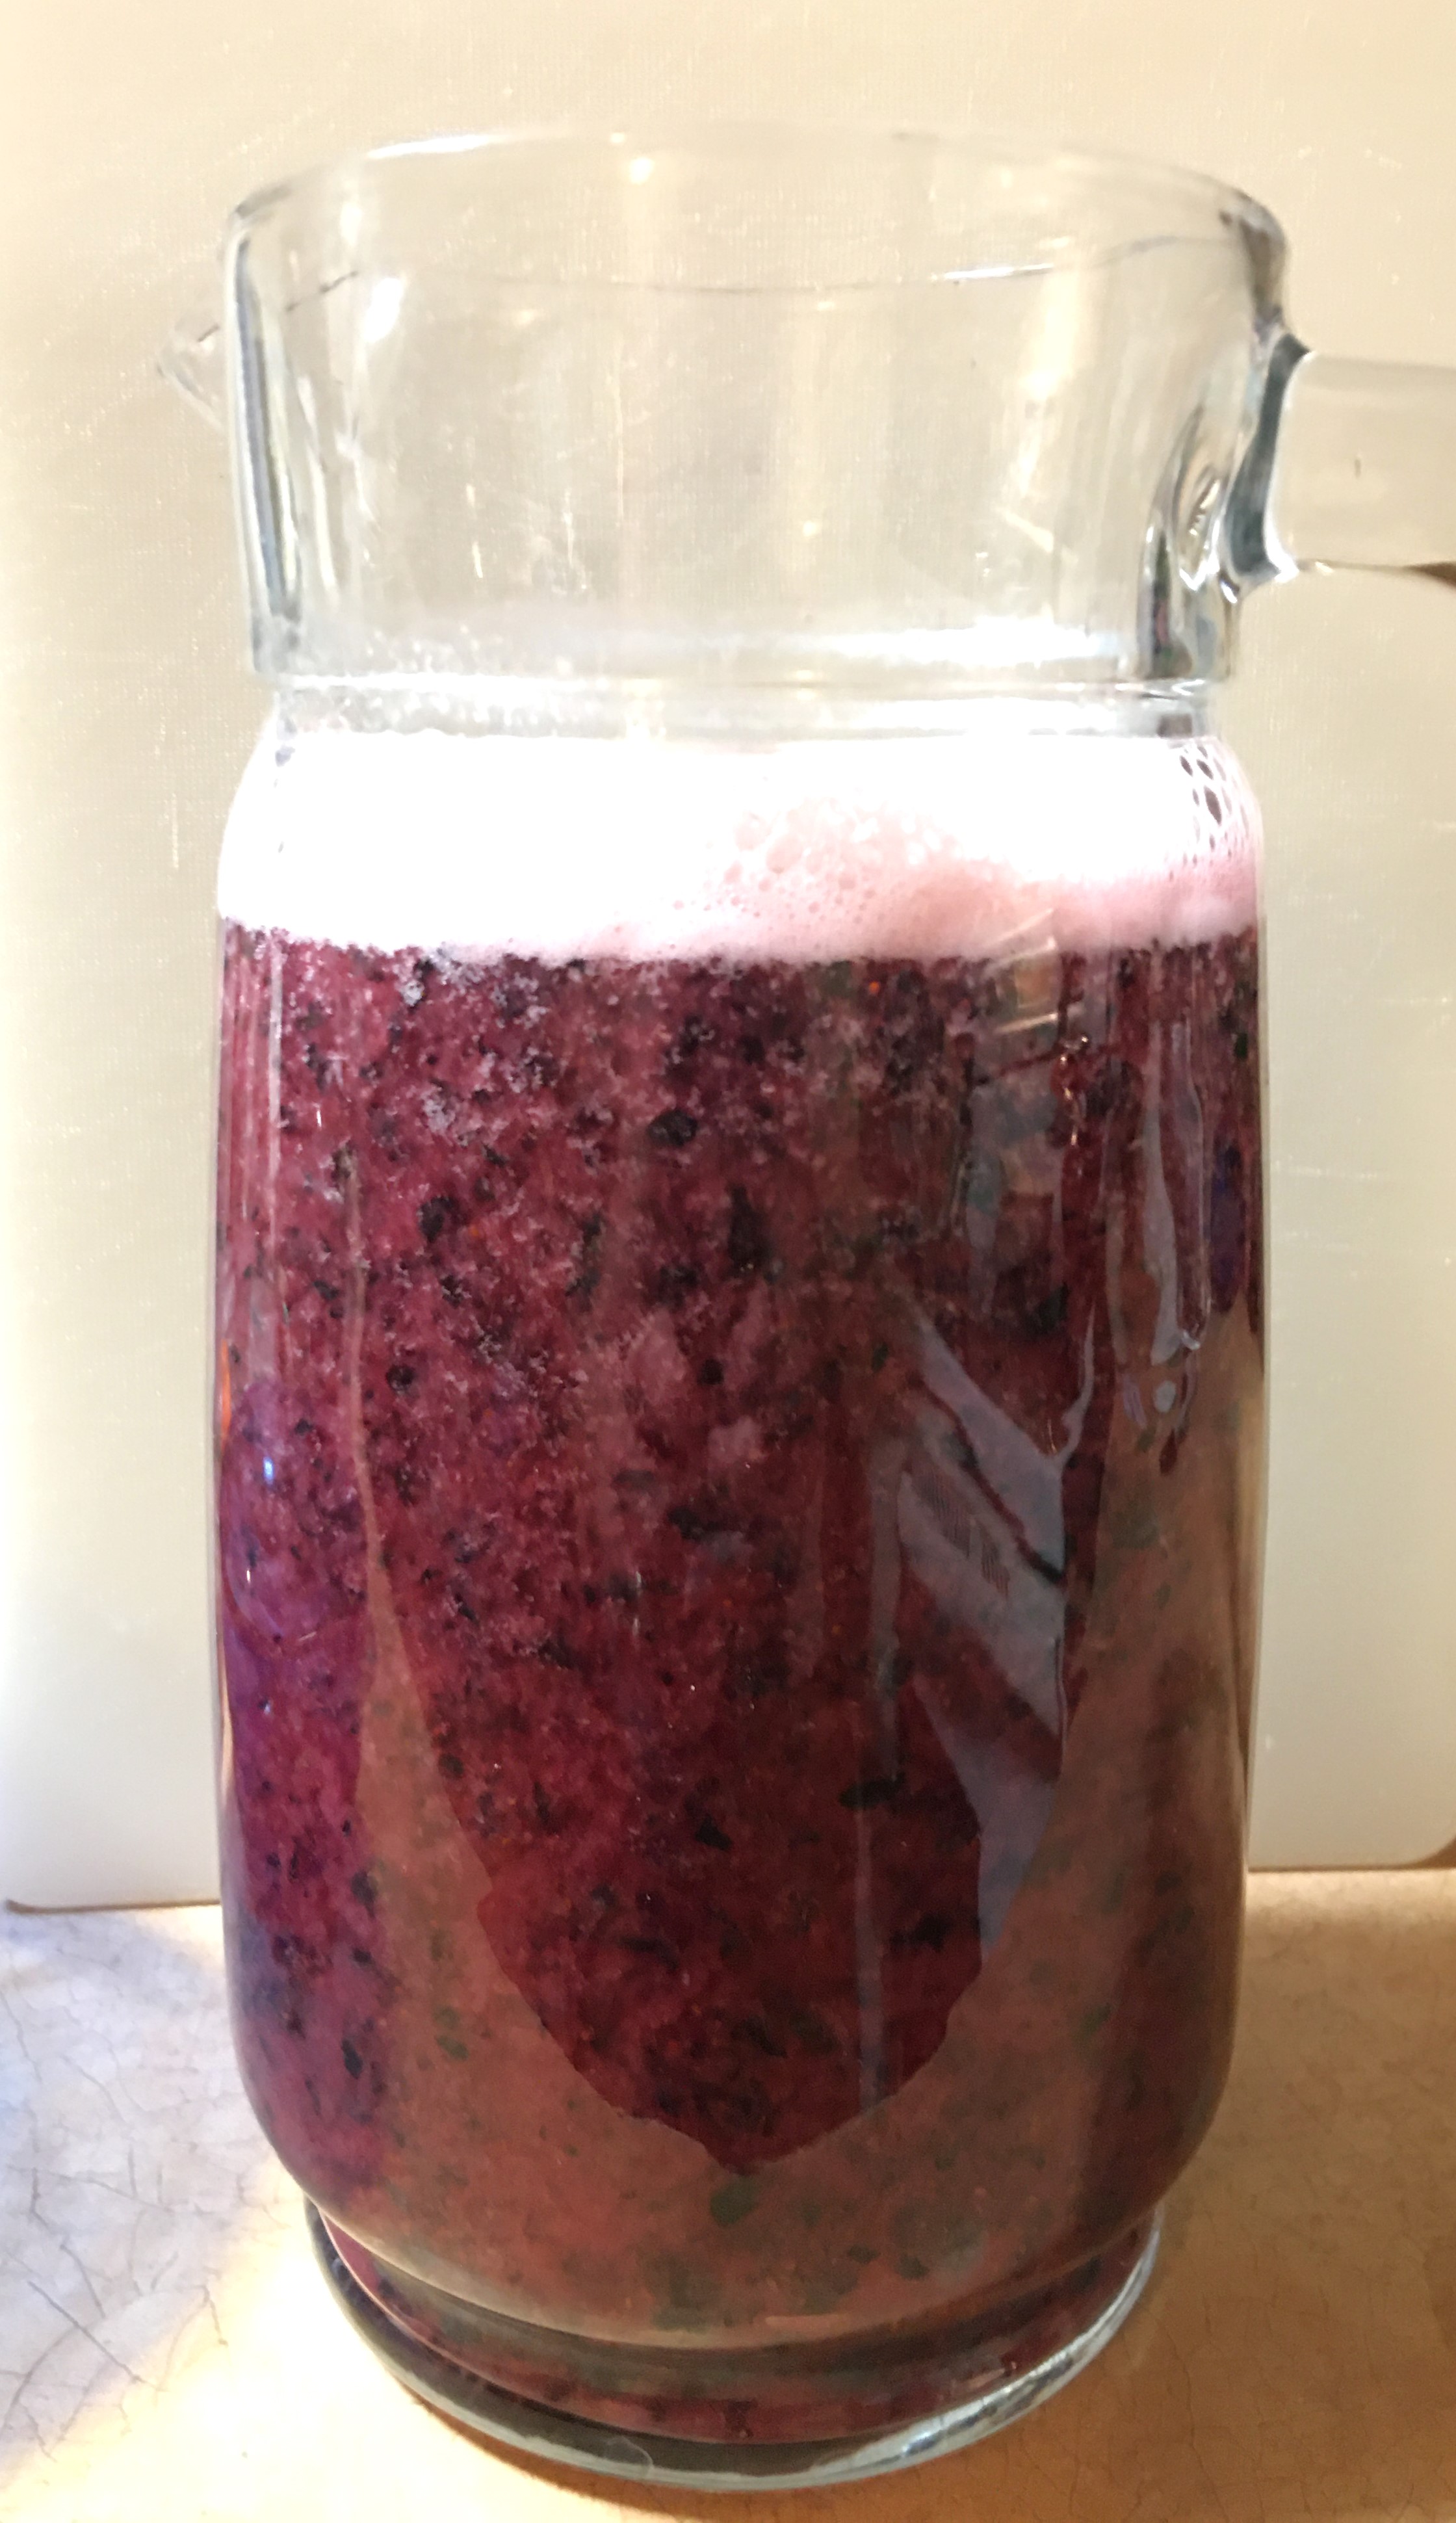
Here I used 3 cups of berries and 5 cups of water.
It was pretty standard across the board that everyone used about 1.5 cups of water per cup of berries. I could have used less water, but I was happy with the amount of liquid with my immersion blender. Everyone I saw used a stand blender. I’m an immersion blender girl and this all fit perfectly in my glass water pitcher. Clean up was just easier for me. So use whatever blending tool you have. You could even use a hand masher if you wanted to or hand squeeze the berries. The bottom line is that you can drink the pulp if you want that in your blueberry juice. Or you’ll end up straining the pulp out and squeeze everything to get all the liquid out. The water is just a medium to make the process flow.
I am going to include a clink for you here though. One lady I saw used her pressure cooker to make the juice. And then she canned her juice for future use and it’s in its simplest form to meet the need of any recipe you’re looking to use. This was just one project that I didn’t want to undertake on top of everything that I already planned to do for this post. But if you’re a canner, definitely check this video out!
NOTE: In canning groups there is a lot of heat surrounding water bath canning and acidity levels. (“Just because Grandma did it doesn’t mean that it’s safe by today’s cooking standards.”) Cooked blueberries acid levels are below the acid threshold, so it is entirely safe to can cooked blueberry juice without adding acid to the juice before water bath canning.
Blueberry Cordial
For blueberry cordial the pulp does need to be strained out. Just about everyone I’ve seen uses cheese cloth. I happen to have a muslin cloth bag that I use for straining fruits all the time, particularly when I’m making my elderberry syrup. So I opted to skip the cheese cloth and just use my muslin bag. It turns a 2-3 step straining process into just a single step.
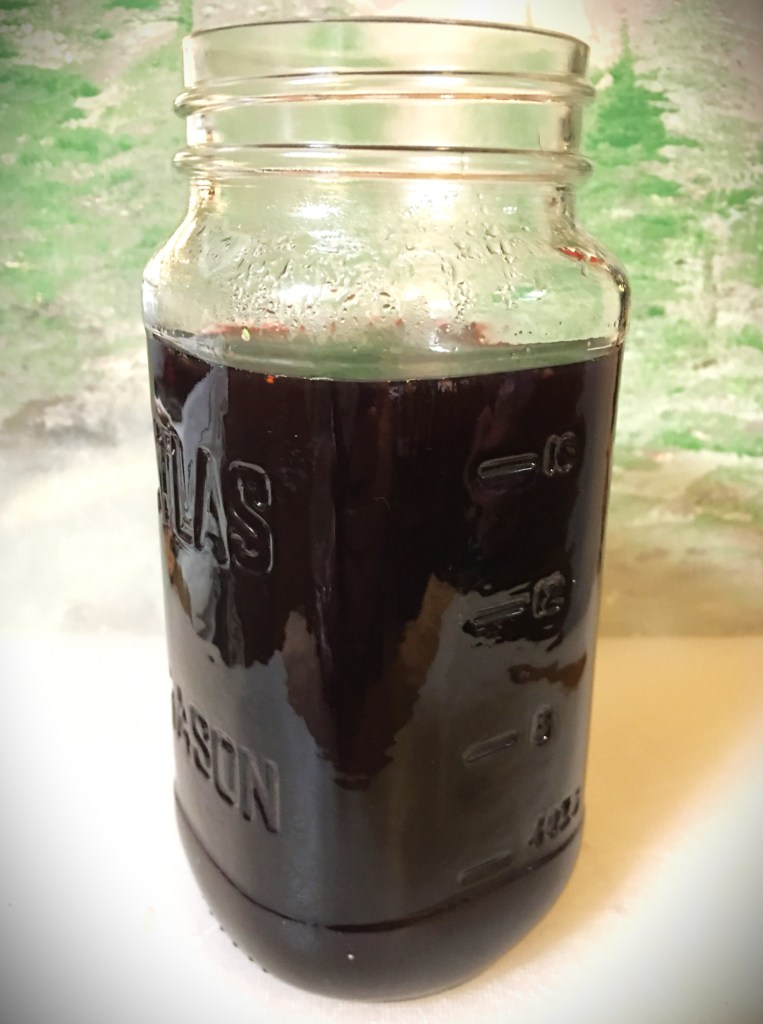
After straining, you’re left with a clear blueberry juice.
And if you’re wondering, the juice tastes like the blueberry equivalent of the watered down apple juice I’ve given my boys. It’s not sweet. And is nothing like the fresh blueberries that I used.
But that’s okay, because the Cordial recipe I chose to use is from a British gentleman and his process starts off with reducing the blueberry juice anyway. Here’s his video here.
I followed his directions and reduced it down to half its volume. Taste wise, that watered down flavor is gone. And what remains is an acidic version of the blueberries that I picked.
Here is where I agree with him, the sweetness level of your cordial is very much dependent on your preference levels. My volume of cordial was greater than his, and even after making the proper conversions from metric to imperial I still could not add as much sugar as he did.
With my end volume around twice the amount of his, he added roughly 1 cup of sugar to his cordial. I would have been happy with 1/2 cup of sugar. It was at the level of sweetness as a soda. However, with cordial being syrupy sweet I ended up with a final measurement of 3/4 cup of sugar. And at this level that tasted to me like the really sweet cough syrup. This is definitely a treat that I will add this as a flavoring to unflavored seltzer water for the boys.
And I’m sure that my husband will add this to his seltzer water too.
I’m keeping this in my fridge to keep it preserved for a month or two. But I’m sure it will probably go quick and I’ll need to pull out my freezer berries to make some more.
Spiked Blueberry Cordial
After tasting the blueberry cordial above, I’m now wondering how this one is going to turn out. The recipe for this adult cordial I found here. But I have a few weeks of waiting before I can sample this one and see if any adjustments need to be made. (I will come back into this post and add to my assessment of this recipe once I have this one completed.)
Full disclosure, I do not own a large enough glass container to pull off this full recipe. (That and I didn’t have enough fresh berries that were thawed and ready to go.) So I cut this recipe in half. The proportions were exactly the same, so I know this is going to turn out as it should.
If you want the half batch recipe, this is what I used:
4 cups blueberries
28 oz vodka
1/2 cup sugar
Everything else I followed the directions.
Once this process has run its course, I’ll be back to give my thoughts.
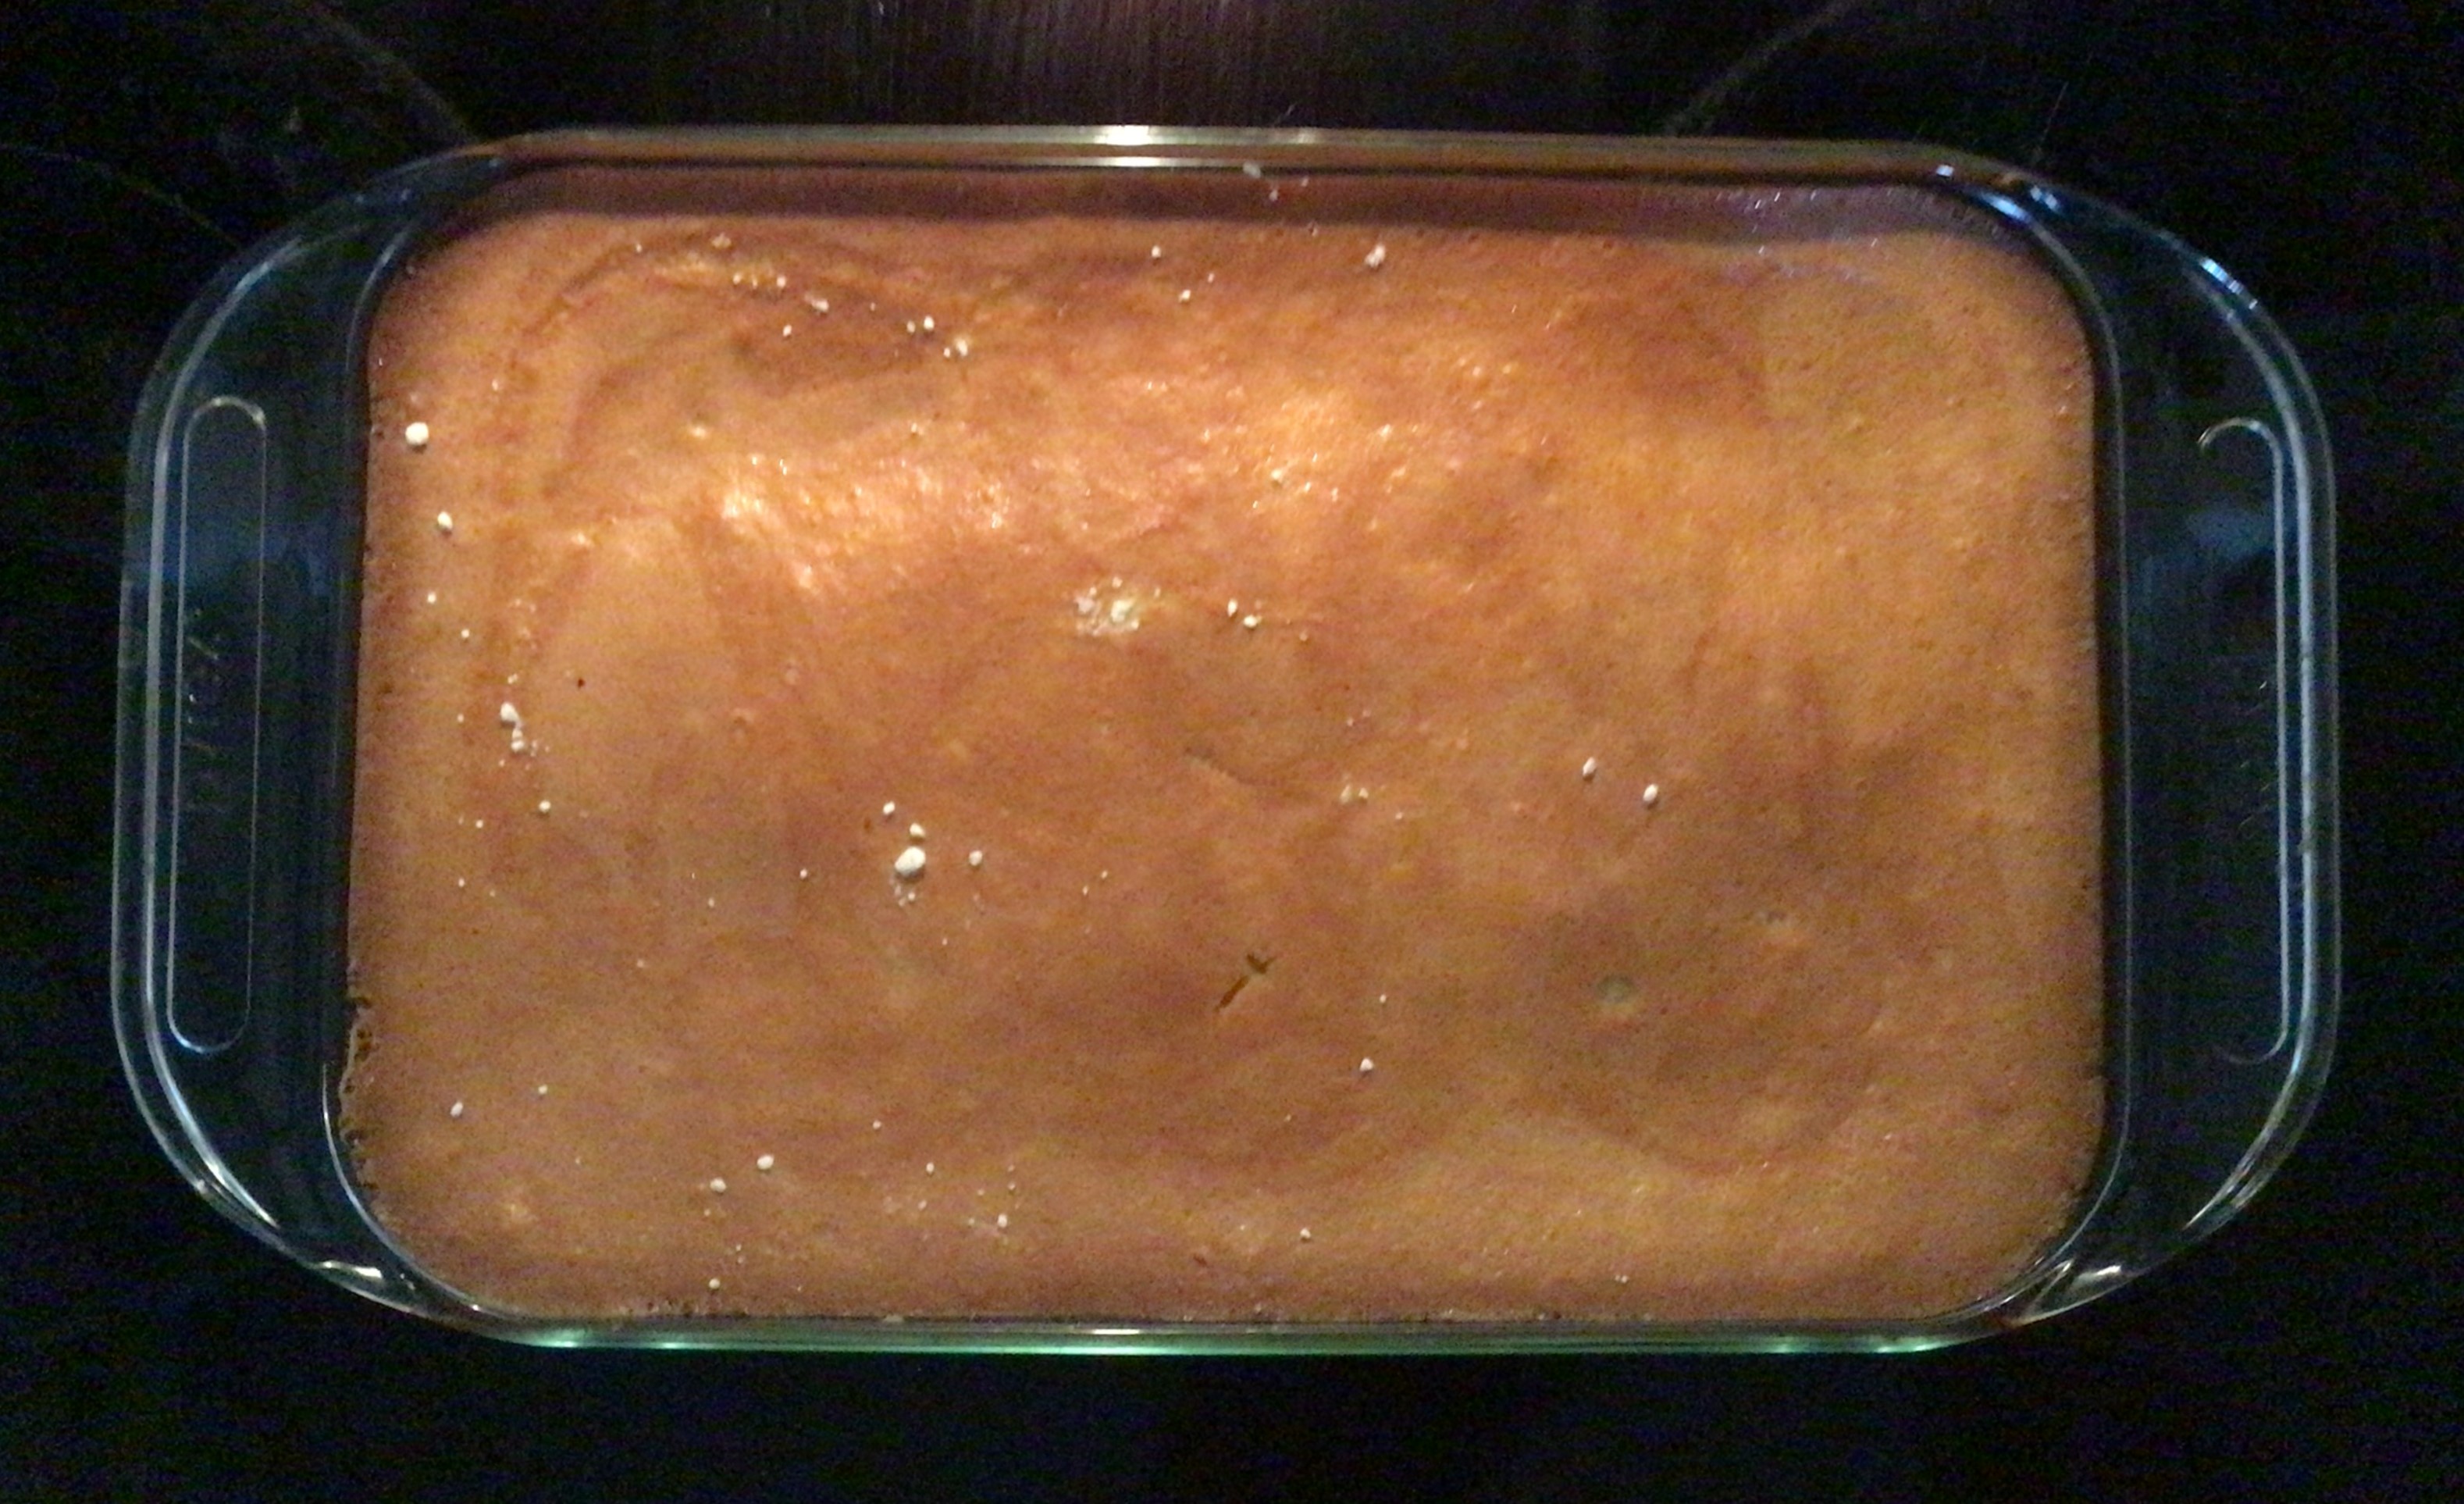
Clafoutis
This recipe, Clafoutis, came my way on Facebook from a friend who was excited to pass this one when he heard that we picked blueberries this year. This is one of his favorite breakfasts and was eager to hear how we liked it.
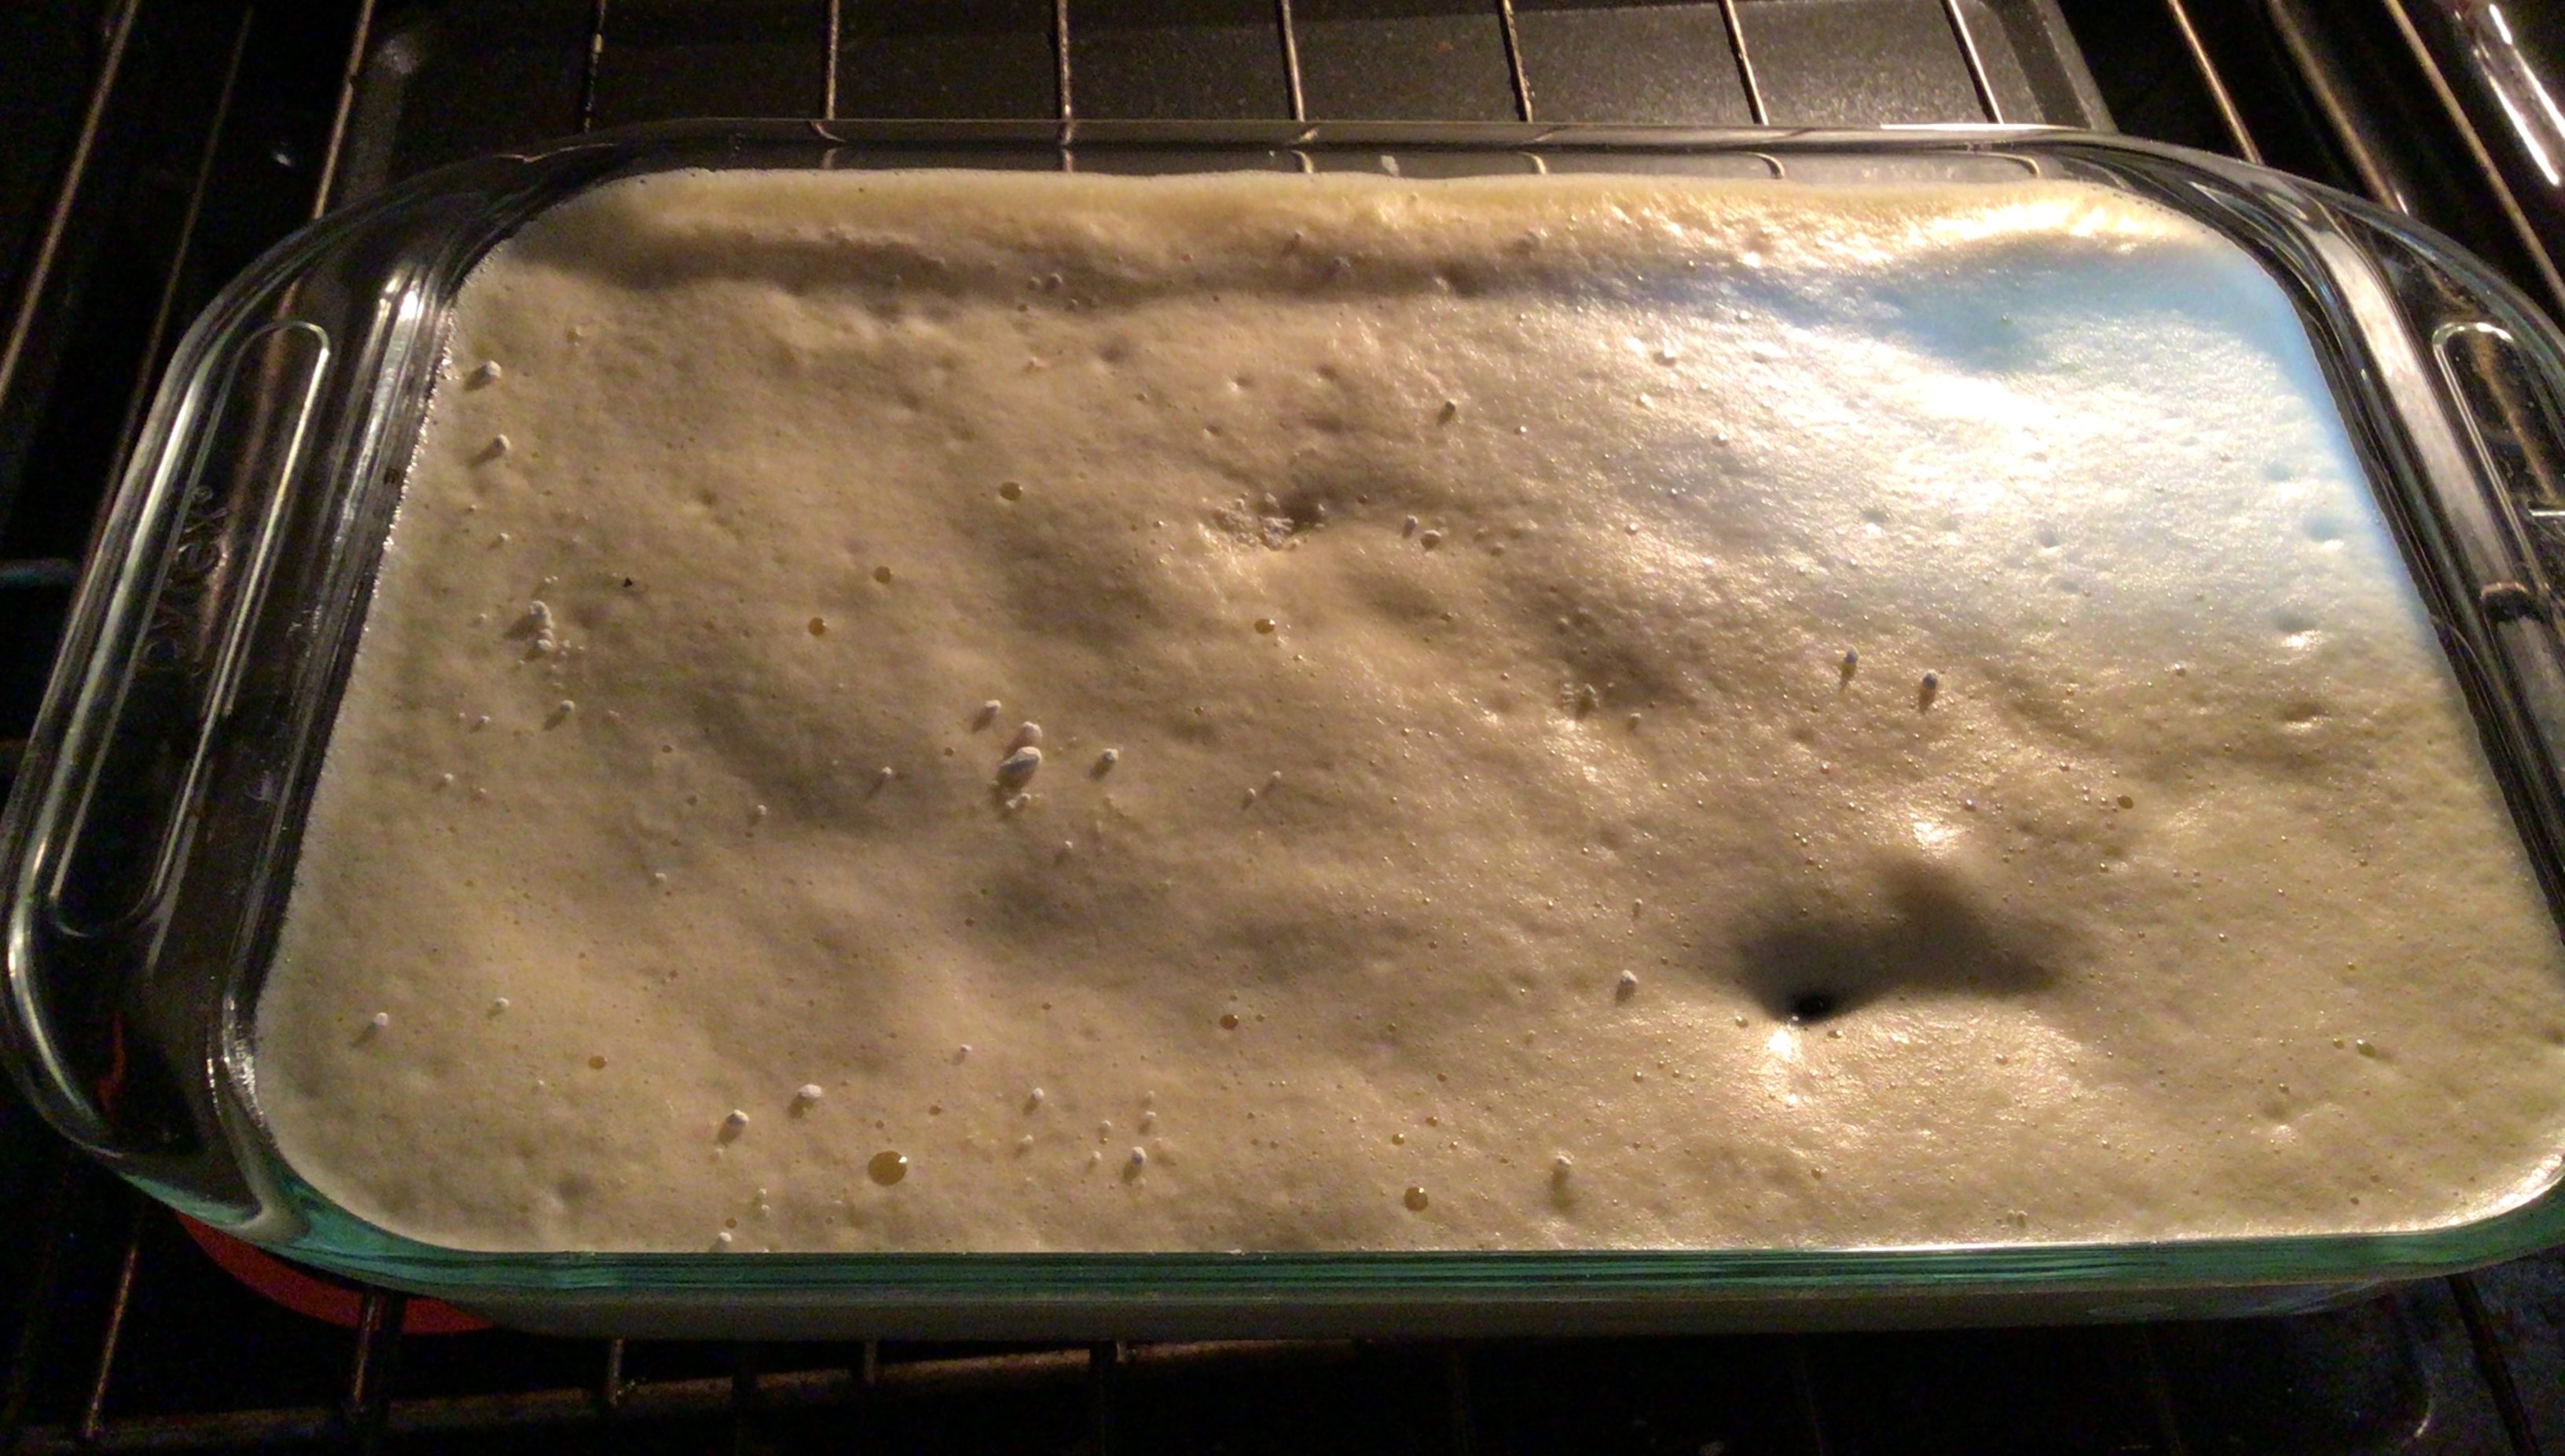
I admit that I modified this recipe by way of the cooking vessel I used. I opted for my Pyrex because my largest pan is actually my cast iron pan I didn’t know if this recipe was going to expand in the oven or not. So it was my faithful Pyrex with a pan to catch anything that might fall over board during the cooking process.
I’m glad to report that nothing cooked over and it stayed in my Pyrex.
The batter itself reminded me so much of making German Pancakes. (This recipe expands, so now you know why I anticipated some expansion.) In fact, it tasted a whole lot like German Pancakes. The difference, of course, is the addition of blue berries. But also the clafoutis retains more of soufflé like structure. It does puff up and deflates a little after you pull it out and cut it. But on the scale of easy to difficult, this is definitely an easy recipe to make.
It’s super easy to bake and is definitely kid approved. I only made a single batch, but I certainly have to make a double the next time I make this recipe.
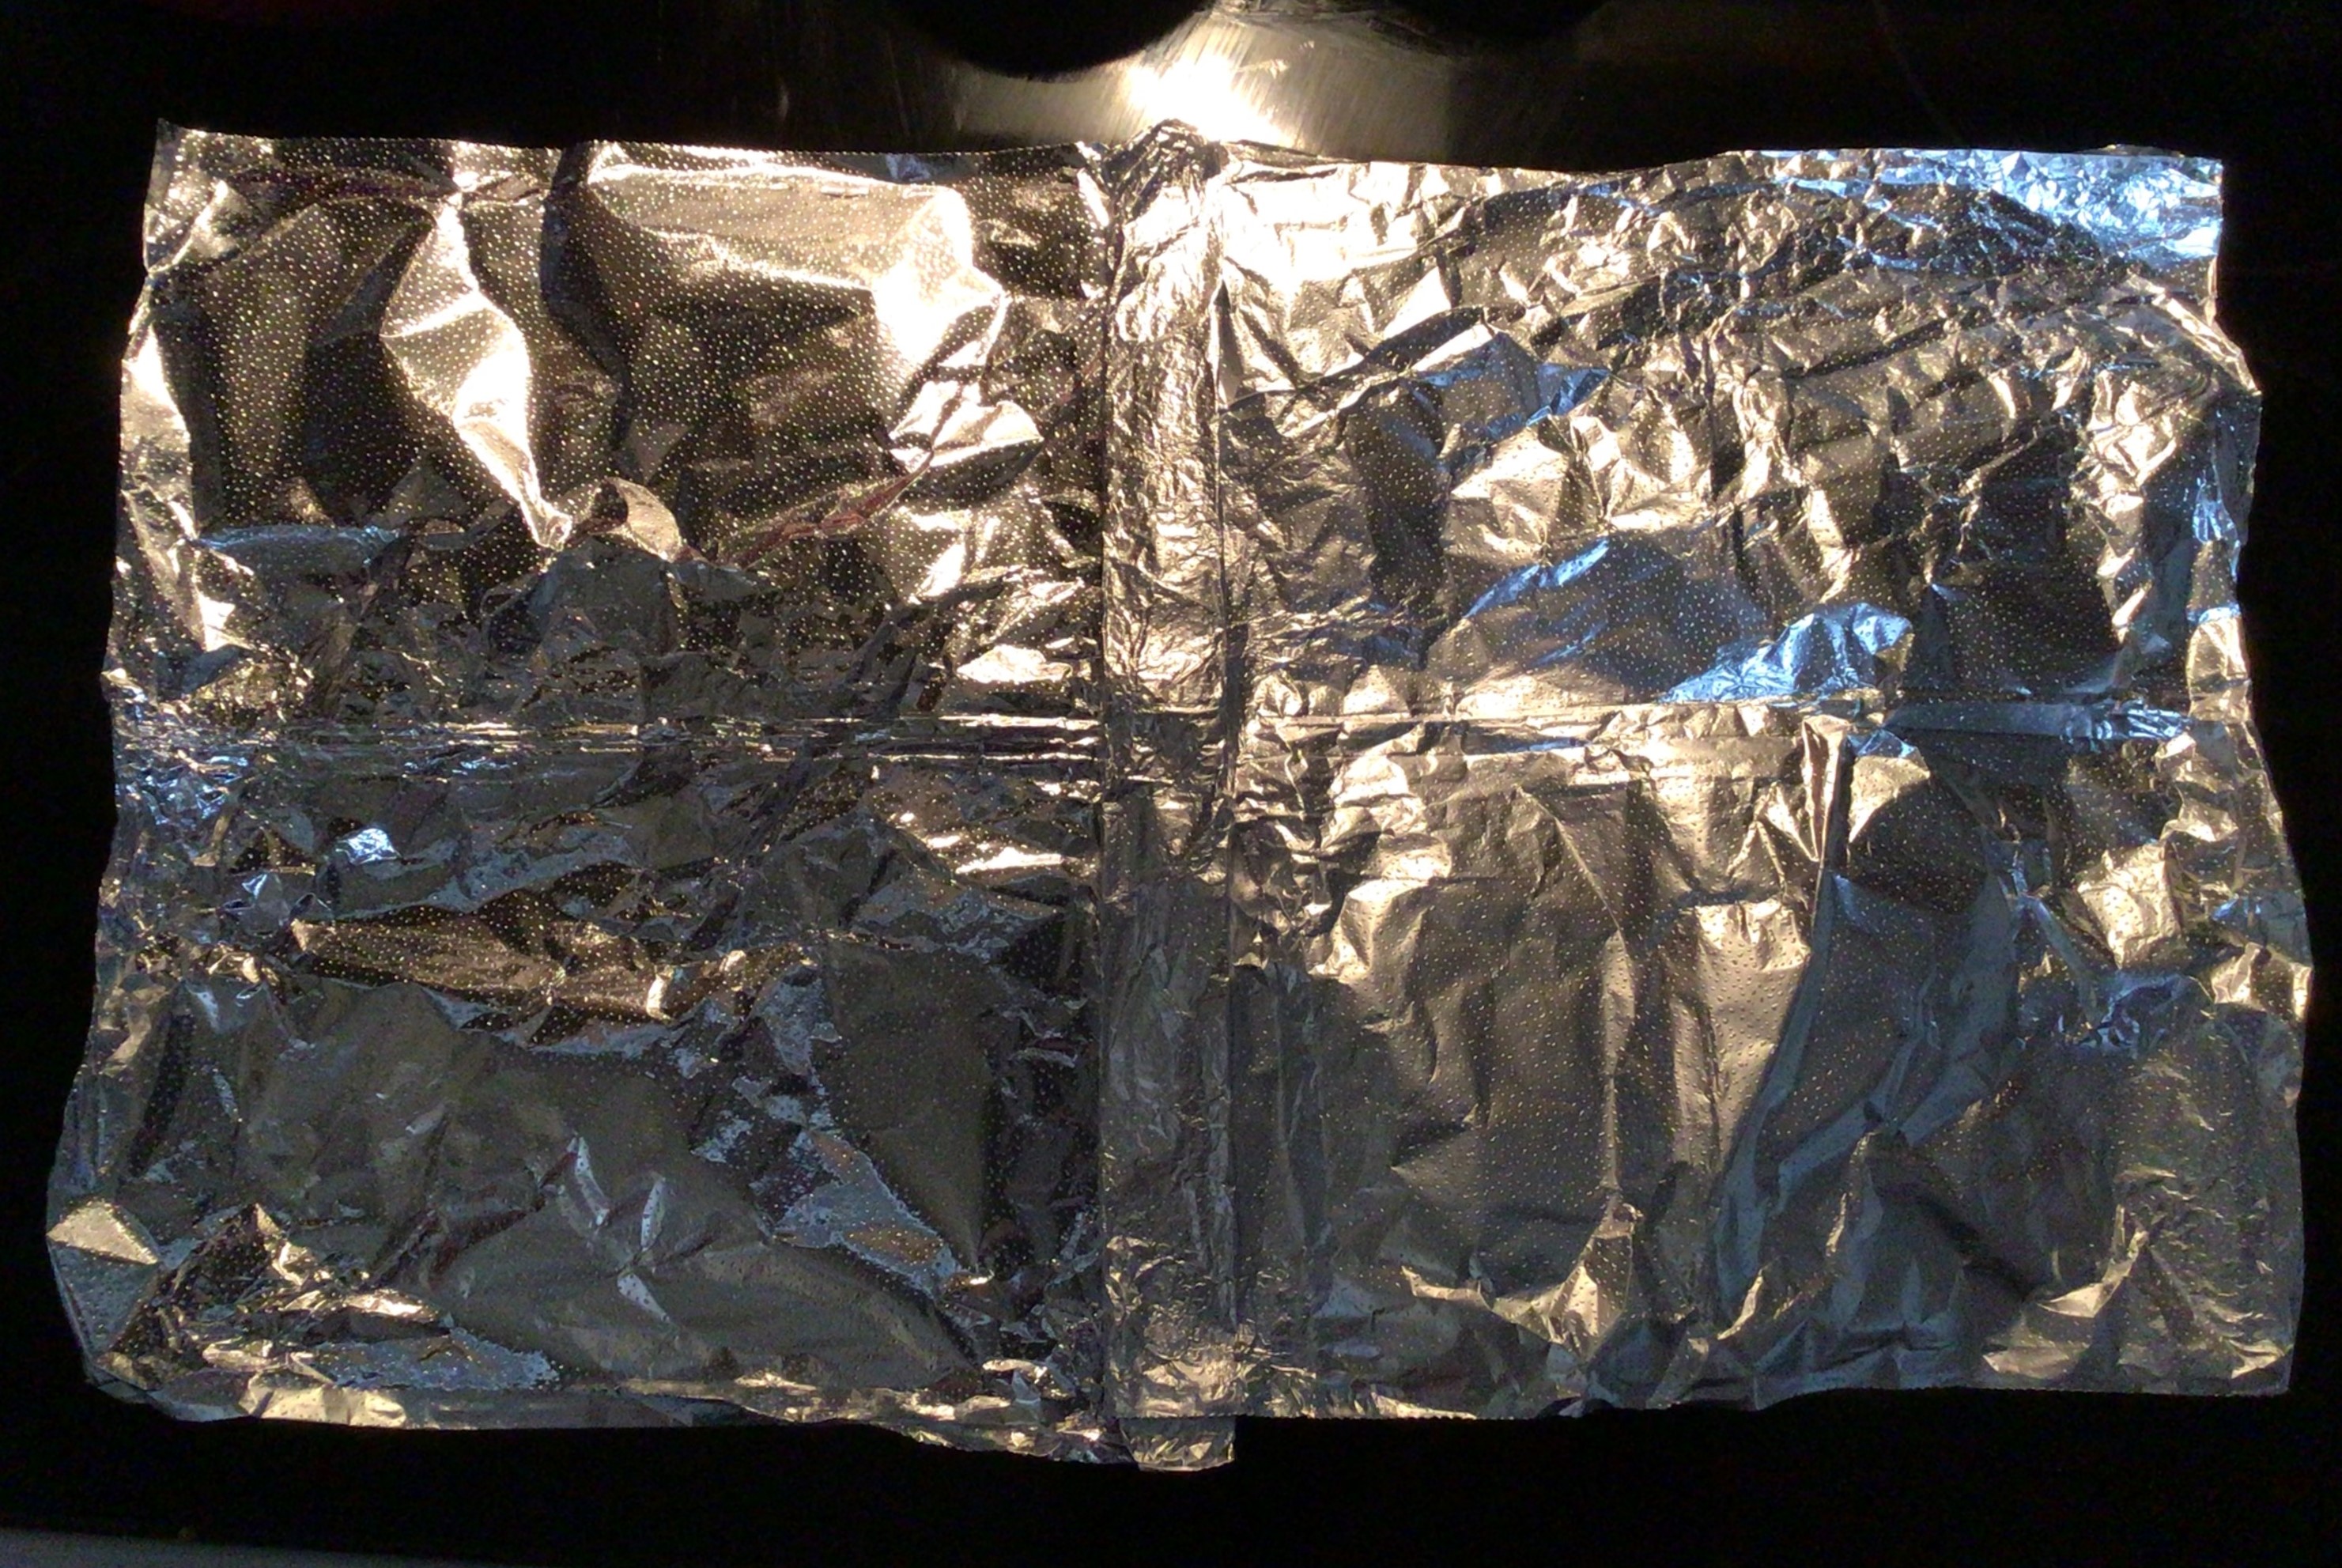
I wanted to make a quick note that baking did take longer in the Pyrex and there was the issue of the center being undercooked when time expired. The top was already brown. Because I needed extra cooking time, I did have to add some foil over the top.
If you’ve ever made a quiche, then you understand the jiggle in the center means more cook time is needed. The same is true with the clafoutis. If you see some jiggle, give it more time.
Blueberry Muffins
And now to the blueberry muffins I started off this post with!
Let’s be honest. Everyone and their grandmother have a dozen blueberry muffin recipes they can pull and one or two that they swear by. This is the one that I use, and I don’t even go to my cook books to look there. The problem that I have always had is that they are either too sweet or the moment you add fresh blueberries it turns into a swampy mess. Ina Garten’s recipe I swear was made for fresh blueberries to be added into it. It’s has the perfect amount of water to sponge ratio where your hands don’t get damp and sticky eating it.
So whether you want to use the recipe I use or the one that has been in your family for 70,000 generations here is some information that you can use to improve your blueberry muffin game.
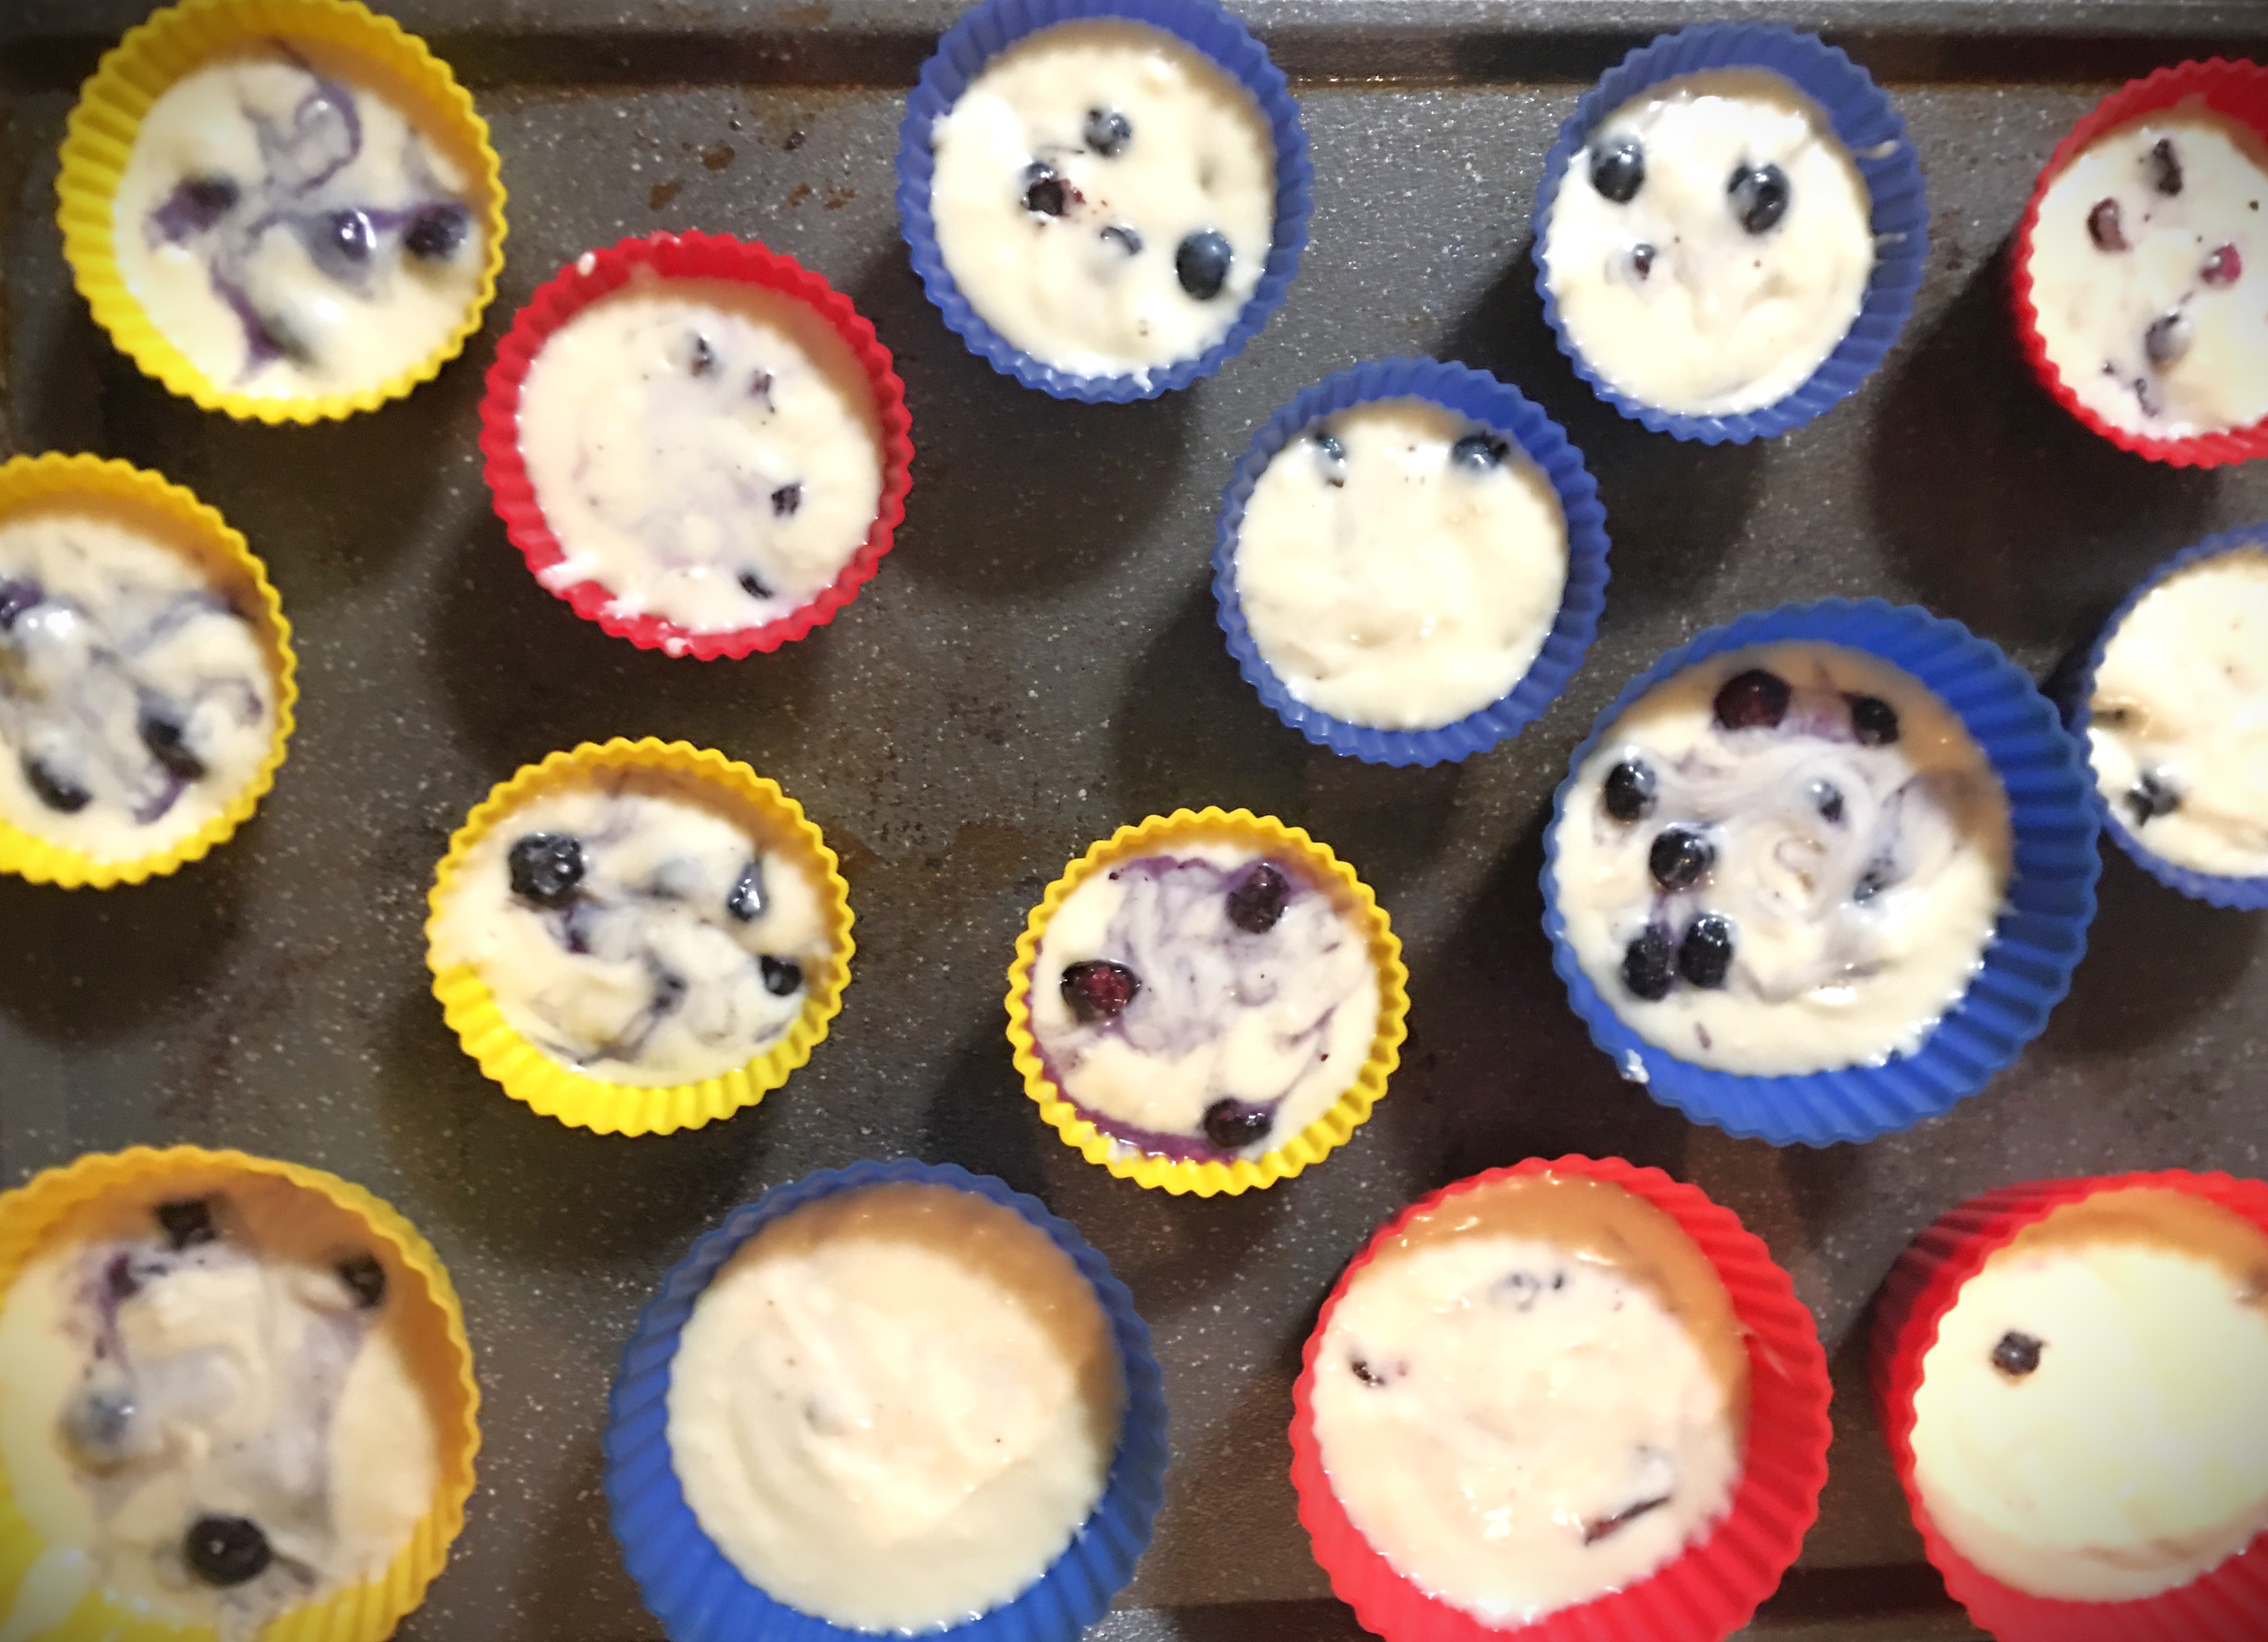
I made one batch of muffin batter. And instead of adding the blueberries into the batter, I put the batter into my silicone cups and then added the blueberries to the color coded cups so I could pull off this ultimate side by side comparison. There was absolutely no way there was any difference in the batter or the sponge. This was entirely based off the berries themselves; fresh, freeze dried, and dehydrated.
In the blue cups I added the fresh blueberries.
The yellow cups have the reconstituted freeze dried berries.
And the red cups have the reconstituted dehydrated berries.
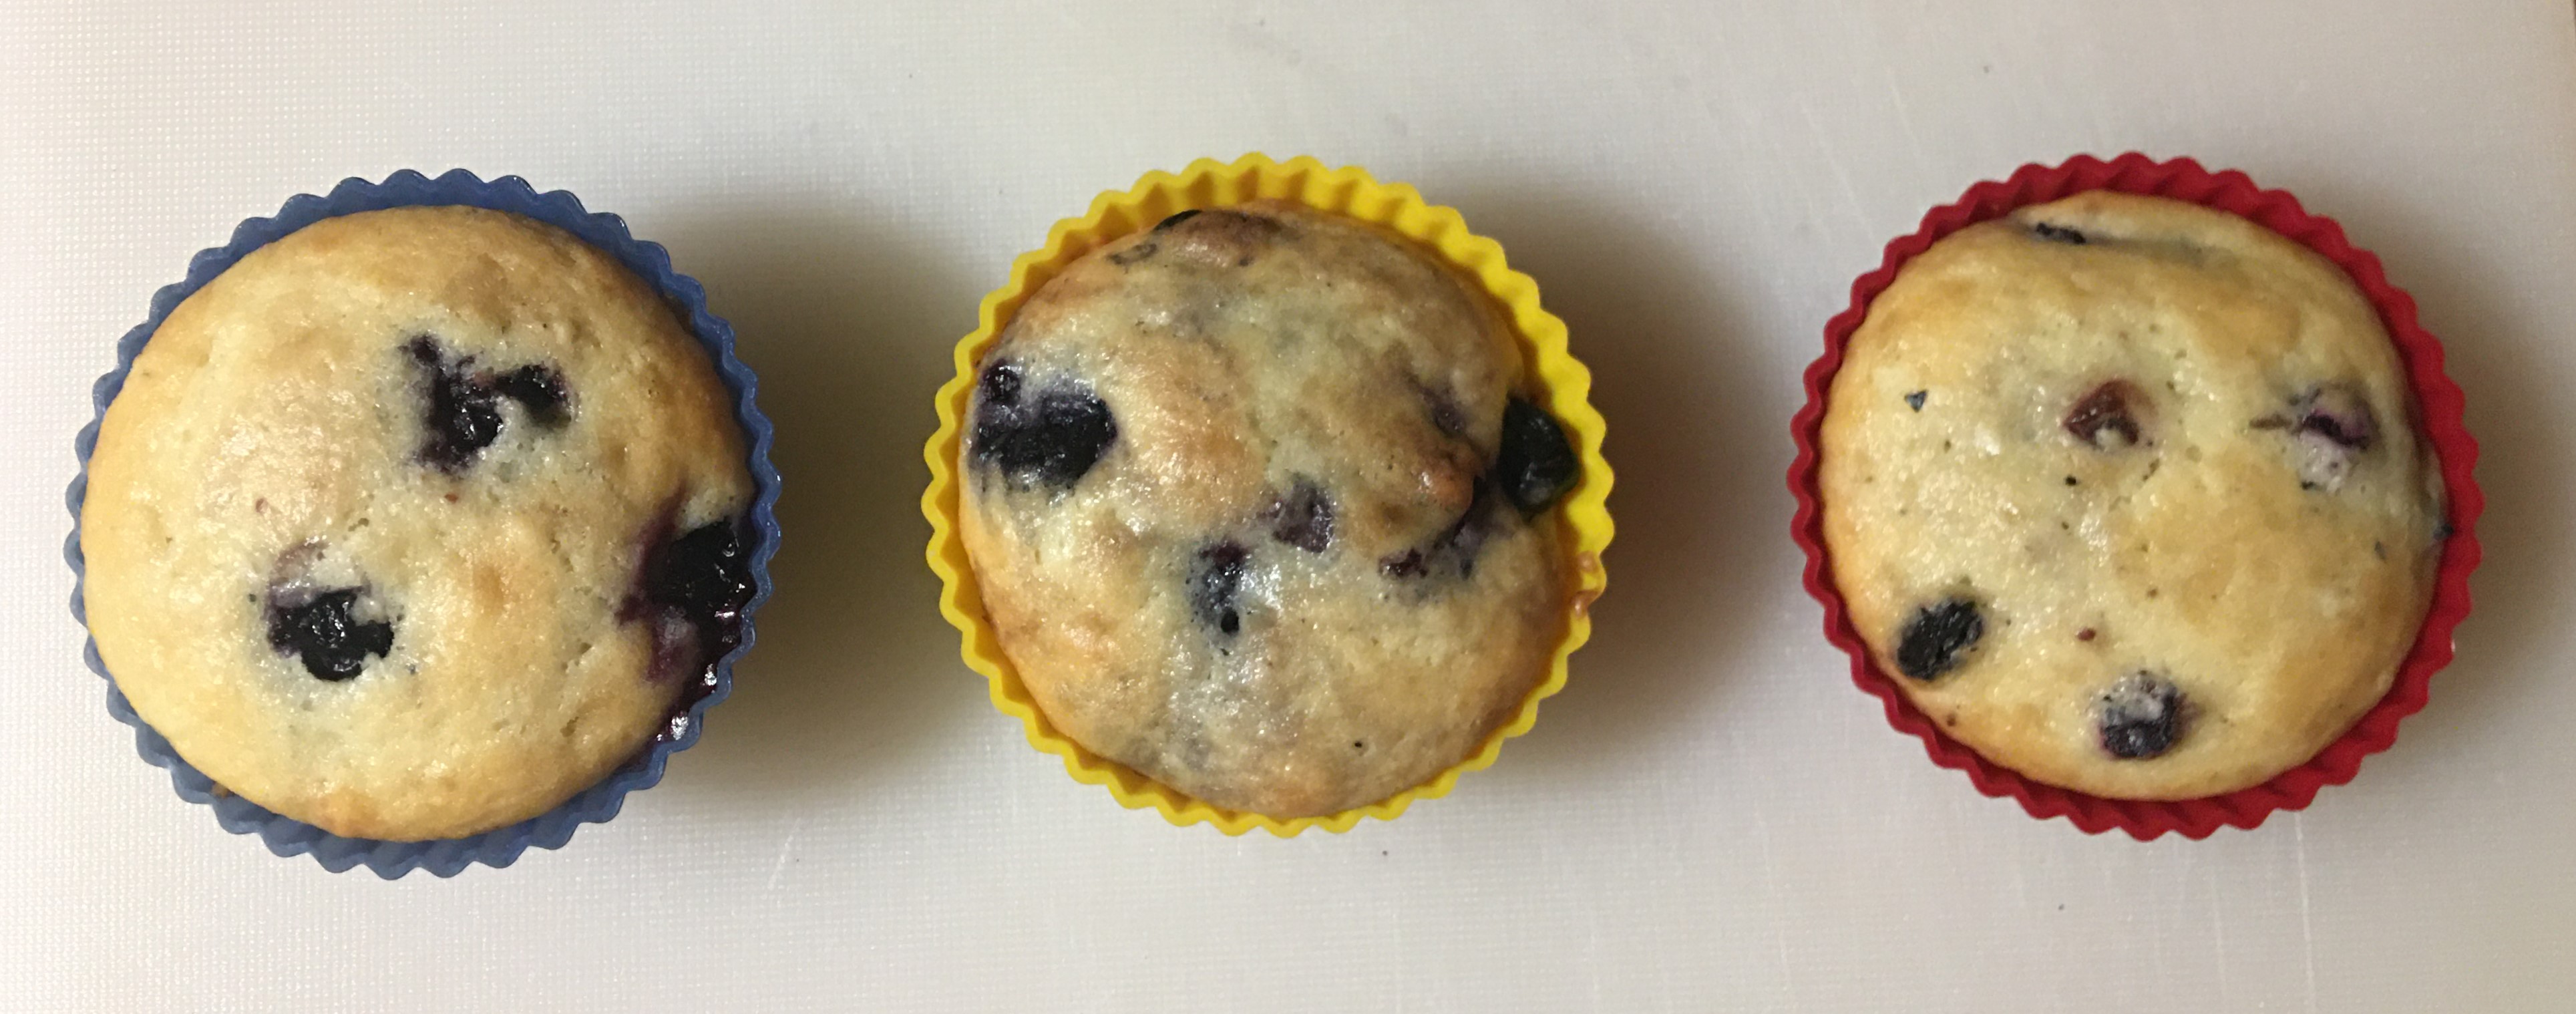
As you can see with this first baked picture, there is an obvious hydration difference between the sponges of the muffins.
The fresh berries, blue cup, are the standard reference point for the recipe that you choose to use. In my preference, the sponge is mildly sweet and firm with enough water content to keep it from being dry.
The reconstituted freeze dried blueberries, yellow cup, added more moisture content to the sponge, but the berries taste and texture wise are the same as the fresh berries. I walked away from this muffin with slightly tacky fingers and some crumb stuck to my fingers.
The reconstituted dehydrated blueberries, red cup, made the crumb dry up a bit. Instead of that perfect balance, it had the feel of what the perfect muffin feels like in a day or two after being baked. The crumb itself is still sweet, the dehydrated berries just took some of the moisture out. That being said, the dehydrated berries were sweeter than the fresh or freeze dried. And they offered a little different texture. You know that cheap box of premade blueberry muffin mix that you can buy at the store? The berry texture is pretty much the same. The berries are bigger than that boxed mix, otherwise there’s a very close comparison there.
If you remember above, my husband said he preferred the yellow cup muffins, freeze dried. I found that all too funny because I still prefer the fresh berry or blue cup muffins. But that just goes to show you just how much it comes down to personal preference.
Decorating with Blueberry Dust
Last but certainly not least, here is the secret baking trick that I alluded to last week!!!!!
The best part about the freeze dried berries is the perfectness about how you can break them down into a decorating powder. Not only is it easy enough to make a decorating powder in seconds. It is also sweet and gives a punch of flavor like you can’t imagine until you try it.
Yes! You can use a spice grinder and turn this into a beautifully fine powder that you can add to your butter cream for a beautiful lavender color with absolutely no food coloring. It also gives an intense blueberry flavor without watering down even your stiff peak frostings or fondants.
In this instance, I just put some crushed freeze dried blueberries into a plastic bag and rolled over it with my rolling pin a few times. Literally anyone can do this!
But my absolute favorite part is just how simplistically beautiful this is. Right here is the blueberry muffin mix from above, cooked in a donut mold. Sprinkled on top is powdered sugar and stripes of the blueberry powder. And finally it’s garnished with edible lavender and whole freeze dried berries.
This is the most beautiful and perfect baked good that I’ve made since having my kids. And it reminds me of the beautiful creativity inside me. It’s not anything spectacular. Because I know there are pastry chefs out there that can make me look like a toddler in my kitchen. But this is a simple wow treat that everyone can make for themselves. And all it takes is finding the products to bring into your basic kitchen and just having some fun.
I hope you try some of these ideas in your kitchen this week!
Products Used Today: This post contains affiliate links to products. We may receive a commission for purchases made through these links, but at no extra cost to you.
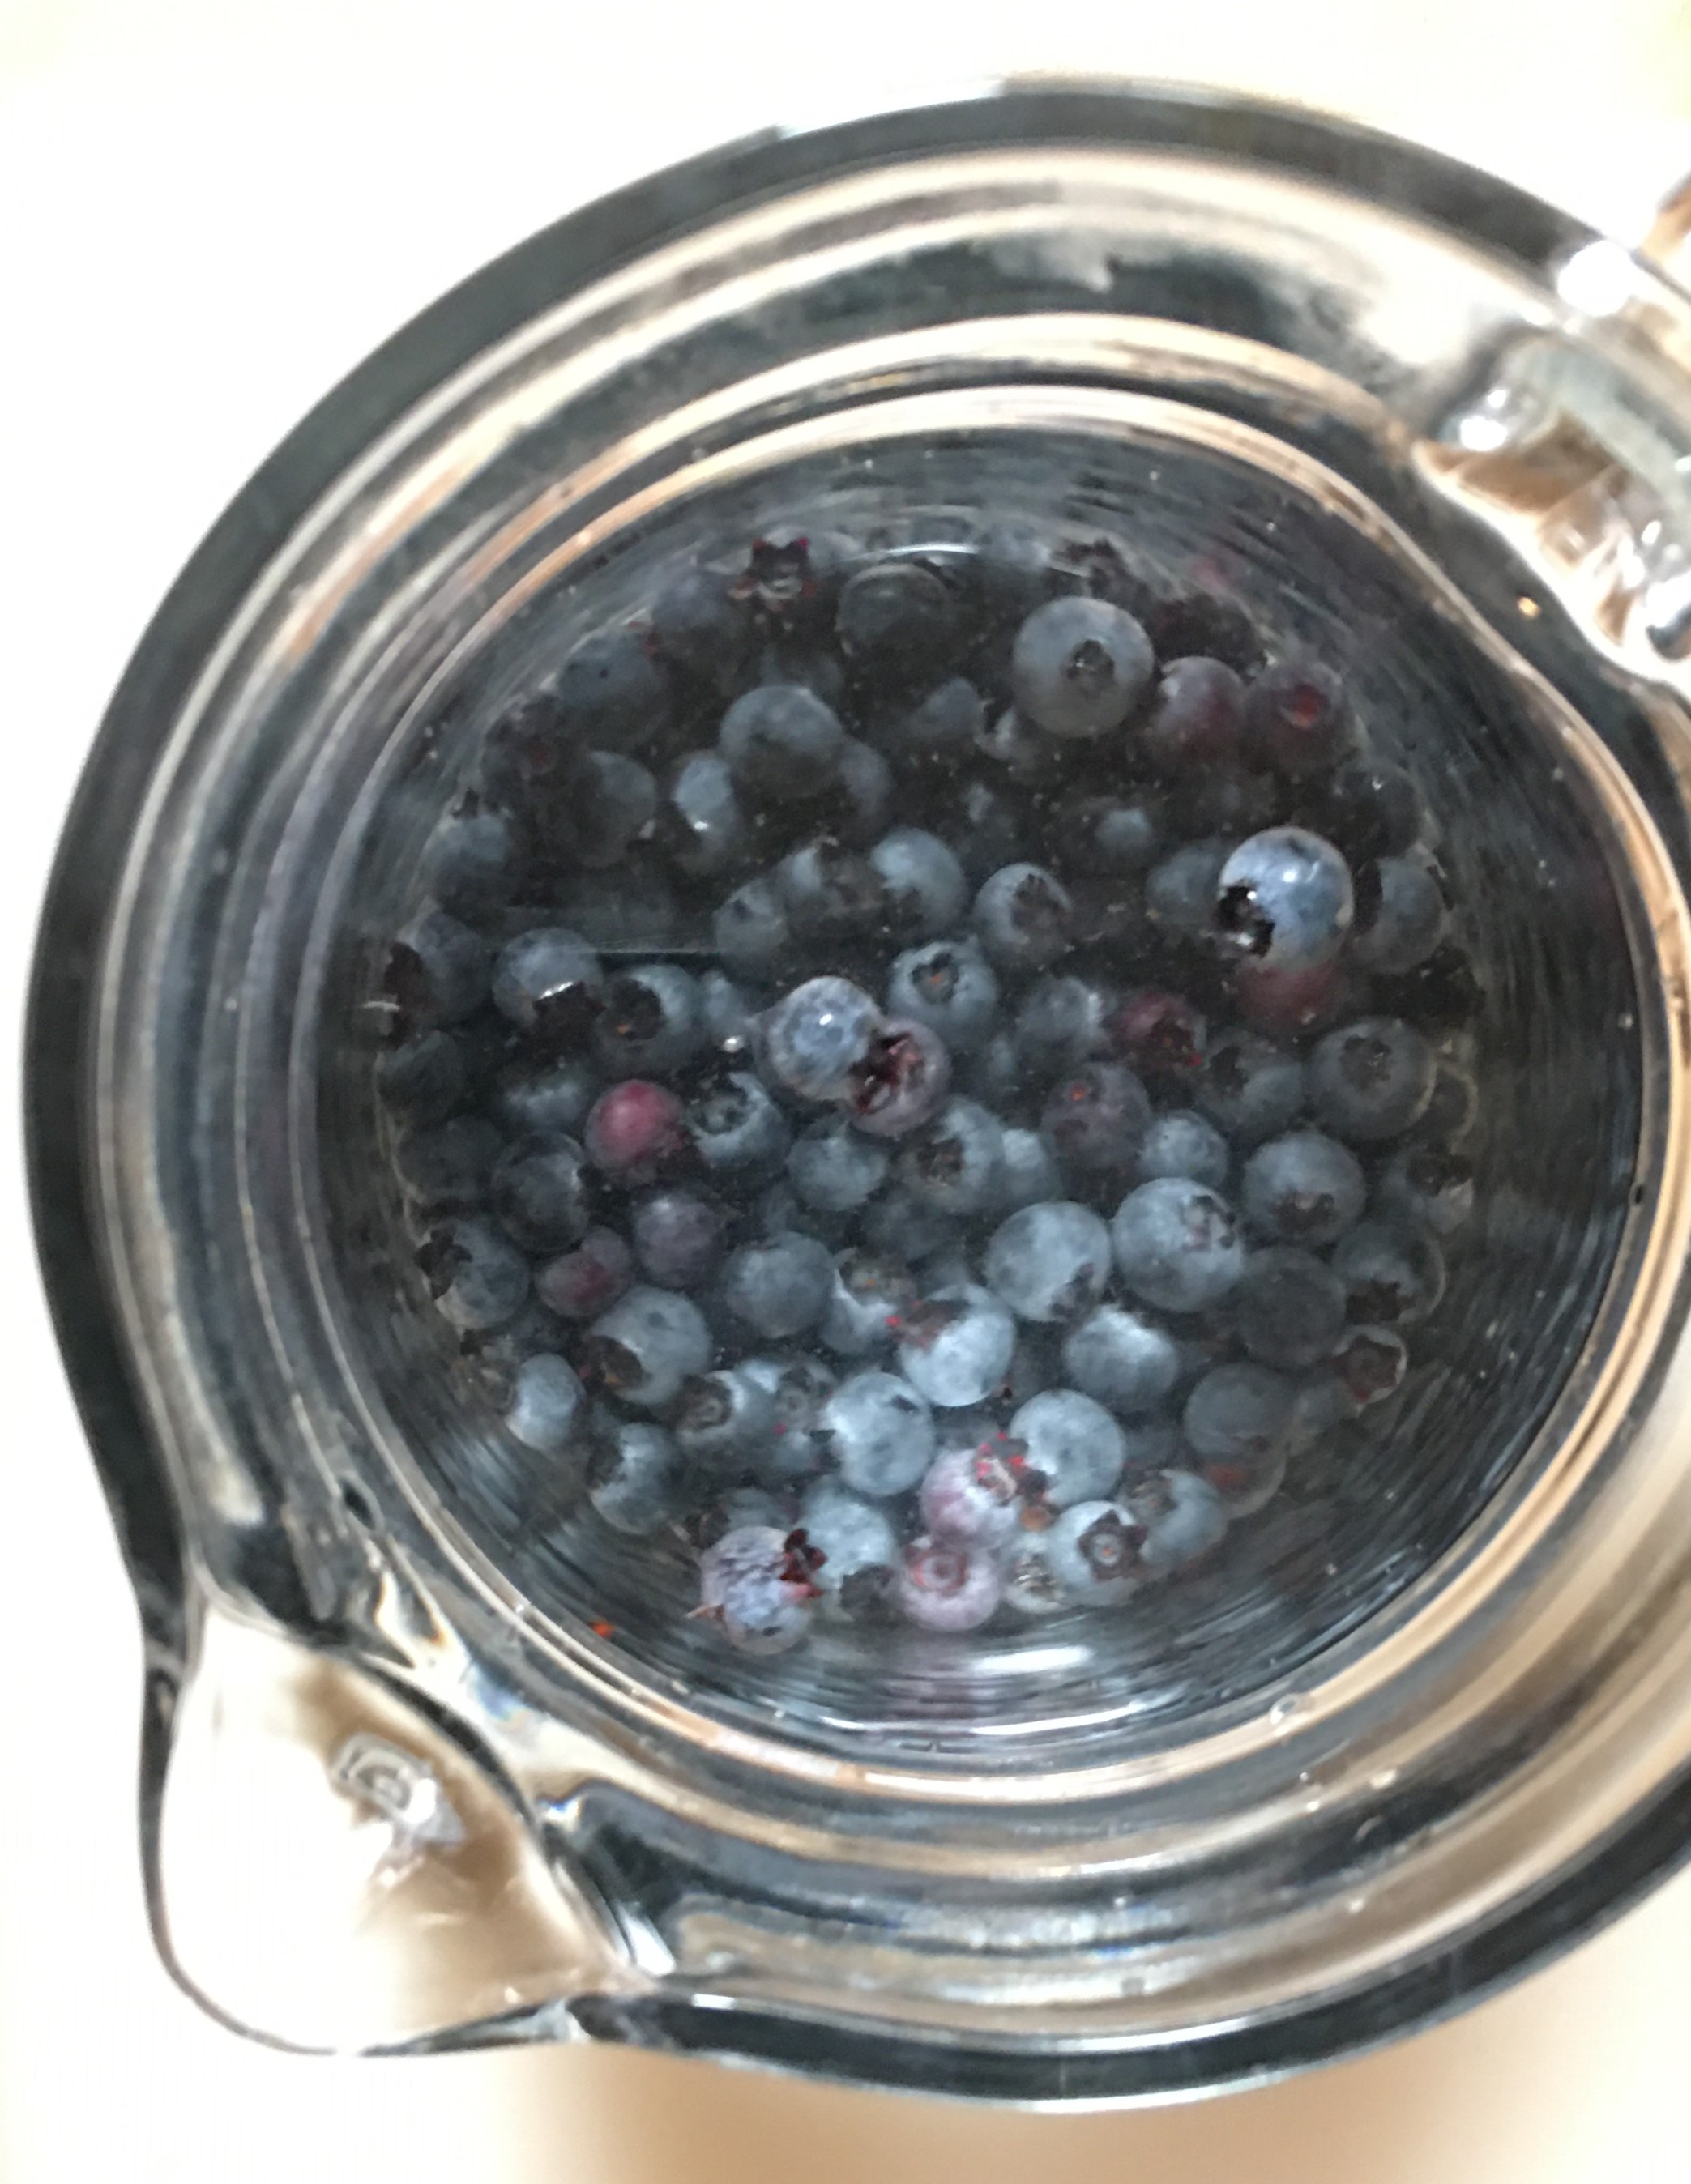
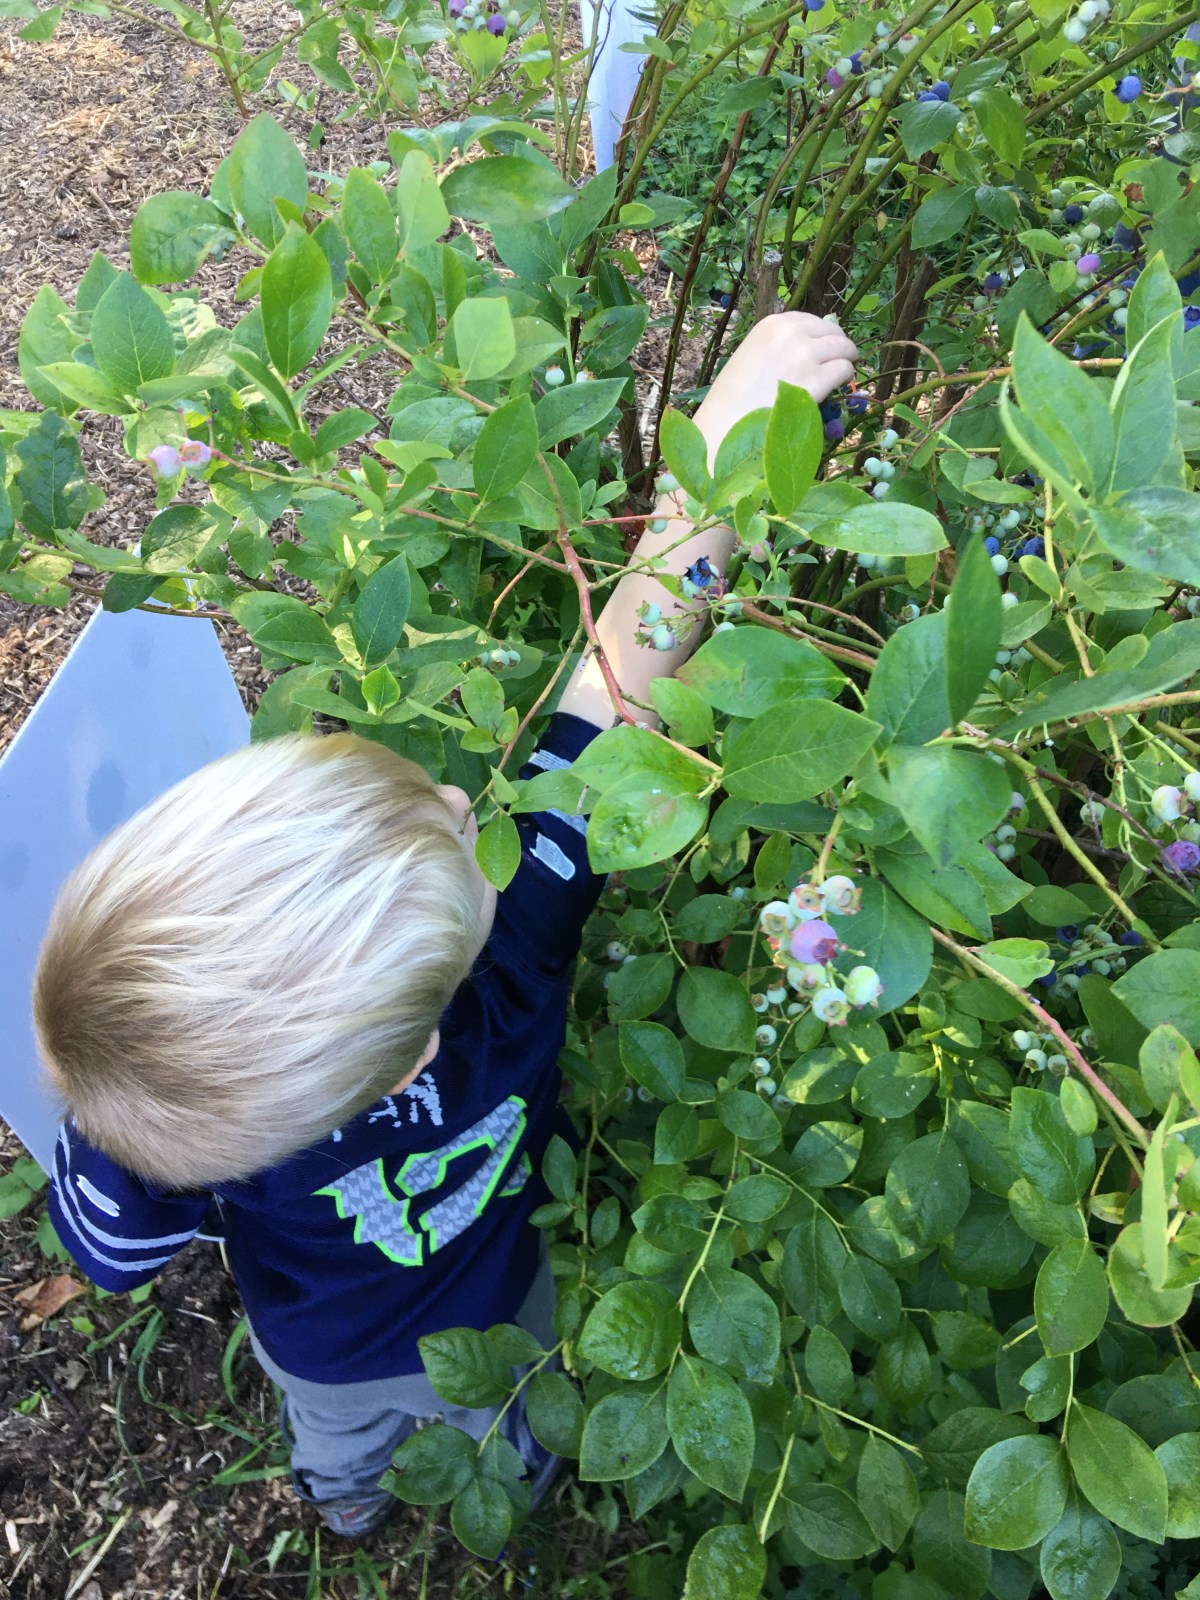
This picture was our family’s first time going out to pick blueberries. I have a second berry picking appointment coming up this weekend and I wanted to share with you our experiences and what you can do with any blue-berries that you picked this year. Or if you’ve yet to visit a blueberry farm, than the berries that you can find in your local produce stand or appointment.
This year blueberries were slow to come into season because of our long cold and wet spring in the Pacific Northwest. (In fact, our whole growing season was completely thrown off, not just the blueberries.
Why did I choose to pick our own berries this year?
My youngest two kiddos LOVE blueberries. If my mother in law or we buy a pint of blueberries from the store, these two will gobble them all up while your back is turned making lunch. LOL I wish that were an exaggeration!
My problems with store berries are that produce prices have jumped through the roof so much where I can only afford to buy one fruit, in moderate weight, each time I go to the store. Yes, we’re a family with a tight food budget. And truth be told, blueberry prices make it so that this fruit really isn’t in our range. I can choose a pint of berries or a few bunches of bananas, or a bag of clementines. So If I want to have fruit to last past one meal, you can guess which direction I usually go. And then there’s the problem that when the blueberries are on sale, sometimes I find berries that already turn, or they’re molding in a day or two at home. Again, not cost effective.
So when I saw a social media add for a local blue berry farm, I jumped on the opportunity!
If you know grocery store storage, you know that the fruit you purchase today is already about 3 weeks off of the plant that it grows on. So picking berries ourselves means that they’re the freshest that you can possible get. And you have the bonus of the fruit being picked while ripe, instead of green. (If you know how quickly the vitamins leave your produce once it’s picked, you understand the value of eating your produce as soon from picking as you can get.
Then there is the educational bonus. By taking the boys out to pick, they see where the blueberries come from (not the store refrigeration case), what the blue berry bush looks like, what a ripe berry looks in comparison to a green berry, and what kind of environment it takes to grow blueberries. (Yes, we picked with boots on our feet!)
Advertisements
This was definitely a learning experience for the boys because we had been picking an insane number of blackberries this summer. And the one thing that they immediately noticed is that they love picking blueberries over black berries because they don’t have thorns!
The remaining bonus to picking blueberries our selves is that we can speak with the farmer and learn about their farming practice. If it matters to your family if a farmer uses pesticides, natural organic sprays, or no sprays at all, this is how you get that information. There are many local farmers out there who do not have the time or money to purchase the “organic” sticker from the FDA. And often times, these farmers use a lot less product on their crops than the companies who can afford that sticker.
Pearson’s Bees and Berries is one of these farms. I would never have known that they skip even the organic sprays had I not met them and talked with them. But the first thing that I loved about this farm is that their bushes are heirloom. This is where I draw the most value from farmers. With as much as society pushes for scientific advancements, I really do not want those advancements in my food. I’m not the mom who buys everything organic. But I am the mom that buys produce (and grow my own) from heirloom and heritage plants whenever I can.
And I’m also the mom that buys directly from local farmers over grocery stores. People are under the assumption that farmers make a lot of money from their crops. Unfortunately, especially for the small farms, they don’t make very much from their crops unless they sell directly themselves. And I would rather my money go directly to a family to invest in their business than a chain. Plus it frees up the grocery resources for the families who are unaware of their local farmers or (for any numerous reasons) can’t make it out to the farms themselves. And if you’ve ever lived in a community where the power goes out or a snow storm comes in and the onion bins are empty, you know what it means to free up resources when you can. (The onion bin is a true story. Every year!)
This first visit to the blueberry farm, we picked 9 pounds of berries. This weekend we’ll pick another 9 pounds.
What do you do with all those berries???
I’m so glad you asked that question!
With my family, the way that we maximize our small grocery budget is by preserving everything that we can for the year. When berries are in season, we store them in a way befitting to how we will use them throughout the year. Apples we make apple sauce. And last year I learned how to can apple pie filling. So in the fall, I can buy the apples at the cheapest price of the year and take care of our apple needs for the year. Black berries, we pick them (for the price of gas to get to our picking location) and have our jam for a year or two for the insane amount of PBJ that we go through in our house.
This is my first year with blueberries to preserve for the year. So I photo documented everything to share with you here. If you decide to hit the berry farms this year before the season ends, you can have an idea on what you want to do with your berries!
Frozen
The first thing my mother in law recommended to use, when she heard of our first trip of picking blueberries, was that they freeze beautifully. And indeed they do!
I took this cookie sheet, and made a single layer of berries. I put them in the freezer to get them frozen and then put them into zip lock bags. I chose the quart sized bags and measured out the berries into 2 cup increments. Most blue berry recipes that I have (and looking at new ones), this is perfect for making a double batch of just about everything. And yes, I always make double batches of everything. With a family of five, with three of them growing, I just overcook to be on the safe side and err on the side of leftovers. And with blue berry muffins, it’s nice to have one baking session with treats for the week.
If I only need 1 cup, then at least I only have a cup of thawed berries in the fridge for the berry thieves to nab!
Dehydrate
The baker in me made me dehydrate. I’ve had many recipes where the juice of the berries was just too much for the sponge and it made a soggy mess! So by taking the liquid out of the berries, you not only save freezer space with this shelf stable preservation but you also keep the right consistency to cakes and muffins.
The problem was what is the right way to dehydrate blueberries?
Before I set up my dehydrator my mother in law had already found a news article that stated the way that you HAVE to do it–but the berries in half.
Now I froze 3 pounds of my berries. And that left me 6 pounds of berries to dehydrate. There was absolutely no way I was going to cut all those berries in half. I’m a mother of 3 after all!
So I performed an experiment.
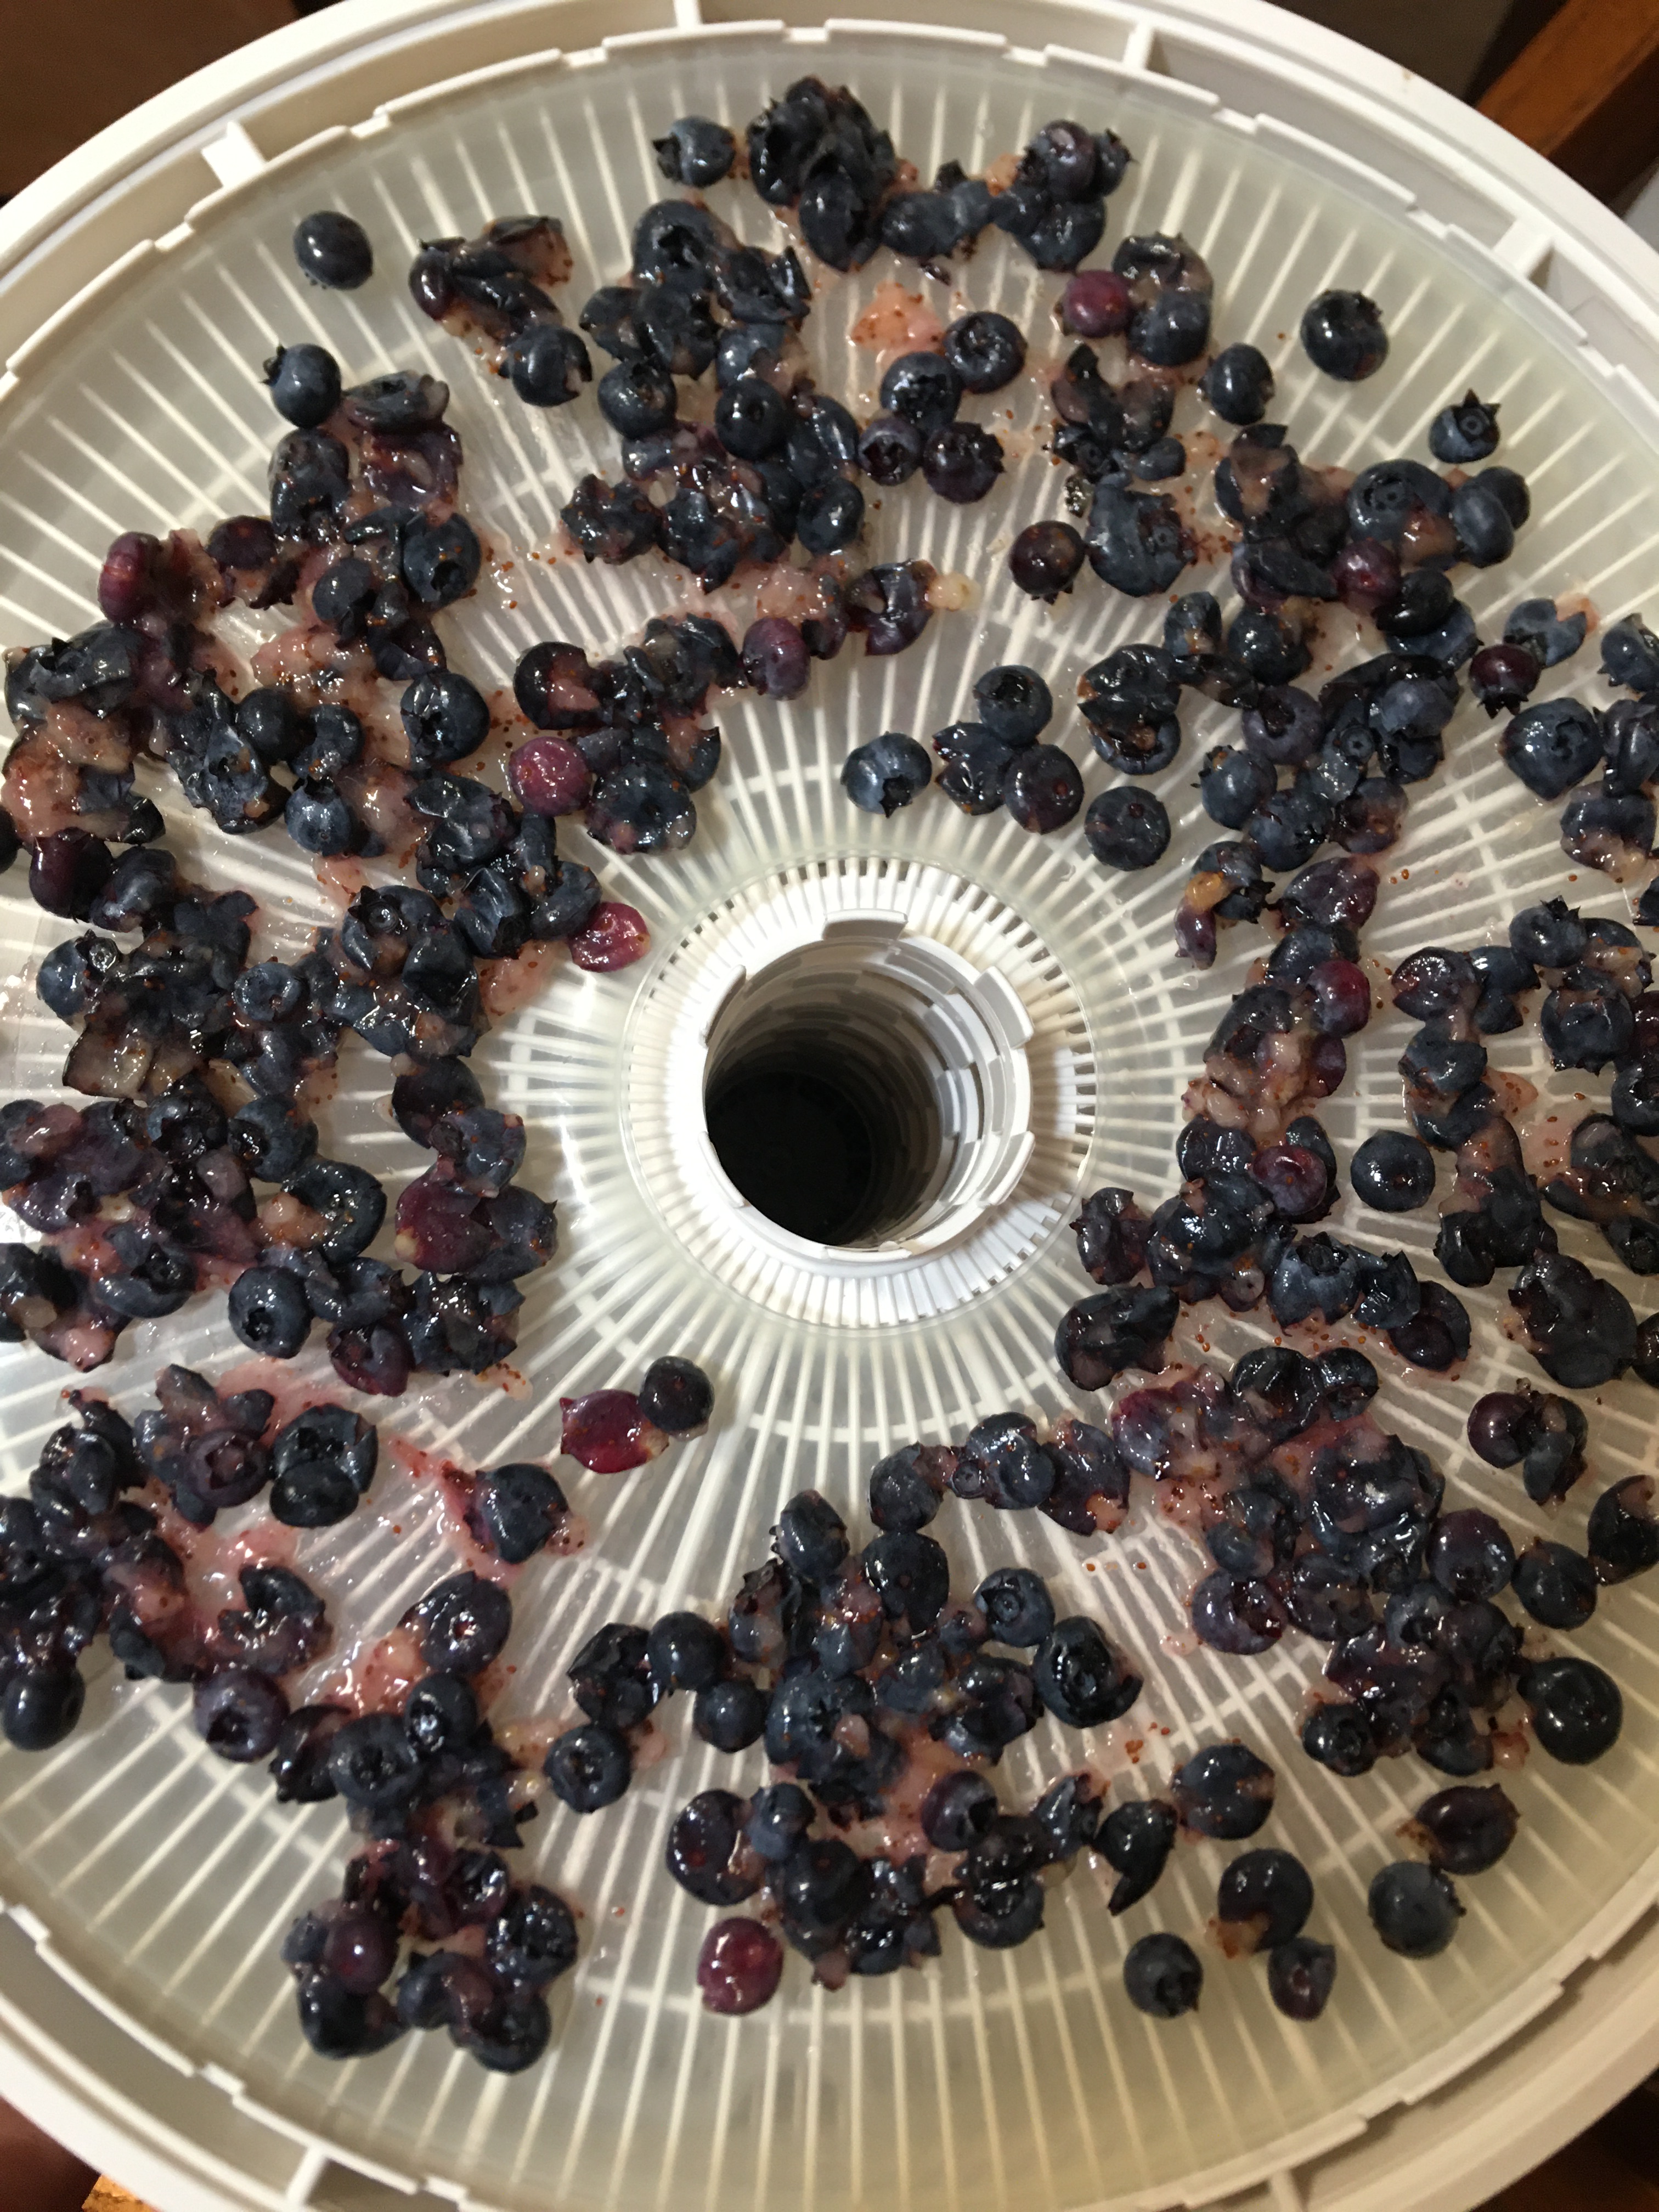
I left berries whole, with an assumption going into this that they would take forever because of the sturdy berry skins, for one tray. The second tray I filled with berries that were cut in half.
As seen above: whole berries and smashed berries.
For three trays I lightly smashed the berries onto a plate, using a glass cup that I could look through. By using the glass cup you can make sure that you see which berries you are smashing, which ones you already smashed, and just how much pressure you are adding in connection to breaking the skins open. For the smashing, I applied just enough pressure that the skins split open, allowing the air in to dehydrate, and yet keep the majority of the fruit structure intact.
When you look at the pictures above, the whole berries and the cut berries looked the same. So I just put the whole berry picture up. Both of those sets were placed on the mesh insert. I’m done with the days of putting fruit directly on the trays. By using just the mesh I don’t ever have to scrub my trays. Plus the mesh you can fold and break up any of the thin bits that cling to the surface. So even the mesh don’t have to be scrubbed either! The Right picture is the smashed berries. You can see what I mean when I say just enough to break the skin. Some got a bit more flat than the other (which looks a lot like the whole berries on the left). But these berries are a bit messier. I wanted to save the mess and not lose out on any of the blueberry goodness. So I dehydrated these on the jelly roll sheets.
The final two trays of blueberries were my fully mashed berries. I’m teaching myself how to seed save from different plants. My tomatoes are not yet ripe, so I can’t practice on those yet. So I chose to use the blueberries as my maiden voyage. And I’ll talk more about that below!
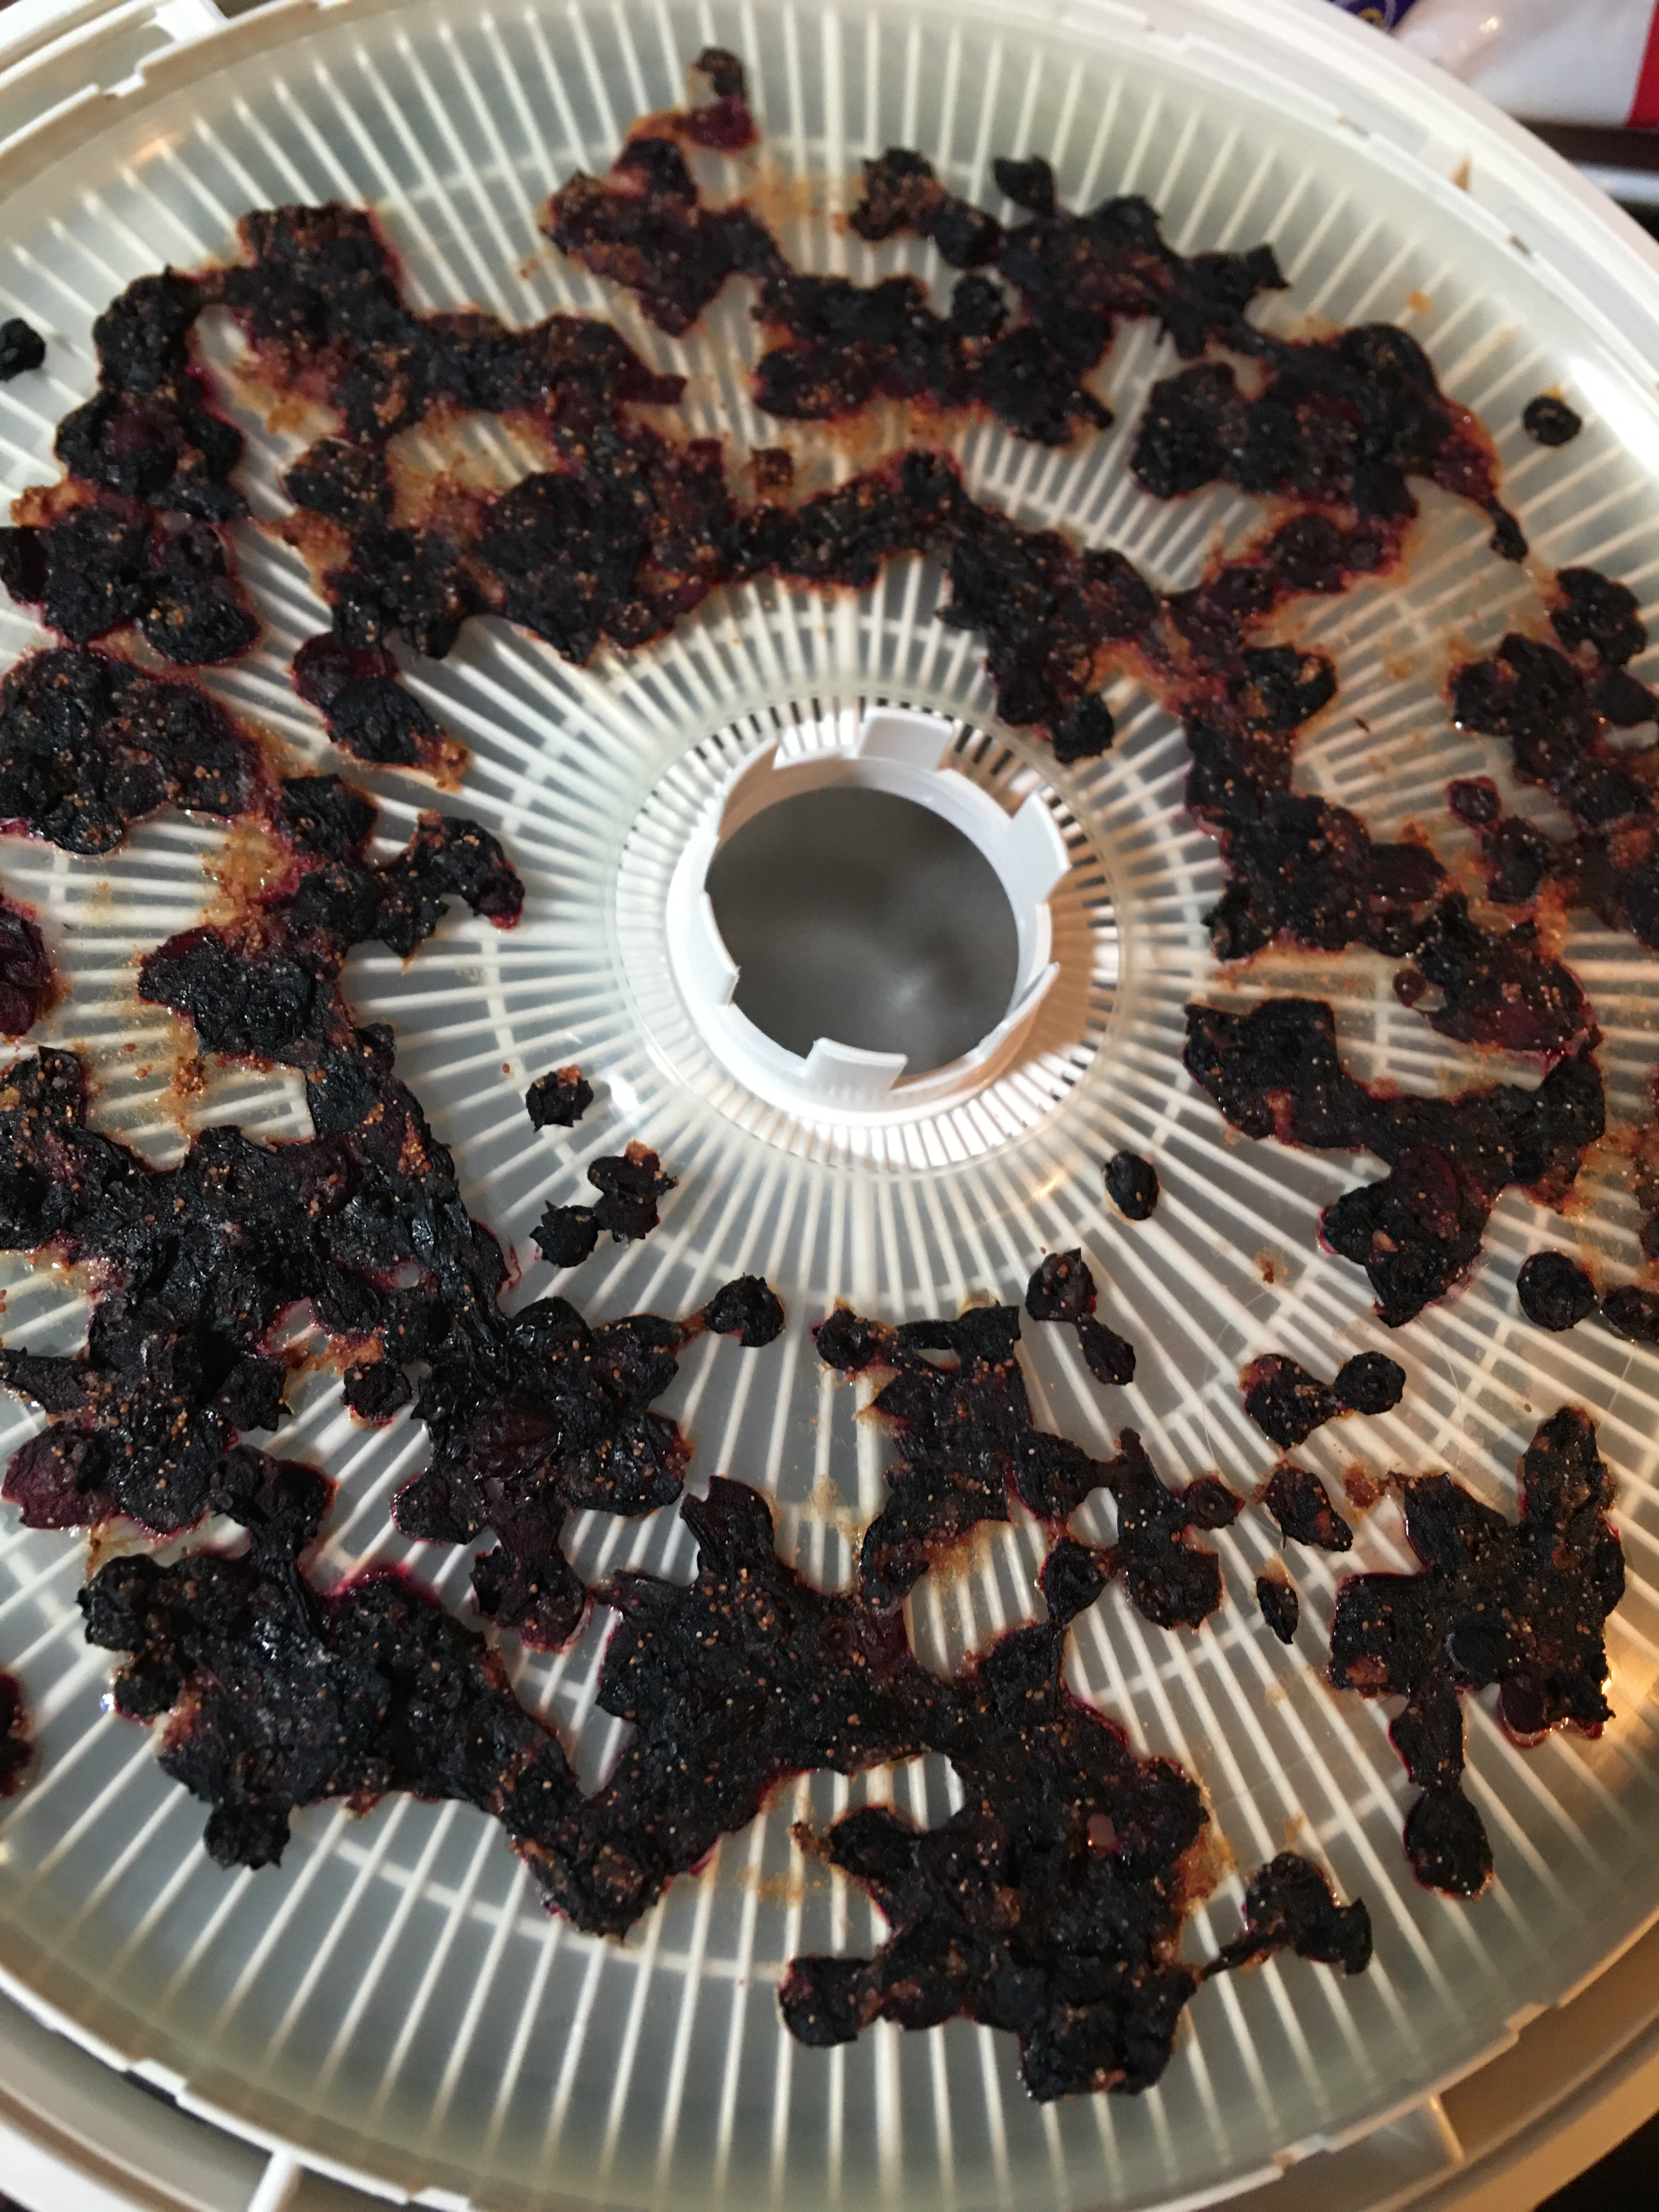
As you can see below, with the final dehydrated product, the fully mashed berries were a mess, a beautiful, lovely mess! So those of course were on a jelly roll insert.
As seen above: smashed and fully mashed.
The drying time and final products actually surprised me! The smashed and mashed took the least time to dehydrate, as anyone would expect. They took about the same amount of time, 13 hours. (Of course we had very high humidity days, which didn’t help here.) The mashed berries pulled off the jelly roll just like any fruit leather would. So if you want fruit leather you can use a blender or you can skip that extra clean up and just use a plate and glass. Of course the blender will give you the means of smoothing out everything across the jelly roll and produce a nice solid leather you can cut into perfect strips. Or you can go the quick and dirty route and skip the whole cutting process. Either way works and is a complete judgment call.
The smashed berries surprised me. I didn’t think they would turn out as perfect as they did. There was very little flesh spread and it looks nearly identical to how the whole and cut berries turned out, when they finished. These look exactly the same as the dehydrated blueberries in the packets of oatmeal or premade blue berry muffin packages. My walking away point is that for the least dehydrating time and same end product, a light smash is the way to go for dehydrating berries!
What surprised me the most was that the cut berries and the whole berries took the same 23 hours to dehydrate. Cutting the berries didn’t speed along the process for me. Even when I ate a whole berry and a cut berry, their textures were identical. I’m not sure why the article my mother in law read said that you had to cut the berries for the best result. There wasn’t a difference.
However there was a difference between the whole/cut berries vs. the smashed berries. When dehydrated the smashed berries had a little bit of pop corn roughness to it, but it had a bit more “airiness” to them. You could say they had a snap and not as dense feel to the teeth. It wasn’t a completely night and day difference between the three methods. But it was noticeable.
My Vote: a quick smash of the blueberries and dehydrating them is the way to go!
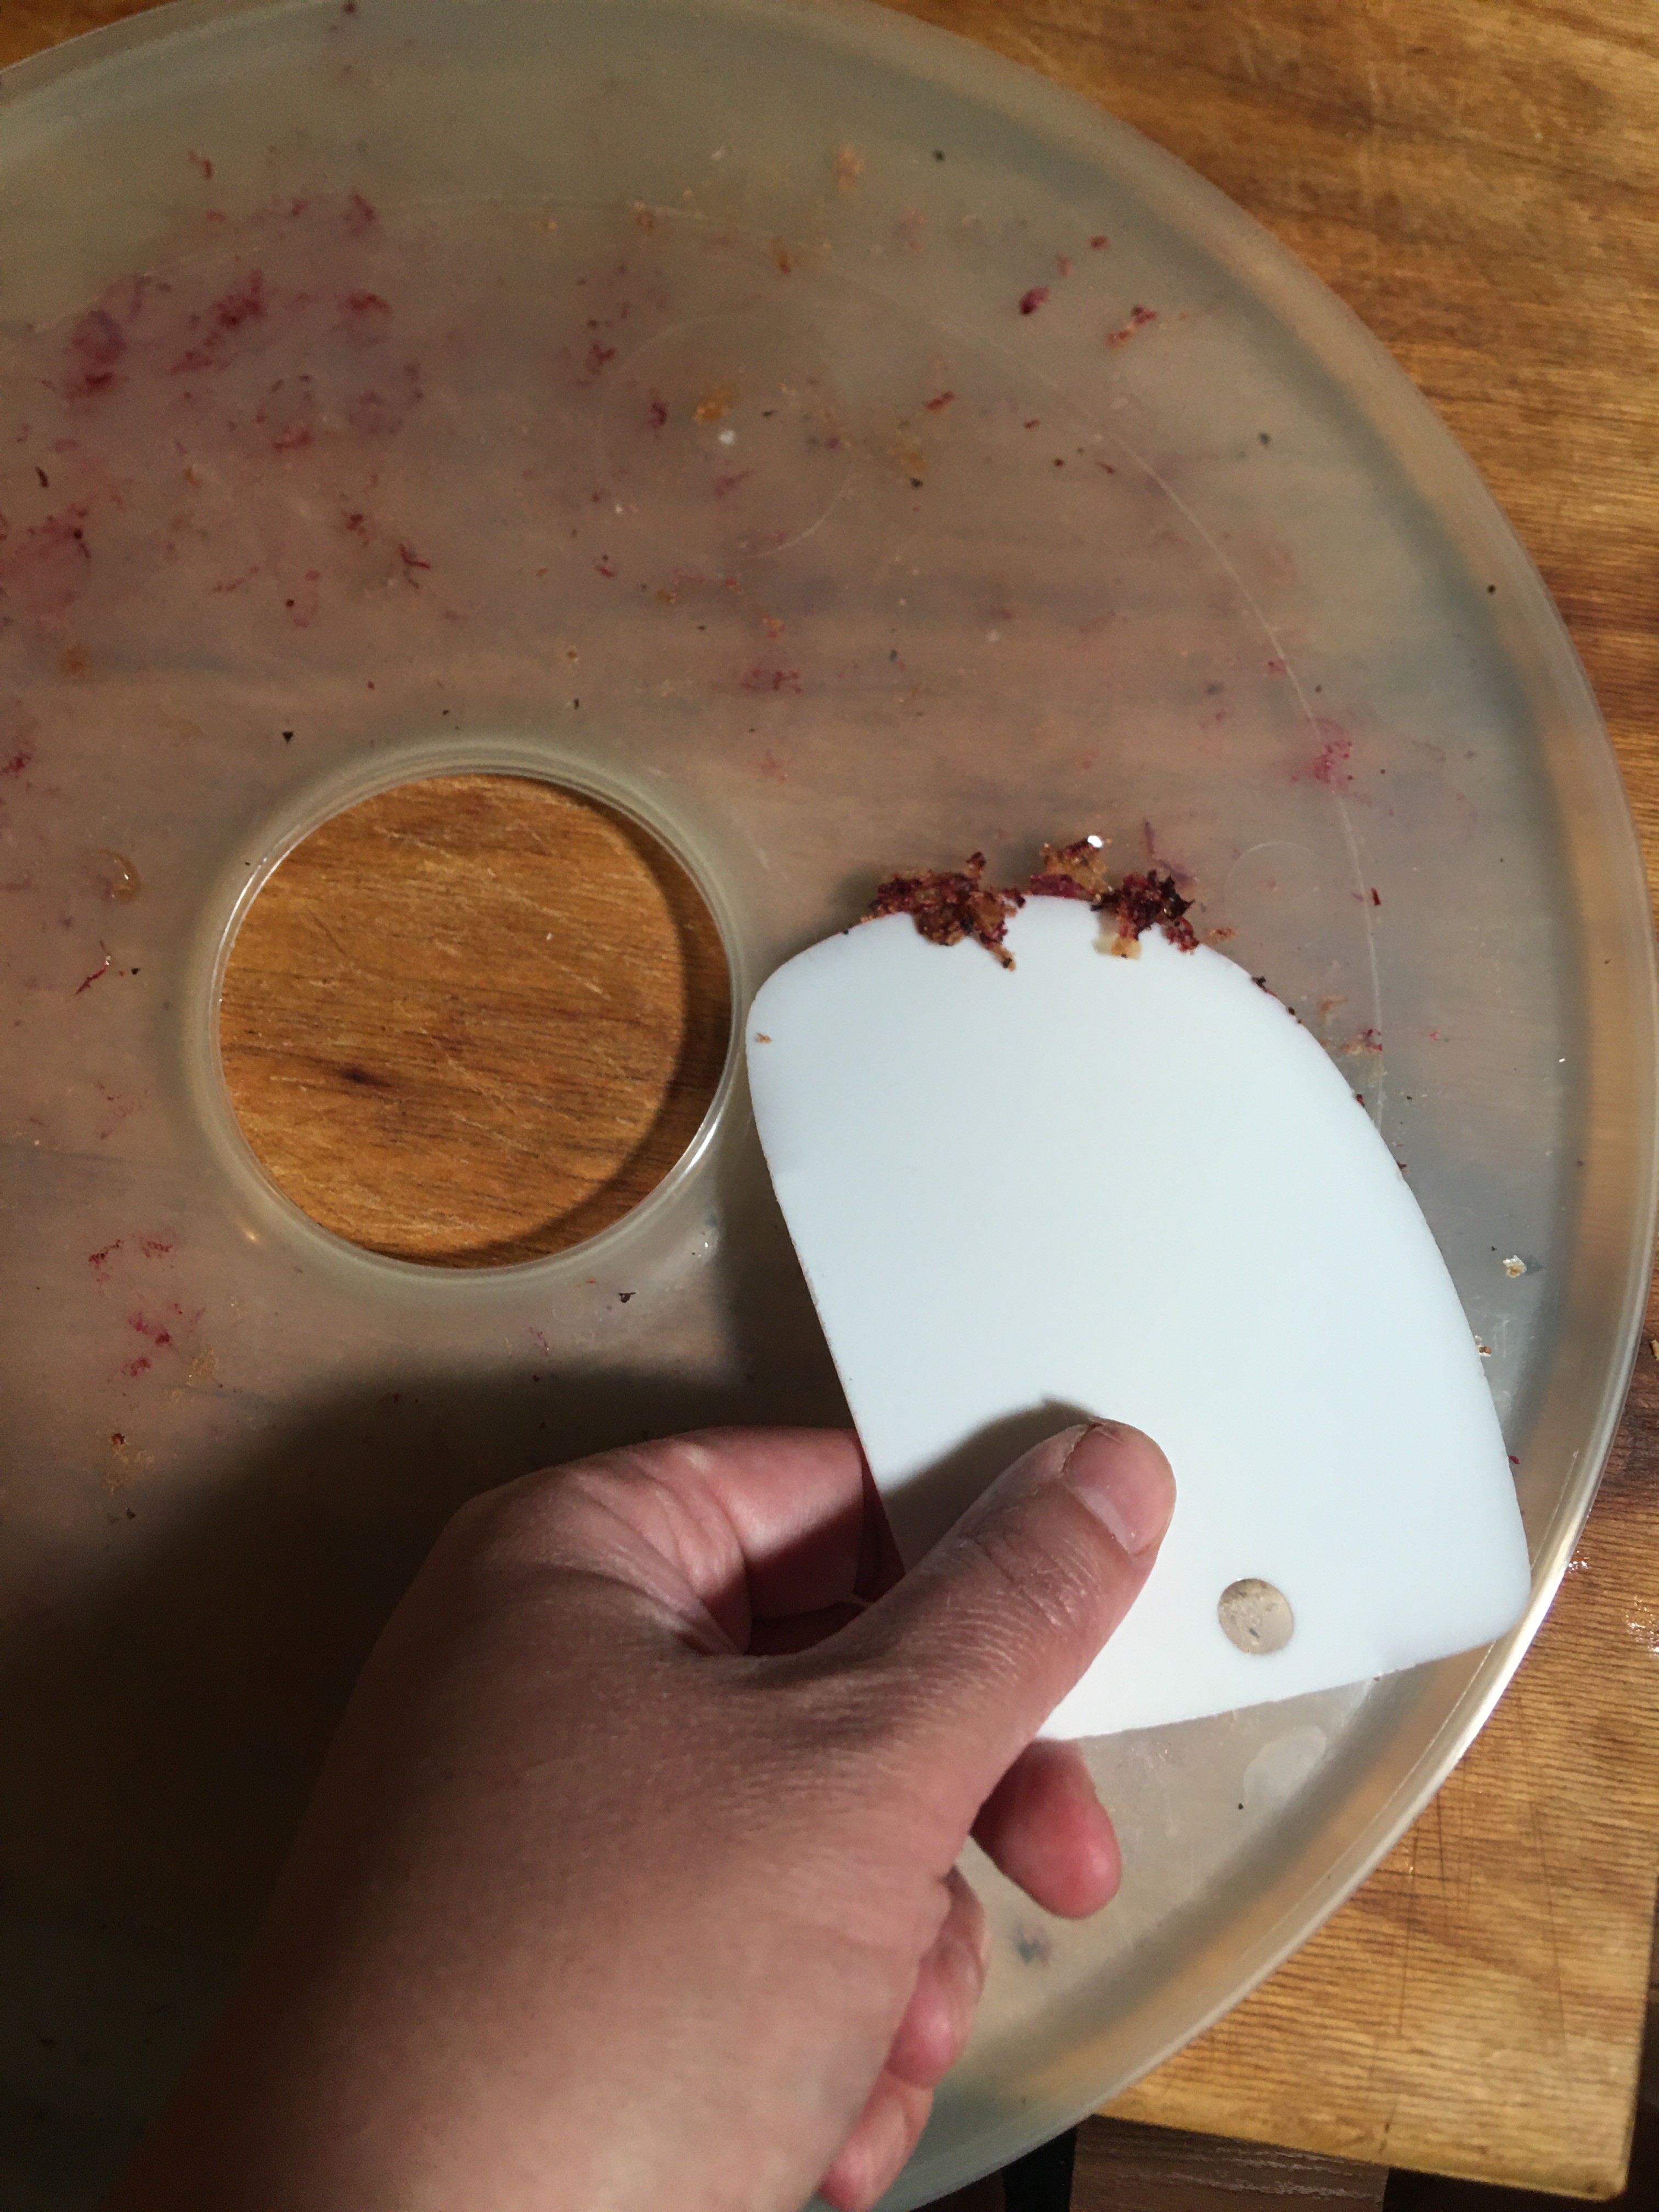
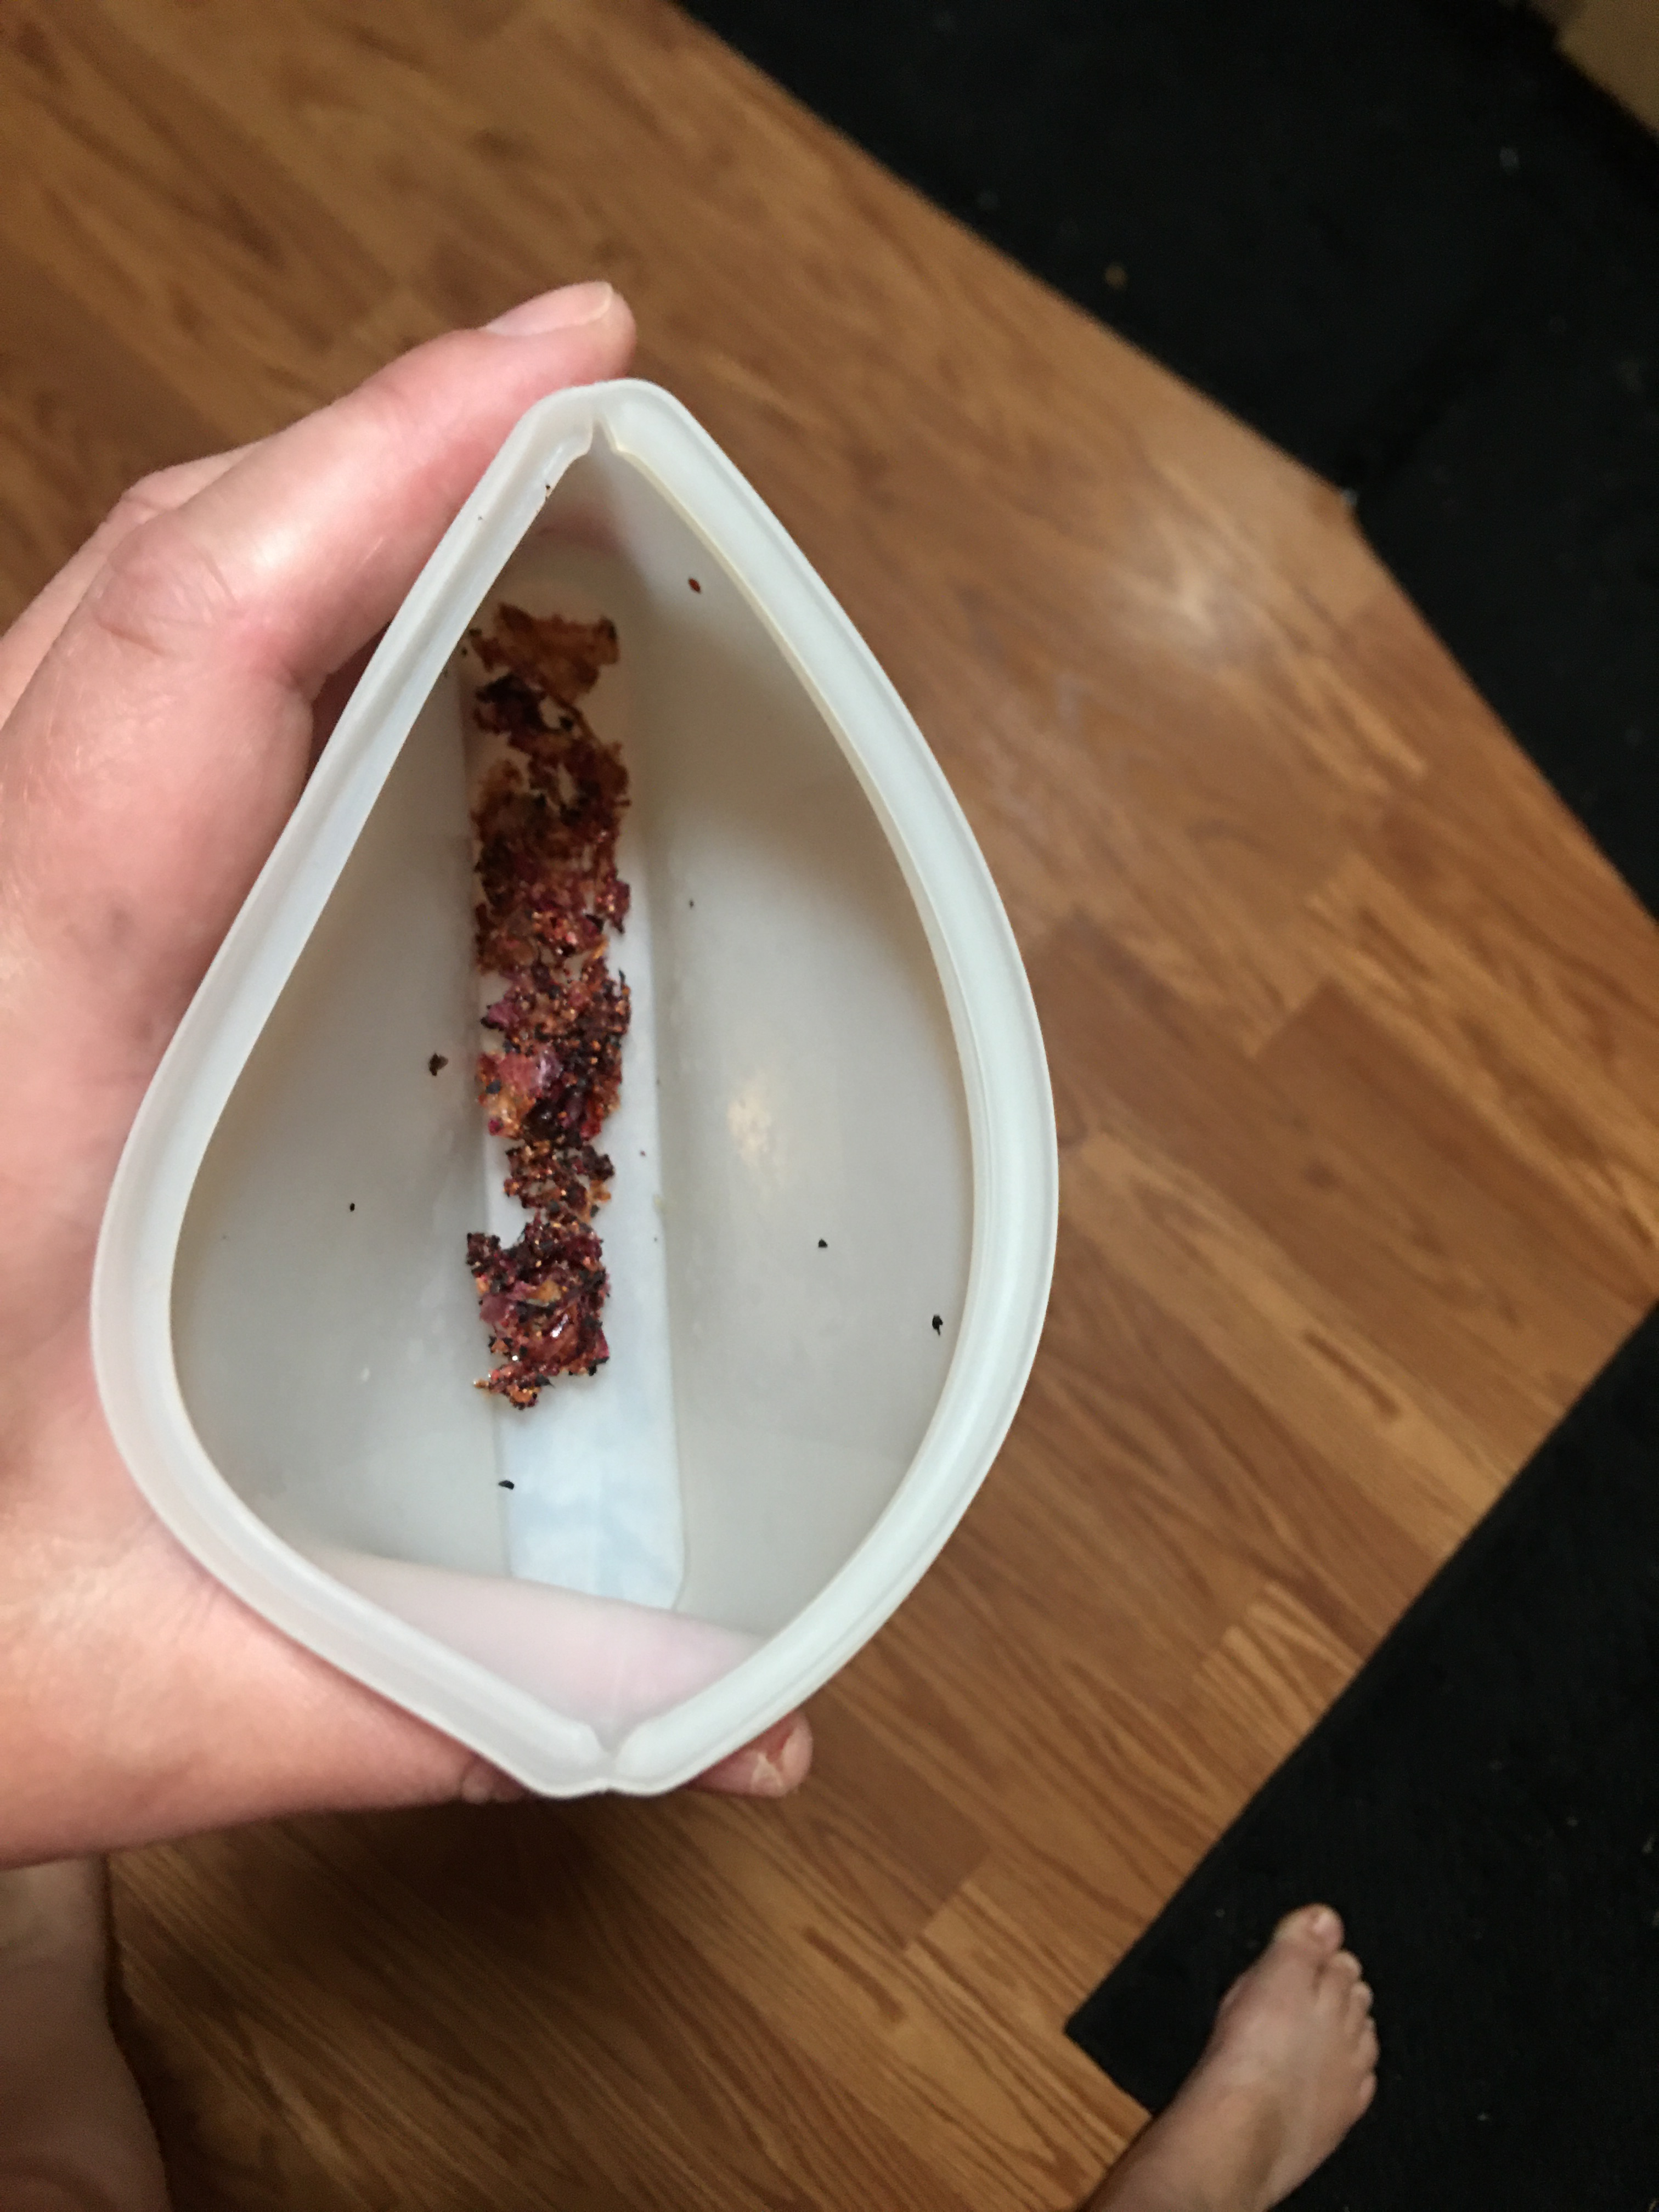
One side product you might not have thought of
Before I end this portion of dehydration, I wanted to talk about this one last observation. I like finding ways of using as much as I can of the things I preserve. And if you’ve dehydrated long enough, especially with the jelly rolls, you know there is always that bit from the juice and fragments of flesh stuck to your tray. This time, I decided on another experiment. I scraped off this little remnant. As you can see in the right picture below, I didn’t gain a whole lot of extra bits off of 5 jelly rolls, but I want you to stay tuned because I use this bit in a recipe below and I want you to know that this is completely usable!
What caused me to go to this effort?
I had to scrape my jelly rolls anyway, to make it quicker for washing when I was all done–no scrubbing. I took a taste of these scrapings. And let me tell you what! These scrapings have just as much flavor as the blueberries themselves. So yes, all that flavor, I was definitely going to cook with that.
Saving Seeds
I have no idea how successful this attempt of seed saving will be. I’m very new to this skill set. Including this batch of blue berry seed, I have three other plant varieties that are in the process of cold stratification.
If you are also new to seed saving, perennial plants do require cold stratification in order to tell the seed that it’s ready to sprout. I only have a small garden so it’s not space effective for me to plant seeds in the fall and let them over winter (cold stratify naturally) and hope they take off in the spring. So the best option for me is to go through the stratification method using my freezer and start the seeds indoors and plant any successful starts.
With blueberries, the methods I’ve seen people use for capturing seeds all involved using a blender and wasting the flesh. As you can imagine, I have no intention of losing berries to waste, so I tried something different.
If you remember above, when I talked about mashing the blueberries I mentioned seed saving. Here is what I did. The mashing broke apart the berries that you would see happen in a blender. The difference is that the flesh, I was able to put in my dehydrator and use it as a food source.
On the plate that I mashed the berries on, I removed the thick flesh and left the juice on the plate. With a silicone spatula, I scraped the juice from the plate into the bows that you see here.
As you can see, there seeds were quite numerous from the several handfuls of berries that I mashed. Definitely the seeds are numerous enough to get me a few starts to plant this spring. And I might have enough to share with others.
The method that I used to separate out the seeds from the juice and bits of flesh was the sluicing method. If you’ve seen a video on how you sluice a pan of gold, you understand the steps that I took here. I didn’t pour in very much water, maybe 1/4 cup of water at a time. I swirled the water in the bowl and let the water separate the juice and flesh from the seeds.
It is true what you hear; the seeds to stick to the bottom of your blender, or in this case your bowl. There will be a few floating seeds, but those are the ones that you don’t want anyway.
I sluiced, in my soup bowl, four or five times until you I got to this last picture of the seeds in the bowl.
From this point I continued in the stratification method that others already show how to do; place a damp paper towel in a zip lock bag, place the seeds on the paper towel, and place in the freezer to start the stratification process. (These are placed in the freezer for a minimum of 90 days for blueberries.)
I know that I’m not going to have any blueberries for five years, but I want to start this process now. And I might have to plan ahead and grown several bushes because I definitely have blueberry lovers on my hands!
Freeze Dried
While I do not have a freeze drier, I so wanted to mention this method of food preservation. This method maximizes on the flavor and texture of the blueberry while maintaining the maximum level of vitamin retention. No other food preservation method tops this method at this moment in food history.
That alone is reason enough, but there is also the added bonus of berries being shelf stable and fresh for up to 25 years, 1 year after opening. If you’ve water bath or pressure canned any preserves, you can recognize the benefit of not having a jar or seal failing you.
Maybe you’re like me and don’t have a freeze drier. I want you to know that you still have that option available to you.
I’m going to talk more about freeze dried berries next week, because I’m going to use these in recipes. And believe me, if you are a professional cake or cupcake baker, you’re going to want to see what freeze dried berries can do for you and your clients. You’re going to have all the berry flavor without throwing your water ratio off. Plus the added bonus of being able to decorate with the berries that you can’t do with fresh and less of your precious time than dehydrating.
Blue Berry Recipe
I wanted to share the blue berry recipes that I have and how each of these ways of preserving blueberries act in a given recipe, but I’ve given you ALOT of information already. So be sure to tune in next week for the recipes and how the berries work.
BUT in the meantime I don’t want to leave you hanging with the jelly roll scraping. So here we go on this quick analysis.
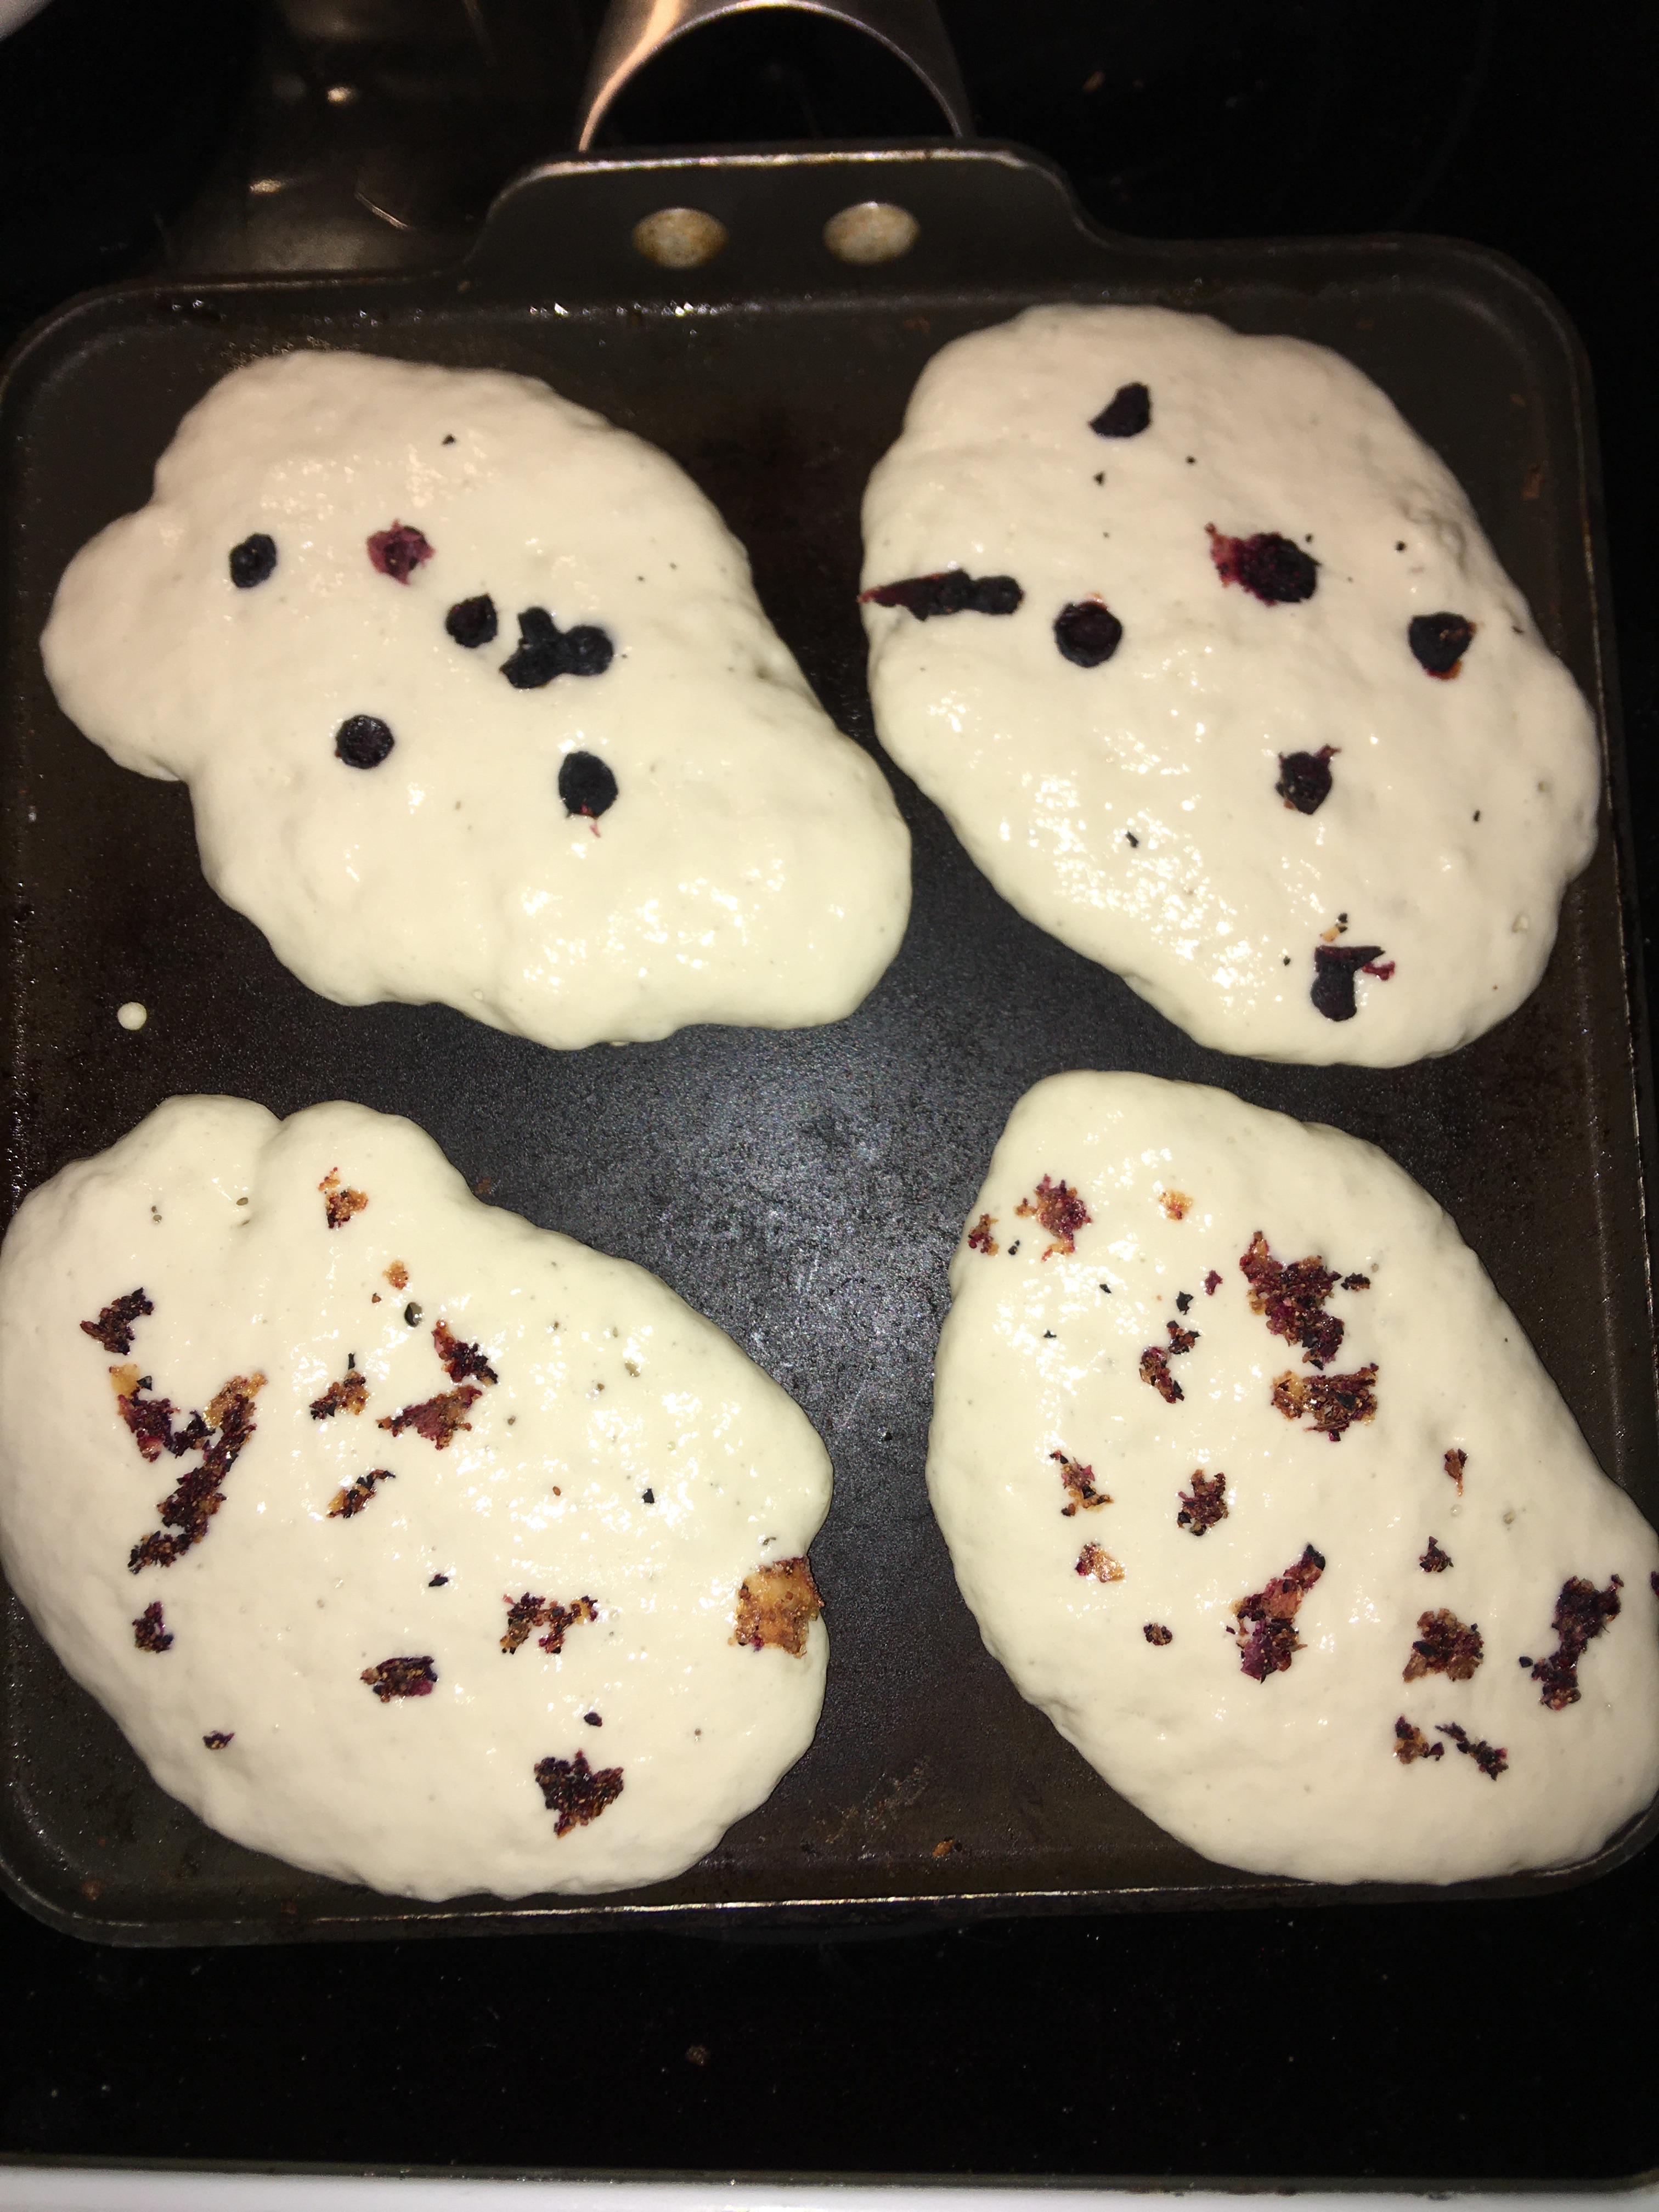
As seen above: the berry scrapings and blueberry pancakes (above: whole dehydrated berries, bottom: berry scrapings)
I didn’t have very much of the scraping, just enough for two pancakes for the boys. I made two other pancakes with the dehydrated berries. (And of course some plain flapjacks for the kiddo who dares to turn his nose up on blueberries.)
The dehydrated berries had a bit of crunch to them, but did not disappoint in the flavor department. The blueberry scrapings I absolutely loved! There was the full blueberry flavor without the bite of a dry blueberry, or even the wet squish of pancakes with fresh berries in them.
I’m so tempted to make more mashed berries and spread it very very thin to maximize the blueberry scrapings, because it’s the absolute perfect world for blueberry pancakes–full flavor without messing up the texture of a classic pancake!
Products seen today
These products are affiliate links. We can receive a commission from purchases made through these links, but at no extra cost to you. These products I have purchased for myself. Where I have talked about them, my statements are based on my experience on these products.
This was a replacement dehydrator for my other Nesco that served me well for over a decade. I wanted to make this recommendation because this dehydrator came with a mesh and jelly roll for each tray. I was prepared to purchase these accessories, but was so pleased to find out that I didn’t have to.
For about a year and a half now, I have wanted to make cheese at home.
What kept me from doing it for so long?
I lied to myself stating that it was just the fact that my days are busy with three young kiddos in the house. It’s a convenient enough excuse. But deep down these were the core issues that I was dealing with. Maybe you’re familiar with these fears.
It’s too difficult.
What am I going to do to keep from burning my hands?
If you had a childhood like mine, and you pulled homemade taffy, you know what I mean about burning your hands. At least with taffy you could coat your hands with as much butter (or other fat product) to protect your flesh from the hot candy. And if you’ve read about Mozzarella making, you know you have to pull cheese. Buuuuut, you can’t put butter on your hands.
Let me tell you something. I am so glad that I set my fears aside and dove in to make my first Mozzarella!!!
Advertisements
First let me assure you that I did NOT burn my hands. So you can rest assured that you can also keep your hands safe.
Second, Mozzarella cheese making is so much easier than I made it out to be in my head. In fact, the next time that I make more cheese, I’m going to have my 6 year old help me. With the exception of handling the warmish hot cheese for the stretching and shaping, I know he can do this with me verbally walking him through the steps. So if you think cheese making is too difficult, I think you’ll also be surprised with how easy it is.
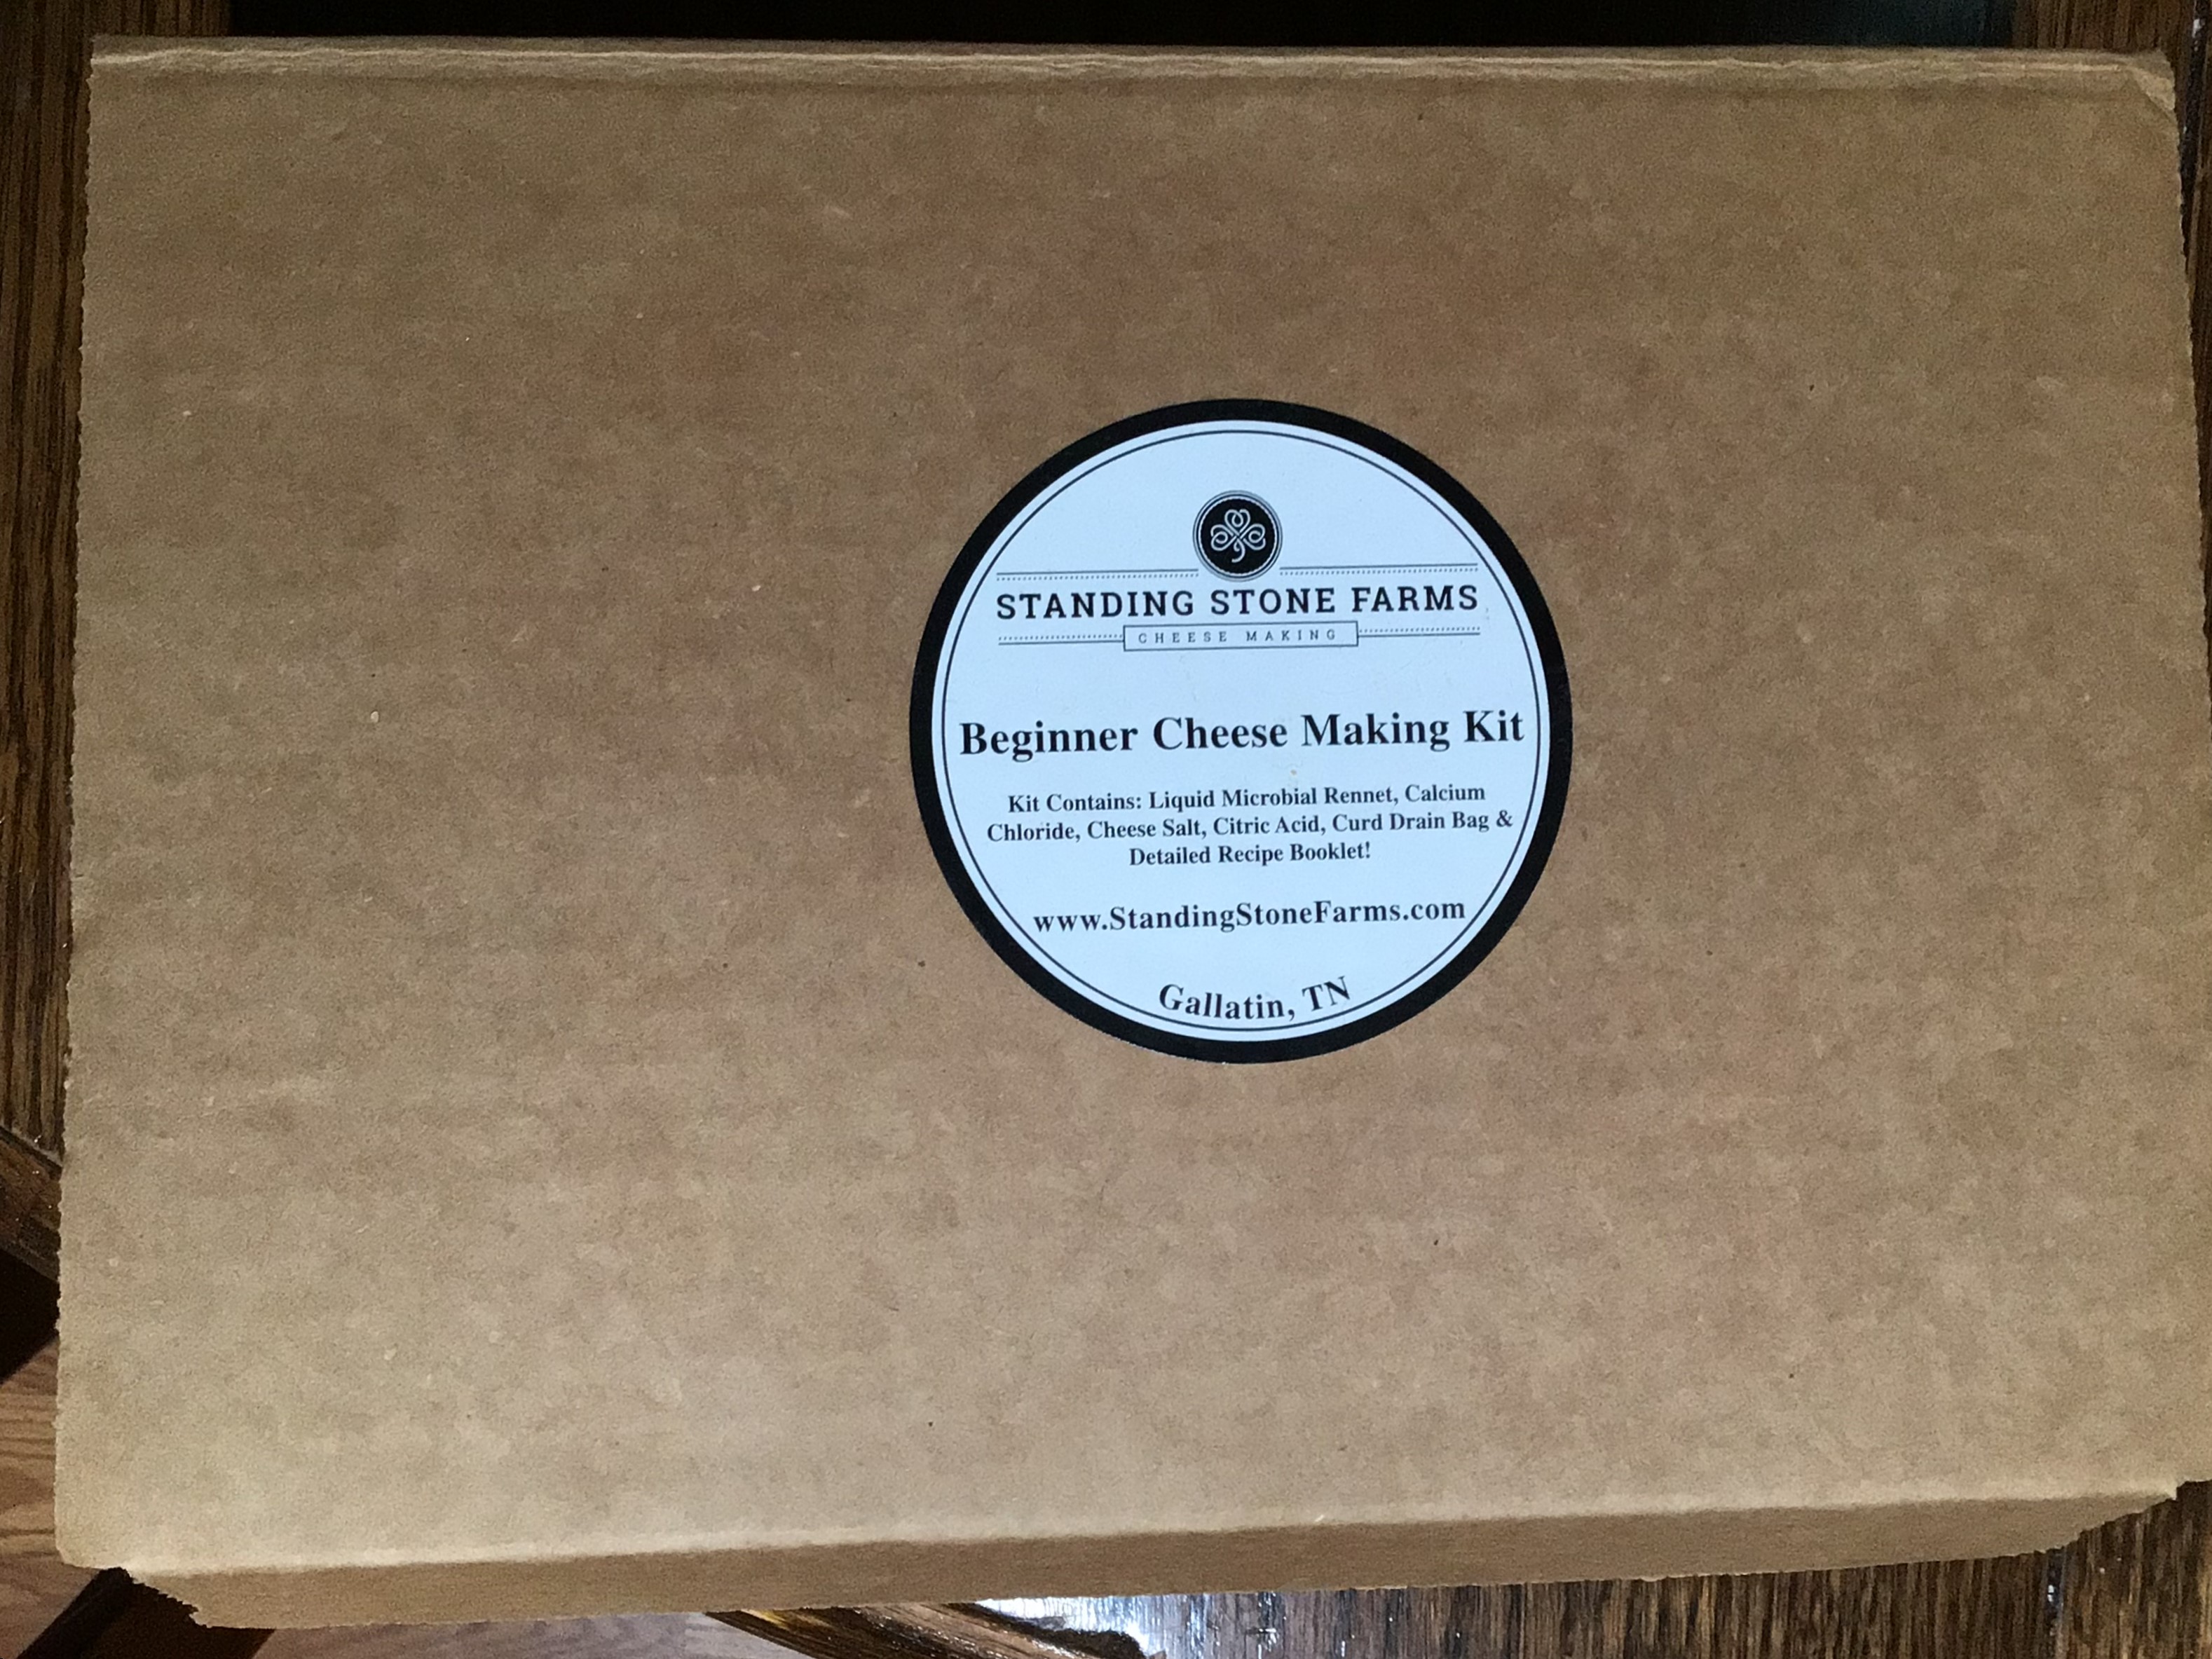
I used this beginner cheese making kit from Standing Stone Farms. Their recipe comes in the kit, which is included here with their permission. Thank you Paula Butler for allowing me to share this recipe! Here is another link for their products, and the link for this beginner cheese making kit on Amazon.
If you want to branch out on your own with a different recipe, I know there were a couple that I specifically or indirectly linked to throughout the post.
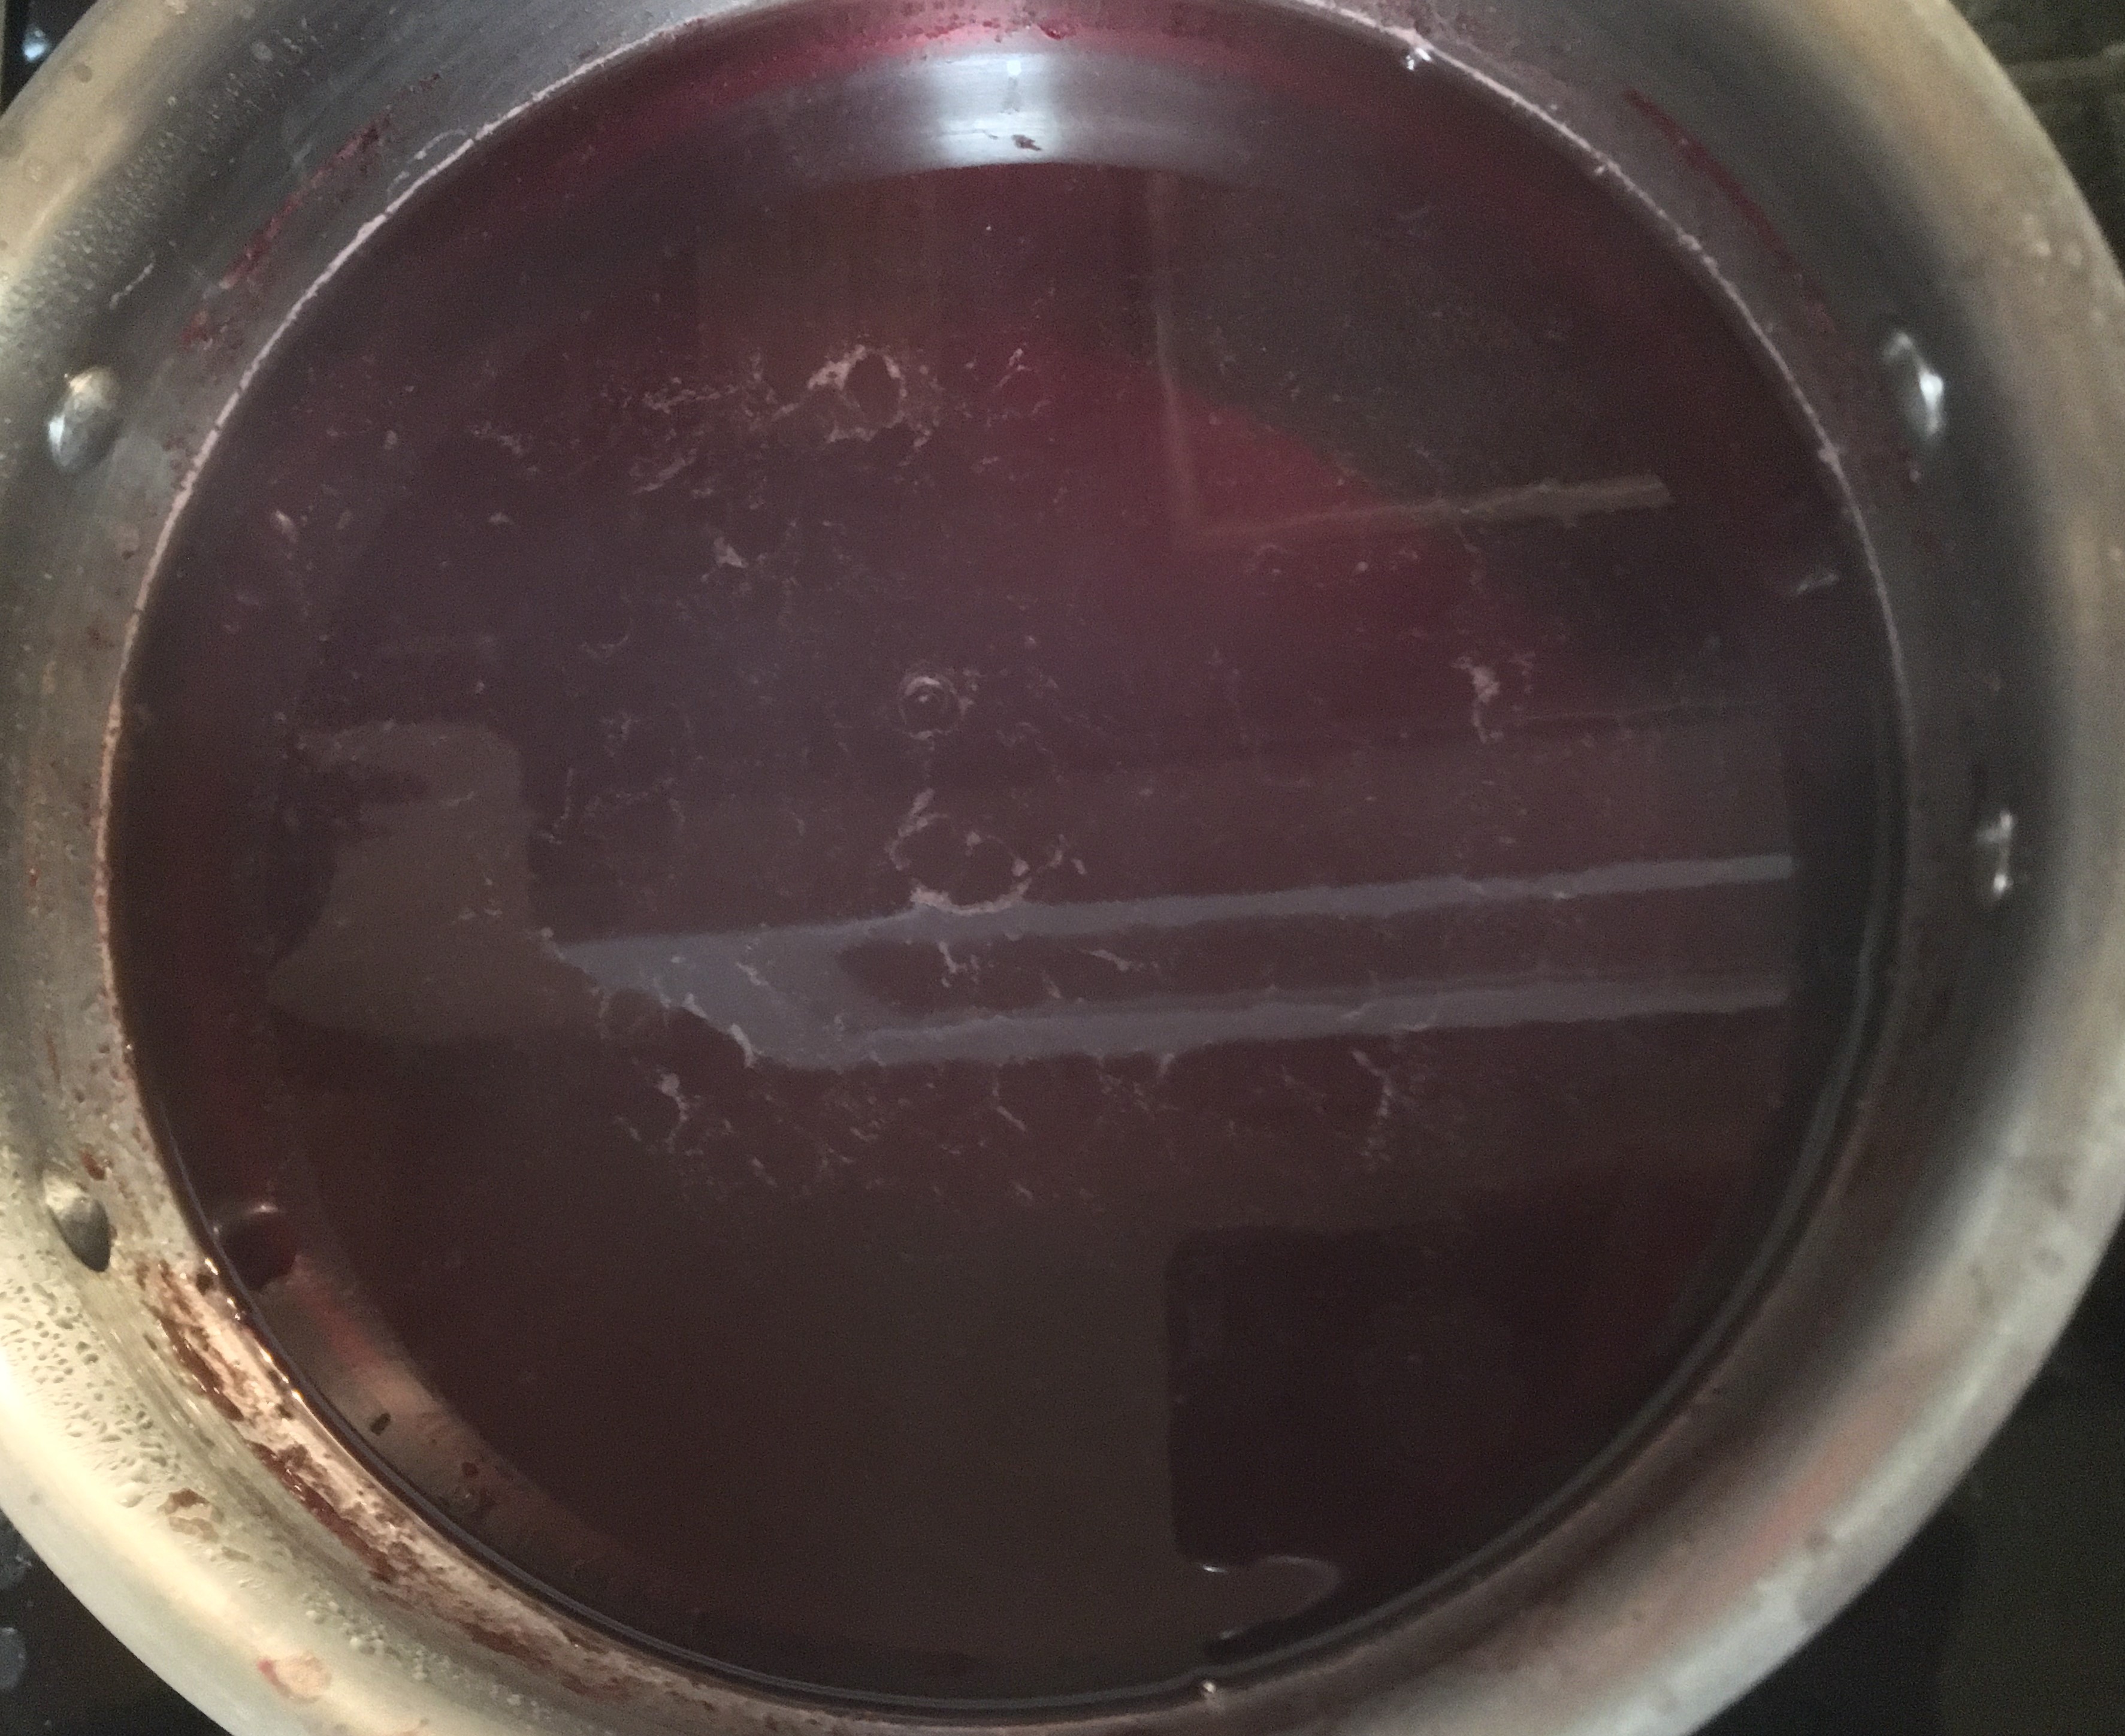
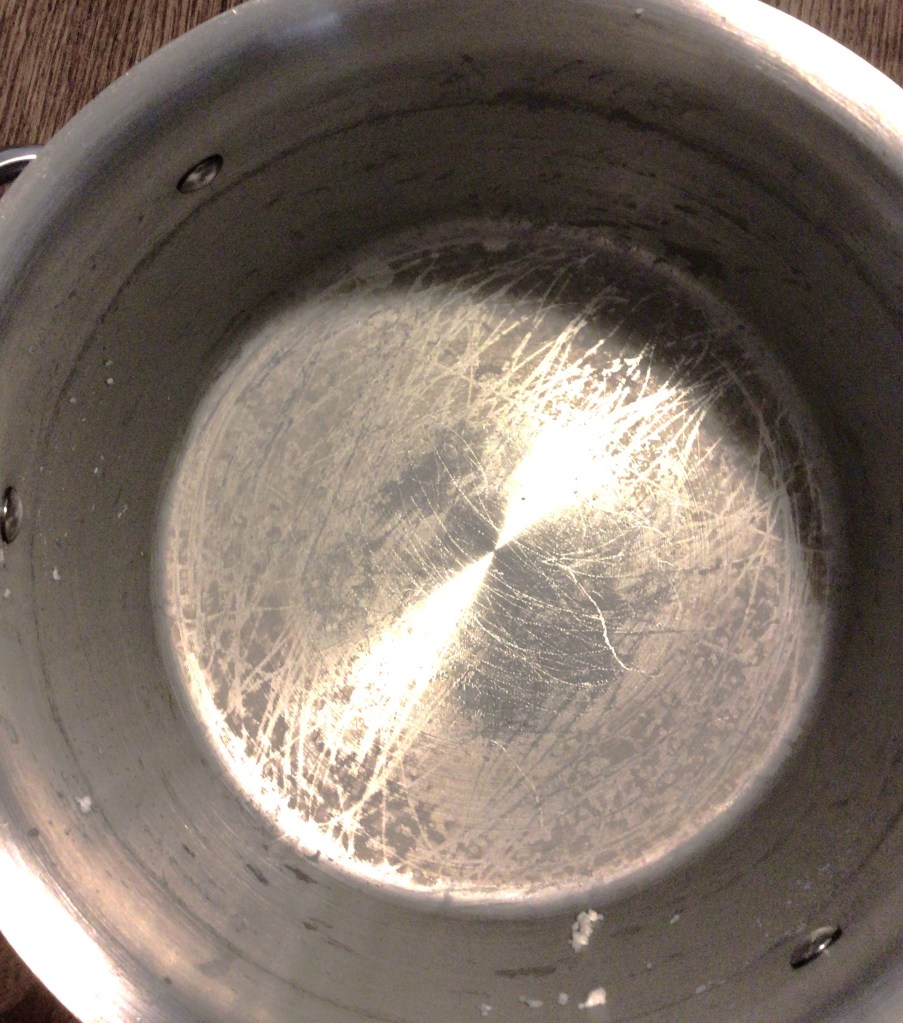
Before I get in the flow of my first time experience, I want to mention now another fear I had. It didn’t rear its ugly head until I had my pot on the stove and the milk already on heat. Let’s just say I’ve scorched many pans cooking milk based soups and chowders. If you cook with milk, you know what I mean. There comes a point where you just accept it as normal.
So now you understand what I mean when I say, I had a legitimate fear of scalding my milk because I’ve been told in the directions, that with Mozzarella cheese you have to be gentle when you infrequently “stir” the milk and you can’t circular stir your milk. Maybe some Italian Mama will comment and say, “Pssht, stir the milk.” Or maybe they’ll agree. So please Italian Mama’s comment and put some minds to rest!
Here is an after the cheese making shot of my pot. My pan didn’t scorch. This is cooked over medium low heat and this was the damage done. So if one of your fears is burning the milk, as long as you keep your temp low and slow you won’t burn your milk.
Making the Cheese
I know another real fear in cooking is not having pictures of what is normal so you have something to compare to. In what I’ve read in my own research, I haven’t seen any pictures like this. I want to set you up for success!
These are all in stage order so you can compare your own journey as you go.
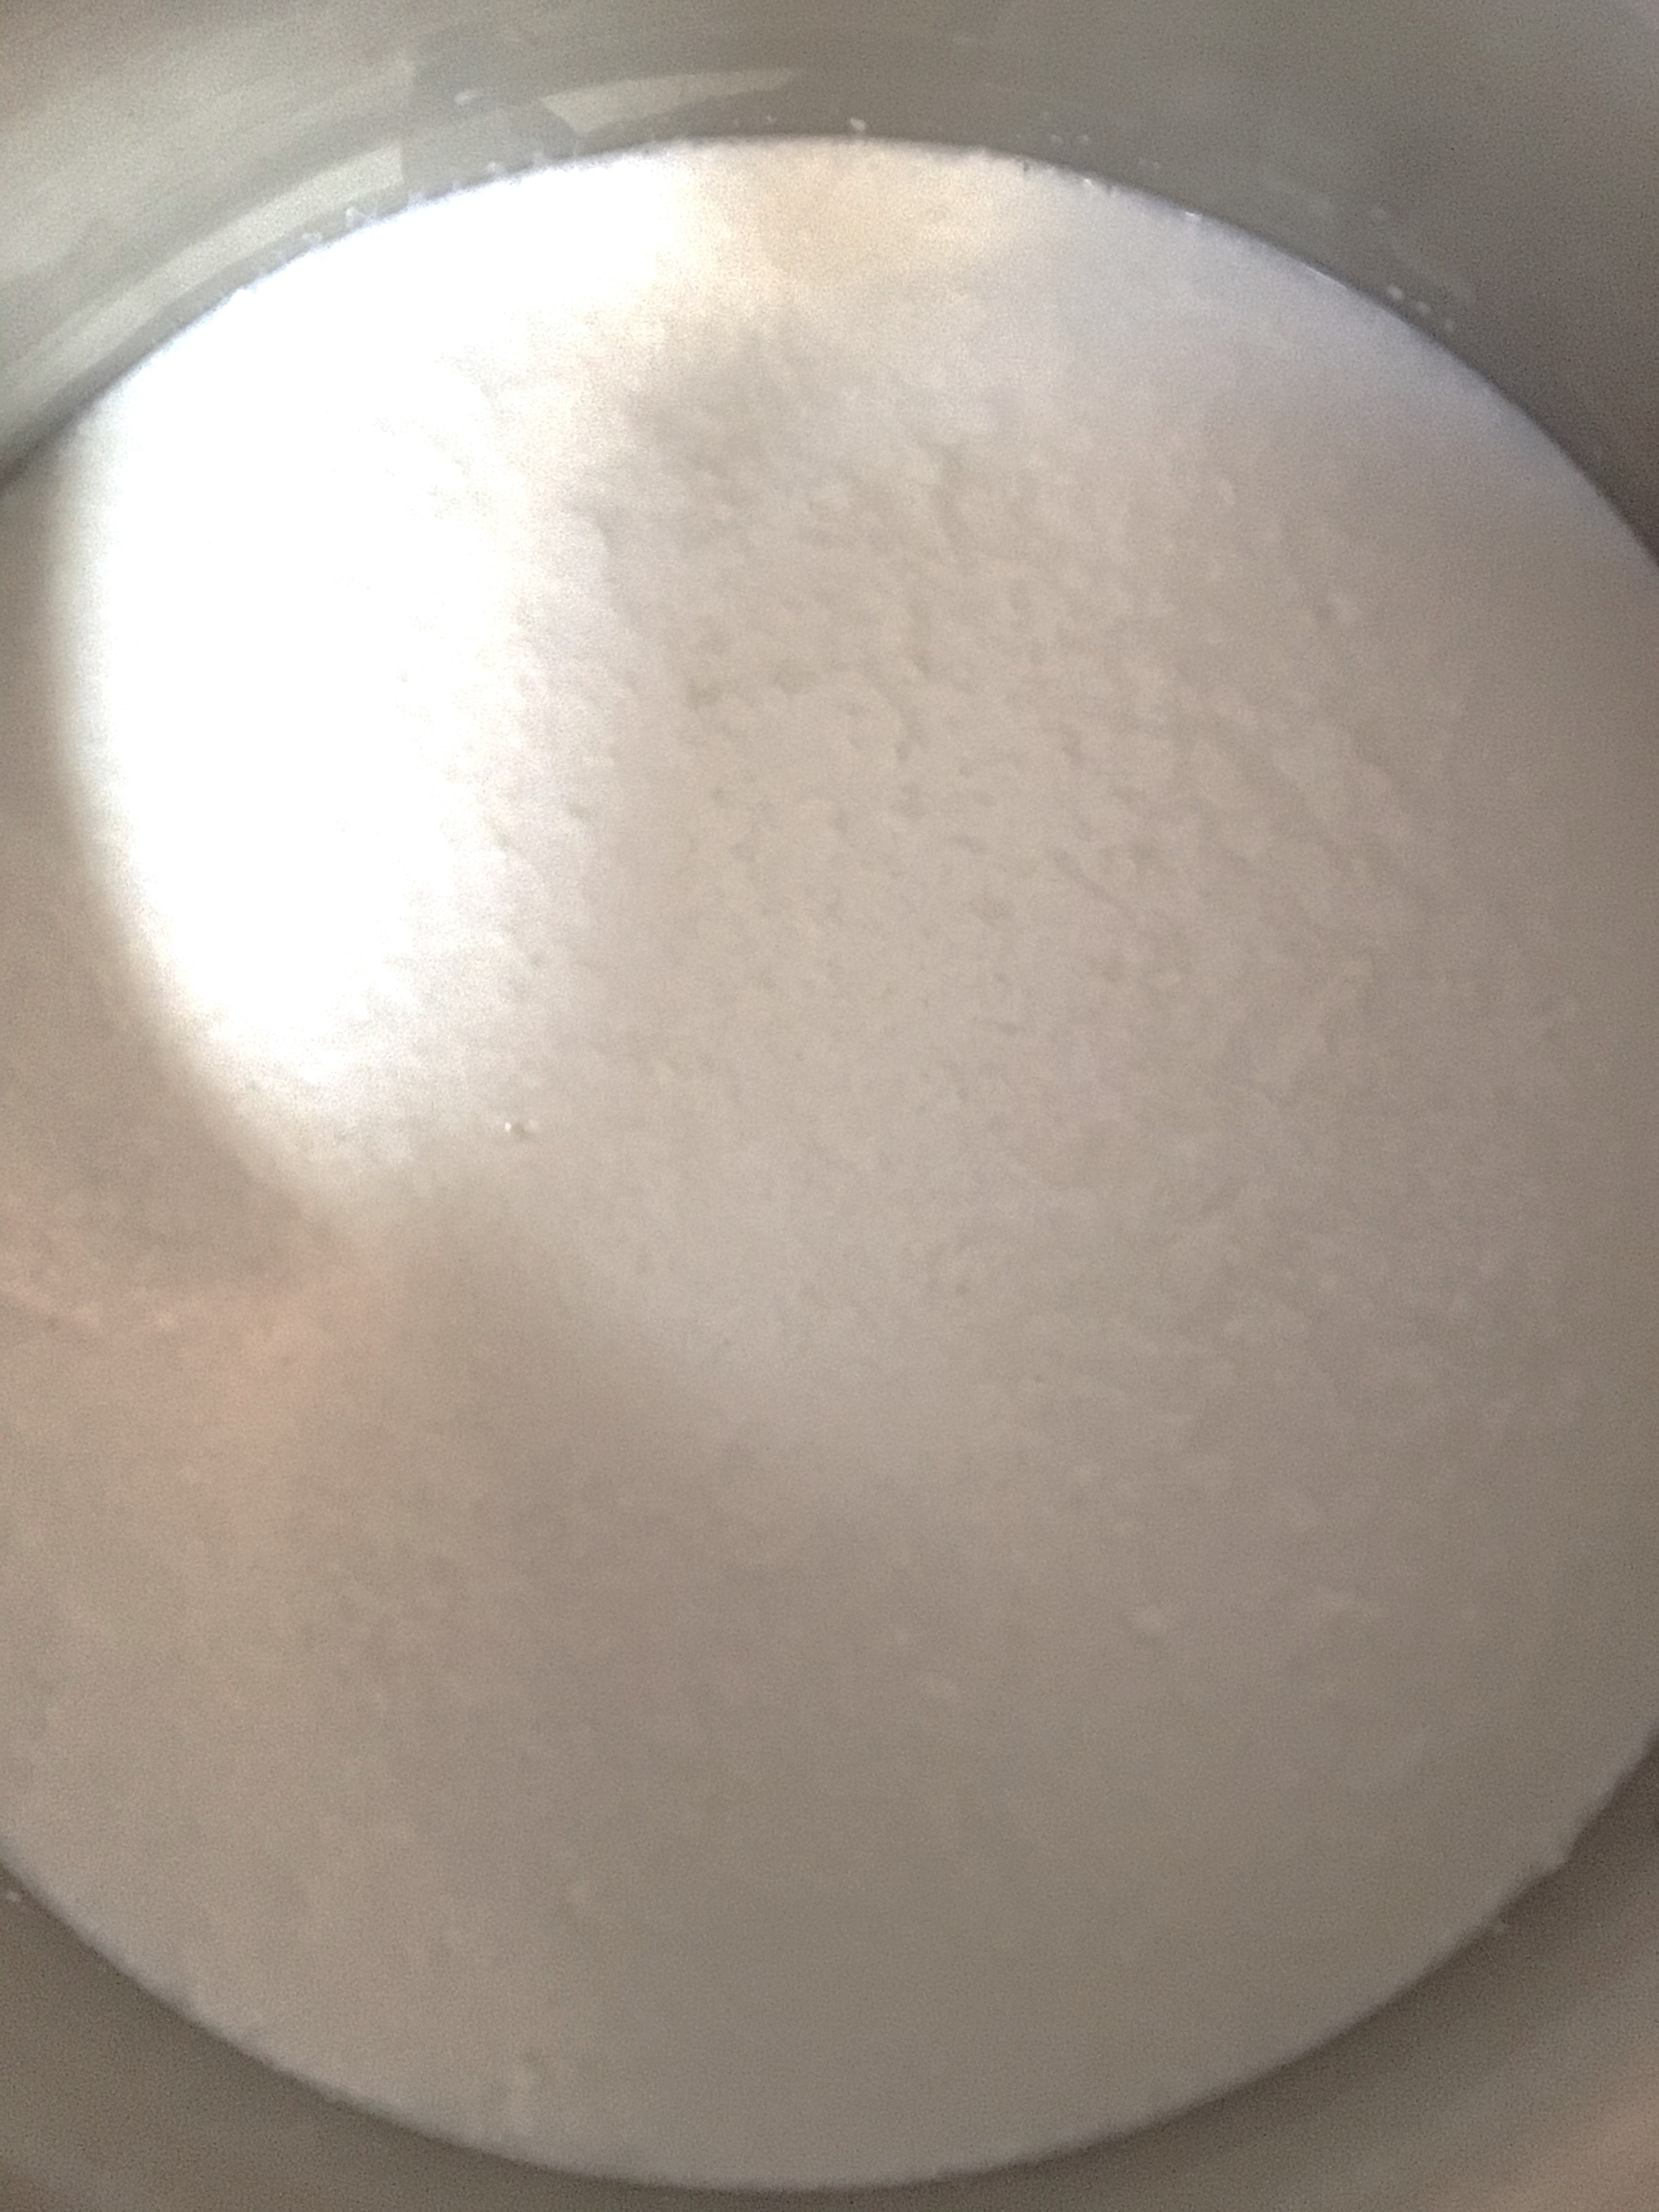
What I didn’t anticipate was how quickly the Acidic Acid works in curding the milk. That gets added to the milk before you turn heat on the burner. And almost right away curds started forming. Obviously the acid and the milk are going to react. So don’t freak out if you turn on your burner, look at your milk and suddenly think, “OMG did I just put in expired milk?!” No you didn’t. The process is already under way.
At 88°F I added the Calcium Chloride and Liquid Rennet.
After all this instant gratification of seeing curd growth, I have to admit it was hard to have the patience for curd temperature to reach 104°F.
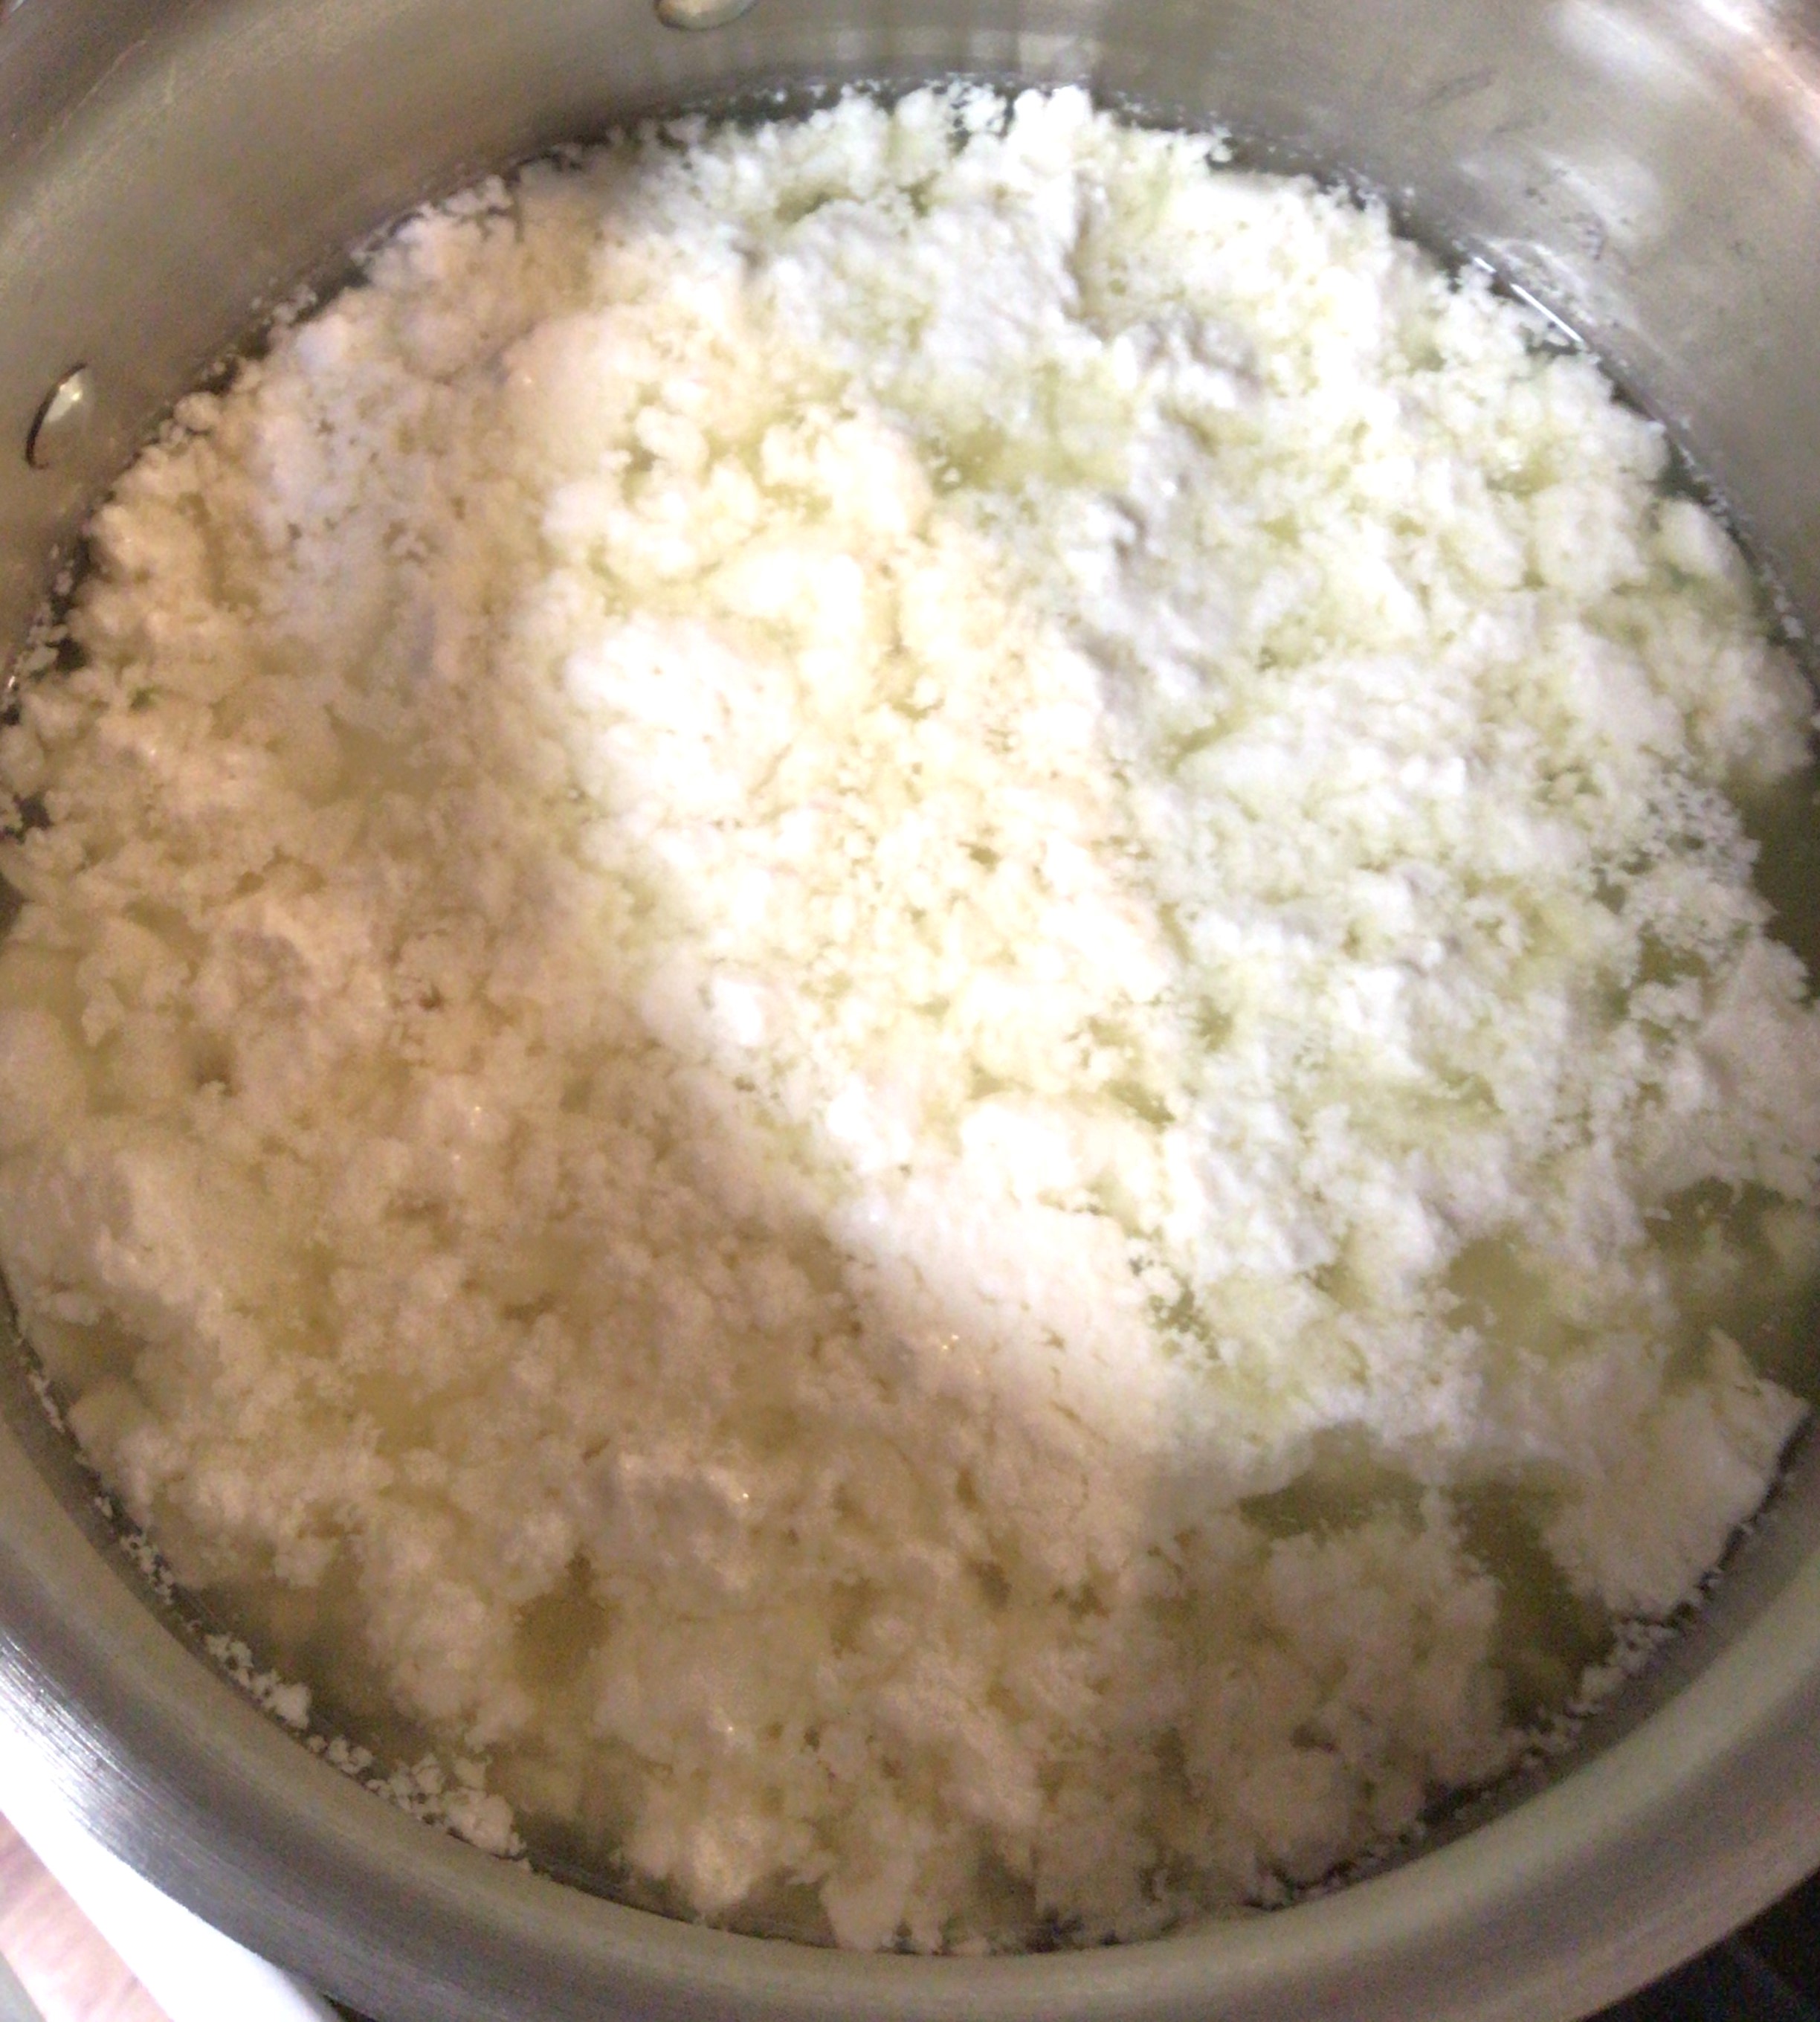
Again, as a first time cheese maker, I assumed that whey was going to be milky white. So you can guess how it felt when I saw the whey was yellow and I asked, “What did I do wrong?”
Nothing. I did nothing wrong. Whey is going to be yellow. The pictures below do no justice to it. It kind of reminds me of neon yellow lemonade. So if you have yellow liquid with your curds, you’re doing great!
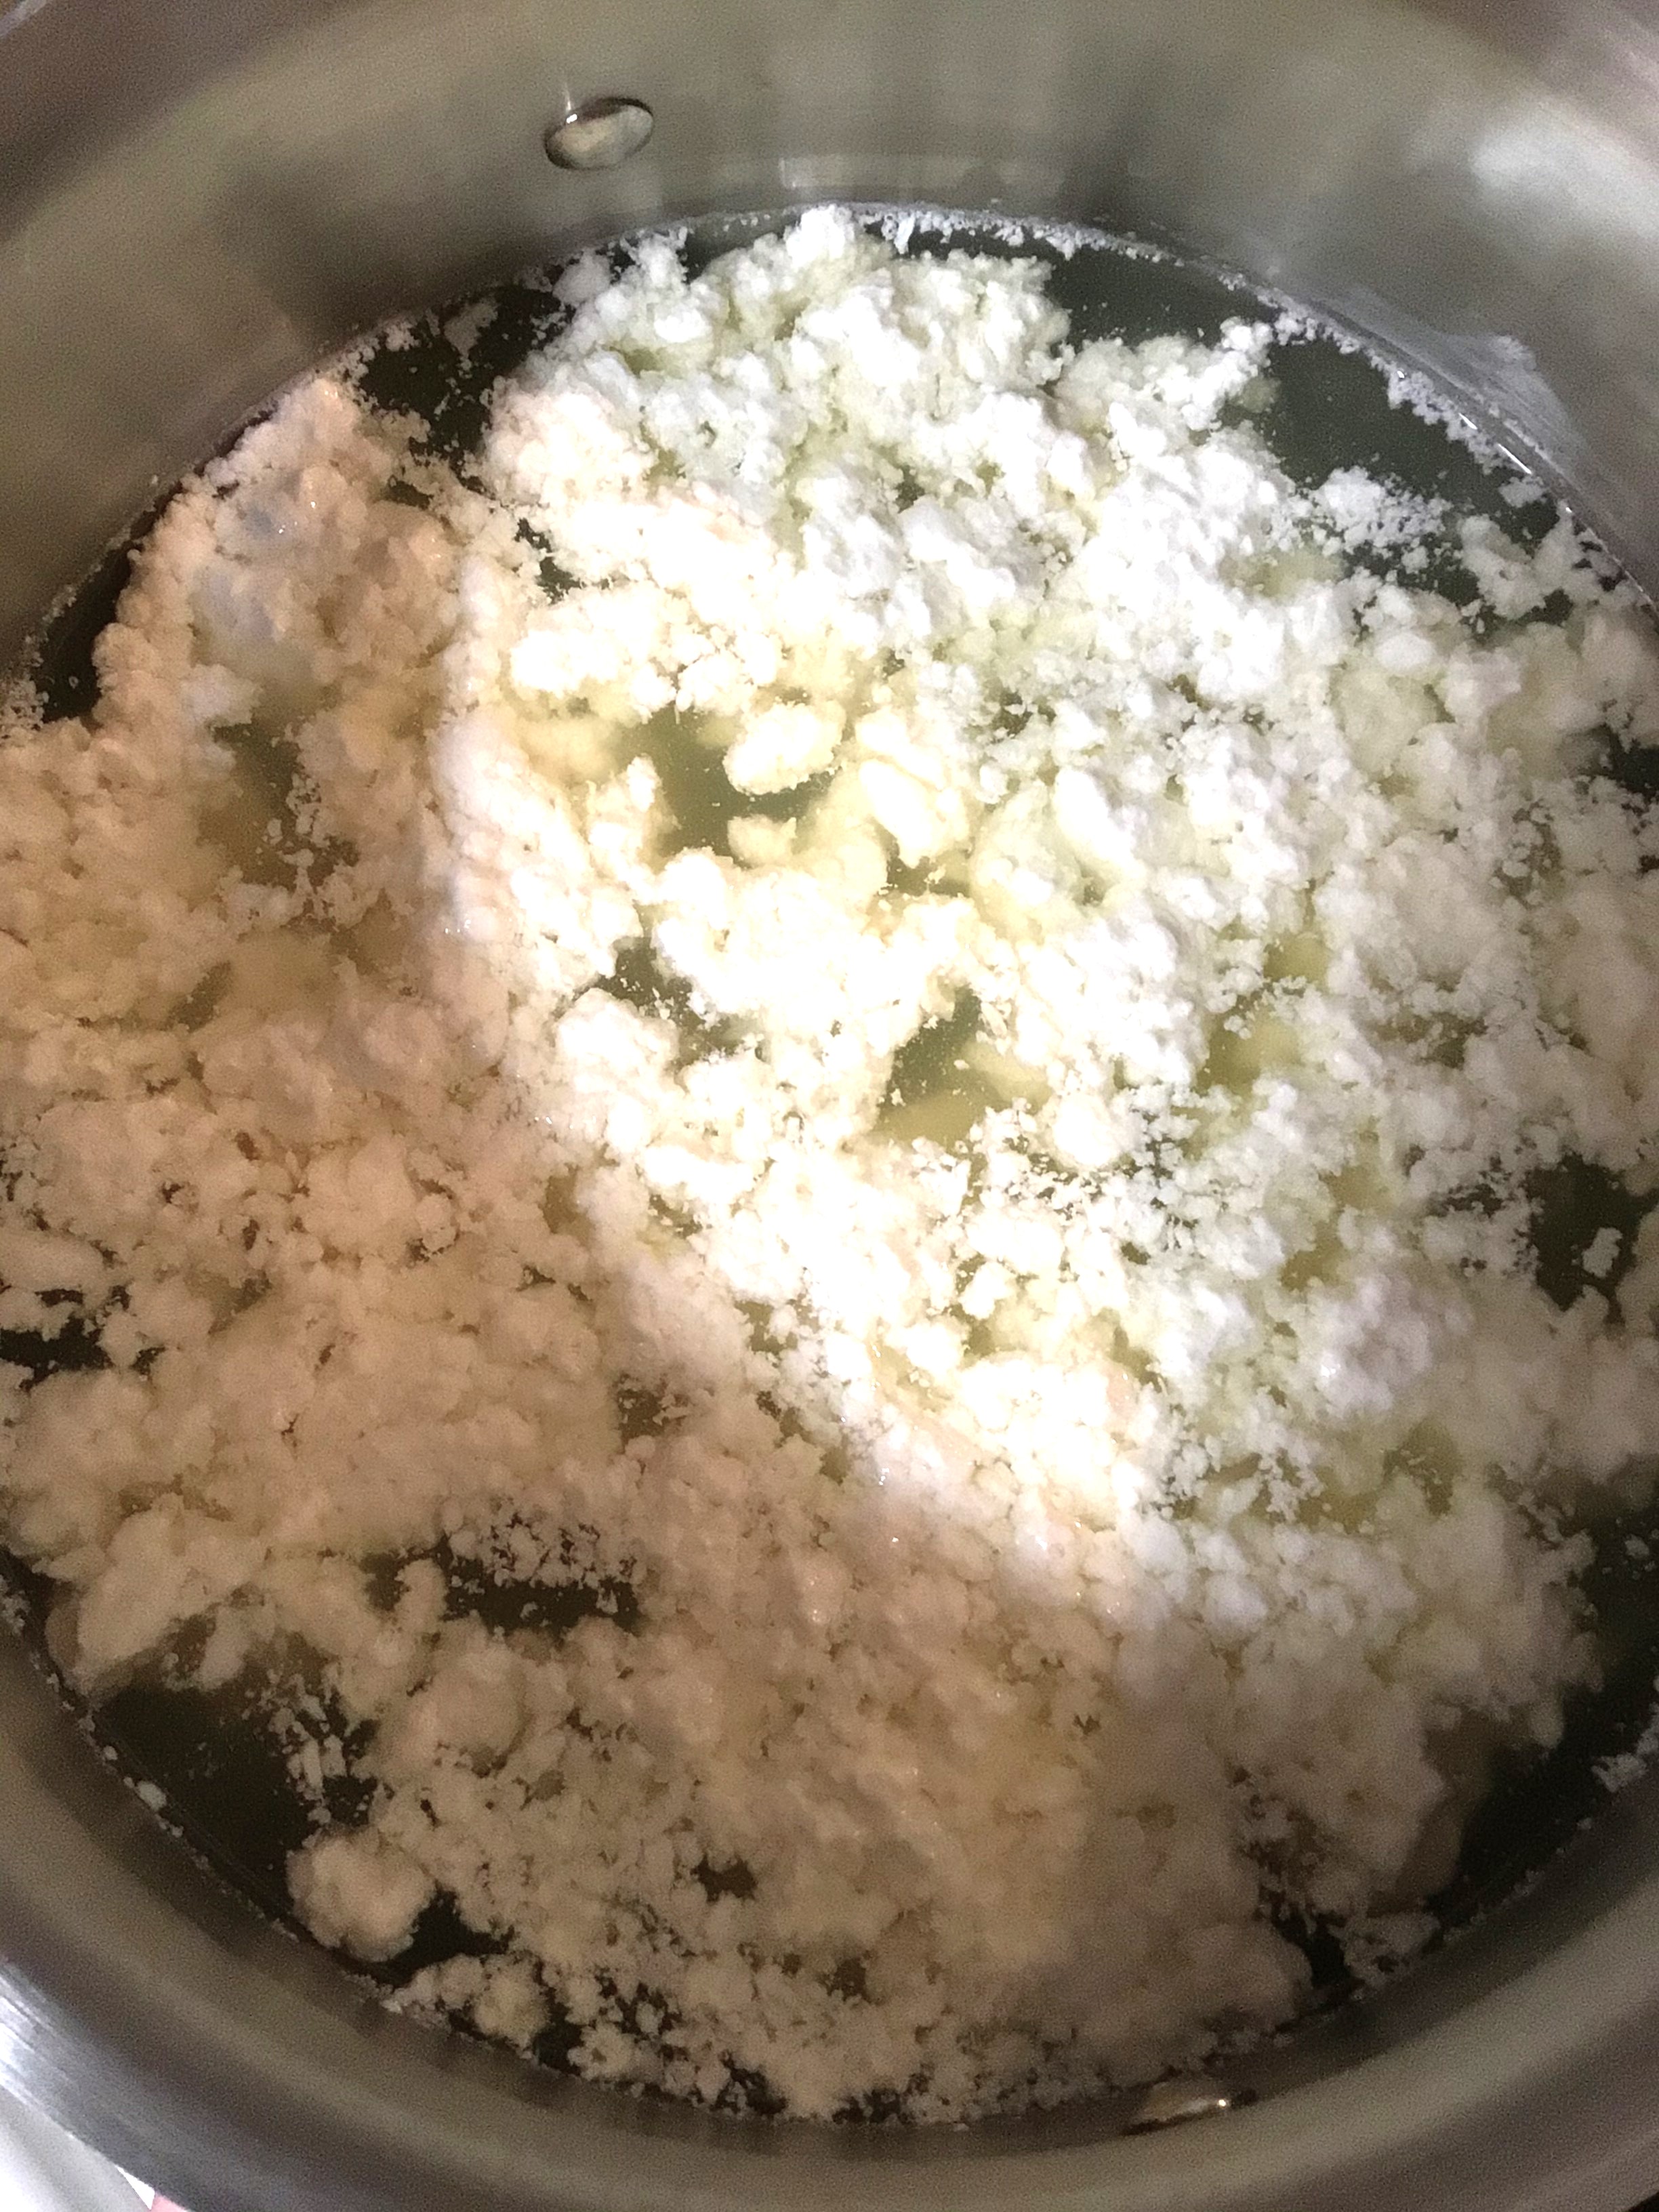
Once your curds come to temp, remove them from heat and let them sit for 2 minutes. Once the time is up it’s straining time!
I was super excited for this part! Looking down from the top of my pot, I thought I was going to pull out something like large squeaky cheese curds. I tried to be gently lifting the curds out of the pot with a slotted serving spoon. Low and behold, I was pulling out Titanic Iceberg cheese curds. Okay, maybe that’s an exaggeration, but there were a good dozen chunks that stretched over the edges of my slotted spoon. I felt like a rock star.
Once the cheese is all strained out there’s one of two methods you can go; stovetop or microwave heating of the cheese. Normally, I avoid using my microwave. I think it best serves me as a bread/cookie box. However, I undertook this new venture during nap time and the kiddos would be waking up any time. So I opted for the microwave. This method works, but I have the feeling I can get better results with the stove top next time. Again, I just don’t cook using my microwave unless I’m cooking popcorn or quickly heating leftovers.
The heating of the cheese is to help release the whey from the curds. And the light addition of salt before each 60 session of warming is to help extract the liquid from the curd. Once you have about a Tbsp of whey left you’re good to move on to the stretching and forming of the Mozzarella.
In the directions I was using, I was told I could use a metal spoon to fold over the cheese while it was hot. And you better believe I took advantage of that tip. (I still cringe at childhood taffy pulling. That candy was hot!)
By the time that I got to the point of this first picture, the spoon lost its effectiveness and I was ready to bite the bullet and go to town using my hands. It was still hot (something similar to a hot spa towel, hot but not flesh burning) but quickly cooled down as I stretched it a couple of times.
For shaping, I decided to go the method that bread makers use when folding the dough under to build up surface tension for boule bread.
Tip: This method of folding the cheese under did two things. One, when the cheese cooled to hold its shape, there’s a canyon like crevice on the center bottom. Two, when I cut a test slice for my mom today that surface tension made a dense slice. If you want a solid slice of goodness, this shaping method might work for you.
Tip 2: I suspect that if you’re looking for more of a string cheese pull apart texture, the method that you’re probably looking for is to keep with a taffy pulling method. Keep going with a pull and fold until you start to feel the cooling of the cheese tightening it up. Then I would focus smoothing the surface for that finished look.
Tip 3: If you’re looking for that soft, squishy ball of mozzarella, I’m pretty sure you’re looking to just stretch it a couple of times, smooth the exterior and then let it cool in your brining liquid or whey.
Once the cheese is shaped, it’s time to put it in liquid to cool and store. I should have just put the cheese back into some of its whey. Or even just water, because I had seasoned it to my liking before I stretched and shaped. The brine I had made was 1 Tbsp of kosher salt in 4 cups of water. It’s too salty for my liking.
If you are sodium sensitive or limit the amount of salt you use, I recommend skipping the storage in brine.
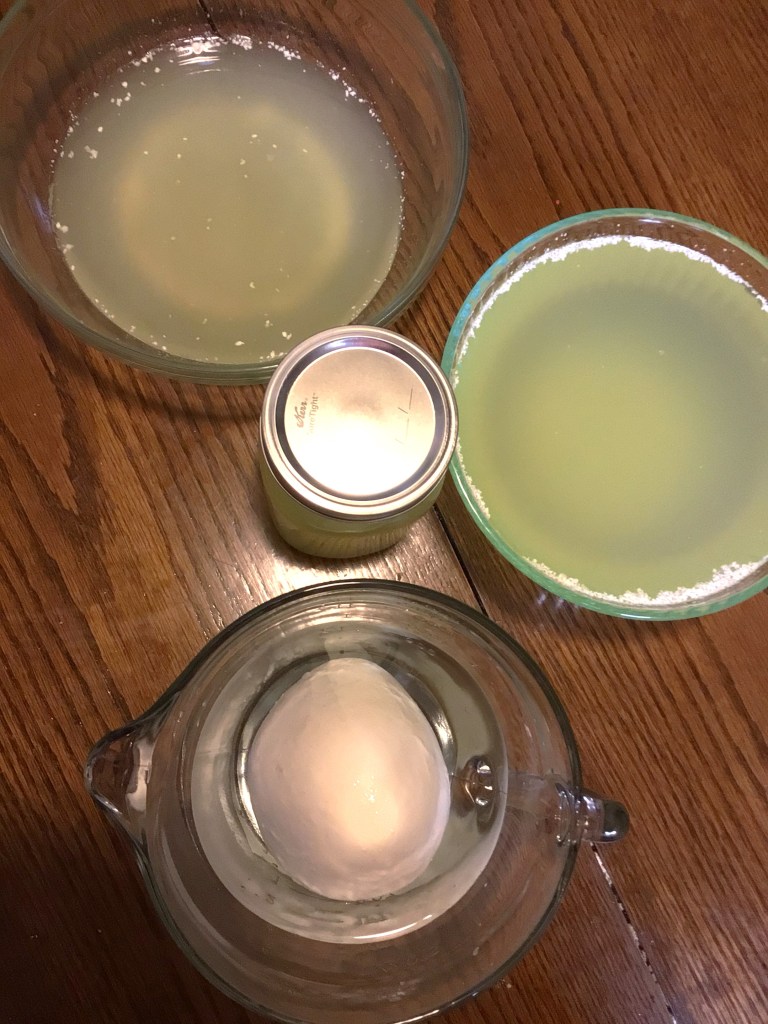
As you can see here, I have a bit more whey then I thought I would. And I looked at my table wondering what I’m going to do with all this whey. But I think I’m going to be okay. The day of and the day after I made the cheese, I used all the whey in the bowl on the top left.
What I’ve Used Whey For
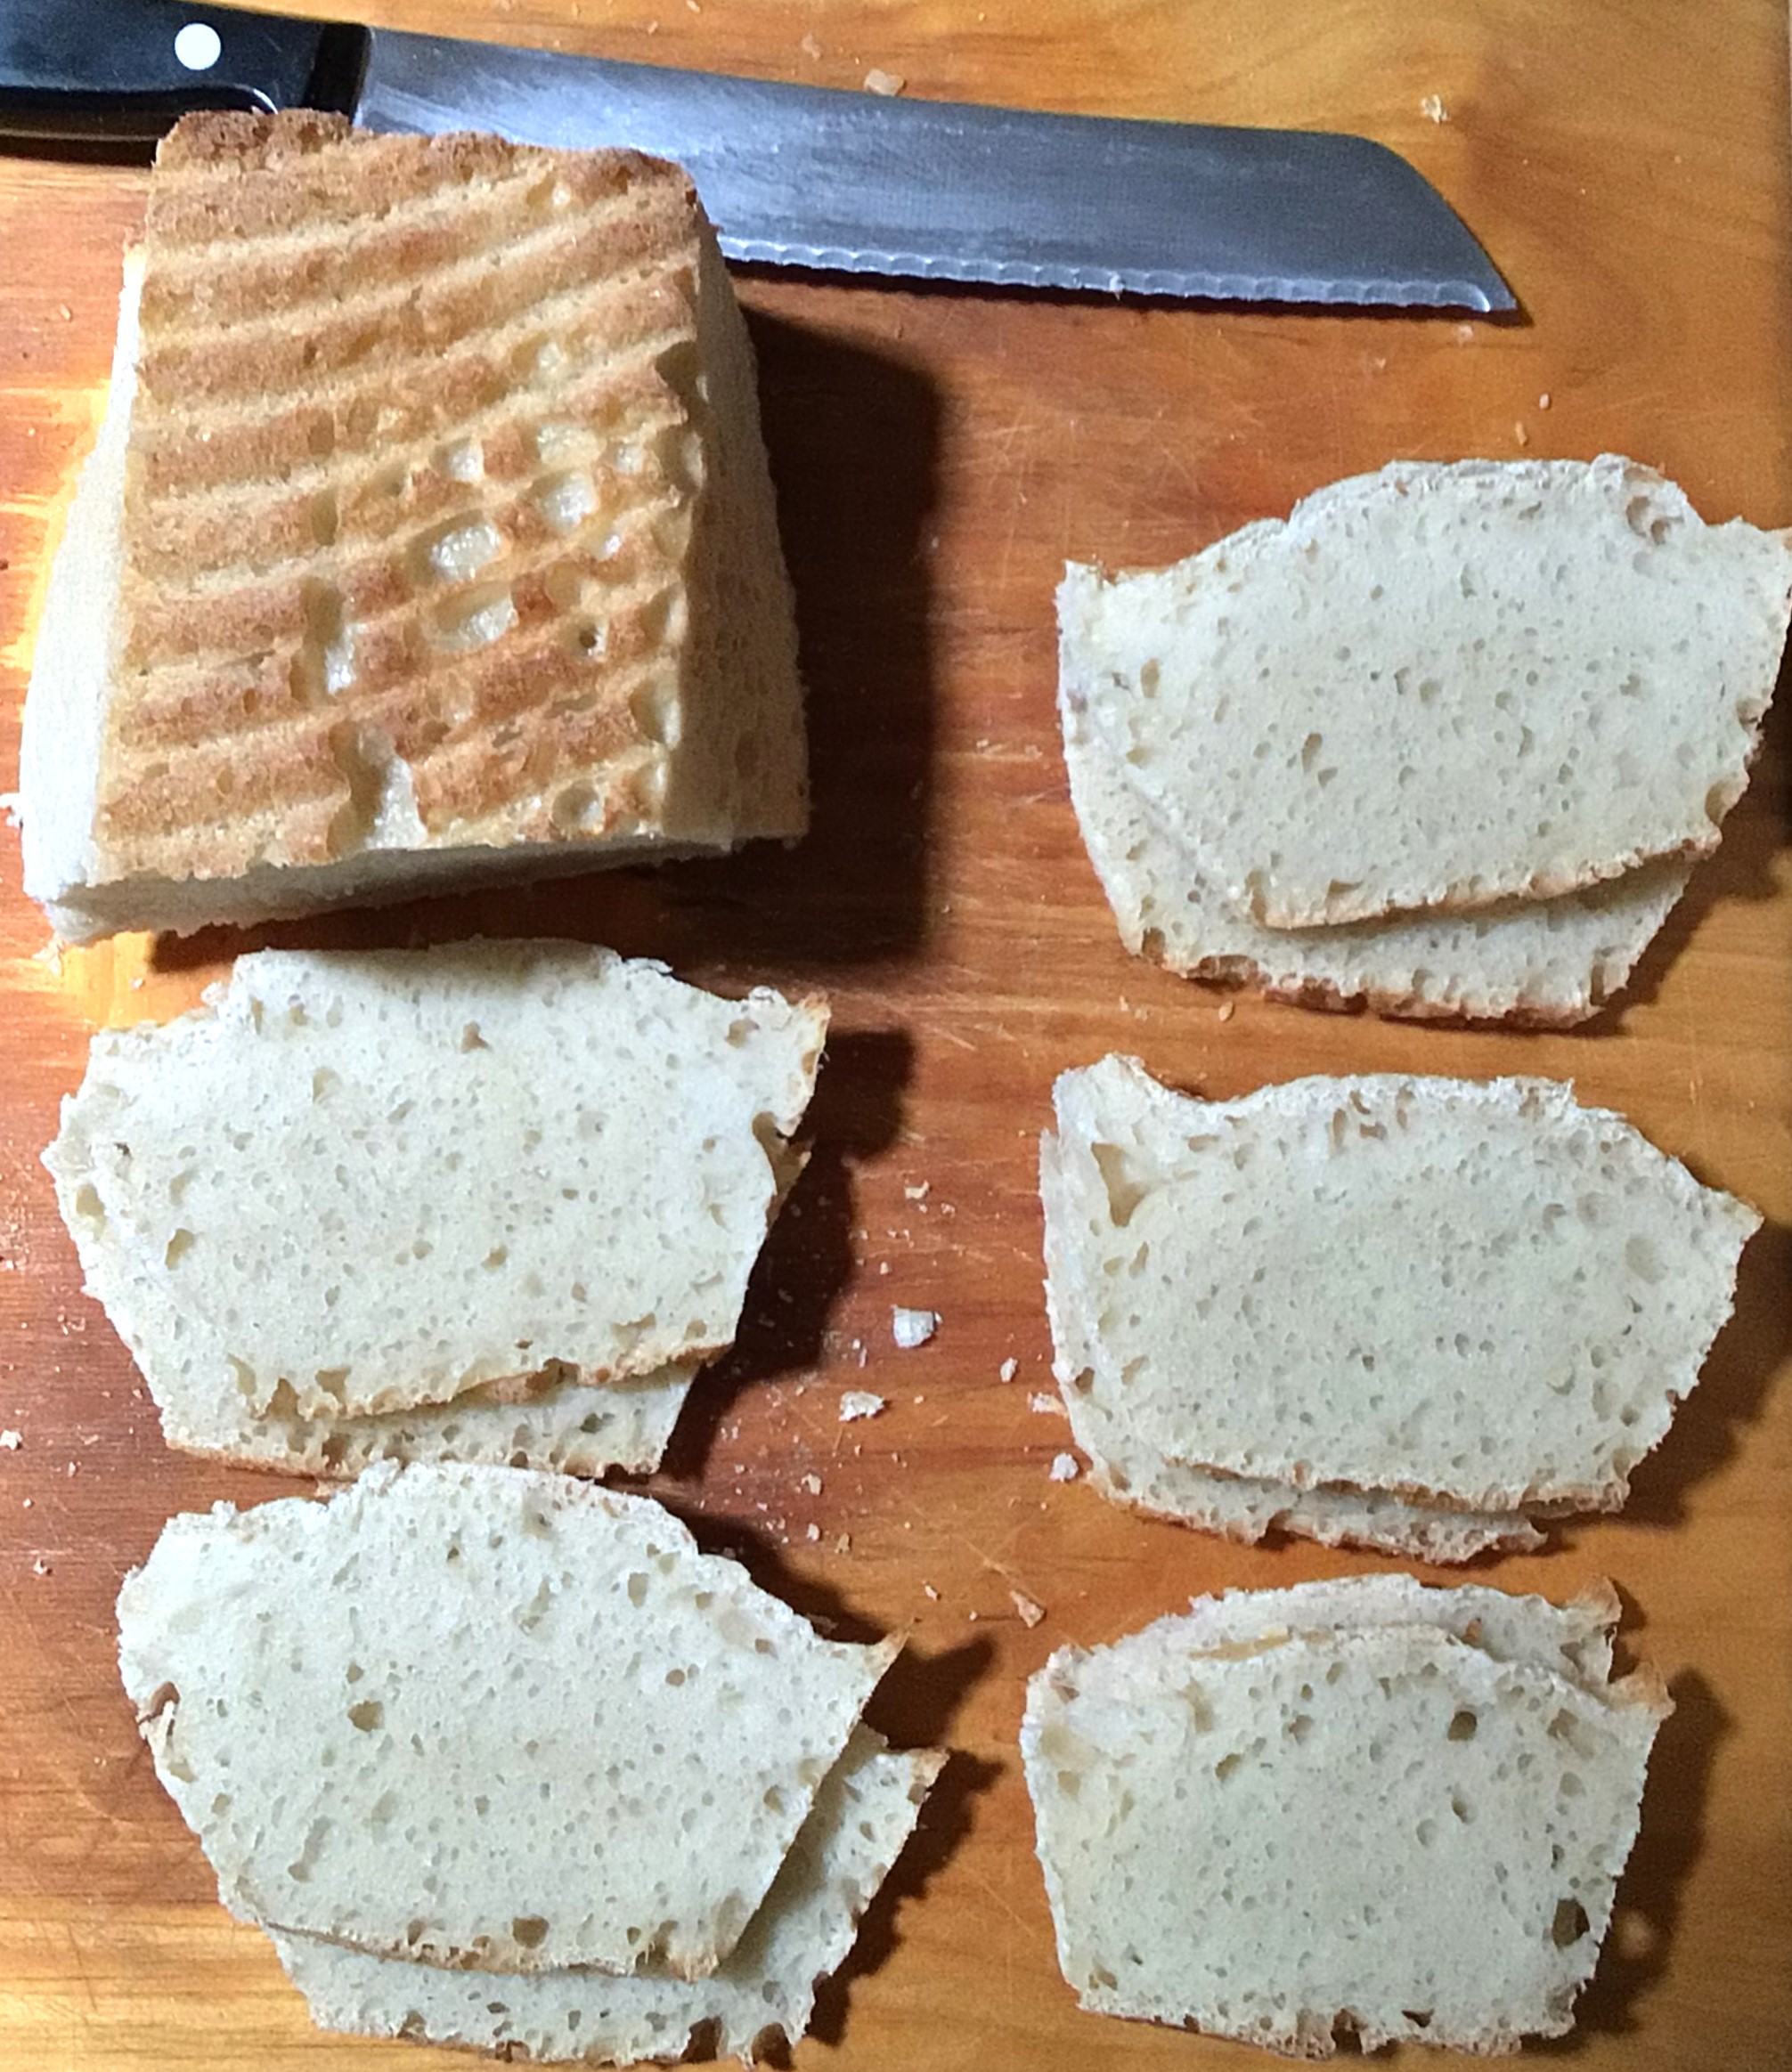
The first thing I made with the whey is my bread recipe that I posted a few weeks ago, found here. The full volume of milk that I use for my bread, I completely replaced with equal volume of whey.
There were a couple of differences that I found with using whey in my bread recipe. One, the dough was much wetter than I’ve ever seen my dough, even on high humidity days. (Picture below) I’m the only person in my family who doesn’t eat raw bread dough, but I have nibbled before just to know what everyone feels so appealing about stealing my dough during proofing. With the whey, the dough feels smoother in my mouth and has a more sweet and bread like flavor than just the overpowering flour flavor that my dough has with milk.
I accidently forgot my dough (thank you children who pushed all my buttons that evening) and my dough over proofed. Because it over proofed I can’t tell you an accurate description of how the whey proofed with the bread. Nor can I tell you how the flavor was different with the whey vs. milk. If you’ve over proofed your bread before, you’ve probably noticed that not only do you have flat tire bread, but there’s also a kind of funk to it. When I over proof bread, the only good thing it’s really good for is grilled cheese sandwiches. My boys won’t really touch it. However comparing over proofed bread flavor, I can tell you this. My boys at 3/4 of a loaf for their PB& J (asking me to make extra sandwiches–this only happens on fresh from the oven days of properly cooked bread). Flavor wise, the only difference from properly cooked and this over proofed was that the natural sourness of the bread was neutralized. And I was about ready to bust out my oil and vinegar and have that for lunch. So I’m excited to try again and do a properly proofed baking of bread with whey!
For Taco Night I decided to take advantage of whey’s natural probiotics, as well as solve my problem with homemade ranch dressing separating after a week.
Ranch Dressing with whey really surprised me! I used a premixed packet, added the store bought real mayo, and for the cup of milk that I normally use I substituted out 3/4 C of whey. I have never tasted ranch dressing that was so good! It had a citrus lemon flavor to it that just lifted it from normal hum drum standard condiment to I think I have a cooking secret ingredient. I had my mom taste it (and she doesn’t do ranch dressing) and she immediately said that she was so glad that she tried it. To her she picked out a cucumber like sub-note, which makes sense with my husband’s reaction that you can taste the herbs in the dressing instead of being overpowered by the mayo.
With the Refried Black Beans that I plopped out of the can into my little sauce pan, I added whey instead of water to get that smooth spreadable consistency. If you think that canned beans are heavy, you most certainly won’t think so after adding whey to it. Again, there was a citrus note that just lifted it into something lighter and much more pleasing to eat.
Advertisements
Let’s just say that those two changes were enough to transform Taco Night into a let’s stay home and skip eating out. I have had some amazing authentic Mexican Food from Chefs who used family recipes. And the only restaurant I would now take over my family Taco Night is Los Cubanos in San Jose, where the Chef has cooked for Presidents and A-Listers.
I am amazed at how much whey can improve the flavor of run of the mill, standard recipes.
As I mentioned earlier, I’m writing this post as a first time cheese maker, so you can have an idea what to expect from a first timer and not someone who has been making cheese over and over and perfected their skills before sharing with the world. I want you to know what you can expect when you first try your hand at cheese making.
Please Try! I want to know what results you find.
As you can see I’ve only tried the whey in three things. But I did pull a search of different ways that whey can be used. I’m going to forewarn you that the list that follows is extensive, but don’t let it intimidate you. I’m looking at this list with Christmas Morning excitement, because the quantity of whey in my fridge is going to get used up AND there are so many different things that I get to try! And let’s face it, I am definitely going to be making more cheese in the future.
Other Uses For Leftover Whey
Ferment Foods “such as sauerkraut, ginger ale, ketchup, and pickles.” Almanac.com
Added to your stock of choice (replacing a cup or two of water)
Use when making Risotto
Substitute for Orange Juice in smoothies and baking.
Substitute for Lemon Juice in recipes, vinaigrette, and cocktails
Make Fermented Salsas, Dips, & Spreads (more recipes on this one link than I can state. Looks like it covers just about everyone’s flavor profile. So you should be able to find at least one to excitedly work with)
Expectations for Best Use Dates
From the Cheese Making directions I used, the Mozzarella is good for 2 week when stored in bring or water. It can be frozen for up to 3 months.
From what I’ve read, frozen whey is good for 3-6 months. (But you will not be able to make any cheese products from frozen whey.) People have made Ricotta cheese with whey that’s been in the fridge for 4 days. One source says that it’s good for 5-6 days. Another says no longer than a week. If you dehydrate it into a powder, you have 6 months refrigerated or 6 days at room temperature on the counter.
If you are looking for a more professional answer, instead of experiential hearsay, the USDA liquid milk products are good in refrigerators for 1 week. Cheeses are good frozen for 3 months. This doesn’t answer precisely for liquid whey, but it appears to fit with circumstantial evidence.
So if you don’t think you’ll get to all your whey right away, be sure to freeze it.
Your whey has gone bad when it has a rancid smell and/or bitter taste.
Pulling from being a breast feeding mom “rancid” and “bitter” may not be what you think. It’s more of an “off” sent/flavor. Yes I tasted my fresh breast milk and warmed frozen breast milk. When the milk was within the 6 month recommended frozen window, it warmed with not much flavor difference. Older freezer milk, when warmed did not have the same flavor. It had more of a sour instead of sweet taste.
In the same manner I recommend that you take a little taste of the liquid whey that you produce and focus on remembering the smell. That way when you ever have a question if the fresh or frozen liquid whey is still good you have a working knowledge to pull from instead of the random descriptors that writers use to convey a thought. After all your taste buds are going to pick up something different than mine, and the milk we could be using could be different in base flavors. (Ask a picky child what this means LOL.)
I know this is a lot of information, but I hope it empowers you into making some cheese and using the whey for other uses. Be sure to leave a comment below about what cheese you make and what you’ve made with the whey.
I know that I will never look at a gallon of milk the same!
Check out what’s new in my store for Cut Files that you can use on your favorite crafting machine. New Releases go live every Monday!
Processing…
Success! You're on the list.
Whoops! There was an error and we couldn't process your subscription. Please reload the page and try again.


Leave a comment