Baking Blues

In case anyone ever wants to know, the time I can get my cooking on and experiment is when the rest of the family is in bed asleep. The down side is that baking usually wakes my husband up and he has instant munchies. Did I mention that it doesn’t matter how much noise I make, what wakes him up is the aroma of fresh baked goods?

The funny part is that while I was editing photos (while the last batched finished baking) he comes in and asks me which one is the best one!

It’s moments like this where I color coded my muffins. Originally I did it, to make it easier to differentiate between the different blueberries. But it made it easier to give a midnight “unbiased” taste tester say which one he preferred. He chose the yellow muffins, for the record, and we’ll get to the muffins in just a moment.

Difference Between Preserved Berries

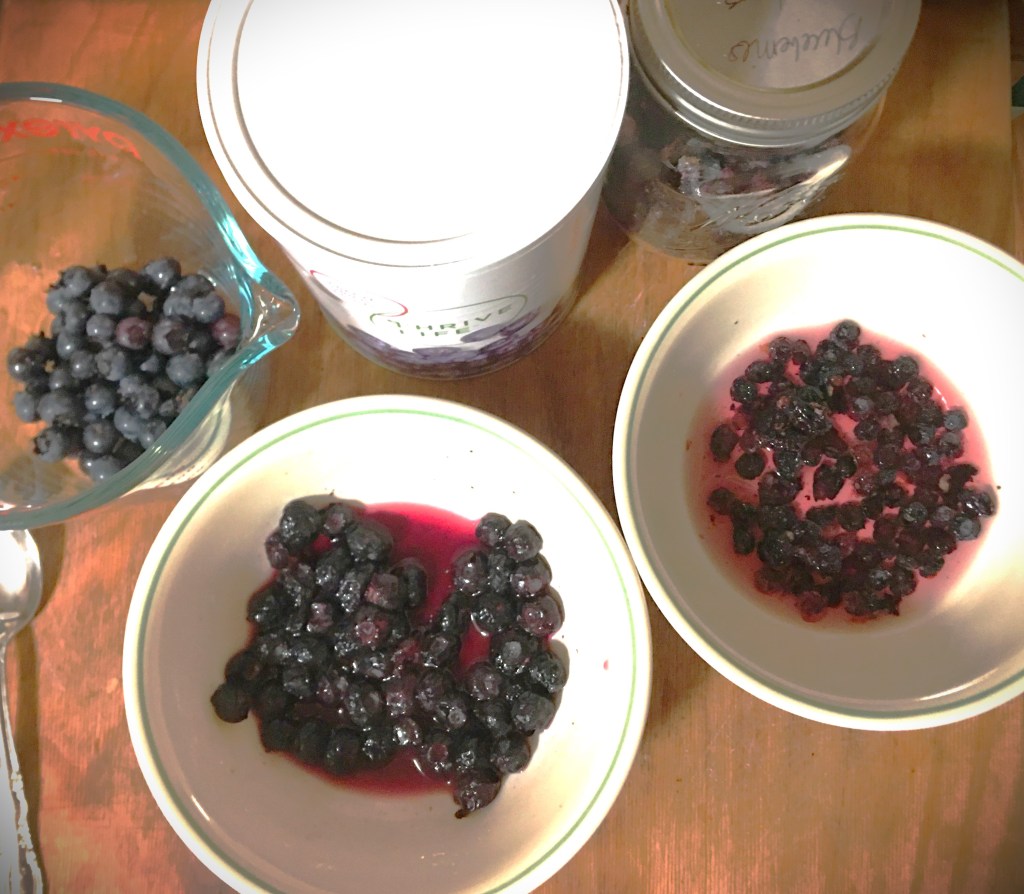
Last week I gave the run down on how the different preparations of the berries turned out in their preserved state. Above is a picture that I didn’t use last week, because I reconstituted the berries for making the muffins. From left to right, you’re looking at fresh blueberries, freeze dried, and dehydrated.

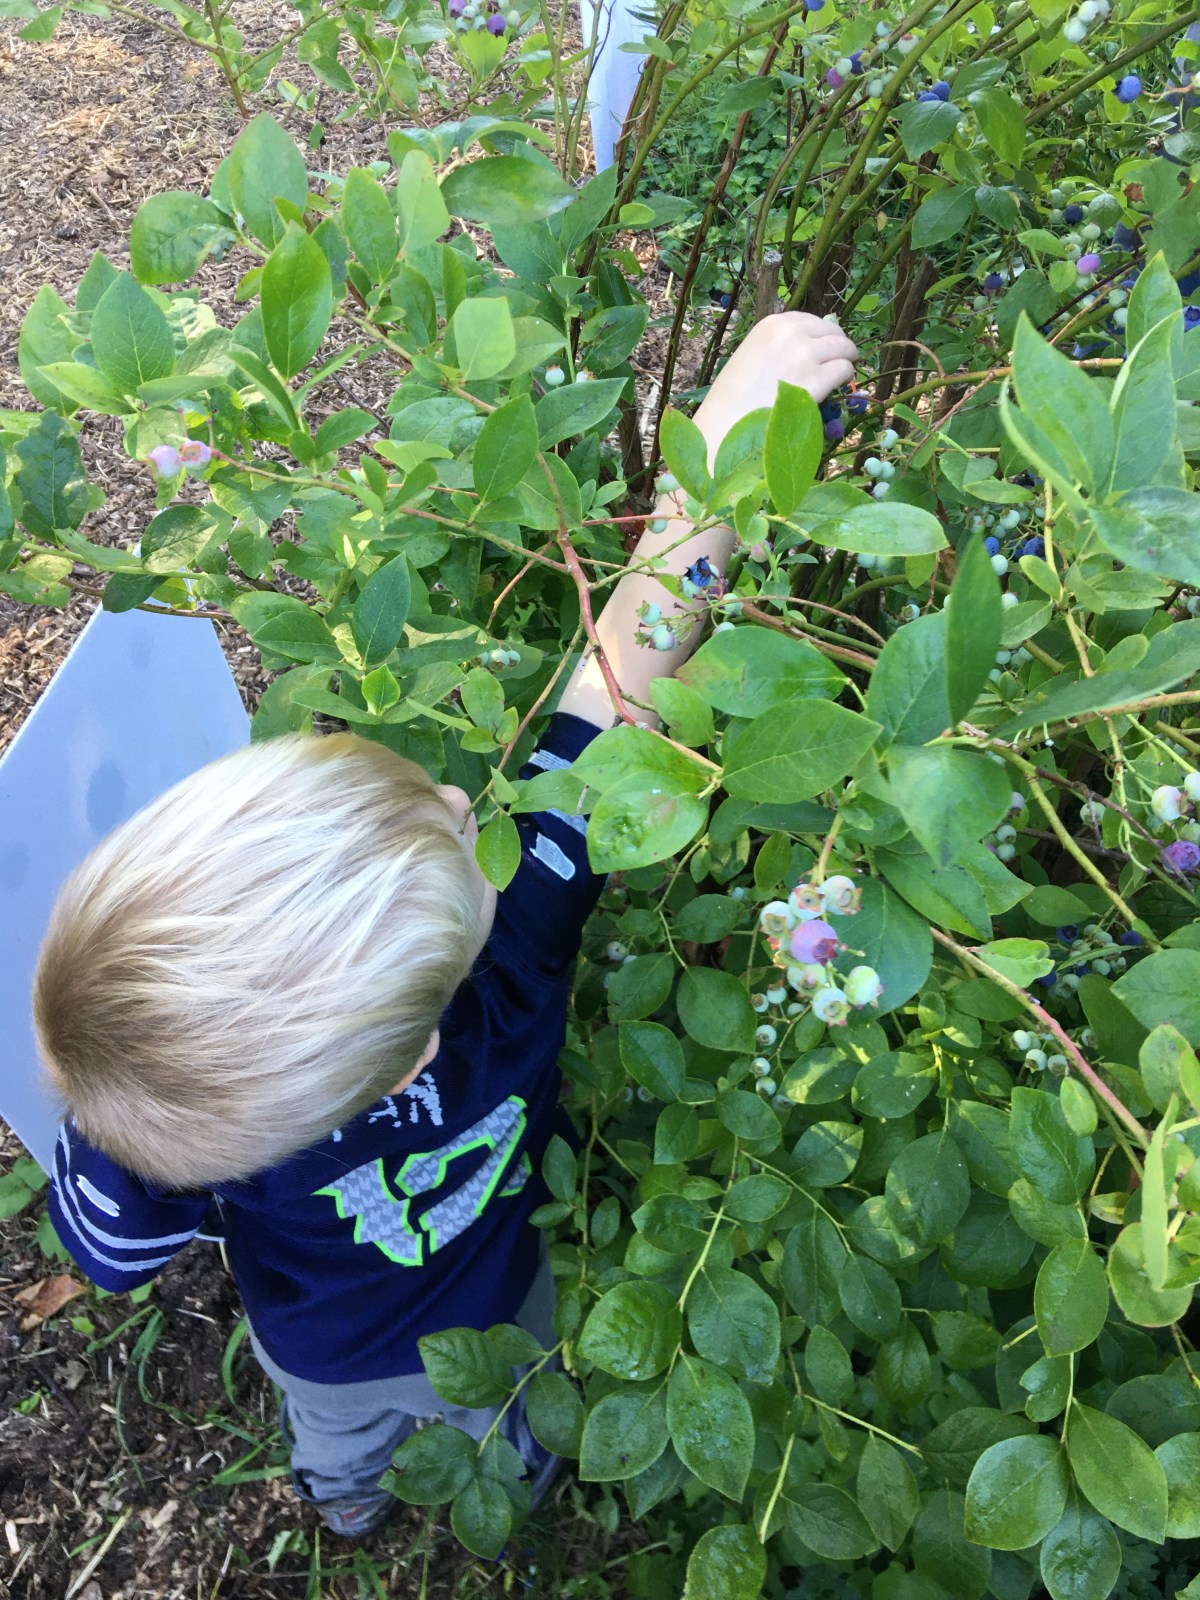
I really can’t tell you how much I’ve been enjoying the berries we picked. There is such a difference in quality of flavor. So if you haven’t picked blueberries for yourself, please do this for you. I know you will not look at store berries the same!

The freeze dried blue berries (before reconstituting) were a trip. They had a near fresh blueberry flavor and they were like a powder bomb in your mouth when you bite into them. There was a moment where I had to remind myself what it was that I just bit, because it confuses the brain when you’re not use to this texture. BUT… when you reconstitute them, let me tell you. The closest I can describe them is that they taste just like the store berries. They’re not as good as the fresh berries I picked, but that could have been because they are different breeds of blueberries. That’s enough to give a little flavor difference. I did drink the juice in the bottom of the bowl and that DID taste just like the blueberry juice that I made in this next section. That closeness alone is what makes me sold on freeze dried blueberries. (Aside from the obvious that they are shelf stable and last a lot longer than fresh berries.)

I reconstituted the dehydrated berries for the same length of time as the freeze dried. If you remember from last week, I described the dehydrated berries as having a bite to them. I’m personally not a fan of eating the dehydrated blueberries as is. BUT once they’re reconstituted, they take on a texture very similar to craisins or raisins that are on the drier side. I would definitely put those on a charcuterie board or several other snacking options. I chose not to drink this reconstitution water, as you can see it looks like colored water. I know I would have been disappointed. It might be a different story if I used hot water instead of room temp and/or I let it sit longer than the 20 minutes that I did (while making my muffin mix).

Now that you’re all caught up on the different berries, lets see all that I made with them. Except for the muffins, all these recipes were new to me over the last month. So I hope you get some inspiration also and try something new!

Blueberry Juice

I needed to make blueberry juice for the kiddo friendly blueberry cordial that I wanted to make for the boys. (They heard that I was making cordial for myself and they wanted some too. So here’s the first stop.)

I’m going to save you the time–DO NOT look up how to make this on YouTube! It’s one of those processes where they all look alike and they all do pretty much the same thing to them. And those who were difference, like one lade added milk, it was just not going to fly for making cordial.

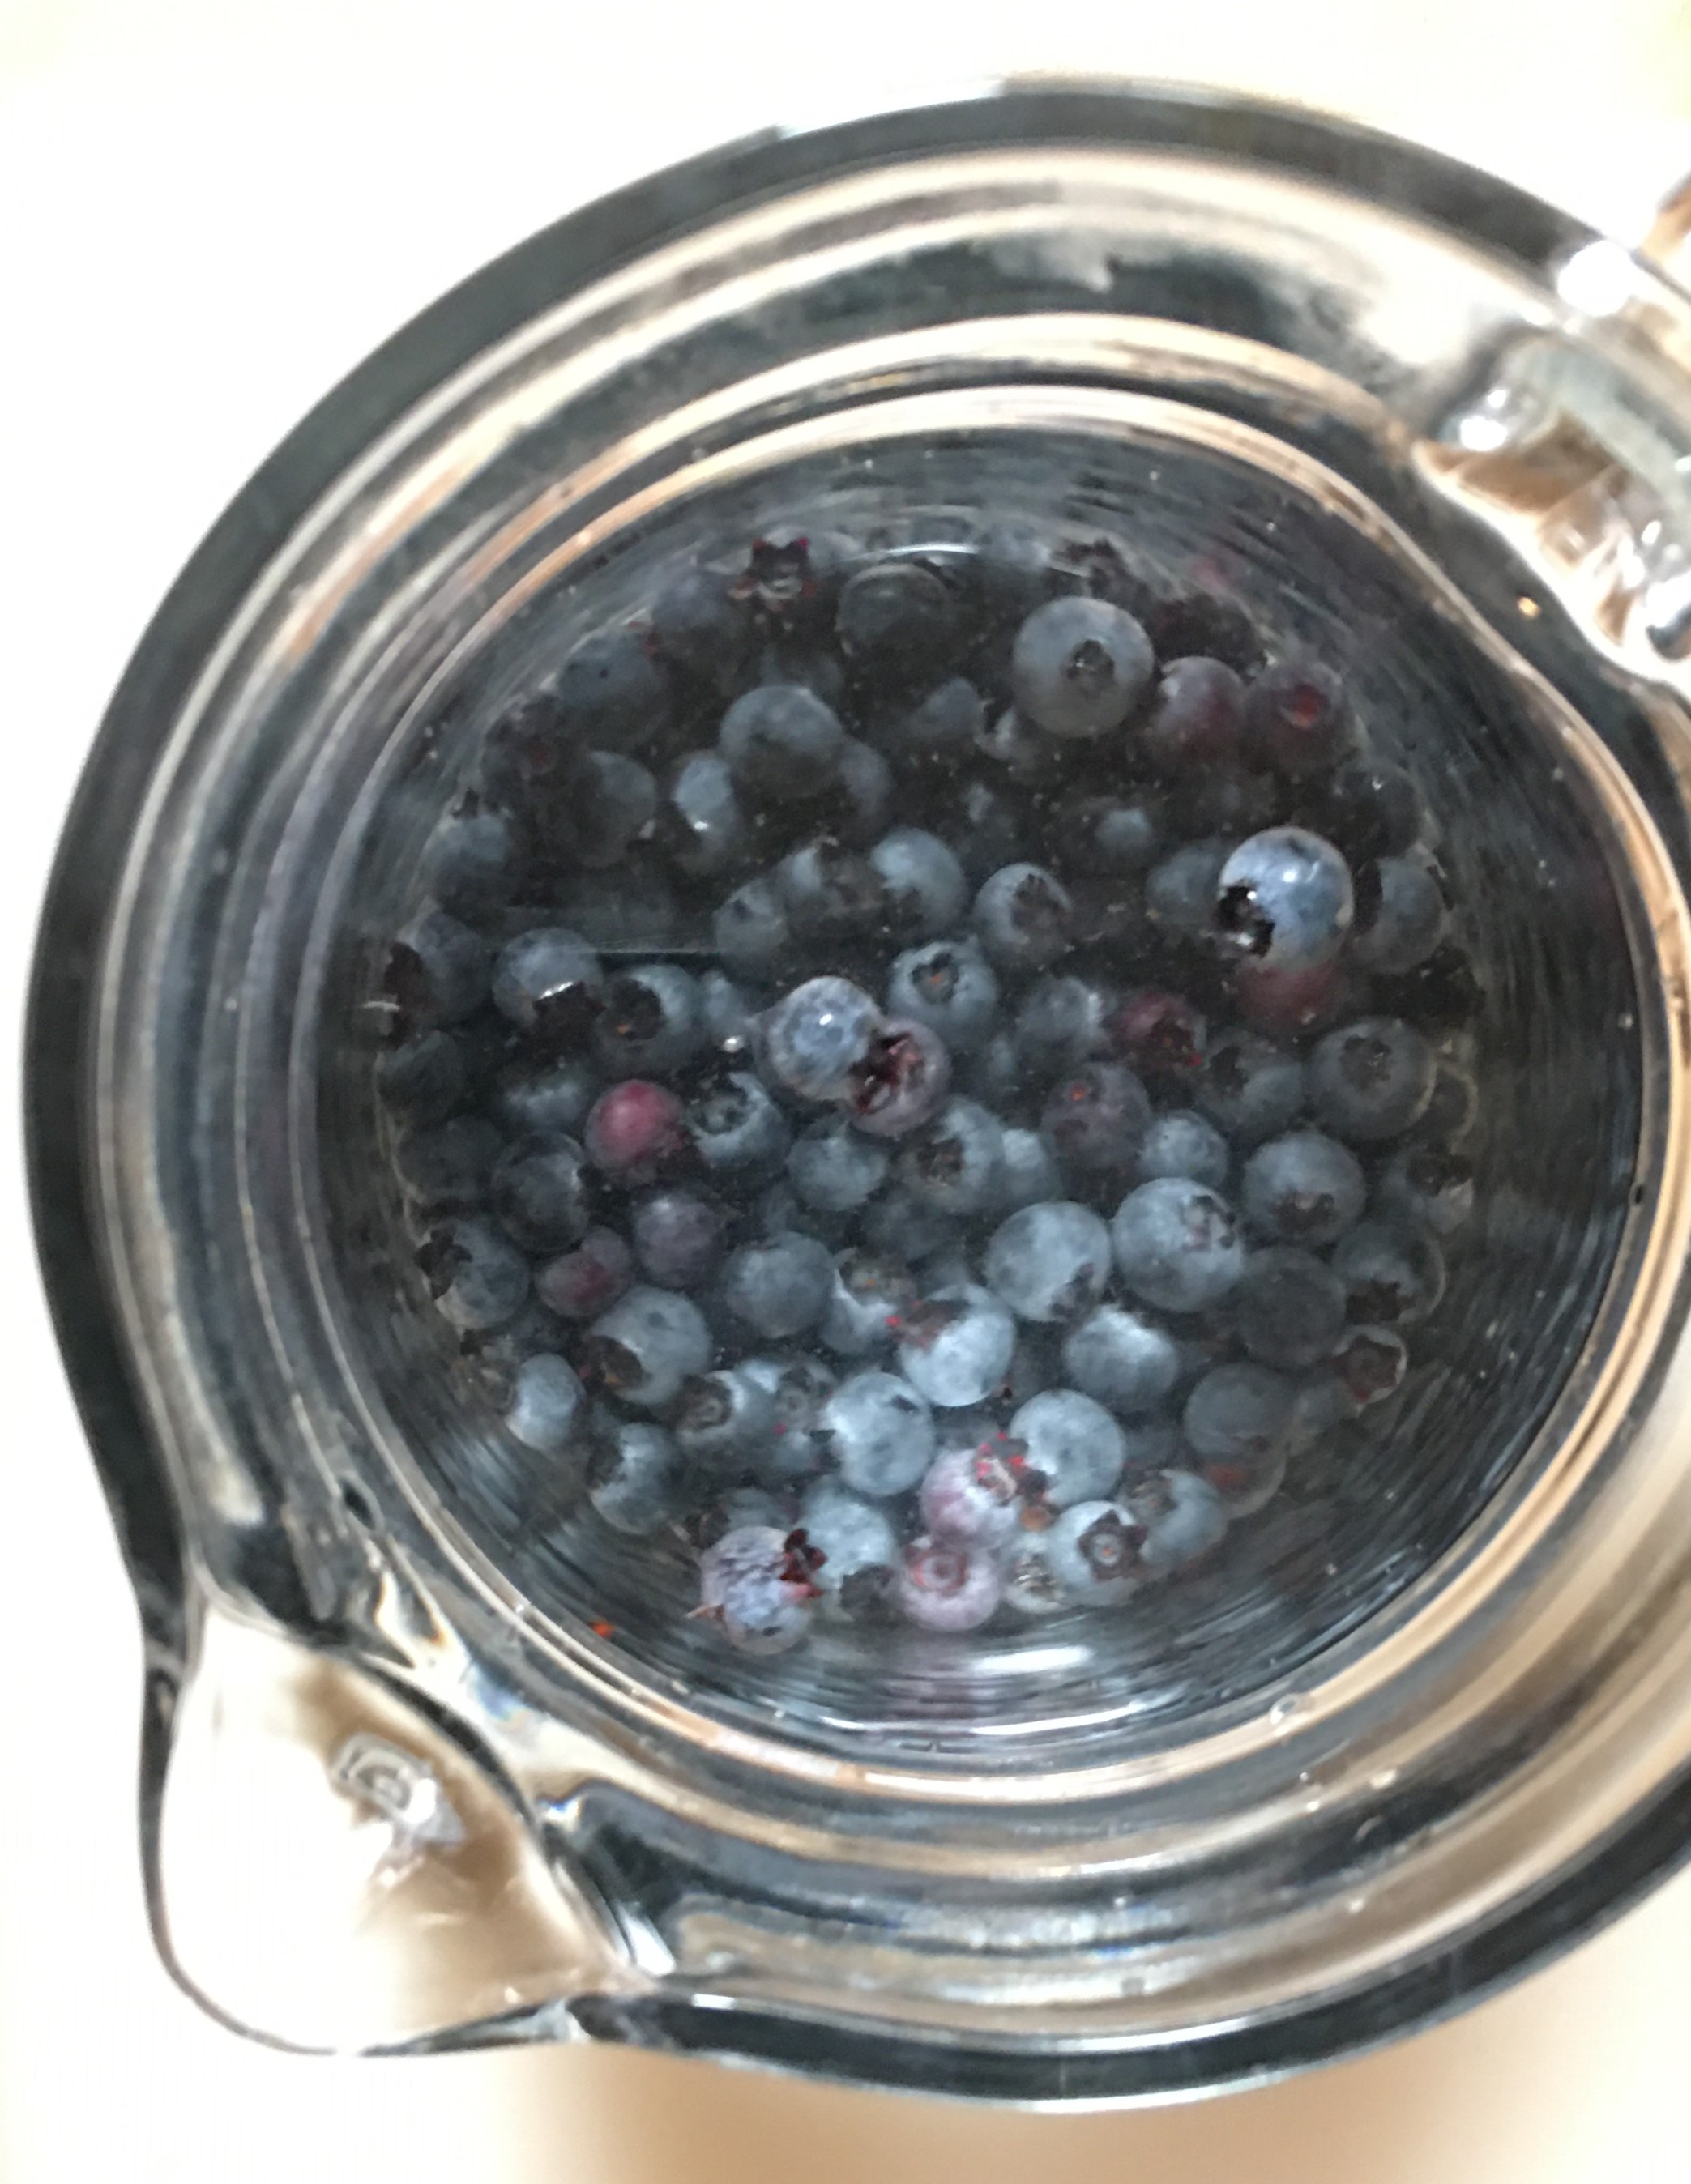
Literally all you need is blueberries and water–that is it!

Here I used 3 cups of berries and 5 cups of water.

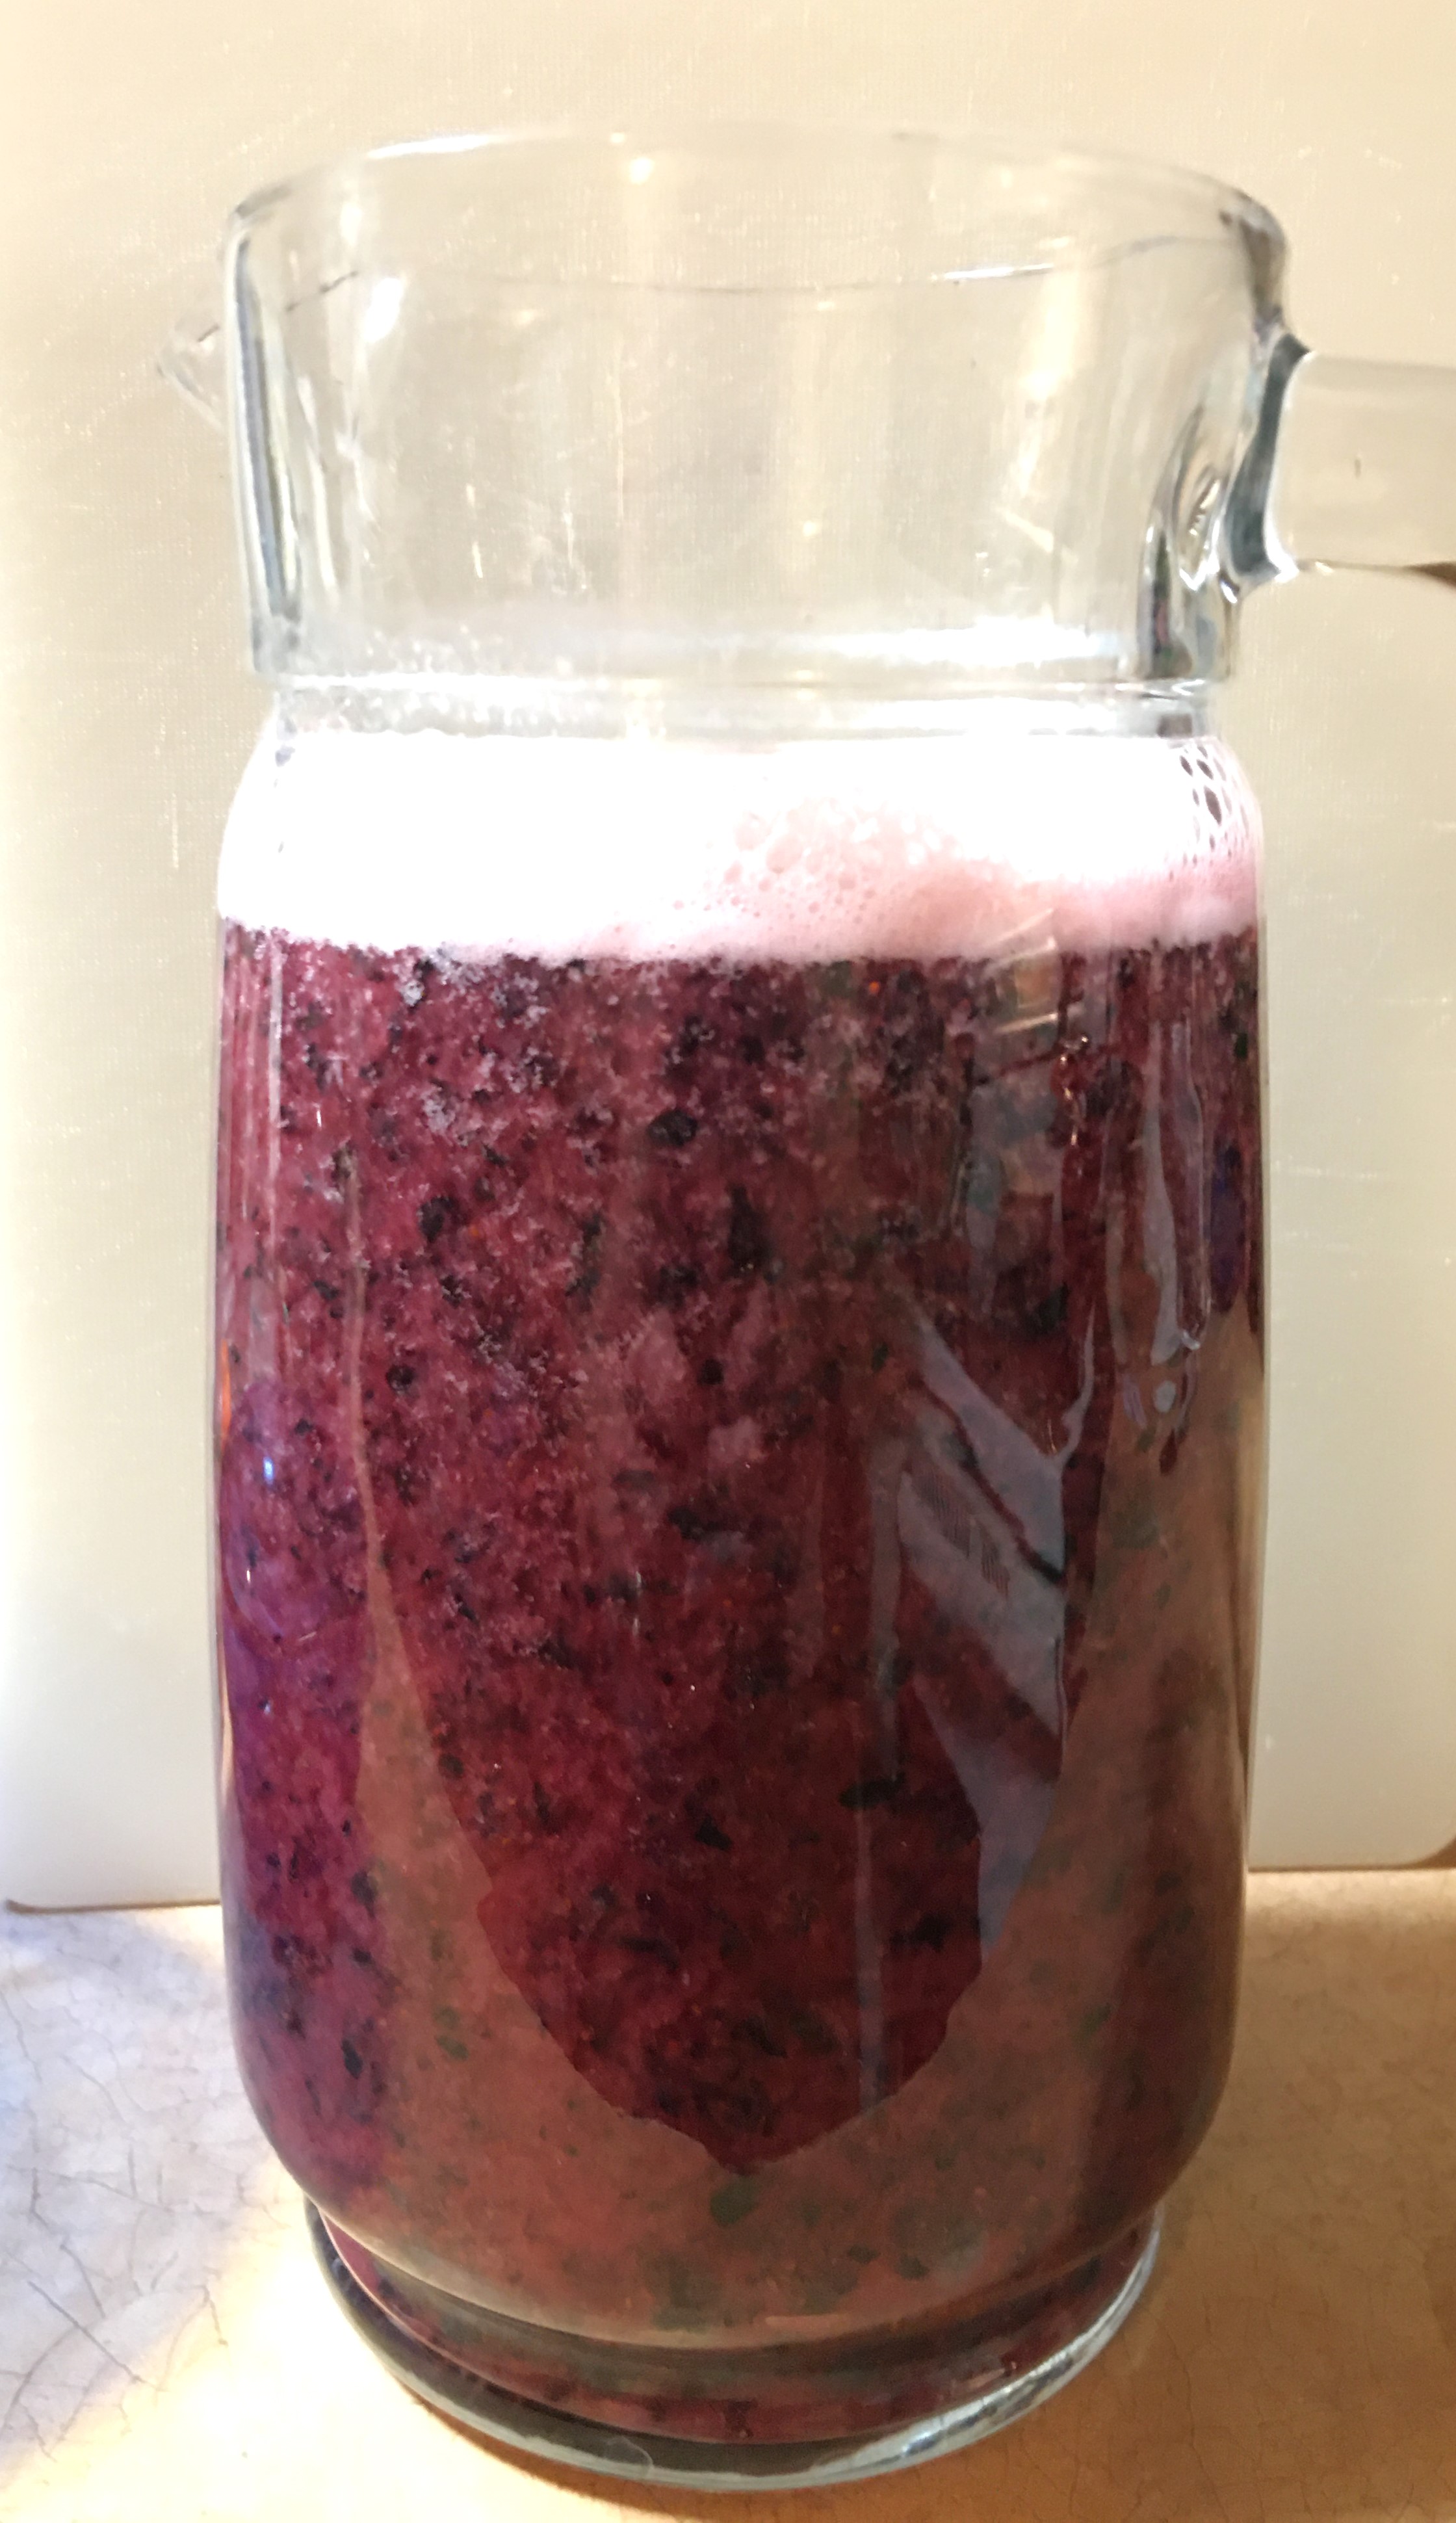
It was pretty standard across the board that everyone used about 1.5 cups of water per cup of berries. I could have used less water, but I was happy with the amount of liquid with my immersion blender. Everyone I saw used a stand blender. I’m an immersion blender girl and this all fit perfectly in my glass water pitcher. Clean up was just easier for me. So use whatever blending tool you have. You could even use a hand masher if you wanted to or hand squeeze the berries. The bottom line is that you can drink the pulp if you want that in your blueberry juice. Or you’ll end up straining the pulp out and squeeze everything to get all the liquid out. The water is just a medium to make the process flow.

I am going to include a clink for you here though. One lady I saw used her pressure cooker to make the juice. And then she canned her juice for future use and it’s in its simplest form to meet the need of any recipe you’re looking to use. This was just one project that I didn’t want to undertake on top of everything that I already planned to do for this post. But if you’re a canner, definitely check this video out!

NOTE: In canning groups there is a lot of heat surrounding water bath canning and acidity levels. (“Just because Grandma did it doesn’t mean that it’s safe by today’s cooking standards.”) Cooked blueberries acid levels are below the acid threshold, so it is entirely safe to can cooked blueberry juice without adding acid to the juice before water bath canning.

Blueberry Cordial

For blueberry cordial the pulp does need to be strained out. Just about everyone I’ve seen uses cheese cloth. I happen to have a muslin cloth bag that I use for straining fruits all the time, particularly when I’m making my elderberry syrup. So I opted to skip the cheese cloth and just use my muslin bag. It turns a 2-3 step straining process into just a single step.

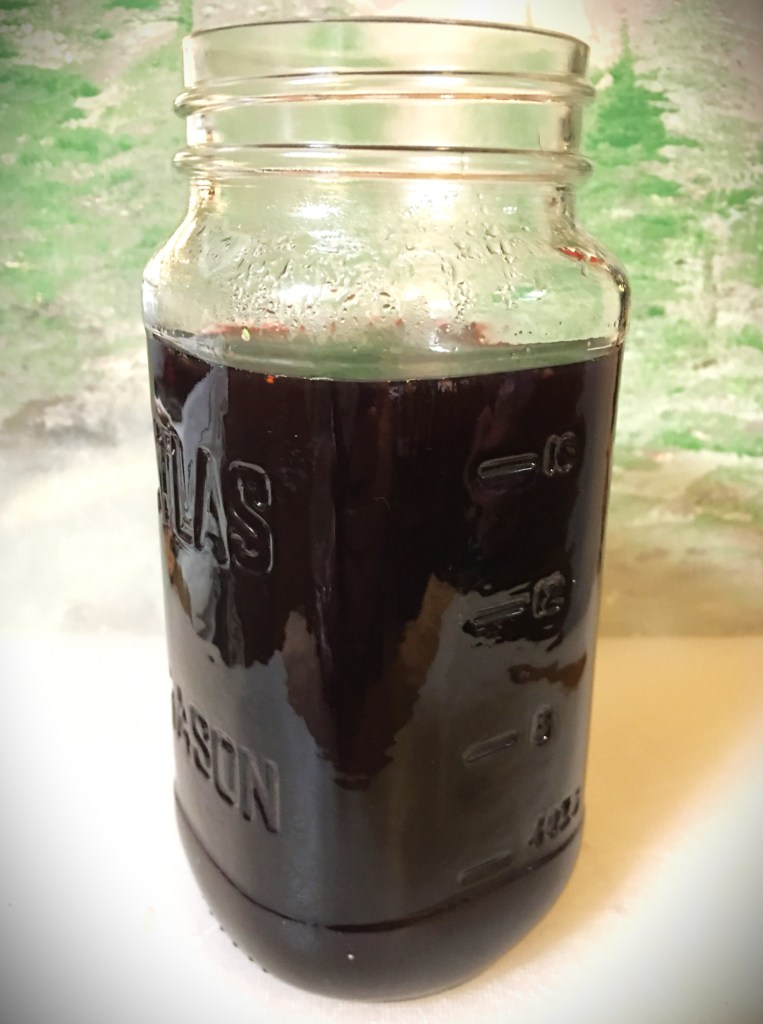
After straining, you’re left with a clear blueberry juice.

And if you’re wondering, the juice tastes like the blueberry equivalent of the watered down apple juice I’ve given my boys. It’s not sweet. And is nothing like the fresh blueberries that I used.

But that’s okay, because the Cordial recipe I chose to use is from a British gentleman and his process starts off with reducing the blueberry juice anyway. Here’s his video here.

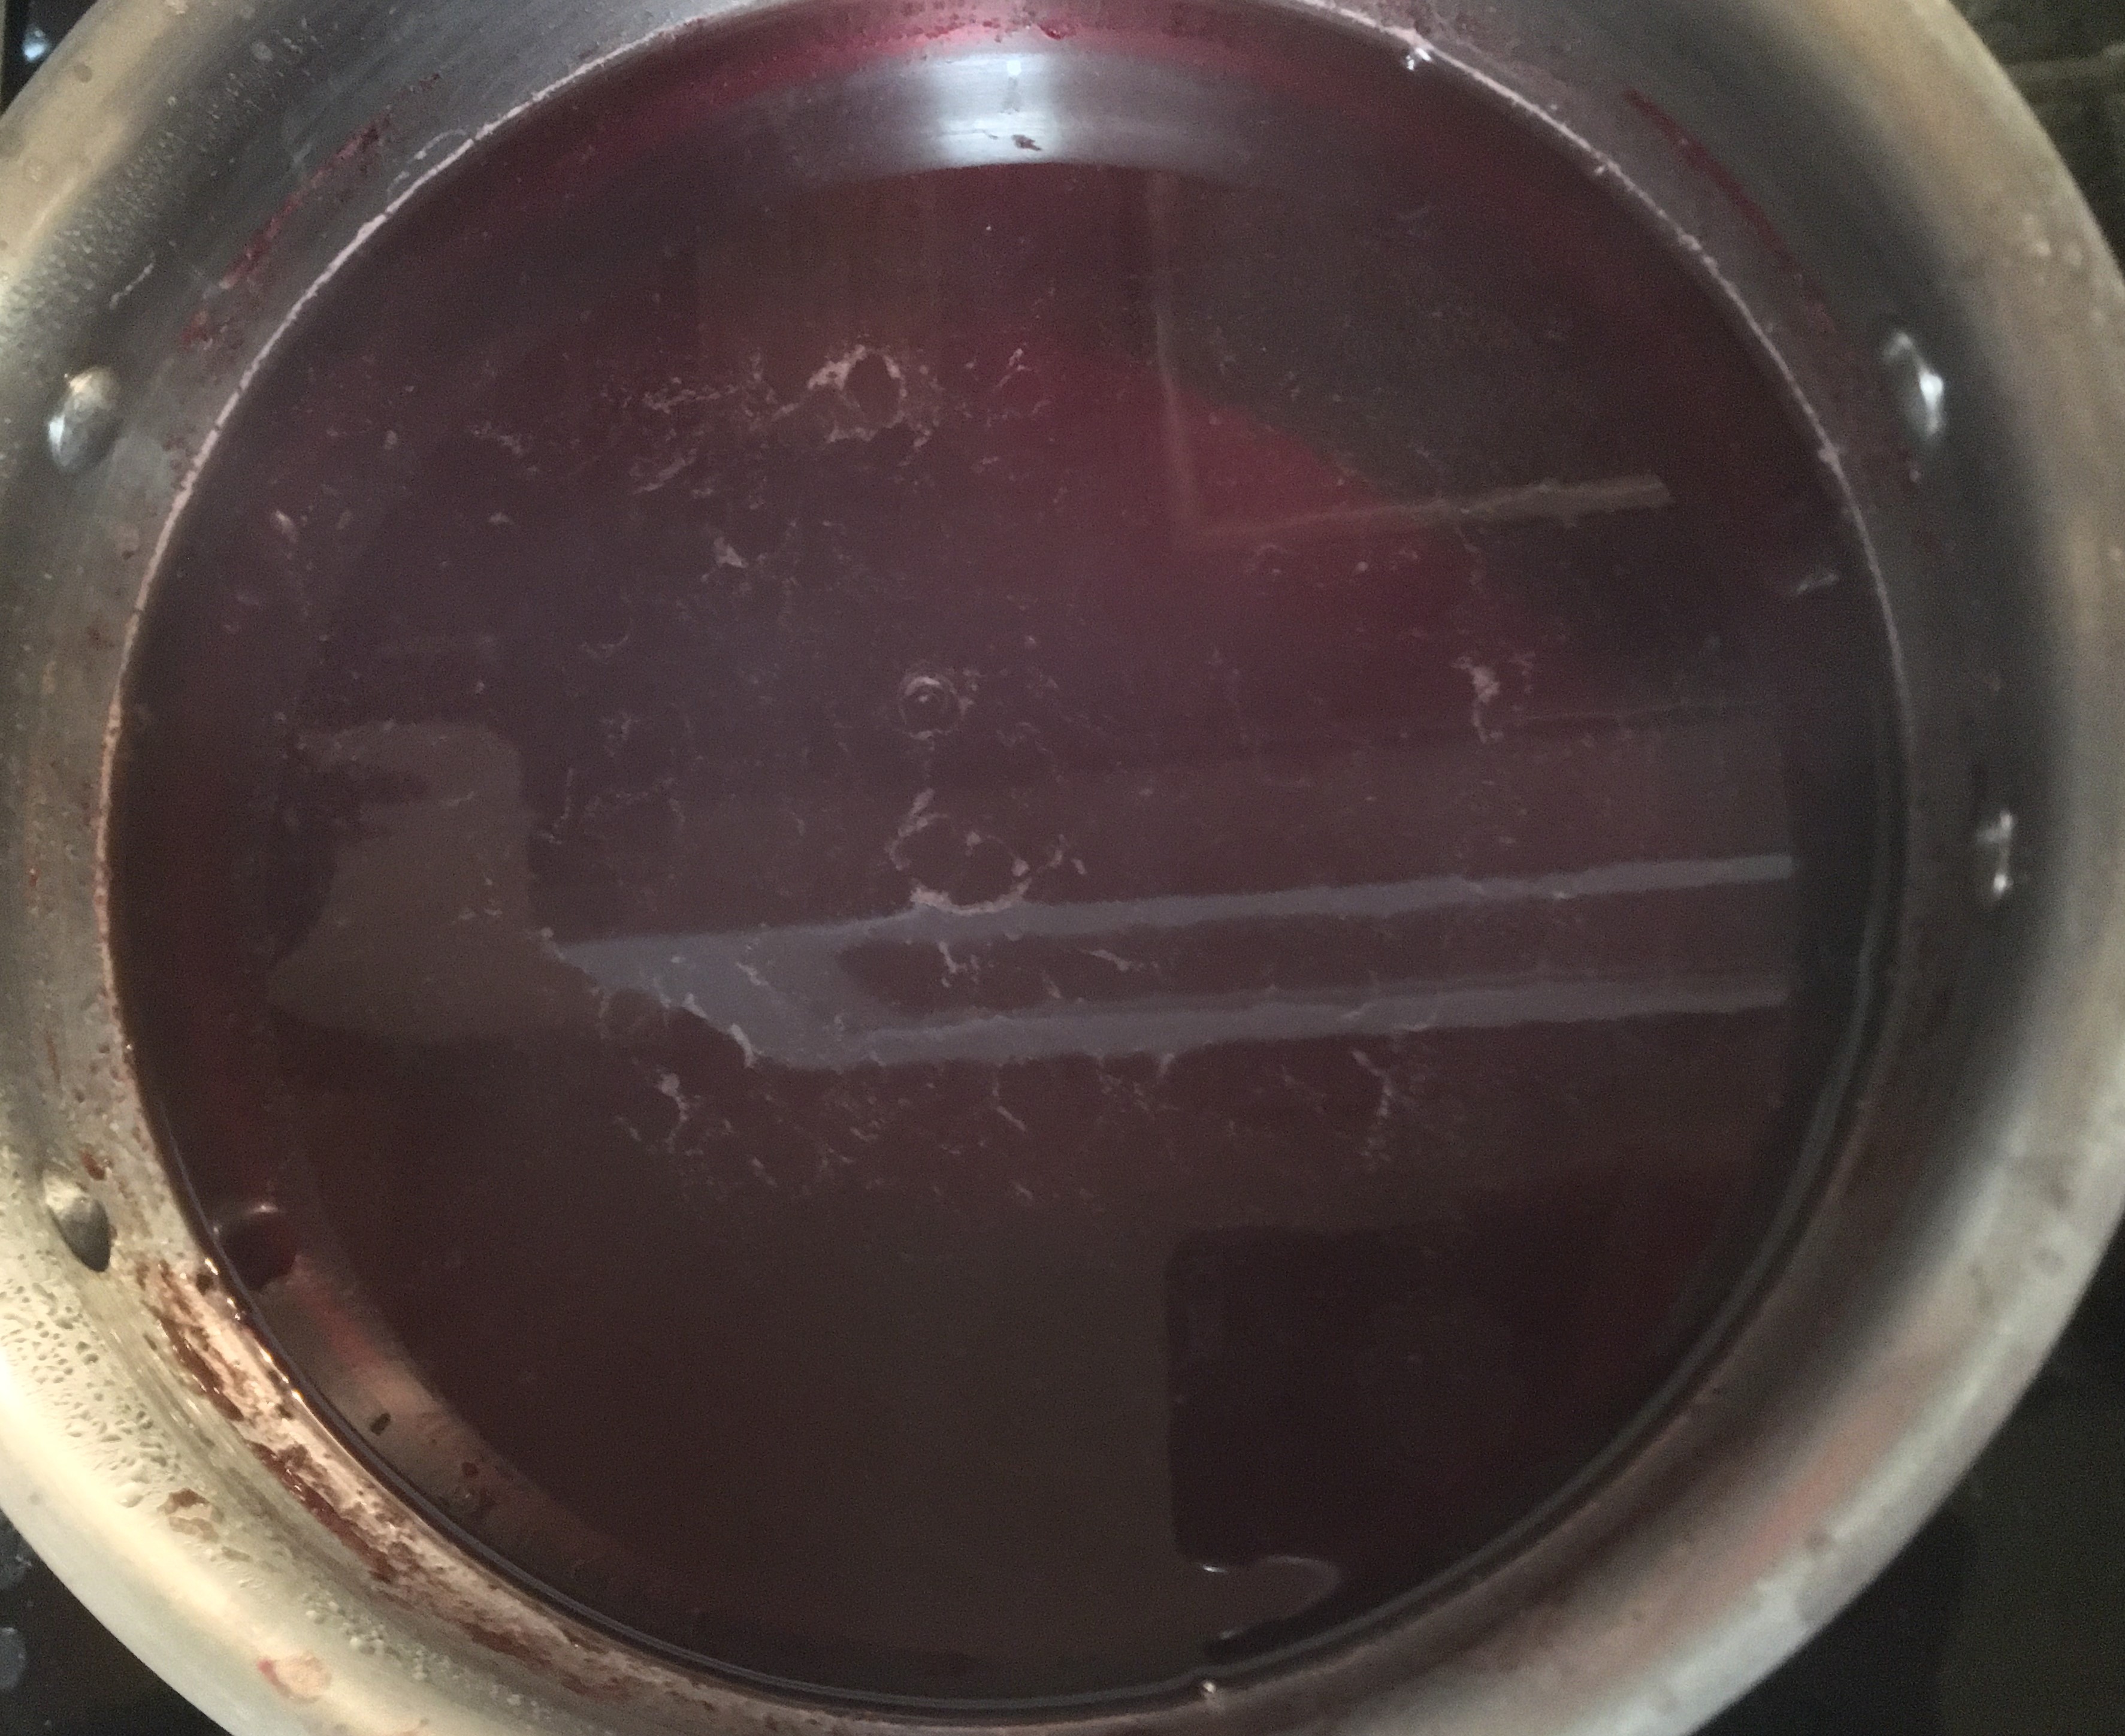
I followed his directions and reduced it down to half its volume. Taste wise, that watered down flavor is gone. And what remains is an acidic version of the blueberries that I picked.

Here is where I agree with him, the sweetness level of your cordial is very much dependent on your preference levels. My volume of cordial was greater than his, and even after making the proper conversions from metric to imperial I still could not add as much sugar as he did.

With my end volume around twice the amount of his, he added roughly 1 cup of sugar to his cordial. I would have been happy with 1/2 cup of sugar. It was at the level of sweetness as a soda. However, with cordial being syrupy sweet I ended up with a final measurement of 3/4 cup of sugar. And at this level that tasted to me like the really sweet cough syrup. This is definitely a treat that I will add this as a flavoring to unflavored seltzer water for the boys.

And I’m sure that my husband will add this to his seltzer water too.

I’m keeping this in my fridge to keep it preserved for a month or two. But I’m sure it will probably go quick and I’ll need to pull out my freezer berries to make some more.

Spiked Blueberry Cordial

After tasting the blueberry cordial above, I’m now wondering how this one is going to turn out. The recipe for this adult cordial I found here. But I have a few weeks of waiting before I can sample this one and see if any adjustments need to be made. (I will come back into this post and add to my assessment of this recipe once I have this one completed.)

Full disclosure, I do not own a large enough glass container to pull off this full recipe. (That and I didn’t have enough fresh berries that were thawed and ready to go.) So I cut this recipe in half. The proportions were exactly the same, so I know this is going to turn out as it should.

If you want the half batch recipe, this is what I used:

  • 4 cups blueberries
  • 28 oz vodka
  • 1/2 cup sugar

Everything else I followed the directions.

Once this process has run its course, I’ll be back to give my thoughts.

Clafoutis

This recipe, Clafoutis, came my way on Facebook from a friend who was excited to pass this one when he heard that we picked blueberries this year. This is one of his favorite breakfasts and was eager to hear how we liked it.

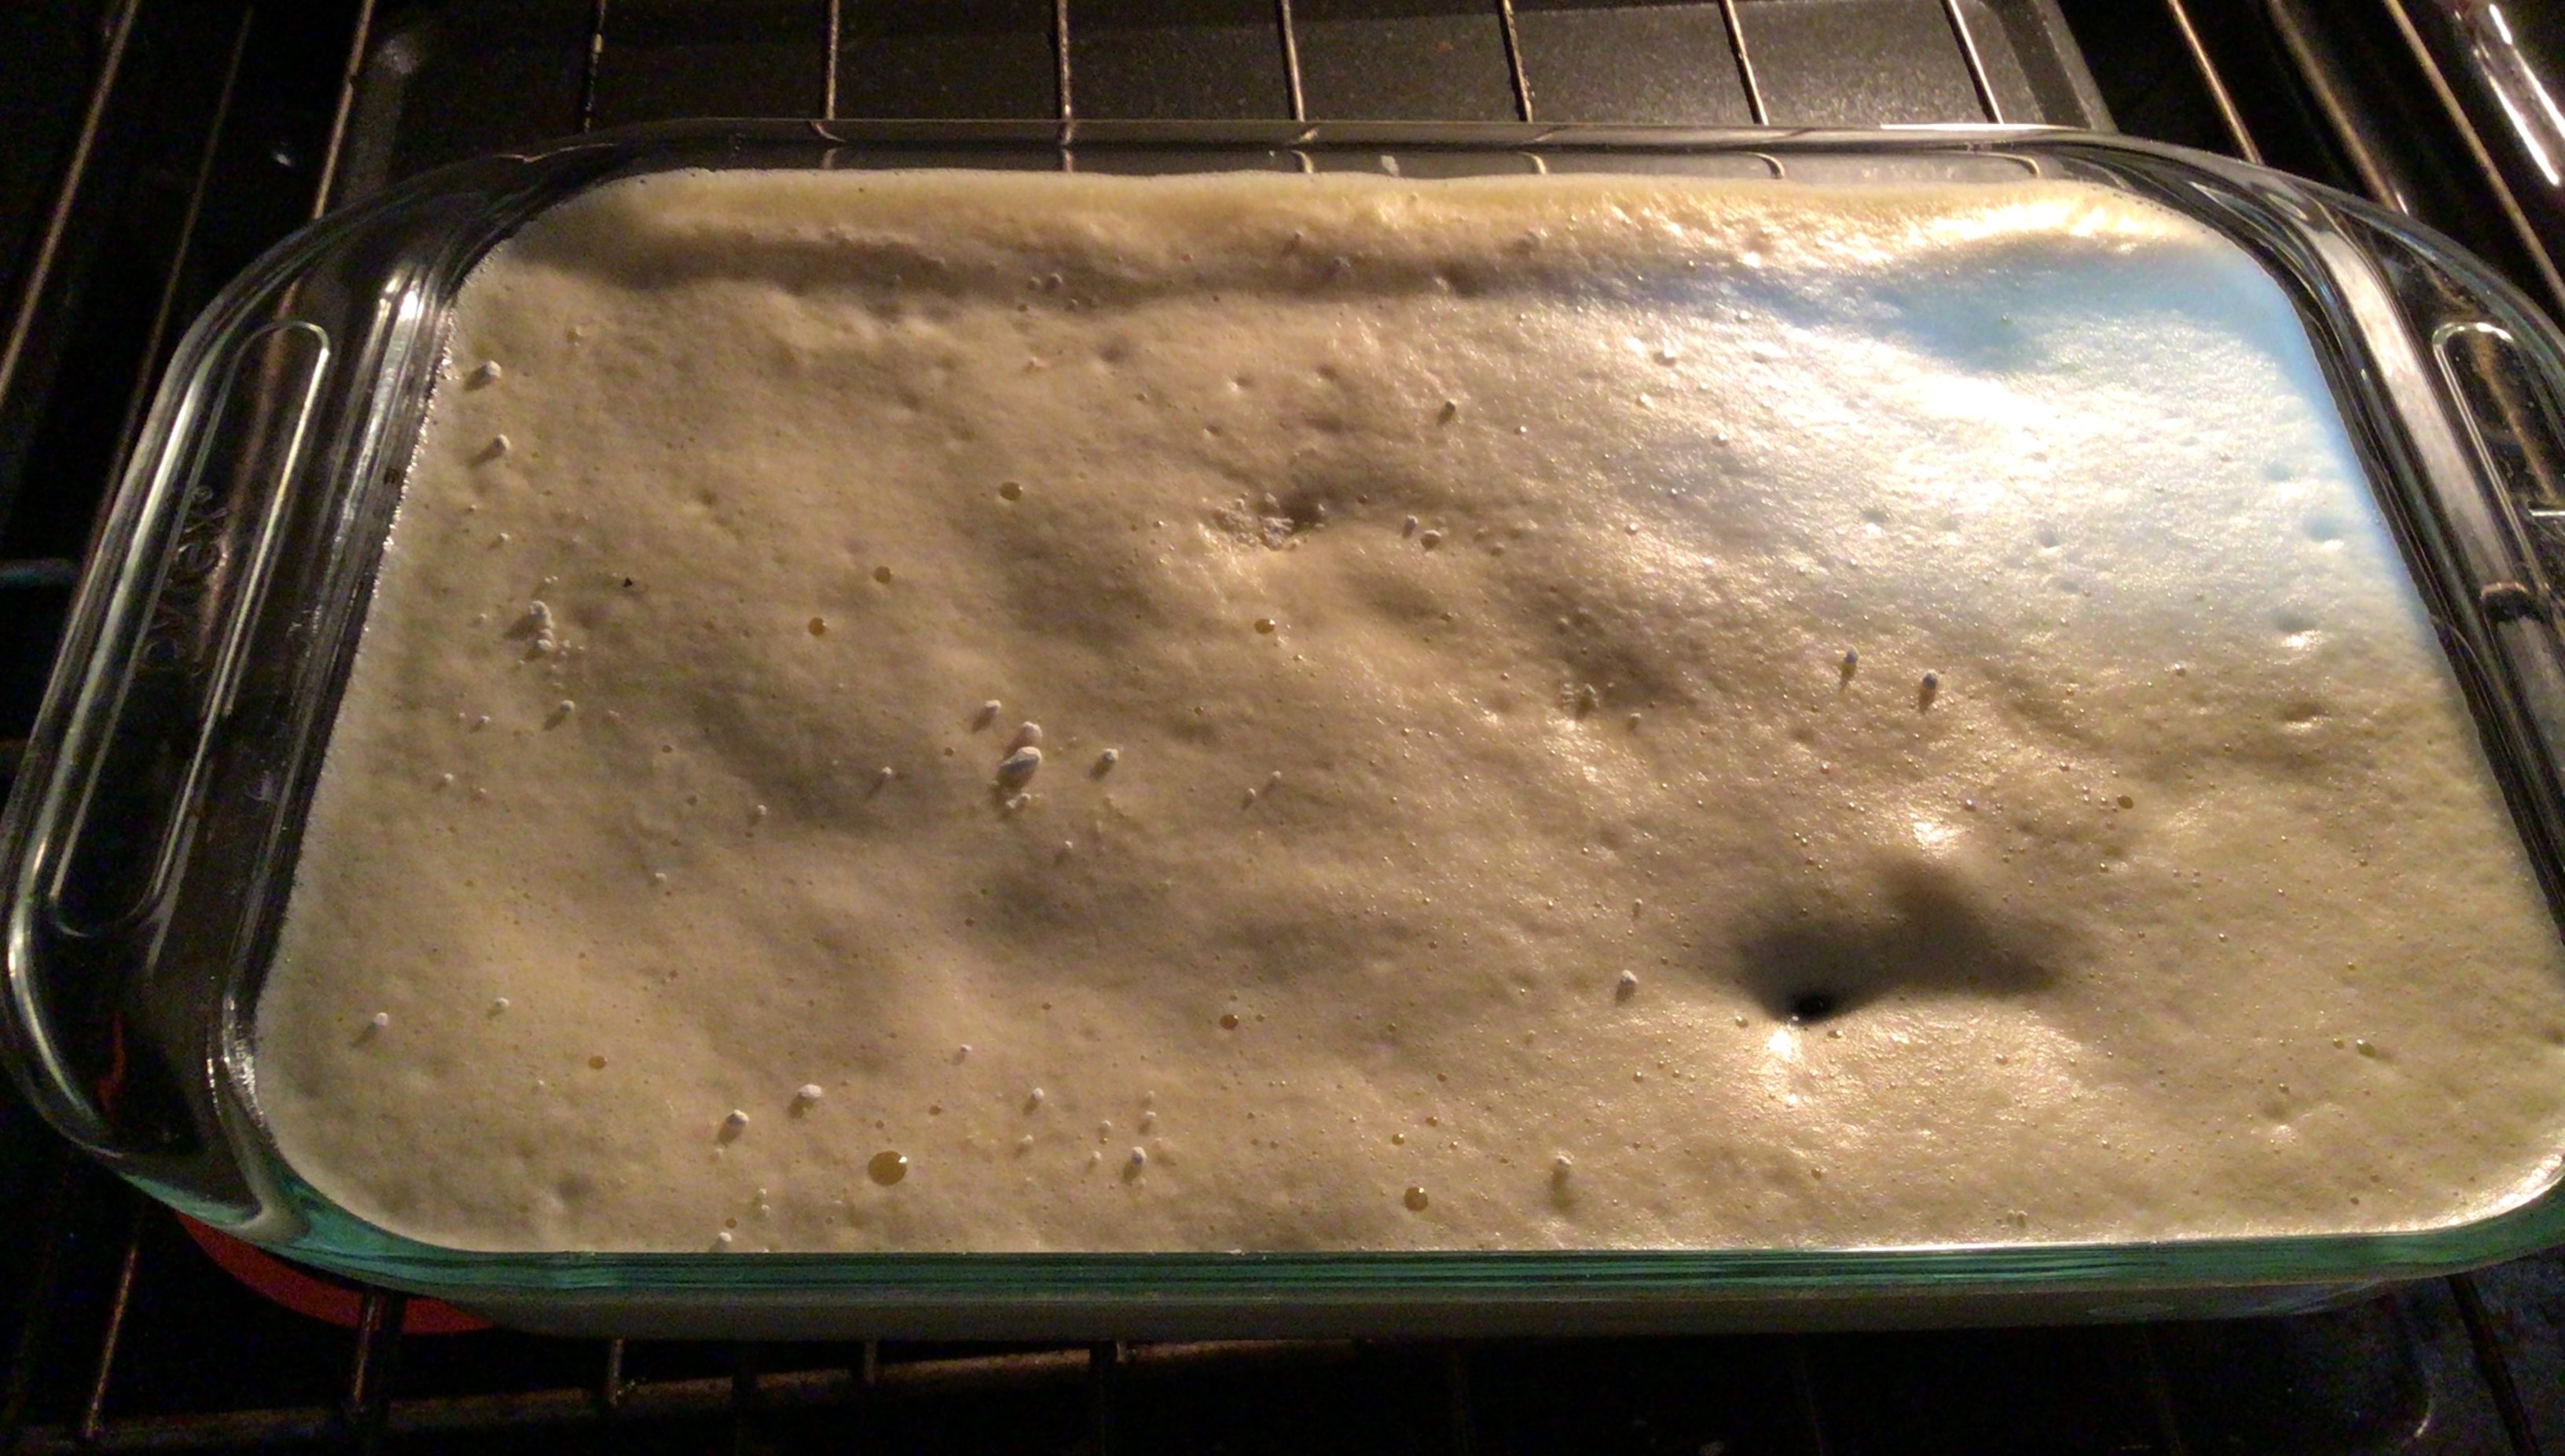
I admit that I modified this recipe by way of the cooking vessel I used. I opted for my Pyrex because my largest pan is actually my cast iron pan I didn’t know if this recipe was going to expand in the oven or not. So it was my faithful Pyrex with a pan to catch anything that might fall over board during the cooking process.

I’m glad to report that nothing cooked over and it stayed in my Pyrex.

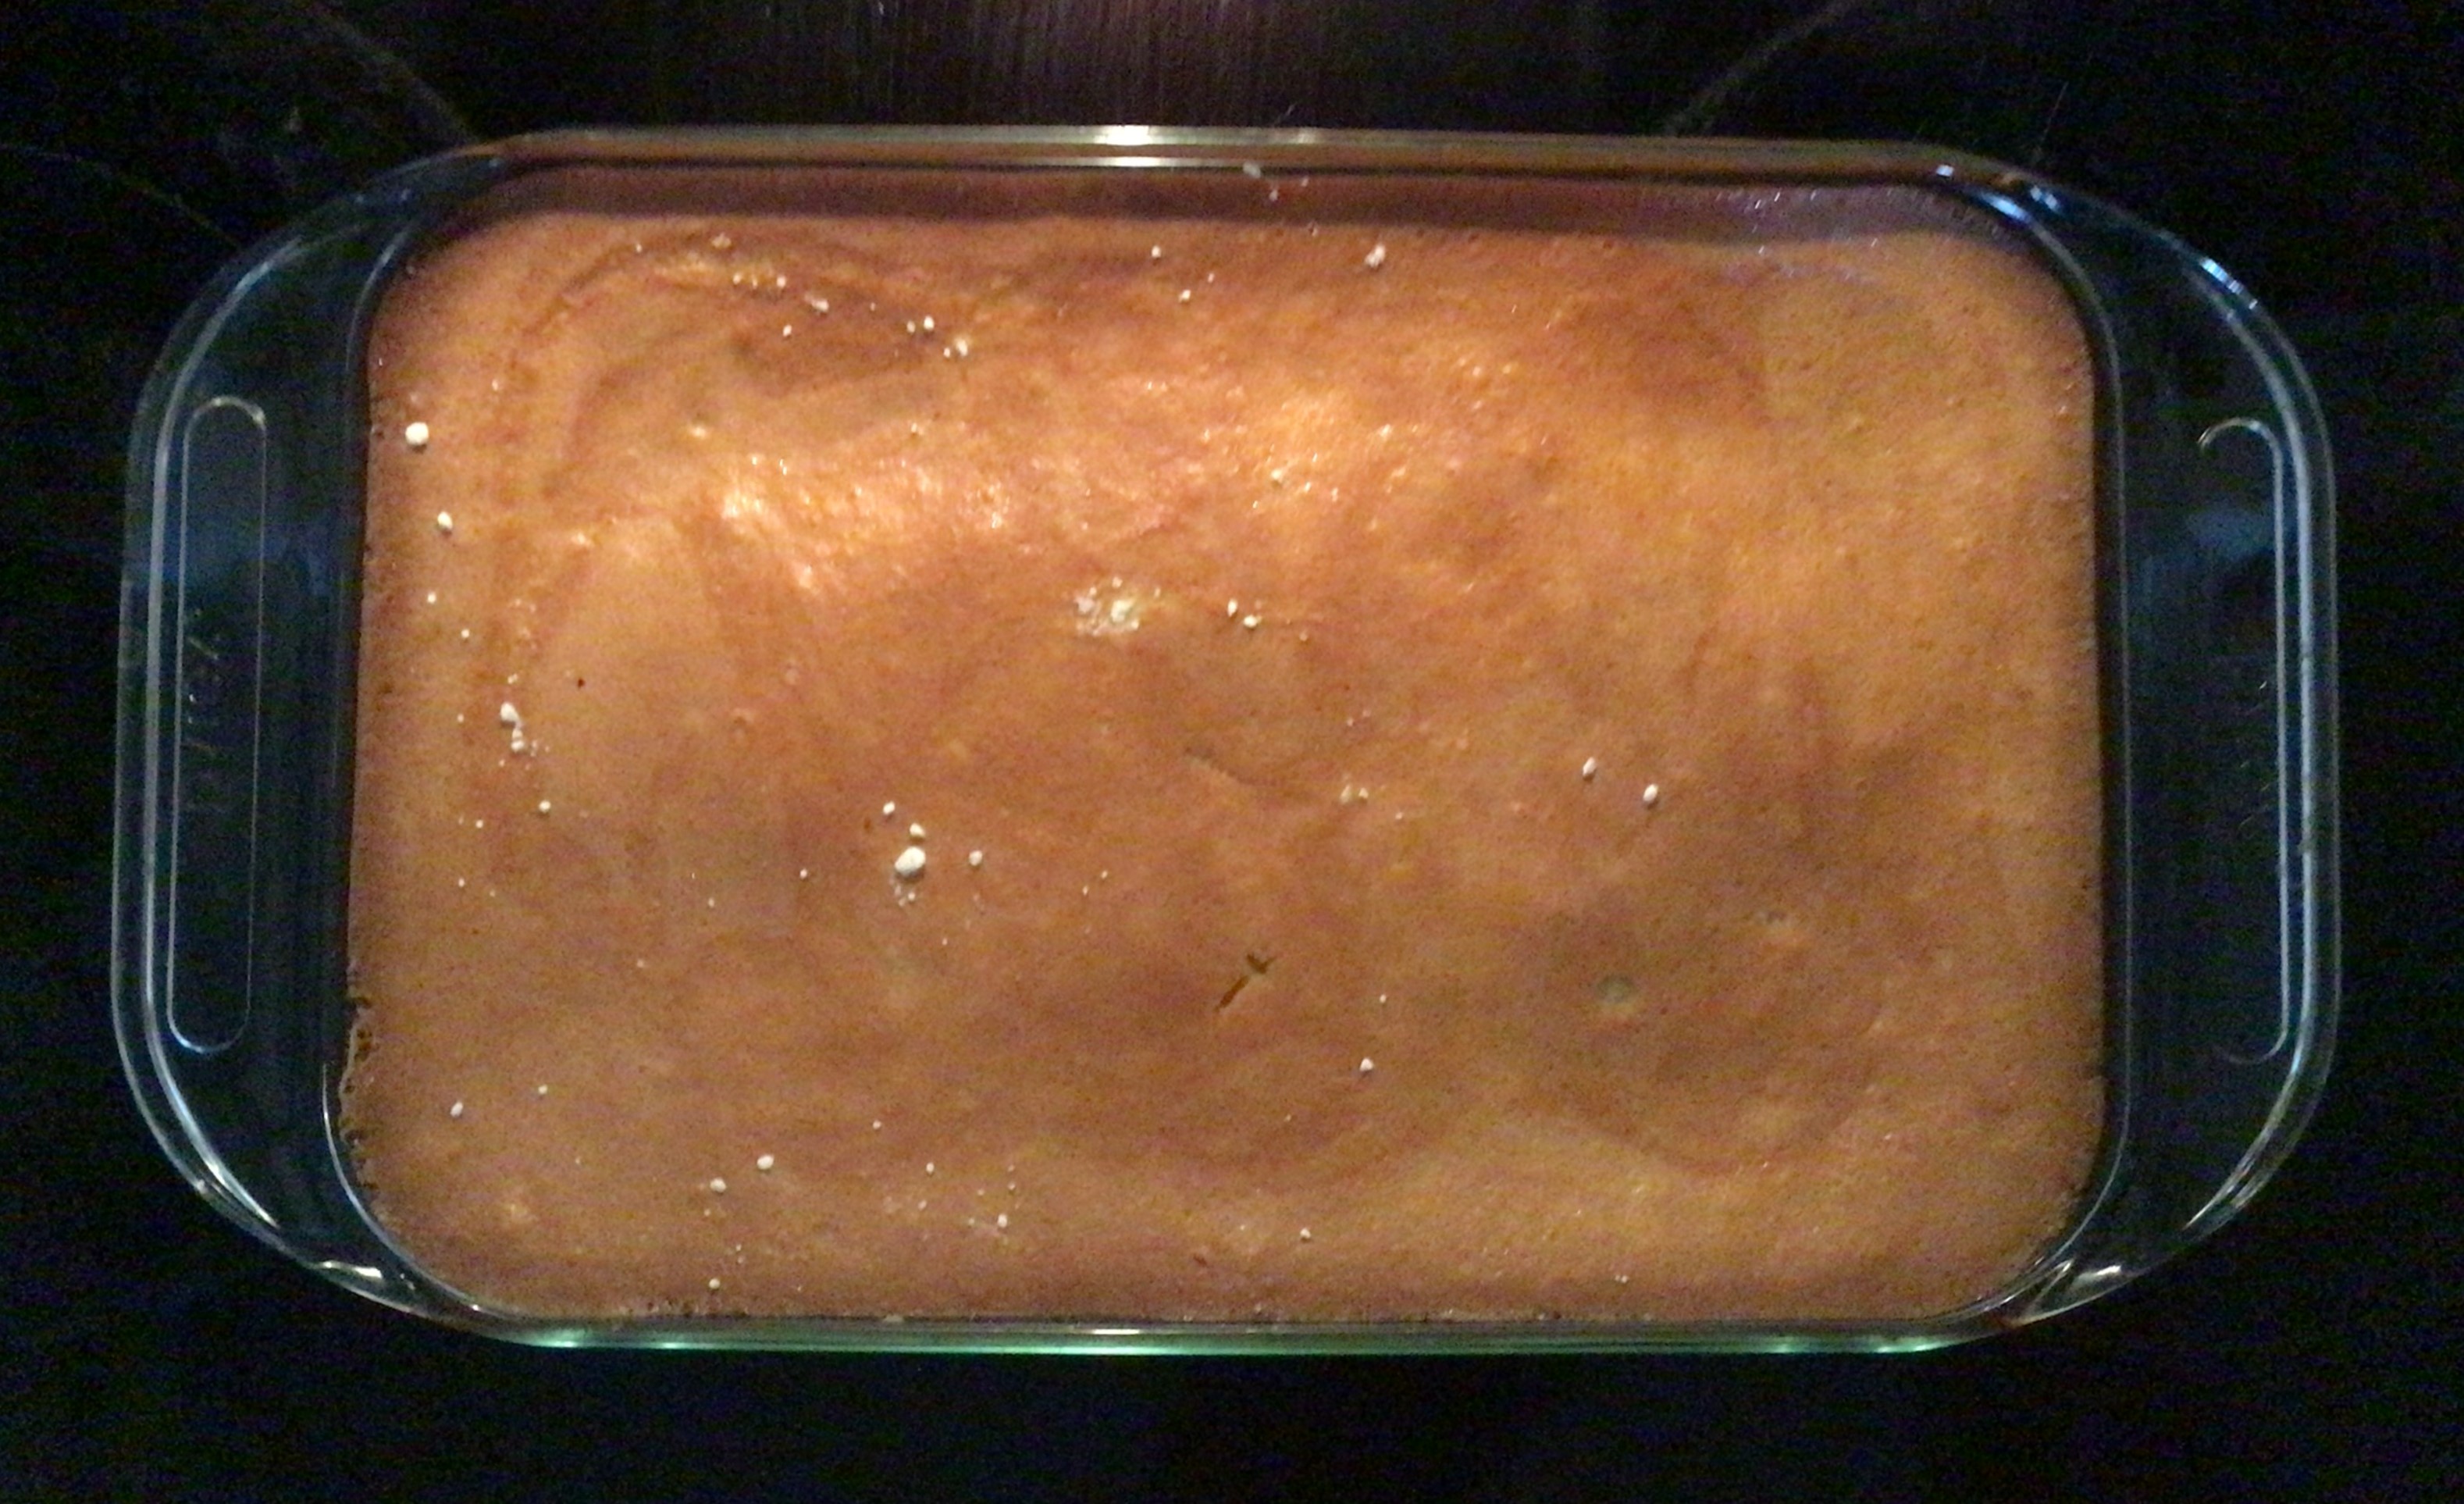
The batter itself reminded me so much of making German Pancakes. (This recipe expands, so now you know why I anticipated some expansion.) In fact, it tasted a whole lot like German Pancakes. The difference, of course, is the addition of blue berries. But also the clafoutis retains more of soufflé like structure. It does puff up and deflates a little after you pull it out and cut it. But on the scale of easy to difficult, this is definitely an easy recipe to make.

It’s super easy to bake and is definitely kid approved. I only made a single batch, but I certainly have to make a double the next time I make this recipe.

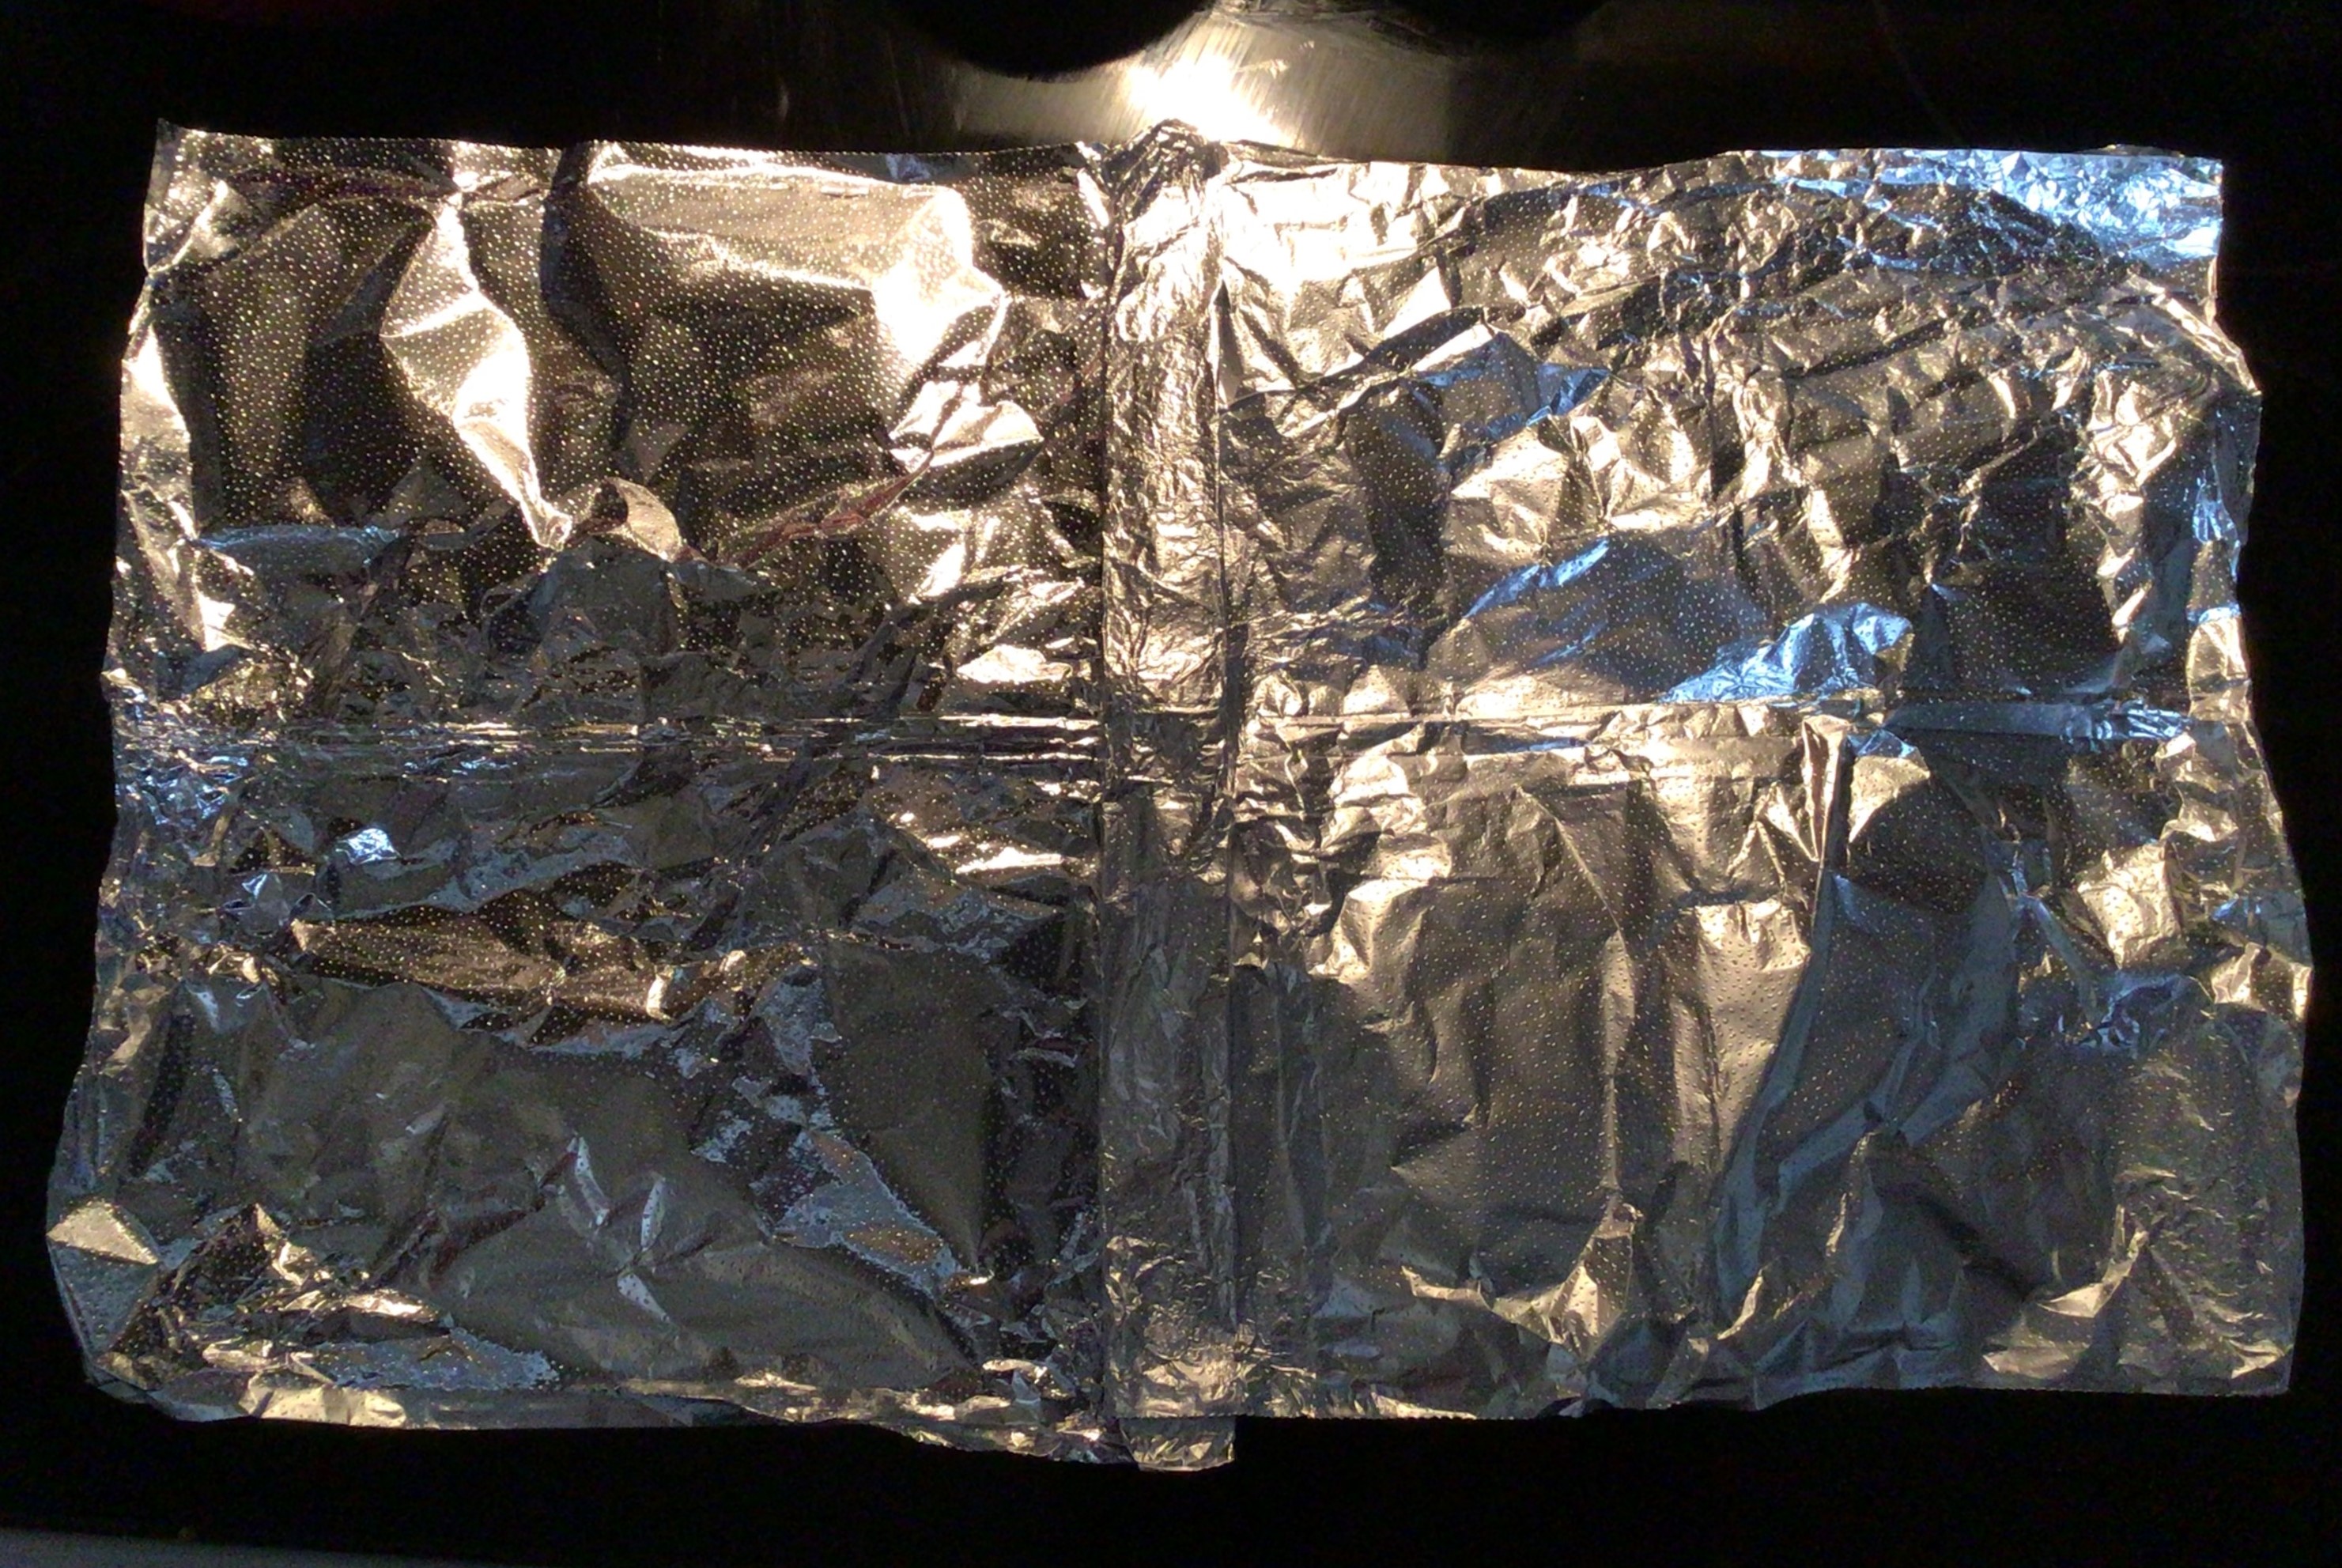
I wanted to make a quick note that baking did take longer in the Pyrex and there was the issue of the center being undercooked when time expired. The top was already brown. Because I needed extra cooking time, I did have to add some foil over the top.

If you’ve ever made a quiche, then you understand the jiggle in the center means more cook time is needed. The same is true with the clafoutis. If you see some jiggle, give it more time.

Blueberry Muffins

And now to the blueberry muffins I started off this post with!

Let’s be honest. Everyone and their grandmother have a dozen blueberry muffin recipes they can pull and one or two that they swear by. This is the one that I use, and I don’t even go to my cook books to look there. The problem that I have always had is that they are either too sweet or the moment you add fresh blueberries it turns into a swampy mess. Ina Garten’s recipe I swear was made for fresh blueberries to be added into it. It’s has the perfect amount of water to sponge ratio where your hands don’t get damp and sticky eating it.

So whether you want to use the recipe I use or the one that has been in your family for 70,000 generations here is some information that you can use to improve your blueberry muffin game.

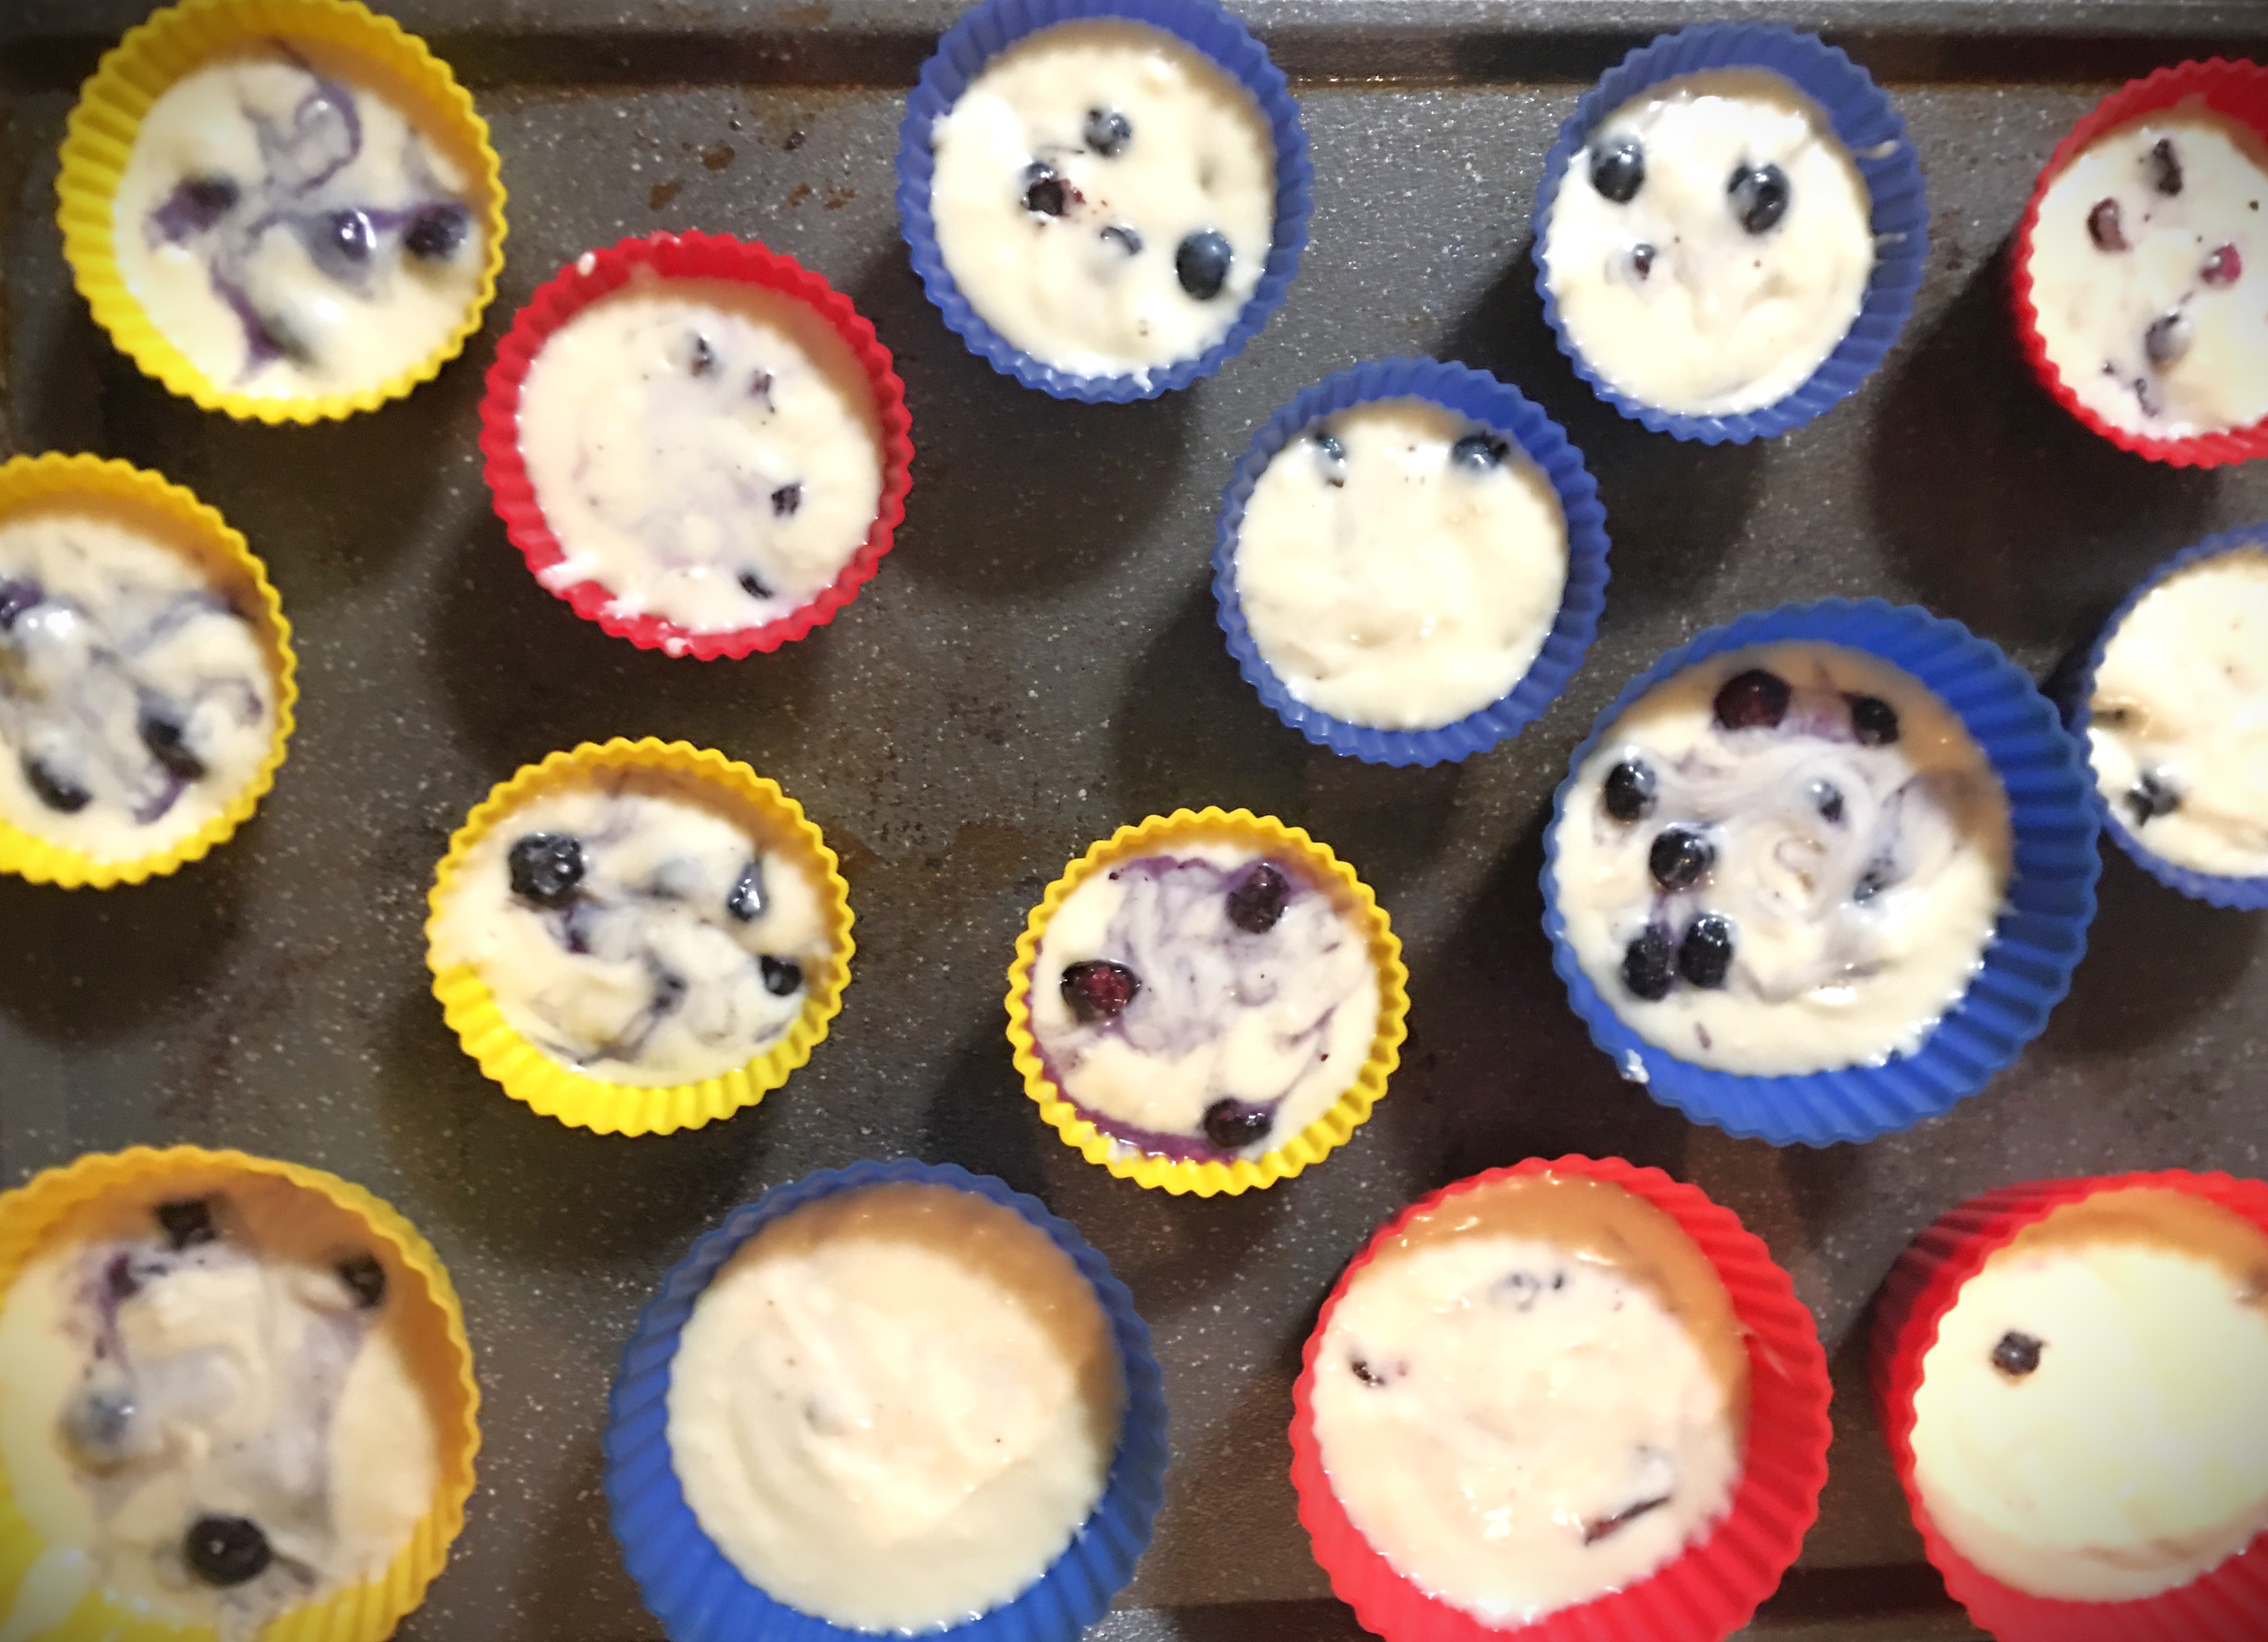
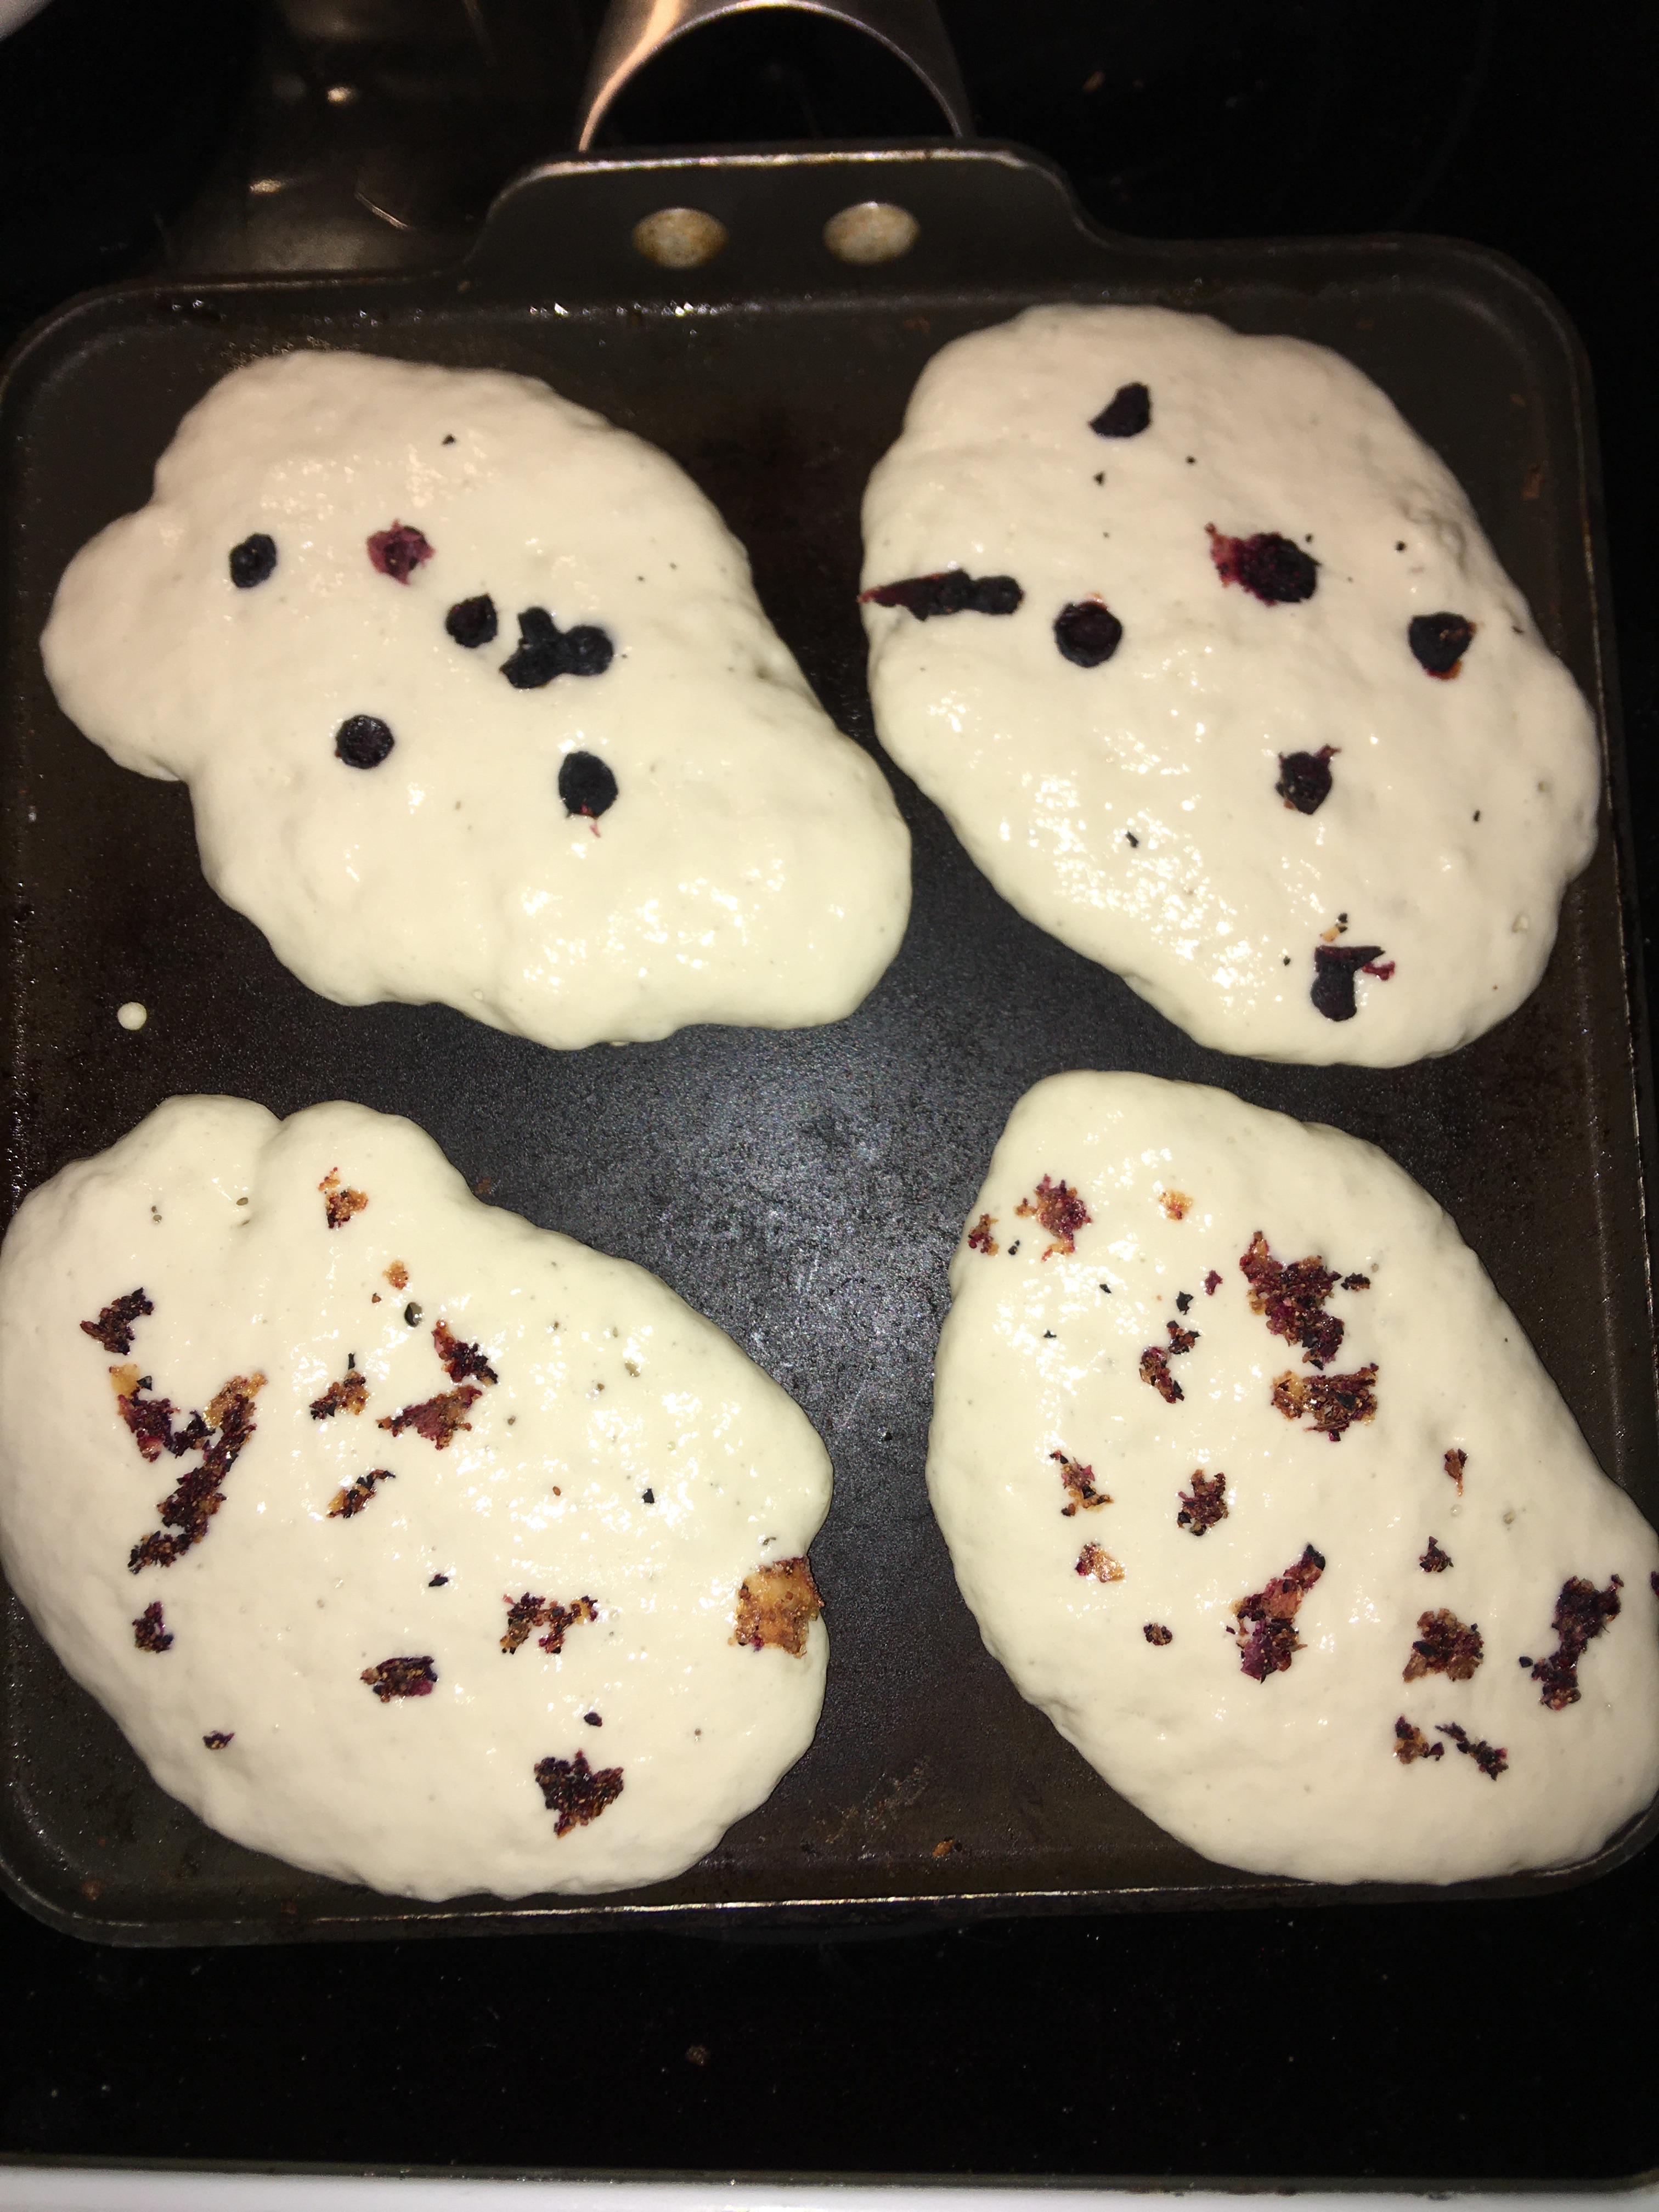
I made one batch of muffin batter. And instead of adding the blueberries into the batter, I put the batter into my silicone cups and then added the blueberries to the color coded cups so I could pull off this ultimate side by side comparison. There was absolutely no way there was any difference in the batter or the sponge. This was entirely based off the berries themselves; fresh, freeze dried, and dehydrated.

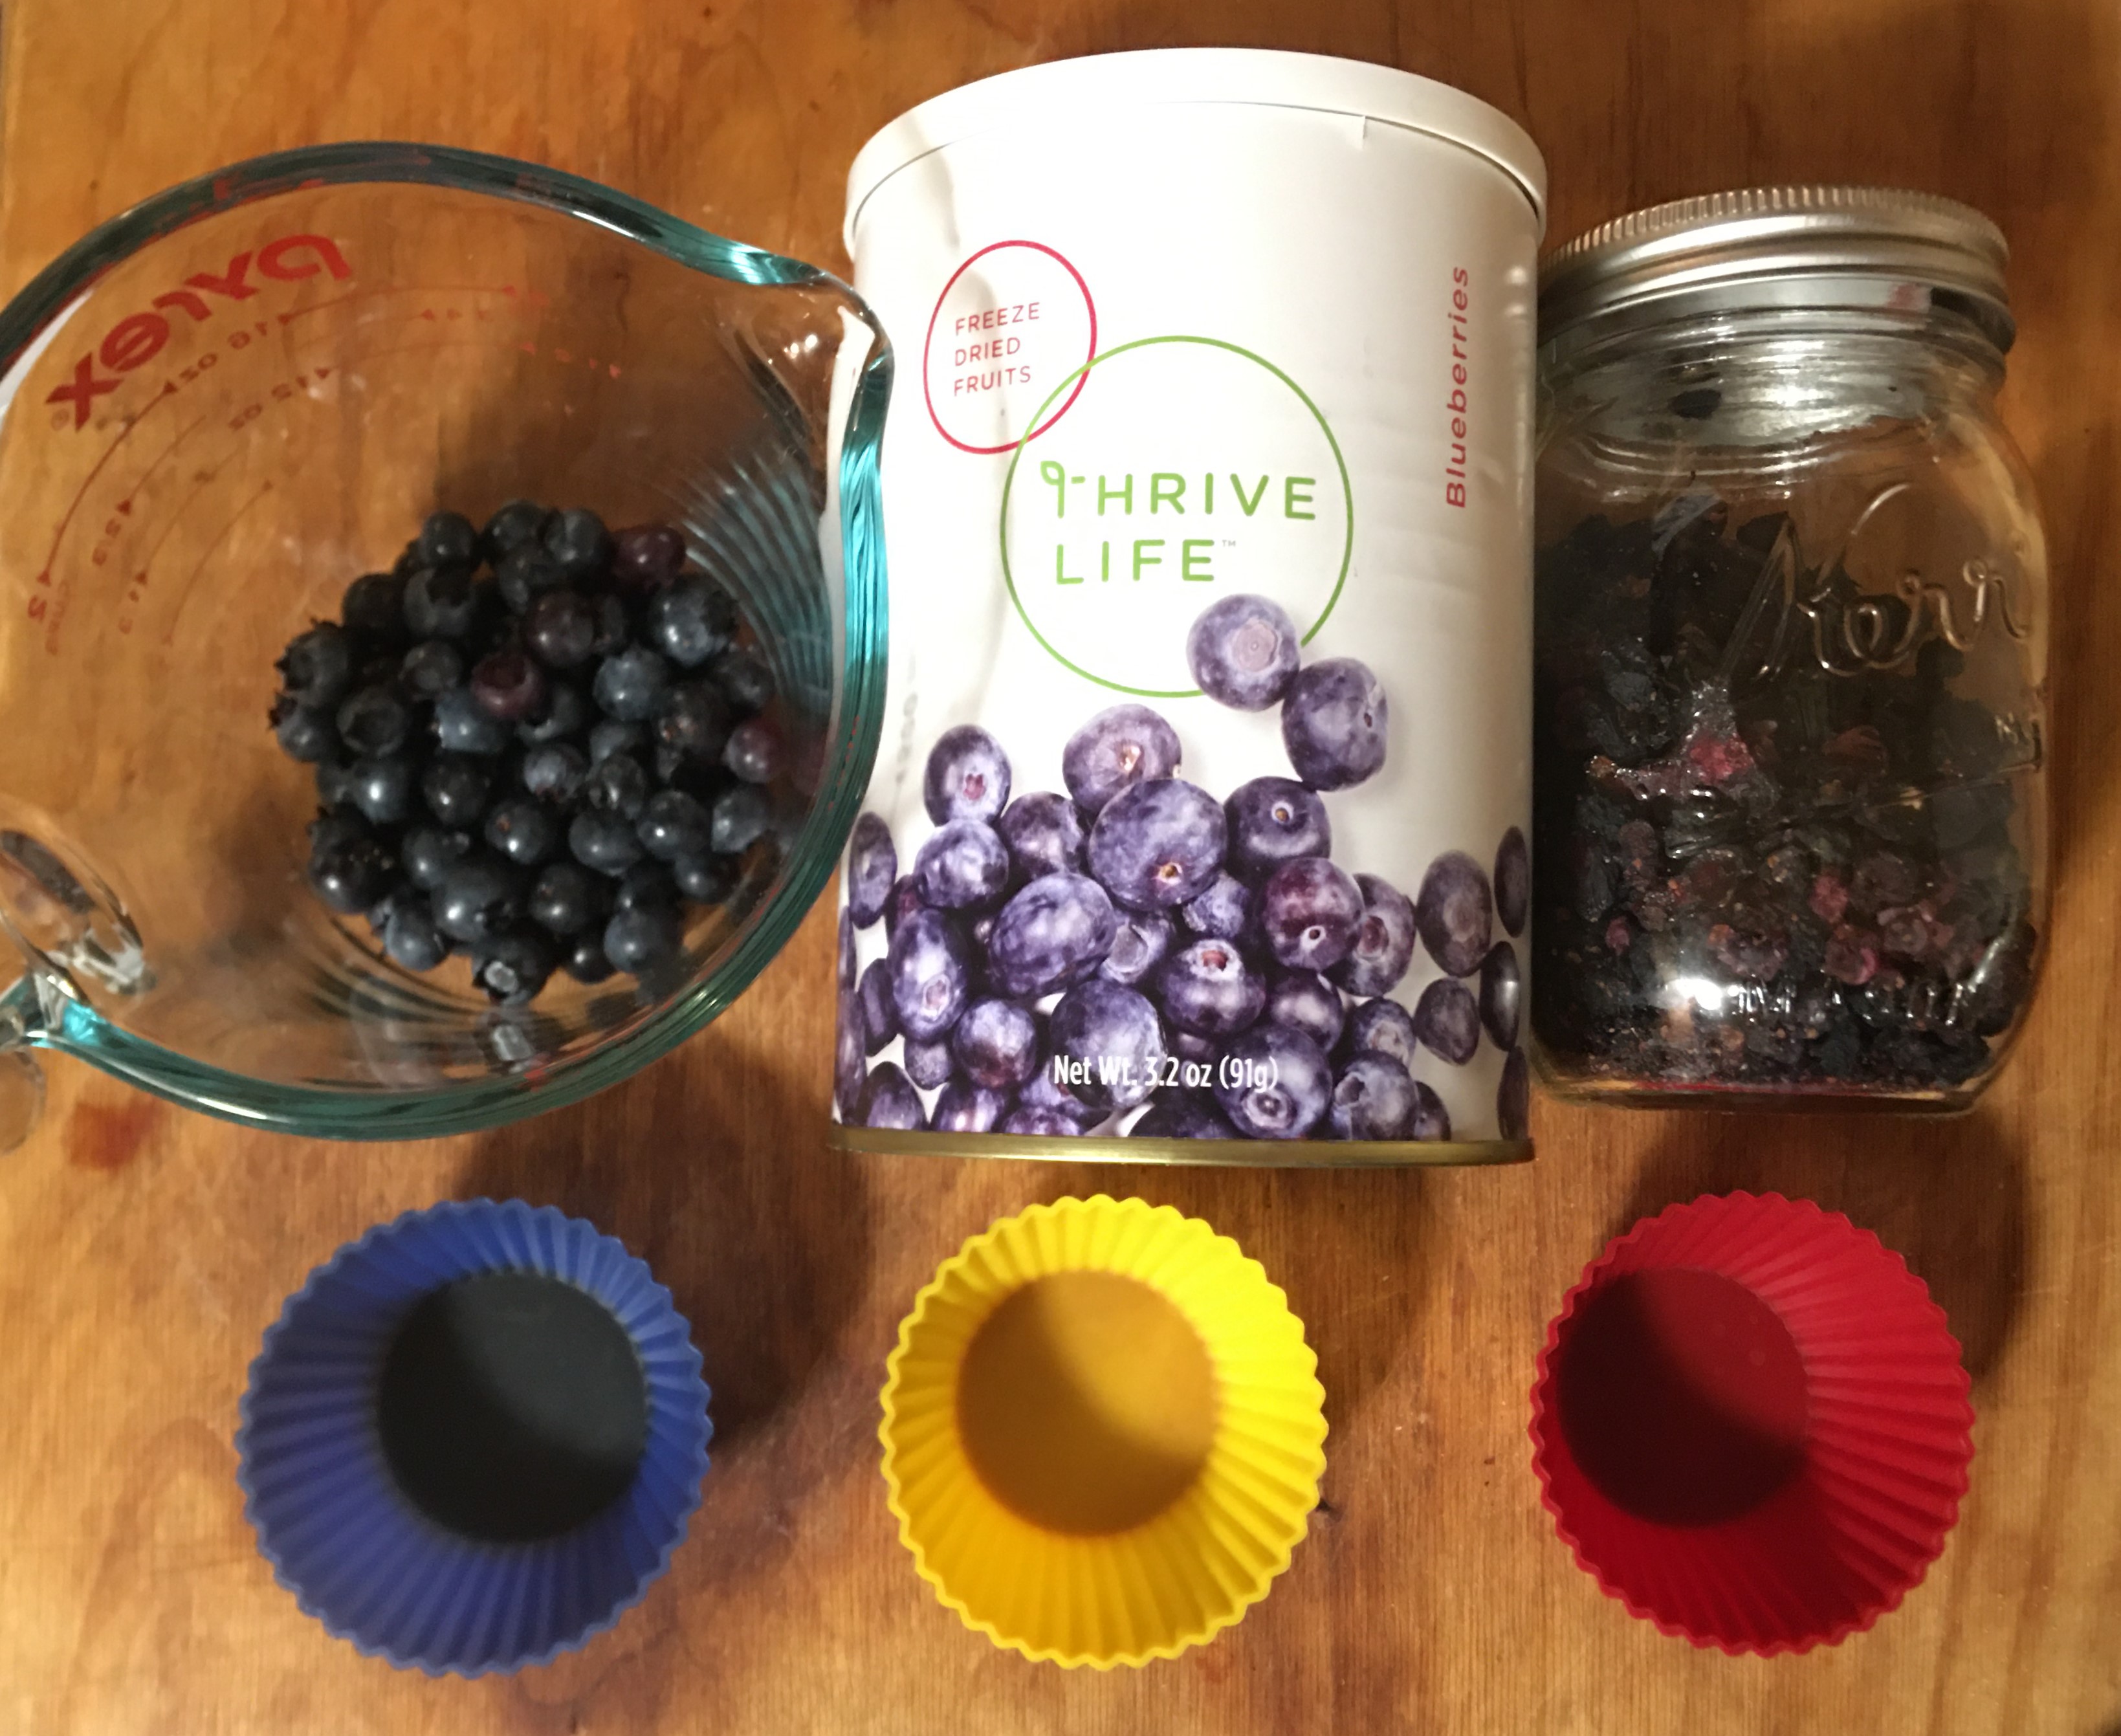
In the blue cups I added the fresh blueberries.

The yellow cups have the reconstituted freeze dried berries.

And the red cups have the reconstituted dehydrated berries.

As you can see with this first baked picture, there is an obvious hydration difference between the sponges of the muffins.

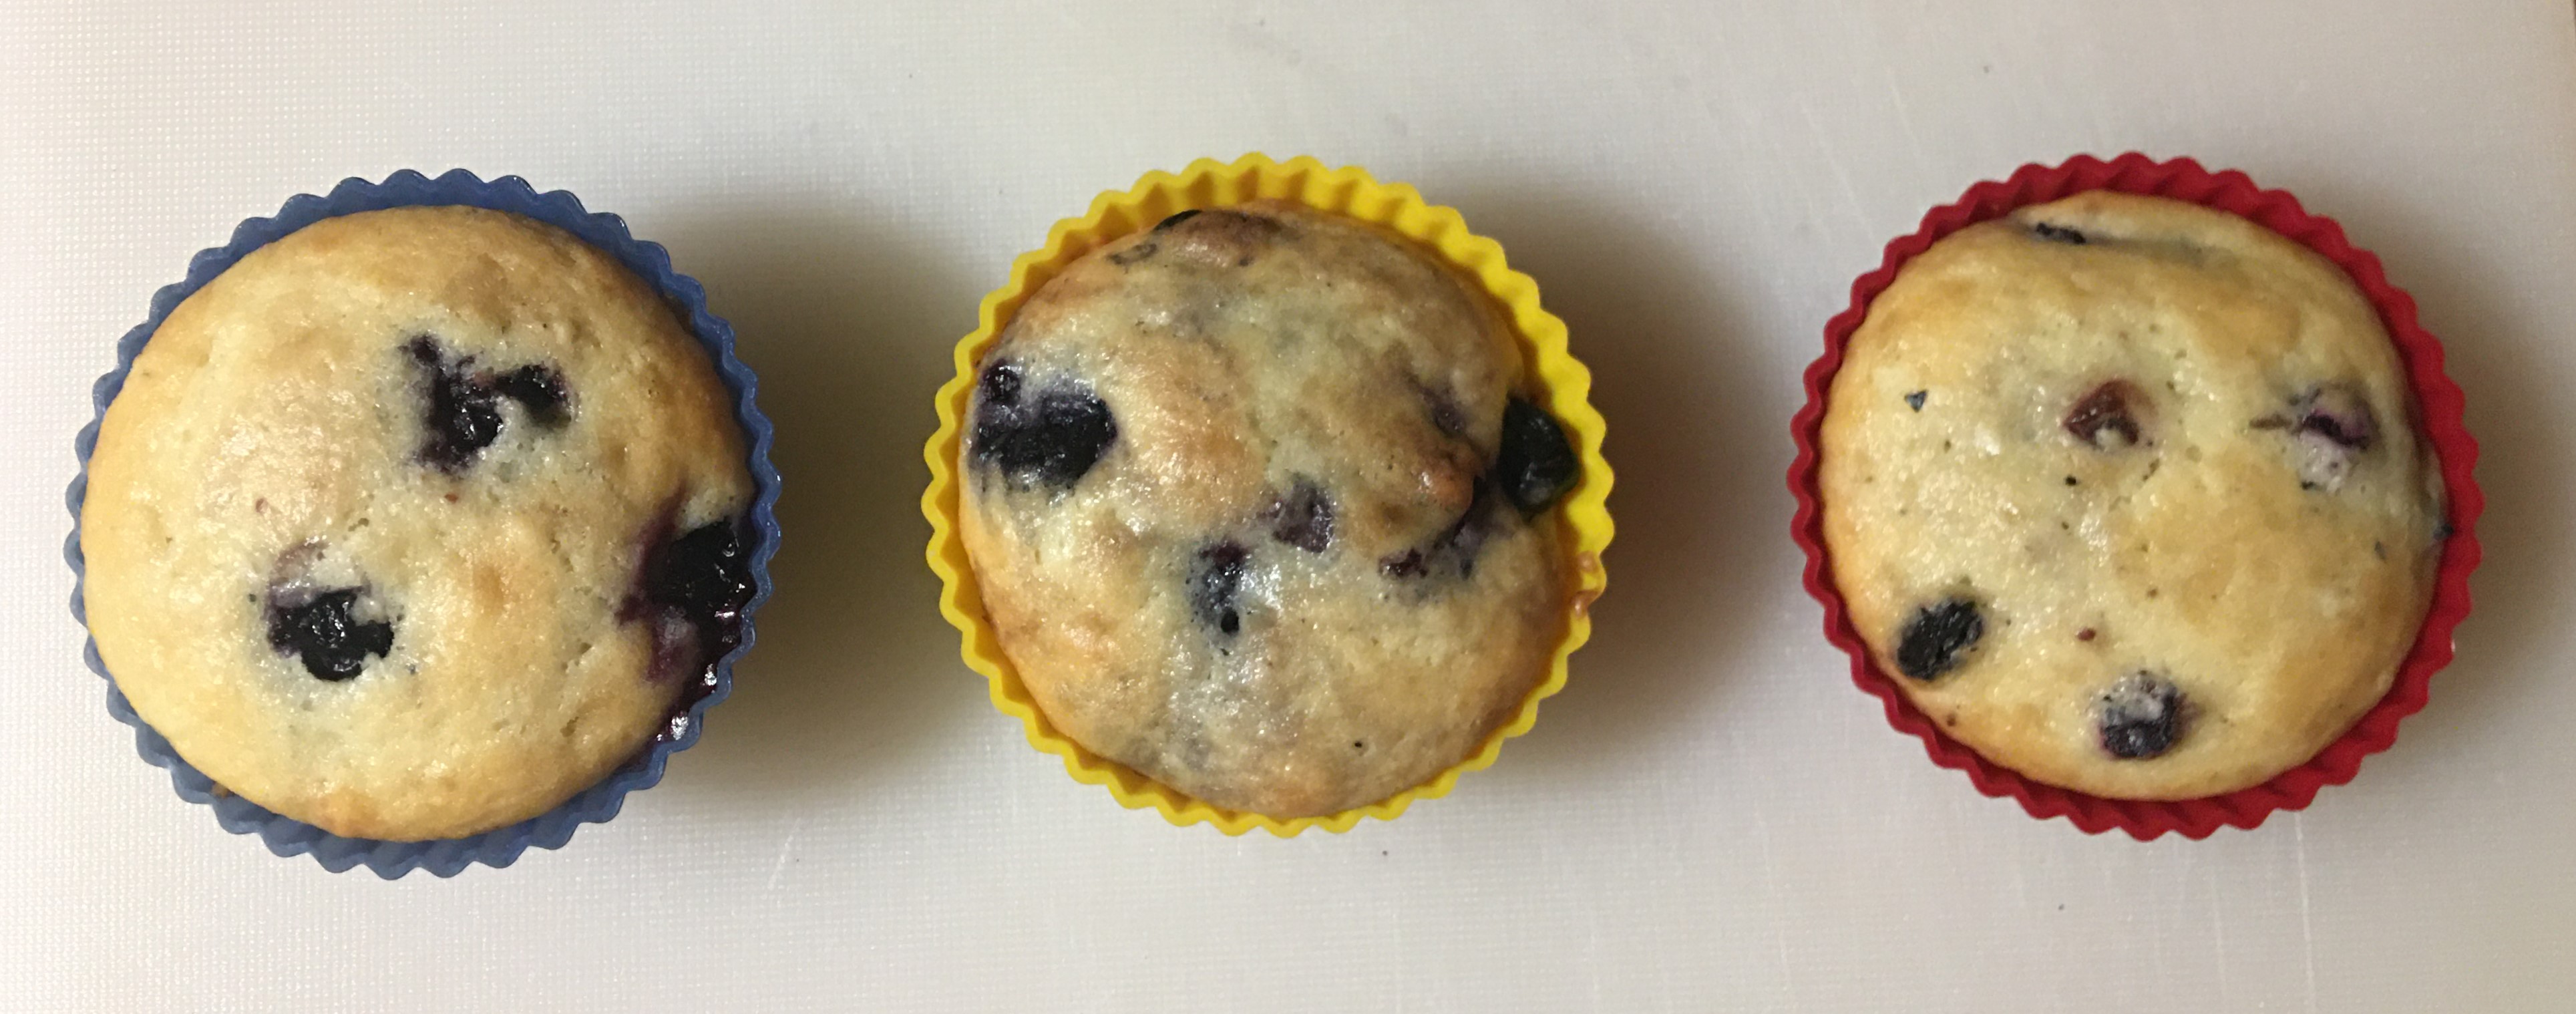
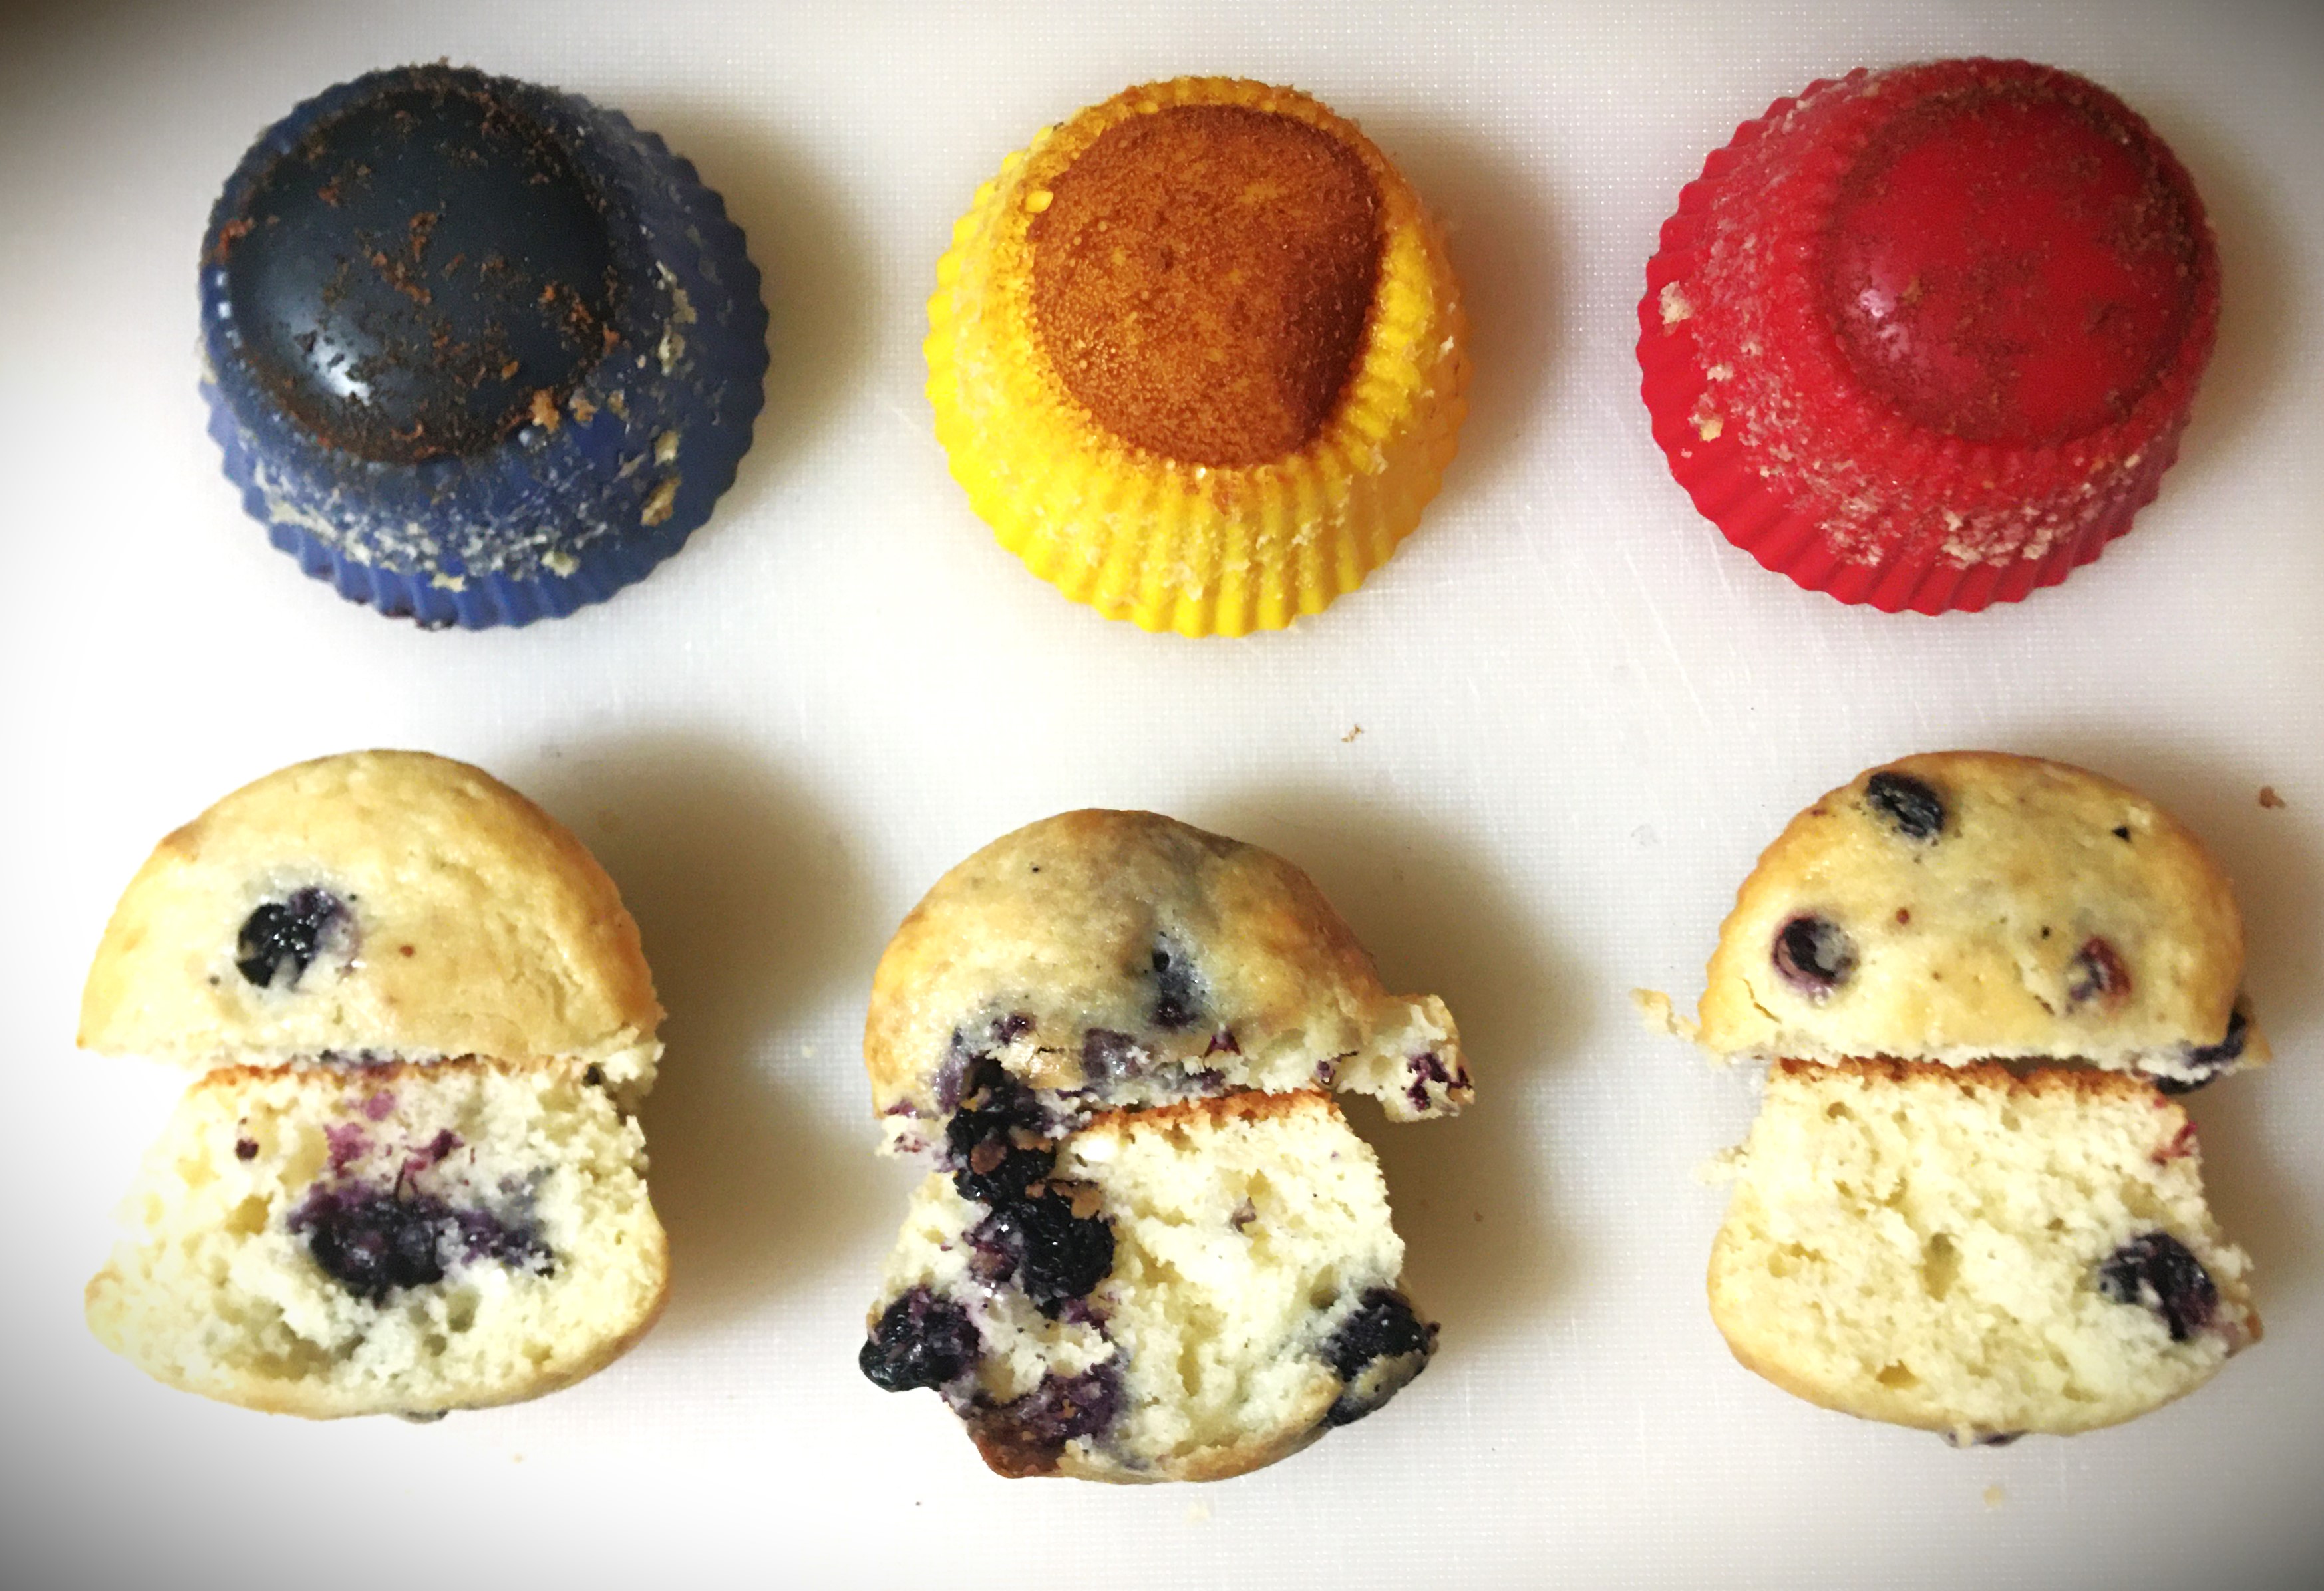
The fresh berries, blue cup, are the standard reference point for the recipe that you choose to use. In my preference, the sponge is mildly sweet and firm with enough water content to keep it from being dry.

The reconstituted freeze dried blueberries, yellow cup, added more moisture content to the sponge, but the berries taste and texture wise are the same as the fresh berries. I walked away from this muffin with slightly tacky fingers and some crumb stuck to my fingers.

The reconstituted dehydrated blueberries, red cup, made the crumb dry up a bit. Instead of that perfect balance, it had the feel of what the perfect muffin feels like in a day or two after being baked. The crumb itself is still sweet, the dehydrated berries just took some of the moisture out. That being said, the dehydrated berries were sweeter than the fresh or freeze dried. And they offered a little different texture. You know that cheap box of premade blueberry muffin mix that you can buy at the store? The berry texture is pretty much the same. The berries are bigger than that boxed mix, otherwise there’s a very close comparison there.

If you remember above, my husband said he preferred the yellow cup muffins, freeze dried. I found that all too funny because I still prefer the fresh berry or blue cup muffins. But that just goes to show you just how much it comes down to personal preference.

Decorating with Blueberry Dust

Last but certainly not least, here is the secret baking trick that I alluded to last week!!!!!

The best part about the freeze dried berries is the perfectness about how you can break them down into a decorating powder. Not only is it easy enough to make a decorating powder in seconds. It is also sweet and gives a punch of flavor like you can’t imagine until you try it.

Yes! You can use a spice grinder and turn this into a beautifully fine powder that you can add to your butter cream for a beautiful lavender color with absolutely no food coloring. It also gives an intense blueberry flavor without watering down even your stiff peak frostings or fondants.

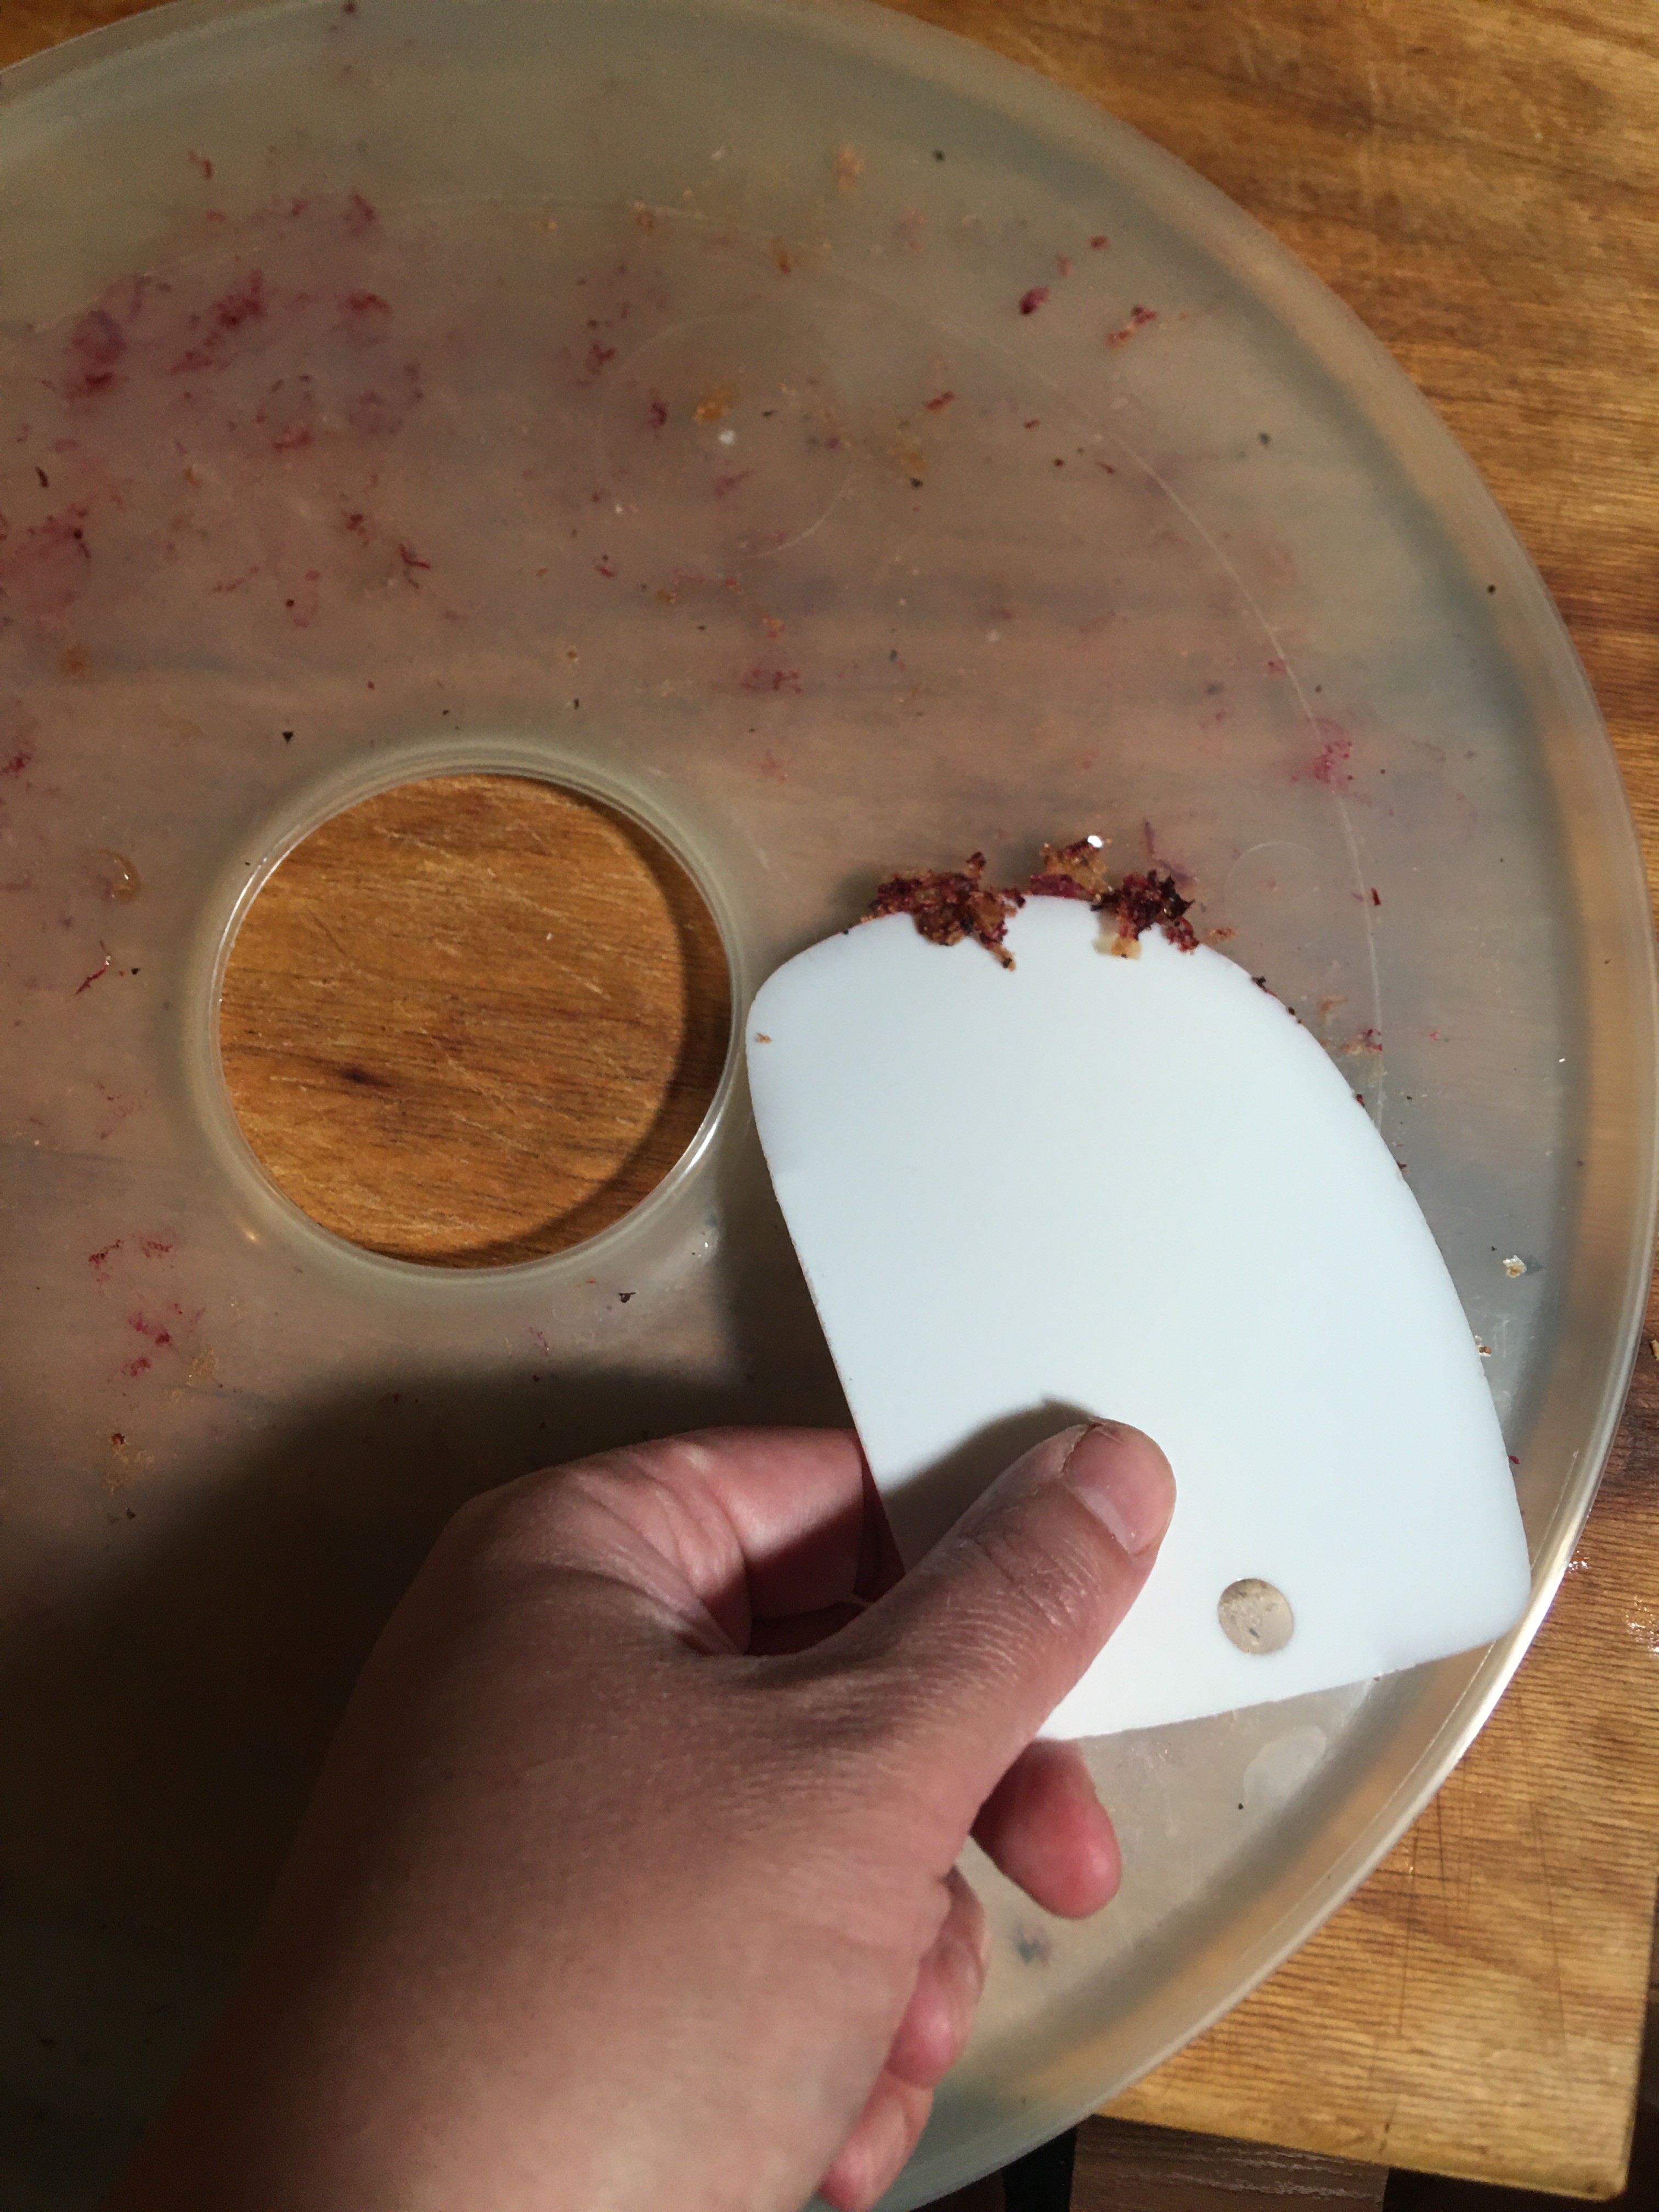
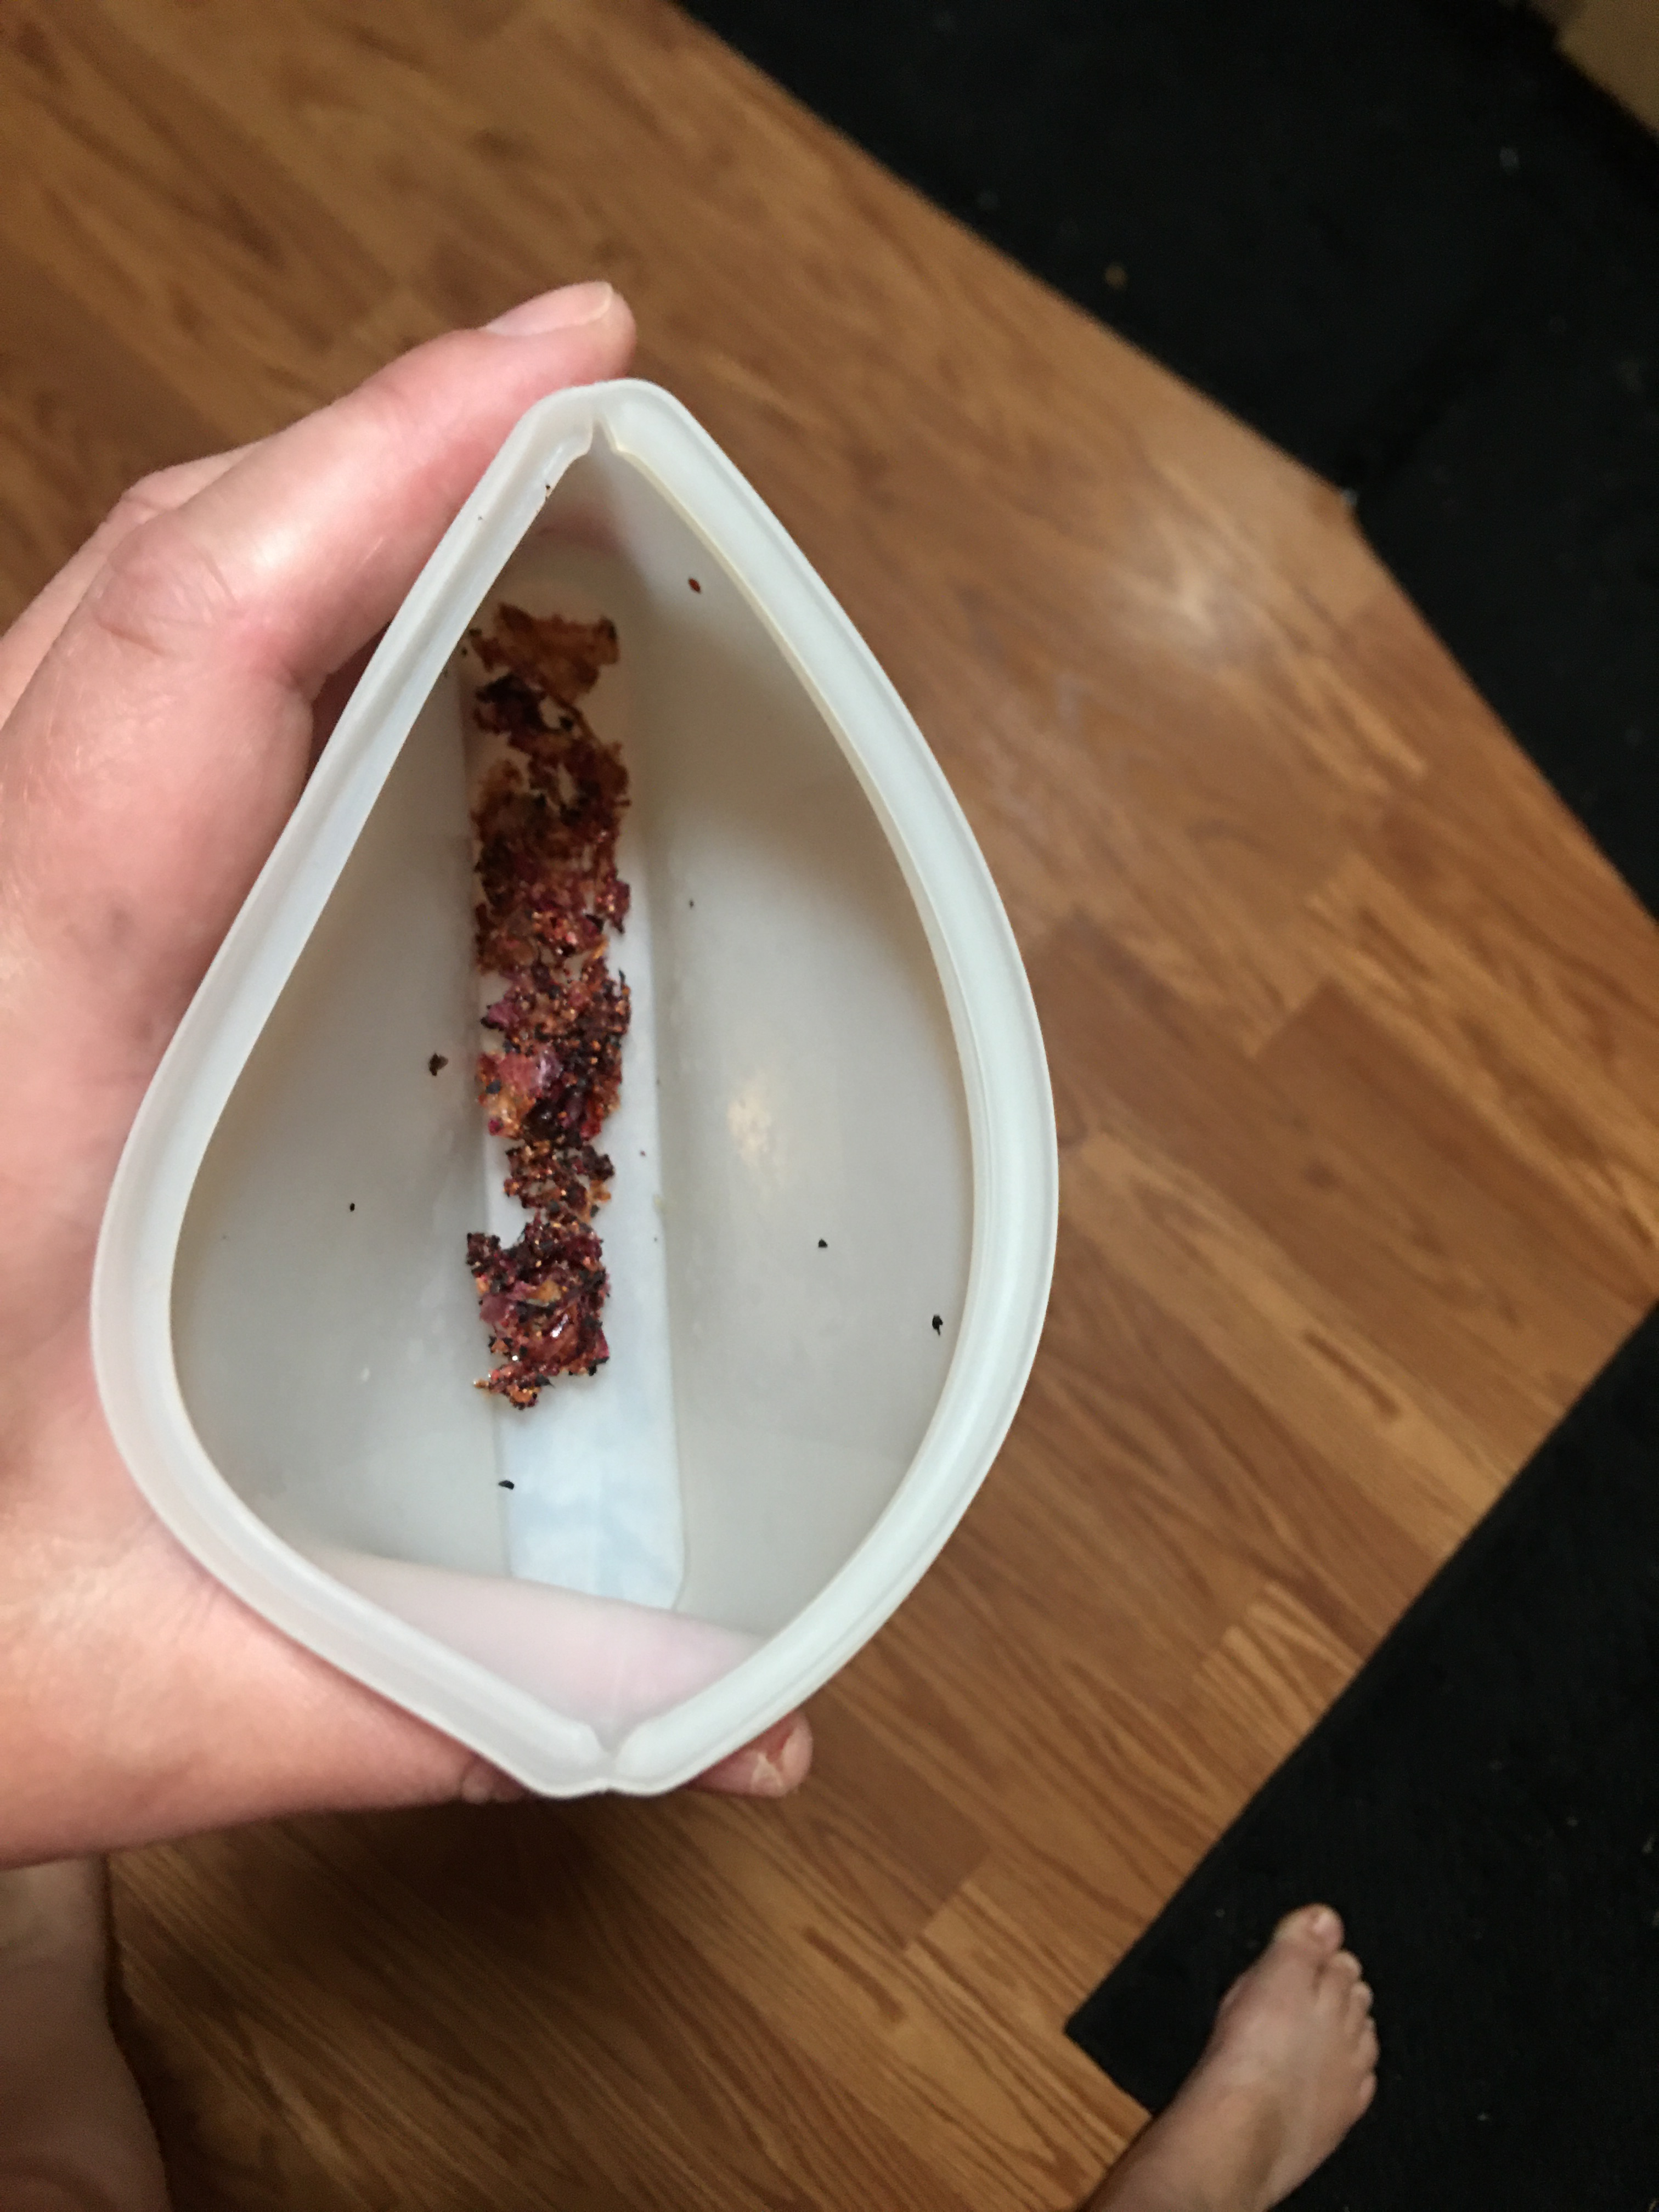
In this instance, I just put some crushed freeze dried blueberries into a plastic bag and rolled over it with my rolling pin a few times. Literally anyone can do this!

But my absolute favorite part is just how simplistically beautiful this is. Right here is the blueberry muffin mix from above, cooked in a donut mold. Sprinkled on top is powdered sugar and stripes of the blueberry powder. And finally it’s garnished with edible lavender and whole freeze dried berries.

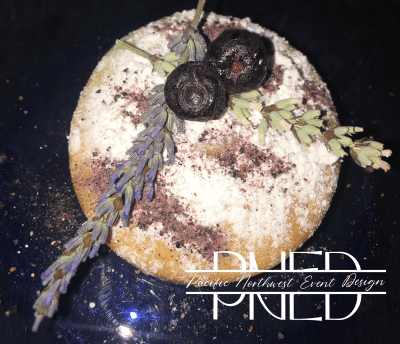
This is the most beautiful and perfect baked good that I’ve made since having my kids. And it reminds me of the beautiful creativity inside me. It’s not anything spectacular. Because I know there are pastry chefs out there that can make me look like a toddler in my kitchen. But this is a simple wow treat that everyone can make for themselves. And all it takes is finding the products to bring into your basic kitchen and just having some fun.

I hope you try some of these ideas in your kitchen this week!


Products Used Today: This post contains affiliate links to products. We may receive a commission for purchases made through these links, but at no extra cost to you.

Processing…
Success! You're on the list.

Leave a comment

Rolling In Blueberries!!!

This picture was our family’s first time going out to pick blueberries. I have a second berry picking appointment coming up this weekend and I wanted to share with you our experiences and what you can do with any blue-berries that you picked this year. Or if you’ve yet to visit a blueberry farm, than the berries that you can find in your local produce stand or appointment.

This year blueberries were slow to come into season because of our long cold and wet spring in the Pacific Northwest. (In fact, our whole growing season was completely thrown off, not just the blueberries.

Why did I choose to pick our own berries this year?

My youngest two kiddos LOVE blueberries. If my mother in law or we buy a pint of blueberries from the store, these two will gobble them all up while your back is turned making lunch. LOL I wish that were an exaggeration!

My problems with store berries are that produce prices have jumped through the roof so much where I can only afford to buy one fruit, in moderate weight, each time I go to the store. Yes, we’re a family with a tight food budget. And truth be told, blueberry prices make it so that this fruit really isn’t in our range. I can choose a pint of berries or a few bunches of bananas, or a bag of clementines. So If I want to have fruit to last past one meal, you can guess which direction I usually go. And then there’s the problem that when the blueberries are on sale, sometimes I find berries that already turn, or they’re molding in a day or two at home. Again, not cost effective.

So when I saw a social media add for a local blue berry farm, I jumped on the opportunity!

If you know grocery store storage, you know that the fruit you purchase today is already about 3 weeks off of the plant that it grows on. So picking berries ourselves means that they’re the freshest that you can possible get. And you have the bonus of the fruit being picked while ripe, instead of green. (If you know how quickly the vitamins leave your produce once it’s picked, you understand the value of eating your produce as soon from picking as you can get.

Then there is the educational bonus. By taking the boys out to pick, they see where the blueberries come from (not the store refrigeration case), what the blue berry bush looks like, what a ripe berry looks in comparison to a green berry, and what kind of environment it takes to grow blueberries. (Yes, we picked with boots on our feet!)

Advertisements

This was definitely a learning experience for the boys because we had been picking an insane number of blackberries this summer. And the one thing that they immediately noticed is that they love picking blueberries over black berries because they don’t have thorns!

The remaining bonus to picking blueberries our selves is that we can speak with the farmer and learn about their farming practice. If it matters to your family if a farmer uses pesticides, natural organic sprays, or no sprays at all, this is how you get that information. There are many local farmers out there who do not have the time or money to purchase the “organic” sticker from the FDA. And often times, these farmers use a lot less product on their crops than the companies who can afford that sticker.

Pearson’s Bees and Berries is one of these farms. I would never have known that they skip even the organic sprays had I not met them and talked with them. But the first thing that I loved about this farm is that their bushes are heirloom. This is where I draw the most value from farmers. With as much as society pushes for scientific advancements, I really do not want those advancements in my food. I’m not the mom who buys everything organic. But I am the mom that buys produce (and grow my own) from heirloom and heritage plants whenever I can.

And I’m also the mom that buys directly from local farmers over grocery stores. People are under the assumption that farmers make a lot of money from their crops. Unfortunately, especially for the small farms, they don’t make very much from their crops unless they sell directly themselves. And I would rather my money go directly to a family to invest in their business than a chain. Plus it frees up the grocery resources for the families who are unaware of their local farmers or (for any numerous reasons) can’t make it out to the farms themselves. And if you’ve ever lived in a community where the power goes out or a snow storm comes in and the onion bins are empty, you know what it means to free up resources when you can. (The onion bin is a true story. Every year!)

This first visit to the blueberry farm, we picked 9 pounds of berries. This weekend we’ll pick another 9 pounds.

What do you do with all those berries???

I’m so glad you asked that question!

With my family, the way that we maximize our small grocery budget is by preserving everything that we can for the year. When berries are in season, we store them in a way befitting to how we will use them throughout the year. Apples we make apple sauce. And last year I learned how to can apple pie filling. So in the fall, I can buy the apples at the cheapest price of the year and take care of our apple needs for the year. Black berries, we pick them (for the price of gas to get to our picking location) and have our jam for a year or two for the insane amount of PBJ that we go through in our house.

This is my first year with blueberries to preserve for the year. So I photo documented everything to share with you here. If you decide to hit the berry farms this year before the season ends, you can have an idea on what you want to do with your berries!

Frozen

The first thing my mother in law recommended to use, when she heard of our first trip of picking blueberries, was that they freeze beautifully. And indeed they do!

I took this cookie sheet, and made a single layer of berries. I put them in the freezer to get them frozen and then put them into zip lock bags. I chose the quart sized bags and measured out the berries into 2 cup increments. Most blue berry recipes that I have (and looking at new ones), this is perfect for making a double batch of just about everything. And yes, I always make double batches of everything. With a family of five, with three of them growing, I just overcook to be on the safe side and err on the side of leftovers. And with blue berry muffins, it’s nice to have one baking session with treats for the week.

If I only need 1 cup, then at least I only have a cup of thawed berries in the fridge for the berry thieves to nab!

Dehydrate

The baker in me made me dehydrate. I’ve had many recipes where the juice of the berries was just too much for the sponge and it made a soggy mess! So by taking the liquid out of the berries, you not only save freezer space with this shelf stable preservation but you also keep the right consistency to cakes and muffins.

The problem was what is the right way to dehydrate blueberries?

Before I set up my dehydrator my mother in law had already found a news article that stated the way that you HAVE to do it–but the berries in half.

Now I froze 3 pounds of my berries. And that left me 6 pounds of berries to dehydrate. There was absolutely no way I was going to cut all those berries in half. I’m a mother of 3 after all!

So I performed an experiment.

I left berries whole, with an assumption going into this that they would take forever because of the sturdy berry skins, for one tray. The second tray I filled with berries that were cut in half.

As seen above: whole berries and smashed berries.

For three trays I lightly smashed the berries onto a plate, using a glass cup that I could look through. By using the glass cup you can make sure that you see which berries you are smashing, which ones you already smashed, and just how much pressure you are adding in connection to breaking the skins open. For the smashing, I applied just enough pressure that the skins split open, allowing the air in to dehydrate, and yet keep the majority of the fruit structure intact.

When you look at the pictures above, the whole berries and the cut berries looked the same. So I just put the whole berry picture up. Both of those sets were placed on the mesh insert. I’m done with the days of putting fruit directly on the trays. By using just the mesh I don’t ever have to scrub my trays. Plus the mesh you can fold and break up any of the thin bits that cling to the surface. So even the mesh don’t have to be scrubbed either! The Right picture is the smashed berries. You can see what I mean when I say just enough to break the skin. Some got a bit more flat than the other (which looks a lot like the whole berries on the left). But these berries are a bit messier. I wanted to save the mess and not lose out on any of the blueberry goodness. So I dehydrated these on the jelly roll sheets.

The final two trays of blueberries were my fully mashed berries. I’m teaching myself how to seed save from different plants. My tomatoes are not yet ripe, so I can’t practice on those yet. So I chose to use the blueberries as my maiden voyage. And I’ll talk more about that below!

As you can see below, with the final dehydrated product, the fully mashed berries were a mess, a beautiful, lovely mess! So those of course were on a jelly roll insert.

As seen above: smashed and fully mashed.

The drying time and final products actually surprised me! The smashed and mashed took the least time to dehydrate, as anyone would expect. They took about the same amount of time, 13 hours. (Of course we had very high humidity days, which didn’t help here.) The mashed berries pulled off the jelly roll just like any fruit leather would. So if you want fruit leather you can use a blender or you can skip that extra clean up and just use a plate and glass. Of course the blender will give you the means of smoothing out everything across the jelly roll and produce a nice solid leather you can cut into perfect strips. Or you can go the quick and dirty route and skip the whole cutting process. Either way works and is a complete judgment call.

The smashed berries surprised me. I didn’t think they would turn out as perfect as they did. There was very little flesh spread and it looks nearly identical to how the whole and cut berries turned out, when they finished. These look exactly the same as the dehydrated blueberries in the packets of oatmeal or premade blue berry muffin packages. My walking away point is that for the least dehydrating time and same end product, a light smash is the way to go for dehydrating berries!

What surprised me the most was that the cut berries and the whole berries took the same 23 hours to dehydrate. Cutting the berries didn’t speed along the process for me. Even when I ate a whole berry and a cut berry, their textures were identical. I’m not sure why the article my mother in law read said that you had to cut the berries for the best result. There wasn’t a difference.

However there was a difference between the whole/cut berries vs. the smashed berries. When dehydrated the smashed berries had a little bit of pop corn roughness to it, but it had a bit more “airiness” to them. You could say they had a snap and not as dense feel to the teeth. It wasn’t a completely night and day difference between the three methods. But it was noticeable.

My Vote: a quick smash of the blueberries and dehydrating them is the way to go!

One side product you might not have thought of

Before I end this portion of dehydration, I wanted to talk about this one last observation. I like finding ways of using as much as I can of the things I preserve. And if you’ve dehydrated long enough, especially with the jelly rolls, you know there is always that bit from the juice and fragments of flesh stuck to your tray. This time, I decided on another experiment. I scraped off this little remnant. As you can see in the right picture below, I didn’t gain a whole lot of extra bits off of 5 jelly rolls, but I want you to stay tuned because I use this bit in a recipe below and I want you to know that this is completely usable!

What caused me to go to this effort?

I had to scrape my jelly rolls anyway, to make it quicker for washing when I was all done–no scrubbing. I took a taste of these scrapings. And let me tell you what! These scrapings have just as much flavor as the blueberries themselves. So yes, all that flavor, I was definitely going to cook with that.

Saving Seeds

I have no idea how successful this attempt of seed saving will be. I’m very new to this skill set. Including this batch of blue berry seed, I have three other plant varieties that are in the process of cold stratification.

If you are also new to seed saving, perennial plants do require cold stratification in order to tell the seed that it’s ready to sprout. I only have a small garden so it’s not space effective for me to plant seeds in the fall and let them over winter (cold stratify naturally) and hope they take off in the spring. So the best option for me is to go through the stratification method using my freezer and start the seeds indoors and plant any successful starts.

With blueberries, the methods I’ve seen people use for capturing seeds all involved using a blender and wasting the flesh. As you can imagine, I have no intention of losing berries to waste, so I tried something different.

If you remember above, when I talked about mashing the blueberries I mentioned seed saving. Here is what I did. The mashing broke apart the berries that you would see happen in a blender. The difference is that the flesh, I was able to put in my dehydrator and use it as a food source.

On the plate that I mashed the berries on, I removed the thick flesh and left the juice on the plate. With a silicone spatula, I scraped the juice from the plate into the bows that you see here.

As you can see, there seeds were quite numerous from the several handfuls of berries that I mashed. Definitely the seeds are numerous enough to get me a few starts to plant this spring. And I might have enough to share with others.

The method that I used to separate out the seeds from the juice and bits of flesh was the sluicing method. If you’ve seen a video on how you sluice a pan of gold, you understand the steps that I took here. I didn’t pour in very much water, maybe 1/4 cup of water at a time. I swirled the water in the bowl and let the water separate the juice and flesh from the seeds.

It is true what you hear; the seeds to stick to the bottom of your blender, or in this case your bowl. There will be a few floating seeds, but those are the ones that you don’t want anyway.

I sluiced, in my soup bowl, four or five times until you I got to this last picture of the seeds in the bowl.

From this point I continued in the stratification method that others already show how to do; place a damp paper towel in a zip lock bag, place the seeds on the paper towel, and place in the freezer to start the stratification process. (These are placed in the freezer for a minimum of 90 days for blueberries.)

I know that I’m not going to have any blueberries for five years, but I want to start this process now. And I might have to plan ahead and grown several bushes because I definitely have blueberry lovers on my hands!

Freeze Dried

While I do not have a freeze drier, I so wanted to mention this method of food preservation. This method maximizes on the flavor and texture of the blueberry while maintaining the maximum level of vitamin retention. No other food preservation method tops this method at this moment in food history.

That alone is reason enough, but there is also the added bonus of berries being shelf stable and fresh for up to 25 years, 1 year after opening. If you’ve water bath or pressure canned any preserves, you can recognize the benefit of not having a jar or seal failing you.

Maybe you’re like me and don’t have a freeze drier. I want you to know that you still have that option available to you.

More information on freeze dried blueberries can be found here.

I’m going to talk more about freeze dried berries next week, because I’m going to use these in recipes. And believe me, if you are a professional cake or cupcake baker, you’re going to want to see what freeze dried berries can do for you and your clients. You’re going to have all the berry flavor without throwing your water ratio off. Plus the added bonus of being able to decorate with the berries that you can’t do with fresh and less of your precious time than dehydrating.

Blue Berry Recipe

I wanted to share the blue berry recipes that I have and how each of these ways of preserving blueberries act in a given recipe, but I’ve given you ALOT of information already. So be sure to tune in next week for the recipes and how the berries work.

BUT in the meantime I don’t want to leave you hanging with the jelly roll scraping. So here we go on this quick analysis.

As seen above: the berry scrapings and blueberry pancakes (above: whole dehydrated berries, bottom: berry scrapings)

I didn’t have very much of the scraping, just enough for two pancakes for the boys. I made two other pancakes with the dehydrated berries. (And of course some plain flapjacks for the kiddo who dares to turn his nose up on blueberries.)

The dehydrated berries had a bit of crunch to them, but did not disappoint in the flavor department. The blueberry scrapings I absolutely loved! There was the full blueberry flavor without the bite of a dry blueberry, or even the wet squish of pancakes with fresh berries in them.

I’m so tempted to make more mashed berries and spread it very very thin to maximize the blueberry scrapings, because it’s the absolute perfect world for blueberry pancakes–full flavor without messing up the texture of a classic pancake!


Products seen today

These products are affiliate links. We can receive a commission from purchases made through these links, but at no extra cost to you. These products I have purchased for myself. Where I have talked about them, my statements are based on my experience on these products.

Nesco FD-1018A Garden Master

This was a replacement dehydrator for my other Nesco that served me well for over a decade. I wanted to make this recommendation because this dehydrator came with a mesh and jelly roll for each tray. I was prepared to purchase these accessories, but was so pleased to find out that I didn’t have to.

Processing…
Success! You're on the list.

Leave a comment

Advertisements

“Someone ate Pac Man!”

We all have our favorite places to source decoration items for parties. And it becomes a challenge when we need to find things that just can’t be on the shelves anywhere.

Last week I shared some ideas on decoration ideas for retro 8-bit arcade games.

This week I want to share with you, keeping with the same theme, my hacks for ordering a cake and a fresh idea for dressing up a snack can.

How to order a cake from a bakery that doesn’t decorate with licensed characters.

We decided that we were going to get the cake from Costco this time. (I’ve used this same ordering technique with my local grocery store bakery department.)

Before going in person or ordering online, you want to sit down and think of how you want to decorate your cake. Previously one kiddo wanted a train birthday and so I had to come up with a steam train engine cake. This time, how was I going to make a Pac Man cake?

First I made my Pac Man. He was cut out of yellow cardstock and laminated so that I wouldn’t have to worry with paper dye bleeding into the frosting.

The Cardstock Train sits ontop of the cake with a cluster of white balloons behind the smoke stack.

The time that I made my train, I attached wooden dowels. This kept everything directionally proportional with the 3D focal point.

This time I needed to get Pac Man to stand up. So dowels were not going to work for me. This time I hot glued a plastic fork on the back. The fork thongs give the ability to stand Pac Man fully upright or reclined back at a 45 degree angle. I needed this flexibility because I had absolutely no idea how the bakery was going to follow my directions or what their placement was going to look like.

The reverse side of Pac-Man has a clear plastic fork attached in the middle. The bowl of the fork and tines are below the body of Pac-Man.

The one thing I can tell you with absolute certainty is that bakery staff looks forward to doing something different as long as it’s not making more work for them. So if you leave your note with your best manners and let them know what you’re going to do, they get excited about being part of something different.

For the train I had asked them to cluster the balloons together, with no strings, to make a cloud cluster for a train that I would place on the cake. I kid you not, I went to pick up this cake and heard all the bakery employees complain about this insane request that they got from someone. Instead of quickly decorating a cake, they were going to spend additional time and drag their day out.

Of course I thought they were complaining about my simple request and so I was bracing myself for some attitude. Instead, I got the complete opposite. One of the employees came to the counter to help me, went back for the cake, and all the employees came to the counter grinning ear to ear because they wanted to see the train.

The success to the train was that I didn’t ask for more “balloons” then they would normally give. I didn’t tell them specifically where I wanted them or how to position them. I didn’t demand a certain color. I left it simply with no strings, white cluster. My request saved them maybe a few seconds from what they normally would do. But that was a few seconds in their favor.

As you can see with my Costco order form, I asked for something simple. I don’t remember if these are their standard balloon colors or sizes. But they were great in giving me large balloons, the exact number I needed, and their colors!

I don’t know what this bakery’s response was, because my husband picked the cake up.

But I do have a story for this one, on the day that I placed the order.

My son was so excited to have a Pac Man cake that as we were leaving the bakery section, after filling the order form, he flagged down the nearest employee and blurted in a loud excited voice that he was getting a Pac Man cake. You should have seen the employees face when he had to tell my son that they don’t do licensed characters. My son cut him off and told him, “No! I’m getting a Pac Man cake!” I had to step in here and explain to the employee that I requested that the balloon strings be left off so I could turn them into ghosts and I would add a Pac Man at the party. The employee chatted for a few more minutes and kept repeating himself that this was a brilliant idea.

If a non-bakery employee was excited about my idea, you can just imagine how the bakery employees reacted when they saw the order form. If nothing else, it turned a typical boring day into something to talk about. Again, this wasn’t a request that added to their work time. It may have saved them seconds. But I’m assuming it was something fun that broke up the monotony.

While on the subject of cakes…..

I don’t know about your family, but I kid you not growing up and even with my own kids, we have at least one cake story that will live as a memory for a lifetime!

Advertisements

What is your cake of a lifetime story???

When we were kids, my mom locked my sister’s birthday cake in the car, at the lake, with the keys in the car.

I tried my hand at making a sculpted cake for my son’s birthday. He wanted a bubble birthday. So I attempted to make a bubble container cake. That cake makes me cry in the fetal position to this day, because the sponge was so dry that the dang cake kept crumbling and falling apart. It didn’t matter how many dowels I added to maintain the structure, that I used fondant for a little holding power, or that the cake was frozen… it was a nightmare!

And that photo I keep buried away in a digital file folder where I can cry as my son laughs as an adult and I have to recount that story. Because even though I hate it, I have to admit that it’s a story that deserves to live on.

So Yes! This Pac Man cake will live on for the ages. Not for the same reason as the Bubble Birthday Cake. But for this reason….

Pac-Man cake has Pac-Man in the upper left corner. Five ghosts are in the center of the cake. The peremeter of the cake is lined with yellow M&Ms like the arcade game's power pellets. All but five of the M&Ms are missing. The M&M eyes of the far right ghost are missing. That ghost's frosting is smudged.

After I finished assembling the cake, I left the party room to go talk with the other moms while the kiddos played. After a time, my birthday boy walks up to me with his hands on his cheeks, devastated face, and trying hard not to cry as he exclaimed, “Someone ate Pac Man!”

I had zero idea what he was talking about, but seeing his reaction was enough that I got up and walked back to the party room to investigate.

Here my son is about to cry. As soon as I saw the cake I busted out laughing almost to the point of cry laughing, because that is absolutely hilarious!!!! This was no typical finger swipe of the frosting. Someone ate as many of the M&Ms as they could reach and took out a ghost in the process. And no, my laughter didn’t help my son. I looked down at him and told him it was going to be okay. I had already taken pictures of the cake. And then I asked him if he wanted to see what his cake looked like before this happened.

We went back to where everyone was at. As I picked up my phone to pull up the pictures I let the moms know that someone had ate the candy decorations off of the cake. They all were mortified, as any mother would be. I showed my son the picture. I fawned over it with him and once he was happy to at least to have seen his finished pre-eaten cake, he went back off to play. Then I showed the moms the picture and filled them in on what happened.

Advertisements

I don’t think they knew how to respond with how I was responding. As a mom, we’re all use to the finger swipes. But to see the cake pillaged! LOL Honestly, my whole thinking was that it could have been a whole lot worse. Someone could have taken a fist full of cake out of the cake. Being angry or interrogating the kids to find out who did it would not have restored the cake. It would have made the party uncomfortable for everyone.

What surprised me was that because I was okay with not knowing who did it, the moms began one by one asking their kids if they took the candy off the cake. None of the kids did. And it became a great mystery. It wasn’t until I mentioned this story in my newsletter that I realized that I never asked any of my three kids. Obviously birthday boy didn’t. His feelings were genuinely hurt in that moment. I assumed my oldest wouldn’t do it. Even though he’s a first grader, it’s just not his style. Now my youngest! That boy has the sweet tooth that the other two have never had. And he’s also in the food swiping stage. I did ask him the other day and he told me that he didn’t. But I also know that he’s at the stage of not telling the truth to see if he can get away with things.

To this very day, I’m going to error on the side that it was my youngest that plundered the cake, but I have absolutely no proof that he did. So officially the case is closed as a cold case. But secretly I still think it’s him.

A New Take on Snack Wrappers

I know I’ve seen the crafty labels that people put on Hershey bars or bags of chips. The one thing that I haven’t seen is a label for Pringles. And snack chips were one of my party purchases from Costco.

When trying to make a theme happen from scratch I really did one more item to pull it all together and finish it off. And what’s better than something you can put jokes on, for kids at an age who adore any joke you throw at them!

A stack of flat snack can wrappers are splayed on the desk. In the center of each label is a Pac-Man with power pellets on either side of him.  On the left portion of the labels are hand written jokes. On the right are chip flavor indicators; cheese bonus, original bonus, sour cream bonus.

My first thought was to create a PDF that I could print off from my printer. However my color ink cartridge was empty and it was just easier to keep material cohesion by using black cardstock and vinyl. Plus I have acrylic pens and have hardly touched my white pen. So I cut from vinyl all that I could. And I wrote out the jokes.

Let me just say that I did not think I would find any Pac Man jokes. I was surprised when I did. There are kid friendly ones and there are adult friendly ones. So you kind of have to pick and choose which jokes you use for your party. But here is the site I used for one reference joke page. I didn’t save the sites and can’t find the second one that I pulled from. But it was a simple Google search and you don’t have to go far before you start seeing repeats. So it is a small joke world for this game. All in all I used 8 jokes that I recycled over the 36 mini tins that I dressed.

Before I show you how I attached these labels I want to point out a troubleshooting tip. I had a lot of weeding and transferring to do. And I’m not ashamed to say that I worked quickly because I had a lot of items to go through. I did lose some letter details, as you can see with this B.

Tip: If you lose details, use a white acrylic pen and draw it back in.

That is the one thing that I love about 8-bit fonts, if you lose a letter detail, all you need to know is how to draw a line or rectangle. I had a few cans that I had to correct. But I didn’t even tell my husband or kids and none of them noticed. And my detail orientated boys are quick to point something out to me that’s missing, wrong, or whatever corrections they want me to make because I didn’t do it just so. ….kids!

The assembly on these is super quick. If you’re using copy paper glue dots are all you need. For cardstock I needed hot glue.

The wrap is slightly longer then the circumference of the can because I didn’t want to have to deal with a hairline crack of color because it wasn’t cut precisely to precise measurement. Because there was overlap, I used two small dots of glue to anchor the edge down to the can. After wrapping the label around, I finished it off with a line of hot glue. There was no puckering or edge lifts. I advise against using glue like Elmer’s where you have to hold and wait dry. Hot glue was perfect because it dried by the time I had aligned and pressed everything into place.

Tip: The tab of the container seal is something that you want to pay attention to, so that no one struggles to open the can. A tried folding the tab up and press it back down after the label was attached. This took too long. So I went with option 2.

Tip 2: Slide the label up under the tab. Apply your anchor glue and then finish off the attachment. Having the tab on top of the label helped to align the label quicker. So it was a time saver guide.

Three fully labeled snack cans are lined up side by side, showing different parts of the label. From left to right; Pac-Man, "Original Bonus", jokes.

An additional option that you can add to these cans is to apply a Pac Man sticker/vinyl on top to cover the Pringles man’s face. I chose not to do this because I wanted to not over complicate all that I had to arrange for the party.

Instead I opted to turn these cans into small coin banks for the boys as an after the party trinket. To make this modification, all you need to do is take a box cutter or exacto knife and slice a single cut through the clear lid. The best way of doing this is to cut with the lid on top of an empty can. The snack was not damaged and you have a proper safe way of making cuts without the lid slipping on you.

Tip: One cut is perfect if you want your coins to remain in the can and still allow a child to shake it and use it as an instrument. If you make a wider slot, you will allow the opportunity for coins to fall out.


I hope these cake stories made you laugh as much as I did. And that you enjoyed all the decorations and new ideas from this week and last. They were fun and well worth making.

If you have any cake stories, please share them in the comments below!

Files used Today:

The file for the Snack Can Label is found in this Archade Label set.

Processing…
Success! You're on the list.

Leave a comment

Advertisements

Making Decorations You Can’t Buy


This post contains affiliate links to products. We may receive a commission for purchases made through these links, but at no extra cost to you.

Sometimes I love being a mom. And there’s days where I can be found saying, “You want what?!”

Okay, so maybe that’s a bit of an over exaggeration. But only a little bit. Because when I asked my son what he wanted for his birthday theme, he told me he wanted a ghost eating, pellet chomping birthday. To my credit I didn’t flinch or bat an eye. But there was an onslaught on thoughts that ran through my head. Are you kidding me? No one has those decorations! How am I going to pull this one off???

The short story is that I put on my big girl crafty panties and I got to work.

The problems with trademarked images are endless. Anyone who is reputable will not make the trademarked characters for you. And those who can have gone through the trouble of getting the licensing rights to do so, which means you’re paying an arm and a leg for another person to make it for you.

In the area of cakes, the easy go around is to decorate the cake with toys and action figures that you can buy on any store toy aisle. But how do you decorate for a theme where nothing is for sale???

Yes, I actually questioned my rational as a mother for introducing my boys to retro arcade games. But I did conquer the boss round on this problem!

Advertisements

Buy what you can

Pac Man may not be the decorating be on the shelves, but plenty of ideas were.

Thanks to 8-bit style games like Mine Craft still kind of popular, there are the plates and napkins. Yes, the Game On is the wrong font and style. And the game controller is definitely the wrong millennium. Fortunately for me, this was a five year old’s birthday party. I wasn’t going to be given the fifth degree on accuracy of my decor.

Thank God!

The one score that I was most excited for, and got me in the proper mind set for actually pulling this party off, was the stack of round yellow sticky notes that I found at the dollar store. The moment I saw them in the office supply aisle I had to severely restrain myself from doing my happy dance and squealing like an excited 5 year old!

For as much work as I was going to do in creating my own designs, I wasn’t going to have enough time to make a birthday banner. So you better believe I had zero issues with giving the round yellow sticky notes to my kids and telling them to put them all over the walls, windows, and on top of the black plastic table cloths. For under $10 I had the skeleton that made a Pac Man birthday happen!

Advertisements

Make What You Need

Fortunately for me, Pac Man was made in an era where things were basic in design and easy to create in my design program. And with this font, I was able to make things that my son was excited for and proud to talk about!

I was very excited when I found the round stick it notes, because this idea came right to me. The yellow M&M’s are perfect power pellets and the other colors are along just for the ride. But with the primary colors being predominant, it fits with the whole theme.

These are super easy to make to! All you have to do is put a scoop of M&M’s in a cellophane bag, fold it over to keep everything in, and staple a label over the top of the bag.

Tip: if you use a permanent pen to color the staples you can make the staples “disappear” and make a clean presentation.

The gift bags I also got from the dollar store, all I needed was a solid colored paper bag. I wanted blue or yellow, but green was all that was in stock. Not a problem, it’s a primary color that was present in the 80’s video games.

I used vinyl here just because it was quicker to make up all the bags this way, not worry about gluing a million pieces, and I could pack the bags right away!

And for my boys, no birthday is complete without a birthday shirt.

I think my favorite part is “Toss me a Quarter” because my husband and I recently took my boys to a retro arcade and I lost count of how many times we were asked for more quarters. This design just brings back so many memories. And the best part is that you can remove this central figure (which is not included in the design for copy right reasons) and put any other character in. This is definitely a blank slate for your 8-bit digital art. Fortunately this character is simple enough to do on your own. In your cutting program take a circle and cut a slice of pie out of the circle with a triangle. If you’re cutting program is able to modify a circle, you can use that feature.

Advertisements

Solve A Problem

Sometimes the ideas that you need to decorate on otherwise obscure theme, is to solve a problem.

One problem that I’m forever facing at birthday parties and other get togethers where lots of people are around is the abandoned beverage can or bottle. I was able to incorporate my character in one more place by laminating my yellow buddy and attaching elastic to make a Can Label.

There are a few benefits of making these for a character party.

One, all you need is a wet erase pen and names stay legible. And after the party you erase names and you’re ready to go to reuse these beverage labels again in the future.

All you have to do is hot glue your hair elastic on (preferably where the seam is, to prevent elastic breakage). With a silicone finger cot, you can flatten your hot glue without burning your fingers.

Two, and possibly the best benefit of all, is if you ever find yourself in a situation where you forgot a hair elastic or yours breaks, this guy is easy to spot in a purse or car floor and your hair needs are over!

This idea will work with any kind of party or event. Bridal shower, cut out a diamond. Baby shower, cut out a bottle.


I know all this information was quick to get through and exciting. I have two more ideas to share with you next week, in addition on tips on how to order a trade mark cake from a bakery who doesn’t make trade mark cakes. So be sure to come back next week for those and a funny story about how this was a birthday party that my boys will NEVER forget!


Can these designs save you time for your next party that you can’t buy decorations for? Get Gift Bag, Level Up, and Arcade Labels here.

Processing…
Success! You're on the list.

Leave a comment

Advertisements