Surprise Gift

It never fails that a moment in life comes when you forgot to get someone a gift or you received a last minute invitation. What do you do?

There’s a couple of things that I keep in my craft room all the time: fabric, ribbon, card stock, picture frames, paint, beads… You get the idea.

We had the privilege of meeting our neighbor’s parents, who came for a visit from halfway around the world. It’s amazing to see how much you can connect with people, especially when you don’t speak the same language. And even more amazing when you find out that you share some similar interests and find commonality.

It’s even more special when you receive an invitation to be a part of celebrating their 60th wedding anniversary.

I’ve been married for over a decade. So much has changed in the world since that day. I tried to think of how much the world will change in another 50. It blows my mind.

What is it like to celebrate a 60th anniversary in another country–one you may or may not have thought you’d be in when you were younger?

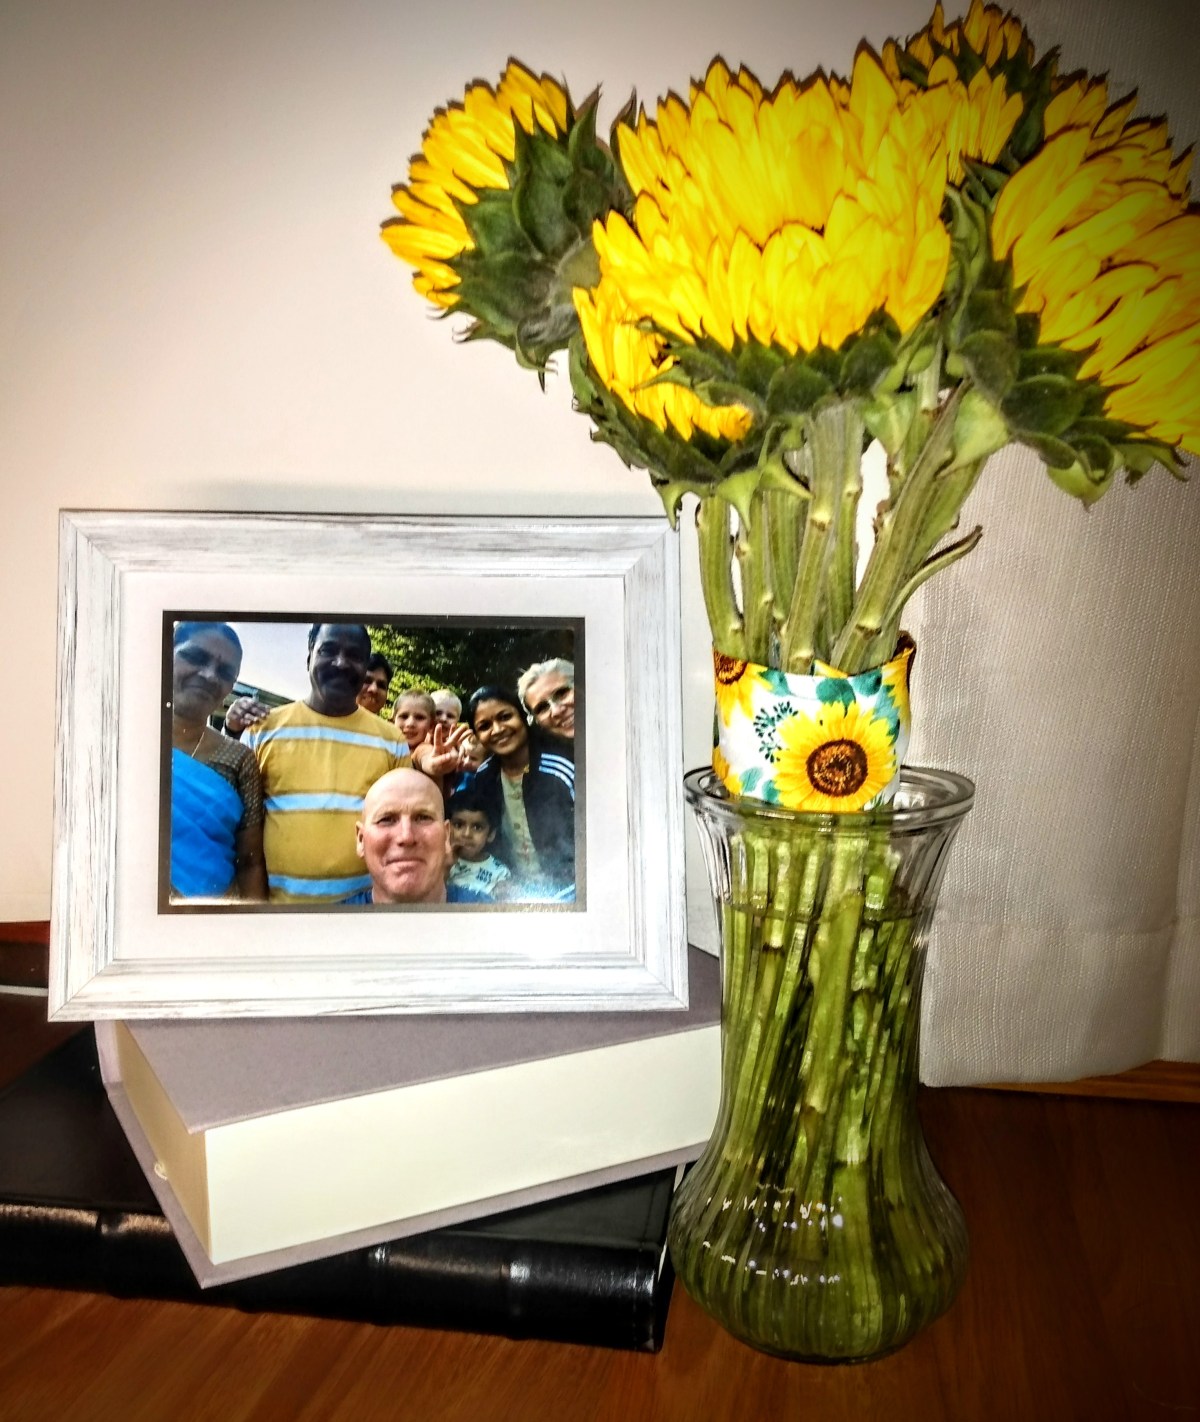
Of course I couldn’t pass up an opportunity to celebrate and honor a long lasting relationship like this. And while thinking about how to give a meaningful gift, with little personal history, and something that’s not burdensome for when they return home, I chose to focus on the memories. Celebrating the last 60 years of their memories together and giving them a memento of this trip, this moment in time.

Advertisements

My husband had taken a group picture at the end of a visit where we had them over and made for them their first American meal. I chose a picture because it travels well and is minimalistic for those who gravitate to that way of life. But I also couldn’t pass up giving some flowers because it’s something that brings happiness in the moment.

So for this quick to gather gift that’s pack full of memories and meaning, here’s an idea for you to consider the next time you need to find a gift in under two hours.

Pick a photo of you and the other person from your phone and send it to a local place that can print it out in an hour.

While that is processing you can stop by a shop, florist, road side stand, farmer’s market, or garden and gather some flowers that have meaning.

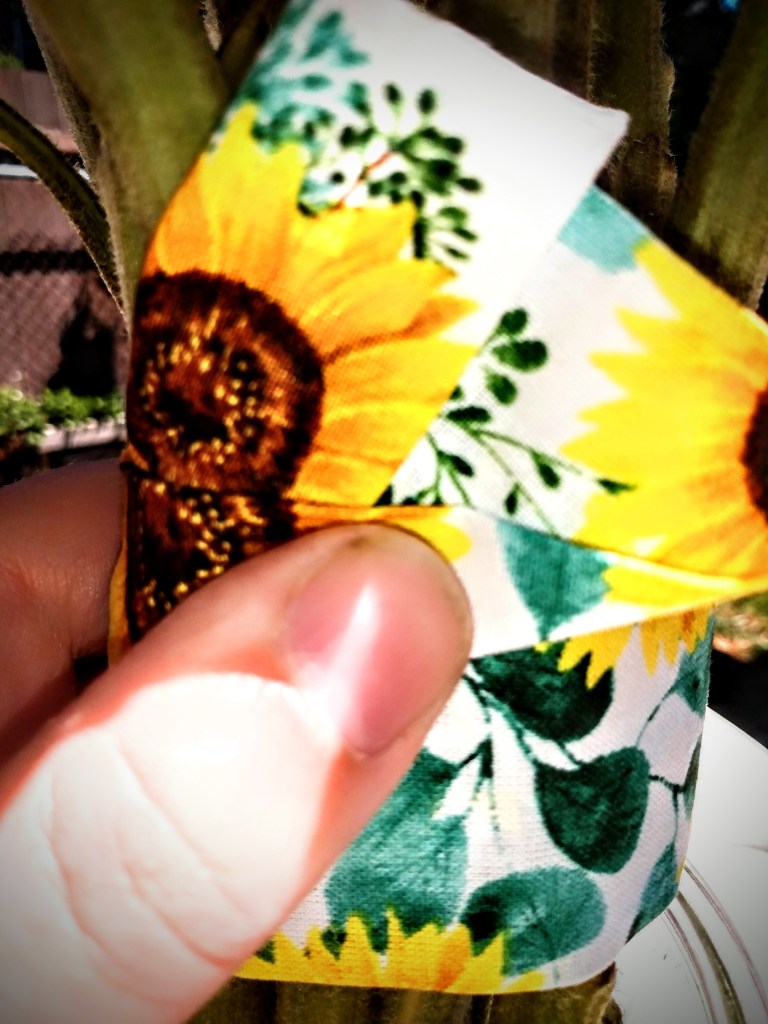
In this instance I chose sunflowers because with our guests, they saw the sunflower I had grown from seed and we talked about sunflowers and sunflower oil for quite some time. Sunflowers may not be their favorite flower, but in this gift, it’s a nod to something we connected with in the middle of a language barrier.

It just so happened that at home I had a vase on a shelf that I was saving for a time to reuse by gifting to someone, and I had some fabric with sunflower print on them.

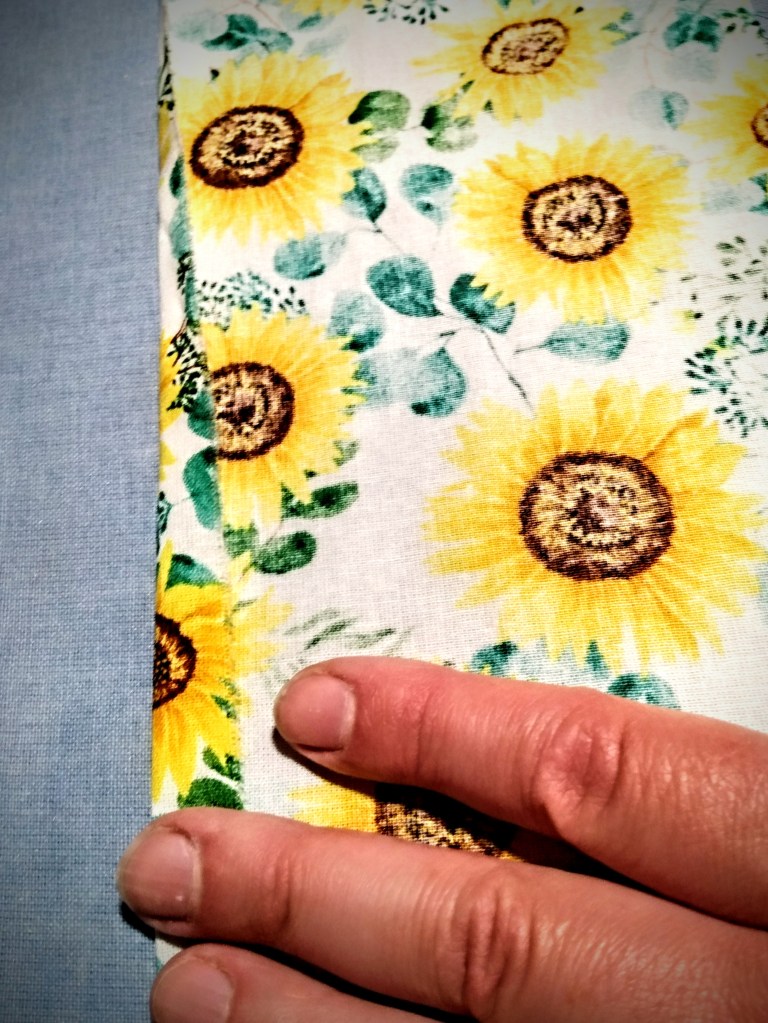
As you notice here, sunflowers can be awkward if they’re not bundled. So I decided to bundle the flowers with a strip of cloth.

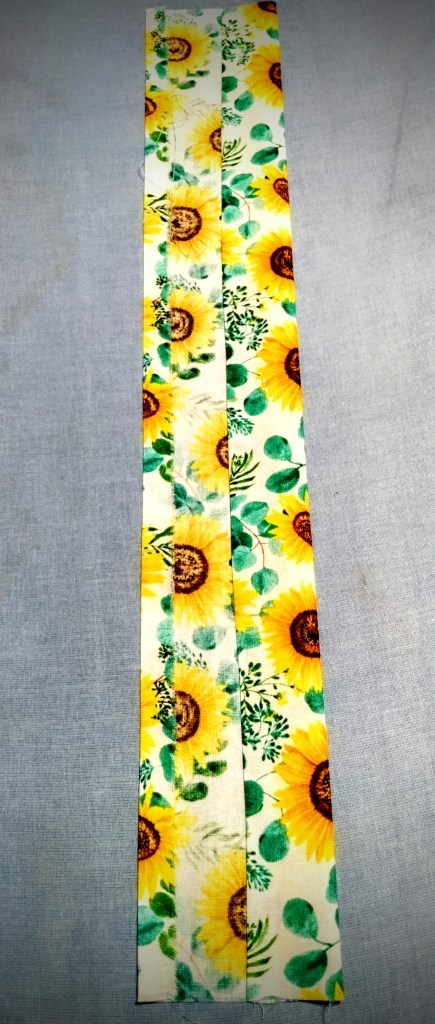
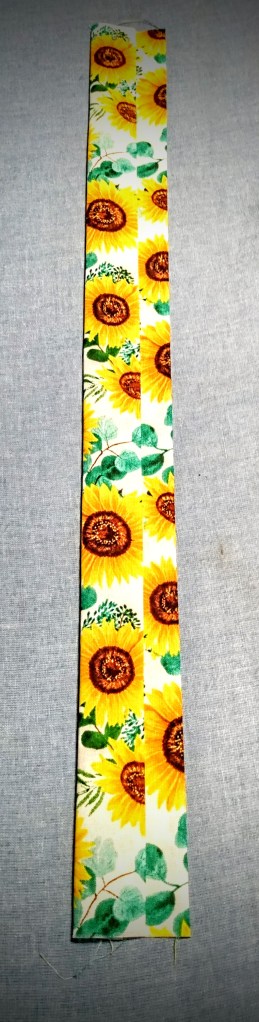
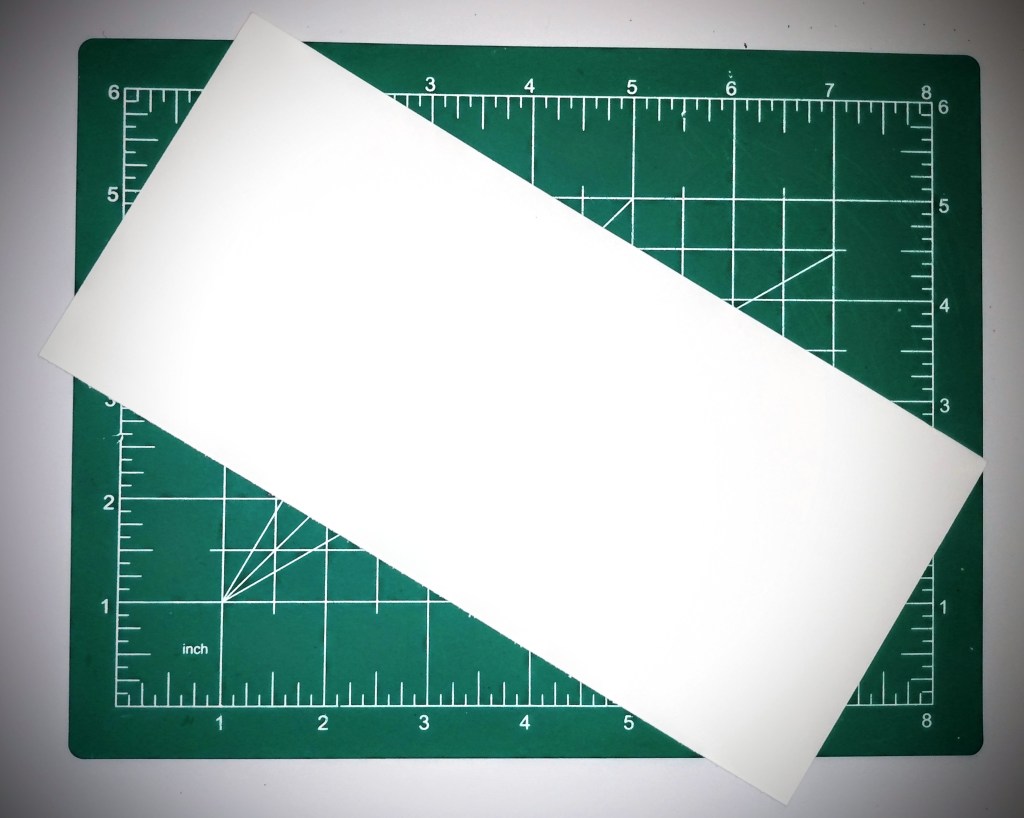
For a professional look of wrapping a bouquet, you want to first trim down the fabric you want to use into a strip. No matter how nicely you cut, the fabric will always fray. To give a clean edge, you want to press the strip of fabric. First, fold and press the raw edge. Then you’ll tri-fold and press the fabric into a wide ribbon. Now the edges won’t fray on you and you didn’t have to sew.

To make this wrap, you want to put one edge of the ribbon between the stems. Then you can wrap it tightly around the bouquet without the ribbon slipping on you.

When you get to the end of the ribbon, you want to fold the ribbon up at a 90° angle. The tuck this final edge down behind the wrap, between the stems. If the wrap is snug, it will hold the ribbon in place without using tape, pins, glue, or any other fastener.

The beauty of making a wrap like this is that the person you are gifting this to can use the fabric after the flowers are long gone. If this person is sentimental, they will no doubt find a way of repurposing and reusing this strip of fabric.

Don’t forget to use a small scrap of the fabric to make a card that matches.

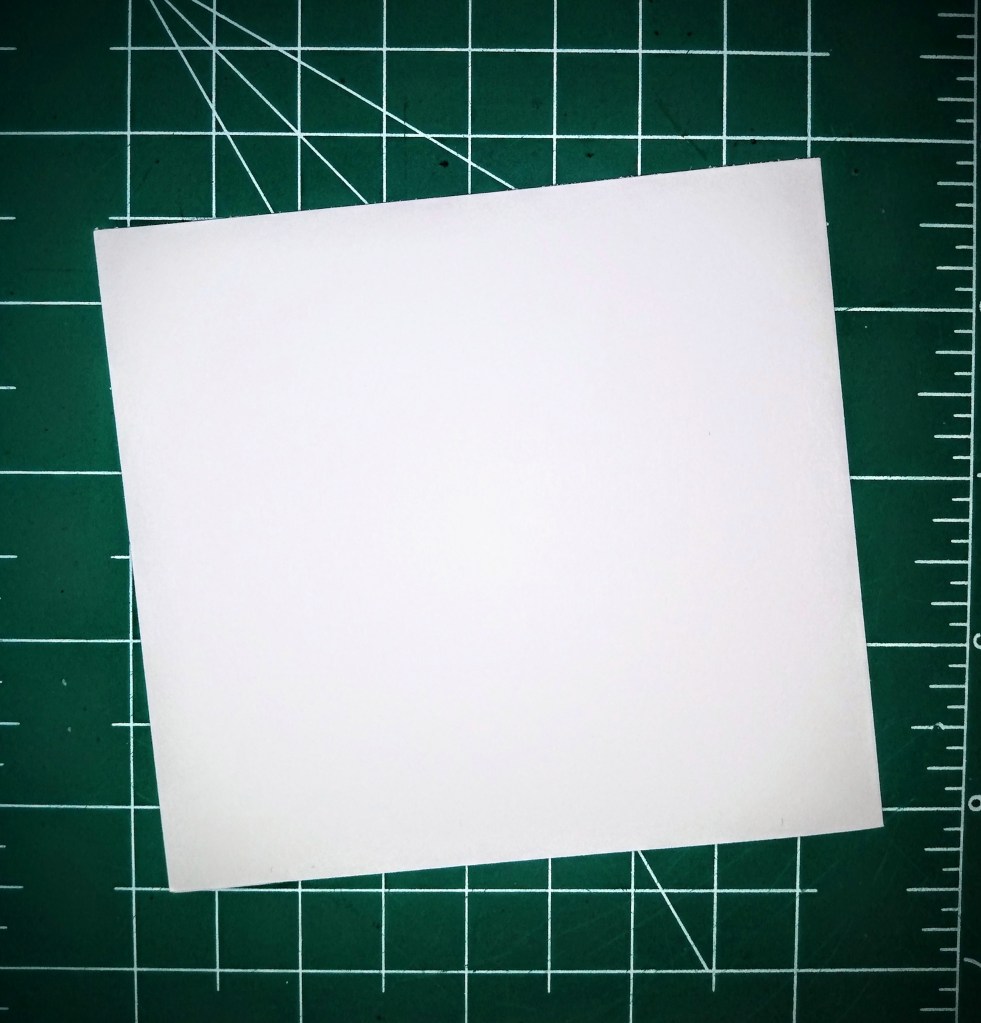
Here, I took a piece of 8.5 x 11″ sheet of card stock and trimmed along the short edge a strip 4″ wide. This strip I folded in half to make a blank card that is 4 x 4.25″.

Using the left over sunflower fabric, I decided how wide of a ribbon I wanted to glue to the front of the card. You can be as precise as you want to be. I chose to wing it and just cut the fabric into a small strip.

This time I had to be careful about the edge because there’s no room for a folded seam. This fabric print looks good with a frayed edge, so I saved time by just removing the stray threads and embrace the fray. (As opposed to if I need to have a very clean edge and have to cut a straight edge.) Now the sides and bottom of the card need to have a straight edge, so I leave this ribbon large and will cut it down after I glue it to the cardstock.

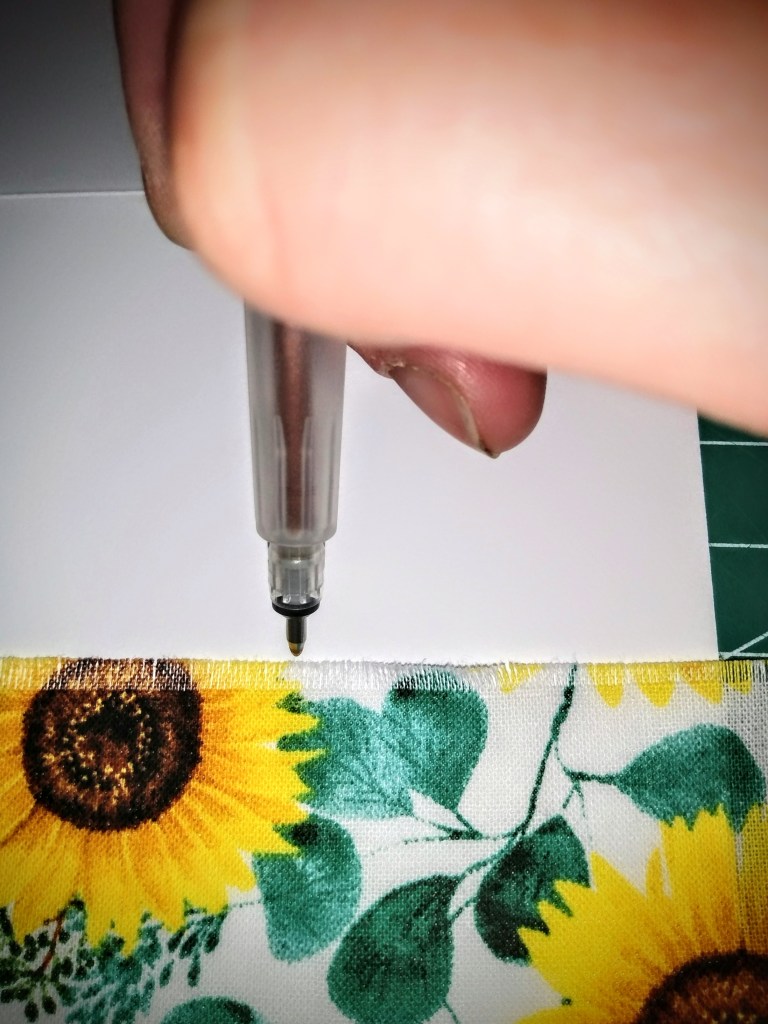
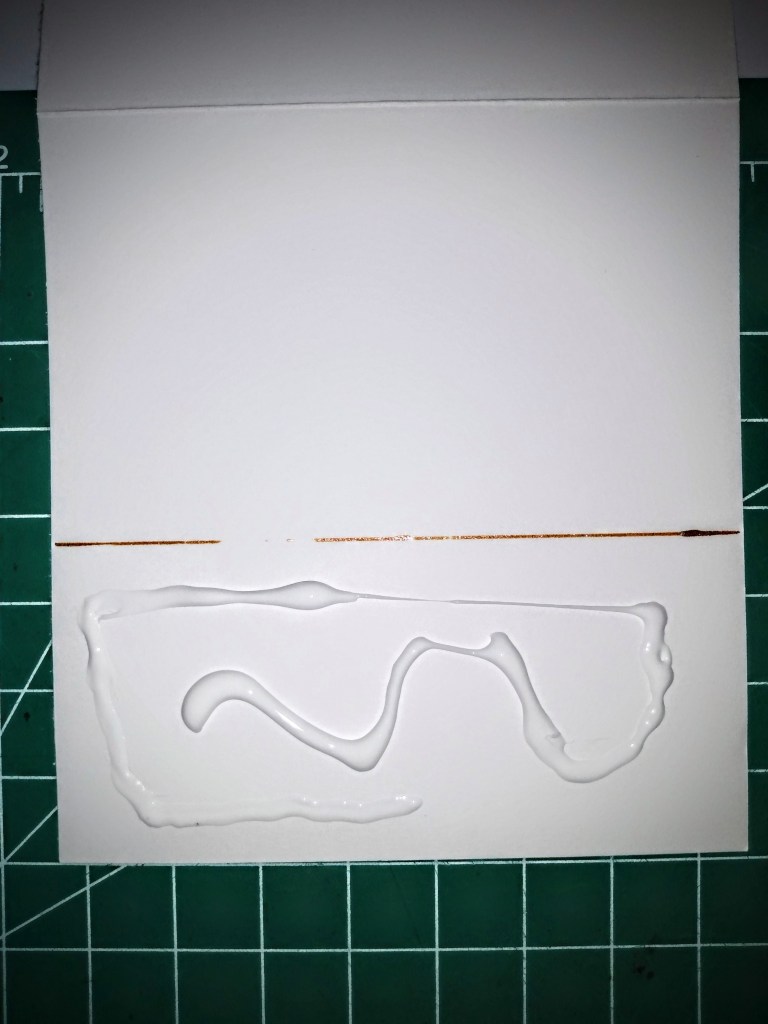
For gluing the ribbon down, you want to decide where you want to place it and mark off the area. You will need to liberally apply glue to prevent fraying on the card, so drawing a glue line is very important. Make sure that where you draw the line will be hidden behind the ribbon, so make sure the line is lower than where you want it. Apply the glue and spread it evenly across the whole section, even over the edges. If you don’t put glue on the edges, the fabric will lift from the cardstock.

Gently lay the ribbon on top of the glue and make any adjustments that you need. When you are satisfied, take a scraper or plastic card, place it in the middle of the ribbon and press it to the edge of the card. Then place the scraper/card in the middle and press down in the opposite direction. This will secure your fabric to the card and remove any air pockets that may have been present.

Now that your ribbon is secure, you can flip the card over. With a pair of scissors, trim off the excess fabric.

I trim from the back because I can see exactly where the edge of the cardstock is.

The blank card is now ready for you to write you message on.

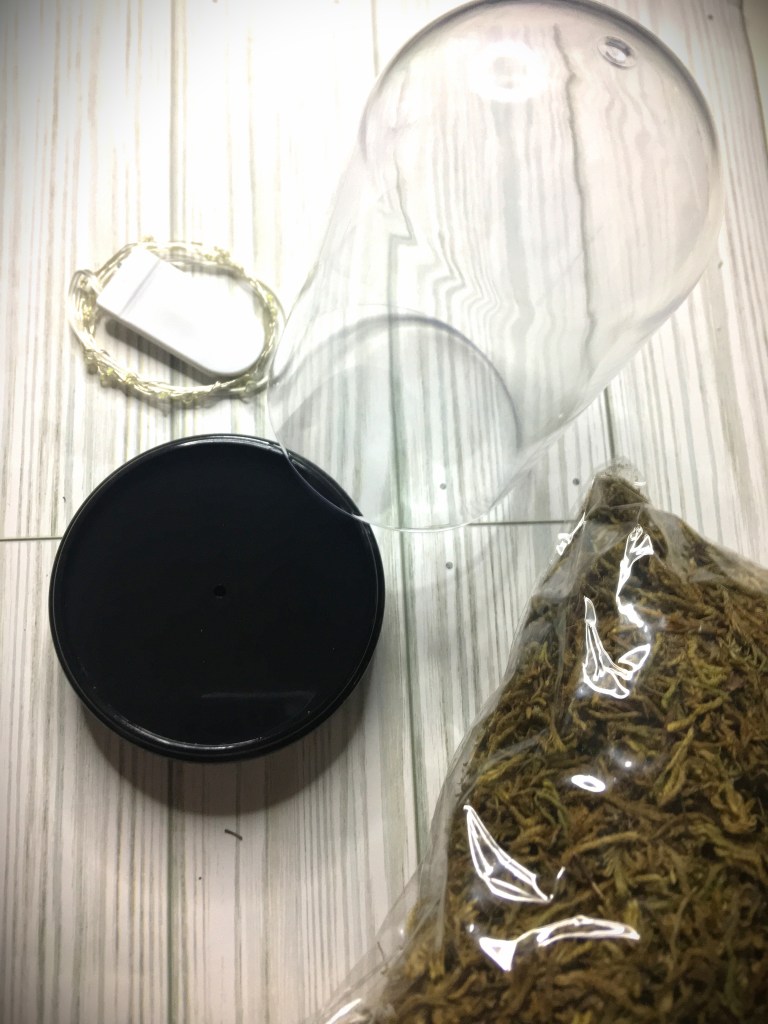
By now, your pictures should be ready to pick up. Once you have them, you can place them in a picture frame and you’re ready to bag or wrap your present.

From this gift given, the part of the gift that meant the most was the blessing that I wrote inside the card.

In today’s world, a blessing spoken over another person is something that’s not talked about. But it’s the most powerful gift that we can give another person. And to have those words writing for the person you’re gifting to read over and over again is life changing.

If you are unfamiliar with a blessing, it’s what you tell someone that you see in them now, but you also what you desire for their future. Instead of “I hope you have a happy birthday” or anniversary, I tell the person what I want to see in their lives for this coming year or the years moving forward.

In a time where people are struggling to see their purpose in life, why they matter, the most important thing you can give a person is a vision of something to look forward to. And the best part about a blessing that you speak over a person is that it’s not something that can be bought. It shows the person that you see them, you value them, and that they have a purpose to live for.

Whether you’re looking for making a meaningful gift on a tight budget, don’t know what to give a person, need an impactful last minute gift, or any other reason, know that you can speak into a person’s life and it means more to them than anything else you give them. So no matter what your gift giving situation is, know that a blessing from you can be the most impactful thing that you can give another person.

Never underestimate the power of your words.

And don’t hesitate to gift a blessing!


Processing…
Success! You're on the list.

One response to “Surprise Gift”

  1. Roy Avatar

    Hi to every one, tthe comtents prsent aat this web pzge are really remarkable foor peolle knowledge,
    well, keerp up the good wotk fellows.

    Like

Leave a comment

Advertisements
Advertisements
Advertisements
Advertisements

Under the Dome

Using Cloches for Centerpieces

I know that one of the biggest things to make right now are shadow boxes. And I LOVE them just as much as the next person. However, the one disadvantage they have is that they only have one viewing direction. So while shadow boxes are great for decorating homes, they lack greatly when it comes to decorating for events.

And that is where Cloches come in!

Think of a cloche as shadow box that can be viewed 360°, perfect for centerpieces.

What I have for you today is a spring cloche that can inspire you for whatever you are looking to create unique decor for your events. Whether you’re looking for a wedding, a Princess birthday party, displaying an heirloom or memory… you are only limited by your imagination.

Supply List

  • 5.7 x 3.6 inch / 14.4 x 9.1 cm High Cloche Dome
  • 3 meter fairy lights, battery operated
  • Floral Moss
  • Hot Glue Gun and Glue
  • Card Stock
  • Butterfly Cut File
  • Flower Cut File
  • White glue (I prefer wood glue)
  • Fabric (optional)
  • Green Floral Wire
  • Needle Nose Pliers with Wire Cutter
  • Tension Tweezers
  • Masking or Painter’s Tape
  • Flat-back Rhinestone Crystals
  • Jewelry & Metal Glue

Cloche Base

The perfect thing about this cloche, when it comes to lighting, is that there was a hole that I could thread the fairy lights through. This made it possible to hot glue the battery pack/switch to the bottom of the cloche, making it invisible. If you choose to also go this route for your lighting, I recommend that you glue the battery pack in such a way that you can unscrew the battery pack and change out the batteries without needing to remove it from the cloche base.

Once the pack is secure, you can flip the base over and position the wires on the top of the base.

Tip: before securing down the wires, place the cloche dome down on top and see how it’s positioned in relation to the base. With this particular cloche, the dome rests inside the lip/edge of the bottom. So if I had put one of the bulbs right up against the lip/edge, then my dome would not be able to sit flat when place over the finished project.

After trying a few different gluing options, I found the best way of securing the wires and moss was the following way. Bend the wire how you want the lights to go. Avoiding the bulbs, you will put dabs of hot glue on the wire and press the moss down on top of the glue. (If you have a silicone finger cot, you can press down directly with your finger without being burned by the glue.

Tip: To maximize the amount of light shining up from the moss, make sure you do not cover the bulbs. You may think you will have holes, but if you look in later pictures you will see that these holes are absolutely not visible. So work with the lights on. You will immediately see true blank holes vs. light holes.

With the base now complete, it’s time to move on to the paper components.

Flowers and Butterfly

With your cutting machine, cut out 2 Butterflies, 4 Flowers, 1 Leaf, and 1 Stem. Because I already had green floral wire, I did not cut out the paper stem. I included the paper stem in case you did not have green wire but wanted to have a cover for a different wire, or even wanted to make the stem completely out of paper. If you choose to make a paper stem, roll it cigar style and glue the edge down. You can use masking or painters tape to hold the edge down while the glue dries.

(Reference Note: The Butterfly I cut was 3 inches tall. As you can see later on the Butterfly takes up all the space. So for this size of cloche, a larger Butterfly is not going to fit. And you are more than welcome to make the Butterfly smaller and even add a few of the smaller size.)

Butterfly

The two Butterflies are the front and back of your Butterfly. Inside these cut out pieces you can place cardstock, tissue paper, fabric, or whatever material you are inspired to use. Glue your first Butterfly down, trim that inner section the Butterfly. This will make it very easy to glue down that second Butterfly and make everything line up.

Tip: If your cardstock has a white core, you can take a marker with a matching color, and make a coordinating edge.

Set the Butterfly to aside and let dry.

Flowers

Using tension tweezers (or other coiling took of choice), roll the flower. At the end of the line, apply an L-shaped dab of glue, and close the flower. The tension tweezers are great for holding that edge down while the glue dries. Or if this is the first of the flowers, masking or painters tape can hold your edge in place for the glue to dry while you move on to the next flower.

To shape the leaf, run a crease down most of the length of the leaf, from the bottom up. At the top of the leaf, coil it around a finger. This will give a gentle bend. If you make the gentle finger coil go off to one side, you will find that you give it a realistic bend.

Stem

While the glue dries, let’s prep the Stem. This picture is a little deceiving; I had cut it before measuring how this size of Butterfly would fit inside the cloche. For a 3 inch tall Butterfly, all you need is a 2.5″ wire. On the bottom of your wire, use your needle nose pliers and form a circle, to make a stand.

When the Butterfly is dry, use your weeding tool or other thin object to bend the wings of your butterfly up.

When the glue on the flowers is dry, it’s time to shape the petals. If you keep the petals flat, but spread them downward, you will have a mum looking blossom. I chose to curl the petals downward and then crease the center. If you can keep the edges a little rounded downward, it has a chrysanthemum appearance. Either way, I wanted the white cardstock as an accenting color, and there are so many white flowers that have this shape, that it has a simple generic look that is just pleasing. Especially if you’re new paper flowers, this one is easy to play with and assemble.

Assembly

With hot glue, apply the glue on the bottom of the first blossom and insert the tip of the wire into the bottom center of the blossom. With the second blossom, add glue, and attach it to the side of the stem. The third blossom, add glue, and position it on the other side of the stem a little lower on the second blossom.

There is a little crevice between the second and third blossoms. Add glue to the wire and position the Butterfly. When these components are set, glue dried, position the wire circle base around a light bulb. (This will cause the light to still give an up light effect and not be covered.) Once you have the wire base where you want it positioned, apply a liberal amount of glue on top of the wire. Before you press down, apply more moss on top of the glue. Now when you press down, you will secure the stem and hide the glue at the same time. Near the base of the stem, add a drop of glue and place the leaf.

The fourth flower can be glued anywhere on the moss covered ground.

For further ground embellishments you could add anything you can imagine; a car, Poly Pocket accessory, miniature figurine, rock, sea shell, anything. In the second picture above you will notice what looks like a gold stone. In fact, my husband thought that I had added a gold nugget from of the boys’ games. In truth, this “stone” is the gold glitter stick that I had to clean out of my hot glue gun. I just let that pool on my desktop and dried as a puddle, instead of throwing it out.

This cloche is ready to go as is or you can further embellish it.

Further Embellishments

I always love to add more. In fact, this butterfly was really begging to be fully blinged out. However, for this moment I chose to show some restraint so I don’t look like the crazy bling lady.

From here on out the jewelry & metal glue works perfectly. It holds while wet and dries quickly.

Please take note on the first picture above. If you haven’t worked with crystals before, these tools description might help you have fun placing the stones. The two tools that came with the crystals that I bought were the tweezers and the white “pencil”. In my opinion, the tweezers were the most difficult tool. The problem with them is that these tweezers didn’t have grips on the tip. These ones were the smooth tip tweezers. If you think this is going to be slippery work for you, I can promise you it is. I shot a handful of stones across my work space before giving up. The white “pencil” doesn’t feel sticky, but when you press down on the stone with the tip, it grips the stones. Kind of. I couldn’t get the “pencil” to pick up the small stones that I used on the edge of the wing. However it was absolutely perfect for the larger stones that I used near the center of the wings and on the body.

Fortunately for me, I had another tool in my craft room. I do the crystal paintings and had one of those complementary placement tools (the pink tool in the picture). It still had a little residual glue in the gap and it was a dream picking up the smaller stones that I used on the wing edge.

However, the tweezers were the perfect tool for placing the pearls in the center of the flowers.

Tip: If you’re new to paper flowers, and noted to yourself that some of the blossoms look a little wonky, pearl placement is going to be your life saver. In the close up picture, above, you will notice that there were three pearls that I used. Yes, that was a wonky flower. It got away from me. But the great things about flowers are that they can grow in clusters. And so there is no shame in strategically placing flower centers so you can make a misshaped flower into a cluster of two or three flowers.

Now that we’re finished with the assembly, we’re ready to put the dome on.

The only thing left to talk about is the difference between plastic and glass cloches. As you can see here, even though you don’t have to worry about the dome breaking when it’s plastic, you will note that it’s definitely not as clear looking as it would be if it were glass. If you are looking to just do a fun project, a project for a beginner crafter, or need to be particularly frugal, the plastic dome is probably going to be the cloche of choice. If you are looking for a wedding or to have a high impression impact, you most definitely want to opt for the glass cloche. My personal preference is the glass cloches, but realistically I live in a young child home with curious boys.

Everyone’s choices are going to be different. But I cannot stress enough…

IF you are doing a wedding, please do not opt for cheap. The wow factor is going to be from glass or higher quality of plastic than you find at the dollar store. However, if you are on a very tight budget (Absolutely No Shame Here!!!) and the dollar store cloche is the only thing in your budget here are my tips:

  • Select only the domes that are clear and free of scratches.
  • Between now and your event, try to not handle the dome.
  • You will be tempted to try your dome over the decor. Buy one extra cloche and use that dome as your dome tester.
  • While you are working with glue, keep it away from the dome. Especially the jewelry & metal glue. You may think you didn’t get any glue on the dome. …and then it dries.

In fact, it’s a good practice, whether glass or plastic, to always have one extra dome on hand. Accidents happen, especially on site.

Please email or comment below with pictures of what you create! I want to see what cloche you make.

Thank you for crafting with me!

Files Used Today

Cloche Butterfly & Flower are found here.

Processing…
Success! You're on the list.