After spending almost a decade in the event decorating industry I have repetatively heard "I can do that". Instead of being dismissed by creative minded people, I want to show you how I do "that" so you can be sucessful in recreating that inspiration image. I just might have a few tricks that you haven't seen yet!
This year I’m working in concert with others in a garden. (I am so excited for this!) If you’re as busy as I am, you can imagine how quickly things slip through the cracks.
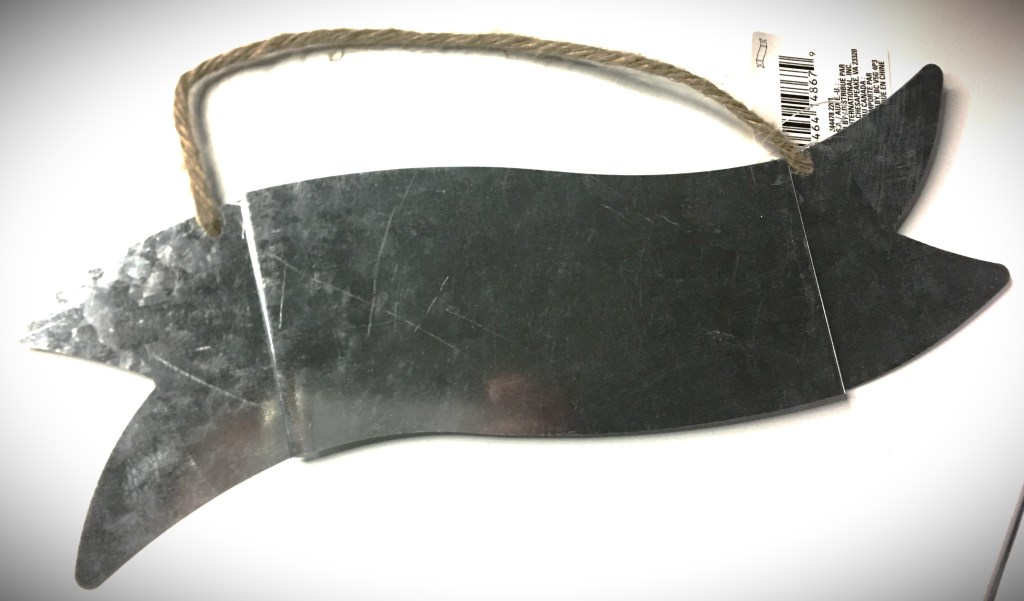
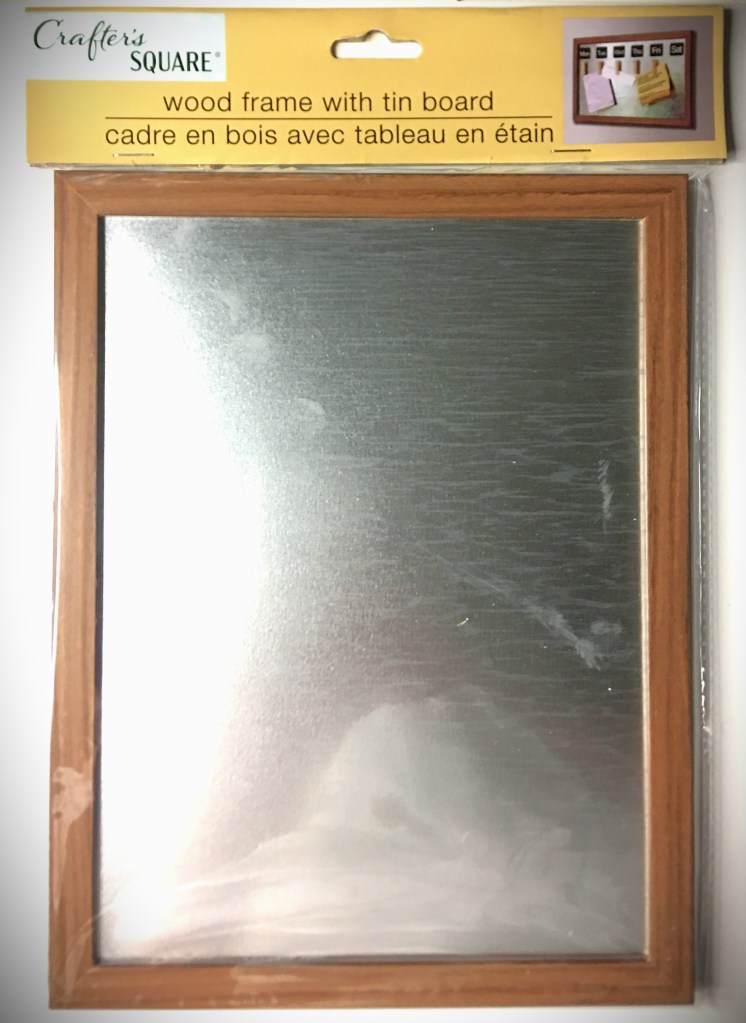
After hitting my local dollar store, I found some pieces that are going to make an inexpensive tool that doubles as home decor, all the while keeping tabs on what’s been done.
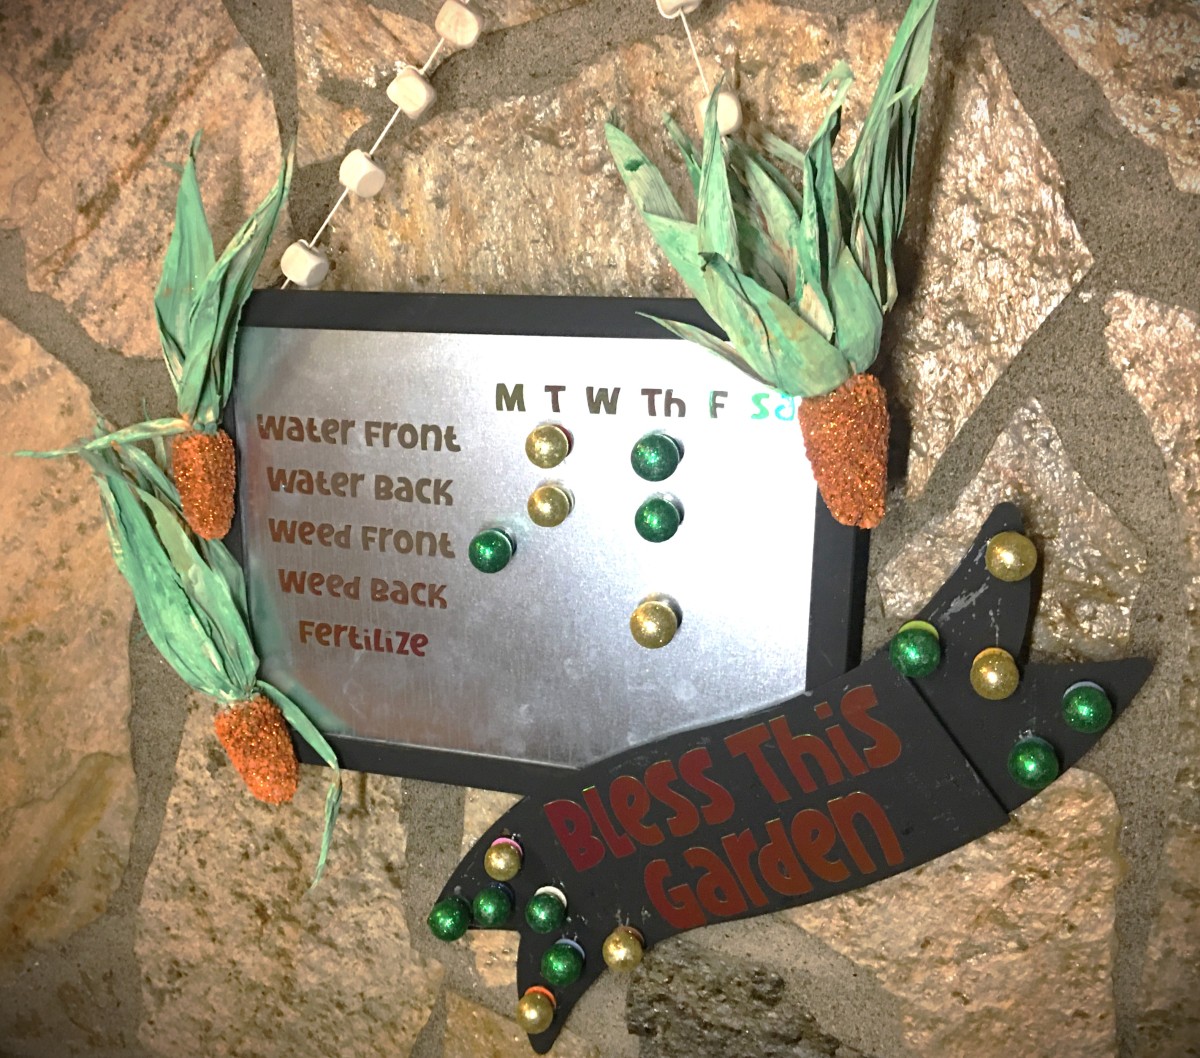
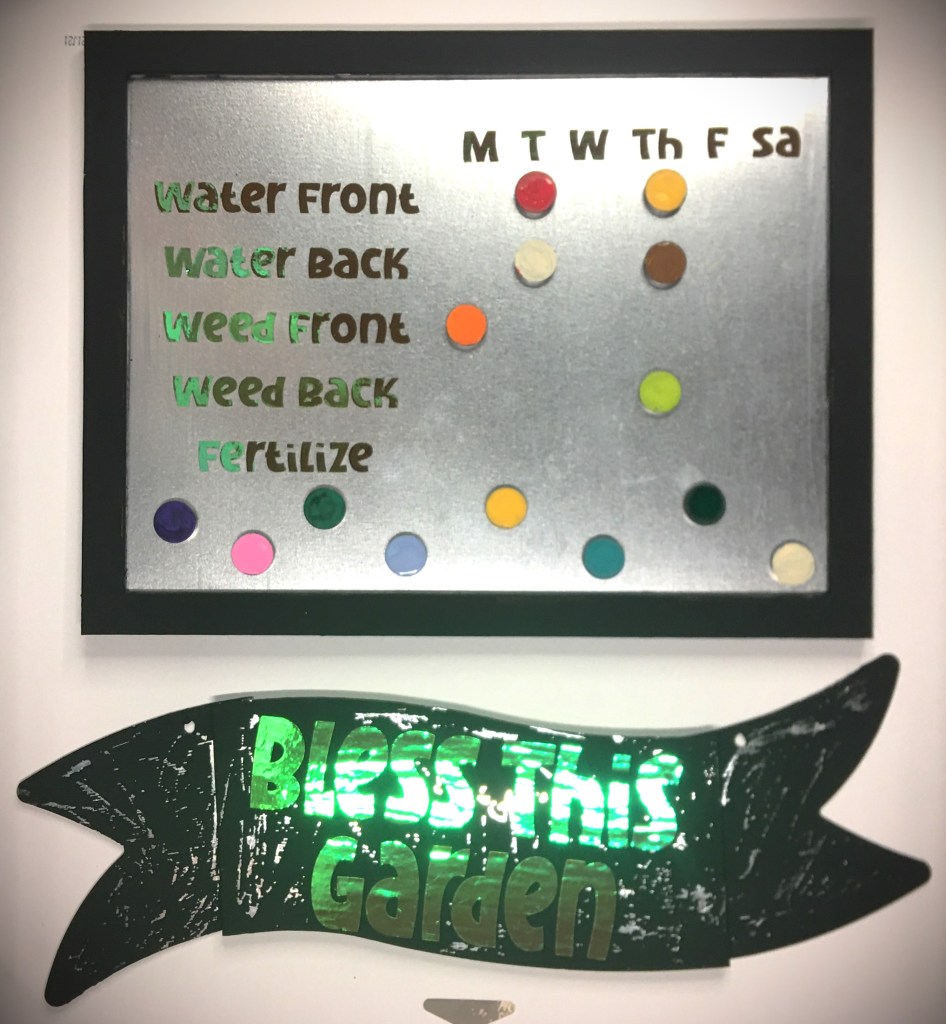
With these I decided to make a magnetic board where anyone tending the garden can quickly mark what they did.
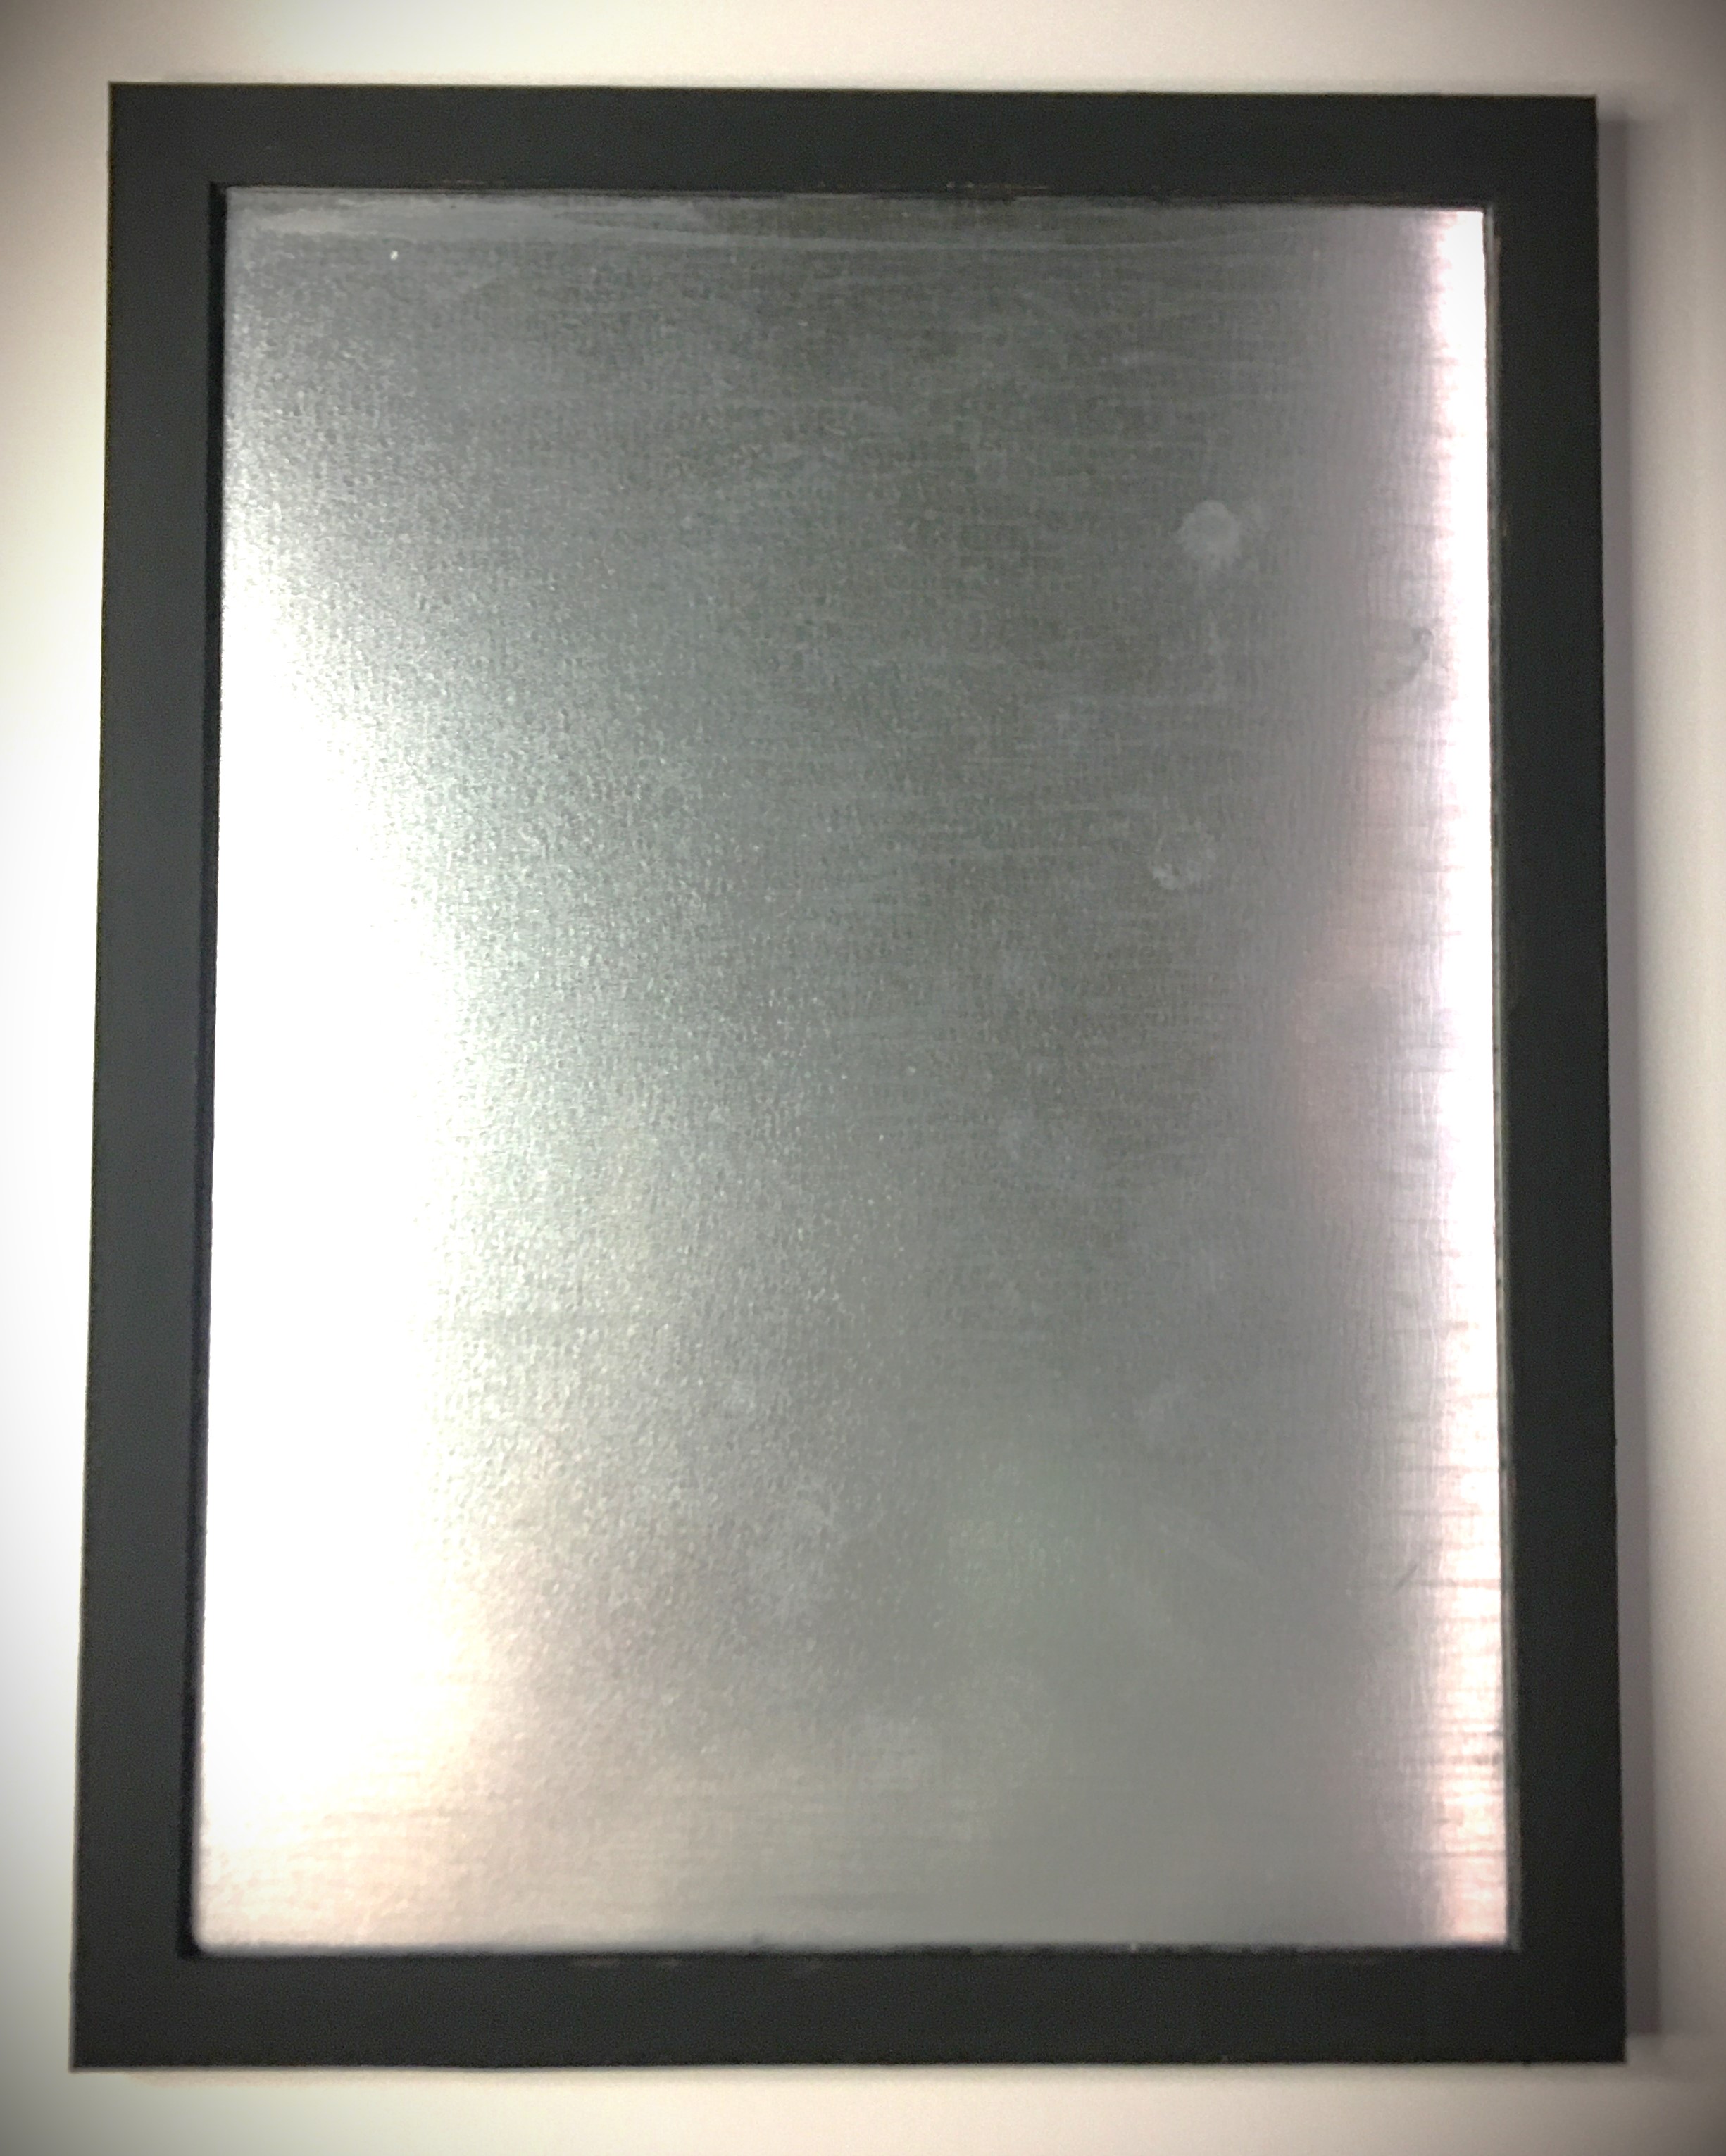
I know the galvanized finish tends to overtake everything. So with the galvanized frame and banner, everything gets lost real quick. Not to mention that the frame was a really bad fake wood. To dress all this up a bit and minimize the galvanized look, I painted the frame and banner black.
I forgot to take a picture of the banner painted in flat black chalk paint (the same paint as the frame). It looked too minimalistic for my taste, so I took the transfer tape (which I used to apply the vinyl text) and put it straight onto the paint. Some places lifted the paint quite easily. But to get the distressed look, I scratched the tape
The magnets needed a little something extra. There are so many things that could be done. I have children and they’re helping with this garden and they’ll also be marking what we do when we work, so I went into kid zone and painted the magnets with acrylic paint and did all the colors.
If you want to keep minimalistic, pick your favorite color.
Love things that sparkle, glue on gem stones or use glitter.
What about texture? Glue on fuzzy pom poms, baby pine cones, large seeds or nuts… literally whatever catches your imagination. Maybe you have a farm and want to use small farm yard figures and animals. (I wish I had these in my craft room!!!)
Something that is great about using the galvanized banner is that the extra magnets can be kept on the banner so you can add stickers, personalization, more tasks, or a note section in the blank space on the bottom.
And then while typing I decided to go a different direction.
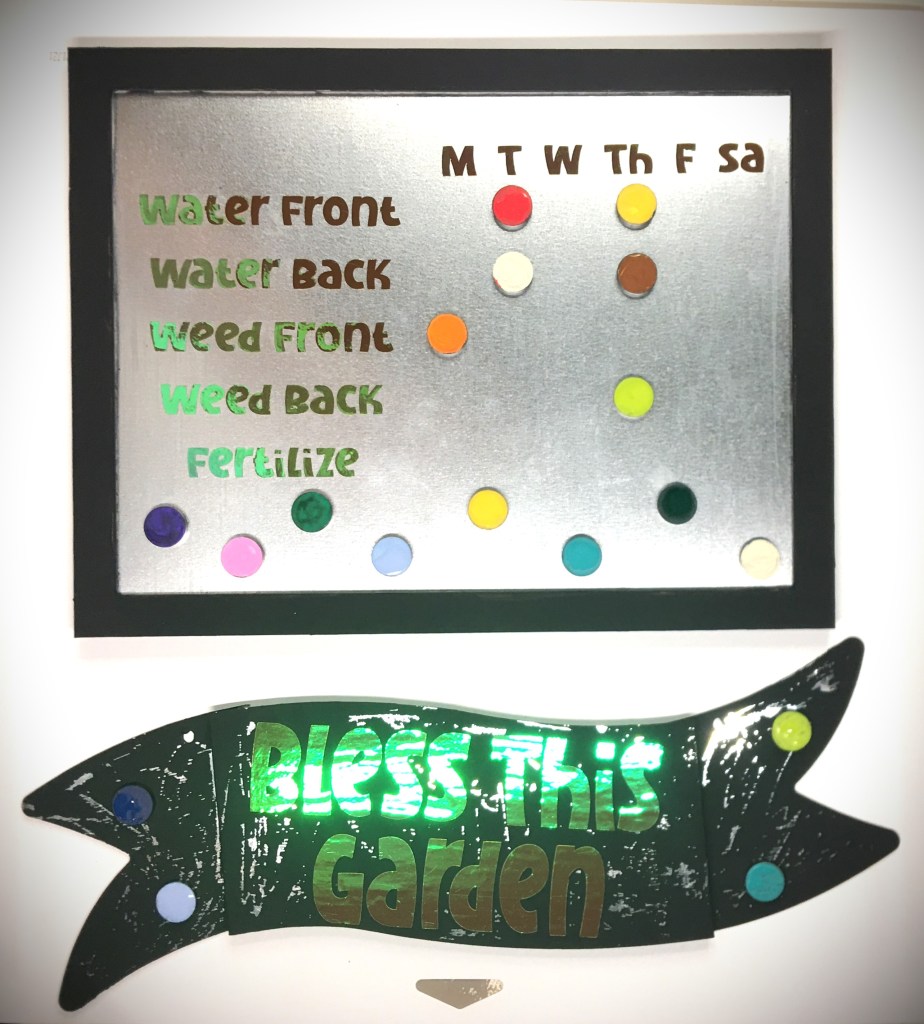
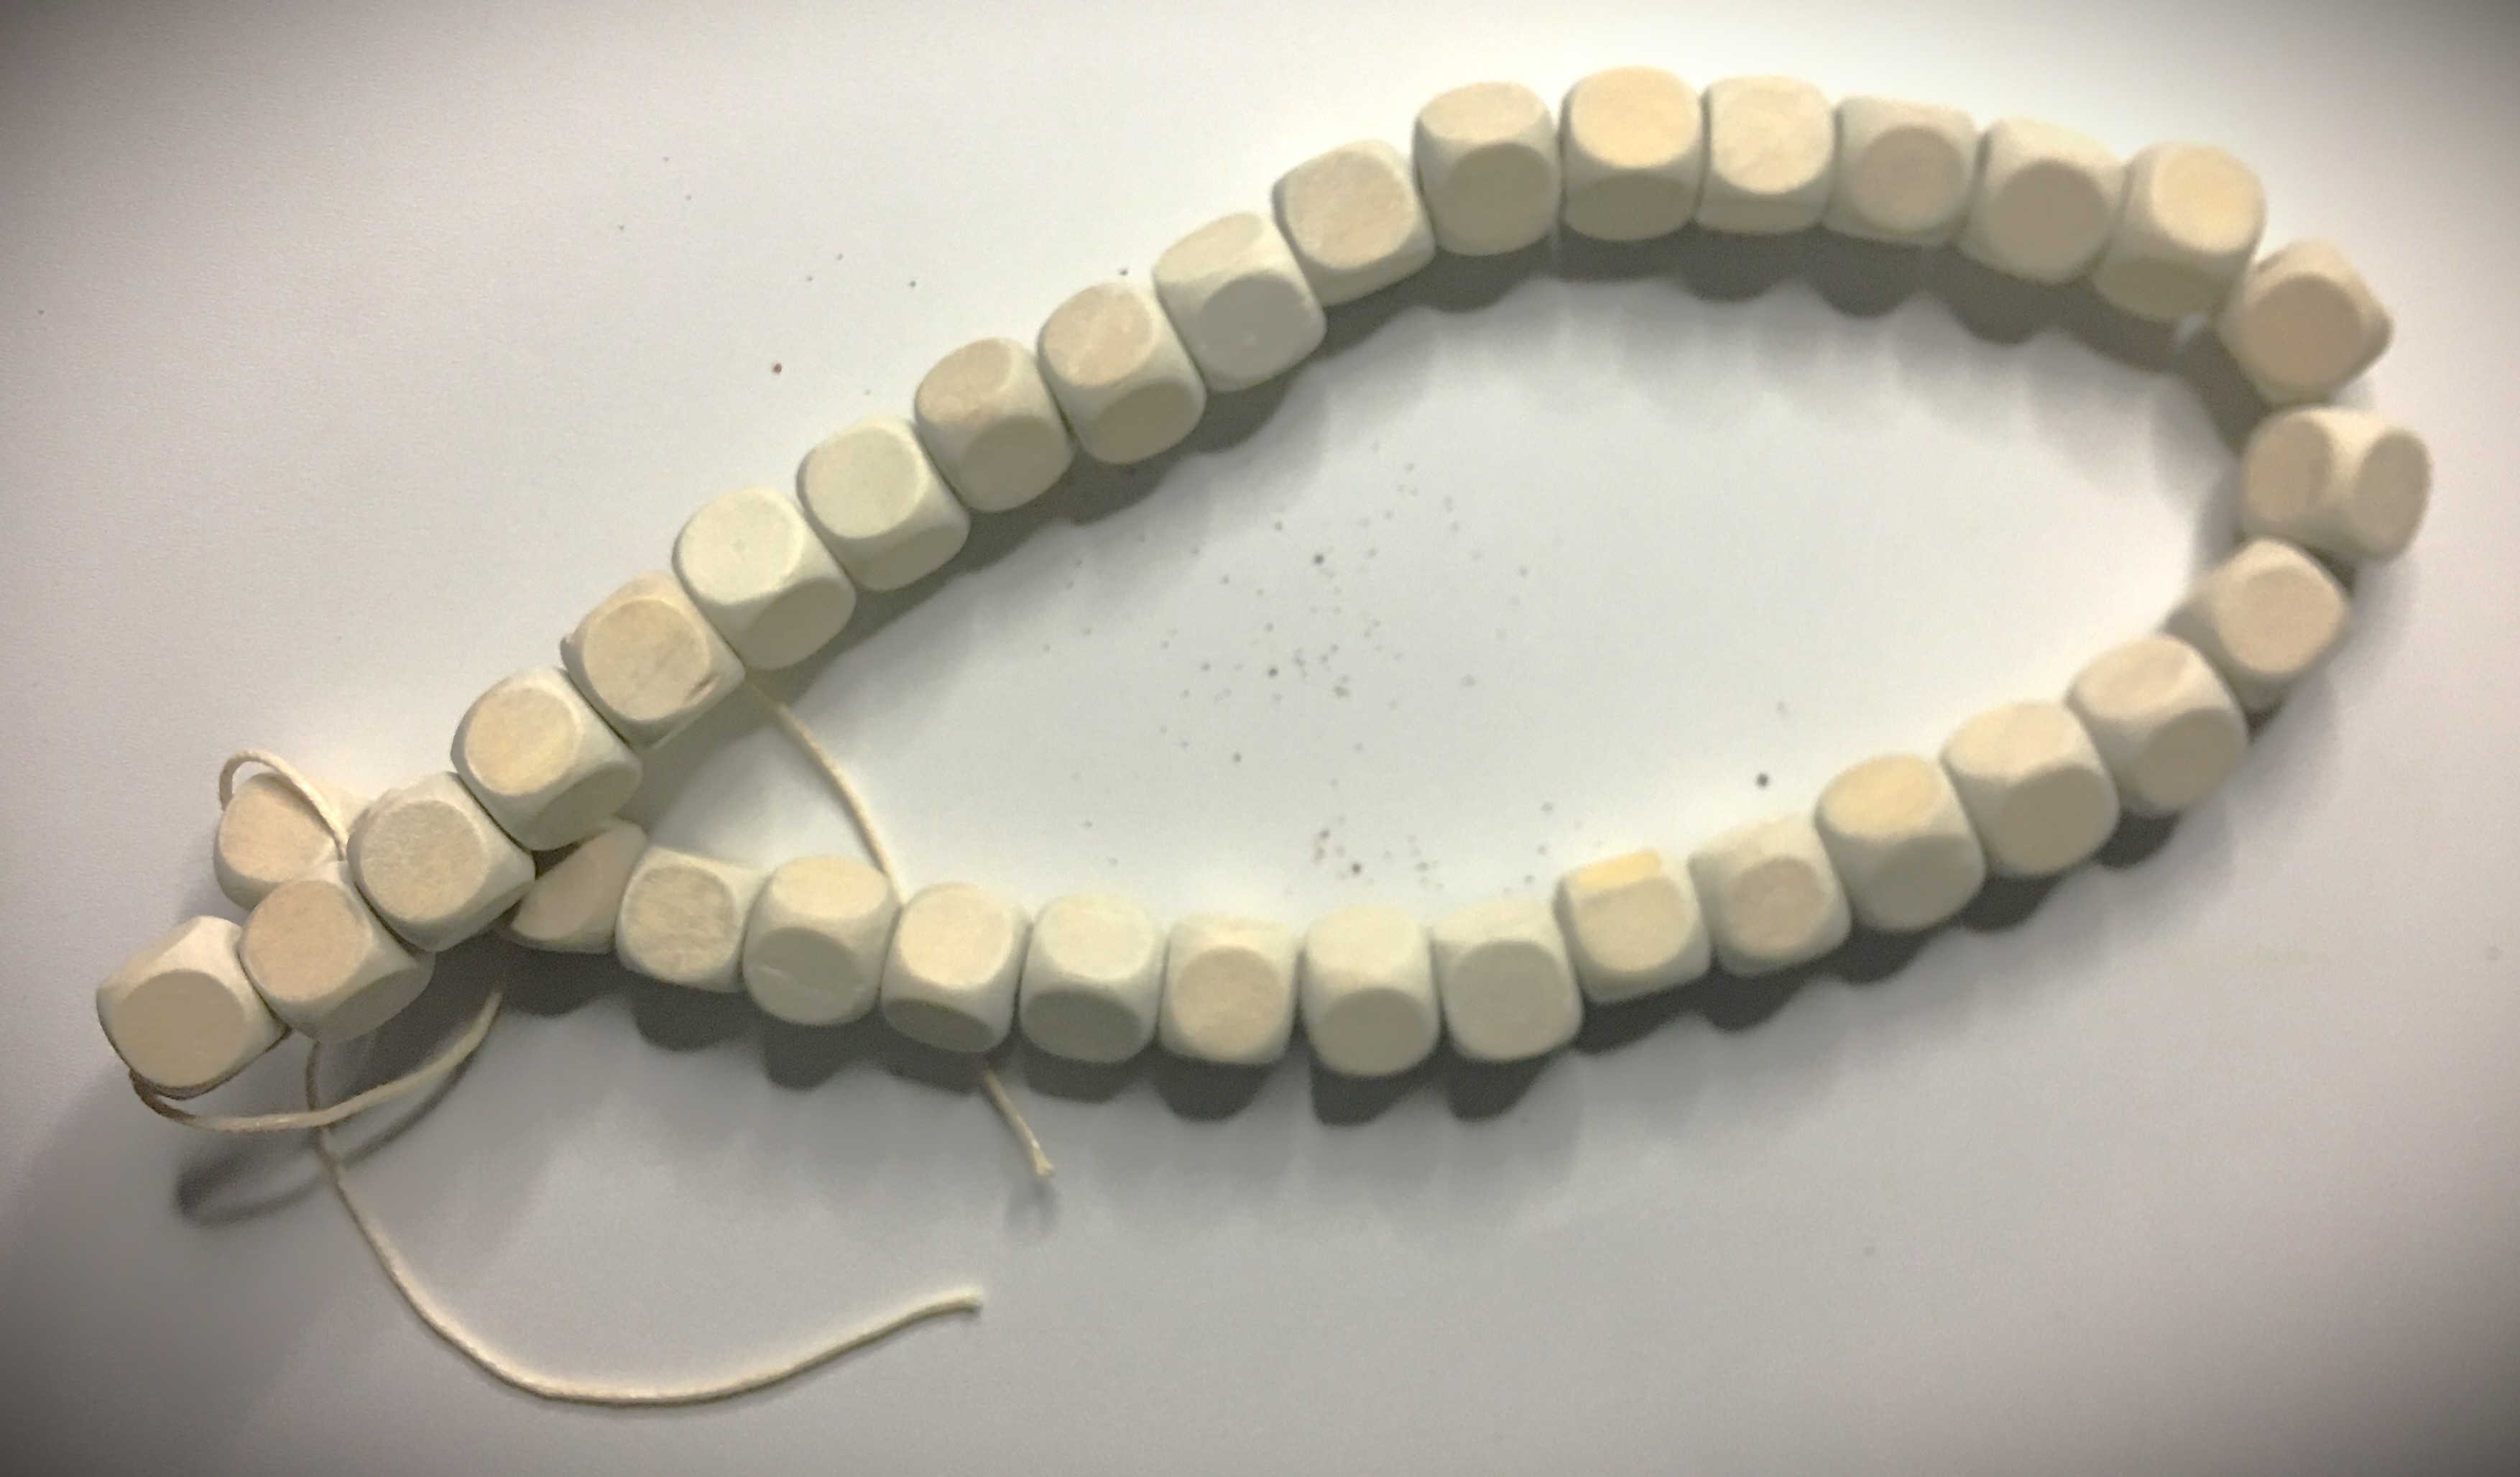
I pulled these out! Last year I made carrots out of my corn cobs. And I brought out the wooden beads from my drawer (which I also got from my local dollar store).
With the beads I removed them all from the string they came on and noted how they tied off the end bead to keep them all on the string. This “knot” that they used was how I spaced the beads further apart on the string.
Once I made those changes, the colorful “polka dots” needed to change. The gold and green glitter styrofoam balls simplified the overwhelming colors.
Even with the new modifications hanging, I’m not satisfied with the final color scheme. And sometimes that happens when you’re creating. You start building from the image you see in your head and make a change here or there and an earlier idea you loved just doesn’t work anymore.
The black isn’t working anymore. I loved the idea to begin with because it was a nice basic color that goes with where I was going to hang this. But it’s just not working anymore.
Advertisements
First thing first, I need to lighten up the banner. So I’ll be distressing it heavily so that the majority of the galvanized metal will show through. With the addition of the carrots, which obviously take the spotlight, I can bring out a lot more of that metal and the metal is not going to overtake and make everything else hide.
But before I do that, I need to decide what I’m going to do with the frame and that’s going to take a few days of looking at it to see where I want to go. At the moment, I’m leaning toward the idea of painting on white striped and creating a plaid hand painted design on it. If I go that route, I might keep the banner predominately black still and incorporate that same design element into parts of the banner.
Stay tuned to see what I finally decide!
Advertisements
And I’m going to leave you here in this moment just because sometimes the right thing is to take a step away from a project and let it tumble around in your brain. You don’t always have to have the answer right away. And you don’t always have to have things done in an hour.
Perhaps it’s convenient to have an idea presented to you in a finished state.
But I’m going to leave you here with your own thoughts. Because I know someone has that inner voice screaming, “You need to ____!”
Go ahead and leave that comment below.
Or better yet, use that idea to make your own magnetic board for your daily tasks, your children’s chore board, a classroom helper sign, your regular “Honey Do” list, or that board that I didn’t mention but you just got the idea for.
And when you’re finished, send me a picture so that I can see what you came up with.
How was your Christmas? Were you able to spend time with those you love?
In my house the whole month of December is difficult. But that’s the life of having a handful of young children in the house. I use to think that starting to decorate at the beginning of December and putting out presents as soon as they were wrapped was adding to the incessant build up of excitement and driving mom bonkers.
Nope.
We did things differently and things didn’t improve. My gift making still happened at night. Or should I say lasting into the wee hours of the morning. Lets just say that coffee is my friend.
But….
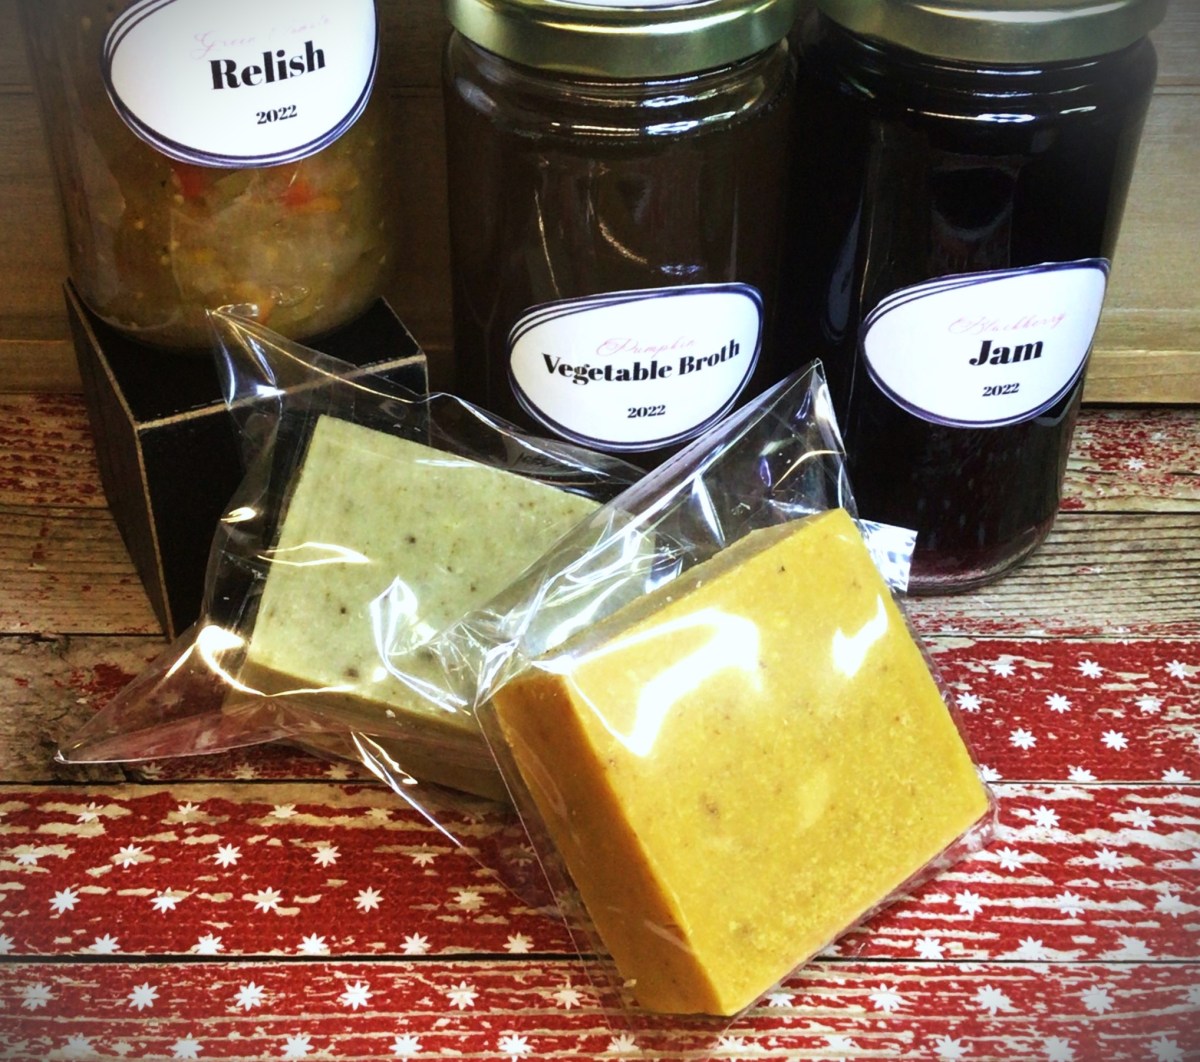
This gift, especially the soap, was probably my favorite gift to give.
I didn’t know how many people were having skin issues this year. And most people don’t talk about what they quietly suffer with. Part of it is the “I’ve tried everything” and no product on the market works.
The truth is that the local grocery stores have aisles dedicated to soap. And when you’re in that aisle you grab what you’ve purchased in the past (which may have been the brand that you grew up using) or it’s a sale based off of the label and its marketing claims. And we think that these area our only options.
Advertisements
You have another option
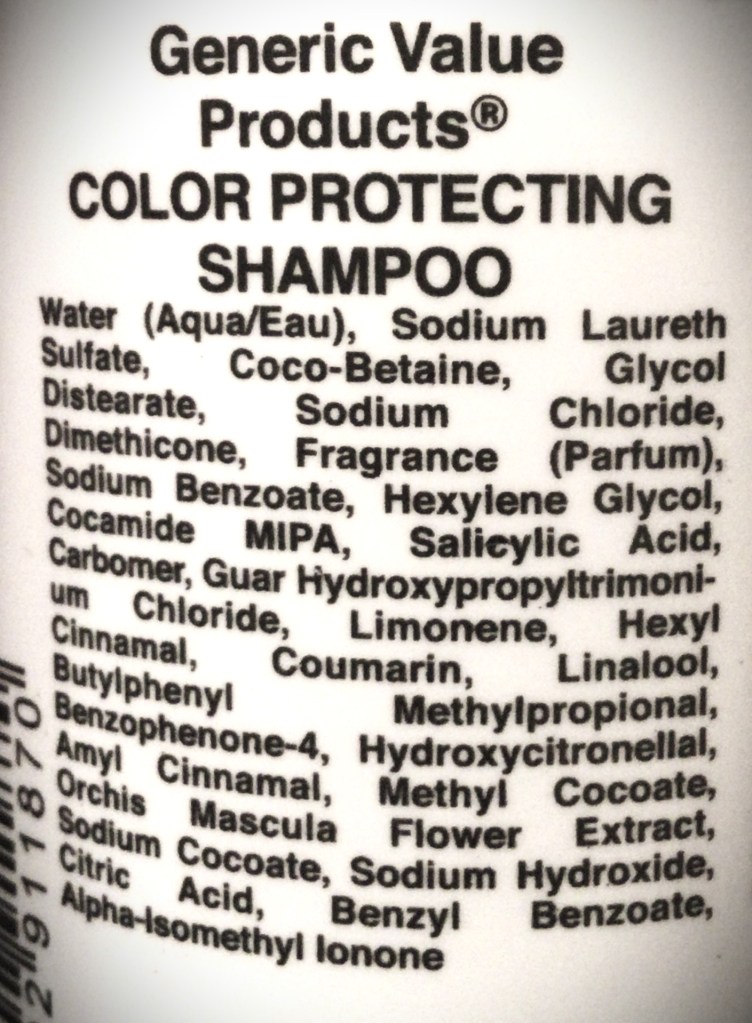
This is the video (three ingredients) that I watched that set me on the path of making my own soap, almost 3 years ago. It was an empowering feeling for me to make my first soap, Goat Milk Soap (4 ingredients), and stop buying the store bought soaps which have an ingredient list that looks something like this:
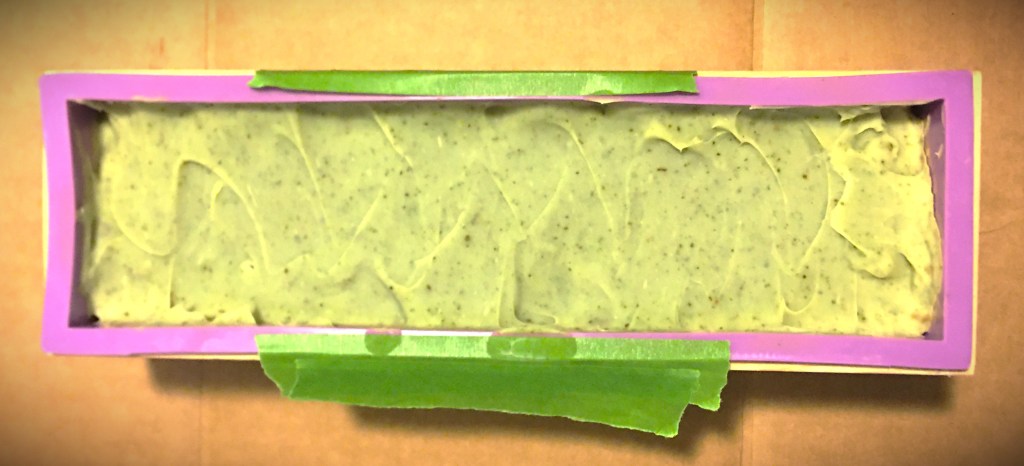
The comfrey soap in its mold.
Even though I took many chemistry courses in college, I can only tell you half of what is on product labels like this. If my children can’t sound out what the words on these kinds of labels have, that means that those ingredients are stuff made in the product labels of these soap corporations. Companies do this (take organic or natural items and change one chemical compound in the chain) they have made something they can patent and prevent other people from recreating (by pain of legal actions).
Soaps are made out of three items and three items alone: water, lye, and fats.
Yes, even those soaps that people claim are made without lye are actually made with lye. There’s a product on the market, melt-able soap base, that people claim is lye free but that is not true. This soap base is where the emulsification of the lye and fats has already happened for you. The lye and fats have already gone through the process of combining and so the lye has become safe to touch and no longer corrosive like in its original form (whether you use a crystalline lye or wood ash).
Advertisements
Here’s an example of a soap base. The first 5 ingredients are fats, followed by water, and then lye (sodium hydroxide). The end of the list is all the little extras that they added in to make their soap base unique from the others on the market.
In essence, this is an already made soap that a person at home can reshape and have the option of adding other things into for further personalization.
If you’re nervous about using lye, a soap base is going to be a good option for you. It’s not the best thing for your skin but definitely better than all the major brands on the store shelves.
Note: When making soap from scratch, with lye, you will need to cure your soap. This means that after you remove it from its mold (after it’s solidified for 24-48 hours), it will need to cure. This means that the soap sits for 4-6 weeks to dry out. While the soap dries, this allows the chemical transformation through emulsifying the lye and fats, to finish its work. When completed, they lye is no longer corrosive. The lye and fats molecular structures are completely joined and stable
Advertisements
Ingredient list from the soaps I made for Christmas
The two soaps that I made this year were Pumpkin Oatmeal and Comfrey Tea Tree.
Both soaps have only 9 ingredients that anyone can understand, colors of the soap come from the natural ingredients, and I can tell you the purpose of each of these ingredients and why they are good for your skin. You don’t need the lab chemicals to create lather or bar hardness. You don’t need the lab fragrances to give you a pleasant scent to wash with.
Note: “Fragrance” listed on an ingredient list of a mass produced soap, approved by USA FDA regulations, is all that has to be noted on a label even though it can include up to 200 different “fragrances” to make the scent of your soap. This is allowed because it’s modified in the lab and falls under proprietary patent laws.
Some of the comfrey soap after I cut it and before I set it aside to cure.
I know that not everyone approves of lard use in soap, usually for religious beliefs, but this fat can be switched out for tallow (beef, goat, or deer) which can align with religious beliefs. Or these animal fats can be omitted completely for the wide world of plant oils.
The variety of fats, found naturally in the world, each have different properties for your skin health and how it functions in a bar of soap. For example, lard is a single ingredient that adds hardness to the soap bar, creates lather, and adds to the shine and conditioning/softening of skin and hair.
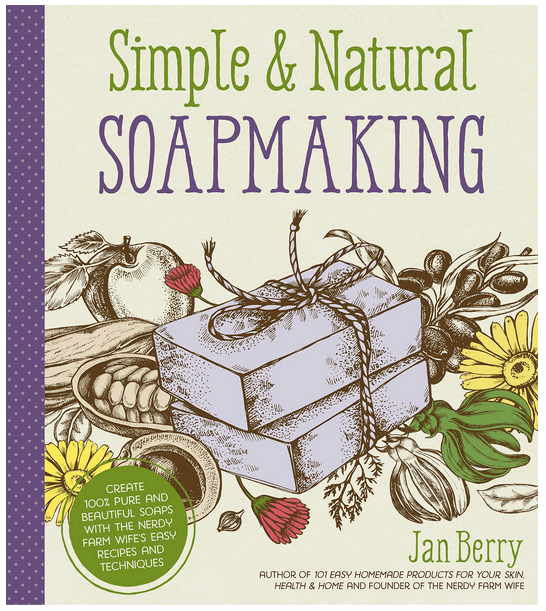
One book that I highly recommend for understanding how fats work in soap making and benefits to your skin and hair is Simple & Natural Soapmaking by Jan Berry
Advertisements
Origin of the fats is also going to play a part in how it reacts with your skin.
Shea Butter is not all the same. In fact, this week I just learned that not only is there a difference in quality of Shea that comes from heat vs. cold pressed processed Shea, but also the region. If I remember the documentary correctly, Uganda Shea butter is absorbed quicker into the skin than the Shea produced from other regions. And I never would have thought it, but the beauty industry is already capitalizing on the difference of absorption rates of the Shea butter produced from eastern and western Africa. It’s not all the same.
So if you by chance tried Shea butter beauty products and felt like the fat just sat on the top of your skin instead of being absorbed as you were promised, the reason isn’t because Shea failed you. It’s because you used a product that had a lesser quality of Shea.
In this instance, if you can afford to purchase a higher quality of Shea butter, all evidence shows that this purchase for a higher quality is most definitely well worth it. I’m all for finding the deal, but moving forward I’m now going to purchase a better quality of Shea.
With animal fats, whether the animal grazed on foods naturally available to the animal vs. grain fed and various injections will all be passed on to you through your skin.
Why what you put on your skin matters
It took me going through my second quarter of Anatomy & Physiology to learn that your skin is your largest organ in your body. Your skin keeps all your insides in, but it also is a filter from the outside world trying to come inside you.
I really don’t know why I was so surprised by all this because growing up we all have the conversations about needing lotion for our skin. We already know that we can correct some conditions by adding lotion or medication, depending on what’s wrong with our skin. But we never think about what we are adding to our skin daily that’s potentially causing the problems to begin with.
An example of a soap label. Notice the difference in readability and ingredients compared to a bar of soap I made (my shampoo bar, currently curing, is the same ingredients that the bar of soaps listed above).
We’re told to wash our hands regularly, especially during cold and flu season (not to mention the marketing for this habit over the last three years). With this increase reminder to wash your hands, how long is that ingredient list? How many of those ingredients do you know how to say, let alone identify what they do in the soap? Is it your hand soap that is adding to your cracked hands during the winter?
For example, my hands crack and bleed every winter. There has never been a lotion that I could find to ease the pain, let alone prevent the cracking in the first place. Christmas was when my Comfrey soap finished curing and I could use this recipe for the first time. Just by the first use alone, the redness of my irritated skin cleared up. The cracks decreased in size by half and by the next day they were all healed. I still have dry knuckles because I stopped using the Comfrey soap (leaving it for my son who has more sensitive skin in need of good soap). The Pumpkin soap isn’t as healing, but it’s still preventing the cracks. The Comfrey soap has aloe vera in it (which the pumpkin does not), so I might have to change that recipe to add some aloe in.
But I think you can start to see just by how your ingredients work, the natural function of things found in your garden, you can easily make a soap for yourself, family or loved ones that meet your skin type needs and not have to spend hundreds or thousands of dollars on store products that just don’t work.
Advertisements
There’s just so much to talk about with soap making. I will have to come back to this subject in upcoming posts. But I wanted to start the thought in your mind that you really can make your own soap. You don’t have to just survive and live with the condition(s) that you currently have. The first step is to start by cutting that ingredient list in half. The fewer the ingredients and shorter the syllables of the words mean that you understand what you are putting on the largest organ of your body. You can pinpoint what irritates your skin and you can pivot by switching out a fat or other ingredient that offers a vitamin or mineral that your skin actually needs.
Leave me a comment below if you’re looking for a solution to an issue.
In 2023 I’m looking forward to talking more about how herbs and garden ingredients can benefit your body. And all you have to do is add them as a seasoning to the foods you already cook, which benefits your body from the inside. And you can already start now with making soap to help your body from the outside. Skip the lab ingredients and start using luxurious soap that uses all natural ingredients which can eliminate all the extras that you need to “fix” what other products are doing to you.
For example, one lifestyle change for my family is that we are switching to homemade shampoo bars. My goal is to find the recipe that makes a shampoo bar where I don’t have to use 3 different conditions to combat the dryness that I’m convinced is caused by the long ingredient list on my shampoo bottles.
Happy New Year!!!
Products that were either mentioned in the post or items that you may find valuable in making your own soap.
This post contains affiliate links that give us commissions on products purchased at no additional cost to you. These items listed here are from Amazon but may be purchased at local markets. These products were paid for by us and are not the only products available.
After watching videos and reading different books, this is my personal favorite resource for recipes, ingredient information, and general soap making information.
I prefer cutting my own bars of soap and this is the set that I wished I would have bought the first time. The cutting block takes the guesswork out of eyeballing a uniform and straight cut.
This is great for just getting started and you don’t want to think about portioning out bar sizes. The disadvantage is that the silicone is very flimsy under the weight of the soap. So make sure that you have cardboard or another hard surface to tansfer the molds to a different location while the soap solidifies.
My granny made lye soap, used it all her life, never had skin problems, i make basic lye soap myself, 3 lbs of greese, bacon preferably, but the drainings off cooked meat, 2 gallons of water, and one can lye, , i greate up some for clothes soap, i use it in place of aal types of soap, melt it and mix with water for dish soap, works better than cascade in the dish washer, the only problem is aquiring the lye, it extreamly hard to get in the stores because it is one of the main ingreidants in the manufacture of meth, and everytime i make soap i have to call the police and noify them, so i dont get charged with making meth, it smells the same, making meth or making soap,
There shouldn’t be any fear in purchasing lye. I’ve been purchasing it for a few years now and have never had to report to a registery. There are certain over the counter medications that I’m aware of that there is a registry because of of it being associated with drug manufacturing. And in the instance of that product registry, there is a notation of who is buying what and at what quantity. For the manufacturing of drugs there is a specific amount that law enforcement starts paying attention to. For the average person, making soap at home, they are not going to come close to hitting that limit. I mention all this to prevent unnecessary fear from being spread.
Thank you for sharing how you make your soap! And also sharing how you use it to also to clean clothes and dishes.
This year is an interesting year to go into for Christmas. For some families, they are facing a tight budget and want to still have some wow while still meeting other necessities. Other families have taken the last few years to simplify their homes with a minimalistic look. And yet there are other people you will gift this year who are limited by space, be it home or office.
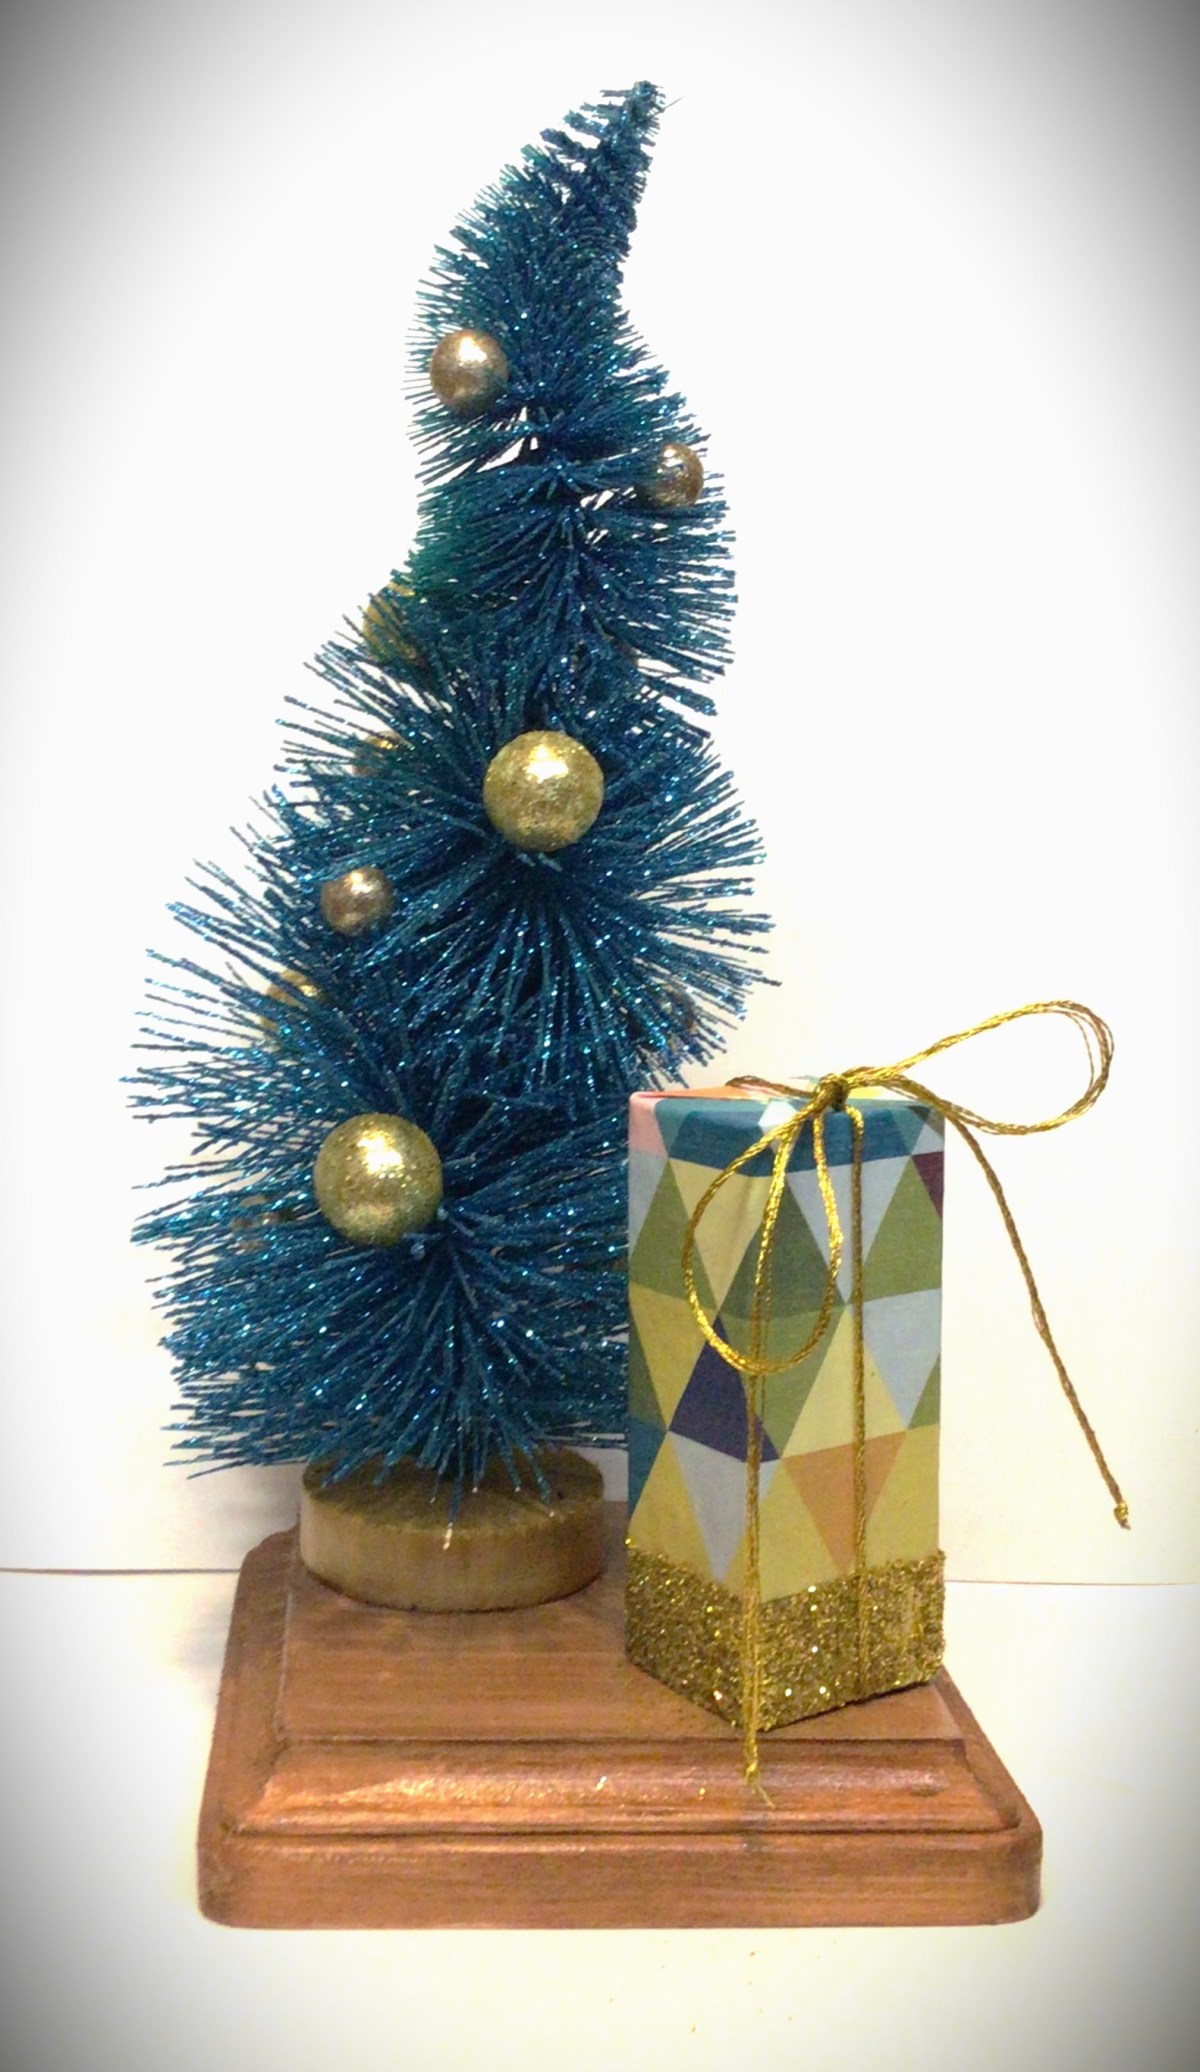
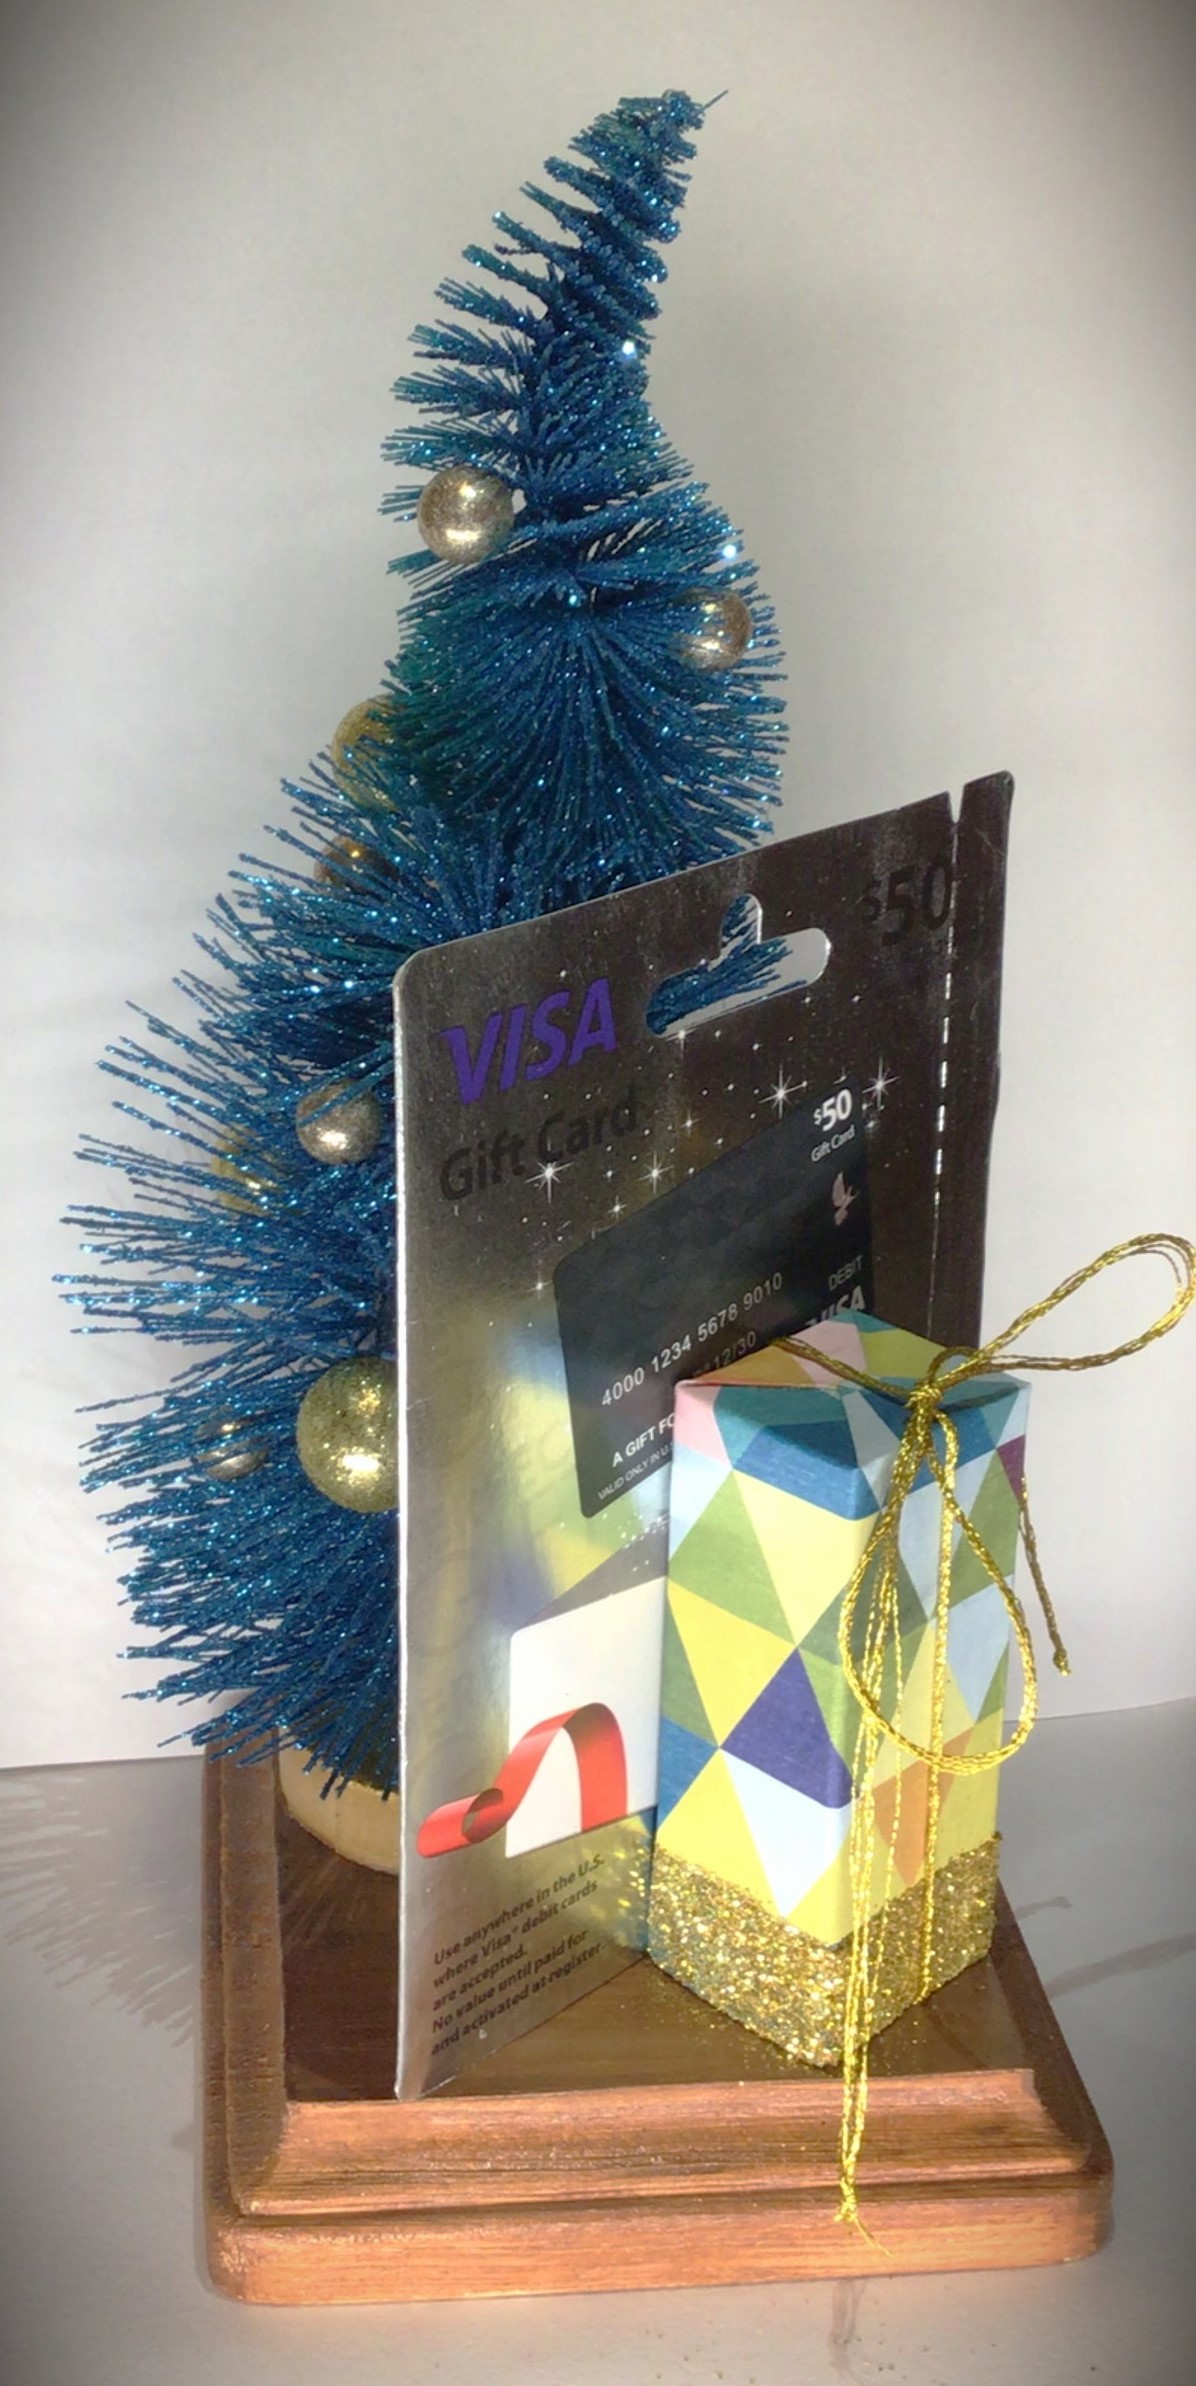
The first gift I want to present to you this year is the Desk Tree.
The beauty of the Desk Tree is that it is minimalistic in design and fits into small spaces at the same time. Not only that, but it is a blank canvas for other ideas that you already have in place for someone on your list. But I’ll come back to all these possibilities in a few moments. As well as the announcement of a special treat!
Let’s Make a Desk Tree
The fundamental components are the base, tree, and present. Everything else is completely customizable and based off of what you can find in your local shops or what you already have in your craft room. This time the only thing I purchased recently was the tree.
Other supplies I had on hand:
acrylic paint
paintbrushes
wood glue
Mod Podge
hot glue gun
clamps
craft paper
glitter
gold embroidery floss
styrofoam balls (different sizes)
Prep All Wood Pieces
I didn’t choose to sand the wood, because I wanted to keep rough surfaces for the wood glue to adhere to well. In fact, where I glued two pieces of wood together I roughed it up by scratching into the wood with a wood carving blade.
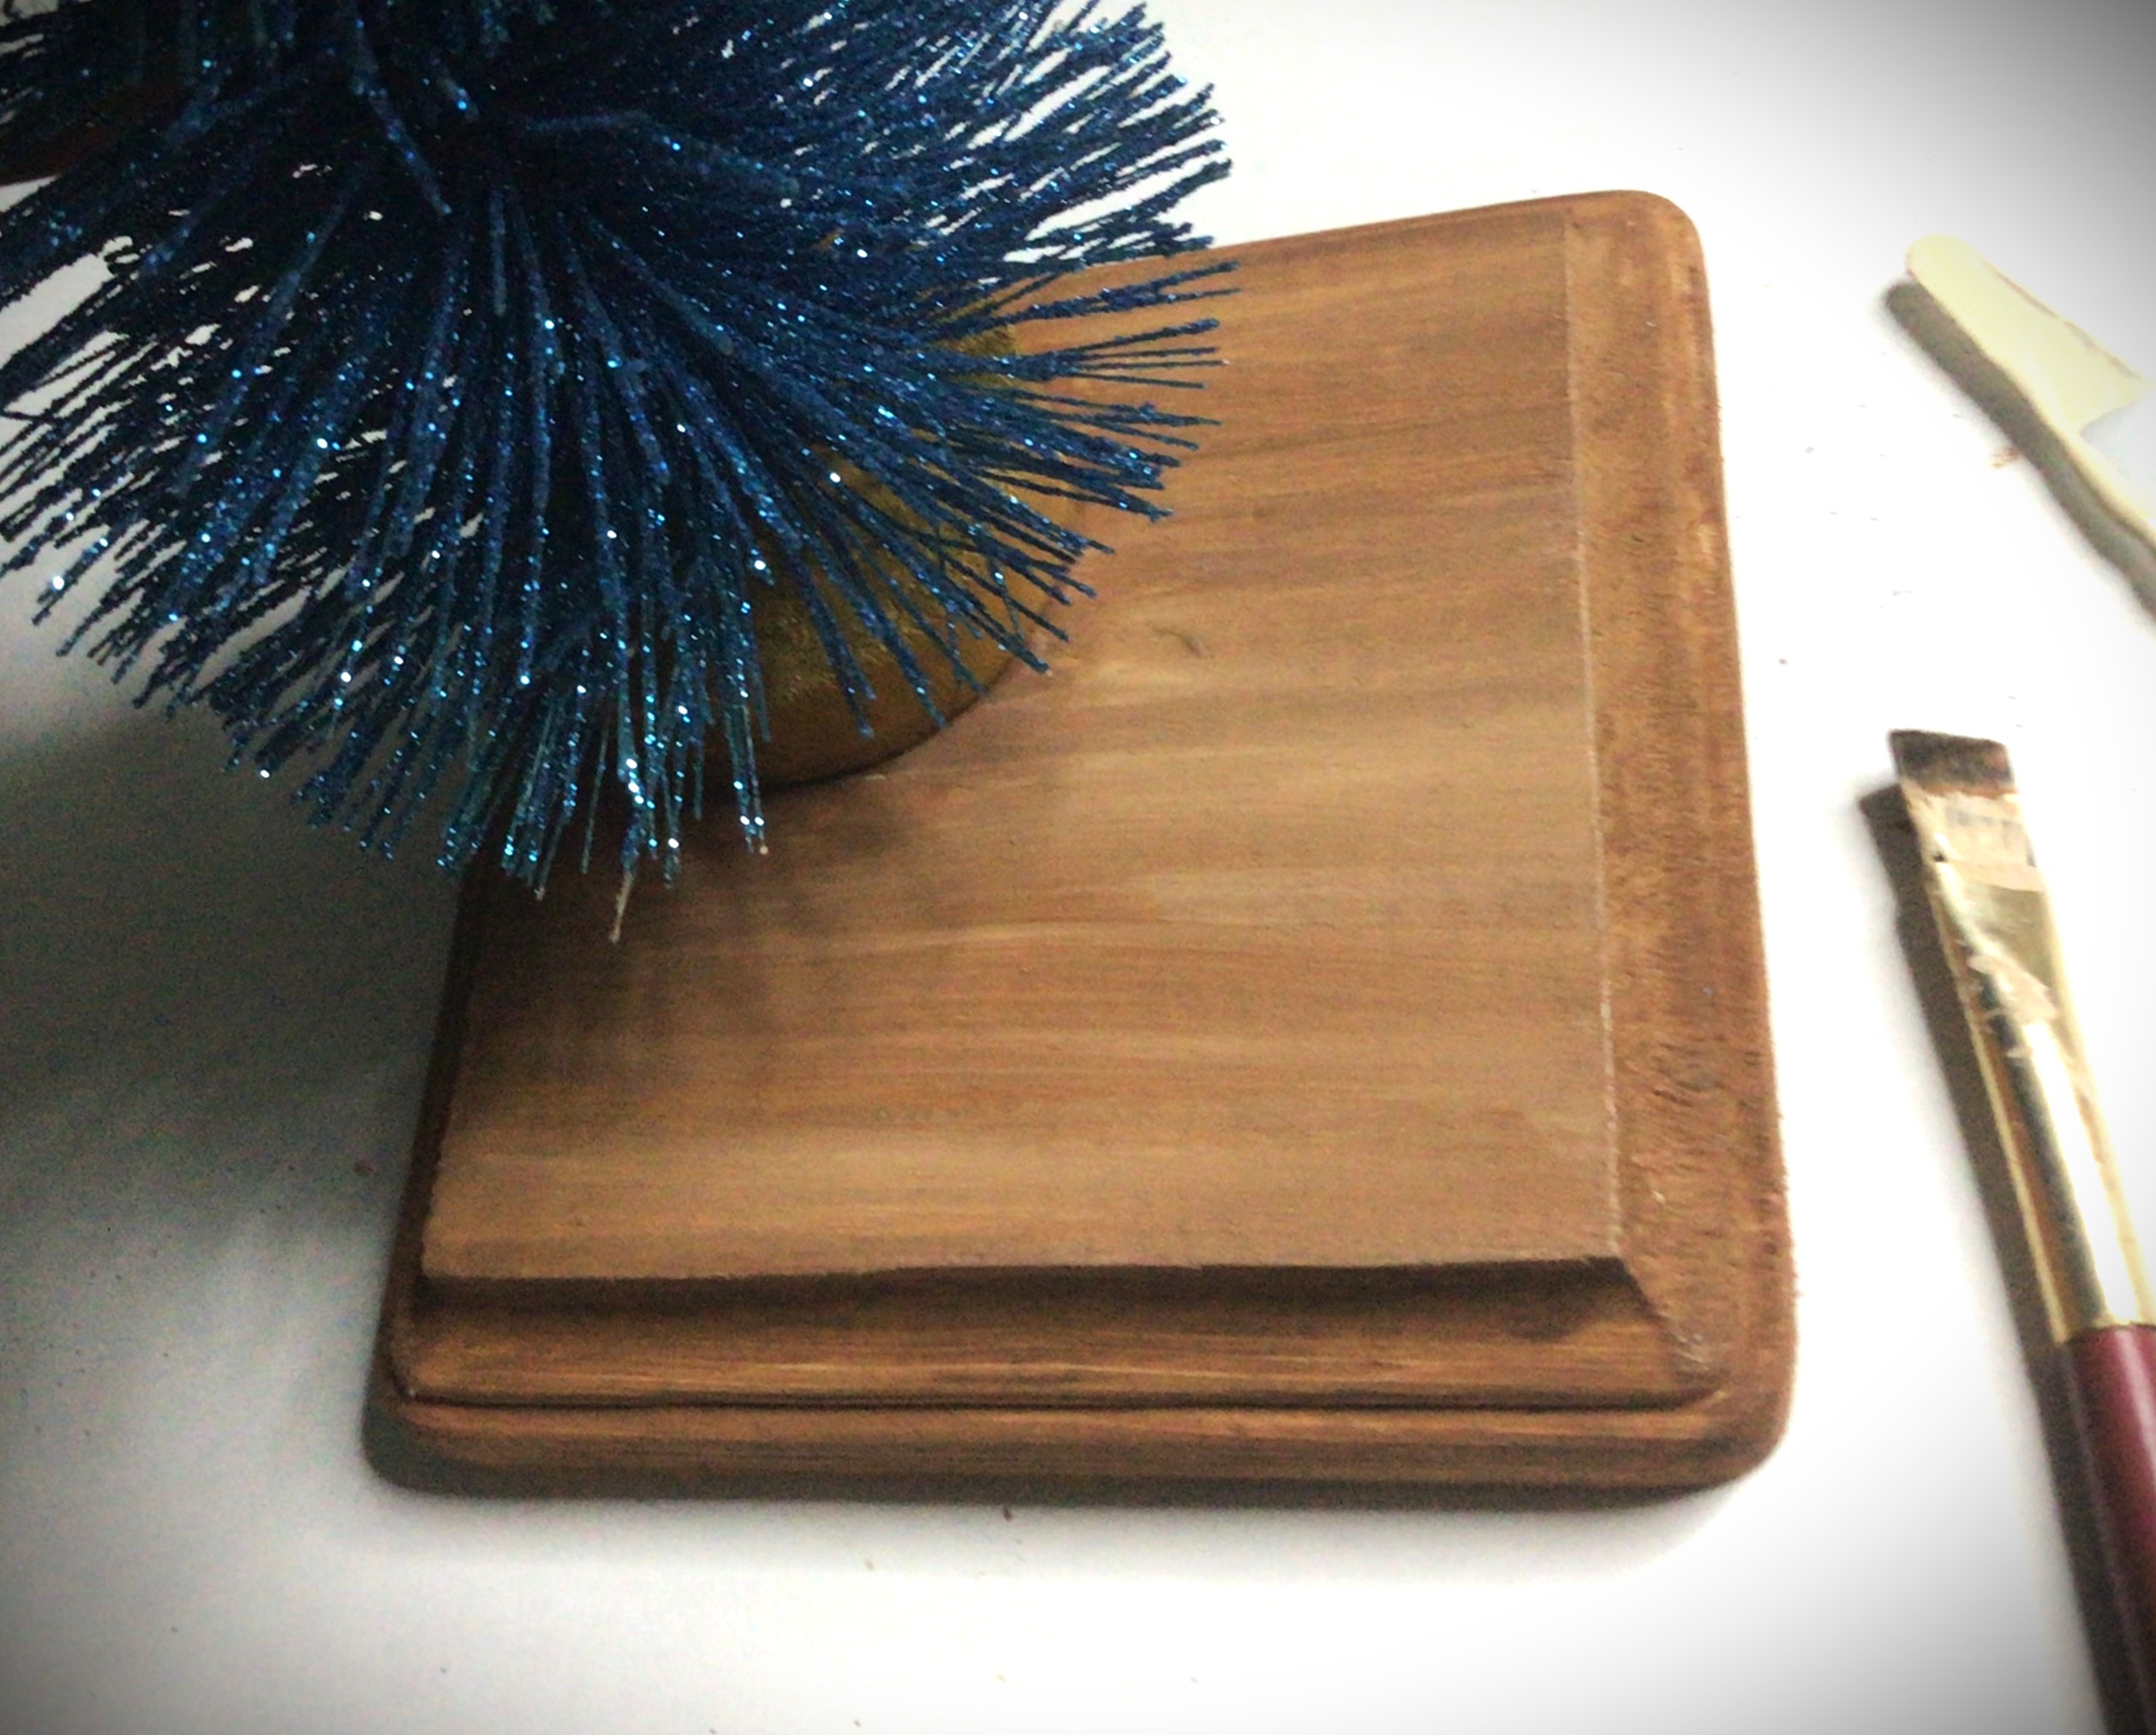
Option: you can paint the base before or after you glue on your tree. For the example in this set of photos, I glued the tree on first and worked around it. For the other copies I made, I painted the base first and glued on the tree afterward. The disadvantage of adding the tree first is that you have to have a steady hand as you paint around the tree. The disadvantage of adding the tree after the base is completely finished is that you run the risk of scratching the “floor finish” if you rough up the spot where you will add the tree.
Paint the Base
I could have painted the tree base before gluing it on. But let’s be honest, I didn’t think about it until later. So just know that it is easier to paint the tree base before you glue it, but entirely possible to paint it while on the base. Just remember to paint the tree base before you paint the floor. Because I chose to go with gold accent to my teal tree, the gold tree base paint doesn’t ruin or effect the floor at all since it blends in with brown. This is another good reason to paint the tree base first. If your paint brush slips, it’s not going to throw off your paint job. And as you can see here, in the first picture, I cleaned the gold off my brush by just painting it on the “floor” going with the grain of the wood.
When you paint the “floor”, paint in the direction of the wood. This allows you to use thin coats of paint (making it a faster dry time) and if the wood grains show through, it adds to your paint job instead of competing with it.
Picture 2 I took to show you that you have the option of leaving any decorative edges of your wood different if your creativity is taking you in a different direction.
Picture 3 shows you the direction that I went, changing the color of the pine to more of a mahogany wood color.
Option: Perhaps you don’t want to paint the base to another wood color finish, but have a wood stain in your garage. Go ahead and use the stain!
Stylize Your Tree Set
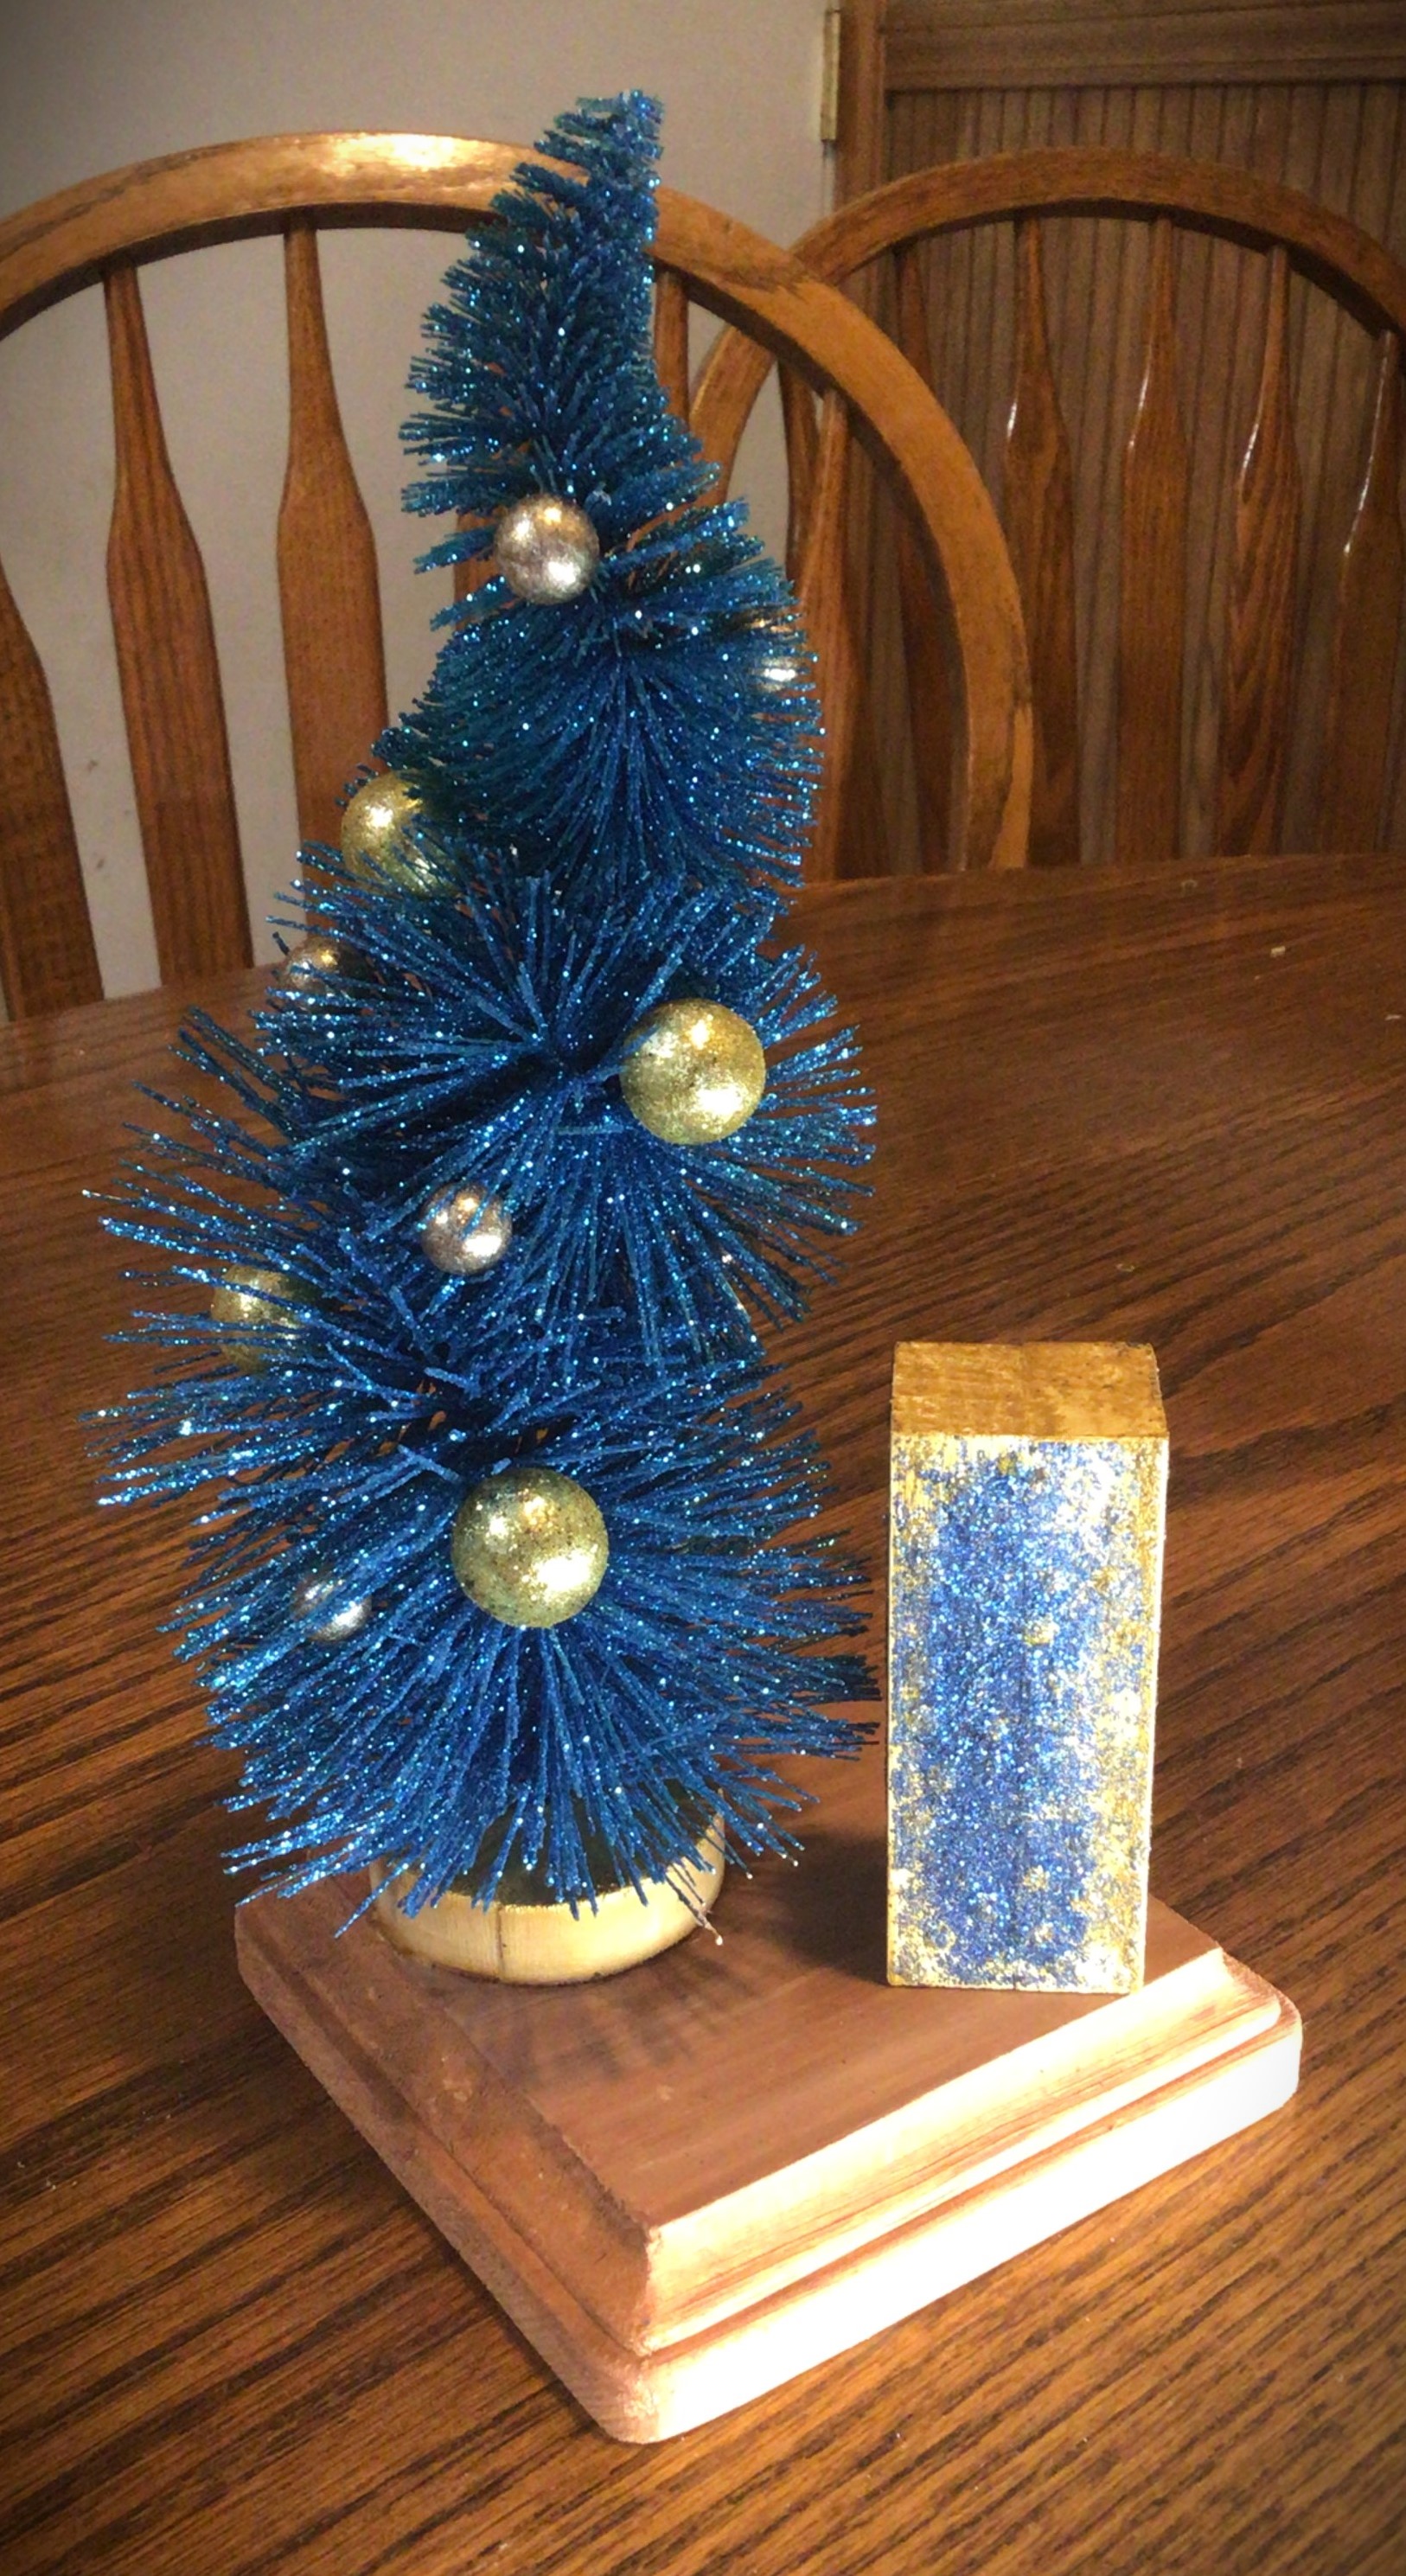
Sometimes you have to pause and put things together to see what direction you want to go with. Originally I had planned on painting my “present” and then add dots of glitter to make my own “wrapping paper”. Let’s just say that my polka dots looked like my preschooler made them. It wasn’t the vibe I was going for so I present to you my second option, glitter “wrapping paper”. For a different project, I might choose this option, but it wasn’t working for me either.
While I was staring at the teal tree with the “ornaments” that I put on it I asked myself what it was that attracted me to this tree. And the answer was the playful was that geometry was used. And then it hit me! I had geometric crafting paper.
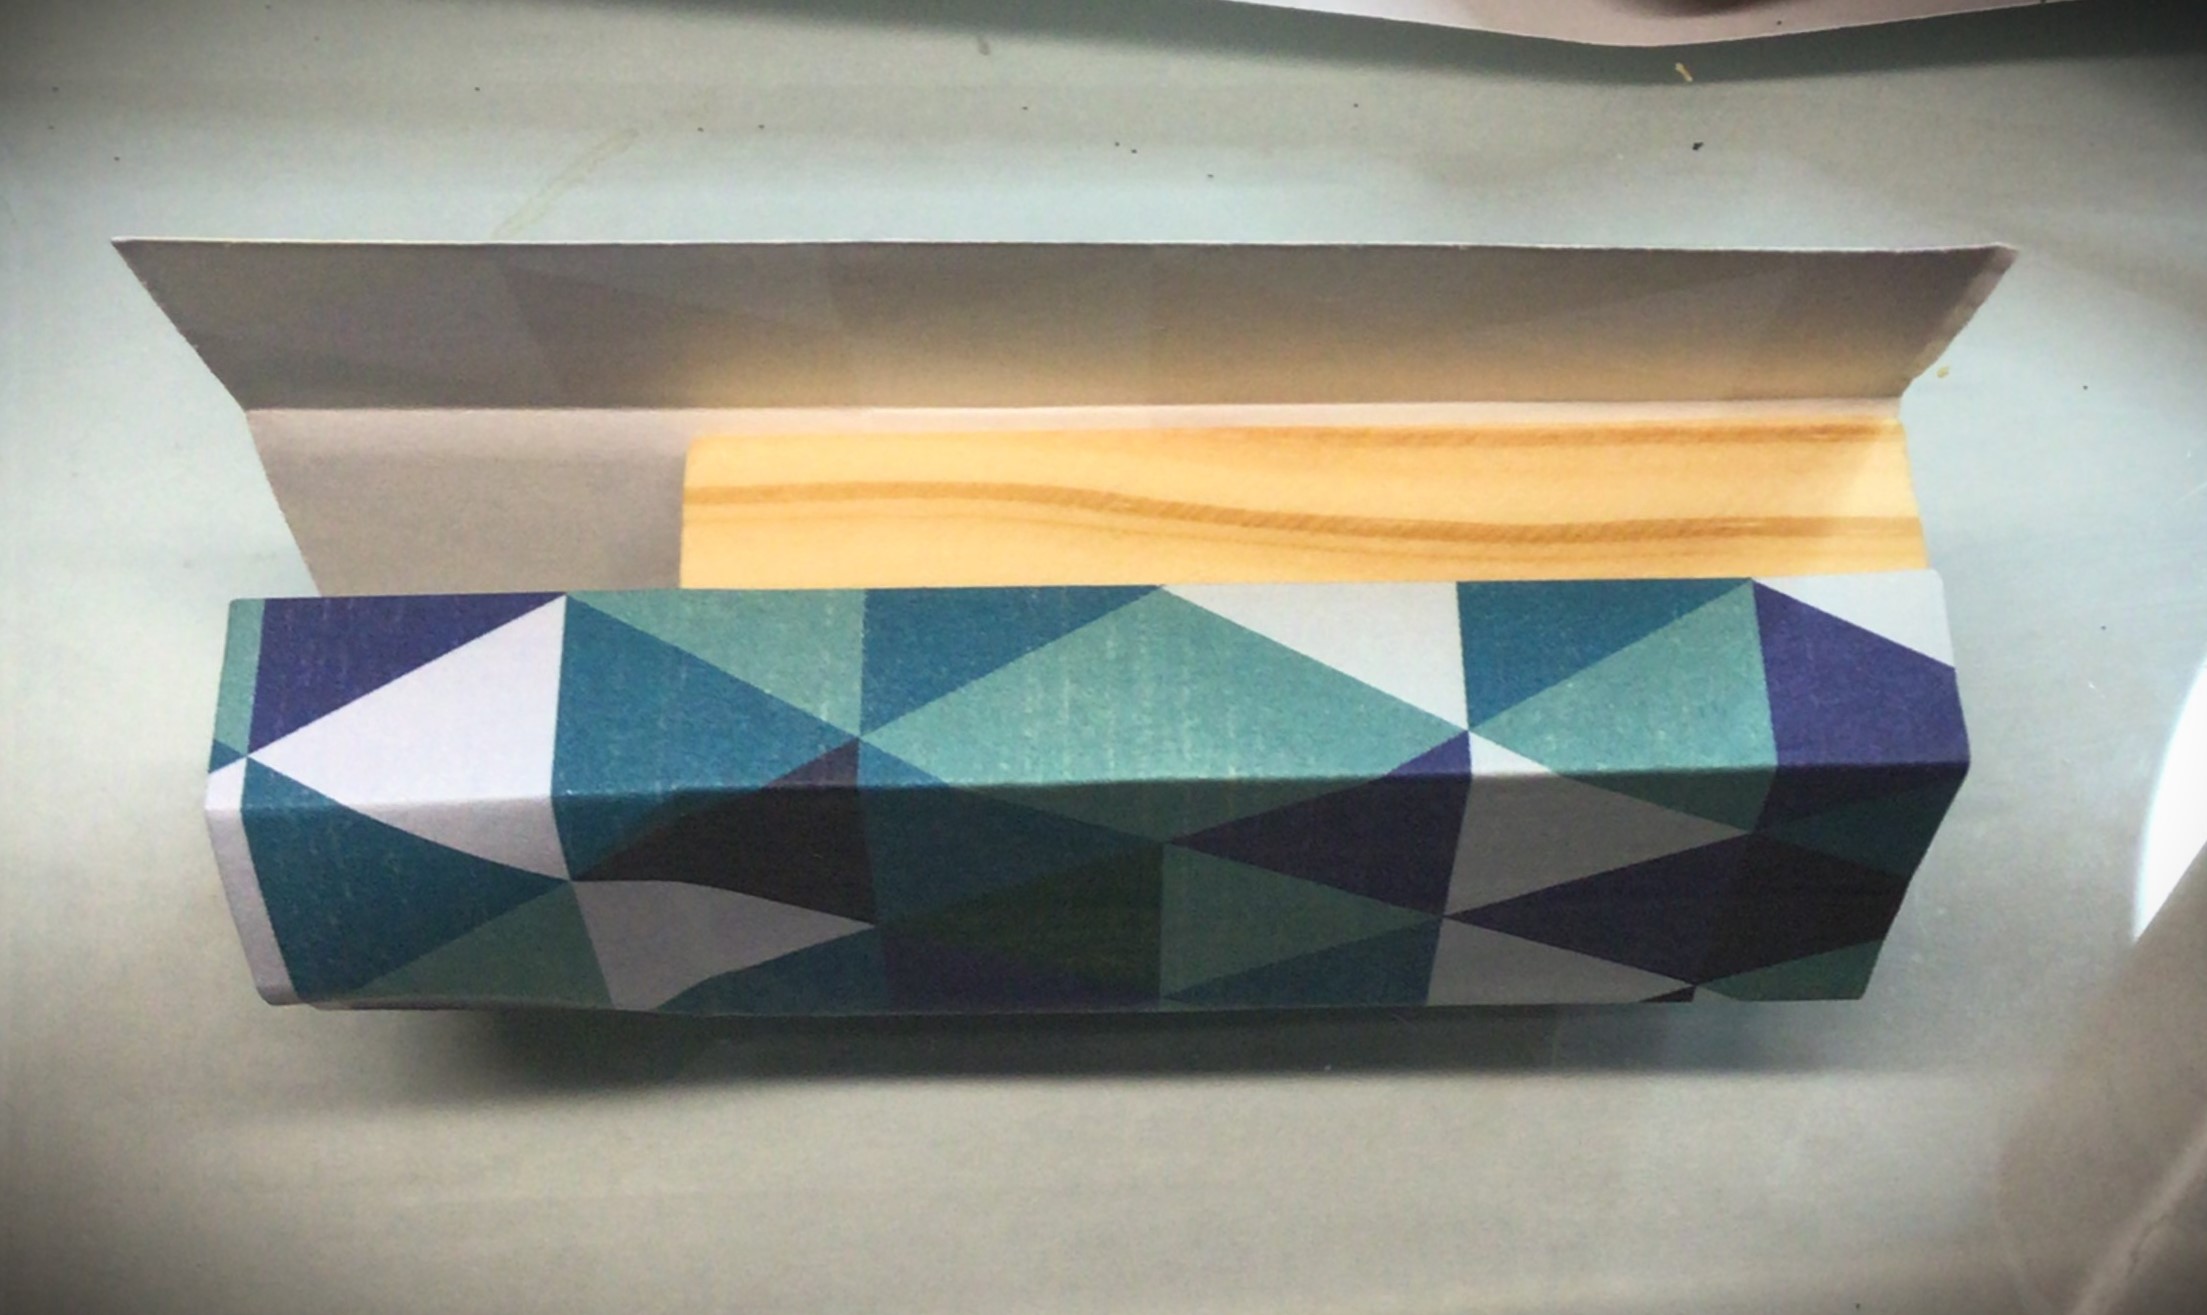
As you can see here, the geometric triangles brought symmetry to a very asymmetric and quirky tree. And the crafting paper just made my job of wrapping this “present” so much easier.
Wrap the Present
This is simpler than actually wrapping your Christmas presents because you get to use glue!
Once I trimmed my paper (leaving the bottom exposed, with enough left over to wrap the top), I created the folds in my paper before gluing it down. The one thing I hate about gluing down craft paper is that if you have to lift it to reposition it, the paper doesn’t look as nice. So to avoid this pit fall, I made sure to make all my creases first. This allowed me to put the edge of the wood block in the crease and line up before laying down the Mod Podge.
Plus there is the added bonus of knowing where your finishing end will land. In this case, I started my first crease by thinking of this blind end finish and placing the paper edge on the corner of a short end. By the end of my creasing job, the tail end had the paper over lapping around halfway on that same small end.
Start by gluing the paper down with this small end tail.
Work one end at a time and smooth out the paper as you lay it down. This will prevent the paper from slipping, having bubbles, or making creases as you go around your wood block.
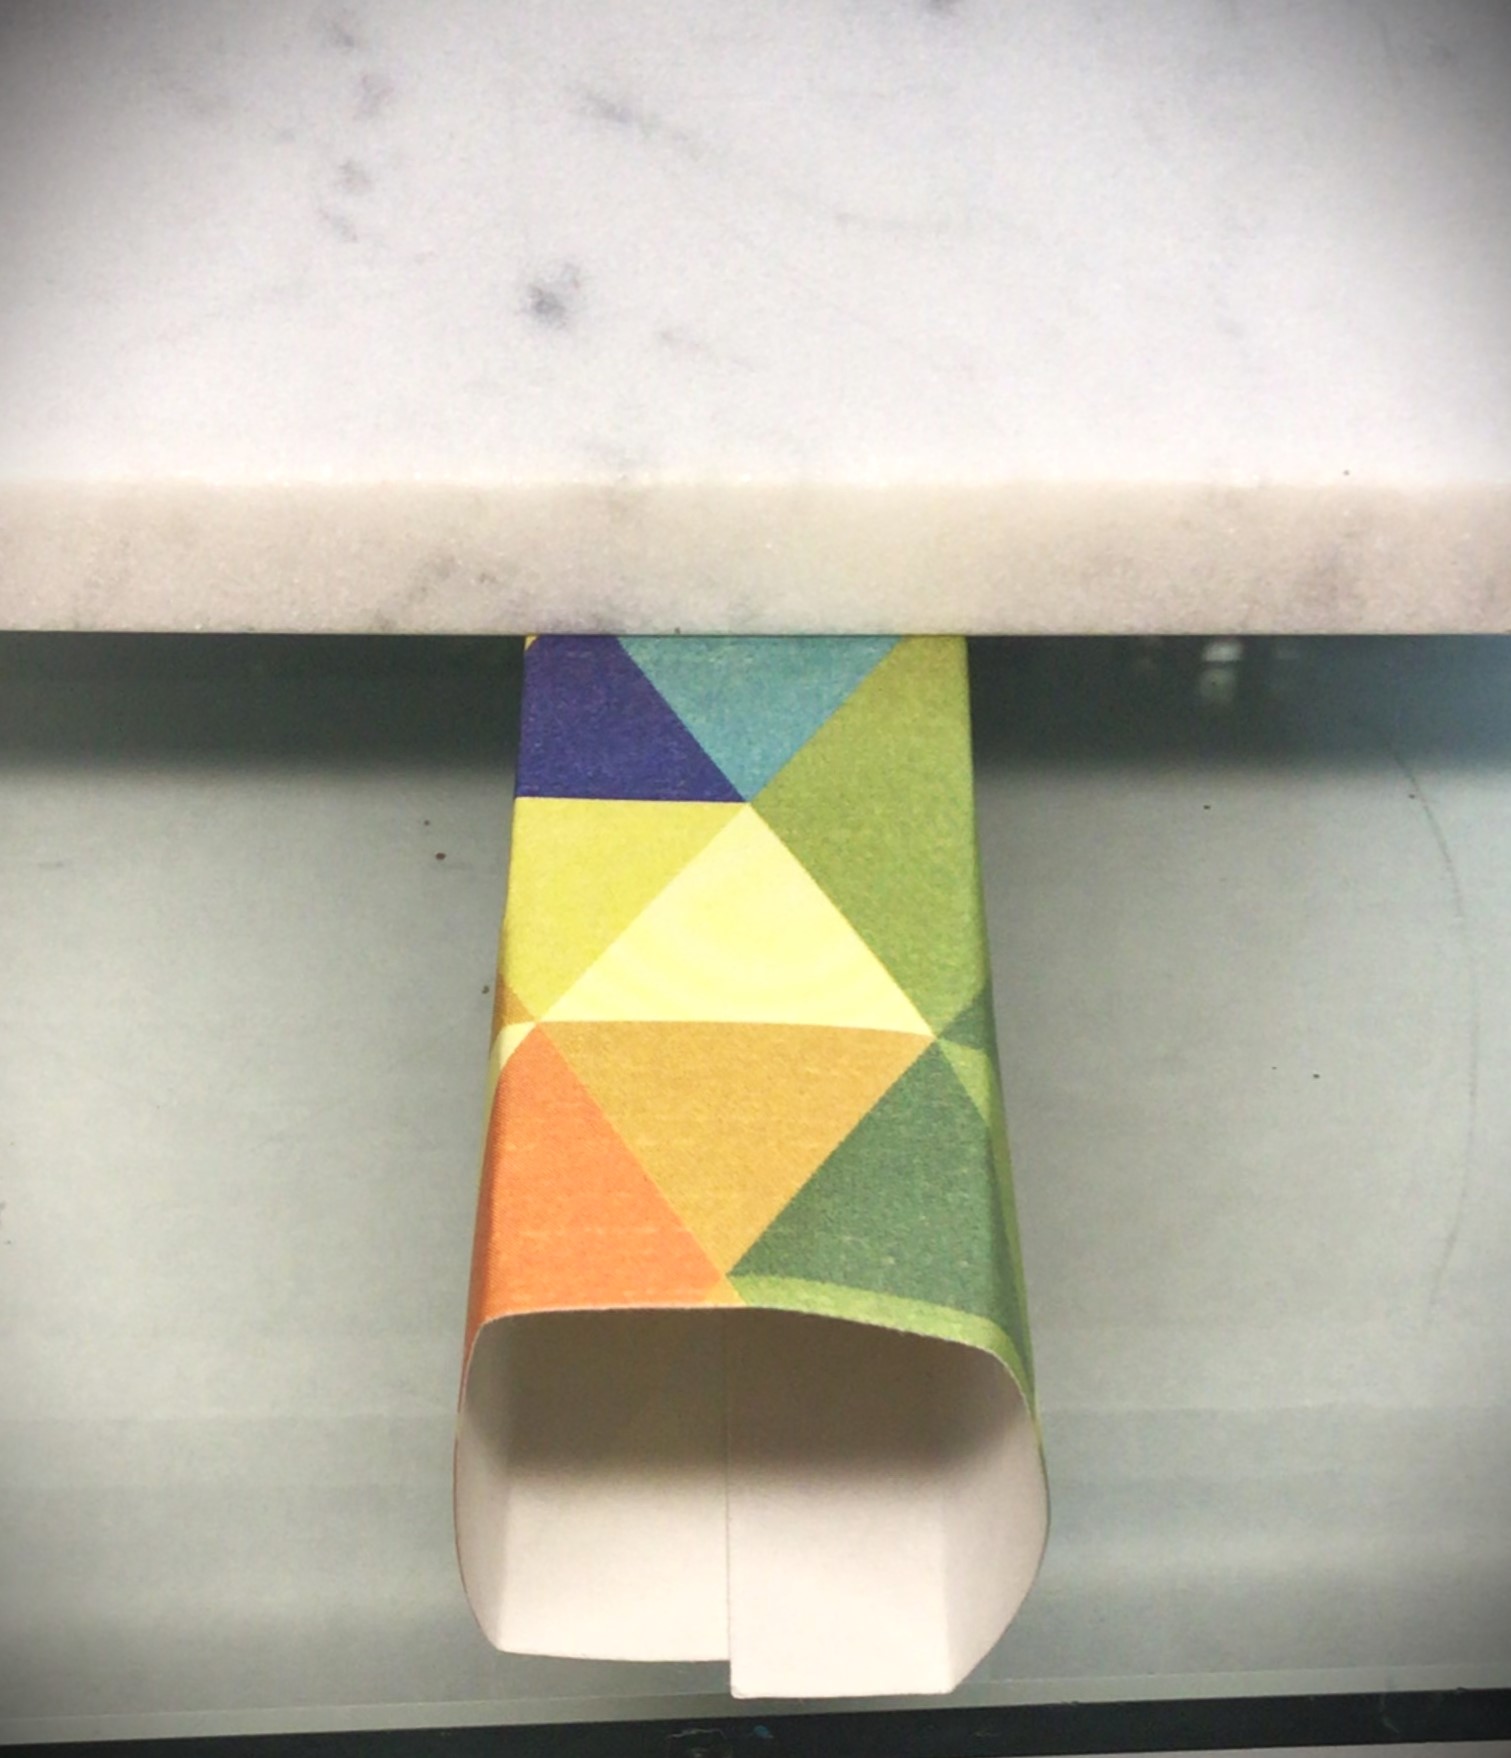
When you come to the end, your last flap will be the section that lines up with the short end of the wood block. Apply glue to both the wood block and on top of the paper that you already glued down. The “present” how has a hidden seam where you don’t have to worry about hiding a back side of the present.
Put this seam side of the “present” table side down and place a weight on top of the block. This frees your hands up to do another step of the project while the glue dries, keeps the paper from lifting or wrinkling.
Once this seam side is dry, you are able to know wrap the top of the wood block. For this step, pre-creasing will also make this step easier.
Fold the seam side of the paper down first. Then fold the other short side of the block down next. Finally fold the long sides down.
Reopen the paper and apply Mod Podge down on the full top of the wood block. Fold down the seam side. Apply Mod Podge to the paper of the other short side and fold it down. Then put Mod Podge on the paper of the long side flaps and press them down in the order that you folded them.
When you “present” top is wrapped, you will want to add a weight to the top until the glue dries. (This once again frees your hands up to work on something else of the project.)
You will probably find that you need to put the “present” in between two items to keep it from falling over. You will see that I put it between a craft bin and one of my bottles of paint
Finishing Touches
In order to tie in the glitter from the teal tree and the pain finish of the craft paper, I decided to add some gold glitter trim to the bottom of the “present”.
TIP: To keep the glitter from shedding, consider applying a top coat of something. It’s whatever you have on hand. If you have some glitter glue, that seals in the glitter you just applied without adding a dull layer over the sparkle.
Once the glitter dried, I opted to add an embroidery floss ribbon. All my ribbons were disproportionate to the present. And I didn’t have any tiny premade bows to stick on top. So if your craft room also is limited in tiny items, consider things like embroider floss, thin hemp twine, baker’s twine, or even sewing thread wrapped around a few times.
Depending on what you use to finish off your present will determine how you attach your present to the wood base. Ideally, you would want to add the present with wood glue. In this instance, wood glue would have created more of a mess to clean up than hot glue. I placed hot glue on either side of the floss so that the glue would balance out the thickness of the floss and make the present secure.
Gifting Options
Desk Tree is perfect as is for gift exchanges and teacher’s gifts. But it’s even better when paired up with the little something extra that just wasn’t enough on its own.
Here are two examples of adding a little something extra to a gift that can still be brought out year after year for holiday decor. Match this up with that perfect scented candle that you found. Or maybe that person you gifting only wanted a gift card. This is a festive way of dressing up a gift card!
No matter how you decide to gift this Desk Tree, you will not go wrong with this project!
SPECIAL ANNOUNCEMENT!!!
Starting with Desk Tree, I’m going to make Limited Editions available of crafts that you see in my blog.
There are many people who would rather “I can make that!” But there are others who are not so crafty inclined. I don’t want you to feel left out on ideas that you love.
For right now, shipping is only going to be made available for the United States. And all purchases are only through my website, Order Here. I will keep you updated on any changes as they become available.
If you have any questions about Limited Editions, please do not hesitate to reach out to me at info@pacificnorthwesteventdesign.com or here:
These links are affiliate links to products used in this project. We may receive a commission for purchases made through these links, but at no extra cost to you.
These are generic Jenga blocks that are great for crafting on a budget when your local dollar store is out of stock.
Last Christmas, my husband put these Dewalt clamps in my stocking for crafting. And they are definitely one of my favorite project tools.
At the time of this posting, this Mod Podge is on sale. There are many varieties and finishes, but I wanted to send you to the sale link.
I originally bought these Marble Tiles for working with HTV. But I’ve found that they have had other uses in my craft room, such as a weight for holding certain projects down.
Processing…
Success! You're on the list.
Whoops! There was an error and we couldn't process your subscription. Please reload the page and try again.
I won’t even say what else comes with this season. Let’s just say that as a mom of three young children, I’m fully aware of what the change of season means. And this past week, that came and knocked the energy out of me. Shoot I didn’t know I had any more energy to be knocked out! I thought my kiddos drained it from me to fuel their never ending supply of energy.
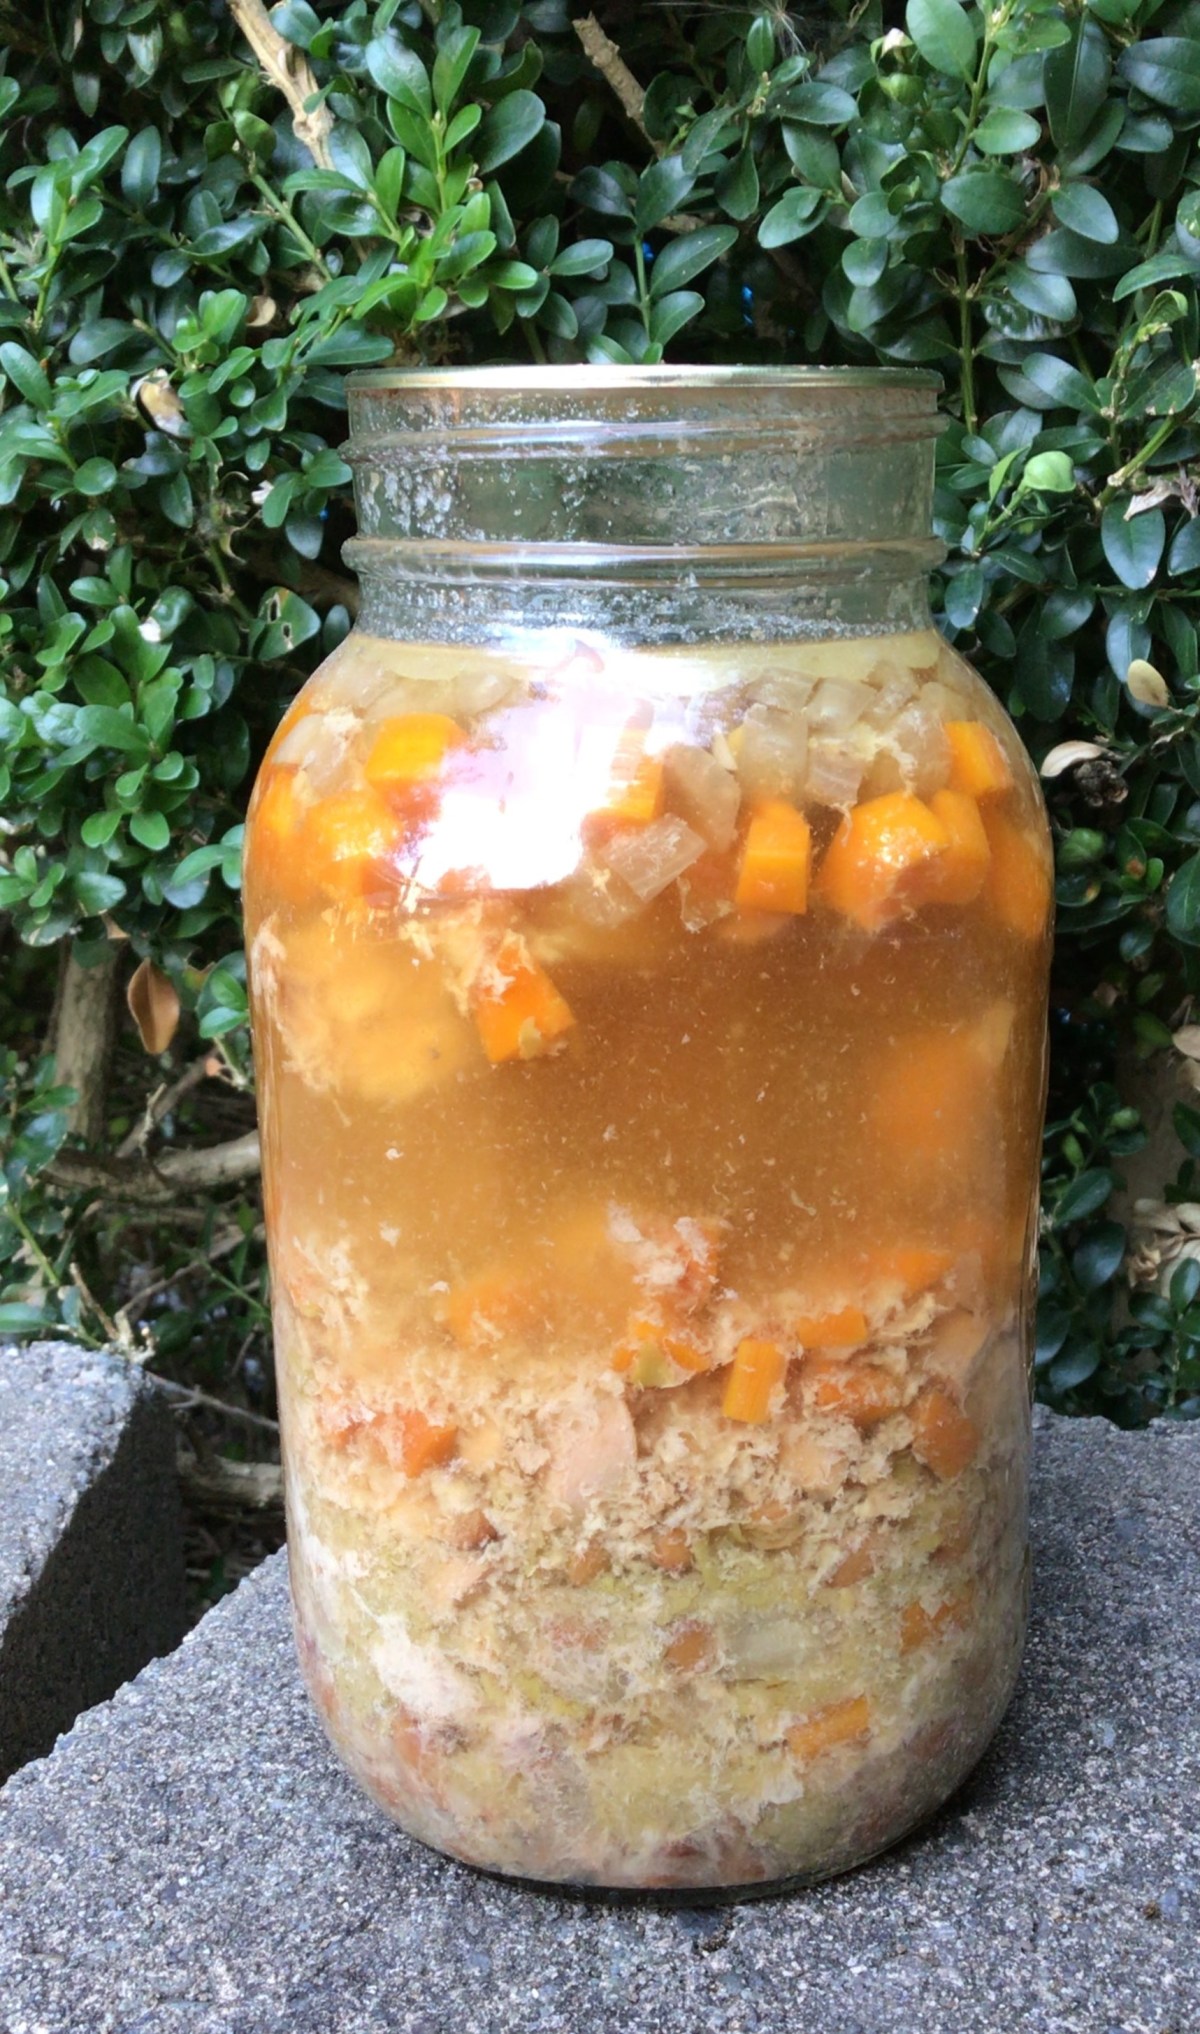
And yet, I was so grateful to have this soup already canned up and ready to go in my pantry. The chicken stock I make, I add antiviral herbs to it. Let me just say that Lemon Balm is my new favorite antiviral herb to cook with! (In a few weeks I’ll share more with you everything I put into my Chicken Stock. You’re going to love it!)
I want to share with you this recipe for Chicken Soup that is perfect for those days where you need healing chicken soup but don’t have the time or energy to make it from scratch. You will absolutely love this because it takes only 5 minutes to warm up–the same amount of time it takes to make condensed soup from the grocery store. BUT it has less ingredients and more immune boosting goodness. And even if your sick days are few and far between, this soup is quicker to heat up than going through a fast food drive through. Plus as the added bonus of being that IT item to use up some leftovers you have sitting in your fridge on the day you crack open this jar of soup.
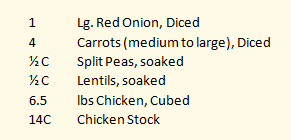
Yields: 7 Quarts of canned soup
Clean your jars and lids.
Prep your ingredients.
Cold pack your chicken, split evenly between all 7 jars.
For each of your ingredients, split evenly between all 7 jars. Start with the larger cut ingredients and end with the smaller peas and lentils.
(It’s easier to shake the smaller ingredients down into the cracks of larger ingredients than to shove the larger ones in on the smaller.)
Fill each of the Quart size jars with about 2 cups of chicken stock.
If you have Kosher or Sea Salt, you can season your soup now. Otherwise, do not put in your table salt or iodized salt. You will season your soup when you open you jar before serving.
Clean the rims of your jars with vinegar and then place lids and rings, finger tight.
Prepare your pressure canner.
Follow your canner’s directions for the correct process of canning with your canner.
For example, I am Sea Level – 1,000 foot elevation so I can the Chicken Soup with 10 lbs of pressure for 90 minutes in my weighted canner.
Once time is complete, turn off the heat and let your canner naturally release pressure.
When you can remove your lid, let the cans sit for an additional 10 minutes before removing them from the canner.
Allow your jars to sit 12-24 hours to seal. Then remove the rings and clean your jars before storing.
With new lids preserving your canned goods for up to 18 months, you have plenty of shelf life for this soup.
There are many options you have for this Chicken Soup.
You can season it and eat as is.
If you have left over rice or noodles in your fridge you can add those ingredients and still have rice and chicken or chicken noodle soup that is ready to eat with a 5 minute warm up on your stove.
With adding a thickening agent (slurry or corn starch) you can turn this into chicken and dumplings or a pot pie filling.
Maybe you have other small amounts of leftover meat, like Italian Sausage. You can use this meat to bulk up the soup, add some kale and parmesan and have a Tuscan style soup.
Or maybe you’re looking for something Latin in flavor. Grab some tortilla strips, grated jack cheese and add in Latin American seasonings and you can have Tortilla soup.
These ideas are a far cry from being authentic cultural cuisines. However I want to give you a few ideas on how you can turn one of your canned soups into a blank slate for some variety.
Advertisements
I know a lot of us really do not have time to prep meals for our families. In fact “meal prep” might have a double four letter word effect in your ears. And that’s okay. For roughly the same time it would take me to cook a soup from scratch for my family, I can make 7 meals that I can crack open and serve dinner in less time than it is for me to go through a drive through. And it’s healthier for us.
To heat up this dinner in 5 minutes, this is all I do:
Grab my jar from the pantry.
Grab my soup pot. And turn my burner on high.
Open the jar and pour the soup into the pot.
Fill the jar with Water and pour into the pot.
Put the jar in the dishwasher and set the table.
Taste the soup to make sure it’s seasoned the way I want it. (Add salt, because I usually only have table salt readily available, so it got canned without salt.)
And it’s dinner time.
If you have a college student who’s coming up on Mid Terms or Finals, this is perfect for them! Often times they’re up late and find themselves hungry after the cafeteria is already closed. This is something they can cook from their dorm room with a microwave or hot plate and have the brain food that they need. Or maybe they’ve caught a cold and need a little mama’s love in the form of soup. This is super convenient and perfect for a care package.
Advertisements
Looking for a gift idea for this Holiday Season?
This is soup is perfect for the new mother getting use to having baby at home, an elderly family member who retired their pots and pans, someone who is an avid camper or loves cooking by camp fire, or anyone else who can benefit from a quick home cooked meal without all the fuss.
Maybe you’re the type of person who loves gifting food to a neighbor, friend, or family when they become ill. Here is a quick way of gifting all that healthy goodness without your schedule batting an eye.
I highly recommend this recipe for everyone!
Do you need another gift idea?
This one is personal and doesn’t require you to have a master’s degree in art to make!
Here are some supplies that you will need:
Canvas
Paint
Paintbrush
Clear Acrylic Spray
Chalk pen/crayon, Paint pen, Pastel, or like craft item you can write with
(Optional) Sponge, Paper towel, Napkin, or Tissue
(Optional) Embellishments such as pre-cut vinyl design
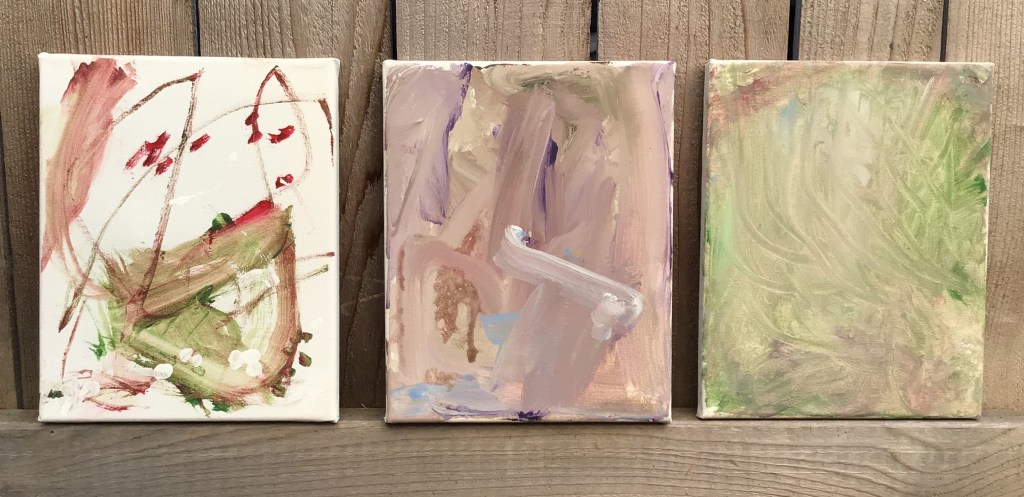
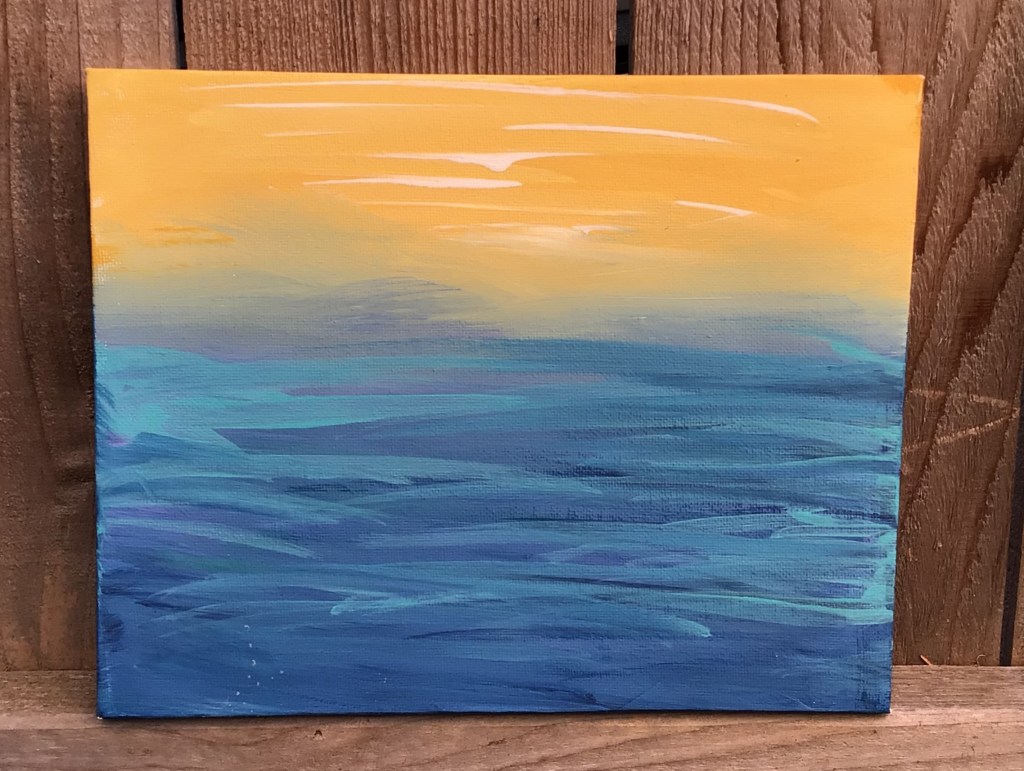
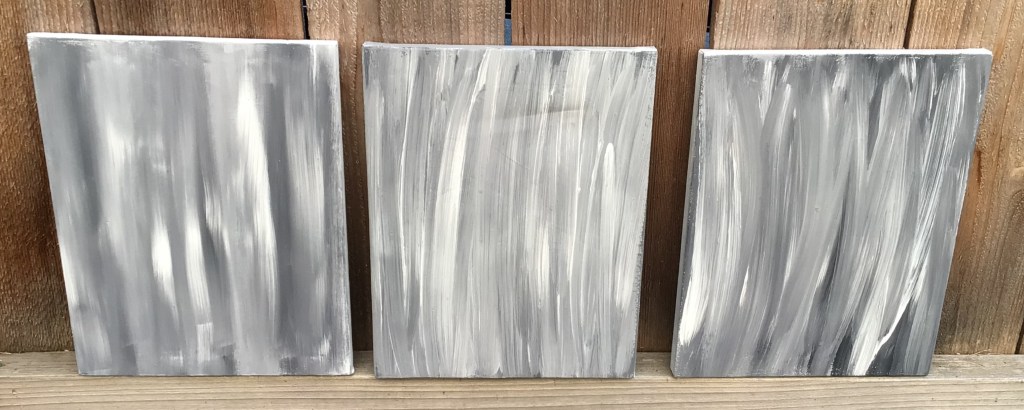
Paint a design on your canvas. You can do whatever design you would like. Here are some examples of canvases that I already have on hand. There are the canvases that my boys made 3 years ago.
And these are the ones that I have in the prepped stage for various projects that I have in the works. You can use coordinating colors, monochromatic colors, are shades for an abstract scene.
Let your canvas dry.
Spray your canvas with Clear Acrylic Spray and let dry. This step is important, because accidents happen and sometimes you want to “erase” a mistake. I’m a phonetic speller and sometimes I just get a word wrong. No worries. By having the acrylic spray dried before you start writing with your crafting pen of choice, you have the option of wiping away the mistake with a wet cloth. The only writing medium that gets to be a bit tricky is acrylic pens. That one you may not find having an “erasing” quality. Chalk pens and most pastels will generally work for excessive editing.
With your writing medium of choice write your message, series of quotes, words of encouragement, or whatever you’re inspired to say. When I made these gifts for nieces and nephews, it took about 7 quotes that I pulled from online to fill the 8×10 canvas with medium small print from top to bottom. You can write as large or small as you would like. Just be aware that the writing medium you choose to use will help you decide how small you are able to write. I used a chalk crayon that had a relatively large nib, so I wrote as small as I could and the words were as tall as the width of my pinky.
Advertisements
Decide if you would like to leave your writing clear and readable or if you would like to smudge the words to make an added texture on top of the painted design that you made. This choice is perfect for the people who believe that their handwriting isn’t pretty. By smudging your writing, you remove the uneven, shaky, or other characteristics of your handwriting that you may be self conscious of. If you choose to smudge, I recommend printing out a copy of your message that you can give with your gift, so the recipient has the opportunity to read the love that you wrote for them. For direction of smudging, that is completely up to your eye. I personally like smudging my work from left to right because I love using horizontal strokes when I paint. I do have some pieces that the strokes are vertical and so my esthetic is to smudge vertical with those, so the “text” doesn’t compete with the flow. But you could choose to smudge diagonally, circular, zigzag… each direction you go will give a different feel to your piece.
Once you are done writing and/or smudging spray your canvas with the Clear Acrylic Spray again. This is going to be a critical step for you. If you chose to smudge your “text”, the spray will prevent further smudging. If you want to add vinyl or HTV on top of your art, this spray is going to anchor your vinyl down. I’ve tried applying vinyl and HTV straight on a painted canvas and both have peeled off, taking paint with it. But every time that I’ve used the Acrylic Spray, vinyl and HTV both stay on the canvas perfectly.
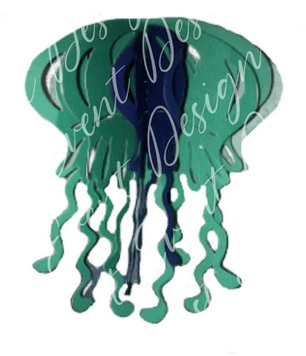
Embellish your gift. Your options are endless at this point. You can choose to make something and personal with just adding your recipient’s name. You can add scrapbooking embellishments with hot glue to add some glam or character. You could pray a frame with a metallic paint and make a modern framed art. Or perhaps you want to do four panels and keep them frameless. And then there’s always the option making a 3D piece using other crafting techniques, such as this.
If you find that you are on a budget this Holiday season, this is a perfect gift option for you. We are in a time in history where people need to hear how much they are loved and valued. So when you can poor into another person and share with them a hope of a future with them, it can hold profound meaning in their life right now. I have never before seen so many people facing suicide and thoughts of hopelessness like I’ve seen in the last few years. Sharing with someone how much they mean to you is something that you will never regret. And you never know that it might be the one thing that offers them hope in a time where it seems like everything is so wrong.
What is inspiring you right now? Do you have ideas sparking in your mind?
Right now I’m inspired with many of the changes that come with fall. This is the season that always has inspired me. In fact, my boys found a whole acorn that I so want to use as a piece of 3D art. I’m hoping I can find some more and have more than a single nut to work with!
Please comment below with what you want to make and even send me some pictures. I would love to see what creativity jumps to life in you!
Files used today
Spring Triple Panel comes with all you see here. Or you can select individual elements.
Right now I’m in the middle of several projects at the same time and instead of throwing something together for you, I decided to spend a coffee moment with you and just share about me. And I welcome you to email me and continue any conversation that you would like to have.
By nature I like being a person who has all the answers. Sometimes it’s because there are so many people out there who don’t have the answers and nothing is more frustrating than hearing someone say they don’t know. I also love researching and learning new things. I like being a person who says I don’t know but here is what I found out…. And in the last few years I’ve embraced those failure moments where things, methods, ideas just don’t work out. I no longer have a fear of saying that I failed at something. The brilliance of failing is that the failure is not the end all be all. I’ve come to the knowledge that failure in one attempt or ten attempts just means that something didn’t work in the process. Life isn’t static. It isn’t pass/fail on one attempt. Everything is a process. And it’s a process that incorporates the effects and influences of things outside us.
In the crafting world, there are so many methods out there where you have to make this item doing x, y and z in that precise order. But in reality, sometimes the person who makes the steps are aware of outside influences that can change how things turn out, or it’s just not something on their radar.
For example, in a crafting group someone was commenting on how the scorch pen didn’t work for a recommended group craft and they fault was on the pen instead of the recommended scorch paste. I’ve used the pen months before and I had the exact failure that she mentioned. But the difference in approach of project failure came down to the framework of thinking. I can’t vouch for what this crafter thought inside of her head, how she reacted emotionally. I can only assess by the phrases used in an online forum. The phrasing indicated that this lady attributed the craft failure to using the pen instead of the paste and the additional contributing factor of not using the exact same heat source (for burning the chemicals) were the reason why she couldn’t obtain the desired effect. On a different response level, I shared with her how I used the same product, used what was supposed to be the “correct” heat source, and still got the same results. It wasn’t the heat source. And it wasn’t the chemical source for that matter either. When I obtained a failed result, I noticed something. The chemical from the pen bled because of the wood grains. The scorch pen didn’t bleed in all directions. It bled in the direction where the wood grain left a miniature channel for the liquid to migrate around instead of remaining in the partitioned area created by the stencil. This same failure could have still been had with the scorch paste if the grain ridges were deep enough for the paste to be pushed through the stencil or seep out and under.
The solution, even though I haven’t yet gone back to prove this for an absolute fact, is sanding the wood to make sure there is nowhere for the chemical product to move outside the stencil.
Life is so much like this. We see a result in someone and we try to go through their steps of getting that desired thing in our own lives. But for one reason, or several, it doesn’t give us the result that we desire. We chalk this up to failure. It feeds into our current (or long lasting) insecurities and feeds our preconceived ideas of ourselves.
“I tried that once…” It didn’t work. They were wrong. They have (knowledge, education, resources, money, family, time, support, etc.) that I don’t have. They had the chance that I didn’t have. I’m just a failure.
How many of those statements have we used in our own lives to excuse why something didn’t work?
What other statements have you used?
For the life of me I cannot remember what caused that triggered in me the need to be perfect. But perfectionism is a disease that eats at you just as much as being a serial failure. Sure a part of me hated letting other people down. But what ate me up the most is when I let myself down. I see in my head how things should be, how they should play out, and I use to beat myself up each and every time I failed those self expectations. I made myself miserable with these failures. Not just the event/activity but how I failed myself, sometimes repeatedly.
The turning point, for me, in this viewpoint of failure happened in college. I was interested in becoming a doctor and took the list of pre-med classes. I was challenged and I excelled in all the lower level classes. I watched others wash out and I was proud of myself for meeting my expectations.
Until….
I hit the wall that I just couldn’t break through. It didn’t matter how light or hard I hit those bricks, that wall would not move. It didn’t matter which angle I came from, there was not a chink in that mortar to gain leverage. There was no going above the wall, under it, or around it.
Organic Chemistry and Advanced Calculus kicked my butt and won.
I had to change my focus and get my degree in another area, one that felt like an easy out because it came natural to me.
BUT…
I took a chance in going in a direction. I learned the human body and how the world works around it. I learned more than what I should actually write here. And even though I “failed” I learned information that I still use today. I understand my body, how it should work, and know what questions to ask and research when it doesn’t work the way it’s supposed to work.
That education also translated into understanding how my garden works even though I never took a botany or agriculture class.
Yes, my initial moment in failure devastated me. To no end! It was the first time I ever truly failed out of something where I couldn’t work my way out. But my walking away learning moment from that complete and utter failure is that there is always something to learn, pull from, and still have tools that I can walk away with.
The world is so quick to define failure as a hard STOP, do not cross, you cannot move beyond this point. But nothing can be further from the truth!!!
Failure is just the simple fact that something did NOT work. It’s NOT a reflection of you. It DOESN’T even define you. Failure IS simply a method that did not work.
Let me rephrase that.
Failure is simply a METHOD that did not work.
You are not a failure. You are never a failure. In fact, the secret of life is that you cannot fail. Ever.
There are always countless options in front of you when you see that failure is not a description of who you are as a person. When you switch the focus from you being a failure to the method of life being a failure, you suddenly see that there is so much out there for you that you couldn’t see before.
In fact, I’ll go as far as to say that when people tell you, “You are a failure” or “You failed me” it has ABSOLUTELY NOTHING TO DO WITH YOU! Instead it’s them shifting their own failure onto you because they can’t face or deal with the failure in their own lives.
So the answer to the post’s question is YES! Yes, you can do that.
And this is the heart behind these blogs. I talk a lot of about crafts, decorating, and food. These are areas that I’m passionate about and having working knowledge with. I dabble in a lot of other areas. And because of that I can say that these principles also work in all areas in life.
If you want to know why I walk with confidence and talk with confidence because I know I’m not a failure.
You’re not a failure
I take every moment, task, event, problem and look at the outside variables. There’s always something else that is an acting influence on what is happening and in some instances, not happening.
My goal is to enable you to see that you’re not a failure. You literally can do anything you want to do. If you want to pursuit a goal you march yourself right up to it. If you hit a wall you can’t go under, over, or around that you redirect yourself. BUT you take with you everything that you learned along the way. When life gives you a dead end, it is not failure. It IS a defining moment where you see the parameters of what you are gifted for in life. You can go to the left or the right and keep that wall on your side. Or you can keep the wall to your back and keep moving forward. The purpose is that you keep moving forward.
And when you hit another wall, you found another boundary, showing you where your purpose lies.
There are some people who feel like all they do is hit one wall after another. My question is this. Are you hitting the same wall over and over again? Or have you just hit all the walls around your boundary and not understood their meaning?
If you’re hitting wall after wall, the focus should be turned away from the walls themselves and focusing in on this specific area inside all these walls. This is your gifting in life!
In fact, if you’re the one who feels like you’re always hitting the walls, you are at an advantage to someone who never feels the pain of trying and ramming the walls. You actually see the definition of where you are weak, the things outside of your wheelhouse. You can turn away from all those and see more clearly what your strengths are. And you can see more clearly what your purpose in life is all about.
The world is good at making us focus on the walls or glass ceilings. Because if we focus on the walls or the limitations in life we’re not seeing who we were designed to be. We are easily controlled and manipulated. We are easy to put into depression and give up on life.
BUT when we see our strengths and our calling, we are a powerhouse!
Each and every person alive has a purpose, because there is not another person like you. There is not another person like me. You have a specific meaningful job and function on this planet that others need that only you can provide. I need you. I need you because you’re not me. I don’t care what the mirror on your wall shows, that image does not define you. You reside inside your body. And that is where your purpose resides. You can be the most different person from me and I will still need you, because you have something inside you, at your core that we all need.
If you want to continue this conversation with me, please email me here:


Leave a comment