Resizing Critters

With Easter tomorrow there is a common crafting problem that pops up with those cute egg and sucker holders…resizing.

Not all eggs are sized the same. Not all suckers are sized the same. There are even some holders for chocolate balls. Not all chocolate balls are the same size.

I’ve seen more frustrated crafters than I care to mention. Either the designer miss-sized the holes, so things don’t fit or the crafter bought a candy that was not standard size for the file they bought.

The good news is that you don’t have to throw out the files that didn’t work for you. All you need to do is resize your file in your cutting program. And I’m going to show you how.

Resizing Your Critters

Step 1: Measure the diameter of your egg, sucker, or chocolate.

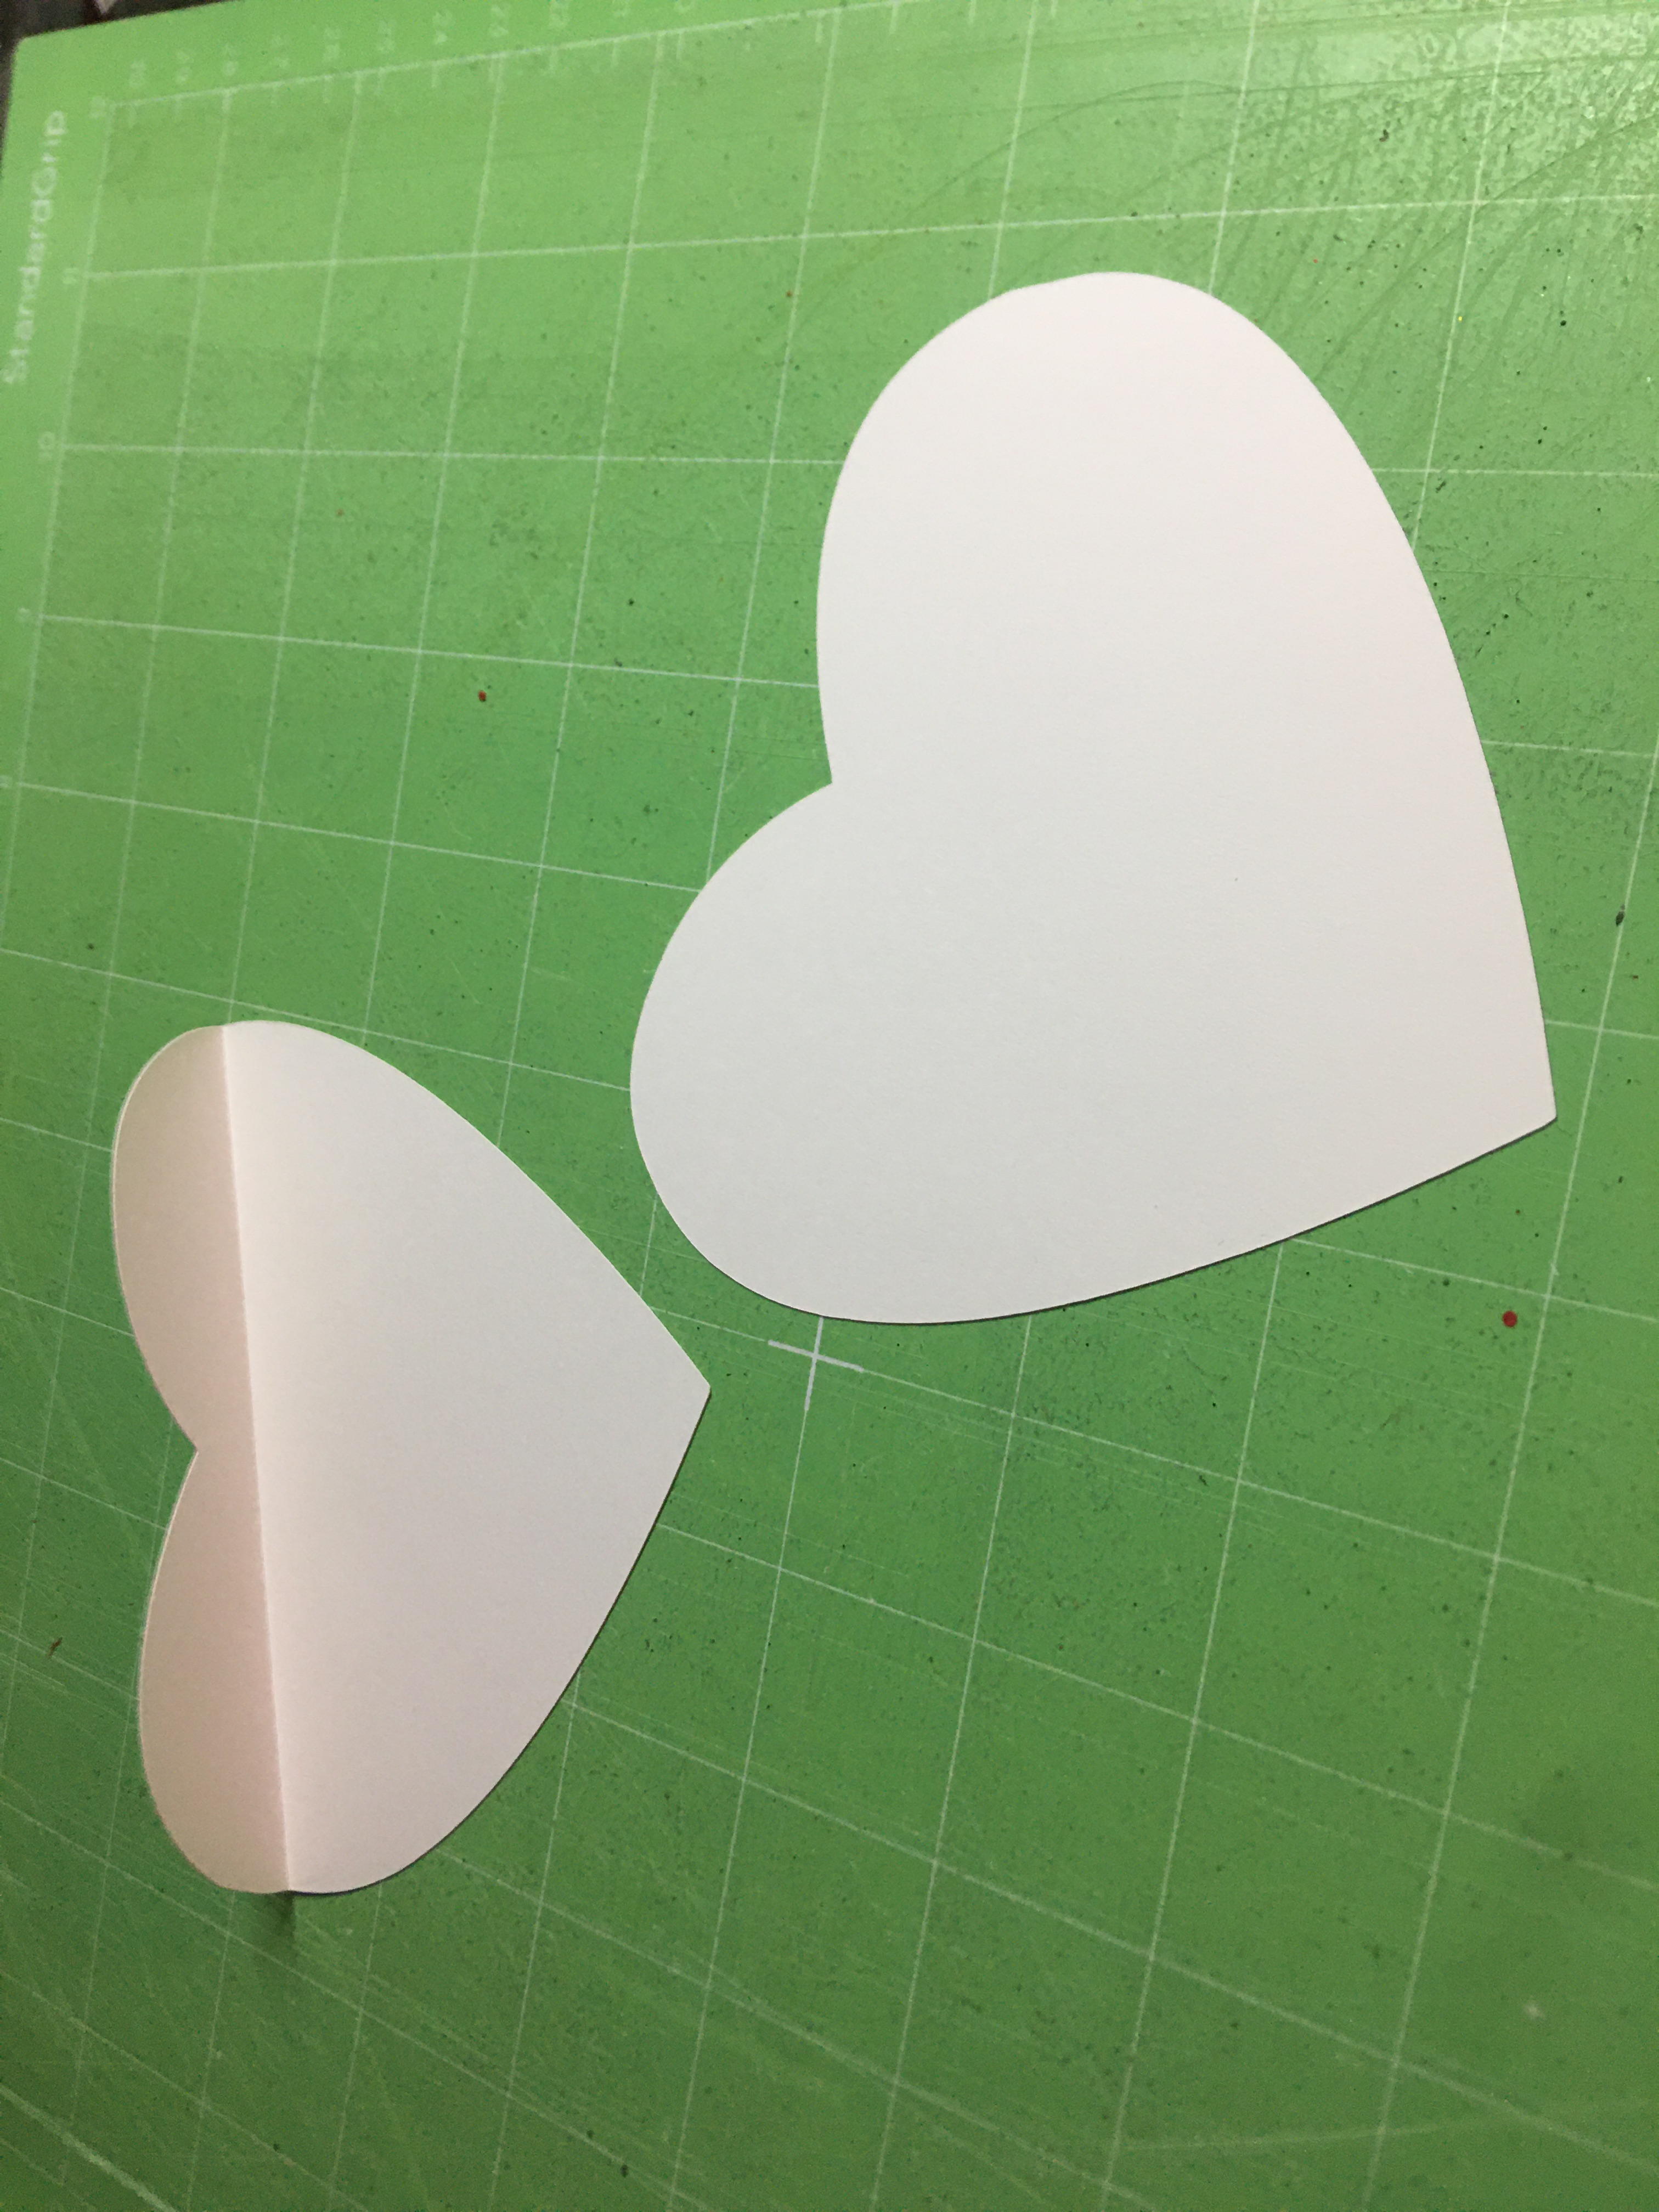
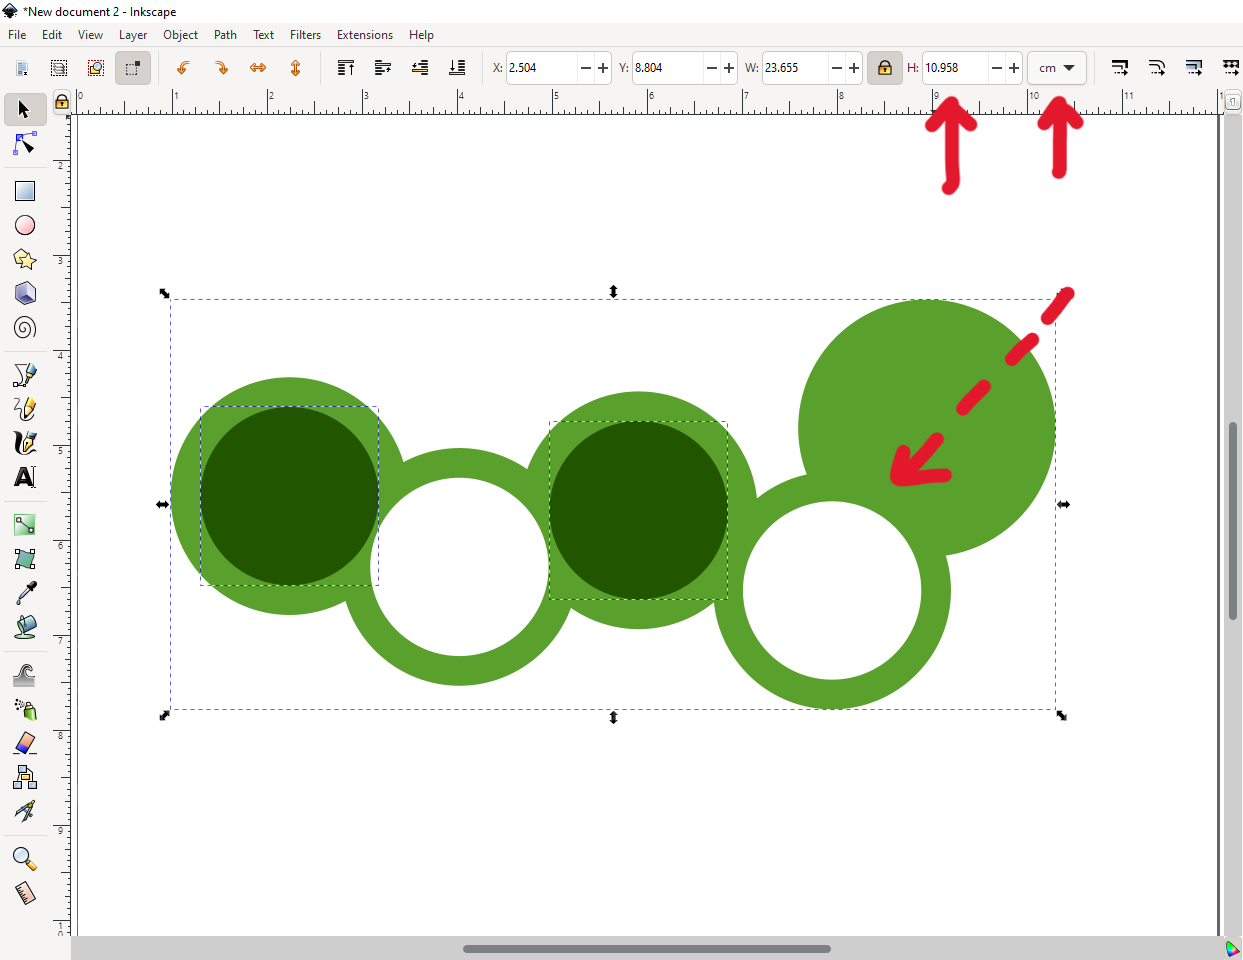
Step 2: (After checking to make sure your entire critter is grouped, to make sure you resize everything in proportion) Make a circle that fits the hole. You will use this circle to verify you have reduced or enlarged your critter to the size you need it. (See Photo 1 above)

Step 3: Check your program’s measurement type and decide if you’re going to do your measurement based off of your objects height or width. (See Photo 2 above)

You will notice in the photos that I have my measurements set to centimeters. The reason for this is because the plastic ornaments I’m using were sized in the metric system. I love designing in Inkscape because I can switch back and forth between the metric and imperial system with just a drop down menu.

The ornament I’m sizing down for is 4 cm.

Step 4: Select All: your entire critter and your sizing circle. Then increase or decrease your critter as you need.

This step will take a little time, because your entire critter is not going to be directly proportional to the hold diameter. I’m sure there’s a math equation that you could come up with to get you the answer every time. I am not a mathematician. So I use the computer program to do the work for me.

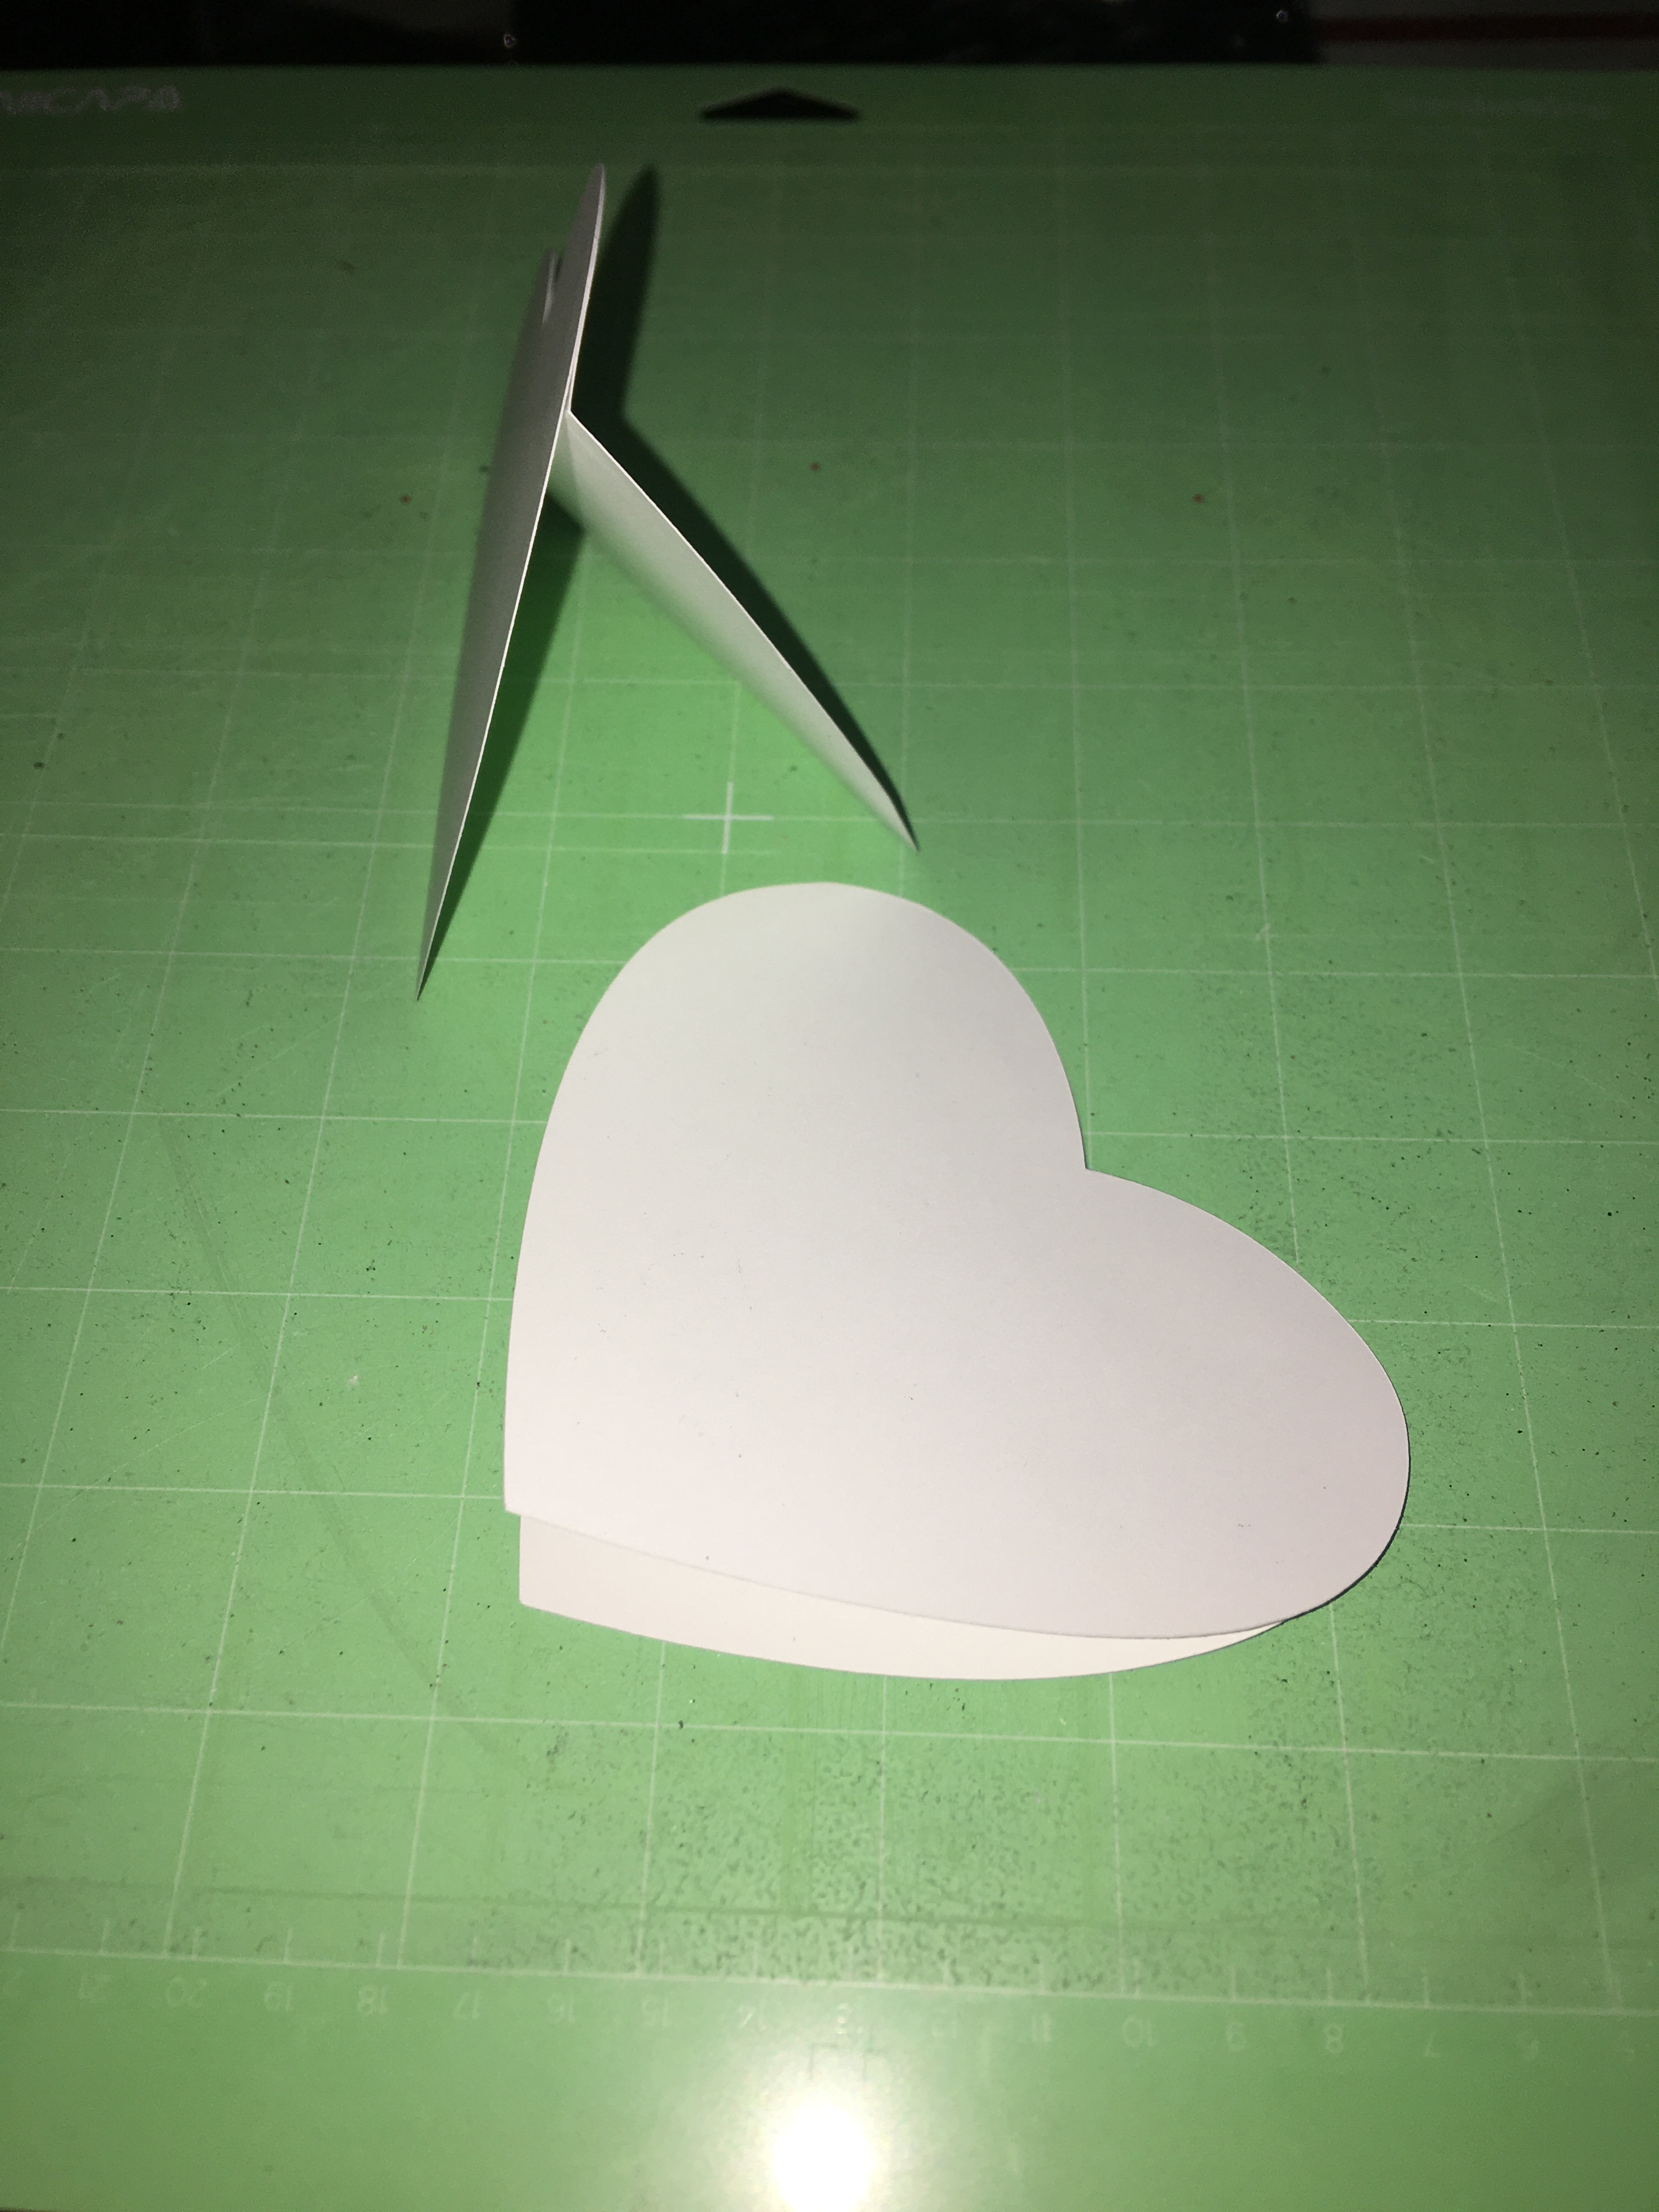
Step 5: Stop sizing in accordance to what you’re sizing for. (See Photo 4 above)

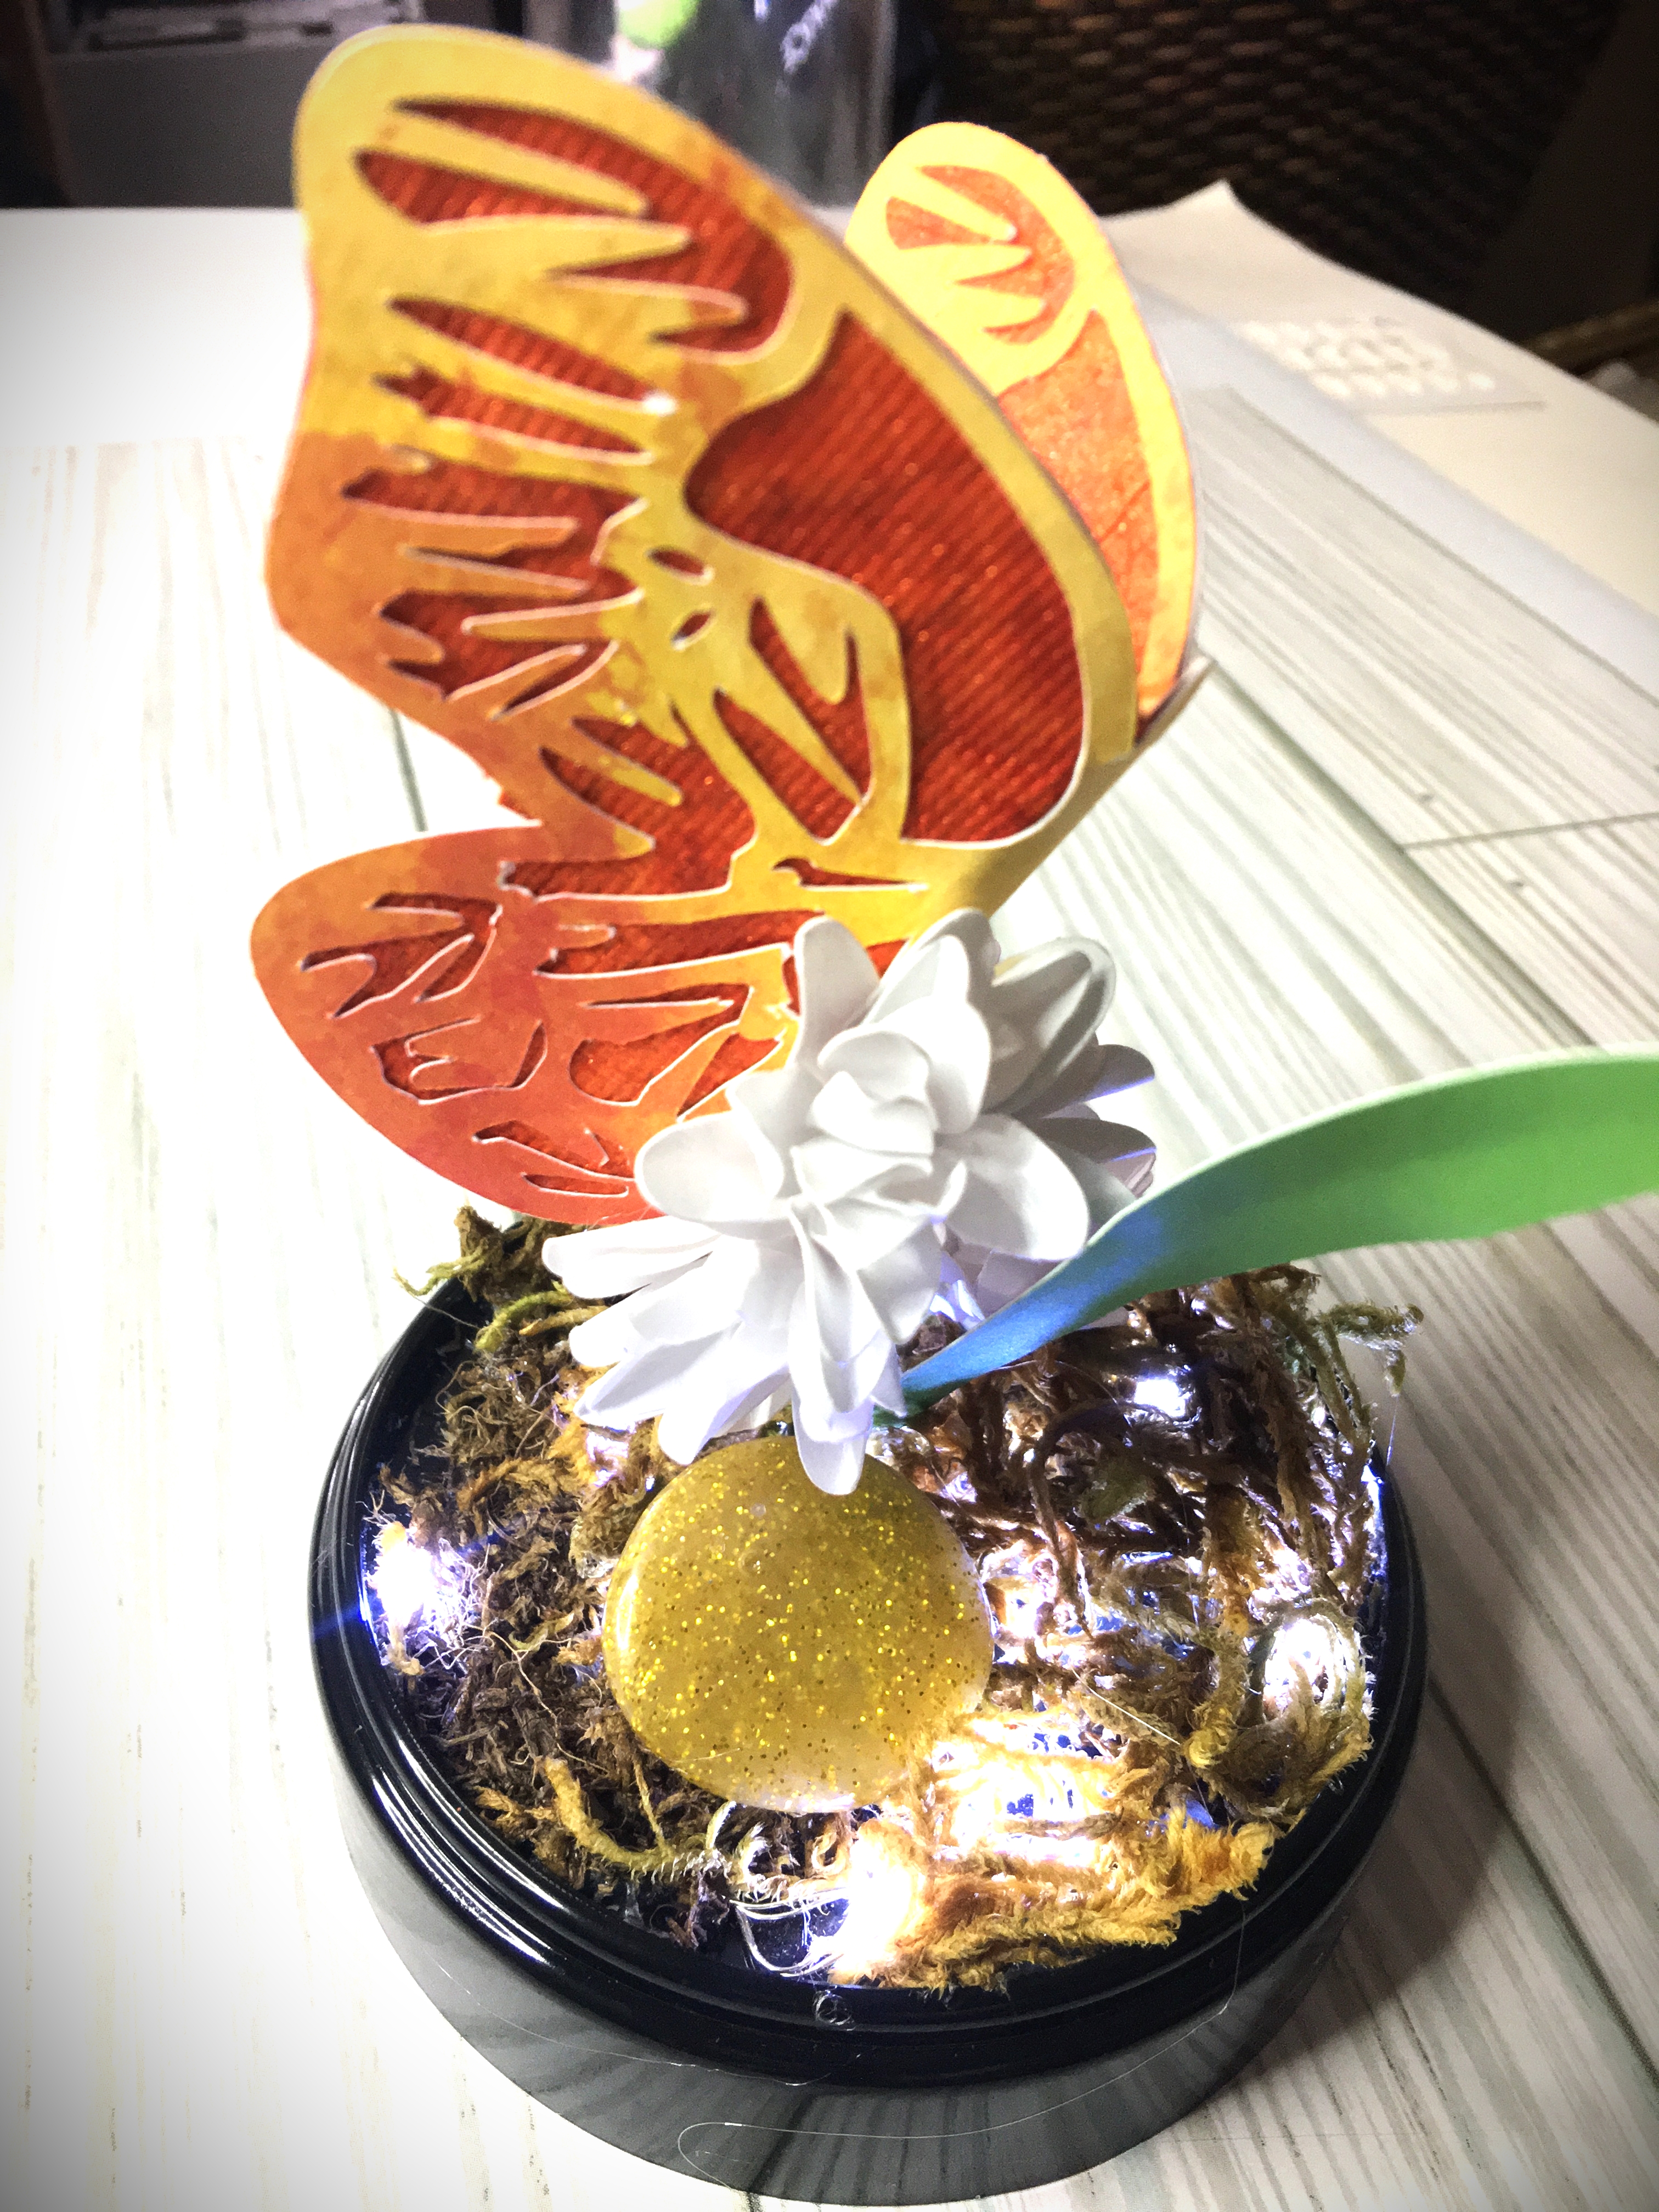
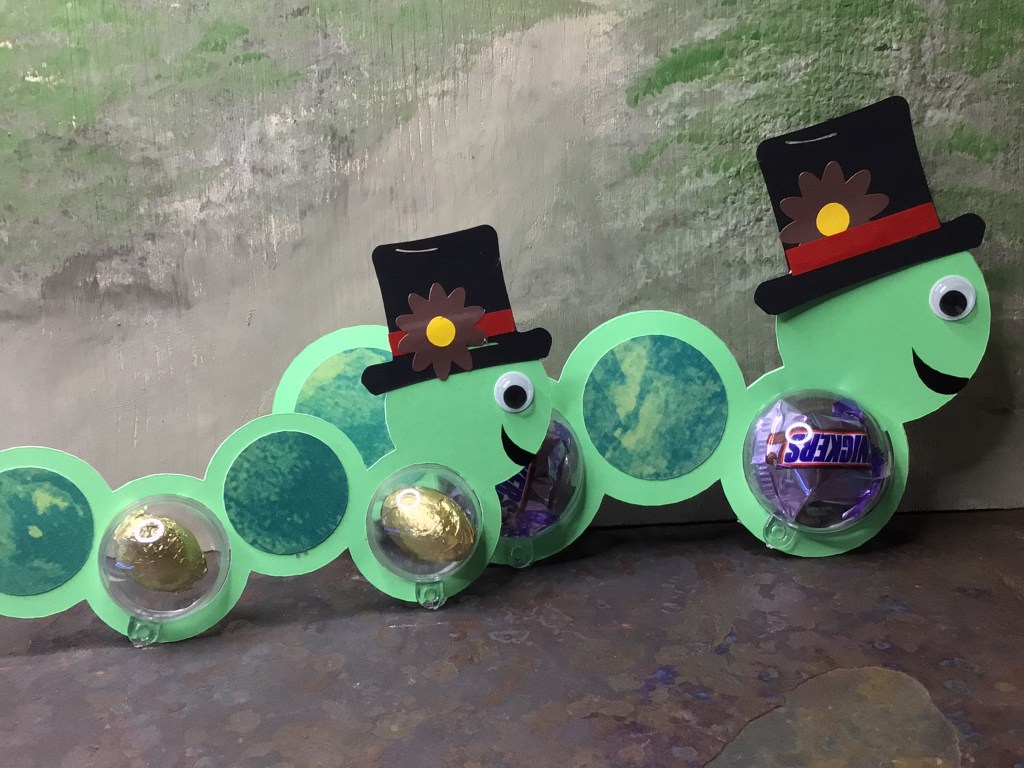
As I mentioned, I’m sizing down for a 4 cm plastic ornament. The ornament has no lip, other than the tab to string the ornament. And the caterpillar holder that I’m using does not have a base to deposit and hold the ornament.

If you’re using a cut file that holds your egg, sucker, or chocolate ball, you don’t have to be precise with your hole sizing. You just need the whole holder to be big or small enough to precisely hold your sweets.

However with a plastic ornament (I needed to use up my 3 cm and 4 cm ornaments that just are NOT standard size for any cut file on the market) I need to have a pretty precise hole size. I need to have it snug to keep the project together. So I made the hole slightly less than 4 cm so the tension of the two pieces of cardstock (glued together) was enough to hold the ornament with no other crafting tricks.

Step 6: Cut your file!

Obviously I didn’t resize in my cutting software. My software does not have a measuring system conversion tab. It’s permanently set in the Imperial measurement system.

If you find that you are also resizing outside of your cutting software, always make note of the height and width of your entire critter. This will allow you to quickly resize your entire critter in your cutting software without the guess work.

Let Me Do the Math For You

I want to make conversion easy for you, if you decide to go with my Caterpillar Ornament cut file!

Here are the measurements I used to make these Caterpillars for my boys.

Small Caterpillar3 cmHeight 2.7″ / 6.85 cm
Medium Caterpillar4cmHeight 3.6″ / 9.15 cm
Cheat Sheet for converting the Caterpillars for full ornaments.

3 cm OrnamentCircle Back Cover 3.5 cm / 1.38″
4 cm OrnamentCircle Back Cover 4.5 cm / 1.77″
Another option is to use half of an ornament and use decorative paper for the back cover.

Tootsie Pop3 cmHeight 2.7″
Dum Dum2 cmHeight 1.85″
Cheat Sheet for converting my Caterpillar Design into sucker holders!

Honestly, with converting you could go as large as you want to. You could size up even more for gifting sox, underwear, baby onsies, and baby burp clothes. Literally you can convert to package any kind of gift in a new way!!!

What do you do when it all goes wrong?

Let’s be honest. Sometimes we forget to resize something. Or we think the designer made it correctly, but our cutting software program uploads the file at non-original dimensions (which has happened!) Or there’s an entirely different reason. Maybe the item you’re crafting with is not uniform in size (which happens with cheaply made items).

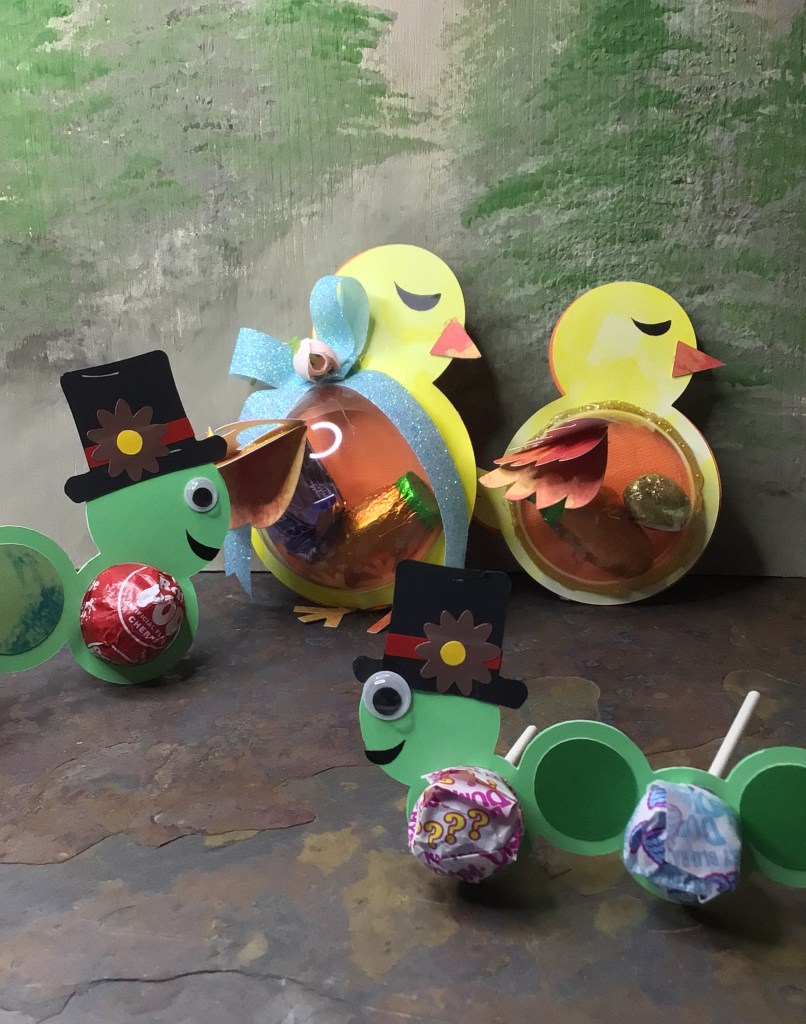
That is what I ran into with another designer’s file while I was finishing my Easter crafting for my boys. I had used this other designer’s file for Rabbits with my 5 cm and 6 cm plastic ornaments. I had also gotten her Chick file. I had to make conversions for her files because all my ornaments were smaller than hers, for which she used to design her file. The Rabbits turned out perfect. The Chicks were hit and miss. The 5 cm Chicks turned out near perfect. The 6 cm Rabbits were perfect. But the 6 cm Chicks were too small!

Now if I were making these for clients, of course I would make the adjustments and make them new. However we all know that my boys are just going to rip into the cardstock and go straight for the candy! They’re not going to notice any flaws. So I’m free to make corrections.

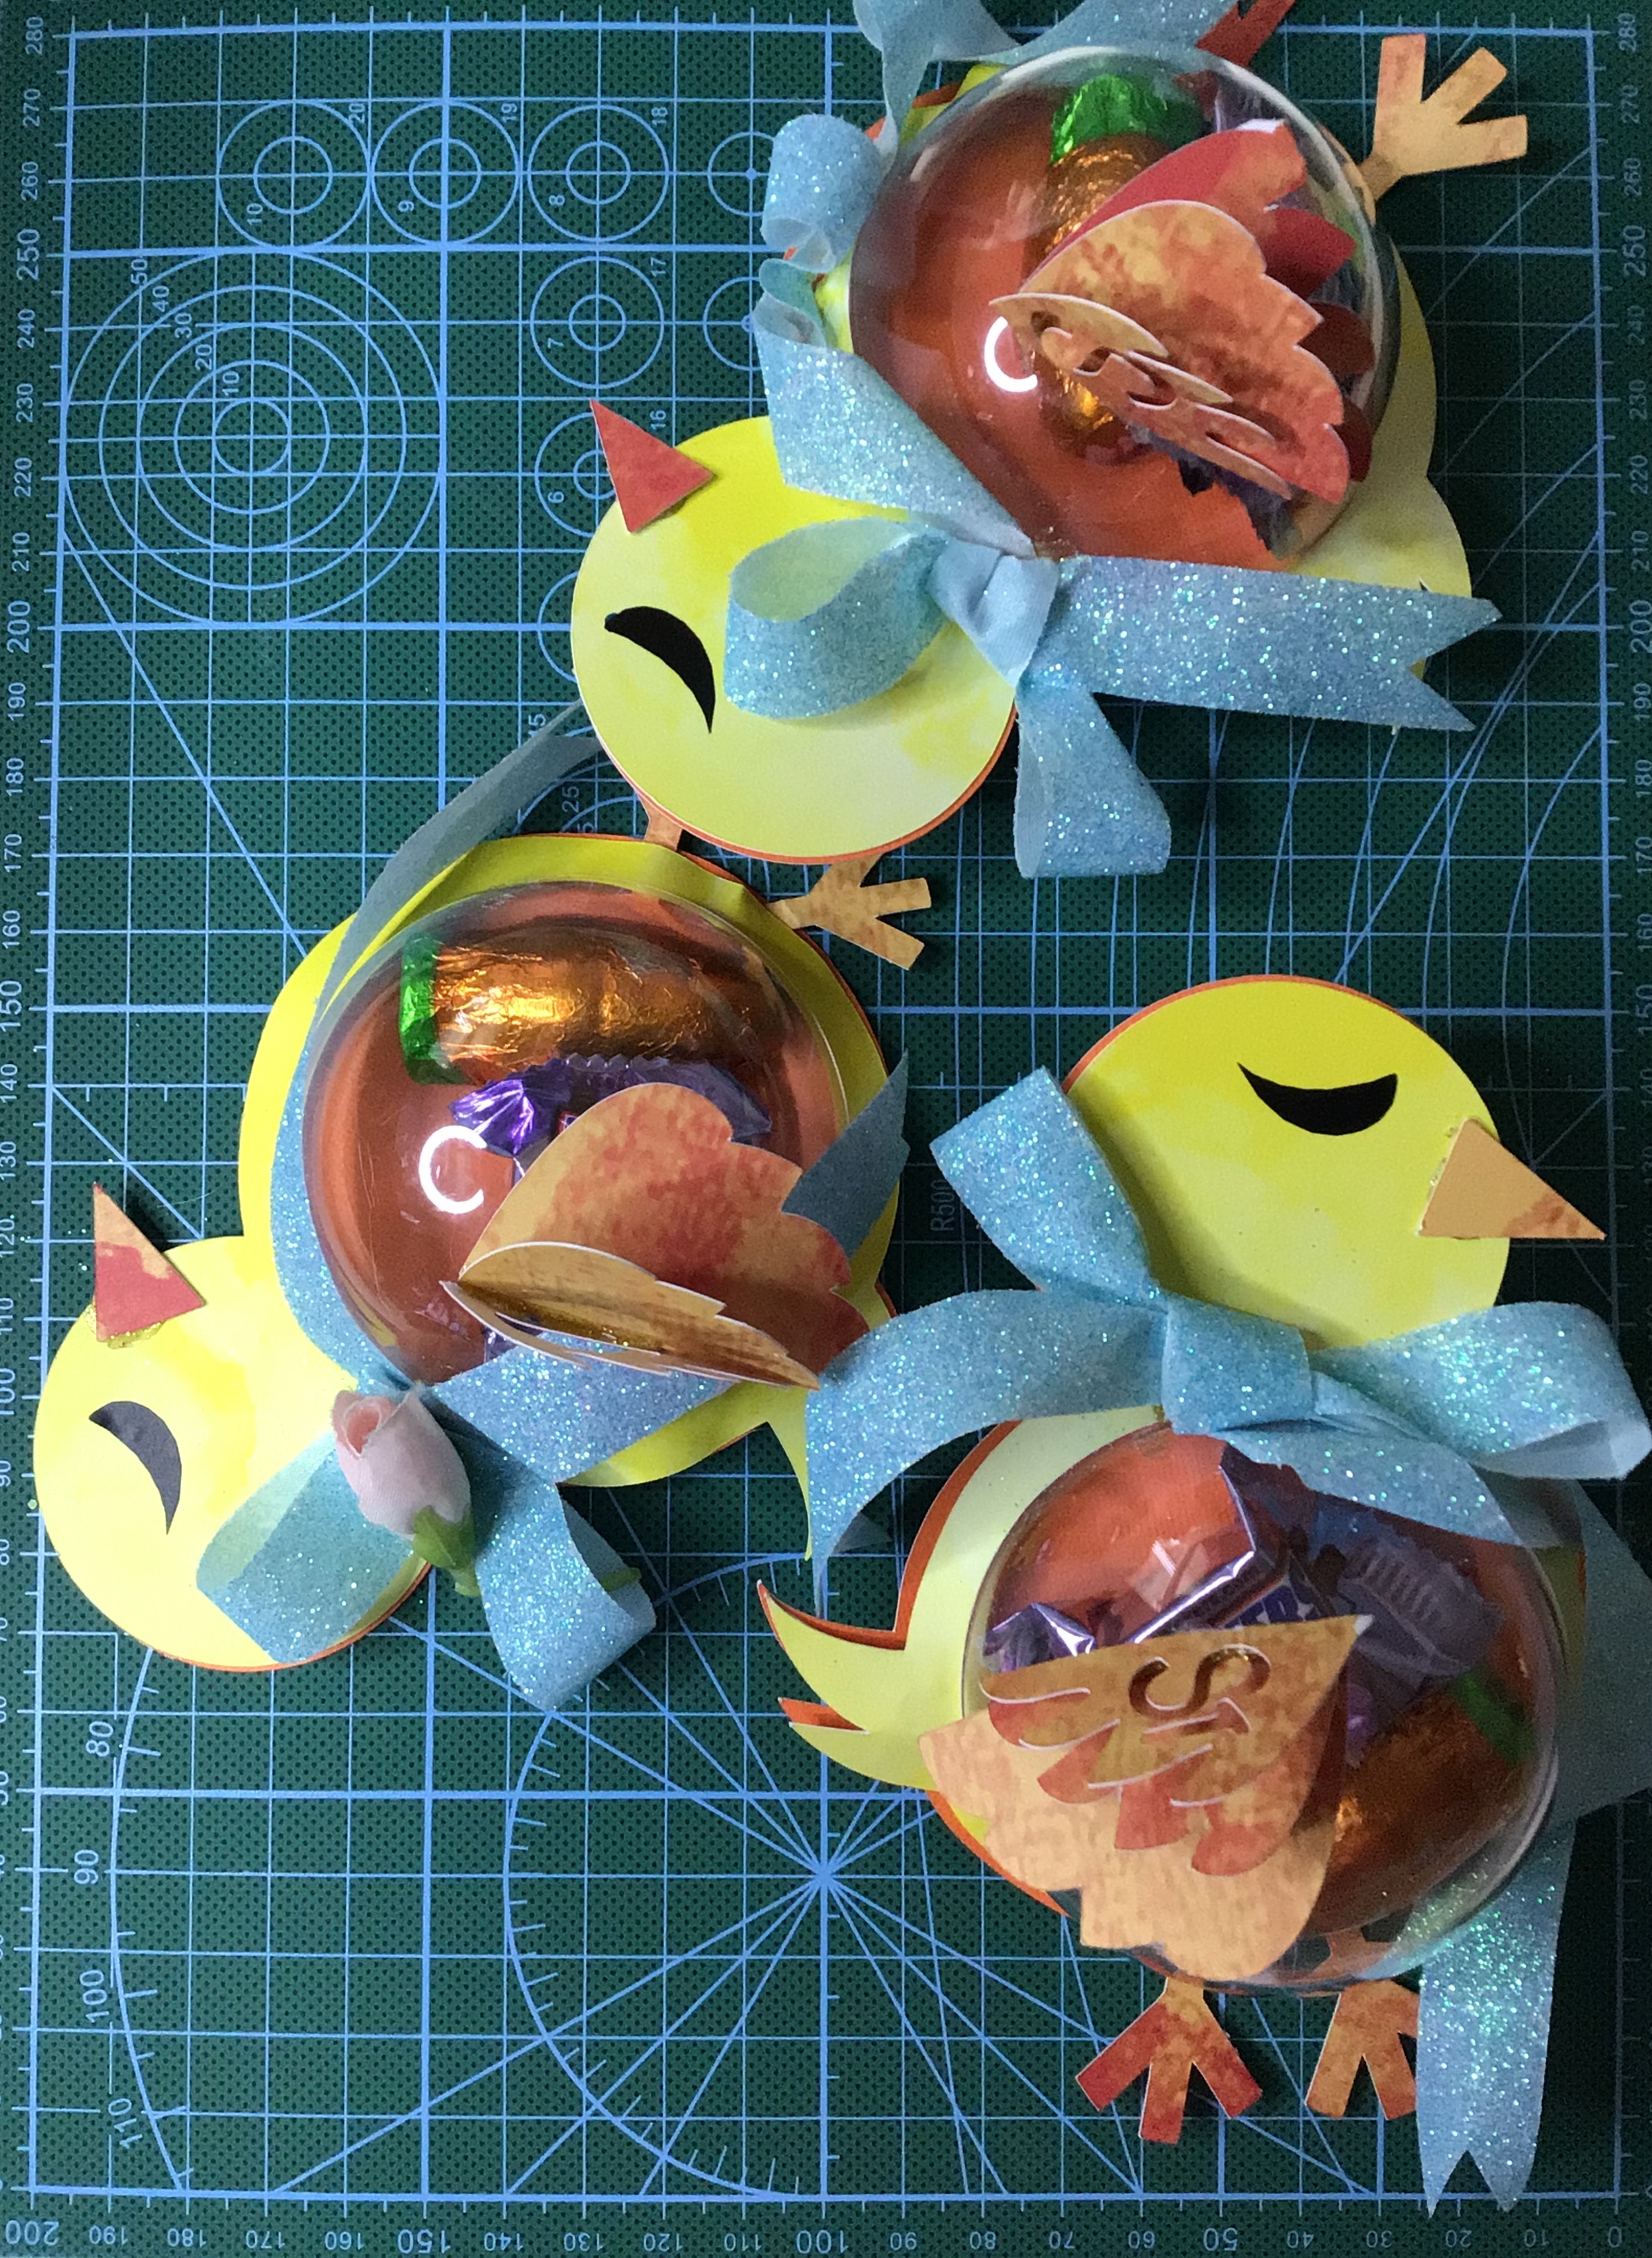
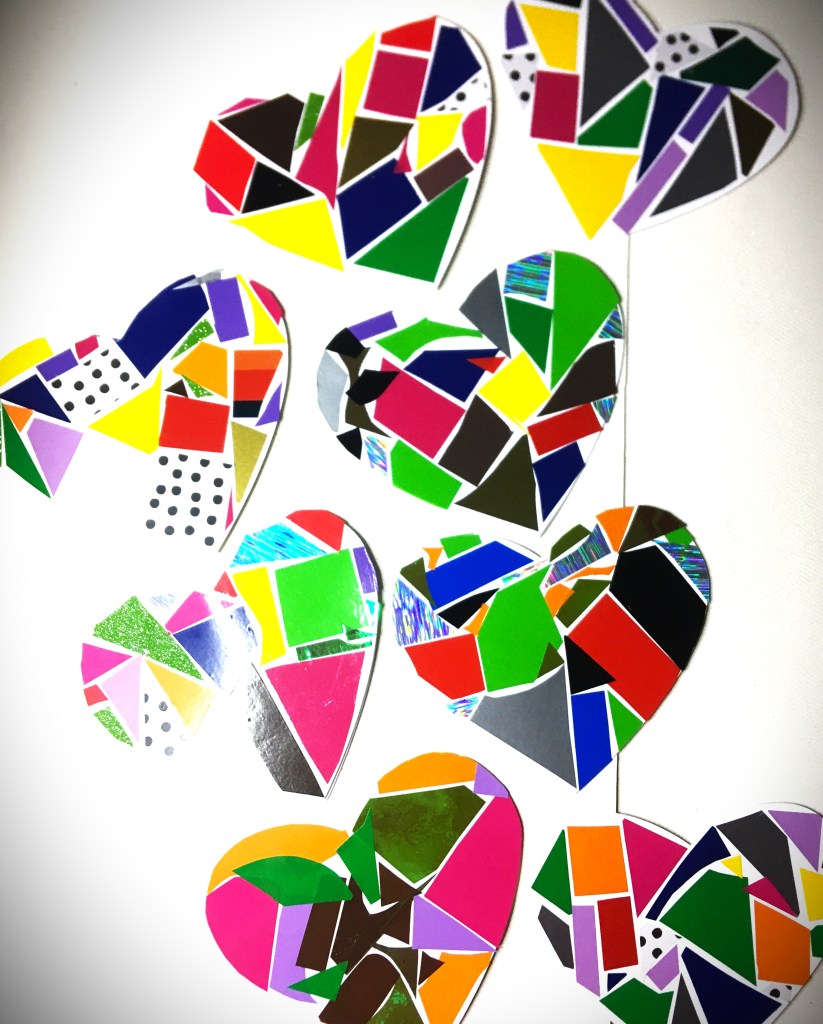
The 6 cm Chicks (on the left with ribbons) had front bellies that just would not seal to the back cover. I mean we are talking eye sore, obviously not the right size at all. So to solve this problem I took ribbon bows and curled the ribbon down over the mistakes. Hot glue is amazing for tacking ribbon down in precise locations.

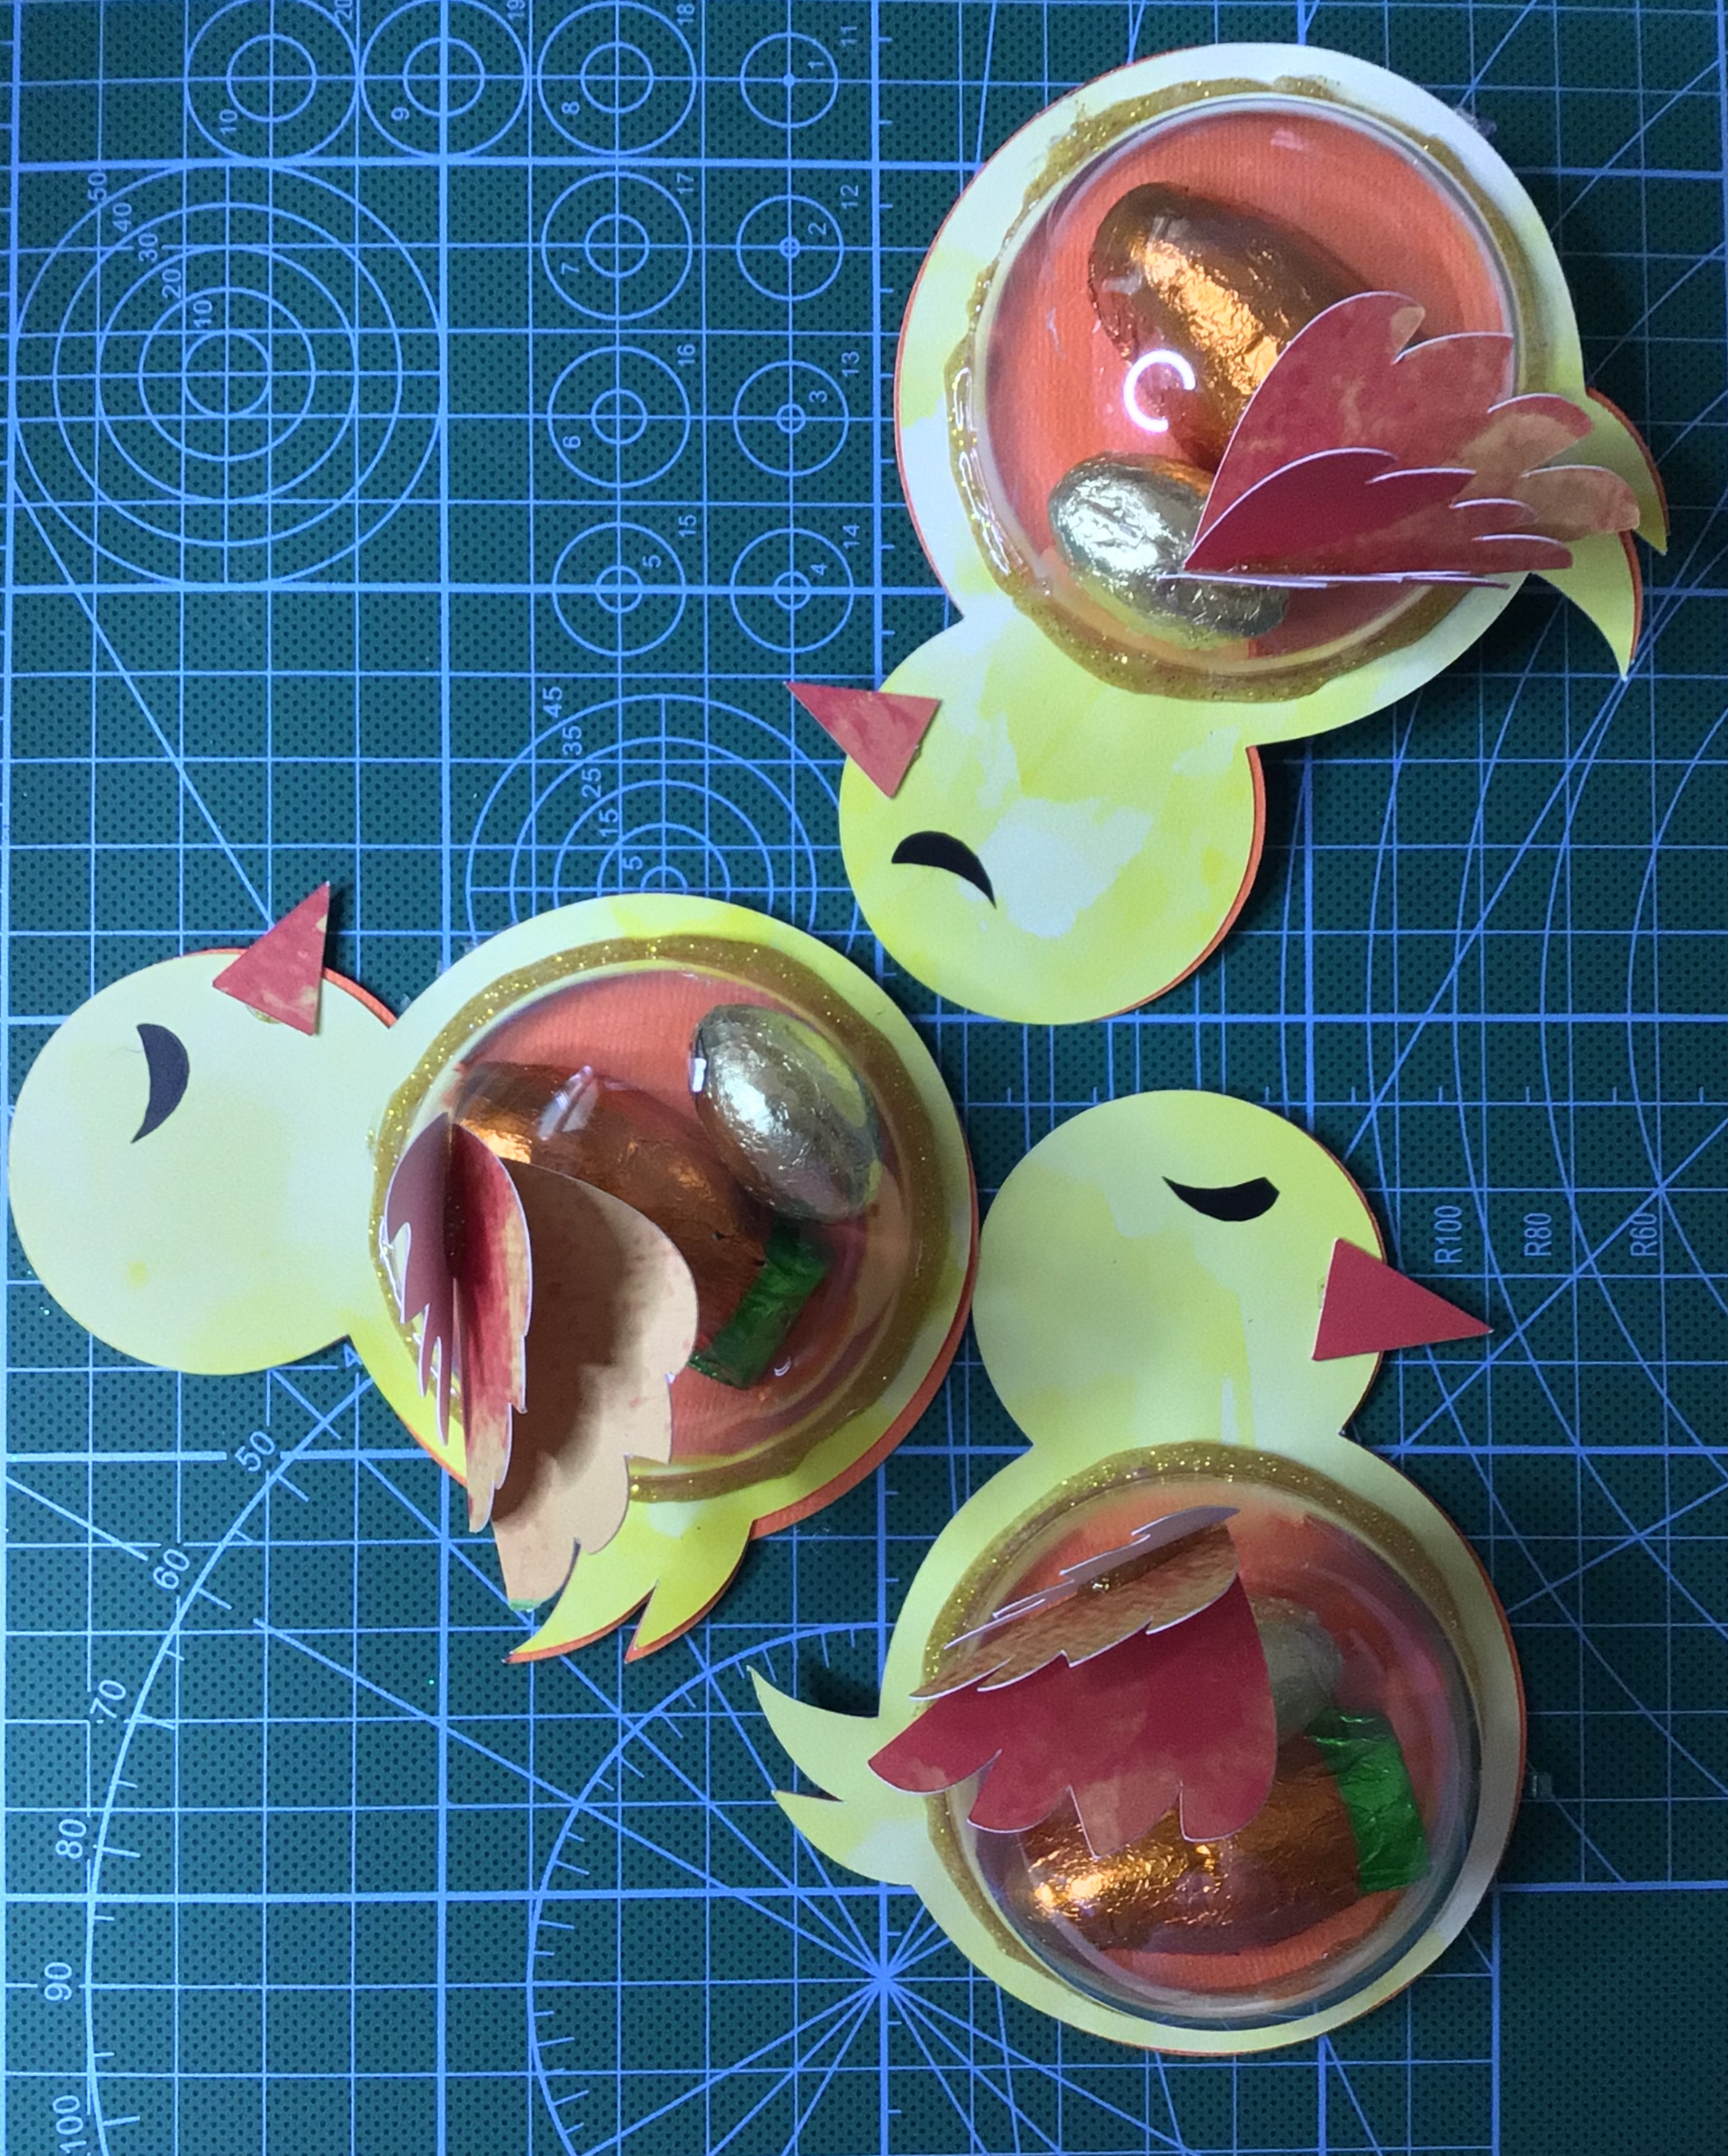
For the 5 cm Chicks (on the right), the half ornaments were having the issue of not staying in place at all. So I pulled out my glitter glue sticks and glued around the entire circular edge. I might have had smoother edges had I used Elmer’s glue and actual glitter. However, with a full weekend ahead and running out of crafting time, I opted for the glitter glue for the glue and done option.

The lesson I learned with embracing the imperfect (for a situation that doesn’t demand perfection) is to think outside the box. Cover up, fill the gaps with extra accessories, glue… it can all add to the beauty of hand crafting.

So if resizing is not exactly your cup of tea, do not fear. Don’t get anxious. Get close to being what you need and use your other skills to make it work. After all, a cut file is just a blank slate for you to make it entirely yours with the touch of your creativity.

Happy Easter!

Files Used In This Post

You can purchase Caterpillar Ornament and Floral Top Hat here.

Processing…
Success! You're on the list.

Under the Dome

Using Cloches for Centerpieces

I know that one of the biggest things to make right now are shadow boxes. And I LOVE them just as much as the next person. However, the one disadvantage they have is that they only have one viewing direction. So while shadow boxes are great for decorating homes, they lack greatly when it comes to decorating for events.

And that is where Cloches come in!

Think of a cloche as shadow box that can be viewed 360°, perfect for centerpieces.

What I have for you today is a spring cloche that can inspire you for whatever you are looking to create unique decor for your events. Whether you’re looking for a wedding, a Princess birthday party, displaying an heirloom or memory… you are only limited by your imagination.

Supply List

  • 5.7 x 3.6 inch / 14.4 x 9.1 cm High Cloche Dome
  • 3 meter fairy lights, battery operated
  • Floral Moss
  • Hot Glue Gun and Glue
  • Card Stock
  • Butterfly Cut File
  • Flower Cut File
  • White glue (I prefer wood glue)
  • Fabric (optional)
  • Green Floral Wire
  • Needle Nose Pliers with Wire Cutter
  • Tension Tweezers
  • Masking or Painter’s Tape
  • Flat-back Rhinestone Crystals
  • Jewelry & Metal Glue

Cloche Base

The perfect thing about this cloche, when it comes to lighting, is that there was a hole that I could thread the fairy lights through. This made it possible to hot glue the battery pack/switch to the bottom of the cloche, making it invisible. If you choose to also go this route for your lighting, I recommend that you glue the battery pack in such a way that you can unscrew the battery pack and change out the batteries without needing to remove it from the cloche base.

Once the pack is secure, you can flip the base over and position the wires on the top of the base.

Tip: before securing down the wires, place the cloche dome down on top and see how it’s positioned in relation to the base. With this particular cloche, the dome rests inside the lip/edge of the bottom. So if I had put one of the bulbs right up against the lip/edge, then my dome would not be able to sit flat when place over the finished project.

After trying a few different gluing options, I found the best way of securing the wires and moss was the following way. Bend the wire how you want the lights to go. Avoiding the bulbs, you will put dabs of hot glue on the wire and press the moss down on top of the glue. (If you have a silicone finger cot, you can press down directly with your finger without being burned by the glue.

Tip: To maximize the amount of light shining up from the moss, make sure you do not cover the bulbs. You may think you will have holes, but if you look in later pictures you will see that these holes are absolutely not visible. So work with the lights on. You will immediately see true blank holes vs. light holes.

With the base now complete, it’s time to move on to the paper components.

Flowers and Butterfly

With your cutting machine, cut out 2 Butterflies, 4 Flowers, 1 Leaf, and 1 Stem. Because I already had green floral wire, I did not cut out the paper stem. I included the paper stem in case you did not have green wire but wanted to have a cover for a different wire, or even wanted to make the stem completely out of paper. If you choose to make a paper stem, roll it cigar style and glue the edge down. You can use masking or painters tape to hold the edge down while the glue dries.

(Reference Note: The Butterfly I cut was 3 inches tall. As you can see later on the Butterfly takes up all the space. So for this size of cloche, a larger Butterfly is not going to fit. And you are more than welcome to make the Butterfly smaller and even add a few of the smaller size.)

Butterfly

The two Butterflies are the front and back of your Butterfly. Inside these cut out pieces you can place cardstock, tissue paper, fabric, or whatever material you are inspired to use. Glue your first Butterfly down, trim that inner section the Butterfly. This will make it very easy to glue down that second Butterfly and make everything line up.

Tip: If your cardstock has a white core, you can take a marker with a matching color, and make a coordinating edge.

Set the Butterfly to aside and let dry.

Flowers

Using tension tweezers (or other coiling took of choice), roll the flower. At the end of the line, apply an L-shaped dab of glue, and close the flower. The tension tweezers are great for holding that edge down while the glue dries. Or if this is the first of the flowers, masking or painters tape can hold your edge in place for the glue to dry while you move on to the next flower.

To shape the leaf, run a crease down most of the length of the leaf, from the bottom up. At the top of the leaf, coil it around a finger. This will give a gentle bend. If you make the gentle finger coil go off to one side, you will find that you give it a realistic bend.

Stem

While the glue dries, let’s prep the Stem. This picture is a little deceiving; I had cut it before measuring how this size of Butterfly would fit inside the cloche. For a 3 inch tall Butterfly, all you need is a 2.5″ wire. On the bottom of your wire, use your needle nose pliers and form a circle, to make a stand.

When the Butterfly is dry, use your weeding tool or other thin object to bend the wings of your butterfly up.

When the glue on the flowers is dry, it’s time to shape the petals. If you keep the petals flat, but spread them downward, you will have a mum looking blossom. I chose to curl the petals downward and then crease the center. If you can keep the edges a little rounded downward, it has a chrysanthemum appearance. Either way, I wanted the white cardstock as an accenting color, and there are so many white flowers that have this shape, that it has a simple generic look that is just pleasing. Especially if you’re new paper flowers, this one is easy to play with and assemble.

Assembly

With hot glue, apply the glue on the bottom of the first blossom and insert the tip of the wire into the bottom center of the blossom. With the second blossom, add glue, and attach it to the side of the stem. The third blossom, add glue, and position it on the other side of the stem a little lower on the second blossom.

There is a little crevice between the second and third blossoms. Add glue to the wire and position the Butterfly. When these components are set, glue dried, position the wire circle base around a light bulb. (This will cause the light to still give an up light effect and not be covered.) Once you have the wire base where you want it positioned, apply a liberal amount of glue on top of the wire. Before you press down, apply more moss on top of the glue. Now when you press down, you will secure the stem and hide the glue at the same time. Near the base of the stem, add a drop of glue and place the leaf.

The fourth flower can be glued anywhere on the moss covered ground.

For further ground embellishments you could add anything you can imagine; a car, Poly Pocket accessory, miniature figurine, rock, sea shell, anything. In the second picture above you will notice what looks like a gold stone. In fact, my husband thought that I had added a gold nugget from of the boys’ games. In truth, this “stone” is the gold glitter stick that I had to clean out of my hot glue gun. I just let that pool on my desktop and dried as a puddle, instead of throwing it out.

This cloche is ready to go as is or you can further embellish it.

Further Embellishments

I always love to add more. In fact, this butterfly was really begging to be fully blinged out. However, for this moment I chose to show some restraint so I don’t look like the crazy bling lady.

From here on out the jewelry & metal glue works perfectly. It holds while wet and dries quickly.

Please take note on the first picture above. If you haven’t worked with crystals before, these tools description might help you have fun placing the stones. The two tools that came with the crystals that I bought were the tweezers and the white “pencil”. In my opinion, the tweezers were the most difficult tool. The problem with them is that these tweezers didn’t have grips on the tip. These ones were the smooth tip tweezers. If you think this is going to be slippery work for you, I can promise you it is. I shot a handful of stones across my work space before giving up. The white “pencil” doesn’t feel sticky, but when you press down on the stone with the tip, it grips the stones. Kind of. I couldn’t get the “pencil” to pick up the small stones that I used on the edge of the wing. However it was absolutely perfect for the larger stones that I used near the center of the wings and on the body.

Fortunately for me, I had another tool in my craft room. I do the crystal paintings and had one of those complementary placement tools (the pink tool in the picture). It still had a little residual glue in the gap and it was a dream picking up the smaller stones that I used on the wing edge.

However, the tweezers were the perfect tool for placing the pearls in the center of the flowers.

Tip: If you’re new to paper flowers, and noted to yourself that some of the blossoms look a little wonky, pearl placement is going to be your life saver. In the close up picture, above, you will notice that there were three pearls that I used. Yes, that was a wonky flower. It got away from me. But the great things about flowers are that they can grow in clusters. And so there is no shame in strategically placing flower centers so you can make a misshaped flower into a cluster of two or three flowers.

Now that we’re finished with the assembly, we’re ready to put the dome on.

The only thing left to talk about is the difference between plastic and glass cloches. As you can see here, even though you don’t have to worry about the dome breaking when it’s plastic, you will note that it’s definitely not as clear looking as it would be if it were glass. If you are looking to just do a fun project, a project for a beginner crafter, or need to be particularly frugal, the plastic dome is probably going to be the cloche of choice. If you are looking for a wedding or to have a high impression impact, you most definitely want to opt for the glass cloche. My personal preference is the glass cloches, but realistically I live in a young child home with curious boys.

Everyone’s choices are going to be different. But I cannot stress enough…

IF you are doing a wedding, please do not opt for cheap. The wow factor is going to be from glass or higher quality of plastic than you find at the dollar store. However, if you are on a very tight budget (Absolutely No Shame Here!!!) and the dollar store cloche is the only thing in your budget here are my tips:

  • Select only the domes that are clear and free of scratches.
  • Between now and your event, try to not handle the dome.
  • You will be tempted to try your dome over the decor. Buy one extra cloche and use that dome as your dome tester.
  • While you are working with glue, keep it away from the dome. Especially the jewelry & metal glue. You may think you didn’t get any glue on the dome. …and then it dries.

In fact, it’s a good practice, whether glass or plastic, to always have one extra dome on hand. Accidents happen, especially on site.

Please email or comment below with pictures of what you create! I want to see what cloche you make.

Thank you for crafting with me!

Files Used Today

Cloche Butterfly & Flower are found here.

Processing…
Success! You're on the list.

Extended Life or Heirlooms

Part 3 and Finale to Make A File Do More

To end this series on Make A File Do More, I want to switch things up a little bit. Instead of a file, I want to focus today on how to make a Statement Piece work more for you.

This is particularly important for DIY Brides. You do everything you can to make your budget stretch the farthest for you. And the best way you can do that, is incorporate as many décor elements into furnishing your new home.

Instead of using cut flowers, for table centerpieces, use live flowers. When the wedding is over you can then plant the flowers in your flower beds or planter boxes.

For your entryway table incorporate lighting from unique lamps that can be used for your bedside lighting. Mind you, I’m not talking about your standard lamp. Use lamps that have character. Think along the lines of art deco glass, stain glass, jet beads, frosted glass orbs, or even something that reminds your guests of Chihuly glass art.

Advertisements

In this case, I want to show you how you can take a piece of art and reuse it over and over again.

Maybe you have a loved one who gifted you a needle point, painting, hand drawing, or other memorabilia. And you want to honor that loved one. Use it as part of your wedding décor. And then after the wedding, you can use it, or give it a place of honor in your home. This is particularly true with beloved items that are placed in a shadow box. You can use a removable vinyl on the glass, with a wedding or love quote. Then when the wedding is over, you can remove this vinyl detail and use the item as a more day to day item.

I’m going to use this painting.

For a wedding or anniversary setting I have this quote, Better or Worse. It can be used on any number of table type settings. It even works for centerpiece arrangements. (If you find a collection of quotes you love, you can have a different quote at each table. Then after the wedding you can have a tile work collage of quotes on a focal wall in your home.)

As another option, for after the wedding, is a seasonal display that so many crafting groups create year round; whether coasters, seasonal blocks, seasonal tiered trays, or another format.

I have not yet pulled out my Easter decorations, but I did make a spring pennant to drape over the top. And once I locate my kiddos’ Easter baskets and other décor items, I have the perfect backdrop for a spring and Easter Display.

Advertisements

So whether you are looking to make a cut file have an extended life in your crafting season, use one item over and over again to bring cohesion in an otherwise eclectic event design, or finding a way to bring added life to items that may otherwise have no life with your family after an event, DO NOT be afraid to think outside the box. Be unique. Find ideas and ways of giving décor items and crafts more life instead of being disposable. We don’t life in a society that talk about heirlooms anymore. But this was a part of life with the generations before ours. We all dream of things we make being passed down to those who come after us, as living memories. Maybe we have items that will. But the one thing that is completely in our control is giving as much life and purpose to things that we celebrate our milestones with.

The file used today, Better or Worse, is perfect for all of your wedding and anniversary needs!

Processing…
Success! You're on the list.

Make A File Do More Part 2

Make that one thing be the end all, be all of your design. Let it be the heart beat in every element that you put out. It doesn’t have to on everything. But that one idea is repeated enough everywhere that it forces all of the other ideas and elements to merge into that one idea. Everything else becomes backup singers or backup dancers to that one idea that you make shine!

Using a Birthday Train File for a Child’s Birthday

Use #1: Cake Topper

Last week I started a miniseries, Make A File Do More. And this week I want to show you how I personally made one cut file to make all the decorations for my son’s birthday. (Please excuse some of the photos. I wanted to make sure to get this posted without causing further delay on reshooting some of the items and editing. Photos will be swapped out in a couple days to better renditions.)

For each of my boys’ birthdays, I give them the option of their theme and I make decorations for them. This year my son wanted a Train birthday. I pulled out the file I made for Easter last year and I updated it with birthday balloons and an added insert to make 3-D Table Top decorations.

The only files that I used for my son’s party, and this blog, are Birthday Train and 3D Train Frame.

As you can see here, we have an absolutely beautiful cut file that looks great in its original form. But as you see, with the cake topper above, it’s an even better as a blank canvas to personalize and use hand detailing to create something above and beyond.

Children’s birthday parties, what are the three standard decorating items for Children’s Birthday Parties? They are Cake Topper, Table Topper, and Banner/Bunting. Everyone gets them. And these items are standard products found in every store, even a dollar store. The one thing that box stores cannot sell are what YOU add and make a standard cut file into something special and unique for the person you are celebrating.

The great part of making one file work extra is that you can pick and choose what you want to use, and how you want to use it. For example, the train is 5 elements. For the Cake Topper, I chose the most important part of the train and then worked with the baker to make the cake and the decorations cohesive. The baker was excited to see me today, because all they saw were my notes asking them to move the white icing balloons in from the corner a little bit so that I could use them as the steam coming from the smoke stack of the Engine.

Let me tell you, when you’re in one industry you look forward to the unusual. It was unusual to ask for balloons to be turned into steam. And I’m sure it made their day! It definitely made my guest’s day. I’m happy because this was the easiest way to make train steam in my busy mom schedule. Otherwise, if I had the time, I totally could have gone the next step and got dry ice and rigged a system to produce actual “smoke” for the train. (Something I would create and recommend to my clients.)

As you’ll see with the 3D Train, you can even change up how you decorate within all your different components.

Instead of the “confetti shower” inside the train (Cake Topper and Banner/Bunting), you can create reflections on the window.

What I absolutely love about this cut file is how easy it is to combine with any other decorative element you want to choose to go with. If you’re party is on the budget, you can go to the dollar store and get the balloon print table cloths. You don’t even have to coordinate you paper plates. If you child literally went down the aisle and grabbed plates of one color, bowls of another, cups of a third color, and napkins of a fourth color (all because they LOVE color), it’s okay. It’s perfect even! Because the different colors of the balloons have you covered.

If you have even more to your budget, you can have the dry ice rigged to all your engines. You can put in your photo booth, carnival stations, balloon arch… everything you desire can be used with this cut file and you have the perfect unifying piece to make everything cohesive.

This train can be added to shirts for the birthday boy/girl, the party planner or point person, as a go away gift for your guests.

Birthday Train can even be resized for countless other items. I’ve successfully used all 5 cars on a 12 inch wide canvas bag. It can be sized up to make even larger items. In fact, I sized the Banner/Bunting train cars up so that most are 12 inches wide. The Closed Car is the largest car, and that one ended up being cut from two 12×12 inch cardstock squares and pieced together. If I can piece together one train (and absolutely no one knew!) then it’s possible to make lawn decorations from this cut file.

The bottom line is that when you have the right cut file, the possibilities are endless!

Just like I said in Make A File Do More, it doesn’t matter which type of an event you are planning for. It doesn’t matter what your inspiration folder in Pinterest looks like. The one thing that every event needs is one item to be your focal point. Pick your favorite phrase. Pick your favorite SVG. Pick your absolute favorite Pinterest idea. Make that one thing be the end all, be all of your design. Let it be the heart beat in every element that you put out. It doesn’t have to on everything. But that one idea is repeated enough everywhere that it forces all of the other ideas and elements to merge into that one idea. Everything else becomes backup singers or backup dancers to that one idea that you make shine!

If you are interested in train cut files, please visit Pacific Northwest Event Design. Coming up in time for Easter will be my Easter Train. Sign up for my newsletter below to find out when that file is live. Also coming in the future will be seasonal trains.

The Files used for this blog are Birthday Train and 3D Train Frame. For more information on these files, please click the above links!

Processing…
Success! You're on the list.

Make A File Do More

If you’ve been in any field long enough (craft, wedding, art, photography, name the occupation), you realize that you can collect files and ideas for eternity and use it once. Or… you can find a way to make one file work for you in countless ways.

For example, photographers take the time to develop their basic settings for editing a photo. With this setting saved, they take a photo, hit the saved button, the adjustments from the saved settings are automatically added, and then they make a few minor adjustments before going to the next photo. So instead of spending 15-30 minutes on one photo, they can have one done in a couple minutes.

Photo by Lukas on Pexels.com

The same can be done with cut files.

The perfect part of working the same basic cut file over and over again is that you create more value for yourself, save time (instead of always starting off from scratch), and you have a primed canvas ready to go for your next idea. Sometimes you have that perfect text or saying that you want to use, but don’t have the inspiration to make something unique to go with it. Think of it like your basics white T-shirt and jeans combo. It’s always ready to go and you just throw on something on top to make it just right for the moment.

If you set up shop at a craft fair, this is especially important for you. How many times have you heard someone comment that they like something, but it doesn’t quite fit them (whether style, color, whatever). By having one item a couple different ways, you decrease the chances of a whole lot of product going home with you AND find out how to optimize your sales by what style sells better. Plus, when it looks like someone is getting a one of a kind (instead of a cookie cutter) item, it’s most likely to cause a sale. It’s the thrill of buying what someone else can’t have.

Cohesion and simplicity work when you have one key element and you work it over and over again. That element is incorporated in everything. But it’s also slightly changed up.

For the next couple of weeks, I’m going to work a simple heart cut file over a few different mediums to show you what I mean by working the same file over again, for cohesion and still find a way to add diversity.

This week I’m going to use paper and vinyl with this Heart Card file.

The craft here is a card. But it has two different ways of decorating built in.

Each year, for Valentine’s Day, I write on hearts what I love about my boys. And I use the hearts as part of our house decorations. As you can see in picture 3, this card is perfect for standing on its side. However, my youngest is at the paper shredding stage. So instead of standing the hearts up all over the house and letting the boys scavenger hunting for their hearts, I will hang some decorative baker’s twine and hang the hearts like bunting/garland.

First things first, decorating. In the past I’ve done solid hearts and lace/doily hearts. I haven’t done a stain glass window style. And the leader, of one of the crafting groups I belong to) posted her heart idea using scrap vinyl. I loved her idea, because I have three small scraps boxes that I keep adding to. (I save scraps to minimize what I throw out.)

One of my scrap boxes

These scraps I cut into glass shard like pieces, triangles, squares… really I just grabbed my scissors and mindlessly cut away. The odd angled bits were probably my favorite ones for this project.

This was the set up for one of my sons’ class valentines. He’s a crafter and went to town, happily making his valentines.

There were a lot of the red heart components (from my Hearts collection) that were left over from prepping for my son to make his class valentines. And I was particularly in love with the thin spiral looking heart. So I couldn’t let those go to waste.

And with a little glue, the finishing touches go on quick and easy. I ran out of With a little glue, the finishing touches go on quick and easy. I ran out of glue stick and used some Elmer’s spray adhesive. Both glues worked great and I had no issue with the card stock sticking to the top of the vinyl (which was a combination of shiny, glitter, metallic and holographic).

After completing my 12 cards here (in addition to the 11 I prepped for my son), there is one bit of advice I want to give with the small pieces of vinyl. It sucks pulling the backing off of all those tiny pieces. If you puncture the vinyl, it really doesn’t show when you press it down and use a scraper to burnish the vinyl down. So you don’t have to worry too much about that. It was easier to take one larger piece of scrap, remove the backing, and cut as you go. However that has its own drawbacks. You don’t have the freedom to lay the piece down to see if it fits in a space. Nor can you adjust it if you don’t like the color combination of a neighboring piece. It is quicker, but you lose out on the control of how everything fits and looks. I wasn’t so much concerned about that in this project, because the red card stock on top framed or covered up areas that I was less than impressed with.

If my 80’s Retro hearts are not quite your vibe, please don’t dismiss this heart or technique. There are so many options out there. If you only use one or two colors of vinyl, you will have a completely different look than what you see in these pictures. If you’re not feeling the vinyl, you could do something If my 80’s Retro Funk hearts are not quite your vibe, please don’t dismiss this heart or technique. There are so many options out there. If you only use one or two colors of vinyl, you will have a completely different look than what you see in these pictures. If you’re not feeling the vinyl, you could do something different. Use Solid or Printed card stock. Paper Mache pages from a novel or sheet music onto cardstock. Or even use photographs for the non-scored heart. Glue on lace or doily on top of drawings, painting, or photos. There are so many ways of making this Heart Card work for cards or decorations for a wedding or other event!

Thanks for joining me today! Be sure to come back next week for the next installment for creating cohesion for an event with one file.


Files Used This Week

Click the links for Heart Card and Hearts to see product descriptions and get these files for your projects.

Processing…
Success! You're on the list.