After spending almost a decade in the event decorating industry I have repetatively heard "I can do that". Instead of being dismissed by creative minded people, I want to show you how I do "that" so you can be sucessful in recreating that inspiration image. I just might have a few tricks that you haven't seen yet!
This year I’m working in concert with others in a garden. (I am so excited for this!) If you’re as busy as I am, you can imagine how quickly things slip through the cracks.
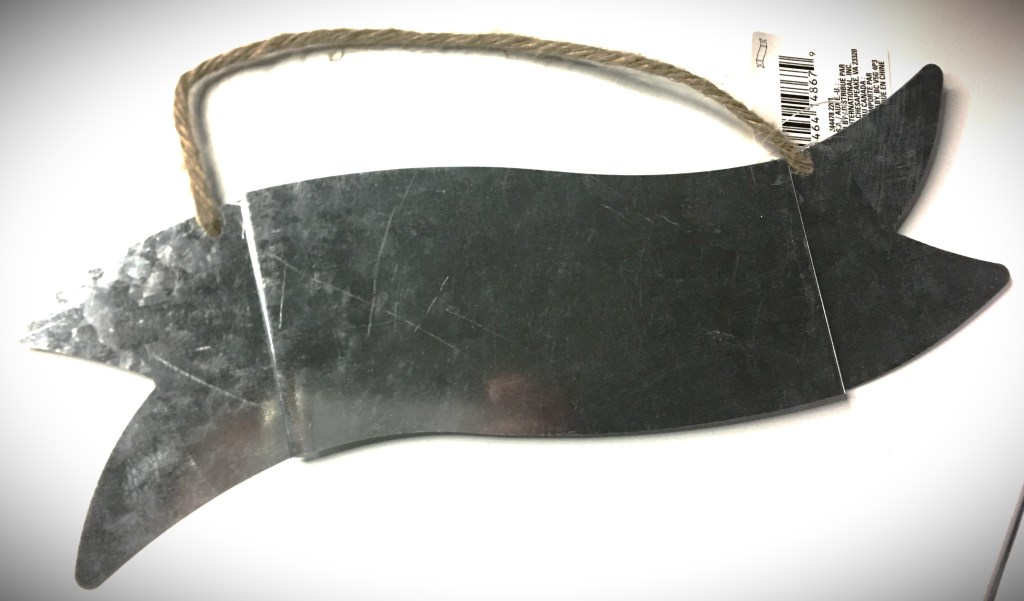
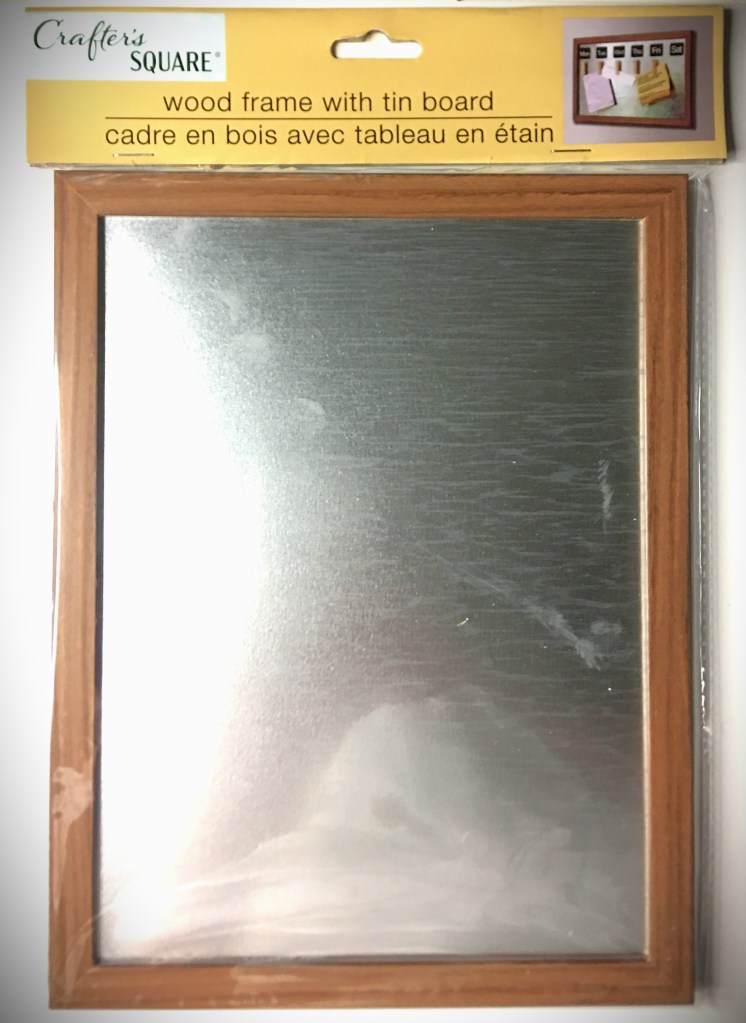
After hitting my local dollar store, I found some pieces that are going to make an inexpensive tool that doubles as home decor, all the while keeping tabs on what’s been done.
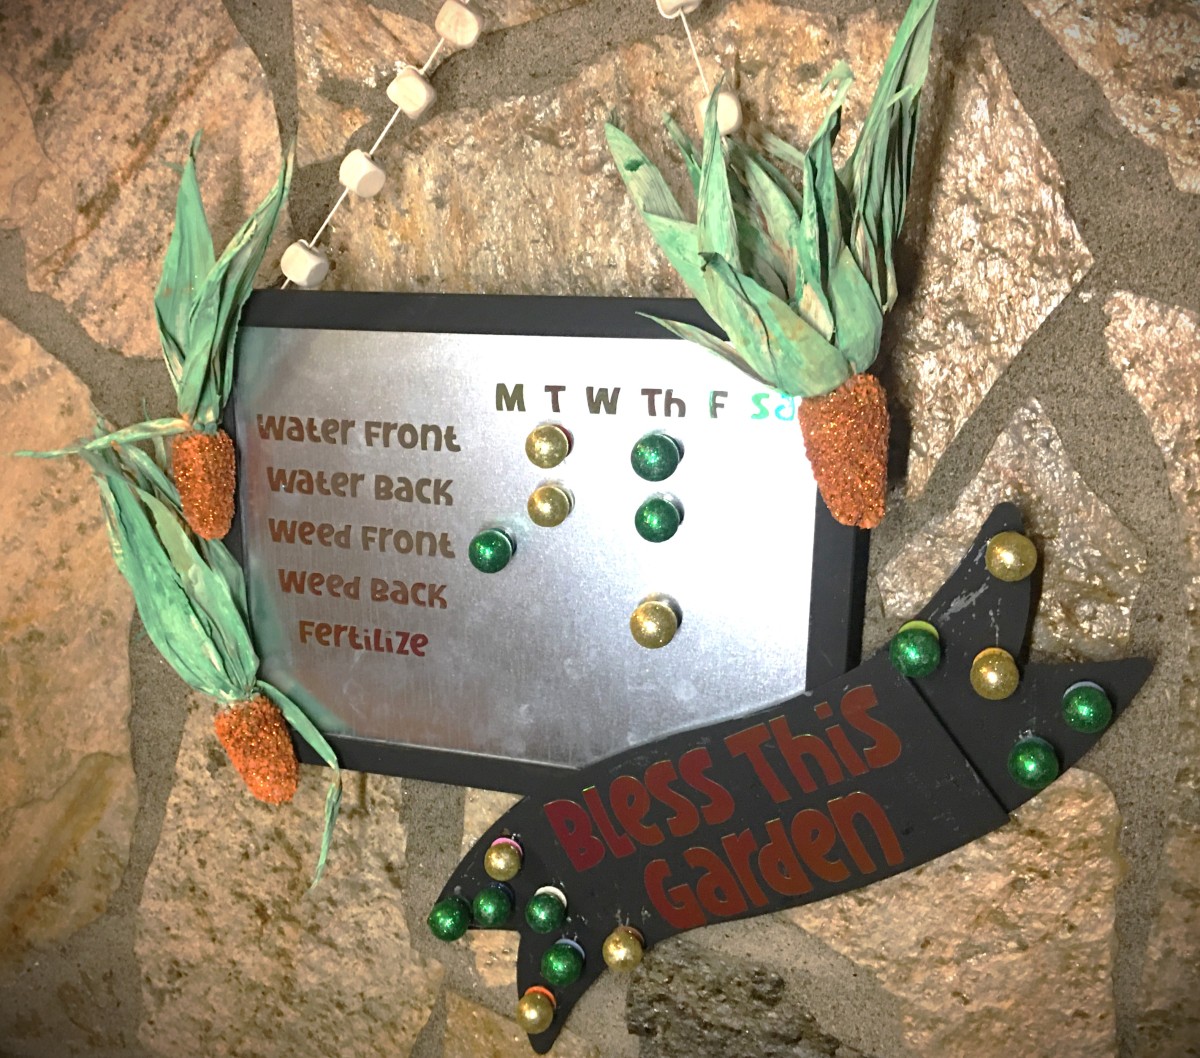
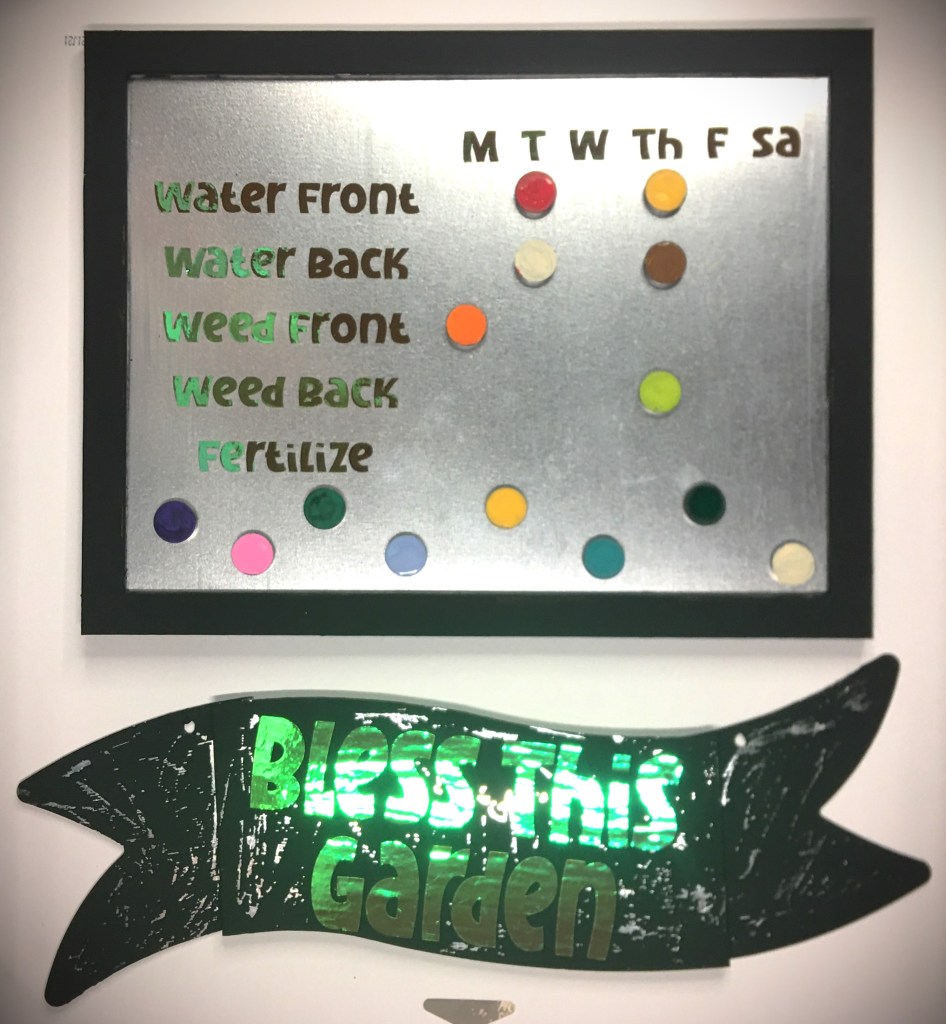
With these I decided to make a magnetic board where anyone tending the garden can quickly mark what they did.
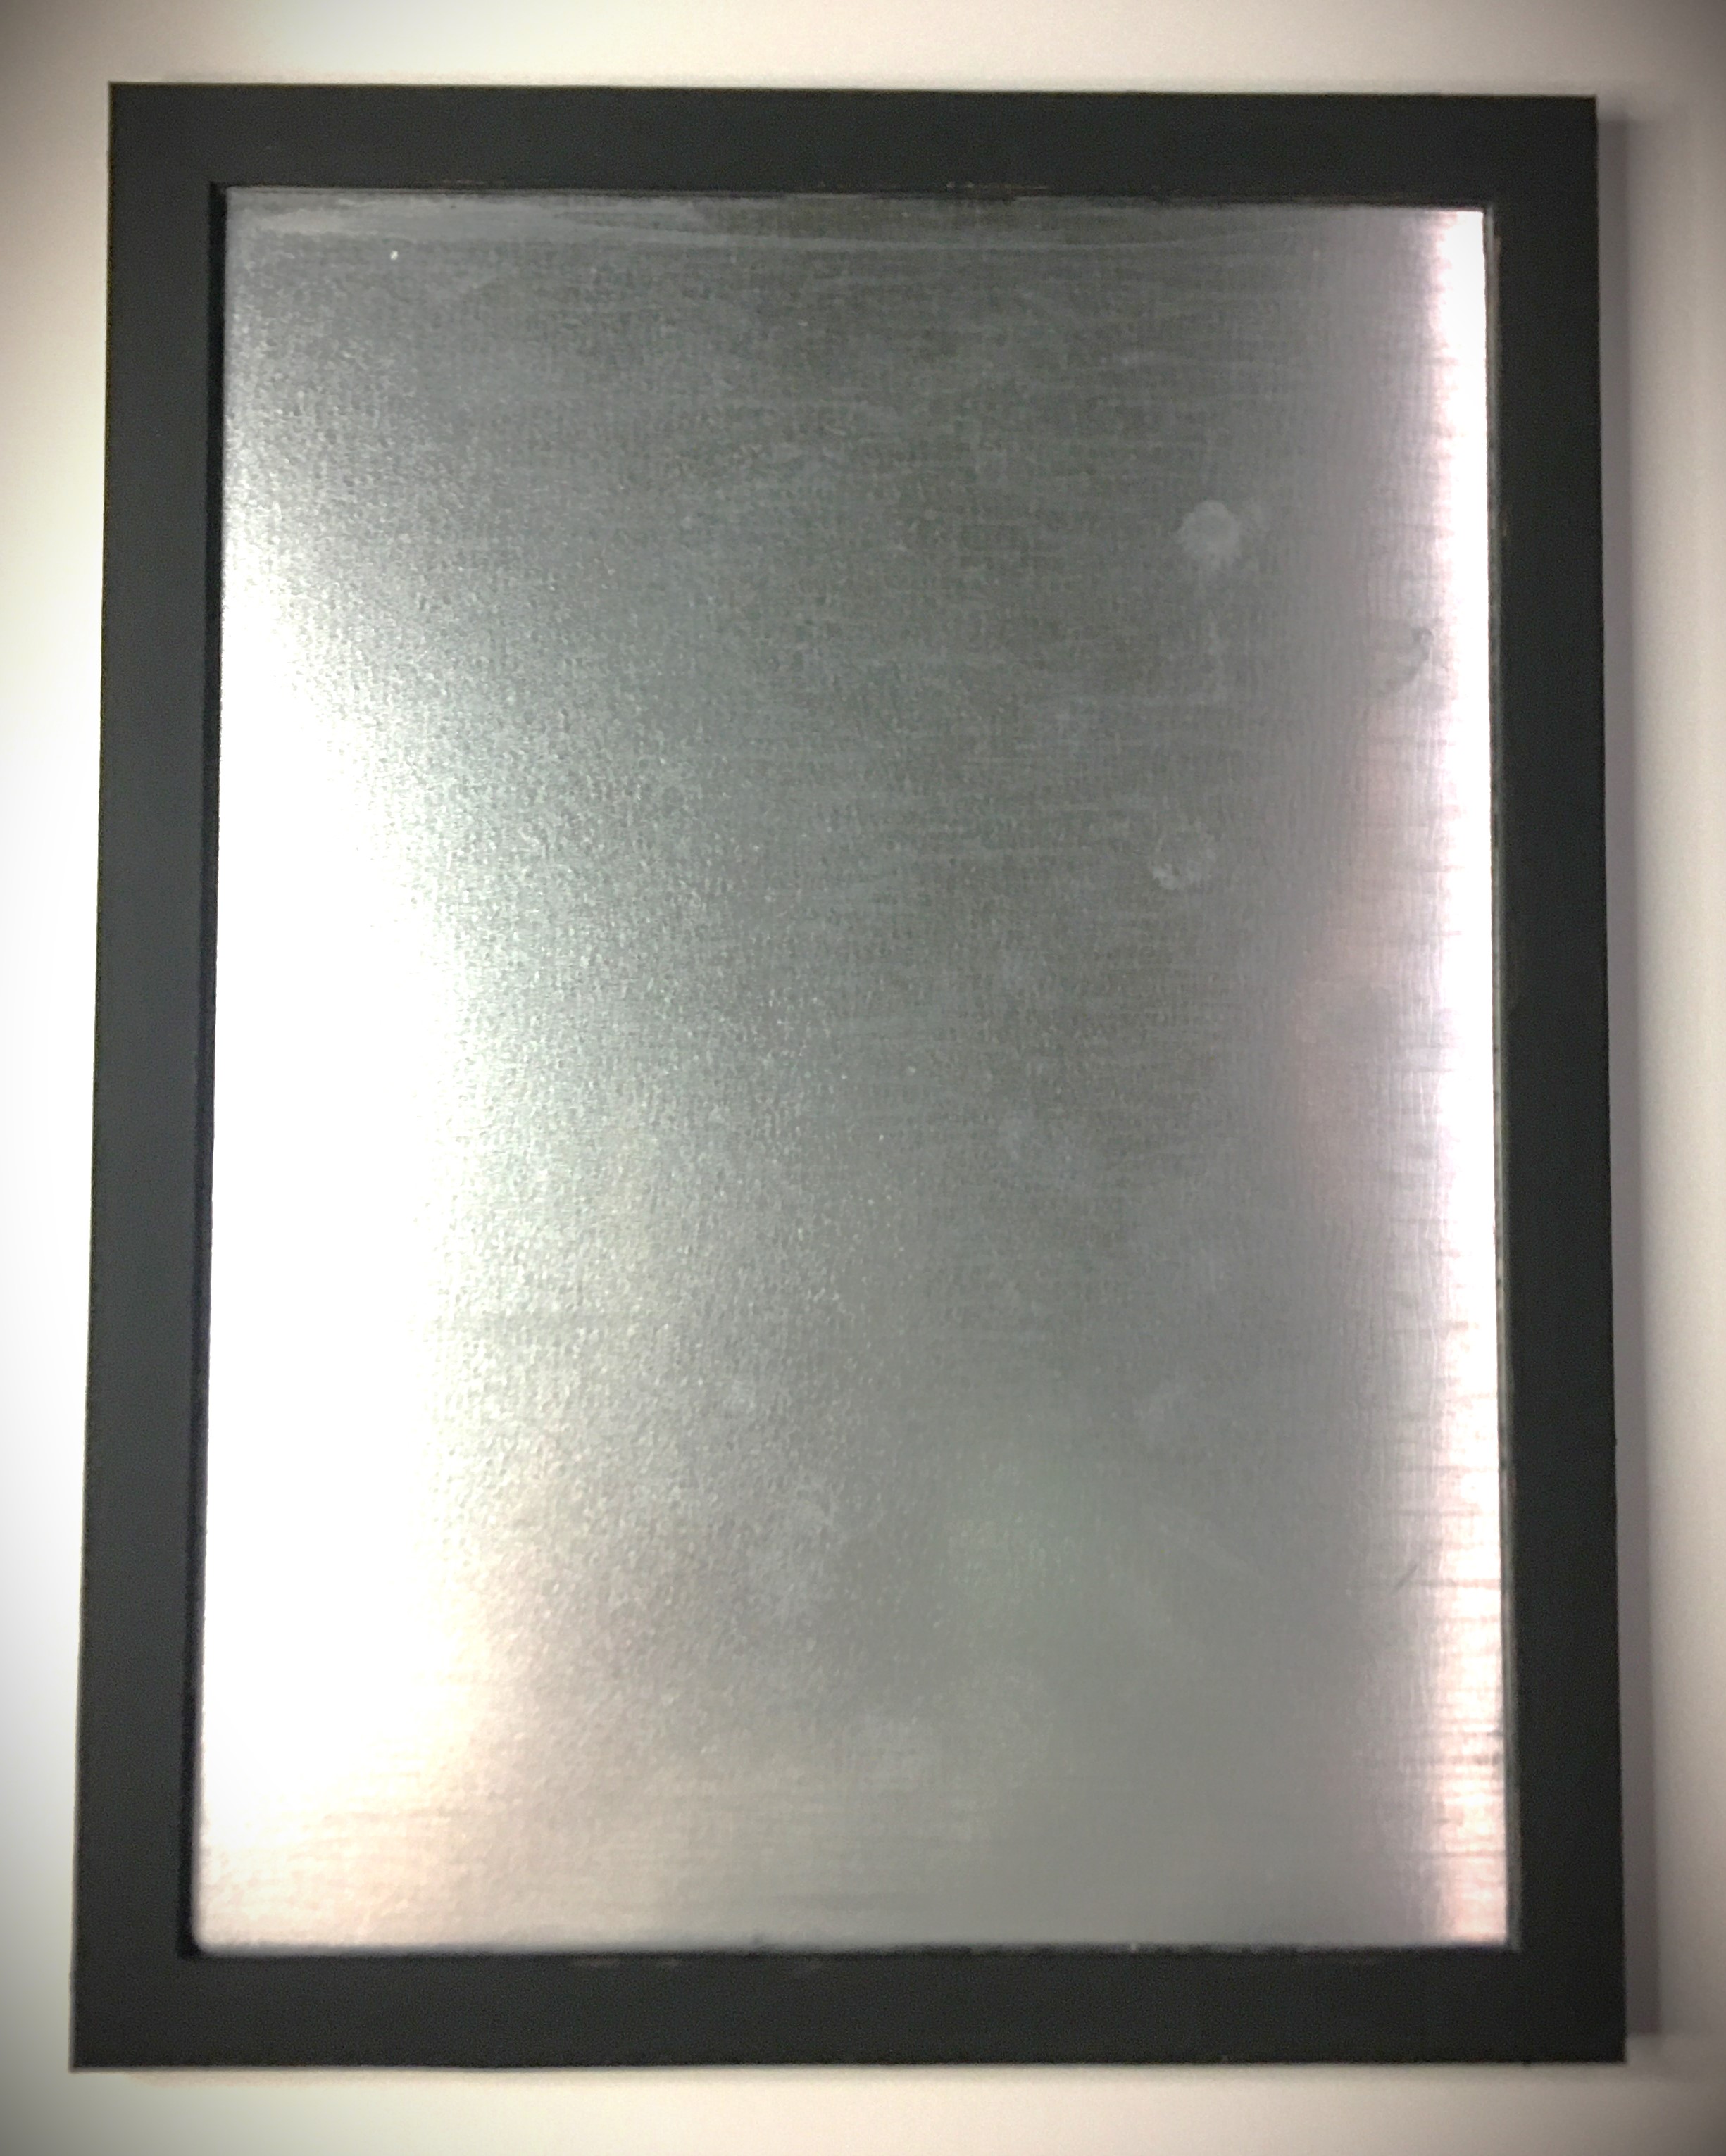
I know the galvanized finish tends to overtake everything. So with the galvanized frame and banner, everything gets lost real quick. Not to mention that the frame was a really bad fake wood. To dress all this up a bit and minimize the galvanized look, I painted the frame and banner black.
I forgot to take a picture of the banner painted in flat black chalk paint (the same paint as the frame). It looked too minimalistic for my taste, so I took the transfer tape (which I used to apply the vinyl text) and put it straight onto the paint. Some places lifted the paint quite easily. But to get the distressed look, I scratched the tape
The magnets needed a little something extra. There are so many things that could be done. I have children and they’re helping with this garden and they’ll also be marking what we do when we work, so I went into kid zone and painted the magnets with acrylic paint and did all the colors.
If you want to keep minimalistic, pick your favorite color.
Love things that sparkle, glue on gem stones or use glitter.
What about texture? Glue on fuzzy pom poms, baby pine cones, large seeds or nuts… literally whatever catches your imagination. Maybe you have a farm and want to use small farm yard figures and animals. (I wish I had these in my craft room!!!)
Something that is great about using the galvanized banner is that the extra magnets can be kept on the banner so you can add stickers, personalization, more tasks, or a note section in the blank space on the bottom.
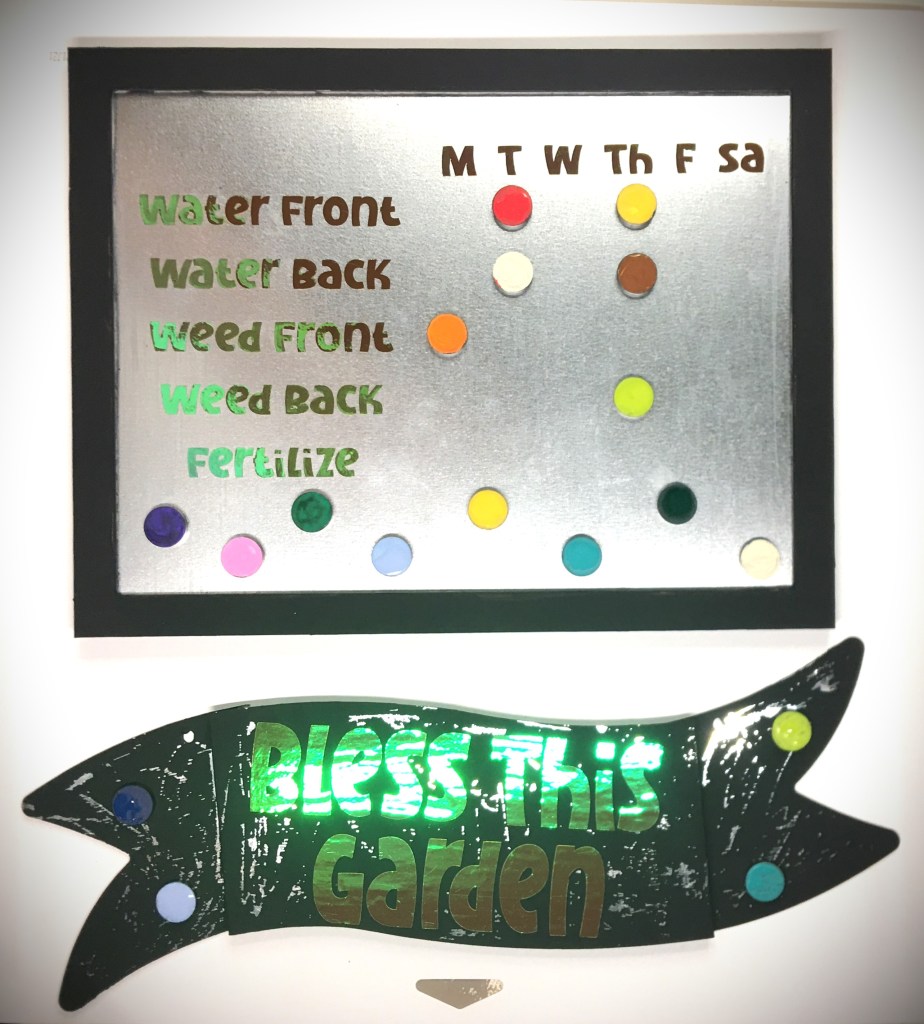
And then while typing I decided to go a different direction.
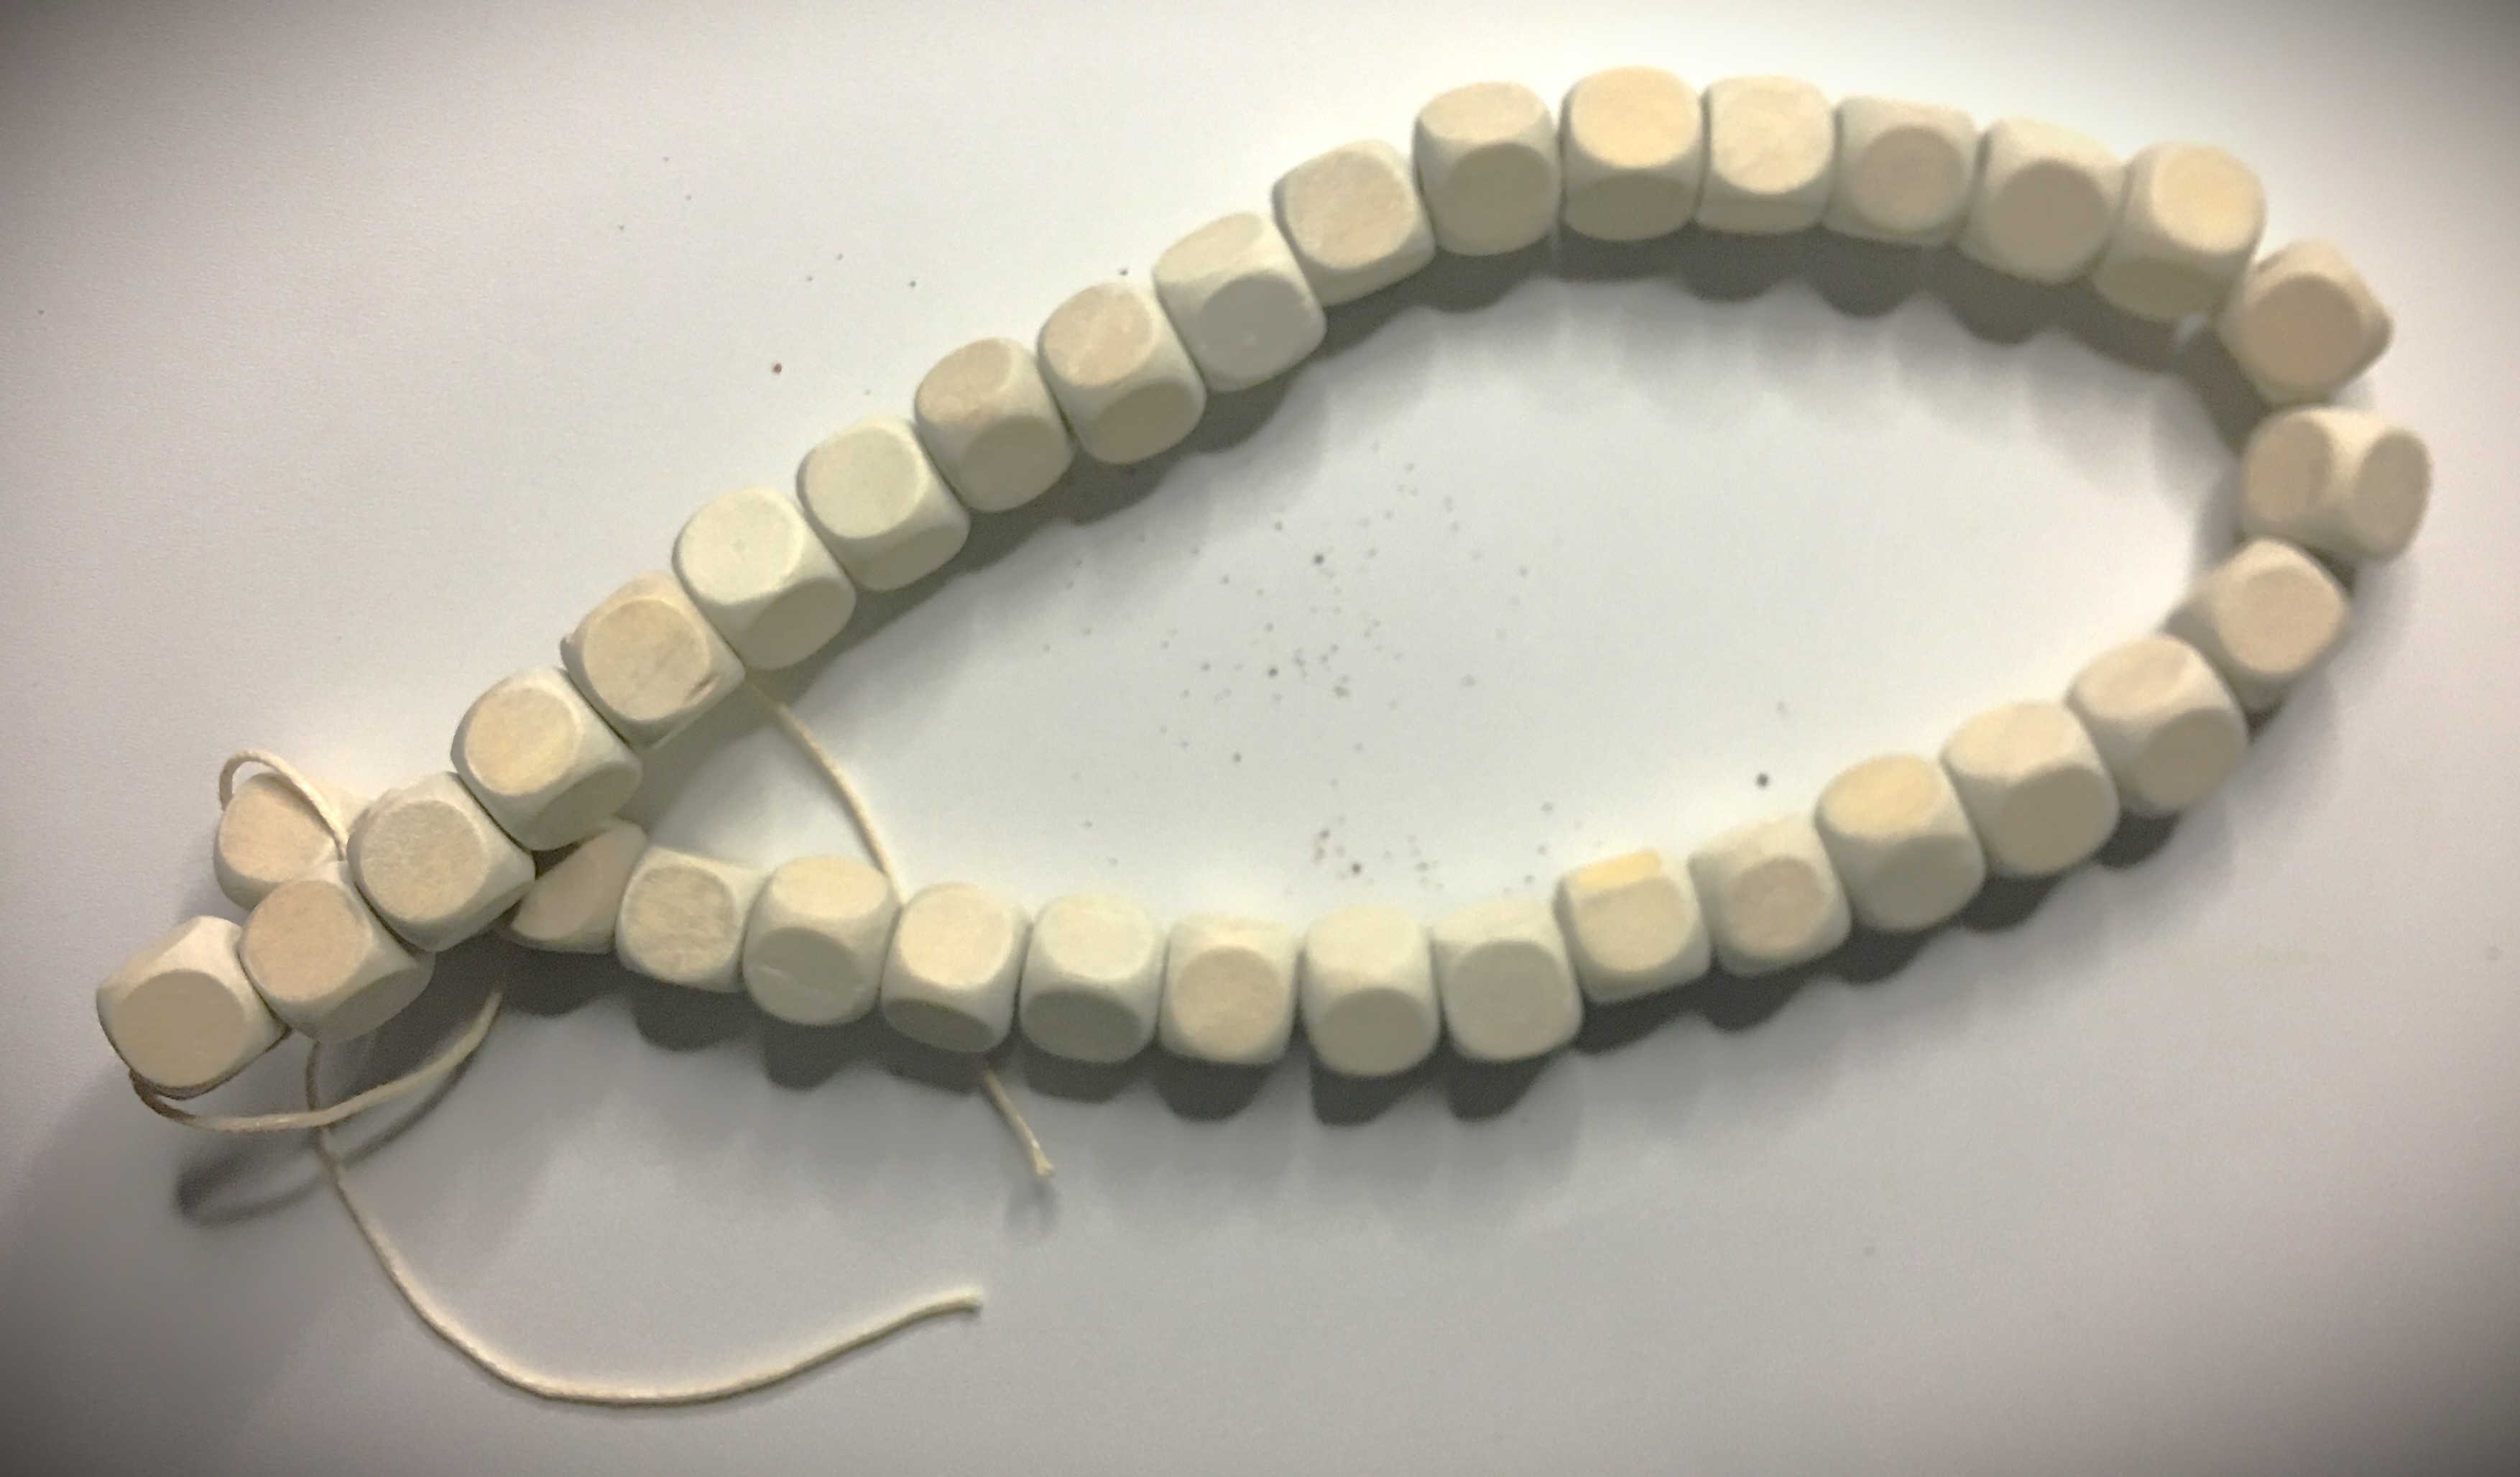
I pulled these out! Last year I made carrots out of my corn cobs. And I brought out the wooden beads from my drawer (which I also got from my local dollar store).
With the beads I removed them all from the string they came on and noted how they tied off the end bead to keep them all on the string. This “knot” that they used was how I spaced the beads further apart on the string.
Once I made those changes, the colorful “polka dots” needed to change. The gold and green glitter styrofoam balls simplified the overwhelming colors.
Even with the new modifications hanging, I’m not satisfied with the final color scheme. And sometimes that happens when you’re creating. You start building from the image you see in your head and make a change here or there and an earlier idea you loved just doesn’t work anymore.
The black isn’t working anymore. I loved the idea to begin with because it was a nice basic color that goes with where I was going to hang this. But it’s just not working anymore.
Advertisements
First thing first, I need to lighten up the banner. So I’ll be distressing it heavily so that the majority of the galvanized metal will show through. With the addition of the carrots, which obviously take the spotlight, I can bring out a lot more of that metal and the metal is not going to overtake and make everything else hide.
But before I do that, I need to decide what I’m going to do with the frame and that’s going to take a few days of looking at it to see where I want to go. At the moment, I’m leaning toward the idea of painting on white striped and creating a plaid hand painted design on it. If I go that route, I might keep the banner predominately black still and incorporate that same design element into parts of the banner.
Stay tuned to see what I finally decide!
Advertisements
And I’m going to leave you here in this moment just because sometimes the right thing is to take a step away from a project and let it tumble around in your brain. You don’t always have to have the answer right away. And you don’t always have to have things done in an hour.
Perhaps it’s convenient to have an idea presented to you in a finished state.
But I’m going to leave you here with your own thoughts. Because I know someone has that inner voice screaming, “You need to ____!”
Go ahead and leave that comment below.
Or better yet, use that idea to make your own magnetic board for your daily tasks, your children’s chore board, a classroom helper sign, your regular “Honey Do” list, or that board that I didn’t mention but you just got the idea for.
And when you’re finished, send me a picture so that I can see what you came up with.
This post contains affiliate links to products. We may receive a commission for purchases made through these links, but at no extra cost to you.
Sometimes I love being a mom. And there’s days where I can be found saying, “You want what?!”
Okay, so maybe that’s a bit of an over exaggeration. But only a little bit. Because when I asked my son what he wanted for his birthday theme, he told me he wanted a ghost eating, pellet chomping birthday. To my credit I didn’t flinch or bat an eye. But there was an onslaught on thoughts that ran through my head. Are you kidding me? No one has those decorations! How am I going to pull this one off???
The short story is that I put on my big girl crafty panties and I got to work.
The problems with trademarked images are endless. Anyone who is reputable will not make the trademarked characters for you. And those who can have gone through the trouble of getting the licensing rights to do so, which means you’re paying an arm and a leg for another person to make it for you.
In the area of cakes, the easy go around is to decorate the cake with toys and action figures that you can buy on any store toy aisle. But how do you decorate for a theme where nothing is for sale???
Yes, I actually questioned my rational as a mother for introducing my boys to retro arcade games. But I did conquer the boss round on this problem!
Advertisements
Buy what you can
Pac Man may not be the decorating be on the shelves, but plenty of ideas were.
Thanks to 8-bit style games like Mine Craft still kind of popular, there are the plates and napkins. Yes, the Game On is the wrong font and style. And the game controller is definitely the wrong millennium. Fortunately for me, this was a five year old’s birthday party. I wasn’t going to be given the fifth degree on accuracy of my decor.
Thank God!
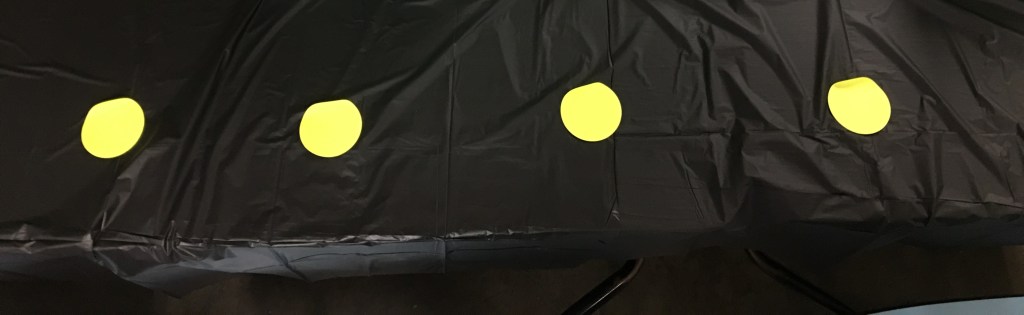
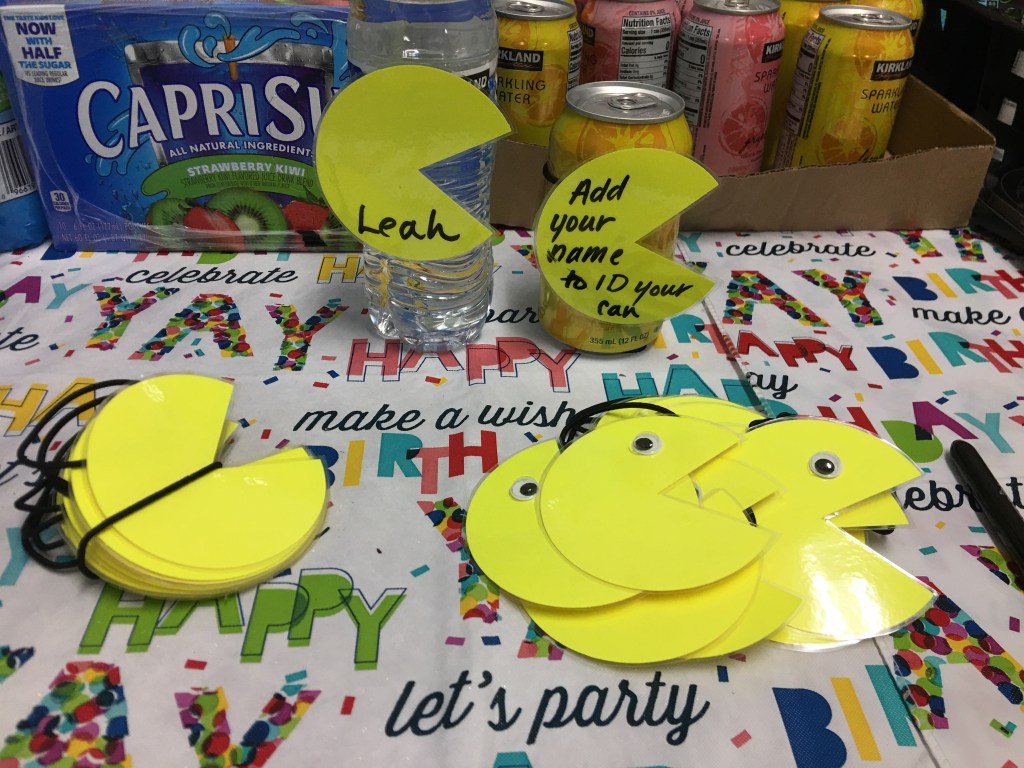
The one score that I was most excited for, and got me in the proper mind set for actually pulling this party off, was the stack of round yellow sticky notes that I found at the dollar store. The moment I saw them in the office supply aisle I had to severely restrain myself from doing my happy dance and squealing like an excited 5 year old!
For as much work as I was going to do in creating my own designs, I wasn’t going to have enough time to make a birthday banner. So you better believe I had zero issues with giving the round yellow sticky notes to my kids and telling them to put them all over the walls, windows, and on top of the black plastic table cloths. For under $10 I had the skeleton that made a Pac Man birthday happen!
Advertisements
Make What You Need
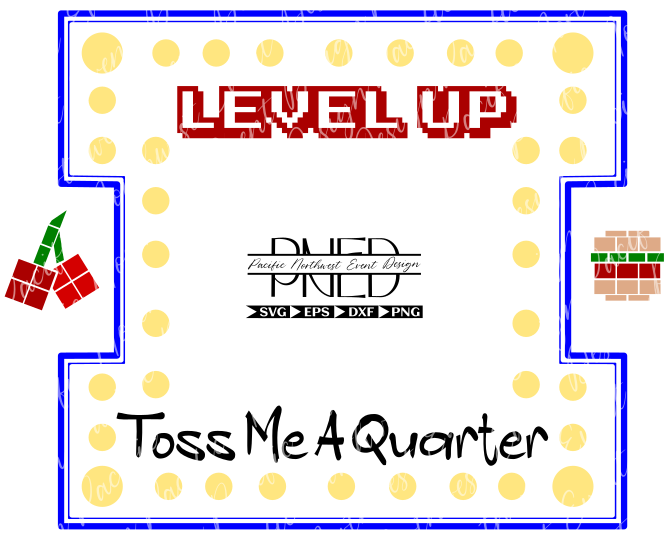
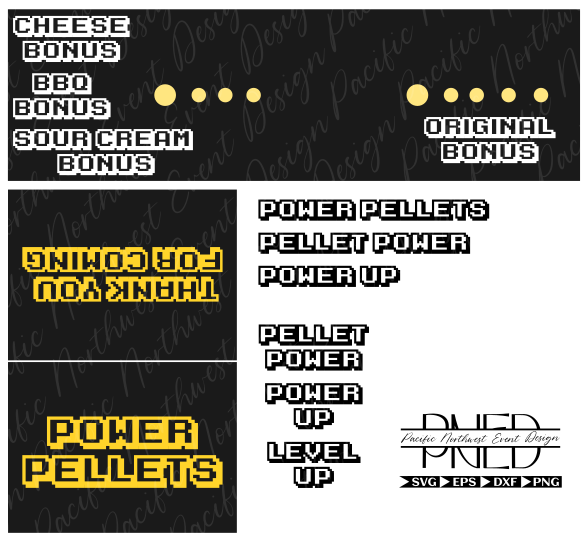
Fortunately for me, Pac Man was made in an era where things were basic in design and easy to create in my design program. And with this font, I was able to make things that my son was excited for and proud to talk about!
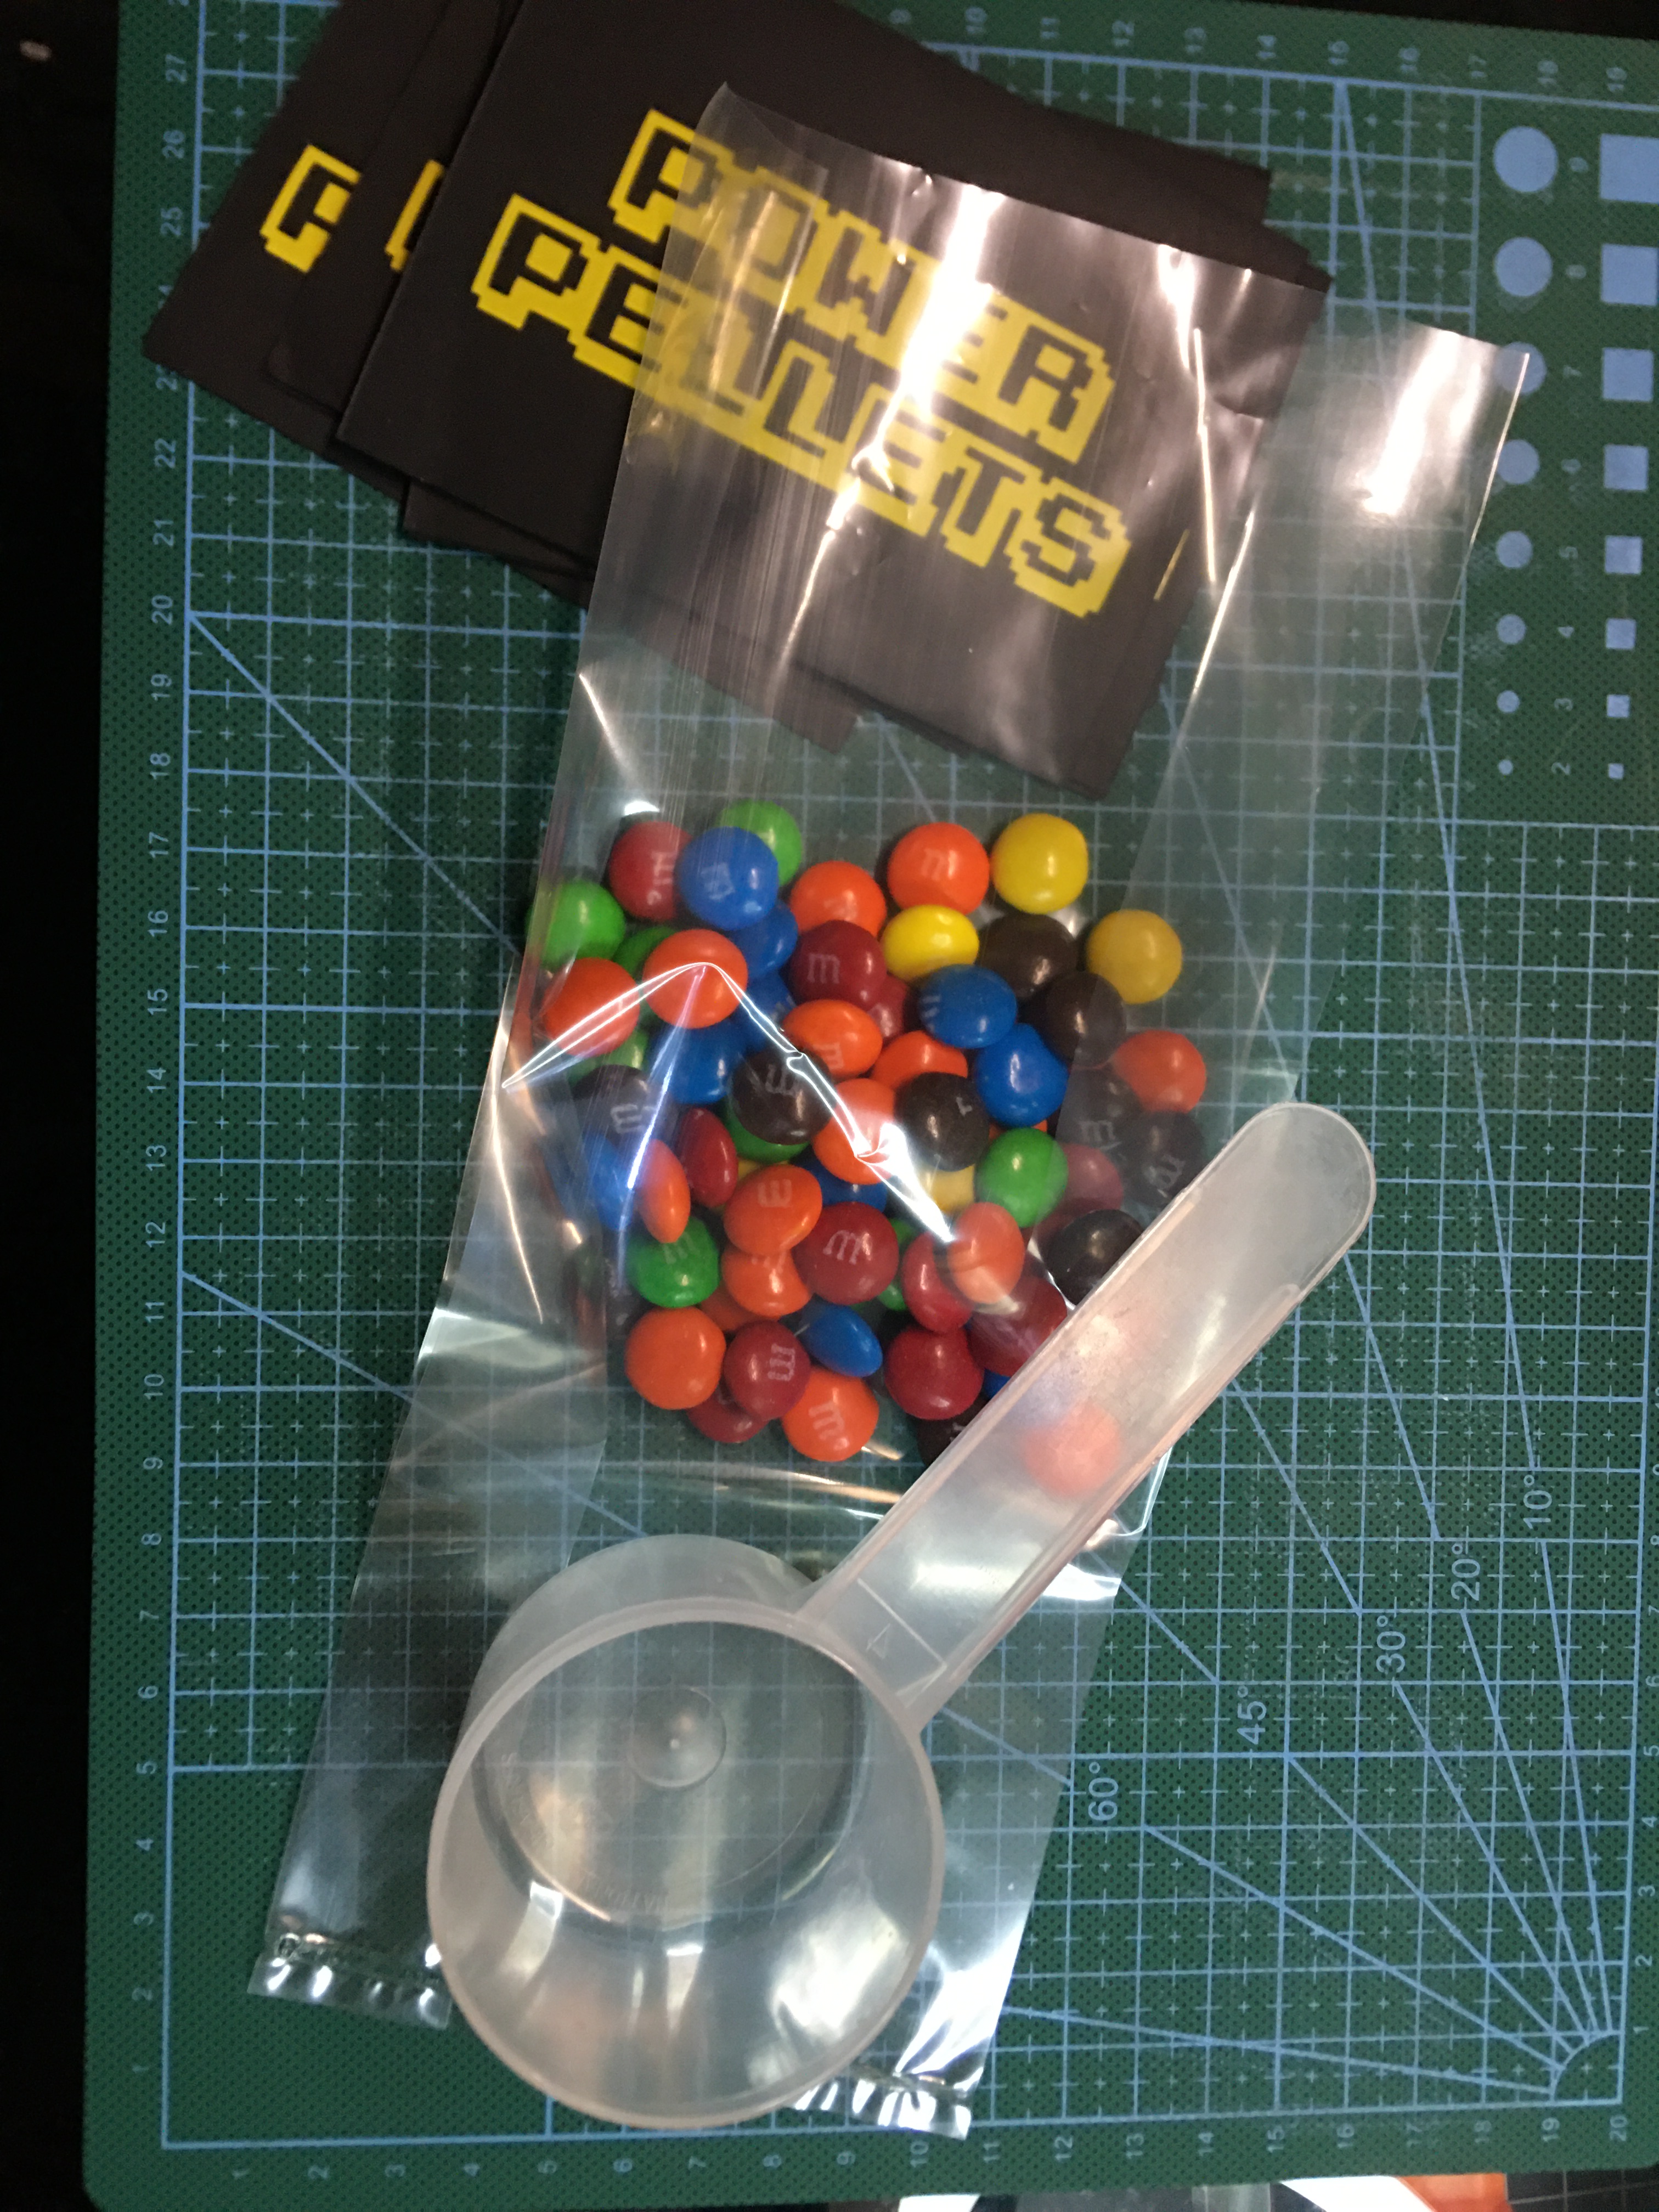
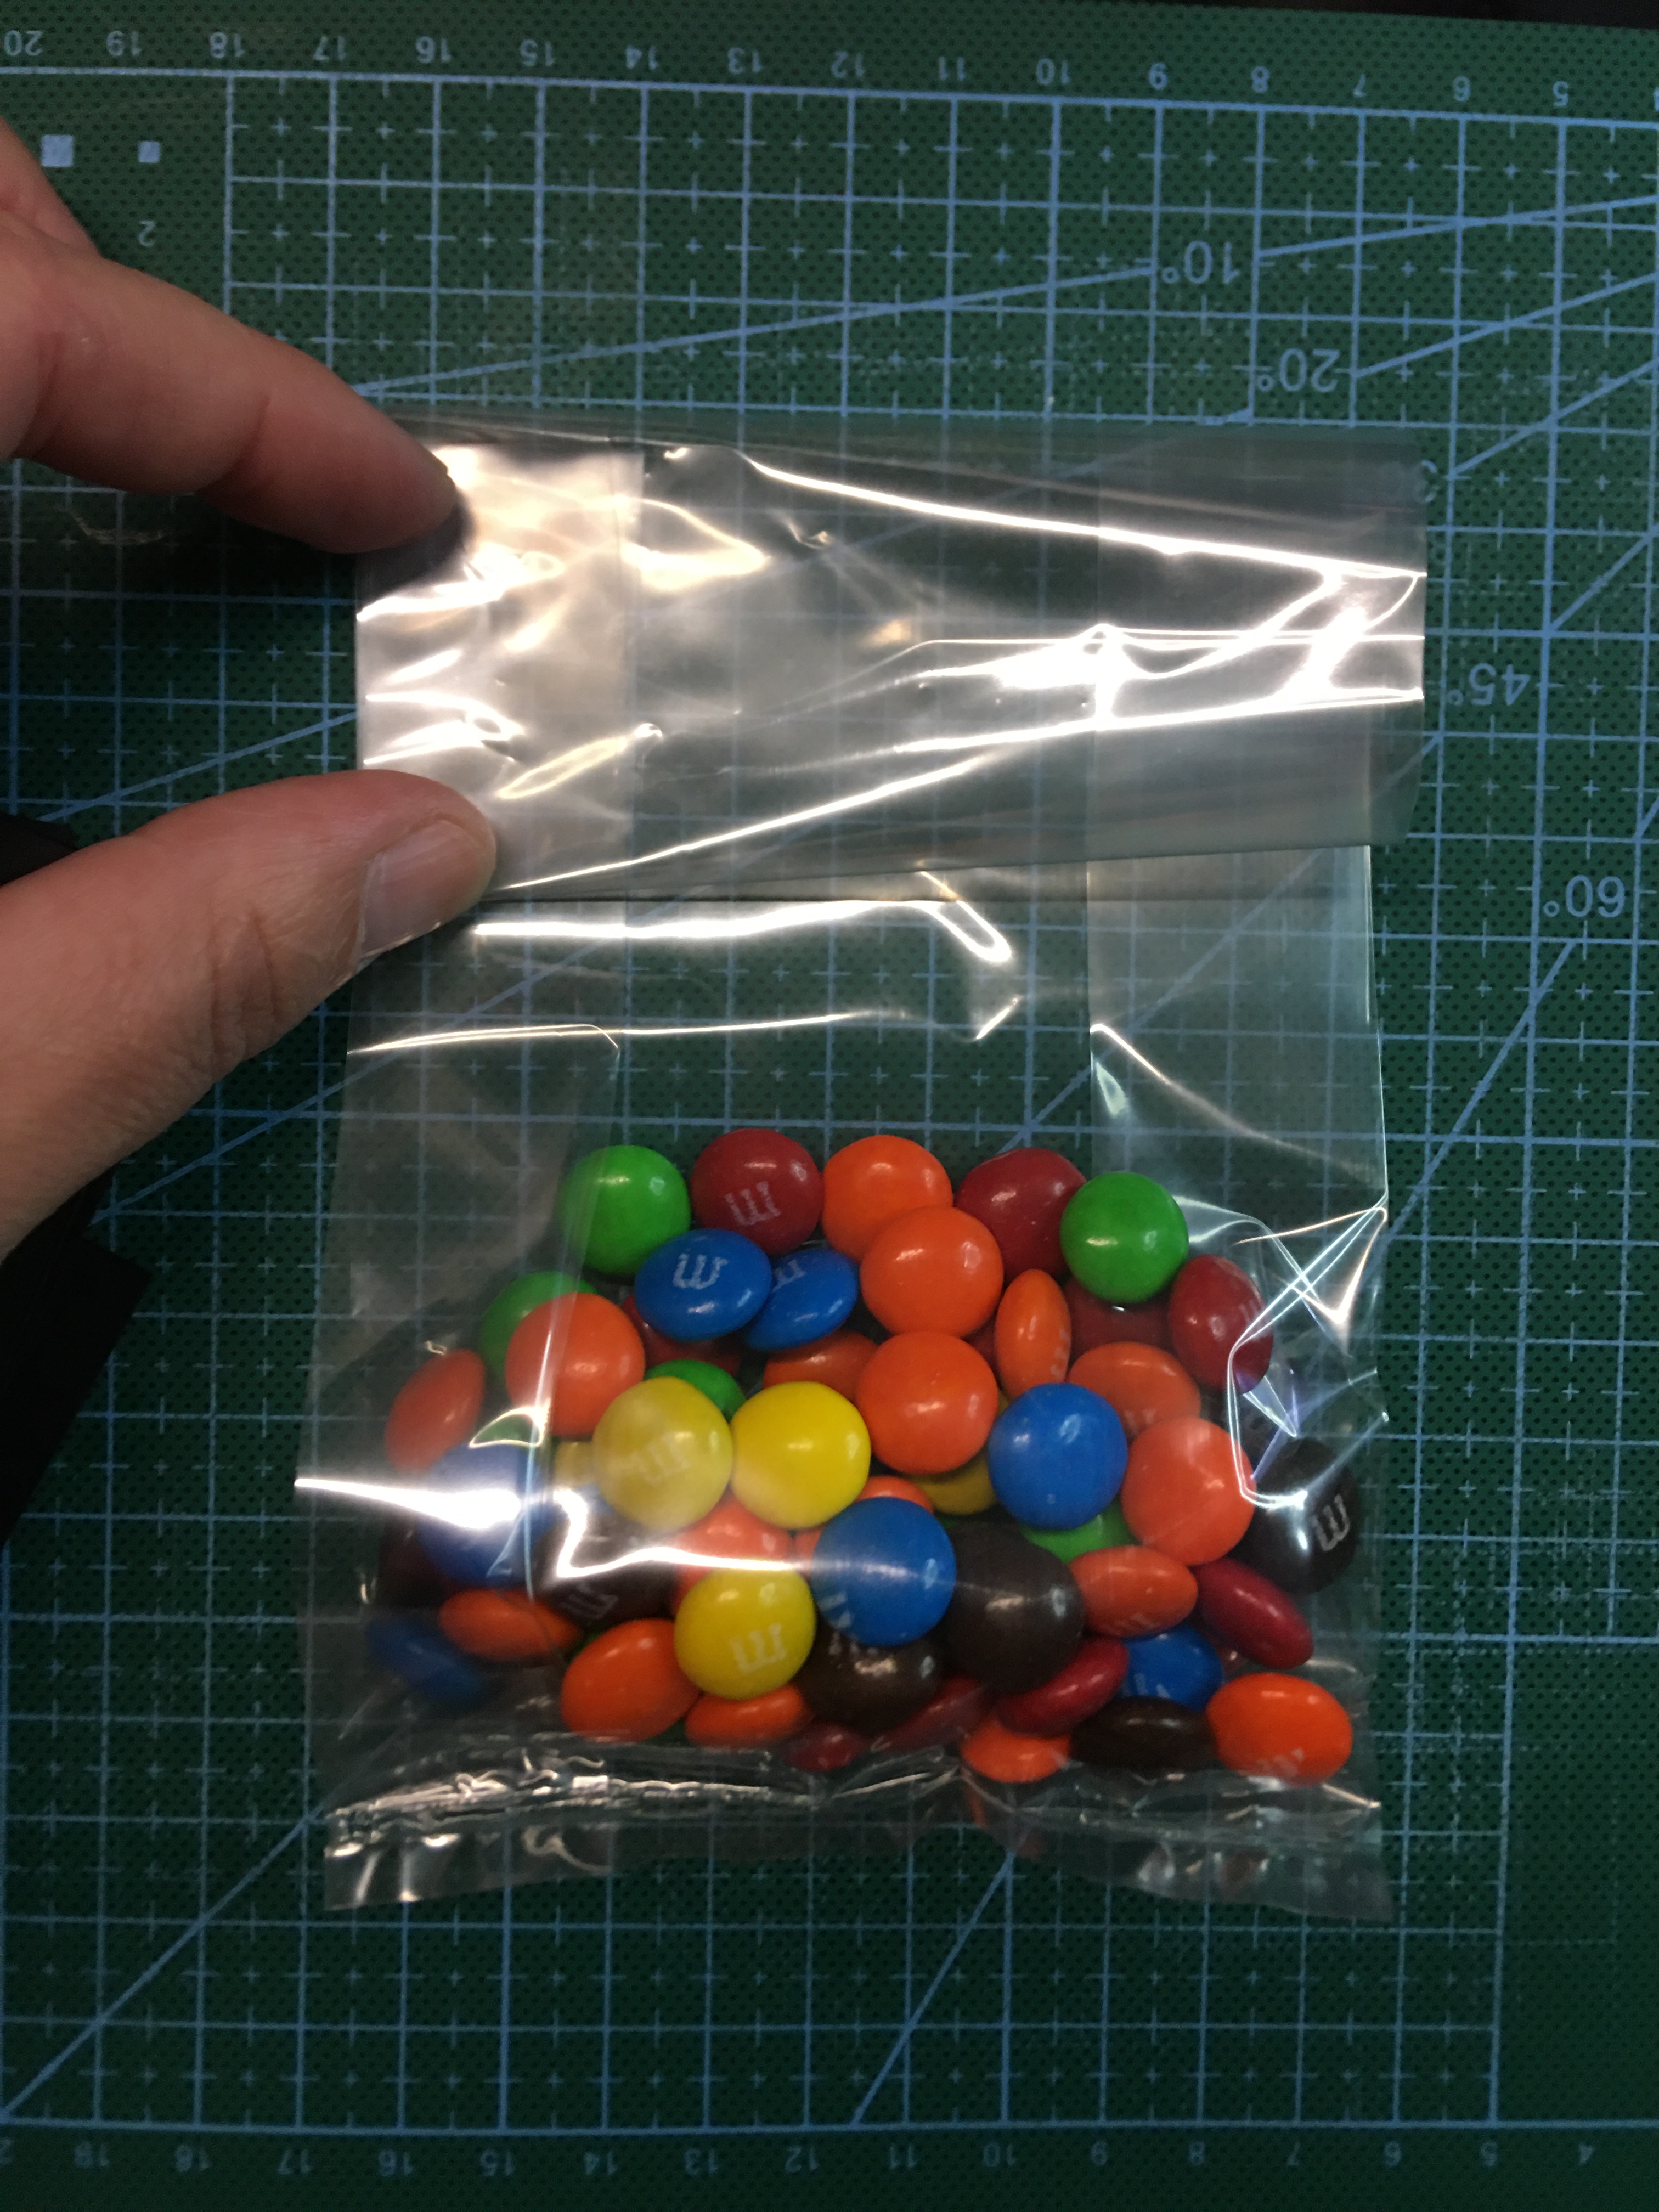
I was very excited when I found the round stick it notes, because this idea came right to me. The yellow M&M’s are perfect power pellets and the other colors are along just for the ride. But with the primary colors being predominant, it fits with the whole theme.
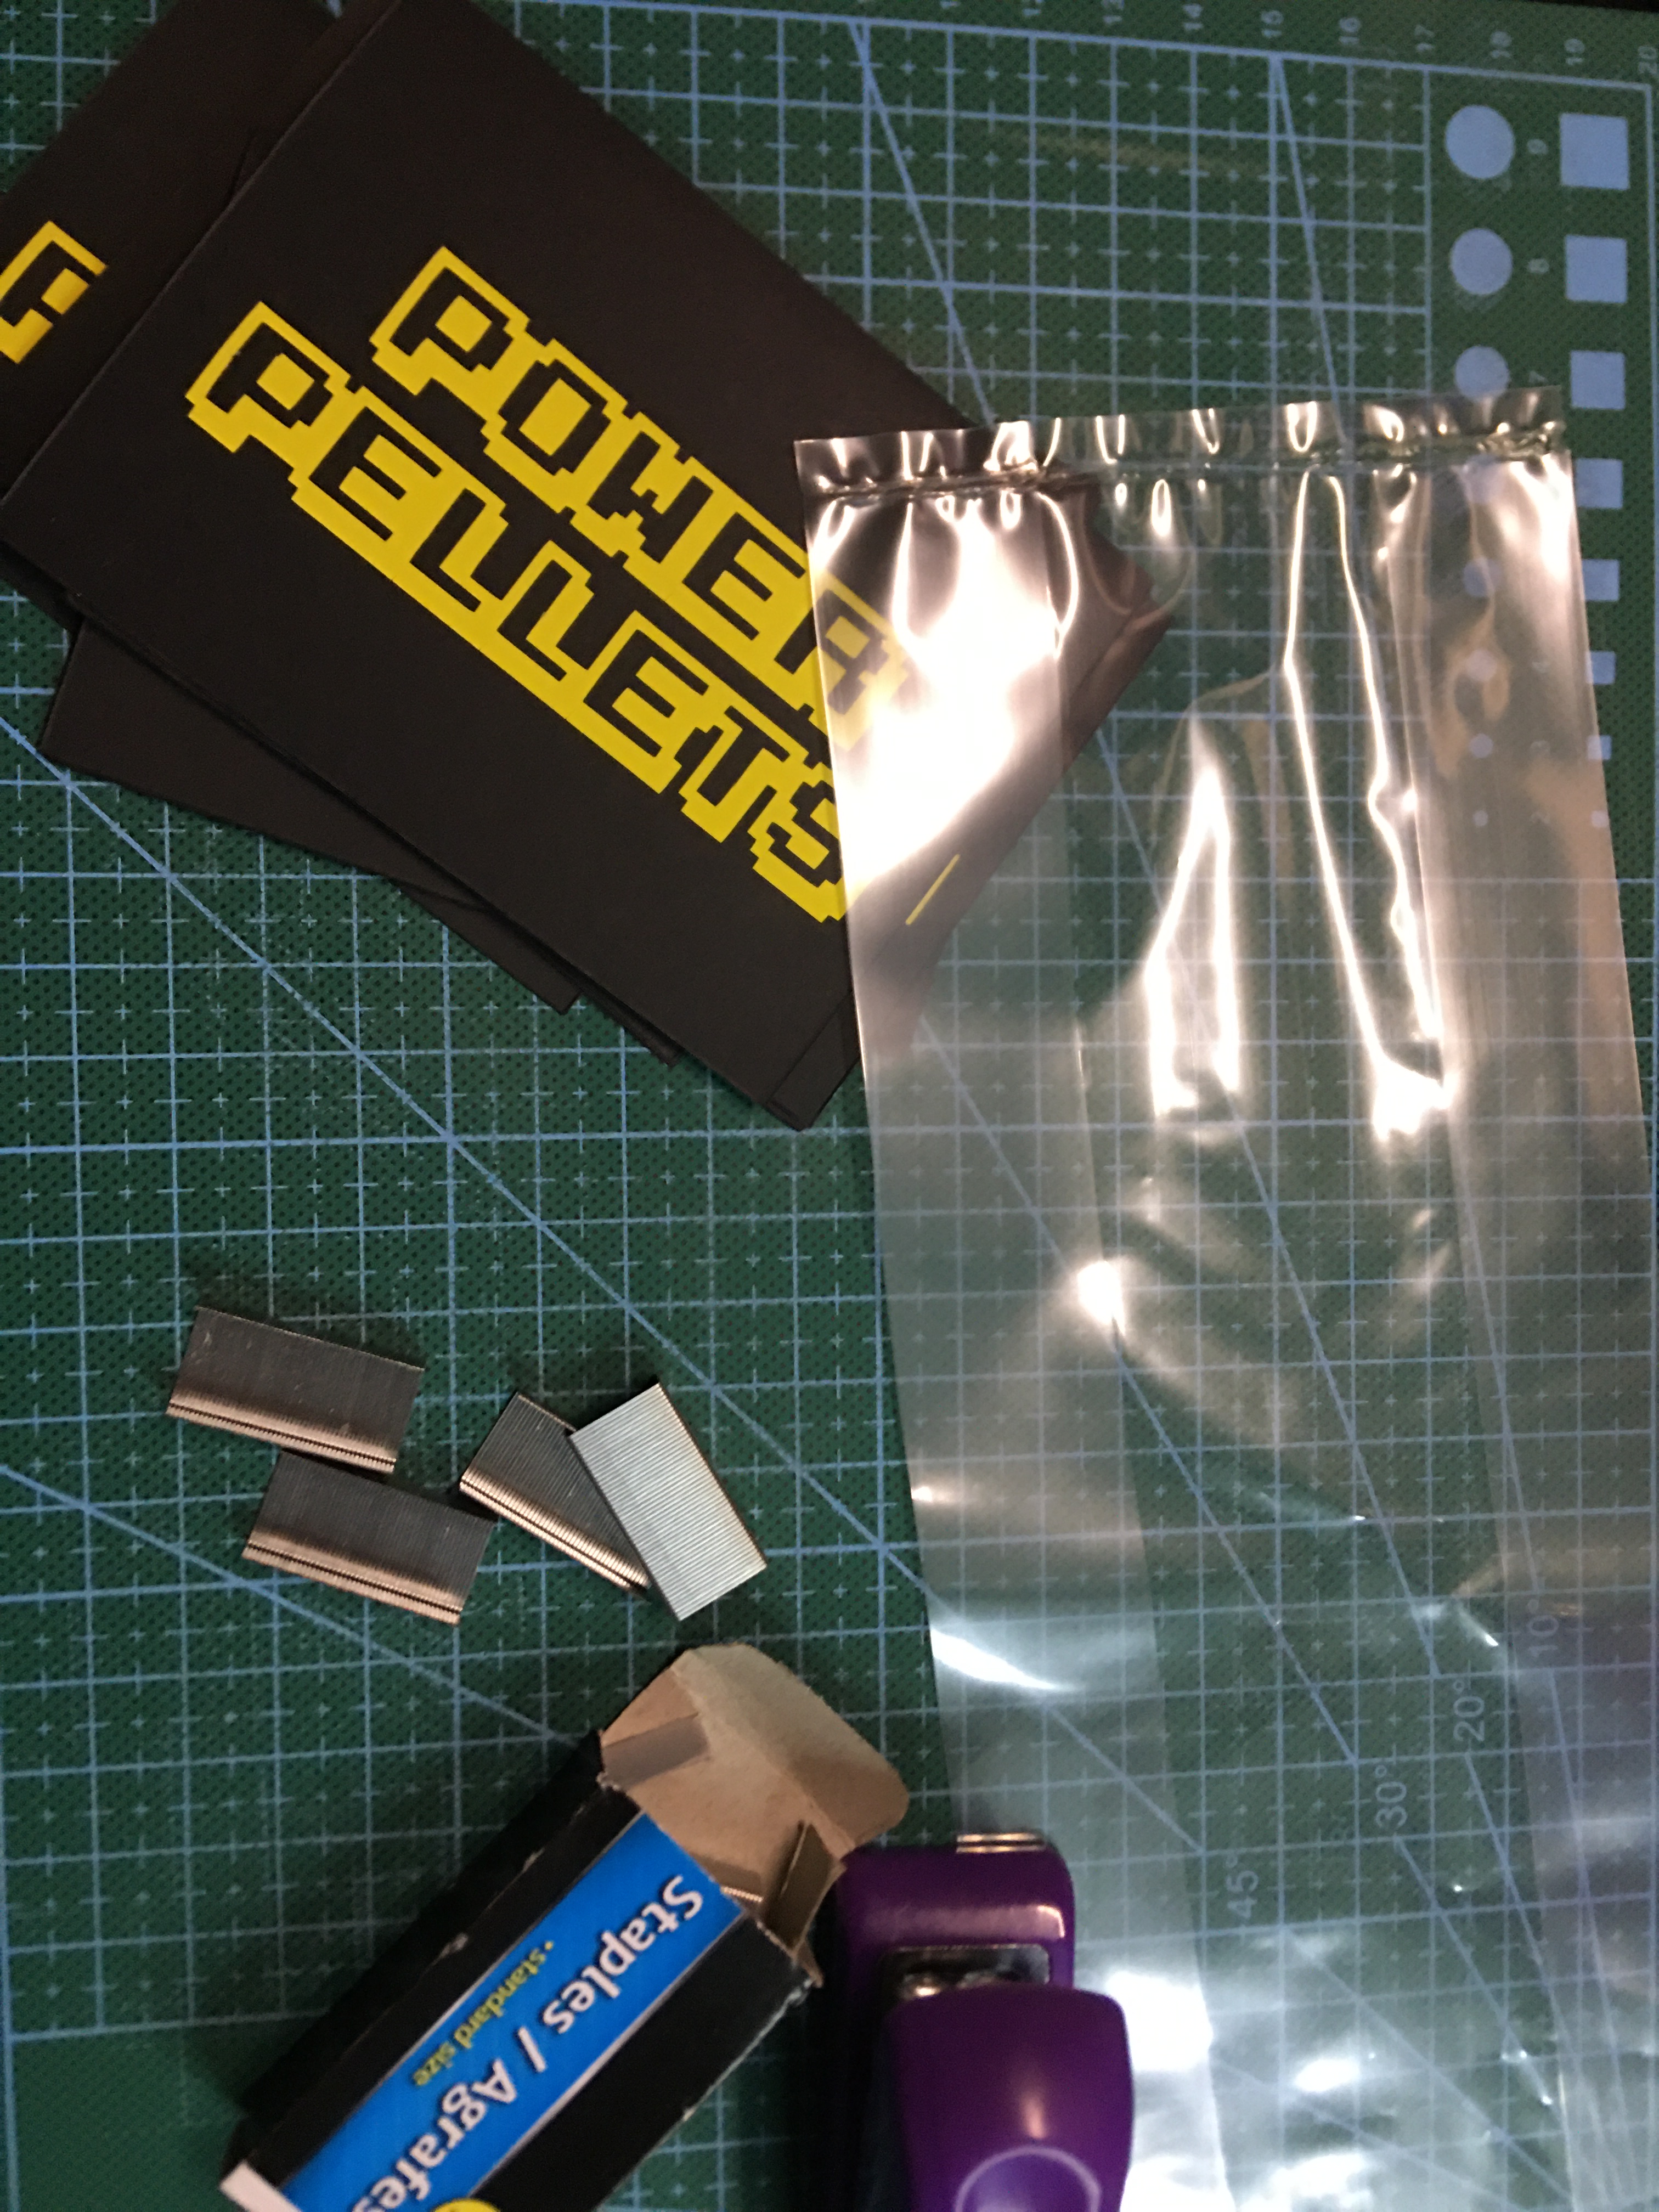
These are super easy to make to! All you have to do is put a scoop of M&M’s in a cellophane bag, fold it over to keep everything in, and staple a label over the top of the bag.
Tip: if you use a permanent pen to color the staples you can make the staples “disappear” and make a clean presentation.
The gift bags I also got from the dollar store, all I needed was a solid colored paper bag. I wanted blue or yellow, but green was all that was in stock. Not a problem, it’s a primary color that was present in the 80’s video games.
I used vinyl here just because it was quicker to make up all the bags this way, not worry about gluing a million pieces, and I could pack the bags right away!
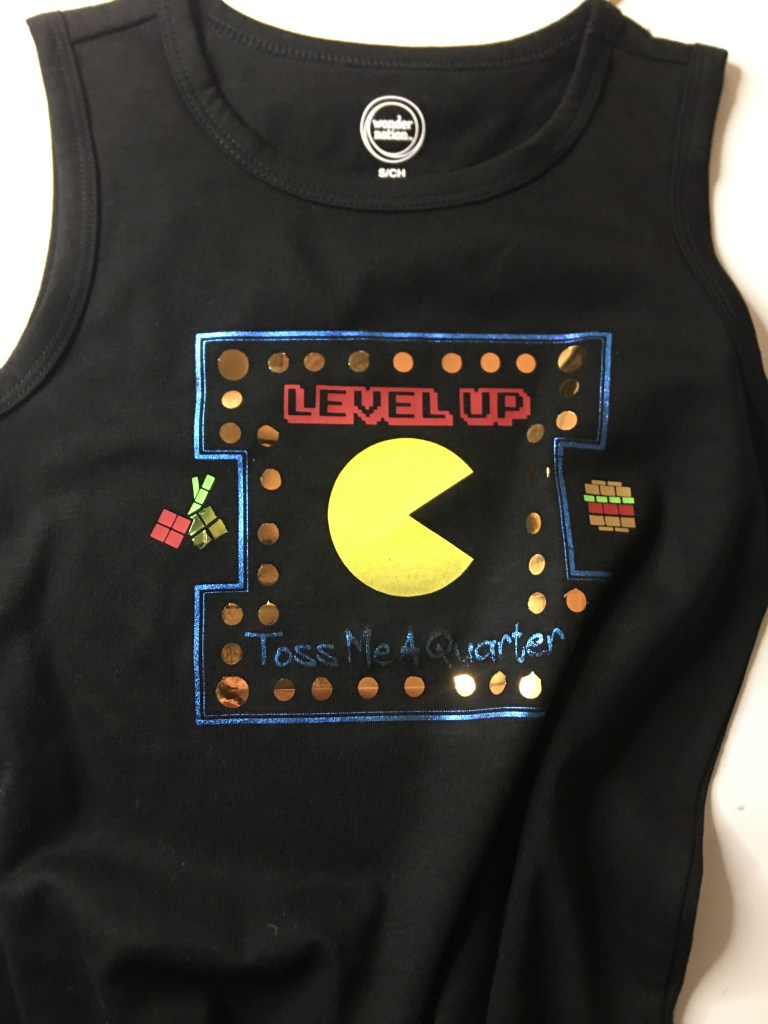
And for my boys, no birthday is complete without a birthday shirt.
I think my favorite part is “Toss me a Quarter” because my husband and I recently took my boys to a retro arcade and I lost count of how many times we were asked for more quarters. This design just brings back so many memories. And the best part is that you can remove this central figure (which is not included in the design for copy right reasons) and put any other character in. This is definitely a blank slate for your 8-bit digital art. Fortunately this character is simple enough to do on your own. In your cutting program take a circle and cut a slice of pie out of the circle with a triangle. If you’re cutting program is able to modify a circle, you can use that feature.
Advertisements
Solve A Problem
Sometimes the ideas that you need to decorate on otherwise obscure theme, is to solve a problem.
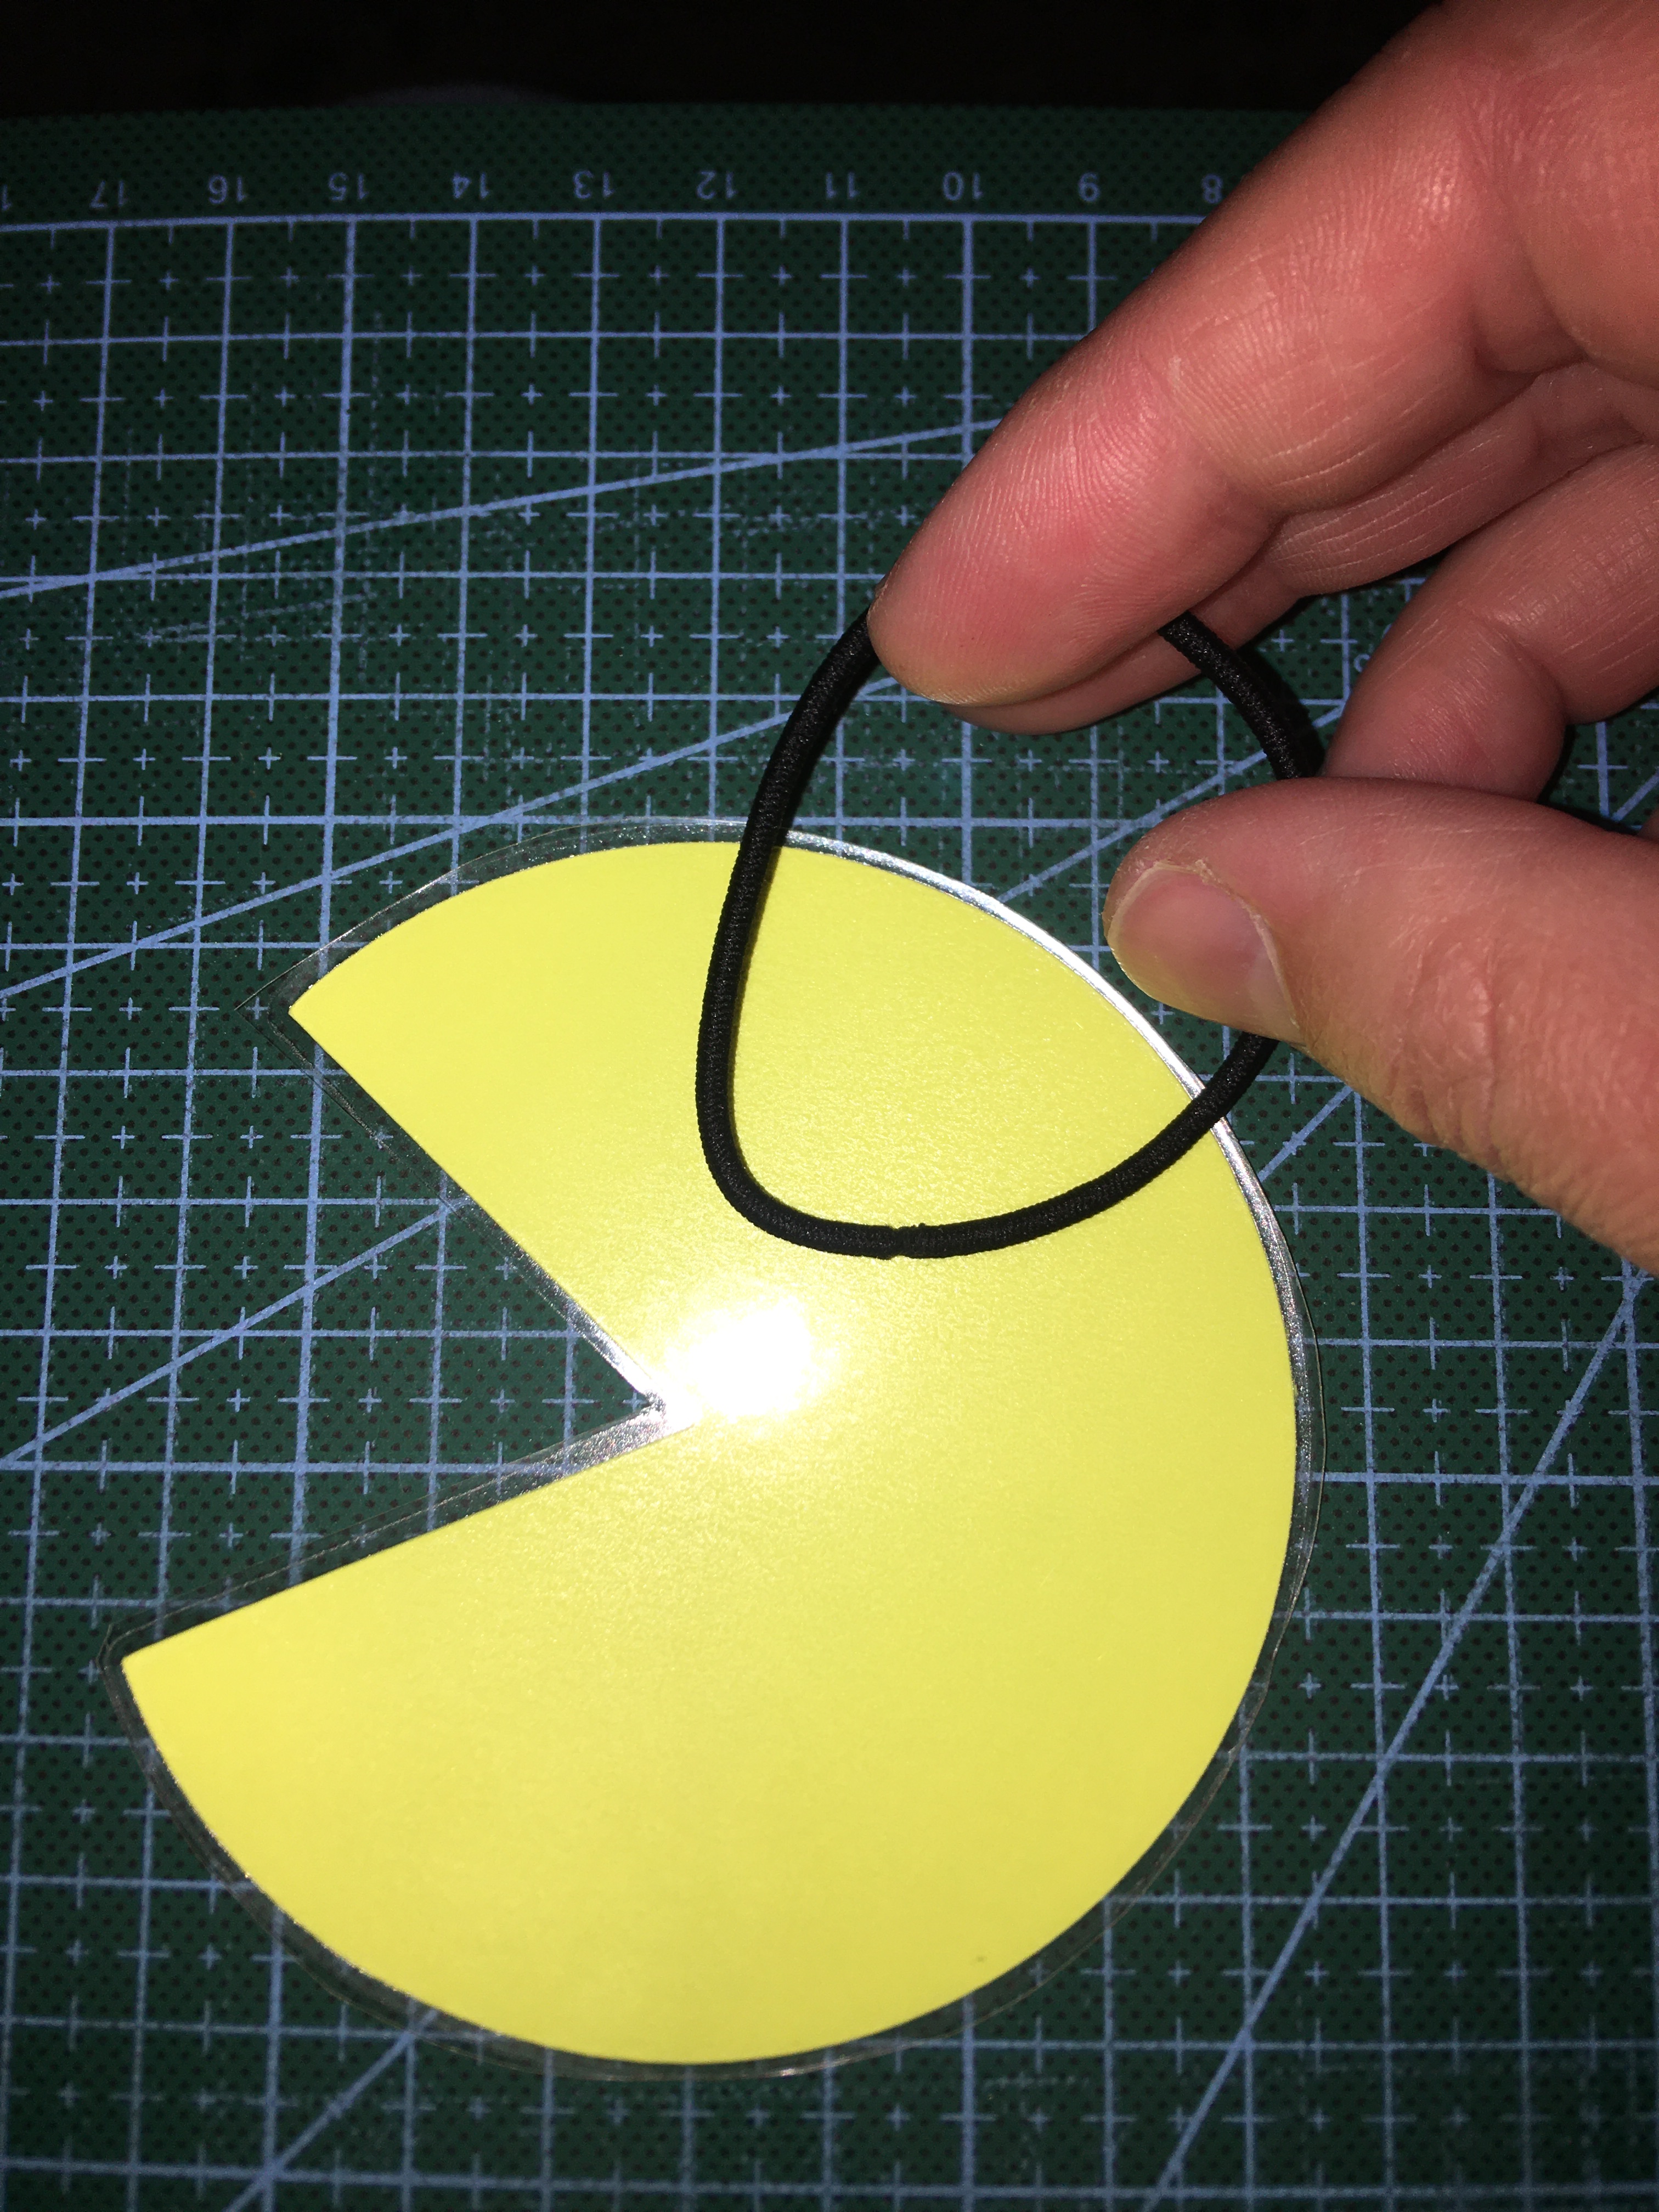
One problem that I’m forever facing at birthday parties and other get togethers where lots of people are around is the abandoned beverage can or bottle. I was able to incorporate my character in one more place by laminating my yellow buddy and attaching elastic to make a Can Label.
There are a few benefits of making these for a character party.
One, all you need is a wet erase pen and names stay legible. And after the party you erase names and you’re ready to go to reuse these beverage labels again in the future.
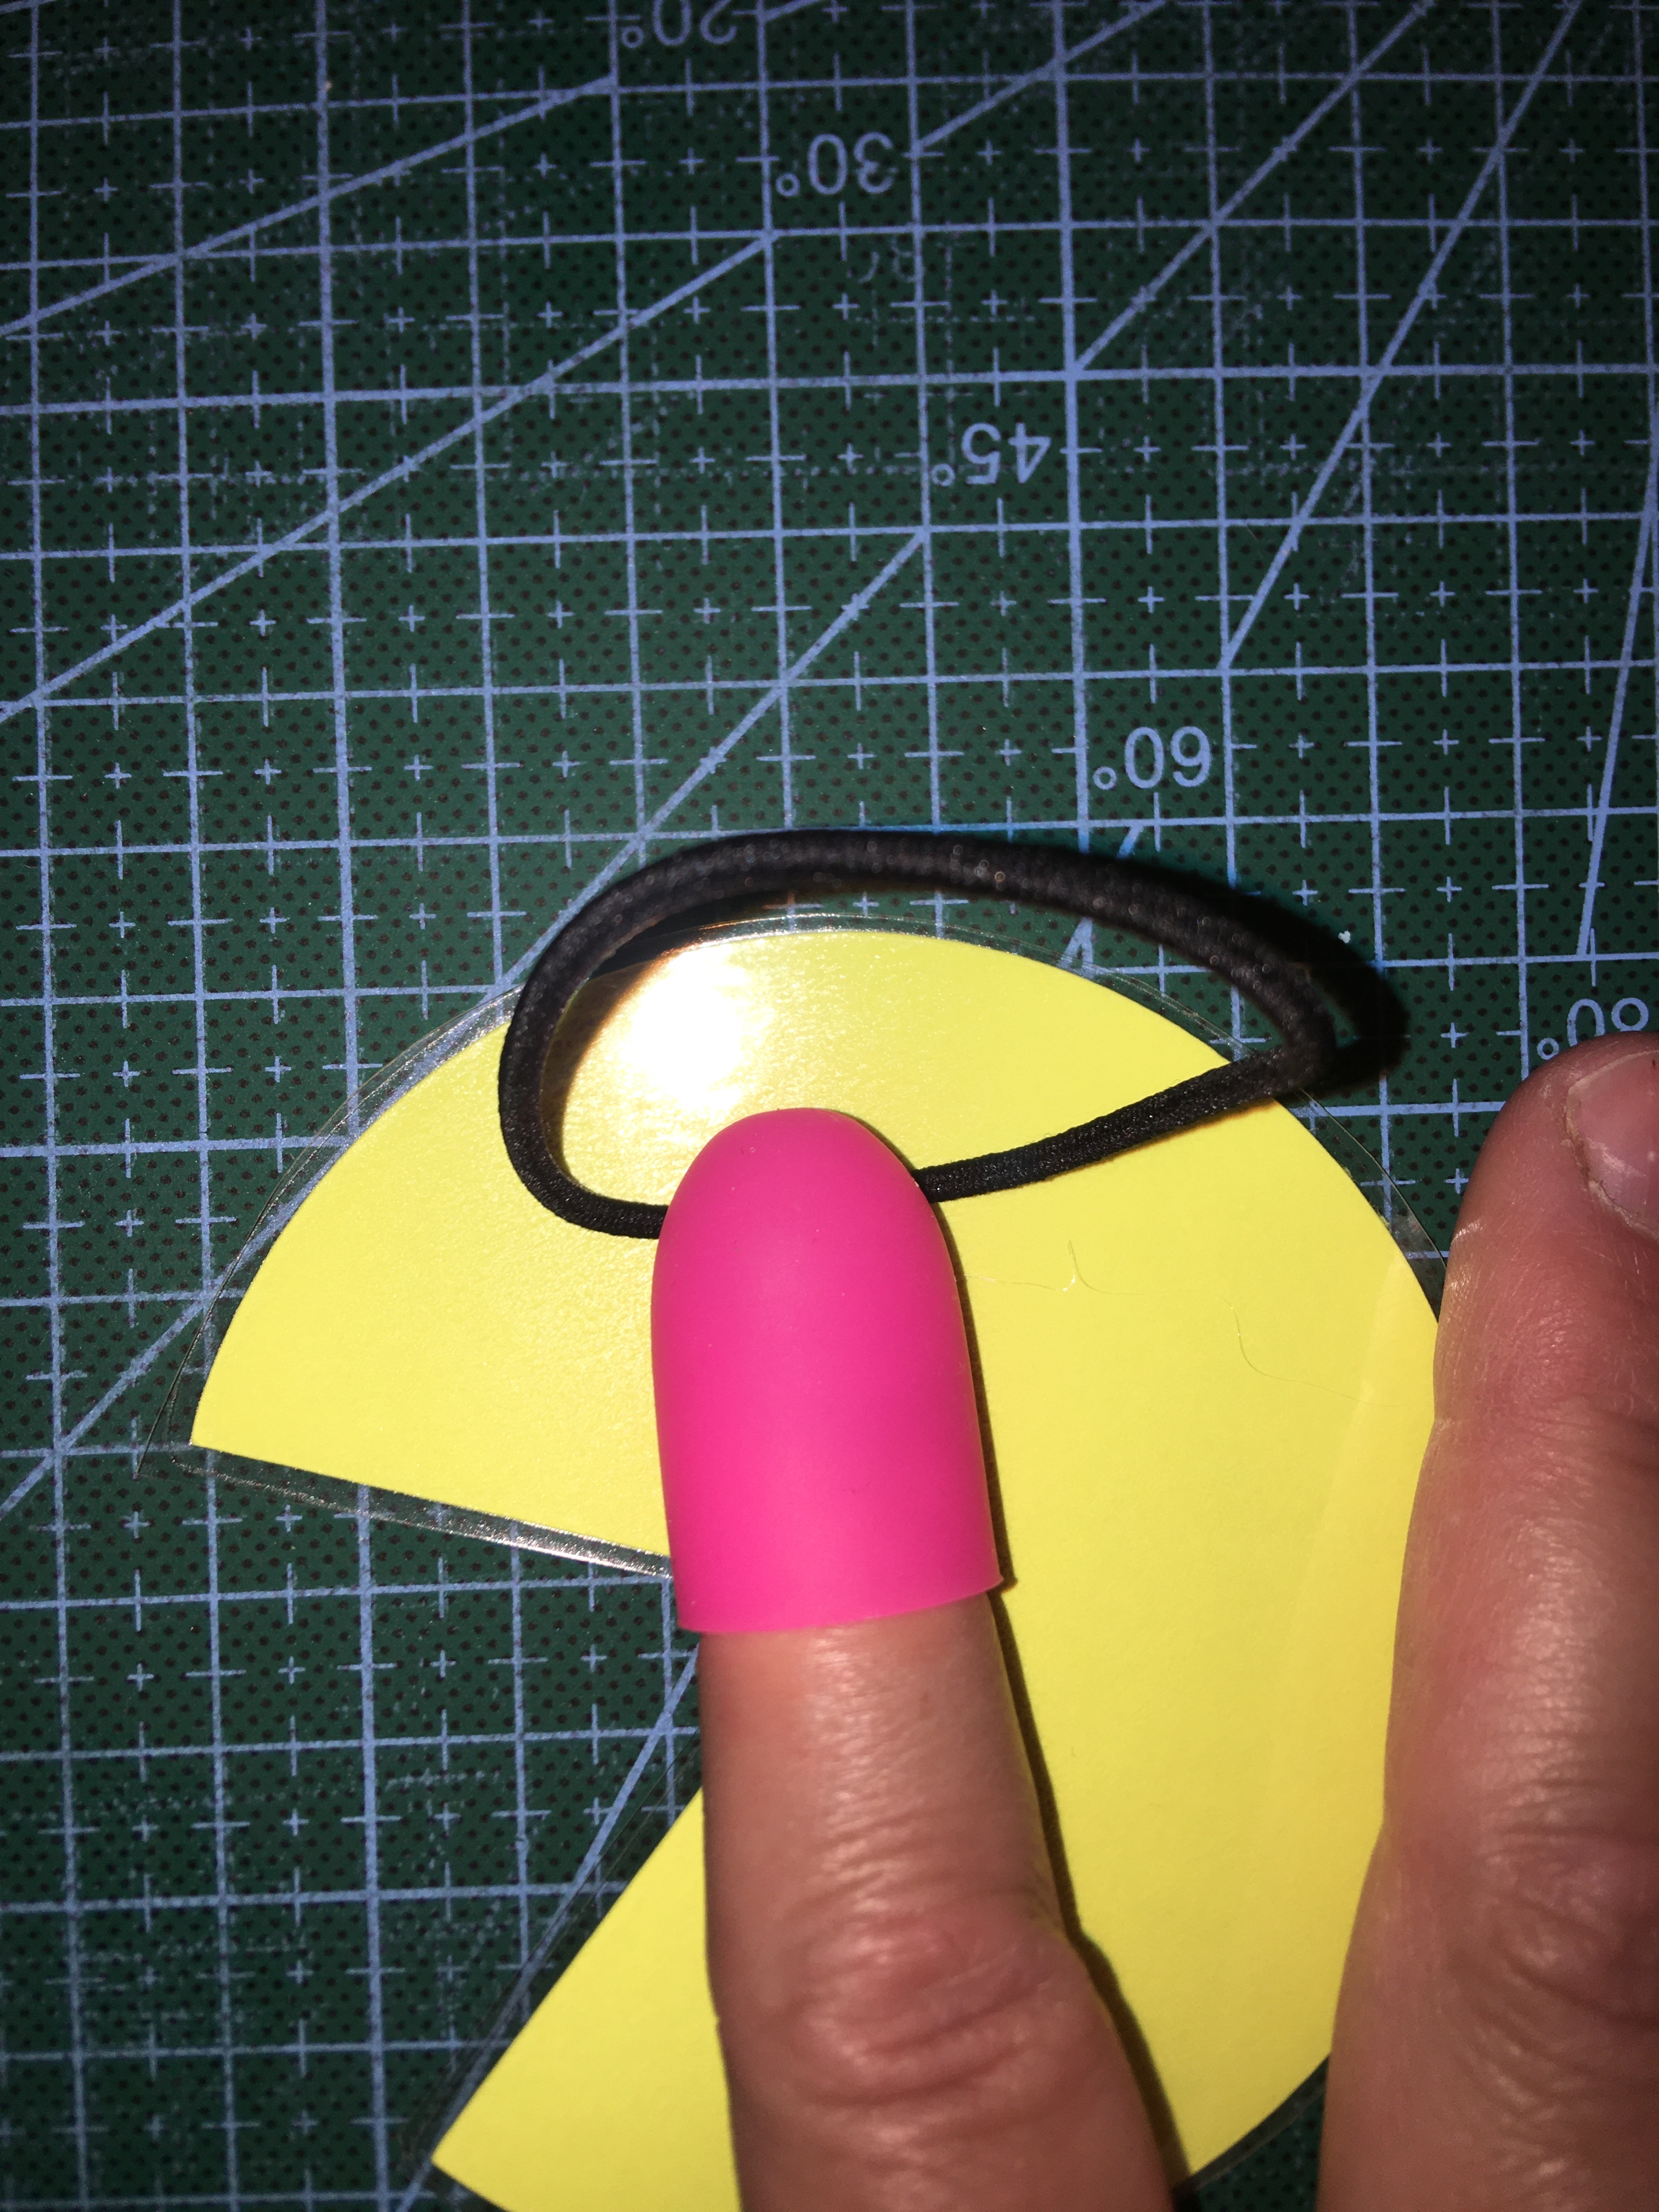
All you have to do is hot glue your hair elastic on (preferably where the seam is, to prevent elastic breakage). With a silicone finger cot, you can flatten your hot glue without burning your fingers.
Two, and possibly the best benefit of all, is if you ever find yourself in a situation where you forgot a hair elastic or yours breaks, this guy is easy to spot in a purse or car floor and your hair needs are over!
This idea will work with any kind of party or event. Bridal shower, cut out a diamond. Baby shower, cut out a bottle.
I know all this information was quick to get through and exciting. I have two more ideas to share with you next week, in addition on tips on how to order a trade mark cake from a bakery who doesn’t make trade mark cakes. So be sure to come back next week for those and a funny story about how this was a birthday party that my boys will NEVER forget!
Can these designs save you time for your next party that you can’t buy decorations for? Get Gift Bag, Level Up, and Arcade Labels here.
Processing…
Success! You're on the list.
Whoops! There was an error and we couldn't process your subscription. Please reload the page and try again.
Lately I’ve been very interested in the Boho style of event designing. A lot of event designers and coordinators tend to gravitate toward the fantasy of rich and fancy feeling decor. There is nothing wrong with that. I gravitate toward that. There’s just something about pretty sparkly things grabbing our attention.
Even when I worked for a decorating company, there was this huge gravitation toward bringing the Boho brides nearer to the glittery and sparkly end of design. I know why there is that nudging toward that direction. But I’m not going to speak ill of other businesses. I just want to take this moment to see and recognize those brides, and other event organizers and celebrants, who want to stay more toward the end of the spectrum of the simplistic and natural look.
This post is for you!
What I want to focus on today are a couple of floral options that are different than what might be proposed to you when you talk with a florist; succulents and preserved wild or garden flowers.
I don’t know if you’ve taken the moment to look at all different colors available in succulents. They are definitely a wide spectrum that diverges from the cactuses and green succulents that your mind naturally gravitates toward.
The best part about succulents, especially if you’re DIY as much as you can for your wedding, is that you can get these in advance and arrange your centerpieces weeks in advance. This is true, even in the middle of winter!
The one thing that you want to pay attention to is the little amount of care that you need to give them. But these are not going to wither or die on you when you look at them funny. They just need to be kept in soil designed for succulents and give them a little water every now and then.
Tip1: Succulents loved being watered from below. So when watering them, place their dish (with drain holes) in a dish of water and give them a few hours to drink as much as they want. They have enough water when you see that the soil on top has been touched by water, not dry to touch.
Tip 2: If you see the petals start to have a wrinkled appearance, they are underwater. Make sure you soak them in a dish of water. It may take a little time. But once the succulents have gotten enough hydration they will look plump again and not wrinkled.
The only other thing that you have to pay attention to is how much light they get. Here in the Pacific Northwest, succulents are not about to get too much sunlight. They can be burnt by full sun, depending on your region. But in the couple weeks that you have them before your event, this is not likely going to be an issue.
Advertisements
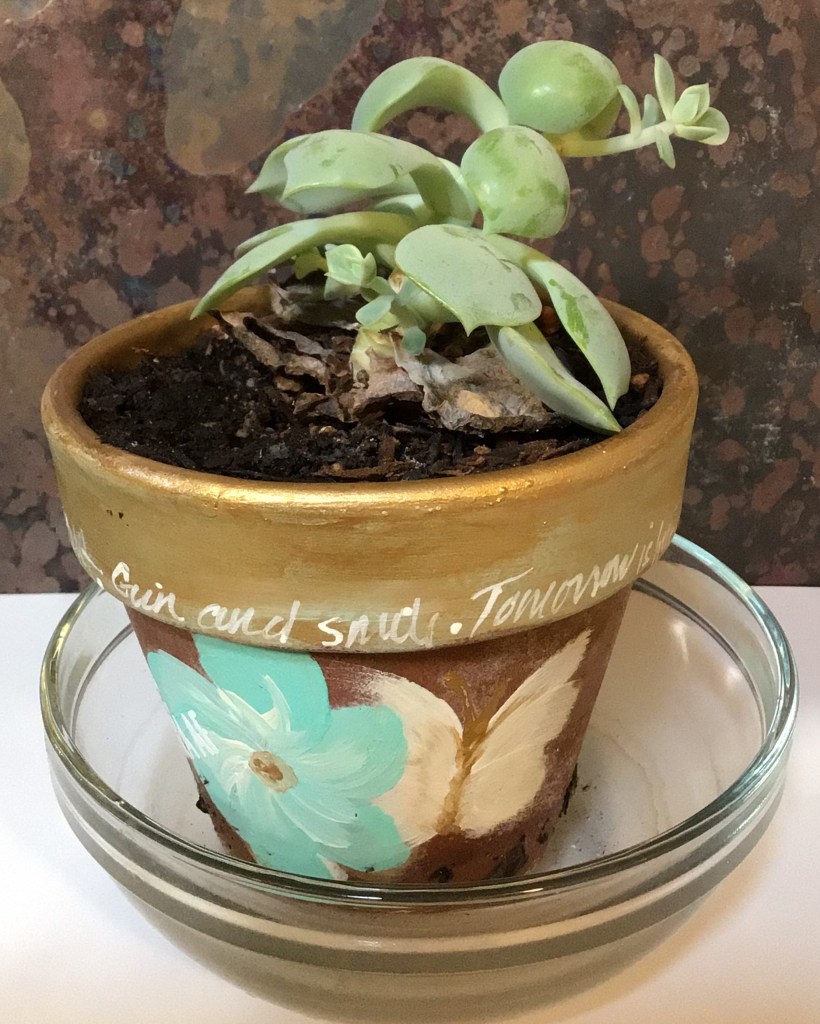
One issue that you might have is when you’re succulent undergoes what looks like a growth spurt.
This example is definitely an exaggeration of what you will see because I’ve had this succulent for well over a year. It started to bolt like this a couple of months after I received it. What happened here is that the window sill (eastward facing) did not receive enough light. So the plant grew to reach more sunlight.
Your succulents will stay small when they have enough light. So if you see this, or you notice that there is some growth that is starting, then you want to find your succelent(s) a sunnier location.
If you catch the growth quick enough, you can trim off the growth, and return your succulent back to the smaller size.
Take a length of dental floss, wrap it around where you want to trim and pull it tight. You can use scissors, but it will apply pressure from two points to cut. If you use thread or floss, you can apply even pressure around the plant. Also if have a cluster flower of a succulent, you can fit the floss in between the petals and top the succulent without damaging the rest of the plant.
The clipping you can then put in a new container with soil and it will propagate for you.
I put the topped succulent in this cup with water with another topped clipping that I’m waiting on soil for. It’s okay to put into water, but you want to get clippings into soil as soon as possible.
If you are saving money by propagating your own succulents from bought succulents, make sure that you give yourself enough time to let new buds grow. It doesn’t happen overnight. If you don’t have enough time, your succulents will look bald and not so happy.
Here is another What-Not-To-Do
This succulent was originally small like the first picture of succulents I showed you in this section. This one also grew to reach for more light. I should have trimmed this when it first started to grow. Had I done that, it would have remained small and cute. Instead, it changed its shape and spread. But what you can learn from this is what it will look like at the spot where you clip back the top your succulent. There is a small bud that you see on the top right. That grew in about two weeks after trimming. On the bottom left you see another bud grow in where I snapped off some of the larger leaves to practice propagation techniques that I’ve seen on FB reels.
If you are interested in looking to propagate succulents for your event, make sure you give yourself enough time to do so. You will want a couple of months to do this DIY. Talk with some local greenhouses with growers who have experience with succulents. Also there are FB groups dedicated to succulents. Join a group or two and learn from those who are succulent whisperers. There is a wealth of good viable information there.
I readily admit that I am not an expert. And there is a world of information available. Just do not take your advice from clips and reels on FB, Tick Tock, or anywhere else. I tried propagating leaves in a plastic bag, through a slit in paper to suspend over water, and directly in water. None of these have worked for me and I am most certainly a novice at propagating succulents. If you’re a novice, I suspect that these reel methods are not going to lead you to success either. (With the leaves, I tried about a dozen and not a single one grew. This is reason why I have little reason to believe these techniques work. Not working the numbers paid off. If I get a success rate of 1 out of 10 attempts, I call it a viable option.)
One other walking away point I want to draw your attention to, is take notice of the terra cotta pot decorations on my pots. These were painted on with acrylic paint and have stayed on the pots over a year later. So it will not flake off anything else. And this is an excellent way of incorporating your event colors. You can create endless possibilities with your design. Whether you go with feather like swirls, dots to simulate lace, stripes, or even using a stencil from any store’s craft department. You can certainly dress up your terra cotta to fit the look you are going for.
I’ve lost count of how many events that I decorated for where I would take home flowers after an event because there was no second life for the floral arrangements after a wedding.
Don’t get me wrong. I LOVED those events because I had pretty flowers to take home and enjoy for a week or two. That is definitely an occupation perk that I’ve enjoyed.
However, at the same time, it has always saddened me a little because I have always wanted people to have more bang for their buck when they are spending good money on a wedding or other event.
So here is where we join two very important passions of mine!
I breathe creativity and decorating. But I also love working in my garden and learning all the old skills of creating home supplements, natural cleaners, and especially new ways of putting food on my table.
The very day that I learned about making a Chive Blossom Vinaigretteis the very same day that I made it.
This is Day One of my Vinaigrette:
My Four year old and I did this together for the very first time and as soon as I saw how this jar looked I immediately thought, “How Beautiful!”
And this was the first, on many ideas that I had:
You can go with sentiments or go all the way with the couple’s monogram, name and wedding date, or even line art that goes with your over all Boho decor.
What I absolutely LOVE about this inspiration is that it’s simple but has so much LIFE after the wedding or event.
For example, this Chive Blossom Vinaigrette will become a salad dressing, meat marinade, or other meal flavor provider in as little as 3 weeks. The total cost for this is just your jar, the chive blossoms, and food vinegar. When you’re looking for cost saving centerpieces, you seriously can’t beat this for bang for your buck!
To do this idea, you will definitely have this be your day of preparation, so have a few hands on deck. You will want to clip your edible flowers, rinse them, and place them in the jars before adding the vinegar.
The reason why I say do this on the day of is because of the process needed to properly turn this into a proper dressing or marinade. It is shelf stable during the whole process, but it needs to be kept in a dark cool place for the 3 weeks of processing. You could also use the jars at the end of the three weeks, when the vinegar takes on a fuchsia/purple appearance. But you want to try to limit the heat and light exposure no matter if you do it at the beginning or end of processing.
Tip 1: This needs to be shaken once a day for the entirety of the three weeks. So you will have a cleaner look at the beginning of the process. At the end of the process, you will have some floating pieces from the flowers. That just naturally happens with daily agitation.
Tip 2: At the end of the 3 weeks, you will need to filter this vinaigrette through a cheese cloth to remove all debris (and rebottle) before you use this as a dressing/marinade.
Maybe puple is not the color that goes well with your Boho design. Here is a list of some other edible flowers that can be used in making your own version of a different vinaigrette. Or you can just put the blossoms of these flowers or others into a jar filled with water.
Nasturtiums
Pansies
Violets
Hostas
Borage
Calendula
French Marigolds
Chrysanthemums
Carnations
Hollyhocks
Sunflowers
Cornflowers
Gladioli
Honeysuckle
Dianthus
Antirrhinum
Tulips
Roses
Lavender
Pea Flowers
Broad Bean Flowers
Onion/Chive Flowers
Brassica Flower Heads
Pak Choi Flowers
Squash Flowers
Dandelions
Daisies
Chamomile Flowers
Red & White Clover Flowers
Chickweed Flowers
WARNING: Make sure that you only use flowers that have NOT had pesticides or herbicides used on them. Whatever has been applied to flowers will enter your body if you eat them or any extract that you make from them.
Advertisements
Flowers as herbs and seasoning have different flavors that they impart. Some have a peppery note to them. The chives that I grow are a garlic chive, so it imparts a garlic flavor without having to fuss with cloves of garlic. I’ve also started working with Lemon Balm (a member of the mint family) which imparts a lemon flavor. So I could have added tiny Lemon Balm leaves in with the chive blossoms. Which now that I think about it, I’m definitely going to add that to my vinaigrette as soon as I post this!
Another thing to keep in mind is that for thousands of years edible flowers and plant leaves have been used for natural medicine. For example, Lemon Balm is great for combating the viruses behind the common cold. So you can give your body the things it needs to keep healthy while adding flavor to your food.
If making a vinaigrette is not something you will use after the wedding (or other event), consider looking into making your own chemical free cleaner. For example, you can still use this mason jar idea and make a kitchen cleaner with lemon or orange slices and peels.
If you’re not looking for a natural cleaner, than even using berries and mint, basil or other leaves in water, is a great of washing your produce before you eat it while borrowing it for a few hours for your event.
There is one more option for Fall and Winter Events when most of the edible flowers are not in season. You can make Pine Syrup or Spruce Tip Syrup. I found this type of syrup interesting because I have spruce widely available around where I live and real Maple Syrup is a luxury on my family’s budget. This can be a pretty centerpiece as well because you use the new growth tips on a spruce tree or pine cones for the Pine Syrup. I’m sure that you can imagine the possibilities for all your holiday parties with this one!
Decorating the Mason Jars
The simplicity of these jars is beautiful all on their own. But maybe you want to dress them up a touch. What can you do to add a little panache?
Paint the jar ring (White, Gold, or other event color)
Apply glitter to the jar ring (after finished spray with a clear coat of paint to keep from leaving a glitter trail)
Use squares of pattern, texture, or fancy cloth on top (held in place by screwing the ring down onto the jar over the fabric)
Decorate the jar itself
Use the jar as a base for a taper candle (with candle holder) to raise the level of the candle above other centerpiece elements
Put your table number on top of the jar
I hope you’re just as excited about these ideas as I am. These are definitely something fresh for existing wedding and party themes. Be free to experiment with using some of your food preparation and preserving techniques the next time you are decorating for your next event!
Files Used In This Project
As a special treat I have a surprise for you! Visit my store and check out Love. Be sure to hang around and see what else is new. Every Monday at least one new SVG is added!
Processing…
Success! You're on the list.
Whoops! There was an error and we couldn't process your subscription. Please reload the page and try again.
There are times in life where you always ask yourself, “What can I get them?” We’ve all been there, especially if you’re the primary gift giver in your family. There are always a few different ideas that come to mind. But then the question becomes, “Will they like it? Or do I just like it?”
When I graduated High School, the one gift that I didn’t appreciate at the time was from my maternal grandfather. Granted it was probably the first time that he gifted a gift alone without my grandma’s thoughts. And I can actually smile at the memory now, because I understand his thinking. But it wasn’t the best graduation gift. I was gifted a set of pink towels.
Yes, you read that right.
I can smile now because from the perspective of a well over retirement age widowed man, I’m sure that towels were a practical gift that he thought he nailed. Everyone needs towels. It’s a necessity. And with college coming up, a graduate is going to need towels. And now that I think about it, maybe my grandma would have approved of the gift.This set of grandparents was very practical at gift giving. There had been a childhood Christmas where I was gifted underclothes. That was definitely NOT what a child expects or wants to open up on Christmas, but it was definitely practical and a necessity at that Christmas.
Please don’t misunderstand me. I’m not mentioning these gifts to say that they were horrible. Neither am I saying, if anyone is thinking of gifting a graduate towels, that you should reconsider. I am mentioning this because what may seem logical, well thought out, and well meaning in your intentions and thoughts, it might just be seen in a different light by the recipient.
It’s this kind of disappointment, written all over the face of the recipient, that prompted and bolstered sales of gift cards for somewhere around two decades now. Also, there’s the fact that some people are just difficult to buy for. Thus the thought of, it’s just better to give a gift card or cash (or some generations prefer gifting checks). You express your desire to love on someone and they get to pick out exactly what is going to make them happy.
Or let’s be honest. There are also times that life happens and you didn’t make it out to the store or missed buying with enough shipping times (or as we’re seeing unusual delays in shipments). What do you do now?
How do you gift cards or cash???
That is the number one reason why I drag my feet so much in gifting by cash or gift card. I love giving meaningful gifts. I love finding a gift that represents a small part of me, but screams that other person’s name. What am I going to do with cash or gift card, slap it in a card and call it day? That’s just not me.
So, here are two ideas that I’ve used.
Explosion Box
This one is actually my favorite right now. Growing up I was always taking pictures. I still have those pictures. I have inherited pictures. And I bless the day that digital cameras were created, because I could take pictures to my heart’s content, see the shots without having to wait for film to be developed and printed, and capture moments that I can relive forever.
If you are like me, love pictures, or you are a memorabilia collector this option is absolutely perfect for you!
There are many options to choose from. You can have many box arms that unfurl for you. You can have a single layer or many layers of box within boxes. There are many “accessories” you can find that comes with different boxes.
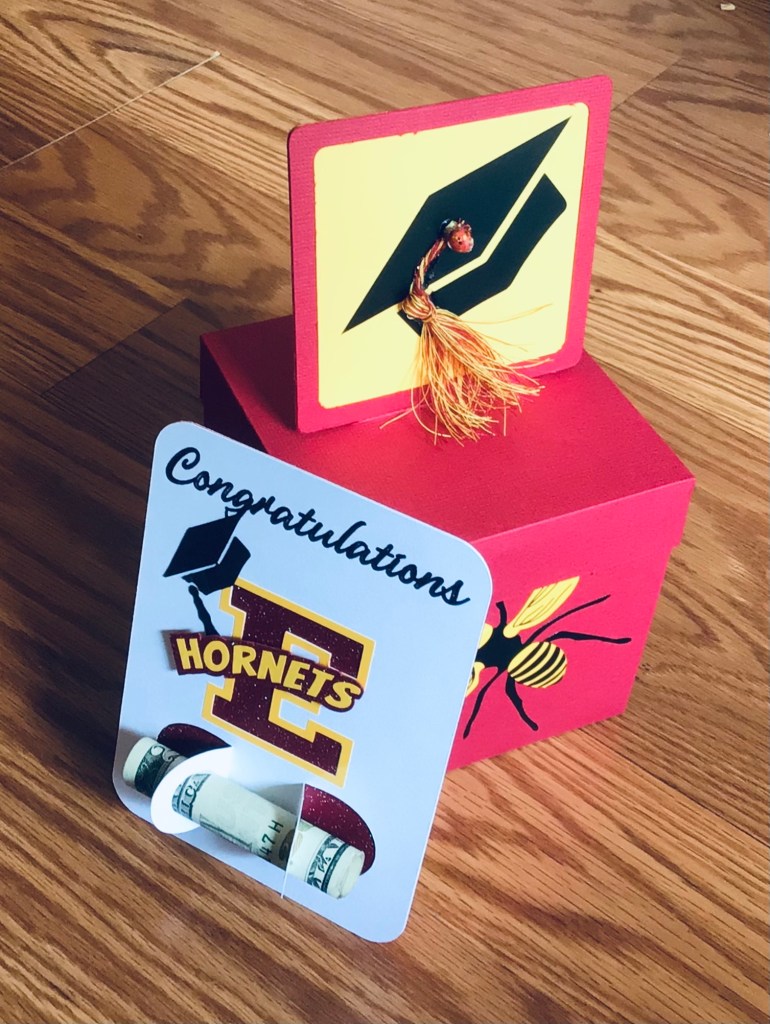
By accessories, I mean what is included in the base design of the box. This year, my graduation boxes feature Polaroid picture frames. Last year my graduation boxes were on the life stages of butterflies. (The first layer was designed with caterpillar shapes. The second layer was all about the chrysalises. The third layer was designed after the butterfly.) Also, this year I’ve focused on the school monogram, school colors, and mascot. You can have just picture frames in the boxes. Or you can have holders that you can store ticket stubs, gift cards, and folded notes. Think memory box and different organizational devices to keep these memories organized.
That is an explosion Box. It is completely customizable. And even when boxes are cut from the same file, the variety of materials available makes them all unique. Even if a few people bought the same explosion box for a person, it’s not like you bought them the same card. The uniqueness of the box is what you put in it. Your shared memories with the recipient are going to be different than the shared memories of the recipient with a different gifter of the same gift. And then the fun begins, because you can compare all the different things that you’ve shared with the same person!
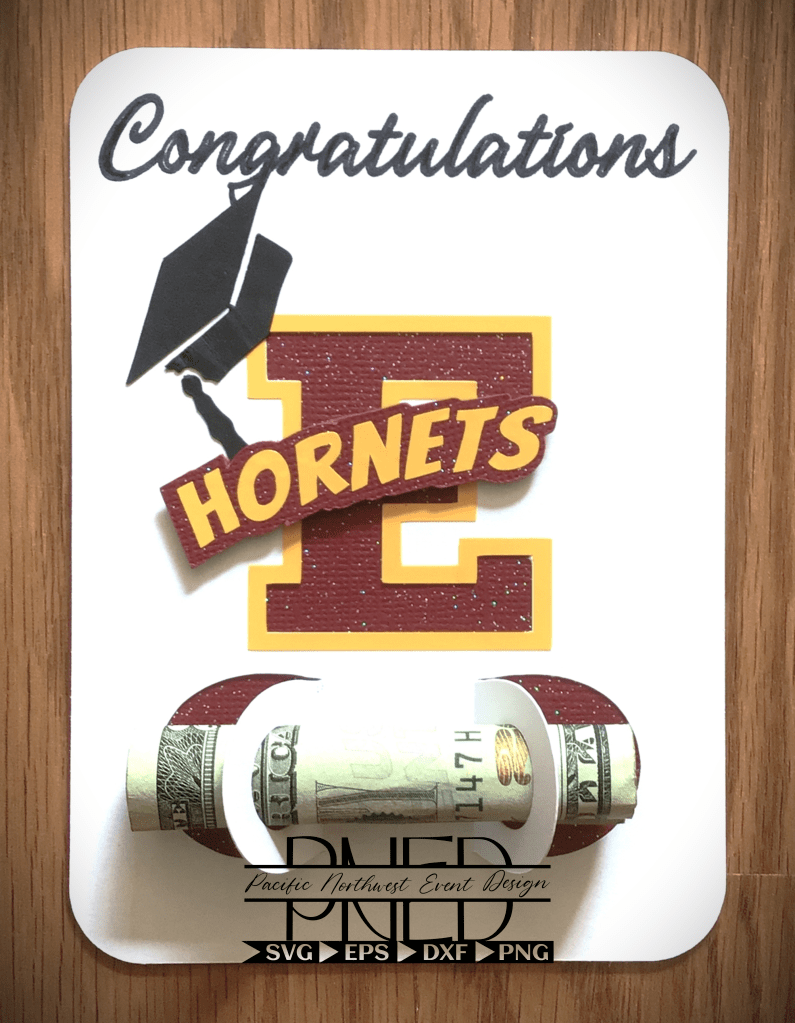
Money Card
This item is the newest fad in giving of cash. I’ve only recently become introduced with them, but I’m sure that they’ve been made for a year or two.
At least, this is the newest rendition of this form of giving money. I’ve seen enough chatter in the crafting groups that money cards are not readily available in certain global regions. And in those areas, which do not have designs reflecting their cultures, they will use a beautified envelope.
There are two different versions of the Money Card that I see right now. One is using a plastic shell inside a card stock holder. Imagine the plastic shell used on your favorite tube of of Chap Stick that’s sealed in between two thin pieces of card board. That is one version of the Money Card. This one is great, because if you want to secure the cash, so it doesn’t slip out in your purse when you pull the cash card out, this is what you’re looking for.
Another version of the Money Card is where there are two tabs with circles. You roll up the cash that you are given and you slide it through the holes in the tabs of the Cash Card. This version is great, and my preferred one, because once the cash is given, the card can then be used again. For example, the Money card can have the tabs flattened and then be used as a book mark.
I love books, so yes I went for second use as a book mark.
This second version is not destroyed to remove the plastic shell holding the money. So it also makes it have the added bonus of being saved as a memory. It’s not that often that people receive notes or letters from loved ones. So here’s one option where a grandparent, aunt or uncle can leave a hand written note for their graduate. And having lost several noteworthy people in my life I can finally tell you from experience that having a hand written letter telling you that your loved one is proud of you and that they love you is something that will NEVER go out of style. It’s something that you pull out and relive the love of that person.
So please don’t underestimate the power of a cash gift that carries your handwriting and love with congratulations. You may think that you will be around forever. But there really is a day that someone will miss you. And with the increase of stories of students dying to suicide or from accidents caused by other, maybe your note of love is something they can tangibly hold. Maybe a note from you keeps your loved one from escaping to drugs or running away and living on the street. Never ever ever underestimate the moments in life where you can lift someone up and tell them just how proud you are of them.
I wish you could see me right now, while I’m typing. If you are crying you’re in good company. I can’t keep the tears out of my eyes. I know my graduates are in secure families, but my heart is breaking in this moment for those graduates that are going through a rough moment that no one knows about. Yes, I have a mama’s heart and I wish I could give those graduates a great big hug, look them in the eyes, and tell them that they matter. They have purpose. The world needs them. And they can make it past this moment.
Please forgive that rabbit trail. I try not to pass up moments that matter. And I never know who reads this blog. But if you needed that last paragraph, know that it was meant just for you.
Money Leis
This was a thing that started back when I graduated High School, at least in my area. I first noticed it was with the year that graduated with me. And I’ll be honest, I so wanted one of those. So thank you Pacific Islander families who introduced this graduation gift to me all those years ago.
This is not my image. Nor do I own the rights to it. This is an image from Pinterest.ca that was found in a google search that was free to share and use. If you own this picture, please reach out to me and I will give you proper credit here.
I’m sorry that I’m not able to instruct you how to make this item. But there are plenty of videos on YouTube that can walk you through those steps. And know that one of these days, I will learn how to make them myself. In fact, I’ll go ahead and put it on my to-learn list for this year. That way I can come back for 2023 Graduation season and have some input on tips and what steps to avoid.
Money Arrangements
Very similar to the Money Lei is the Money Arrangements. I’ve seen many crafters fold money, like the Money Lei, to make flowers and topiaries. I’ve also seen people roll up bills. These rolled bills are then arranged into different shapes. You could use the rolls to make a graduation cap, graduation cake, or just about anything you have the imagination for.
If you’re interested in making making money topiaries, I did find a pictorial tutorial that looks very user friendly for those who might describe themselves as craft challenged. Here is a link to Sugar Bee Crafts. As of the writing of this post, I have not had contact with this craft blogger. Nor do I receive any compensation for this mention. I bring this to you, to be of service and help you come up with new ideas for your gift giving.
Now that I’ve given you some ideas on meaningful ways of gifting cash to your graduate, here is a little tutorial on how to make a quick tassel to dress up any graduation craft.
How To Make A Tassel
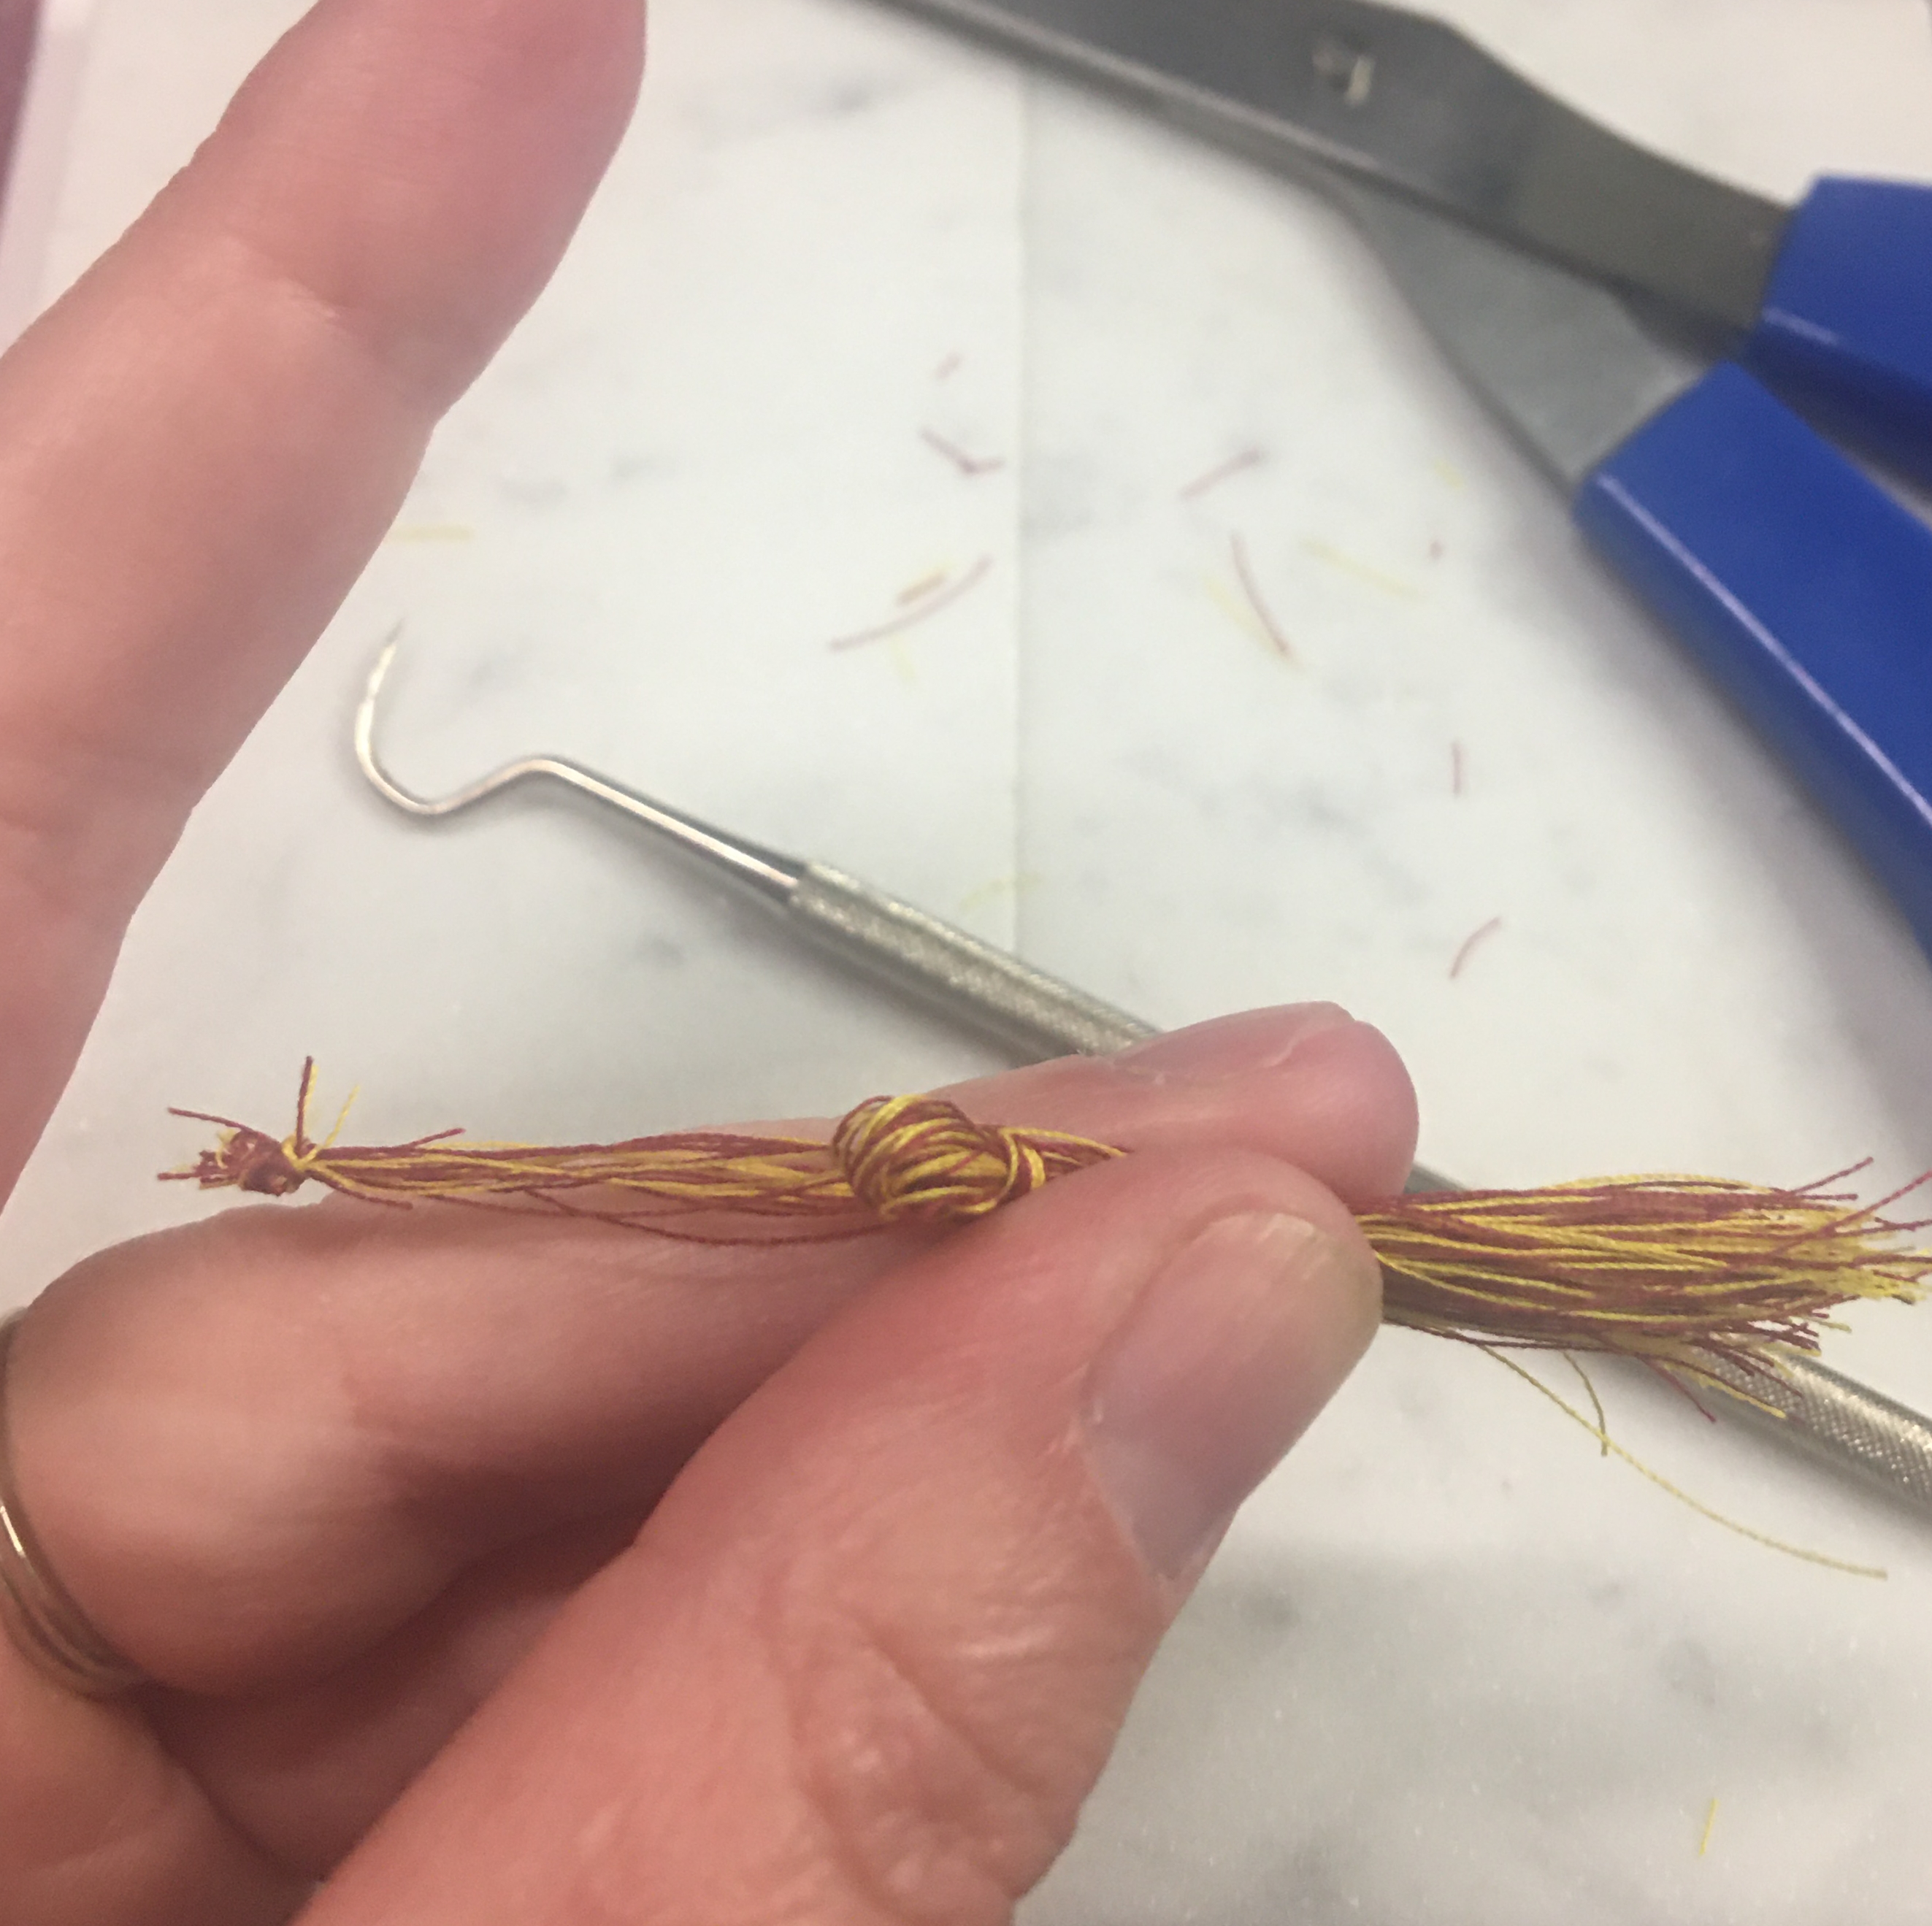
My collection of Embroidery Floss was not locatable when I was making my nephew’s graduation box. So I did the next best thing. I used my sewing thread that was in his school colors. And this was absolutely perfect, because I needed a small tassel and sewing thread gave a more sleek appearance that was proportional to the final product.
What I used:
Two different colored spools of thread
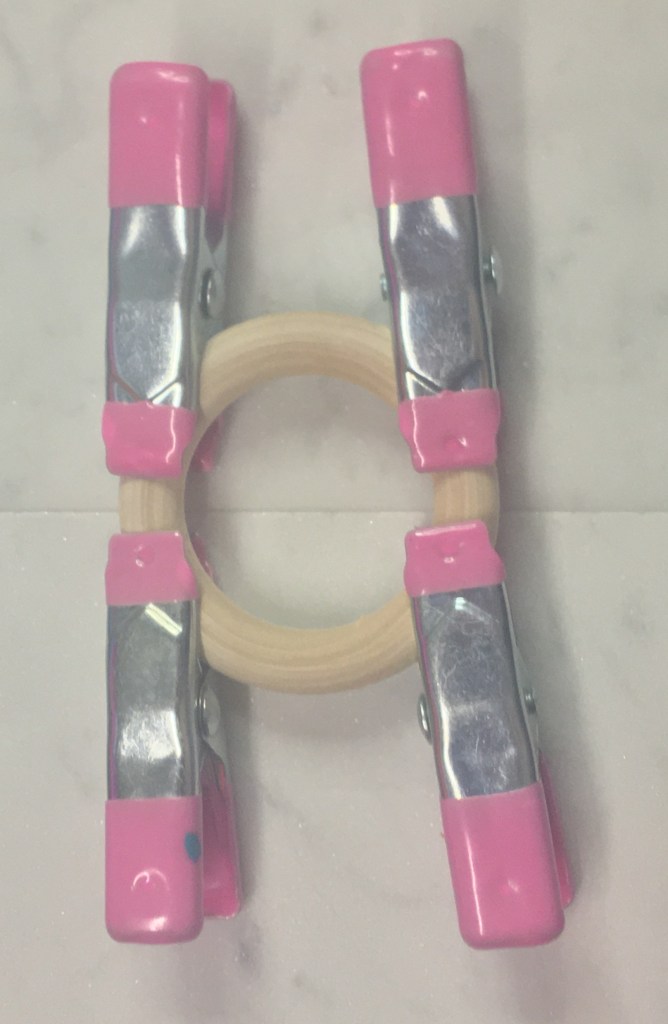
(1) 2 inch wooden ring
(4) crafting clamps
Scissors
Hot glue gun and glue for application
Place the clamps on your ring so that you can keep your thread centrally located.
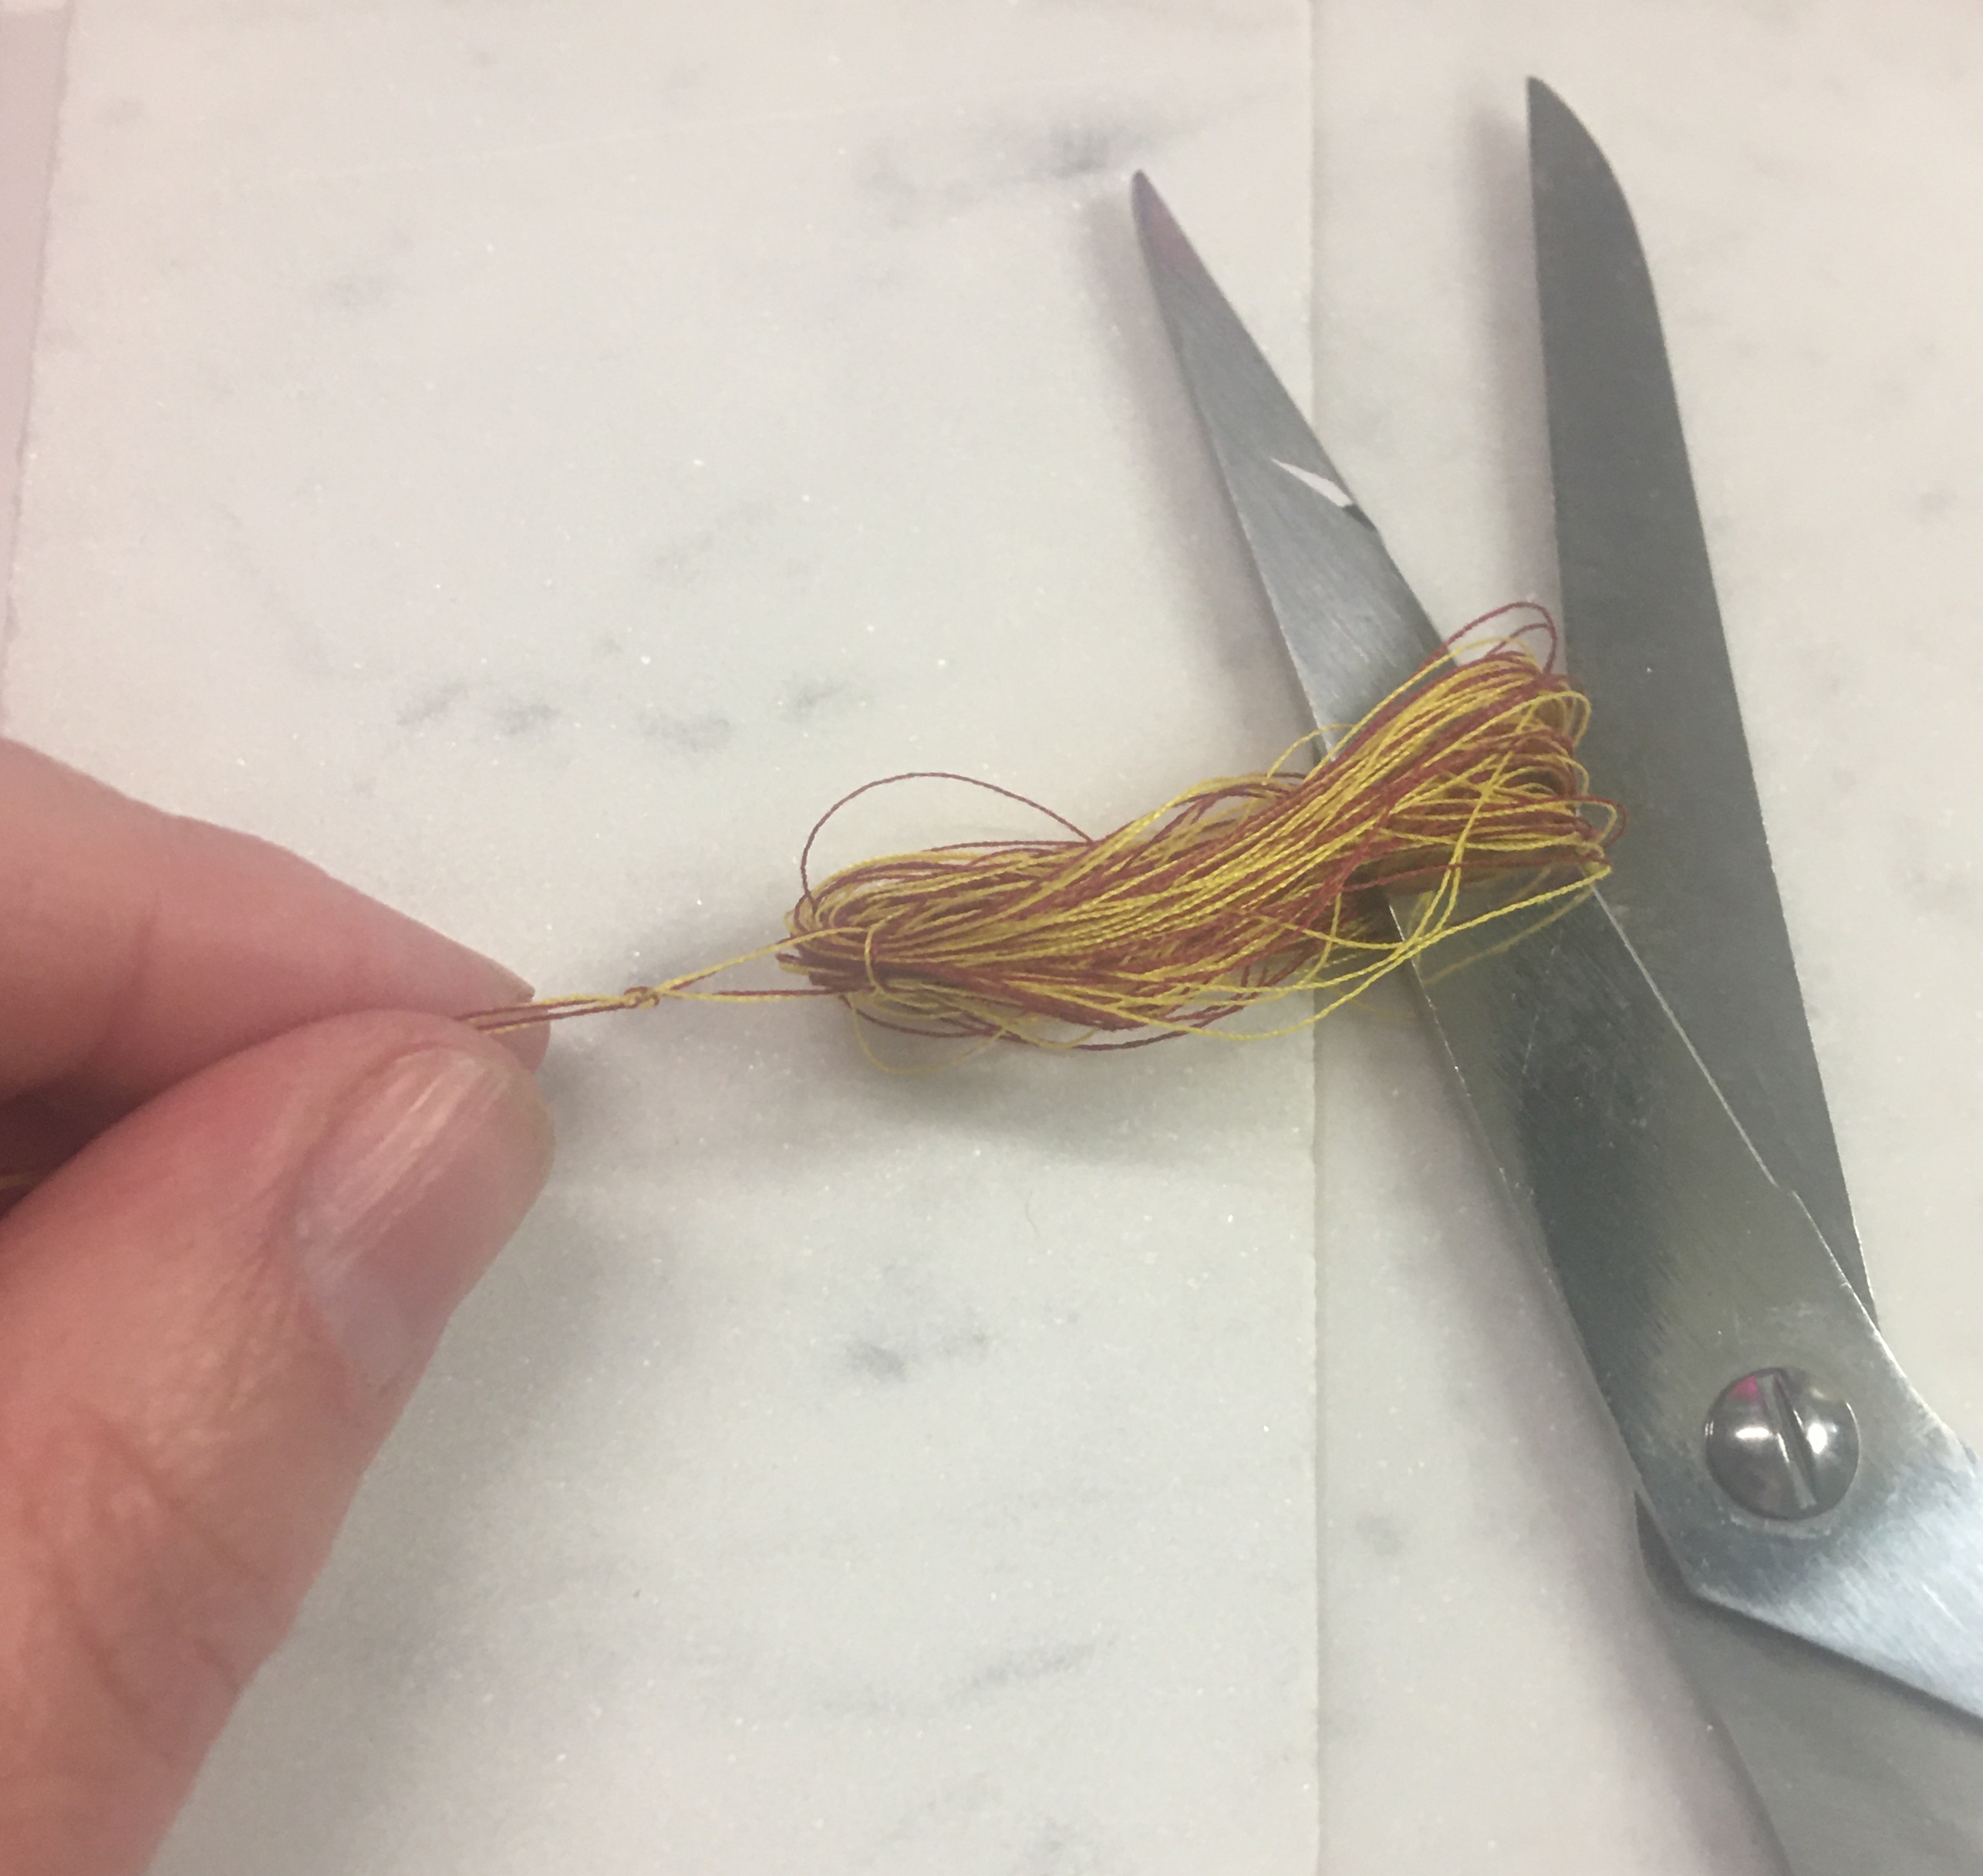
Take the ends of your two threads, leave a tail at the top of the ring, and start wrapping your thread around the ring.
Once you’ve reached your desired thickness, cut your finishing tail on the same side of the ring.
(Left Top) Remove the clamps, slide the thread off the ring, and hold one side of the loop. Make sure to keep the other side open.
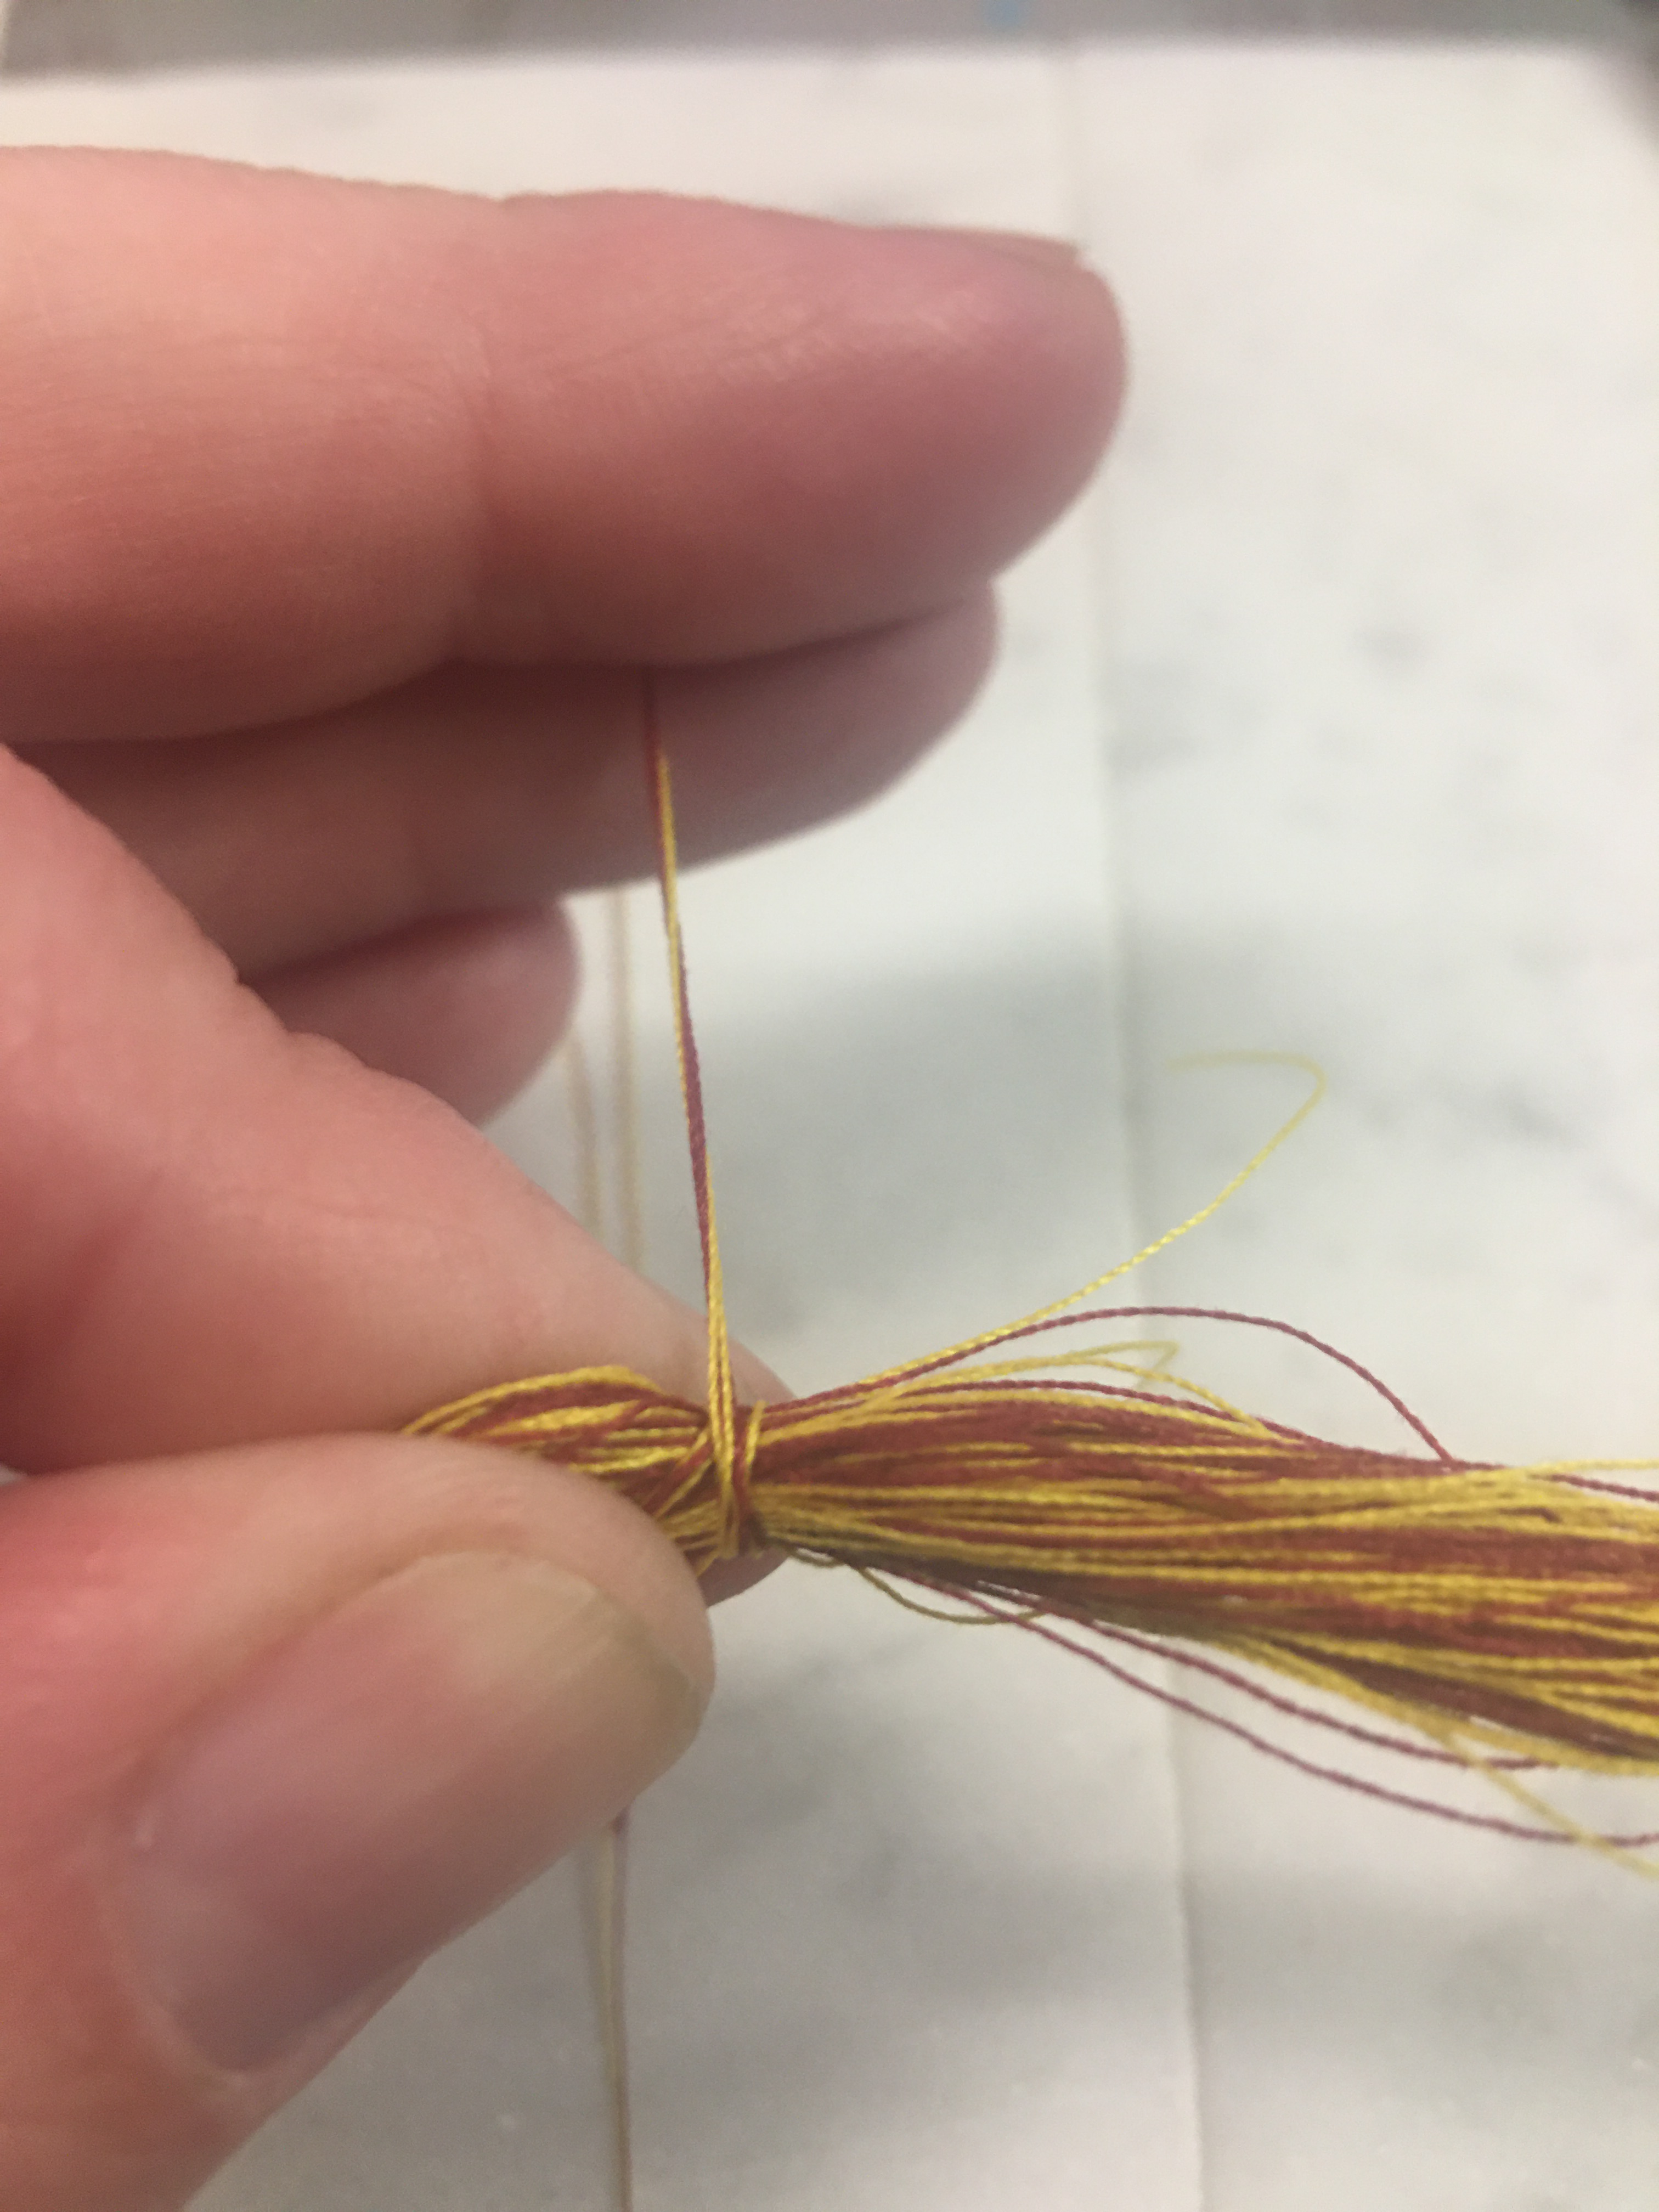
(Left Middle) Wrap your tails around the open end of the loop and carefully tie your tails in a knot. If you pull too tight, you will distort the lengths of the thread. When this happens, keep calm and finish the knot. We can fix this when we trim the bottom of the tassel.
(Left Lower) Place your scissors in the center of the loop and pull them to the opposite side, away from the knotted end.
(Right) Take both tails and wrap them around the tassel head, to desired band thickness.
(Bottom Left) Tie the tails with a couple of the tassel strands. This will become the back of your tassel that you will glue to your project.
The tassel strands that you tied to the tails (and the tails) will all be pulled up to the top of the tassel to form the cord. You can choose to braid these. I opted to coil the threads by twisting them. (I knotted the end to just maintain order, especially for gluing.)
Trim the bottom of the tassel to make all ends even.
(Bottom Right) Glue your tassel to your project.
Further description of how I applied the tassel on my project:
On my nephew’s explosion box, I marked with a pen where I wanted to add my thread tassel. I started by hot gluing the tassel body in position. With the body in position I twisted the tails/cord, applied a thin row of glue on the pen line and laid the cord. Once the glue cooled, I trimmed off the knot and too long bits of thread. These ends I then hid under a colored foam ball that I stole from a silk flower arrangement.
Tip: The thinner you can keep your glue, the more it will hide. So try to be stingy on the glue. There will be more than enough glue to hold the tassel in place.
Tip 2: If you have a small crochet or tatting hook, you can make a seamless tassel by pulling the tails down into the center of the tassel and trimming off any length longer than the rest of the tassel.
I hope that you enjoyed these ideas and you find that you have a couple more options for gift giving this graduation season!
Files that were used for this post
My 2022 Graduation Collection has options for a general Explosion Box and Money Card. These include the monograms where you can custom make your graduation items with the same letters that I use.
I also have options for premade school boxes and cards for my local schools.
If you would like a specialized design for your school and mascot, feel free to email me to receive a time estimate of when that file goes live. You can reach me at info@pacificnorthwesteventdesign.com
Processing…
Success! You're on the list.
Whoops! There was an error and we couldn't process your subscription. Please reload the page and try again.
It doesn’t matter how many years you’ve been crafting and DIYing. You will fail. I fail.
What you do with failure determines what your future will look like. What your end product will look like. You can finish in a failure. Or you can take an option and end on a different note.
In fact, here is my most recent fail and how I pulled out of it.
Two weeks ago I started working on a Teacher Appreciation gift for my son’s pre-school teacher. First, let me just say that it’s difficult coming up with a meaningful gift for a teacher that they don’t get a million of and you’re just one of those parents who giving a gift card just doesn’t feel personalized enough.
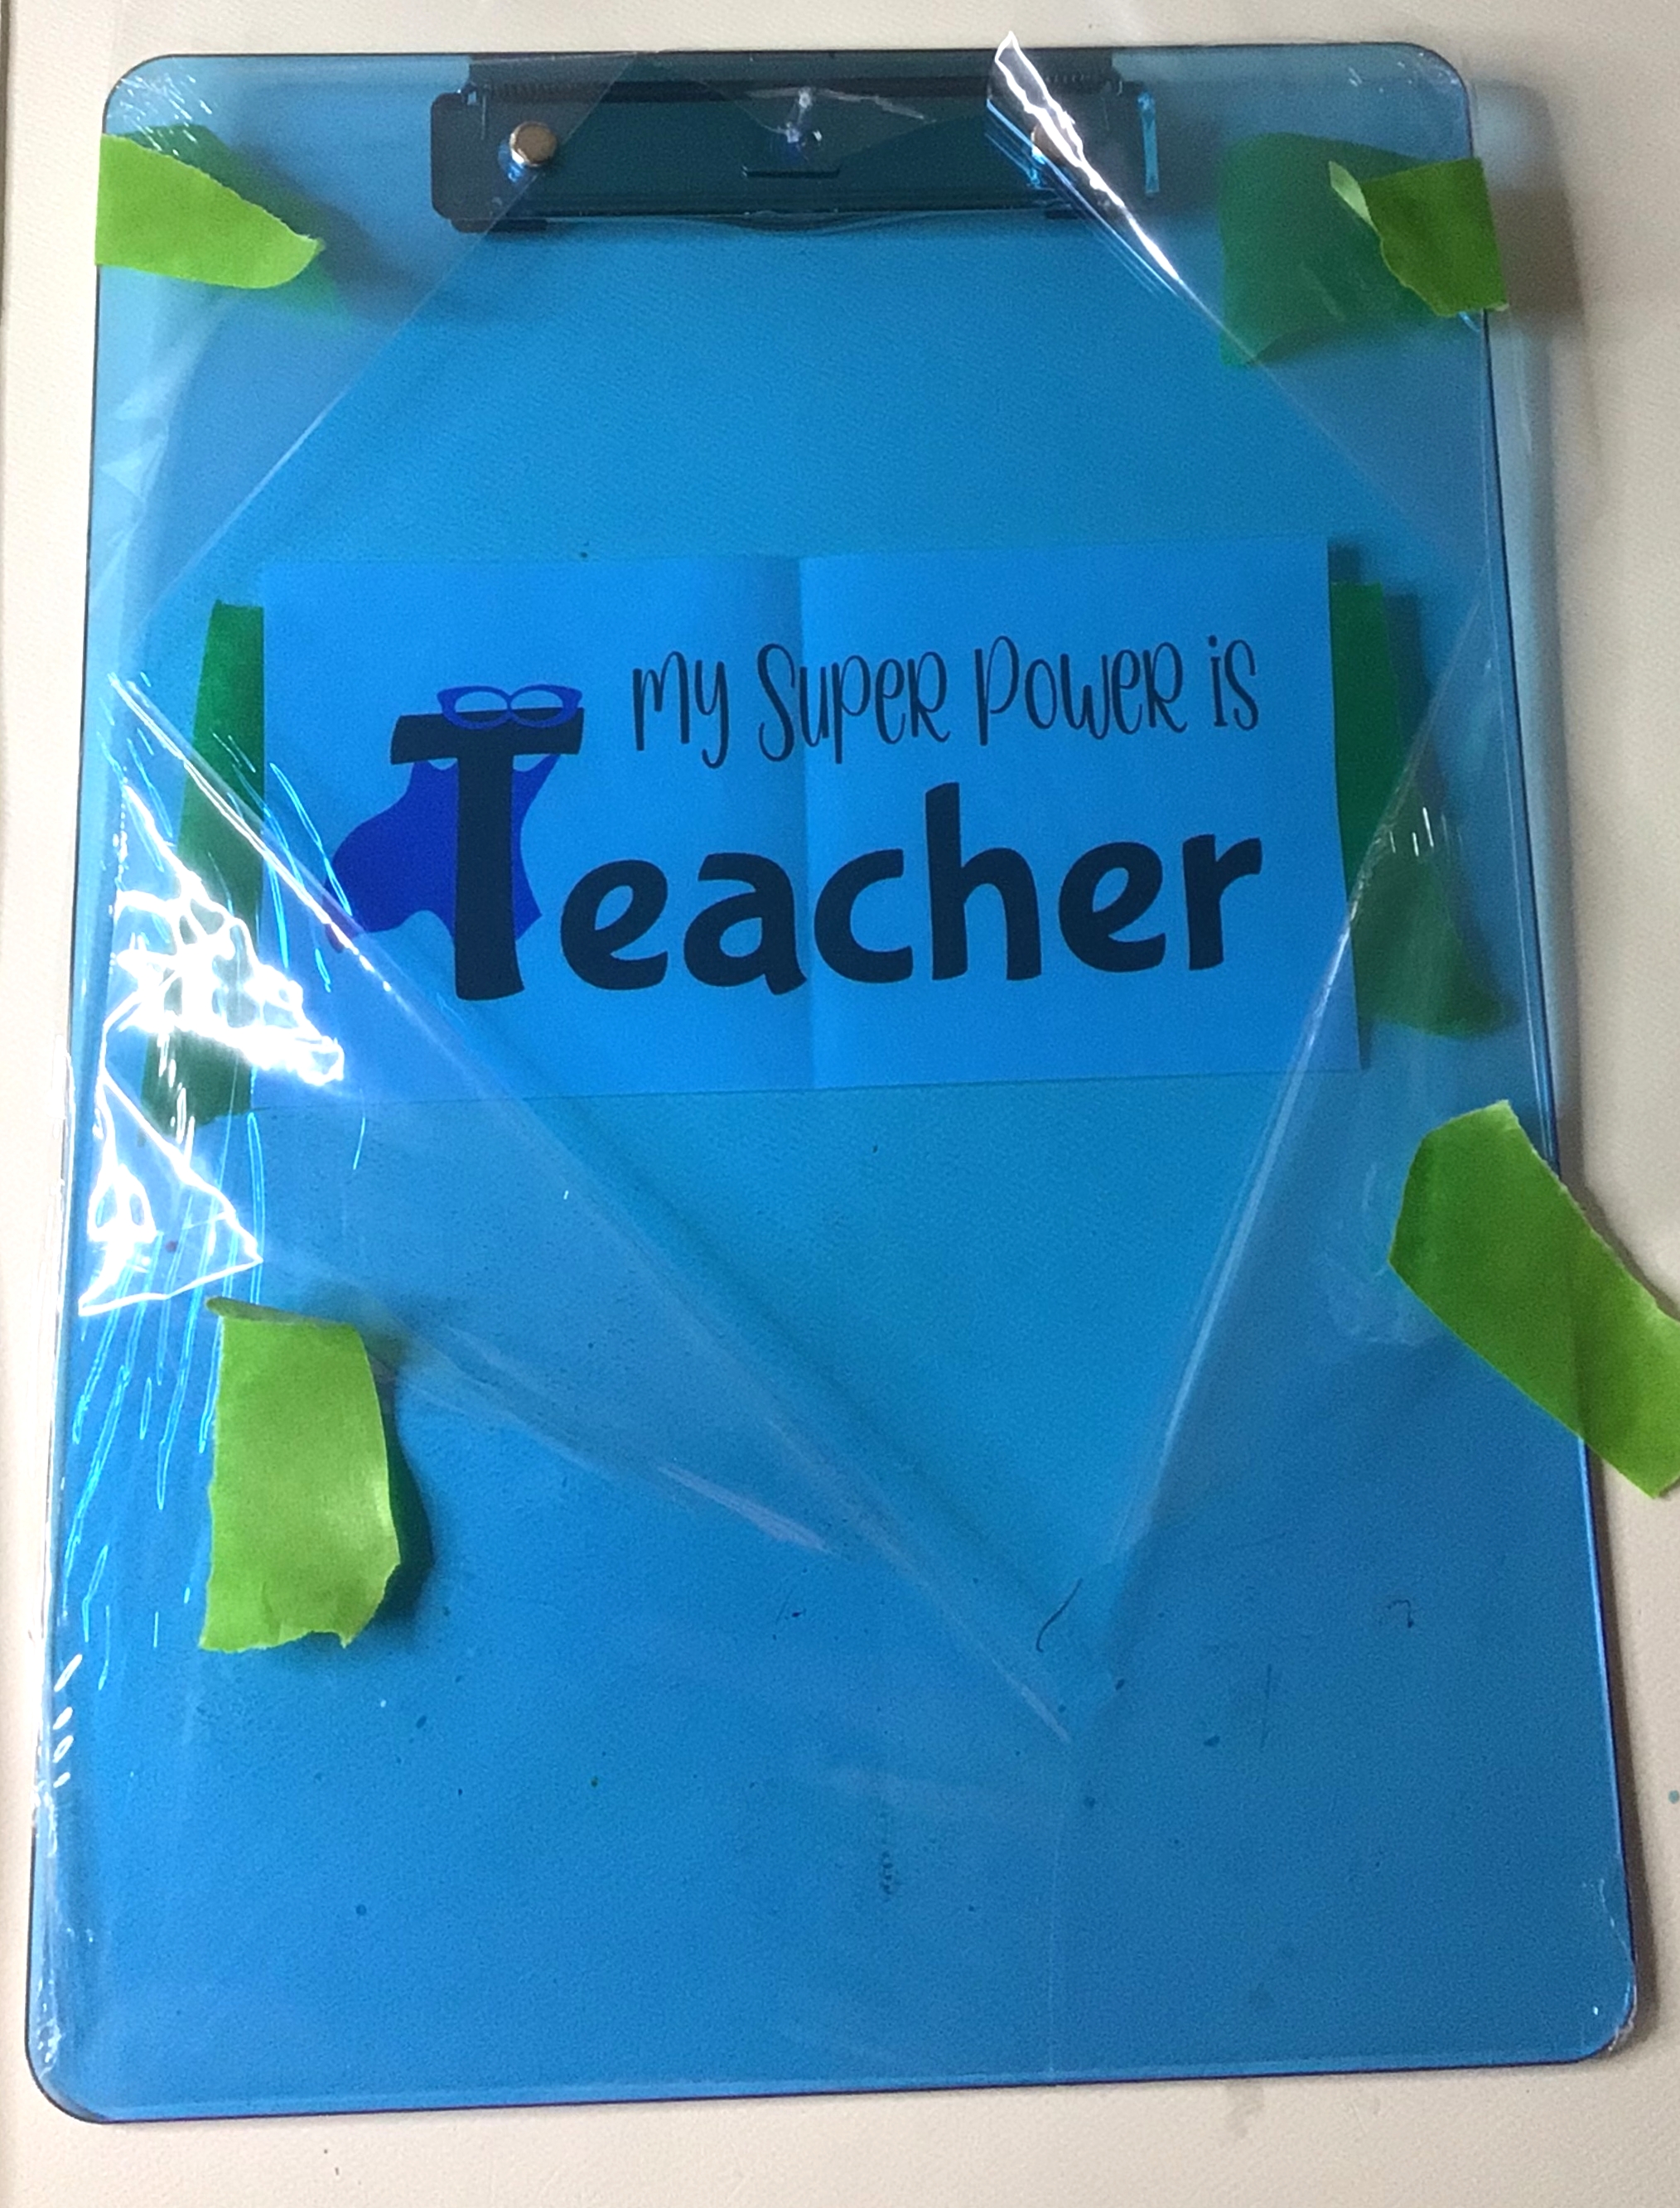
I help out in my son’s class and noticed that his teacher had one clip board. It’s pretty standard and who knows if it was on its last leg or was a work mule. But I do know that with home schooling my older son that a single clip board is not enough for me. And this was what birthed the idea of making a personalized clip board for our pre-school teacher.
Advertisements
I find the diamond painting crafts a very relaxing no thinking type of craft. With that experience, I had high hopes of having fun and relatively easy time with this. What I should have counted on is that the Jewel and Metal Glue would have had a mind of its own and gotten all over the place.
I should have set up more protection against glue betrayal. With the print out of the design on the back side of the clip board, I can see exactly what my work field was going to look like. I should have taped on protective paper (just spare crafting paper) to protect the exposed board that was not being worked on.
As it was the glue, coming out of the tube, came out at larger quantity than I needed for the small text on the top. What I needed, to control glue quantity, was a tooth pick. It provided enough glue to adhere the gems, and kept the glue of glopping up and making a further mess. However, the clear glue also found ways of transferring to other parts of my hand and got on the board. The crafter who recommended this glue to me (and other crafters) said that it dried clear. And I was under the impression that it would be relatively invisible.
Yeah, not so much.
IF you can keep the glue minimal, it hides quite nicely. IF you get impatient or frustrated, the glue does travel. It does clump up. It does not dry invisible.
I also want to mention that the gemstones were the actual frustrating part. The tweezers that came with them did not pick up well or easily. The white pencil that came with them worked maybe half the time. I actually had to pull out a spare diamond painting tool and use that. The disadvantage that comes into play is the gem glue. It acts like a super glue and builds up. It causes the gems to stick to the tool. So make sure you take the time and clean whatever tool you are using regularly. By keeping the glue buildup to a minimum, you will keep the frustration down a little.
Tips that I have for my next time:
Fully tape off the non-work area
Try to not use the tiny gemstones
Don’t be hasty, use a tooth pick for glue application
If using the side of your hand, put tape on the side of your hand (to replace every now and then to prevent hand transferring of glue)
Advertisements
Correcting the Failure
There were a few ideas that I had to redeem the glue failure of this project. Had the failure just been hand transferring of glue, I would have made other icons, “pows”, comic speech bubbles, etc to add more of a graphic design. However the glue failure was mostly an eye sore around the text with the stones, where the glue was just too thick.
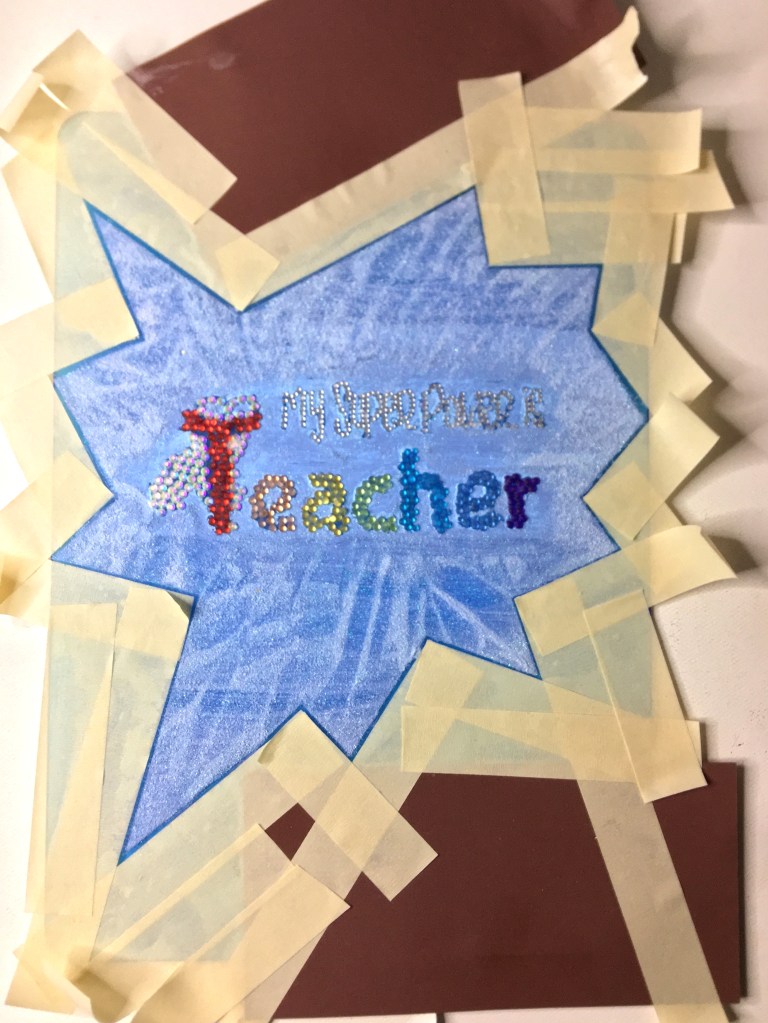
I opted for acrylic paint to cover the glue. On top of the paint were glitter glue and a layer of fine glitter.
Step One: Tape off your Comic Speech Bubble. With cutting the edges, it allowed for the continuation of the lines and making the edges as varied as you want them. Just make sure that you press your edges down well so that the paint and glue don’t feather under the tape.
Step Two: Paint. Between the letters and around the gemstones, I used an acrylic paint pin. The edge of the pen is just more firm and easier to manipulate than a paint brush.
Step Three: Add glue and glitter. Once the excess glitter is shaken off, peel the tape off of the clip board.
The wrinkles that you see here is just the uneven application of the glitter glue. I was playing with texture to see if I could get a comic sunbeam pattern.
Step Four: Tape off the clip board for sealing with clear acrylic spray paint. This paint will keep the glitter from shedding. (I sprayed two coats of paint.)
There’s two ways of reapplying the tape. The tape can be put right on the glitter line. Or, as I chose, I offset the tape so that I could seal the edges of the glitter, but also add a simple edge to the design. The clear acrylic paint creates a glazed appearance.
Be sure to press down all the tape edges well. If the edges are not fully pressed, it leaves the opportunity of the clear paint to feather under the masking tape.
Once you have sprayed your last coat, you are ready to remove the tape and paper. If you choose to remove the tape with the paint still wet, there is the chance that there will be some feathering. If you wait until the spray paint is dry, there will not be that potential transference.
As you can see with this side by side, particularly around the -her of teacher, it is possible to clean up glue failure. There is a trade off of not being able to keep a minimalist design esthetic. However, there is light at the end of the failure tunnel. Sometimes you can remove errors that just can’t be erased.
No matter what you are working on, take heart. If something goes wrong, it is not the end. You can fix it. Take a deep breath. Look at your options and see what all is available. If you have more than one option, try to visualize what it will look like if you go down that route. Which route is going to get you in a better place in the fewest amounts of steps? Which route is going to eliminate the failure in what you’re working on? Not all solutions are equal. But the more options you have the more you hope you have for your end product.


Leave a comment