Just Like New

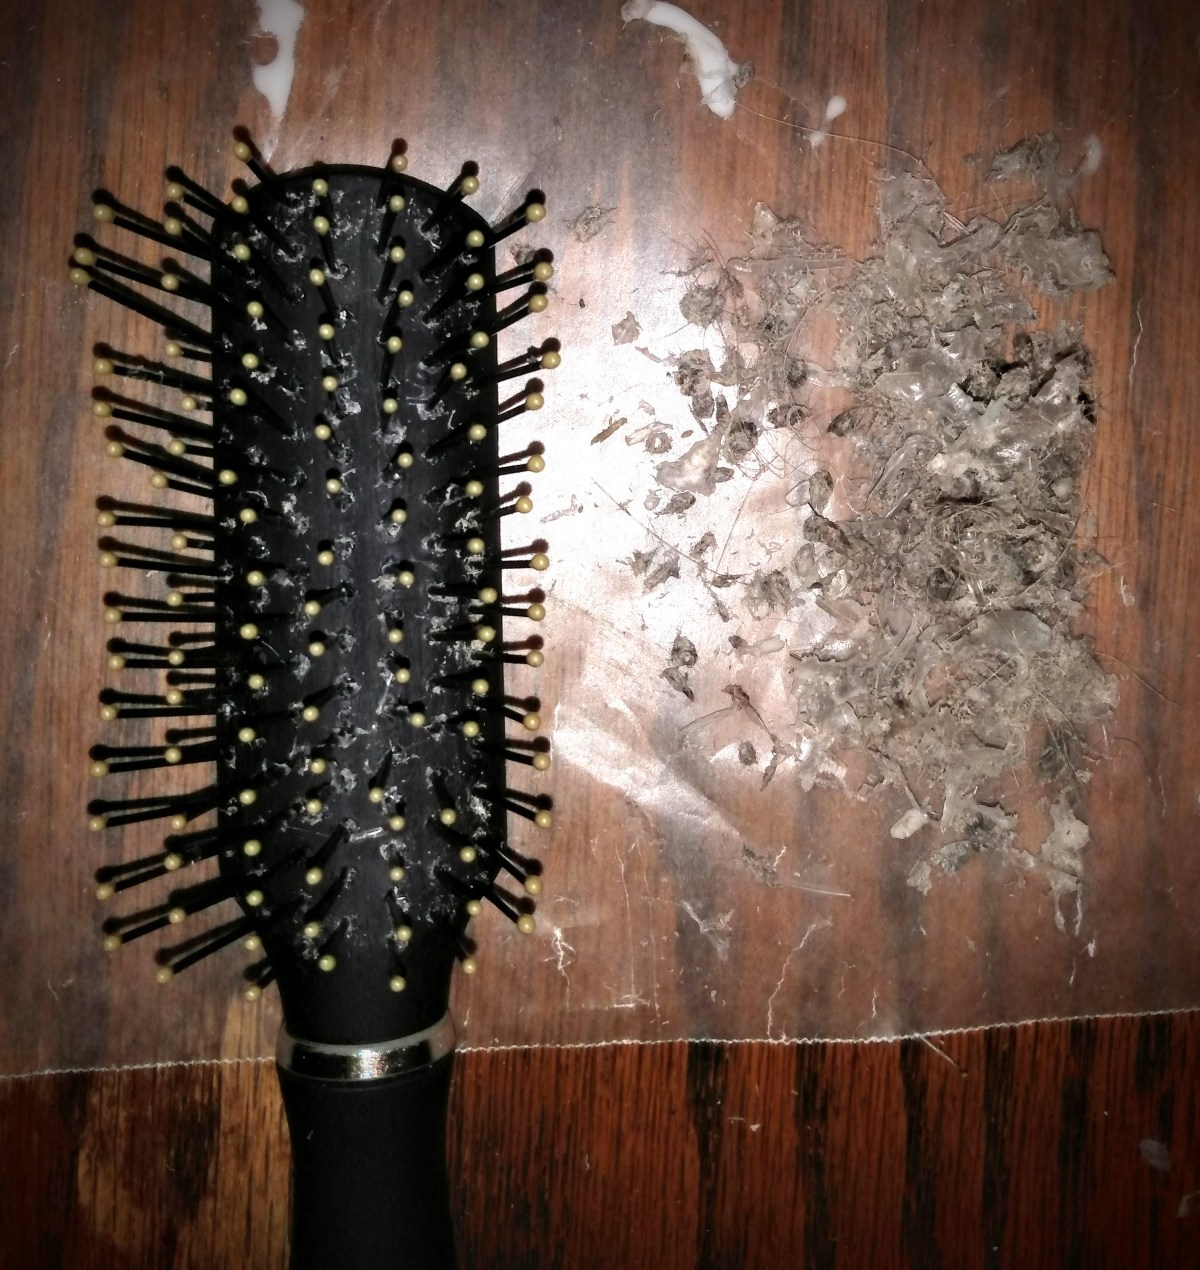
Once upon a time I use to buy a brand new hair brush after about a year. I’m sure you’ve seen your brushes about that milestone–when you remove the hair and there’s a blanket of fuzz at the base of your bristles.

I don’t throw my brush away anymore. Instead I clean it!

I’m going to pick up in this process after the hair removal and using a pair of tweezers to push all that fuzz to the tip of the bristles.

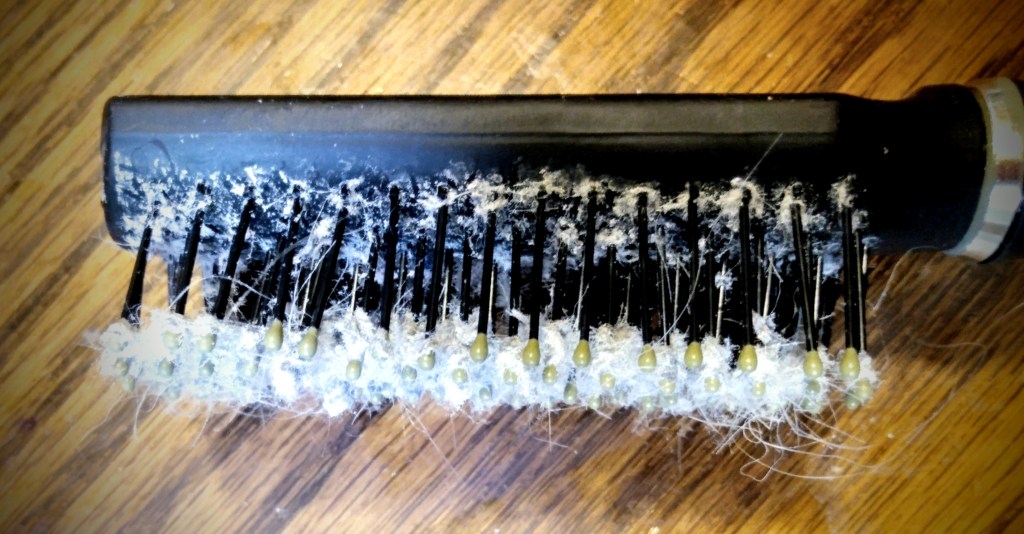
Don’t be afraid of you can’t get everything to the tips. I find that when I’ve done this step, I end up getting my brushes cleaner than if I leave the fuzz down at the base. The reason is because I use glue. The glue binds the debris at the top. But it also drips down to the brush base. It then grabs a hold of the debris that is still around the bristles base. By moving as much as you can to the top, it enables the glue to maximize how much it captures at the base.

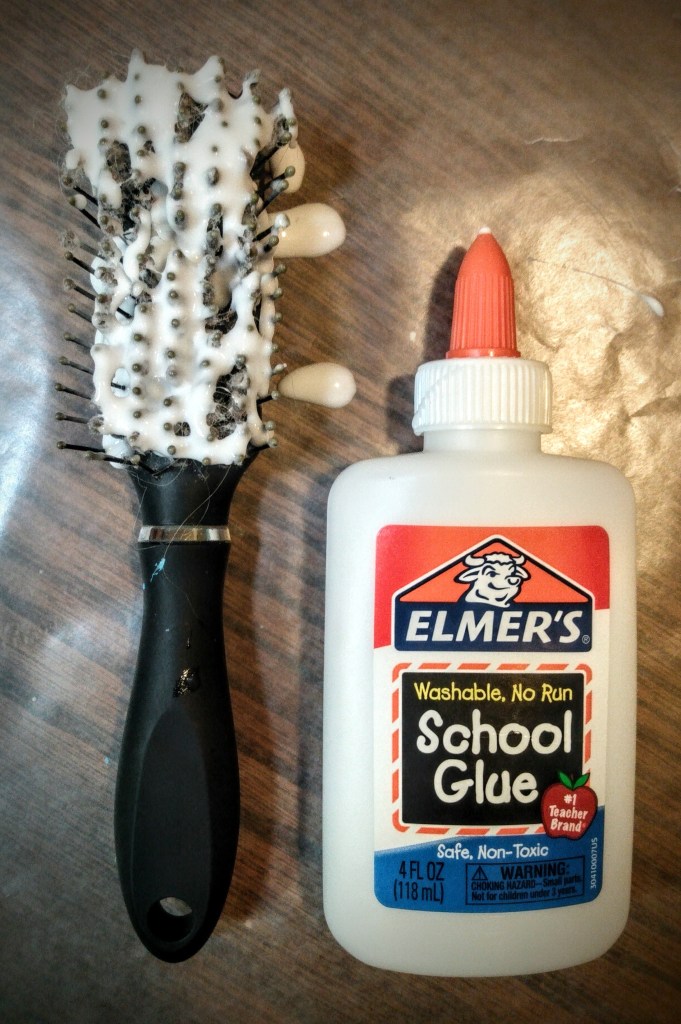
The glue that I use is Elmer’s white glue–the same glue used by school children in the U.S. The reason why I use this type of glue is because it has a little bit of elasticity when it’s dry and holds together even when it’s not fully dry. It’s tacky, but it holds on to the debris and itself. Plus it has the added bonus of washing off.

More rigid glue tends to stick to the bristles and brush.

For example, you could use hot glue. But there’s not much give once it cools. And because it’s more rigid, you run the risk of damaging the bristles (like pulling off the balls on the end), which will in turn ruin the health of your hair.

If I were to locate alternate glue, might pick a wood glue or rubber cement. Both of these have a similar property as Elmer’s glue.

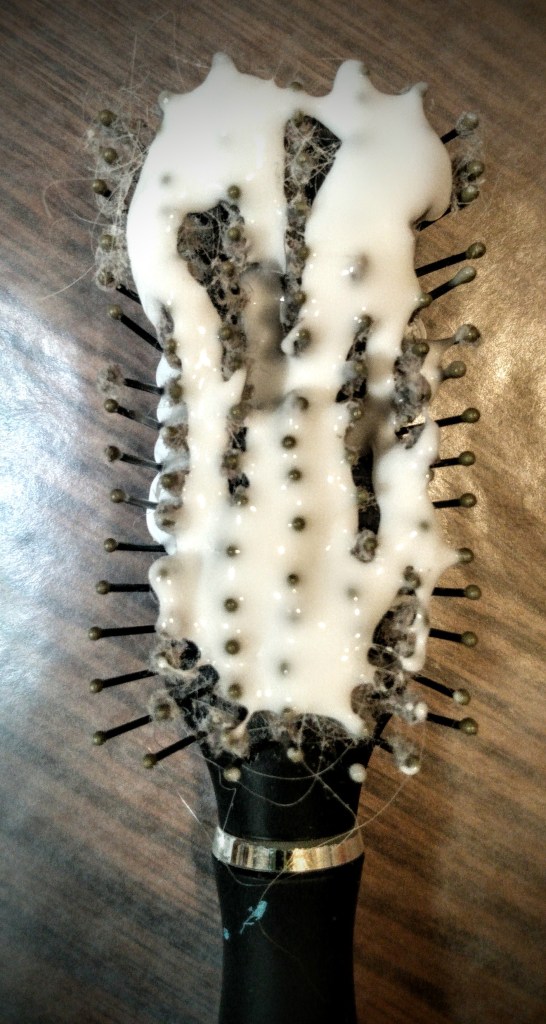
When applying the glue you can be as meticulous air as liberal as you choose. You can open the orange cap and apply the glue precisely along the rows and columns. Or you can take the glue cap off and cover surface area quickly. If you choose the quick method, make sure you hit every area where you pulled debris up to the tip of the bristles. If there’s no glue on the debris, then nothing is binding it together to make it easier to pull off.

At this point timing is everything.

I applied the glue after I used my brush for the day and I let the glue sit over night to dry. (Even still, I used a liberal amount of glue so the glue wasn’t dried come morning. This was okay because my schedule had the space for not needing my brush and for finishing this cleanup project.)

Last year when I cleaned my brush I think I went the more precise method because the glue was dried come morning. This year the glue was still too wet so I had to use my hair drier to help the glue set.

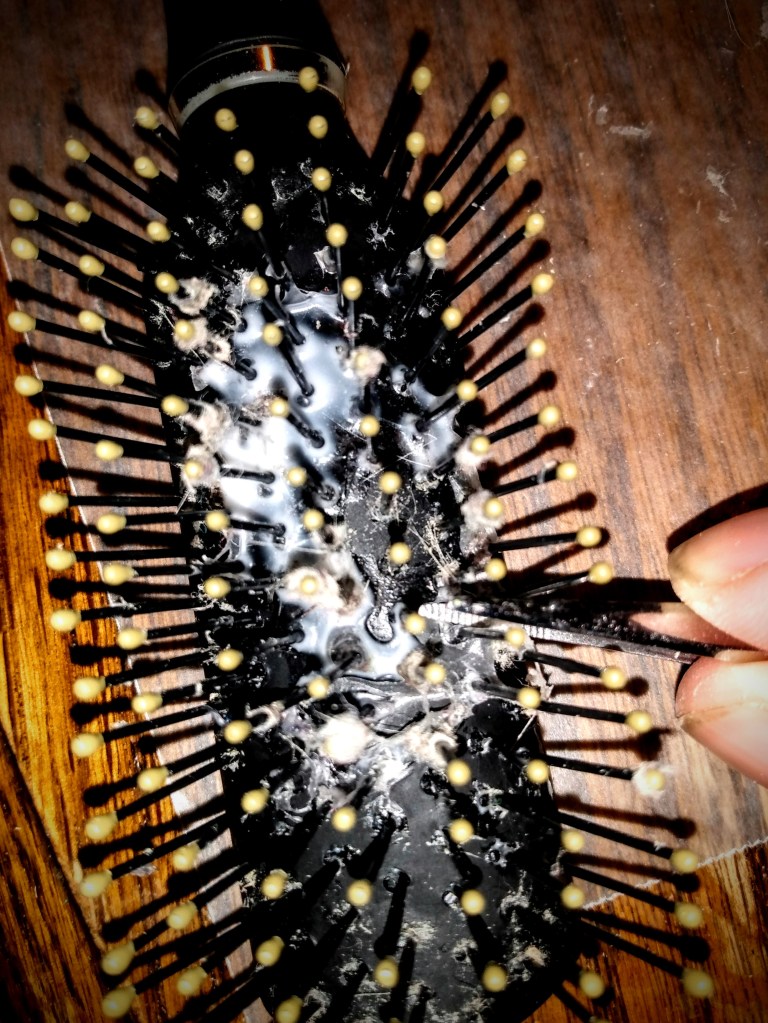
As you can see here, the debris on the top was dry. So I could easily start peeling those bits off my brush. However the glue on the base had pooled together thickly and was most definitely that wet brilliant white.

I removed the debris that was dried. This opened up the air flow for when I used my hair drier to set the rest of the glue.

TIP: If you don’t want to wait over night, use a hair drier to set the glue in a quicker time frame. You can have your brush clean and ready to use that same day.

Cleaning the base can be a little trickier. It seems like all the brushes that I have, each bristles is inserted into the base in a V formation, so the tail is pointing up alongside the bristles. This elbow joint likes to hold on to debris. This is why I like using glue. It helps to gram on to those difficult to reach debris. But it also means that I also need to use a pair of tweezers to get in there and get the glue to lift with the debris.

Sometimes you can just run the tweezers between the bristles. And in other moments you need to grasp the bottom of the bristle with the tweezers and pull up toward the top.

The good news is that you can completely clean your brush without having to be satisfied with that ring of debris hanging out at the bottoms of your bristles.

As you can see here, I was able to remove all that fuzz debris that was on the bottoms of my brush. This is the third time that I’ve cleaned this brush. And all the protective balls, on the ends of the bristles, are intact.

As I mentioned before, I grew up where we just disposed of brushes when they were “dirty”/ a blanket of fuzz remained when the hair was all removed. But I found out that it doesn’t have to be that way. A brush can have extended life.


What is something that you use to throw away but found a way to extend its life?

3 responses to “Just Like New”

  1. Pacific Northwest Event Design Avatar

    I’m sorry I hear that the notifications have been emailing you so frequently. I can understand that would be annoying. Unfortunately the full controls of notifications can only be reached from your end. To verify this I check with my own subscriptions that I follow.
    You will want to go to your Notifications tab. From there hit the Settings icon (it looks like a gear on my screen). Scroll down to sites you follow. Once you click on a specific blog you are immediately given options for which notifications you want. You’ll see options for new posts, all updates, all comments. The option that is probably giving you the most email notifications is probably the toggle being switched on for all comments that are made. If you switch that notification off, you should notice a huge decrease in notifications.

    I hope that helps.

    Like

  2. 313 Avatar

    I have been browsing online more thaan 4 hours today, yet I nevcer found anyy interesting
    article lie yours. It’s prety wrth ennough forr me.
    In myy opinion, if alll site ownerrs and bloggers
    madee ood content as you did, thhe neet wikll bee a lot moe
    useful tha ever before.

    Liked by 1 person

  3. Ruben Avatar

    What’s Happpening i’m new to this, I stumbled upon tthis I have fohnd It positively useful andd itt haas helped mme outt loads.
    I am hopingg tto contribute &help different users like its helperd me.
    Good job.

    Liked by 1 person

Leave a comment

Processing…
Success! You're on the list.
Advertisements
Advertisements
Advertisements
Advertisements

Getting Buzzy For Spring

There’s one skill that I’ve wanted to learn from a friend of mine, incorporating mason bees into my garden.

Here in North America, mason bees are the indigenous bee. They pollinate 45 times more than honey bees. And if you have young children, you don’t have to worry about there being an altercation and your child (or pet) from being stung. (We’ve been teaching our kiddos about bees because one day I want to have honey bees for honey production. So they already know what’s expected of them when it comes to our pollinating friends.)

I can’t even begin how excited I was when I received an email from a family locally owned hardware store that they were doing a craft for Earth Day, which involved making a home for mason bees.

Today I’m sharing with you the process that my kiddos went through to make a home for mason bees.

We were instructed to bring a soup can or cardboard milk container. The hardware store supplied the craft materials to decorate and make the bee home.

All my milk cartons still had milk in them and I haven’t bout soup in a can for well over a year now. What I did have available was an empty ten pound can. So if you don’t have a small can, know that it’s possible to make a home with a larger can.

Things you will need:

(Feel free to modify with the materials that you have on hand.)

  • Milk carton or soup can
  • Construction paper (printer paper, non-toxic colored paper, recycled paper, whatever you have on hand)
  • Tape
  • Straws
  • Cardboard tubes: toilet paper or paper towel (optional)
  • Corrugated cardboard (optional)
  • Scissors
  • Glue
  • Stickers (optional)
  • Twine
  • Pens, crayons, or other decorating medium (optional)
Advertisements

If this is a kid’s project you’re setting up for, cut all rolled paper and straws to the length that fits from the back of the soup can to the front.

You can even prep other materials for your bee house. If you have scrap blocks of wood, you can several holes through the block.

I don’t know what you have in surplus in your craft room. But I have many wine corks that have been waiting for just the right project. When I get a free afternoon, I’ll make an adult version with rolled cardboard, drilled scrap wood blocks, and my collection of wine corks that will also be drilled.

Here are some additional bits of information about mason bees, if you are unfamiliar with them.

Here is another resource to get you started on your path for creating a home for mason bees. If you want to buy mason bees to start your bee colony, I found this site which is still selling until May 22, 2023. They have a bee info page that can instruct you in how to care for mason bees to make sure that they remain healthy and happy.

If you’ve watched the movie The Pollinators (2020), then you understand the need to help support our local pollinating community. If you haven’t seen this documentary yet, it’s worth the time to understand what it going on with the bee population in the United States. And if it’s happening here, it’s very likely happening in other places.

Last year (2022) was a bad growing season in the Pacific Northwest (PNW). To this day I still believe with my whole heart that the bees were what made my garden successful, when others in my local community found only hardship. So for my gratitude, I already planned on adding more flowers to my garden as well as being a more hospitable home for my pollinators. With that being said, I will leave you with the pictures of my family. And once the weather clears, I’m going to examine closely where our best place of hanging this mason bee home is going to go.

Happy Earth Day!

Processing…
Success! You're on the list.

Leave a comment

Advertisements
Advertisements

Pulling Double Duty

The one thing that I love about budget and DIY weddings is that the couples, and their families, look for ways of reusing items after the wedding instead of using disposable items. And this is one thing that everyone can agree on, whether you’re a diehard Earth Day person, living Green, being Frugal, or just getting more bang for your buck.

I’m going to focus on one wedding item that tends to be wasteful or even a financial drain…wedding favors.

There are so many cute ideas out there. I really get it.

Some of them are practical. Like the paper fans on those hot summer outdoor weddings.

But if we’re being honest, how many of those items are really used by your guests after the wedding?

The problem that I see is that all those monogrammed, personalized items really don’t see a life outside of the wedding. The true exceptions are for the family and guests who are truly sentimental.

My husband is one of those sentimental people. I kid you not, he’s the one who collects the paper fans after the wedding and brings them home. His feelings are hurt if the one of the boys plays too rough with one and rips it. And 5 years later I just see a blue fan, but he remembers who wedding it was from and at least five new people he met, and a funny story or two from the reception.

So I want to challenge you to find a way to make your wedding favor do double duty. Or even triple duty!

One idea I have for you are little candles that you can purchase at craft fairs and support a local vendor.

Advertisements

Use #1 Wedding Favor

Instead of personalizing these with your names, initials and wedding date, try finding phrases or words that represent your love for each other. Funny phrases work if you’re a funny or prank making couple. When you take away the obvious personalization and go with personalization that your guests can identify with, you automatically guarantee that your guests are going to want to take your favors home.

Use #2 Year Round Gifting

For example, if you’re keeping with the romantic or Boho themes, this floral wreath is absolutly perfect! It adds to your wedding decor, but it’s absolutely something that people will love to decorate their homes with when they leave our reception. Worse case scenario, you take a few home and they are still an appropriate gift to give for birthdays, Valentine’s Day, an add on trinket to another couple or bride, the possibilities are endless.

This decal is 2″ tall. Some of the details were eliminated to due to size. The rose buds you see here are about 3mm tall.

Use #3 Centerpiece Decorations

If you’re thinking about using tea light candles on your reception tables anyway, these are perfect because one purchase price for a favor is fully utilizable for your centerpiece. And if you design it just right, you can combine it with other candles. For example, here’s the same candle with gold mercury glassware.

Advertisements

Use #4 After the Candle is Gone

People love cute little things. Even more than that, they love cute little things that they can easily see using when the contents are gone.

This little jar is perfect for adding:

  • A new tea light
  • Coins
  • Q-tips
  • Toothpicks
  • Sink side jewelry holder
  • Small office supply holder (ex. tacks)
  • Tooth Fairy jar
  • Spice holder
  • And any crafty person can find a million uses for this size of a jar on a craft project

I think I bought several of these scented candles from a Christmas Craft Fair vendor for about $5 each. Yes, there are most certainly wedding favors out there that you can find cheaper per unit. BUT my big question is…

Which favor is going to be memorable for your guests? Pull double or triple duty for your decor? Will be used long after your wedding?

Another bonus to purchasing an item like this from a local vendor is that they are likely to work you a deal if you buy something in bulk from them. It’s something to talk to them about. But even at $5, it really is a great deal.

But the absolutely best thing about this favor is that it will absolutely not end up in the trash as soon as you leave for your honeymoon!

File Used Today, Love Wreath, will go live on Monday! There will also be other variations available. So be sure to check them out in my shop.

Processing…
Success! You're on the list.
Advertisements