Starting New Skills

The one thing that I appreciated from my childhood was just how many skills I learned from my parents; cooking, gardening, home repairs, auto repairs, and so much more. Part of this appreciation is seeing how many of these skills have become less and less commonplace in the younger generations. And it’s so promising to see a growing number of people seeking to learn these skills now.

Today I wanted to share a monthly experience that we have with our kids. Craft days!

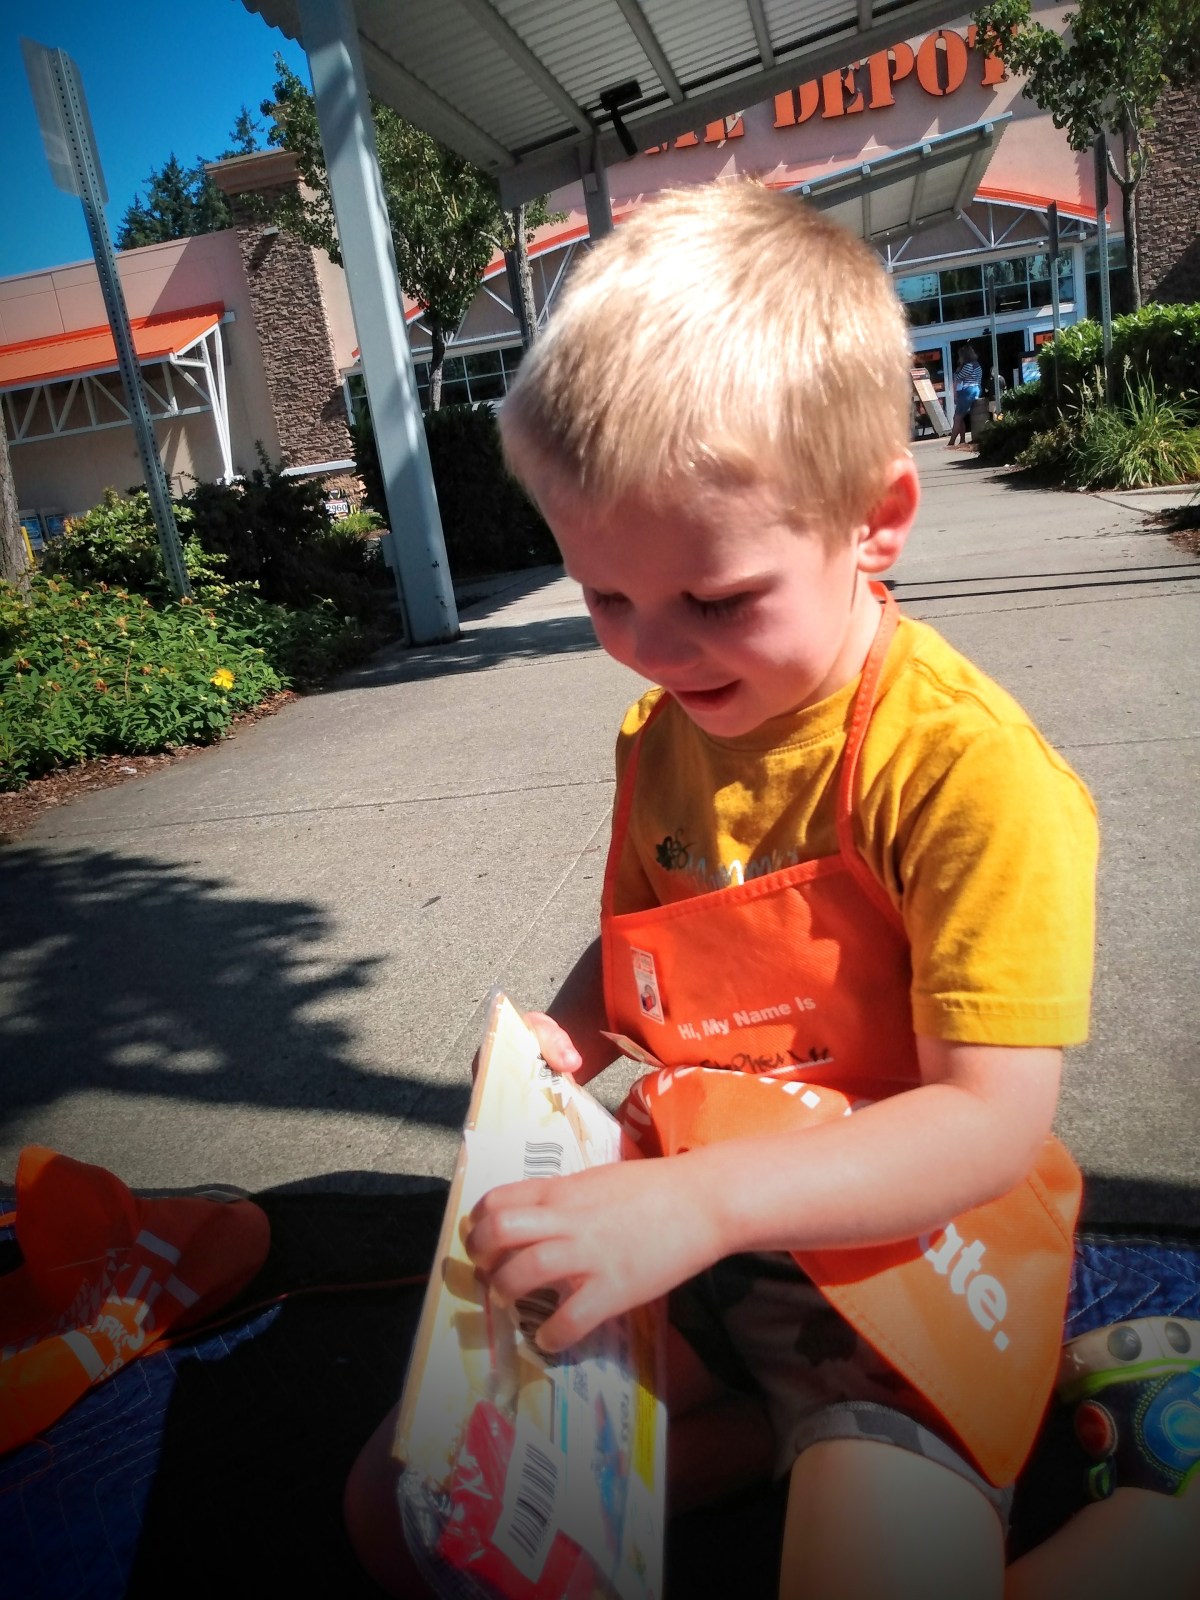
I’m aware of three box stores in my local area that offer a free craft to kids; Home Depot, Lowes, and Joann Fabric. None of these stores are sponsoring this blog nor have they compensated me for this post. I mention them by name for the sake of helping out fellow parents who are looking to foster these skills in their kids or grand kids. They are free, which is perfect for families who don’t have the budget to purchase supplies.

Here’s what the corn hole craft project looked at the beginning of our morning.
Advertisements

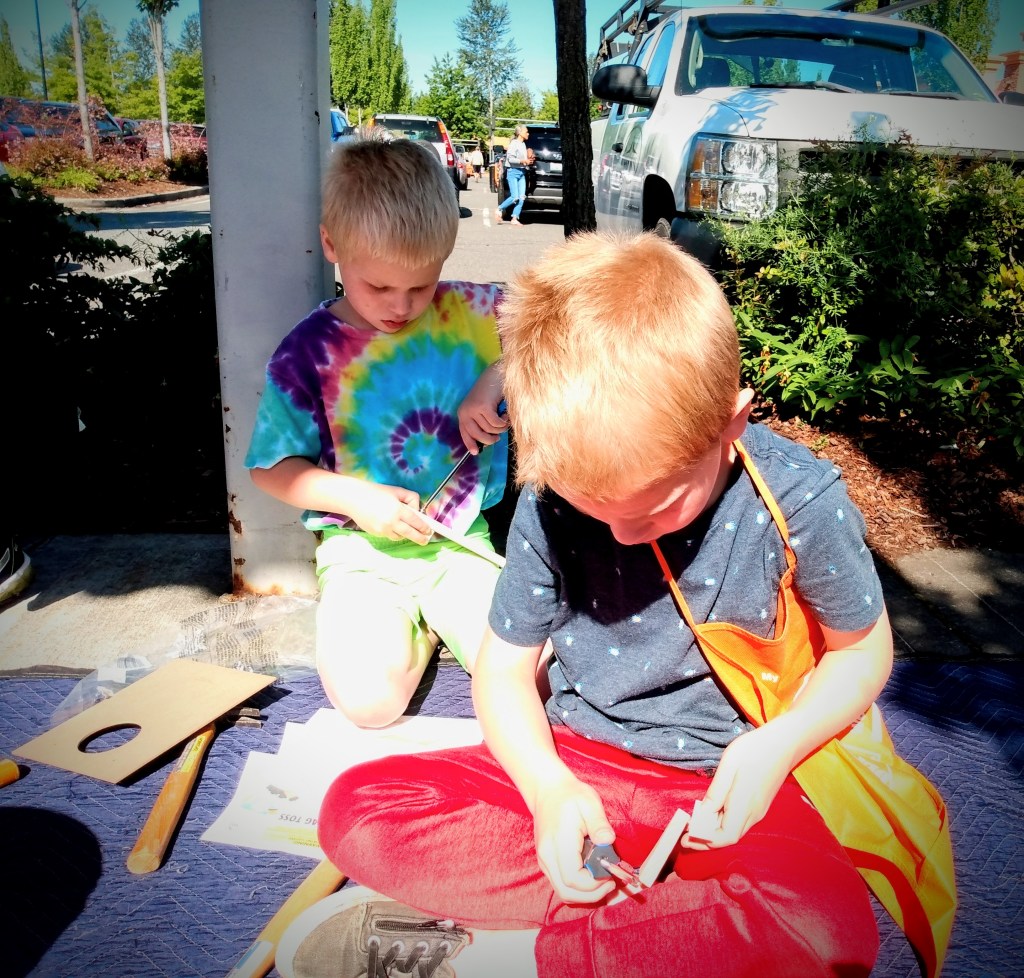
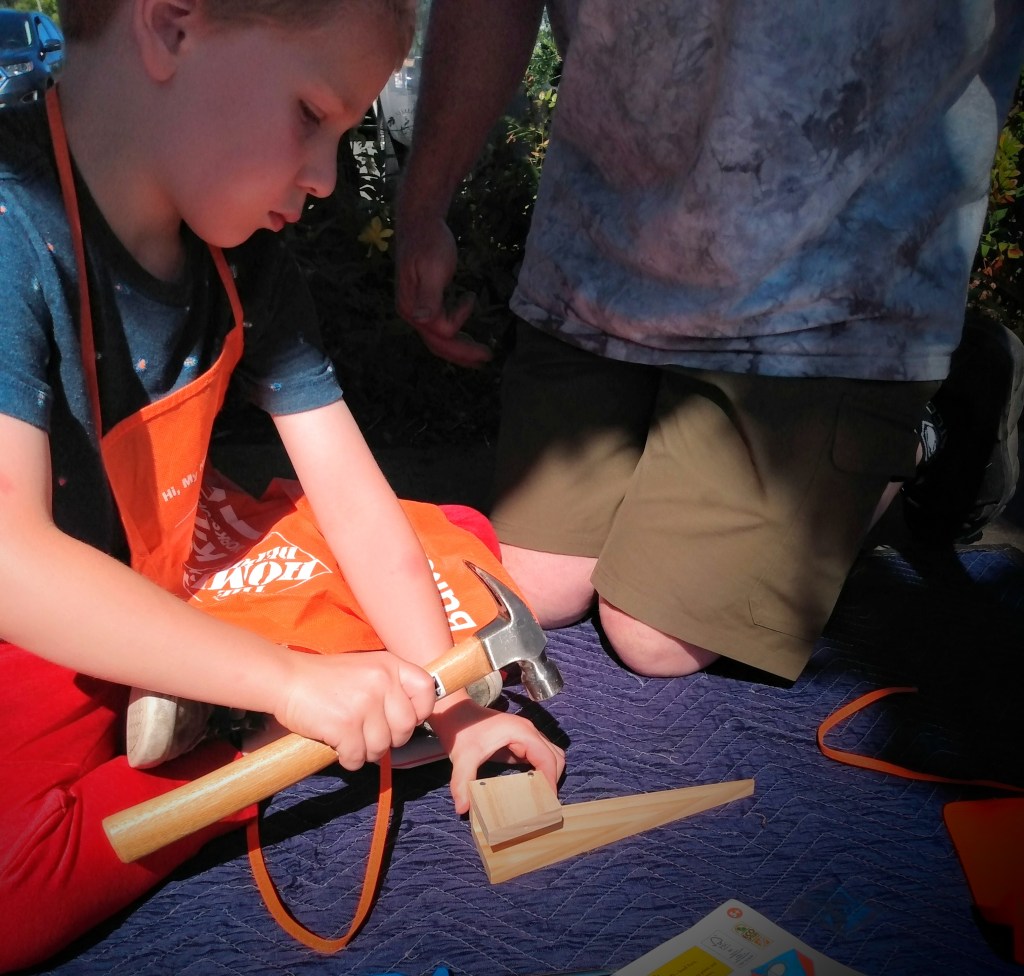
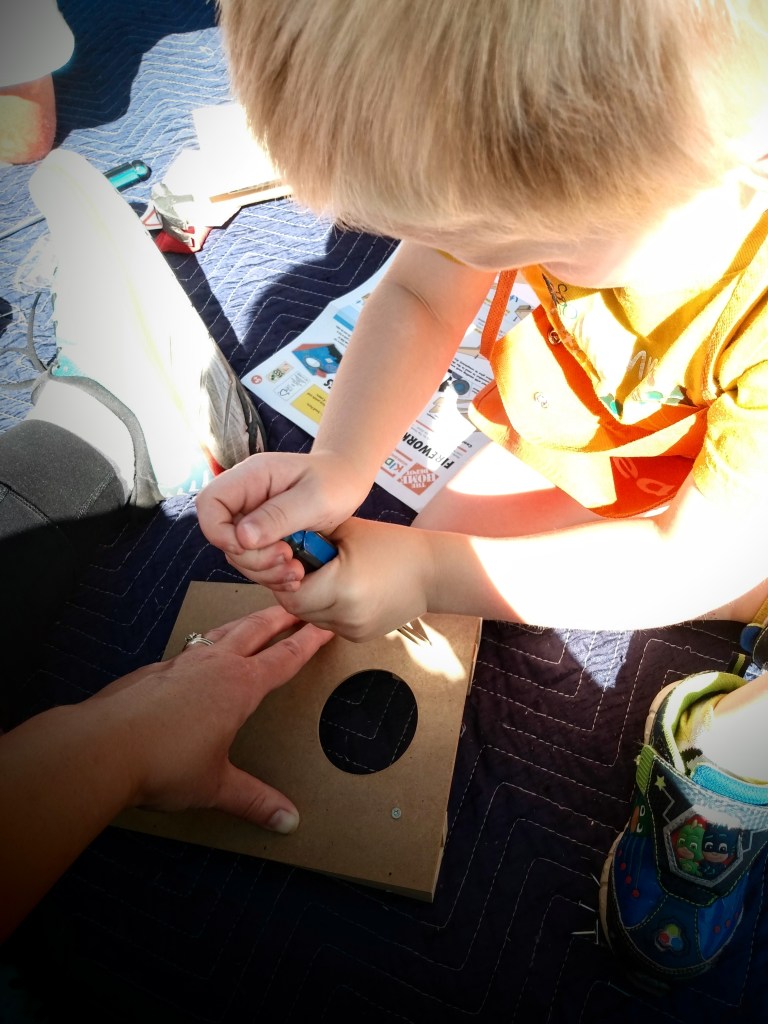
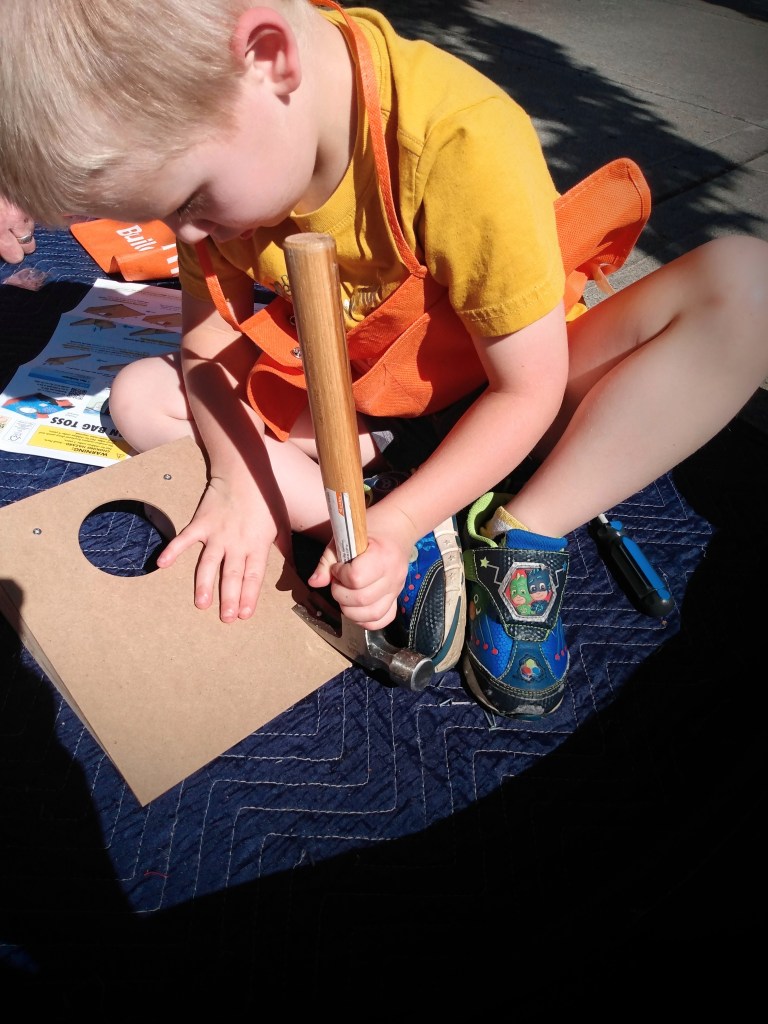
We’ve been doing these hardware store crafts for five years now. And as long as the days get with small children, the time really flies by and they pick up the skills of using a hammer and screw driver too quickly.

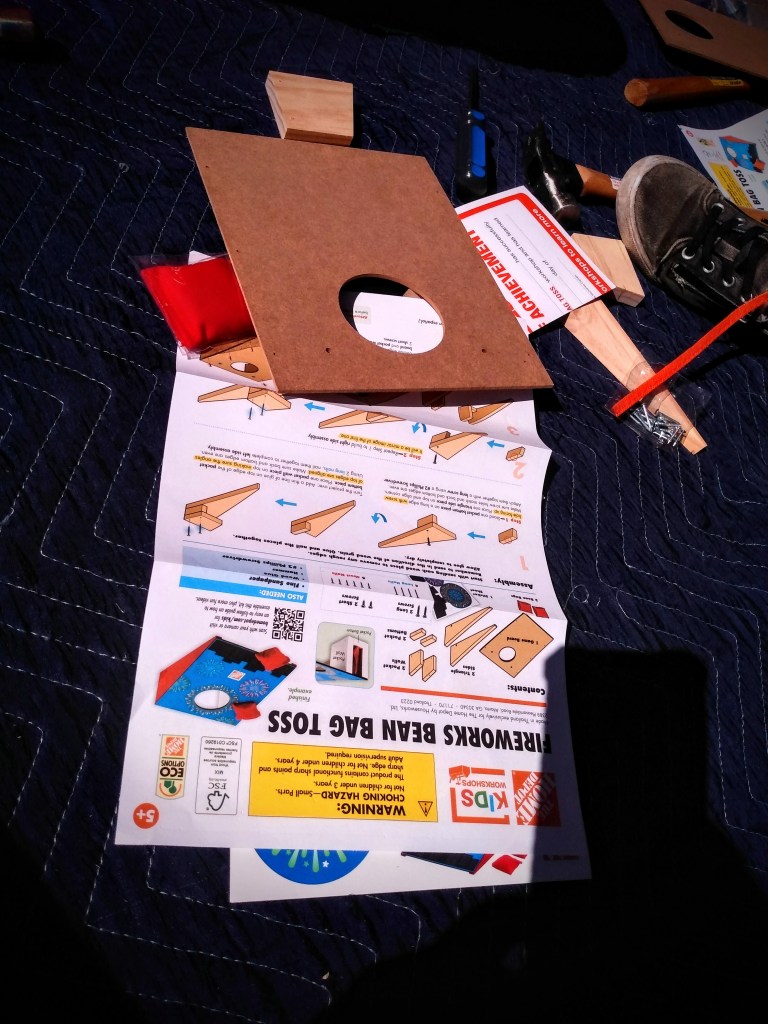
This miniature corn hole craft was the first one where I sat down with my youngest and purposely focused on just being support. (The older kids decided they wanted to fly solo–time goes by too quickly where you’re sidelined on these crafts!).

My solo crafters wanting to build with no help.

Instead of telling my youngest how to build, I had him pull out the pictograph directions and tell me what we were doing for steps. I was just there to hold pieces for him while he built away.

My one and only job for the day, hold the project in place.

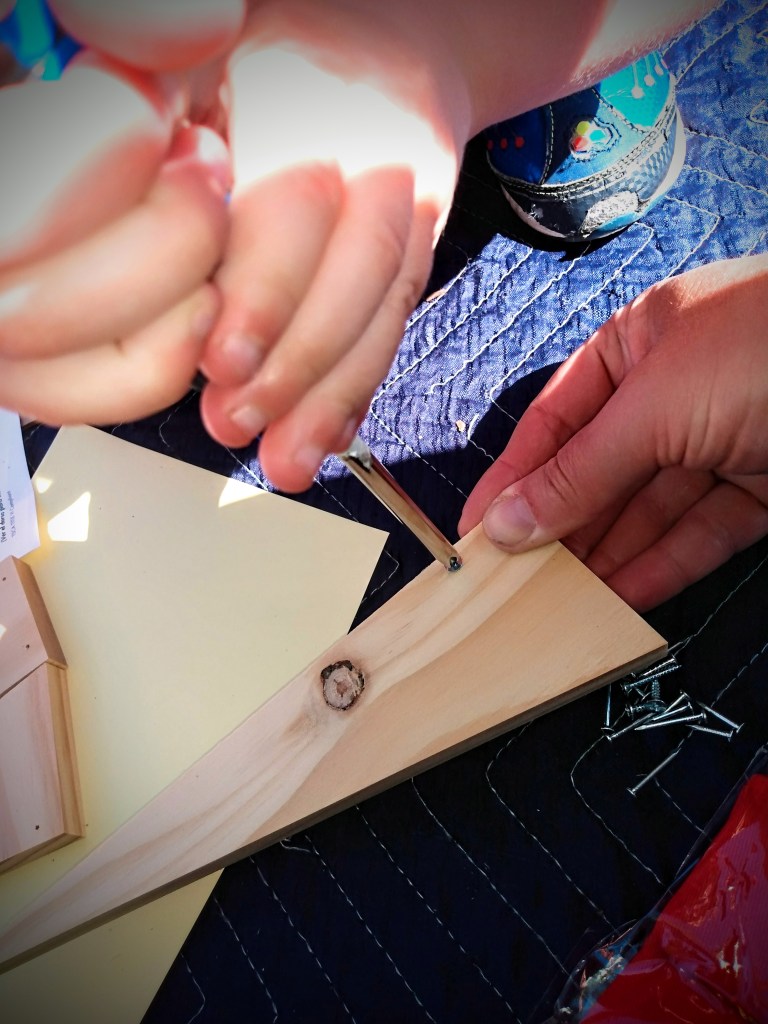
This is the child that loves having things in a certain order and done a particular way. But it was fun watching him process the building information and doing it the way that he saw makes sense. But what was a good surprise was seeing him use the claw end of the hammer when the nail wasn’t lined up the way he wanted it. He didn’t want to make corrections the way that I would. He wanted to fix the error his way.

This reminds me of a series of lessons from a virtual life skills summer camp that I watched with my kiddos this past month. This was a series teaching basic home electrical repair skills to teens. I watched it to learn for myself because this was one skill that I didn’t learn from my dad, but there’s times where my husband is so busy that I could do these things home repairs without waiting for his schedule to slow down for him to do it.

What’s amazing about whole families learning new skills is that we’re not dependent on one person taking care of a honey-do list. We’re enables to work as a team to get something done.

Advertisements

For example, even though my oldest is still in early elementary, he’s able to take care of nail and screw projects. I learned some new electrical skills to help my husband out. And my husband has been learning new food preservation skills to help in the kitchen.

For our family, it’s important to learn new skills and “cross train” because it creates value in our family. One person isn’t dumped on and obligated to do certain tasks by themselves. This can be overwhelming, especially as the adults in the house, because we’re constantly juggling our schedules and to do lists. Sometimes surprise tasks just become overwhelming because there’s not enough time in the day.

But when another family member knows how to do a task alongside you, it turns into a quality time moment instead of a stressed out I-don’t-have-time-for-this.

I don’t know about anyone else’s family, but my kids are already at the age where they want to feel valued and appreciated. And by giving them fix-it skills, it’s one thing where my kids can do something for my husband or I, feel accomplished, and then feel valued with a “thank you” and “you did a good job”.

And it’s not just with tools. The kids have been learning how to cook things on their own and they’re so proud of being able to cook breakfast for the family.

It doesn’t matter the age, people thrive on feeling appreciated and knowing that they contributed something. And that value isn’t taking into consideration the memories that are made in the process.

One of my favorite memories of working on cars with my dad was when he had me crawl under a car and do an oil change with only him available to talk me through the process. It was the late 80’s and one of the biggest fads for girls was wearing press on nails.

It was when I was removing the last bolt that two of my nails popped off and landed in the oil pan just as the oil gushed out. I started freaking out. My dad thought I had lost the bolt in the pan. He and my uncle started laughing their butts off when they found out that I was looking for my nails!

Let’s just say that after I fished the nails out of the oil that it didn’t take me long to realize that there was no way I was going to be able to salvage them.

Advertisements

There’s nothing in the world that would exchange for the memories that I have with working on cars with my dad. Nothing goes right all the time. And it’s these memories that bring patience when I’m working on skills with my boys. Things will go wrong. Some of those things will be hilarious. And it may only be these funny memories that they remember for the rest of their lives. But that’s okay.

I know that they don’t remember the times they’ve hit my fingers with a hammer. They won’t remember the frustration of first learning how to press down on a screw driver and turning at the same time, all just to get that screw to go down into a project. But their muscle memory will live on forever as they grow to learn more skills, such as home electrical repair, car repairs, garden building projects, making meals, and so many other valuable life skills.

What they will remember forever is that their mom and dad believed in them that they could make something. When frustration sets in, they know they can problem solve their way out of it because they were believed in. But above all they will take on the new challenge of learning something new because their parents continue to learn new skills.

We’re never too young to learn a new skill. Neither are we too old.

Maybe one day soon, they will learn a new skill. And as they show us, my husband or I will learn that new skill because they want to teach us something.

So whether you have kids or grand kids or not, learning a new skill is ageless. It’s a great memory building moment to teach the young (even teens) a new to them skill.

And it’s never too late to learn a new skill for yourself.

What new skill are you ready to learn now or pass on to the next generation?

One response to “Starting New Skills”

  1. best buy instagram followers site Avatar

    Way cool! Some extremely valid points! I appreciate you writing this post and also the
    rest of the site is extremely good.

    Liked by 1 person

Leave a comment

Processing…
Success! You're on the list.
Advertisements
Advertisements
Advertisements
Advertisements

Holy Jam Batman!

This post contains affiliate links to products. We may receive a commission for purchases made through these links, but at no extra cost to you.

One of the first things you’ll hear when you start in the world of making your own jams and jellies is that you MUST stick strictly to the recipe or your jam won’t set.

And the first thing anyone will set out and do is try to take a single batch recipe and double it or triple it, like you’re making chocolate chip cookies. After all, if your family goes through PB&J like nobody’s business you really don’t want to make 6 pints of jam at a time. That would take forever!

Plus, if you have kids underfoot there is absolutely no chance you’ll get four pots of jam on your stove top. Because the odds are that you’ll have a four ring circus around your ankles and all your pots start a rolling boil at the same time. At least that’s how things would play out in my house IF I had to make jam one batch at a time.

Fortunately for us, my husband and house a lady who was selling off her jam inventory and gave us her large batch recipe. Unfortunately I can’t share that recipe with you because of a verbal agreement that we made with her. And that’s one thing about my husband and I, we keep our word.

BUT, it got us on the path to know that you don’t have to make single batch jams and jellies if what you are really looking for is to make one large batch and set your family up for a year’s worth of jam in one day!

Advertisements

I’m sure that there are other large batch recipes out there if you took the time to search, but there’s not going to be many. One, too many people have a small business making jam for bazaars and other venues. And if you’re in the business, you’re not going to put your recipe online because that’s just not a good business model. Ball has an extensive jams and jelly section, but all of them are single batch. I haven’t had time to scour the pages of extension offices to see if they have large batch recipes. But I did find one rather quickly with the company that I buy my pectin in bulk.

Yes! You can buy pectin in bulk and at a far greater savings than buying the box of 2 packets of gel pectin at your local grocery store.

For the last several years I have been buying Hoosier Hill Farm Powder Pectin. They have an amazing product and I’ve preferred this over the gel/liquid pectin that I grew up using. It’s less mess. And like I mentioned above, it’s at a far better price than buying the same quantity in the gel/liquid form.

If you don’t have the time to search out your own large batch of Jam and Jelly recipe, you can use this one from Hoosier Hill Farm. You can go directly to the site through the link, but for your convenience I have it here:


Cooked Jam Directions and Recipes

  1. Locate and mark off fruit recipe on chart below. Check 8 OZ jars for defects. Because containers are not filled to the rim, one more container than the specified cup yield may be needed.

If jams will not be placed in boiling water bath, wash, scald and drain jars, or use automatic dishwasher with very hot rinse water. Keep hot.
If jams will not be placed in boiling water bath, wash jars and sterilize in boiling water for 10 minutes. Keep hot.
Wash lids and place in a small container. Cover with cooling water shortly before placing on filler jars. Always use new lids.

  1. Prepare fruit as directed in recipe.
  2. Measure amount of prepared fruit specified in recipe ingredients listing, pack solidly in cup. If measure is slightly short, add water.
    Place measured fruit in 6 or 8 quart sauce pot. Add lemon juice if listed.
  3. Measure sugar and set aside. DO NOT REDUCE SUGAR.
  4. Stir fruit pectin into prepared fruit. (Sauce pot must be no more than 1/2 full to allow for full rolling boil.)
  5. Bring to a full boil over high heat stirring constantly. At once stir in sugar. Stir and bring to a full rolling boil. (a boil cannot be stirred down). Then boil hard one minute stirring constantly. Remove from heat.
  6. Skim off foam with large metal spoon. Immediately ladle into jars leaving 1/4 inch space on top. With a damp cloth, wipe jars and threads clean.
  7. Immediately cover jars with hot lids. Screw bands on firmly.
  8. Place in boiling water bath carefully setting jars on rack in canner or large sauce pot of boiling water. Water should cover jars by 1 to 2 inches. Cover canner, and return the water to a boil, then boil 5 minutes. (At high altitudes, increas boiling time by 1 minute for each 1000 feet above sea level). Remove jars from canner.
  9. Let jam stand to cool. Check seals. Jar lids should be slightly concave or remain so when pressed. Remove bands from jars. Store jam in a cool dry place. (small amounts of unsealed jam may be covered and stored in the refrigerator).

I added the pint yield for anyone who might not yet have the conversion memorized.

Tip: The above jam recipe is a little on the loose side for my taste. So by cooking it a couple minutes longer on the rolling boil will firm it right up. The next time I run this recipe I’ll rolling boil for 3 minutes instead of 1.

What I want to point out is that this recipe does set jam every time. AND if you take a look at all the measurements you will see that they are exactly doubled or tripled the original measurements.

Can I use grandma’s recipe in a large batch?

I have yet to find any real information that says you cannot.

The rumor is that you can’t double a recipe because it won’t set. But here’s the deal, jams and jellies set because the sugar to pectin ratio is kept!

If companies dealing in high volume jams and jellies sales can make recipes in high quantity, you can too. You just have to understand the science and process behind making jams and jellies.

Pectin has to have a high sugar concentration to set. Low or No Sugar Pectin doesn’t have to have that sugar content because it has dextrose (a simple sugar extracted from corn and other vegetables). Because a sugar was already added into the Low or No Sugar Pectin, less is required when you you make your jam or jelly.

So if you are meticulous in your math for creating a larger batch of grandma’s jam then there is no reason why you can’t have success in doubling, tripling, or quadrupling grandma’s recipe!

Tip: Switch from measuring out your ingredients from cups to a unit of measurement, lbs. or grams. By switching to weight measurement you eliminate the dead space of your berries and the precise measurement of your dry ingredients. The reason why the set can be different in using the same recipe over and over again is because the weight of the measurements is different even if the look of your cup measurement seems to be consistent.

If you’re nervous about increasing your batch amount, you can take a trick from candy making to test your jam. Keep a bowl or glass of ice cold water handy. When your cook time is done, drop some of the jam into the water. If it’s not going to set, but remain a syrup, the jam/jelly will dissipate in water. If it is going to set, then it will gel up in the water.

I’ve known too many canners who process their jam and then wait until they crack open a jar to find that their jam/jelly didn’t set. The simple water test, or even setting a small quantity of jam in a bowl and putting it a freezer to cool down, will give you a rather quick indication if your jam/jelly will set or not.

If the jam/jelly doesn’t set or is too loose, then there was something wrong with the ratio of sugar to pectin. (This is all the more reason to find a successful recipe and translate it into weight measurements. Then you can recreate the recipe and have perfection each and every time.) Unfortunately I can’t advise you in adding more sugar or adding more pectin to your recipe because I can’t tell you where your recipe went wrong.

Advertisements

So in this moment of uncertainty, what I would do is head this off in a scientific approach– set aside two samples. In one sample sprinkle in a little more sugar. In the other sprinkle in a little more pectin. What happens? Which one thickens the jam/jelly? Which one makes it looser or no change at all? Also remember that if you’re using powder pectin, it will take a little bit for the pectin to do its thing. It has to hydrate and react with your jam/jelly.

The same goes with if your jam/jelly is too thick. The reason for it being too thick is either because there’s too much pectin or the jam/jelly got reduced too much (you cooked off the water content). There are some fruits that have more natural pectin in it. That’s the reason why apples don’t need pectin to make an apple jelly. So if you’re working with a jam that has a mixture of apple in it, then this is one thing to keep in the back of your mind, the effect that pectin has on your recipe.

But as I mentioned above in the recipe Tip, sometimes the only change you need to make is how long you run your rolling boil for. The longer your rolling boil goes, the more your water content will burn off. Just be careful not to burn your jam on the bottom of your pan. That flavor will permeate through your entire batch.

Making a Memorable Gift

We’re living in a moment of time where family budgets are taking an extreme hit. And with the holidays quickly approaching us I want to share with you one quick idea on how to make a budget friendly gift that will leave a lasting memory. So whether you’re looking to give a hostess, thank you, teacher appreciation, Christmas, or white elephant gift you can take this skill of jam/jelly making and make a gift that will be appreciated!

Once you’ve processed your jam and the jar has cooled, take a selection of material that fits the person or gifting moment. You can choose to cut the fabric in a square or a circle. Depending on if you’re using a wide mouth or standard jar lid will determine what size of square or circle you will make. Another determining factor will be if you want the overlying fabric to hang low or high.

Tip: Set your jar upside down on the back side of our fabric. With a marker or chalk, mark out 2″ from either side of the lid of your jar. Draw out your circle or square. (The Christmas Truck print was a 2″ square. The Red Plaid was a square cut 3″ off both sides of the lid.)

Once your fabric is cut place it on top of your lid and secure it with the jar ring, string, ribbon, or even elastic. Decorate as elaborate of simple as your taste leans.

And now you’re ready for the holidays with simple gifts that don’t suck the joy right out of your festivities!


These cute Jar Labels can be found here in a bundle.

Processing…
Success! You're on the list.

Leave a comment