Fill Up On The Fillings

The holidays are all coming up. And this can bring many feelings to different feelings. When adulting, the hardest part of the holidays are when finances are tight.

To help lighten the mood and bring a little cheer with the gift of flowers.

I’m going to show a simple and easy to make arrangement that you can personalize any way you want because it’s a blank slate. The beauty of it is that I reused some items and others were given to me. I had no out of pocket expenses to share this post with you.

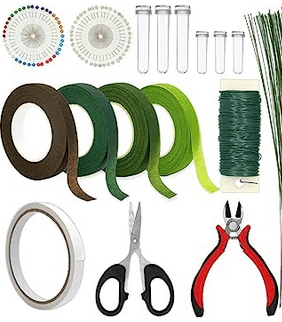
So let’s start with the materials.

Vase

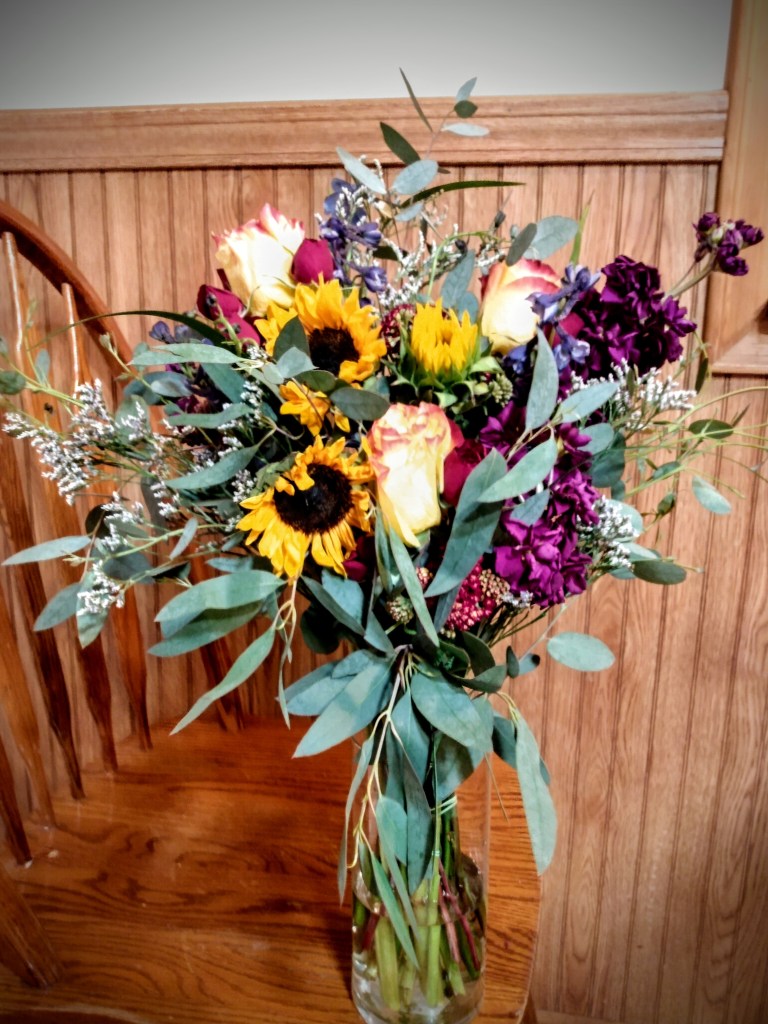
What inspired this post was the vase that my mom had sent me some flowers in.

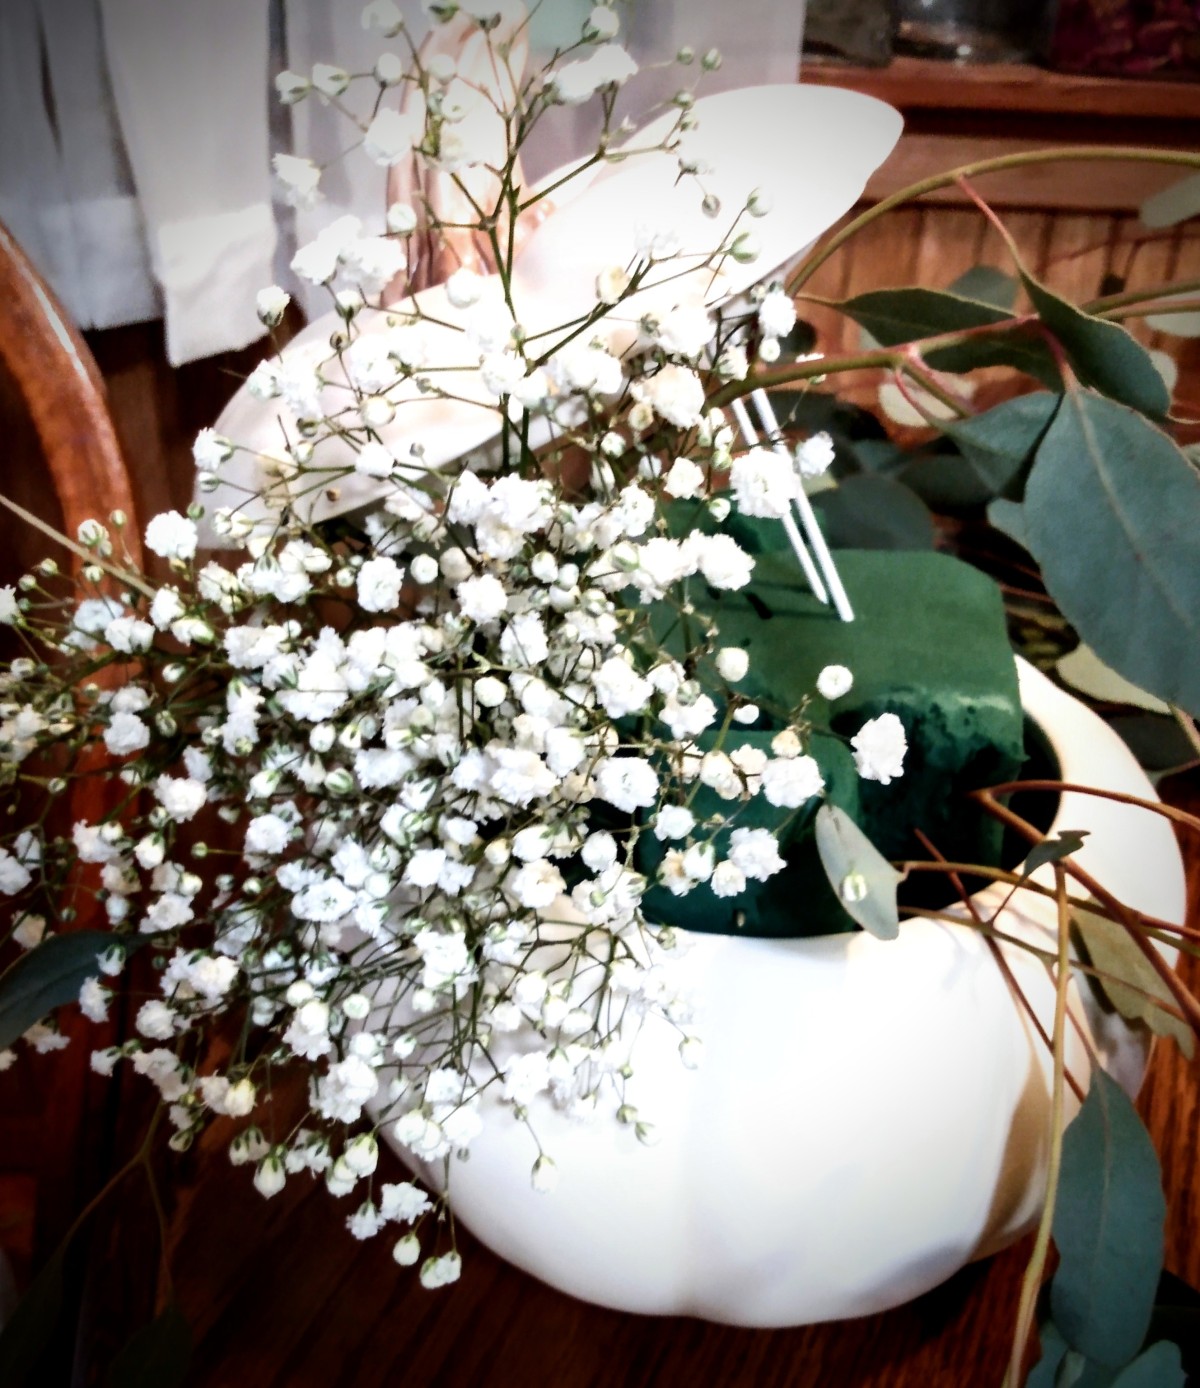
Fall is my season. I love pumpkin everything. In fact I grow and purchase pumpkins to have all my pumpkin goodness that I can preserve for the rest of the year. And yes, I make pumpkin scones year round because their deliciousness transcends what is in season.

Unfortunately I can’t send you a picture of what the floral arrangement was that my mom sent. Mostly because I want to keep the blank slate in your mind and spark your creativity.

What I like about this white pumpkin is that if you remove all the floral it is literally a cookie jar. So feel free to use this idea any time of year and use cookie jars, old tea pots, water pitchers, even a shoe box (hello baby shower with baby shoe boxes!) Literally, use what you have on hand that brings you inspiration.

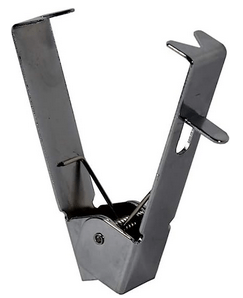
If you’re using a cookie jar or anything else with a lid, let me show you the parts of this vase and how it works.

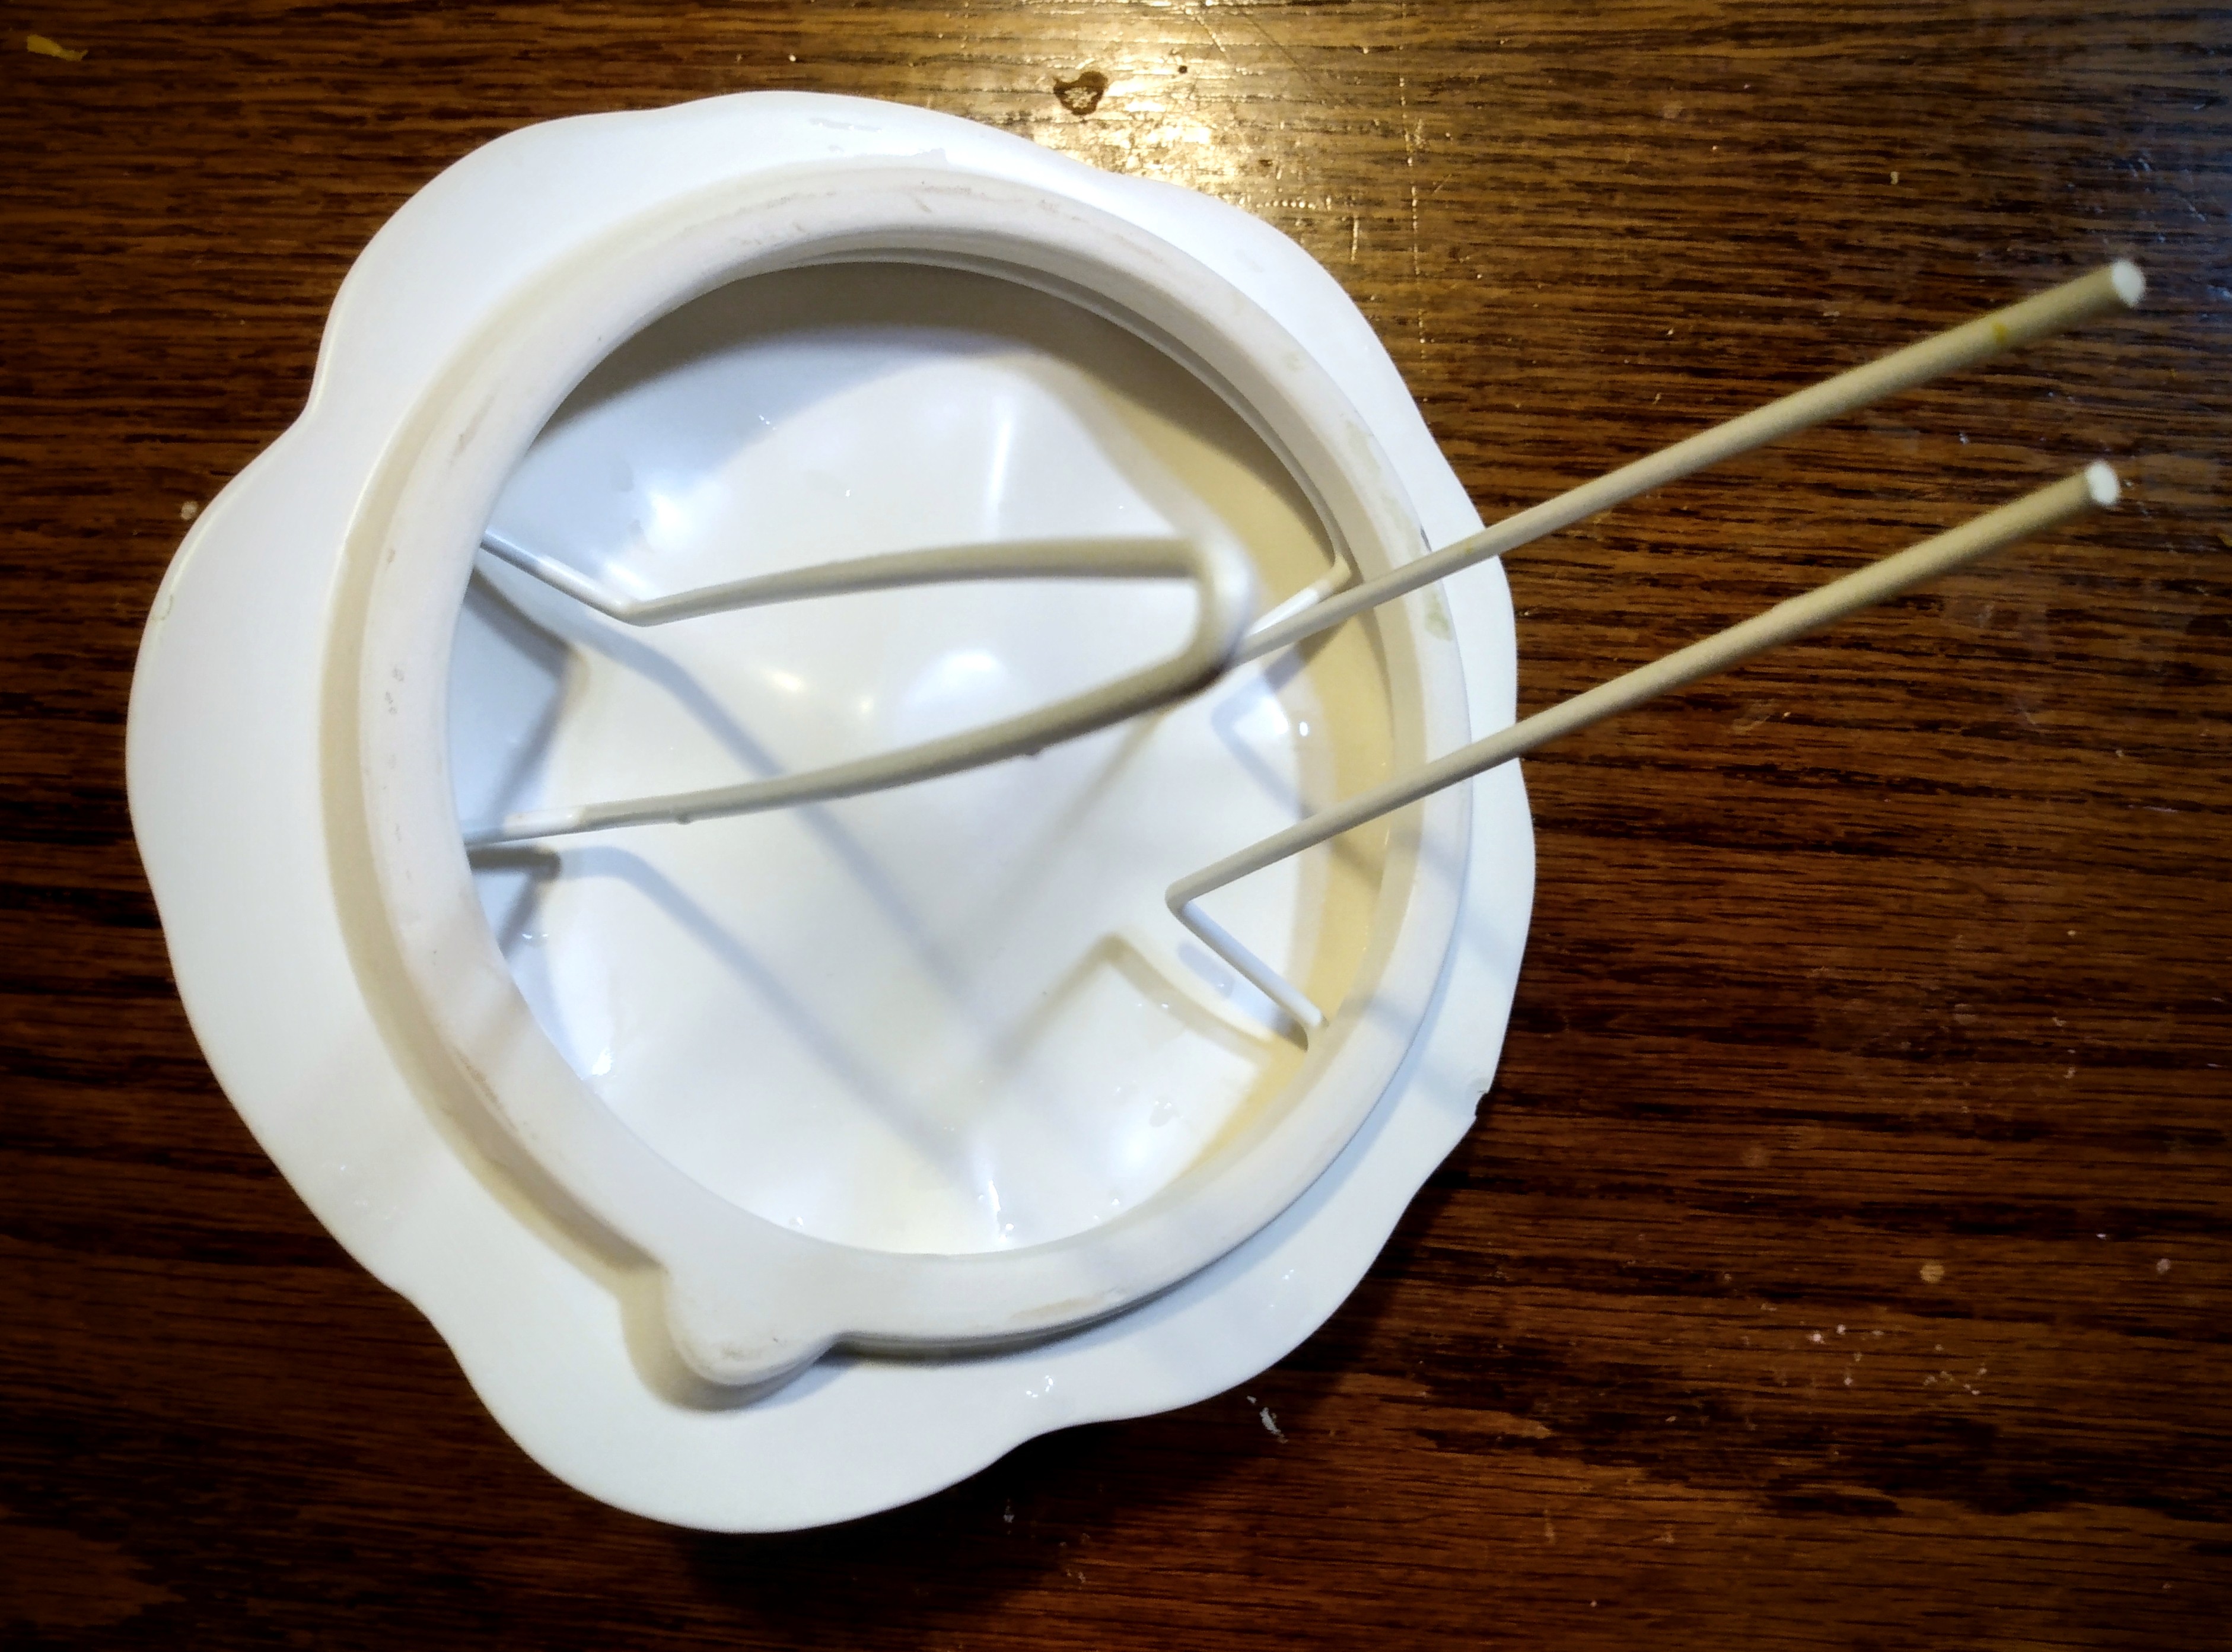
This lid stand/holder is very specific for floral. I’m sure with today’s online offerings, you could find these. But you’re going to have to know what your lid size is and go from there. I have one other cookie jar, but the lid is smaller and this stand/holder definitely will not fit in it.

However I do have two options off the top of my head that I could use from items I have in my house.

I have porcelain dolls from my childhood, and this stand/holder immediately reminded me of the doll stands I have that go around my dolls’ waist. The tension part is too small to fill the lid like in this pumpkin vase, but with two or three I could position them in the smaller lid to make the tension and platform to raise the lid.

Another option is making one from a thick gauge wire. If your local store has a DIY floral department or aisle, you will find wire thick enough to hold its shape and hold the weight of a lid. If you want to price comparison shop, go to an automotive shop or aisle. You’ll often find that you will get a better price in that department, but also walk out with a larger quantity of wire.

Once you have the wire, you can make your own custom holder/stand by leaving several inches of one leg sticking out as you then go in and create a loop of wire inside the lip of your cookie jar lid. I would make a few loops inside that lid to ensure that when you move and manipulate the legs that you don’t shrink your loop and allow your lid to fall. Once you’re confident in you loop, bring out a second leg and then use wire cutters to cut the wire. You can always add more than two legs if you feel like you need to add more stability.

Advertisements

Inner Stability

For lid placement, you will need something to anchor the stand into.

I’m choosing to reuse the oasis that came with the flowers my mom sent me. This is an amazing product because it not only allows you to place flowers like a pin in a pin cushion. It also allow absorbs and holds water, keeping your flowers in water much longer than free standing in just a vase of water.

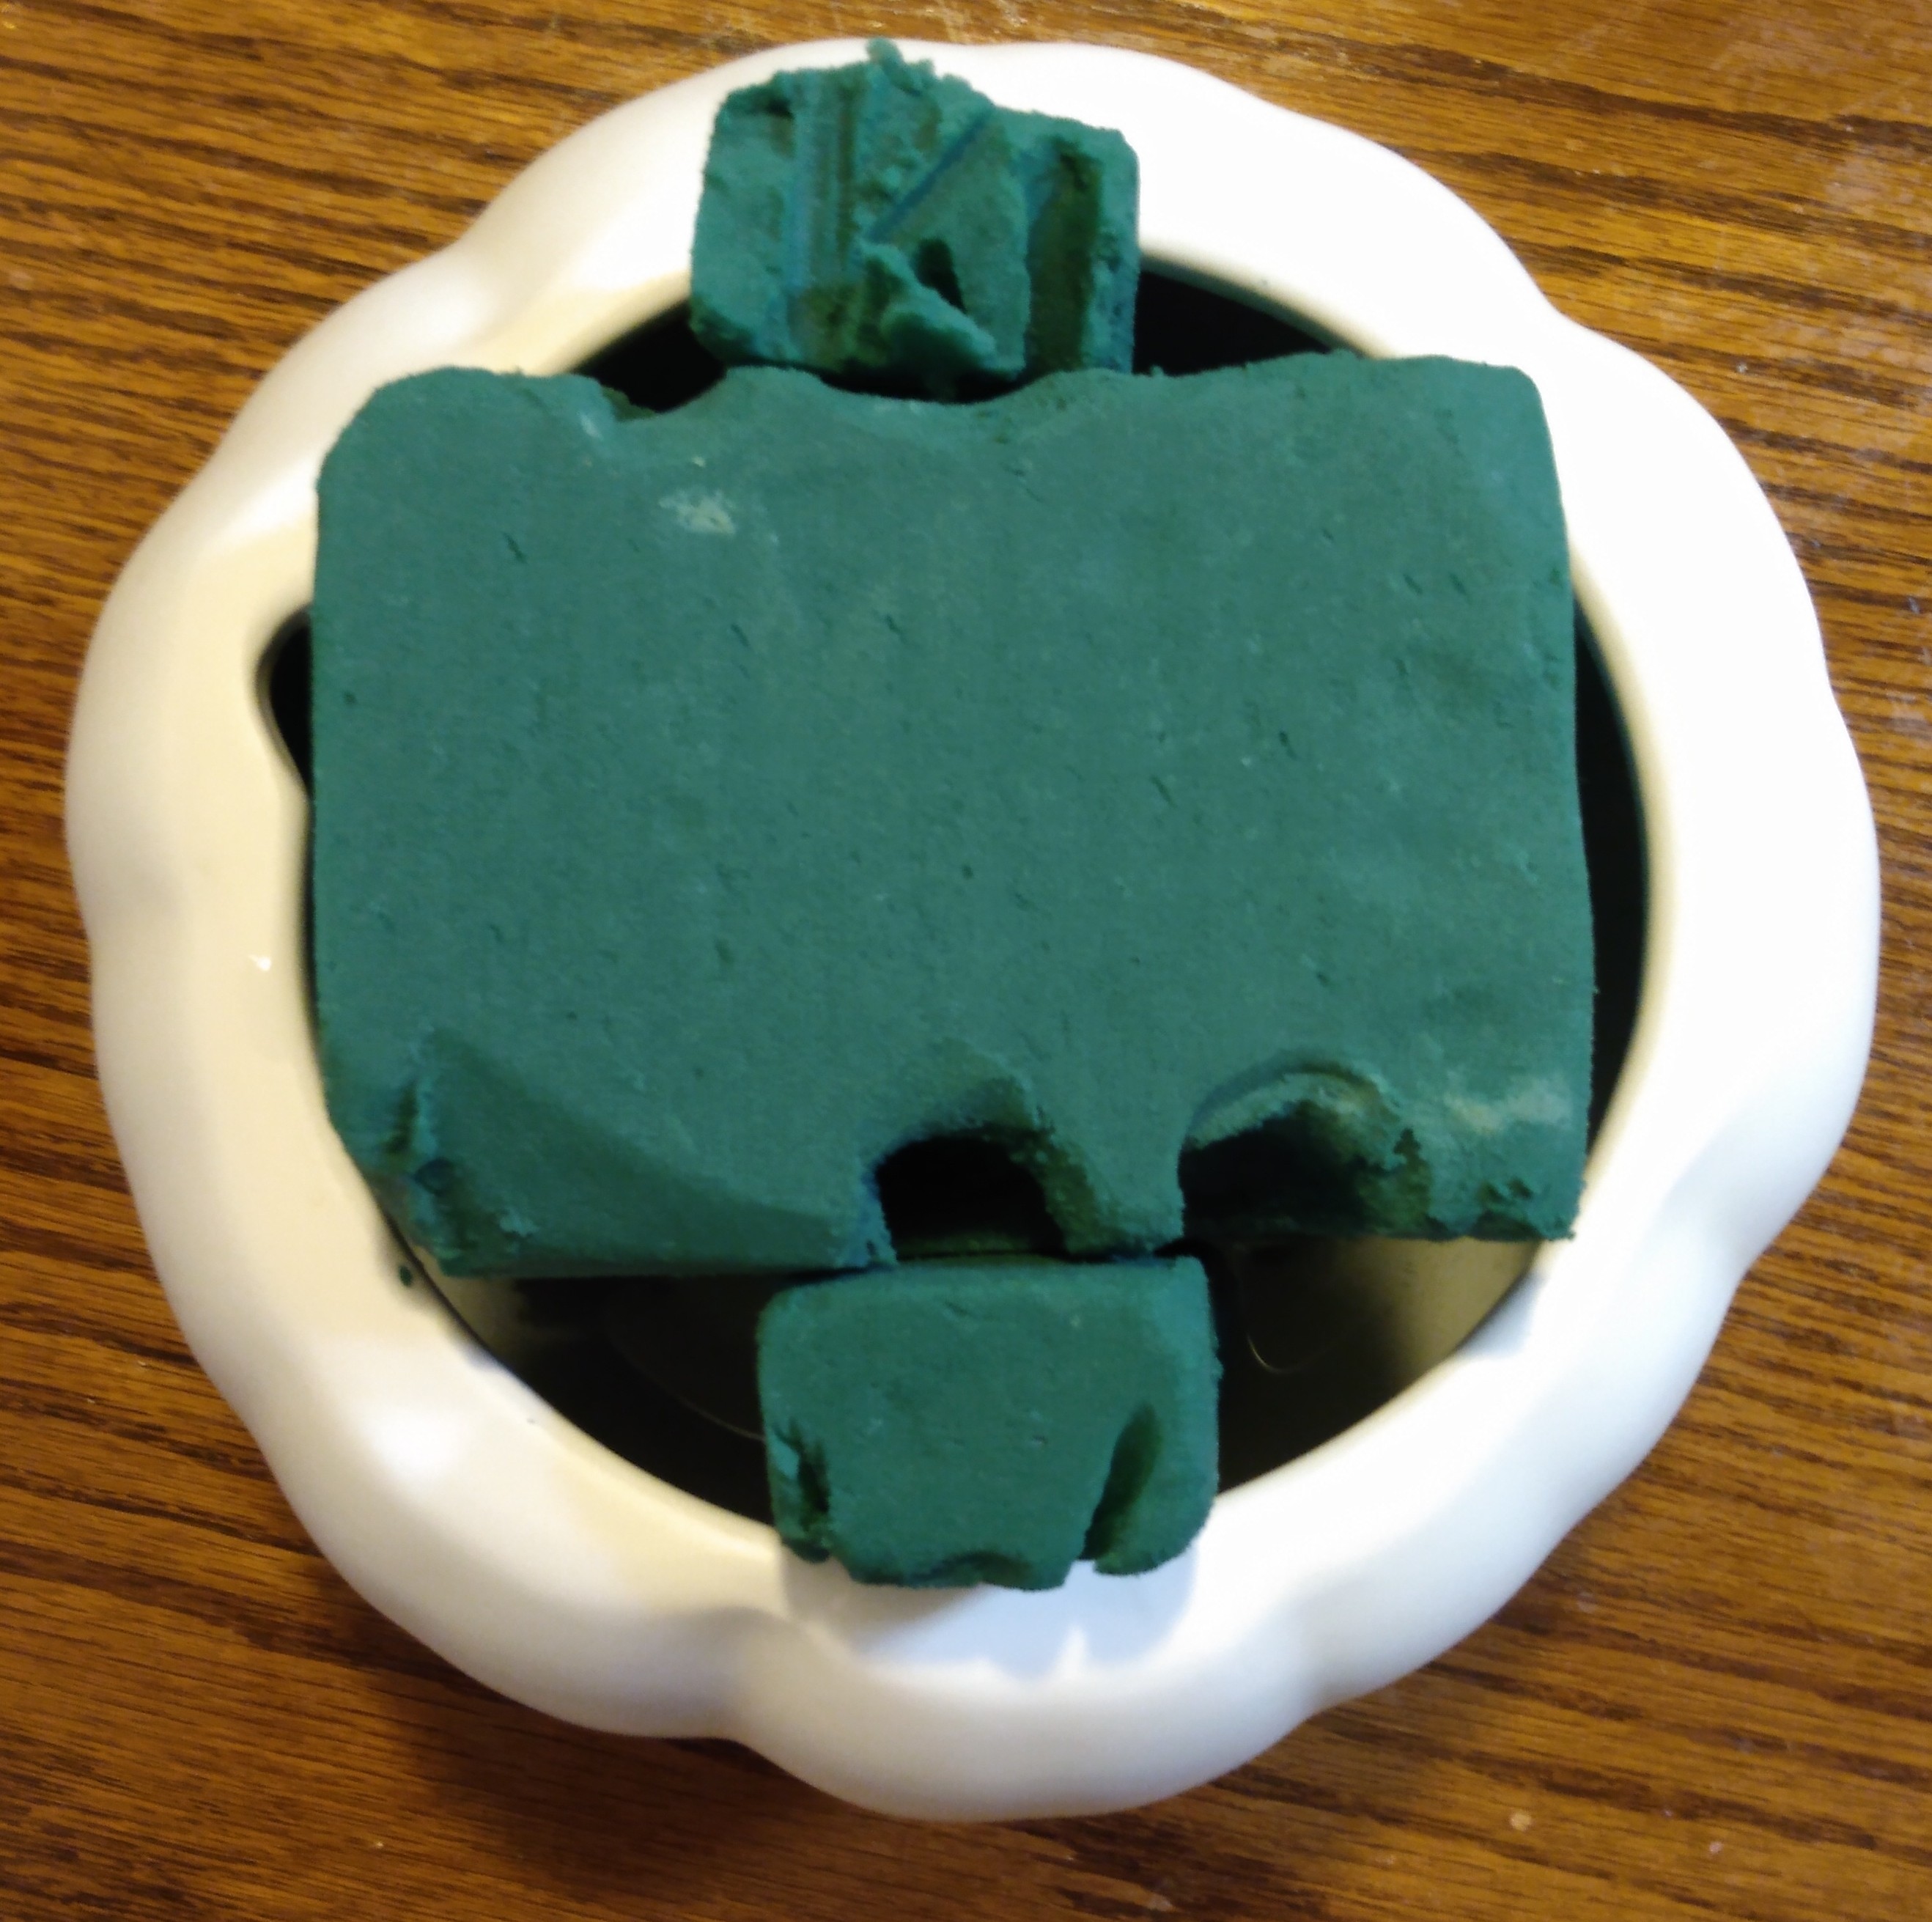
If you want to use silk flowers that you have on hand, feel free to use a Styrofoam ball or block. (I don’t recommend styrofoam for fresh flowers because the plastic will kill your flowers and won’t allow them to be properly hydrated.

Once you’ve decided what you’re using as a structure (of if you’re even using a structure), you may find that you need to piece bits together to keep them from falling into your cookie jar and becoming lost. Flower stems are enough to keep bits together. However if you need everything to be in place before you get started on your flowers, know that toothpicks or a couple inches of wire are your best friend.

As you can see here, a single toothpick is all that was needed to hold up a water logged piece of oasis.

This is a beneficial trick if you only have a small sliver of oasis that doesn’t touch the bottom of your vase. Or even if you find that your oasis fell apart on you. Or maybe some oasis you salvaged was a different size than the vase you are working with. You can certainly make your oasis fit the vessel you choose to use.

TIP: Please note that placing a toothpick or wire in a 90° angle is going to cause frustration. The weight of wet oasis and flowers are going to collapse. So instead, angle the toothpick at a 45° angle. That way when gravity starts to work against you, the toothpick will hold its place. This will be further reinforced by the flowers that you soon add.

Advertisements

Flowers

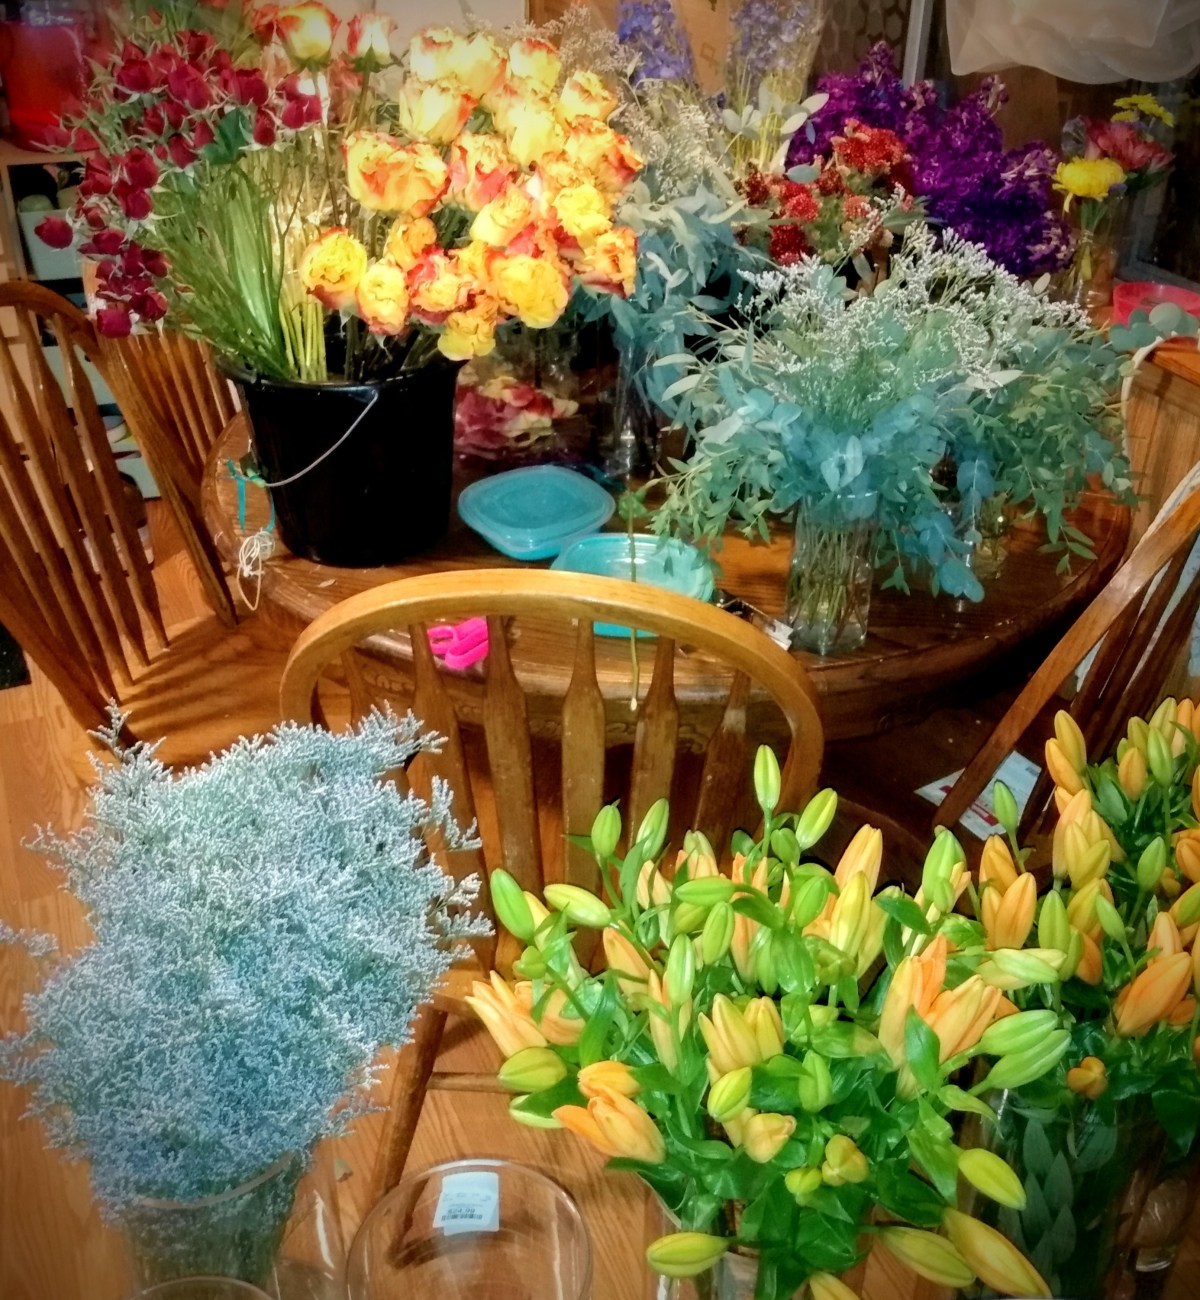
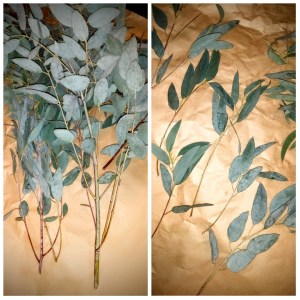
The Flowers that I was gifted after an event I attended was baby’s breath and eucalyptus. Often we look at these as just fillers to make an arrangement look larger than the more desired stems.

I wanted to use these fillers specifically because they are often overlooked for being used as flowers on their own. Maybe you have a lot of fillers left over from other arrangements that you made. Or maybe your budget is tight and these are the only flowers that are in your price range.

There are so many other fillers that you can find in your grocery store. So please keep your eyes open. And not all stores offer the same offerings. The grocery stores don’t supply very many filling options. However, stores like Trader Joe’s offer the best selection of filler flowers in my area. And their prices are quite affordable.

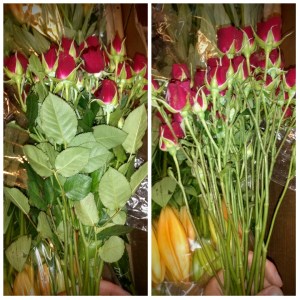
TIP: If your local store doesn’t offer many choices for filler flowers take a look at what is available for discounted flowers. They’re the ones that have the more delicate flowers that are wilted. These discounted bouquets are often cheaper than just fillers flowers, but the fillers used in these bouquets still have a long life to them. There are a huge number of flowers that will last weeks without even having water available to them. So know that even all that you can afford is a heavily discounted, on its last leg bouquet, if there’s a decent amount of fillers included, you can make a decent arrangement even if you have to throw out the wilted roses, lilies, and other delicate petal flowers.

Advertisements

Arranging

When looking at using long stems of filler, like eucalyptus, you will be happier in how these stems lie when you hold them up and see which direction they are naturally bending. (See the right picture below.) If you want the stem to cascade down, angle the bend down and also put it in the oasis by entering from the bottom and putting the stem upward. This can be seen in the picture on the left.

See the difference between placing firm eucalyptus stems. Using the left picture (above) the stems you see in the bottom right corner are the stems that I angled from the bottom of the oasis and pushed upward. The one stem that is in the upper left corner is the one that I pushed from the top and downward. But this stem I also used a second trick. Even with the curve of this stem, it had the tendency to stand upright. So I curved the stem in a C shape and kind of hooked the stem in the oasis. Then I put the pumpkin lid over this stem to weigh it down. Even with this trick, the stem never gave a cascading down effect like you see with the bottom right corner stems.

How you place the stems is everything about how it stands up or lays down.

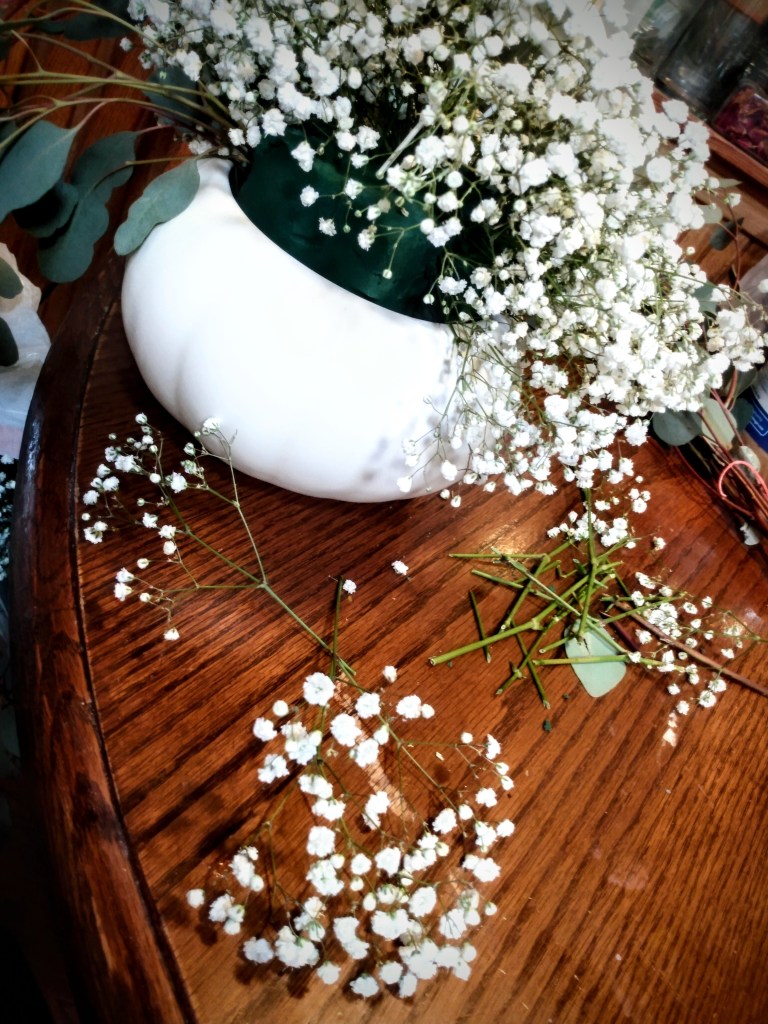
The baby’s breath is much easier to shape the way that you want. For this cookie jar I used about four stems of baby’s breath and snipped them down into smaller branches. And with an arrangement like this, there’s no need for long pieces. All you need are the “scrap” pieces or bits that are the size of your hand or smaller.

If you “scrap” pieces or the bits that you cut down are too small, it just means that you need more of them to fill larger spaces.

One work around for filling empty spaces quicker is to take larger pieces like this. In the below picture on the left is a stem that is about the length of my elbow to my wrist. It could have been trimmed down into four smaller stems, but I wanted to fill a large hole with just this one piece.

To close up the gap spacing between these branches, slide your fingers up the main stem, gathering all the stems up the main stem. That gathering bunches all the stems up to achieve what you see in the right picture. You will have to hold you stem in this position until you push it into the oasis. At that point, the foam holds bunching in place.

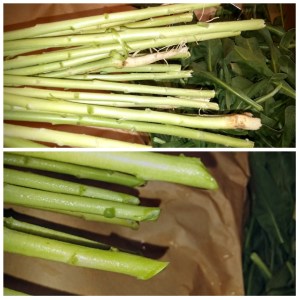
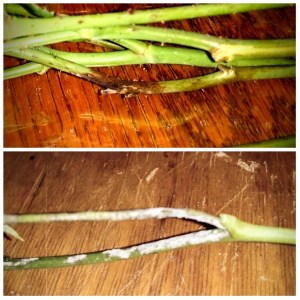
Before you place your first gathered stem, I want to draw your attention to a stem feature that has the potential of causing you some up front frustration.

The weakest part of the baby’s breath stem is the joint where all the branches merge. The times that stems snap, when placing them in oasis, is when I try to push these joints in without giving them assistance.

If you have an arrow tip like you see above, it’s easiest if you just snip that off. It causes resistance, when pushed in the oasis, that you don’t need, because those stem numbs have no flowers.

Look further up on the stem and you see what it looks like when you have attached flowering stems. When I don’t need the height from the stem, I snip it right there at the base of where all the stems merge. Then I slide my fingers down to make more of an arrow point instead of a tear drop. That fat end of the tear drop is difficult to push into oasis. However, if you make a sharper point, or a smaller surface area to push in, the stem slides right into the oasis.

If there are any other merges in the stem, it’s easiest if you pinch it smaller to get it to go into the foam. Depending on how large of a cluster you have, there may be a few of these joints that you have to manipulate into the foam.

Advertisements

Final Adjustments

Once you’ve filled in all your empty space, there’s a few decisions to make.

  • Do you add more of one filler or the other?
  • Was there too much and some needs to be removed?
  • Does placement need to be adjusted?
  • Is something missing?

I looked at the final arrangement here and went through these same questions. All the holes I filled with baby’s breath as that’s what I chose to be primary flower out of these two fillers.

The thought crossed my mind to add more eucalyptus. But I opted with the creative decision of having less leaves on my pumpkin “vines”. So that meant instead of removing branches of eucalyptus I chose to weave the branches through the clusters of baby’s breath.

As far as “am I missing anything?” that is the question that is always there when you have a blank canvas for an arrangement.

Right now this is how my pumpkin sits in my living room. But it also allows me to keep this long lasting arrangement in season through the rest of the year. For Thanksgiving, I could add fall leaves or any other fall accent pieces. For December all the fall accent pieces can be pulled out of the oasis and winter pieces added. For example, I would put in snowflakes or mini presents. In fact, I’m eye balling some mini glitter snowflakes while writing this. The question is if I want to keep with the white color and add silver glitter snowflakes. Or do I want to add a splash of color and put in gold snowflakes?

But that’s the beauty of making a simple arrangement like this. I can dress it up and change it.

In fact, I could keep this up for the New Year and put in foil clusters that look like fireworks.

For now I’m just going to have to contain myself and not entertain my kids. It’s so easy to grab their small stuffies and other toys and use them as props to make little scenes. We don’t do Elf on the Self in our house, but just like there’s millions of Pinterest posts on Elf on the Shelf ideas, there’s just as many possibilities for arrangements like this. It doesn’t matter if you have a pumpkin cookie jar like vase (like I used here) or a teapot or coffee cup. No matter what you are using as a unique vase, you have just as many options to accessorize and decorate without limits.

How would you dress up a pumpkin arrangement like this?


Leave a comment

Processing…
Success! You're on the list.
Advertisements
Advertisements
Advertisements
Advertisements

Making Arrangements

Talk to a florist and they’ll tell you that you just can’t throw flowers together and expect them to look good. And to the average person, we toss that comment off to the side and say, “just watch me.” And then we wonder why our DIY arrangements look nothing like the inspiration picture that we want to recreate.

Success and being free of frustration comes when we stop trying to clone a picture and just use it truly as just as an inspiration.

  • Color combination
  • Style
  • Form
  • Specific flowers and greenery

For the wedding that I’m pulling inspiration for these posts, the bride gave me this inspiration picture.

In addition to this picture the bride wanted to incorporate lilies in with the bridal bouquet and the groom’s boutonniere.

What she obviously liked about this picture was the colors and garden style bouquet. So these were the two points that drove the design work for this job.

Every florist has their own touch and esthetic. Because florists are not all the same, that is the permission that you have to stray from your inspiration picture and create with your own floral voice.

If your inspiration picture is a flower you can’t identify, strongly dislike the fragrance of a flower, or can’t source a flower, pick replacements that share the same color, size, or feel. When looking at flowers and one jumps out at you, you absolutely love, and fits in your colors, go with it! Draw inspiration from the flowers even more than you do a picture.

You want to love every flower and greenery that you purchase. When you look at the spread it should already make you smile and excited even when you haven’t done a single thing. This helps you when deciding what flowers you want to place next to each other. You will know when you like a combination. You will also know when you don’t like flowers next to each other. And this is okay. It is part of the creative process!

Advertisements

In the last post, Making Flowers Possible, we went through the process of cleaning your flowers and preparing them to assemble your bouquets. Having already done this in advance, for your assembly day, you are ready to reach and grab and assemble without fussing over messy stems.

Before we move forward I did want to link a couple videos to show you some techniques that I found were clear and easy to follow; spiral, X base (starting around the 3:30 mark), and building from different holds.

With the flowers that my husband periodically brings home for me, I’ve successfully assembled in a spiral formation and love how sleek, secure, and stem supportive it was.

For the life of me, I could not get these wedding bouquets to work with me in spiral formation. Even with fluffing, adjusting height, and rearranging floral placement…nothing was looking right.

And that is where frustration first sets in!

Advertisements

You have that image in your head about how these flowers are supposed to go together and look. And when you try all the tricks, it’s easy to think that you’re out of options. Then panic sets in. And all the overwhelmed feelings break like a damn.

That’s why I linked the above videos. There’s at least a half dozen different options available when one fails.

The spiral failed for me in this time crunch, so I modified it with the X formation. But before I went down that option, I pinpointed what was the main cause of my emerging frustration.

I had combination of flowers that I wanted next to each other. The combos were not staying next to each other no matter how I was holding the flowers.

That’s when inspiration hit and I made a trick for myself that I wanted to pass on to you!

For the floral combinations that you have to have next to each other, use your floral tape and tape them together how you want them.

You can also include greenery, or make bunches of greenery with this trick as well.

This is a particularly helpful tool when you also find that you’re struggling with keeping your bouquet symmetrical and balanced.

And if you’re that DIYer that has to have all your floral looking exactly alike, this can help you save time. You can be precise and make it easy to replicate.

Or maybe you’re having an arranging party and everyone is assembling a little too different from each other. You can totally make an assembly line and break down the arrangements into smaller pieces that you can build up as you go.

This bundle and then arrange technique is also great if you like the garden bouquet style but the fly away elements just are not your thing. It can transform a wild garden into a more manicured garden.

In what order do you want to arrange?

I mentioned before that for this wedding order I had 3 bouquets, 3 boutonnieres, 6 oversized vase floating, and 2 flower baskets.

Here’s how I made my choice of order.

Boutonnieres can use scrap pieces. So flowers where the stem snaps, greenery that you trim because it’s too long, flowerets and sprigs that are pared down because they were too full for what you need in other arrangements.

Flower baskets can also use all the flowers that snap off the stems, because you’re just using petals.

My submersible floral arrangement use only specific flowers, so I put those in reserve. And I’ve done those enough I can do them in my sleep. So I put those arrangements off to the side for when I need a break or when I’m frustrated and need a win to get myself back into a good head place.

That leaves the bouquets.

I start with the bridesmaids bouquets because it gives me time to warm up and see how the flowers are going to work with me. Plus there’s the added bonus that they are smaller.

The thing that has to be remembered though is that all the best of the best needs to be set aside for the bride’s bouquet.

As I pull stems, the perfect blossoms I put aside in a vase. The flowers with my favorite colorings, I set them aside as well.

This is especially the case with the roses. But I don’t skimp out on the bridesmaids. I aim for the middle for them. For example, the roses I needed for the bride, the bridesmaids, the boutonnieres, and the flower baskets. My lease favorite roses I left in the container for the baskets. They will be walked on and not photographed closely. The boutonnieres I make from the buds that accidently snap off the stem or left over from the bride’s reserve.

And this is the beauty of ordering extras, or a little more flowers than you need. One, it’s a buffer for damage during transit. But more importantly, it allows you to have a selection and delegate as you need.

I didn’t have mother or grandmother corsages. But how would you put them in the hierarchy of who you are saving for whom. For me, I would put them after the bride, but before the bridesmaids. But maybe you would order them after the bride and bridesmaids. That’s the decision you have to make. And it ensures that you have the quality where your hierarchy lies.

Maybe you’re doing fresh flower aisle runner. Did you want the quality to go there over bouquets, because the guests see those up close?

Again, there’s no wrong answer. You just want your plan ahead of time where the best of the best of your flowers are going to go.

And your order of assembly reflects this.

You may not want to start with your most important piece until after you’ve warmed up and gotten the feel for what you want to create. Your highest carnage of stems is going to happen in the very beginning. And again, when frustration hits. So you want to time your best pieces just right to avoid both of those casualties.

Advertisements

What to do when the frustration hits

And believe me it will hit, especially if you’re doing this DIY by yourself. It’s okay. This is normal. Nothing is wrong with you. You can do it. And keep telling yourself that this will turn out when all is finished.

  • Take a coffee break
  • Grab a snack and walk away for 5 minutes.
  • Eat that meal that you normally eat an hour or two ago.
  • Get a breath of fresh air by walking outside to check your mail. And before you open that box, take a look around and see what is going on in nature around you.

I did this job while my husband was at work and I had my kids entertaining themselves in the other room. Thankfully they’re great kids and understand that I need to focus on work. (Of course it helps that they know that they get rewarded with amazing quality time when I complete jobs, they’re so understanding even if they want the cuddles and attention now.

My kids get an honorable mention right now because I’m the type of person that gets in the zone and will neglect my needs to push through and get a job done in a more expedited manner. Mostly, this is to prevent taking advantage of my night owl tendencies. But their schedule can’t be pushed like that.

Advertisements

My kids were my built in mandatory break times. And that’s a good thing.

Their lunch time came right when I finished the first bridesmaid bouquet. It was pretty, but I wasn’t satisfied with it I wanted it better. And me being forced to take a work break to feed the kiddos gave me the step away break that I needed to process what it was that I didn’t like and obtain an idea to fix it.

Not everyone arranging flowers has kids in their space. But maybe you have a pet that needs being seen to. Maybe you have a phone call that has been pushed back long enough and it’s time to make.

Whatever you do in your normal life, be sure to continue it while you DIY your flowers. These moments are the moments that help you to refocus your mind and open the doors to inspiration and ideas that were hard pressed to come because of the tunnel vision of the focused drive.

What if something goes wrong?

Oh the stories I can tell you of things going wrong!

We always dream and envision things going smoothly and perfectly the first time. But let’s be honest, life happens.

This particular job didn’t go smoothly. In fact, I cried and I panicked. Because of course my thing that went wrong happened at night, when shops were closing down and I promised to deliver in the morning.

I was working with my submersed arrangements, enjoying the moment of doing something predictable, enjoyable, and very peaceful. I was working on my third vase when I heard what sounded like an industrial bug zapper going off. I had no idea what that was, because we don’t own a bug zapper.

My husband walked in and I told him about the noise, asking him if he knew what would make that sound. He shrugged and continued to check and see how the job was progressing. He looked over at the completed vases and asked if one of them was leaking because there was some water of the floor. I looked at him as if he was crazy. Of course there was water on the floor, I’m working with water.

Not even a minute later the bottom blew out of one of the completed vases and at least 5 gallons of water shot all over my hardwood floor.

To an outside observer, this was comedic gold! I’m talking I Love Lucy proportions.

The good news is that the flowers were perfectly fine, unharmed by what happened. And yes, the water got cleaned up.

Advertisements

The stress was that I was a vase short, shops about to close, and no one would be open in the morning before I needed to deliver. I couldn’t go to my local go to shops. They would be closed by the time I arrived. Fortunately, there was one store I could make it to before they closed that possibly had what I needed. And I felt so blessed that they had exactly two matching ones that I could work into my design and fulfill my order, better than what I originally promised.

I share this story with you to not just make you laugh. (Yes I can laugh about this now!) But to show you that even in the professional world of event designing, these things happen to us as well.

Cry in the moment if you need the cry. It will release everything you’ve locked up inside during this whole process. You will feel refreshed afterward.

Acknowledge the moment for the tragedy that it is, but don’t let it stop you or put you into a freeze where you can’t get back to work.

What resources do you have to pull from to recover?

Is this obstacle something you can replace?

Can you still function with what it is that you have?

Call in the assistance of a loved one to be the clarity of mind that you are not in this moment. Loved ones are amazing people to act as support. Never forget or underestimate the people that surround you.


The photos for this week are from the wedding floral that I did for the inspiration picture at the beginning. The bride wanted to go with the garden style of floral. But I don’t want you to leave today thinking that this is the only way to use these beautiful flowers.

Next week I’m going to show you the different styles that I created with the left over flowers from this job. I can’t wait for you to show you these different inspirations that you can take and make for yourselves. Plus, I have one that is a couture shot! It’s not practical for a centerpiece, but it was sure fun to photograph.

See you next week!


Is there anything you want directions on how to build when it comes to floral design? Comment below!

Here are some Products that can assist you in your floral arranging.

This post contains affiliate links to products. We may receive a commissions on products purchased through these links, but at no extra cost to you. These items listed here are from Amazon but may be purchased at local markets and floral wholesaler.

Rose Cleaner Rose Stripper Thorn Remover Stem Cleaner Tool

I have this tool. It works for cleaning the stems of more flowers than just roses.

Premium Garden Shears

The larger shear is the one that I use for trimming larger flower stems and branches of greenery.

Floral Arrangement Kit

This is a good starter kit that has everything that is useful for making arrangements.

1/2″ Wide Floral Tape

This is a must have, even if you’re trying not to buy any extra items. I’ll go more into this next week. The trick to this tape is that you stretch it to make it sticky.


2 responses to “Making Arrangements”

  1. JohnnyAtorm Avatar
    JohnnyAtorm

    The excellent answer, gallantly 🙂

    ——
    rajabet.com app download

    Like

  2. Same Flowers Other Styles – How I Can Do That Avatar

    […] example, if you remember from Making Arrangements last week, here are the pictures from some of the […]

    Like

Leave a comment

Processing…
Success! You're on the list.
Advertisements
Advertisements

Making Flowers Possible

When I participate in wedding open houses, one of the most common things I would hear is “I/We can make that.”

Each and every time I heard that phrase I cringed. It didn’t matter if I heard it when I worked for an event decorating company (where I participated in over the top large event decorating) or when I branches out on my own. This phrase makes every professional cringe.

Just like a plumber who hears someone say, “Oh that’s easy! I can do that and save on a plumbing bill.” That plumber is not only cringing, but he’s laughing at you and thinking that he’ll see you in a day or two. You might very well fix that plumbing issue. But experience says that it’s a DIY plumbing job that will go wrong. And instead of paying a couple hundred dollars to the plumber, it’s a couple thousand dollar repair for a DIY “fix”.

That’s one reason why I started this blog. I like to contribute to the creative community, pass on skills that aren’t generally being passed down anymore, but also to help the DIY person succeed.

Here’s a glimpse of how you might receive your flowers from a distributor.

Here’s the thing, a professional is going to have inside deal on material costs and more importantly the knowledge and muscle memory on how to do a particular skill. They’re going to know the short cuts that save time. They also know all the wrong ways of doing things, know how to recover from a failed idea, and when to move on to the next idea in an expedited manner.

Is it possible for you to do your own wedding flowers?

Absolutely!

Purple Stock

(The following pictures are the flowers that I used for this job. I’ve included names if any of these are unfamiliar to you. There are so many beautiful flowers in this world! Please don’t be limited by the ones that you see here. In these pictures I’m showing how I strip the stems bare in my prep work. I’ll talk about that in just a moment.)

I’m going to spend the next couple of weeks talking you through how you can make your own floral arrangements. I won’t share all of my trade secrets because I still love playing with flowers, but I want to help you avoid a head ache or two, plus a panic attack. I DIY most everything for my wedding and still after all this time, I remember the melt downs I had, especially when it came to the wedding invitations.

The stress on a DIY bride is real. So I want to help you, so that you can trust to come to me when you need a professional.

Dark Blue Delphinium

First things first, you have to prepare before you start.

The best way to kick start this is by having an inspiration picture. This will help you navigate through the online sites where you can order flowers to be shipped to your house or when you talk with a flower producer/distributor.

  • You might not know the names of the flowers you want to order.
  • You might be able to find a deal on a look alike flower.
  • There could be a budget friendlier alternative.
  • You can upscale with a rarer look alike.
  • An out of season option can be switched out with an in season look alike.

Inspiration pictures also give an idea on which flowers look good together. Nothing is worse than ordering flowers that you like individually but when you put them together, something just isn’t right.

Red Alstomeria

Even with this wedding, which I made floral arrangements for last weekend, I went into my local flower distributor with a list of flowers I picked out (to imitate an inspirations picture) from online. But when I looked at the flowers in the walk in cooler, there were other ones that jumped out and added further inspiration so I couldn’t wait to arrange. When it came time to pick up the sales person helping me pulled a couple of additional bunches of other flowers that my flowers insured her with. From that additional pull, there was a different flower or two that looked better in the collective whole than the ones I originally thought I wanted.

(I’ll come back to this thought in two weeks when I show you additional arranging options using the same flowers!)

Once you’ve put in your flower order, you’ll want to schedule your pick up with a minimum of two days before your wedding or other special event. You will most definitely need two days if not three to make your arrangements. I don’t play with flowers every day and this job took me two days and some touch up work on the day of before loading up the flowers for the wedding.

Advertisements

The Schedule I Gave Myself:

Day 1 Thursday–I picked up my flower order from my distributor. I took them back to my work space and got out buckets and vases and filled them with water. Then I went straight to work to prep my flowers for the next day.

Day 2 Friday–I spent all day arranging.

Day 3 Saturday/Wedding Day–examine all the bouquets and other arrangements. Does anything than to be adjusted or flowers switched out? Put on decorative elements, such as ribbon. Cut fresh ends, place in fresh water, and load up for morning delivery.

Red Yarrow

Your DIY arrangement schedule may need more time. You may need to start your prep work on a Wednesday, so you have an additional work day. The important thing to remember is that these flowers are going to take longer than you think they will.

If you are a bride who wants to do everything yourself, this schedule is probably something similar to what you will need to implement. If you like working in groups and want to make a flower arranging day, it might be possible to do this in one day. After all the more hands you have, the less work and time is required from you. Just be prepared that if you have others working with you, nothing is going to look the same. There will be variations in assembly and placement. So please make your choices based off of your expectation level. This will give you the least amount of stress and make DIY floral arranging more pleasurable.

For this wedding I made 3 bouquets (that were doubling as table centerpieces), 3 boutonnieres, and 6 large submersible vases.

Advertisements

Preparing Your Flowers

Hopefully when you pick up/receive your floral delivery, the flowers were kept cool in transportation. Heat is going to make your flowers wilt. But don’t stress out! They will bounce back. The Purple Stock that I used was the bunch that wilted the most in transportation. They were the first bunch that I stripped the stems, cut the bottom of the stems at a 45° angle, and put in water in front of an air conditioner.

Prep your stems first, so the flowers can drink while you’re prepping other stems.

If your event is in this wonderful summer heat, you will want to make sure that you keep your flowers in a cool room. Heat is not your friend with many types of flowers. So if you’re event is outside in hot weather, also make sure that the flowers you use are hardy and won’t wilt in the heat.

At the bottom of this post, I’ll post some links to items that can be helpful not just for prepping your flowers but also items that you will need for assembling (the topic for next week) your floral arrangement.

So trimming the bottom of the stems at a 45° angle is what all florists will tell you is the optimum cut to allow your flowers to drink and hydrate themselves while you are working with them. By cutting at the bottom portion of the stem, you leave yourself length for making tall arrangements and giving yourself plenty of room to make additional trims if your flowers need another stem clean up.

Spray Roses

Make sure that your scissors are brand new sharp. Old scissors will mash up the bottom of your stem and you will see that you will need to make a new trim on your stems in a day or two. The flowers will just struggle. Also, gardening sheers are amazing to have on hand if you are using flowers with thick stems (roses, Asiatic lilies, sunflowers, and others). Even new scissors will struggle with these larger stems.

Cleaning up the stems is definitely a task you want to do before you start making your arrangements. There are a few different reasons why you want to clean off the stems from leaves and thorn.

  • Thorns hurt!
  • Leaves take up room–anything not around the bloom face is just going to get in the way and not be seen.
  • Leaves resting in water will decompose quickly and make the water look muddy.
  • Cut flowers drink up water and try to keep everything on the stem alive. By removing the leaves, the flower focuses on keeping the blooms beautiful and fresh.
Long Stem Roses

Once all your flowers are cleaned up and in water, you’ll also want to take the time to also break down your greenery and filler into more workable sizes. Most of my eucalyptus came as branches. Baby’s breath and other floral fillers come in poufy branches also.

If you’re not a fan of baby’s breath, my current favorite is Misty Blue Limonium. It’s a tiny robust flower just like baby’s breath, but tends to have a fan shape bunching of flower. Not to mention that Baby Blue has a hint of blue that still looks white from a distance. (You’ll see Baby Blue in a picture below where I show you my flowers all prepped and ready to work with.)

Asiatic Lilies

Do you need to add flower “food” to the water?

Because there is product, there is going to be an industry that tells you that you need to buy this food. I personally choose not to buy the flower preservation crystals. Even with the flowers that I keep around the house, they last longer when I just use filtered water and change the water every day or two. In fact, I have a bouquet of flowers from my husband that is 3 weeks old, and all I did was change the water frequently.

Other methods I’ve tried are sugar in the water and carbonated clear soda. These two methods work just the same as the flower packet I’ve gotten with the bouquets my husband buys.

If you want to use a plant food, you’re welcome to go that route. However I don’t want to you feel pressured to buy one more thing. Good filtered water is more than enough. If filtered water is not an option either, than make sure that you have water sitting out over night before your flowers arrive. This will allow chlorine and other chemicals to evaporate out.

Eucalyptus

Now that your flowers and greenery are drinking, stems cleaned, and voluptuous bunches are broken down to smaller, more manageable sizes, you are all prepared for assembling your arrangements.

For this first night with your flowers, give them space to breath. This is valuable for flowers like Asiatic lilies, whose buds will pop off if you accidently brush them. You want to keep them cool. If you don’t have a root cellar or other cold place, you’ll want to consider a well air conditioned room.

Avoid using your refrigerator to keep any of your flowers cold. Some flowers have sensitive petals and will freeze. Another thing that is not common knowledge is that certain fruits and vegetables can also influence the overall health of your flowers. For example, onions on the sandwich you have in the fridge for lunch is more than enough to cause petals on your flowers brown. So if you have a soda cooler available at home or your wedding venue, make sure that no one has left their lunch or other meal in the cooler!

Prep all your floral and greenery into separate buckets.
Advertisements

Things To Watch Out For

The expectation when you purchase flowers to make your own arrangements is that the flowers you receive are perfect. Unfortunately, even with pesticides and herbicides used in commercial floral fields, there is going to be some damage that you may find in your flowers.

Two different diseases that I found on different flowers (rose and delphinium) in my purchase.

If you have diseased stems, you will notice this when you clean your stems. These are important to find. When you make arrangements, all your stems are right up against each other. And depending on the damage being caused by bacteria or viral infection, mold, or even burrowing pests, direct contact can potentially cause damage to the rest of your flowers. Unless you have experience working in a home garden, you probably haven’t seen instances like this and wouldn’t know how to deal with it. So the best thing to do is take these stems away and dispose of them.

This is one reason why I make sure I have a floral buffer. I have enough stems to do my job even when I have to dispose of a few flowers.

Another reason why a buffer is a great idea is that flowers can bruise.

Here are different types of bruising to look out for.

As you can see here, whether from harvesting or shipping, flowers can bruise. You might be fortunate and find that removing the outer (buffer) petals you can remove the bruised portions (which I did with the red bud.) However, it is possible that the bloom is bruised beyond an acceptable standard.

If you find blooms that are this damaged, you will want to catch this quickly! For example, I had five roses that disintegrated from severe bruising like this. The distribution center that I got these from have a policy where when you notify them/return the flowers in a 24 hour period there are options available; refund, exchange.

Before you make your floral purchase, find out what kind of return policy they have. Know in advance if there’s a chance that you’re going to be stuck with flowers that you can’t use. Is this company’s policy an acceptable risk?

Needless to say, it’s a very good practice to prep your flowers once you receive them. Not only does it help organize you and better manage your time. It also keeps the window of return/refund open for you.

Here is an example of Buffer Petals

As I mentioned above, even when you buy from a reputable company, your flowers may arrive in a condition that can surprise you. This picture, above, is pretty standard for buying from a field or wholesale distributer. These flowers are not damaged. This is real life. The industry calls these busted petals “buffer petals”.

Think of these petals as being your insurance policy. Roses are packaged together for shipment. Petals are going to be rumpled and discolored. When florists receive roses like this, they simply remove these buffer petals and reveal a pristine flower.

TIP: If you’re working with a budget wedding, these buffer petals (and other broken or too small flowers) are perfect for flower girl practice or even photo props for your photographer. With many wedding pictures taken before the ceremony, it’s a great option for your photographer to have a little something to play with if they’re inspired by your flowers!

Now that you’re flowers are prepared, you’re ready for a good night’s sleep!


Come back next week to get some ideas on how to construct your bouquet.

Here are some Products that can assist you in your floral arranging.

This post contains affiliate links to products. We may receive a commissions on products purchased through these links, but at no extra cost to you. These items listed here are from Amazon but may be purchased at local markets and floral wholesaler.

Rose Cleaner Rose Stripper Thorn Remover Stem Cleaner Tool

I have this tool. It works for cleaning the stems of more flowers than just roses.

Premium Garden Shears

The larger shear is the one that I use for trimming larger flower stems and branches of greenery.

Floral Arrangement Kit

This is a good starter kit that has everything that is useful for making arrangements.

1/2″ Wide Floral Tape

This is a must have, even if you’re trying not to buy any extra items. I’ll go more into this next week. The trick to this tape is that you stretch it to make it sticky.


What’s your favorite flowers to play with?

3 responses to “Making Flowers Possible”

  1. wedding bouquet Avatar

    I think the admin of this website is truly working hard in favor of his web page,
    since here every material is quality based material.

    Liked by 1 person

  2. Same Flowers Other Styles – How I Can Do That Avatar

    […] see below the rose. This is red yarrow and I wanted to spot light it for a moment. Two posts back, Making Flowers Possible, I mentioned how the sales person had pulled additional flowers for me that had inspired her when […]

    Like

  3. Making Arrangements – How I Can Do That Avatar

    […] the last post, Making Flowers Possible, we went through the process of cleaning your flowers and preparing them to assemble your bouquets. […]

    Like

Leave a comment

Processing…
Success! You're on the list.
Advertisements
Advertisements
Advertisements
Advertisements

I Love You Means Propagating

Lately I’ve been very interested in the Boho style of event designing. A lot of event designers and coordinators tend to gravitate toward the fantasy of rich and fancy feeling decor. There is nothing wrong with that. I gravitate toward that. There’s just something about pretty sparkly things grabbing our attention.

Even when I worked for a decorating company, there was this huge gravitation toward bringing the Boho brides nearer to the glittery and sparkly end of design. I know why there is that nudging toward that direction. But I’m not going to speak ill of other businesses. I just want to take this moment to see and recognize those brides, and other event organizers and celebrants, who want to stay more toward the end of the spectrum of the simplistic and natural look.

This post is for you!

What I want to focus on today are a couple of floral options that are different than what might be proposed to you when you talk with a florist; succulents and preserved wild or garden flowers.

Succulents

Photo by Quang Nguyen Vinh on Pexels.com

I don’t know if you’ve taken the moment to look at all different colors available in succulents. They are definitely a wide spectrum that diverges from the cactuses and green succulents that your mind naturally gravitates toward.

The best part about succulents, especially if you’re DIY as much as you can for your wedding, is that you can get these in advance and arrange your centerpieces weeks in advance. This is true, even in the middle of winter!

The one thing that you want to pay attention to is the little amount of care that you need to give them. But these are not going to wither or die on you when you look at them funny. They just need to be kept in soil designed for succulents and give them a little water every now and then.

Tip 1: Succulents loved being watered from below. So when watering them, place their dish (with drain holes) in a dish of water and give them a few hours to drink as much as they want. They have enough water when you see that the soil on top has been touched by water, not dry to touch.

Tip 2: If you see the petals start to have a wrinkled appearance, they are underwater. Make sure you soak them in a dish of water. It may take a little time. But once the succulents have gotten enough hydration they will look plump again and not wrinkled.

The only other thing that you have to pay attention to is how much light they get. Here in the Pacific Northwest, succulents are not about to get too much sunlight. They can be burnt by full sun, depending on your region. But in the couple weeks that you have them before your event, this is not likely going to be an issue.

Advertisements

One issue that you might have is when you’re succulent undergoes what looks like a growth spurt.

This example is definitely an exaggeration of what you will see because I’ve had this succulent for well over a year. It started to bolt like this a couple of months after I received it. What happened here is that the window sill (eastward facing) did not receive enough light. So the plant grew to reach more sunlight.

Your succulents will stay small when they have enough light. So if you see this, or you notice that there is some growth that is starting, then you want to find your succelent(s) a sunnier location.

If you catch the growth quick enough, you can trim off the growth, and return your succulent back to the smaller size.

Take a length of dental floss, wrap it around where you want to trim and pull it tight. You can use scissors, but it will apply pressure from two points to cut. If you use thread or floss, you can apply even pressure around the plant. Also if have a cluster flower of a succulent, you can fit the floss in between the petals and top the succulent without damaging the rest of the plant.

The clipping you can then put in a new container with soil and it will propagate for you.

I put the topped succulent in this cup with water with another topped clipping that I’m waiting on soil for. It’s okay to put into water, but you want to get clippings into soil as soon as possible.

If you are saving money by propagating your own succulents from bought succulents, make sure that you give yourself enough time to let new buds grow. It doesn’t happen overnight. If you don’t have enough time, your succulents will look bald and not so happy.

Here is another What-Not-To-Do

This succulent was originally small like the first picture of succulents I showed you in this section. This one also grew to reach for more light. I should have trimmed this when it first started to grow. Had I done that, it would have remained small and cute. Instead, it changed its shape and spread. But what you can learn from this is what it will look like at the spot where you clip back the top your succulent. There is a small bud that you see on the top right. That grew in about two weeks after trimming. On the bottom left you see another bud grow in where I snapped off some of the larger leaves to practice propagation techniques that I’ve seen on FB reels.

If you are interested in looking to propagate succulents for your event, make sure you give yourself enough time to do so. You will want a couple of months to do this DIY. Talk with some local greenhouses with growers who have experience with succulents. Also there are FB groups dedicated to succulents. Join a group or two and learn from those who are succulent whisperers. There is a wealth of good viable information there.

I readily admit that I am not an expert. And there is a world of information available. Just do not take your advice from clips and reels on FB, Tick Tock, or anywhere else. I tried propagating leaves in a plastic bag, through a slit in paper to suspend over water, and directly in water. None of these have worked for me and I am most certainly a novice at propagating succulents. If you’re a novice, I suspect that these reel methods are not going to lead you to success either. (With the leaves, I tried about a dozen and not a single one grew. This is reason why I have little reason to believe these techniques work. Not working the numbers paid off. If I get a success rate of 1 out of 10 attempts, I call it a viable option.)

One other walking away point I want to draw your attention to, is take notice of the terra cotta pot decorations on my pots. These were painted on with acrylic paint and have stayed on the pots over a year later. So it will not flake off anything else. And this is an excellent way of incorporating your event colors. You can create endless possibilities with your design. Whether you go with feather like swirls, dots to simulate lace, stripes, or even using a stencil from any store’s craft department. You can certainly dress up your terra cotta to fit the look you are going for.

Advertisements

Wild and Garden Flowers

Photo by solod_sha on Pexels.com

I’ve lost count of how many events that I decorated for where I would take home flowers after an event because there was no second life for the floral arrangements after a wedding.

Don’t get me wrong. I LOVED those events because I had pretty flowers to take home and enjoy for a week or two. That is definitely an occupation perk that I’ve enjoyed.

However, at the same time, it has always saddened me a little because I have always wanted people to have more bang for their buck when they are spending good money on a wedding or other event.

So here is where we join two very important passions of mine!

I breathe creativity and decorating. But I also love working in my garden and learning all the old skills of creating home supplements, natural cleaners, and especially new ways of putting food on my table.

The very day that I learned about making a Chive Blossom Vinaigretteis the very same day that I made it.

This is Day One of my Vinaigrette:

My Four year old and I did this together for the very first time and as soon as I saw how this jar looked I immediately thought, “How Beautiful!”

And this was the first, on many ideas that I had:

You can go with sentiments or go all the way with the couple’s monogram, name and wedding date, or even line art that goes with your over all Boho decor.

What I absolutely LOVE about this inspiration is that it’s simple but has so much LIFE after the wedding or event.

For example, this Chive Blossom Vinaigrette will become a salad dressing, meat marinade, or other meal flavor provider in as little as 3 weeks. The total cost for this is just your jar, the chive blossoms, and food vinegar. When you’re looking for cost saving centerpieces, you seriously can’t beat this for bang for your buck!

To do this idea, you will definitely have this be your day of preparation, so have a few hands on deck. You will want to clip your edible flowers, rinse them, and place them in the jars before adding the vinegar.

The reason why I say do this on the day of is because of the process needed to properly turn this into a proper dressing or marinade. It is shelf stable during the whole process, but it needs to be kept in a dark cool place for the 3 weeks of processing. You could also use the jars at the end of the three weeks, when the vinegar takes on a fuchsia/purple appearance. But you want to try to limit the heat and light exposure no matter if you do it at the beginning or end of processing.

Tip 1: This needs to be shaken once a day for the entirety of the three weeks. So you will have a cleaner look at the beginning of the process. At the end of the process, you will have some floating pieces from the flowers. That just naturally happens with daily agitation.

Tip 2: At the end of the 3 weeks, you will need to filter this vinaigrette through a cheese cloth to remove all debris (and rebottle) before you use this as a dressing/marinade.

Maybe puple is not the color that goes well with your Boho design. Here is a list of some other edible flowers that can be used in making your own version of a different vinaigrette. Or you can just put the blossoms of these flowers or others into a jar filled with water.

  • Nasturtiums
  • Pansies
  • Violets
  • Hostas
  • Borage
  • Calendula
  • French Marigolds
  • Chrysanthemums
  • Carnations
  • Hollyhocks
  • Sunflowers
  • Cornflowers
  • Gladioli
  • Honeysuckle
  • Dianthus
  • Antirrhinum
  • Tulips
  • Roses
  • Lavender
  • Pea Flowers
  • Broad Bean Flowers
  • Onion/Chive Flowers
  • Brassica Flower Heads
  • Pak Choi Flowers
  • Squash Flowers
  • Dandelions
  • Daisies
  • Chamomile Flowers
  • Red & White Clover Flowers
  • Chickweed Flowers

WARNING: Make sure that you only use flowers that have NOT had pesticides or herbicides used on them. Whatever has been applied to flowers will enter your body if you eat them or any extract that you make from them.

Advertisements

Flowers as herbs and seasoning have different flavors that they impart. Some have a peppery note to them. The chives that I grow are a garlic chive, so it imparts a garlic flavor without having to fuss with cloves of garlic. I’ve also started working with Lemon Balm (a member of the mint family) which imparts a lemon flavor. So I could have added tiny Lemon Balm leaves in with the chive blossoms. Which now that I think about it, I’m definitely going to add that to my vinaigrette as soon as I post this!

Another thing to keep in mind is that for thousands of years edible flowers and plant leaves have been used for natural medicine. For example, Lemon Balm is great for combating the viruses behind the common cold. So you can give your body the things it needs to keep healthy while adding flavor to your food.

If making a vinaigrette is not something you will use after the wedding (or other event), consider looking into making your own chemical free cleaner. For example, you can still use this mason jar idea and make a kitchen cleaner with lemon or orange slices and peels.

If you’re not looking for a natural cleaner, than even using berries and mint, basil or other leaves in water, is a great of washing your produce before you eat it while borrowing it for a few hours for your event.

There is one more option for Fall and Winter Events when most of the edible flowers are not in season. You can make Pine Syrup or Spruce Tip Syrup. I found this type of syrup interesting because I have spruce widely available around where I live and real Maple Syrup is a luxury on my family’s budget. This can be a pretty centerpiece as well because you use the new growth tips on a spruce tree or pine cones for the Pine Syrup. I’m sure that you can imagine the possibilities for all your holiday parties with this one!

Decorating the Mason Jars

The simplicity of these jars is beautiful all on their own. But maybe you want to dress them up a touch. What can you do to add a little panache?

  • Paint the jar ring (White, Gold, or other event color)
  • Apply glitter to the jar ring (after finished spray with a clear coat of paint to keep from leaving a glitter trail)
  • Use squares of pattern, texture, or fancy cloth on top (held in place by screwing the ring down onto the jar over the fabric)
  • Decorate the jar itself
  • Use the jar as a base for a taper candle (with candle holder) to raise the level of the candle above other centerpiece elements
  • Put your table number on top of the jar

I hope you’re just as excited about these ideas as I am. These are definitely something fresh for existing wedding and party themes. Be free to experiment with using some of your food preparation and preserving techniques the next time you are decorating for your next event!

Files Used In This Project

As a special treat I have a surprise for you! Visit my store and check out Love. Be sure to hang around and see what else is new. Every Monday at least one new SVG is added!

Processing…
Success! You're on the list.

Leave a comment

Advertisements