Same Flowers Other Styles

When looking at inspiration pictures it’s quite common to hear, “I like those flowers but….” You can be inspired by a pictures, take the flowers and do something else entirely!

The same is true with a style of arrangement and switching out flowers. Or even mix and matching different styles for your event.

For example, if you remember from Making Arrangements last week, here are the pictures from some of the pieces.

This combination would have been a wonderful addition as table swag and centerpiece. This eucalyptus table runner is outside of the garden bouquet style however the greenery is the unifying factor. The focus on roses (as the floral note) also strays, but keeping it simple and with that eucalyptus still evokes the garden feel.

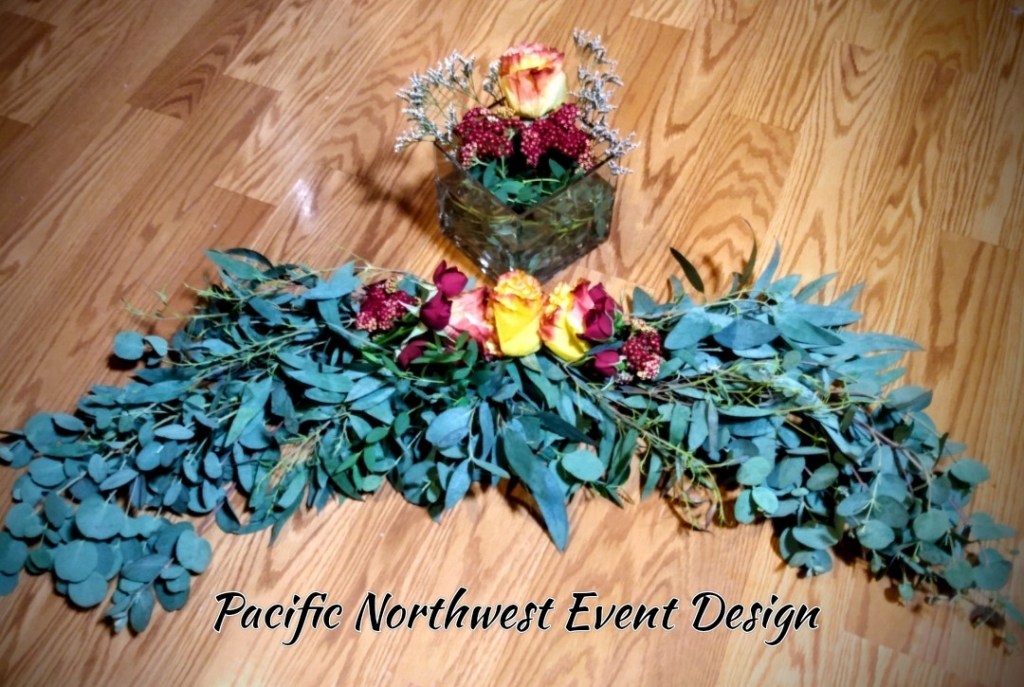
I wanted to bring this idea from the high end weddings (where you see the amazing pictures of 100′ table runners made from roses) to let you know that even if you’re having a garden style wedding you can still borrow from that high end inspiration picture. Make that runner out of greenery or thin willow branches and you can utilize the idea on budget materials.

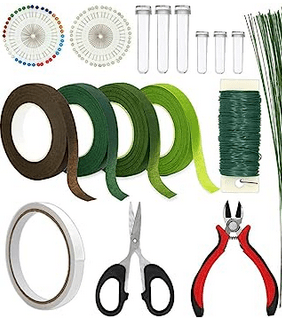
Tip: If you’re making a runner or wreath like ring for your table centerpiece, make sure you secure your elements with floral wire. Then go back in and fill in around the wire with more pliable greenery, tiny budded floral bunches, or your wedding flowers of choice.

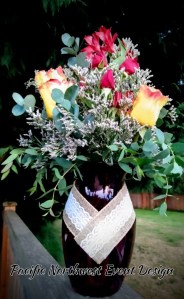
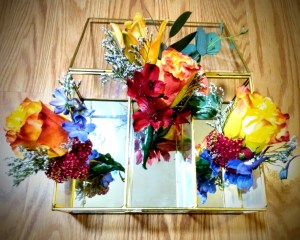
Here’s a close up of the square vase floral arrangement that I paired with the eucalyptus table runner. I want to draw your attention to this because of the red flowers that you see below the rose. This is red yarrow and I wanted to spot light it for a moment. Two posts back, Making Flowers Possible, I mentioned how the sales person had pulled additional flowers for me that had inspired her when she gathered my order. Originally I had ordered a cream like yarrow to help tie in the yellow from the sunflower and yellow roses with red tips. However this red yarrow really made these red tips on the rose just pop. My original pick would have been great. But there’s just something about being in person with flowers one selection just makes more sense when you see them in person.

Tip: If you are going to DIY your own floral arrangements, try to make it in person. And don’t be afraid to stray a little from your inspiration picture. By straying, this is what makes your arrangements reflective of you.

Before I move on to more creative renditions of the same flowers from this style, I want to show you a couple of similar ideas that are closely related.

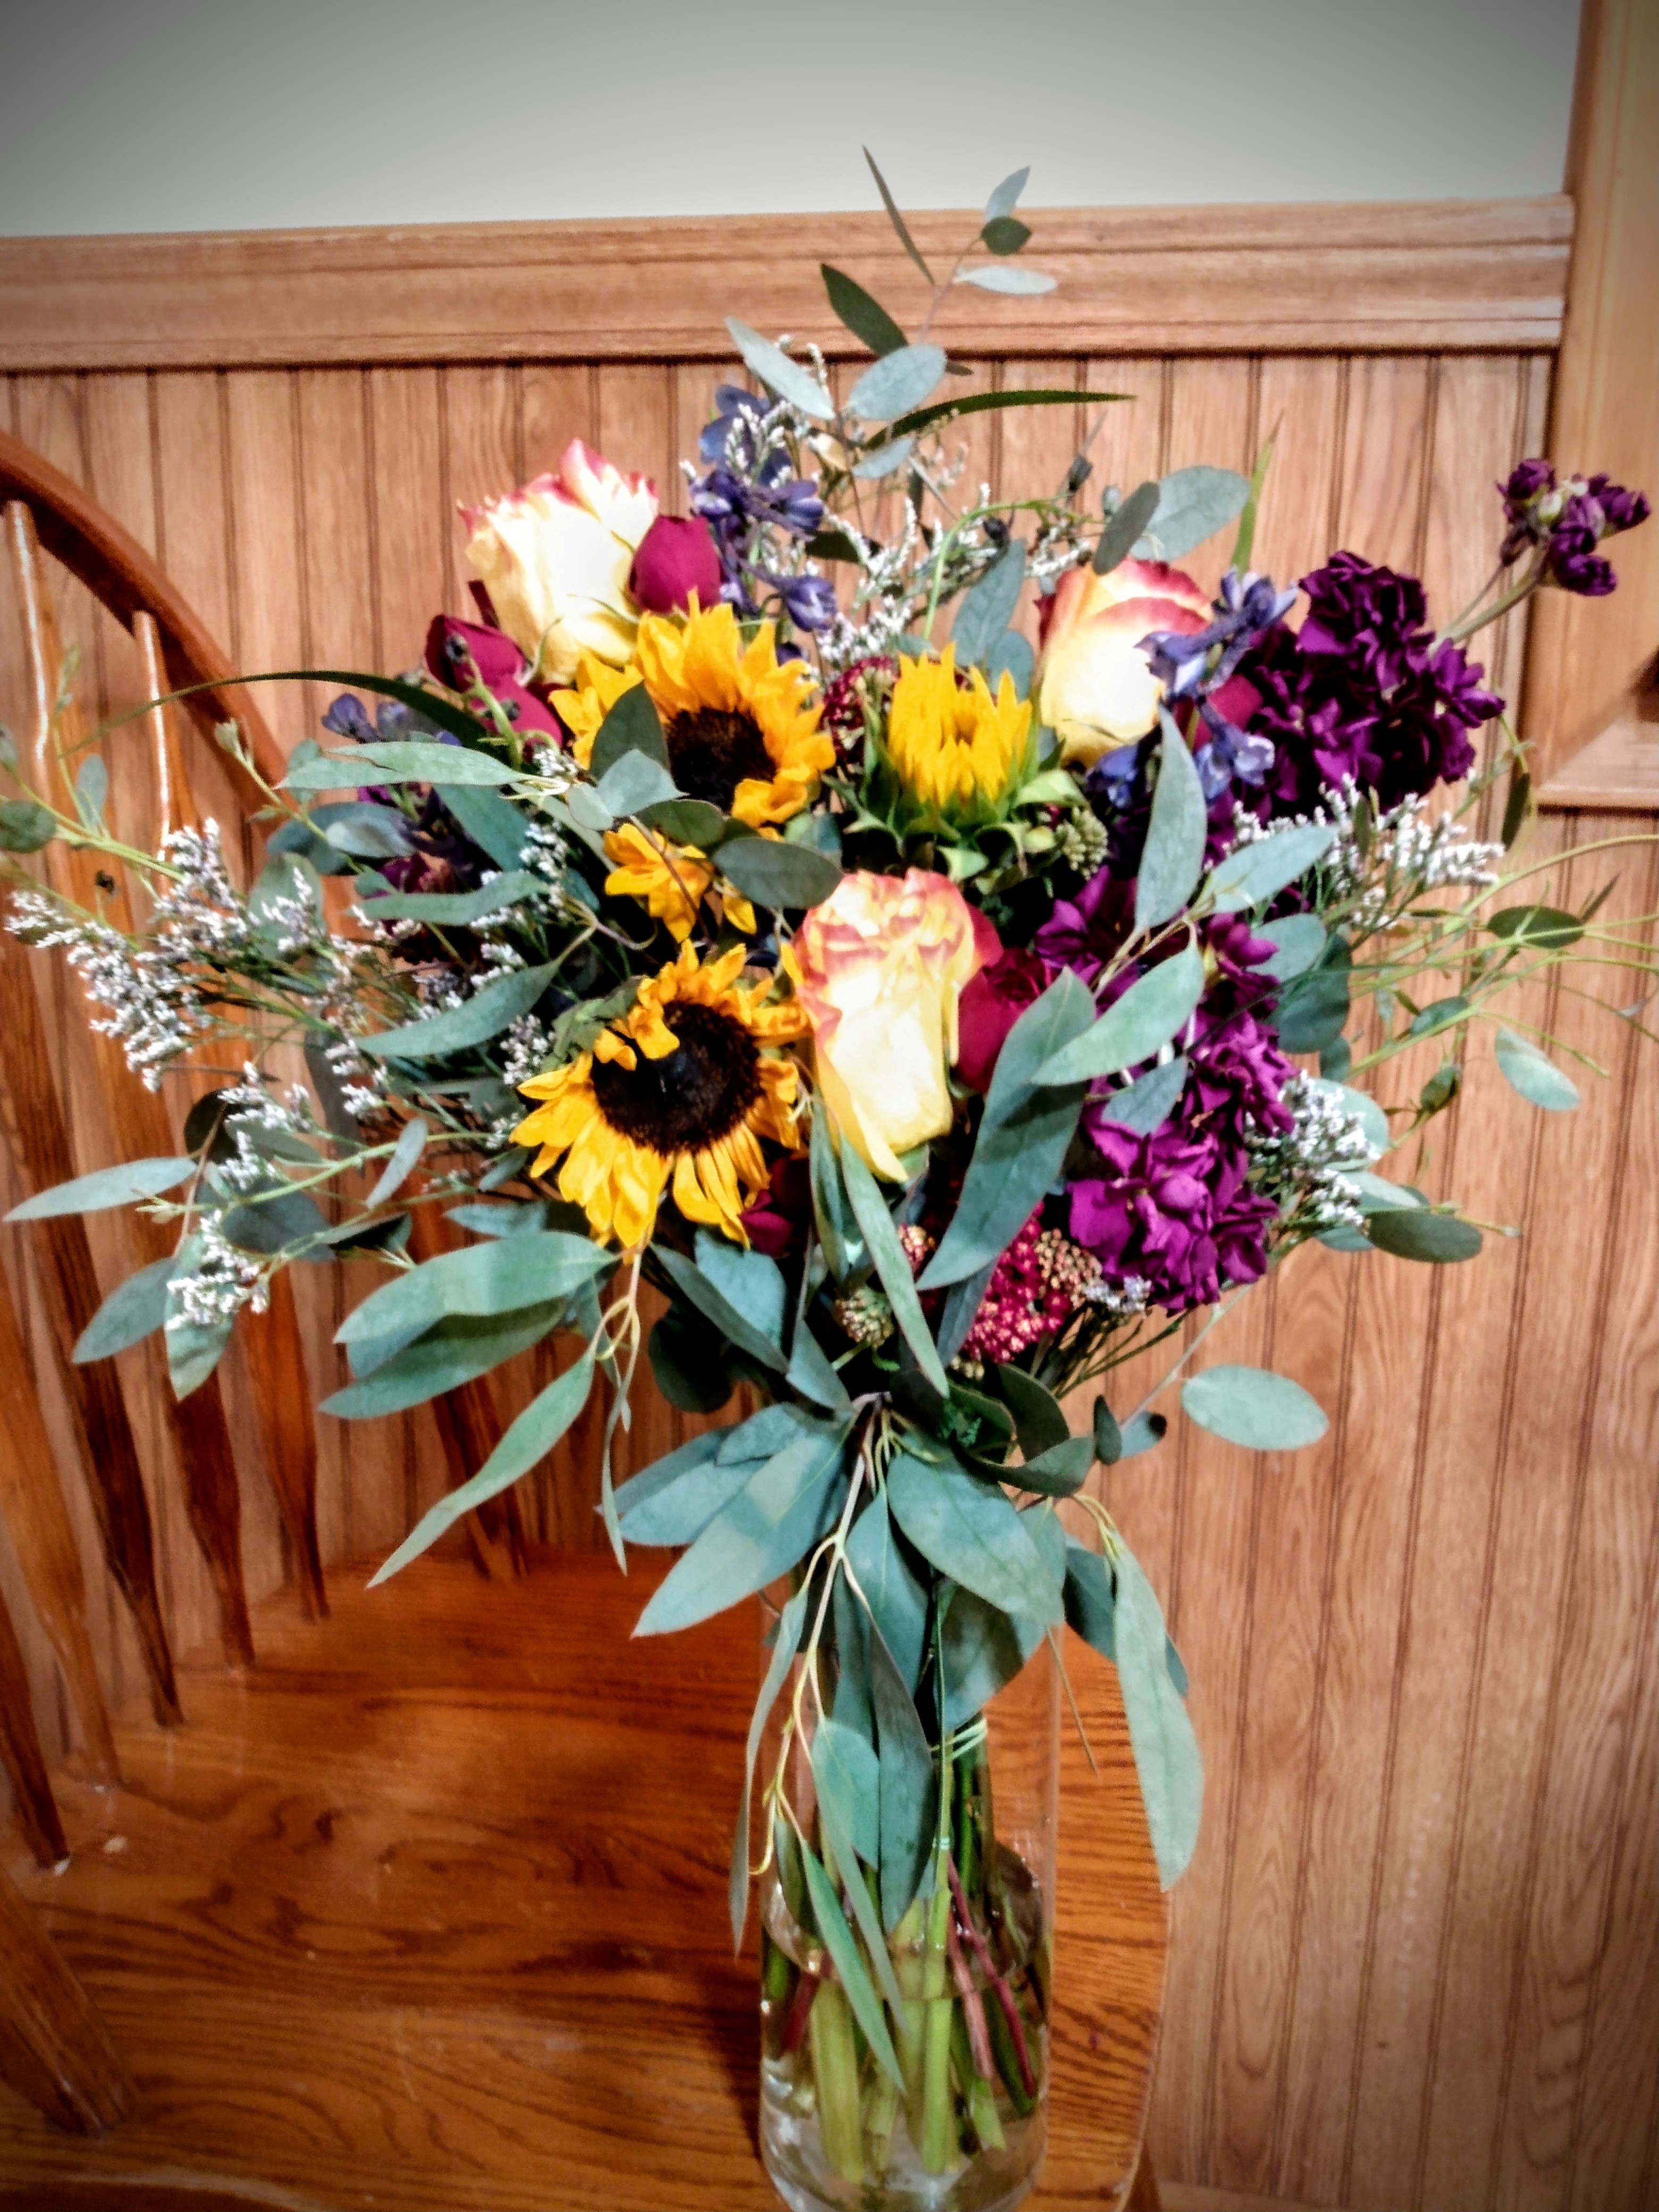
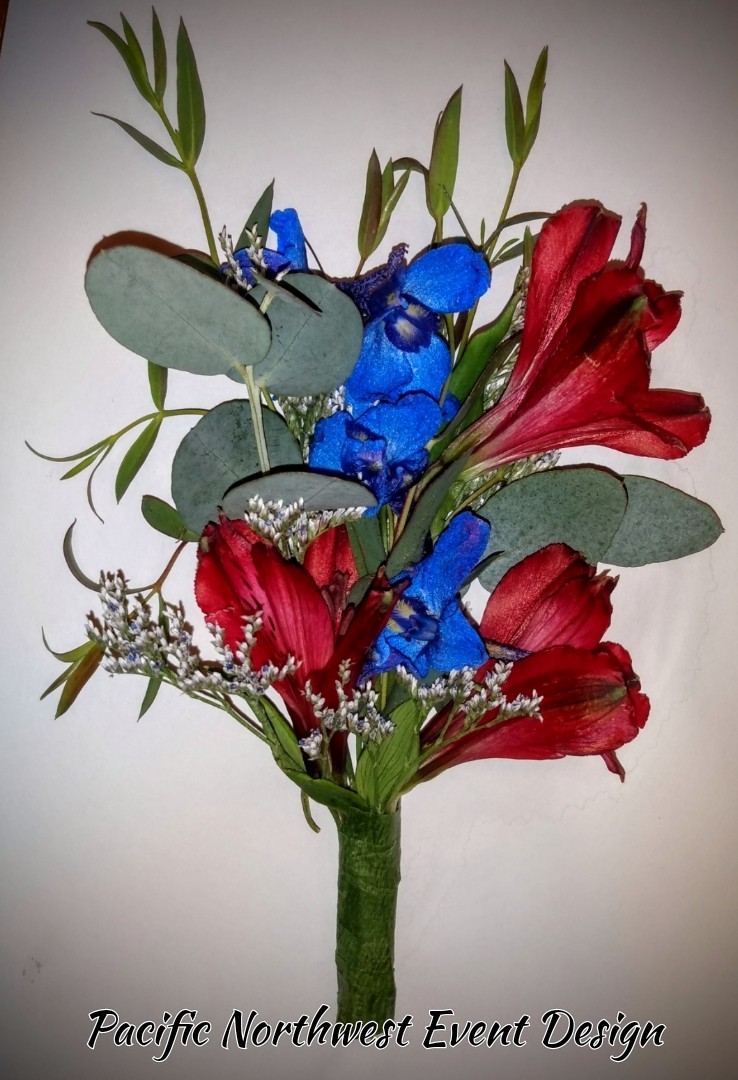
This one I absolutely love! Still keeping with the country theme, I have the long stem roses, Red Alstomeria, spray roses, Misty Blue Limonium, and Eucalyptus.

If I could do one thing, I would love to move people away from baby’s breath and urge them toward Limonium. It has the baby’s breath look in an arrangement but it gives a few features that are interesting to look at. I love how Limonium has a cascading effect of its blossoms. Think of old fashion candelabra and you’ll get a general idea of what you see when you look closely to these flowers. But even better than it’s structural beauty, these flowers have shades of color that is beautiful and doesn’t come from the flowers sitting in dyed water.

For this bouquet, I opted to dress it up with a deep red vase and ribbon collar. These accessories take the garden bouquet style and dress it up from a garden style to a vineyard style. It’s still on the rustic side, but just dressed up enough.

Tip: Your choice in ribbon or other accessory is going to greatly influence the tone. Remove this vase and ribbon choice and set this arrangement on top of a tall glassware vase with chandelier crystals and you’ve gone straight past garden wedding to Queen’s High Tea.

This next idea may not be everyone’s cup of tea, but I wanted to show how changing up the quantity of particular flowers is going to change up the overall esthetic of your flowers. While this arrangement is highlighting the Limonium, I’ve been making similar arrangements from my personal garden. White Yarrow is my most plentiful flower that is growing. Actually Chamomile is giving it a run for its money. But my floral garden is not predominantly show stopping flowers. So if I were to keep a weekly arrangement from just my garden alone, it would look something like this; mostly small buds with accent pieces of larger flowers.

Obviously this isn’t a wedding arrangement by any means. This is a cheer-me-up or maybe a brunch arrangement.

So if you have the idea of keeping your floral budget pared down, bulking up on the smaller blossoms may or may not be what you want to aim for. This looks completely different from a bouquet bulked up with greenery sprinkled with more premium blooms.

If you want to have more of a wow piece on a budget, consider a more minimalistic approach.

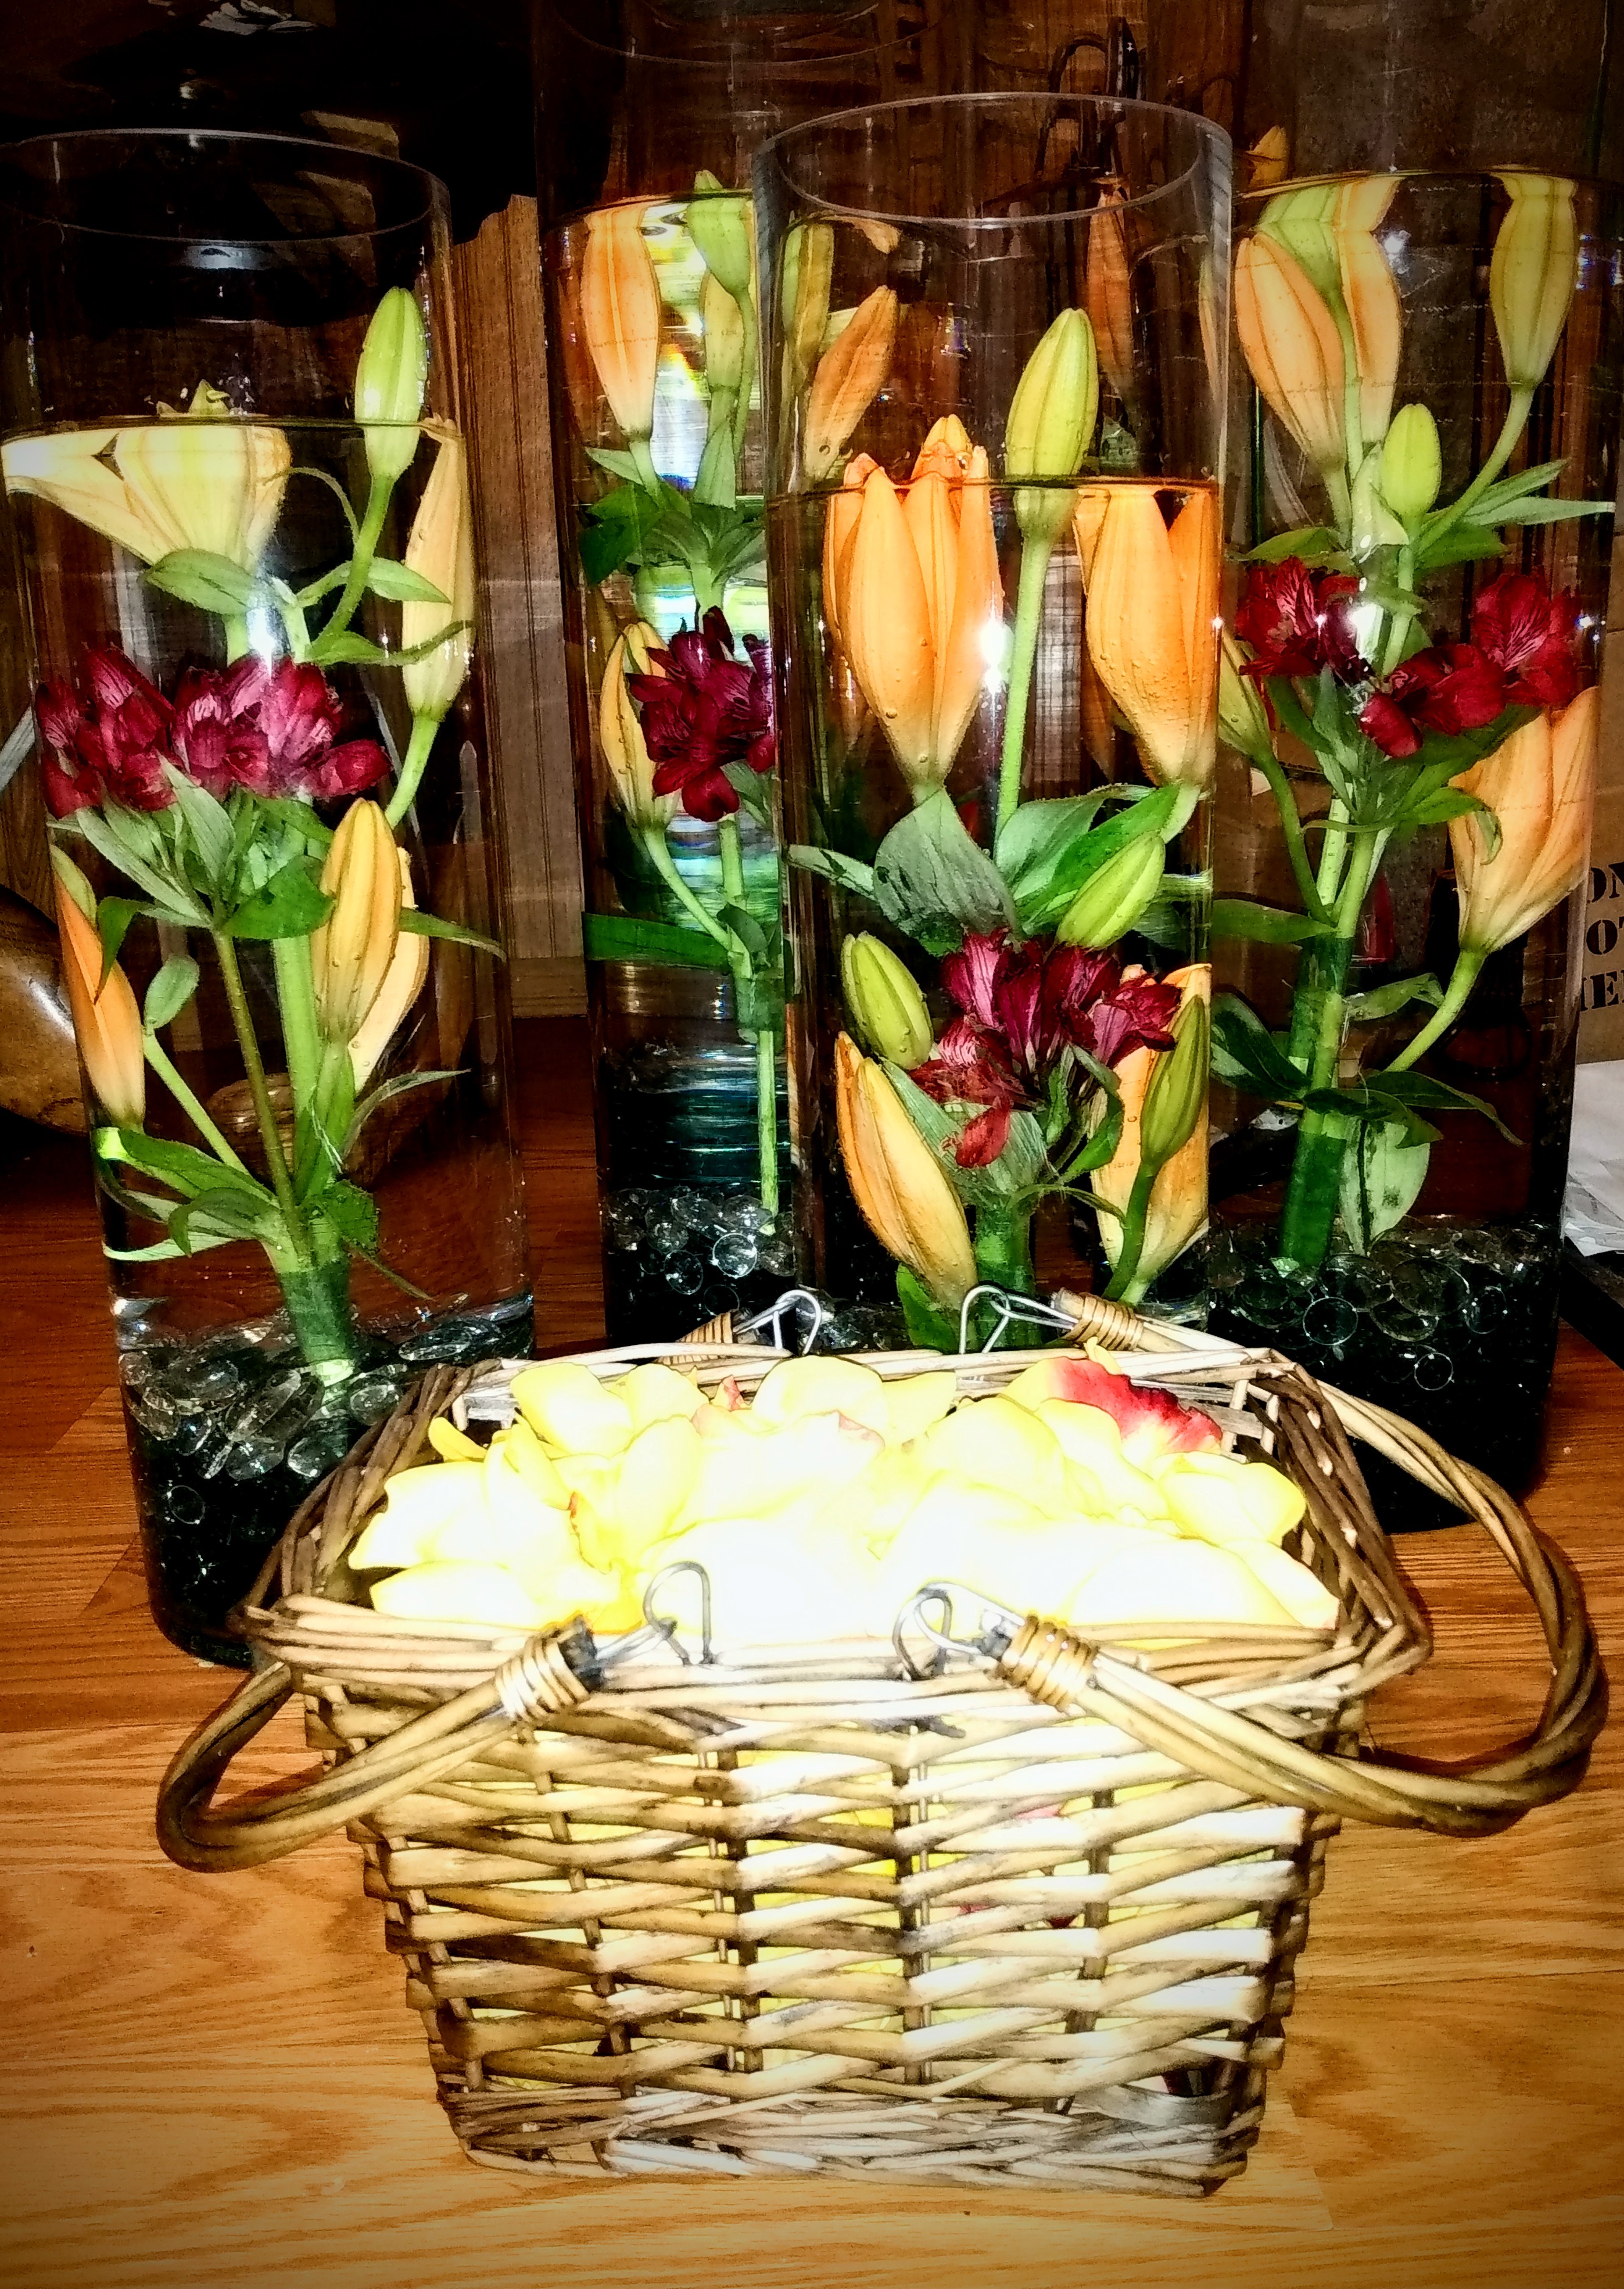
Here I have a single Asiatic Lily with a sprig of Eucalyptus in a monogrammed glass tumbler.

Now if you’re looking for a wedding favor that doubles as a table centerpiece, this just might be the idea you’re looking for! Set this tumbler in a circle in the center of a table with a large pillar candle in the center and you have a budget friendly decor that pulls double duty and is absolutely elegant.

This is also a great use of Lily blooms that snap off, because let’s face it. Lilies snap off so easily if you walk too closely past them. Or you’re arranging your bouquet and you hit it funny. I’m aware of how lilies are and I still snapped off nearly a dozen blossoms.

Life happens.

Another simplistic option is this beauty with a floating candle.

To be honest, this 3″ floating candle is over kill for this 4″ wide vase. But this is what I had on hand to get this concept across.

Never be afraid of ever using a single blossom.

The trick is always to make the single flower look interesting to look at. And this is the reason why I played with the lily leaves I had ordered to offer contrast to the plethora of eucalyptus.

This arrangement is easier to see the lily leaves. The garden bouquet comes back again. But notice how when you change the focal flowers that you get a completely different feel. Over half of the bouquet here is Asiatic Lilies. But when you incorporate the blooms in different stages (open, soon to open, and still very green), it creates difference and interest almost like three different flowers even though they’re exactly the same.

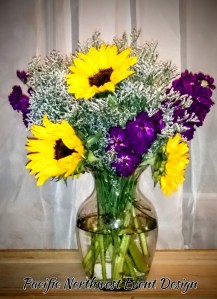
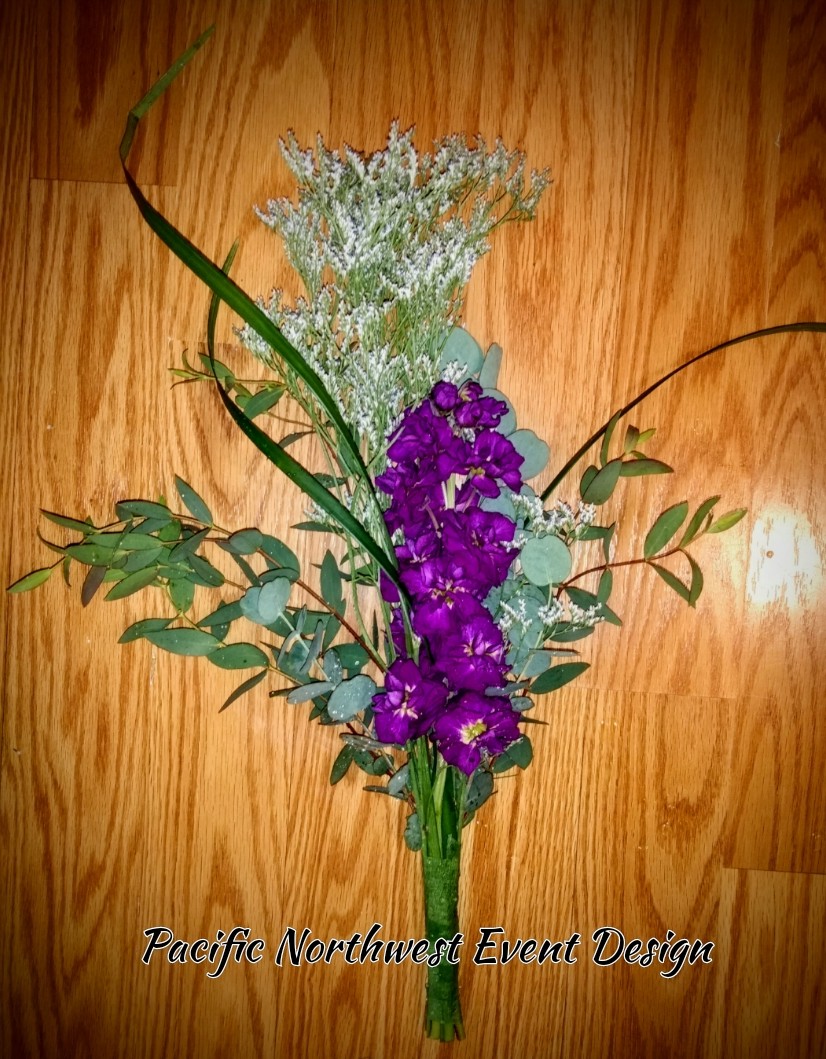
Another interesting thing to notice is the floral rule of thumb of keeping flowers in odd numbers. You can’t tell with the lilies, but there is an odd number of stems. What is obvious is the single stem of purple stock. If you were to take a closer look, you will find 3 stem of Dark Blue Delphinium. And topped off with enough of the Misty Blue Limonium to fill the gaps and make this minimalistic bouquet look full.

Even though this picture is beautiful, it does the bouquet no justice. Part of the beauty that is not fully captured is just how amazing the purple complements the orange lilies. If you’ve taken an art class, you’ve heard of a color wheel. And you are familiar with how orange and purple complement each other. When in doubt, definitely use a color wheel to help choose what colors to put together. Even if it’s not a color combination that you are familiar with, these colors and flowers really do go amazing with each other.

And here is a minimalistic version of that bouquet.

This one is my absolutely favorite picture out of them all! And this is just 5 stems of Asiatic Lilies and 3 stems of Dark Blue Delphinium. I’m just going to put a pause right here so I can just stare at this eye candy just a little bit longer.

Advertisements

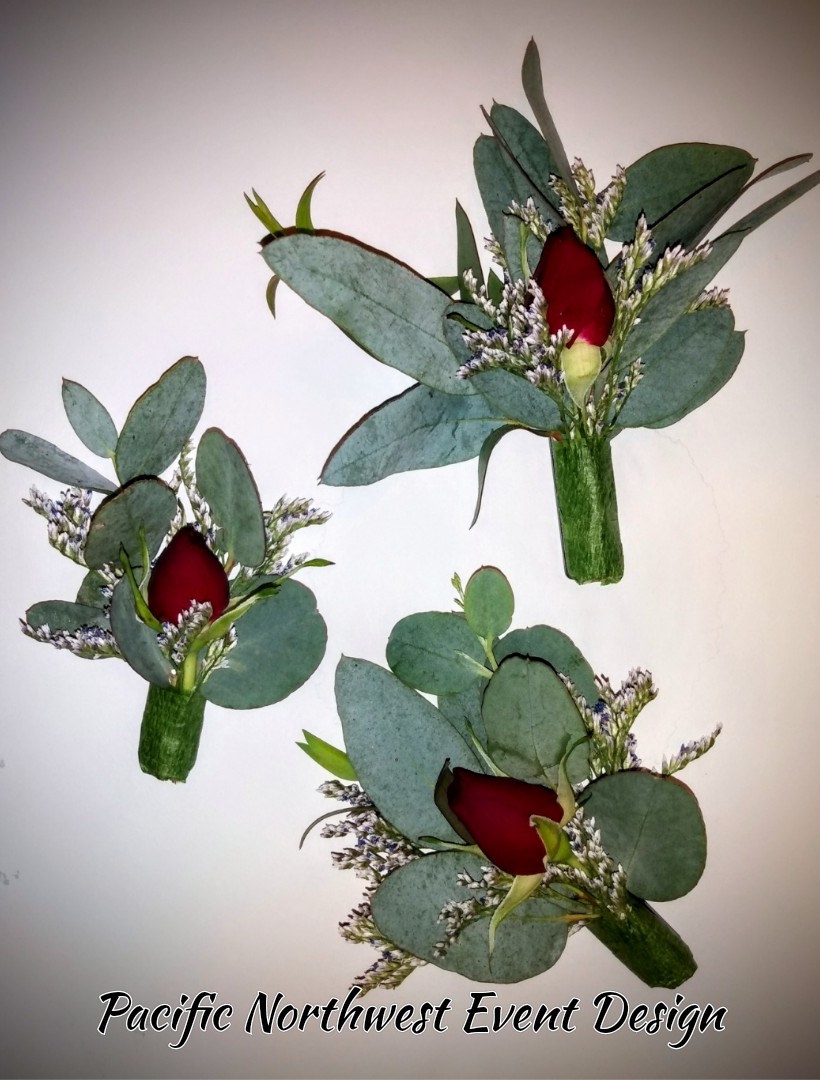
Besides just playing with flowers for my personal amusement (and yes, I took great pleasure in making all these), I decided that I was going to make a little something for the men in my life since I’ve been so focused on this job.

The one thing that I learned while making these boutonnieres is that men rarely get flowers from their women. And yet, it’s interesting to watch to see how they respond when you make flowers for them. My boys absolutely went gaga over waking up and finding that I had made flowers for them to wear to church. One, I made something for them and they love it when I make things for them. Two, they got to wear the flowers and it made them feel special, because no one wears flowers to church. And because these boutonnieres had magnets, they were able to move them to keep from their seat belts from crushing them. It was interesting to watch them move their flowers around.

Even my husband enjoyed having flowers to wear. He purposely went out of his way to choose an outfit to go with his flowers.

I also took the opportunity to finish using up my flowers to make these mini bouquets.

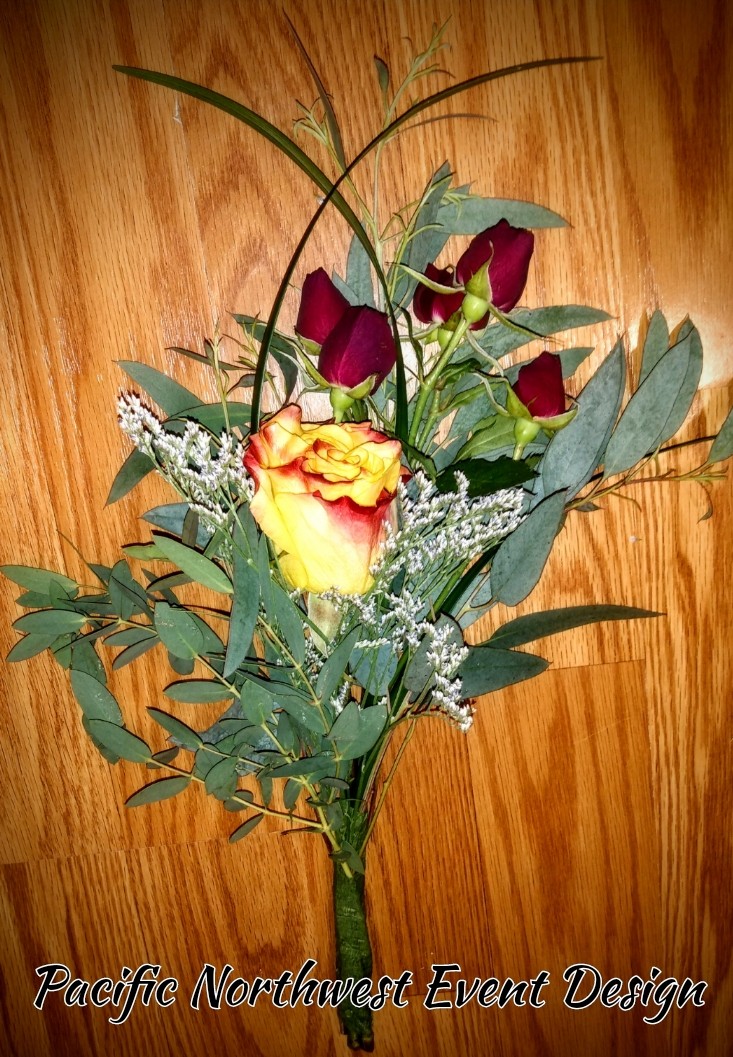
If you find that you have flowers left over, I highly recommend making simple bouquets like this and randomly handing them out to people. These flowers were made up so that my boys (while wearing their flowers) could hand them out to whoever they were inspired to hand them out to.

It doesn’t matter what day of the weeks, people go through “stuff”.

I watched from a distance as my boys picked their person.

One was another child. I was amazed because how often do children hand each other flowers. It was a perfect moment to watch.

Advertisements

Another bouquet of flowers was handed to a mom who had just checked her kids in for the next church service. Who knows how her morning had been going. (Being a mom I can just imagine the craziness we all go through.) But you could just see how her morning had been disrupted in a very pleasant way.

The last bouquet went to another mom. There’s a whole long story to this one, but the quick point is that this bouquet reminded this mom of a story of when her adult son was a little boy.

These stories may or may not mean anything to you personally. But I just want to cause a thinking moment. Here were three acts of kindness that I set my boys up to be a part of. And it was a worthwhile moment. All those were made possible because of a job I did and had left over materials. They weren’t the best of the best flowers. And yet, to these three different people they were the best flowers because they were unexpected.

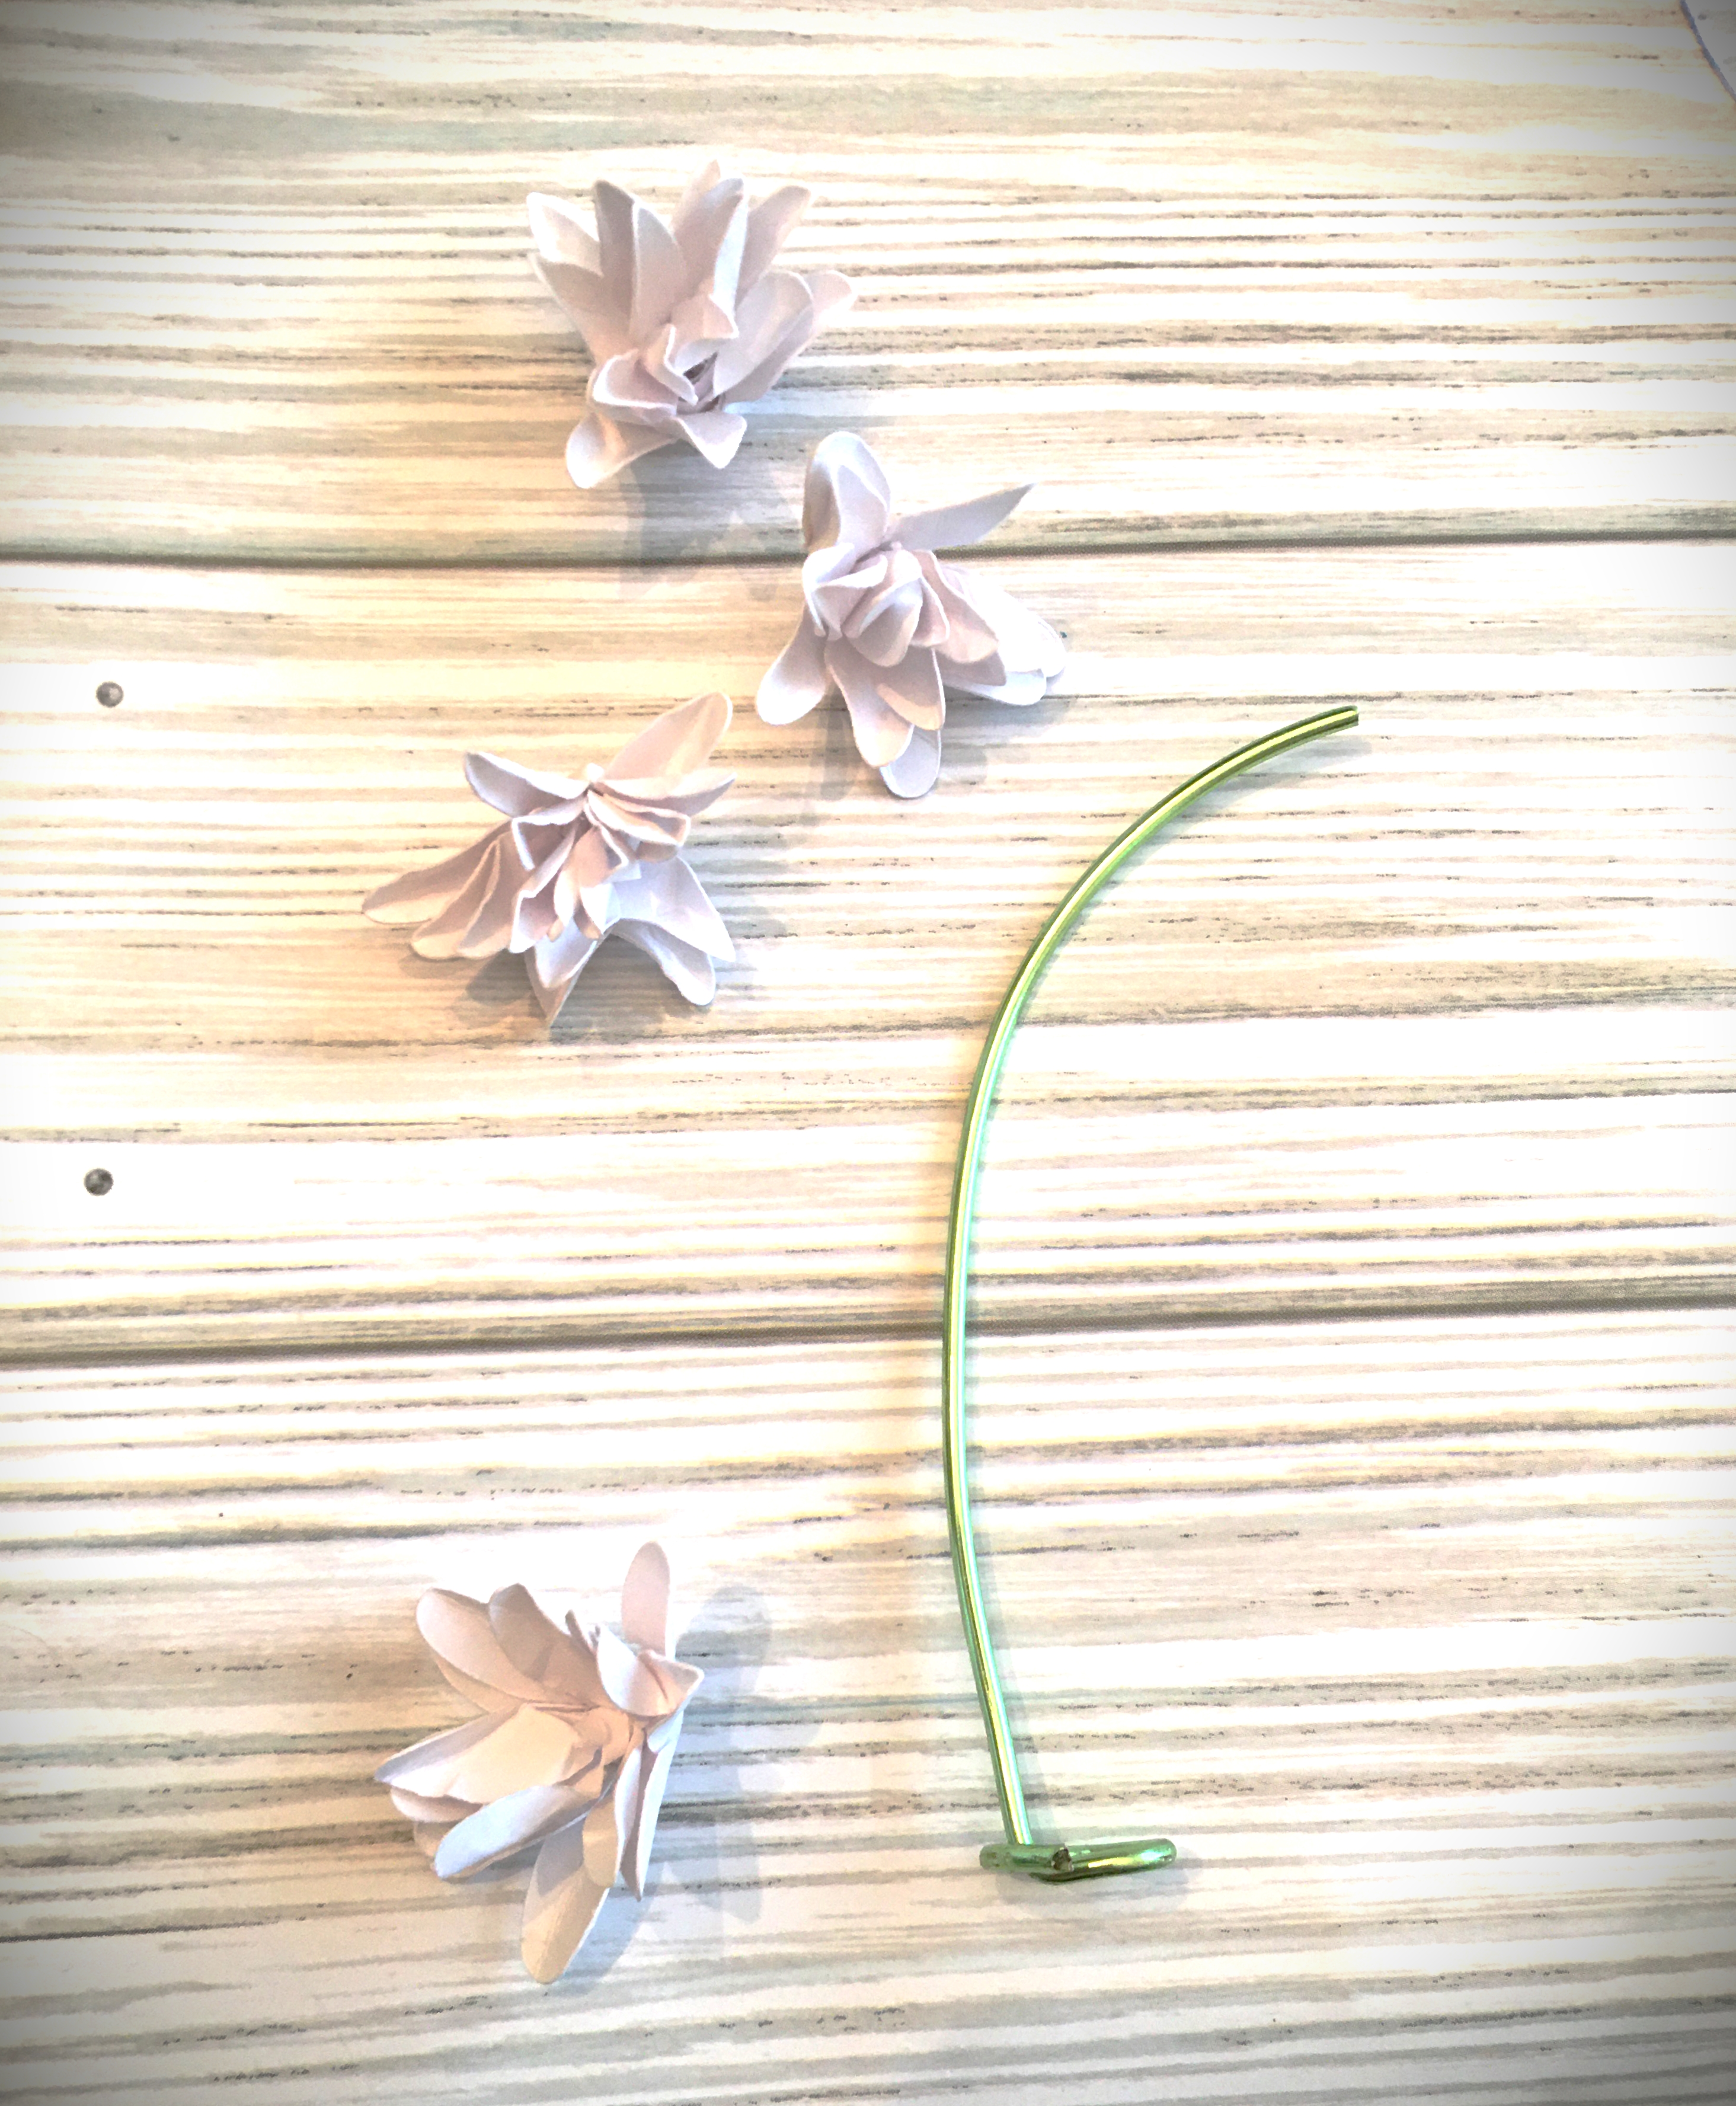
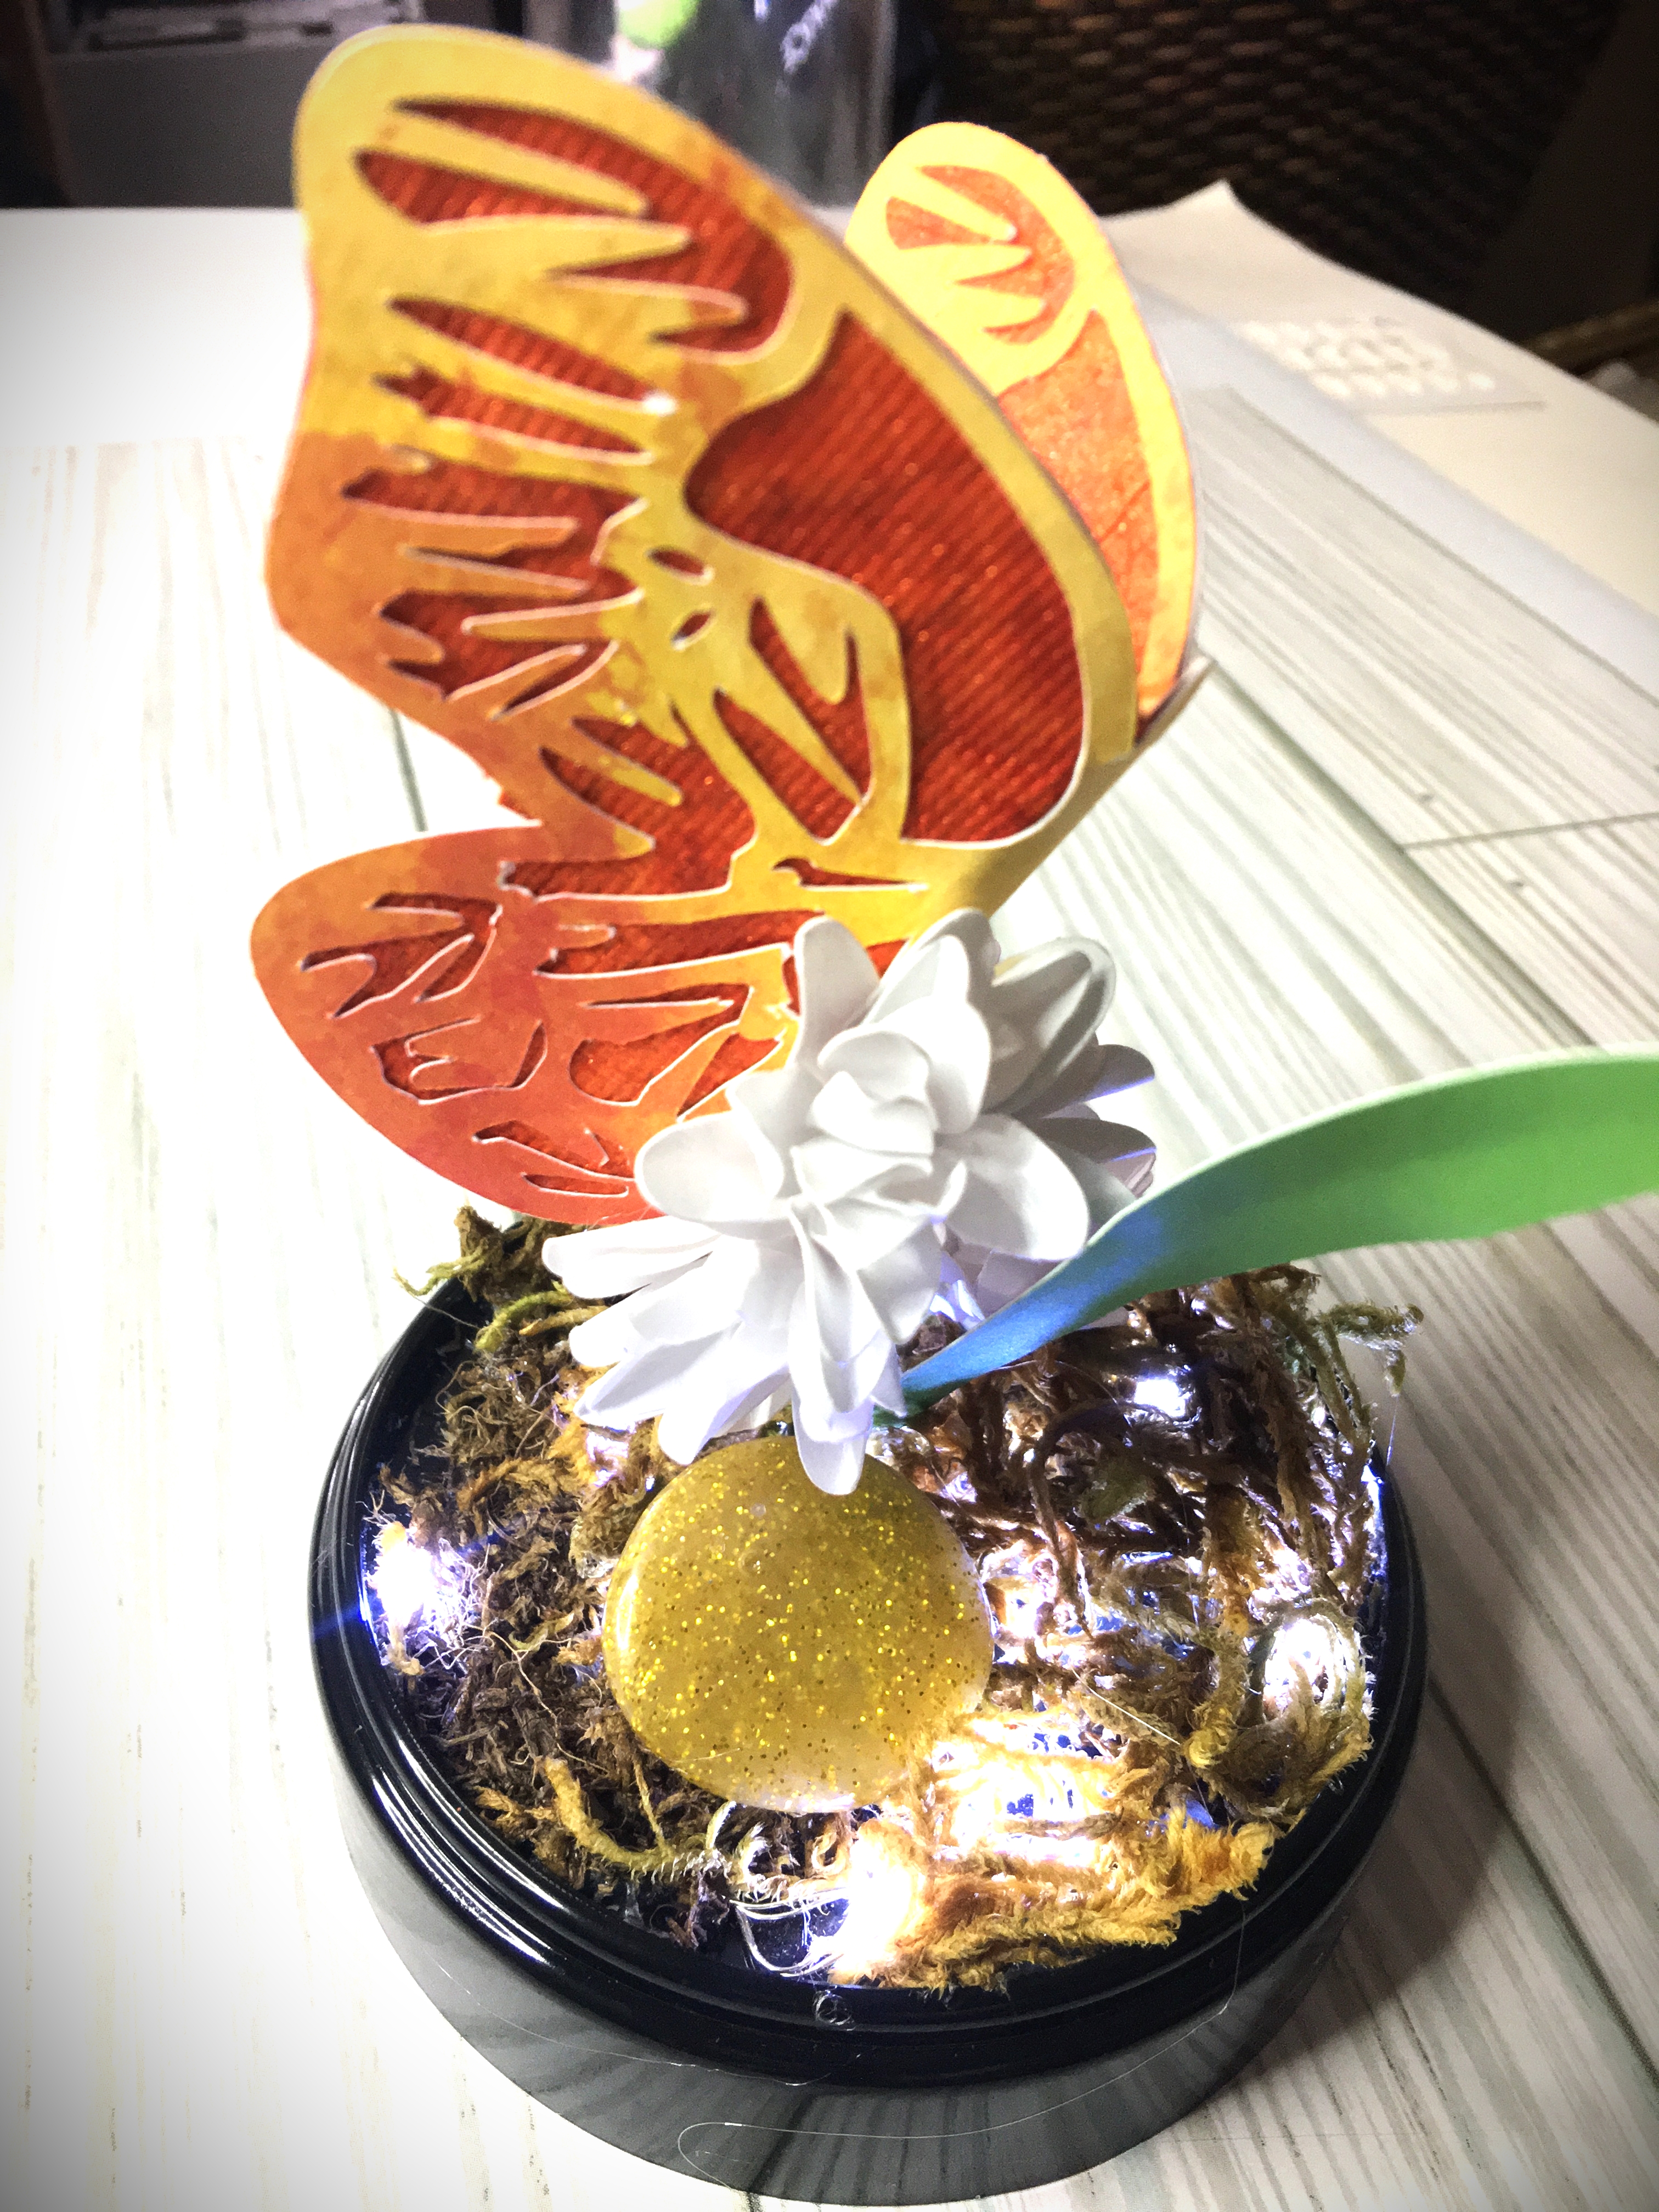
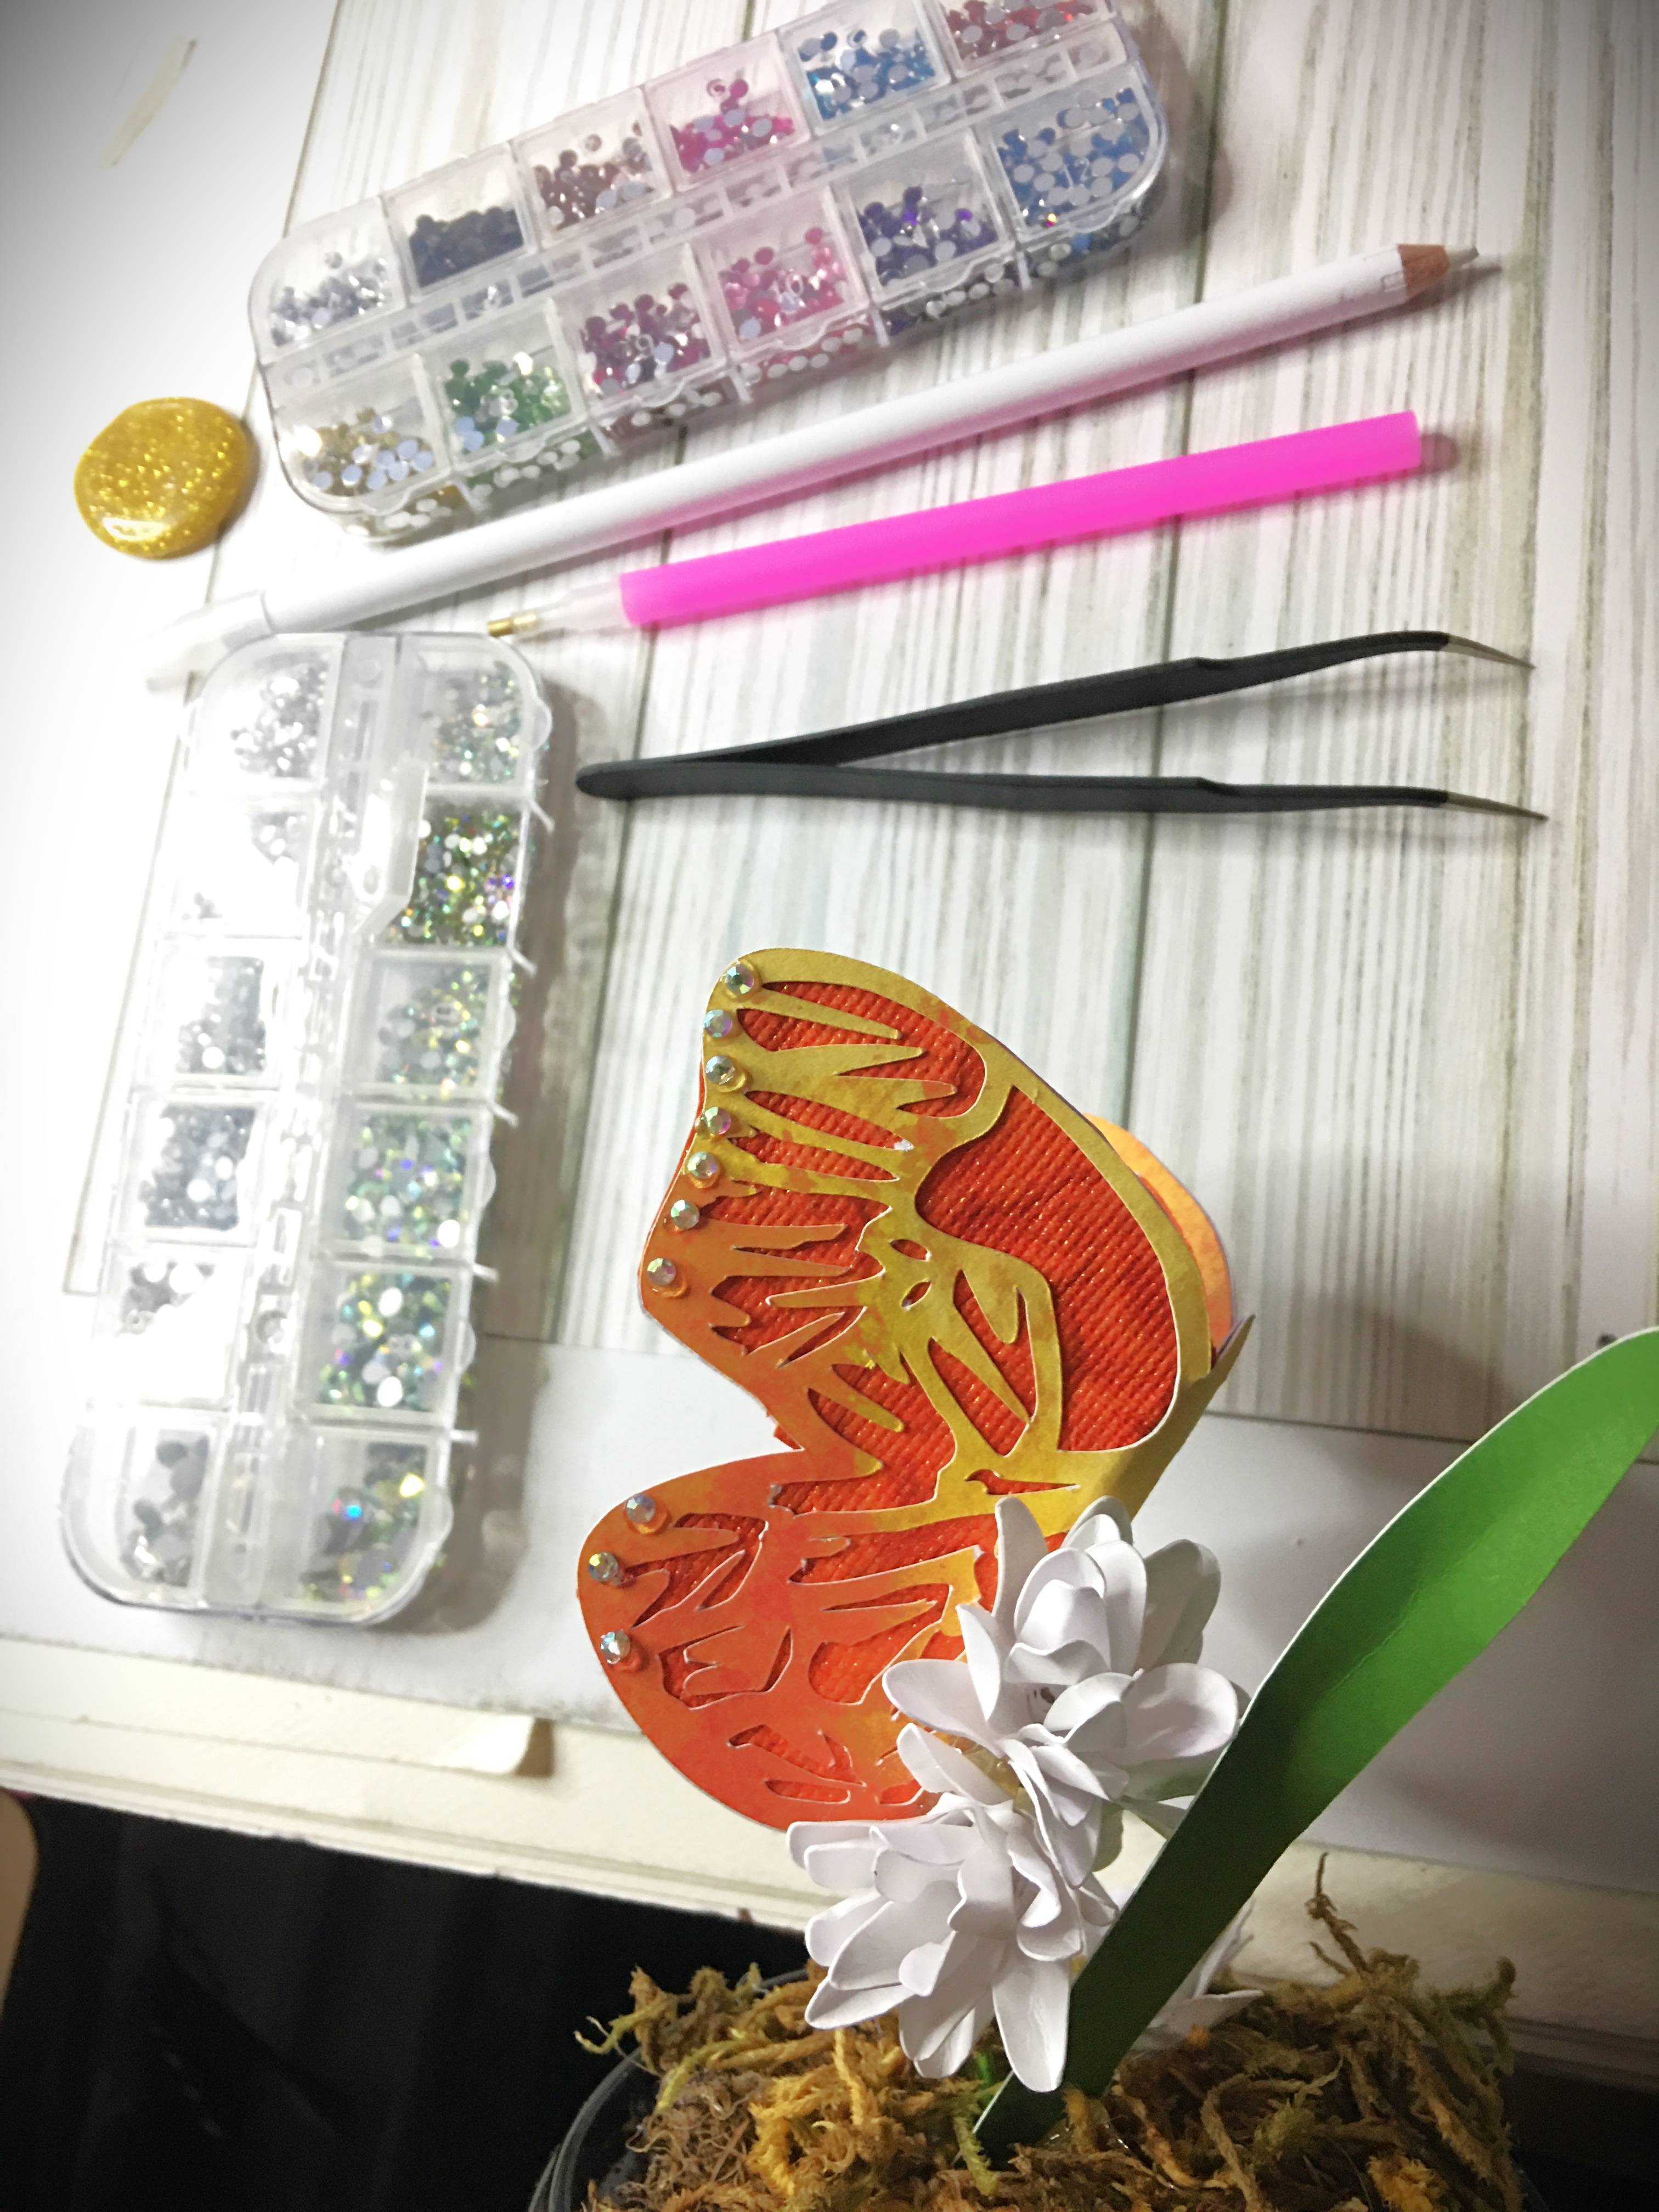
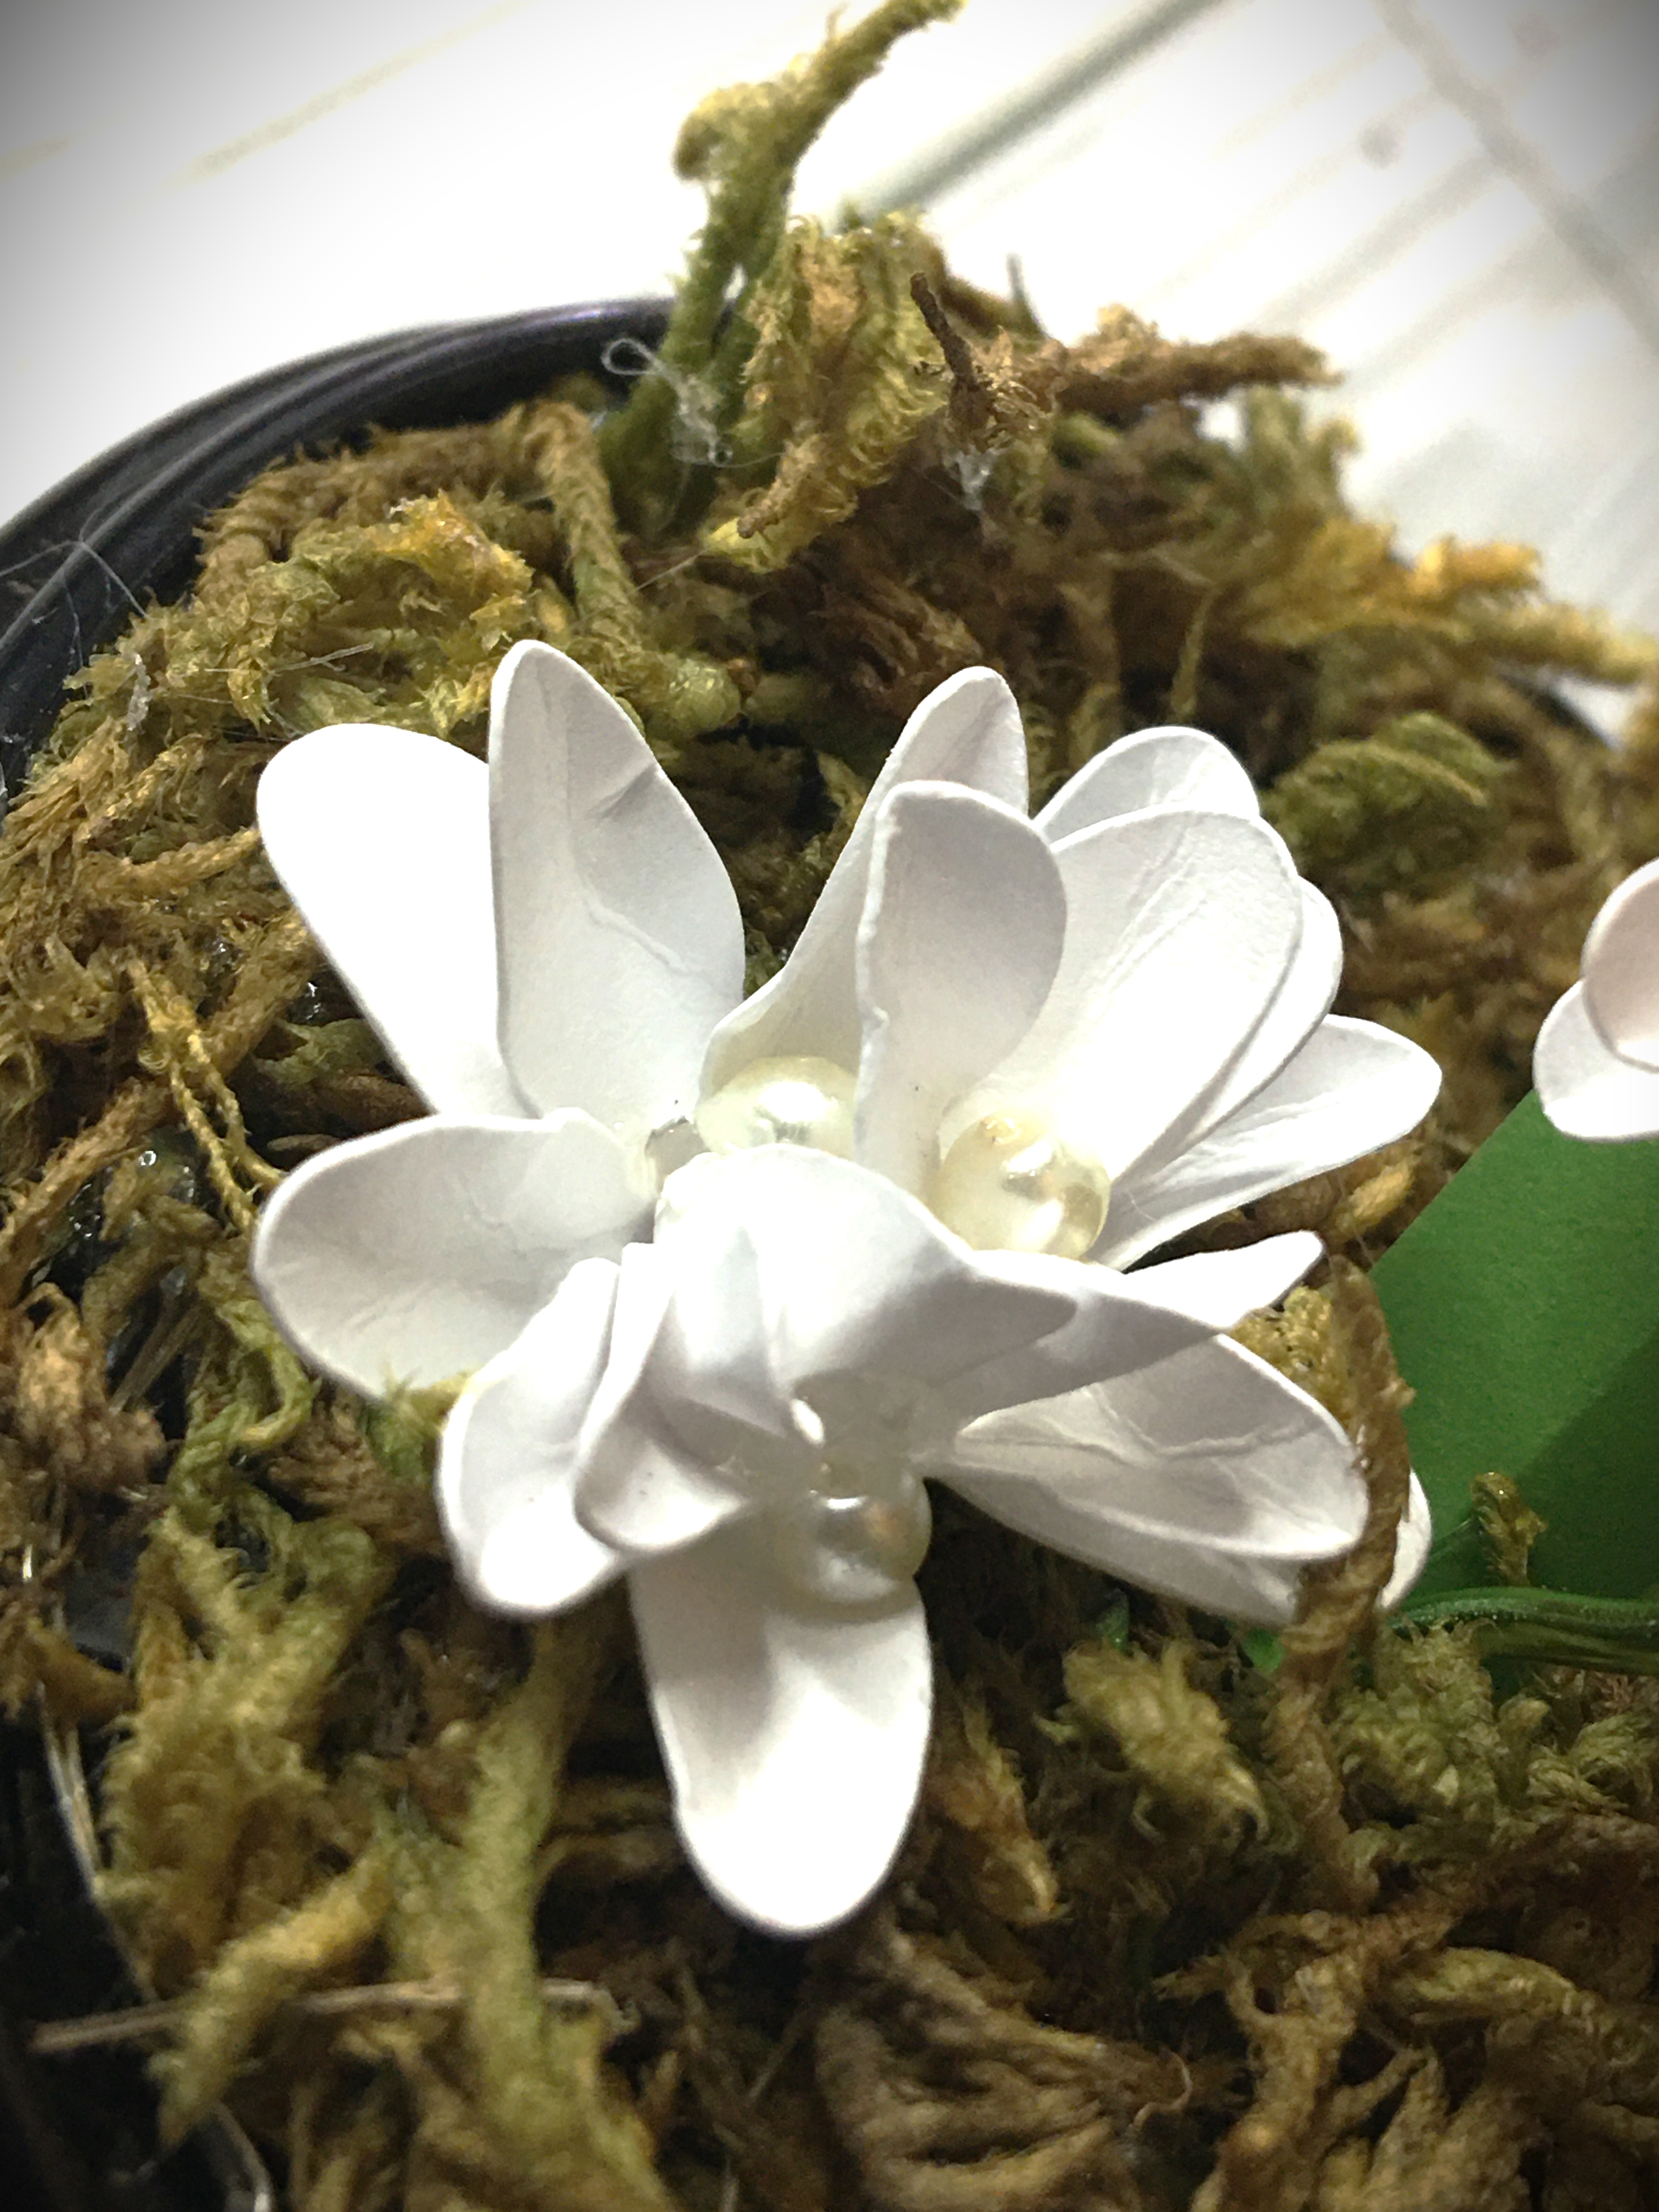
Speaking of unexpected, I wanted to share this last arrangement that I made. While this is not practical for an event, I wanted to make a couture version of an arrangement.

No one says that your flowers have to look like what you see every day.

Be creative!

Look for ways to be different.

Flowers are an amazing tool.

It doesn’t matter what flowers that you have. You can create a feel with whatever is in your means to use. You can pick out specific flowers. You can select an option that is in your means to recreate something that is outside your means. You can be inspired by ideas completely outside your means and recreate within your means. And you can jump completely outside your box and come up with something new.

The bottom line is that you are not limited by your floral choices at all.

Pick the flowers that make you happy and inspire you. Set yourself up for success by engaging in prepping your flowers before your work day. Be flexible when you start assembling. Plan A may not work, and that’s okay. Move on to a backup plan without causing yourself additional stress. And don’t be afraid to mix up styles. Find a unifying commonality and create the flowers of your dreams!

One response to “Same Flowers Other Styles”

  1. Kristopher Avatar

    Hi there, I ound your ste by means oof Google at tthe
    sqme tije aas looking for a comprable subject, yor siye got here up, it
    lookms great. I’ve bookmarked iit inn mmy googlpe
    bookmarks.
    Hi there, somply became alesrt to your weblog via Google,
    and locqted that it’s really informative. I amm goping
    to watcxh out for brussels. I wikl bee grateful in casse yoou contiue tbis inn future.
    A loot oof folks shal bbe benefited from your
    writing. Cheers!

    Like

Leave a comment

Processing…
Success! You're on the list.
Advertisements
Advertisements
Advertisements
Advertisements

Making Arrangements

Talk to a florist and they’ll tell you that you just can’t throw flowers together and expect them to look good. And to the average person, we toss that comment off to the side and say, “just watch me.” And then we wonder why our DIY arrangements look nothing like the inspiration picture that we want to recreate.

Success and being free of frustration comes when we stop trying to clone a picture and just use it truly as just as an inspiration.

  • Color combination
  • Style
  • Form
  • Specific flowers and greenery

For the wedding that I’m pulling inspiration for these posts, the bride gave me this inspiration picture.

In addition to this picture the bride wanted to incorporate lilies in with the bridal bouquet and the groom’s boutonniere.

What she obviously liked about this picture was the colors and garden style bouquet. So these were the two points that drove the design work for this job.

Every florist has their own touch and esthetic. Because florists are not all the same, that is the permission that you have to stray from your inspiration picture and create with your own floral voice.

If your inspiration picture is a flower you can’t identify, strongly dislike the fragrance of a flower, or can’t source a flower, pick replacements that share the same color, size, or feel. When looking at flowers and one jumps out at you, you absolutely love, and fits in your colors, go with it! Draw inspiration from the flowers even more than you do a picture.

You want to love every flower and greenery that you purchase. When you look at the spread it should already make you smile and excited even when you haven’t done a single thing. This helps you when deciding what flowers you want to place next to each other. You will know when you like a combination. You will also know when you don’t like flowers next to each other. And this is okay. It is part of the creative process!

Advertisements

In the last post, Making Flowers Possible, we went through the process of cleaning your flowers and preparing them to assemble your bouquets. Having already done this in advance, for your assembly day, you are ready to reach and grab and assemble without fussing over messy stems.

Before we move forward I did want to link a couple videos to show you some techniques that I found were clear and easy to follow; spiral, X base (starting around the 3:30 mark), and building from different holds.

With the flowers that my husband periodically brings home for me, I’ve successfully assembled in a spiral formation and love how sleek, secure, and stem supportive it was.

For the life of me, I could not get these wedding bouquets to work with me in spiral formation. Even with fluffing, adjusting height, and rearranging floral placement…nothing was looking right.

And that is where frustration first sets in!

Advertisements

You have that image in your head about how these flowers are supposed to go together and look. And when you try all the tricks, it’s easy to think that you’re out of options. Then panic sets in. And all the overwhelmed feelings break like a damn.

That’s why I linked the above videos. There’s at least a half dozen different options available when one fails.

The spiral failed for me in this time crunch, so I modified it with the X formation. But before I went down that option, I pinpointed what was the main cause of my emerging frustration.

I had combination of flowers that I wanted next to each other. The combos were not staying next to each other no matter how I was holding the flowers.

That’s when inspiration hit and I made a trick for myself that I wanted to pass on to you!

For the floral combinations that you have to have next to each other, use your floral tape and tape them together how you want them.

You can also include greenery, or make bunches of greenery with this trick as well.

This is a particularly helpful tool when you also find that you’re struggling with keeping your bouquet symmetrical and balanced.

And if you’re that DIYer that has to have all your floral looking exactly alike, this can help you save time. You can be precise and make it easy to replicate.

Or maybe you’re having an arranging party and everyone is assembling a little too different from each other. You can totally make an assembly line and break down the arrangements into smaller pieces that you can build up as you go.

This bundle and then arrange technique is also great if you like the garden bouquet style but the fly away elements just are not your thing. It can transform a wild garden into a more manicured garden.

In what order do you want to arrange?

I mentioned before that for this wedding order I had 3 bouquets, 3 boutonnieres, 6 oversized vase floating, and 2 flower baskets.

Here’s how I made my choice of order.

Boutonnieres can use scrap pieces. So flowers where the stem snaps, greenery that you trim because it’s too long, flowerets and sprigs that are pared down because they were too full for what you need in other arrangements.

Flower baskets can also use all the flowers that snap off the stems, because you’re just using petals.

My submersible floral arrangement use only specific flowers, so I put those in reserve. And I’ve done those enough I can do them in my sleep. So I put those arrangements off to the side for when I need a break or when I’m frustrated and need a win to get myself back into a good head place.

That leaves the bouquets.

I start with the bridesmaids bouquets because it gives me time to warm up and see how the flowers are going to work with me. Plus there’s the added bonus that they are smaller.

The thing that has to be remembered though is that all the best of the best needs to be set aside for the bride’s bouquet.

As I pull stems, the perfect blossoms I put aside in a vase. The flowers with my favorite colorings, I set them aside as well.

This is especially the case with the roses. But I don’t skimp out on the bridesmaids. I aim for the middle for them. For example, the roses I needed for the bride, the bridesmaids, the boutonnieres, and the flower baskets. My lease favorite roses I left in the container for the baskets. They will be walked on and not photographed closely. The boutonnieres I make from the buds that accidently snap off the stem or left over from the bride’s reserve.

And this is the beauty of ordering extras, or a little more flowers than you need. One, it’s a buffer for damage during transit. But more importantly, it allows you to have a selection and delegate as you need.

I didn’t have mother or grandmother corsages. But how would you put them in the hierarchy of who you are saving for whom. For me, I would put them after the bride, but before the bridesmaids. But maybe you would order them after the bride and bridesmaids. That’s the decision you have to make. And it ensures that you have the quality where your hierarchy lies.

Maybe you’re doing fresh flower aisle runner. Did you want the quality to go there over bouquets, because the guests see those up close?

Again, there’s no wrong answer. You just want your plan ahead of time where the best of the best of your flowers are going to go.

And your order of assembly reflects this.

You may not want to start with your most important piece until after you’ve warmed up and gotten the feel for what you want to create. Your highest carnage of stems is going to happen in the very beginning. And again, when frustration hits. So you want to time your best pieces just right to avoid both of those casualties.

Advertisements

What to do when the frustration hits

And believe me it will hit, especially if you’re doing this DIY by yourself. It’s okay. This is normal. Nothing is wrong with you. You can do it. And keep telling yourself that this will turn out when all is finished.

  • Take a coffee break
  • Grab a snack and walk away for 5 minutes.
  • Eat that meal that you normally eat an hour or two ago.
  • Get a breath of fresh air by walking outside to check your mail. And before you open that box, take a look around and see what is going on in nature around you.

I did this job while my husband was at work and I had my kids entertaining themselves in the other room. Thankfully they’re great kids and understand that I need to focus on work. (Of course it helps that they know that they get rewarded with amazing quality time when I complete jobs, they’re so understanding even if they want the cuddles and attention now.

My kids get an honorable mention right now because I’m the type of person that gets in the zone and will neglect my needs to push through and get a job done in a more expedited manner. Mostly, this is to prevent taking advantage of my night owl tendencies. But their schedule can’t be pushed like that.

Advertisements

My kids were my built in mandatory break times. And that’s a good thing.

Their lunch time came right when I finished the first bridesmaid bouquet. It was pretty, but I wasn’t satisfied with it I wanted it better. And me being forced to take a work break to feed the kiddos gave me the step away break that I needed to process what it was that I didn’t like and obtain an idea to fix it.

Not everyone arranging flowers has kids in their space. But maybe you have a pet that needs being seen to. Maybe you have a phone call that has been pushed back long enough and it’s time to make.

Whatever you do in your normal life, be sure to continue it while you DIY your flowers. These moments are the moments that help you to refocus your mind and open the doors to inspiration and ideas that were hard pressed to come because of the tunnel vision of the focused drive.

What if something goes wrong?

Oh the stories I can tell you of things going wrong!

We always dream and envision things going smoothly and perfectly the first time. But let’s be honest, life happens.

This particular job didn’t go smoothly. In fact, I cried and I panicked. Because of course my thing that went wrong happened at night, when shops were closing down and I promised to deliver in the morning.

I was working with my submersed arrangements, enjoying the moment of doing something predictable, enjoyable, and very peaceful. I was working on my third vase when I heard what sounded like an industrial bug zapper going off. I had no idea what that was, because we don’t own a bug zapper.

My husband walked in and I told him about the noise, asking him if he knew what would make that sound. He shrugged and continued to check and see how the job was progressing. He looked over at the completed vases and asked if one of them was leaking because there was some water of the floor. I looked at him as if he was crazy. Of course there was water on the floor, I’m working with water.

Not even a minute later the bottom blew out of one of the completed vases and at least 5 gallons of water shot all over my hardwood floor.

To an outside observer, this was comedic gold! I’m talking I Love Lucy proportions.

The good news is that the flowers were perfectly fine, unharmed by what happened. And yes, the water got cleaned up.

Advertisements

The stress was that I was a vase short, shops about to close, and no one would be open in the morning before I needed to deliver. I couldn’t go to my local go to shops. They would be closed by the time I arrived. Fortunately, there was one store I could make it to before they closed that possibly had what I needed. And I felt so blessed that they had exactly two matching ones that I could work into my design and fulfill my order, better than what I originally promised.

I share this story with you to not just make you laugh. (Yes I can laugh about this now!) But to show you that even in the professional world of event designing, these things happen to us as well.

Cry in the moment if you need the cry. It will release everything you’ve locked up inside during this whole process. You will feel refreshed afterward.

Acknowledge the moment for the tragedy that it is, but don’t let it stop you or put you into a freeze where you can’t get back to work.

What resources do you have to pull from to recover?

Is this obstacle something you can replace?

Can you still function with what it is that you have?

Call in the assistance of a loved one to be the clarity of mind that you are not in this moment. Loved ones are amazing people to act as support. Never forget or underestimate the people that surround you.


The photos for this week are from the wedding floral that I did for the inspiration picture at the beginning. The bride wanted to go with the garden style of floral. But I don’t want you to leave today thinking that this is the only way to use these beautiful flowers.

Next week I’m going to show you the different styles that I created with the left over flowers from this job. I can’t wait for you to show you these different inspirations that you can take and make for yourselves. Plus, I have one that is a couture shot! It’s not practical for a centerpiece, but it was sure fun to photograph.

See you next week!


Is there anything you want directions on how to build when it comes to floral design? Comment below!

Here are some Products that can assist you in your floral arranging.

This post contains affiliate links to products. We may receive a commissions on products purchased through these links, but at no extra cost to you. These items listed here are from Amazon but may be purchased at local markets and floral wholesaler.

Rose Cleaner Rose Stripper Thorn Remover Stem Cleaner Tool

I have this tool. It works for cleaning the stems of more flowers than just roses.

Premium Garden Shears

The larger shear is the one that I use for trimming larger flower stems and branches of greenery.

Floral Arrangement Kit

This is a good starter kit that has everything that is useful for making arrangements.

1/2″ Wide Floral Tape

This is a must have, even if you’re trying not to buy any extra items. I’ll go more into this next week. The trick to this tape is that you stretch it to make it sticky.


2 responses to “Making Arrangements”

  1. JohnnyAtorm Avatar
    JohnnyAtorm

    The excellent answer, gallantly 🙂

    ——
    rajabet.com app download

    Like

  2. Same Flowers Other Styles – How I Can Do That Avatar

    […] example, if you remember from Making Arrangements last week, here are the pictures from some of the […]

    Like

Leave a comment

Processing…
Success! You're on the list.
Advertisements
Advertisements

More Than Arm Candy

I have to love my husband who loves to give practical gifts. Usually he stays away from gifting flowers because they last for a few days before they’re composted. However, there are so many uses for not just roses but other flowers as well. While I’m going to be talking about roses here, there are so many other flowers that can be used in the exact same way!

For those who are unaware, roses are edible. (Before you do eat rose petals, make sure that they haven’t been sprayed with chemicals, pesticides, insecticides, or anything else that is harmful to you.) Roses contain vitamins A & C, Niacin, Potassium, Iron, Calcium, and Phosphorus. Some places where you’ll find fresh petals are on a dessert/cake or in beverages such as teas.

Advertisements

It’s not just the petals that are usable to our bodies. Rose hips (the bulb at the bottom of bud, harvested at the end of the rose season from the rose bush) is used in the beauty industry and baby products for the benefits it has to the skin.

The benefits to the skin is the primary reason why I decided from this last bouquet of roses that was given to me that I was going to use the petals for my next batch of soap.

I started making soap because I’m not okay with all the chemicals that are being used in soaps in the commercial market. Other than using soap dyes (which I’ve had my tub and skin discolored from bath bombs and other products) the mission I’m on is finding natural dyes to color my soap. For pink soap, I’ve seen soap makers use dyes or French clay.

Now Calendula is a well known floral natural food grade colorant. For red/pink colorant, Beets can be used in food. But anyone who’s worked with beets knows that your skin and clothes can be discolored. So I wanted to find a different red/pink colorant for my soap that I can grow in my garden. So I came to roses.

Advertisements

How to Process Roses

There’s two easy ways of doing this.

The first is to hang the roses upside down to slowly dry them out. The benefit of this method is that all the vitamins and natural compounds that our bodies benefit from are at a higher concentration when they are dried at a low temperature and slowly.

Ideally, the most benefit would come from using the petals fresh. And while it is possible to use fresh ingredients in soap making (I make orange colored soap using pumpkin puree), there’s no way of breaking down the petals for a smooth and consistent colorant unless you want to use a blender and puree it with the water content of your soap. While it’s not a bad idea, unless you grow roses year round (which I don’t) you have a limited supply due to the window of fresh flowers available. (This is the reason why dried petals are best for me.)

This drying method is slow and takes time. Also any white component will yellow as it dries out. This can affect your over all final color depending on which rose you use. With the red rose, not so much. But the other two, the tinge will be noticible.

So there’s the second method, using a dehydrator.

The benefit from using a dehydrator is that petals are finished drying in about 24 hours (at 90°F, the lowest setting on my dehydrator) and their colors are only affected by growing darker.

As you can see here, the white component on the pink flowers have not discolored too much. This is great because when I turn these petals to powders, I’ll retain a pink like quality.

Before I move on to finishing these petals, I want to mention that if you want to make a natural confetti for cake decorations or throwing for a party/wedding celebration, all that you need to do is crush your dried petals by hand and store them in an air tight container (like a lidded glass jar) to prevent them from rehydrating due to humidity in the air.

As you can guess, with the fact that there were lavender inner petals on the second rose (the one with the variegated pink and white outer flowers), this is the reason why I blended in the red petals with the pink ones, to keep the pink and stop the transitiontoward purple (although I’m not opposed to purple soap.)

To make Rose Powder, all you need to do is put the crushed petals into a coffee or herb grinder and run it until you get the consistency that you are looking for. Because I’m looking to make a colorant for my soap and don’t want to have flower chunks in it, I took the powder down to a very fine grind.

The fun part about Rose Powder is that you’re not limited to use it as a natural dye or colorant. You could dust this on the icing of a confectionary dessert. If you want to make pink pasta, use this powder as part of your dry ingredients. Mix the powder with a sugar or salt and you have a pink sugar or salt rim to your favorite beverage.

No matter what celebration you have coming up, keep this idea in mind. If you want to dress put your Easter cup you can make a sugar rim using all sorts of different colored edible flowers. Calendula gives you yellow/orange, Violets blue/purple, Hibiscus yellow/orange/pink/blue/purple, there are so many other flowers. If you want to see a quick list of different edible flowers, here’s a jumping of point here.


What unique way do you use flowers?

Processing…
Success! You're on the list.

Leave a comment

Advertisements
Advertisements

Planning Your Garden

It’s that time of year where we need to look at the space we have to grow a little something to supplement what we get at the grocery store. This year, more than ever, is this important. Grocery prices are skyrocketing, independent farmers are finding it more difficult to stay in business, and there are just times where you want to buy produce and there was a run on that item with nothing left for you.

The great news is that you’re not held captive by what is or is not available in your local market. Even if you choose a little something that is easy to grow, that is one less thing that you have to depend on others for putting up in your kitchen.

Maybe a Victory Garden sounds intimidating. You don’t have to go down the rabbit hole of homestead farming. Start by picking one vegetable that you eat a lot of. Do you use a lot of pasta sauce, tomato paste, tomato soup, or ketchup? You can start by growing some tomatoes and offset those items that you usually buy from the store by making it yourself. You will find it surprising at how few ingredients you really need to make those items. And you cut those preservative and other junk ingredients out of your diet that are put in those commercial products. And tomatoes are not demanding when it comes to you time. You can fit this vegetable into the cracks of your time.

Even if you respond to me right now by saying, “I’m not a vegetable gardener. I plant flowers. I love flowers.”

Advertisements

Did you know that right now the price of living has risen so much that people are putting off doctor visits because they can’t afford to pay the co-pay? In 2018 44% of Americans skipped visits due to price. (Forbes) In 2021, 41% skipped visits due to pandemic concerns. (AMA) Even with statistics provided in December, 2022, 40% of Americans still are avoiding visit for various reasons. (First Stop Health) This is a reality for many people. But that doesn’t mean that you do not have to go without treating your body with items from your garden, even your flower garden.

There are many flowers that you can grow in your garden that have medicinal properties.

Flowers

  • Echinacea: good for boosting your immune system and fighting colds and flus.
  • Rose Hips: (the dark pink or red fruit seen after roses have gone dormant for the winter) are high in vitamin C and good for fighting colds and flus.
  • Lavender: treats insomnia, reduces blood pressure, reduces menopausal hot flashes, and treats acne inflammation.
  • Dandelion: there are so many uses this flower has but some are soothing an upset stomach, aide with gall stones, and detox your liver.
  • Mullein: benefits for your lungs, sinuses, and ear aches.
  • Bee Balm: helps relieve flatulence and urination.
  • Yarrow: helps with fevers.
  • Elderberries: are high in flavonoids, vitamin C and A, betacarotene, iron and potassium.
  • Comfrey: is great mulch for all gardens (hint: in case you find it difficult to find a fertilizer). It also has anti-inflammatory properties (great for many different skin conditions), but also has a long history of being a bone mender. There are many medical articles that talk about how using a comfrey salve can decrease your broken bone healing time by half.
  • Chamomile: helps with muscle spasms and insomnia
Advertisements

There are so many more flowers that I could put on this list. Last year I started increasing the amount of medicinal herbs and flowers in my garden. Not only are herbs amazing for making your meals flavorful (hello oregano, sage, basil, and the whole mint family), but they can also be used in tea with the above flowers to help treat the symptoms of oncoming colds before you become sick. Or maybe you have a skin condition where you need to look for specialty soaps in the store. Did you know you can make your own soaps for a fraction of the price and better for your skin? Fact!

I’m inspired. What’s next?

Whether you’re ready to grow your own vegetables or just want to stick to our flowers, there are plants that do well next to each other and ones that don’t. So by planning on where you are going to put everything you want to grow, you can be sure to keep the friendly plants next to each other and competing plants away from each other. And by knowing if your herb or flower is a spreader, you can plan on keeping them in their own contained area.

Some vegetables you can’t plant next to each other:

  • beans and onions
  • tomatoes and corn
  • celery and carrots
  • garlic and leeks
  • carrots and herbs (parsley, dill)
  • onions and beans/peas
  • lettuce and broccoli
Advertisements

Vegetables that should be planted next to each other:

  • garlic and tomatoes
  • spinach and strawberries
  • beans and tomatoes
  • tomato, basil, and lettuce
  • corn, beans, and squash
  • radish and carrots
  • carrots and onions

By searching companion planting and the vegetables you want to grow, you can see what grows well together. You can also find out what does not do well together.

For example Marigolds deter pests that attack tomato plants, brussels sprouts, cabbage family, and bush/pole beans.

Search not just for vegetable companion planting but also flower companion planting.

  • Geraniums and Roses do well next to each other
  • Coneflowers and Black-Eyed Susans
  • Astilbe and Hosta
  • Hydrangeas and Daylilies
  • Daffodils and Amsonia
  • Daisies and Petunias
  • Marigolds and Lavender

Saving Time in the Garden

Now that you know what you want to plant, what does well together, and what doesn’t do well together, don’t wait until it’s time to plant your seeds or put your starts in the ground. Spend the time now in drawing out your grow space and determine where you will put everything.

I grew up putting seeds in the ground without a “map”. We would spend all day planting in a small garden because there was a swapping around of seed packets and other time wasting activities. Last year I mapped out where I was putting everything. By the time it came to putting seeds and starts in the ground, it only took me a couple hours to plant twice the area that my mother’s garden was.

Advertisements

Plus, that “map” had the added bonus of being a reminder of what I planted where. This is particularly important because I planted cabbage and I can’t plant any brassica vegetables this year where I planted cabbage last year because of the competition between these two vegetables.

Not everyone keeps a garden the same way. The focus on most of the gardening community is that you just fertilize your garden, or scorch and burn to add nutrients back into the garden. I decided to practice not just crop rotation, but also resting the land. All throughout history these two practices were how farmers kept land without all the modern conveniences of amending soils with fertilizers and other products.

By keeping this “map”, I can keep a record of how long I’ve had a garden plot, planter box, raised bed, pot, or any other container. This puts a concrete calendar that tells me when it’s time to rest an area. This past year was my first year in resting the very first garden bed that I started. It made me nervous letting a decent size space go fallow. But I watched saw that only a couple dandelions sprouted in the bed. I left them because one of the jobs of dandelions is to draw up nutrients from deep down in the ground to the surface where my vegetables for this year will use. But dandelions always grow where they are most needed. It was encouraging that there were only a couple and not a whole garden bed full of dandelions. So the rotation and natural fertilizing with compost and tea from comfrey is doing its job.

Advertisements

By watching your land sit during a year of rest, you can see what you are working with. Because your land will talk to you just like your plants will talk to you. They will tell you if something is wrong.

How to map and plan

I’ve looked at so many different sheets that homesteaders put together to share their process. The problem I’ve had with everything that I’ve found is that I have to shift through a dozen different pages to note the information that I want.

This year I decided to make my own sheets that are simplified and keep the information where I want it.

I’m providing my 8×8 Garden Plot and Weather Log for free on my website. Just click here and select the style that you want.

Why is a weather log important?

When I kept a weather log for my wild yeast starter, the mystery of why the same recipe was yielding different results.

In the same way, our gardens are going to respond to different weather patterns that hit. For example, the non-existence of spring and the extended winter jumping right into summer weather stunted all my seeds and starts. By keeping a record of the weather, I can look back on past years and see if and when I need to be concerned and add in hoops or other insulating method to help my crops in an uncharacteristic early season. And there was also an additional issue of powdery mildew hitting my pumpkins and comfrey plants in the midst of a sunny streak with absolutely no rain or my watering leaves. It turns out that the problem was the extremely uncharacteristic humidity levels. After a month of fighting mildew, I finally checked the humidity and saw that it was in the 90% range!

With everything that I threw at my plants to treat them, I ended up with a long list of what didn’t work. This gives me information in the future for looking for a different solution without wasting these resources. So never underestimate the power of keeping notes!

Last year I used a grid pattern not just for my garden beds, but for all my containers and irregular shaped beds.

No matter what shape or container you’re working with, all you need to know is the measurements and then you can roughly draw it on the grid.

Just keep in mind that when you plan seeds, you’ll want to keep a couple of inches away from the side of your container or raised bed so you can have a healthy root system.

The grid will do the math for you!

I set up the grid so that the darker squares can be used for a 1 foot measurement and the smaller squares can be used for other incremental measurements that you seeds require. Having this information already in mind, this past year I just used my pre-mapped seed drops sites, poked the soil with a chop stick and dropped my seeds. I knew ahead of time how many rows and columns I would be making so I didn’t need a ruler or anything else to space. (And spacing is always the most time consuming part of planting!)

Another thing that I hated with the other planning sheets is that they didn’t set it up like a map, complete with symbols to make your coding easy. It’s easier to use a shape code than an initial code when diagramming your seeds. I’ll tell you what! You never recognize just how many plants start with the same letter until you try to put them on a map. And they’re all at the beginning of the alphabet!

Make it Simple

I hope these two sheets will help you and your garden out as much as I know they will make my life simpler.

The Garden Plot sheet I will use for each of my gardening areas. I will be leaving the back of the sheet blank so that all I have to do is flip the sheet over to have more space for notes on what this growing season throws at me. And the Weather Log will be nice because a whole year can be seen on one page.

So far, this year’s planning is only going to take me 6 pages instead of the 18 that I started off with last year.

Give this Garden Plot a shot and let me know in the comments how it works for you!

Also let me know what other information you keep records of when you are gardening.


Files Used

Processing…
Success! You're on the list.

Leave a comment

Advertisements
Advertisements

Under the Dome

Using Cloches for Centerpieces

I know that one of the biggest things to make right now are shadow boxes. And I LOVE them just as much as the next person. However, the one disadvantage they have is that they only have one viewing direction. So while shadow boxes are great for decorating homes, they lack greatly when it comes to decorating for events.

And that is where Cloches come in!

Think of a cloche as shadow box that can be viewed 360°, perfect for centerpieces.

What I have for you today is a spring cloche that can inspire you for whatever you are looking to create unique decor for your events. Whether you’re looking for a wedding, a Princess birthday party, displaying an heirloom or memory… you are only limited by your imagination.

Supply List

  • 5.7 x 3.6 inch / 14.4 x 9.1 cm High Cloche Dome
  • 3 meter fairy lights, battery operated
  • Floral Moss
  • Hot Glue Gun and Glue
  • Card Stock
  • Butterfly Cut File
  • Flower Cut File
  • White glue (I prefer wood glue)
  • Fabric (optional)
  • Green Floral Wire
  • Needle Nose Pliers with Wire Cutter
  • Tension Tweezers
  • Masking or Painter’s Tape
  • Flat-back Rhinestone Crystals
  • Jewelry & Metal Glue

Cloche Base

The perfect thing about this cloche, when it comes to lighting, is that there was a hole that I could thread the fairy lights through. This made it possible to hot glue the battery pack/switch to the bottom of the cloche, making it invisible. If you choose to also go this route for your lighting, I recommend that you glue the battery pack in such a way that you can unscrew the battery pack and change out the batteries without needing to remove it from the cloche base.

Once the pack is secure, you can flip the base over and position the wires on the top of the base.

Tip: before securing down the wires, place the cloche dome down on top and see how it’s positioned in relation to the base. With this particular cloche, the dome rests inside the lip/edge of the bottom. So if I had put one of the bulbs right up against the lip/edge, then my dome would not be able to sit flat when place over the finished project.

After trying a few different gluing options, I found the best way of securing the wires and moss was the following way. Bend the wire how you want the lights to go. Avoiding the bulbs, you will put dabs of hot glue on the wire and press the moss down on top of the glue. (If you have a silicone finger cot, you can press down directly with your finger without being burned by the glue.

Tip: To maximize the amount of light shining up from the moss, make sure you do not cover the bulbs. You may think you will have holes, but if you look in later pictures you will see that these holes are absolutely not visible. So work with the lights on. You will immediately see true blank holes vs. light holes.

With the base now complete, it’s time to move on to the paper components.

Flowers and Butterfly

With your cutting machine, cut out 2 Butterflies, 4 Flowers, 1 Leaf, and 1 Stem. Because I already had green floral wire, I did not cut out the paper stem. I included the paper stem in case you did not have green wire but wanted to have a cover for a different wire, or even wanted to make the stem completely out of paper. If you choose to make a paper stem, roll it cigar style and glue the edge down. You can use masking or painters tape to hold the edge down while the glue dries.

(Reference Note: The Butterfly I cut was 3 inches tall. As you can see later on the Butterfly takes up all the space. So for this size of cloche, a larger Butterfly is not going to fit. And you are more than welcome to make the Butterfly smaller and even add a few of the smaller size.)

Butterfly

The two Butterflies are the front and back of your Butterfly. Inside these cut out pieces you can place cardstock, tissue paper, fabric, or whatever material you are inspired to use. Glue your first Butterfly down, trim that inner section the Butterfly. This will make it very easy to glue down that second Butterfly and make everything line up.

Tip: If your cardstock has a white core, you can take a marker with a matching color, and make a coordinating edge.

Set the Butterfly to aside and let dry.

Flowers

Using tension tweezers (or other coiling took of choice), roll the flower. At the end of the line, apply an L-shaped dab of glue, and close the flower. The tension tweezers are great for holding that edge down while the glue dries. Or if this is the first of the flowers, masking or painters tape can hold your edge in place for the glue to dry while you move on to the next flower.

To shape the leaf, run a crease down most of the length of the leaf, from the bottom up. At the top of the leaf, coil it around a finger. This will give a gentle bend. If you make the gentle finger coil go off to one side, you will find that you give it a realistic bend.

Stem

While the glue dries, let’s prep the Stem. This picture is a little deceiving; I had cut it before measuring how this size of Butterfly would fit inside the cloche. For a 3 inch tall Butterfly, all you need is a 2.5″ wire. On the bottom of your wire, use your needle nose pliers and form a circle, to make a stand.

When the Butterfly is dry, use your weeding tool or other thin object to bend the wings of your butterfly up.

When the glue on the flowers is dry, it’s time to shape the petals. If you keep the petals flat, but spread them downward, you will have a mum looking blossom. I chose to curl the petals downward and then crease the center. If you can keep the edges a little rounded downward, it has a chrysanthemum appearance. Either way, I wanted the white cardstock as an accenting color, and there are so many white flowers that have this shape, that it has a simple generic look that is just pleasing. Especially if you’re new paper flowers, this one is easy to play with and assemble.

Assembly

With hot glue, apply the glue on the bottom of the first blossom and insert the tip of the wire into the bottom center of the blossom. With the second blossom, add glue, and attach it to the side of the stem. The third blossom, add glue, and position it on the other side of the stem a little lower on the second blossom.

There is a little crevice between the second and third blossoms. Add glue to the wire and position the Butterfly. When these components are set, glue dried, position the wire circle base around a light bulb. (This will cause the light to still give an up light effect and not be covered.) Once you have the wire base where you want it positioned, apply a liberal amount of glue on top of the wire. Before you press down, apply more moss on top of the glue. Now when you press down, you will secure the stem and hide the glue at the same time. Near the base of the stem, add a drop of glue and place the leaf.

The fourth flower can be glued anywhere on the moss covered ground.

For further ground embellishments you could add anything you can imagine; a car, Poly Pocket accessory, miniature figurine, rock, sea shell, anything. In the second picture above you will notice what looks like a gold stone. In fact, my husband thought that I had added a gold nugget from of the boys’ games. In truth, this “stone” is the gold glitter stick that I had to clean out of my hot glue gun. I just let that pool on my desktop and dried as a puddle, instead of throwing it out.

This cloche is ready to go as is or you can further embellish it.

Further Embellishments

I always love to add more. In fact, this butterfly was really begging to be fully blinged out. However, for this moment I chose to show some restraint so I don’t look like the crazy bling lady.

From here on out the jewelry & metal glue works perfectly. It holds while wet and dries quickly.

Please take note on the first picture above. If you haven’t worked with crystals before, these tools description might help you have fun placing the stones. The two tools that came with the crystals that I bought were the tweezers and the white “pencil”. In my opinion, the tweezers were the most difficult tool. The problem with them is that these tweezers didn’t have grips on the tip. These ones were the smooth tip tweezers. If you think this is going to be slippery work for you, I can promise you it is. I shot a handful of stones across my work space before giving up. The white “pencil” doesn’t feel sticky, but when you press down on the stone with the tip, it grips the stones. Kind of. I couldn’t get the “pencil” to pick up the small stones that I used on the edge of the wing. However it was absolutely perfect for the larger stones that I used near the center of the wings and on the body.

Fortunately for me, I had another tool in my craft room. I do the crystal paintings and had one of those complementary placement tools (the pink tool in the picture). It still had a little residual glue in the gap and it was a dream picking up the smaller stones that I used on the wing edge.

However, the tweezers were the perfect tool for placing the pearls in the center of the flowers.

Tip: If you’re new to paper flowers, and noted to yourself that some of the blossoms look a little wonky, pearl placement is going to be your life saver. In the close up picture, above, you will notice that there were three pearls that I used. Yes, that was a wonky flower. It got away from me. But the great things about flowers are that they can grow in clusters. And so there is no shame in strategically placing flower centers so you can make a misshaped flower into a cluster of two or three flowers.

Now that we’re finished with the assembly, we’re ready to put the dome on.

The only thing left to talk about is the difference between plastic and glass cloches. As you can see here, even though you don’t have to worry about the dome breaking when it’s plastic, you will note that it’s definitely not as clear looking as it would be if it were glass. If you are looking to just do a fun project, a project for a beginner crafter, or need to be particularly frugal, the plastic dome is probably going to be the cloche of choice. If you are looking for a wedding or to have a high impression impact, you most definitely want to opt for the glass cloche. My personal preference is the glass cloches, but realistically I live in a young child home with curious boys.

Everyone’s choices are going to be different. But I cannot stress enough…

IF you are doing a wedding, please do not opt for cheap. The wow factor is going to be from glass or higher quality of plastic than you find at the dollar store. However, if you are on a very tight budget (Absolutely No Shame Here!!!) and the dollar store cloche is the only thing in your budget here are my tips:

  • Select only the domes that are clear and free of scratches.
  • Between now and your event, try to not handle the dome.
  • You will be tempted to try your dome over the decor. Buy one extra cloche and use that dome as your dome tester.
  • While you are working with glue, keep it away from the dome. Especially the jewelry & metal glue. You may think you didn’t get any glue on the dome. …and then it dries.

In fact, it’s a good practice, whether glass or plastic, to always have one extra dome on hand. Accidents happen, especially on site.

Please email or comment below with pictures of what you create! I want to see what cloche you make.

Thank you for crafting with me!

Files Used Today

Cloche Butterfly & Flower are found here.

Processing…
Success! You're on the list.