After spending almost a decade in the event decorating industry I have repetatively heard "I can do that". Instead of being dismissed by creative minded people, I want to show you how I do "that" so you can be sucessful in recreating that inspiration image. I just might have a few tricks that you haven't seen yet!
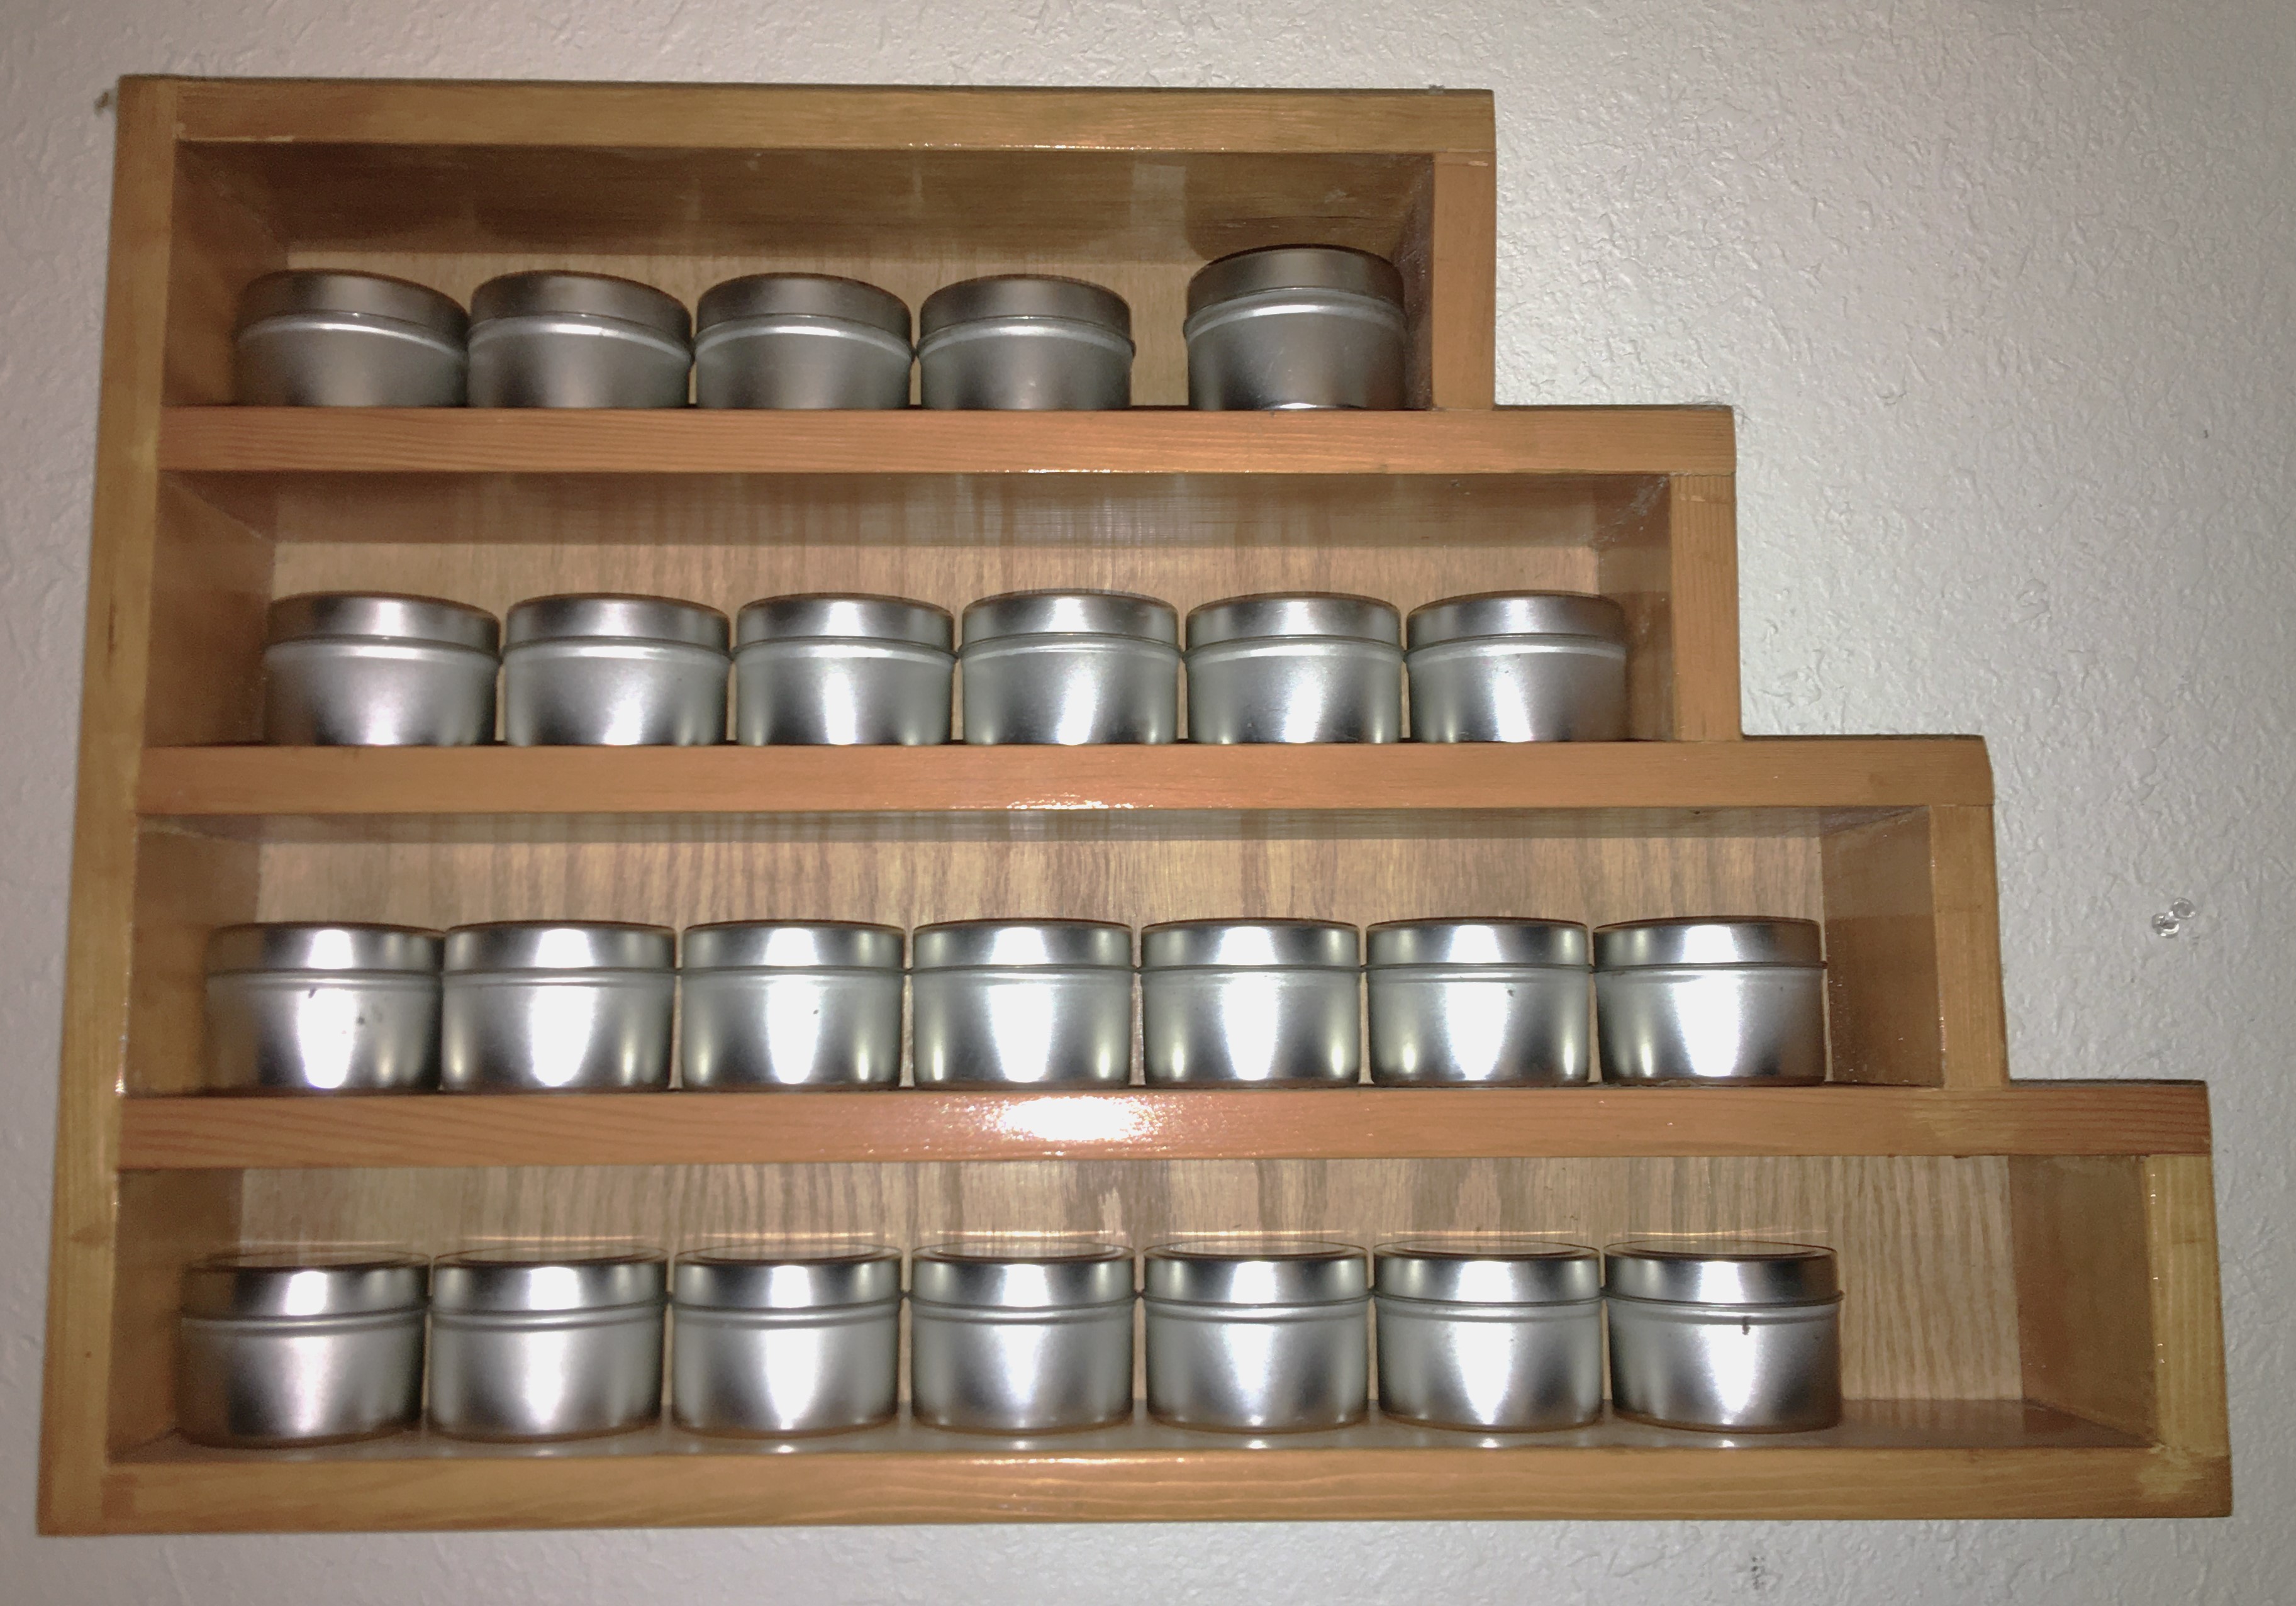
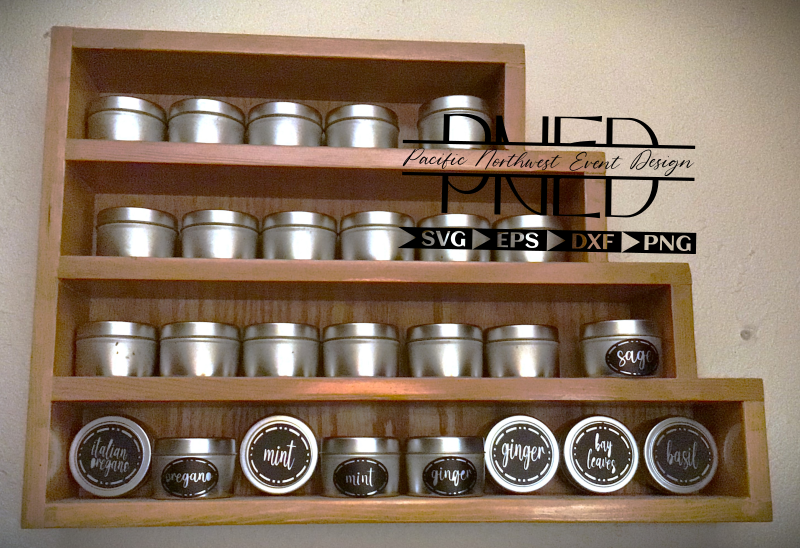
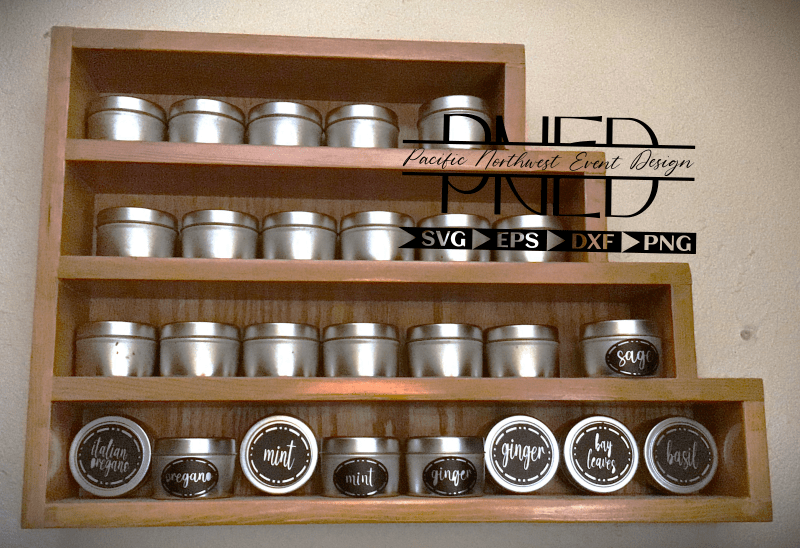
Long before I met my husband, his father had made and gifted him (and his siblings) a handmade spice rack. For well over a decade, we had intentions of displaying this gift and filling it with spices. However, the convenience of buying spices really took away the need of using the tins.
A few years ago I played around with my dehydrating skills and found new seasonings to cook with that I never thought of making.
I love mushrooms. There’s a gentle earthiness that comes with using them in a recipe. And when your family doesn’t go out of their way to eat mushrooms, I sneak them into sauces by dehydrating the mushroom and then grinding them down to a powder with a spice blender. Now I can have the benefit of having the flavor profile without my family seeing it and making their picky faces.
My absolutely favorite “spice” to cook with is actually butternut squash. I roast the squash in my oven. When it’s finished cooking I remove the flesh from the skin and mash it. From there, I take the mash and spread it across the fruit roll up tray of my dehydrator. Once the mash dries out, I also put that in my spice grinder and turn it into powder.
Here’s the absolutely most beautiful thing about turning your vegetables into powder! If you have a child or family member who turns their nose up at even the mention of vegetables, you turn it into a powder and season your food with it and your family has absolutely no idea that they are eating vegetables!
Not only this, but if you’ve made sauces before you are fully aware of how the traditional flour and corn starch have no benefit of flavor. You have to remember to cook down your flour. And if you use too much corn starch, and have sensitive taste buds, you can actually taste it. So there’s the issue of the texture; corn starch has a different texture and appearance than flour. But…instead of using these two traditional thickeners you can use dehydrated vegetables.
I prefer using potato flakes over flour and corn starch hands down. You can use potato flakes minutes from finishing your cook time. So if you forgot to cook flour to make rue, you have potato flakes. If you hate making slurry with corn starch and then wait for it to set, use potato flakes. I’ve had slurry take anywhere up to 10 minutes to take effect. But with potato flakes, it’s generally set in about two minutes.
That is my #1 mom hack of thickening a sauce, stew, or soup.
My #2 mom hack is using butternut squash instead of sugar!
If you’ve made your own tomato sauce before, you know the debate among the community: use sugar or not. Sometimes you need that sweetness to balance out that flavor profile. However, if you’re trying to eliminate sugar, or keep it to a minimum, what do you do?
You add butternut squash powder!
It’s sweet. You have an added vegetable in your meal. Plus, you have the added bonus of having yet another thickening agent that is healthy for you.
Advertisements
You would think, for as much as I make seasoning and thickening agents from vegetables, why haven’t I grown my own herbs yet?
It wasn’t until this year that I set out, with intention, growing herbs. And it was a great thing that I focused on herbs this year.
A family member tested positive this year with the strain of covid with assaults the gastro-intestinal track. But I had fresh herbs on hand that are anti-viral in nature, giving your body the building blocks to strengthen your immune system to do its job that it was designed to do.
Bay leaves are anti-viral, good for your body no matter which virus your body is fighting.
Lemon balm is also an anti-viral, but its properties are good for the whole coronal family of viruses. So it’s good if you test positive or if you’re fighting off the common cold (it’s from the same family).
So with these two herbs, and my homemade chicken stock, I had the building blocks to make a broth for this family member. Because their GI was being affected, of course food is sounding pretty horrible compared to other strains. To this broth, I added other herbs that I knew were beneficial for delicate GI and combating nausea; ginger, mint….
I’m still working on the recipe to making it recreatable. But I know I’m on the right track because this family member asked me to make a second batch of broth, because it tasted good AND it soothed their stomach so they could get some nutrients into their body.
The whole point of the broth was not to cure them from the virus. The whole goal was to get the nutrients into their body for them to get their body everything they need to fight the virus. Our bodies are amazing things. They’re meant to fight off disease. We just need to give them the building blocks to do their job.
And that is what is amazing about growing a garden. Whether you’re growing food to put on the table or growing herbs to make food taste better without all the extra ingredients in the now $6-10 bottles of seasoning at the store (sometimes more, and if they’re on the shelf).
Consider what it is that you can grow for your family. You may not have the yard to grow a garden. But with a sunny window, you can grow a few easy low maintenance herbs that are good for fighting colds and viruses. I buy bay leaves, because I don’t have the space for a bay tree. But Lemon Balm can be grown in a pot in a sunny window. And the mint family (which lemon balm comes from) is prolific and among the easies things you can grow. Plus it’s something that you plant once and it will keep coming back and grow.
Please comment below with the herbs you grow or with any hacks you have for using vegetables in a new way!
The file, Seasoning Labels, I used for these herb layers are now live in my shop here. The file comes with the labels oval in shape. To create these in the round, I just resized the oval into a circle. This font is amazing for retaining its shape!
Processing…
Success! You're on the list.
Whoops! There was an error and we couldn't process your subscription. Please reload the page and try again.
Lately I’ve been very interested in the Boho style of event designing. A lot of event designers and coordinators tend to gravitate toward the fantasy of rich and fancy feeling decor. There is nothing wrong with that. I gravitate toward that. There’s just something about pretty sparkly things grabbing our attention.
Even when I worked for a decorating company, there was this huge gravitation toward bringing the Boho brides nearer to the glittery and sparkly end of design. I know why there is that nudging toward that direction. But I’m not going to speak ill of other businesses. I just want to take this moment to see and recognize those brides, and other event organizers and celebrants, who want to stay more toward the end of the spectrum of the simplistic and natural look.
This post is for you!
What I want to focus on today are a couple of floral options that are different than what might be proposed to you when you talk with a florist; succulents and preserved wild or garden flowers.
I don’t know if you’ve taken the moment to look at all different colors available in succulents. They are definitely a wide spectrum that diverges from the cactuses and green succulents that your mind naturally gravitates toward.
The best part about succulents, especially if you’re DIY as much as you can for your wedding, is that you can get these in advance and arrange your centerpieces weeks in advance. This is true, even in the middle of winter!
The one thing that you want to pay attention to is the little amount of care that you need to give them. But these are not going to wither or die on you when you look at them funny. They just need to be kept in soil designed for succulents and give them a little water every now and then.
Tip1: Succulents loved being watered from below. So when watering them, place their dish (with drain holes) in a dish of water and give them a few hours to drink as much as they want. They have enough water when you see that the soil on top has been touched by water, not dry to touch.
Tip 2: If you see the petals start to have a wrinkled appearance, they are underwater. Make sure you soak them in a dish of water. It may take a little time. But once the succulents have gotten enough hydration they will look plump again and not wrinkled.
The only other thing that you have to pay attention to is how much light they get. Here in the Pacific Northwest, succulents are not about to get too much sunlight. They can be burnt by full sun, depending on your region. But in the couple weeks that you have them before your event, this is not likely going to be an issue.
Advertisements
One issue that you might have is when you’re succulent undergoes what looks like a growth spurt.
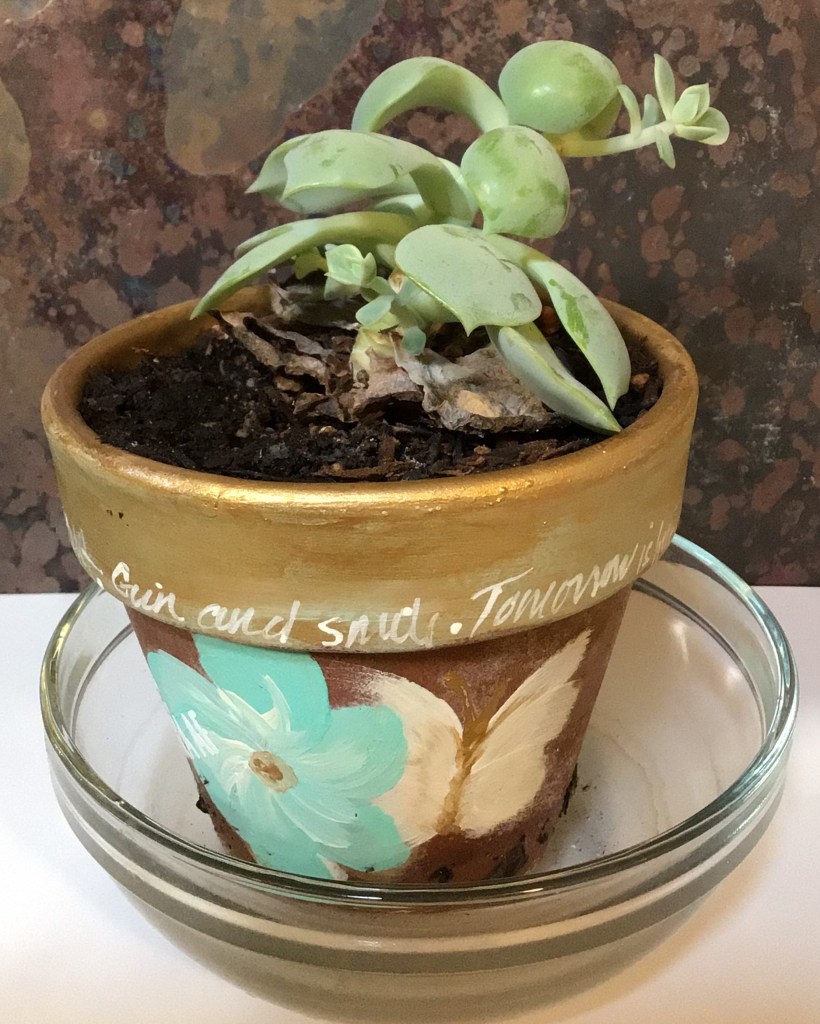
This example is definitely an exaggeration of what you will see because I’ve had this succulent for well over a year. It started to bolt like this a couple of months after I received it. What happened here is that the window sill (eastward facing) did not receive enough light. So the plant grew to reach more sunlight.
Your succulents will stay small when they have enough light. So if you see this, or you notice that there is some growth that is starting, then you want to find your succelent(s) a sunnier location.
If you catch the growth quick enough, you can trim off the growth, and return your succulent back to the smaller size.
Take a length of dental floss, wrap it around where you want to trim and pull it tight. You can use scissors, but it will apply pressure from two points to cut. If you use thread or floss, you can apply even pressure around the plant. Also if have a cluster flower of a succulent, you can fit the floss in between the petals and top the succulent without damaging the rest of the plant.
The clipping you can then put in a new container with soil and it will propagate for you.
I put the topped succulent in this cup with water with another topped clipping that I’m waiting on soil for. It’s okay to put into water, but you want to get clippings into soil as soon as possible.
If you are saving money by propagating your own succulents from bought succulents, make sure that you give yourself enough time to let new buds grow. It doesn’t happen overnight. If you don’t have enough time, your succulents will look bald and not so happy.
Here is another What-Not-To-Do
This succulent was originally small like the first picture of succulents I showed you in this section. This one also grew to reach for more light. I should have trimmed this when it first started to grow. Had I done that, it would have remained small and cute. Instead, it changed its shape and spread. But what you can learn from this is what it will look like at the spot where you clip back the top your succulent. There is a small bud that you see on the top right. That grew in about two weeks after trimming. On the bottom left you see another bud grow in where I snapped off some of the larger leaves to practice propagation techniques that I’ve seen on FB reels.
If you are interested in looking to propagate succulents for your event, make sure you give yourself enough time to do so. You will want a couple of months to do this DIY. Talk with some local greenhouses with growers who have experience with succulents. Also there are FB groups dedicated to succulents. Join a group or two and learn from those who are succulent whisperers. There is a wealth of good viable information there.
I readily admit that I am not an expert. And there is a world of information available. Just do not take your advice from clips and reels on FB, Tick Tock, or anywhere else. I tried propagating leaves in a plastic bag, through a slit in paper to suspend over water, and directly in water. None of these have worked for me and I am most certainly a novice at propagating succulents. If you’re a novice, I suspect that these reel methods are not going to lead you to success either. (With the leaves, I tried about a dozen and not a single one grew. This is reason why I have little reason to believe these techniques work. Not working the numbers paid off. If I get a success rate of 1 out of 10 attempts, I call it a viable option.)
One other walking away point I want to draw your attention to, is take notice of the terra cotta pot decorations on my pots. These were painted on with acrylic paint and have stayed on the pots over a year later. So it will not flake off anything else. And this is an excellent way of incorporating your event colors. You can create endless possibilities with your design. Whether you go with feather like swirls, dots to simulate lace, stripes, or even using a stencil from any store’s craft department. You can certainly dress up your terra cotta to fit the look you are going for.
I’ve lost count of how many events that I decorated for where I would take home flowers after an event because there was no second life for the floral arrangements after a wedding.
Don’t get me wrong. I LOVED those events because I had pretty flowers to take home and enjoy for a week or two. That is definitely an occupation perk that I’ve enjoyed.
However, at the same time, it has always saddened me a little because I have always wanted people to have more bang for their buck when they are spending good money on a wedding or other event.
So here is where we join two very important passions of mine!
I breathe creativity and decorating. But I also love working in my garden and learning all the old skills of creating home supplements, natural cleaners, and especially new ways of putting food on my table.
The very day that I learned about making a Chive Blossom Vinaigretteis the very same day that I made it.
This is Day One of my Vinaigrette:
My Four year old and I did this together for the very first time and as soon as I saw how this jar looked I immediately thought, “How Beautiful!”
And this was the first, on many ideas that I had:
You can go with sentiments or go all the way with the couple’s monogram, name and wedding date, or even line art that goes with your over all Boho decor.
What I absolutely LOVE about this inspiration is that it’s simple but has so much LIFE after the wedding or event.
For example, this Chive Blossom Vinaigrette will become a salad dressing, meat marinade, or other meal flavor provider in as little as 3 weeks. The total cost for this is just your jar, the chive blossoms, and food vinegar. When you’re looking for cost saving centerpieces, you seriously can’t beat this for bang for your buck!
To do this idea, you will definitely have this be your day of preparation, so have a few hands on deck. You will want to clip your edible flowers, rinse them, and place them in the jars before adding the vinegar.
The reason why I say do this on the day of is because of the process needed to properly turn this into a proper dressing or marinade. It is shelf stable during the whole process, but it needs to be kept in a dark cool place for the 3 weeks of processing. You could also use the jars at the end of the three weeks, when the vinegar takes on a fuchsia/purple appearance. But you want to try to limit the heat and light exposure no matter if you do it at the beginning or end of processing.
Tip 1: This needs to be shaken once a day for the entirety of the three weeks. So you will have a cleaner look at the beginning of the process. At the end of the process, you will have some floating pieces from the flowers. That just naturally happens with daily agitation.
Tip 2: At the end of the 3 weeks, you will need to filter this vinaigrette through a cheese cloth to remove all debris (and rebottle) before you use this as a dressing/marinade.
Maybe puple is not the color that goes well with your Boho design. Here is a list of some other edible flowers that can be used in making your own version of a different vinaigrette. Or you can just put the blossoms of these flowers or others into a jar filled with water.
Nasturtiums
Pansies
Violets
Hostas
Borage
Calendula
French Marigolds
Chrysanthemums
Carnations
Hollyhocks
Sunflowers
Cornflowers
Gladioli
Honeysuckle
Dianthus
Antirrhinum
Tulips
Roses
Lavender
Pea Flowers
Broad Bean Flowers
Onion/Chive Flowers
Brassica Flower Heads
Pak Choi Flowers
Squash Flowers
Dandelions
Daisies
Chamomile Flowers
Red & White Clover Flowers
Chickweed Flowers
WARNING: Make sure that you only use flowers that have NOT had pesticides or herbicides used on them. Whatever has been applied to flowers will enter your body if you eat them or any extract that you make from them.
Advertisements
Flowers as herbs and seasoning have different flavors that they impart. Some have a peppery note to them. The chives that I grow are a garlic chive, so it imparts a garlic flavor without having to fuss with cloves of garlic. I’ve also started working with Lemon Balm (a member of the mint family) which imparts a lemon flavor. So I could have added tiny Lemon Balm leaves in with the chive blossoms. Which now that I think about it, I’m definitely going to add that to my vinaigrette as soon as I post this!
Another thing to keep in mind is that for thousands of years edible flowers and plant leaves have been used for natural medicine. For example, Lemon Balm is great for combating the viruses behind the common cold. So you can give your body the things it needs to keep healthy while adding flavor to your food.
If making a vinaigrette is not something you will use after the wedding (or other event), consider looking into making your own chemical free cleaner. For example, you can still use this mason jar idea and make a kitchen cleaner with lemon or orange slices and peels.
If you’re not looking for a natural cleaner, than even using berries and mint, basil or other leaves in water, is a great of washing your produce before you eat it while borrowing it for a few hours for your event.
There is one more option for Fall and Winter Events when most of the edible flowers are not in season. You can make Pine Syrup or Spruce Tip Syrup. I found this type of syrup interesting because I have spruce widely available around where I live and real Maple Syrup is a luxury on my family’s budget. This can be a pretty centerpiece as well because you use the new growth tips on a spruce tree or pine cones for the Pine Syrup. I’m sure that you can imagine the possibilities for all your holiday parties with this one!
Decorating the Mason Jars
The simplicity of these jars is beautiful all on their own. But maybe you want to dress them up a touch. What can you do to add a little panache?
Paint the jar ring (White, Gold, or other event color)
Apply glitter to the jar ring (after finished spray with a clear coat of paint to keep from leaving a glitter trail)
Use squares of pattern, texture, or fancy cloth on top (held in place by screwing the ring down onto the jar over the fabric)
Decorate the jar itself
Use the jar as a base for a taper candle (with candle holder) to raise the level of the candle above other centerpiece elements
Put your table number on top of the jar
I hope you’re just as excited about these ideas as I am. These are definitely something fresh for existing wedding and party themes. Be free to experiment with using some of your food preparation and preserving techniques the next time you are decorating for your next event!
Files Used In This Project
As a special treat I have a surprise for you! Visit my store and check out Love. Be sure to hang around and see what else is new. Every Monday at least one new SVG is added!
Processing…
Success! You're on the list.
Whoops! There was an error and we couldn't process your subscription. Please reload the page and try again.
The one bit of insight you have, when working for someone else, is just how much a business throws out. And the quality of their garbage. And you also gain insight as to what kinds of businesses subsidize other businesses for you marking your product down for their employees.
I personally know of a few companies who have switched to the Lean Operational method of running a business. And even then it still, somehow, manages to amaze me how much gets thrown out.
Maybe it’s the fact that I grew up where we didn’t have as much as other people around us. Maybe it’s the fact that my mom created magic when she made the gifts we were given on less than a shoe string budget. Maybe it’s the fact that I carry on that frugality because our family budget can go farther and do more things when I reallocate and make do with the little I have, so the hard work of my husband can go elsewhere for family provisions.
This craft here is me on a plate, for you. This is me thinking outside of the box. This is me using materials where half of what you see is stuff that most people throw away.
If you are looking for a new infusion to your farm house style or Easter decor, this project is for you!
Advertisements
Materials
8×10 Canvas Frame
Teal and Metallic Gold Acrylic Paint, with paint brush
First you want to remove the canvas from our frame so you can paint the frame for your reverse canvas. (If you’re new to Reverse Canvas, hold on for a moment and I will circle back to help you through this process.) Paint the front and sides of your frame with Teal paint. If you keep the paint very thin, you will notice that the paint is dry to the touch in about three minutes. For this example, I went in a circle around the frame twice with the minimum amount of paint (dry brush method, where it look likes and almost feels like you’re brushing on already dry paint) and ended with full coverage of color with no waiting time to apply the Gold paint. It’s really not in my budget to play with Gold Leaf. I would use it for a client. But for the rustic feel I went for, metallic gold paint was enough to add a smidge of class to an otherwise rustic feeling project. And the gold, I used somewhere around a nickel size drop of paint and hit the corners and some edges. Then I set the frame to the side to dry while I added the HTV to the canvas.
First Time Creating a Reverse Canvas: From the back side of the Canvas remove the staples with a pair of pliers. (There are two different methods of putting the canvas back on the frame, which I’ll cover in steps ahead. I just want to let you know from the beginning, if you remove the staples right from the beginning, it can save you from potential problems in future steps. It’s not mandatory, but definitely one of my highly recommended steps.) If small holes next to the staples happen, don’t be afraid, you will not see them later on. If the staples are stubborn, feel free to cut the canvas next to the staple, with a crafting knife, and release the canvas. Set the canvas to the side and move forward with painting your frame, mentioned above.
TIPS: If you’re keeping with the rustic look, there’s no need to sand your frame. If you want a smooth looking frame, you will definitely want to sand your frame before you paint it. If the frame staples are visually unappealing to you, I highly recommend dry wall spackle. You can find some that is purple when you apply it and turns white when it’s dry. It’s very easy and convenient to use, with next to no guess work. A palate knife or even your finger is all you need to apply the spackle. Once it dries, you’ll quickly run over it with sandpaper a couple times. This will smooth out your edges. And when you paint your frame, no one will know that you used putty to fill in the frame cracks. (This is the same method I use when I want to use a frame that for one reason or another was gouged or dropped.
Applying Vinyl to the Canvas
When you go to cut your HTV (High Temperature Vinyl) from your cutting machine, remember to mirror your image. Once you’ve weeded your vinyl, you will place your frame on top of your canvas, so that you can see exactly where you want to press your carrier sheet down on the canvas. (This step is mostly important if you have a few small holes in the canvas that you’re working around. If you’re canvas came off the frame undamaged, than feel free to skip using the fram as a point of reference.) Follow our vinyl’s directions for heat and pressing time. These settings vary. Once you’re vinyl is attached, proceed to reattaching your canvas to your frame.
What if I choose to use Permanent Vinyl? I have successfully used permanent vinyl on canvas. I prefer HTV over 651 (or permanent) because once I have it adhered I do not have to worry for one moment about humidity causing the vinyl to lift. But please do not be shy with using permanent vinyl. You will still want to use an iron to press your Canvas. If there’s any moisture in the fabric, the iron will get that dried out and prepped for your permanent vinyl. Once you place your vinyl, you will want to make sure to have your project on a hard surface that you can press down with a scraper or squeegee. The more attention that you use with burnishing that vinyl down will pay off in the end with a longer life to your craft. Remove your transfer tape and then move forward with attaching the canvas back onto the frame.
Advertisements
Reapply Canvas to the Frame
There are two ways of doing this; hot glue gun or staples.
Method Hot Glue Gun: Apply a liberal amount of hot glue to the back of your frame. Flip it over and position it over your canvas before pressing down and attaching the two together.
The benefit of this method is that it is so quick! Any skill level of crafter can do this application. The important thing to remember is that you have to move quickly so your glue doesn’t cool down on you. AND you will want to try and manage how much glue you use. Too little and the canvas won’t want to stick to your frame. Too much and you will have guaranteed seepage of glue that you will have to clean up. My recommendation is err on the side of a little too much and keep the glue a little off center. It’s better if it seeps out of the outside edge instead of the inside edge. With an inside edge seep, you will need to try and scrape the glue off the canvas or risk having what looks like slug trail on your canvas.
Method Staples: Flip your frame upside down. Position your canvas on top of the frame. Take your staple gun and staple at the top center of your frame. Gently pull your canvas down and place a staple in the center bottom of the frame. Gently pull the canvas to one side and staple in the center of that side. Gently pull on the other side of the canvas and staple in the center of that side. This is called Stretching Canvas. You will then go through the whole rotation again, moving out from center. On a frame this size, you should have about 5 staples across the top and bottom. And about 7 down the sides.
In my opinion I recommend stretching your canvas with the Staple Method. Anytime you add anything to canvas, if it’s not taunt, the weight of your project will warp the appearance of your canvas.
I’m in a crafting group where many of the crafters there swear by the hot glue gun method. In that group I withhold this information because in that setting it’s more important to have these ladies soak up the success of accomplishing a craft that they might not otherwise have attempted.
Here, I want to give you further information because I want you to make an education decision based off of the goal you are after. If you are making this to sell at a craft fair, or you’re decorating for an event that you want professionalism for, I want to set you up for success in these moments. And I know we are not face to face so I can’t use my tone or non-verbal cues to fill you in on this. I am by no means dogging on the hot glue method. In fact, in this example I’m showing you I couldn’t find my staple gun and so I in fact used a hot glue gun. I know the value of stretching canvas and so even with a hot glue gun, I still stretched my canvas. It took much longer than with a staple gun. And if I were using something of more weight than paper carrots, I can assure you that I would not trust hot glue to keep my standard of professionalism to clients. (I know my limitations with hot glue guns, and I’m woman enough to admit that there are many other crafters out there who are geniuses with hot glue. I have skills, but I am not a hot glue gun goddess.)
I want you to feel comfortable with your skill level and what goals are for this project. If what you have available is a hot glue gun, you’re not at all comfortable with stretching canvas, and you’re new to reverse canvas making–PERFECT! Know that you can make a beautiful and professional looking canvas using this method. If you want the challenge and extra security that staples offer, than stretching your canvas is exactly what you’re looking for.
Once your canvas is attached, you will want to trim off the extra canvas. You can either use a crafting knife and cut away on the outer edge of the frame. Or you can use a pair of scissors, angle you blade into the back of the frame, and trim the canvas back.
With clean edges, it’s now time to add those carrots!
Carrots
This is the part that I’m most excited about. These carrots are made completely from scraps that most of the times end up in the trash or recycling bins.
Most of these segments are made from triangles and parallelogram scraps about 3″ wide. Some wider, some less. All of these were from scraps from an explosion box I made a few months back. The card stock was 5 different textures and shades of orange. In fact, one of the orange papers was actually faded from being left out in front of a window. The segments you see above were not triangles and so I pre-folded them in triangular forms to make it quicker to shape and hold with a small drop of glue.
These single cones I then stacked with each other. On a few of the carrots I placed the glue on the back of the cone. Most looked better with the attachment point being at the front of the cone.
I made a few extra carrots than I had space for on the canvas, because I wanted to have some choices of which ones looked better than others. In fact, one carrot had a herringbone look to it. And since it didn’t have the same feel as the others, that one got set aside for a future project.
Once I got the length of carrots that I was happy with (a few were 4″ long and others were as much as 8″), I went into my bin of silk flowers that have seen better days. In fact, they were part of the flowers that I bought from a wedding planner who was selling all of her inventory. I was after her roses, but she gave me her entire flower collection. These leaves were actually from some geraniums and daffodils. The daffodils were actually really beat up and were just collecting dust, because I couldn’t use them for events. And this was the moment that I could actually give these greens a purpose. Other than purchasing silk ferns, these greens were actually quite perfect.
What makes these carrots so special in the crafting world is that it embraces the cubism element from the art world. I’ve seen a lot of carrots made from yarn and cloth, styrofoam and foam. These paper carrots give talking points and structure. And this structure is what was great for placing in the frame, with the ability to break free from the frame (giving a nod to surrealism).
Finishing Touches
Once I found the placement that I liked for these carrot shapes, I glued them down with hot glue gun.
Due to the light weight nature of this project, attaching the ribbon with hot glue is enough. However, if you’re creating for a professional item, you will want to use a stapler to attach you bottom layer of ribbon to the frame. For the top ribbon attachment, E6000 glue would be better than hot glue. But hot glue does do the job for a non-sellable project.
Please comment below and tell me how this spring time project turned out for you. Pictures are even better. I love seeing what other people make!
It really is amazing to think about how much of our world and lives are all about creating something. Sometimes the first thing we think about when we hear “National Crafting Month” are the classic artistic skills of painting, quilting, sewing, crochet/knitting, needle point…everything that you would step into a crafting store to build your supply lists. Maybe you say you’re NOT a crafter because these classic forms of crafting feel as foreign and difficult as learning a language from a country on the other side of the world from you. But there is so much more to crafting.
Crafting is what we learn from others.
In my case I learned how to craft from my mom. She learned from her mom. She learned from her mom. And I’m not sure how far back that goes. So when people ask me, I’m at least a third generation crafter. I learned the old crafts. It’s what my matriarchs knew and passes on.
And while I move forward with new crafting technology and techniques, I’m also mindful of how things use to be done.
For example, the inspiration for what I’m writing today is birthed from current events, what every day women have done for centuries, and how to be creative in unifying these ideas.
For many years, my family has been taking care to learn how to grow a garden. One I have fond memories of my grandparent’s garden. My mom even off and on grew a garden.
I mention gardening because of the events unfolding in Ukraine, worldwide fertilizer production has been drastically cut back. In fact, many farmers around the world who depended on fertilizers to produce food for their local and global markets are not going to have the supply they will need. In fact, it is still uncertain if Ukrainian farmers will receive their wheat seeds in enough time for a spring planting. If they do not, many countries around the world will not have wheat to import, because Ukraine has been their wheat supplier.
Now I’m not a farmer. I don’t supply food for other families. However, I’m mindful of what is going on around the world market because I want to be aware. Knowing what I know, now, it’s becoming important to me to grow more for my family right not. Yes, inflation and the cost of groceries plays into that. It play into any first world country family who is living on a budget. And it’s ignorant of me to ignore the fact that so many other families, in areas not as prosperous as the place I call home. So to honor those families, where I may not have as much influence to change what they are facing, I’m making conscious decisions to change how I’m doing things right now. If I grow more, and use more of the resources that my two hands can produce for my family, than that frees up resources for others to provide for their families. I learned how to grow a garden as a child. Not all families around me learned that skill set. So I use my skills to provide for my family, so there’s less strain on my local market, which has a trickledown effect. If enough local families relieve the food chain, it relieves on a regional level. This in turns frees up resources on a national level. And in an ideal world, governments would not be wasteful and they would take these excess resources to relieve the food vulnerability in other countries.
And that would take me in a new conversation away from what I want to focus on today.
International Women’s Day
The one thing I love about being in the Pacific Northwest is that I grew up in an area where I learned about and ate cuisine from different places around the world. And from these different cultures I’ve learned food preparation that I would not have learned in a less culturally diverse community.
And while the most popular women to honor on International Women’s Day are politicians and celebrities, I want to draw attention and bring honor to the more humble group of women–village mamas. It doesn’t matter if a culture’s history was spent mostly in a tribal setting, rural village, or small townships, Mamas were the ones who made the world turn and kept families alive. They passed down cooking techniques and recipes that kept their people alive through countless seasons and years of famine, blight, war… they put the food on the table. And boy do mamas know how to make food resources stretch.
This week I’m particularly been in awe of all the women who fed their families in a variety of ways with one crop, corn.
I’m not going to lie, I grew up where family recipes consist of cooking corn on the cob. And then you either eat it on the cob or cut it off the cob. Other than cornbread, that is what I inherited in my ancestral cook book. I will also be truthful and admit that corn is my least favorite. So yes, ladies around the world, please feel free to send me your favorite corn recipes. I will gladly embrace them, because I’m educating myself on the uses of corn to become less dependent on wheat for providing for my family. This fall, it is already on my books that I’m going to teach myself to make masa and tortilla from the corn I harvest this year. I have a general working knowledge and it will officially be put to the test.
And step one in my education, today, was shucking corn. Last fall I planted Strawberry Corn because it is a corn that can be popped and pop corn is one of my family’s favorite snacks. So I took my meager harvest that had been drying and doubling as fall and winter decorations, and I shucked.
As a historian, I’ve seen how village Latinas shucked corn by rubbing the ears together. Here is what I learned today….
There is a reason why these mamas use a basket or other larger vessel to shuck into. A soup bowl is not big enough. The kernels on the floor will be processed to germinate and put back into my garden this year. And I will have effectively doubled what I have previously planted in years past.
The easiest kernels to release are the ones at the ear tip. And those first ones take the most effort. Once I got seeds to release, I had a whole side of ear cleared in a couple of swipes. An up and down movement is what I found necessary to start the process. Once I was started a side to side movement seems to make the seeds drop much faster. Then on the last corn (with no other cob to rub against), I found that using my thumb in a downward movement (from the top of the cob), there was not much pressure that was needed to drop those last seeds.
Another thing that any mama in a resource scarce place will tell you is that you waste nothing.
We as human beings were created to be creative people.
I harvested my corn, but here is where National Crafting Month comes in. What am I going to do with the cob and husks that are left over?
I’m not sure if there was another generation that followed my grandparents in making husk art. I honestly haven’t seen any creations at farmer’s markets for the fairgrounds since my grandparents passed away. I’m going to have to make a husk doll in the upcoming days and show you because they’re not popular hits in Google image search. I have 4 cobs left to craft with. So I’ll try my hand at that and make at least a brief posting on how that turns out. And if you’ve never heard or seen of a husk doll, then I’ll have the pleasure of passing on a little history.
But for today, I took three of my cobs and turned them into fun Easter decorations.
This is one craft that I will definitely do again in the future. In fact, I will have my boys do it. This is a messy craft, so be forewarned.
There are some bits of information that you need to know, if you’ve never had experience with corn cobs before. The husks take paint nicely with no real preparation. However, the paint feels like it takes forever to dry. I tried to keep my paint thin and it still took upward of two hours before the husks were completely dry.
Now you will absolutely love working with the cob portion!
The cob will absorb paint like a sponge. Drying will not be instantaneous but it surprised me at how quickly it was dry to the touch. I had planned on putting my glitter on wet paint, but I had to go with option 2, glue. The dry time is completely dependent on the type of glue you use and it’s dry time. The glitter does not shed easy, but some will come off on your finger if you swipe it (when dry).
Bringing it back around to celebrating women, what is something that you appreciate or want to know from women different from you?
How can you turn that into a craft to celebrate what it means to be a woman?
In fact, please comment below something that you admire about women in a culture different from your own. I’m always looking for new knowledge and skills. If you inspire a creation, I want to give you recognition as well.
Happy Belated International Women’s Day!
Processing…
Success! You're on the list.
Whoops! There was an error and we couldn't process your subscription. Please reload the page and try again.


Leave a comment