Options For Creating Faux Stain Glass Windows
With the increase of daylight, the approach of spring, and the first thoughts of Easter sprout ideas of how to bring new life and color into our lives.
This week end I’m participating in a crafting challenge. And one of the group crafts was a faux stain glass window.
When I go into these challengers, I focus on using the supplies in my office and only make a new supply purchase if I don’t have an item, or cannot think of an alternate item. Can I use a flat canvas instead of a framed canvas? Have my boys recently broken a toy that I can give a second life to? Have I recently purchased something that came in beautiful packaging that I can use to add dimension or further details?
I LOVE creating multi-medium products!
For this faux stain glass project, I didn’t have a framed piece of glass. (There are products on the market for making faux stain glass.) And I didn’t make that purchase because I have glass items I could pull from. What I chose to use was a half completed family schedule project.
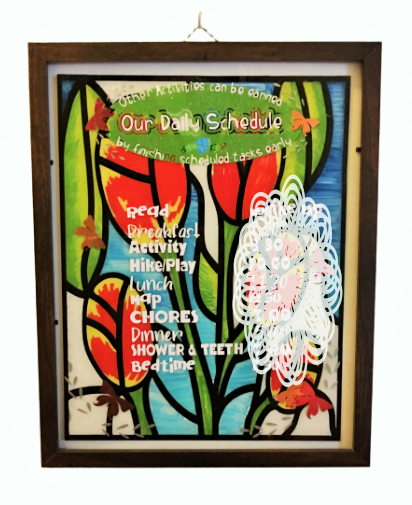
For over a year this picture frame hung, waiting for the inspiration for how to complete it. Do you have a project, or dozen, like that?
Well, this was the perfect glass for me to work with. All the vinyl already on the glass was placed on the front of the pane. And for faux stain glass, all the work is done on the back.
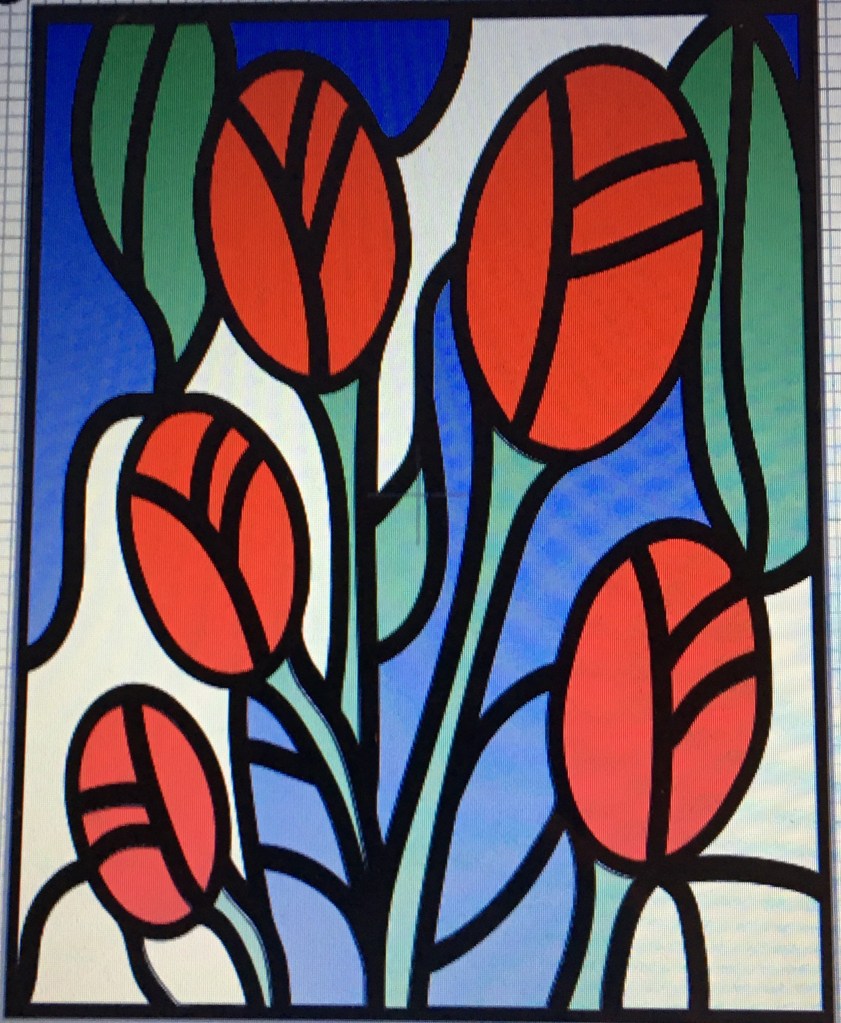
If you want to make a faux stain glass for your holiday switch out, an upcoming event, or as a fun project with your children, this is perfect for you. I’m working on my own designs to add to my shop. You might find another cut file artist who have some stain glass patterns. Or you can use a blank coloring book picture (children’s cartoon coloring book, adult coloring book, a blank mandala, or any other image). For these pages, all you have to do is upload them into your cutting machine program. When cutting out your glass outline, use a permanent vinyl that is the same color on the front and back. If you choose a vinyl that is printed or colored on one side and white on the back, you will have a white outline from your viewing side of your glass.
One common problem you may not avoid is your faux stain glass lines not releasing from your transfer tape. I have never had difficulty transferring to glass before. But even with all the tricks I know, I scrapped my first cut of vinyl and had to go with a Take Two.
I’m not sure if the problem was this pane of picture frame glass, the size of the project (10″ x 13″), or that my transfer tape was too sticky. But I did have to use my nails to scrape off the bottom quarter of my vinyl. So I adhered the transfer tape to both legs of my pants. I got the tack down to a barely sticky level. The vinyl still lifted in a couple of places, but at lease it released. The next time I do this technique with vinyl I am going to use transfer paper and see if the less tack released better.
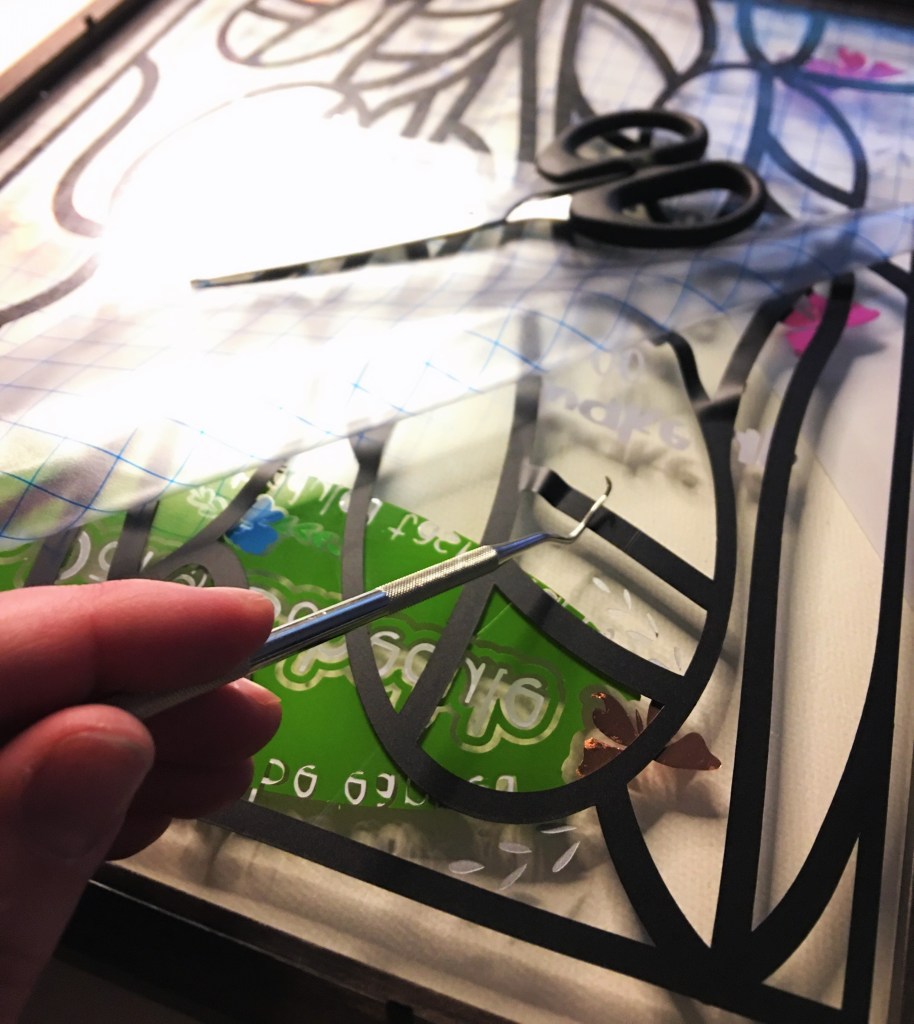
To minimize the amount of lifting I recommend starting in a corner and slowly folding the transfer tape back on itself. As you start to see the lift, immediately start to press it back down with your finger. If you go too quickly, you will more thank likely have large sections pull back up from the glass. With the aid of your weeding tool, you can reposition and press down. However, it becomes more difficult to prevent creases in the vinyl when the uplifting sections get longer. So the sooner you can press these pieces down the better.
Another common problem is trapped air bubbles. You may not see it on this back side. But it is obvious from the front of the glass.
To overcome air bubbles, you will want to pierce the vinyl with the sharp point of our weeding tool or other needle. With a way for the air to escape, you can now use your finger nail to press the air out. This will also press the vinyl down. When you flip the glass back over you should notice that the bubble is gone.
If the air did not escape the bubble, then go back in with your weeding tool and make the hole a little bigger.
There have been several times I’ve done this on other projects. Most of the time the hole seals itself up. In a worst case scenario there will be a small wrinkle. But it will only be visible from the back side.
Once your vinyl is laid, you are ready for the fun part. Painting!
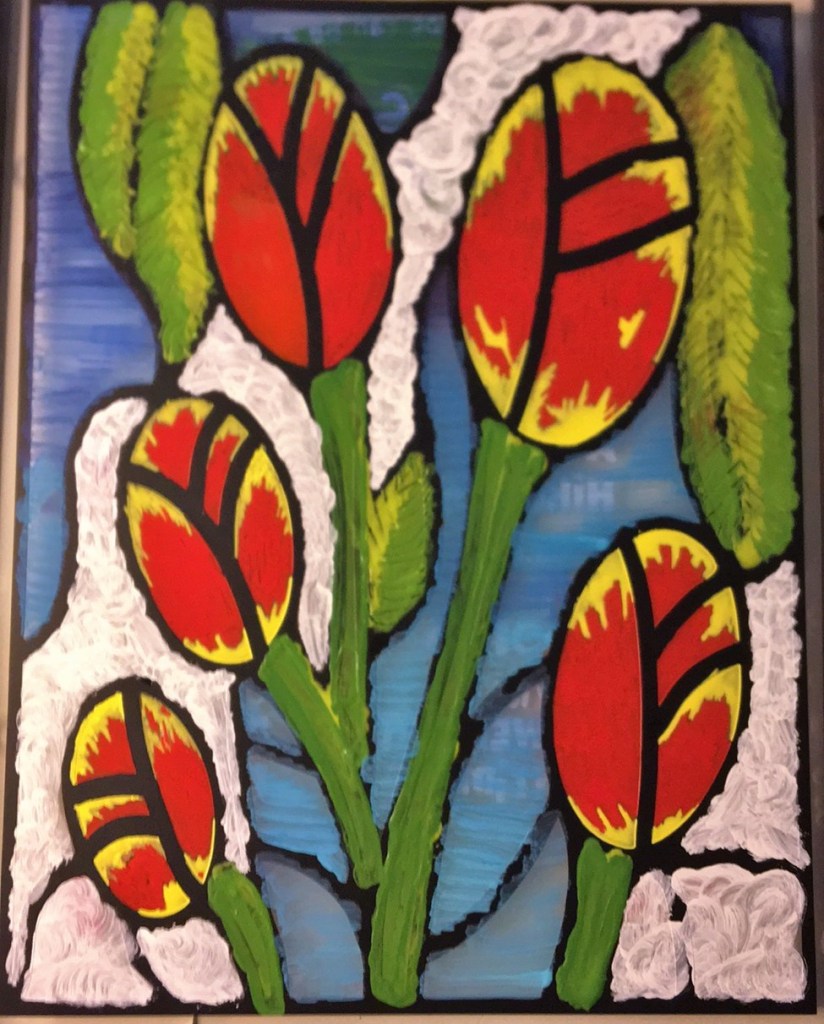
This time around, I tested a few different application methods to help you decide how you want to make your faux stain glass. In the picture below you will notice that the paint looks different between the greenery, tulips, and sky/clouds. I used three different preparations of acrylic paint. But in the past I have also used washable children’s finger paint and tempera paint. So don’t think you are limited to paint choices.
Glue Mixed With Acrylic Paint
What you see on the greenery is a mixture of Mod Podge with a couple drops of acrylic paint.
Depending on the directions you read, you might be told to use Mod Podge, white glue, or clear glue. The bottom line is, they’re all glue and they’re going to act the same. The problem I had with this method is actually a couple fold. First, glue clumps and thickens horribly the longer you work with this mixture. And even with a fine painting brush, your painting surface is going to increase the longer you work with the glue. With just the greenery portion, the tip of my brush doubled in size by the time I finished. So to combat the thickening glue paint mixture, start with your smaller/finer detailed areas first and end with your larger surface areas.
Another problem that I had with this method was the inconsistency of pigment placement. It didn’t matter what brush strokes I used, the color inconsistency was worse than a dog’s fur that is suffering from hot spots.
I kept flipping my glass over to check the visibility and progress. A second coat did not smooth things out. In the end I had to apply a third coat (by which the glue was already thick) where I was blobbing on dots right next to each other. Fortunately, at this point I was working with two shades of green. I took a toothpick and “drew in” leaf veins, blending in the shades. It brought a cohesion that was greatly missing.
My recommendation with this method: apply your glue/paint liberally. If you are using more than one color or shade in a single section, apply first at your lines and then work your way in to where you want the colors/shades to meet.
Acrylic Paint
My favorite paint to work with is acrylic paint. If it were possible to be in tune with an art medium, this is tied for first place with me. (It’s partner in crime is fabric.)
I was quickly frustrated with the glue mixture, that I decided to go straight to acrylic paint by itself. You will see this demonstrated in the blue sky and white clouds. (The clouds are not visible in the final product, because I painted the back of the picture frame holder white for cohesion.)
If you want paint brush stokes to add character to your glass, this is probably the medium of choice for you. The sky I applied with side to side brush strokes. The clouds I applied with circular strokes. So this is very easy to add textures and definition to your glass.
Here is the problem with this method. The front and back of your glass are going to look different. The front of the glass automatically gives the appearance of gloss. When acrylic dries, the finish is matte. Not to mention, if you’re choosing acrylic you’re choosing your stroke pattern. Your pattern is going to take precedence over painting over the finite edge of your vinyl (or permanent marker if that was the tutorial/directions your chose to follow).
That being said, with all the care and precautions I took, I was able to stay in the lines better with plain acrylic than I was with the glue and acrylic mixture. There was absolutely noway I could prevent going over the lines with the glue.
With these first two options, there was absolutely no way that I could keep the lines clean so that both sides were presentable. And I tried.
So that leads me to the third option I tested.
My recommendation: if you want visible brush strokes or create an umbre effect, this method is for you.
Acrylic Paint Pens
I chose this paint method for the tulip section, because I love visiting the Tulip fields each year. I love the bearded tulips and the multi colored ones alike. And if you couldn’t guess, I have an affinity for the red tulips with yellow tips.
And the acrylic pens were perfect for this kind of detail!
Again, I used the materials that i already had in my crafting stash. My acrylic pens are generic, but they did the job. And I can’t wait to purchase a better quality product to use.
For as much as I loved this method the best, over all the numerous products and techniques I’ve ever used on glass, they still had their own drawbacks. My number one problem is that the tips were so small in comparison to the size of my project. It’s a good thing that I find coloring calming and an avenue to my happy place. This was probably the most time consuming paint application.
Trial and error with this product is that the paint pen wants to apply a layer of paint too thin. I regularly had to shake the paint down to the tip. And about halfway through the tulips, I had to compress the tip to purposely create a small pool of paint to spread out.
Another draw back for this application method is that you cannot blend your colors. I, for one, have a pet peeve about muddying my pens. They can be ink, watercolor, or paint. I cannot muddy my tips. I need true colors. And because of this preference I worked with the yellow first, then went back through with the red. Even with my toothpick trick, the yellow was too dry to blend with using that method.
My recommendation: if you want to blend with the pens,work sections at a time. And if you like keeping your tips clean, leave a hair line separation between colors.
Another bonus for this method is that you have complete control over every application line of the paint. You have full control over not painting on or over the lines for each section. So if you want to have a flawless back and front, for duo viewing, this method is a must!
Drying Times
Maybe your method of choice is less about application and more about drying time. Believe me, I’ve conscientious about this because I have young children. Anything that takes long drying times I have to safe guard unless I want smears, prints, or transfers to my furniture and walls.
Acrylic Paint was the quickest. Especially since I only needed one coat of paint. The sections were dry pretty much when I finished the tulips. I give it an estimate of 20 minutes. As I mentioned before, acrylic paint dries with a matte finish. So the bonus here is that you don’t have to test touch to see if it is done drying. You see the difference.
The Acrylic Pen comes in second place for drying time. I have no estimate for you because on glass there was no noticeable change that I could see. The finish is just as glossy as when you first apply it. I had to test touch for dryness. I didn’t have a clock in front of me, so it could have been a ten minute dry time or twenty (from first painted section in relation to when I finished painting the entire project.) I would have zero qualms about putting the picture frame back on after an hour of drying time.
Glue with Acrylic Paint is like watching paint drying. It’s a slow process. But if you have worked with Mod Podge you know. Whatever wet glue you choose, you already know that takes several hours to properly dry. Mod Podge takes 24 hours to cure. And all of the drying time is very much determined by how thick you choose to paint. My glue had about an hour to dry.It was still mildly tacky, but I had to put the cover back on so little fingers didn’t damage the work I did.
Final Thoughts
With larger sections, this is a project that I believe even self proclaimed non-crafters can do. The important thing is selecting the paint method that you are most comfortable using. If the word paint intimidates you, but you still enjoy coloring a color page or two, then you will feel right at home with using an Acrylic paint pen set. It literally feels like coloring with markers. If you prefer a quick and done method, grab a brush and your choice of acrylic paint. If you love glue and/or medium manipulation than the mixture of glue and acrylic paint is definitely for you.
Everyone is going to have a different preference or comfort level. You craft with what is comfortable with you and your expectations. This is what truly sets you up for success. Whether you are making a faux stain glass window, the background for another project, or even transforming a vase into something more note worthy for your centerpieces.
If you want to clean up the back side of your glass pane, so that it’s more presentable, here are two options. If you have a steady hand and are good at lining pieces of vinyl up, you can cut out a second set of lines and apply it on the backside. The second option is picking your paint of choice and paint over the colors on the original set of lines. For example, on my project I could use a black sharpie, black acrylic paint with a fine tip brush, or my black acrylic pen to re-establish my black lines.
It’s my hope that you now feel enabled and courageous to try something new.
Paint Is Your Friend
And right now we can all use a little more color in our lives!
