

The frost has come to my neck of the woods. And that means that it was time to get some of my fall gardening work done. I pulled out the wood chips that I bought on sale at the beginning of summer.
Originally the wood chips was supposed to go over our garden beds this past season, along with some drip irrigation, to start us on the path of water conservation. However a cold summer and life happening just kept pushing that task lower on the to-do list. Not that I’m sad about that. It meant that I had the materials to winterize my garden in a way that I was not planning almost half a year ago.
A lot of our projects turn out being out way of adding to our grow space without taking up more yard space. And this should be encouraging to you, because it means that you also have permission to make your own grow space one small project at a time. There really is no need to wait until you have farmable land to start growing your garden. Start in your urban or suburban area, one space at a time, building up what you can grow, however you can grow it.
We started off with one small garden plot with a blueberry bush, a few raspberry canes, and two different types of vegetables.
Today, I worked on expanding my grow space for garlic. Up until today I was growing garlic in one garden plot about 2 feet by 4 feet. And we wanted to grow more garlic to become self sufficient in that produce. We love it as a seasoning and main ingredient in the foods we eat throughout the year. But we’ve also come to appreciate it more as a food that is also a medicine. So it was time to grow more because we can control how it’s grown.
Growing Concerns
Something you may not be aware of is that in the US market most heads of garlic, in the grocery stores, are being imported from China. And depending on how you view your food choices, Chinese garlic may not line up with how you want your food to be grown.
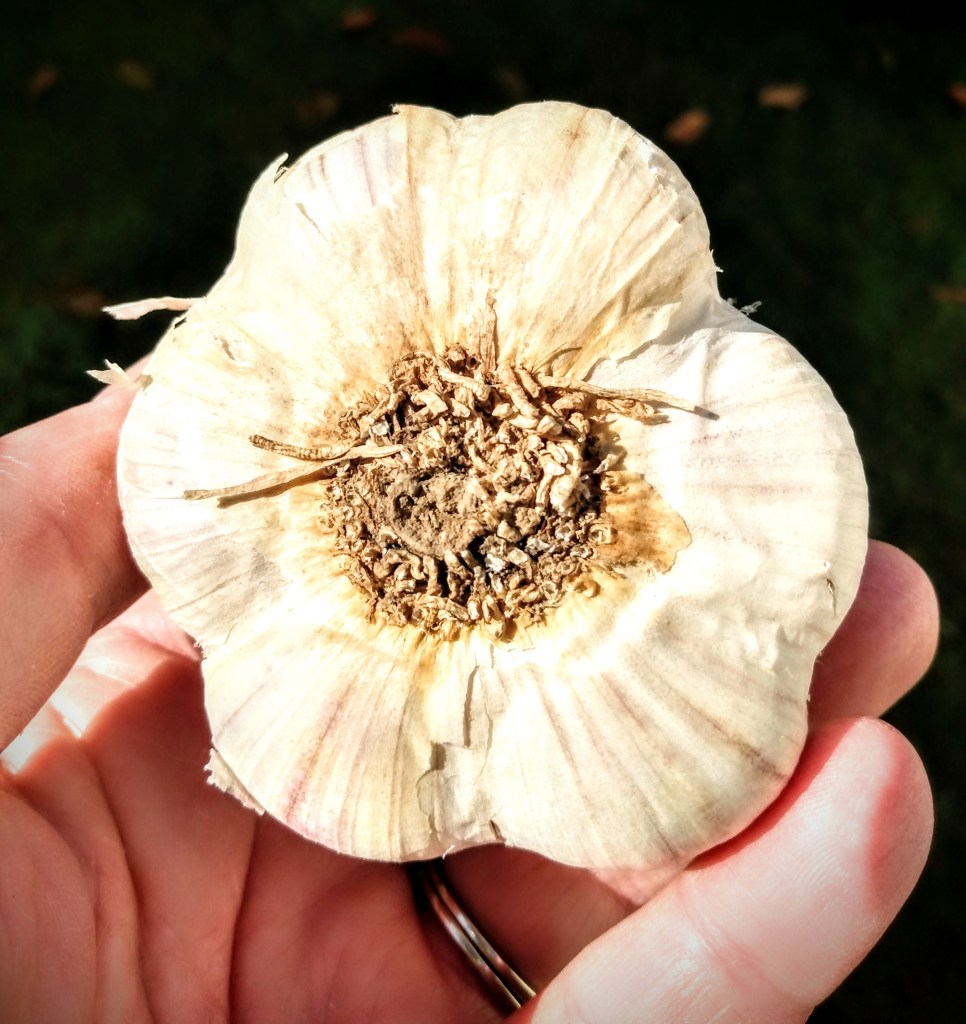
Note: garlic grown locally will still have some of the roots still visible in the bottom of the garlic head. Garlic that is imported from China, the roots are shaved off so that you have a smooth, flat surface where the roots should be.
Another concern with foods bought at US grocery stores is what you can find on the produce ID code. On the stickers placed on produce, you can learn what type of product you are buying. If the four digit number starts with a 3 or 4, it is conventionally grown. Pesticides have also been used on those products. (Dangers of pesticides can be seen here. Although this is a huge conversation and this is a brief mention in this post. But I do want to note that food is being brought in from less regulated countries.) If the number is 9, it is organically grown.
But there are other numbers to be aware of. A five digit PLU code starting with a 3 means the fruit was either irradiated or electronically pasteurized. (Dangers of irradiation can be found here.) A five digit code, starting with an 8, means that it was genetically modified.
These are just a few points of interest that overlooked that the average consumer may not be aware of. And growing your own produce gives you awareness of how your food is grown from start to finish.
Setting up Garlic Grow Boxes
A few months ago I had fixed loose boards by using a power drill and screwing the boards back to the frame. Had I not done that earlier, this is the time of year that I would normally to that mending job. But the best time to mend grow boxes is when you have one crop harvested and right before you put in the next one.
Make a Container You Will Love is how I start off all my new boxes. This time I reused one of my existing boxes. My onions didn’t do so well in it this past grow season, so I’m changing it up to see how my garlic will do here.
Before I put the garlic in, I needed to break up the compacted soil, remove some grass that had started to grow, and more importantly, mend the box. After three full seasons of growing, the liner in the grow box had started to rip away. So once the weeding was done, I pulled the black liner back up and staple it in place with a staple gun.

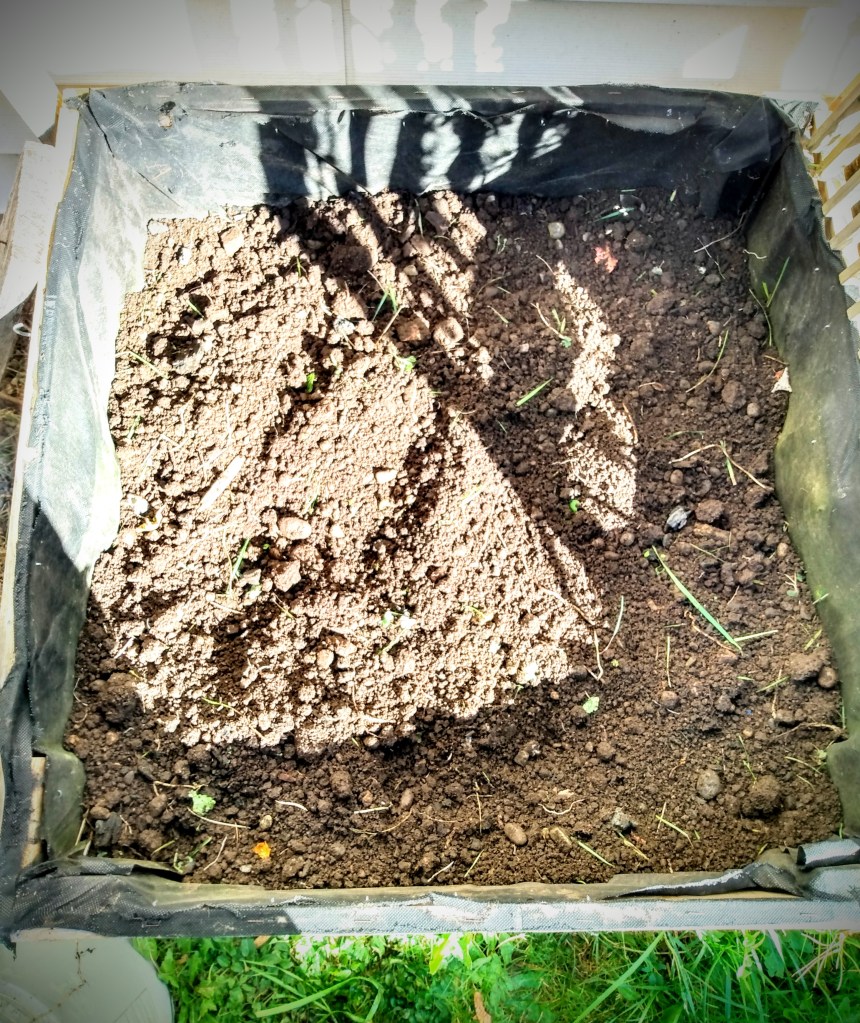
With the liner secure, this frees me up to really dig into the soil to fluff it up and move it around and break up all the compacting that has happened over the last couple years.
Once the soil was ready to go I reached for the new garlic that I ordered to plant this year. In this box I’m planting German Extra Hardy Garlic (a hard neck variety).
Earlier I mentioned looking at the roots of the garlic head. Here you can see the roots (trimming the roots is part of the curing process, but you can see the individual roots. This is what you want to see when you buy garlic).
Now that I’m ready to plant the garlic, I break the head down to individual cloves. Once they’re broken down, they’re ready to plant.

When planting garlic, the general rules are:
- Plant the cloves 3″ below soil level
- Plant each clove pointy side up
- Plant each clove 6″ away from each other
- Add an additional 1″ soil over your whole plot
- Then add 3-6″ of mulch on the very top
I have modified and moved away some of these rules in the past. In the previous location that I grew garlic, it was in a sheltered garden bed next to the house. So I never mulched those garlic and they grew perfectly fine in my climate.
The cloves that I planted in previous years did well when the tips of the bulbs were 1″ below soil level. If I put them 2-3″ deep, they remained dormant until I moved the soil around and those cloves were brought higher up.
If, when spring comes, you don’t see the shoots of the garlic popping through the soil, then you may want to consider pushing away a little bit of the soil. But garlic is one of the produce that has been one of the easier crops to grow and there shouldn’t be problems at all.
Seeing how I’m growing new garlic varieties, and in raised beds, I set up the boxes closer to the “rules”. The only modification that I’m making is the spacing between each clove. As you see below, I’m offsetting the rows. By offsetting, this allows me to plant an additional two rows that I wouldn’t have had room with if I kept the cloves is a perfect grid like pattern. This is something I’ve learned from other gardeners and have applied with other produce that I’ve grown. And seeing how I grow with limited areas, this is a smarter way of using space and maximizing harvest.

Once all the cloves were placed where I wanted them (larger cloves more to the center of the box and smaller ones towards the edges–larger cloves are expected to grow larger heads) I put soil over the top, about an inch or two, and leveled it off.
Then to finish off the box, I topped it off with bark mulch.
This year I mulched my boxes because I have more containers that I’m using over the winter than I’ve used in the past. And since I don’t have enough greenhouse plastic to cover everything, I’m going to use the mulching method which is more commonly used. I do have a few small, new, boxes that I’m using this year that is away from a warm shelter. So I will be keeping an eye on these boxes in particular. If it looks like the soil is going to freeze over too much, the plan is to set up some carbon fiber hoops and surround the boxes with greenhouse plastic. (I have one variety of garlic and my ginger that I definitely don’t want to lose.)
Always have a backup plan!


One brief thing that I want to mention is to be aware of what kind of material that you are using for mulch. Always look at the Ingredients on the bag.
Most people are at least aware of looking on ingredient labels when they are going out to buy food from the store. Whether it’s a food allergy or just awareness that some gross things are being put into our food that effect our overall health, more and more people are beginning to take on this practice.
The same is true about what you put on your garden!
I bought this mulch, on sale, about 6 months ago. The original mulch that I was going to buy had a better sale. But when I found the ingredient list on the bag of wood chips I saw more than a handful of chemicals that were used in the product. It was advertised to prevent weeds from growing. But the reason why they could make that promise was because of what they were using in the wood chips. There was not just herbicide, but also chemicals that kept the wood color treated. Nothing of what I saw on that label reflected how I try to keep my garden as natural and organic as I can.
If you take a look at the picture above, on the left, you will notice that this ingredient list is listed with only one thing–aged forest product. For me, this was a better choice than the one that had well over 20 ingredients. I didn’t mind spending an extra $1 a bag when it meant that it fit a closer to my gardening philosophy.
Prepping an Existing Garlic Bed
Earlier I had mentioned that we’ve been growing garlic for several years, before we became aware of the wonders and beauty of different varieties. My earlier garlic bed is kind of funny because we grew so many different varieties in there that we have no idea what kind of garlic they are. That is other than Elephant Garlic. There’s no mistaking that variety with the others that we have grown.
This past growing year, I let this garden bed go fallow (something that I will talk more about in the future). As you can see here, you will notice the shoots of the garlic already coming up.


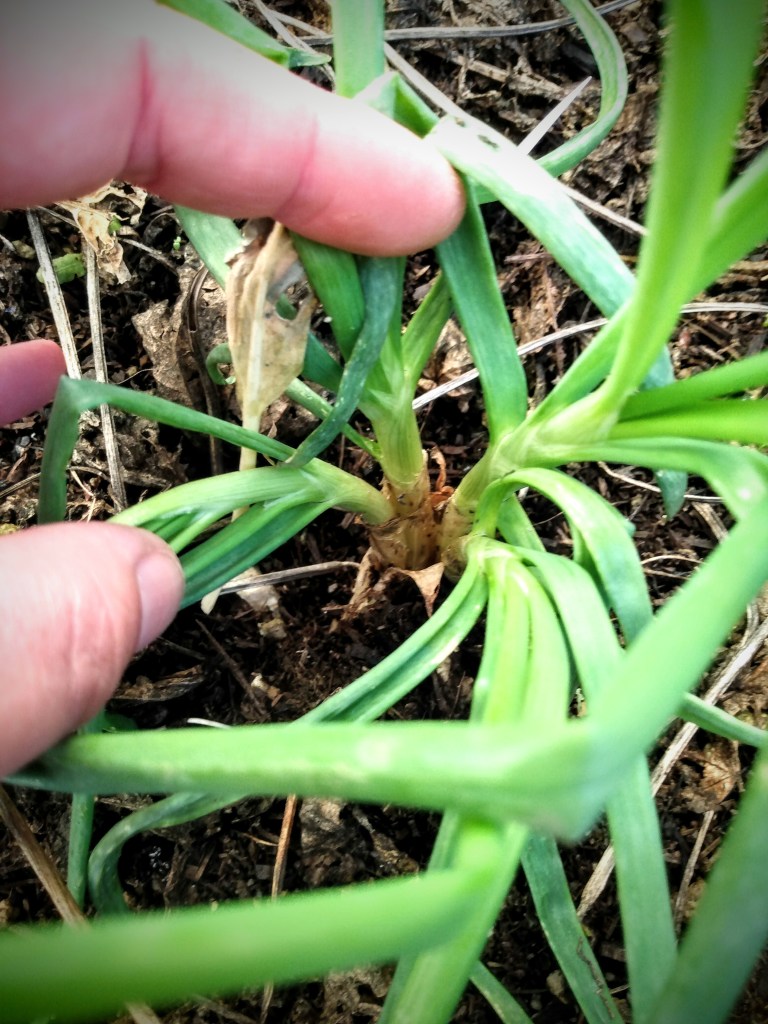
When I say that we had a crazy grow season, I’m not joking. We had two springs instead of a spring and a summer, so quite a few of my plants are off on their cycle. But these shoots are great when it comes time to getting garlic beds ready for the winter.
With how close these shoots are, my guess is that these were some of the cloves that had been planted too deep and didn’t get a chance to grow because other things were growing near them. With this bed allowed to go fallow, these cloves were able to have the opportunity to sprout.
Each year I take these clumps, dig around them to loosen the soil, and separate out the cloves that had at one time been a whole garlic head. Once they are all dug out, I loosen the whole bed and mix in some compost. Then I replant all the cloves with the proper distance.
I’m beginning to think that my garlic bed acts much the same as where you plant potatoes. Once you plant them there, they will keep growing back.
Another Theory for Garlic that Keeps Growing Back
When we first started growing garlic, we were told that we needed the garlic to go to seed before harvesting. So for a few years that’s what we did. We even tried to harvest the seeds. I just couldn’t seem to sync by time right with the seeds.
Then we learned that harvesting the scapes (the part that develops and grows the seeds) changes the flow of the plant. Instead of making seeds, energy is redirected to the bulb to enable the bulb to grow larger than it would if left to go to seed.
So my other theory for garlic growing back year after year, when I pull all the garlic that grows, is that the seeds that fell to the ground germinated and started to lifecycle of new garlic, not from planting cloves, but from seed.

Closing Thoughts
The amazing thing about growing garlic is that it is one of the easiest things you can grow and least demanding. You can work a full time job and have busy weekends and still successfully grow garlic.
If you’ve wanted to try and grow something, I highly recommend garlic.
It is forgiving. And it tells you when it’s ready to harvest. Through the season the garlic grows a tall stalk. When it’s finished growing, the stalks will brown and fall over. And that’s not even talking about how many different resources are available if there’s a specific question you have about growing garlic.
If you’re looking for something new to grow or found that the garlic cloves you have in your kitchen starting to grow a green sprout, go ahead and plant it in some soil and grow your own garlic!

Leave a comment