Repurposing A Frame

(This post contains affiliate links to products. We may receive a commission for purchases made through these links.)

It never fails that you find something very cute to give something, but it comes with non-removable art that just not fit with what you want to gift or make for yourself. Maybe it is art that isn’t your style. Maybe it is a design that’s so cheap and is exactly the reason why you find it at the dollar store.

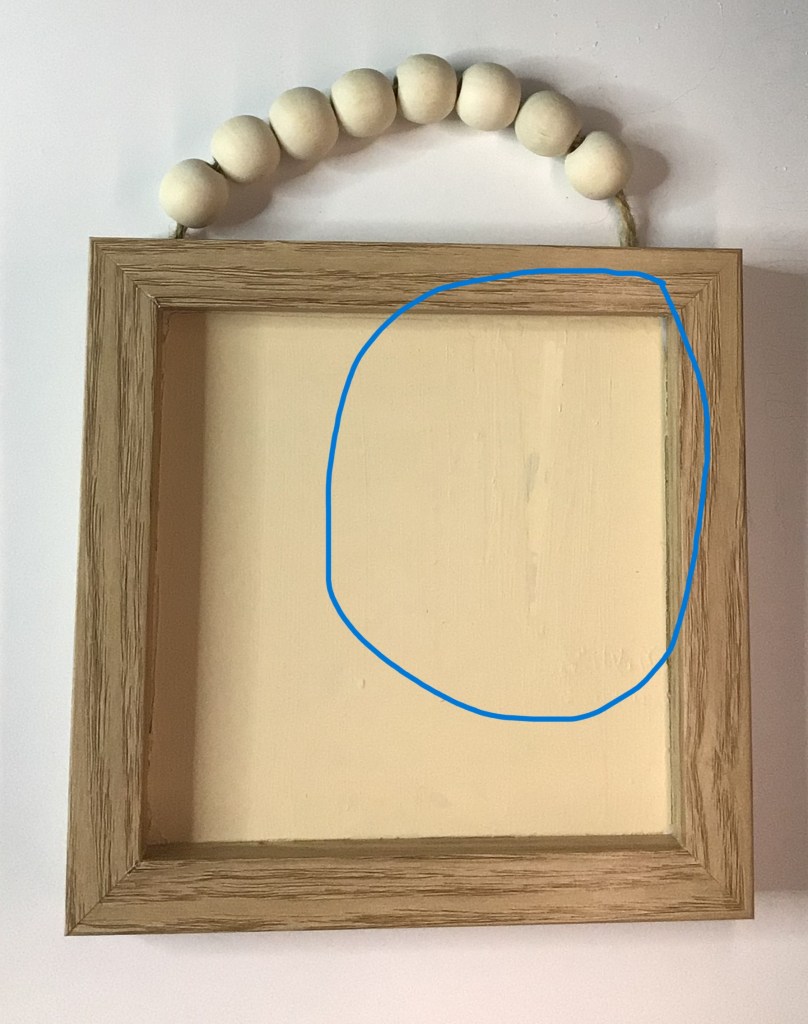
For example, I found this cute frame.

I found that the size was cute. And I absolutely loved the beaded clutch like handle. Best of all, I loved how the frame and handles were very much reminiscent of unfinished wood. This was the perfect blank slate that I could do so much with!

The negative mark was the non-removable art. Truth be told, I almost put this back on the shelf.

But here is how I turned this dollar store product into the perfect blank to make a personalized present.

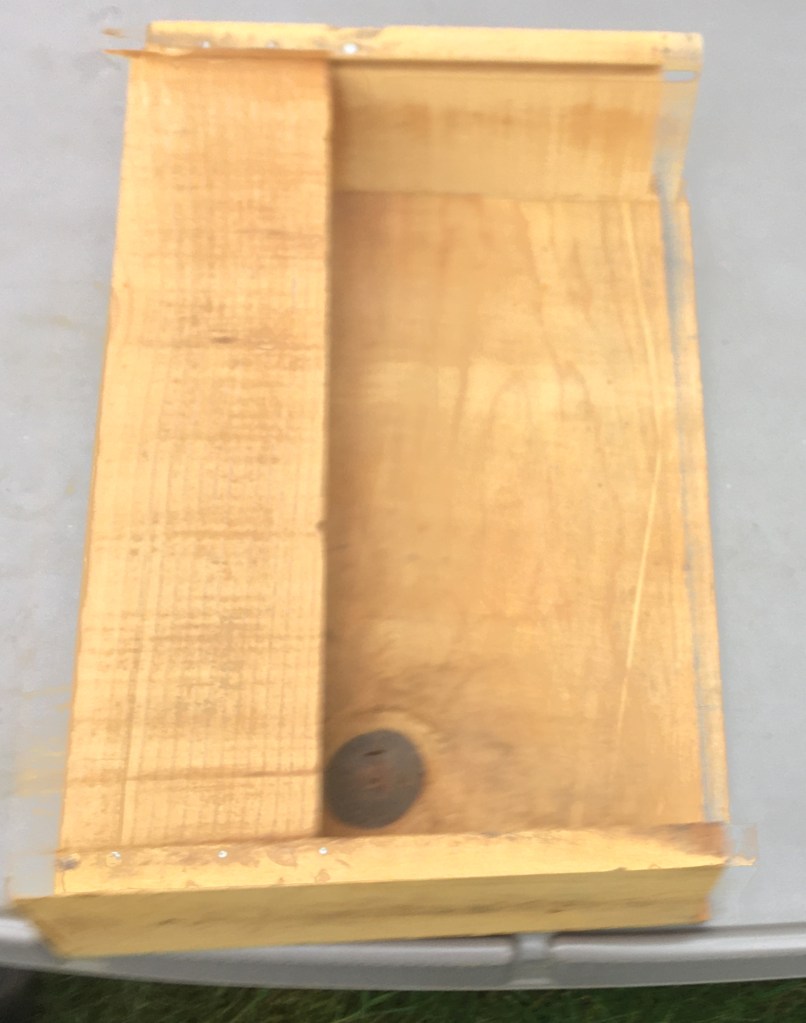
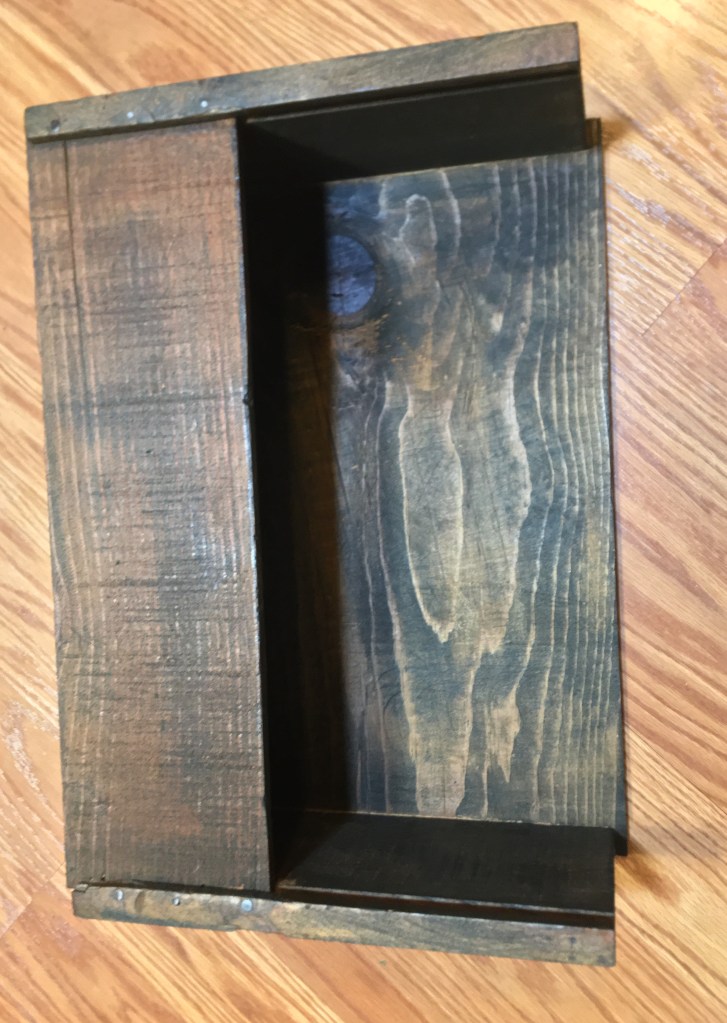
First you paint over the non-removable art

Especially if you like the current state of the finish of the frame you’re working with, you want to grab some masking tape and tape off the frame to protect it from the paint. It doesn’t matter how handy you are with a paint brush, you really do want to take the few extra minutes to tape off the frame. It just takes an unexpected sneeze or someone sneaking up behind you, knock on the door, ring of the phone, or that your brush slips.

Apply the tape on the inside edge of the frame. Cut down the tape to the corner of the frame, so you can fold the edges over.

The tape that I used here was Green Frog Tape.

Once the frame is taped off, take your paint of choice and cover the original art.

I used Waverly Cashew Chalk Paint. Because this color is so pail, it took about 4 layers to cover up the dark original colors. The important thing to remember is that you always want to paint with thin layers. First they paint dries quicker. Second, you can apply cleaner layer lines.

If you choose to put on a thicker layer of paint to compensate for dark colors, it just takes forever to dry before you can add successive layers of paint.

Once the paint dries…

You have the choice of what you will do next. You can apply a stencil to paint on your new design. Or there is the option of hand painting a picture.

If you are done with all painting options, you’ll want to remove the tape.

Removing Tape

Depending on who you talk to, there are a handful of different theories on which time to remove the tape.

OPTION 1:

Some crafters say, remove the tape while the paint is wet. Yes, this method prevents peeling up the paint that you just laid down. The problem I have with this method is that if the paint is wet on the surface, it’s wet on the tape. So you have to pay attention to the paint on the tape as you pull it up:

  • Paint ending up back on your blank because of the tape flopping over backwards (or paint side down) on your frame.
  • Paint ends up on your fingers. Sometimes you forget, or think you avoided paint transfer, and then you find out later you had a small drop of paint on your finger and now you have a paint finger print.
  • Paint ends up somewhere else on your, like your shirt or pants.

OPTION 2:

Other crafters advise that you remove the tape when the paint is dry. This method is great for preventing all options of potential paint transfer. However, the problem with this method is that sometimes the paint adheres to the tape and pulls up off your project when you remove the tape. This is especially the case when the original surface is smooth or plastic.

OPTION 3:

A third group will tell you to wait for the paint to mostly dry. This is the happy medium to the first two options.

I’ve never been able to make OPTION 1 or 3 work for me. If there’s any wet paint, I’ll somehow find a way of getting it on me or transferring back onto my project. So my go-to is OPTION 2, wait for the paint to dry.

TIP for OPTION 2: right before you remove the tape, take an exacto knife, and run the blade along the bottom of the masking tape all around the frame. This will effectively separate the tape and paint.

What if my paint strips off with tape removal?

Have no fear! Take a breath and don’t panic. This is an easy fix.

The first thing you’re going to do is build back up your layers of paint on the surface where the paint stripped off.

TIP: To create the illusion of no paint stripping, keep from this new set of corrective paint layers from overlapping on to the original dry paint that remained intact.

Once you’ve built back up the layers of paint that had peeled off, you’re going to add one more layer of paint over the original and new paint. This will cover over any potential seams in the paint.

The best of all is that if you are going to add any decal over this paint, it is possible for the decal to cover over any potential seams. If you’re using this as a shadow box, the items you place in front of the painted back ground will cause enough shadows to distract from the seams.

This is an example of where one less layer of paint can show the difference of your paint patch job. Make sure to do the same number of layers, plus an additional layer over both original and new paint.

Adding decals over the background paint with transfer tape

I want to mention one more potential problem you can face, with paint peeling, with a project like this. Whether you’re adding vinyl or a decal with a clear piece of transfer tape, you will want to be mindful of this transfer tape. Even if the transfer tape has low tack, it can still find a way of holding the paint more than the paint is holding on to the project surface.

The way that I have gotten around this problem is that I think of the transfer tape ONLY having contact with the vinyl or decal, and hold those elements in their place for application. I go out of my way to NOT press the transfer tape down onto the paint.

Instead, what I do is gently place the design down on the painted surface so there is absolutely no adherence. The bonus to this is that you can use a weeding tool, palate or other tool to nudge the design center (or any other location) on the frame. Once the decal or vinyl is exactly where I want it placed, I only press down on the decal/vinyl with my finger. The pressure from your finger is enough to get the decal/vinyl to adhere. And once your elements are all pressed, you can then peel off the transfer tape without it pulling off your paint!

Can’t find a frame like this, but want to make one?

I have no idea if I will find this beaded frame again at my local dollar store. In fact I would be surprised if I ever did. There’s something about the cute things in that store chain, that you pretty much only find in stock one time.

The good news is that this is an easy frame to create!

Originally this frame has a 4 x 4 inch work space. But you can select any shadow box of any size.

You can make the wooden bead clutch handle by using a thick jute twine and stapling it to the frame.

Yes! This handle is literally stapled to a mini shadow box frame.

If you want a supply list, to make your own frame, here are the items you will need:

  • Shadow Box: 4×6 Frame, 8×8 Floating Glass Frame , 8×8 White Shadow Box, 3-Frame Set
  • Jute Twine
  • Wooden Beads: 16mm (Thumbnail size), 20mm (US Quarter is 24mm)
  • Staple Gun (if you choose to use a standard desk stapler, make sure that you use several staples on either side of the twine. The twine can be reinforced by using wood glue and gluing to the shadow box.)
  • Scissors
  • Paint/Stain (optional–if you want something other than unfinished wood)

I hope you have just as much fun as I had making this Affirmation Gift!

The Baby Affirmation cut file used for this project can be found in my shop here. To personalize with the child’s name, just select your favorite bold font and place in the provided blank space.

Processing…
Success! You're on the list.

Leave a comment

Finding Hardware

What are your feelings about sharing a garage/shop with someone?

I find it frustrating! I have my office/craft space organized with containers that are labeled with its contents. So even if I have containers down I know exactly what’s in it at a glance. And it’s super easy to put away and clean up.

The garage… I so wish, with every wish available I could send my family away for the weekend to organize it and find an official home for everything. And you can guess it. My problem is that my husband has a way he wants it and our two ways of organizing a work space for repairs, large projects, and keeping our hand tools are two very different ways of thinking. The funny part is that more times than not, it’s my husband who’s coming to me to find a specific tool. And yes, I keep my own stash of hammer, screw drivers, and allen wrenches that I zealously guard like my fabric scissors. If you touch them, you better put them back where they belong, LOL.

And if you’ve built anything for any length of time, you know how hard it is to find screws, nails, and washers specific for your project. God Bless my Husband, but he has that garage that we’ve all seen our grandfather’s have: screws in a coffee can, nails in jars… they may have a home but you have to dig for the style and size of hardware that you’re hunting for.

So for my husband’s birthday this year, I had my boys help me build my husband a caddy to separate all those pieces of hardware into an easy to access place that you can quickly grab without feeling like you’re sorting through that bag of unmatched socks. And Bonus for my bragging rights, is that I sourced everything for this caddy from our garage.

This caddy is perfect for a garage, craft room (of all types), office, or anywhere you need to space save and easily access anything. While you’ll see I labeled these specific for garage hardware, you can take this idea and run with it for crafting. Instead of nails, label it buttons. For a Teacher’s classroom, instead of tacks, label for push pins. Change bolts to paper clips. You can completely cater this project to anyone and their passion!

Advertisements

Here is everything that I used:

  • Wood Box
  • Hammer
  • Tack Nails
  • Hand Sander
  • Black Wood Stain
  • Acrylic Paint with Brushes
  • Glass jars
  • Electric Drill with Drill Bit
  • Nuts and Bolts (small)
  • Size Appropriate Wrenches
  • Vinyl
  • Hardware Labels
  • Weeding Tools
  • Transfer Tape

The box that I used is a wooden box (about 12″ by 8″) that’s very similar to a cigar box with sliding lid. The lid was missing and one of the long sides was about to fall off. So I just removed the lid and nailed it to the top of the box.

One reason why I wanted to reshape the box was to have a little hidey shelf, in case my husband wanted it. You know the little objects you want to put in a safe place, but usually any counter space is a place prime for losing the thing you want to put in a safe place. So here’s a safe place. This box was rough, because it wasn’t meant to be decorative. I sanded the box on all sided before staining it. Yes, it maintained the rough look and feel. But I also fully appreciate the rustic aesthetic.

Advertisements

While the stain dried, I cleaned out my fridge from all the jars of pickled items. I’m not a pickle eater. Nor am I a fan of pickled vegetables. BUT my husband loves them. And my fridge door is where I sourced this collection of empty jars for this project. (I was not about ready to take from my canning jars, although I’ve seen people use canning jars for their hardware holders.)

After the jars were washed and I found which ones were similar in size, I placed them on the underside of this caddy. The smallest jars I put on the shelf. And I went back and forth if I wanted the row of two or the row of three jars to be in front. I chose to put the set of three in the center just for symmetry. Plus, I knew the screws were going to go in the larger jars. And other than the nails, these are the most sought after hardware in my house. So I put those in the front to make it the most convenient to grab.

While the jars dried, from their scrubbing, I set the kiddos up for painting the caddy. They got a bit distracted and wanted to play instead of use tools, but they dropped everything to paint for their dad. And since my husband loves their art, I sacrificed my want to keep the wood stain, which was my favorite part. But I kept the underside stained so a piece of me was still there.

I’m showing you this step, because you can make your caddy however you favor it. You can keep it clean and upscale. Or you can make it very family orientated. There’s no wrong way to make this caddy.

Advertisements

During this drying time, I cut out my labels with my cutting machine and assembled the layers ahead of time. That way when I was ready to apply theses labels, everything was lined up and ready for a simple peel and stick on the jars.

When the jars and the acrylic paint dried, I grabbed my drill, nuts, bolts, and jars. The first thing I did was drill a hole in the center of the lids. (If you are opting to use canning jars, make sure the lids you choose to use have already been used to preserve your food. That way you still have good canning lids ready to use in the future.)

After you are finished drilling, place your jars on the caddy in the exact places you want them. This pre-spacing is very important, especially when you have rows of jars next to each other like I have on the center and right side. I didn’t want the row to go over the edge, for esthetic reasons. If you have all your jars the same size and they second row comes over the edge, it’s okay. You may want to consider painting the jar lids to keep a uniform look. But the placement is also important because you will find that your jar lids are a smaller diameter than your jar sides. So by pre-spacing your lids, you will make sure you can screw your jars into your lids and not have an issue with the box sides or the shelf.

While you hold your lid in place, drill a hole through your caddy. When you hold is completed, you thread the bolt through the caddy and the lid and secure it with the nut. Hand tightening the nut and bolt will not be enough. You will want to tighten them with a wrench. This is most important if your bolts are short and if you want to be able to (un)screw your jar without holding onto the lid.

TROUBLE SHOOTING: If you find it difficult to keep your lid in the correct place for drilling, without moving, here are a couple of ideas you can use to assist in keeping your lids in place. Before drilling, use masking tape to tape your lid down to the caddy. Another option is to use a hot glue gun and place a circle of glue around the center of the lid. Be careful not to glue the center. You don’t want to drill through glue.

Advertisements

Once your jar lids are all secure, you’re ready to label!

To get labels to stick with the most success, clean your jar with a cotton ball soaked in rubbing alcohol. This will remove any oils, dust, soap, or anything else that could cause your vinyl to not secure cleanly to the jar.

It is crafter’s choice how you want to add the labels. You can place your jars on a work surface and apply them off the caddy. Or you can apply the labels while on the caddy. I chose to have all the jars attached to the caddy because the only jars that were a perfect match were the three that put in the center row. They were from the same company of pickled vegetables. All my other jars were different sizes, but very similar in measurements. However, if I applied my labels off caddy and centered them on the jars, then none of my labels would have lined up. However, with my jars on caddy, I could get the labels to line up near perfectly and give the illusion that all my jars are matching. The exceptions of course are my small jars in the back (washers and nuts). But those are tiny jars hidden in the back and completely understandable why nuts would be larger than washers.

However, if you’re the personality type that is bothered by things not absolutely, perfectly matching, then please ignore my chaos here. Work to your strengths and show us the beauty of our symmetry and perfectly lined labels. I love watching your work. But if you’re the type that can’t get things to line up perfectly, know that there are ways of lining things up even when your jars are millimeters off in their heights.

Mounting the Hardware Caddy

I’m sorry I do not have a picture of this for you today. We’re in the process of reorganizing our garage and we’re not sure yet if we’re wall mounting or rack mounting this caddy. I will update this post when we get that project finished, so you can see how you might choose to mount your caddy.

The one thing that you need to be aware of is how gravity is going to work when you have the jars filled with their hardware.

Remember, I organized my jars so that my heaviest and largest jars are on one side. If I install with screw jars forward, all the weight and pull are going to be forward. So I will need to compensate. If I install the screw jars in the back, toward a wall, there will be very little compensated needed because the center of gravity will be near the wall and negligible.

For wall mounting, I would want to have my screw jars forward and screw the back side of the box into the wall, with a screw in each corner of that board. Preferably I would want to screw the caddy into a stud, because that will carry the weight beautifully. If it’s impossible, hit at least one stud (which I would center the caddy on and put in an additional set of two screws, in additional to the corner screws). If all I have available is drywall, I will definitely put in wall anchors and drill the screws into those. That way the weight of the hardware will not weaken the dry wall and pull out of the wall under too much weight.

If we choose to go with mounting the caddy on our rack, I will do that using conduit bracket mounts. I will use at least three brackets on the screw jars side. That way, the weight of the screws will pull straight down. there will also be a bracket or two on the back just for stability purposes for when the screw jars are removed, and the center of gravity changes.

Another option for rack mounting is to use a block of wood. The caddy (jars removed for installation) I would put on the bottom side of the wire shelf, with the block of wood on the top of the shelf. Then drilling a screw through the open space of the shelf into the block of wood. This option is not the one I would personally go with, because it doesn’t work with how we use our shelves in the garage. But I did want to mention it because the caddy can be screwed into an existing shelf that you might have.

While there are many ways of installing a caddy like this, I want to put out one more idea. If none of the above work for your situation, you can add wall mounts to the back of your caddy. There are all sorts of alligator grip picture hanging mounts that you can use. With a trip to your local hardware store, you can find picture mounts that can hold portraits up to 50 pounds. That is over kill for this project, but I want to mention that this is another option that could work for you.

Please send in pictures or let me know who make this for. As I mentioned, this example of a hardware caddy I made for my husband for his birthday. But this is perfect for a Father’s Day gift, Graduation gift, something for a teacher, crafter, or even just as another option for home organization.

Files used for this project:

You can find Hardware Labels here.

Processing…
Success! You're on the list.

What If I Fail?

It doesn’t matter how many years you’ve been crafting and DIYing. You will fail. I fail.

What you do with failure determines what your future will look like. What your end product will look like. You can finish in a failure. Or you can take an option and end on a different note.

In fact, here is my most recent fail and how I pulled out of it.

Two weeks ago I started working on a Teacher Appreciation gift for my son’s pre-school teacher. First, let me just say that it’s difficult coming up with a meaningful gift for a teacher that they don’t get a million of and you’re just one of those parents who giving a gift card just doesn’t feel personalized enough.

I help out in my son’s class and noticed that his teacher had one clip board. It’s pretty standard and who knows if it was on its last leg or was a work mule. But I do know that with home schooling my older son that a single clip board is not enough for me. And this was what birthed the idea of making a personalized clip board for our pre-school teacher.

Advertisements

I find the diamond painting crafts a very relaxing no thinking type of craft. With that experience, I had high hopes of having fun and relatively easy time with this. What I should have counted on is that the Jewel and Metal Glue would have had a mind of its own and gotten all over the place.

I should have set up more protection against glue betrayal. With the print out of the design on the back side of the clip board, I can see exactly what my work field was going to look like. I should have taped on protective paper (just spare crafting paper) to protect the exposed board that was not being worked on.

As it was the glue, coming out of the tube, came out at larger quantity than I needed for the small text on the top. What I needed, to control glue quantity, was a tooth pick. It provided enough glue to adhere the gems, and kept the glue of glopping up and making a further mess. However, the clear glue also found ways of transferring to other parts of my hand and got on the board. The crafter who recommended this glue to me (and other crafters) said that it dried clear. And I was under the impression that it would be relatively invisible.

Yeah, not so much.

IF you can keep the glue minimal, it hides quite nicely. IF you get impatient or frustrated, the glue does travel. It does clump up. It does not dry invisible.

I also want to mention that the gemstones were the actual frustrating part. The tweezers that came with them did not pick up well or easily. The white pencil that came with them worked maybe half the time. I actually had to pull out a spare diamond painting tool and use that. The disadvantage that comes into play is the gem glue. It acts like a super glue and builds up. It causes the gems to stick to the tool. So make sure you take the time and clean whatever tool you are using regularly. By keeping the glue buildup to a minimum, you will keep the frustration down a little.

Tips that I have for my next time:

  • Fully tape off the non-work area
  • Try to not use the tiny gemstones
  • Don’t be hasty, use a tooth pick for glue application
  • If using the side of your hand, put tape on the side of your hand (to replace every now and then to prevent hand transferring of glue)
Advertisements

Correcting the Failure

There were a few ideas that I had to redeem the glue failure of this project. Had the failure just been hand transferring of glue, I would have made other icons, “pows”, comic speech bubbles, etc to add more of a graphic design. However the glue failure was mostly an eye sore around the text with the stones, where the glue was just too thick.

I opted for acrylic paint to cover the glue. On top of the paint were glitter glue and a layer of fine glitter.

Step One: Tape off your Comic Speech Bubble. With cutting the edges, it allowed for the continuation of the lines and making the edges as varied as you want them. Just make sure that you press your edges down well so that the paint and glue don’t feather under the tape.

Step Two: Paint. Between the letters and around the gemstones, I used an acrylic paint pin. The edge of the pen is just more firm and easier to manipulate than a paint brush.

Step Three: Add glue and glitter. Once the excess glitter is shaken off, peel the tape off of the clip board.

The wrinkles that you see here is just the uneven application of the glitter glue. I was playing with texture to see if I could get a comic sunbeam pattern.

Step Four: Tape off the clip board for sealing with clear acrylic spray paint. This paint will keep the glitter from shedding. (I sprayed two coats of paint.)

There’s two ways of reapplying the tape. The tape can be put right on the glitter line. Or, as I chose, I offset the tape so that I could seal the edges of the glitter, but also add a simple edge to the design. The clear acrylic paint creates a glazed appearance.

Be sure to press down all the tape edges well. If the edges are not fully pressed, it leaves the opportunity of the clear paint to feather under the masking tape.

Once you have sprayed your last coat, you are ready to remove the tape and paper. If you choose to remove the tape with the paint still wet, there is the chance that there will be some feathering. If you wait until the spray paint is dry, there will not be that potential transference.

As you can see with this side by side, particularly around the -her of teacher, it is possible to clean up glue failure. There is a trade off of not being able to keep a minimalist design esthetic. However, there is light at the end of the failure tunnel. Sometimes you can remove errors that just can’t be erased.

No matter what you are working on, take heart. If something goes wrong, it is not the end. You can fix it. Take a deep breath. Look at your options and see what all is available. If you have more than one option, try to visualize what it will look like if you go down that route. Which route is going to get you in a better place in the fewest amounts of steps? Which route is going to eliminate the failure in what you’re working on? Not all solutions are equal. But the more options you have the more you hope you have for your end product.

Teacher Super Power was the file used today. It can be found here!

Advertisements

Processing…
Success! You're on the list.

Taming Fly Aways!

I know these are common problems for family get-togethers. Either, your family is so large, that when you have a pot luck style meal there is always the problem of not having enough table space. Or your family is enjoying the sun with a BBQ and you spend more time than you can admit chasing down paper plates, napkins, and even silverware.

My family suffers from both of these problems. Every year.

Inspiration hit when I watched this video, tutorial using dollar store Jenga Blocks, from She So CraftDee. This video was so well put together with directions, that I don’t want to recreate what this talented woman did. So I will just direct you to her video if you want to learn how to create structures using Jenga Blocks. Instead, I will proceed with the road blocks I faced while working with this tecnique and how I made this Paper Goods Caddy.

Materials

  • (54) Jenga Blocks (I used 48 of one style of blocks and 6 blocks of another style)
  • Hot Glue Gun and Glue
  • Multi-Purpose Cement 0.5 fl oz (E6200 would be the best choice)
  • Ruler (Optional)
  • Paint
  • 1.25″ Nails
  • Hammer
  • (14) 0.5″ Wood Cubes
  • (3) Square Pen Holders
  • Glitter Paper
  • Metal Gift Tag
  • Vinyl
  • Transfer Tape
  • Elmer’s Glue
  • Glitter
  • Acrylic Paint Pen (optional)
  • Flat Face Rhinestones (optional)
  • Jewelry & Metal Glue (optional)

Project Dimensions

The overall dimensions are 17″ wide by 6.5″ high by 7.5″ deep. The interior of the silverware holder squares are 2.5″. The plate holder is 9.5″ wide by 1.75″ deep. The napkin holder is 7.5″ wide by 1.75″ deep.

This accommodates 9″ paper plates and standard sized napkins. In the picture are 9″ plates and cocktail napkins (6.5″). The dimensions can be adjusted according to your family needs.

Before I jump into how to assemble this caddy, I want to start with the pitfall of gluing options.

She So CraftDee only uses hot glue. I do want to draw attention to the fact that it’s not just any hot glue stick, but wood glue. Full disclosure, I have not yet worked with hot wood glue so I cannot attest to the strength or durability. But for the crafter who does not use hot wood glue or have never heard about it, it is not going to function the same way as the standard glue stick that you have in your craft stash. So please do not expect standard hot glue to work like hot wood glue.

I have decorated in enough wedding and other events that, professionally, I would not put trust in wood glue alone to hold a vase that holds water and everything else that adds weight. An LED pillar light is only going to weigh ounces. However, the weight of a glass vase filled with water, stones, flowers, and anything else of weight is going to add up quickly. There is no telling if and when glue will fail. So I would highly recommend that you reinforce your build in the legs and the base frame so that you can rest assured that you won’t have a catastrophe on your table tops. Wood glue and standard hot glue would all be adequate for any non-weight baring sides.

Advertisements

Because this Paper Goods Caddy is a functional piece, you will definitely need to use something much more substantial, for reinforcement. I used Multi-Purpose Cement (from the dollar store) as my primary gluing option, with the use of standard hot glue to hold the blocks in place while the Cement cured. For a home craft, the Multi-Purpose Cement is a good choice if you just need a little bit of glue. You will use the full 0.5 fl oz tube for this project. However if you are a professional, I would recommend E6200 over all other glue.

TIP #1: Examine your Jenga Blocks. You want to make sure they are solid wood with no cracks, grooves, or holes. The cheaper Jenga Blocks do not give you the easiest surfaces to work with. I had a couple of blocks that had a gaping hole where the wood was laminated together. The glue went straight down to my work surface. If sanding doesn’t give you a smooth working surface, paint your blocks. The glue actually held much better to the painted surface than the laminated wood surface. Plus, the paint fills the gapes and grooves for you. Just be sure to let your paint dry overnight.

TIP #2: If you are using colored blocks, like I did, set up the pattern that you want your bricks to be in before you start gluing. This will keep your pattern uniform in the front and the back.

Prep the Silverware Holder

Please feel free to decorate the silverware holders in your personal style. However if you want to recreate what you see in the pictures, these are the steps that I took.

  1. Paint the top 2/3 of the pen holder with white acrylic paint. (Allow to dry.)
  2. Paint the bottom 1/2 with teal acrylic paint. (Allow to dry.)
  3. Cut Glitter Paper (or vinyl of choice) into 2.5″ strips (the number will vary depending on the length of your Glitter Paper or vinyl choice). Also cut 3 additional strips at 1″.
  4. Slide a 2.5″ strip into a box and crease the edge. (This will give you the cleanest edge and prevent you from mismeasuring the inside of the box.) Trim on the crease.
  5. Remove the backing and place on the inside face of the box.
  6. Repeat 4-5 for the remaining 11 inside faces of the three boxes.
  7. Take a 1″ strip of Glitter Paper and apply it to the bottom outside edge of the pen holder box.
  8. Tack the edge of the Glitter Paper closed with a dot of glue.
  9. Repeat steps 7-8 for the other two pen holder boxes.
  10. Glue two of your boxes together, Glitter Paper seam sides together. Use a very liberal amount of Multi-Purpose Cement in the center, with a rectangular frame of Hot Glue. NOTE: Hot Glue does leave a gap between items glued together. So if you want zero gap please use Cement only. You will need to clamp together the boxes until the glue dries (an estimate of 1-2 hours).
  11. Set Aside for Assembly.
Advertisements

Prep Gift Tag

  1. Take a left over piece of 2.5″ strip of Glitter Paper. If it is large enough, wrap it around from top front, down, over the bottom edge, and up the back side. If it is not large enough, take two pieces that fully cover the front and back and cover each side.
  2. Trim the edges of the Glitter Paper that run over the edge of the metal gift tag.
  3. Create the hole, matching the metal gift tag, by piercing the Glitter Paper covering the hold.
  4. Using your cutting machine, cut “Family” (or any other phrase of choice). The Font I used was Chunky Confetti.
  5. After you weed your vinyl, apply “Family” with transfer tape onto your gift tag.

Prep the Paper Goods’ Feet (Optional)

My oldest son informed me that we needed to add a bottom so that the napkins and the plates could stay in the holder. He was concerned about his grandma having to put in and take out her paper goods. So I designed this so that the Caddy is not just a holder, but it’s a moveable container that can keep the goods in and be easy storage.

  1. Take 7 of the 1″ cubes and glue them end to end. This is one foot.
  2. Repeat with the other 7 cubes to make a second foot.

NOTE: you can use Hot Glue for this prep because the feet will not hold a lot of weight. I chose to the Multi-Purpose Cement because I have clamps, and I want to ensure that in the heat of the summer sun, the hot glue will not soften and become weak.

Advertisements

Paper Goods Caddy Assembly

From my stash of Jenga Blocks, I wanted to use ones with colored ends, but didn’t have enough. So this is the reason why I used 48 blocks of one style and 6 blocks of another style (which were used on the sides of the plate holder). The two different styles of blocks had different heights, which lends to the floating brick illusion. The floating bricks could be more prominent by using an even smaller set of Jenga Blocks, still using the 2 row build.

  1. Mark off your Jenga Blocks. My blocks were about 3″ wide so I drew two lines at inch increments so that I could work fast and glue all the bricks together uniformly.
  2. Glue together your two row sections, 3 bricks on top of two. In the inch section I put a large circle of Cement with two dabs of Hot Glue on either side. Once Hot Glue dries, you are free to move on to the next piece to glue.
  3. You will have 6 sets of two rows.
  4. Glue together your napkin face plate, starting with the rows. Make 2 sets of 3 blocks, glued together end to end. And make 2 sets of 2 blocks, glued end to end.
  5. Start with the base and work your way up. One top of one of the 3 blocks, center a 2 block set and also glue on the arms that will attach to the plate holder. On top of the two arms and the set of two, glue on the other set of 3. On top of that glue on the last section of 2.
  6. Set the base for your plate section, by making 2 corners. If you are using two different sized blocks for a floating brick look, your larger blocks will be used here on the sides (they are the unpainted bricks in my photos). Glue your side piece on top of your front and back corner piece. Do this for the other side. NOTE: your center bottom piece is not going to be attached to anything for a few steps, so set those off to the side for the moment.
  7. Space out your corners by setting a two row section on top, do not glue.
  8. With your corners set, remove the two row section without moving the base corners, place your napkin face plate. Once you have the napkin face plate center, you know where to add the Cement and a single dab of Hot Glue.
  9. This amount of glue is not enough to keep the napkin face plate in place, so you will need to hammer one nail into each arm of the face place, into the base corner, so that it will offer the stability to the napkin face plate.
  10. Glue the two row section, which you used to space the corner sections, onto the middle arms on the side of the plate section. Use a dab of Cement and Hot Glue.
  11. Repeat this last step with a two row section for the back of the plate section.
  12. Glue a side arm, on top of the two row sections, on each side.
  13. Repeat steps 10-12 to form the middle of the plate section.
  14. Repeat steps 10-11 to form the top of the plate section.
  15. Turn the Caddy upside down and glue in the middle sections that were set off to the side, back in step 6.
  16. To reinforce the face plate a second time, you will use 4 nails to nail both sides of the left and right Jenga Blocks above it.
  17. Where you would like to add glitter, paint on your glue and apply glitter.
  18. (Optional) Use your acrylic pen and draw on a frame around the front edge of each of your blocks, front and back.
  19. (Optional) To add gems, place a dot of Jewelry & Metal Glue where you would like to add your Rhinestones. You can glam this up as much as you want, including using only Rhinestones instead of glitter (step 17).
  20. Hot Glue your “Family” Gift Tag to the Napkin Faceplate.
  21. Glue the single silverware box, upright on the right hand side. Apply the Multi-Purpose Cement Glue and Hot Glue onto the Jenga Blocks (to the height of the silverware box). Attach the silverware box.
  22. Tip the Cady on its side so you can position the Double Silverware Box. As you look at the side of the Cady, note that the middle row is the front of the Plate Holder. Use the Jenga block to create a 45° angle. The front bottom of the Silverware Box is lined up with the bottom edge of that middle Jenga Block. The top back edge of the box will be in alignment with the front of that back row of the Plate holder.
  23. Remove the double box and apply the Multi-Purpose Glue and Hot Glue to the side of the Cady where the Double Box will sit.
  24. Attach the Double Box to the Caddy.
  25. Turn the bottom of the Caddy upside down and apply Multi-Purpose Glue and small dabs of Hot Glue to the two recessed sections of the middle row.
  26. Attached the two feet, centered on that middle 4th square, into those recessed sections.

Congratulations! You have completed a space saving Paper Goods’ Caddy.

Please leave a comment how this caddy turned out for you.

If you’ve seen a project that you want more information on how to make, please let me know so I can set you up for success!

Empty Tomb is now live. 100% of preceeds will go to the support of orphans in Rwanda.

Processing…
Success! You're on the list.
Advertisements

New Twist on Carrots

Making a new style out of throw away materials

The one bit of insight you have, when working for someone else, is just how much a business throws out. And the quality of their garbage. And you also gain insight as to what kinds of businesses subsidize other businesses for you marking your product down for their employees.

I personally know of a few companies who have switched to the Lean Operational method of running a business. And even then it still, somehow, manages to amaze me how much gets thrown out.

Maybe it’s the fact that I grew up where we didn’t have as much as other people around us. Maybe it’s the fact that my mom created magic when she made the gifts we were given on less than a shoe string budget. Maybe it’s the fact that I carry on that frugality because our family budget can go farther and do more things when I reallocate and make do with the little I have, so the hard work of my husband can go elsewhere for family provisions.

This craft here is me on a plate, for you. This is me thinking outside of the box. This is me using materials where half of what you see is stuff that most people throw away.

If you are looking for a new infusion to your farm house style or Easter decor, this project is for you!

Advertisements

Materials

  • 8×10 Canvas Frame
  • Teal and Metallic Gold Acrylic Paint, with paint brush
  • 2 Complimentary Ribbons
  • HTV Vinyl (Permanent Vinyl is another option)
  • Garden Now Open SVG
  • Leaves from Silk Flowers
  • Hot Glue Gun with Glue Sticks
  • Pliers
  • Crafting Knife or Scissors
  • Staples (optional)
  • Sandpaper (optional)

Prepping the Frame

First you want to remove the canvas from our frame so you can paint the frame for your reverse canvas. (If you’re new to Reverse Canvas, hold on for a moment and I will circle back to help you through this process.) Paint the front and sides of your frame with Teal paint. If you keep the paint very thin, you will notice that the paint is dry to the touch in about three minutes. For this example, I went in a circle around the frame twice with the minimum amount of paint (dry brush method, where it look likes and almost feels like you’re brushing on already dry paint) and ended with full coverage of color with no waiting time to apply the Gold paint. It’s really not in my budget to play with Gold Leaf. I would use it for a client. But for the rustic feel I went for, metallic gold paint was enough to add a smidge of class to an otherwise rustic feeling project. And the gold, I used somewhere around a nickel size drop of paint and hit the corners and some edges. Then I set the frame to the side to dry while I added the HTV to the canvas.

First Time Creating a Reverse Canvas: From the back side of the Canvas remove the staples with a pair of pliers. (There are two different methods of putting the canvas back on the frame, which I’ll cover in steps ahead. I just want to let you know from the beginning, if you remove the staples right from the beginning, it can save you from potential problems in future steps. It’s not mandatory, but definitely one of my highly recommended steps.) If small holes next to the staples happen, don’t be afraid, you will not see them later on. If the staples are stubborn, feel free to cut the canvas next to the staple, with a crafting knife, and release the canvas. Set the canvas to the side and move forward with painting your frame, mentioned above.

TIPS: If you’re keeping with the rustic look, there’s no need to sand your frame. If you want a smooth looking frame, you will definitely want to sand your frame before you paint it. If the frame staples are visually unappealing to you, I highly recommend dry wall spackle. You can find some that is purple when you apply it and turns white when it’s dry. It’s very easy and convenient to use, with next to no guess work. A palate knife or even your finger is all you need to apply the spackle. Once it dries, you’ll quickly run over it with sandpaper a couple times. This will smooth out your edges. And when you paint your frame, no one will know that you used putty to fill in the frame cracks. (This is the same method I use when I want to use a frame that for one reason or another was gouged or dropped.

Applying Vinyl to the Canvas

When you go to cut your HTV (High Temperature Vinyl) from your cutting machine, remember to mirror your image. Once you’ve weeded your vinyl, you will place your frame on top of your canvas, so that you can see exactly where you want to press your carrier sheet down on the canvas. (This step is mostly important if you have a few small holes in the canvas that you’re working around. If you’re canvas came off the frame undamaged, than feel free to skip using the fram as a point of reference.) Follow our vinyl’s directions for heat and pressing time. These settings vary. Once you’re vinyl is attached, proceed to reattaching your canvas to your frame.

What if I choose to use Permanent Vinyl? I have successfully used permanent vinyl on canvas. I prefer HTV over 651 (or permanent) because once I have it adhered I do not have to worry for one moment about humidity causing the vinyl to lift. But please do not be shy with using permanent vinyl. You will still want to use an iron to press your Canvas. If there’s any moisture in the fabric, the iron will get that dried out and prepped for your permanent vinyl. Once you place your vinyl, you will want to make sure to have your project on a hard surface that you can press down with a scraper or squeegee. The more attention that you use with burnishing that vinyl down will pay off in the end with a longer life to your craft. Remove your transfer tape and then move forward with attaching the canvas back onto the frame.

Advertisements

Reapply Canvas to the Frame

There are two ways of doing this; hot glue gun or staples.

Method Hot Glue Gun: Apply a liberal amount of hot glue to the back of your frame. Flip it over and position it over your canvas before pressing down and attaching the two together.

The benefit of this method is that it is so quick! Any skill level of crafter can do this application. The important thing to remember is that you have to move quickly so your glue doesn’t cool down on you. AND you will want to try and manage how much glue you use. Too little and the canvas won’t want to stick to your frame. Too much and you will have guaranteed seepage of glue that you will have to clean up. My recommendation is err on the side of a little too much and keep the glue a little off center. It’s better if it seeps out of the outside edge instead of the inside edge. With an inside edge seep, you will need to try and scrape the glue off the canvas or risk having what looks like slug trail on your canvas.

Method Staples: Flip your frame upside down. Position your canvas on top of the frame. Take your staple gun and staple at the top center of your frame. Gently pull your canvas down and place a staple in the center bottom of the frame. Gently pull the canvas to one side and staple in the center of that side. Gently pull on the other side of the canvas and staple in the center of that side. This is called Stretching Canvas. You will then go through the whole rotation again, moving out from center. On a frame this size, you should have about 5 staples across the top and bottom. And about 7 down the sides.

In my opinion I recommend stretching your canvas with the Staple Method. Anytime you add anything to canvas, if it’s not taunt, the weight of your project will warp the appearance of your canvas.

I’m in a crafting group where many of the crafters there swear by the hot glue gun method. In that group I withhold this information because in that setting it’s more important to have these ladies soak up the success of accomplishing a craft that they might not otherwise have attempted.

Here, I want to give you further information because I want you to make an education decision based off of the goal you are after. If you are making this to sell at a craft fair, or you’re decorating for an event that you want professionalism for, I want to set you up for success in these moments. And I know we are not face to face so I can’t use my tone or non-verbal cues to fill you in on this. I am by no means dogging on the hot glue method. In fact, in this example I’m showing you I couldn’t find my staple gun and so I in fact used a hot glue gun. I know the value of stretching canvas and so even with a hot glue gun, I still stretched my canvas. It took much longer than with a staple gun. And if I were using something of more weight than paper carrots, I can assure you that I would not trust hot glue to keep my standard of professionalism to clients. (I know my limitations with hot glue guns, and I’m woman enough to admit that there are many other crafters out there who are geniuses with hot glue. I have skills, but I am not a hot glue gun goddess.)

I want you to feel comfortable with your skill level and what goals are for this project. If what you have available is a hot glue gun, you’re not at all comfortable with stretching canvas, and you’re new to reverse canvas making–PERFECT! Know that you can make a beautiful and professional looking canvas using this method. If you want the challenge and extra security that staples offer, than stretching your canvas is exactly what you’re looking for.

Once your canvas is attached, you will want to trim off the extra canvas. You can either use a crafting knife and cut away on the outer edge of the frame. Or you can use a pair of scissors, angle you blade into the back of the frame, and trim the canvas back.

With clean edges, it’s now time to add those carrots!

Carrots

This is the part that I’m most excited about. These carrots are made completely from scraps that most of the times end up in the trash or recycling bins.

Most of these segments are made from triangles and parallelogram scraps about 3″ wide. Some wider, some less. All of these were from scraps from an explosion box I made a few months back. The card stock was 5 different textures and shades of orange. In fact, one of the orange papers was actually faded from being left out in front of a window. The segments you see above were not triangles and so I pre-folded them in triangular forms to make it quicker to shape and hold with a small drop of glue.

These single cones I then stacked with each other. On a few of the carrots I placed the glue on the back of the cone. Most looked better with the attachment point being at the front of the cone.

I made a few extra carrots than I had space for on the canvas, because I wanted to have some choices of which ones looked better than others. In fact, one carrot had a herringbone look to it. And since it didn’t have the same feel as the others, that one got set aside for a future project.

Once I got the length of carrots that I was happy with (a few were 4″ long and others were as much as 8″), I went into my bin of silk flowers that have seen better days. In fact, they were part of the flowers that I bought from a wedding planner who was selling all of her inventory. I was after her roses, but she gave me her entire flower collection. These leaves were actually from some geraniums and daffodils. The daffodils were actually really beat up and were just collecting dust, because I couldn’t use them for events. And this was the moment that I could actually give these greens a purpose. Other than purchasing silk ferns, these greens were actually quite perfect.

What makes these carrots so special in the crafting world is that it embraces the cubism element from the art world. I’ve seen a lot of carrots made from yarn and cloth, styrofoam and foam. These paper carrots give talking points and structure. And this structure is what was great for placing in the frame, with the ability to break free from the frame (giving a nod to surrealism).

Finishing Touches

Once I found the placement that I liked for these carrot shapes, I glued them down with hot glue gun.

Due to the light weight nature of this project, attaching the ribbon with hot glue is enough. However, if you’re creating for a professional item, you will want to use a stapler to attach you bottom layer of ribbon to the frame. For the top ribbon attachment, E6000 glue would be better than hot glue. But hot glue does do the job for a non-sellable project.

Please comment below and tell me how this spring time project turned out for you. Pictures are even better. I love seeing what other people make!

The SVG used in this post can be found here

Processing…
Success! You're on the list.
Advertisements