After spending almost a decade in the event decorating industry I have repetatively heard "I can do that". Instead of being dismissed by creative minded people, I want to show you how I do "that" so you can be sucessful in recreating that inspiration image. I just might have a few tricks that you haven't seen yet!
I have to love my husband who loves to give practical gifts. Usually he stays away from gifting flowers because they last for a few days before they’re composted. However, there are so many uses for not just roses but other flowers as well. While I’m going to be talking about roses here, there are so many other flowers that can be used in the exact same way!
For those who are unaware, roses are edible. (Before you do eat rose petals, make sure that they haven’t been sprayed with chemicals, pesticides, insecticides, or anything else that is harmful to you.) Roses contain vitamins A & C, Niacin, Potassium, Iron, Calcium, and Phosphorus. Some places where you’ll find fresh petals are on a dessert/cake or in beverages such as teas.
Advertisements
It’s not just the petals that are usable to our bodies. Rose hips (the bulb at the bottom of bud, harvested at the end of the rose season from the rose bush) is used in the beauty industry and baby products for the benefits it has to the skin.
The benefits to the skin is the primary reason why I decided from this last bouquet of roses that was given to me that I was going to use the petals for my next batch of soap.
I started making soap because I’m not okay with all the chemicals that are being used in soaps in the commercial market. Other than using soap dyes (which I’ve had my tub and skin discolored from bath bombs and other products) the mission I’m on is finding natural dyes to color my soap. For pink soap, I’ve seen soap makers use dyes or French clay.
Now Calendula is a well known floral natural food grade colorant. For red/pink colorant, Beets can be used in food. But anyone who’s worked with beets knows that your skin and clothes can be discolored. So I wanted to find a different red/pink colorant for my soap that I can grow in my garden. So I came to roses.
Advertisements
How to Process Roses
There’s two easy ways of doing this.
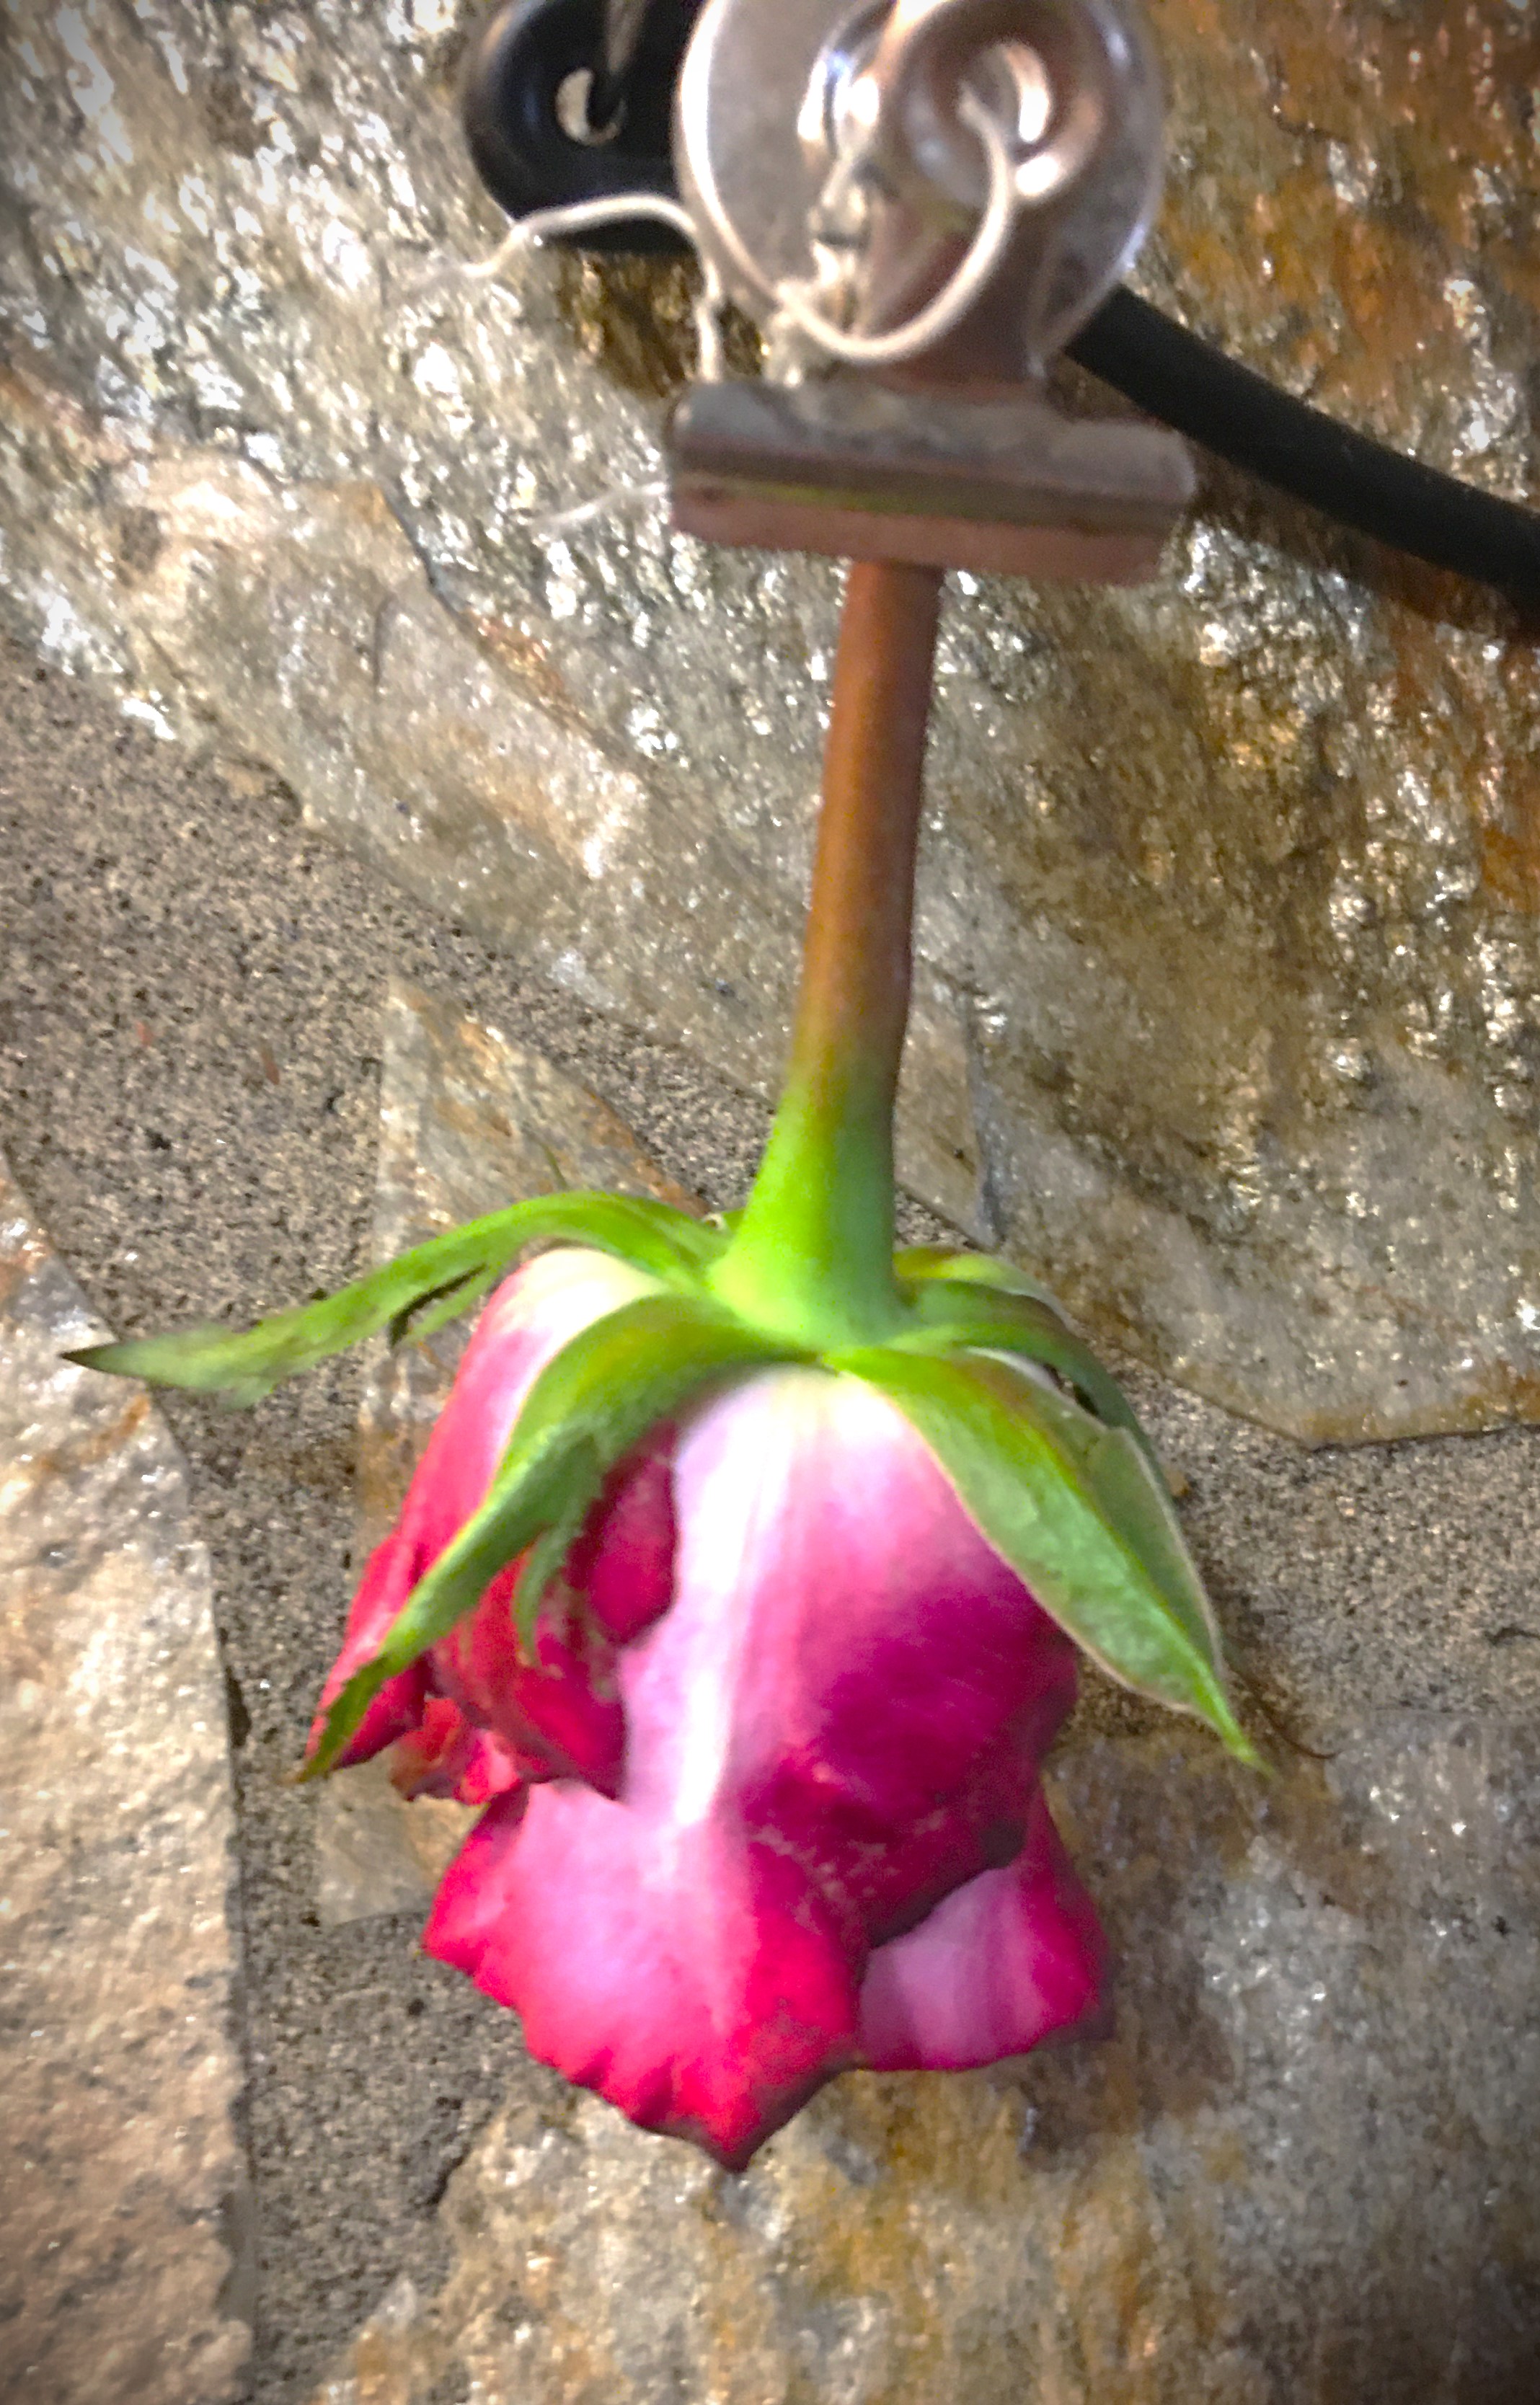
The first is to hang the roses upside down to slowly dry them out. The benefit of this method is that all the vitamins and natural compounds that our bodies benefit from are at a higher concentration when they are dried at a low temperature and slowly.
Ideally, the most benefit would come from using the petals fresh. And while it is possible to use fresh ingredients in soap making (I make orange colored soap using pumpkin puree), there’s no way of breaking down the petals for a smooth and consistent colorant unless you want to use a blender and puree it with the water content of your soap. While it’s not a bad idea, unless you grow roses year round (which I don’t) you have a limited supply due to the window of fresh flowers available. (This is the reason why dried petals are best for me.)
This drying method is slow and takes time. Also any white component will yellow as it dries out. This can affect your over all final color depending on which rose you use. With the red rose, not so much. But the other two, the tinge will be noticible.
So there’s the second method, using a dehydrator.
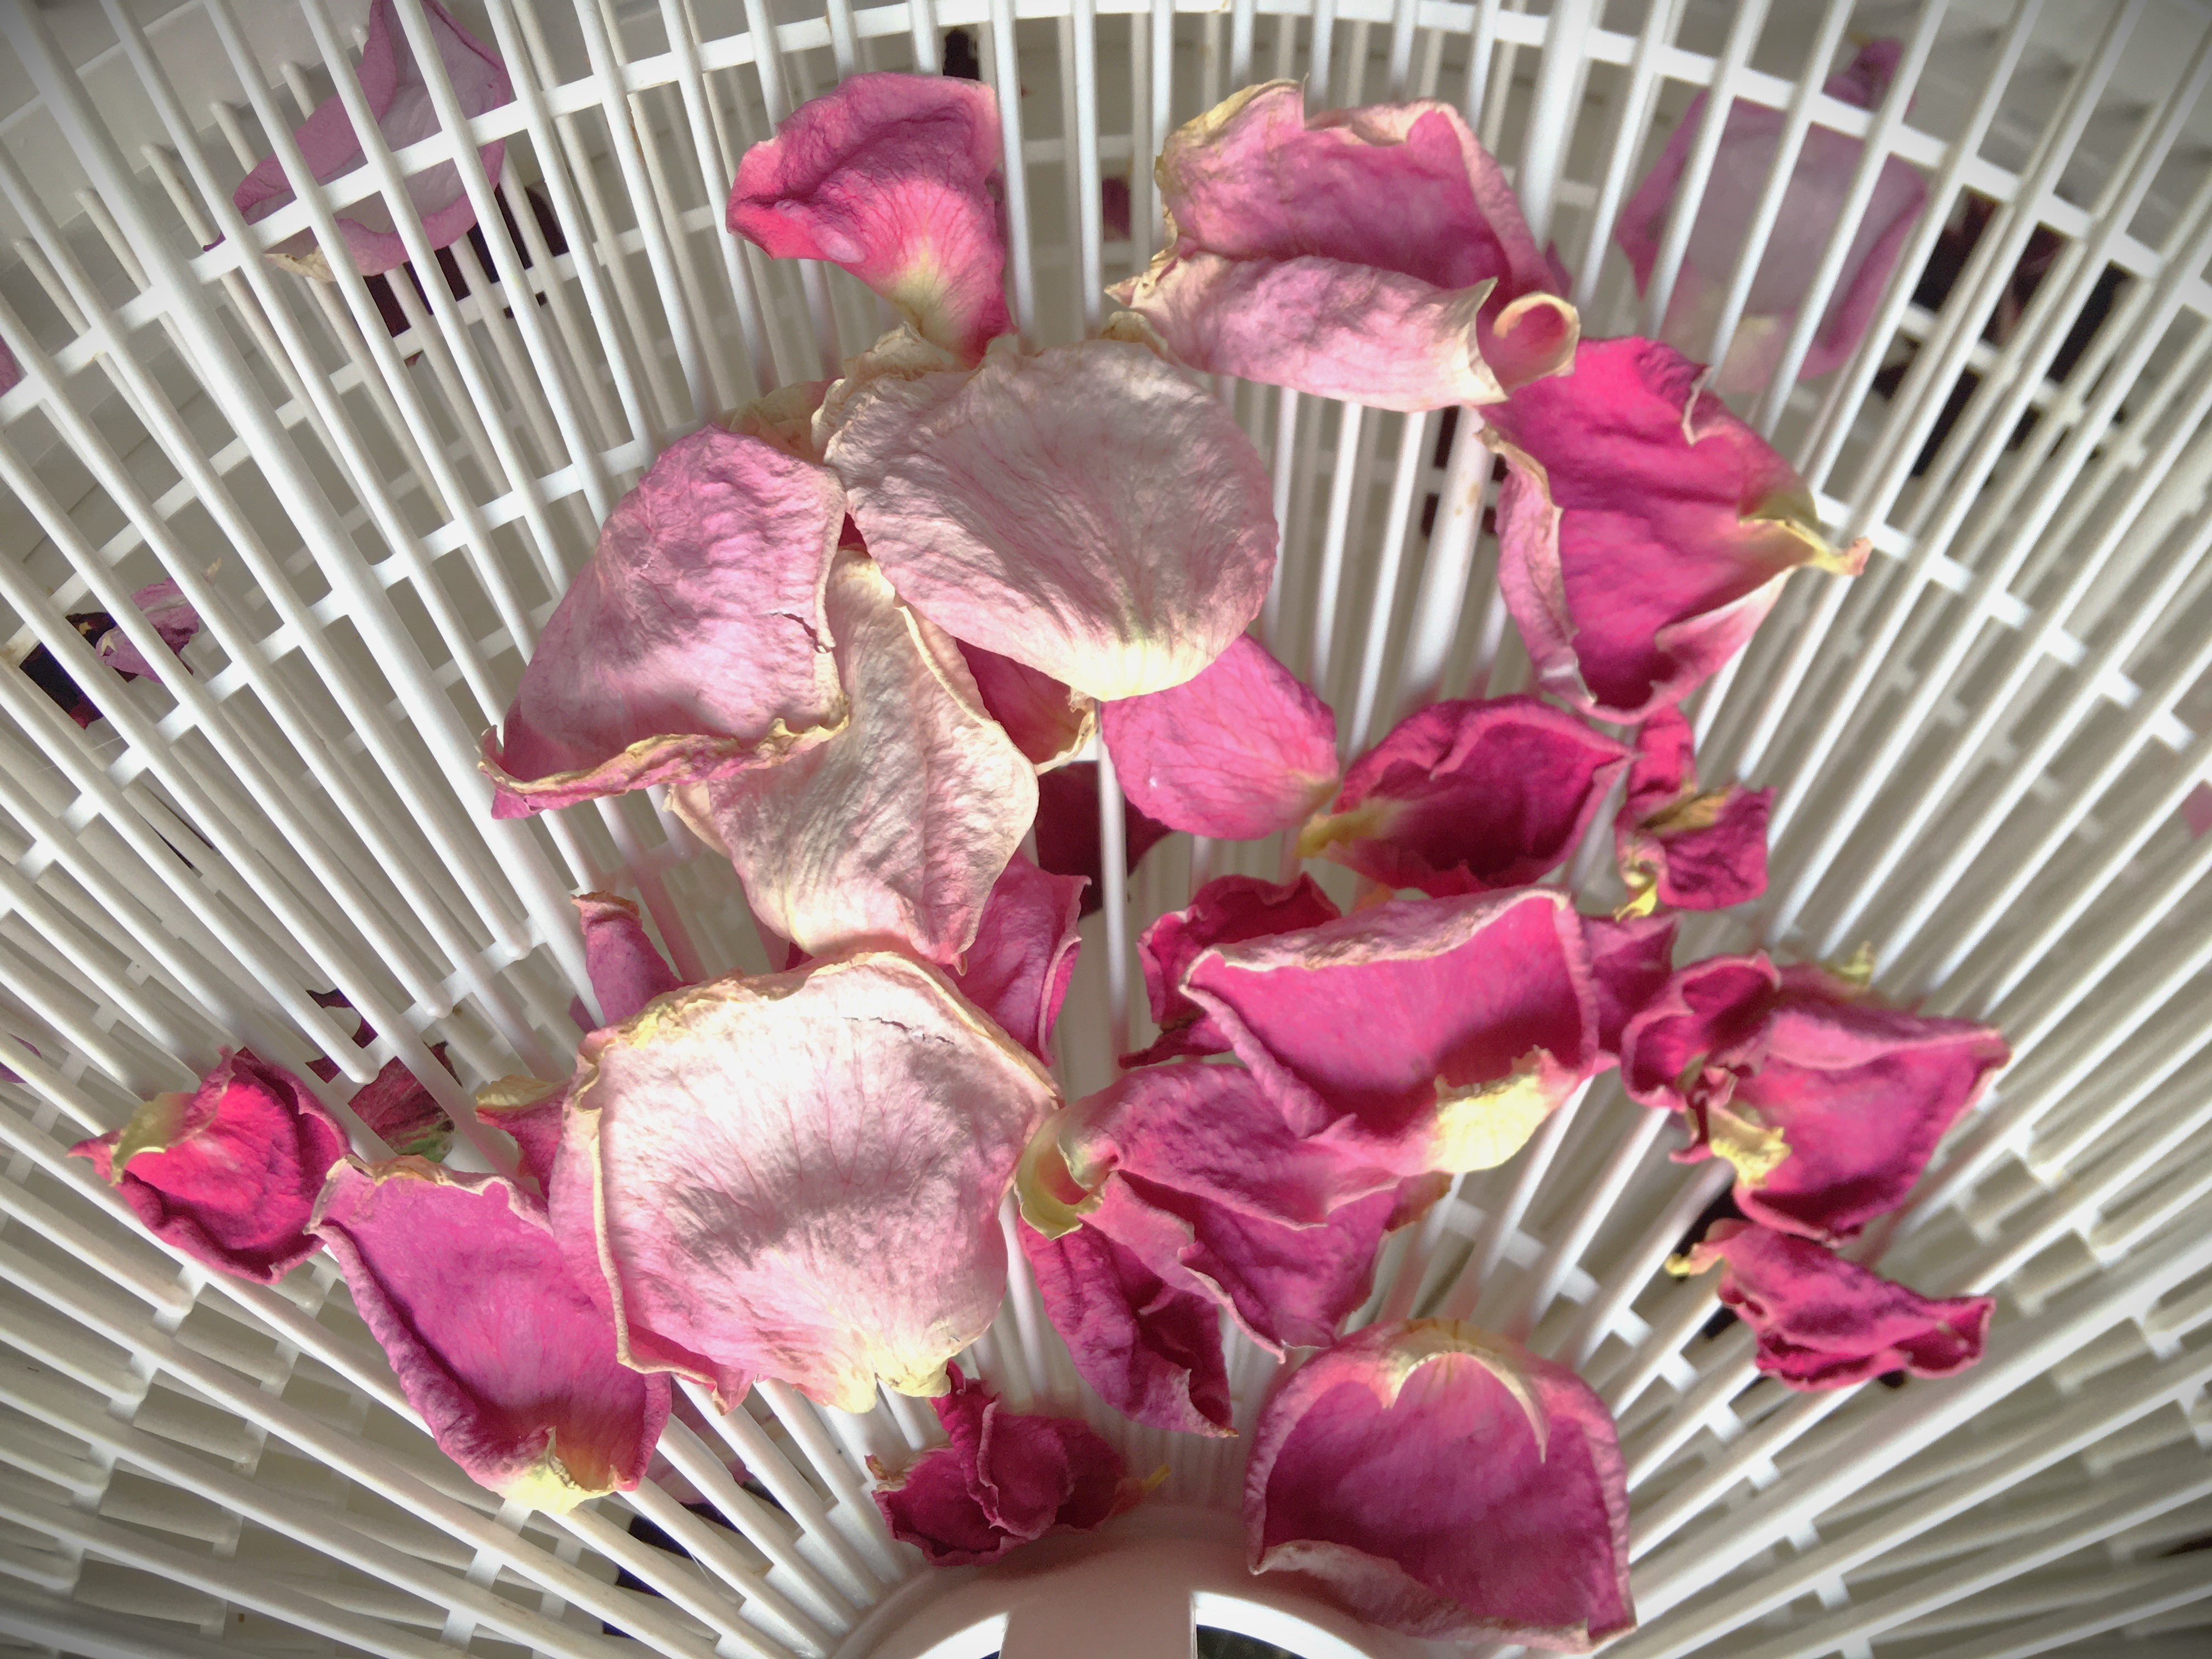
The benefit from using a dehydrator is that petals are finished drying in about 24 hours (at 90°F, the lowest setting on my dehydrator) and their colors are only affected by growing darker.
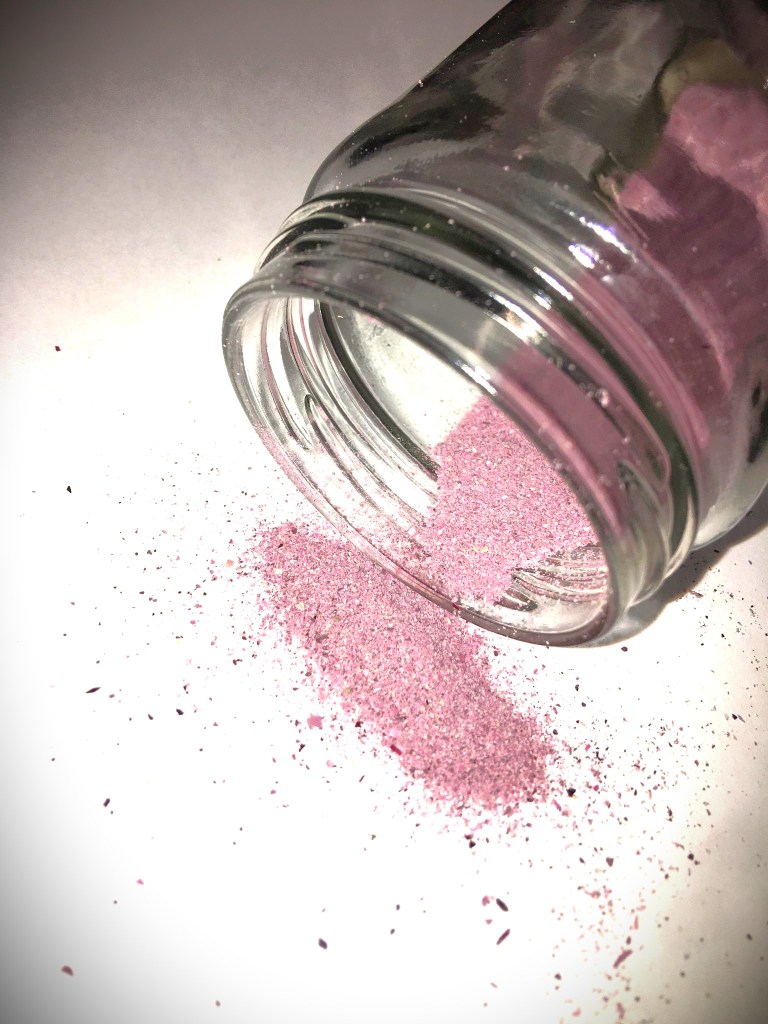
As you can see here, the white component on the pink flowers have not discolored too much. This is great because when I turn these petals to powders, I’ll retain a pink like quality.
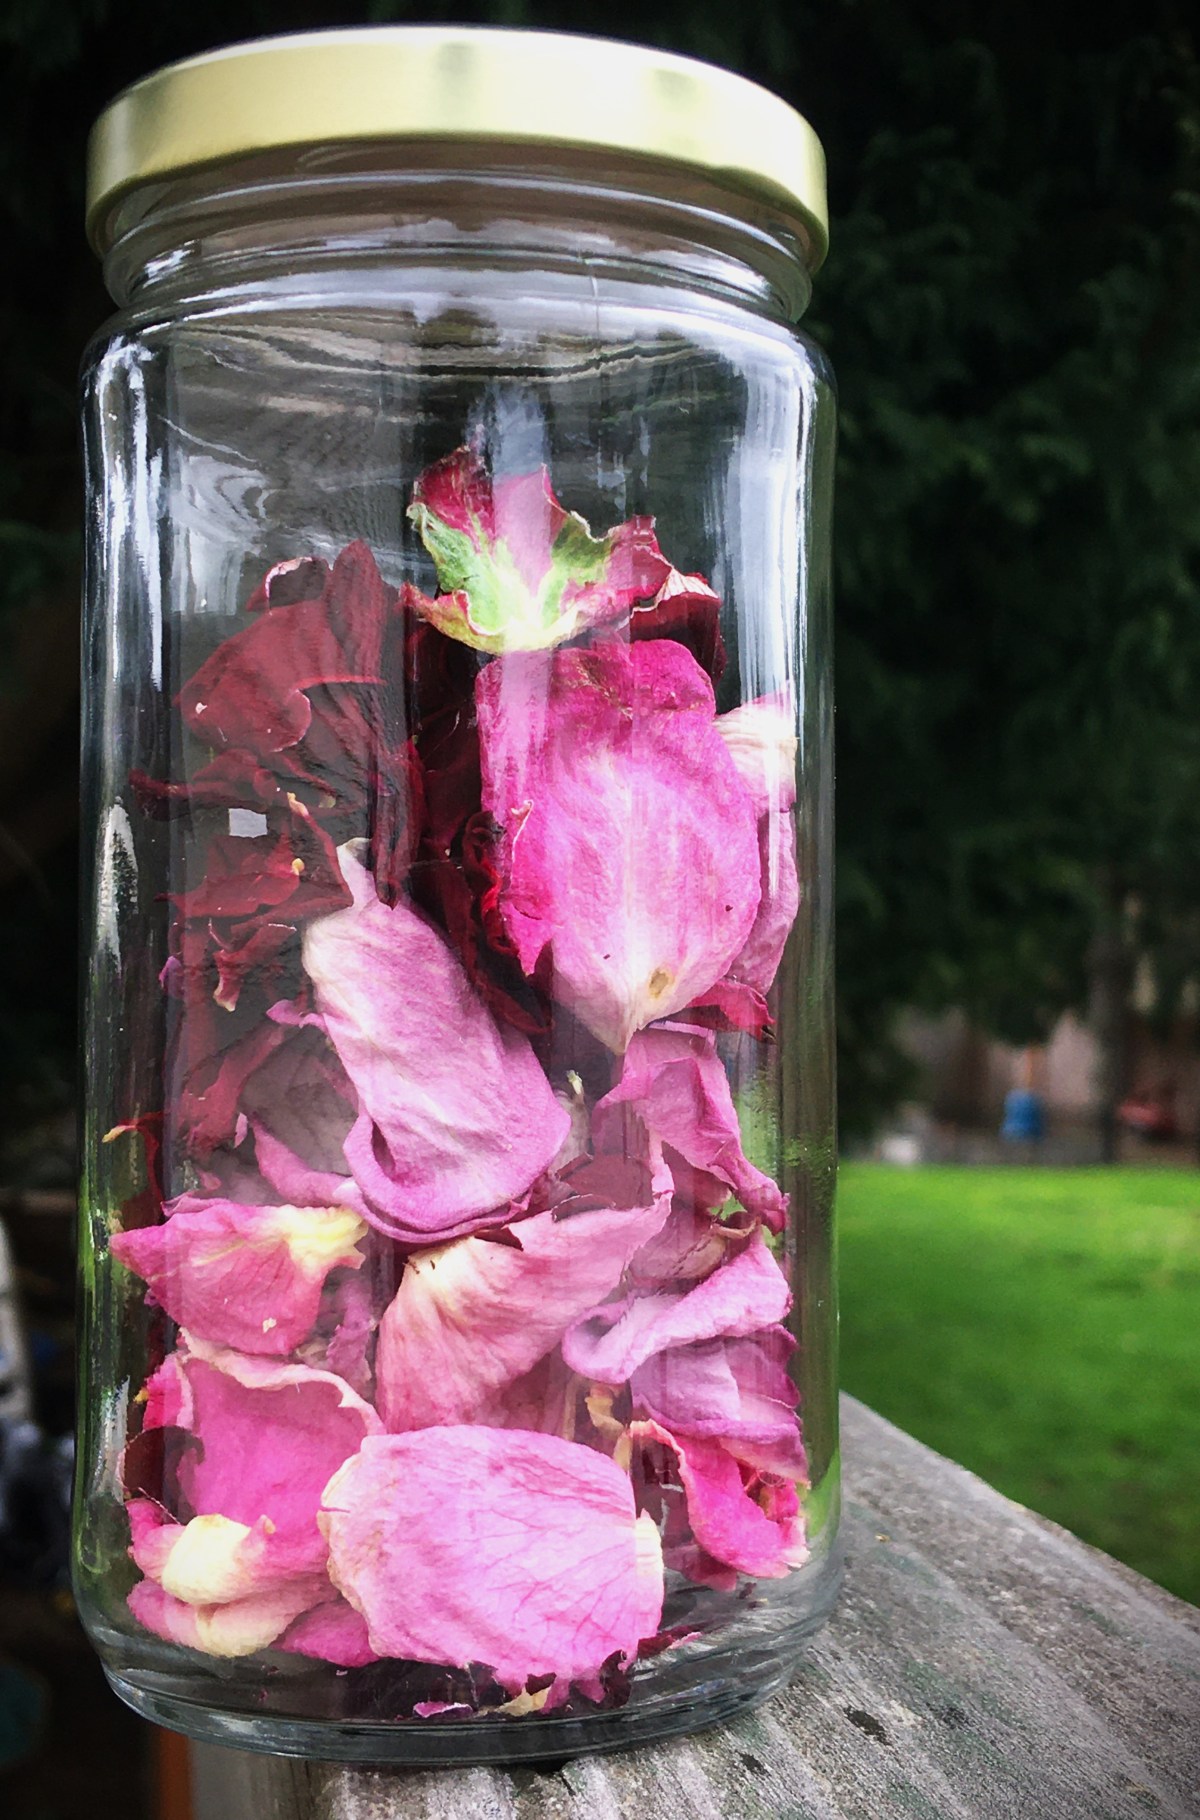
Before I move on to finishing these petals, I want to mention that if you want to make a natural confetti for cake decorations or throwing for a party/wedding celebration, all that you need to do is crush your dried petals by hand and store them in an air tight container (like a lidded glass jar) to prevent them from rehydrating due to humidity in the air.
As you can guess, with the fact that there were lavender inner petals on the second rose (the one with the variegated pink and white outer flowers), this is the reason why I blended in the red petals with the pink ones, to keep the pink and stop the transitiontoward purple (although I’m not opposed to purple soap.)
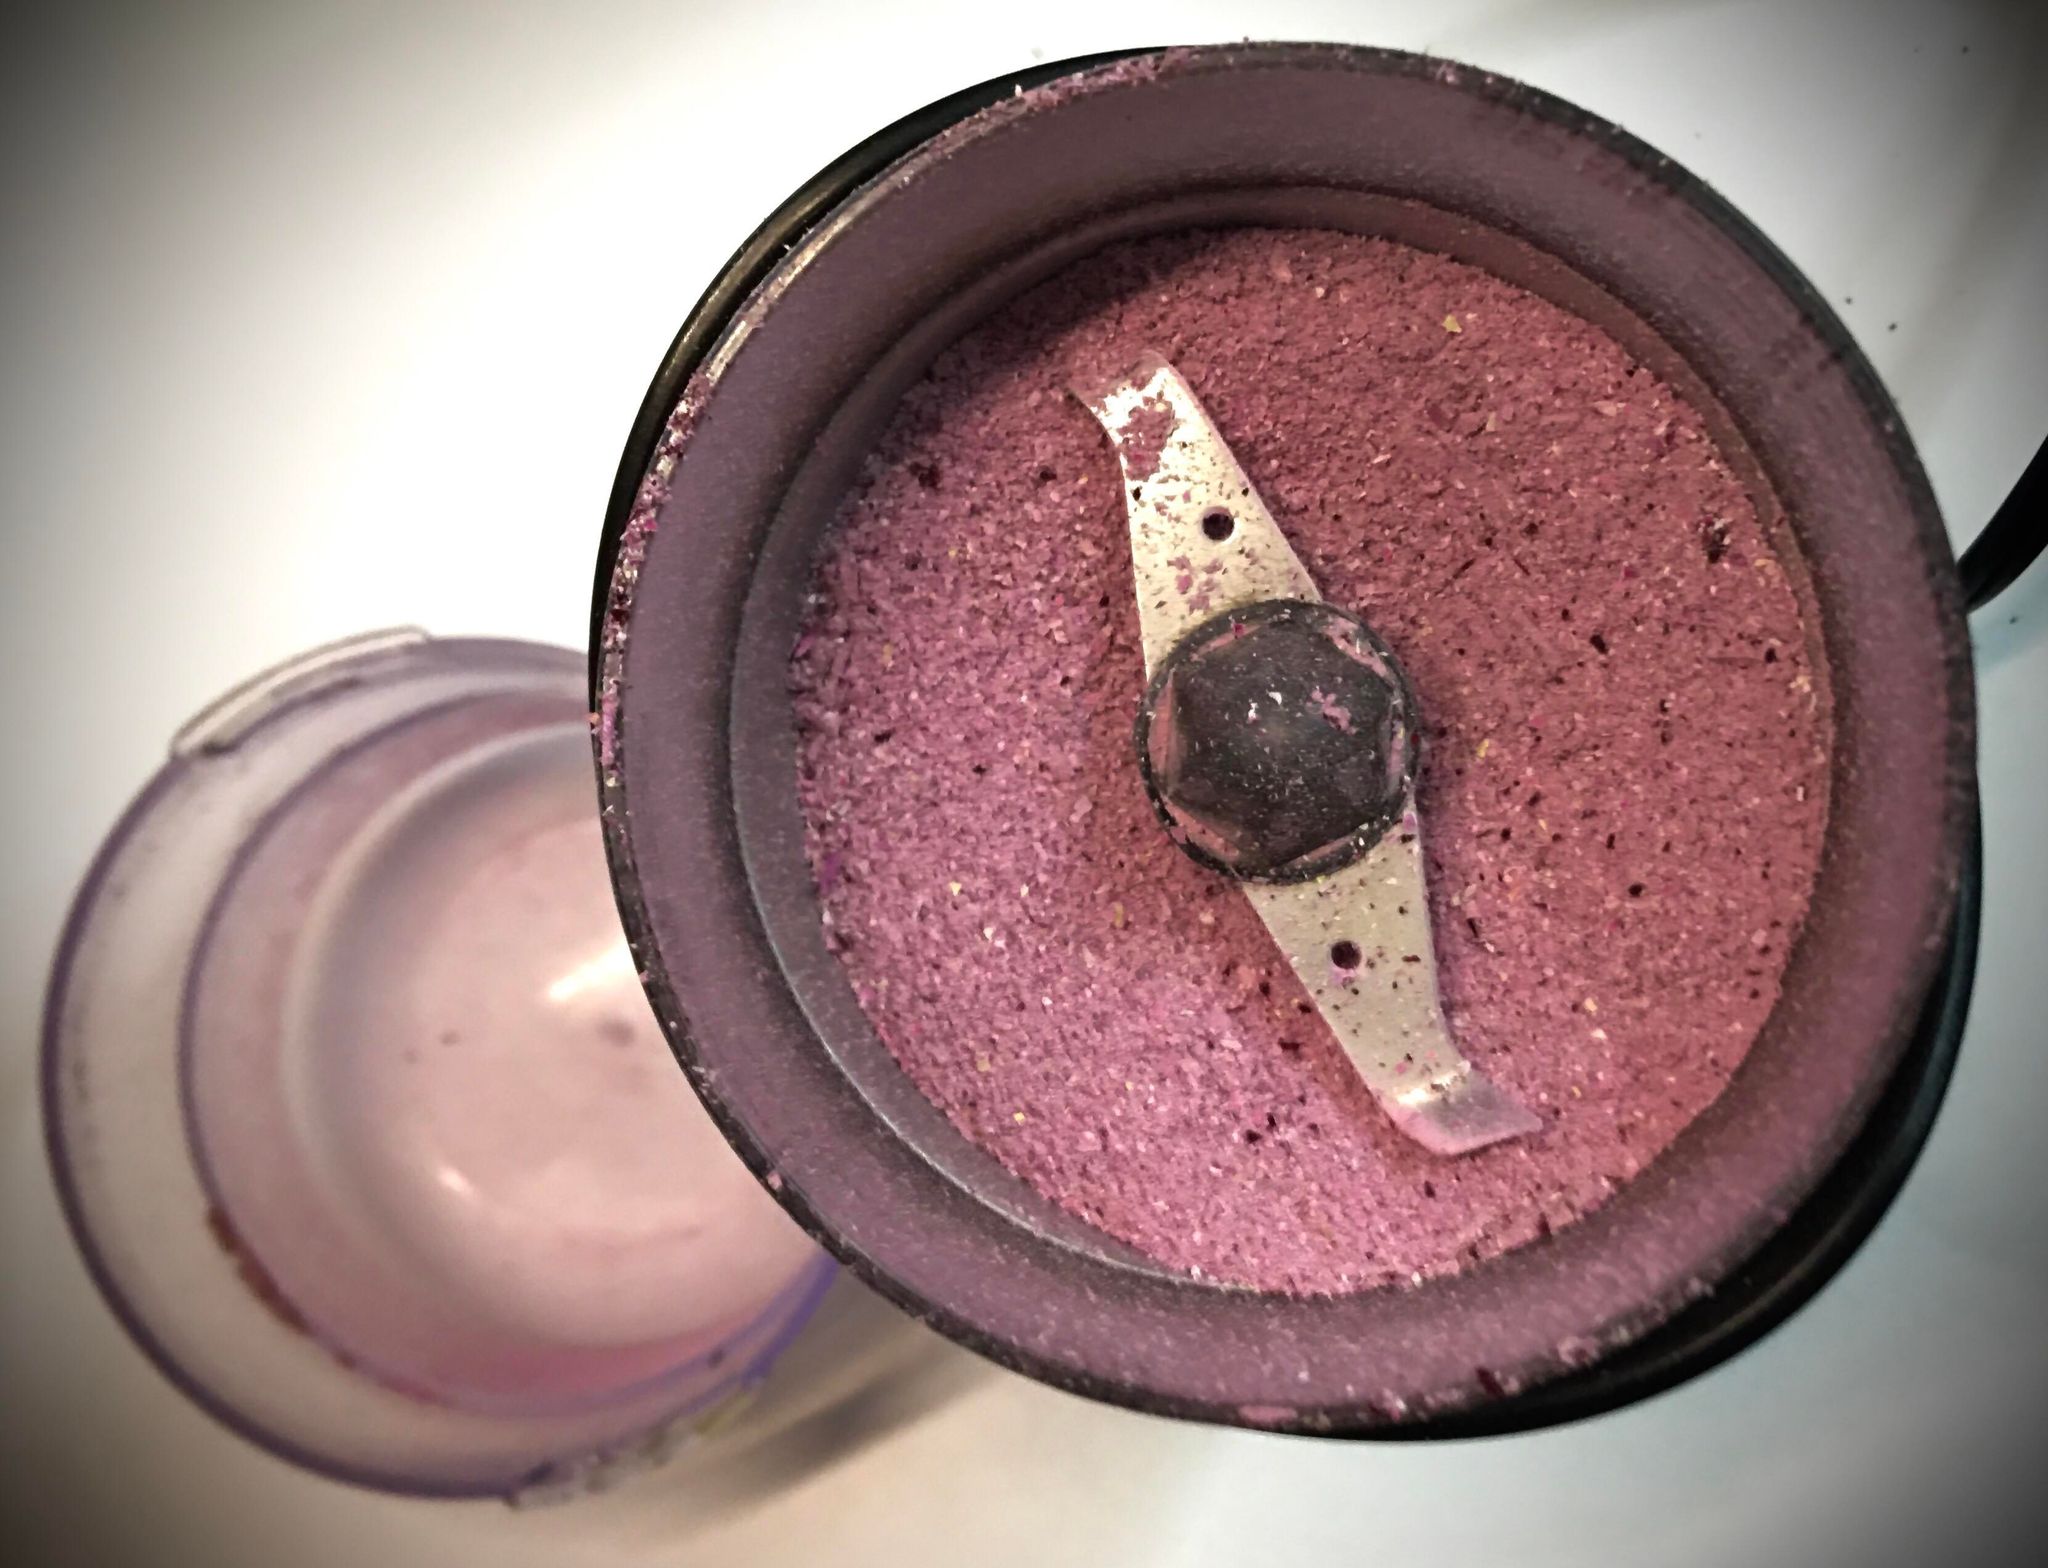
To make Rose Powder, all you need to do is put the crushed petals into a coffee or herb grinder and run it until you get the consistency that you are looking for. Because I’m looking to make a colorant for my soap and don’t want to have flower chunks in it, I took the powder down to a very fine grind.
The fun part about Rose Powder is that you’re not limited to use it as a natural dye or colorant. You could dust this on the icing of a confectionary dessert. If you want to make pink pasta, use this powder as part of your dry ingredients. Mix the powder with a sugar or salt and you have a pink sugar or salt rim to your favorite beverage.
No matter what celebration you have coming up, keep this idea in mind. If you want to dress put your Easter cup you can make a sugar rim using all sorts of different colored edible flowers. Calendula gives you yellow/orange, Violets blue/purple, Hibiscus yellow/orange/pink/blue/purple, there are so many other flowers. If you want to see a quick list of different edible flowers, here’s a jumping of point here.
What unique way do you use flowers?
Processing…
Success! You're on the list.
Whoops! There was an error and we couldn't process your subscription. Please reload the page and try again.
Before I answer this question, I should put it in a framework. In some instances no, it doesn’t matter if you don’t follow directions on a recipe, or do things out of order. And in other instances, YES it absolutely matters if you do things in the right order AND measurements.
What is the determining factor?
The item you are making.
For example, cooking and baking. I will absolutely advocate experimenting. Yes, even with bread (which we’re always told is a science and should never be deviated from). I’ve gone in left field with bread recipes and have had success.
Know the science. If the ingredient is not part of the active component, it’s just there for flavor. Experiment away. Yeast (going back to the example of bread) is a living organism and has preferred temperature and environments for optimized leavening activity. This is the science part that you cannot change no matter what you toss in the bowl. Kill your yeast, there’s nothing you can do (even following the recipe perfectly) that will get that bread to rise.
So by all means, if you want some fancy bread with herbs tossed in to complement a meal you’re making, do it! Use a recipe you’re familiar with and add the herbs you want to add. Go ahead and baste the bread with salted garlic butter right before cooking it. Modify to your heart’s content.
Advertisements
When does it really matter?
Soap making is definitely one of those times where you must follow the recipe.
Mind you, I’ve been less than precise where I’ve added a couple of grams more or less of the fat/oil components of the recipe and the bars have turned out fine. Some fat/oil are known for making a softer bar, so be prepared that if you use more of a softening fat/oil, your bar is going to turn out softer than if you were more precise. But the soap is still soap and still becomes firm when you cure the soap.
Just because I brought this subject up, here are fat/oils that affect the hardness of your soap: Sunflower oil will make a softer bar. Harder bars of soap can be obtained by using Cocoa Butter, Lard, Palm Oil, or Tallow.
Take the time to do a quick search and learn what all the different fat/oils do. Many contribute multiple attributes to your soap. Some attributes you can find are lather, shine/conditioning, oil control for acne, helping dry skin, and so many other factors. It really is fascinating to see what can contribute or irritate your skin’s health!
And when you make soap, the ingredient that it absolutely matters how you use it is Lye (sodium hydroxide for bar, potassium hydroxide for liquid)!
Of course there are the standard safety warnings: use in a well ventilated area; wear long sleeves, gloves, and eye protection; and use equipment that are least reactive to this caustic chemical (use glass or plastic).
But this particular ingredient, it absolutely matters how you use it!
Here’s one way that I messed up!
Disclaimer: At no point in time am I ever encouraging you to go against directions with caustic ingredients. At all times use safety equipment and be aware of what you are doing. Understand what you are working with, what reactions are happening, and never leave a project at a volatile moment in the process. Be present. Be aware. And have safety equipment and procedures in place. And always work in an environment free from distraction.
Even know I don’t know why I thought I could make soap during the day when the kiddos were awake. There’s a reason why other women also tell you to focus on soap making after you put the kids to bed for the night. I knew exactly why and I still chose to give into the illusion I could do this and it would turn out all right.
Nope. Even nap time is not a good time to make soap.
After the frazzle of getting the kiddos to go to sleep, I forgot that the recipe I was using did not call for water (to react with the lye). Instead I was using Aloe Vera liquid (which acts like water in this recipe). I put the Aloe Vera in the bowl that I was melting down my solid fats (coconut oil being one). I caught this accident when I grabbed my Olive Oil to measure out.
I so wanted to kick myself!
Instead of wasting all these ingredients, I decided to move forward and see what happens when you make the mistake and proceed with the batch.
The first thing I learned, you can’t sub out a fat/oil for your “water” ingredient.
This comes back to science–which you cannot change no matter how much you wish you could. Olive Oil did not dissolve the lye. The chemical reaction with the lye never took place until I added the fat/oils into the bowl and started mixing. The Aloe Vera finally came in contact with the lye and the reaction could proceed.
And this is why soap recipes are broken up into two components: lye and fat/oils!
When your lye and water start to react it produces heat. If you have your whole recipe in a bowl when this happens, your fat/oils are instantly heated by the reaction. What follows is the accelerated rate of saponification. And if this happens before your fat/oils are emulsified with the lye solution, then you are faced with all the problems of soap making.
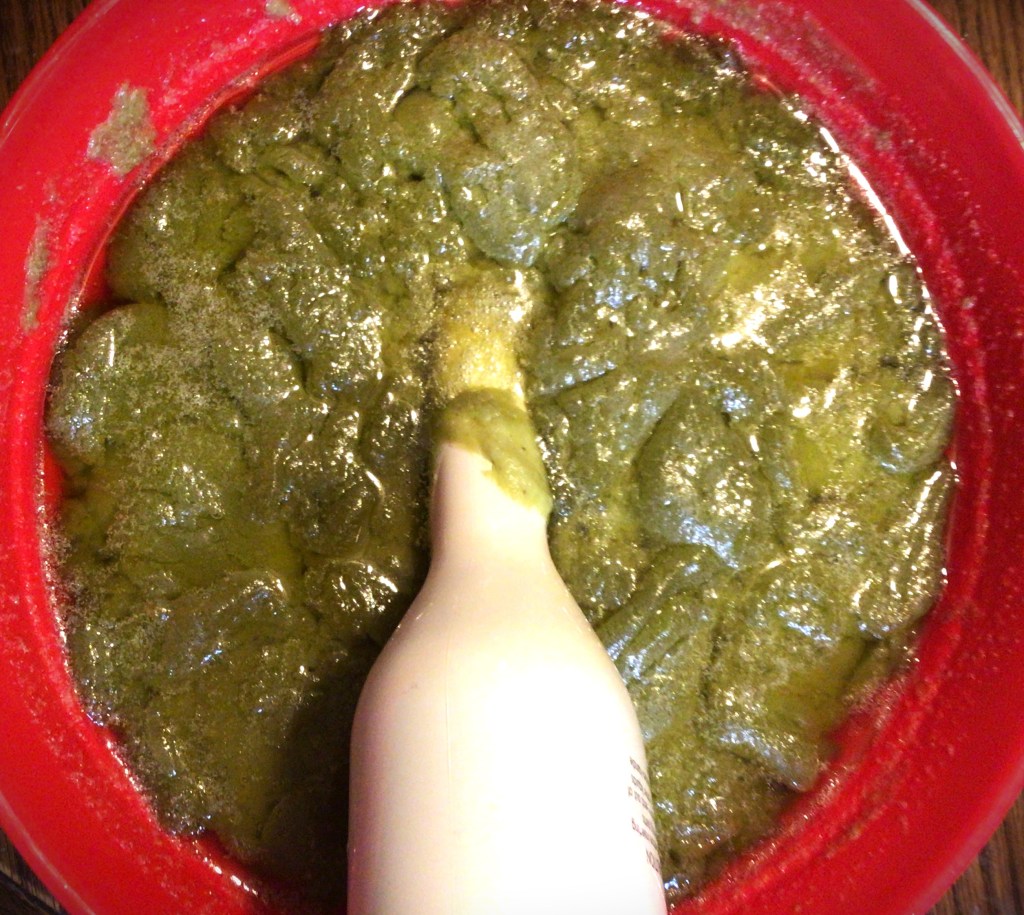
In this particular instance, my soap broke. I had an oil slick on my hands. And I know for a fact that my soap wasn’t set up because it hadn’t had the time needed to emulsify everything together.
And the more that I blended the soil back into the soap version of cottage cheese, the problems didn’t go away. By the time I got the oil slick to disappear, my soap seized up!
At this point there were only two options. One, I could throw everything away and start again. Or Two, I could see if this would work.
Normally, everyone tells you to take the blending of your cold press soap to a light trace. I’m not like everyone else. I find that a light trace gives me a soft soap (even when following a recipe to utter perfection). So my comfort zone is to take my soap to a medium trace. It gives me a firm soap that doesn’t melt in the shower thanks to young hands who sometimes leave the bar in the water. And it still allows me to make bars without air bubbles. (I’ll come back to that trick in just a moment.)
I kept blending that seized soap past my usual medium trace and prayed to see the final signs of emulsification. This one is hard to describe in words, because this is just where experience comes into practice–you know when you’ve emulsified.
At this point the soap was so thick from seizing and still being worked that I only had a few minutes before complete loss. And I didn’t even have time to stop and put in my scent. So I stopped and immediately transferred into my individual soap molds and my loaf mold.
Tip for Removing Air Bubbles: This one is taken directly from the baking world of cake making. Have you ever seen someone drop a cake or cupcake pan down on the counter several times? They were removing the air bubbles to keep an even crumb. I use this same trick for soap making, especially with the batches of soap with a heavier trace.
I dropped my molds like there was no tomorrow, to remove the air bubbles. I knew they were there. And because of how I could or could not drop the molds, both types had different outcomes.
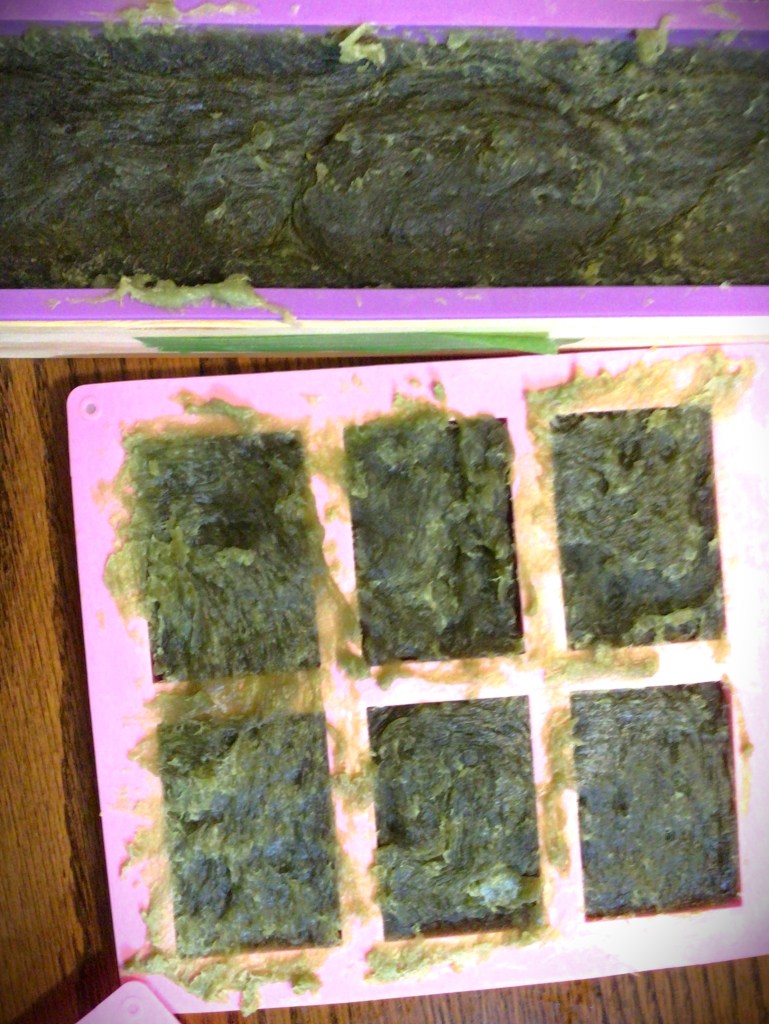
The individual molds were not rigid and could only use a light drop. The silicone wouldn’t hold up to much gravitational help. As a result, you can see here how these soaps turned out to have a cratered texture.
On the other hand, the loaf mold has that beautiful wood frame (thank goodness for jointed corners!) which definitely could withstand a little help from gravity. I dropped that loaf mold several times until the soap started lying flat in the mold and no more air bubbles came to the surface. And as you can see here, no one would ever know that I had trouble with this batch of soap. (These ones again will be for family use because I didn’t include the scent.)
Advertisements
What if recovery is not possible?
This time I was able to pull soap out of that massive mistake. But I already had a backup plan in my back pocket in case I unmolded the soap and there was total devastation.
Melt down the soap and mix it with a correctly formed soap mixture. This is what soap makers do all the time when they forget to mix in a scent or even a couple of other errors. Especially when you do a cold process of soap making you have a little more time to decide if you want to fix this mistake by melting down and trying again.
Cube or shave the soap down into decorative pieces and add it into a soap batch that worked out better. If you’ve ever seen soap that has another color “floating” in the bar of soap. This is the technique they use. The day that you unmold these soaps and cut them down, they are solid enough to add to a fresh batch of soap. You will just cure the bars on the time scale of this fresher batch of soap. (Tip: make sure that this fresh batch of soap is stopped at a light trace. This will help get around all the corner/curves and get into any craters without the need of dropping the mold to remove air bubbles–which would throw off the suspended look.)
Use it for other DIY projects. Make sure that you still cure this soap because you don’t want the lye to cause problems with your other projects. But you can use this soap to grease that sticky glass slider track or any other trick that you’ve seen elsewhere.
Just because this mistake had a “happy” ending…
I want to give this disclaimer one more time.
Disclaimer: At no point in time am I ever encouraging you to go against directions with caustic ingredients. At all times use safety equipment and be aware of what you are doing. Understand what you are working with, what reactions are happening, and never leave a project at a volatile moment in the process. Be present. Be aware. And have safety equipment and procedures in place. And always work in an environment free from distraction.
Sometimes, you just need to know the reason why you’re told “this is the way that you do this”. As I said earlier, in instances where you accidently gravitate away from a recipe, you’re not going to start a fire or blow your house up by adding herbs or seasoning in a recipe that you’re told to stick to. But when you’re working with chemicals, the process that you’re told to follow is there to prevent serious issues from happening. There’s no doubt a long list of possible things that could happen by mixing soap out of order, most of them causing harm to your body.
Advertisements
How can you prevent mistakes from happening?
Make sure you’re in the right headspace for your project. (You’re not distracted or sleep deprived as examples.)
If you’re rushed, stop and find a different time to do this project. (You are in control.)
Rewrite your ingredients in the order that you will use them.
Rewrite you steps in precise order (short and easy to read).
Before you start your project, organize your materials in groupings of what you’re adding together, in the order that you will add them.
Pre-measure out everything into separate containers.
Even if you’re used the recipe before, reread through the ingredients and steps and make sure you remember what you’re doing.
Even when you do prepare, mistakes are still going to happen. Know in advance what you’re going to do. Have plan B, C, and D already in your head. This allows for quick thinking and recovery. One of these plans needs to include what you do when you need to dispose of a failed project.
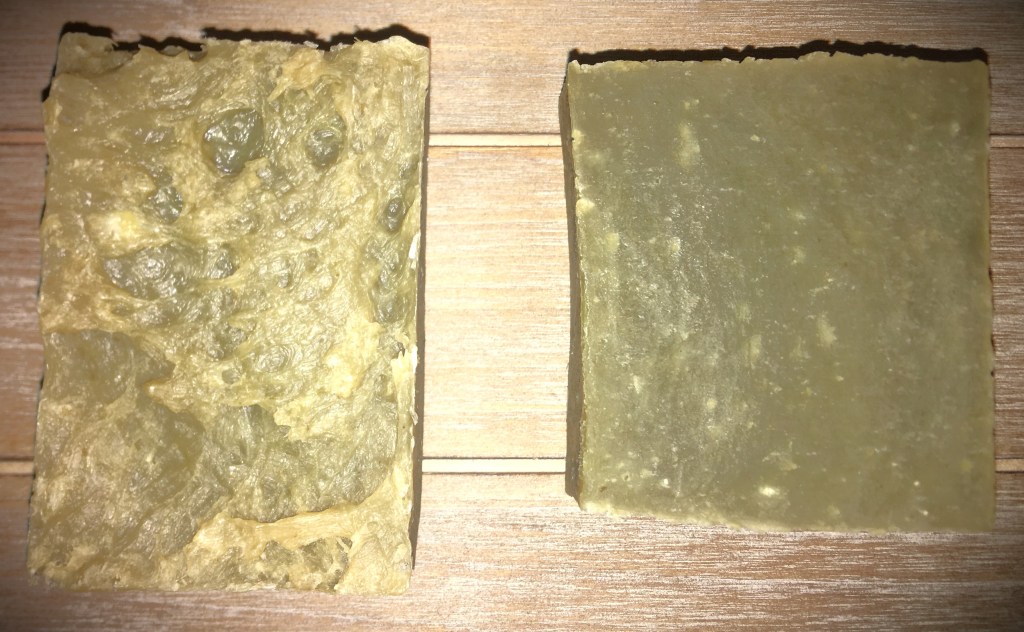
Here’s the final cut
As I walk back through all that happened, I’m actually still surprised by how things worked out in the end, having dealt with broken soap and fixing it until it seized. When you look at these pictures you will see that the bar on the left (the soap I put in individual molds) definitely show the war that took place. However the bar on the right (cut from the loaf mold) looks like the only issue was minor cosmetic issues.
Most of the issues on the loaf mold soap are really seen from the side view. And the worst of the individual mold is seen in the face picture.
As a point of reference, if you ever hear a soap maker describe a problem as looking like brain matter, what they are describing is the face shot of the individual mold. It doesn’t literally look like a brain, but it has webbing and crater like surface.
Hopefully you never have to go through any of this while making soap of your own. But here’s at least some conversational information that you may or may not hear from anyone that you’re learning soap making from or in any of the countless videos on YouTube.
Above all, at least now you have some information and images to go with everything else that you are learning elsewhere.
Processing…
Success! You're on the list.
Whoops! There was an error and we couldn't process your subscription. Please reload the page and try again.
How was your Christmas? Were you able to spend time with those you love?
In my house the whole month of December is difficult. But that’s the life of having a handful of young children in the house. I use to think that starting to decorate at the beginning of December and putting out presents as soon as they were wrapped was adding to the incessant build up of excitement and driving mom bonkers.
Nope.
We did things differently and things didn’t improve. My gift making still happened at night. Or should I say lasting into the wee hours of the morning. Lets just say that coffee is my friend.
But….
This gift, especially the soap, was probably my favorite gift to give.
I didn’t know how many people were having skin issues this year. And most people don’t talk about what they quietly suffer with. Part of it is the “I’ve tried everything” and no product on the market works.
The truth is that the local grocery stores have aisles dedicated to soap. And when you’re in that aisle you grab what you’ve purchased in the past (which may have been the brand that you grew up using) or it’s a sale based off of the label and its marketing claims. And we think that these area our only options.
Advertisements
You have another option
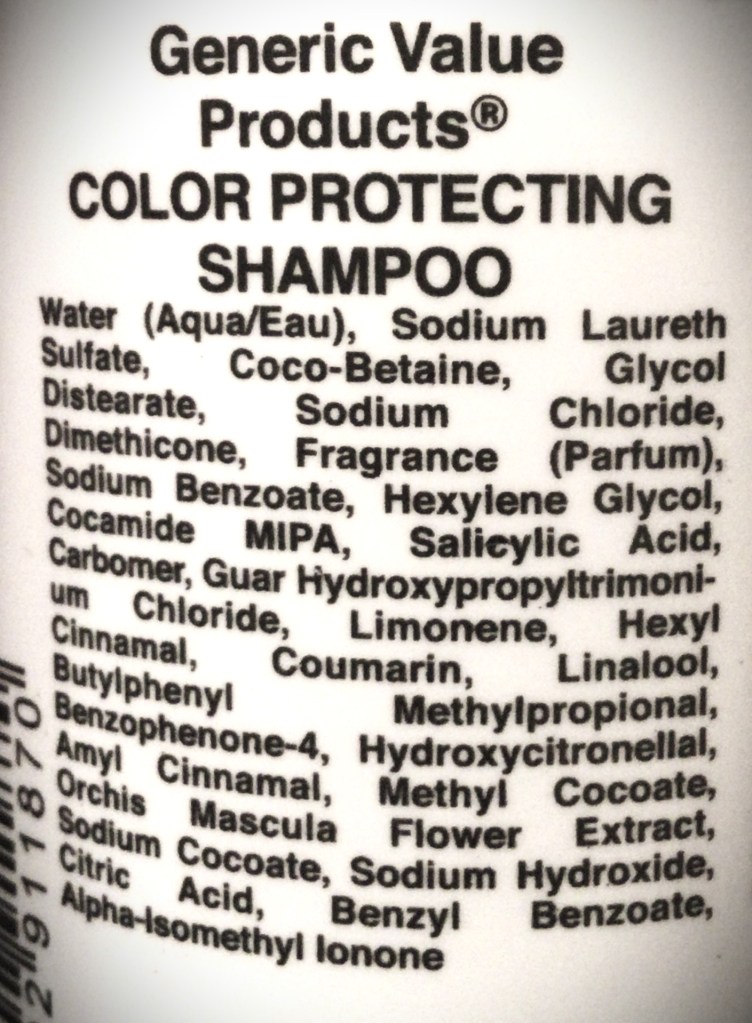
This is the video (three ingredients) that I watched that set me on the path of making my own soap, almost 3 years ago. It was an empowering feeling for me to make my first soap, Goat Milk Soap (4 ingredients), and stop buying the store bought soaps which have an ingredient list that looks something like this:
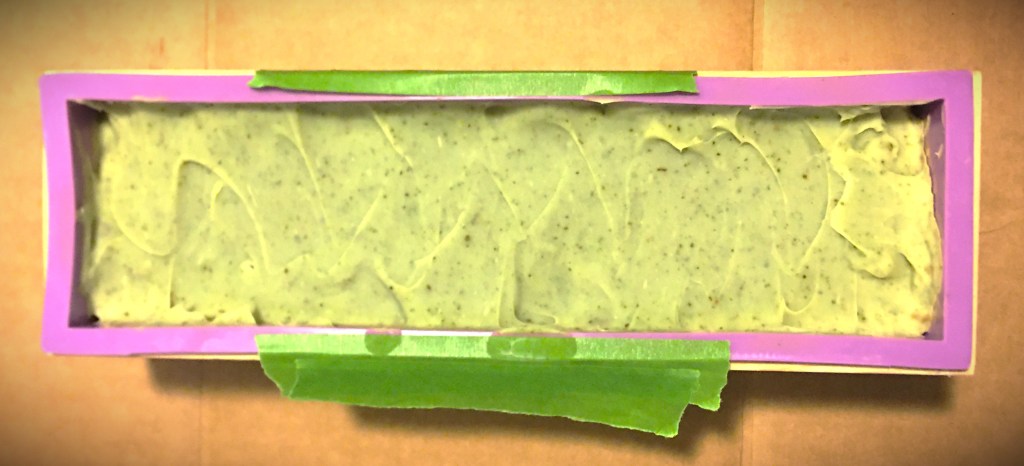
The comfrey soap in its mold.
Even though I took many chemistry courses in college, I can only tell you half of what is on product labels like this. If my children can’t sound out what the words on these kinds of labels have, that means that those ingredients are stuff made in the product labels of these soap corporations. Companies do this (take organic or natural items and change one chemical compound in the chain) they have made something they can patent and prevent other people from recreating (by pain of legal actions).
Soaps are made out of three items and three items alone: water, lye, and fats.
Yes, even those soaps that people claim are made without lye are actually made with lye. There’s a product on the market, melt-able soap base, that people claim is lye free but that is not true. This soap base is where the emulsification of the lye and fats has already happened for you. The lye and fats have already gone through the process of combining and so the lye has become safe to touch and no longer corrosive like in its original form (whether you use a crystalline lye or wood ash).
Advertisements
Here’s an example of a soap base. The first 5 ingredients are fats, followed by water, and then lye (sodium hydroxide). The end of the list is all the little extras that they added in to make their soap base unique from the others on the market.
In essence, this is an already made soap that a person at home can reshape and have the option of adding other things into for further personalization.
If you’re nervous about using lye, a soap base is going to be a good option for you. It’s not the best thing for your skin but definitely better than all the major brands on the store shelves.
Note: When making soap from scratch, with lye, you will need to cure your soap. This means that after you remove it from its mold (after it’s solidified for 24-48 hours), it will need to cure. This means that the soap sits for 4-6 weeks to dry out. While the soap dries, this allows the chemical transformation through emulsifying the lye and fats, to finish its work. When completed, they lye is no longer corrosive. The lye and fats molecular structures are completely joined and stable
Advertisements
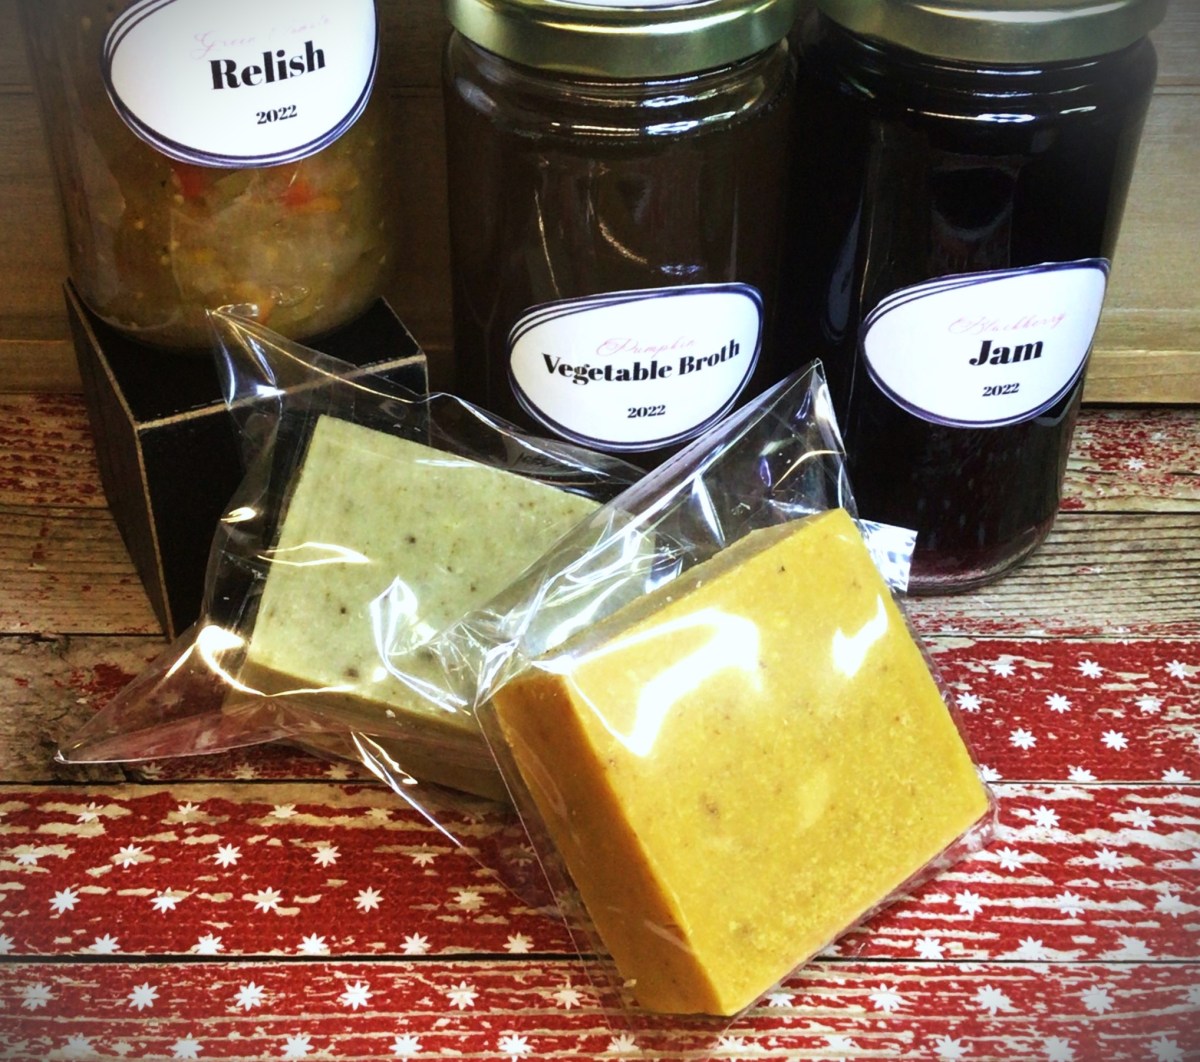
Ingredient list from the soaps I made for Christmas
The two soaps that I made this year were Pumpkin Oatmeal and Comfrey Tea Tree.
Both soaps have only 9 ingredients that anyone can understand, colors of the soap come from the natural ingredients, and I can tell you the purpose of each of these ingredients and why they are good for your skin. You don’t need the lab chemicals to create lather or bar hardness. You don’t need the lab fragrances to give you a pleasant scent to wash with.
Note: “Fragrance” listed on an ingredient list of a mass produced soap, approved by USA FDA regulations, is all that has to be noted on a label even though it can include up to 200 different “fragrances” to make the scent of your soap. This is allowed because it’s modified in the lab and falls under proprietary patent laws.
Some of the comfrey soap after I cut it and before I set it aside to cure.
I know that not everyone approves of lard use in soap, usually for religious beliefs, but this fat can be switched out for tallow (beef, goat, or deer) which can align with religious beliefs. Or these animal fats can be omitted completely for the wide world of plant oils.
The variety of fats, found naturally in the world, each have different properties for your skin health and how it functions in a bar of soap. For example, lard is a single ingredient that adds hardness to the soap bar, creates lather, and adds to the shine and conditioning/softening of skin and hair.
One book that I highly recommend for understanding how fats work in soap making and benefits to your skin and hair is Simple & Natural Soapmaking by Jan Berry
Advertisements
Origin of the fats is also going to play a part in how it reacts with your skin.
Shea Butter is not all the same. In fact, this week I just learned that not only is there a difference in quality of Shea that comes from heat vs. cold pressed processed Shea, but also the region. If I remember the documentary correctly, Uganda Shea butter is absorbed quicker into the skin than the Shea produced from other regions. And I never would have thought it, but the beauty industry is already capitalizing on the difference of absorption rates of the Shea butter produced from eastern and western Africa. It’s not all the same.
So if you by chance tried Shea butter beauty products and felt like the fat just sat on the top of your skin instead of being absorbed as you were promised, the reason isn’t because Shea failed you. It’s because you used a product that had a lesser quality of Shea.
In this instance, if you can afford to purchase a higher quality of Shea butter, all evidence shows that this purchase for a higher quality is most definitely well worth it. I’m all for finding the deal, but moving forward I’m now going to purchase a better quality of Shea.
With animal fats, whether the animal grazed on foods naturally available to the animal vs. grain fed and various injections will all be passed on to you through your skin.
Why what you put on your skin matters
It took me going through my second quarter of Anatomy & Physiology to learn that your skin is your largest organ in your body. Your skin keeps all your insides in, but it also is a filter from the outside world trying to come inside you.
I really don’t know why I was so surprised by all this because growing up we all have the conversations about needing lotion for our skin. We already know that we can correct some conditions by adding lotion or medication, depending on what’s wrong with our skin. But we never think about what we are adding to our skin daily that’s potentially causing the problems to begin with.
An example of a soap label. Notice the difference in readability and ingredients compared to a bar of soap I made (my shampoo bar, currently curing, is the same ingredients that the bar of soaps listed above).
We’re told to wash our hands regularly, especially during cold and flu season (not to mention the marketing for this habit over the last three years). With this increase reminder to wash your hands, how long is that ingredient list? How many of those ingredients do you know how to say, let alone identify what they do in the soap? Is it your hand soap that is adding to your cracked hands during the winter?
For example, my hands crack and bleed every winter. There has never been a lotion that I could find to ease the pain, let alone prevent the cracking in the first place. Christmas was when my Comfrey soap finished curing and I could use this recipe for the first time. Just by the first use alone, the redness of my irritated skin cleared up. The cracks decreased in size by half and by the next day they were all healed. I still have dry knuckles because I stopped using the Comfrey soap (leaving it for my son who has more sensitive skin in need of good soap). The Pumpkin soap isn’t as healing, but it’s still preventing the cracks. The Comfrey soap has aloe vera in it (which the pumpkin does not), so I might have to change that recipe to add some aloe in.
But I think you can start to see just by how your ingredients work, the natural function of things found in your garden, you can easily make a soap for yourself, family or loved ones that meet your skin type needs and not have to spend hundreds or thousands of dollars on store products that just don’t work.
Advertisements
There’s just so much to talk about with soap making. I will have to come back to this subject in upcoming posts. But I wanted to start the thought in your mind that you really can make your own soap. You don’t have to just survive and live with the condition(s) that you currently have. The first step is to start by cutting that ingredient list in half. The fewer the ingredients and shorter the syllables of the words mean that you understand what you are putting on the largest organ of your body. You can pinpoint what irritates your skin and you can pivot by switching out a fat or other ingredient that offers a vitamin or mineral that your skin actually needs.
Leave me a comment below if you’re looking for a solution to an issue.
In 2023 I’m looking forward to talking more about how herbs and garden ingredients can benefit your body. And all you have to do is add them as a seasoning to the foods you already cook, which benefits your body from the inside. And you can already start now with making soap to help your body from the outside. Skip the lab ingredients and start using luxurious soap that uses all natural ingredients which can eliminate all the extras that you need to “fix” what other products are doing to you.
For example, one lifestyle change for my family is that we are switching to homemade shampoo bars. My goal is to find the recipe that makes a shampoo bar where I don’t have to use 3 different conditions to combat the dryness that I’m convinced is caused by the long ingredient list on my shampoo bottles.
Happy New Year!!!
Products that were either mentioned in the post or items that you may find valuable in making your own soap.
This post contains affiliate links that give us commissions on products purchased at no additional cost to you. These items listed here are from Amazon but may be purchased at local markets. These products were paid for by us and are not the only products available.
After watching videos and reading different books, this is my personal favorite resource for recipes, ingredient information, and general soap making information.
I prefer cutting my own bars of soap and this is the set that I wished I would have bought the first time. The cutting block takes the guesswork out of eyeballing a uniform and straight cut.
This is great for just getting started and you don’t want to think about portioning out bar sizes. The disadvantage is that the silicone is very flimsy under the weight of the soap. So make sure that you have cardboard or another hard surface to tansfer the molds to a different location while the soap solidifies.
My granny made lye soap, used it all her life, never had skin problems, i make basic lye soap myself, 3 lbs of greese, bacon preferably, but the drainings off cooked meat, 2 gallons of water, and one can lye, , i greate up some for clothes soap, i use it in place of aal types of soap, melt it and mix with water for dish soap, works better than cascade in the dish washer, the only problem is aquiring the lye, it extreamly hard to get in the stores because it is one of the main ingreidants in the manufacture of meth, and everytime i make soap i have to call the police and noify them, so i dont get charged with making meth, it smells the same, making meth or making soap,
There shouldn’t be any fear in purchasing lye. I’ve been purchasing it for a few years now and have never had to report to a registery. There are certain over the counter medications that I’m aware of that there is a registry because of of it being associated with drug manufacturing. And in the instance of that product registry, there is a notation of who is buying what and at what quantity. For the manufacturing of drugs there is a specific amount that law enforcement starts paying attention to. For the average person, making soap at home, they are not going to come close to hitting that limit. I mention all this to prevent unnecessary fear from being spread.
Thank you for sharing how you make your soap! And also sharing how you use it to also to clean clothes and dishes.


Leave a comment