Meaningful Gifts

Happy Mother’s Day to all the moms who are celebrating today with their children, the moms who are missing their children, the moms who have lost their babies far too early, those who shared an all too brief moment with their babies, the mothers who are in the middle of a season of making the dream of motherhood a reality, and those who love on the children from other mothers who lean on you to be the loving assurance in this season of their life. No matter what motherhood looks like to you, Happy Mother’s Day!

Photo by Secret Garden on Pexels.com

Depending on who you talk to, some people feel that holidays are too commercialized. Others find it difficult to find the perfect gift. And others find it difficult to gift a loved one while feeling the financial pressures of this season of world history. No matter where you personally find yourself on this spectrum, I want to help you find inspiration on how you can find a meaningful gift for someone. Whether it’s a belated mother’s day present, a birthday, anniversary, father’s day, grandparents’ day, teacher appreciation, graduation, or any other occasion, know that you can gift in a meaningful way.

I’m going to use the example of the mother’s day gift that I gave one of the mothers in my life. While this may not apply to the person in your life, the same principle can be applied in finding what you can gift that special person in your life.

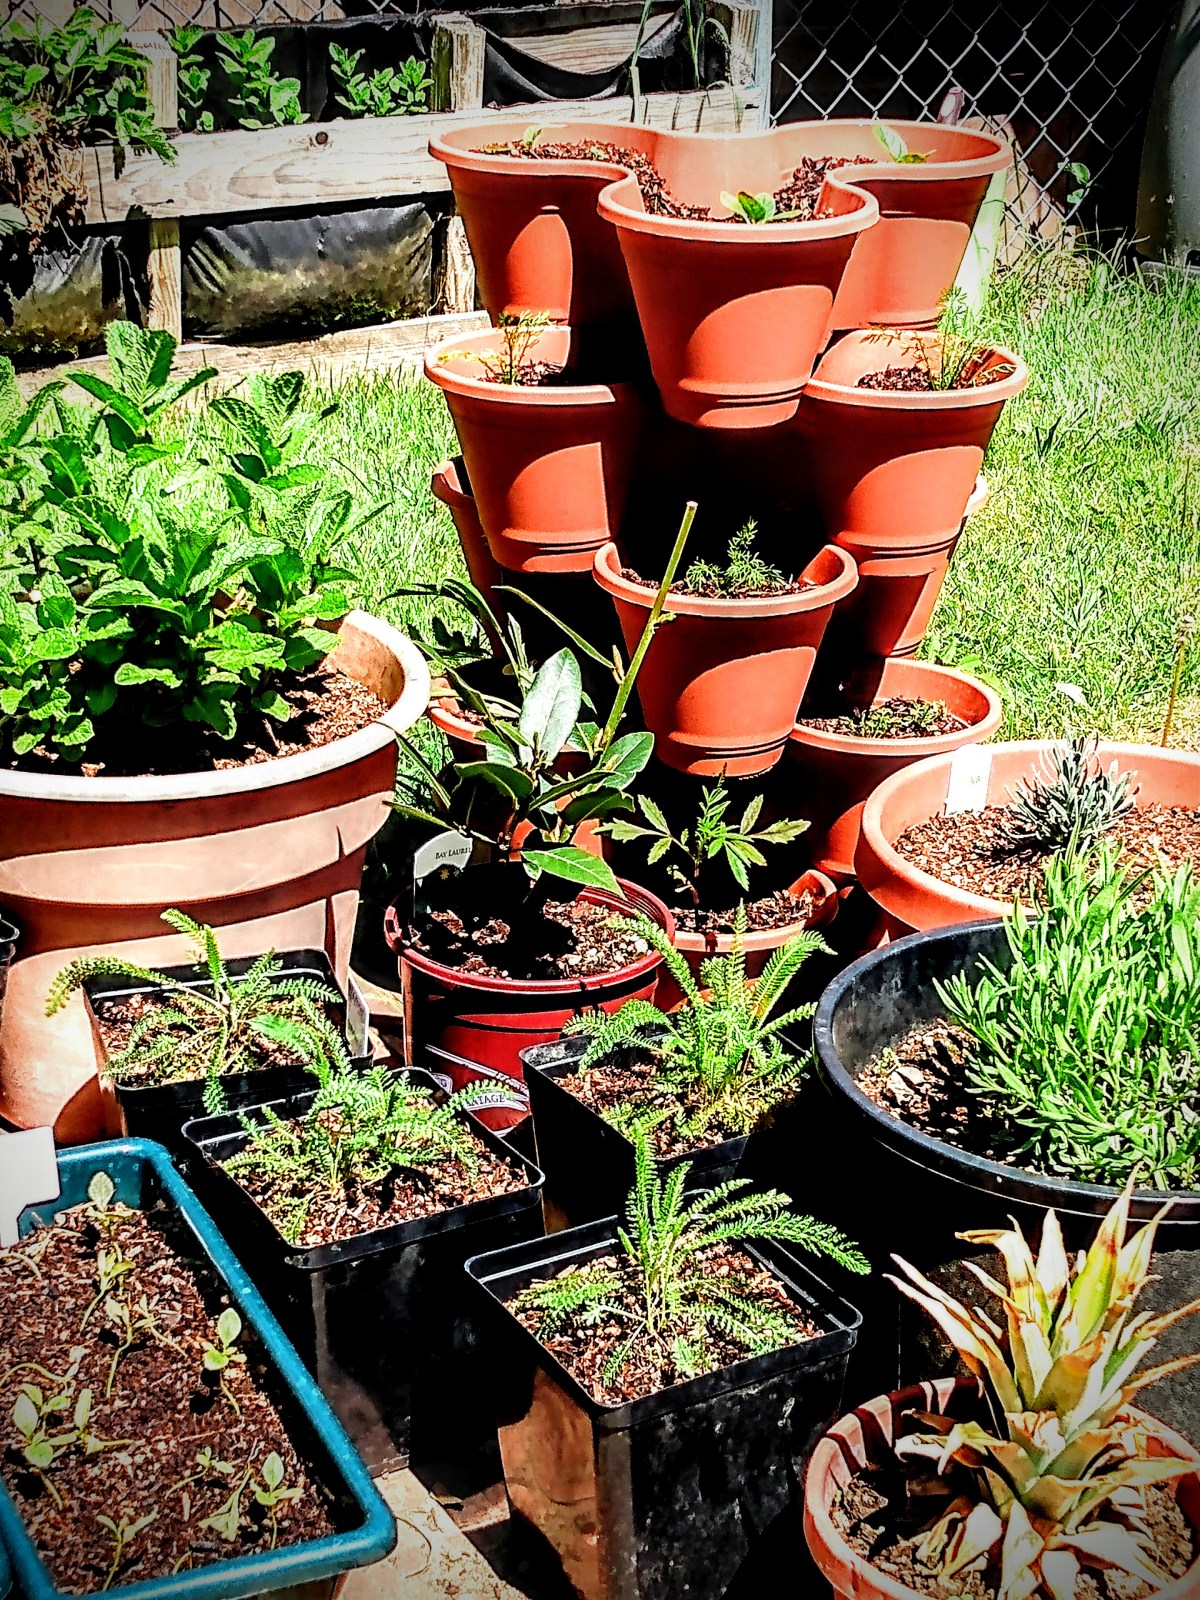
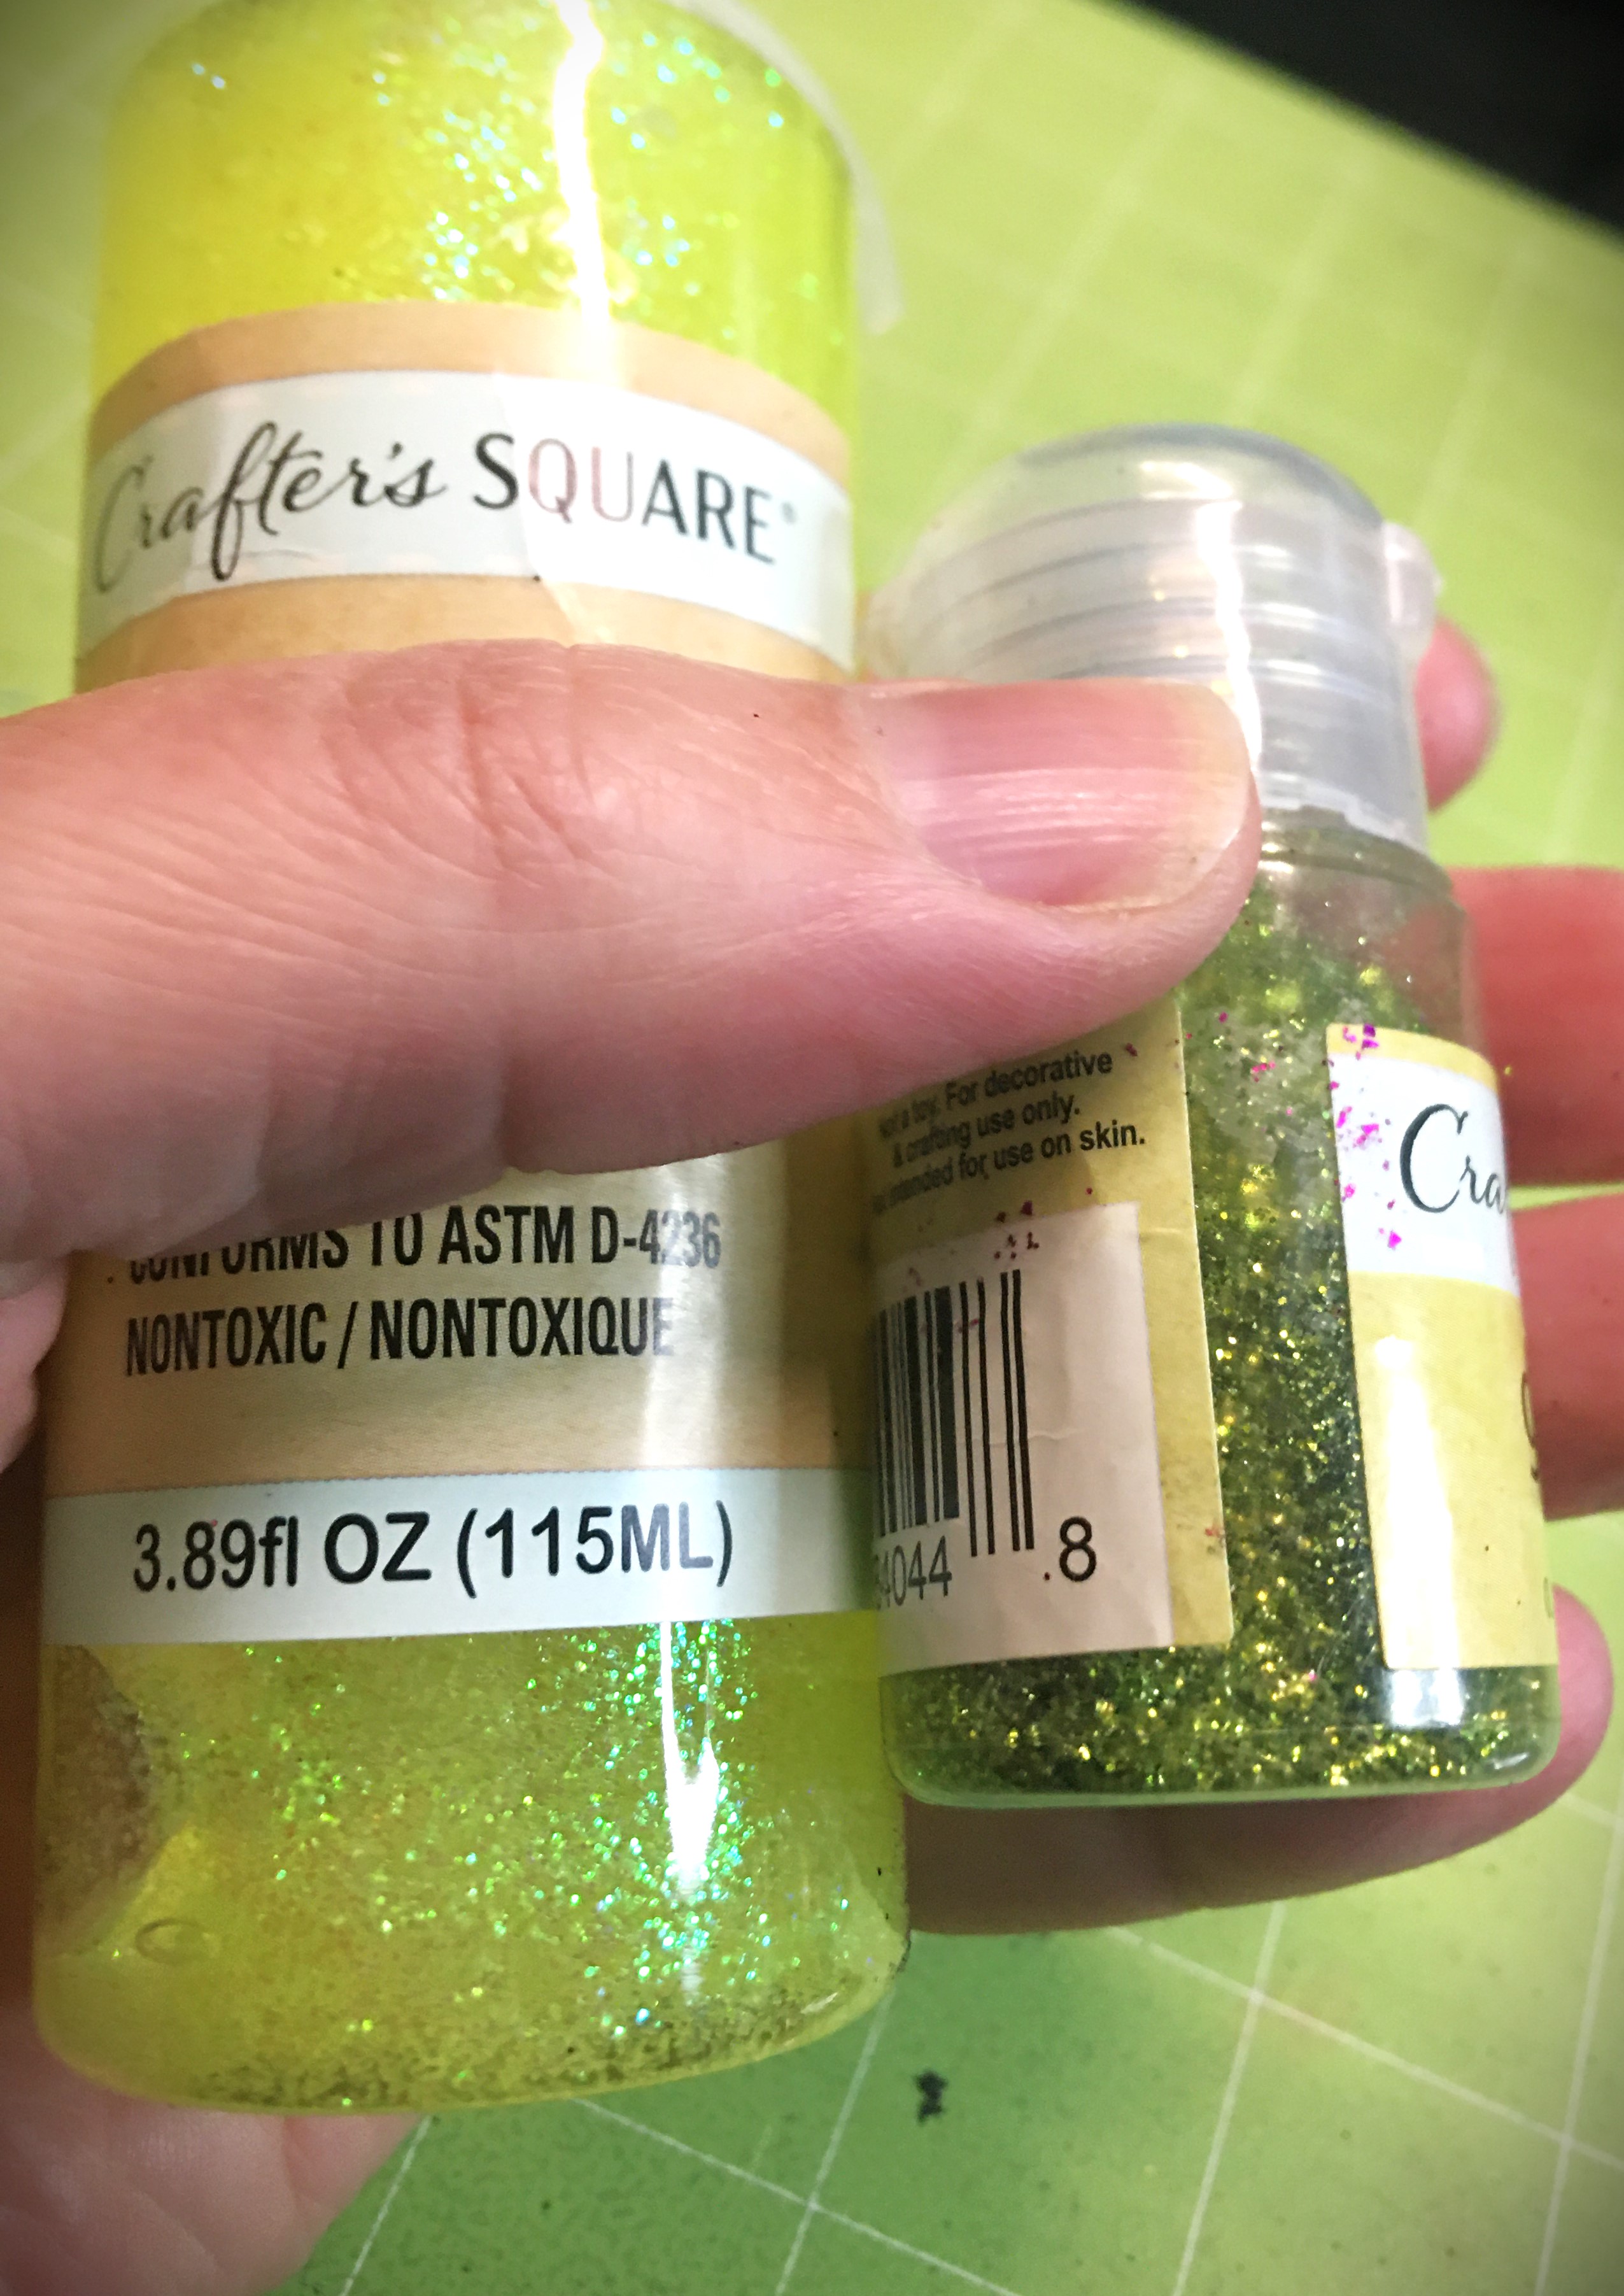
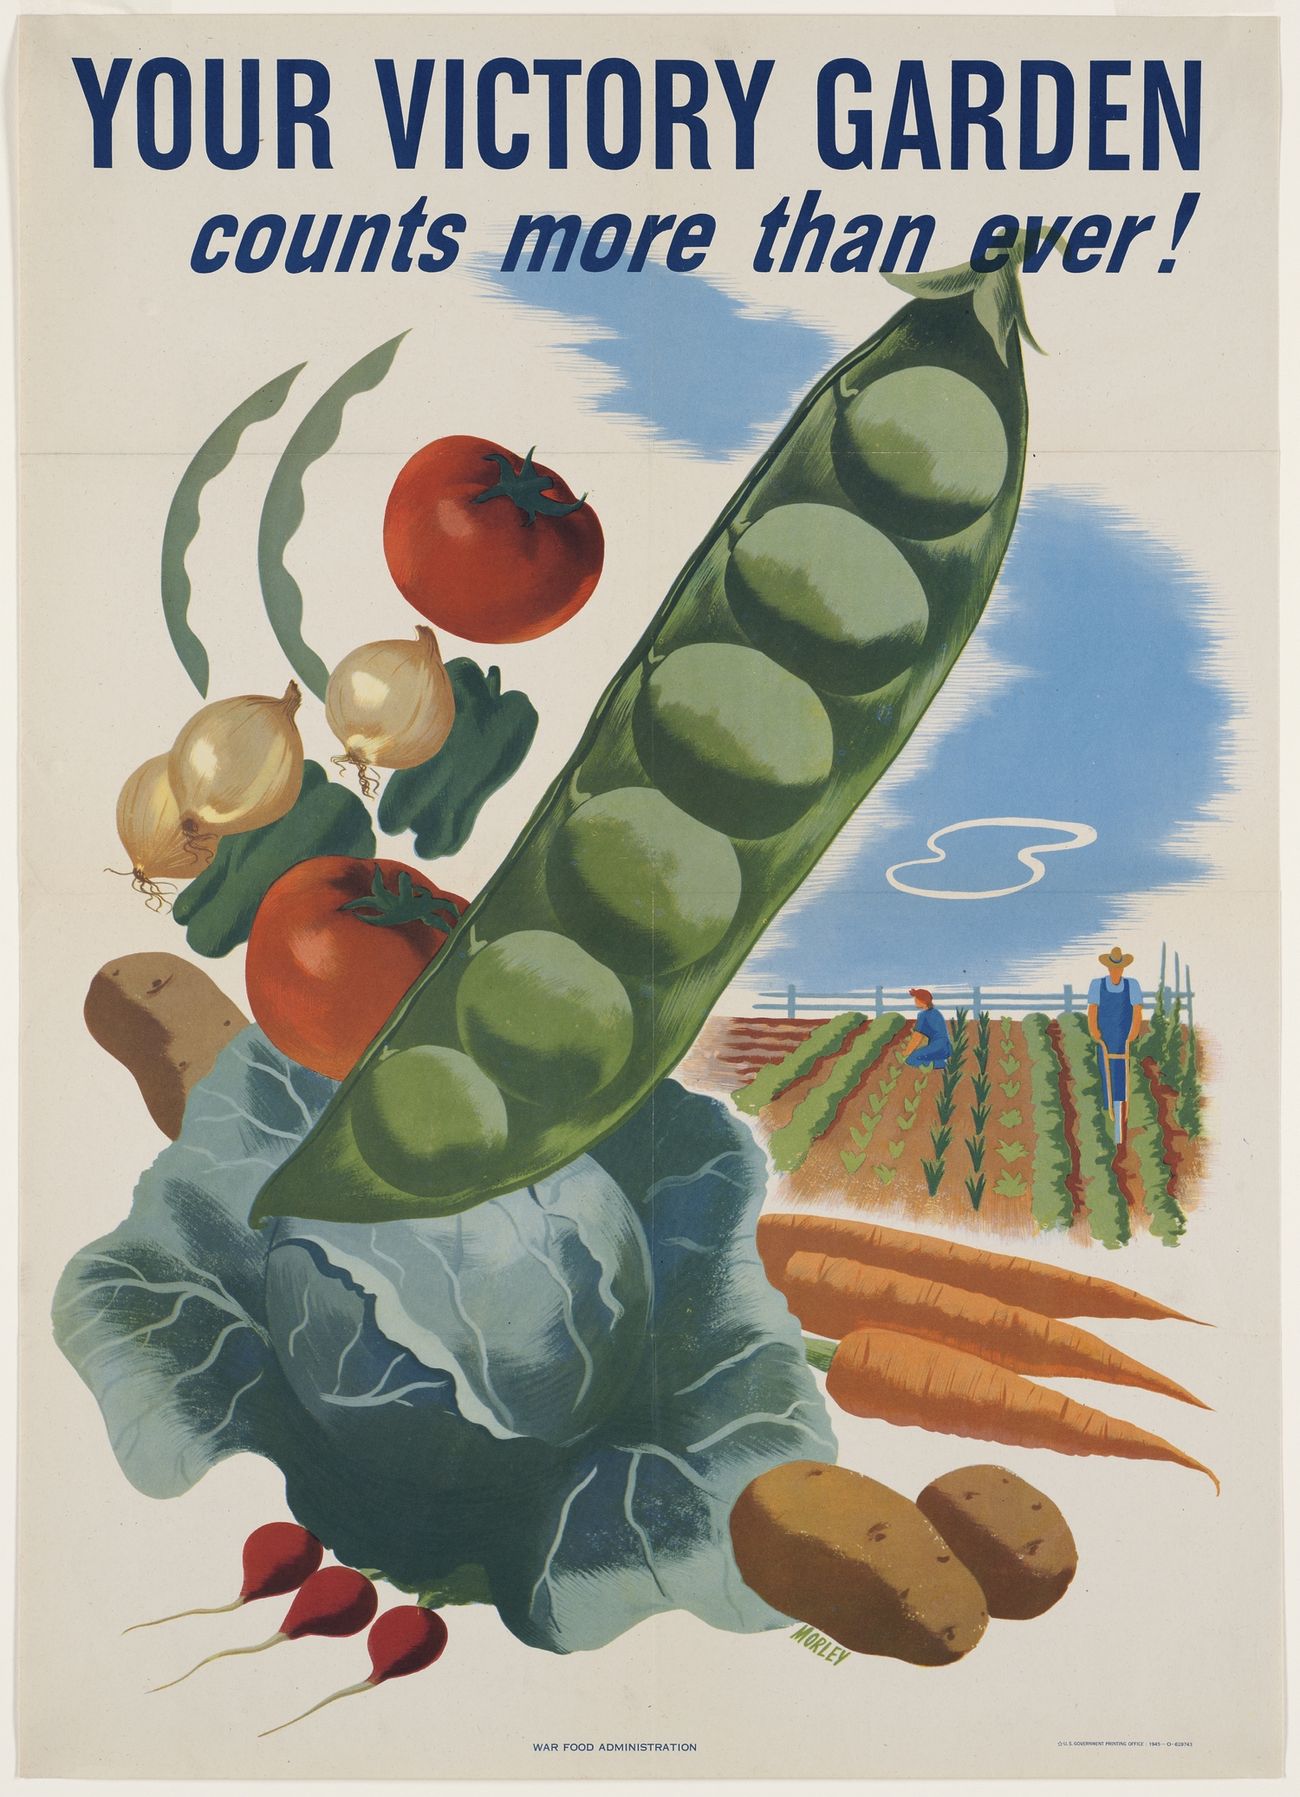
This mom loves talking about her memories. For many years she’s shared her precious memories of when she operated a daycare. And one of those fond memories is when she grew gardens with the children under her care.

Growing salads in a container box.

One thing about moms, it seems pretty universal that sharing memories usually isn’t about the memory. It’s about reliving a moment in life that brought pleasure to them.

From this understanding, I knew that building a garden for this mom was a gift that would fill her love tank. Not only is it an opportunity for her to relive precious memories in the here and now, it also opened the opportunity to add more memories in association with these older memories. By building a garden and scheduling time to upkeep and tend to the garden, it was also guaranteeing visits and making time for her to spend time together.

Container growing for small spaces.

For this mom, she has two love languages. Her primary love language is gift giving. Her receiving love language is quality time.

Making a deposit of part of this season’s garden was not just a simple arrive, dig holes, put in start, say good bye, and move on with the day.

Advertisements

For this Mother’s Day gift, it took in the appearance of leaving all the gardening supplies in the car and starting off with a sit down chat and getting caught up with all the news, even if it was only a day since we last saw each other. Then, I was able to go prepare the garden beds for this first plant installment.

Even before I could bring out the plants, this mom was already so filled with love that she wanted to spend some more talking. As much as I wanted to stay task driven (my personality is to knuckle down and get a project done quickly so I can move on to the next task), this day was all about showing love to this mom.

Pallet boxes for narrow spaces and hanging baskets on cyclone fence

So we had another chat session.

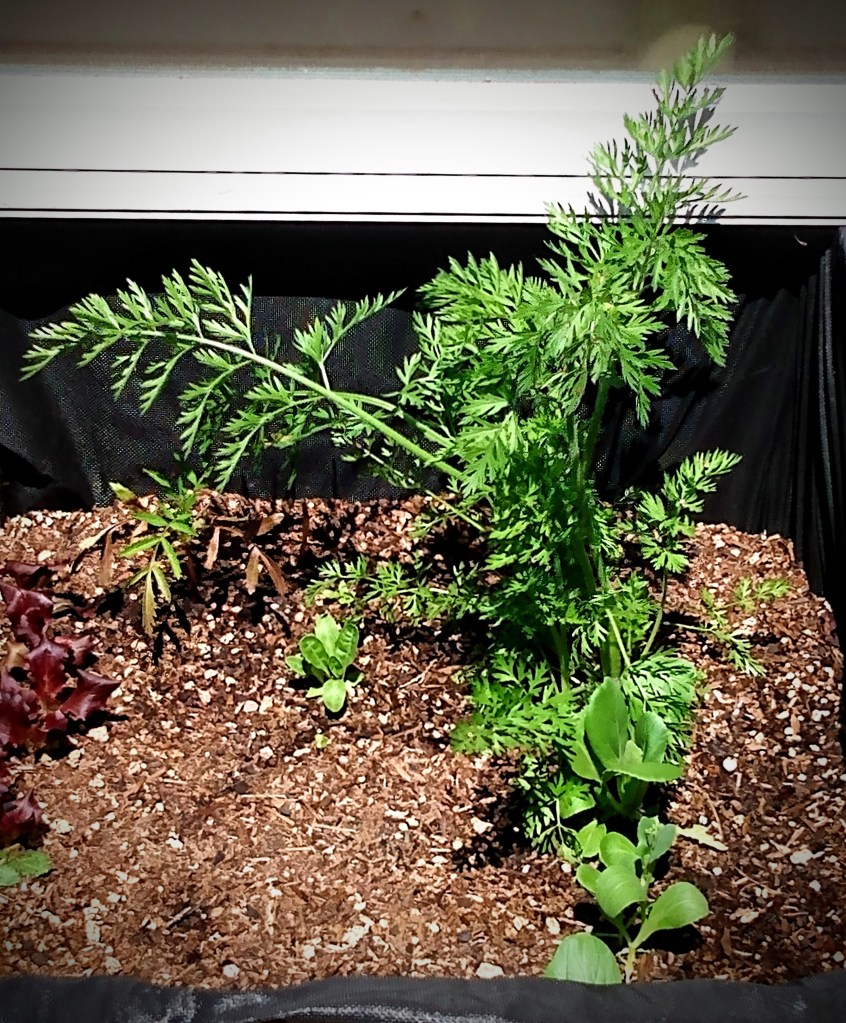
When I could find a polite moment to get back to the task of putting the starts back into the ground, I made that move. And with the final post plant watering, I went back and gave this mom one last extension to the gift I was giving her.

Remember, I said that this mom shows love to others by giving to them. So while I was building this garden for this mom, I know that the one thing that would bring her even more pleasure is by telling her upfront that the goal of this garden is primarily to meet her primary produce needs, I’m planting more than she will personally need so that she can give from the garden to others.

I wish I could share with you the look on her face, because she was bursting with love. Knowing that she was having a garden this year was more than enough to help her feel love, she felt seen and more loved because the gift was enabling her to show love to others without need to be reserved or anything else. It was a gift that was freely given so that she could freely give to others.

Growing herbs in repurposed gutters hung on a cyclone fence.

I know that this story may or may not show you specifically what you can give the hard to shop for person, but there is a valuable lesson here.

A good gift is designed to make a person feel loved because it speaks to how they most readily feel loved.

If you don’t know this love language, ask your person how they most feel loved. They will gladly tell you. It could be a tangible object or food that makes them feel loved. Or it can be a non-tangible activity, expression, or display.

A great gift is one that fills their love tank, but also doubles as a tool to enable them to share their love with others.

Container growing garden with DIY budget friendly or recycled components. Chicken wire trellis threaded through upright supports.

Maybe your loved one is not like this mother. Maybe they don’t show love to others by giving them things. Maybe they show love through acts of service. However their schedule is busy. By gifting them your time to do tasks for them or help them create time, this can free up time where they can show love to others by spending time with another person.

My encouragement to you today is to be inspired with a gift idea that doesn’t come from the shelf of a store. Yes, there are many store bought items that are amazing and meaningful. I want to strike the inspirational fire to give a gift out of love and seeing the other person at a core level. And also enable them to pass on love to others.

Advertisements

Right now we live in an interesting moment in history. It is an uncertain time for many families. But it is also a prime moment to celebrate others by giving to them in a way that shows them that you remember past conversations. Where you have heard and remembered things that could have easily been passed off as trivial information in the moment.

Let’s show our loved ones that we see them. And we celebrate them for who they are.

Again, Happy Mother’s Day!

publicdomainpictures.net

This post contains affiliate links to products. We may receive a commissions on products purchased through these links, but at no extra cost to you. This item link is to Amazon but may be purchased at local markets, and found at your local library.

If you are unfamiliar with Love languages, here is the book that started it all.

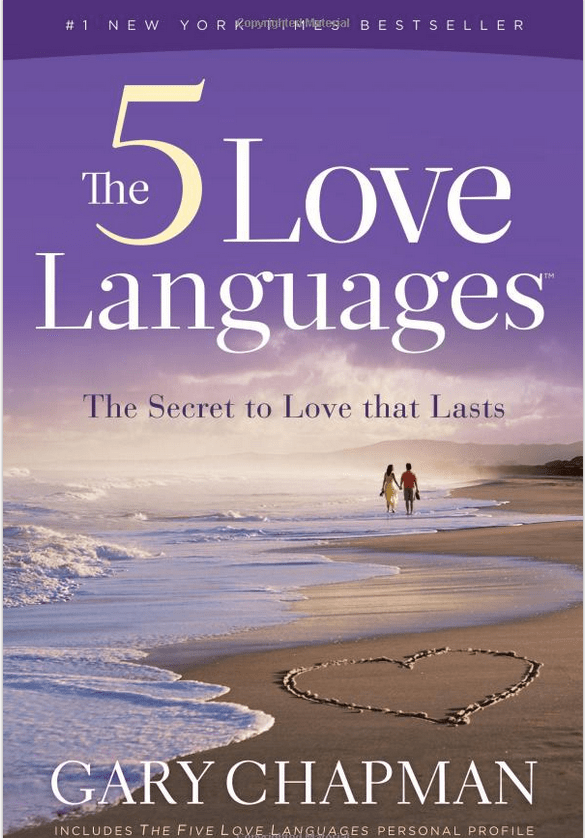
The Five Love Languages by Gary Chapman

Originally this was written for understanding your mate. There are several other editions available to meet other relationship needs such as children, being single, and in relationship of a military service member.

Processing…
Success! You're on the list.

Leave a comment

Advertisements
Advertisements
Advertisements
Advertisements

Space Saving Spring Decor

Depending on the space you’re looking to decorate for spring and Easter, you might find that you want a little sparkle in a small place. Maybe it’s a window ledge, a office desk corner, a mantel piece, or just a side table. This is something quick that you can put together and adds as much or little color as you like. The best part is that with the exception of glue drying time, you can have this project done in under an hour!

Materials Needed:

  • Clear Glass Salad Plate
  • Clear Glass Cylinder Container (with lid)
  • Glitter (color of choice)
  • Glitter Glue (complementary color)
  • Elmer’s Glue
  • Paint Brush
  • Paper and Wire Decor Eggs
  • Tall Candles (colors of choice)
  • Fairy Lights (optional)
  • Polycyclic or Clear Acrylic Spray Paint (optional)
  • Vinyl Decals/Stickers (optional)
  • Silk Flowers (optional)

Everything you see here I sourced at my local dollar store, with the exception of my Elmer’s glue and polycyclic. Hello mom of young children here! I found that I’m least likely to cry with accidents when I buy things from the dollar store. And accidents happen.

Advertisements

Let’s Make It

Jar Stand

This one is a multifunctional component. I’m showing you how this holds a decor item, the paper and wire eggs. Instead of the eggs, you can use the plate for treats. Or you can set the plate aside and use the jar as a plate holder for part of your Easter Brunch.

  1. Inside the glass jar paint in your glue in the bottom portion of the jar. I used a yellow glitter glue to complement the green glitter. When using glitter glue, it’s important to pat the glue on your project and not paint it on. This type of glue does not have the holding power that Elmer’s glue has. I chose to stop the glue a little over halfway up the jar and stroke upwards to create a grass like effect. If you want to use Elmer’s glue you’ll have a little better control over the glue and a quicker dry time. Just make sure to add a little secondary color of glitter into your original glitter choice. This will give dimension to your color and keep it from becoming flat looking.
  2. Dump a good portion of glitter into the bottom of your jar and swirl it around on top of the glue. For the sides of the jar, I turned and tilted the glitter from the bottom of the jar down toward the mouth. I also hit the sides as I turned the jar, so that with it came to knock out all the excess glitter, there was very little that came out.
  3. Allow to thoroughly dry.
  4. You may find that you need a dry loose bristle brush to brush out some stray glitter that likes to stick to the clear glass.
Advertisements

Egg/Treat Plate

In order to keep this plate safe for treats, make sure to apply the glitter to the underside of the plate. This makes the face hand washable.

  1. Apply a thin layer of Elmer’s glue to the area of the plate that you want to add the glitter. For me, I love the silver coloring of my jar’s lid and want that to shine up through the bottom of the plate. So I only applied glue to the lip of the plate.
  2. Sprinkle glitter over the wet glue. The more thorough you are on the shaking off of excess glitter makes the final step easier to apply without lifting the glitter.
  3. Once the Elmer’s glue is dry, seal in the glitter with polyclinic sealant or clear acrylic spray. This is an important step if you want to make sure that you won’t leave glitter trails when handling the plate. If you choose to use polycyclic, you want to tap the sealant on instead of brushing. Brushing actually ends up stripping glitter off of the glass. If you tap it on, the only glitter that comes off is whatever is loose to start with. If you’re like me and want to minimize the amount of glitter loss, clear acrylic spray is perfect. There is no loss. Plus the acrylic spray has the additional bonus of retaining the sparkle of the glitter more.
  4. Allow to thoroughly dry.
Advertisements

Assemble the Accessories

For my display I chose to go with the multi colored paper and wire eggs and different pastel colors of tall candles. This is where even more personalization can happen. If you have rattan balls, you can use those here and keep with white candles to keep a clean minimalistic look. (In this instance a white frosted paint or white glitter might be your choice of decorating the jar and plate.)

For the candles, if you choose to go the color route, you can mute the colors by frosting the outside of the glass.

Or perhaps you have ribbon from other decor you already have up. You can hot glue a band of that ribbon around the candle.

For this set, I’m going to apply vinyl decals onto the glass. Also I’ll apply a decal on the jar.

Coming back to the jar, you might choose to further decorate the inside. Perhaps you want to add battery powered tea or short pillar lights. Maybe you love fairy lights. (For this one I would recommend hot gluing the switch the bottom side of the lid. This allows you to turn on the light just by lifting the lid and not having to fish for the switch on the bottom of the jar.) You could be a flower person. You could arrange your favorite silk flowers inside. Combined with fairy lights could be very dreamy looking. I think I’m going to have to find where I stashed my silk butterflies. The wing span is about 6″ and I could arrange 1 or 2 butterflies on the inside and have a little whimsy on the inside of my jar.

Advertisements

Put It All Together

Even with all the different ways of personalizing this project, it’s all going to take on a different life depending on how you will set this up. Will you use a colorful table runner? Or maybe you’ll display this set with absolutely no further modification. I can totally see the white frost, rattan balls, white candles set on a reclaimed wood side table.

How will you set this up in your home?

Vinyl Decal designs can be found here:

Easter Candles (Decal)

Processing…
Success! You're on the list.

Leave a comment

Advertisements
Advertisements

Planning Your Garden

It’s that time of year where we need to look at the space we have to grow a little something to supplement what we get at the grocery store. This year, more than ever, is this important. Grocery prices are skyrocketing, independent farmers are finding it more difficult to stay in business, and there are just times where you want to buy produce and there was a run on that item with nothing left for you.

The great news is that you’re not held captive by what is or is not available in your local market. Even if you choose a little something that is easy to grow, that is one less thing that you have to depend on others for putting up in your kitchen.

Maybe a Victory Garden sounds intimidating. You don’t have to go down the rabbit hole of homestead farming. Start by picking one vegetable that you eat a lot of. Do you use a lot of pasta sauce, tomato paste, tomato soup, or ketchup? You can start by growing some tomatoes and offset those items that you usually buy from the store by making it yourself. You will find it surprising at how few ingredients you really need to make those items. And you cut those preservative and other junk ingredients out of your diet that are put in those commercial products. And tomatoes are not demanding when it comes to you time. You can fit this vegetable into the cracks of your time.

Even if you respond to me right now by saying, “I’m not a vegetable gardener. I plant flowers. I love flowers.”

Advertisements

Did you know that right now the price of living has risen so much that people are putting off doctor visits because they can’t afford to pay the co-pay? In 2018 44% of Americans skipped visits due to price. (Forbes) In 2021, 41% skipped visits due to pandemic concerns. (AMA) Even with statistics provided in December, 2022, 40% of Americans still are avoiding visit for various reasons. (First Stop Health) This is a reality for many people. But that doesn’t mean that you do not have to go without treating your body with items from your garden, even your flower garden.

There are many flowers that you can grow in your garden that have medicinal properties.

Flowers

  • Echinacea: good for boosting your immune system and fighting colds and flus.
  • Rose Hips: (the dark pink or red fruit seen after roses have gone dormant for the winter) are high in vitamin C and good for fighting colds and flus.
  • Lavender: treats insomnia, reduces blood pressure, reduces menopausal hot flashes, and treats acne inflammation.
  • Dandelion: there are so many uses this flower has but some are soothing an upset stomach, aide with gall stones, and detox your liver.
  • Mullein: benefits for your lungs, sinuses, and ear aches.
  • Bee Balm: helps relieve flatulence and urination.
  • Yarrow: helps with fevers.
  • Elderberries: are high in flavonoids, vitamin C and A, betacarotene, iron and potassium.
  • Comfrey: is great mulch for all gardens (hint: in case you find it difficult to find a fertilizer). It also has anti-inflammatory properties (great for many different skin conditions), but also has a long history of being a bone mender. There are many medical articles that talk about how using a comfrey salve can decrease your broken bone healing time by half.
  • Chamomile: helps with muscle spasms and insomnia
Advertisements

There are so many more flowers that I could put on this list. Last year I started increasing the amount of medicinal herbs and flowers in my garden. Not only are herbs amazing for making your meals flavorful (hello oregano, sage, basil, and the whole mint family), but they can also be used in tea with the above flowers to help treat the symptoms of oncoming colds before you become sick. Or maybe you have a skin condition where you need to look for specialty soaps in the store. Did you know you can make your own soaps for a fraction of the price and better for your skin? Fact!

I’m inspired. What’s next?

Whether you’re ready to grow your own vegetables or just want to stick to our flowers, there are plants that do well next to each other and ones that don’t. So by planning on where you are going to put everything you want to grow, you can be sure to keep the friendly plants next to each other and competing plants away from each other. And by knowing if your herb or flower is a spreader, you can plan on keeping them in their own contained area.

Some vegetables you can’t plant next to each other:

  • beans and onions
  • tomatoes and corn
  • celery and carrots
  • garlic and leeks
  • carrots and herbs (parsley, dill)
  • onions and beans/peas
  • lettuce and broccoli
Advertisements

Vegetables that should be planted next to each other:

  • garlic and tomatoes
  • spinach and strawberries
  • beans and tomatoes
  • tomato, basil, and lettuce
  • corn, beans, and squash
  • radish and carrots
  • carrots and onions

By searching companion planting and the vegetables you want to grow, you can see what grows well together. You can also find out what does not do well together.

For example Marigolds deter pests that attack tomato plants, brussels sprouts, cabbage family, and bush/pole beans.

Search not just for vegetable companion planting but also flower companion planting.

  • Geraniums and Roses do well next to each other
  • Coneflowers and Black-Eyed Susans
  • Astilbe and Hosta
  • Hydrangeas and Daylilies
  • Daffodils and Amsonia
  • Daisies and Petunias
  • Marigolds and Lavender

Saving Time in the Garden

Now that you know what you want to plant, what does well together, and what doesn’t do well together, don’t wait until it’s time to plant your seeds or put your starts in the ground. Spend the time now in drawing out your grow space and determine where you will put everything.

I grew up putting seeds in the ground without a “map”. We would spend all day planting in a small garden because there was a swapping around of seed packets and other time wasting activities. Last year I mapped out where I was putting everything. By the time it came to putting seeds and starts in the ground, it only took me a couple hours to plant twice the area that my mother’s garden was.

Advertisements

Plus, that “map” had the added bonus of being a reminder of what I planted where. This is particularly important because I planted cabbage and I can’t plant any brassica vegetables this year where I planted cabbage last year because of the competition between these two vegetables.

Not everyone keeps a garden the same way. The focus on most of the gardening community is that you just fertilize your garden, or scorch and burn to add nutrients back into the garden. I decided to practice not just crop rotation, but also resting the land. All throughout history these two practices were how farmers kept land without all the modern conveniences of amending soils with fertilizers and other products.

By keeping this “map”, I can keep a record of how long I’ve had a garden plot, planter box, raised bed, pot, or any other container. This puts a concrete calendar that tells me when it’s time to rest an area. This past year was my first year in resting the very first garden bed that I started. It made me nervous letting a decent size space go fallow. But I watched saw that only a couple dandelions sprouted in the bed. I left them because one of the jobs of dandelions is to draw up nutrients from deep down in the ground to the surface where my vegetables for this year will use. But dandelions always grow where they are most needed. It was encouraging that there were only a couple and not a whole garden bed full of dandelions. So the rotation and natural fertilizing with compost and tea from comfrey is doing its job.

Advertisements

By watching your land sit during a year of rest, you can see what you are working with. Because your land will talk to you just like your plants will talk to you. They will tell you if something is wrong.

How to map and plan

I’ve looked at so many different sheets that homesteaders put together to share their process. The problem I’ve had with everything that I’ve found is that I have to shift through a dozen different pages to note the information that I want.

This year I decided to make my own sheets that are simplified and keep the information where I want it.

I’m providing my 8×8 Garden Plot and Weather Log for free on my website. Just click here and select the style that you want.

Why is a weather log important?

When I kept a weather log for my wild yeast starter, the mystery of why the same recipe was yielding different results.

In the same way, our gardens are going to respond to different weather patterns that hit. For example, the non-existence of spring and the extended winter jumping right into summer weather stunted all my seeds and starts. By keeping a record of the weather, I can look back on past years and see if and when I need to be concerned and add in hoops or other insulating method to help my crops in an uncharacteristic early season. And there was also an additional issue of powdery mildew hitting my pumpkins and comfrey plants in the midst of a sunny streak with absolutely no rain or my watering leaves. It turns out that the problem was the extremely uncharacteristic humidity levels. After a month of fighting mildew, I finally checked the humidity and saw that it was in the 90% range!

With everything that I threw at my plants to treat them, I ended up with a long list of what didn’t work. This gives me information in the future for looking for a different solution without wasting these resources. So never underestimate the power of keeping notes!

Last year I used a grid pattern not just for my garden beds, but for all my containers and irregular shaped beds.

No matter what shape or container you’re working with, all you need to know is the measurements and then you can roughly draw it on the grid.

Just keep in mind that when you plan seeds, you’ll want to keep a couple of inches away from the side of your container or raised bed so you can have a healthy root system.

The grid will do the math for you!

I set up the grid so that the darker squares can be used for a 1 foot measurement and the smaller squares can be used for other incremental measurements that you seeds require. Having this information already in mind, this past year I just used my pre-mapped seed drops sites, poked the soil with a chop stick and dropped my seeds. I knew ahead of time how many rows and columns I would be making so I didn’t need a ruler or anything else to space. (And spacing is always the most time consuming part of planting!)

Another thing that I hated with the other planning sheets is that they didn’t set it up like a map, complete with symbols to make your coding easy. It’s easier to use a shape code than an initial code when diagramming your seeds. I’ll tell you what! You never recognize just how many plants start with the same letter until you try to put them on a map. And they’re all at the beginning of the alphabet!

Make it Simple

I hope these two sheets will help you and your garden out as much as I know they will make my life simpler.

The Garden Plot sheet I will use for each of my gardening areas. I will be leaving the back of the sheet blank so that all I have to do is flip the sheet over to have more space for notes on what this growing season throws at me. And the Weather Log will be nice because a whole year can be seen on one page.

So far, this year’s planning is only going to take me 6 pages instead of the 18 that I started off with last year.

Give this Garden Plot a shot and let me know in the comments how it works for you!

Also let me know what other information you keep records of when you are gardening.


Files Used

Processing…
Success! You're on the list.

Leave a comment

Advertisements
Advertisements

Just A Touch of Spice

Long before I met my husband, his father had made and gifted him (and his siblings) a handmade spice rack. For well over a decade, we had intentions of displaying this gift and filling it with spices. However, the convenience of buying spices really took away the need of using the tins.

A few years ago I played around with my dehydrating skills and found new seasonings to cook with that I never thought of making.

I love mushrooms. There’s a gentle earthiness that comes with using them in a recipe. And when your family doesn’t go out of their way to eat mushrooms, I sneak them into sauces by dehydrating the mushroom and then grinding them down to a powder with a spice blender. Now I can have the benefit of having the flavor profile without my family seeing it and making their picky faces.

My absolutely favorite “spice” to cook with is actually butternut squash. I roast the squash in my oven. When it’s finished cooking I remove the flesh from the skin and mash it. From there, I take the mash and spread it across the fruit roll up tray of my dehydrator. Once the mash dries out, I also put that in my spice grinder and turn it into powder.

Here’s the absolutely most beautiful thing about turning your vegetables into powder! If you have a child or family member who turns their nose up at even the mention of vegetables, you turn it into a powder and season your food with it and your family has absolutely no idea that they are eating vegetables!

Not only this, but if you’ve made sauces before you are fully aware of how the traditional flour and corn starch have no benefit of flavor. You have to remember to cook down your flour. And if you use too much corn starch, and have sensitive taste buds, you can actually taste it. So there’s the issue of the texture; corn starch has a different texture and appearance than flour. But…instead of using these two traditional thickeners you can use dehydrated vegetables.

I prefer using potato flakes over flour and corn starch hands down. You can use potato flakes minutes from finishing your cook time. So if you forgot to cook flour to make rue, you have potato flakes. If you hate making slurry with corn starch and then wait for it to set, use potato flakes. I’ve had slurry take anywhere up to 10 minutes to take effect. But with potato flakes, it’s generally set in about two minutes.

That is my #1 mom hack of thickening a sauce, stew, or soup.

My #2 mom hack is using butternut squash instead of sugar!

If you’ve made your own tomato sauce before, you know the debate among the community: use sugar or not. Sometimes you need that sweetness to balance out that flavor profile. However, if you’re trying to eliminate sugar, or keep it to a minimum, what do you do?

You add butternut squash powder!

It’s sweet. You have an added vegetable in your meal. Plus, you have the added bonus of having yet another thickening agent that is healthy for you.

Advertisements

You would think, for as much as I make seasoning and thickening agents from vegetables, why haven’t I grown my own herbs yet?

It wasn’t until this year that I set out, with intention, growing herbs. And it was a great thing that I focused on herbs this year.

A family member tested positive this year with the strain of covid with assaults the gastro-intestinal track. But I had fresh herbs on hand that are anti-viral in nature, giving your body the building blocks to strengthen your immune system to do its job that it was designed to do.

Bay leaves are anti-viral, good for your body no matter which virus your body is fighting.

Lemon balm is also an anti-viral, but its properties are good for the whole coronal family of viruses. So it’s good if you test positive or if you’re fighting off the common cold (it’s from the same family).

So with these two herbs, and my homemade chicken stock, I had the building blocks to make a broth for this family member. Because their GI was being affected, of course food is sounding pretty horrible compared to other strains. To this broth, I added other herbs that I knew were beneficial for delicate GI and combating nausea; ginger, mint….

I’m still working on the recipe to making it recreatable. But I know I’m on the right track because this family member asked me to make a second batch of broth, because it tasted good AND it soothed their stomach so they could get some nutrients into their body.

The whole point of the broth was not to cure them from the virus. The whole goal was to get the nutrients into their body for them to get their body everything they need to fight the virus. Our bodies are amazing things. They’re meant to fight off disease. We just need to give them the building blocks to do their job.

And that is what is amazing about growing a garden. Whether you’re growing food to put on the table or growing herbs to make food taste better without all the extra ingredients in the now $6-10 bottles of seasoning at the store (sometimes more, and if they’re on the shelf).

Consider what it is that you can grow for your family. You may not have the yard to grow a garden. But with a sunny window, you can grow a few easy low maintenance herbs that are good for fighting colds and viruses. I buy bay leaves, because I don’t have the space for a bay tree. But Lemon Balm can be grown in a pot in a sunny window. And the mint family (which lemon balm comes from) is prolific and among the easies things you can grow. Plus it’s something that you plant once and it will keep coming back and grow.

Please comment below with the herbs you grow or with any hacks you have for using vegetables in a new way!

The file, Seasoning Labels, I used for these herb layers are now live in my shop here. The file comes with the labels oval in shape. To create these in the round, I just resized the oval into a circle. This font is amazing for retaining its shape!

Processing…
Success! You're on the list.

Leave a comment

Under the Dome

Using Cloches for Centerpieces

I know that one of the biggest things to make right now are shadow boxes. And I LOVE them just as much as the next person. However, the one disadvantage they have is that they only have one viewing direction. So while shadow boxes are great for decorating homes, they lack greatly when it comes to decorating for events.

And that is where Cloches come in!

Think of a cloche as shadow box that can be viewed 360°, perfect for centerpieces.

What I have for you today is a spring cloche that can inspire you for whatever you are looking to create unique decor for your events. Whether you’re looking for a wedding, a Princess birthday party, displaying an heirloom or memory… you are only limited by your imagination.

Supply List

  • 5.7 x 3.6 inch / 14.4 x 9.1 cm High Cloche Dome
  • 3 meter fairy lights, battery operated
  • Floral Moss
  • Hot Glue Gun and Glue
  • Card Stock
  • Butterfly Cut File
  • Flower Cut File
  • White glue (I prefer wood glue)
  • Fabric (optional)
  • Green Floral Wire
  • Needle Nose Pliers with Wire Cutter
  • Tension Tweezers
  • Masking or Painter’s Tape
  • Flat-back Rhinestone Crystals
  • Jewelry & Metal Glue

Cloche Base

The perfect thing about this cloche, when it comes to lighting, is that there was a hole that I could thread the fairy lights through. This made it possible to hot glue the battery pack/switch to the bottom of the cloche, making it invisible. If you choose to also go this route for your lighting, I recommend that you glue the battery pack in such a way that you can unscrew the battery pack and change out the batteries without needing to remove it from the cloche base.

Once the pack is secure, you can flip the base over and position the wires on the top of the base.

Tip: before securing down the wires, place the cloche dome down on top and see how it’s positioned in relation to the base. With this particular cloche, the dome rests inside the lip/edge of the bottom. So if I had put one of the bulbs right up against the lip/edge, then my dome would not be able to sit flat when place over the finished project.

After trying a few different gluing options, I found the best way of securing the wires and moss was the following way. Bend the wire how you want the lights to go. Avoiding the bulbs, you will put dabs of hot glue on the wire and press the moss down on top of the glue. (If you have a silicone finger cot, you can press down directly with your finger without being burned by the glue.

Tip: To maximize the amount of light shining up from the moss, make sure you do not cover the bulbs. You may think you will have holes, but if you look in later pictures you will see that these holes are absolutely not visible. So work with the lights on. You will immediately see true blank holes vs. light holes.

With the base now complete, it’s time to move on to the paper components.

Flowers and Butterfly

With your cutting machine, cut out 2 Butterflies, 4 Flowers, 1 Leaf, and 1 Stem. Because I already had green floral wire, I did not cut out the paper stem. I included the paper stem in case you did not have green wire but wanted to have a cover for a different wire, or even wanted to make the stem completely out of paper. If you choose to make a paper stem, roll it cigar style and glue the edge down. You can use masking or painters tape to hold the edge down while the glue dries.

(Reference Note: The Butterfly I cut was 3 inches tall. As you can see later on the Butterfly takes up all the space. So for this size of cloche, a larger Butterfly is not going to fit. And you are more than welcome to make the Butterfly smaller and even add a few of the smaller size.)

Butterfly

The two Butterflies are the front and back of your Butterfly. Inside these cut out pieces you can place cardstock, tissue paper, fabric, or whatever material you are inspired to use. Glue your first Butterfly down, trim that inner section the Butterfly. This will make it very easy to glue down that second Butterfly and make everything line up.

Tip: If your cardstock has a white core, you can take a marker with a matching color, and make a coordinating edge.

Set the Butterfly to aside and let dry.

Flowers

Using tension tweezers (or other coiling took of choice), roll the flower. At the end of the line, apply an L-shaped dab of glue, and close the flower. The tension tweezers are great for holding that edge down while the glue dries. Or if this is the first of the flowers, masking or painters tape can hold your edge in place for the glue to dry while you move on to the next flower.

To shape the leaf, run a crease down most of the length of the leaf, from the bottom up. At the top of the leaf, coil it around a finger. This will give a gentle bend. If you make the gentle finger coil go off to one side, you will find that you give it a realistic bend.

Stem

While the glue dries, let’s prep the Stem. This picture is a little deceiving; I had cut it before measuring how this size of Butterfly would fit inside the cloche. For a 3 inch tall Butterfly, all you need is a 2.5″ wire. On the bottom of your wire, use your needle nose pliers and form a circle, to make a stand.

When the Butterfly is dry, use your weeding tool or other thin object to bend the wings of your butterfly up.

When the glue on the flowers is dry, it’s time to shape the petals. If you keep the petals flat, but spread them downward, you will have a mum looking blossom. I chose to curl the petals downward and then crease the center. If you can keep the edges a little rounded downward, it has a chrysanthemum appearance. Either way, I wanted the white cardstock as an accenting color, and there are so many white flowers that have this shape, that it has a simple generic look that is just pleasing. Especially if you’re new paper flowers, this one is easy to play with and assemble.

Assembly

With hot glue, apply the glue on the bottom of the first blossom and insert the tip of the wire into the bottom center of the blossom. With the second blossom, add glue, and attach it to the side of the stem. The third blossom, add glue, and position it on the other side of the stem a little lower on the second blossom.

There is a little crevice between the second and third blossoms. Add glue to the wire and position the Butterfly. When these components are set, glue dried, position the wire circle base around a light bulb. (This will cause the light to still give an up light effect and not be covered.) Once you have the wire base where you want it positioned, apply a liberal amount of glue on top of the wire. Before you press down, apply more moss on top of the glue. Now when you press down, you will secure the stem and hide the glue at the same time. Near the base of the stem, add a drop of glue and place the leaf.

The fourth flower can be glued anywhere on the moss covered ground.

For further ground embellishments you could add anything you can imagine; a car, Poly Pocket accessory, miniature figurine, rock, sea shell, anything. In the second picture above you will notice what looks like a gold stone. In fact, my husband thought that I had added a gold nugget from of the boys’ games. In truth, this “stone” is the gold glitter stick that I had to clean out of my hot glue gun. I just let that pool on my desktop and dried as a puddle, instead of throwing it out.

This cloche is ready to go as is or you can further embellish it.

Further Embellishments

I always love to add more. In fact, this butterfly was really begging to be fully blinged out. However, for this moment I chose to show some restraint so I don’t look like the crazy bling lady.

From here on out the jewelry & metal glue works perfectly. It holds while wet and dries quickly.

Please take note on the first picture above. If you haven’t worked with crystals before, these tools description might help you have fun placing the stones. The two tools that came with the crystals that I bought were the tweezers and the white “pencil”. In my opinion, the tweezers were the most difficult tool. The problem with them is that these tweezers didn’t have grips on the tip. These ones were the smooth tip tweezers. If you think this is going to be slippery work for you, I can promise you it is. I shot a handful of stones across my work space before giving up. The white “pencil” doesn’t feel sticky, but when you press down on the stone with the tip, it grips the stones. Kind of. I couldn’t get the “pencil” to pick up the small stones that I used on the edge of the wing. However it was absolutely perfect for the larger stones that I used near the center of the wings and on the body.

Fortunately for me, I had another tool in my craft room. I do the crystal paintings and had one of those complementary placement tools (the pink tool in the picture). It still had a little residual glue in the gap and it was a dream picking up the smaller stones that I used on the wing edge.

However, the tweezers were the perfect tool for placing the pearls in the center of the flowers.

Tip: If you’re new to paper flowers, and noted to yourself that some of the blossoms look a little wonky, pearl placement is going to be your life saver. In the close up picture, above, you will notice that there were three pearls that I used. Yes, that was a wonky flower. It got away from me. But the great things about flowers are that they can grow in clusters. And so there is no shame in strategically placing flower centers so you can make a misshaped flower into a cluster of two or three flowers.

Now that we’re finished with the assembly, we’re ready to put the dome on.

The only thing left to talk about is the difference between plastic and glass cloches. As you can see here, even though you don’t have to worry about the dome breaking when it’s plastic, you will note that it’s definitely not as clear looking as it would be if it were glass. If you are looking to just do a fun project, a project for a beginner crafter, or need to be particularly frugal, the plastic dome is probably going to be the cloche of choice. If you are looking for a wedding or to have a high impression impact, you most definitely want to opt for the glass cloche. My personal preference is the glass cloches, but realistically I live in a young child home with curious boys.

Everyone’s choices are going to be different. But I cannot stress enough…

IF you are doing a wedding, please do not opt for cheap. The wow factor is going to be from glass or higher quality of plastic than you find at the dollar store. However, if you are on a very tight budget (Absolutely No Shame Here!!!) and the dollar store cloche is the only thing in your budget here are my tips:

  • Select only the domes that are clear and free of scratches.
  • Between now and your event, try to not handle the dome.
  • You will be tempted to try your dome over the decor. Buy one extra cloche and use that dome as your dome tester.
  • While you are working with glue, keep it away from the dome. Especially the jewelry & metal glue. You may think you didn’t get any glue on the dome. …and then it dries.

In fact, it’s a good practice, whether glass or plastic, to always have one extra dome on hand. Accidents happen, especially on site.

Please email or comment below with pictures of what you create! I want to see what cloche you make.

Thank you for crafting with me!

Files Used Today

Cloche Butterfly & Flower are found here.

Processing…
Success! You're on the list.