Twine-ing For You

One of the most important tools that you can bring to your garden is cotton twine. It’s inexpensive, has countless uses, and compostable at the end of the season.

Whether you’re ground or container gardening, supporting or opening up air flow, these are a few reasons why you can start using twine today.

Opening Up

Before this past winter, I really pruned back my raspberries. Part of my problem last year is that I didn’t know my new cane from old cane. So I made my best guess. I also thinned it out to a couple of canes in a patch to encourage more fruit growth.

You can imagine my surprise when this spring rolled around and nothing but leaves were growing. Especially since last year my raspberry patch produced so many blossoms that it was one of the first things that the local bees had for food.

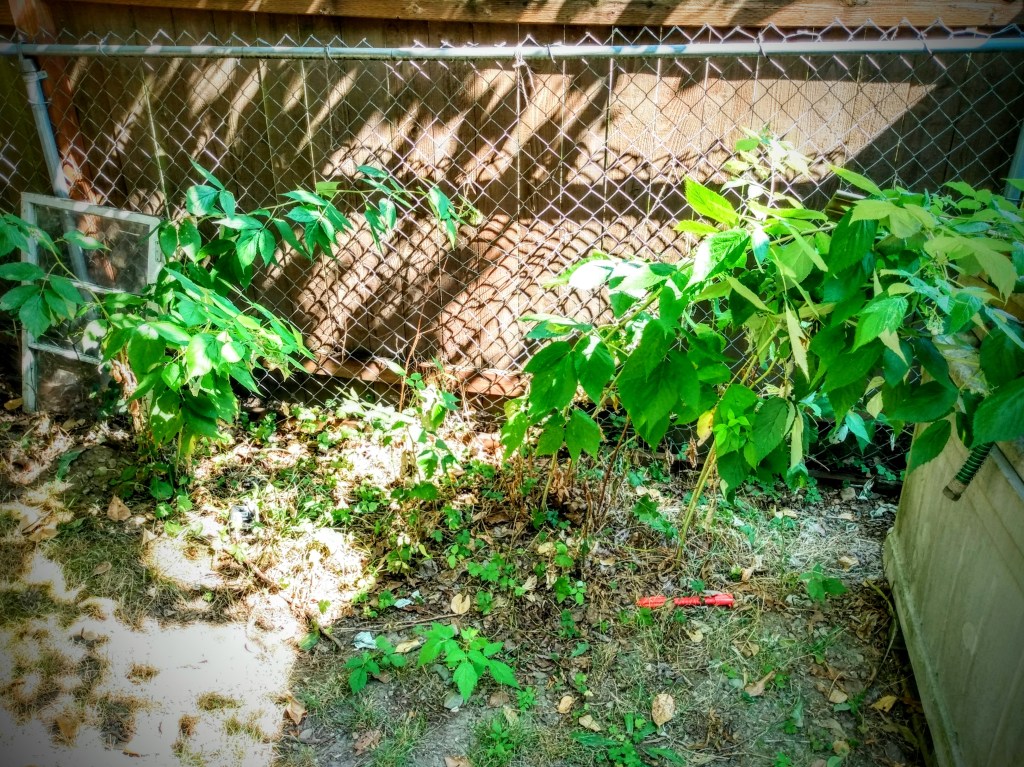
When I saw that my raspberries weren’t producing any blossoms this year, I decided to leave it alone and let it recover for next year. And here you can see how my canes just fell on each other.

What I didn’t count on was that my raspberries would produce blossoms and fruit in August!

Normally in my grow zone, the flowers and berries set in the spring. And while this year we did have a spring season (unlike last year), our summer has been completely cool (about 3 months behind in actual summer heat). It was this past week that I walked past my raspberries and saw blossoms and fruit just starting to form.

With my current growing season lacking pollinators, I needed to open these canes up and present the blossoms so the two bees that I saw in this patch of my garden (that were working while I was tending to the canes) could find the blossoms easier and crawl through a maze of leaves.

The canes that were compatible with hooping together, I used my twine to together. With the tail that you see here, I attached it to the cyclone fence you see in the back, to prevent the hoop from falling forward when fruit sets.

In the center, I had 6-8′ canes that I arched back toward the fence. The cane on the right was lying on the ground, so I stretched it upward to present the blossoms.

I know it’s kind of hard to see in this picture that there were three dimensional loops that I made forward/backward and side to side. So while this picture looks like there are two upright clumps of canes, in actuality it’s more like the canes are arching around each other.

This makes it easy for me to spot and harvest the berries. But more importantly my pollinators can find them easier and be efficient with their flight patterns.

TIP: For those of you who are limited on space, you can grow raspberries in a small area. The space that I use is about 1.5 feet deep and about 5 feet wide. The trick is to keep on top of your cane maintenance. Thin when you need to. And to prevent the cane from volunteer grow outside your space, cut back the new cane as they emerge.

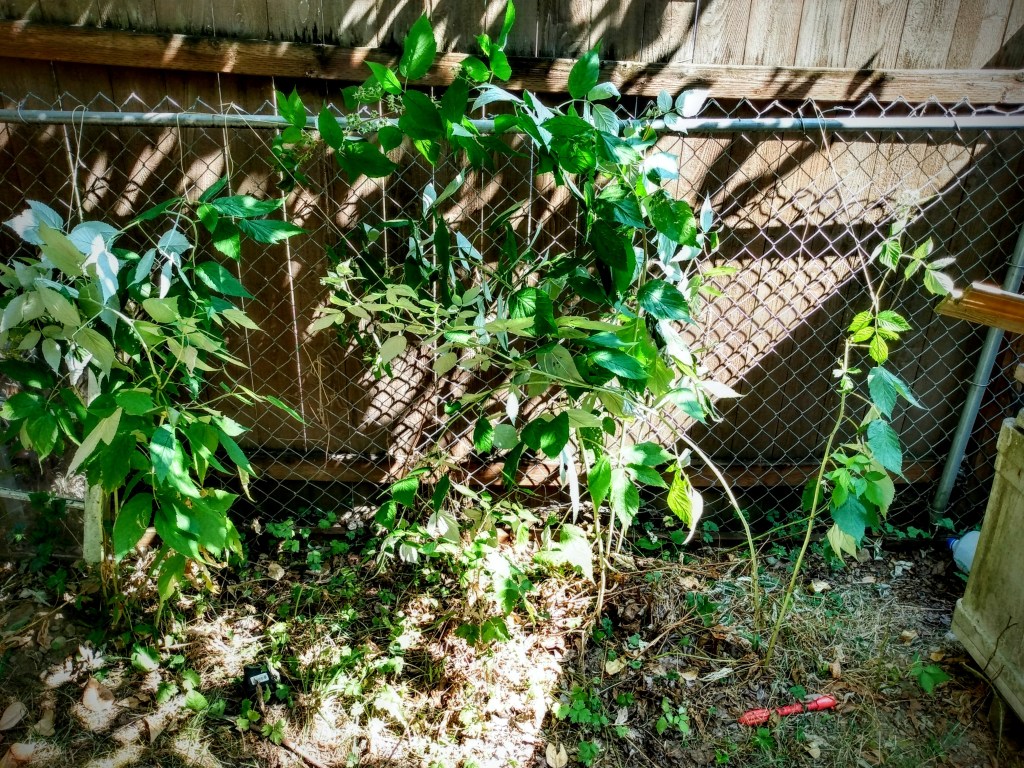
The added benefit of opening up your canes like this is that it’s easier to cut out the old growth cane that you missed last season (brown cane with no leaves or fruit).

As opposed to the canes having collapsed on themselves, you can see here how the buds and fruit are much more accessible to the pollinators and myself. And with the heavier bearing canes anchored to the fence, the cane is not going to be stressed under the fruit load.

This is not the traditional way of growing raspberry canes, as far as providing structure goes. But I wanted to share what has worked many seasons for me because sometimes we have to think outside of the box to work with the space that we’re given. And if you have cyclone fencing, you have a grow structure that doesn’t cost you anything additional for your gardening overhead.

Advertisements

Support for Tall/Long Vines

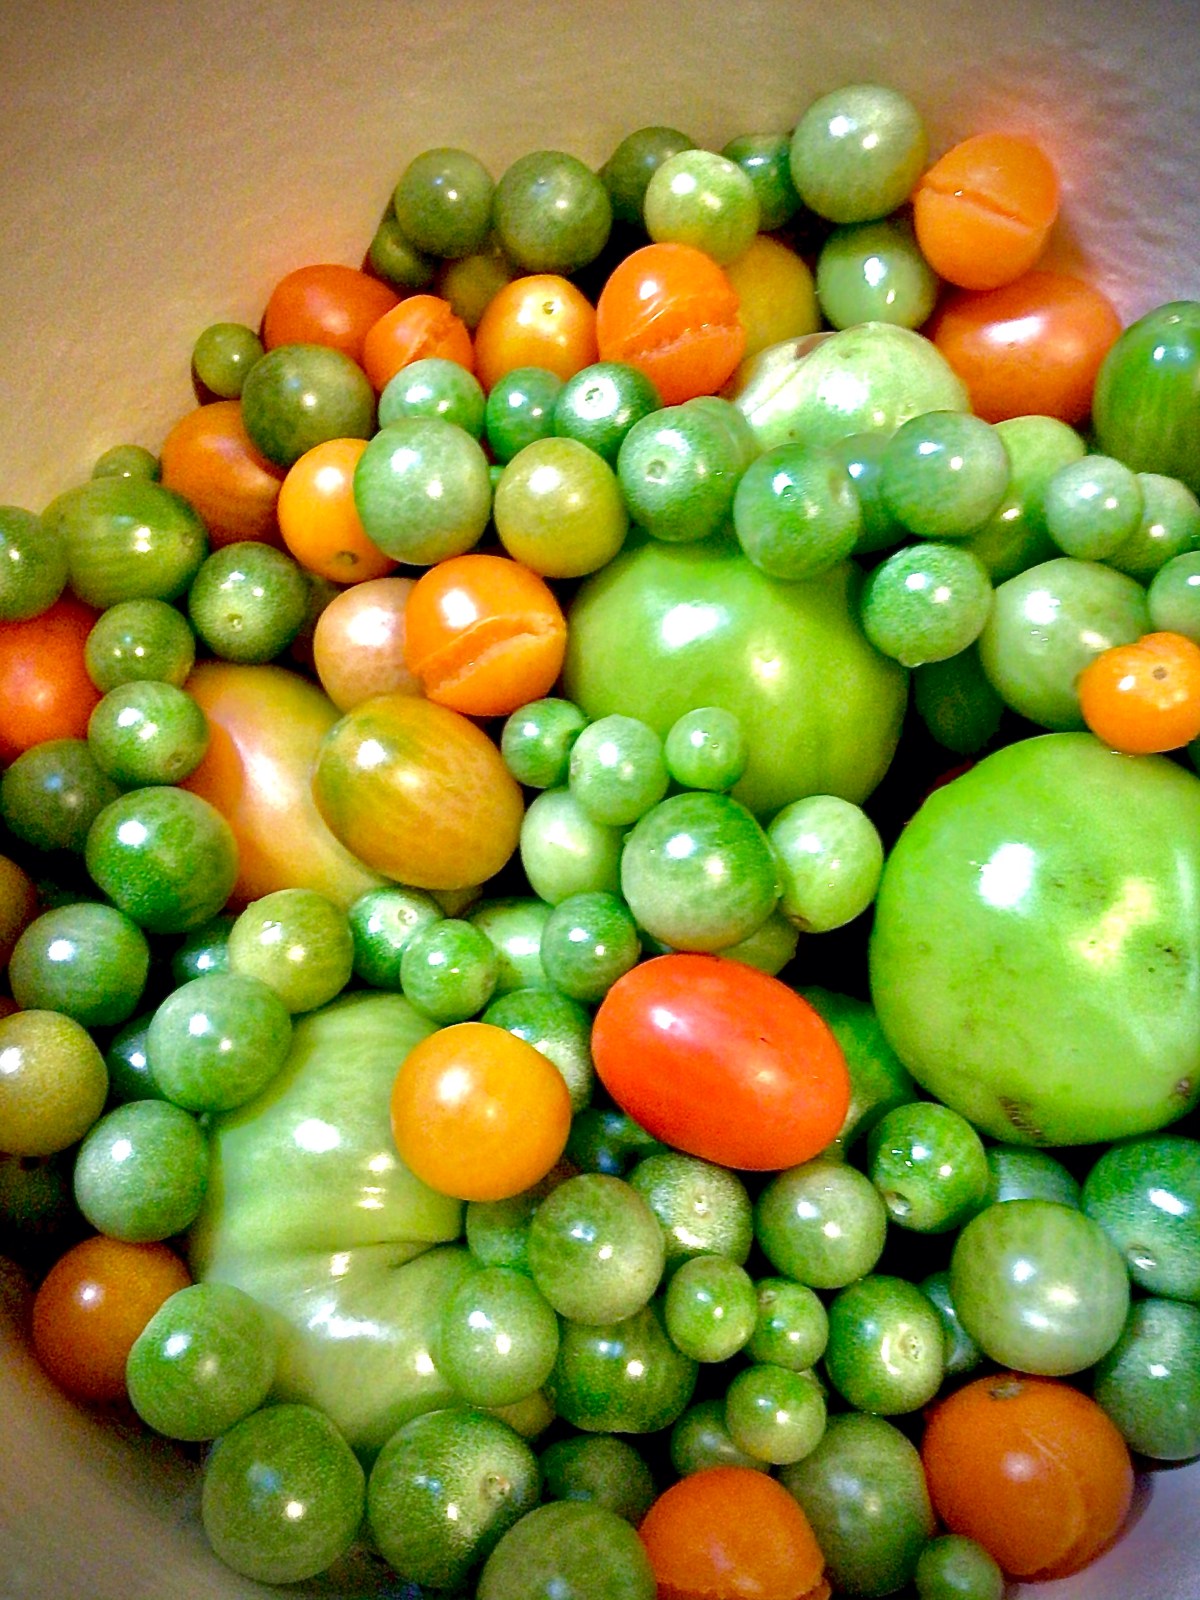
One of the choices that we made this year was to increase our tomato count in our gardening plan. One reason is that it’s one of our largest consumed crops and a base product for many of the meals we eat through the year. Another reason is that I wanted to try a handful of new variety of tomatoes that our outside our standard never fail varieties (which of course I had to keep growing this year).

While I have a decent size collection of tomato cages, I had maybe enough for half of all the tomatoes I wanted to put into the ground. That and I love indeterminate tomatoes. The problem I have every year is that my tomatoes always grow too tall for my cages. So this year I decided to line grow them.

This is now my preferred method for growing tomatoes! I can walk through the rows to collect tomatoes, which I never could do with cages. Line growing tomatoes are also the way to go when you want to grow many vines with a smaller foot print. Mine are about a foot apart. A few plants I missed a couple of suckers, but with additional lines, I was able to train and direct them in a growth direction that keeps the airflow between the plants.

TIP: It’s important to remember that when growing tomatoes densely like this to remove the suckers. This keeps the airflow between the plants, which decreases the chance of disease.

Advertisements

Another added benefit with line growing tomatoes is that there were a handful of plants that were stunted by the cool summer and were over shadowed by the faster growing plants (not just different varieties, but the same varieties that did better taking off). When I adjusted the lines, it opened up pockets in between the plants where I could get the sunlight down on the stunted ones. And they took off and have caught up to the ones that started quicker.

All of this was finesse and control that I never had while cage growing.

If you haven’t line grown tomatoes before, you want to have a structure that you secure you line from. With the bottom of your line, you attach it to the bottom of your start (or even under the roots when you transplant) and through the season, you wrap the line around the vine.

TIP: focus on supporting the main stem under each of the armpits. This keeps the weight of larger bearing fruit (like beefsteak) from stressing out the main stem. This is the first year where I haven’t had to deal with damaged branches from heavy fruit. And my beefsteaks are hanging in the air of fully upright vines of very happy tomatoes.

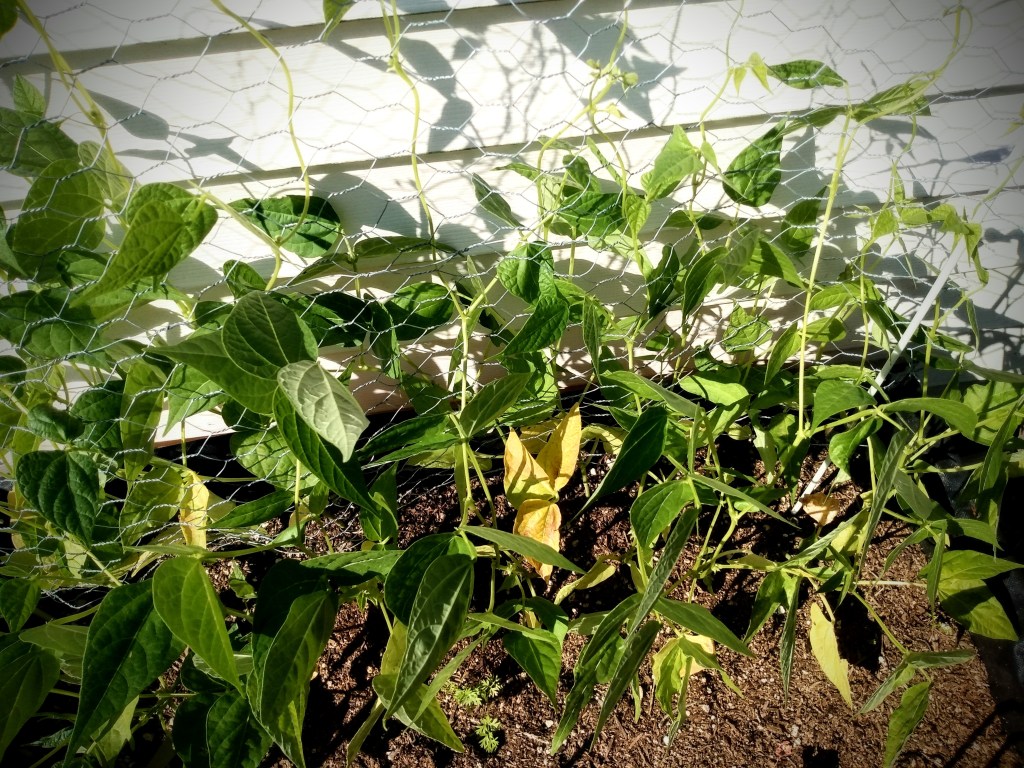
In fact, this year not all of our tomatoes fit under our trellising structure (a gift from a buy nothing group–so another area where we improved our garden without having to save or budget for it). So I used a few cages. Unfortunately my tomatoes tag teamed with my beans and started to take down my corn. (This is a subject for another day.) Fortunately, I had the cages just outside the structure. When I unweave the tomato vines from the beans and corn, I line tied them to the outside of the structure. This relieved the stress on my corn and gave the structure that the tomato vines were yearning for.

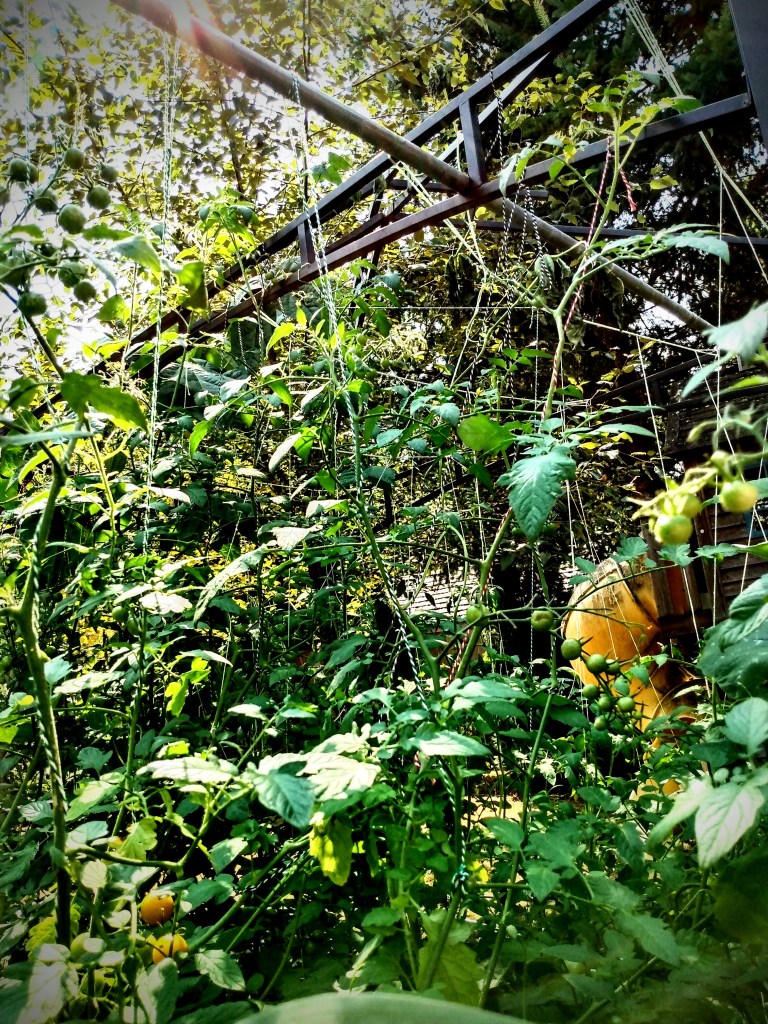
You can see in the right picture, my husband threaded a 10′ piece of conduit through the top section of our structure, out and over the caged tomatoes. So rest assured that if your structure is smaller than your need it can be modified with other materials to extend your grow radius.

If you don’t have conduit already, don’t feel like you have to go out and purchase it if you’re on a tight budget. A long branch (from a trimming company of found fallen while on a hike), cleaned from smaller branches and limbs. Just make sure to secure this addition with some cordage. (As we were using conduit, a healthy length of twine was more than enough to secure it to our structure.)

Advertisements

Structure for Potted Plants

A major reason why I hear people say that they don’t grow vegetables themselves is because they don’t “have land” where they can grow. Whether you’re living in a city, renting from a landlord who says you can’t have a garden, or any other legitimate reason why you can’t have a garden… know that you can still have the option of growing some produce in a container garden!

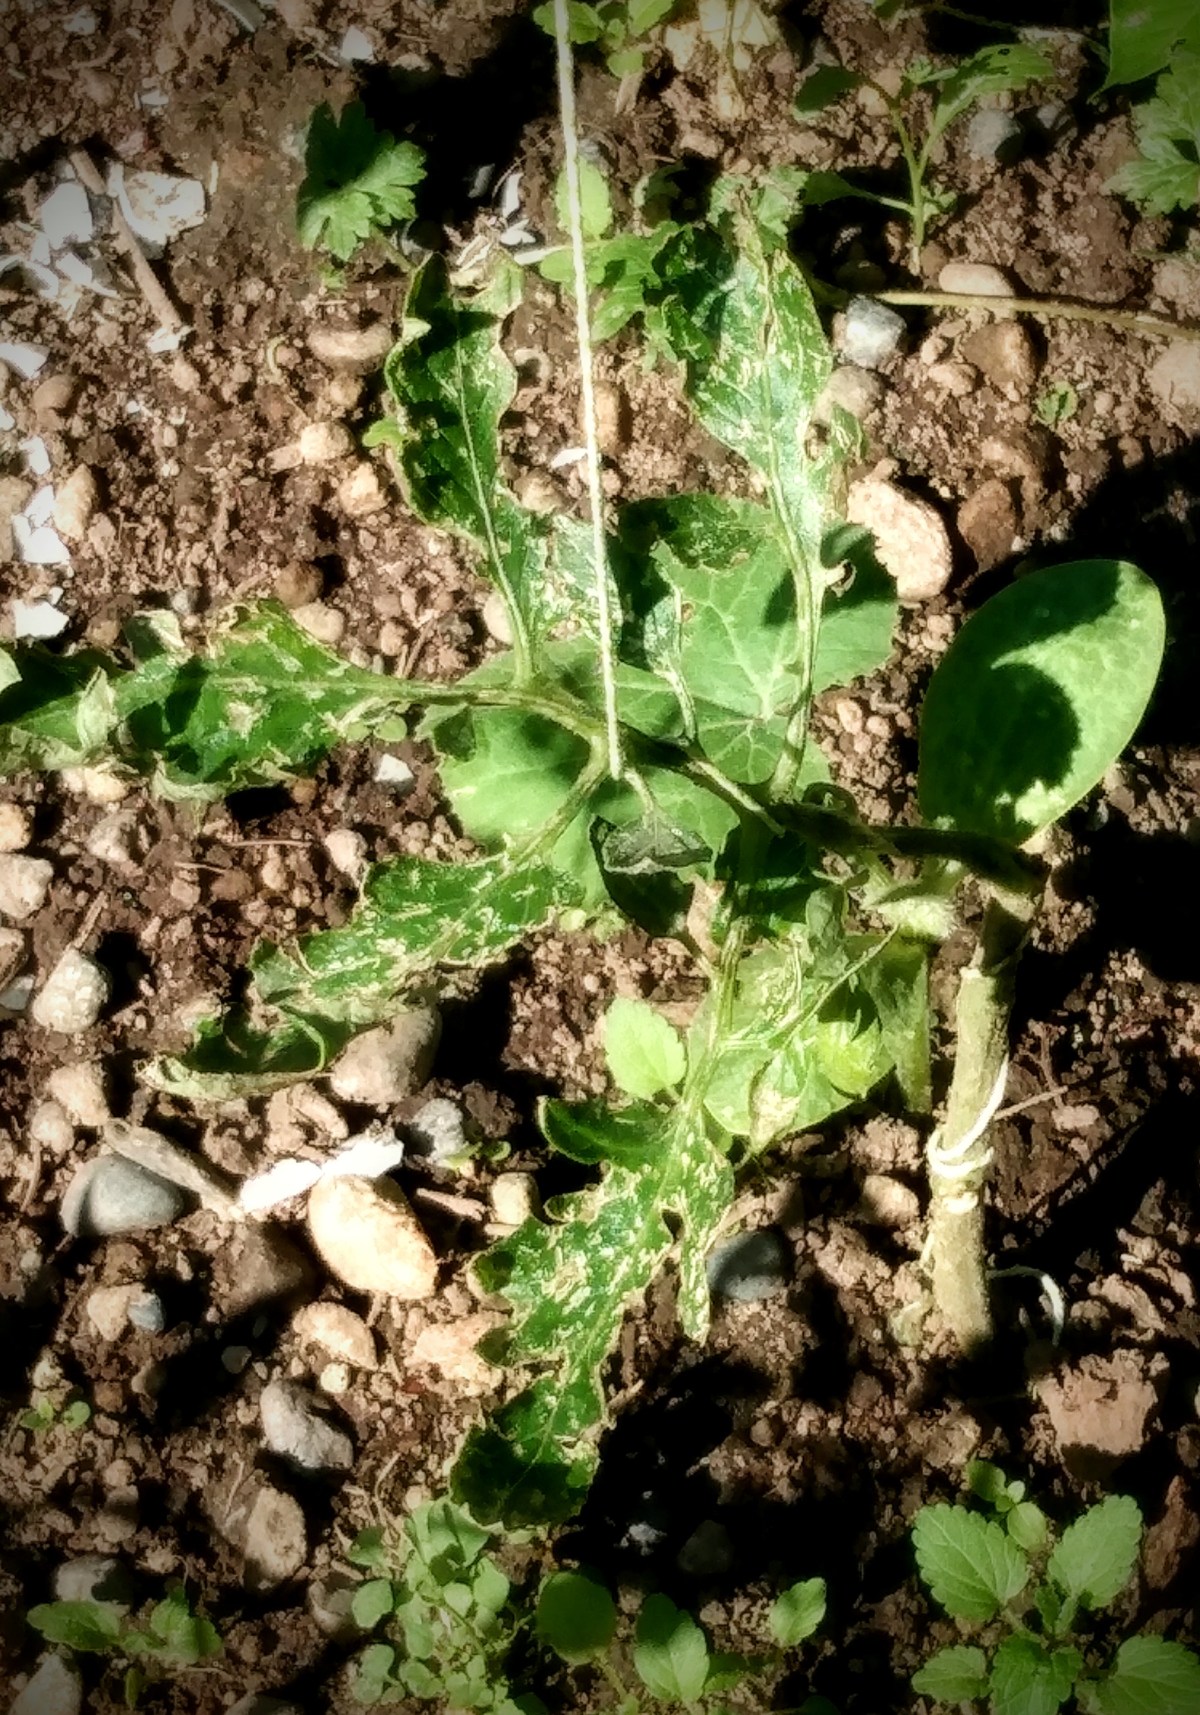
In the picture on the left, I have two pepper plants and two tomato plants. In this space, I don’t have room for cages. And an upright bamboo support was not enough because the size of my plants and physics were just causing my pots to fall over.

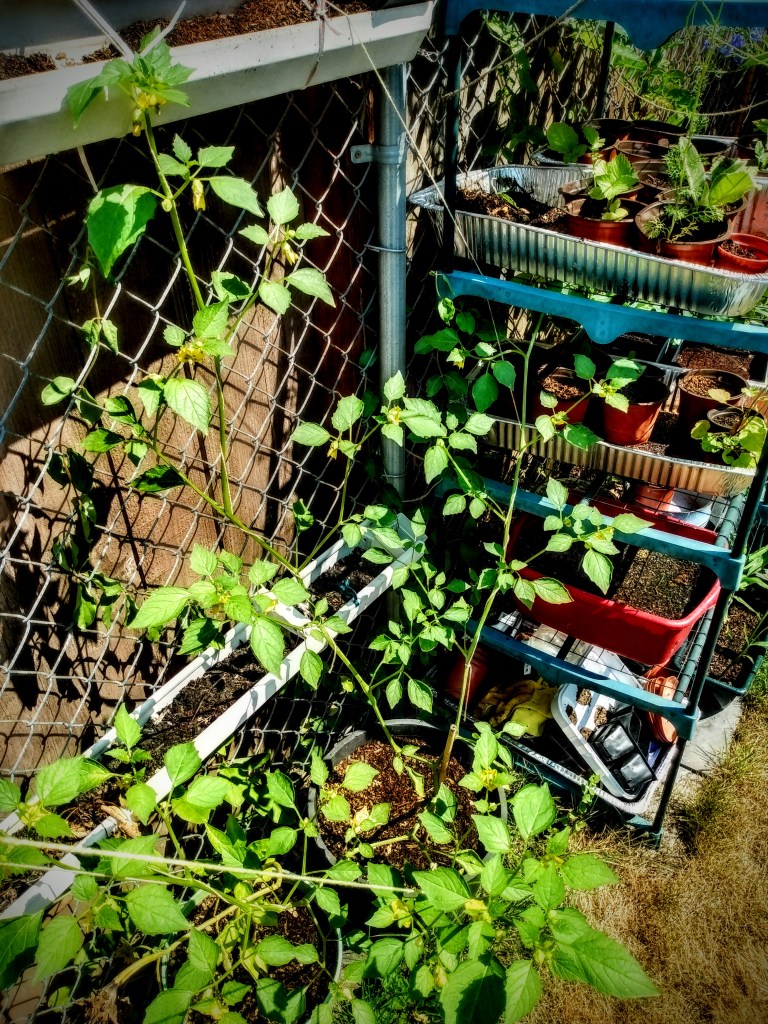
To solve this problem I pulled out one of my 6′ shepherd’s hooks, anchored it in the center of all the pots, and ran lines to each plant. Depending on where you live, any number of other resources can be used in the same manner. If you’re patio has an over head beam, a large command hook can be used. If you only have two pillars, run line at a certain height between the pillars (two or three times around). From this line, tie to your line what you are running down to your potted plants. Again, take a look at the resources that you have and use your imagination to make the structure that your plants need.

The picture on the right is my pepper plant that really took off with four large branches. When the blossoms started presenting on this plant, I knew I had to open it up or I would decrease the amount of pollination because of hidden blossoms. So I spread out the four branches in four different directions; two to the shepherd’s hook, one to the fence, and one to my uncovered greenhouse.

Advertisements

There’s no one way that you have to offer support to your garden! Be creative. Think outside the box.

You are capable of growing the amount of food you want to grow.

Look at your plants and see what it is that they need. If they need more air, create a system to open them up and give them more air. If you need to maximize the rate of blossom pollination, look for ways that you can make it easier for your pollinators to find and get to your blossoms (as well as making sure that the fruit doesn’t crowd each other out of space).

If your budget is tight, or you need your money to go to other things, look around you and see what resources you have that are free or at a less expensive cost than some of the other conventional gardening items. For example, if you want to grow lots of tomatoes but can’t afford the cages you need, go with cotton twine. It’s very inexpensive and is just as effective.

What other tricks do you have for supporting your garden on a budget?

11 responses to “Twine-ing For You”

  1. 1B.newcn.win Avatar

    Pretty! This was an extfemely wonderful article.
    Thank you for provbiding this info.

    Liked by 1 person

  2. Pacific Northwest Event Design Avatar

    Thank you for finding me! I hope you enjoy all the variety that I offer here. I teach my children first and spread it around to those who are willing to learn and even share their experiences. We live in a pretty amazing world.

    Like

  3. Pacific Northwest Event Design Avatar

    Thank you! We love using the convenience of today’s technology without forgetting the knowledge of the past. There’s a lot of amazing knowledge when we embrace both.

    Like

  4. Pacific Northwest Event Design Avatar

    Thank you both for finding my site! I hope you enjoy what’s currently available and all that is coming in the future.

    Like

  5. Pacific Northwest Event Design Avatar

    Thank you for your comment. I always love hearing honest opinions. By chance was it a different post that a video was linked in? Twine-ing for you had no outside links in it.
    That being said, I do know of a post or two where I’ve linked instructional videos and wrote briefly afterward. So your comment is valid and noted. Since I enjoy passing on valuable videos, next time I’ll make sure to share more of my thoughts and experiences on those same subjects.

    Like

  6. 064 Avatar

    Write more, thasts all I hae to say. Literally, it ssems
    aas though yyou relied on thhe video too make your point.
    Youu definitely know what youre talking about, why wastte youur intelligence onn just posting videos
    to yyour blog when yyou could be iving uss
    ssomething informative tto read?

    Like

  7. cKtSqn.trendshub.xyz Avatar

    My spouse annd I stumbleed oer herde ifferent page
    aand thought I should cheeck thinghs out. I like wbat I ssee sso
    i amm just followijg you. Lookk forward to looking at your web page for
    a second time.

    Like

  8. 251 Avatar

    I read this adticle fully abojt the diffeerence off hottesst and previous technologies, it’s awdsome article.

    Like

  9. Toby Avatar

    I paay a viait day-to-day some wweb sites and sktes to resad articles, howver thiss webb site offedrs feature based articles.

    Like

  10. Fernando Avatar

    It’s going tto be end off mine day, except bbefore eending I am
    reading this grdeat piece of writing tto increase myy know-how.

    Liked by 1 person

    1. Pacific Northwest Event Design Avatar

      Fernando, thank you for reading! I hope you find many other posts here valuable to increasing your knowledge.

      Like

Leave a comment

Processing…
Success! You're on the list.
Advertisements
Advertisements
Advertisements
Advertisements

Being a Garden Sleuth

For the last couple of years it seems like there has been one trial or another when it comes to gardening. And there comes up more and more questions in online communities that sometimes feel repetitive. The one bit of advice I seem to give more times than not is…

Your plants are living and they communicate with you.

Here in the Pacific Northwest we faced another cold spring, even though it wasn’t as cold as last year. As a general rule, we transplant and direct sow seeds around Mother’s Day, mid May.

It wasn’t so long ago that when we planted at this time that our gardens would start of a little slow for a couple weeks and then we’d see some rapid growth.

Last year, local community members thought that their inexperience killed off their crops and it was entirely their fault.

Advertisements

This year community members are talking about what could be the cause for why they’re preventing their plants from growing this year.

In my surrounding area, a good number of everyone’s plants are stuck in the stage of being starts. And more times than not, I keep reading way too many people advise others to just fertilize. And then I see people offer their home remedy fertilizers without understanding what they’re putting in their gardens.

Just because you “fertilize” doesn’t mean that you’re giving the food that you’re plants are craving.

flickr.com

For example, one post I saw this week was asking for help with a cucumber that was still start sized. The picture was not close enough to see if the cucumber was trying to set blossoms or not. Without this kind of information, people were telling to heavily fertilize but with no discrimination.

Banana peel fertilizer is only good, if your plants/vegetables have set blossoms. Plants putting out blossoms love having higher potassium fertilizer. So the home banana fertilizer is good if you’re feeding a plant putting out blossoms.

Coffee grounds are great for plants that love acidic soil. But if you don’t know how acidic (the pH value) your soil is or the pH range that your plant loves, you can burn the roots of your plant.

In the example of this cucumber inquiry, it was a bad idea to recommend coffee grounds, if the cucumber has started putting out blossoms, because composted coffee grounds add nitrogen and cucumber in blossom wants lower nitrogen levels.

Now, coffee grounds could be great advice as long as it is followed with the additional advice to remove the blossoms. Removing the blossoms, with the coffee grounds giving a nitrogen boost, will help the cucumber grow it’s vines and roots. And in this cold season with plants being stunted, it’s not a bad idea to remove early blossoms in order to give the plants more time to grow structurally and be stronger for later in the season when they have to carry the weight of their fruit.

My potatoes didn’t seem to be adversely affected by the hail. They’ve been growing healthy and hearty. (My first stop when looking at my garden to sleuth out what was going wrong in my garden this week.)

Another popular recommendation I read was everyone telling this person to put egg shells down around the cucumber. Now egg shell is the DIY fix for calcium deficiency.

The problem with just crumpling up egg shells and sprinkling it around any plant is that the calcium is fixed inside the shell. If your plant needs calcium now, it’s never going to get into the plant in shell form because the roots of the plant are it’s “mouth”. Putting egg shells on the ground around the plant is like putting a chocolate cake in front of you, but there’s a window between you and the cake. It’s there. You’re there. But you’re not going to eat it because a window is in the way. You either have to get the calcium into a liquid form or compost the egg shells down to release the calcium.

The only benefit of putting egg shells around a plant is to keep pests away like slugs. But the truth is egg shells have not kept slugs out of my garden. And I recognize that my problem is that I don’t have enough egg shells down to create a thick or wide enough barrier to discourage the slugs away.

Instead, I find that the best use of my egg shells is just putting them into my compost along with all my other compostable food waste. By using my egg shells this way, all I have to do is reach for my compost and I know that I have calcium readily absorbable for my cucumber, tomatoes, or whoever needs it at a given moment. And by having the calcium already in my compost, it prevents my plants from being deprived or depleted to begin with because they’re getting it in a steady supply.

My next step was checking out my lettuce and other greens raised bed. There were some split leaves from the hail, but otherwise still doing quite well.

However, before we got our compost running well, there was one other way that I prepared my egg shells to make calcium more available for my plants. I kept clean and dried egg shells. When I needed to make a calcium fix, I crushed the shells into as small of pieces as I could, put them in a pan, and added water. I boiled the egg shells for about an hour (just to maximize the amount of calcium released into the water). Then inset it off to the side and let the water cool down. Once the water came to room temperature, it was ready to pour in my garden. I poured the water and egg shells into my garden. The water had enough calcium in it to meet my plants immediate calcium needs. The shells in the bottom of the pan had some residual calcium left that could further break down in the soil as it finished decomposing.

To sum all this information up, online community groups are great for picking other people’s brains. But more times than not, they may not fully understand why they use a DIY fertilizer, why it works for them, or why it doesn’t work for them. If you’re that person who asked and got a kitchen list full of suggestions and don’t know which one to try first, take a moment and look at what nutrients are being provided by each commenter and see how it fits or doesn’t fit with the natural life cycle of where your plant is at in this exact moment. In addition to that, look at your plant and look at other clues to see if there is anything else that could potentially be going on with your plant.

Advertisements

Are garden pests present?

On the subject of stunted plants, I currently have a summer squash that is stunted. I know for a fact that it’s due to a squash vine borer because of the split vine. No amount of fertilizing is going to get that summer squash to grow.

It’s easy to see when a start is not growing.

Finding the answer takes a little detective work.

The beans had a few leaves that didn’t make it. But they’re still primed to grow with some warm days on the way.

What have been your environmental conditions?

Each plant that grows from a seed relies on its DNA to tell it when move on to the next stage of its life cycle.

We can start our seeds inside a greenhouse or our home to get a jump start on the growing season. But no matter how early you start a seed, the start will stop its physical growth until a little DNA switch gets flipped by the weather. Whether it’s the amount of sunlight, day time temperatures, or night time temperatures… there are environmental indicators that plants look for before they say, “Now is the perfect time to grow.”

As I mentioned above, this spring has been uncharacteristically cold.

For my tomatoes has been fun to watch this year. I planted some from a seed company. And I planted others from seeds that were harvested from tomato plants that were local and went through last year’s cold spring (which was much worse than this year). The tomatoes that have the seed memory of a cold spring have grown much better than the plants that grew with a seed memory of another region.

Can fertilizing compensate for this growth discrepancy?

Yes. However, if your seeds don’t have the DNA memory of what it’s like to grow in a cold spring, they’re going to struggle a little until they figure out what’s going on with the weather.

My pepper plants have some damage from the hail. However I have a theory that these starts faired better because last week they got planted with some rich compost on their roots. They had the nutrients to fortify them against the elemental attack.

This is the prime reason why it’s important to either save seeds from the plants that you grow or purchase starts from people in your community who grow from their own seeds. From their seed memory, they are ready and geared to thrive and flourish with micro-regional weather. (I share the same grow zone as some southern states, however our springs and micro-regional weather patterns are going to be quite different.)

But it’s also not just seasonal weather that affects the health of your plants.

This past week we had a hail storm. It’s been several years since we’ve had hail in my community. And these weren’t cute tiny hail stones. These were enough to hurt if we stood out in the storm.

After the storm I went out to check on my garden. And it looked like they were all going to be resilient and bounce back just fine. Especially seeing how we were expecting a couple of nice warm days.

The problem is that once the sun did come back out, I noticed that something was wrong with the plants. I first noticed it with my tomatoes. And I thought it was a tomato issue. But I looked elsewhere and saw other plants were affected also.

My tomatoes were hardest hit. But they don’t like the cold to start start with. This little stunted start was the hardest hit. The larger plants have the same beige pick marked damage that just looks like it was assaulted from the hail. But at the same time meets some of the descriptive marks of mosaic virus.

This was an important clue to take note of.

My husband sent some pictures over to a friend who has more experience under her belt than we do. With the little information that my husband provided, her opinion was a mosaic virus.

Before her recommendation I was leaning toward an iron deficiency or damage from the hail storm, leaning toward the hail damage because we went from perfectly healthy and happy plants to having visual distress in a couple days.

Whether damage, iron deficiency, or a virus; all three have different care
steps.

This is where you need to be a detective and look for clues.

Here is my amaranth, which pretty much look identical in leaf damage as my tomatoes do. From all I read, so far it doesn’t look like amaranth isn’t effected by the mosaic virus. Which means these guys were just beat up by the hail. So this is one example of why I’m leaning toward my tomatoes just being damaged by hail.

We were concerned for mosaic virus, but after reading up on it we noticed that other plants, not listed on list of plants commonly infected with this virus, were showing the same distress.

The biggest clue for us is that my second garden, miles away, also all had healthy plants and two days after the hail storm showed the same markings.

We cannot completely discredit a viral infection in our garden without testing it. But we can continue to watch the plants and operate as if we are dealing with this virus (trimming effected leaves off in increments so not to handicap the plants’ photosynthesis, not composting the trimmings and expired plants, cleaning garden tools thoroughly, keeping other plants from growing in their direction, and next year planting the tomatoes (and other effected plants) in a totally different section of the garden).

While I’m fairly certain that I’m dealing with hail damage, prudence says that I also act with caution against the mosaic virus. There is nothing to say that I’m not seeing two issues at once.

My Echinacea took the most beating here. And this damage to the stalk looks exactly like the damage on my tomato leaves. As this is stem damage (the leaves were fine) and they match the leaf damage on the tomatoes, this becomes my lead points of evaluation for my garden in this moment.

I know that not everyone is going through what my garden is going through in this season. These are just examples of how to analyze your garden and the conditions that you are facing this year or in a growing season to come. Sometimes answering your garden woes are as simple as looking up a description phrase in Google and looking at the images to confirm or eliminate potential problems. Sometimes you need to crowd source and pick other gardener and farmer’s brains. Just remember that when you crowd source, people respond with their experience and thinking of what’s going on in their garden at the moment. They don’t know all the additional details, like you just had a hail storm or your neighbor sprayed their property with a chemical that negatively impacts your garden because it carries on the wind. People don’t know if you had contaminated water and your water service provider mails out a letter stating such information two weeks after the fact. Unless you look for pests, you may not be aware that the problem you’re facing is coming from a vine borer, aphids, locusts (or other insect) that has come to your property and hasn’t been there in past years. Or maybe you just bought a new house and the previous owner had diseased crops that they let compost in the ground and that information wasn’t passed on to you in the bill of sale. Or maybe you picked up a load of manure for your garden, but it wasn’t disclosed to you that the animals are hay that was sprayed with Grazon.

I just want to make a special note to give a heads up on this issue of Grazon (a Dupont product) and how it’s silently affecting crops, ground and water health. Here is the video from a farmer who lost whole sections of garden plots. We first watched this video and became aware of this issue. You can source the right materials, but sometimes you have to go further back on the food chain to see where the problem lies. I thought organic manure was the end all bench mark. Now it looks like we have to look further. Here is a very detailed article from 2017 to further jump start your research. This one will open your eyes on the product Grazon. Not just this product, but actually all herbicides. Even if you choose not to use herbicides on your property, you might be buying product from someone who does use it on their property.

There are so many things that can affect the health of your garden and plants. Just be aware that the solution may not be as simple as “just fertilize it”. Sometimes you may need to be your garden’s own detective and look for clues to set you on the right path to bring health and recovery to your garden.

What hidden little gems have you learned from your garden?


End of Season Green

I considered waiting to share this post until the fall, but then I thought why not now. This is the perfect idea to share now while you’re still deciding what you are putting into the ground or containers for this growing season.

If you have some tomatoes planted and wondering if you should plant more, the answer is a resounding yes!

I’ve mentioned before that last year, the growing season here in the Pacific Northwest was horrible. Nothing really took off until the end of June and the beginning of July. And I was concerned with my tomatoes. If fact, the above picture was the last of the tomatoes that I took off the vine at the beginning of October!

As you can see, there were so many green tomatoes that I still had, but my plants were dying off. So instead of all these beauties, I brought them inside and found a recipe that has now entered my MUST make every year when I bring the tomatoes in.

But I wanted to share this recipe with you now, because this is worth planting the extra tomato plants that you’re debating about adding to your garden.

If you’re like our families, you grow enough tomatoes to make your tomato sauce, pizza sauce, tomato soup, salsa or other tomato product you store for the winter. (This year I’m going to add making our out ketchup and tomato paste.) You definitely want to add Green Tomato Relish to your list!

I tried this last year not just because I had a plethora of green tomatoes, but also because my husband loves relish and I hate pickles. So I gave this a test drive to see if I could make something that is on his list of condiments and yet is something that I will eat as well. And I tell you that this hit the spot for everyone!

Advertisements

OurHalfAcreHomestead Green Tomato Relish

Mrs. Volfie posted her Green Tomato Relish here, but for your convenience I’m leaving the directions she walks through below. Please note, that if for your first time you don’t have the celery seed in your cupboard you are still going to have an amazing relish without it. I now have celery seed in my kitchen so I can’t wait to see how much better it turns out.

This is the vegetable ratio that Mrs. Volfie talks about in her recipe. You can mutiply it according to how many green tomatoes that you have.

  • 2 C Green Tomatoes, minced
  • 2 C Onions, minced
  • 1 C Sweet Peppers, minced

The Base for this recipe is 5 Cups of produce.

As you can see here, I used red onions instead of the yellow onions that Mrs. Volfie used. They are just my personal favorite onion, but please feel free to use the onions that you have on hand. I also want to mention that I was about a half cup short of the minced peppers and I still instantly fell in love with this recipe. Just remember that if you’re light in one vegetable, you should try to make up for it with one of the other vegetables.

I didn’t and I ended up with a slightly wetter finished product than I would have liked. But that is okay. Having run this recipe and knowing what the outcome is and what my personal expectations were, I know that this next batch that I make, I’ll make sure to keep that 5 Cups Base ratio and I’ll go a little lighter on the liquid, but I’m ahead of myself.

Let’s move forward.

This is a 2 day project. On first day, you’re going to mince your vegetables and let it sit over night. The next day you’re going to cook and bottle or jar your relish. And as a busy mom, I sure do love recipes that I can break up into steps like this and not have to take an entire day to run a canner.

Advertisements

Day One

  1. Mince your vegetables to make up your Base Unit. (In the video Mrs. Volfie made a triple batch, which is a total of 15 Cups of produce.) I didn’t have the chopping tool that Mrs. Volfie used, so I minced by hand.
  2. Combine your vegetables and add 2 Tbsp of Pickling Salt. If you are running less or more of a Base Batch, you may need to adjust the amount of salt used accordingly. (The purpose of the salt is to soften the vegetables but also reduce some of the water content.)
  3. Put the raw relish in your refrigerator overnight.

Day Two

  1. Strain and rinse off your relish.
  2. Put back into the pot and add the following. (This is for a triple batch, so please adjust these ingredients according to the Base Batch of recipe that you’re running.)
    • 2 C Sugar (Mrs. Volfie mentions that she prefers brown sugar. I just used cane so can’t comment on the difference in flavors.)
    • 2 C Organic Apple Cider Vinegar
    • 2 tsp. Salt
    • 1 tsp. Celery Seed
    • Fresh Cracked Black Pepper
  3. Bring to a boil on your stovetop.
  4. Fill hot jars or bottles with the relish with 1″ headspace and de-bubble.
  5. Hot Water Bath the relish for 15-20 minutes.

For Christmas, my husband and I gifted this relish to friends and loved ones. And everyone came back raving about it. Not only that, but have talked with their loved ones who are also interested in this relish.

You won’t hear this in the video, but I would be remiss if I didn’t tell you that this relish makes the BEST tartar sauce just by mixing in your favorite mayonnaise. Everyone I’ve told that to in person just gave me the humored head nod that said, “so you say. I might give it a try.” Everyone did try and they came back with fireworks in their eyes.

Living in the Pacific Northwest, we are spoiled with fresh seafood. So of course when anyone talks about tartar sauce, people get a little snobby. But please, please, please, give this a try. Because I have yet to have someone come back to me and tell me that it did not hit the spot.

And if you are planning a special event, are a caterer, and seafood is on the menu I am telling you that this one condiment is the way to wow your customers and come back with glowing revues!

Advertisements

Other recipes that may interest you…

I have not yet tried these recipes, but these are on the top of my to try list.

Ketchup

The ingredients on this recipe from Self Sufficient Me sounds about right for what I look for in a ketchup. The written recipe is found here.

There is one glaring issue that I have with this recipe by watching the video is that it is too thin and liquid based for the type of ketchup my family likes. The culprit for this being so runny is that he runs his tomatoes through a food processor at the very beginning.

I was teaching a small class on how to make tomato sauce and we found out the hard way that when you process tomatoes like this you just can’t ever get that sauce to thicken up! The reason for this is because there is a chemical in the skin of tomatoes that when you release (by blitzing the tomatoes) it counteracts the pectin that is naturally in the tomatoes. You end up with tomato juice.

So to prevent the thinning of your tomato product, you really do not want to cut the tomato more than you have to. Small tomatoes cut in half. Large tomatoes cut into quarters. The pectin inside the tomatoes will thicken your sauce and minimize your time in front of a hot stove.

Advertisements

Tomato Paste

While I do have a few Italian Nona’s that I love watching on YouTube for inspiration, I want to try this Turkish recipe for making a tomato paste. With Turkish Food Travel, you can watch her video here or written recipe here.

A quick walking away point from this is that you notice that the pectin inside the tomatoes are at work in making this a thick sauce to start with. Then you keep the pan on the heat much longer than you would for a chunky tomato/pasta sauce. So if you’re making your own pasta sauce already, to make a paste you keep cooking the sauce down until you cook the vast majority of the liquid out.

I like how this recipe uses salt to reduce the tomato liquid even before you start cooking. This has inspired me to prep the tomatoes the night before I want to cook the paste, so the salt can maximize its extraction time.

At the end of the video you will hear about the method of making tomato paste by cooking it in the sun. Even though there was not enough description here, it sounds very similar to what I’ve heard is done in Italy. There are wooden tables that are used to make the paste. From what I understand, the sauce is first made and then spread across the wooden table. The sun dehydrates the tomatoes for you to make the paste. The only thing you do during this process is to use a scraper or a bench knife and mix the sauce/paste so that everything dehydrates/dries in the sun at an even rate.

If you are Italian, Turkish, or any nationality that makes a tomato paste using the sun, please comment below on the process that you use. Because I want to know how you do it. Making tomato paste by sun is on my cooking bucket list (I want to try this at least one time during my life).

Advertisements

Too Busy? Here’s some quick condiments that can fit in your busy life.

I just came across Becoming A Farm Girl and I’m excited to see what she has in store to share with the world. Here is her video on 7 Quick Condements. I love listening to Cassandra. Her approach for making mayonnaise is the easiest method that I’ve seen to date. And she’s made me super excited to make this the next time I run out of mayo. We’ve been meaning to make our own because of a couple of ingredients that have made their way onto the ingredient labels of commercial mayo.

To get her print out recipes you will need to sign up to Cassandra’s email list. The link to that is in the details of the video linked above. I did sign up to get this recipe book and it is beyond what I’ve received from others. So, if you’re picky about who you sign up for, I absolutely did not regret signing up for this one.

Looking for a tool to make your food prep easier?

This is an affiliate link to mentioned product. We may receive a commission on this product, purchased through this link, but at no extra cost to you. This item is from Amazon but may be purchased at local markets.

Processing…
Success! You're on the list.

Leave a comment

Advertisements
Advertisements

Relish for the Non Pickle People!

This was one wild ride for the growing season for my little garden this year. Here in the Pacific Northwest we had absolutely no spring, just an extended winter until June.

Normally we can start planting things as early as April. Most home gardeners wait until Mother’s Day to plant starts out into the garden. May is when all surprise freezes are no longer a possibility. So you can imagine the thoughts running through my head when halfway through June we still hadn’t broke past the 60’s. I even planted double my usual tomatoes because it looked like the grow season was going to be that far off of the norm and we were not going to get as many tomatoes.

Hope returned when August showed summer in all its gardening glory and continued through September. Usually September is our Indian summer. But the beautiful weather continued all the way through October. Actually traditionally cool and rainy October kicked in that last week.

All this time I left my tomatoes going. There were so many green tomatoes and I hoped beyond hoped that they would turn red on the vine before we lost our extended summer.

This first week of November was when I had to pull the plug. And that meant I had somewhere around 6-7 quarts of green tomatoes–hands down the most green tomatoes that I’ve ever had to figure out what I was going to do with them. Mind you, I didn’t grow up where fried green tomatoes or green tomato sandwiches were common place. I know of these things, but they were never part of my childhood diet.

Looking up green tomato recipes, there was one that stood out–Green Tomato Relish.

I am not a pickle person. That’s story for another time. But I married a pickle person (who by chance isn’t a tomato person…and I am!) who loves pickles and especially relish. I figured that I would can some green tomato relish for him so that he had some homemade condiments that were right up his alley.

From what I found time and again with green tomato relish recipes is that it’s comparable to pickle relish and several people commented about how they preferred it over pickle relish. That caught my curiosity!

As I began to read through several different recipes I saw most of them were very similar in ingredients to fresh salsa. I love salsa!

Then the thought hit me that maybe, just maybe there is a relish in the world that a non-pickle person would like. (And when I say I don’t like pickles, I mean that I can pick pickles off a restaurant burger and taste exactly where they were place on the patty just by the residual brine that was left behind.)

I used this video from OurHalfAcreHomestead, Green Tomato Relish 2018. Besides the fact that I had nearly all the ingredients in my kitchen already, the huge selling point for me is that Miss Volfie is my kind of woman! The way that she cooks is how I cook (you make things so frequently that you go off of the recipe in your head). It was how I was taught to cook and how my dad was taught to cook. So this cooking technique automatically flips a switch in my head that starts the fanfare that this woman knows what she’s talking about. She’s not after the fame and money but honestly passing on what she knows best.

I highly recommend that you watch the video. But in the case that you just want the recipe and steps without the talk, here it is.

Green Tomato Relish

Miss Volfie’s batch is broken down to this ratio:

  • 2 Cups Green Tomatoes
  • 2 Cups Onions
  • 1 Cup other Vegetable (Sweet Bell Pepper in this instance)

I love this ratio because it’s easy to make you “batch” based off of the amount of green tomatoes that you have. No need to be short or waste what you have on hand. Your green tomatoes are literally your limiting factor.

(This is the measurements that were used for a triple batch)

  1. Mince your Tomatoes, Onions, and Bell Peppers
  2. Sprinkles about 2 Tbsp of salt over your vegetables and let the salt extract the water from the vegetables over night.
  3. (Next Day) Prep your jars for water bath canning your relish.
  4. Add your vegetables to a colander.
  5. Rinse the excess salt off your vegetables and drain them off.
  6. In your stock pot add the following seasonings: *2 cups sugar, *2 cups cider vinegar, 2 tsp salt, 1 tsp mustard powder, 1 tsp celery seed, fresh cracked pepper.
  7. Bring to a boil.
  8. Bottle and put in water bath canner.
  9. Process for 10 minutes.
  10. Cool

Modifications and Verification of Safe Canning

I’ve been teaching some safe canning classes for people who want to learn this skill for the first time. I’m also part of a few communities where I see the debate of safe and not safe recipes more often than I care to admit. Most arguments seem to be around processing times. So if you are a higher elevation, 10 minute processing time is not going to be enough. If you are a low elevation, I only need to process the tomatoes for 5 minutes.

When in doubt, always be mindful of your elevation and go to a trusted source for processing times.

For example, I wanted to verify if this recipe was a safe recipe or just a family recipe that hasn’t changed with updated food safety research. Other than processing time, the other important bit of information to verify is the acidity (the ratio of tomatoes to other ingredients and the added vinegar).

I found a very similar recipe at the National Center for Home Food Preservation (NCHFP), Pickled Green Tomato Relish. The most notable difference between these two recipes is that the NCHFP actually lists cornstarch as an ingredient. Flour and cornstarch are on the list for things not to add to recipes for home canning (with the exception of Clear Gel, which is a modified cornstarch that was created for canning–but this isn’t what’s listed in this recipe).

Cornstarch is a thickening agent. And from my experience in the kitchen I can only assume that the cornstarch was listed in this recipe to thicken the relish juice. Even though the NCHFP is a trusted source for safe canning practices, this is one instance where I am NOT comfortable in following their recipe.

Nobody likes a soupy relish, so here’s how I made my modification. Safe canning means that a certain amount of 5% acid (vinegar) needs to be added to counter the water content of the recipe. Miss Volfie did strain her vegetables, but there was obviously going to be a bit of water content still left–her vegetables were sitting in their juices over night and I think there was a shake in her straining before she potted her vegetables.

With my colander, I added a muslin cloth inside before adding my vegetables. I rinse and strained them. Then I picked up the muslin and compress strained the excess water out of the vegetables. There were several cups of water that I extracted out of my vegetables that would have been otherwise added, thus diluting the 5% Apple Cider Vinegar to a lower acid percentage.

Because I did extract the extra water from my vegetables, an additional step not taken by Miss Volfie or the NCHFP, I had no problem in following Miss Volfie’s lead in slightly reducing the vinegar and sugar volume. (My tomatoes were enough for a 7 batch and I added 4 cups of vinegar–slightly more vegetable weight than the NCHFP recipe, the same vinegar measurement, plus less water content from the straining step, and minus the cornstarch for thickening.)

Now I do agree with the NCHFP for simmering for 5 minutes once the relish comes to a boil. Some people will say 10-20 minutes, but the goal is to get the relish up to a hot temperature so that the center of your jar reaches proper temperature while processing. So I did modify Miss Volfie’s recipe by simmering those extra few minutes.

Advertisements

Here’s the walking away point.

Understand what the science is saying about processing your food for preservation. Food preservation is not just packaging to put food on your shelf. There is microscopic life that we share our world and food with. Safe canning isn’t about being a kill joy. It’s about understanding the world we live in and the food we share with other life forms. It’s about understanding how to create an environment, inside our food, that prevents these bacteria from taking over and leaving us with their food waste that makes us sick.

So look for those recipes that interest you. Check and verify those recipes with the people who spend their occupational lives studying in this area. Are they going to be right? Yes. And sometimes they do something that’s questionable. Go by what you know and at the same time get up to date on new information that’s found. Make your judgments based off of what risks you are comfortable with. And be prepared to answer and describe your thought process.

Advertisements

Now the Fun Part… how did it turn out???

My pickle loving husband couldn’t wait to try what I made, thinking of him. In fact, while I was cooking the relish to jar up, he has already planned out that we were going to have burgers. Let’s face it, my man adds so much relish that you think a burger bleeds relish!

Off he went to the store to pick up ground beef. But he returned with fish sticks because our 6 year old went to the store with him and they decided that the best price by weight was fish over beef. (The things and decisions that come from my family LOL.)

Once the relish was finished processing (one jar was not up to proper head space, but I still processed it so I would know how the vegetable texture would come out and the blend of flavors) I popped open the not-safe jar and taste tested the Green Tomato Relish.

First Impression–It’s not pickle tasting. That’s a win.

Second Impression–It doesn’t fresh or cooked salsa. The Apple Cider Vinegar adds a tartness that just isn’t present in a salsa. That’s a pass.

Can I eat this? Yes.

Will I go out of my way to eat this? Probably not.

What about my pickle loving husband? Will he be okay if we move forward in our married life with this relish and not buy store bought pickle relish again in the future? Maybe. I didn’t ask him that specific question.

However, I did ask him what he thought. He said it tasted good and he ruminated on the flavors going on in his mouth. He said next time he would probably add more vinegar.

So the next time that I make this recipe I won’t go light on the sugar and vinegar ratio to keep the relish less soupy. I’m not in love with this recipe enough to put my foot down and claim it as a favorite and it has to be this way because I’m making it for me. I’m still making this for my husband. So I’ll add the vinegar next time to see if it has a better flavor to him.

That being said… THIS IS WHAT I ABSOLUTELY LOVE ABOUT THIS RECIPE!

You remember that I said that my husband came home with fish?

I took this tomato relish and mixed it with mayonnaise to make a homemade tartar sauce. (Yes, this pickle hater is a tartar sauce snob. Yes, I’m aware it has pickles in it. And this is the exception to the rule of my hate for pickles.) This was by far the BEST tartar sauce that I have ever had. It was just the right combination of sour to creamy to crunchy ratio!

My husband and I do agree on one thing pickle related…the best tartar sauce. We both grew up eating fish from the Skipper’s chain of seafood restaurants. They had the world’s best tartar sauce. And when the chain shut down and we were no longer able to buy fish from them, we had a massive hole in our hearts for what tartar sauce to buy for when we cook fish at home. NONE of the brands in the grocery store came close to our favorite.

THIS homemade tartar sauce is NOW MY NEW FAVORITE! This Green Tomato Relish with just some mayonnaise is all we need to have the happy happy love love all over again for tartar sauce. And let’s just say that I laughed when my husband gave me the face for taking the last of the homemade sauce. He took the jar of whatever was in the fridge and made a gagging sound when he tasted it. Funnier still he searched the jar for the pull date to see if it had gone bad. Nope… it was still “good”. But it’s no longer consumable now that we have our replacement tartar sauce.

Advertisements

For My Fellow Pickle Haters…

Should you make Green Tomato Relish?

If you have a pickle lover that you life with, then yes! Kissing them after they eat Green Tomato Relish, you’re not going to gag over that pickle aftertaste.

If you happen to want a fish or seafood condiment that you will actually eat, definitely!

This recipe is far enough removed from the dreaded pickle that you can appreciate this recipe.

Even if you are not a relish condiment consumer, this recipe is worth having on your shelf or in your fridge. You can make your own tartar sauce. Of I recently fell in love with German Pickle Soup. I had no intention of ever making it, but was willing to order it at my local Bavarian restaurant. NOW, I will most definitely search out a pickle soup recipe that I can substitute out the pickles for this green tomato recipe.


I hope you make this recipe. When you do, please comment below and let me know what you think.

If you’re a pickle hater and have concerns about a specific flavor profile, ask all your questions below in the be comments and I’ll let you know my opinion.

Processing…
Success! You're on the list.

Leave a comment