Reverse That Frame

While getting ready for an upcoming Maker’s Market, I’m reminded of a time I was in a crafting group. A couple of times a year the group would do a special session of crafting binges. One of the first things I made with this group was a reverse canvas. It’s one of the simplest crafting transformations that is so satisfying.

If you haven’t heard of a reverse canvas, or have yet to make one yourself, grab a framed canvas, screw driver or staple remover, paint, exacto knife, and stapler or staple gun. This is all you need to make your own reverse canvas.

At any of your craft stores, or even dollar store, you can find two types of canvases: frames canvas and canvas flat. The flat looks like canvas that has been glued to a piece of cardboard. (You can make this in a similar fashion as you’ll see with this reverse canvas.) A canvas frame is the one where you see the canvas stretched over a wooden frame.

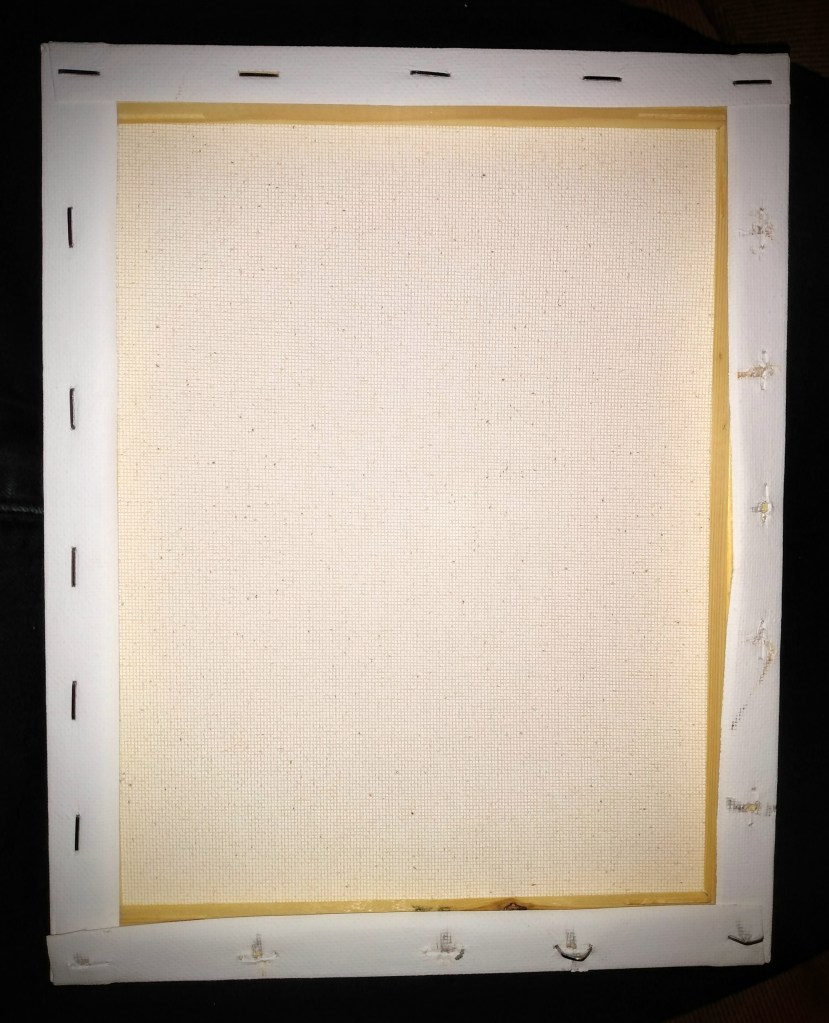
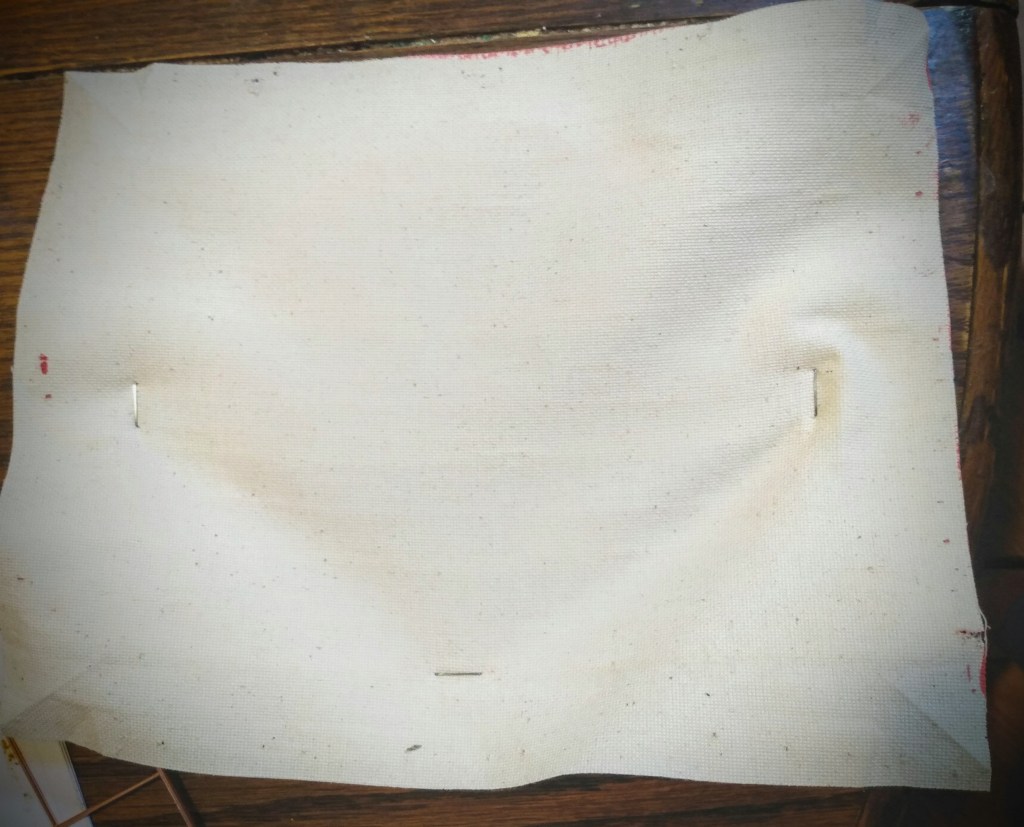
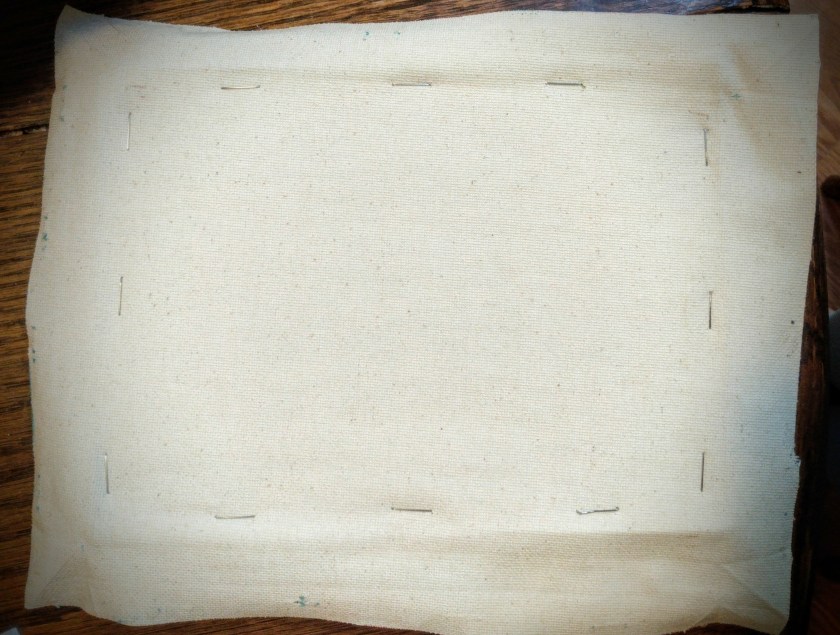
First, you want to flip your canvas frame over and remove the staples from the back. I’ve had some frames where this was easy. And there have been a few frames where I had to work to get those staples off. If you find that the staples don’t want to release from the wood, grab a piece of needle nose pliers. This will give you enough leverage where you can wiggle the staples out.

Don’t worry if your prying scars this side of the frame. With all the holes and splintering, this side of the frame will remain the backside that no one will see.

I’ve heard many crafters recommend using the exacto knife and cutting the canvas free from the frame by cutting on the side of the staple between the staple and the outside edge of the frame. If you don’t want to spend the time removing the staples, this is the method that you will love. The down side of this option is that the finished back of your reverse canvas is not going to be smooth as it could be But as I mentioned before, no one is going to see the back of the frame once it’s on the wall.

The rest of this walk through is under the assumption that you remove the staples. There are also other ways of reapplying the canvas, such as using hot glue, but I’m going to show you how to stretch the canvas. This is going to give you the best quality and make it look less DIY and more professional in finish.

Paint to Dress It Up

Of course you have the option to paint your frame and canvas at any point in time. My timing of choice is to paint the frame and canvas once they are separated from each other.

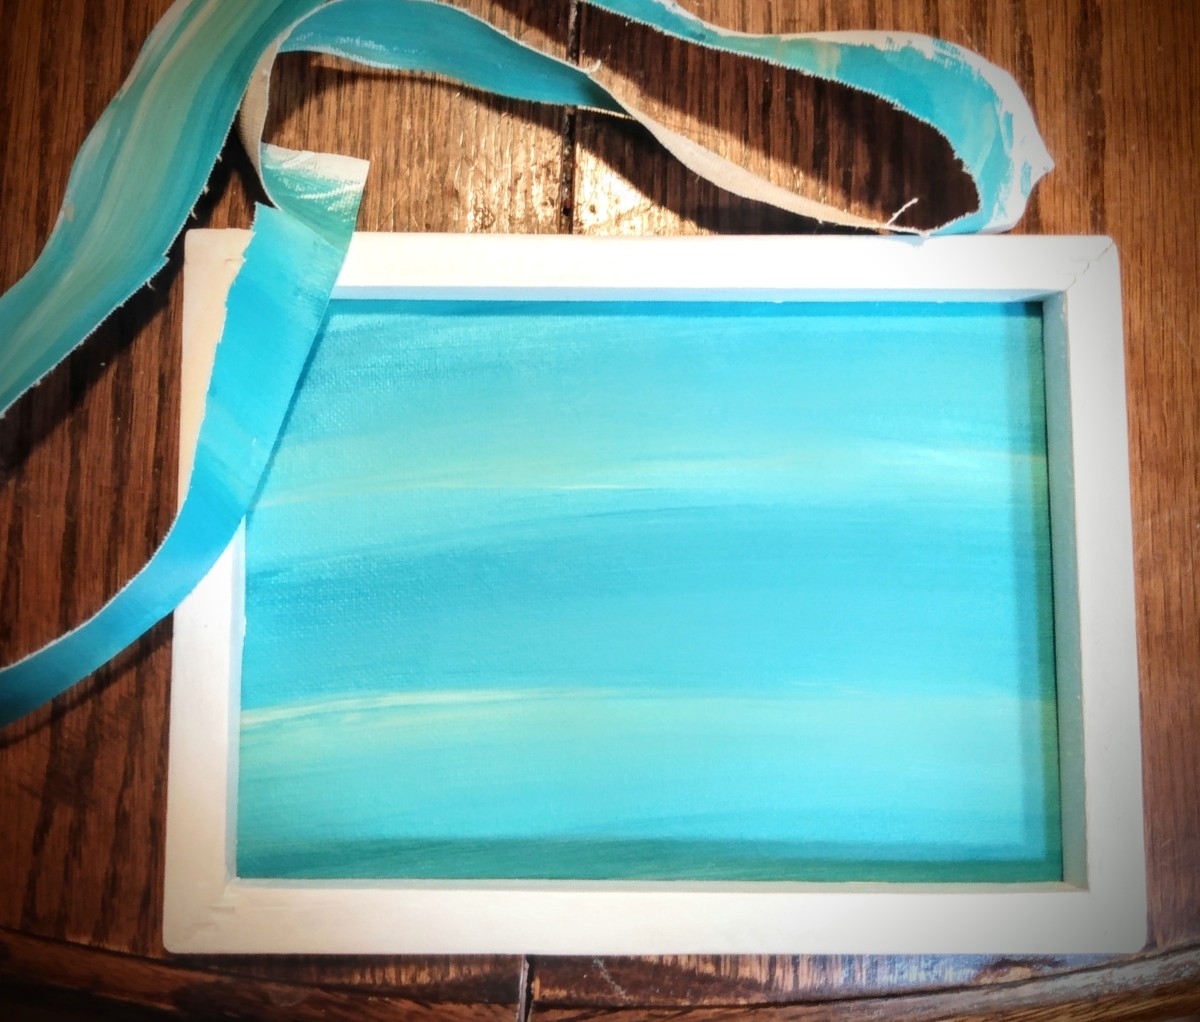
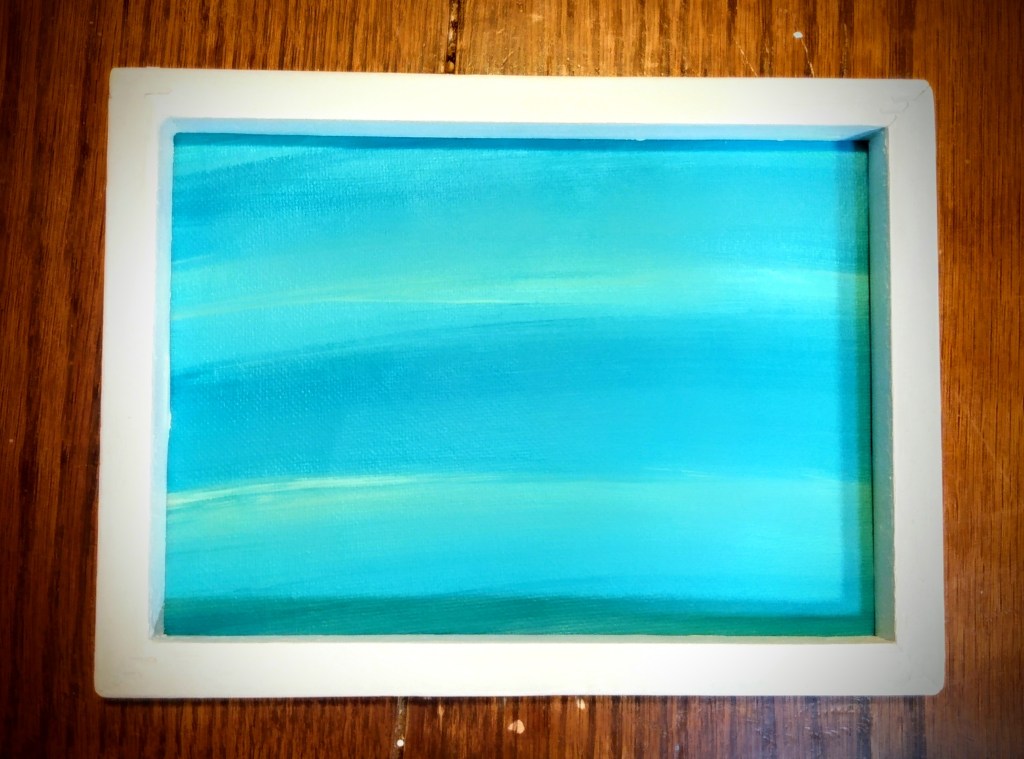
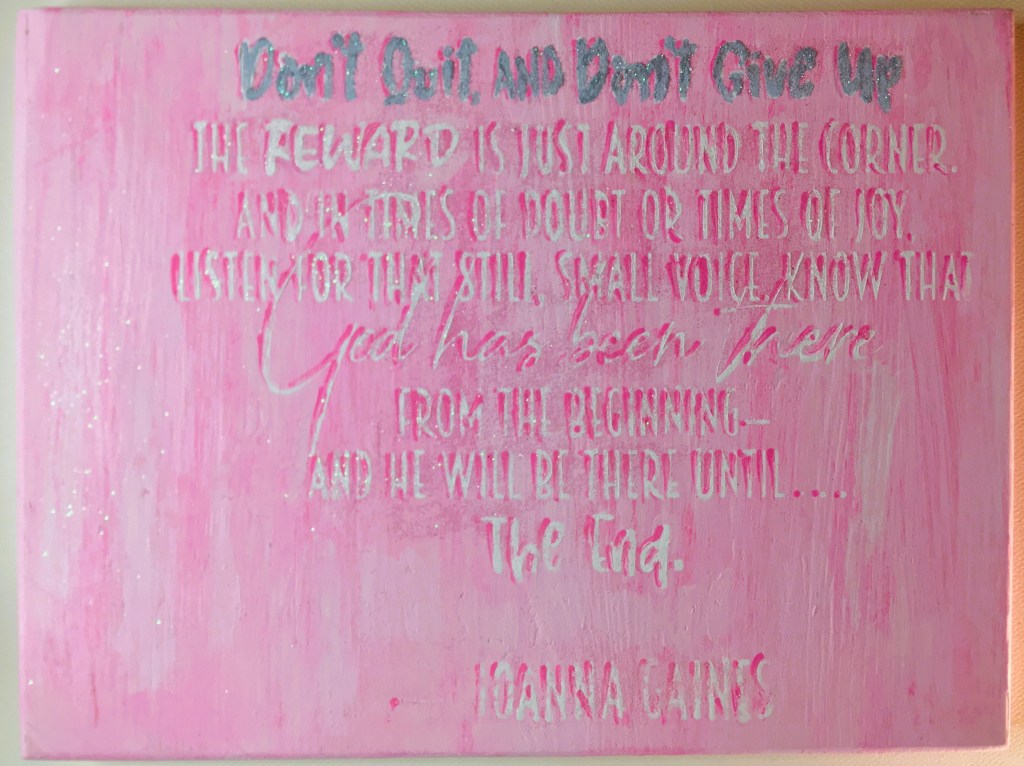
As you can see here, for one of my Market products, when you paint them separately, you are free to personalize and customize your project anyway that you want.

If you want to spray paint, you can. You can use glitter or other crafting medium. When the pieces are separated, you will never have the accidental over spray or find the need to tape off to protect one element while you’re working with the other. And if you want to try your hand at free hand painting one element, you can work absolute certainty of the work that you’re doing.

Once canvas and frame are dry, you are ready to put your canvas back on your frame.

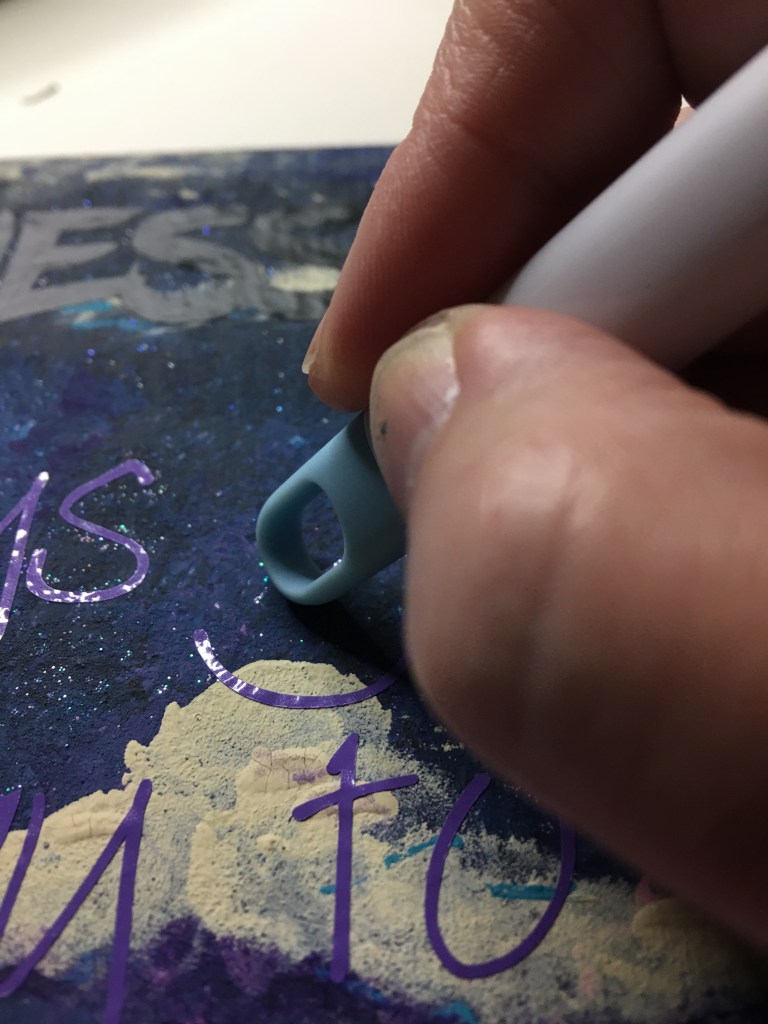
TIP: If you wanted a pattern on the canvas (like I did above), make sure you take a look at your frame on top of your canvas. Make sure your lines, design, landscape or portrait are lined up like you want them in the frame. You may find that what you painted on the canvas doesn’t line up inside the frame like it did when you were just looking at the canvas.

Advertisements

It’s Time to Stretch

If you pre-lined up your canvas and frame (as described in the tip above), you will need to hold on to both pieces and carefully flip it over. Make sure that the canvas doesn’t slip. If it does, you may need to reposition it.

If you have a solid canvas, or one that doesn’t need positioned, start of by putting your frame front side down on your table or work surface. The staple holes side should be up. Next, place your canvas down with paint side down.

Find the center of the long side of your frame and staple your canvas to that spot.

Next, find the center of the other side of your frame and pull the canvas tight to that spot. You may need to use both hands. This will give you control in how tight you will make the canvas in the end. Once you feel the tension, staple the canvas, tight, to the center of that frame arm.

Find the center of the short end of your frame. Pull the canvas tight to that point. You should notice that you can pull it more than you did with the first pull you made. Staple it in place.

Find the center of the last side of the frame and pull the canvas tight. At this point, I start pulling the canvas to the outside edge of the frame and using the frame edge as leverage to keep the canvas tight as you staple.

As you look at these pictures you are going to really see the warping in the canvas just from these initial 4 staples. This is normal and in no way reflects the final product. In fact, the more that I pull the canvas, the more tension that I add. I find that if I gradually add more tension as I go the least likely I am of ripping my canvas from pulling too hard.

After these initial staples are in place, the next step is to aim your stapler about 2 inches to the side of center staple. Pull and stretch the canvas toward the nearest corner, in a diagonal pull. The original pulls were in an up/down directional pull. But after you place the first 4 staples, you want to pull diagonally to prevent bubble like ripples from forming around already set staples.

Another benefit to diagonal pulls is that this is how I get my canvas to keep tight like the skin stretched on top of a bongo.

Another truck to keeping a tight canvas is that as you start pulling diagonally, you want to alternate directions that you’re pulling in.

For example, if your frame (after the 4 initial staples) is orientated in front of you with the long frame size on the top and the short on the sides, keep your frame in this orientation. Start with a staple 2 inches to the right of the staple on you top long side. Then drop to the bottom long side and pull the canvas to the bottom left corner with adding a staple 2 inches to the left of the the bottom long frame side center staple. Then for the short frame side on your right hand side, pull the canvas toward that right bottom corner and place your staple 2 inches below the center staple. Finally move to the left hand side short frame side, pull the canvas toward the upper corner , and place the staple 2 inches above the center staple.

Advertisements

With these four staples in place, we’re now going to staple on the other side of the center staple to balance out the tension that we’re putting in the canvas.

The last pull was toward the upper left corner (on the short side). So now we’re going to go to the bottom right corner (on the long side). Pull to the lower right corner and staple to the right of the bottom center staple. Next, pull to the upper left corner and staple to the left of the upper center staple. Then pull to the upper right corner and staple above the right center staple. Finally pull to the lower left corner and staple bellow the left center staple.

At this point the canvas has an even pull and it’s a good time to check the front to see if any adjustments need to be made. If there is no design to the canvas you can keep stretching and stapling in opposite directions until the canvas is fully attached to the frame.

If you have a design, now is a great time to check to make sure that you are stretching with enough balanced tension that the design is still straight.

Is the design pulling or warping toward a short/long side of the frame? Then you pull the canvas tighter in the opposite direction. This will take pulling toward the two corners opposite of where it was gravitating toward.

If the design is gravitating toward a corner, you want to pull tightest on the opposite corner to bring the design back to its original orientation.

Once you’ve made the corrections that needed to be made (keep checking back to the front after each set of 4 staples to keep an eye on what you need to do), continue with the stretching and stapling until the canvas is reattached to the frame.

Time for a Trim

As you see here, all of the original funkiness from the 4 original staples has worked itself out. The center is smooth and tight. On the outside edges of the canvas you can still see bunches and creases of where I pulled tight against the frame (using it as leverage to pull the canvas tighter). None of this matters because we will trim off the excess canvas.

Flip the canvas over so you can see the front face. Grab your exacto knife. You are going to cut into the canvas at about a 45° angle behind the frame. This will cut enough of the canvas back so that you won’t see the edges from the front of the frame. The benefit of the exacto knife is that you can run the flat edge of the knife against the edge of the frame and cut a straight line.

It is possible to cut away the excess canvas with a pair of scissors. You will want to pay a little extra attention to where you are cutting. You will want to get the scissors in there so that you are cutting behind the frame. But at the same time you want to make sure that you aren’t cutting too close to or between the staples. Just like any taunt fabric, canvas will rip along the grain. This is particularly true when you have the tension that we built in with stretching the canvas.

And now you see the final product with the excess canvas cut away!

This particular canvas is ready for the next step in the product that I’m making, which is a 3D wall art.

But you can consider this as a crafting blank that you can add anything to it. You can stencil paint a design on it. Maybe you want to mod podge a photograph or note from a loved one. Or there could be a decal that you want to attach to this canvas. You could also have an early childhood stick figure drawing from your child or grand child that you want to frame in a unique way. This may be what you’re looking for.

There are so many different things that you can do with a reverse frame. You are only limited by your imagination.

One last thing I want to mention, before you add your favorite decorations to this canvas, think about how you want to hang this reverse canvas. The frame can stand by itself on a counter or table top as long as what you add is very light. Otherwise, like in my case of 3D art, you will want to add a mode of hanging.

Some options for hanging your art are:

  • drill a couple of holes into the back of the frame where finishing nails can hold up your frame on a wall
  • staple a long bit of ribbon to the two top corners of your frame
  • nail a portrait anchor on the back

You’re not limited to these ideas. But they are a few of the most common ones.

How do you use reverse frames?


Leave a comment

Processing…
Success! You're on the list.
Advertisements
Advertisements
Advertisements
Advertisements

Easy Cheesy

Since last week I continued my experimenting with whey and I wanted to do a follow up post on what I learned. And this information is important because of the inflation, the items that are starting to not be stocked in the grocery stores, and supply chain issues.

So whether you are trying to be more efficient with how you spend your grocery budget, or if you’re trying to find a replacement for the things you cannot find on the shelves here are some ideas for you.

First, for those of you who are dependent on keeping some probiotics in your diet for your guy health, know that whey gives you a better option for probiotics. Check the label on your yogurt with probiotics. It’s been brought to my attention that those yogurts often have higher sugar content than other yogurts. If you’re not up to making your own yogurt, you can buy greek yogurt, stir in whey and you have a probiotics yogurt, at a better price, and lower sugar content.

If you make a dressing at home (for example we make Ranch) from a packet/scratch, switch out the milk content for whey. If your dressing calls for water instead of milk, still use whey instead of water. This simple switch automatically adds gut healthy probiotics and gives you the same dressing. The whey will impart a hint of lemon to the final product, but that gives new life to a favorite condiment that you take for granted or no longer excited about.

Whey also solved a problem that we had with the Ranch dressing we’ve experienced for the last 6 months or so. For whatever reason, the dressing (same recipe we’ve been using for years) always separated after a week. I was tired of this waste, and got excited when I came across an article that talked about how homemade mayonnaise normally lasts a week. However if you add whey into your homemade mayo, the shelf life increased for one week to a month. That was what caused me to substitute out milk for whey in our Ranch dressing mix. We are approaching two weeks and my dressing no longer separates. It hasn’t turned bad yet either.

So if you’re looking to extend your shelf life on a mix, look to whey.

Do you remember the list, I posted last week, about uses for whey?

I’ve been working my way through that list.

Here is everything that I got out of that first gallon of milk:

  • 1.5 pounds of Mozzarella Cheese
  • 4 loaves of Bread
  • 1 jar of Ranch dressing
  • 1 batch of homemade Doughnuts (which my boys and husband’s coworkers couldn’t eat enough of)
  • Pizza dough (enough for 2 large pizzas)
  • 66g of Ricotta Cheese
  • And I froze the whey left over whey before it went bad for 5 more loaves of bread.

I couldn’t believe how much I got out of 1 gallon of milk! If I had used milk for all of that, instead of whey, I would have used at least 2.5 gallons of milk.

How great is that?!!!!

Advertisements

More Cheese

I know that even with my first time experience, there’s a chance that someone might still be uncertain of making cheese. So I wanted to make Ricotta from the mozzarella whey. And Ricotta is the absolute easiest cheese to make.

If you were leery trying to make Mozzarella for the first time, try Ricotta!

Now above I already stated that I was able to recapture 66g more cheese by making Ricotta from the Mozzarella cheese. This was not enough Ricotta to make a lasagna dinner with for my family. So that same day I grabbed a gallon of milk from my fridge and made Ricotta from a second method.

Get ready to make the easiest cheese from one of these two methods!

Advertisements

Traditional Method From Whey

Before I made this first batch of Ricotta, I had already used about half of my whey from making Mozzarella. (I share this with you in case you’re reading these two methods to see which is going to yield you the most cheese–yes, I see you!)

With the traditional method, you put your whey into a stainless steel pot and turn on the heat to medium low.

That is it. You let it warm up to 200°F. There are small bubbles that start to form around the edge of the pot. Don’t be afraid if you don’t see Ricotta forming until the whey reaches in the neighborhood of 140°F. That was about the temperature that I started to see some action take place.

Once you reach 200°F, turn off the heat and remove the pot from the burner.

The instructions, that I followed, said to immediately remove the cheese and drain it.

Now Ricotta has smaller curds of cheese than mozzarella, so this time I used a cheese cloth to strain the curds from whey.

The instructions said to let the cheese drip dry for 2-8 hours depending on how dry you want your Ricotta. I had very gently squeezed the whey out and hung it to dry for an hour and a half before I taste tested it. It was already too dry for my liking and tasted like chalk. The instructions never told me to salt the Ricotta. So I’m going to tell you, salt the Ricotta.

Tip: Salting Ricotta is easier when it is warm instead of cooled from the drying process.

This is the left over whey that I put in the freezer to make 5 more additional loaves of bread. I pre-portioned the whey out into baggies so that all I have to do is defrost the whey in the fridge, the day before bread making day, and I don’t have to measure it out again.

The great news about this method, of Ricotta making, is that even though I didn’t stir the whey during this cooking process, my pot was clean on the bottom.

This traditional method is right in the skill level of my 6 year old’s cooking level. So if you were nervous or afraid of making Mozzarella, rest easy and KNOW that YOU CAN DO THIS! I have every confidence in you.

Advertisements

Ricotta From Milk Instead of Whey

As I already mentioned, 66g of Ricotta is not enough for a lasagna dinner. It is enough to make a spread out of and eat it on top of a toasted bagel.

I grabbed a fresh gallon of milk, the Ricotta recipe from the beginner cheese maker kit (that I shared last week) and tried a different method of making Ricotta. The Recipe I used called for whole milk and a couple of cups of heavy whipping cream. All that I had in my fridge was a gallon of 2%. So that is all that I used. From just 2% milk, I yielded 630g (1.4 lb) of Ricotta.

Into my stainless steel pot I added the milk, 1 tsp. Citric Acid, and 2 tsp. Non-iodinated salt. Turn the burner to low-medium heat. Leave the milk alone until it reaches 140°F. Then you scrape the bottom of the pan with a rubber/silicone spatula. Do not touch it again until you see the cheese layer, on top, crack and the whey start to boil up through that crack(s). Turn the burner off and put the pot on a cool part of the stove. Cover the pot and let it sit for 20-30 minutes.

Strain the Ricotta through a cheese cloth, inside a fine mesh strainer.

In this method, instead of air drying I used my spoon (or you can use your silicone spatula from earlier) and pushed the Ricotta around in the cheese cloth. The whey naturally separates without the gentle squeeze or drip drying. And while you push the Ricotta, take a pinch of salt at a time and season the Ricotta to taste.

You are in control of how salty your Ricotta tastes. And you are in control of the sodium content, for those who are on a low sodium diet.

I stopped pushing my Ricotta when I got to the creamy texture that I prefer. If you prefer your Ricotta to be drier and you’re not able to get it from just pushing the cheese in the cheese cloth, go ahead and hang it up to air dry in the cheese cloth. I recommend checking on your cheese every half hour just to make sure that you do not get too dry.

Tip: If your Ricotta gets too dry and you just can’t eat it like that, don’t worry. Mix in a little whey at a time to re-wet your cheese. If it becomes too wet, hang it up to dry again.

The only problem that I had with this method of making Ricotta is that the heat was a little higher than I did with the first method. The bottom of my pan did start to scorch, as you see here.

Even with this level of scorch, the flavor of the cheese was not harmed. But it was a close call. Moving forward, I know that my stove needs to remain at a medium Low temperature.

The next time that I make Ricotta from this method, I’m going to drop my heat a little BECAUSE I know that my stove runs HOT. I am forever reminding my husband to drop the heat when he cooks because it slips his mind that our stove does this and he has burning issues. He’s a good cook, he just expects our hot stove to behave like a normal stove and it just doesn’t.

Tip: Know your stove. If your stove runs hot, drop the heat a little lower. If your stove runs cooler, add a little more heat.

Advertisements

Differences in Whey

There is a difference in the appearance of the whey from Ricotta compared to the whey from Mozzarella. The Ricotta whey was not as clarified.

Independence Day weekend is very busy with my family, so I have yet to put the Ricotta whey into the pot and run a second batch. But as you see here, there is a lot of material left in this whey that I anticipate a greater return in additional Ricotta (vs. what I pulled out of the Mozzarella whey). I have time to food prep coming up early this next week. So be sure to sign up for my newsletter below and I’ll email you the results of this second run in my 7 July 2022 email. (If you are reading this past the email date, please comment below and I’ll respond with the results that I found).

Over all…

I’m excited to have cheese in the house that only has 3 ingredients: milk, citric acid, and salt. In a day and age where the ingredient lists grows longer and longer, this makes me feel good about the food I cook my family. Even more so, I learned new skills that I can teach my boys that I don’t have to wait until they’re older for them to make.

I am also happy that I have healthy probiotics on hand that I can add to as a seasoning and milk alternative to other recipes.

Please walk away from today with ideas on how to stretch your milk ingredients and add more nutrients into your other foods.

An idea that just popped into my head, how whey would work with making risotto. I know that I’ve made it with wine and also with chicken broth. So it makes me curious. I may have to try this out for dinner later on this week!


If you’re interested in making a Ricotta spread (which I use for my bagels), cut up some fresh herbs and mix it in with your cheese. I used the leaves from two sprigs of Italian Oregeno, from my garden, and used enough Ricotta for two bagels.

Use your imagination with the herbs that you have on hand.

Processing…
Success! You're on the list.

Leave a comment

Advertisements

Don’t Throw That Out Yet!

It doesn’t matter if you’re an Artist, DIY Bride, Crafter, or a Just Because-er, you will create something and there’s just nothing you can do to save that project from the junk heap. Sometimes we get wrapped up in our own emotions of wasted time, wasted materials, dashed dreams of overextended ambitions, and everything else, that we forget even the Master Artists had unsuccessful projects.

If you’ve spent anytime in art history classes, or been around artists long enough, you probably already heard about this. All the Greats recycled their canvas. That’s right! Da Vinci, Rembrandt, Picasso, I could go on and on… they all painted over something they created before. The lesson that we can take from this is that we can create over something that we tried to create before.

This was a wood block that I had to give up on after running through Plan A to Plan F. That’s right, I tried to correct and original problem five other times! Am I stubborn? Yes. Am I determined? You better believe it. Do I succeed at everything? No. But, I give myself permission to set aside what is clearly not working. For this particular project, I discarded about 16 hours of trying to make it work and grabbed a new blank. In less than an hour, I executed my main vision without having to go through another plan letter. Sometimes scrapping a project to start over on the same vision is completely necessary. And that is when your success comes.

Here is where things get good for this block of wood. Even though I had painted it on all sides (in a color I don’t usually work with) there are ways of recovering materials and reusing it in something completely different. I had fully intended on sanding the glitter and acrylic paint off, but inspiration hit and I really didn’t want to waste the time of stripping the wood for a clean base. Instead I challenged myself with this cotton candy pink by adding black, blues and purple to the pink and creating a base that gave off a vibe of sunrise or sunset. And that in turn inspired the three variations of Darkness To Light. (Click here to see all three!)

What is amazing about blending colors and adding textures into your paint is that you can cover over even the raised text from stencil painting and the glitter. Acrylic paint doesn’t cover glitter at all. It always manages to shine through. So if you decide to not go with glitter ontop of a project you previously used glitter on, I recommend taking the time to sand the glitter off. I’m sorry I could not get a picture of the glitter coming through (I gave up after 30 attempts), but my oldest son kept playing with my lights to get the glitter to sparkle. So if you know kids, when they play with lights you know the glitter is still there. However after much finagling, I was able to get one angle where my camera did finally pick up on the raised lettering. But unless I point out stuff like, most people I know pretty much never pick up on the fact that I reused this wood block.

The raised letters are right here on the bottom just above this cloud line.

Normally at this point in a project I spray a couple of coats of clear acrylic spray over the top. It seals in the paint to it doesn’t transfer paint when you knock it against something. And I love using HTV over paint. I get a better end product with it and the vinyl stays on without lifting. (Permanent vinyl tends to lift when you have higher humidity levels.) The clear acrylic spray also smooths out your surface, making it more flat when you adhere your vinyl. Coming up the next few shots, you will see what the raised textured acrylic paint did to the vinyl. But this is something that spray acrylic and HTV really does overcome.

Instead of my usual route, I went with the unsealed acrylic paint and permanent vinyl. Going into this, I knew that there were a few obstacles that I was going to have to overcome; transfer tape stripping the paint off the wood block and the vinyl not adhering to the uneven surface.

Transfer Tape Stripping of the Paint

This is the #1 problem most crafters complain about when they work with paint and vinyl! You will find it everywhere, on every forum where people are asking for help. You will get the standard answers of use a transfer tape with less tack, use transfer paper, use press and seal…. I’m telling you that you don’t need to do any of this! The reason is that the problem isn’t the level of stickiness. The problem is that you’re pressing your transfer material onto your paint with the same force that you’re using to adhere your vinyl. Both have tack. They’re both going to stick. So please don’t spend more money chasing a solution that is still going to be part of the problem. I know because I’ve tried all the different tack and I still pulled up paint before I learned this.

Solution: DO NOT burnish your transfer tape with your vinyl.

Instead: gently lay your transfer tape in position and very lightly press it to your surface. The goal here is keep your vinyl in position while you use another tool to press down ONLY on the vinyl. With Darkness and Light being larger letters, using my fingers was enough to transfer the vinyl. For my thin letters here, I used my cutting machine’s scoring tool. This gives the ability to press down as hard as you like. You will not adhere your transfer tape to your paint. And you’re not going to scratch your unprotected paint either. Absolutely none of my paint peeled or flaked off. You can zoom in on the following pictures and see for yourself. All of my built up layers of acrylic stayed the same as they were before I applied my vinyl.

Vinyl Adhering to an Uneven Surface

There’s generally two problems under this category. One actually getting your vinyl to adhere and not lift (you’re not going to get a complete seal). The other problem is purely cosmetic, you’re not going to have that glossy (or matte) smooth finish.

For the cosmetic, unsealed raised paint is never going to give you a flat smooth vinyl esthetic.

As I stated earlier, there are ways around this. But the way that I painted and left it unsealed…this is what it looks like. If you choose to work with vinyl on an uneven surface and want to try for the perfect finish, I recommend finding an appropriate sealer to help minimize the highs and lows of your surface and then aim for placement to go where there is the least amount of height disparity. Chances are that you’ll probably still won’t get that flawless look, but you’ll get close. Just remember that the more layers of sealer you put on top you will have to allow more than enough time for it to fully dry or cure before applying the vinyl. Vinyl needs to have a dry surface to adhere to because your sealer has to breathe to dry/cure. (This is most definitely not the project you want to use the wet method of applying vinyl. Save that for a glass or plastic surface that don’t need to breathe.)

That being said, there is a solution to maximizing the potential of your vinyl adhering properly.

Once you’ve removed your transfer tape, go back through and reburnish your vinyl. Transfer tape hides alot. You never see what is not fully burnished until you remove the transfer tape. As you can see here, there was plenty of places where I didn’t press down on the vinyl enough the first time, or because the text is so thin the transfer tape pulled some of it up. In reality, for this project it was both of those things.

With nothing protecting my vinyl, I didn’t want to scratch or crease it with my scoring tool. So I flipped my tool over and used the other side. It is wider than my thin text, but it also didn’t have a plastic seam running down the middle. So I had a smooth surface to go back over my vinyl and burnish it again without fear of scratching my vinyl or my paint for that matter.

Here is the final project!

I’m sure that the question will be asked, “Did your vinyl lift?”

At the time of writing this blog, my vinyl has sat untouched for over 48 hours and looks the exact same as the finished project picture above. I have every reason to believe that I’m in the clear and the vinyl will stay as is. You are more than welcome to ask in the comments below for a future check in. I’m more than glad to fill you in on the status.

I am going to add one observation I’ve had with vinyl though. Where you put your project is totally going to effect the longevity of what you made. For example, I have bathroom art which has vinyl on top of acrylic and were sealed. the two pieces that I have in there, the vinyl on the piece nearest the shower lifted after 6 months. So much so that I had to apply some glue underneath to keep the vinyl on. The glue solved the problem and I haven’t had lifting since. The piece that is about two feet further away had one small piece lift, but not enough for me to get glue in there to reattach it. Since the same vinyl was used on both pieces, I know it wasn’t the vinyl itself. It was the humidity from being close to the shower. Vinyl does not like humity. So be aware of where your final placement is going to be. And let that information help you make decisions on which materials you are going to use for your project. Again, there are always solutions on how to fix things. But being aware is so very important for the longevity of your creations.

This was important to point out, because I will never put this Darkness to Light project in my bathroom or near my stove in my kitchen (where it would become exposed to steam). The uneven surface creates little pockets where steam/humidity can come in and loosen the adhesive bond.

Now that all is said and done, I am so happy with the outcome of this recycled project!

The scrapped project brought me so much tears and frustration. I actually hid it in my craftroom because of how many emotions is evoked in me. But it’s transformation brings me so much joy! Sometimes it’s hard for me to wrap my mind around the fact that there is ugliness and frustration under the new design. It makes me wonder if all the Great Artists felt like this when they painted over something previously made.

Thank you for walking through this transformation project with me. I hope it inspires you not to give up on something that you’ve made that just doesn’t hit the mark on any level. These projects can see new life in a new direction.

Please comment below, sharing with my any transformation projects you’ve made. Or if you’re stuck on something and would like some perspective to help get unstuck. I’m here for you.

See you next week!

Processing…
Success! You're on the list.