When I participate in wedding open houses, one of the most common things I would hear is “I/We can make that.”
Each and every time I heard that phrase I cringed. It didn’t matter if I heard it when I worked for an event decorating company (where I participated in over the top large event decorating) or when I branches out on my own. This phrase makes every professional cringe.
Just like a plumber who hears someone say, “Oh that’s easy! I can do that and save on a plumbing bill.” That plumber is not only cringing, but he’s laughing at you and thinking that he’ll see you in a day or two. You might very well fix that plumbing issue. But experience says that it’s a DIY plumbing job that will go wrong. And instead of paying a couple hundred dollars to the plumber, it’s a couple thousand dollar repair for a DIY “fix”.
That’s one reason why I started this blog. I like to contribute to the creative community, pass on skills that aren’t generally being passed down anymore, but also to help the DIY person succeed.

Here’s the thing, a professional is going to have inside deal on material costs and more importantly the knowledge and muscle memory on how to do a particular skill. They’re going to know the short cuts that save time. They also know all the wrong ways of doing things, know how to recover from a failed idea, and when to move on to the next idea in an expedited manner.
Is it possible for you to do your own wedding flowers?
Absolutely!

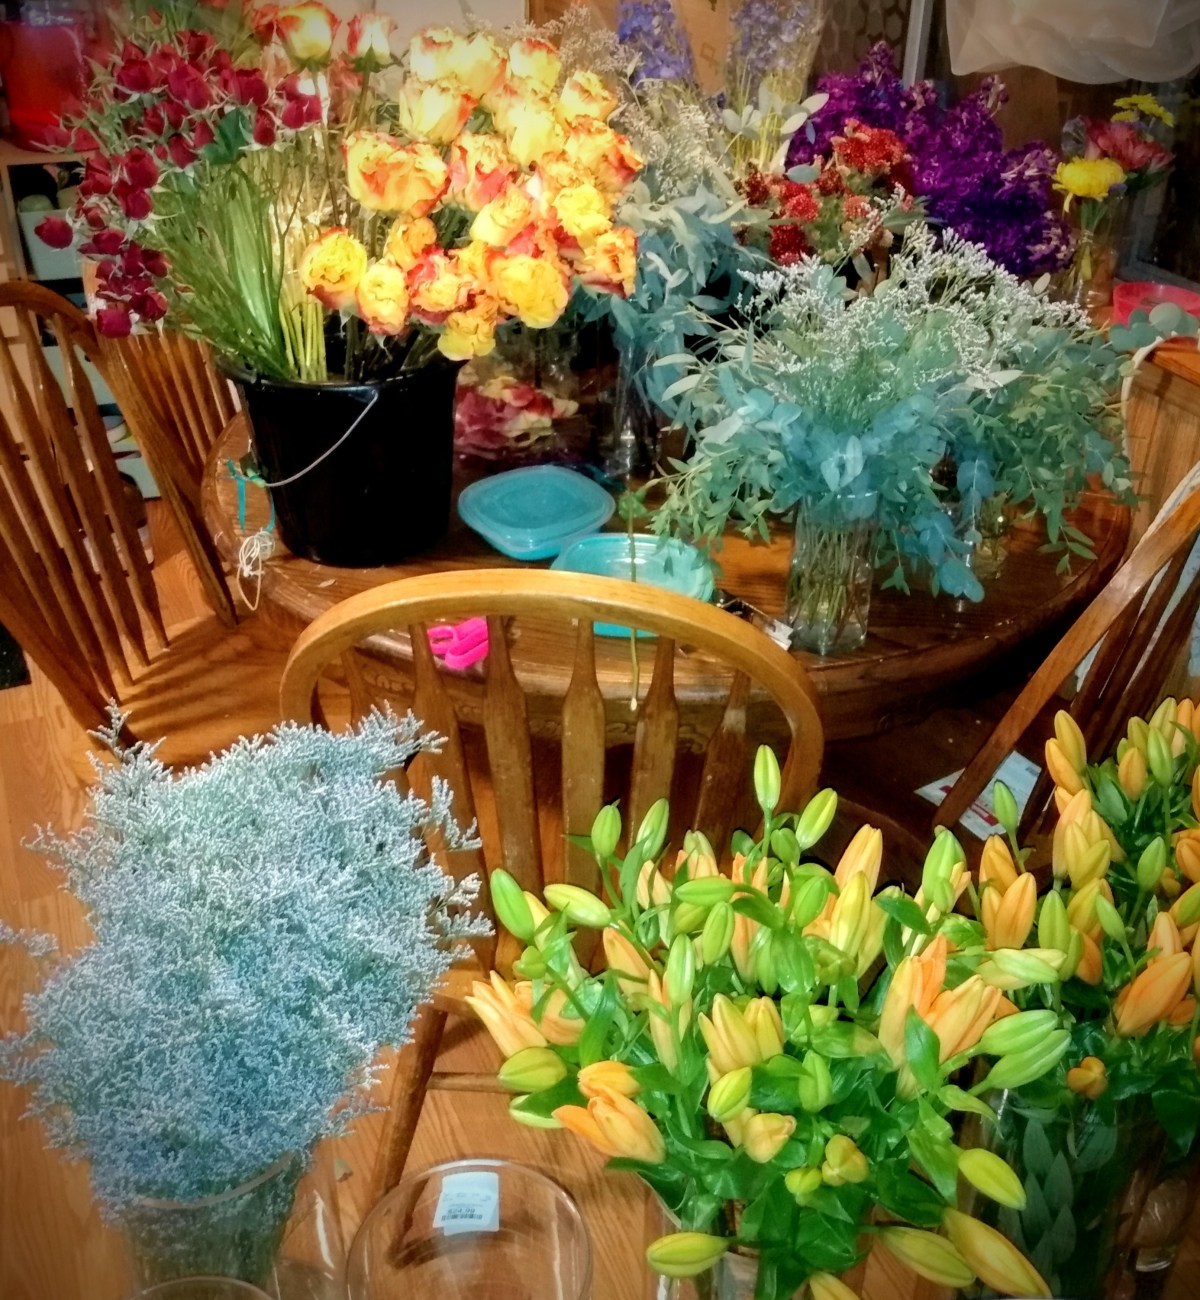
(The following pictures are the flowers that I used for this job. I’ve included names if any of these are unfamiliar to you. There are so many beautiful flowers in this world! Please don’t be limited by the ones that you see here. In these pictures I’m showing how I strip the stems bare in my prep work. I’ll talk about that in just a moment.)
I’m going to spend the next couple of weeks talking you through how you can make your own floral arrangements. I won’t share all of my trade secrets because I still love playing with flowers, but I want to help you avoid a head ache or two, plus a panic attack. I DIY most everything for my wedding and still after all this time, I remember the melt downs I had, especially when it came to the wedding invitations.
The stress on a DIY bride is real. So I want to help you, so that you can trust to come to me when you need a professional.

First things first, you have to prepare before you start.
The best way to kick start this is by having an inspiration picture. This will help you navigate through the online sites where you can order flowers to be shipped to your house or when you talk with a flower producer/distributor.
- You might not know the names of the flowers you want to order.
- You might be able to find a deal on a look alike flower.
- There could be a budget friendlier alternative.
- You can upscale with a rarer look alike.
- An out of season option can be switched out with an in season look alike.
Inspiration pictures also give an idea on which flowers look good together. Nothing is worse than ordering flowers that you like individually but when you put them together, something just isn’t right.

Even with this wedding, which I made floral arrangements for last weekend, I went into my local flower distributor with a list of flowers I picked out (to imitate an inspirations picture) from online. But when I looked at the flowers in the walk in cooler, there were other ones that jumped out and added further inspiration so I couldn’t wait to arrange. When it came time to pick up the sales person helping me pulled a couple of additional bunches of other flowers that my flowers insured her with. From that additional pull, there was a different flower or two that looked better in the collective whole than the ones I originally thought I wanted.
(I’ll come back to this thought in two weeks when I show you additional arranging options using the same flowers!)
Once you’ve put in your flower order, you’ll want to schedule your pick up with a minimum of two days before your wedding or other special event. You will most definitely need two days if not three to make your arrangements. I don’t play with flowers every day and this job took me two days and some touch up work on the day of before loading up the flowers for the wedding.
The Schedule I Gave Myself:
Day 1 Thursday–I picked up my flower order from my distributor. I took them back to my work space and got out buckets and vases and filled them with water. Then I went straight to work to prep my flowers for the next day.
Day 2 Friday–I spent all day arranging.
Day 3 Saturday/Wedding Day–examine all the bouquets and other arrangements. Does anything than to be adjusted or flowers switched out? Put on decorative elements, such as ribbon. Cut fresh ends, place in fresh water, and load up for morning delivery.

Your DIY arrangement schedule may need more time. You may need to start your prep work on a Wednesday, so you have an additional work day. The important thing to remember is that these flowers are going to take longer than you think they will.
If you are a bride who wants to do everything yourself, this schedule is probably something similar to what you will need to implement. If you like working in groups and want to make a flower arranging day, it might be possible to do this in one day. After all the more hands you have, the less work and time is required from you. Just be prepared that if you have others working with you, nothing is going to look the same. There will be variations in assembly and placement. So please make your choices based off of your expectation level. This will give you the least amount of stress and make DIY floral arranging more pleasurable.
For this wedding I made 3 bouquets (that were doubling as table centerpieces), 3 boutonnieres, and 6 large submersible vases.

Preparing Your Flowers
Hopefully when you pick up/receive your floral delivery, the flowers were kept cool in transportation. Heat is going to make your flowers wilt. But don’t stress out! They will bounce back. The Purple Stock that I used was the bunch that wilted the most in transportation. They were the first bunch that I stripped the stems, cut the bottom of the stems at a 45° angle, and put in water in front of an air conditioner.
If your event is in this wonderful summer heat, you will want to make sure that you keep your flowers in a cool room. Heat is not your friend with many types of flowers. So if you’re event is outside in hot weather, also make sure that the flowers you use are hardy and won’t wilt in the heat.
At the bottom of this post, I’ll post some links to items that can be helpful not just for prepping your flowers but also items that you will need for assembling (the topic for next week) your floral arrangement.
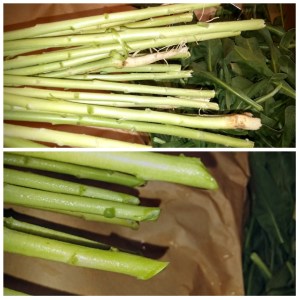
So trimming the bottom of the stems at a 45° angle is what all florists will tell you is the optimum cut to allow your flowers to drink and hydrate themselves while you are working with them. By cutting at the bottom portion of the stem, you leave yourself length for making tall arrangements and giving yourself plenty of room to make additional trims if your flowers need another stem clean up.

Make sure that your scissors are brand new sharp. Old scissors will mash up the bottom of your stem and you will see that you will need to make a new trim on your stems in a day or two. The flowers will just struggle. Also, gardening sheers are amazing to have on hand if you are using flowers with thick stems (roses, Asiatic lilies, sunflowers, and others). Even new scissors will struggle with these larger stems.
Cleaning up the stems is definitely a task you want to do before you start making your arrangements. There are a few different reasons why you want to clean off the stems from leaves and thorn.
- Thorns hurt!
- Leaves take up room–anything not around the bloom face is just going to get in the way and not be seen.
- Leaves resting in water will decompose quickly and make the water look muddy.
- Cut flowers drink up water and try to keep everything on the stem alive. By removing the leaves, the flower focuses on keeping the blooms beautiful and fresh.

Once all your flowers are cleaned up and in water, you’ll also want to take the time to also break down your greenery and filler into more workable sizes. Most of my eucalyptus came as branches. Baby’s breath and other floral fillers come in poufy branches also.
If you’re not a fan of baby’s breath, my current favorite is Misty Blue Limonium. It’s a tiny robust flower just like baby’s breath, but tends to have a fan shape bunching of flower. Not to mention that Baby Blue has a hint of blue that still looks white from a distance. (You’ll see Baby Blue in a picture below where I show you my flowers all prepped and ready to work with.)

Do you need to add flower “food” to the water?
Because there is product, there is going to be an industry that tells you that you need to buy this food. I personally choose not to buy the flower preservation crystals. Even with the flowers that I keep around the house, they last longer when I just use filtered water and change the water every day or two. In fact, I have a bouquet of flowers from my husband that is 3 weeks old, and all I did was change the water frequently.
Other methods I’ve tried are sugar in the water and carbonated clear soda. These two methods work just the same as the flower packet I’ve gotten with the bouquets my husband buys.
If you want to use a plant food, you’re welcome to go that route. However I don’t want to you feel pressured to buy one more thing. Good filtered water is more than enough. If filtered water is not an option either, than make sure that you have water sitting out over night before your flowers arrive. This will allow chlorine and other chemicals to evaporate out.

Now that your flowers and greenery are drinking, stems cleaned, and voluptuous bunches are broken down to smaller, more manageable sizes, you are all prepared for assembling your arrangements.
For this first night with your flowers, give them space to breath. This is valuable for flowers like Asiatic lilies, whose buds will pop off if you accidently brush them. You want to keep them cool. If you don’t have a root cellar or other cold place, you’ll want to consider a well air conditioned room.
Avoid using your refrigerator to keep any of your flowers cold. Some flowers have sensitive petals and will freeze. Another thing that is not common knowledge is that certain fruits and vegetables can also influence the overall health of your flowers. For example, onions on the sandwich you have in the fridge for lunch is more than enough to cause petals on your flowers brown. So if you have a soda cooler available at home or your wedding venue, make sure that no one has left their lunch or other meal in the cooler!

Things To Watch Out For
The expectation when you purchase flowers to make your own arrangements is that the flowers you receive are perfect. Unfortunately, even with pesticides and herbicides used in commercial floral fields, there is going to be some damage that you may find in your flowers.
If you have diseased stems, you will notice this when you clean your stems. These are important to find. When you make arrangements, all your stems are right up against each other. And depending on the damage being caused by bacteria or viral infection, mold, or even burrowing pests, direct contact can potentially cause damage to the rest of your flowers. Unless you have experience working in a home garden, you probably haven’t seen instances like this and wouldn’t know how to deal with it. So the best thing to do is take these stems away and dispose of them.
This is one reason why I make sure I have a floral buffer. I have enough stems to do my job even when I have to dispose of a few flowers.
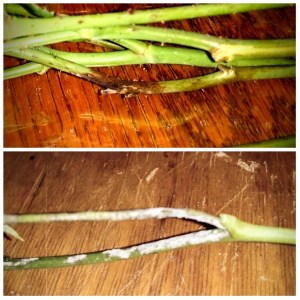
Another reason why a buffer is a great idea is that flowers can bruise.

As you can see here, whether from harvesting or shipping, flowers can bruise. You might be fortunate and find that removing the outer (buffer) petals you can remove the bruised portions (which I did with the red bud.) However, it is possible that the bloom is bruised beyond an acceptable standard.
If you find blooms that are this damaged, you will want to catch this quickly! For example, I had five roses that disintegrated from severe bruising like this. The distribution center that I got these from have a policy where when you notify them/return the flowers in a 24 hour period there are options available; refund, exchange.
Before you make your floral purchase, find out what kind of return policy they have. Know in advance if there’s a chance that you’re going to be stuck with flowers that you can’t use. Is this company’s policy an acceptable risk?
Needless to say, it’s a very good practice to prep your flowers once you receive them. Not only does it help organize you and better manage your time. It also keeps the window of return/refund open for you.

As I mentioned above, even when you buy from a reputable company, your flowers may arrive in a condition that can surprise you. This picture, above, is pretty standard for buying from a field or wholesale distributer. These flowers are not damaged. This is real life. The industry calls these busted petals “buffer petals”.
Think of these petals as being your insurance policy. Roses are packaged together for shipment. Petals are going to be rumpled and discolored. When florists receive roses like this, they simply remove these buffer petals and reveal a pristine flower.
TIP: If you’re working with a budget wedding, these buffer petals (and other broken or too small flowers) are perfect for flower girl practice or even photo props for your photographer. With many wedding pictures taken before the ceremony, it’s a great option for your photographer to have a little something to play with if they’re inspired by your flowers!
Now that you’re flowers are prepared, you’re ready for a good night’s sleep!
Come back next week to get some ideas on how to construct your bouquet.
Here are some Products that can assist you in your floral arranging.
This post contains affiliate links to products. We may receive a commissions on products purchased through these links, but at no extra cost to you. These items listed here are from Amazon but may be purchased at local markets and floral wholesaler.
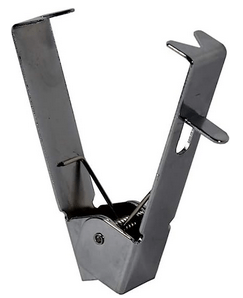
Rose Cleaner Rose Stripper Thorn Remover Stem Cleaner Tool
I have this tool. It works for cleaning the stems of more flowers than just roses.
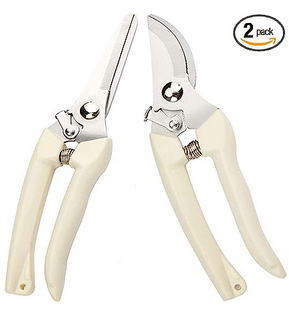
The larger shear is the one that I use for trimming larger flower stems and branches of greenery.
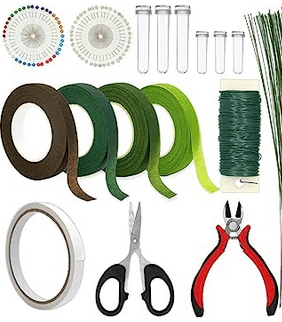
This is a good starter kit that has everything that is useful for making arrangements.
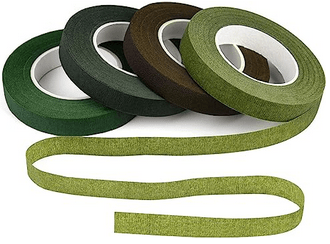
This is a must have, even if you’re trying not to buy any extra items. I’ll go more into this next week. The trick to this tape is that you stretch it to make it sticky.
What’s your favorite flowers to play with?
3 responses to “Making Flowers Possible”
-

[…] see below the rose. This is red yarrow and I wanted to spot light it for a moment. Two posts back, Making Flowers Possible, I mentioned how the sales person had pulled additional flowers for me that had inspired her when […]
LikeLike
-
[…] the last post, Making Flowers Possible, we went through the process of cleaning your flowers and preparing them to assemble your bouquets. […]
LikeLike

Leave a reply to wedding bouquet Cancel reply