The Vanilla Life

Photo by Qwirki & Co. on Pexels.com

There’s just something about having real vanilla extract in your pantry. It’s so tempting to reach for that imitation vanilla extract on the grocery shelf when you see that price tag on the real extract. But there is such a huge difference in flavor when you use the real stuff.

I’m not going to go into the problems and scary information that will want you stay away from the imitation extract. There’s not need to create fear or disgust. So I’m just going to focus on the good and benefits of the real vanilla and add value to making the purchase of the real vanilla beans to make your own extract and other products.

How to make a Vanilla Extract

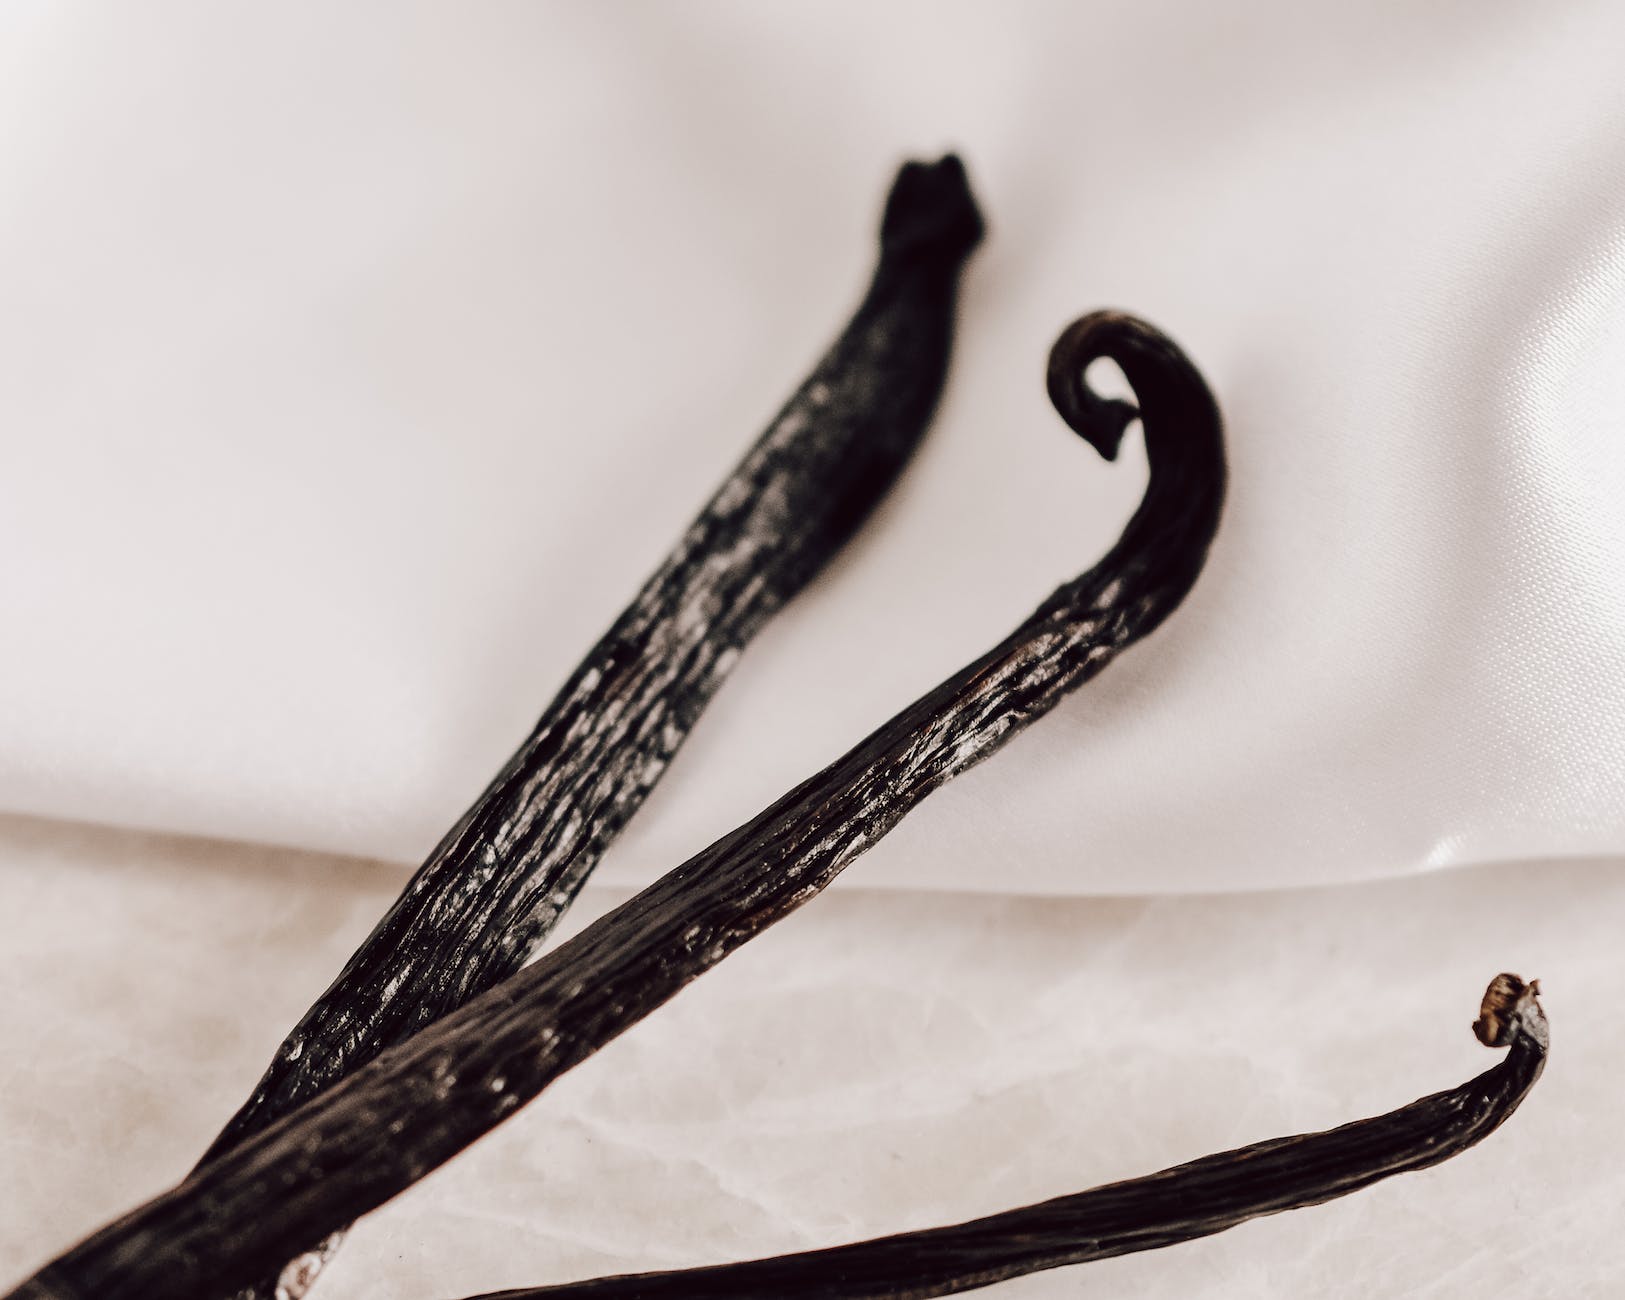
All you need to make your own extract is vanilla beans, 70-proof alcohol (or higher), and a glass jar (with a sealing lid) to extract. The three most common alcohols used are bourbon, rum, and vodka. (My preference is vodka because it has the least amount of alcohol flavor.) A general rule of thumb is to use 4-6 vanilla beans for each 8 oz of alcohol.

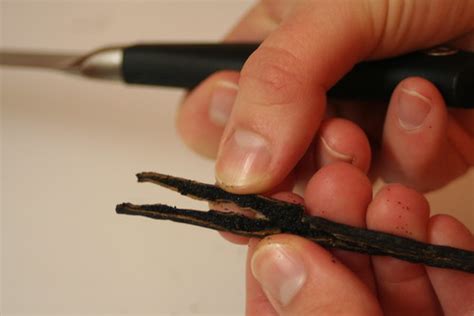
Slice the vanilla beans down the length of the bean. This opens the bean up to create the most surface area for extraction. It also releases the bean, which heightens the flavor of the extraction.

flicker.com

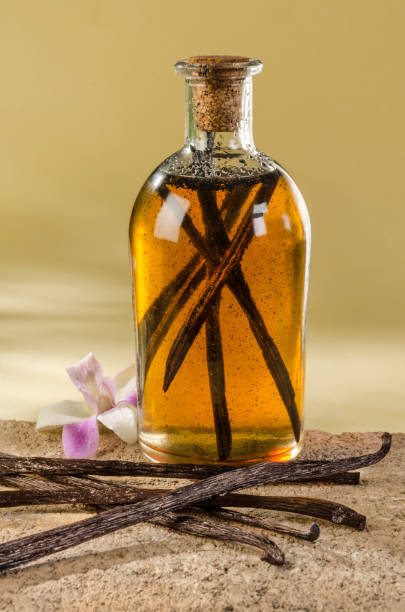
Put the cut beans into your jar and fill the jar up to the brim with your alcohol of choice. Tighten the lid and give the ingredients a good shake. Place in a cool dark place for a minimum of two months. (For a rich potent extract, let it sit for 6-12 months.) Shake the jar daily for the first two weeks.

The draw backs of making your own extract

What everyone tells you is that as you use your extract, you need to keep topping off your jar.

My big problem is that I use vanilla extract a lot and I quickly found that my extract quickly became diluted! I didn’t do anything wrong. It’s just that the non-vanilla alcohol quickly overtook the extract. And so my vodka quit tasting like a vanilla extract and began tasting more like vanilla infused vodka. That’s not so much of a problem if you’re after flavored liquor. But it’s a huge problem if you’re using the extract for baking.

flicker.com

My solution is making a few jars of vanilla extract at the same time. Yes it is a little overkill at first glance, but bear with me. Once your jar starts giving you a less potent extract, it’s time to shelve it and let the vanilla beans go to work and extract more. By giving this first jar a little vacation, and grabbing a second jar, you get the benefit of having vanilla potency as well as keeping the extract cycle going.

Some people say that your beans will last for 5 years. My mom had gifted me a bean from Hawaii where it was marketed to last up to 25 years. I’m not going to put an expiration date on your beans. My Hawaiian bean and the second one that I added to it, are still in their jar maybe 18 years after I first received it. I just recently fished this jar back out from the back of my cupboard because I finally had beans and alcohol to start back up on my real extract. The older beans are only giving off a diluted vanilla extract now. So I added 2 new beans in to jump start my extraction and get real vanilla back in my life. And I have a larger bottle started, which I should get to the longer extracted window before I need to use it and give my smaller bottle a break and refortify itself.

Benefits of Vanilla

If you grew up like I did, the only thing you were exposed to was imitation vanilla extract. If you were fortunate enough to have a family member go to Mexico, they might have brought back a real vanilla extract. But all you knew was that it was a luxury and yes it tastes amazing.

What you May not know

Vanilla beans contain B Vitamins (niacin, thiamin, B6, Pantothenic acid), potassium, riboflavin, copper, magnesium, and iron. They also have these properties; antioxidant, anticancer, anti-inflammatory, and are neuroprotective.

Depending on if you want to just make your own real vanilla extract, or would like to use vanilla to help meet your other health needs, the above information is a great starting point to talking with a naturopath or herbalist to see how vanilla can find a new course for healing your body.

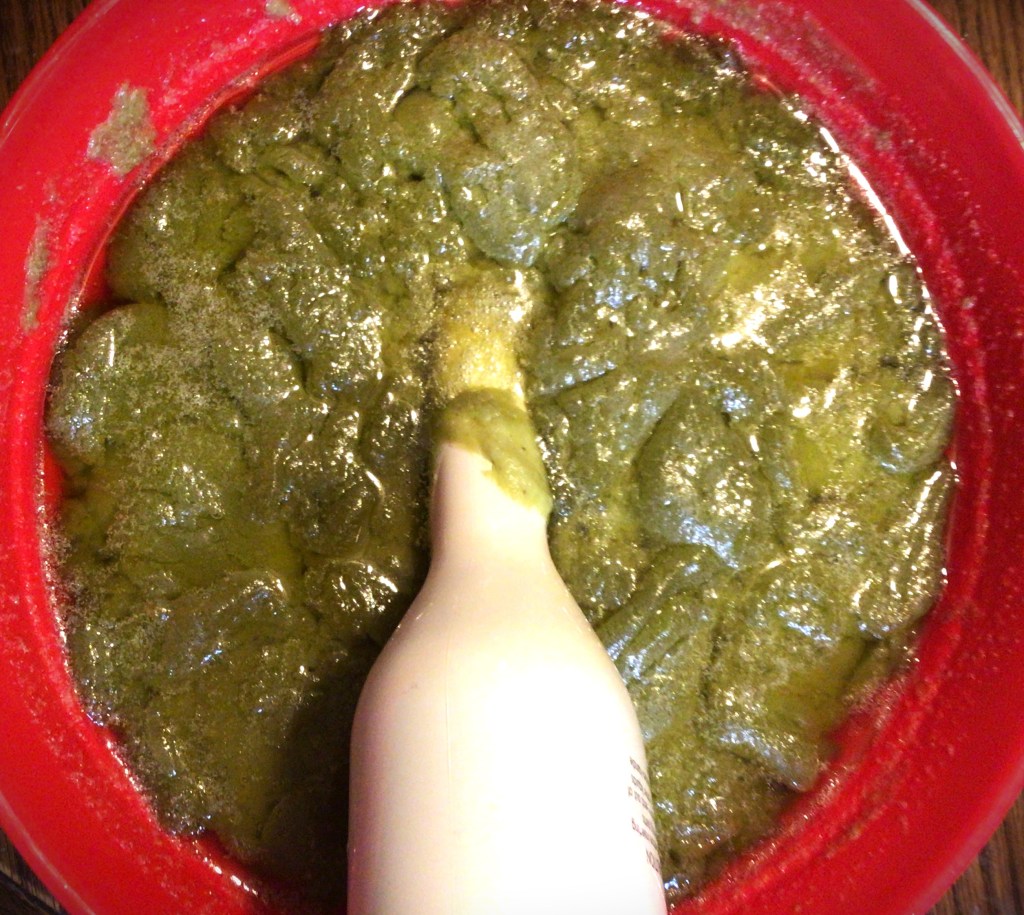
I started looking a little deeper into what other benefits I could gain from vanilla (aside from incomparable baking goodness) when I got into soap and lotion making. It’s probably well thought about how vanilla is great as a comforting aroma therapy to soothe anxiety and calming the stomach. After all vanilla bean ice cream is pretty much a comfort food.

What was new information to me is that there have been studies that show there is the potential of vanilla having the benefits of increasing hearth health by helping to reduce LDL cholesterol, it’s antibacterial properties help treat acne, the antioxidants have healing properties to boost your immune system, help heal split ends and strengthen hair, and slow down the aging process (age spots and wrinkles).

Advertisements

All of these benefits were what has been found in the studies that have researched the compound Vanillin. These studies have done work in vanilla extracts and the seeds. And if this interests you, these studies are well worth reading up on.

Even if you don’t want to pursue vanilla for health reasons, it is worth knowing that vanilla beans contain over 200 compounds. And their concentrations are dependent on the region from where the beans are harvested. Again, this is another area of diving into that is well worth the look. I wanted to mention this (as well as point you back up to the vitamins and minerals mentioned in the beginning) to point you toward the benefit of using real vanilla extract over imitation vanilla extract (which has absolutely none of these components).

Extract is not the only thing you can make from Vanilla

Vanilla beans can also infuse oil.

In the infusion that I made, I used 4 vanilla beans, a quart sized mason jar, and olive oil. (You can choose your own carrier oil, like jojoba oil, or any other that is better absorbed into your skin. Each oil has its own benefits that it offers the infusion.)

Follow the same steps as above, with the vanilla extract. The only difference in the method is that the vanilla beans are scraped from the bean pod. The pods are what I put into the oil. (The beans I put into a lotion–this will be its own post in the future.)

Instead of keeping my oil in a cool dark place, I left mine in a westward facing window and used solar heat to help the infusion for 2 months. Even using winter sun, the finished oil has a warm vanilla scent.

This oil can be used for so many different needs.

  • Use the oil on your skin for massage or relieve dry skin
  • Use to improve sleep whether you put a drops of oil in a warm bath or smell the oil before going to bed
  • Improve your skin health by adding a couple drops into your face wash or lotion
  • It is reported to soothe minor burns when you add 2-3 drops to effected area
  • Use in desserts (for whatever recipe calls for oil and you chose a cooking oil like avocado or olive)

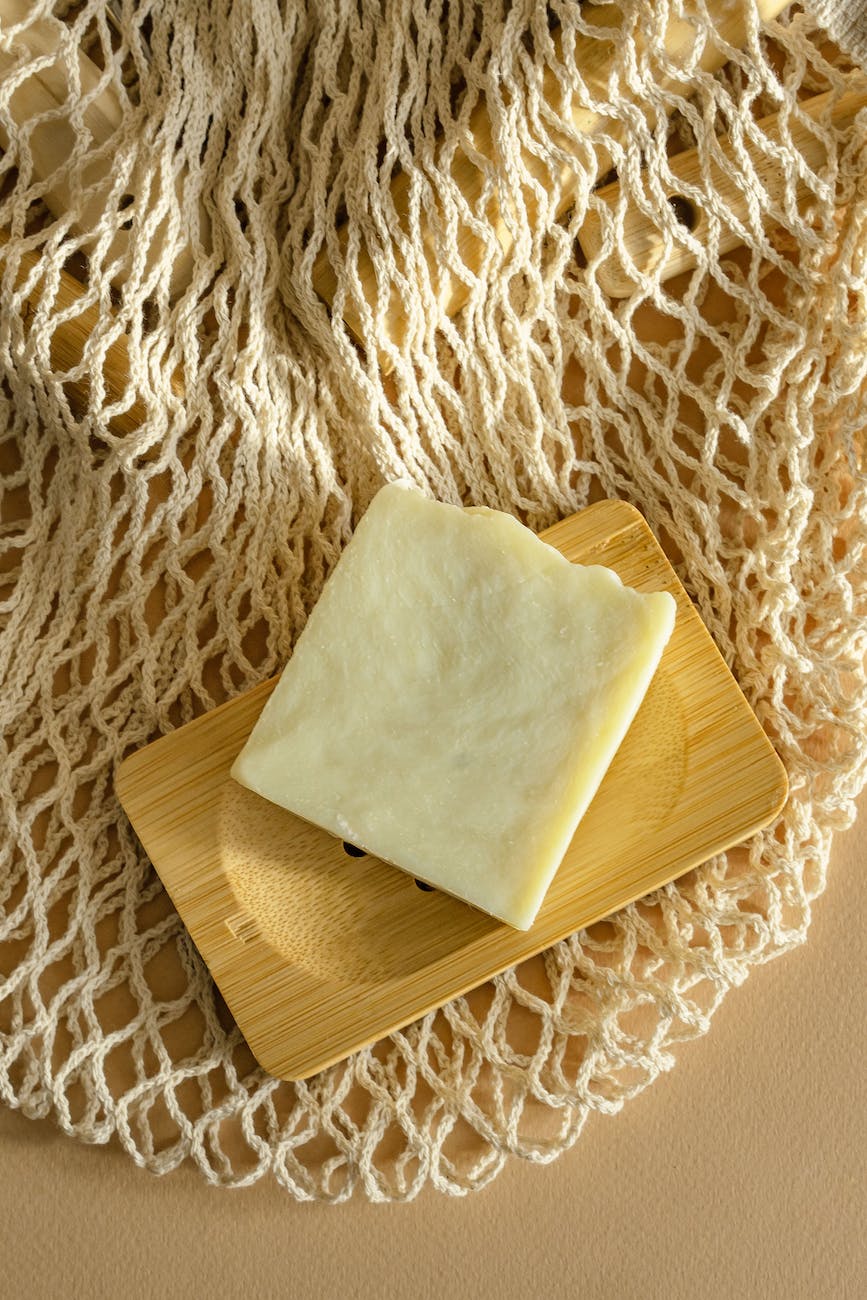
I also use infused oil in products I made for sale.

Advertisements

If you are interested in using vanilla beans for cooking only, you can put a bean in with some sugar in your food processor and blend together. This will give you a fancy sugar that you can dust on top of desserts or use as a sugar rim on a drink of choice. The same can be done with salt (even though savory herbs are usually matched with salt).

The most important thing to keep in mind when using vanilla beans, whether in extract or infusions, make sure that your beans have an oily sheen to them. Many compounds are found in the oil of the bean and speak to the overall health and quality of the bean.

There is so much goodness found in vanilla beans. Hopefully, you have learned something new about vanilla. That it has so much more to offer than just being the flavor of a beloved ice cream or just a simple ingredient that you add to your cakes and cookies.

What have you used Vanilla for?


This post contains affiliate links to products. We may receive a commissions on products purchased through these links, but at no extra cost to you. These items listed here are from Amazon but may be purchased at local markets.

Are you looking for a new place to buy vanilla beans? I am very pleased with this vendor.

Processing…
Success! You're on the list.

2 responses to “The Vanilla Life”

  1. Damien Safdeye Avatar

    I really like what you have acquired here, certainly like what you’re stating and the way in which you say it. You make it entertaining and you still take care of to keep it wise. I can not wait to read far more from this site.

    Like

    1. Pacific Northwest Event Design Avatar

      Thank you for commenting! I appreciate what you’ve shared. My goal is to take a new skill and make it approachable for someone who might question if they can do it. Being entertaining is an amazing bonus. Thank you for reading, and I hope you enjoy future posts.

      Like

Leave a comment

Advertisements
Advertisements
Advertisements

Ginger After Failure

I don’t know about you, but I’ve seen too many videos talking about how to propagate ginger, all promising success. And yet I failed a few times. I followed all the directions. I tried rooting in water and just putting the root with node in soil. And following all the advice nothing happened.

Now a person not secure in their gardening skills will think that they have a black thumb, they can’t grow grow ginger. But I want to tell you that you absolutely CAN grow ginger!!! It’s not that you’ve failed. It’s just that you didn’t find a method that works for you.

Before you check out on growing ginger, take a read here and see if this method will fit you.

Advertisements

The problem I had with all the standard methods is that I have absolutely no idea why I failed.

Can you relate?

If I knew how I failed I could make corrections. But when I don’t know I’m flying blind. And in all actuality I had chalked it up that I would just have to buy ginger for the rest of my life. And so I bought ginger.

Unfortunately I forgot my ginger, because I still had my two ginger seasonings on hand (coarse ginger and ground ginger). It wasn’t until I was running low that I remembered that I had bought a root and it was finally time to process that root to renew my herb stash.

Imagine my surprise when my neglected ginger, still in the produce bag, had about a dozen nodules with red tips on them! While I had convinced myself that I would not do another ginger experimentation to grow, I seriously couldn’t resist what I had accidentally done in my kitchen, just by being a busy mom and letting something fall through the cracks.

Instead of trying one of the other methods that I had already failed at, I decided to try something that I was already successful at, this time around. I let the ginger tell me what we were going to do. As a massive bonus, I entered a botany lesson that I never learned in any college course.

Success #1 was simply letting the ginger sit in plastic, room temperature on my kitchen counter.

When I say “success” I want you to know that it doesn’t mean that I actually grew a ginger plant. For the first time I actually grew roots in the nodes!

I don’t know where I thought the roots would come from. If I had to guess, I would have thought the roots would have come from the brown scaled portion of the rhizome. I never would have guessed that the roots would come from the nodes themselves! So when I saw these first glimpses of roots, that was what made me commit to seeing this through one more time.

Advertisements

So at this point, I cut the sections that had the nodes with emerging roots from the original rhizome. I washed them and soaked these pieces in water for about 15 minutes before putting them in the lidded tupperware. Because the produce bag was enough to grow these nodes and roots, I wanted to continue this environment. And because I know that terrariums are viable grow environments, I switched from the plastic bag and moved toward a terrarium. With wetted skin and a semi closed system (setting the lid down on the bowl without pressing it sealed shut), I moved forward to see what would happen. (The rest of the rhizome with rootless nodes, I left them in the produce bag to see if the roots would grow.)

The bonus of continuing in this exposed manner, I have full control to make choices based off of observation. If the root dries out, I simply spray some water in the bowl and “close” the system again. If the rhizomes start to shrivel, I have the option of placing these bits into some soil to supplement nutrients. (However that was a last ditch effort in my mind because I’ve grown potatoes over successive season and have seen how depleted a potato can become with sprouts and still successfully grow a potato plant and a new generation of potatoes. And I’ve taken it down to where a potato has little left inside the skin.)

If you can see in the upper right corner of the picture, the top node has obvious growth that occurred in the time I had it in the plastic container. I was concerned that these roots were being infected with mold and that I was losing the ginger. I didn’t necessarily smell mold but I also didn’t know what it was that was making my root look more like an enlarged moth antennae.

Taking the node with the largest “moth antennae” root, I tried to “wash” the white fuzz off. It didn’t want to come off. So I took a knife and tried to gently scrape the fuzz off. It flaked off. And it was then that I understood that this phase of “fuzzy root” is normal. The part that flaked off showed an exposed root similar to those pictures that you can find online that strips the enamel off of a tooth and show you what the dent, underneath, looks like.

My translation of this observation is that the stage of rooting was ready for soil. It just seems natural that the filament extension of the root is the ginger’s way of seeking out nutrients to grow. Wanting to have success this time around, I put the rhizomes into potting soil. But first I had to cut the rhizomes down to orientate the nodes so that they face up.

Why did I cut the rhizomes???

It’s a legitimate question! My original thought, when doing this was that I only had a shallow dish to plant these in. Hind thought, this probably wasn’t the best idea. The whole point in growing ginger is to get roots that you can harvest in a year. The small bits that they were before would have made it for a successful harvest in a year. These small of pieces probably won’t. I probably hamstringed myself and extended my time to harvest because ginger is a slow grower to begin with.

Advertisements

The good news is that as of time of time writing, all my ginger is thriving and doing quite well. Not a single piece has died. I’m just anxious for some growth to take off. But I’m ahead of myself.

Once I positioned the nodes facing upward, I went ahead and added a layer of potting soil up on top and left the node tips pointing out.

To keep their terrarium feel still going, I took a sheet of plastic wrap and created a layer on top of this cooking sheet. That central node and one other was above the rim level, so I sliced holes in the plastic wrap for the nodes to poke up through.

The slices in the plastic also double as a slight air flow to keep the potting soil from growing mold as well.

At this point I set the ginger aside to have some more grow time. And in the mean time I set out to understand the “fuzzy roots”.

I didn’t get my answers until I came across someone’s dissertation and posting of slides for their report. If you want to get to know ginger like you’ve never seen before, check out these three pictures! All of a sudden it made sense why the roots were coming out of the node and that “fuzzy roots” are part of the anatomy of ginger. (Full disclosure, the third picture is not ginger. In this dissertation, ginger was barely mentioned in comparison to the other plants. I include this diagram though because it’s the perfect depiction of what I was seeing in the “fuzzy roots” of my ginger. It gave me the assurance that I absolutely needed to know that what I was observing is natural and part of the growth process of ginger.)

About two weeks later is when I couldn’t keep my patience any longer. I had to take a look at the root growth again. As you can see from the tip growth that things were progressing. But seeing how I’ve delved into understanding the root growth of ginger, curiosity was just getting the better of me.

I can’t tell you how excited I was!!!

All thoughts of ginger consumption set aside just look at this picture.

This is what we are missing when we grown ginger underground!!!

Look at that beautiful root growth!

I wish I knew what to say at this point. I’m still in awe and amazement at what this ginger decided to show me about itself. It honestly is discouraging at seeing excruciatingly slow scale leaf growth. Even now, if I didn’t have the commitment to study the root growth of ginger, I would have questioned this round of ginger growing. I would have questioned if this stalling meant that I was going to lose yet another round of ginger propagation. BUT when you take a look at those roots!

At this point I decided that I could rest assured that my ginger was going to thrive. I planted this start and the others I had made in the process (including the slow arriving ones that I had left in the bag at the beginning of this post).

Advertisements

If you have failed with growing ginger in the past, using other methods, see if doing something different creates different results for you. If you’re discouraged, set up your own trial where you too can look at the full life of ginger. If you want to have options in order to help your ginger grow, this might be the method for you. I haven’t seen anyone else try this method of ginger propagation, so I’m going to call it Root Growth Observation because you watch who the roots are growing in order to move on to the next step and support your ginger in its growth.


If you’ve had difficulty propagating ginger, what worked for you?

Have you tried something like this?

Tell me all about the process you went through.


Processing…
Success! You're on the list.

2 responses to “Ginger After Failure”

  1. Personalised Teacher Gifts, Avatar

    What a thoughtful means to show appreciation for the instructors in our lives.

    Thanks for sharing these gift ideas.

    Like

    1. Pacific Northwest Event Design Avatar

      Thank you for commenting. I try to regularly work in some gift ideas throughout the year. So I hope you catch those and enjoy them just as much!

      Like

Leave a comment

Advertisements
Advertisements

Starting On Your Own

Now that a new planting season is about to knock on our door, I’m beginning to hear more and more from those venturing into gardening the discouragement of last year’s grow season in the Pacific Northwest.

I’ve mentioned before that last year, we didn’t have a spring. We had back to back winter that went off the deep end and nose dived right into summer. We were cold and wet and literally missed a season. My garden didn’t know what to do. Even when I direct sowed at the proper time everything stalled for 2 months and it felt like I was the only person in my community that was grateful for the 6-8 weeks of extended summer weather. I needed it to finish off some of my vegetables, like my tomatoes.

And throughout the area of 4 or so cities, a good number of people said their vegetables gardens failed to produce anything.

I get it. The vegetables that I planted in May were harvested at the same time as what I planted in July.

This year I’ve already started in on my plan of getting ready for this spring. And I’m treating it like I’m going to have another cold, non-existent spring. Everything I overwintered is indication we’re not going to have a repeat this year, but I’m not taking chances. Food prices are insane. I need to offset my grocery bill by growing more than I have in the past. So I’m going to share with you what I’m doing this year to give my garden a leg up on what may or may not happen.

The Big Leaf Parsley and Oregano that I planted last year, which did not germinate at all last year, all of a sudden decided this winter that they were going to germinate and sprout. I’m looking forward to a lovely spring this year.

Advertisements

Uneven Germination Rates

If you have a small garden that you work, one of the frustrations that you have is when you plant your seeds according to the proper measurements and seeds just don’t germinate. You start off thinking that you’re going to get a certain amount of starts of one vegetable, and in the end you find out you get a small fraction of that.

I’ve tasted that bitterness. In a normal year you can successive plant a new seed where there’s gap. But last year that didn’t work at all.

So this year I’ve started off my seeds indoors in small flats.

I’ve already repotted four other bunches of these sunflowers. You can see here that the seeds just didn’t want to sprout at the same time. I’m okay with that. I’m starting my seeds this way, because if none want to sprout, I won’t waste my limited garden space.

With how shallow this flat is, once these sunflowers get to a certain height, it’s time to repot them. They want to spread their roots and grow. And as much as they love this loose soil, it’s time to get these tall fellas into a pot where I can thin them out and give them more space.

With my pots a third full I sprits the soil with some water so that it has a little moisture to start the seedling off. Next I go to my flat, with a spoon, and insert it off on the flat’s wall and gently lift up on the roots. With the roots free, I set the seedling on top and put soil around it so that it can stand on its own again. I’m putting 3 of these seedlings into this 6 inch pot.

Yes, this is not at the final spacing on the seed package. But if you’ve purchased plant starts, the majority of the time all the seedlings are crammed packed. You’ve also learned how to massage the roots apart. And you’ve also learned that you end up snapping roots. The plants do live and do grow.

To minimize this breakage, if the primary root is long (you’ll see this shortly really well with some corn that I repotted), then I loop it on top of the soil as I get it settled into this new pot. The roots will still grow out and spread to fill this pot, but with the central heart of the roots a little more compartmentalized it should keep the greater heart portions of the roots of each of the plants more separate and easier to knead apart when it’s time to put them in the ground.

With each layer of soil I put down, I give it a spray of water.

The corn on the other hand, I’m finding that their root system has vastly out performed in growth in comparison to the sunflowers.

Ok, I have to pause here and say that I was blown away with this root system growth, because I’ve uprooted my corn at the end of the seasons that I’ve grown it, and my direct sow root systems were maybe a handful at the end of a season.

So here I have three seedlings in my hand and their main roots were already trying to wrap around the smaller ones that I didn’t want to bring out yet. These ones needed massaging already to separate. Originally I was going to put three seedlings in the pot, just like the sunflowers. But I still have frost going strong and I need more time in the pots. So I’m only putting two seedlings in the pot so that I can maximize root growth now.

Even with the fact that these roots are already large, they’re definitely going to fill the pot before it’s time to plant. So a weekly diluted spray of fertilizer is going to be necessary to keep these starts healthy and not eat through all the nutrients in the soil before it’s time for the roots to get adjusted to their new home in their final resting place of my garden bed.

I’m actually looking forward to seeing how these starts perform this year, because a few years ago I always bought corn starts and so many were crammed pack together in a pot of equal size. Those corns always underperformed.

But that’s the beauty of growing your own starts. You can do things differently.

If you talk with anyone who pour their lives into perennial plants, you will always hear them talk about their success comes from healthy root system. If perennial plants grow healthy with focus on their season of root growth (during the winter), it really makes sense that annual plants really benefit from root growth as well. Yes, their life span is short. But if you’re looking to get a good return, in the form of produce, attention to root growth is necessary. If a plant has a healthy root system, their rest of the plant is going to be healthy too.

Here’s the new home of these sunflowers and corn. I have a whole lot more starts to repot. Some will be repotted into different size pots, and some in different composites. I’m currently experimenting for what’s going to work best for my garden and me. Just like not all parents share the same parenting style, neither to plant parents (or gardeners). Our soil isn’t the same. Our touch and interaction with plants aren’t either.

As I leave you today, I just want to let you know that it’s okay if your garden didn’t do well last year. It could have been the fault of the weather. It could have been the seeds, starts, or root health of the plant. It could be a combination of so many things. But I want you to know that you are empowered to do things differently. There’s not one set way of doing things successfully with your garden. You really do have your own science experiment that you perform each year, because the variables will change. Last year my changing variable was the weather. And I learned a lot. A LOT.

This year I choose to do things differently to see what happens differently. I’m pushing through more seeds than I have in the past. But I’m also growing out my long maturity plants so they have more time. I’m choosing to thin the least healthy starts even before they go into the ground and maximizing the use of my small garden.

How are you doing your garden different this year?

Advertisements

Processing…
Success! You're on the list.

Leave a comment

Advertisements
Advertisements

Does it really matter???

Before I answer this question, I should put it in a framework. In some instances no, it doesn’t matter if you don’t follow directions on a recipe, or do things out of order. And in other instances, YES it absolutely matters if you do things in the right order AND measurements.

What is the determining factor?

The item you are making.

For example, cooking and baking. I will absolutely advocate experimenting. Yes, even with bread (which we’re always told is a science and should never be deviated from). I’ve gone in left field with bread recipes and have had success.

How can you have success?

Photo by Ron Lach on Pexels.com

Know the science. If the ingredient is not part of the active component, it’s just there for flavor. Experiment away. Yeast (going back to the example of bread) is a living organism and has preferred temperature and environments for optimized leavening activity. This is the science part that you cannot change no matter what you toss in the bowl. Kill your yeast, there’s nothing you can do (even following the recipe perfectly) that will get that bread to rise.

So by all means, if you want some fancy bread with herbs tossed in to complement a meal you’re making, do it! Use a recipe you’re familiar with and add the herbs you want to add. Go ahead and baste the bread with salted garlic butter right before cooking it. Modify to your heart’s content.

Advertisements

When does it really matter?

Soap making is definitely one of those times where you must follow the recipe.

Mind you, I’ve been less than precise where I’ve added a couple of grams more or less of the fat/oil components of the recipe and the bars have turned out fine. Some fat/oil are known for making a softer bar, so be prepared that if you use more of a softening fat/oil, your bar is going to turn out softer than if you were more precise. But the soap is still soap and still becomes firm when you cure the soap.

Just because I brought this subject up, here are fat/oils that affect the hardness of your soap: Sunflower oil will make a softer bar. Harder bars of soap can be obtained by using Cocoa Butter, Lard, Palm Oil, or Tallow.

Take the time to do a quick search and learn what all the different fat/oils do. Many contribute multiple attributes to your soap. Some attributes you can find are lather, shine/conditioning, oil control for acne, helping dry skin, and so many other factors. It really is fascinating to see what can contribute or irritate your skin’s health!

And when you make soap, the ingredient that it absolutely matters how you use it is Lye (sodium hydroxide for bar, potassium hydroxide for liquid)!

Of course there are the standard safety warnings: use in a well ventilated area; wear long sleeves, gloves, and eye protection; and use equipment that are least reactive to this caustic chemical (use glass or plastic).

But this particular ingredient, it absolutely matters how you use it!

Here’s one way that I messed up!

Disclaimer: At no point in time am I ever encouraging you to go against directions with caustic ingredients. At all times use safety equipment and be aware of what you are doing. Understand what you are working with, what reactions are happening, and never leave a project at a volatile moment in the process. Be present. Be aware. And have safety equipment and procedures in place. And always work in an environment free from distraction.

Even know I don’t know why I thought I could make soap during the day when the kiddos were awake. There’s a reason why other women also tell you to focus on soap making after you put the kids to bed for the night. I knew exactly why and I still chose to give into the illusion I could do this and it would turn out all right.

Nope. Even nap time is not a good time to make soap.

Photo by Mikhail Nilov on Pexels.com

After the frazzle of getting the kiddos to go to sleep, I forgot that the recipe I was using did not call for water (to react with the lye). Instead I was using Aloe Vera liquid (which acts like water in this recipe). I put the Aloe Vera in the bowl that I was melting down my solid fats (coconut oil being one). I caught this accident when I grabbed my Olive Oil to measure out.

I so wanted to kick myself!

Instead of wasting all these ingredients, I decided to move forward and see what happens when you make the mistake and proceed with the batch.

The first thing I learned, you can’t sub out a fat/oil for your “water” ingredient.

This comes back to science–which you cannot change no matter how much you wish you could. Olive Oil did not dissolve the lye. The chemical reaction with the lye never took place until I added the fat/oils into the bowl and started mixing. The Aloe Vera finally came in contact with the lye and the reaction could proceed.

And this is why soap recipes are broken up into two components: lye and fat/oils!

When your lye and water start to react it produces heat. If you have your whole recipe in a bowl when this happens, your fat/oils are instantly heated by the reaction. What follows is the accelerated rate of saponification. And if this happens before your fat/oils are emulsified with the lye solution, then you are faced with all the problems of soap making.

In this particular instance, my soap broke. I had an oil slick on my hands. And I know for a fact that my soap wasn’t set up because it hadn’t had the time needed to emulsify everything together.

And the more that I blended the soil back into the soap version of cottage cheese, the problems didn’t go away. By the time I got the oil slick to disappear, my soap seized up!

At this point there were only two options. One, I could throw everything away and start again. Or Two, I could see if this would work.

Normally, everyone tells you to take the blending of your cold press soap to a light trace. I’m not like everyone else. I find that a light trace gives me a soft soap (even when following a recipe to utter perfection). So my comfort zone is to take my soap to a medium trace. It gives me a firm soap that doesn’t melt in the shower thanks to young hands who sometimes leave the bar in the water. And it still allows me to make bars without air bubbles. (I’ll come back to that trick in just a moment.)

I kept blending that seized soap past my usual medium trace and prayed to see the final signs of emulsification. This one is hard to describe in words, because this is just where experience comes into practice–you know when you’ve emulsified.

At this point the soap was so thick from seizing and still being worked that I only had a few minutes before complete loss. And I didn’t even have time to stop and put in my scent. So I stopped and immediately transferred into my individual soap molds and my loaf mold.

Tip for Removing Air Bubbles: This one is taken directly from the baking world of cake making. Have you ever seen someone drop a cake or cupcake pan down on the counter several times? They were removing the air bubbles to keep an even crumb. I use this same trick for soap making, especially with the batches of soap with a heavier trace.

I dropped my molds like there was no tomorrow, to remove the air bubbles. I knew they were there. And because of how I could or could not drop the molds, both types had different outcomes.

The individual molds were not rigid and could only use a light drop. The silicone wouldn’t hold up to much gravitational help. As a result, you can see here how these soaps turned out to have a cratered texture.

On the other hand, the loaf mold has that beautiful wood frame (thank goodness for jointed corners!) which definitely could withstand a little help from gravity. I dropped that loaf mold several times until the soap started lying flat in the mold and no more air bubbles came to the surface. And as you can see here, no one would ever know that I had trouble with this batch of soap. (These ones again will be for family use because I didn’t include the scent.)

Advertisements

What if recovery is not possible?

This time I was able to pull soap out of that massive mistake. But I already had a backup plan in my back pocket in case I unmolded the soap and there was total devastation.

  • Melt down the soap and mix it with a correctly formed soap mixture. This is what soap makers do all the time when they forget to mix in a scent or even a couple of other errors. Especially when you do a cold process of soap making you have a little more time to decide if you want to fix this mistake by melting down and trying again.
  • Cube or shave the soap down into decorative pieces and add it into a soap batch that worked out better. If you’ve ever seen soap that has another color “floating” in the bar of soap. This is the technique they use. The day that you unmold these soaps and cut them down, they are solid enough to add to a fresh batch of soap. You will just cure the bars on the time scale of this fresher batch of soap. (Tip: make sure that this fresh batch of soap is stopped at a light trace. This will help get around all the corner/curves and get into any craters without the need of dropping the mold to remove air bubbles–which would throw off the suspended look.)
  • Use it for other DIY projects. Make sure that you still cure this soap because you don’t want the lye to cause problems with your other projects. But you can use this soap to grease that sticky glass slider track or any other trick that you’ve seen elsewhere.

Just because this mistake had a “happy” ending…

I want to give this disclaimer one more time.

Disclaimer: At no point in time am I ever encouraging you to go against directions with caustic ingredients. At all times use safety equipment and be aware of what you are doing. Understand what you are working with, what reactions are happening, and never leave a project at a volatile moment in the process. Be present. Be aware. And have safety equipment and procedures in place. And always work in an environment free from distraction.

Sometimes, you just need to know the reason why you’re told “this is the way that you do this”. As I said earlier, in instances where you accidently gravitate away from a recipe, you’re not going to start a fire or blow your house up by adding herbs or seasoning in a recipe that you’re told to stick to. But when you’re working with chemicals, the process that you’re told to follow is there to prevent serious issues from happening. There’s no doubt a long list of possible things that could happen by mixing soap out of order, most of them causing harm to your body.

Advertisements

How can you prevent mistakes from happening?

  • Make sure you’re in the right headspace for your project. (You’re not distracted or sleep deprived as examples.)
  • If you’re rushed, stop and find a different time to do this project. (You are in control.)
  • Rewrite your ingredients in the order that you will use them.
  • Rewrite you steps in precise order (short and easy to read).
  • Before you start your project, organize your materials in groupings of what you’re adding together, in the order that you will add them.
  • Pre-measure out everything into separate containers.
  • Even if you’re used the recipe before, reread through the ingredients and steps and make sure you remember what you’re doing.

Even when you do prepare, mistakes are still going to happen. Know in advance what you’re going to do. Have plan B, C, and D already in your head. This allows for quick thinking and recovery. One of these plans needs to include what you do when you need to dispose of a failed project.


Here’s the final cut

As I walk back through all that happened, I’m actually still surprised by how things worked out in the end, having dealt with broken soap and fixing it until it seized. When you look at these pictures you will see that the bar on the left (the soap I put in individual molds) definitely show the war that took place. However the bar on the right (cut from the loaf mold) looks like the only issue was minor cosmetic issues.

Most of the issues on the loaf mold soap are really seen from the side view. And the worst of the individual mold is seen in the face picture.

As a point of reference, if you ever hear a soap maker describe a problem as looking like brain matter, what they are describing is the face shot of the individual mold. It doesn’t literally look like a brain, but it has webbing and crater like surface.

Hopefully you never have to go through any of this while making soap of your own. But here’s at least some conversational information that you may or may not hear from anyone that you’re learning soap making from or in any of the countless videos on YouTube.

Above all, at least now you have some information and images to go with everything else that you are learning elsewhere.

Processing…
Success! You're on the list.

Leave a comment

Advertisements

Waxing Gone Wrong

It’s easy to find videos and information on how to walk you through waxing cheese so that you can keep cheese in your house without taking space up in your fridge. This is particularly useful when you want to take advantage of sale prices at your local grocery store. Or maybe you’re adventuresome enough to make cheese at home.

What is harder to find is a heads up of what you’re looking for when after you’ve waxed your cheese.

This is what I want to share with you today.

In all the YouTube videos and blog posts you’re told to walk out for cracks in the wax or mold on the outside. But what does that look like? And that’s not even taking into consideration that in reality there’s a couple of other things that you should look for that you should be aware of as well. So let’s take a look at what can go wrong.

The first indication that you need to check your cheese…

About two months ago I noticed an earthy musty smell in my pantry that came out of nowhere.

If you’re use to preserving food, you know that when there’s a change in your pantry smell than something is up.

If you’re new to food preserving, it might not cross your mind that you need to check something. I want to plant that red flag in your mind right now. If a new smell comes up in your pantry, check all your food and see where it’s coming from.

Note: I first noticed this smell in my pantry about two months ago. Instead of removing the wax and checking the viability of re-waxing all the cheese you are about to see, I let it all go. I took this to the extreme so that you can have a very good visual of what you can find and see with certainty of what is going on with the cheese when you remove the wax.

You find dampness that seems to have come from nowhere.

Honestly I kind of laughed when I saw this one. Out of all the research I did before waxing my own cheese, no one talked about wet cheese. So I never would have known to look for this one.

The problem with this issue is that if you’re just looking for cracks and discoloration of the wax, you’re not going to catch this problem. The only way you’ll find this problem is by handling your waxed cheese when it’s time to flip them.

I felt something tacky. It was kind of like sugar water; something is a little sticky but you don’t know what or why. I didn’t know what was causing this tacky feeling on my wax until I picked it up and where my fingers pinched into the wax (to pick it up). Instead of a firm wax feel, there was a bit of mush and a couple of drops of liquid came dripped out. I didn’t see any cracks, but the liquid was coming out of somewhere.

When I opened this cheese up, there was quite a volume of water that came out. And the picture doesn’t really do justice for this one. I tried to capture the amount of water that came out, but about half the water went under the cutting board.

This problem is not salvageable because there was a breach in the wax, meaning that bacteria had access to cheese with an obviously wet environment. While the scent wasn’t too off, it was different than when this cheese was made. But it was the fact alone that the environment inside the wax was perfect for breeding food borne illness that this cheese had to be thrown away.

What caused the water to form inside the wax?

The number one reason, especially for this amount of liquid, is the fact that this was Queso Blanco, a semi solid cheese.

Depending on who you listen to, some people say that only hard cheeses are qualified for waxing. Then there are some people who saw that semi hard cheeses are able to be waxed.

Know that the amount of water content in the cheese that you wax is going to be inside this environment. If your wax is compromised, that water content becomes a problem.

The wax blows up like a balloon and looks like a pillow.

This is another example of a problem that does not involve a crack or discoloration of the wax. The giveaway that something is wrong is that you see the wax bulging.

When the wax is opened, you once again see that the cheese is wet, an indication of a breach in the wax. The water inside is minor in comparison to the glaring indication that something is wrong. You can see here that the cheese itself became bloated.

What causes this bloating?

A microorganism got in and started eating on the cheese. Its respiration causes the carbon dioxide to become trapped in the wax, causing the bulge in the wax. When the cheese also bulges, you know this compromise has gone on for quite some time.

Again, this problem is not salvageable. The cheese needs to be tossed in the garbage.

The wax has become discolored.

I was interested in seeing what was going on inside this problem. Everyone you talk to will tell you that the discoloration is caused by mold. But there’s cheese mold and then there’s mold. Cheese mold (white–like the store cheese that’s on sale because it’s old cheese) can be cut off, cleaned off with vinegar and reprocessed.

This is not “cheese mold” this is toxic mold. Immediately toss it.

Now there are some people who will try to say that the mold is isolated in one location and try to rationalize that you can cut and reprocess. Please don’t. There is moisture on the cheese. The wax created a biome for this mold to grow in. And the evidence is that the off smell of the cheese was not localized but also on the opposite side of the block.

Something looks like white mold on the outside of the wax.

This one I had hoped to find the mold that I was told you could cut off and reprocess the cheese.

Surprise!

Instead I found a noticeable off smell, discoloration of the surface of the cheese, and slime. This one is caused by a yeast infiltration.

If you know yeast, you know that even if you cut it off, it’s coming back. This also gets tossed in the garbage.

What happens if you ignore the crack in your wax?

Let’s just say that I’m glad that I saved this one to be the last I was going to examine. And I didn’t even open the one with the gaping crack. I chose the small hairline crack.

I could not finish removing the wax. The rotten scent was overpowering. Obviously this was a toss for me.

Here’s the thing. I know for a FACT that the cause of this problem was that these two blocks of cheese fell from my pantry and hit the floor. When I picked them up from impact I looked and it appeared that the wax was undamaged.

Never assume there was no damage.

If you want to save the cheese from this problem than when you pick the cheese up from a fall, just immediately remove the wax, clean the cheese with vinegar, air dry it and put on a fresh wax casing. This problem is totally avoidable.

Maybe the cheese falls with a family member and they put it back without letting you know. If you ever see a crack, immediately open it and see what’s going on. Make an educated decision on what to do.

What can we do to prevent these issues?

First toss out everything that you hear from the people who are sharing their cheese making experiences. If you want to learn how to preserve cheese, to be shelf stable, then turn to cheese mongers who make a living off of preserving cheese.

Look at the waxed cheese that you can purchase at the cheese shops.

Pay attention to how thick the wax is.

I am going to tell you right now, the cheese that you see in my pictures here are double dipped layers. I put on two layers of wax because the non-professionals said that it was enough. If you put the last picture (cracked wax) next to a professionally waxed cheese, you will notice that what I applied is a fraction of what the professionals apply to their commercial cheese.

If you want to prevent bacteria, yeast, mold and other microorganisms from infesting your waxed cheese, you need to make sure that you create a thick enough barrier to protect your food. Thick barriers are going to offer better protection than a thin barrier. Do not be cheap. Use the amount of wax a professional is going to use.

Another condition that you have in your control is the area in which you keep your waxed cheese. The experts say that cheese wants to be stored between 40-50 °F. If there is no location in your home that meets this temperature criterion, the best place is in the crisper of your fridge (which is warmer than the main compartment–too cold for cheese) and where you can control humidity. You want high humidity (about 85%), which may require a open container of water in the crisper drawer with the cheese.

Do you need a jumping off point for what experts say in how to store cheese? Look for articles written by cheese makers who have been in business for generations. Another great place is the American Cheese Society. The best yet is anything put out by a Certified Cheese Fromagier–someone who has gone through the training and accreditation for knowing it all in the cheese world.

Processing…
Success! You're on the list.

Leave a comment